Home Blog PowerPoint Tutorials How to Change Language in PowerPoint

How to Change Language in PowerPoint

People who require juggling multiple languages to suit their professional needs can often find a single language inadequate for their PPT and the interface. This might mean switching between the proofing language to check spelling and grammar, as well as the interface language to adjust it to editing needs. Below are instructions on how to change language in PowerPoint.
If you are a Google Slides user looking for this solution, please refer to our article on how to change language in Google Slides .
Should I change Proofing Language or Interface Language?
PowerPoint enables using multiple languages that you can switch between to match your presentation needs. Most commonly, users require to change the proofing language in PowerPoint, which means changing the grammar checker assigned language.
In case you are working at a remote location with a borrowed computer, you may be required to change the interface language of PowerPoint, as it would feel uncomfortable to locate menus or specific tools.
Check below for the instructions to change both the language interface and proofing language in PowerPoint.
How to Change PPT Language Interface in PowerPoint
To change the language of the PowerPoint interface on a PC, go to Review > Language > Language Preferences .
Note: Follow the following instructions for other devices:
- Mac: If you are using Mac, you can change the interface language via the Apple menu from System Preferences > Language & Region .
- iPhone/iPad/Android: iOS and Android users, by default, will see the language set for their device as the default language in PowerPoint.
- PowerPoint for the Web: If you are using PowerPoint for the Web, it uses the same language as the host app of your documents, such as OneDrive, SharePoint, Dropbox, etc.

The Language Preferences option provides a menu from which you can choose the language you intend to use from the Office display language menu. The menu allows adding the new and preferred language and the one to be used if the text is unavailable for the primary language. To remove a specific language from the list, select it from the Office authoring languages and proofing menu at the bottom and click Remove .

If you are installing a new language, it will take a few minutes before it is installed and ready for use.

You can switch between languages anytime by following the same steps and managing your preferred list for the interface.

The selected language will become available for PowerPoint and other Office apps such as Word and Excel. The default preferences you set will also be applied across your Office apps.

How to Change Proofing Language in PowerPoint
Whether you’re using PowerPoint on a PC or an Android or iOS device, you might have multiple keyboards installed to type in various languages when creating PPTs for different audiences. To set and change the proofing language, go to Review > Language > Set Proofing Language on a PC or Tools > Language on Mac. If you’re using PowerPoint for the Web, go to Review > Spelling & Grammar > Set Proofing Language .

In the dialog box, select the language for checking spelling and grammar. When selecting a proofing language, you can also set a default language.

Once selected, PowerPoint will check the spelling and grammar in your desired proofing language. PowerPoint provides the utility to choose between specific languages and the version of the language preferred by the user (e.g., European or Latin American versions of Spanish).

Like this article? Please share
Presentation Tips, Presentations Filed under PowerPoint Tutorials
Related Articles

Filed under Business • April 10th, 2024
Discovering Coaching Presentation Tools
Discover the best PPT templates to use as coaching presentation tools with this article. Tools explained + examples.

Filed under Google Slides Tutorials • March 22nd, 2024
How to Share a Google Slides Presentation
Optimize your presentation delivery as we explore how to share a Google Slides presentation. A must-read for traveling presenters.

Filed under Education , Presentation Ideas • January 1st, 2024
How to Create Presentations with AI using ChatGPT
We tested ChatGPT for helping us create better presentations. Join us in this article to know a first-hand experience on AI content generators and their potential role for presenters.
Leave a Reply
Blog > How to change languages in PowerPoint
How to change languages in PowerPoint
01.01.20 • #powerpointtips.
In this post you will learn how to change languages in PowerPoint. Watch our video-tutorial or follow the steps listed down below!
First, select File in the PowerPoint menu. Then go to Options – a window will open. Select Languages . You can change both editing language (to check spelling and grammar) and display language (defines language of tabs and features). If your desired language is already in the menu, you can simply click on it and then select Set as default – Close PowerPoint and restart – your language should be changed now, and you are all done. If you cannot find the language you want, click on Get more display and help languages from Office.com and proceed with the next step.

The Office-webpage now opens. Scroll down a little and you will see a selection box that asks you what language you need. Choose the one you want. In a grey box, two different versions for download show up: 32-bit and 64-bit. To check which one you need, simply go to your computer settings > System > About . Under Device Specifications , you will see whether you have a 32 or 64-bit operating system. Download the version that matches it.

Install the language you just downloaded. To do so, just follow the instructions you get during the installation process. Once that is finished, we will repeat what we did in the first step ( File > Options > Languages ) Your new language should appear now. Click on it, press Set as default and close the Options-window. Next time you start PowerPoint, the language will be changed.

How can I change the language in PowerPoint?
Related articles
About the author.

Pia Lehner-Mittermaier
Pia works in Marketing as a graphic designer and writer at SlideLizard. She uses her vivid imagination and creativity to produce good content.

Get 1 Month for free!
Do you want to make your presentations more interactive.
With SlideLizard you can engage your audience with live polls, questions and feedback . Directly within your PowerPoint Presentation. Learn more
Top blog articles More posts

PowerPoint Quiz Templates - 10 free Quiz Designs

Blue Alps - Free PowerPoint Template

Get started with Live Polls, Q&A and slides
for your PowerPoint Presentations
The big SlideLizard presentation glossary
Tutorials are videos with instructions that show how for example a product or a software works.
Web-Based-Training (WBT)
Web-Based-Training (WBT) is an older term for learnmethods that can be accessed over the internet.
Vertical Communication
Vertical communication means that information is passed from one person to the next according to a linear system based on their titles. This type of communication is used when a company follows a hierarchical structure or for important, sensitive information.
Normal view (slide view)
The normal view or slide view is the main working window in your PowerPoint presentation. You can see the slides at their full size on screen.
Be the first to know!
The latest SlideLizard news, articles, and resources, sent straight to your inbox.
- or follow us on -
We use cookies to personalize content and analyze traffic to our website. You can choose to accept only cookies that are necessary for the website to function or to also allow tracking cookies. For more information, please see our privacy policy .
Cookie Settings
Necessary cookies are required for the proper functioning of the website. These cookies ensure basic functionalities and security features of the website.
Analytical cookies are used to understand how visitors interact with the website. These cookies help provide information about the number of visitors, etc.
How to change your language settings in Microsoft PowerPoint in 3 different ways
- You can change the language in PowerPoint in three different ways to help with editing or translating, or to set your display settings in another language.
- To change the language settings in PowerPoint for editing purposes, you'll need to access the "Language..." option in the "Tools" tab.
- To translate text, you can launch the Translator tool instead.
- If you're looking to change the display language, you'll have to change your operating system settings.
- Visit Business Insider's Tech Reference library for more stories .
If you want to change the language in PowerPoint, the presentation program offers you three different options depending on what you need.
You can change the editing language, which tells PowerPoint how to edit text as you type in your preferred language. This may prove particularly helpful if you've been sent a slideshow to edit that's written in another language.
You can also select "Translate…" to use the Translator tool on text in real-time, though Microsoft Office notes that this feature is only available for users with an Office 365 subscription, Office 2019 for Mac or Windows. This feature allows you to highlight entire text boxes or individual words and transform your presentation text any of the languages PowerPoint offers.
Lastly, you change the display language on PowerPoint by altering your operating system's language setting. On a Mac, depending on the language, you may be asked to add input sources.
None of these options affects the others, so you can have different languages for edits, slide text, and display. Here's how to change all three language settings in PowerPoint.
Check out the products mentioned in this article:
Microsoft office (from $149.99 at best buy), apple macbook pro (from $1,299.00 at apple), acer chromebook 15 (from $179.99 at walmart), how to change the powerpoint editing language.
1. Open PowerPoint on your Mac or PC.
2. Click the "Tools" tab on the top menu.
3. Select "Language…" from the dropdown menu.
4 . In the pop-up window that appears, scroll and select a language from the list.
5. Check the box for "Do not check spelling or grammar" if you don't want PowerPoint to use the language for proofreading.
6. Click the "Set As Default" button if applicable.
7. Click the "Yes" button to proceed.
How to use the PowerPoint Translator Tool for text
1. Open PowerPoint and click "Tools."
2. Choose "Translate..." from the dropdown menu.
3 . The "Translator" window on the right side of your presentation screen will open.
4. Click a text box that you'd like to translate. The text will appear in the white box in the Translator window.
5. Select a language from the "To:" dropdown menu. The translated text will appear in the blue box below.
6. Click "Insert" to insert that translated text in a new text box on the slide. You can then move the text box and resize it as needed.
7. You can also highlight individual words or sentences with different translations appearing below the blue box, depending on the context. Click the three dots to view a sample sentence.
8. Choose "Insert" when you're ready to substitute.
How to change the PowerPoint display language on Mac
1. Click the Apple icon on your Mac.
2. Select "System Preferences…" from the dropdown menu.
3. Click the "Language & Region" option in the first row.
4. Toggle to the individual "Apps" menu.
5. Click the (+) icon in the lower right of the window.
6. Select "Microsoft PowerPoint" from the "Application:" dropdown menu.
7. Select your preferred language from the "Language:" dropdown menu below.
8. Click the "Add" button.
9. Restart the app when prompted.
How to change the PowerPoint display language on PC
1. Sign on to an Administrator account.
2. Select the Start button.
3. Choose Settings.
4. In the window, click Time & Language.
5. Select the Language option.
6. Choose a language from the Windows display language dropdown.
Related coverage from Tech Reference :
How to download and access microsoft powerpoint on your mac computer, how to convert google slides to a powerpoint presentation in 4 easy steps, how to embed a youtube video into your microsoft powerpoint presentations using a mac or pc, how to convert a powerpoint to google slides in 2 different ways, yes, you can use microsoft word on a chromebook — here's how to install it.
Insider Inc. receives a commission when you buy through our links.
Watch: 45 ways to eat eggs
- Main content
- All Templates
- Infographics
How To Change The Language Of PowerPoint: A Complete Tutorial
- October 2, 2023
PowerPoint is an easy-to-use program with an interface similar to other Microsoft Office Programs. Even better, it allows you to create presentations in different languages for use by a mixed global audience. But how do you change the language in PowerPoint?
There are three methods on how to change the language of PowerPoint. For starters, you can modify the language for selected texts in the presentation. Alternatively, you can modify the language for the whole application. You can also alter the language for a particular presentation.
So, do these methods work? In this step-by-step guide, we will discuss all of this and more.
How To Change The PowerPoint Language?
As I said, There are at least 3 ways you can alter the language of PowerPoint. Let’s discuss how each works.
Method 1: Change The Language For Specific Text In A Presentation
This is the easiest method of changing your PowerPoint’s language by choosing a specific text. It involves the following:
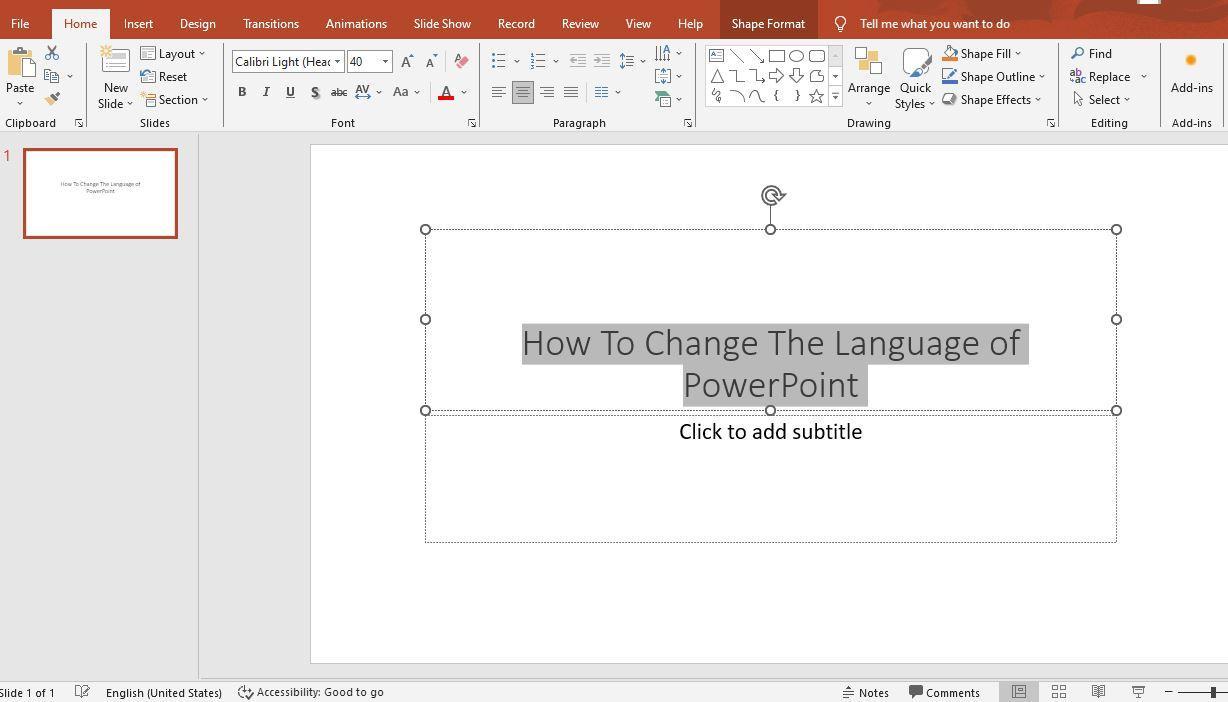
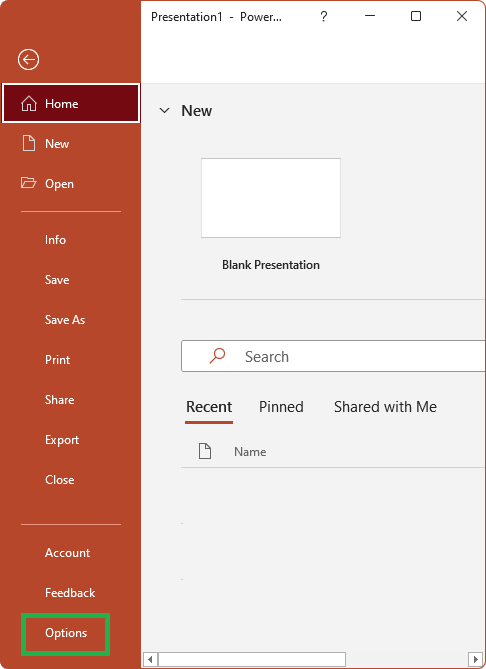
Step 1: Start your PowerPoint application and select “New” . Then, click on “Blank Presentation” .

Step 2: Next, highlight the text on the presentation that you would like to change the language. If it is the entire text, right-click on the text and press “Ctrl + A” on your keyboard if using a Windows computer. But if using a Mac, press “Command+A” .
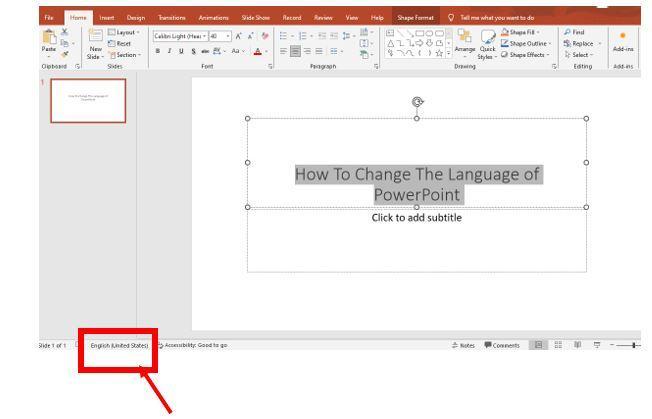
Step 3: From the left sidebar at the bottom of your PowerPoint window, Choose “Language” . A new pop-up window will appear with different languages.
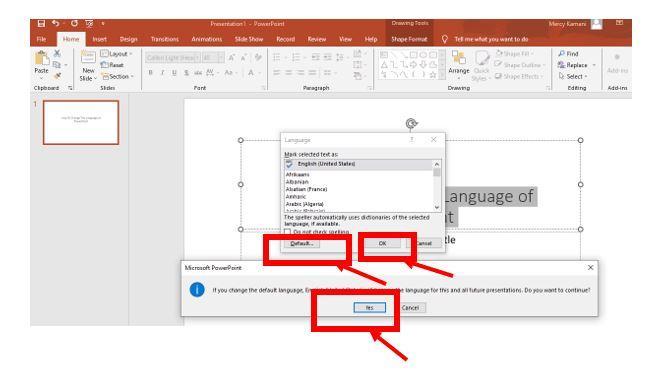
Step 4: Choose your preferred language from the list and click “Default” . On the popup window that appears, click “Yes” to set the language. Then, press the “OK” button. Your presentation should now appear in the new language.
Method 2: Change The Language for The Entire PowerPoint Application
In this method, you get to modify the editing and display language for the whole PowerPoint and Microsoft Word applications. Here is how to do it.
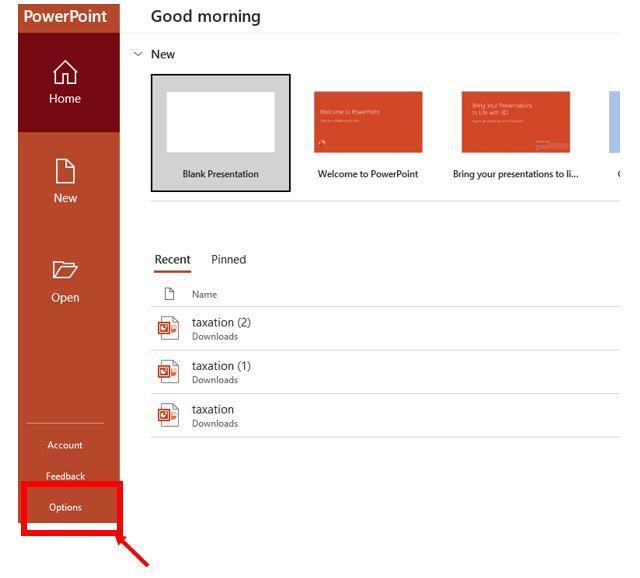
Step 1: Open your PowerPoint on your Windows computer. Here is how it should look like:

Step 2: Once you have opened the application, click on “Options” at the bottom part of the left sidebar.
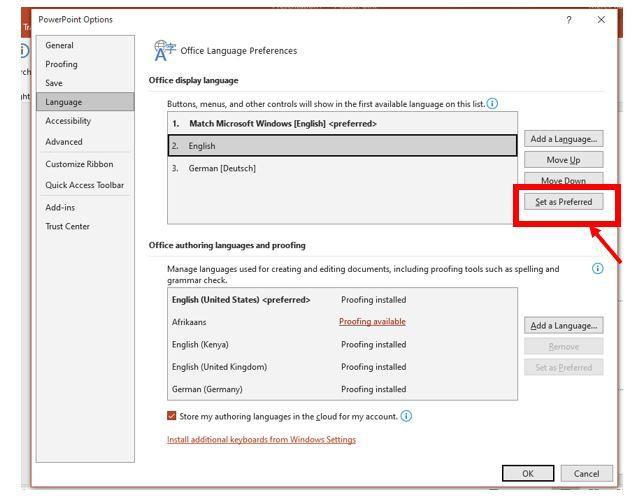
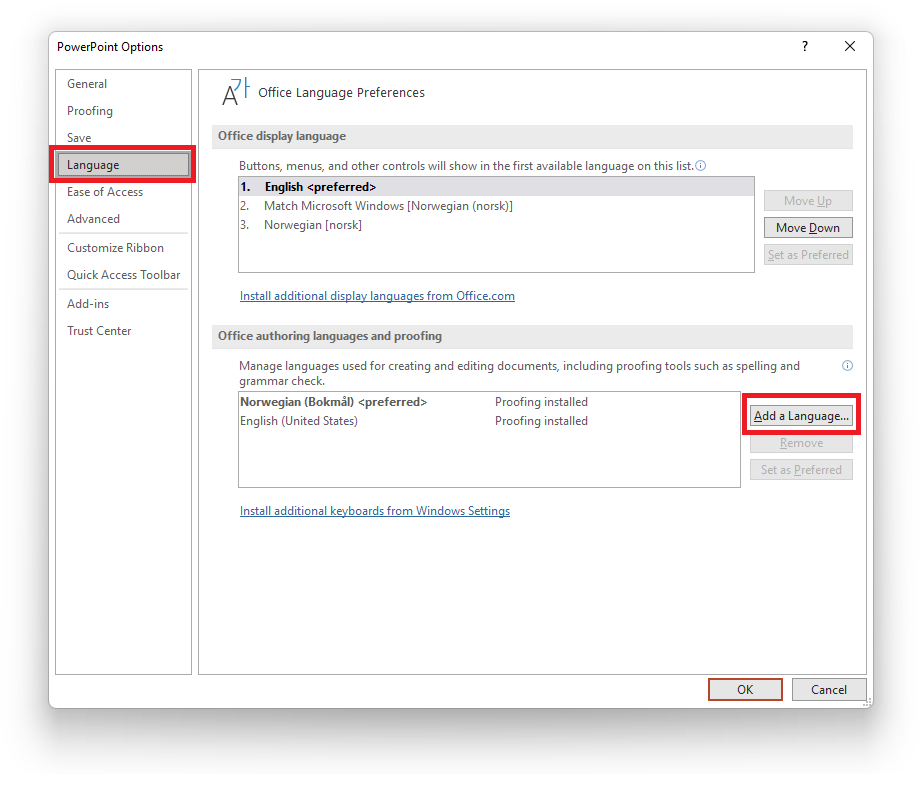
Step 3: A pop-up window will appear after clicking ‘’Options”. Select “Language” on the left sidebar.
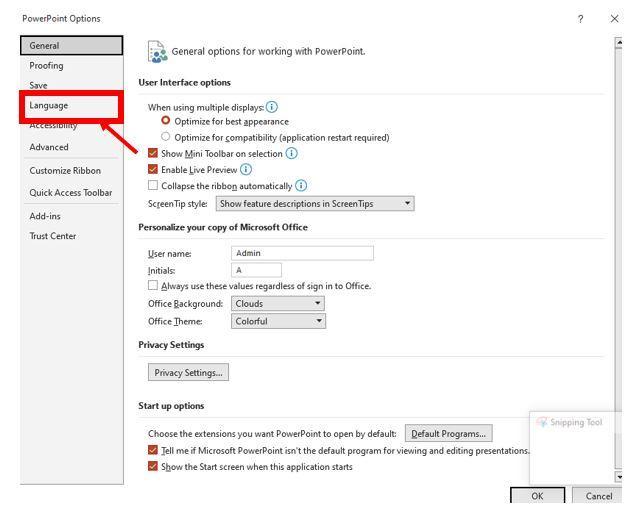
Step 4: Under the Office Display Language, choose your desired language if it’s already in the menu. Then, click on “Set as Preferred” from the right sidebar and press “OK” .

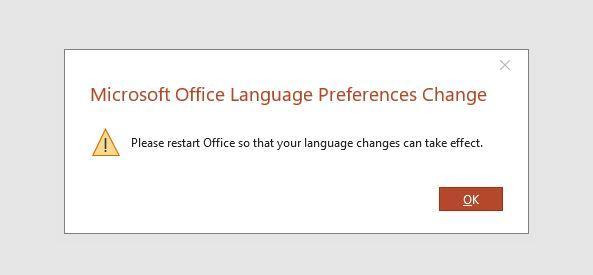
Step 5: Next, a pop-up window will appear, asking you to restart Office so the language modifications can be implemented. Click the “OK” button and close your PowerPoint application. Then, open the program again.
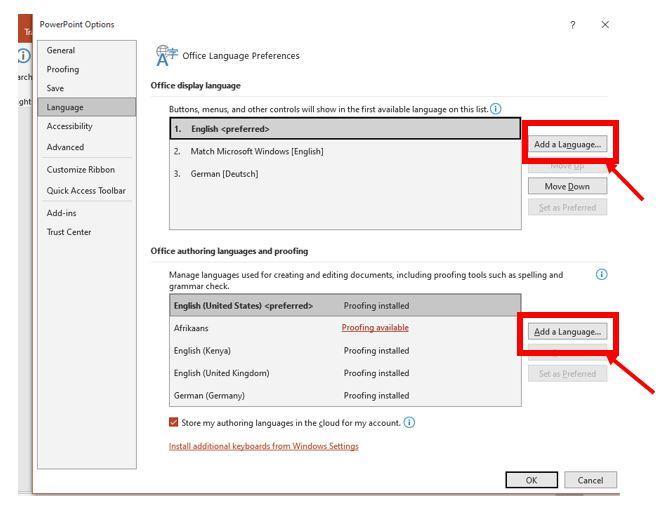
Step 6: If your preferred language is unavailable, click “Add a Language” from the right sidebar. Then, choose the language you want to use from the list and click “Install” .

Step 8: After installing the new language, this pop-up window will appear. Click “Continue” to close and restart your PowerPoint application and allow the modifications to take effect.

Method 3: Change The Language For A Specific Presentation
This is also a relatively easy way to alter the language of PowerPoint, but only for a particular presentation. Here are step-by-step instructions on how it works:
Step 1: Start your PowerPoint application. Then, click on the tab “New” from the top left sidebar. Next, choose “Blank Presentation” .
Step 2: On the top menu, click the “Review” tab if you have a Windows computer. If using a Mac, select the “Tools” tab instead.

Step 4: A new language dialog box will pop up. From the Office Display Language, choose your desired language. Then, click on “Set as Preferred” from the right sidebar. Next, press the “OK” button.
Step 6: If you would like to alter the proofing language, select your preferred under the Office Authoring Languages and Proofing. Then, click on the “Set as Preferred” button.

Step 8: If your desired language is unavailable in the Office Display Language list, click on “Add a Language” to install it.
If you are using a Mac computer, watch this video on how to change the PowerPoint language:
Troubleshooting Tips for Changing PowerPoint Language
Sometimes, you may experience problems while trying to change the language of PowerPoint. Below are a few troubleshooting tips that could help you.
- Before attempting to alter the language, ensure your Office 365 subscription supports the language you want to use for PowerPoint.
- Make sure your PowerPoint application is up-to-date. Outdated versions may have bugs or compatibility problems.
- If you have set multiple language preferences in PowerPoint, try clearing them and restart the program. Then, modify the language.
- Clean the cache and delete any temporary files related to PowerPoint.
- Delete and reinstall the Microsoft Office, including PowerPoint. This could help fix any corrupted files, causing the issue.
- Alternatively, restart your PC and try to alter the language once more.
- If all the above options don’t yield results, you can reach out to Microsoft Support for further assistance.
When presenting to a diverse audience from different countries and cultures, knowing how to change PowerPoint language is crucial. It is the only way to serve them better. The good news is that there are several easy ways to make the modifications.
However, some methods only allow you to modify the language for selected text and others for the entire presentation. So, you must carefully choose the best one that matches your needs. With that said, if you counter challenges while trying to alter the language, there are various troubleshooting tips to help you.
Leave a Reply Cancel reply
Your email address will not be published. Required fields are marked *
Save my name, email, and website in this browser for the next time I comment.

- Login / Register
Username or email address *
Password *
Lost your password? Remember me
No account yet?
- Slide Library
- Slide Library for PowerPoint
- Downloadable slides and shapes
- Slide Library search
- Search Library via shortcut keys
- Slide Library update alerts
- Rename or delete objects
- Share Slide Library
- Save slides or shapes to Slide Library
- Save presentation to Slide Library
- Manage Templates
- View all templates and set default
- Agenda Wizard
- Create Agenda Slides
- Update Agenda Slides
- Agenda Slide Numbering
- Navigate via Agenda
- Table of Contents
- Import Agenda Items
- Save Agenda Format
- Manage Colors
- Color Palette Toolbar
- Customize Color Toolbar
- Apply fill with outline color
- Recolor Charts
- View RGB color values & names
- Theme Color Tints and Shades
- Share Color Palette with team
- Insert Shapes
- Standard PowerPoint shapes
- Callouts / Speech Bubbles
- Hand Drawn Circles
- Harvey Balls
- Create Mini Slides
- Move to Multiple Slides
- Right Facing Centered Triangle
- Status Indicators
- Arrange and Align Shapes
- Select same color or size
- Select shapes by attribute
- Align shapes
- Align to first selected shape
- Choose Align anchor point
- Align using shortcut keys
- Copy paste position multiple shapes
- Straighten Lines
- Swap positions
- Distribute evenly
- Set Horizontal Gaps
- Set Vertical Gaps
- Squeeze or expand gaps
- Remove gaps
- Group Objects by Row
- Group Objects by Column
- Send to back, bring to front
- Send backward, bring forward
- Flip or rotate
- Group, ungroup and regroup
- Edit Shapes
- Same height, same width
- Copy paste position, size
- Resize shapes
- Slice shapes
- Multiply shapes
- Stretch shapes and fill gaps
- Toggle line weight and style
- Change margins toggle
- Chevrons same angle
- Paragraph Styles
- Save Paragraph Styles
- Apply Paragraph Styles
- Use PowerPoint Indent Increase/ Decrease to apply bullet styles
- Reset Paragraph Styles
- Ticks and Crosses bullets
- Paint Formatting
- Advanced Format Painter
- Position & Size Painter
- Table Format Painter
- Style Painter
- Text Format Painter
- Change Shape Painter
- Chart Format Painter
- Angles & Curves Painter
- Animation Painter
- Cycle Accent Colors
- Format Text
- Fit text to textboxes
- Wrap Text Toggle
- Merge Textboxes
- Split Textboxes
- Increase/ Decrease Font size
- Change Text Case
- Color Bold Text
- Delete Text or Replace
- Insert Superscript text
- Format Tables
- Create table from text boxes
- Convert table to text boxes
- Convert text to table
- Insert columns and rows
- Paste Excel data without source formatting
- Paste Excel data into text box tables
- Export Table or Box Table Data to Excel
- Set cell margins
- Express Table layout
- Table stripes
- Autofit columns
- Evenly space columns
- Align shapes over tables
- Harvey Balls for Tables
- Status Indicators for Tables
- Customizable PowerPoint Shortcuts
- Extra PowerPoint shortcuts
- Add PowerPoint shortcuts
- Search shortcut keys
- Reassign PowerPoint shortcuts
- Reset PowerPoint shortcuts
- McKinsey PowerPoint shortcuts
- F4 or Ctrl+Y redo or repeat
- Printable PowerPoint Shortcuts PDF
- How to Print a Custom Shortcuts list
- Search Shortcut Keys
- Searchable PowerPoint Shortcuts list
- Format Toolbar Overview
- Format Toolbar Layout Options
- Lock or Unlock Objects
- Lock objects
- Lock objects to the Slide Master
- Unlock objects
- Proofing Tools
- Check Formatting
- Check Fonts
- Check Template
- Check Slide Layout
- Check Content
- Check Punctuation & Spacing
- Reduce File Size
- Flip Slides
- Set Proofing Language
- Change set language for PowerPoint presentations
- Slide Numbering
- Manage Slide Numbering
- Slide Numbers with totals
- Add words to Slide Numbers
- Change Starting Slide Number
- Skip Slide Numbers on Hidden Slides
- Slide Navigator
- Footers & Footnotes
- Filename Footer
- Enlarge Footnotes
- Refine Slides
- Add summary slide
- Format slide title
- Display No Fly Zone
- Send slide to appendix
- Camouflage mode
- Format Painter
- Set Grayscale
- Format Images
- Compress file size
- Format Charts
- Charts Toolbar
- Config Options
- Customize Settings
- Dark Mode Display
- Review Slides
- Customizable Status Stamps
- Sticky Notes
- Tag slides with filename and page number
- Share Slides
- Email selected slides in PPT or PDF format
- Print selected slides
- Save selected slides
- Slide Library for Teams
- Team Slide Library
- Create multiple Team Slide Libraries
- Synchronize Team Slide Libraries
- Synchronize Team Slide Library to your company Dropbox/ Box/ OneDrive folder
- Updating your Team Slide Library
- Import entire presentation to the Slide Library
- Share Slide Library with a colleague
- Share Custom Settings
- Share Custom Settings with Team
- Getting Started
- Getting started with PPT Productivity add-in for PowerPoint
- Downloadable PowerPoint Elements for Slide Library
- Tutorial - How to Create Custom Paragraph Styles for PowerPoint
- Can I use PPT Productivity on a Mac?
- PPT Productivity Basic Tools Tutorial
- PPT Productivity Plus Tools Tutorial
- New Features
- August 2023 update: Color Toolbar enhancement, new icons and more
- February 2023 update: New Slide Libraries available to download!
- January 2023 Update: Agenda Wizard, Format Painters + More
- How to copy and paste formatting in PowerPoint
- PowerPoint How To
- What are the most popular PowerPoint shortcuts?
- Where are PPT templates stored? Finding templates in PowerPoint
- Pasting data into a PowerPoint table without source formatting?
- Consulting Toolkit
- How to create effective consulting slides using Minto Principles
- Missing the McKinsey PowerPoint Shortcuts?
- Missing the Accenture QPT for PowerPoint?
- Missing the BCG PowerPoint Tools?
- Missing the Bain Toolbox for PowerPoint?
How to add Stamps or Stickers to PowerPoint slides?
- Looking for a Consulting PowerPoint Toolbar?
- Top 10 PowerPoint Hacks / Shortcuts used by strategy consultants
- PowerPoint Tips
Set PowerPoint Proofing Language for all slides or a selection
- June 15, 2020
Easily set all your existing slides to the same language in PowerPoint using PPT Productivity add-in , including shapes or objects on slides and the notes pages! This feature is especially useful for anyone working in countries like Canada or Switzerland where multiple official languages are used, or for companies where teams are collaborating from different countries. But it's also useful to ensure a consistent type of English is used throughout your presentation (eg UK English vs US English).
Set Proofing Language determines the dictionary for spell checking that is used - this is what determines whether words appear with a red squiggly line beneath them. Standard PowerPoint does not include an option to change the language easily for an entire presentation to make proofing or reviewing easier. If you try to update the set language in Standard PowerPoint, you need to apply it for each textbox. But PPT Productivity add-in for PowerPoint solves this problem and gives you a feature to change the set proofing language for all slides in PowerPoint . Or for selected slides or shapes - you have options!
Standard PowerPoint Change Language for all slides
In standard PowerPoint, to change language for all slides you need to:
- Select all slides by pressing CTRL+A (from the Thumbnail pane in Normal view or from the Slide Sorter view)
- Navigate to the Review tab on the ribbon and Click the Language button
- Click the Set Proofing Language menu option
- Select the language you would like to use as the proofing language
This standard PowerPoint option will update the language for titles and textboxes as defined in the slide layouts. But the standard PowerPoint feature will not include text boxes added to your slides, shapes added to your slides with wording, or the text in handout notes for each slide . This is why we created the change set language feature in PPT Productivity for PowerPoint .
How to change language in PowerPoint for spell check review for entire presentation?
With PPT Productivity you can set the proofing language for the entire presentation , a specific slide, or individual shapes. Using the PPT Productivity Proofing Language drop-down menu you can change the language in PowerPoint. You can:
- Set the Default Proofing language for your presentation
- Select the shapes/ slides to update language - all text-boxes in the selection, including any text-boxes in Grouped shapes, will be set to the Default Language of your presentation
- Convert all shapes in all slides to your Default Language
- Change language for all slides or a selection of slides or shapes
- When you change language for the entire presentation or selected slides, the set language for notes in these slides will also be updated
To do this, you simply select either the Set all slides language or Set selected slides/ shapes language features from the PPT Productivity Ribbon. Watch a brief demonstration of the Set proofing language features in the video below.
Take a look and let us know what you think.
Head to our home page to download a free trial now!

Want to see our tools in action?
Book a personalized demo with our PowerPoint professionals

Download 30 Day Free Trial
Download your 30 day free trial - Microsoft Office for Windows
Related productivity tips

Looking for PowerPoint stamps and stickers? Perhaps you’ve come out of one of the top tier ...

Need a Beautifying/ Proofing tool for PowerPoint?
We are excited to let you know we are currently working on Beautifying/ Proofing tools for PPT ...

Can I lock a shape, image or object in PowerPoint? Yes!
With PPT Productivity add-in for PowerPoint you can now lock shapes, images or other objects in ...
PowerPoint: Change Proofing Language for entire Presentation
Step 3: Activate
Changing the proofing language of the entire presentation, i.e. the editing language used by the built-in spell checker, is not a straight forward task in Microsoft PowerPoint. It is quite strange why Microsoft has not made this common task more accessible to the user. If a presentation that should be in English is originally set to French, you must manually alter each and every text frame on every slide. The “ Change Language ” add-in for Microsoft PowerPoint, however, provides an easy way to change the proofing language of an entire presentation with just a few clicks.
“Change Language” add-in
Get the add-in for Microsoft PowerPoint now.
How to use the proofing language add-in?
When the add-in has been installed and activated, the new button can be found on the Review tab. The Change Language button is located in a new group called “Coragi Language Tools”, which is to the right of the general language settings.

When the “Change Language” button is pressed, the following dialog is displayed:

The “Editing Languages” section lists all the installed editing languages available for Microsoft PowerPoint. It is possible to install additional editing languages if the default languages don’t fit your needs. We will come back to how you can do this later in this article. The editing languages are sorted in ascending order, and the currently active language for the presentation has been selected.
The “Range” section gives you the option to change the editing language for the “Entire Presentation” or the “Active Slide”. Usually, it is recommended to change the language for the entire presentation, since it will set the default language as well. It means that any new textboxes or shapes will use this default editing language.
When you have selected the desired editing language and the range, press the OK button. Depending on the number of slides and shapes in your presentation, setting the language can take a few seconds. The dialog is closed when the update has been completed. Now, let us show you how to get started with the “Change Language” add-in.
Prerequisites
In order to use the add-in your computer needs to satisfy the following system requirements:
- Microsoft Windows 10 or later.
- Microsoft PowerPoint 2010 or later.
Please notice that the add-in does not run on Mac (macOS). Only Microsoft Windows operating system is currently supported.
The web version, PowerPoint Online for Office 365, is not supported. The add-in only works with the installed client software.
Both 32 bit and 64 bit Windows operating systems are supported.
How to install the proofing language PowerPoint add-in?
This section describes how to download, enable, and use the Change Language add-in which allows you to apply a specific proofing language to all slides in a PowerPoint presentation.
In order to download, install and activate the add-in, please do the following:
Step 1: Download
Press the Download button above to get the PowerPoint add-in file.
Add-ins for Microsoft PowerPoint 2010 and later use the .ppam file extension, i.e. “ P ower P oint A dd-in M acro”. The file contains components that add additional functionality, including extra commands, custom macros, and new tools for extending default PowerPoint functions. This type of add-in file was first introduced in 2007 with the release of Microsoft Office 2007.
Step 2: Install
You can easily get access to the above “Addins” folder by typing the following shortcut path in the top text box in the File Explorer and then press the Enter key:
You will then automatically be directed to the correct folder.
Please be aware that the “…\AppData\Roaming\Microsoft\AddIns” folder is hidden , and the full path must be entered manually. It is not possible to open the “Users” folder in File Explorer and then browse to the folder path (unless you have enabled the option to show hidden files and folders).
To open and activate the add-in file please do the following:
- Open Microsoft PowerPoint
- Now the Change Language add-in has been enabled in PowerPoint. In case you get any security warnings (“Enable Macros”), you need to press “Enable Content”. As mentioned in the beginning of this article, you can find the “ Change Language ” button on the Review tab. Press the button to change the proofing language.
How to add new editing and proofing languages?
You can enable additional proofing languages by doing the following:
You need to restart PowerPoint for the language changes to take effect.
- On the main ribbon/toolbar, to to Files > Options
- When done, select the preferred proofing language, and press the “ Set as P referred ” button.
You would have to restart PowerPoint for the language changes to take effect.
How to manually change the spell-check language of a presentation?
Using the Change Language add-in is the most time-saving way to change the proofing language of the active slide or the entire presentation. You can of course go also through the manual process of changing the spell check language for each and every slide, textbox and shape. We will now show you how to do it.
- Select all shapes on each slide. You can press Ctrl+A on your keyboard to select all shapes on the current slide.
- On the Review ribbon, click on the button called “ Language “, and then the dropdown menu item “ Set proofing language “
- Select your proofing language, and press “OK”.

This process has to be repeated for every slide in your presentation. This also has to be repeated for any slide masters that your presentation uses.
Our recommendation is to use the Change Language add-in to save time.
Supported proofing languages in PowerPoint
Microsoft offers a long list of spell cheking languages for Microsoft PowerPoint. If the language is currently not available on your computer, you need to install it as described earlier in this article.

Leave a Reply Cancel reply
Your email address will not be published. Required fields are marked *
Save my name, email, and website in this browser for the next time I comment.
Related Posts

PowerPoint: How to Debug a PowerPoint Add-in?
In this article we will show you how to debug a standard PowerPoint add-in. There are two kinds of add-ins available for Microsoft PowerPoint: PowerPoint Add-in Macro (.ppam) COM add-in In this article we will explain how you can debug a standard .ppam add-in for PowerPoint. This kind of add-in is written in Visual Basic […]
Privacy Overview
- Slidesgo School
- PowerPoint Tutorials
How to Change the Display Language in PowerPoint

If you want to change the display tongue in PowerPoint, this is your tutorial. No matter if you have downloaded a version of the software with the incorrect default language or you want to improve your reading skills, we will teach you, step by step, how to do it.
Setting a new preferred language in PowerPoint
Installing additional display languages in powerpoint, changing the language for office 2016 or earlier versions, changing the language of powerpoint proofing tools.
Ready to choose a new preferred language for PowerPoint? It’s as simple as following the next steps.
- In the toolbar, go to Files → Options.
- Then, in the left menu, click on Language.
- In the section Office display language, click on any of the options from the list and, then, click on Set as preferred.
- If you want to match the tongue of Office with the one of your own Microsoft Windows, click on Match Microsoft Windows.
- Then, a popup window appears. It will ask you to relaunch the program to apply the changes.
- Close the program and open it again. Remember to save the changes if you modified your presentation.
- If the tongue that you want to set as preferred is not on the list, click on Install additional display languages from Office.com.
- Click on any of them → Install.
- A new window will appear in your browser. It will allow you to download the linguistic module of the tongue that you have selected.
- Click on Download.
- The browser will show a new window. There, you can read the specifications of the selected tongue.
- Click on Download and wait a few seconds.
- Your browser will show the latest downloads at the bottom. Double click on the pack to install it.
- PowerPoint will ask you to save your current work before proceeding. Click on Save. Download it as a 64-bit or 32-bit pack, depending on your Windows version.
- Wait until it finishes, it will take a couple of minutes. Then, a popup appears to let you know that you have completed the installation. Click on Close or its translation, depending on the language. As we have selected Portuguese, you’ll see Fechar.

- Now open PowerPoint again.
- Click on File → Options → Language. The new tongue appears there. Click on it and, later, on Select as preferred. Click OK.
- A popup window will ask you to close the program and to open it again to apply the changes. Click OK.
- Open PowerPoint.
- Now it displays the new language!
If you want to modify the tongue in Mac, follow these directions:
- To change the user interface, Go to the Apple menu.
- Then, go to System Preferences → Language & region.
- Select one option from the list of Preferred Languages.
- If you are not able to find your tongue, click on + and add it. Then, restart Office.
- To change the Editing language, press Tools → Language.
- Pick up a tongue → OK.
- If you want to make it Default, mark that option.
- Open Office.
- In the toolbar, go to File → Options → Language.
- Click on any of the options → Set as Default.
- If you can’t find a given tongue, press Add additional editing languages.
- Choose one from the list → Add.
Make sure that the Keyboard Layout appears as Enabled. Otherwise:
- Click on Not enabled.
- Click on Add languages → pick one one of them → Add → close the dialog box.
You also need to double check if the Proofic option is working. If it says Installed, it will work. But if it is not:
- Click on Not installed. Download the tongue Accessory Pack and follow the instructions. This step is pretty similar to the one in the section above.
- In PowerPoint, go to File → Options → Language.
- Click on the new tongue and select Set as Default or Match Microsoft Windows, if that is the Office display tongue. If you need more information on the issue, you can read this Microsoft tutorial .
In PowerPoint, you can establish the authoring language of a text, i.e., setting the tongue in which you are going to write. It also offers a series of tools that will help you with the grammar and spelling checks. It’s very useful when making mistakes, as the software will spot them easily. Does it sound good? Let’s see how to work with them.
- In language options again, go to Office authoring languages and proofing.
- As before, click on any of them and choose Set as Preferred.
- Click on OK, and a warning window will pop up. Click OK.
- If the one you are looking for is not in the system, click on Add a Language…
- Choose one from the list. If you want the program to check your grammar and spelling, mark the Get proofing tools → Add. This will direct you to the installation page. Some of the tongues don’t allow you to get them, so you won’t be able to select it. For this part of the tutorial, we have chosen German.
- Once on the webpage, click on download and wait until it finishes.
- Open the file and a window appears to let you know that the installation is ready. Click on Close or its translation, that will vary depending on the tongue. As we have chosen German, you’ll see Schließen.
- Close PowerPoint and relaunch it again. Go to File → Options → Language. As you can see, German is now ready for you to use.
- Click on that (or other) language → Set as Preferred. When a window appears, click on OK. Select OK once again.
As you have seen, changing the tongue in PowerPoint is as easy as it can be! Go to the language settings and follow these simple steps. This program will correct your spelling mistakes and will help you with grammar. If you liked our Language Learning App template , download and edit it now and, if you are looking for new templates for PowerPoint , have a look at our collection of presentations. Remember that this tutorial is applicable to Office 365. If you have any other version, you may encounter slight differences.
Do you find this article useful?
Related tutorials.

How to Download Google Slides Templates
When preparing a presentation, many people start panicking because they realize how much time it will take to edit each and every slide. Creating them from scratch, filling them in, looking for pictures, moving the elements...How stressful! But there is a solution that saves you a lot of time. We're sure that you've browsed the internet for templates, or basically, pre-established designs and elements, that can be downloaded for free and can be edited to your liking. Are we right? Then, we have some good news for you!

Discover our collection of printable templates
With the advance of technology, printing has become something that is no longer a necessity. Smartphones have made the paper format less and less frequent, but there are still certain cases in which having physical resources is much more convenient. Whether it's for taking notes, handing out assignments, making worksheets or handing out business cards or invitations, it's necessary to print your customized designs.From now on, in every Slidesgo printable presentation that you download, you will find the instructions for printing on the third slide. Depending on the style, colors or format of each presentation, we will tell you if you can...

How to Add Superscript and Subscript in Google Slides
Let’s take the most famous formula: E=mc^2, Einstein’s relativity equation. It wouldn’t be the same if it was E=mc2, right? Okay, yes, some people write it like that because it’s very famous and it won’t be misunderstood. But technically… It can! This is where the sophistication of superscript or subscript enters the room! Do you know how to write them in equations, copyright brands or even footnotes in your presentations? Let’s figure out how.

How to Add Superscript and Subscript in PPT
It can be a registered brand, a footnote or a math formula that you need to properly write. “2^2+2” is not the same as “22+2”, is it? Using superscript or subscript in a proper way makes a whole difference in texts. If it’s for your mathematical or physics complex formulas or just an anecdotic footnote, let’s figure out how to write them in a powerpoint presentation!
- Insider Reviews
- Tech Buying Guides
- Personal Finance
- Insider Explainers
- Sustainability
- United States
- International
- Deutschland & Österreich
- South Africa

- Home ›
- tech ›
- how-to »
How to change your language settings in Microsoft PowerPoint in 3 different ways

- You can change the language in PowerPoint in three different ways to help with editing or translating, or to set your display settings in another language.
- To change the language settings in PowerPoint for editing purposes, you'll need to access the "Language..." option in the "Tools" tab.
- To translate text, you can launch the Translator tool instead.
- If you're looking to change the display language, you'll have to change your operating system settings.
If you want to change the language in PowerPoint, the presentation program offers you three different options depending on what you need.
You can change the editing language, which tells PowerPoint how to edit text as you type in your preferred language. This may prove particularly helpful if you've been sent a slideshow to edit that's written in another language.
You can also select "Translate…" to use the Translator tool on text in real-time, though Microsoft Office notes that this feature is only available for users with an Office 365 subscription, Office 2019 for Mac or Windows. This feature allows you to highlight entire text boxes or individual words and transform your presentation text any of the languages PowerPoint offers.

Lastly, you change the display language on PowerPoint by altering your operating system's language setting. On a Mac, depending on the language, you may be asked to add input sources.
None of these options affects the others, so you can have different languages for edits, slide text, and display. Here's how to change all three language settings in PowerPoint.
Check out the products mentioned in this article:
Microsoft office (from $149.99 at best buy), apple macbook pro (from $1,299.00 at apple), acer chromebook 15 (from $179.99 at walmart), how to change the powerpoint editing language.
1. Open PowerPoint on your Mac or PC .
2. Click the "Tools" tab on the top menu.
3. Select "Language…" from the dropdown menu.

6. Click the "Set As Default" button if applicable.
7. Click the "Yes" button to proceed.
How to use the PowerPoint Translator Tool for text
1. Open PowerPoint and click "Tools."
2. Choose "Translate..." from the dropdown menu.
3 . The "Translator" window on the right side of your presentation screen will open.
4. Click a text box that you'd like to translate. The text will appear in the white box in the Translator window.
5. Select a language from the "To:" dropdown menu. The translated text will appear in the blue box below.
6. Click "Insert" to insert that translated text in a new text box on the slide. You can then move the text box and resize it as needed.
7. You can also highlight individual words or sentences with different translations appearing below the blue box, depending on the context. Click the three dots to view a sample sentence.
8. Choose "Insert" when you're ready to substitute.
How to change the PowerPoint display language on Mac
1. Click the Apple icon on your Mac.
2. Select "System Preferences…" from the dropdown menu.
3. Click the "Language & Region" option in the first row.
4. Toggle to the individual "Apps" menu.
5. Click the (+) icon in the lower right of the window.
6. Select "Microsoft PowerPoint" from the "Application:" dropdown menu.
7. Select your preferred language from the "Language:" dropdown menu below.
8. Click the "Add" button.
9. Restart the app when prompted.
How to change the PowerPoint display language on PC
1. Sign on to an Administrator account.
2. Select the Start button.
3. Choose Settings.
4. In the window, click Time & Language.
5. Select the Language option.
6. Choose a language from the Windows display language dropdown.
Related coverage from Tech Reference :
How to download and access microsoft powerpoint on your mac computer, how to convert google slides to a powerpoint presentation in 4 easy steps, how to embed a youtube video into your microsoft powerpoint presentations using a mac or pc, how to convert a powerpoint to google slides in 2 different ways, yes, you can use microsoft word on a chromebook — here's how to install it.

- Current Location in Google
- Hide Whatsapp Messages
- Phone is hacked or not
- Whatsapp Deleted Messages
- Download photos from Whatsapp
- Instagram Messages
- How to lock facebook profile
- Unfollowed on Instagram
- Best printers for Home
- Best Mixer Grinder
- Best wired Earphones
- Best 43 Inch TV in India
- Best Wi Fi Routers
- Best Vacuum Cleaner
- Best Home Theatre in India
- Smart Watch under 5000
- Best Laptops for Education
- Best Laptop for Students

- Advertising
- Write for Us
- Privacy Policy
- Policy News
- Personal Finance News
- Mobile News
- Business News
- Ecommerce News
- Startups News
- Stock Market News
- Finance News
- Entertainment News
- Economy News
- Careers News
- International News
- Politics News
- Education News
- Advertising News
- Health News
- Science News
- Retail News
- Sports News
- Personalities News
- Corporates News
- Environment News
- Top 10 Richest people
- Cibil Score vs Cibil Report
- Top 10 Largest Economies
- Lucky Color for 2023
- How to check pan and Aadhaar
- Deleted Whatsapp Messages
- How to restore deleted messages
- 10 types of Drinks
- Instagram Sad Face Filter
- Unlimited Wifi Plans
- Recover Whatsapp Messages
- Google Meet
- Check Balance in SBI
- How to check Vodafone Balance
- Transfer Whatsapp Message
- NSE Bank Holidays
- Dual Whatsapp on Single phone
- Phone is hacked or Not
- How to Port Airtel to Jio
- Window 10 Screenshot
Copyright © 2024 . Times Internet Limited. All rights reserved.For reprint rights. Times Syndication Service.
- CLOUD PREMIUM New
- Today’s Offer
- Redeem Voucher
No products in the basket.
Course Cloud
the best place for online learning!

Not a member yet? Sign up
Don’t have an account yet? Sign Up
Already have an account? Log In
By signing up, I accept Course Cloud’s Terms & Conditions
- How to Change Language in PowerPoint for All Slides: A Detailed Guide

PowerPoint is unbeatable for making a visual presentation. It is a persuasive tool for business as well as other purposes, but you have to manage it wisely. If you want to learn how to change language in PowerPoint, this blog is for you. This PowerPoint program offers you some options depending on what you need. The guide below will help you to know how to change the language in PowerPoint. Also, you will learn how to change language correction in PowerPoint.
How to Change Language in PowerPoint?
There are several ways you can change language in MS PowerPoint. It will set the proofing language for your spelling and grammar check. The simplest way how to change language in PowerPoint 2007 is given below-
- Highlight and select the text you want to change
- Look at the left in the “Status Bar” at the bottom of your PowerPoint window. Click the ‘Language’ button.
- Another way is you can go to the ‘Review’ tab, ‘Language’ group, click ‘Language’, select your desired proofing language in the drop-down menu.

- Then press ‘Ok.’
By doing this, you can change the default language of your selected part.
However, you are probably interested in learning how to set the language of your entire presentation. This is a bit complex! Yet, the following tricks might help you.
How to Set the Same Language for Everything on a Single Slide?
To set the same language for everything on a single slide, do the following:
- Click on the specific slide you want to work on
- Now press ‘Ctrl A’ to select everything on the slide
- Now, look at the left in the “Status” bar at the bottom of your window
- Click the ‘Language’ button
- Select the language you want to change
- Press the ‘Ok’ option
In this way, you can do this for all your slides. However, if you are working on a longer presentation, this might not be very practical for you. In that case, you can try the following.
How to change the Language of Placeholders Across all Slides in a PowerPoint Presentation?
To execute this properly, follow the steps below:
- Go to the ‘View’ tab
- Search the ‘Outline View’ option in the ‘Presentation Views’ group to the left
- After that, click on a slide in the view pane to the left
- Press ‘Ctrl A’ to select all slides of the presentation
- Now, click the ‘Language’ button to the left in the Status Bar at the bottom of your PowerPoint presentation
- Select the language you want to use
By following this, you can change the language of every slide in your presentation. Besides, it includes elements that have been defined in your slide master, like – tag line placeholders, text placeholders, content placeholders, etc.
However, any text boxes, shapes, or other elements, that have been added to the slides that are not present in the slide master used will not be affected. Therefore, you need to change the language of all the slides described above or use an add-in that automatically sets the language across the entire presentation.
How to Change Language in PowerPoint 2016?
If you want to change the language for Office 2016 or even for the earlier versions, go through the following steps-
- Open Office
- Now, in the toolbar, go to File> Options> Language.
- Click on your options and then “Set as Default.”
- If you can’t find your language, click on “Add additional editing languages.”
- After that, select one from the list and press “Add.”
You have to be sure that the keyboard layout appears as “Enabled”. If not-
- Select and press the “Not enabled” option.
- After that, click on “Add languages”> your preferred language> “Add” and then close the dialogue box.
Also, you have to recheck if the proof option is working. If it is installed, it will work for sure. Otherwise, you have to:
- Click on “Not installed”. Download the tongue Accessory Pack and follow the instructions. This step is pretty similar to the one in the section above.
- In PowerPoint, go to File → Options → Language.
- Click on the new tongue and select “Set as Default” or “Match Microsoft Windows” if that is the Office display language.
How to Change the Language of Menus and Buttons in PowerPoint?
To change the display language in PowerPoint , for instance – the language of buttons, menus and controls, follow these steps:
- Find out the ‘File’ tab
- There, select ‘Options’ in the menu to the left
- Select ‘Language’ you can find the menu to the left in the dialogue box
- Now, select the default language you want
- Select ‘Set as Preferred’
- Press the ‘Ok’ button.

If your preferred language is not listed, follow the steps below.
How to Add an Authoring Language?
If you want to add an authoring language, you have to:
1. Open an Office program; choose MS PowerPoint.
2. Now, select File >Options >Language.
3. On the Office Language Preferences set, you will find under Office authoring languages and proofing, select “Add a Language”.
4. After that, choose the desired language in the “Add an authoring language” dialogue.
5. And then, select “Add”. By doing this, a browser page will open where you can download your installation file.
6. Now, select “Download” on the browser page and run the downloaded package to complete the installation process.
7. Afterwards, the added language appears in the list of Office authoring languages.
However, proofing available may appear next to the language name. From there, you can obtain a language pack with proofing tools for your language. However, if proofing is not available next to the language name, then you will know that proofing tools are not available for that language. On the other hand, if proofing installed appears next to the language name, you’re all set.
How to Add a New Language in PowerPoint?
If you want to add a language, choose the UI display language , and set the authoring and proofing language, you can conveniently use the Office language options.

If your preferred display language is not available in PowerPoint, you can download and install it from the Microsoft Office support page. Also, this is a case when you change the text language of a PowerPoint presentation, but the spelling and grammar check does not seem to work. Therefore, you will not get an error message if your language is not installed.
Therefore, go through follow these steps to learn how to change the proofing language in PowerPoint and add a new display language:
- Go to the ‘File’ tab
- Then, click ‘Options’ in the menu to the left
- After that, select ‘Language’ in the menu to the left in the dialogue box
- Click on the ‘Install additional display languages from Office.com’ link
- Finally, follow the instructions on the webpage
The above instructions will guide you to download and install display, help, and proofing menus for the language you want to use. However, all install menus will be in the selected language.
Remember that you can set the display and authoring languages independently. For instance, you can use everything in the same language or use a combination of more languages for your OS, authoring, Office UI display, and so on.
Basically, the languages available on your computer depend entirely on the language version of your Office and any additional language pack, language interface pack, or ScreenTip languages.
How can you Change the PowerPoint Display Language on Mac?
If you are using Mac, you can change the PowerPoint display language easily. To do the job, follow the instructions below-

1. To change the user interface, click the Apple icon on your Mac.
2. Then, select “System Preferences” from the dropdown menu.
3. Select the “Language & Region” option in the first row.
4. After that, toggle to the individual “Apps” menu.
5. Then, look at the lower right of the window and select the (+) icon.
6. Later on, click “Microsoft PowerPoint” from the “Application” dropdown menu.
7. Choose your preferred language below from the “Language” dropdown menu.
8. Then, just click the “Add” button.
9. If you want to make it default, mark that option.
10. Restart the app when prompted.
How to Use the PowerPoint Translator Tool for Text?
If you want to use the PowerPoint translator tool, you have to follow the instructions below-
1. Select the “Tools” option in PowerPoint.
2. You will find “Translate….” from the dropdown menu; select it.
3. After that, the “Translator” window on the right side of your PowerPoint screen will open.
4. There, select a text box that you want to translate. Meanwhile, the text will appear in the white box in the translator window.
5. Choose a language from the “To” dropdown menu. By doing this, the translated text will appear in the blue box below.
6. Tap on the “Insert” option to insert that translated text in a new text box on the slide. Afterwards, you will be able to move the text box and resize it as needed.
7. Also, you can highlight individual words or sentences with different translations. You will find it appear below the blue box, depending on the context. Then, tap on the three dots to view a sample sentence.
8. Finally, select “Insert” when you’re ready to substitute.

The Bottom Line
As you have seen, changing the tongue in PowerPoint is as easy as it can be! Go to the language settings and follow these simple steps. This program will correct your spelling mistakes and will help you with grammar.
Having good knowledge of how to change language in PowerPoint is essential when you want to impress people with the accuracy of your presentation. Therefore, you should learn about it in-depth to deliver the best presentations. For this purpose, you may join this PowerPoint Introduction course for more tips and tricks.
Recent Posts
- How to Become a Web Designer From Scratch?
- Xero Chart of Accounts: What you Need to Know
- Is a Bookkeeping Certificate Worth It?
- What Is Double-Entry Bookkeeping? Guide for Small Businesses
- What is Forensic Psychology and Criminology All About? (Scope and Requirements)
- How to Delete an Unwanted Page in Microsoft Word 2016
- How to Relieve Stress and Depression Quickly: A Guide to Success
- How Much Does a Bookkeeper Earn in the UK
- What is the Payroll Management System in HR Evolution?
0 responses on "How to Change Language in PowerPoint for All Slides: A Detailed Guide"
Leave a message cancel reply.
You must be logged in to post a comment.