- ServiceNow Consulting Services
- ServiceNow IT Workflows
- ServiceNow Customer Workflows
- ServiceNow Employee Workflows
- Hyperautomation
- ServiceNow Implementation Services
- ServiceNow Integration Services
- ServiceNow Managed Services
- ServiceNow for Manufacturing Industry
- Digital Transformation In Banking
- Digital Transformation In Insurance
- Digital Transformation in Wealth & Asset Management
- Digital Transformation in Life Sciences
- Digital Transformation in Hospitals
- Digital Transformation for Payers
- Data Migration Utility
- 360 Degree Business Assessment
- ServiceNow Dx Support
- Service Automate
- Rome Release
- Case Studies
- News Events
- Infographic
- Thought Leadership

Handling Assignment Rules in ServiceNow
In ServiceNow, if one is looking for automatic assignments then he can rely on the instance’s ability to assign the tasks automatically to different users and groups depending on the specified conditions. In order to achieve this, ServiceNow has the following modules:
- Assignment Lookup Rules
- Assignment Rules
Assignment Lookup Rules:
This module appears under the ‘System Policy application’ menu. This table is basically generated out of the box as its definition is provided in the ‘Data Lookup Definition’ table in the instance, specifically for field assignments in the incident table. Assignment lookup rules mainly provide the functionality of changing any field value and not just the assignment fields.
Assignment Rules:
This module appears under the ‘System Policy application’ menu. It helps to automatically assign the tasks to a particular user or a particular group using the assigned_to and assignment_group fields respectively, depending on the specified set of conditions. One can define these assignment rules readily for their desired table.
Following are the steps for defining the assignment rule:
- Navigate to System Policy -> Assignment -> New

- From the above figure, one can see that the dot-walking can also be done in the condition builder field. Just select the ‘Show Related Fields’ option in the condition and then select the appropriate attribute.
- Further, in the ‘Assign To’ tab, select the appropriate user and group to whom the task is to be assigned.
If two assignment rules conflict, then the assignment rule with the lowest execution order runs first. The lower the execution order, the higher is the precedence.
Distinguishing Factors between the Data Lookup Rules and Assignment Rules:
Precedence among the assignment rule and business rule:.
In certain circumstances, the business rules gain precedence over the assignment rules.
The business rules and assignments rules run in the following order:
- All the ‘before record insert’ business rules having order less than 1000.
- First and foremost, assignment rule with lowest execution order and matching condition.
- All the ‘before record insert’ business rules having order more than 1000.
- All the ‘after record insert’ business rules.
We are pretty sure that this blog must have given an overview of dealing with Assignment Rules in ServiceNow.
Any comments\suggestions are most welcome. We have posted further blogs as well on other topics and will frequently come back with something innovative.
Share This Story, Choose Your Platform!
Tokyo Now Platform Administration
Define assignment rules, table of contents.
- Adoption blueprints
- Select your adoption blueprint
- Install applications for an adoption blueprint
- Activate a plugin on a personal developer instance
- Request a plugin
- List of plugins (Tokyo)
- Find components installed with an application
- Add a system property
- Create a system properties module
- Handle HTTP 500 errors
- Query join and complexity size limits
- NTLM authentication
- Proxy servers for SOAP clients
- Bypass the proxy server
- Table extension and classes
- Global default fields
- Tables module
- Delete a custom table
- Delete all records from a table
- Roll back patch upgrades or plugin activations
- Use the Deleted Records module to restore a deleted record
- Use the Delete Recovery module to restore a deleted record
- Use the Script Execution History module to roll back a Scripts-Background execution
- Create a table index
- Create a task
- Assignment lookup rules example
- Assignment rules module
- Condition editor example
- Data lookup rules
- Precedence between data lookup, assignment, and business rules
- Workflow assignments
- Baseline assignment rules example
- Create an assignment rule
- Important Task table fields
- Journal fields
- Create a planned task
- Create a baseline
- Measure time and effort
- Important planned task table fields
- Planned task scripts
- Planned task hierarchy
- Configure rollup for planned task fields
- Reminder table
- Task table modifications
- Tasks workflow
- Activate Time Card Management
- Create a time sheet policy
- Set a time sheet policy as default policy
- Assign a time sheet policy to a user
- Create a rate type
- Create time cards and log time through Time Sheet Portal
- Submit time sheet through Time Sheet Portal
- Log time and submit time sheets of your resources
- Create a time sheet
- Submit a time sheet
- Approve or reject a time sheet
- Copy time cards from a previous time sheet
- Auto-generate time cards
- Submit a time card
- Approve or reject a time card
- Record time worked
- Manage costs
- Domain separation and Time Card
- Tools for driving tasks
- Request many to many task relations
- Plugin manifest
- Define a relationship type
- Define a task relationship allowed from the task relationship type record
- Modify the displayed field
- Mark as Solution button
- Define task relationships with UI actions
- Define a dictionary override
- Dictionary entry form
- Dictionary attributes
- Modify the Glide durations format
- Generate a schema map
- View the schema map
- Reference default many-to-many relationships
- Create a database view
- Add a table to the database view
- Example left join in creating a database view
- Specify a field to return
- Relabel a column
- Specify the number of records to return
- Test the database view
- Create a function field to perform a database function
- Display function results in a database view
- Use disjunctions in complex queries
- Database views in the base system
- Configure the list layout
- Configure list calculations
- Omit record count in a list
- Configure list controls
- Advanced list control with scripts
- Controlling the sort sequence used to display lists
- Configure list editor properties
- Configure list control settings for the list editor
- Example - Restrict a table
- Example - Restrict a field
- Example - Restrict a field with a script
- Example - Restrict a field with a condition
- User preferences for list editing
- Enable or disable personal lists
- Control which roles can personalize lists
- Manage personal lists
- Administer detail rows
- Suppress filters and breadcrumbs with list controls
- Use script includes to suppress filters and breadcrumbs
- Increase the allowed number of breadcrumb entries
- Use list controls in hierarchical lists
- Activate context ranking
- Create a ranking definition
- Apply a new sort order to a list
- Rank stories in a related list
- Action script for list context menus
- Dynamic actions script for list context menus
- onShow script for list context menus
- Using the form designer
- Configuring the form layout
- Administering form personalization
- Administering form annotations
- Configure attachment system properties
- Disable attachments on a table
- Index attachments on a table
- Hide the attachment [view] link
- Configure attachment icons
- Create a UI macro for a formatter
- Create a formatter and add it to a form
- Activity formatter
- Process flow formatter
- Parent breadcrumbs formatter
- Approval summarizer formatter
- Override a formatter with macros
- Limit the number of activity stream entries
- Create a template using the Template form
- Create templates for related task records
- Create a template by saving a form
- Create records based on a template
- Create a module for a template
- Template bar
- Toggle the template bar
- Scripted templates
- Create a UI action
- Override a UI action for an extended table
- UI policies
- Advanced form configuration
- Choice list security
- Values to associate with choice labels for scripting
- Integer values for default choice lists
- Configure state field choice values
- View choice list definitions
- Add the condition count to a condition field
- Update a conditions field to use condition builder v2
- Database field type
- Dictionary entry data types
- Document ID field
- Function field
- Configure TinyMCE to allow deprecated tags
- Configure TinyMCE to allow JavaScript in URLs
- Formatting icons for the HTML field editors
- Extended functions
- Table functions in TinyMCE
- Customize TinyMCE attributes
- Highlight text in TinyMCE
- Insert a line break in the HTML editor
- Add a table to the HTML field
- Embed images in HTML fields
- Link to a website in HTML fields
- Embed videos in HTML fields
- Define video file types for HTML fields
- Disable user access to the image library
- Paste content into the HTML editor
- Image field type
- IP address field type
- Restrict the CODE tag in journal fields
- Validate HTML in journal fields
- Journal field display limits
- Enable the text field character counter
- Name-value pairs field type
- Target threshold colors attribute
- Territories assigned
- Dependent fields
- E.164 phone number field configuration
- Configure a territory phone display rule
- Enable dynamic creation for reference fields
- Configure cascade delete rules
- Define the reference key
- Display a reference field as a choice list
- Select a field as the table display value
- Tree picker lookup
- Reference field icon
- Configure the related incidents icon
- Configure the show workflow icon
- Constrain the assigned to field by role
- Constrain the assignment group field
- The INSTANCEOF operator in reference qualifiers
- Auto-complete for reference fields
- Recent selections
- Configure suggested text for string fields
- Configure suggested text for journal fields
- Supported wiki tags
- Create a Wikitext field
- Extend the functionality of a Wikitext field
- Make a field mandatory
- Change the field label or hint
- Delete a field from a table
- Hide email addresses in a watch list
- Configure order buttons on the watch list slushbucket
- Highlight list fields
- Modify string field length
- Specify a default field value
- Make a field dependent
- Require unique values for a field
- Define field styles
- Add auto-numbering records in a table
- Configure left padding of a system number in a table
- Prevent numbering gaps
- Enforcing unique numbering
- Installed with field normalization
- Enable a field type for normalization or transformation
- Create a raw field
- Run a single data job
- Run multiple data jobs
- Rollback a data job
- Create the normalization record
- Create a normal value
- Create aliases
- Apply aliases
- Create rules
- Coalesce records on a normal value
- Transform a field
- Create a transform definition
- Create a transform variable for a transform definition
- Create a script for a transform definition
- Create a transform category
- Pattern matching
- Domain separation and Field Normalization
- Installed with data policy
- Data policy fields
- Convert a UI policy to a data policy
- Convert a data policy to a UI policy
- Data policy debugging
- Create custom data lookups
- Add a state model and transitions
- Implement process flow and UI actions with a state model
- Installed with State Model
- Locale settings
- Session and reference currency
- Single-currency mode
- Price fields
- Default currency values in forms
- Default currency values in reports
- Default currency values in lists
- Default currency values in import and export
- Default currency values in scripts
- Schedule the rate update job
- Use your own currency-conversion rates
- Control default currency field configuration and use in an instance
- Change default currency decimal places
- Configure default currency fields in audit records
- Configure the currency optimizer
- Updating the Currency Instance record
- Understanding how FX Currency field conversions work
- Life cycle of records containing FX Currency fields
- Dot-walkable Currency Instance fields
- Understanding FX Currency values in lists and reports
- Add conversion rates using a custom rate table
- Configuring FX Currency global settings
- Add an FX Currency field to a table
- Identify the FX Currency field and its display parameters
- Set the reference currency
- Specify the rate table and date source for currency conversions
- Select the rate and target table fields used for filtering
- FX Currency values in import and export
- Define locales
- Activate a language
- Set the default language for an instance
- Set a fallback language
- Configure a language as reading from right to left
- Map languages and regions with the language selector widget
- User specific language
- Languages table
- Translated Name / Field table
- Message table
- Field Label table
- Choices table
- Translated text table
- Debug translations
- Localize price fields
- Set up locations
- System localization properties
- List non-translated items
- Create a new choice record
- Create a new language record
- Translate a client script message
- Translate a field label
- Translate a field value
- Translating text fields
- Translate a related list name
- Import a translation from an Excel spreadsheet
- Translate to an unsupported language
- Translating the knowledge base
- Translating Service Catalog cart labels
- Activate Localization Framework
- Components installed with Localization Framework
- Localization Framework support for Service Catalog items
- Virtual Agent Designer integration with Localization Framework
- Localization Framework support for Natural Language Understanding models
- Localization Framework support for Surveys
- Localization Framework support for Knowledge Base
- Localization Framework support for email notifications
- Localization Framework support for HR Service Delivery
- Create and configure a custom artifact
- Create a processor script
- Processor script functions
- Create a UI action for the custom artifact
- Read script helper functions for LFDocumentContentBuilder
- Create a custom email subflow
- RWS Translation Management System spoke
- Configure RWS TMS in the Localization Framework
- XTM Translation Management System spoke
- Configure XTM TMS in the Localization Framework
- Integrate with a translation management system
- Create a custom translation management system
- Configure the Localization Framework preferences
- Localization Framework Roles
- Workflows in the Localization Framework
- Creating Localization Project
- Adding localization request items to a project
- Request translations for Service Catalog items
- Request adhoc translation for Service Catalog items
- States of localization projects and tasks
- Translation modes
- Fulfill a localization task
- Approve a localization task
- Error messages in the Localization Framework
- Request translations from Insights Dashboard
- Activate Dynamic Translation
- Dynamic Translation properties
- DynamicTranslation API
- Create a credential for the MicrosoftTranslation alias
- Create a connection for the MicrosoftTranslation alias
- Activate the Microsoft translator configuration
- Create a credential for the IBMTranslation alias
- Create a connection for the IBMTranslation alias
- Activate the IBM translator configuration
- Create a Java KeyStore certificate
- Attach a Java KeyStore certificate to Google Cloud Translator Service spoke
- Create a JWT signing key for Google Cloud Translator Service spoke
- Create a JWT provider for Google Cloud Translator Service spoke
- Configure the credential for the GoogleTranslation alias
- Configure the connection attributes for the GoogleTranslation alias
- Access Dynamic Translation spoke actions from the Flow Designer
- Actions in Dynamic Translation spoke
- Language Detection spoke
- Create a translator configuration
- Create a language code mapping
- Migrate to version v3 of a translator configuration
- Limitations in Dynamic Translation
- Enable dynamic translation for a field
- Error messages in Dynamic Translation
- Translate a knowledge article from a translation task
- Dynamic Translation for Agent Chat overview
- Request for domain separation in Dynamic Translation
- Personalize the system date format
- Personalize the system time format
- Configure the date picker for the list editor
- Time worked
- Display resolve time as a duration
- Export date and time formats
- Default schedules
- Create a holiday schedule for multiple regions
- Parent and child schedules
- Schedule fields
- Schedule entry fields
- Schedule for the fifth instance of a week date
- Repeat a monthly schedule
- Invoke the Schedule page and view a calendar
- Schedule calendar
- Domain support and schedules
- Automate generation and distribution of a report
- Automatically generate something from a template
- Automatically run a script of your choosing
- Special cases in job schedules
- View a schedule item
- Event registry
- Register an event
- Escalation intervals and pause conditions
- Create a business calendar
- Create a business calendar group
- Define business calendar entries
- Define business calendar filtering options
- Pair business calendars with packages
- Activate Fiscal Calendar plugin
- Generate a fiscal calendar
- View, modify, and validate fiscal periods
- Set a system time zone
- Change the time zone choice list
- Change a time zone in a scheduled report
- Change a time zone in a scheduled data import
- Define a relative duration
- Use a relative duration
- Metric definitions
- Time configuration SLAs
- Time worked fields
- Create a timeline page
- Customize the timeline page span style
- Timeline sub item
- Display a metric as a timeline
- Make a timeline visible to a selected user
- Range calculator scripts
- Changes in perspective
- Managing spans
- Components installed with Client Transaction Timings
- Timing values
- Predictive Intelligence for Contextual Search
- Features of Search administration
- Exploring Search Suggestions
- Schedule the Build Search Suggestions script
- Schedule suggestion pruning
- Set maximum age for searches used in suggestion generation
- Test regular expression patterns in Search Suggestion Exclusion List Rule entries
- Analyze search relevancy
- Use the GraphQL REST API to view suggestions created from external user searches
- Search Suggestions tables
- Domain separation and Search Suggestions
- Search signal tables
- Features of Zing text indexing and search engine
- Global search displays a page of matching results
- Default display fields for global search tables
- Search settings filter and group global search results by table
- Global search displays exact matching records
- Global search displays your most recent search queries and results in Next Experience UI
- Configure parallel processing of search groups
- Revert to the legacy global search UI
- Set the preview limit for global or workspace search in Next Experience UI
- Hide per-table search result counts in Next Experience UI
- Add a workspace application to the Unified Navigation search context menu
- Update a type-ahead suggestion
- Configure "Did you mean?" suggestions
- List search finds records from the current table
- Boolean operators allow conditional search results
- Quotation marks allow exact phrase searches
- Wildcard characters allow searching for patterns and variations
- Enable or disable the Zing junk filter
- Zing generates search results in four phases
- Zing filters search results with access controls
- Score search terms by inverse document frequency (IDF)
- Set the relative weight of a field
- Zing indexes punctuation as part of some words
- Zing indexes some HTML elements
- Configure a table for indexing and searching
- Configure a text index group to search across multiple tables
- Zing index and search dictionary attributes
- Reindex a table without impacting text search results
- Regenerate the text index for a single record
- Remove an index
- Remove an index for a specific field
- Remove the text index for a child table
- Change the query mode of an indexed table
- Text indexing statistics and status
- Configure tables to use the Japanese tokenizer
- Configure a global stop word
- Configure a table-specific stop word
- Enable automatic stop words for a table
- Disable a stop word in Zing
- Zing matches derived words with stemming
- Enable search synonyms
- Create synonym dictionaries
- Select synonym dictionaries for a table
- Disable synonyms for a table
- Debug synonym searches
- Enable and disable Search Suggestions in Zing
- Set the maximum number of suggestions Zing displays
- Installed with Zing
- Exploring AI Search
- Assign roles to AI Search administrators and users
- Create an indexed source
- Indexed source retention policies and filter conditions
- Indexed source attributes
- Field settings
- Perform a full table index or reindex for a single indexed source
- Perform a full table index or reindex for multiple indexed sources
- Create a search source
- Preview matching records for a search source
- Create a search profile
- Link a search source to a search profile
- Publish a search profile
- Create a synonym dictionary linked to a search profile
- Create synonyms
- Clone a synonym dictionary
- Link a synonym dictionary to a search profile
- Unlink a synonym dictionary from a search profile
- Delete a synonym dictionary
- Create a stop word dictionary linked to a search profile
- Create stop words
- Clone a stop word dictionary
- Link a stop word dictionary to a search profile
- Unlink a stop word dictionary from a search profile
- Delete a stop word dictionary
- Modify settings for a typo handling dictionary
- Exclude a term from a typo handling dictionary
- Default Genius Result configurations
- Activate Q&A Genius Results
- Activate People Genius Results
- Link a Genius Result configuration to a search profile
- Set the evaluation order for Genius Result configurations in a search profile
- Create a Genius Result configuration
- Link an NLU model and intents to a Genius Result configuration
- Create a result improvement rule
- Boost search results using a result improvement rule
- Block search results and Genius Results using a result improvement rule
- Promote search results using a result improvement rule
- Create a search application configuration for AI Search
- Create a facet in an AI Search application configuration
- Configure navigation tabs in an AI Search application configuration
- Auto-complete suggestions in AI Search applications
- Using search scripted post-processors in AI Search application configurations
- Search result sort options in AI Search application configurations
- Enabling and configuring AI Search in Now Platform applications
- Enable automatic domain updates for a referenced table
- Request the External Content for AI Search plugin
- Create an external content schema table
- Defining access permissions for external documents
- Mapping external users and groups to Now Platform users
- Components installed with External Content for AI Search
- Configure AI Search Assist for a record producer
- AI Search Assist admin role
- AI Search Assist properties
- Domain separation and AI Search Assist
- Using AI Search
- Lemma and Unicode normalization
- Internationalization support for AI Search
- Machine learning relevancy in AI Search
- Content security in AI Search
- Encrypted fields in AI Search
- View AI Search ingestion log messages
- View all AI Search log messages
- Review ingestion history for an indexed source
- Enable session debugging for AI Search
- Diagnose search result access issues using the Search Preview UI
- Debug search source and content security filters
- Debug external content security filters for a Now Platform user
- Review record counts for indexed sources
- Plugins installed with AI Search
- Components installed with AI Search
- AI Search system properties
- Now Platform tables excluded from AI Search indexing
- Variable types supported by AI Search indexing
- AI Search index fields
- AI Search External Search User Mapping Table Data Source Relationship form
- AI Search Genius Result Configuration form
- AI Search Genius Result Configuration NLU Model Mapping form
- AI Search Results Improvement Rule form
- Child Table form
- Dictionary and AI Search Dictionary forms
- Dictionary Term form
- Field Setting form
- Indexed Source form
- Indexed Source Attribute form
- Indexed Source History form
- Navigation Tab form
- Record Producer Configuration form
- Rule - Action Mapping form
- Search Application Configuration form
- Search Profile form
- Search Profile - Dictionary Mapping form
- Search Profile - Genius Result Mapping form
- Search Profile - Search Source Mapping form
- Search Scripted Post-processors form
- Search Source form
- Sort Option form
- Suggestion Reader Group form
- Activate the Performance Analytics and Reporting Solution for Advanced AI Search Management Tools
- AI Search Profile dashboard
- AI Search dashboard
- Create a cross-scope access privilege for the AI Search dashboards
- Customize the banner logo for the AI Search Analytics dashboard
- Configure Service Portal to send analytics data
- Search Preview UI for AI Search
- Advanced AI Search Management Tools reference
- Install AI Search for Next Experience
- Verify that your instance meets the prerequisites for AI Search for Next Experience
- Migrate Zing search application configurations to AI Search
- Enable AI Search for Next Experience
- Add a new Unified Navigation workspace search configuration to AI Search for Next Experience
- Revert to Zing as the Unified Navigation search engine
- Repair AI Search for Next Experience after activating a new Now Platform language
- Enable search-based auto-complete suggestions in AI Search for Next Experience
- Using AI Search for Next Experience
- AI Search for Next Experience reference
- Components installed with Contextual Search
- Contextual search concepts
- Contextual search components diagram
- Contextual search properties
- Define a search context
- Configure table for a contextual search
- Create a filter configuration using mapping
- Create a filter configuration using scripts
- Configure search resource context properties
- Set a search context as default
- Set the default source for search context
- View a searcher
- Show the related search box in a form
- Add multiple search fields for contextual search
- Add additional resources to the source selector of a form
- Edit search resource display field record
- Specify fields for the Cxs_popup view
- Modify or disable search actions available for contextual search
- Enable viewing of search results for the current and another selected user
- Define contextual search for record producer
- Provide knowledge in incident email notification
- Edit an email notification for the search results
- Specify field for attached Knowledge article links
- Run a report on contextual search usage
- Domain separation and Contextual Search
- Intelligent Search for CMDB
- Event states
- The incident events business rule
- Sample scripts from the change events business rule
- Script actions
- Global events
- Create an event
- Reprocess an event
- Pass event parameters from a workflow to a notification
- Unique record identifier (sys_id)
- Create an archive rule
- Create a destroy rule
- Archive rule and destroy rule properties
- Manage archived data
- Data archive table size limits
- Data migration process for archiving table data from non-reference fields to reference fields
- Export limits
- Form export
- Determining which list fields are exported
- Use a URL query to filter a list result
- Query parameters for display value and header
- Export Set fields for display value and header
- System properties for display value and header
- Field types affected by export controls
- Default values for column headers and column values
- Exporting currency fields to Excel
- Call URL export programmatically
- Break up a large export
- Enable export debug logging
- Import an XML file
- Create an export set from a list
- Create an export definition
- Export set supported file types
- Schedule an export
- Cancel an export set
- Export Set properties
- Import sets key concepts
- Concurrent imports
- Processing custom CSV files
- Importing JSON files
- FTP data source extended properties
- JDBC type data source
- LDAP type data source
- Data Stream (Integration Hub) data source
- Custom (Load by Script) type data source
- Create a File type data source
- Create a JDBC type data source
- Create an LDAP type data source
- Create an OIDC type data source
- Define action properties
- Create a Data Stream (Integration Hub) type data source
- Create a Custom (Load by Script) type data source
- Data source fields
- Transformation script variables
- Map with explicit transform map scripts
- Map with transformation event scripts
- Create a robust import set transformer
- Robust import set transformer properties
- Create robust transform definitions
- Temporary entity model
- Define ETL entities
- Define ETL entity mappings
- Create ETL entity field definitions
- Define Robust Transform Engine operations
- Import run details
- Updating records using coalesce
- Standard import set tables
- Import sets maximum row size
- Create a transform map
- Mapping options
- Create a field map
- Field map script variables
- Run an import
- Importing date/time values
- Review the import set
- Viewing the import log
- Import run history
- Scheduled data import scripting options
- Monitor scheduled data import executions
- Monitor concurrent import sets
- Monitor concurrent import set jobs
- Posting a CSV file - Perl and Java examples
- Delete import sets
- Delete import set tables
- Import sets properties
- Creating an import set web service
- Web service import set mode
- Inserting multiple records using insertMultiple
- Web service import sets security requirements
- Download an import template
- Add a record in the template
- Update a record in the template
- Import a record from the template
- Show reference fields as lists in Excel templates
- Easy import template validation
- Easy import properties
- Troubleshoot import set performance
- XML records from lists
- Create an XML data source to another instance
- Add onBefore scripts to the transform map
- Retrieving data from a CSV formatted file
- Create a clone target
- Exclude a table from cloning
- Data preservation on cloning target instances
- Clone profiles for clone requests
- Cancel a clone
- Schedule cloning
- Modify cloning schedules
- View clone status
- View clone history
- Roll back a clone
- Post-clone cleanup scripts
- Activate database rotation
- Activate table cleanup
- Mark records for deletion
- Preview affected records for deletion
- Schedule or execute a job to delete records
- Rollback a delete job
- Mark records for updating
- Schedule or execute a job to update records
- Rollback an update job
- Domain separation and Data Management
- Set up Google Maps API
- Activate a supported Microsoft SCCM plugin
- SCCM data import process and source tables
- Configure the SCCM integration and schedule an import
- Activate SCCM Asset Intelligence scheduled imports
- Upgrade the SCCM integration version
- Migrate the Verizon eBonding Integration to a Production System
- Request Google custom search integration
- Legacy Import set data for Altiris
- Legacy: Web services import set tables for Altiris
- Computer Telephony Integration
- Integrating ServiceNow with your Intranet
- Direct JDBC Probe
- JDBC Probes via Data Source
- Select * JDBC Probe short cut
- Using the Work Element
- Build a search provider for your instance
- Syslog probe
- Domain separation in third-party application and data source integration
- Deactivate the validation script during user creation
- User self-registration
- User preferences
- Create a user group
- Configure group types for assignment groups
- Hide groups
- Special administrative roles
- Read-only role
- Create a role
- Add a role to an existing role
- Assign a role to a group
- Assign a role to a user
- Define role delegators and delegate roles
- Prevent a role from being delegated
- User administration system properties
- Audit user roles
- Security jump start - ACL rules
- Impersonate a user
- Manage user sessions
- Non-interactive sessions
- Add a new company
- Add a department
- Application Usage Overview dashboard
- ServiceNow Store Usage Overview dashboard
- Implementing Normalization Data Services using guided setup
- Normalized Company Names table
- Normalized Mappings table
- Normalization Properties
- Change a normalized company name
- Define a metric
- Sample field value duration script
- Metric instance
- Response time on forms
- Network response times
- Browser settings and performance
- Slow mutex locks record detail
- Slow events log record detail
- Slow scripts log record detail
- Slow interactions log record detail
- Slow transactions log record detail
- Use a slow query log
- Generate an index suggestion for a slow query
- Review index suggestions for slow queries
- Export an index suggestion to a non-production instance
- Schedule an index suggestion for creation
- Test index performance
- Schedule an index to be dropped
- Create a transaction call chain register
- Review a transaction call chain
- View and kill active transaction
- Canceled-transaction logging to a table
- Import set performance
- Thread performance monitoring
- ServiceNow Performance dashboards
- Asynchronous Message Bus (AMB)
- Instance View
- MySQL Global Status
- ServiceNow Servlet
- Slow Pattern
- Application Insights overview graphs and metrics
- Application Insights detail graphs and metrics
- Monitoring users and transaction performance through Application Insights
- Monitoring semaphore queue efficiency through Application Insights
- Monitoring database performance through Application Insights
- Monitoring event queue efficiency through Application Insights
- Monitoring MID server performance through Application Insights
- Troubleshoot a slow pattern
- Troubleshoot a scheduled job through Application Insights
- Application Insights p1 prediction model
- Configure Application Insights thresholds
- Configure Application Insights threshold triggers
- Components installed with Application Insights
- Application Insights properties
- Apply table rotation
- View a table hierarchy and the extension model
- Add a module to test connection speed
- Add variable information to the cancellation message
- Enable transaction quota debugging
- Configure a transaction quota rule
- Example system log messages
- Modify the transaction cancellation page
- Application-quota property
- Configure an application-quota rule
- Use table extension
- Create an operational toggle
- Create an operational toggle level to define thresholds
- Create run level toggle mapping
- Resolve a skipped update and set a resolution status
- Skipped Changes Reviewed related list
- Revert a customization
- Changes Applied related list
- Claim Outcomes to Review related list
- Upgrade Details related list
- Upgrade Monitor overview
- Factors affecting upgrade duration
- Upgrade Monitor
- Upgrade Progress
- Upgrade Summary Report
- System Upgrades form
- Upgrade Details form
- Resolve Conflicts form
- Enable and use debug upgrade
- Upgrade Preview module
- Upgrade Monitor schedule states
- Building your Upgrade Plan
- Refreshing your Upgrade Plan
- Installing your Upgrade Plan
- Preview Upgrade Plan
- Review skipped records with upgrade plan
- Upgrade History module
- View previewed upgrade
- Preview predicted changes
- View loaded files for a plugin
- System Upgrade form
- Upgrade details form
- Review skipped records using related lists
- Upgrade History Task form
- Update default labels in VTB view
- View import history
- Quick access to plugins and history records
- Explore upgrade history log
- Upgrade Center VTB Labels list
- Updated Aug 4, 2022
- 1 minute read
- Table Administration
The instance can automatically assign a task to a user or group based on pre-defined conditions by using data lookup rules and assignment rules.

Cloud SYlla
Your Agile & Digital Partner
- Mar 2, 2023
Understanding Assignment Rules: A Comprehensive Guide

Assignment rules are an important feature of Salesforce that help businesses automate assigning records to specific users or teams based on predefined criteria. This article will discuss assignment rules, how they work, and the benefits they provide to businesses.
What are Assignment Rules?
Assignment rules are a set of criteria that are defined by businesses to determine how records should be assigned to users or teams within the Salesforce system. These criteria can be based on several factors, such as the record type, location, record status, or the user's role or territory. For example, a company may set up an assignment rule to automatically assign a new lead to the sales rep who covers that particular region or product line.
How do Assignment Rules Work?
When a record is created or updated, the assignment rules evaluate the record based on predefined criteria. The assignment rule automatically assigns the record to the designated user or team if the criteria are met. Once the record is assigned, the user or team can work on the record.
Salesforce provides a simple wizard that enables administrators to set up assignment rules. The wizard allows administrators to define the criteria for the assignment, select the user or team to assign records to, and set up any needed notifications or escalations.
How to Set Up Assignment Rules in Salesforce

Setting up assignment rules in Salesforce is a straightforward process that requires the following steps:
Identify the criteria for record assignment - Before creating an assignment rule, businesses should first identify the criteria used to assign records. It might include the record type, location, user role, or other custom fields.
Create the assignment rule - Once the criteria have been identified, businesses can create the assignment rule in Salesforce. It involves setting up a rule that evaluates the criteria and assigns records to the appropriate user or team.
Test the assignment rule - After the assignment rule has been created, businesses should test it to ensure it is working correctly. It might involve creating test records and verifying that they are assigned to the correct user or team.
Activate the assignment rule - Testing it in Salesforce will allow it to be activated. It allows it to automatically assign records to the appropriate user or team.
Types of Assignment Rules in Salesforce
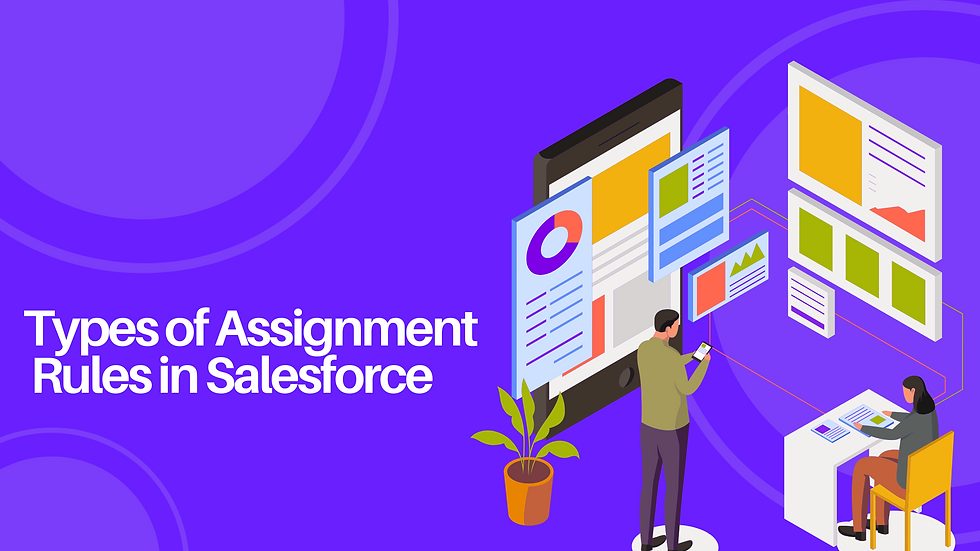
Salesforce offers two types of assignment rules: standard assignment rules and lead assignment rules.
Standard assignment rules assign records to users or teams based on predefined criteria. They can be set up for various record types, including leads, cases, and opportunities.
Lead assignment rules are specific assignment rules used to assign leads to sales reps. They evaluate the criteria for a lead, such as location or product interest, and assign the lead to the appropriate sales rep based on a round-robin or customized assignment method.
Benefits of Assignment Rules
There are several benefits to using assignment rules in Salesforce, including:
Increased Efficiency
One of the most significant benefits of assignment rules is their increased efficiency. By automating the process of assigning records, sales, and customer support teams can spend less time manually assigning leads and cases to the appropriate users or teams. They can focus on more important tasks, such as following up with leads, resolving customer issues, and closing deals.
With assignment rules, businesses can streamline their processes and reduce the time it takes to respond to customer inquiries, ultimately improving their overall efficiency and productivity.
Improved Customer Satisfaction
Another important benefit of assignment rules is the improved customer satisfaction they can provide. Businesses can automatically assign cases to the appropriate user or team to ensure that customer inquiries are handled promptly and efficiently. Customers receive faster responses to their inquiries, which can help improve their overall satisfaction with the company.
In addition, by assigning cases to users with the appropriate skills and knowledge, businesses can ensure that customer issues are resolved more effectively, further improving customer satisfaction.
Accurate Data
Assignment rules also help businesses maintain accurate data in their CRM system. By automating the process of assigning records, businesses can ensure that data is entered correctly and consistently. It means that reports and analytics generated from the data are more accurate and reliable, which can help businesses make more informed decisions.
In addition, businesses can use assignment rules to enforce data validation rules, which can help prevent incorrect data from being entered into the system.
Consistency
Another benefit of assignment rules is that they help ensure consistency in record assignments. By automating the process of assigning records, businesses can ensure that records are assigned to the appropriate user or team consistently. It reduces the risk of errors or omissions occurring when records are manually assigned.
In addition, by using assignment rules to enforce a standardized process for record assignment, businesses can ensure that records are handled consistently across different teams and regions.
Flexibility
Finally, assignment rules provide businesses with great flexibility in assigning records. Businesses can define complex rules based on various criteria, such as record type, location, or user role. Businesses can customize their assignment rules to fit their specific needs and workflows.
In addition, assignment rules can be updated or modified as needed, allowing businesses to adapt to changes in their business or industry.
Best Practices for Using Assignment Rules in Salesforce
Businesses should follow these best practices to ensure Salesforce assignment rules are working effectively:
Define clear assignment criteria: Before setting up assignment rules, businesses should define clear criteria for record assignments. It will help ensure that records are assigned accurately and consistently.
Test assignment rules before activation: Before activating assignment rules, businesses should test them to ensure that they are working correctly. It will help prevent errors and ensure that records are assigned to the appropriate user or team.
Monitor and adjust assignment rules: It is important to monitor them regularly to ensure they are working properly. Businesses should also be prepared to adjust assignment rules as needed to accommodate changes in their business or industry.
Communicate changes to users: When changes are made to assignment rules, businesses should communicate with them to ensure they are aware of any changes in their workload or responsibilities.
In conclusion, assignment rules are a powerful feature of Salesforce that helps businesses automate assigning records to specific users or teams. The benefits of assignment rules include increased efficiency, improved customer satisfaction, accurate data, and consistency.
By using assignment rules, businesses can streamline their processes, improve their overall effectiveness, and achieve their goals more efficiently.
At Cloud Sylla, our sole focus is on assisting businesses in achieving success through digital transformation. Our goal is to aid customers in making the crucial shift to digital technologies, enabling them to bolster their strategies, multi-channel distribution, and internal operations.
Recent Posts
What is Record-Triggered Flow in Salesforce? Detailed Guide
How to Get & Reset Security Token in Salesforce? (Detailed Guide)
What is Sharing Rules? How can you Create it in Salesforce? (Complete Guide)
ServiceNow: Building Powerful Workflows by Tim Woodruff, Ashish Rudra Srivastava, Martin Wood
Get full access to ServiceNow: Building Powerful Workflows and 60K+ other titles, with a free 10-day trial of O'Reilly.
There are also live events, courses curated by job role, and more.
Setting the Assignment group with Assignment Rules
Assignment Rules are a simpler alternative to Data Lookup. While Data Lookup is very powerful, allowing you to set any field, it does involve a quite a bit of configuration, including creating a new table.
In contrast, an Assignment Rule uses the simpler condition builder to specify when it should run. If it matches, then it'll either populate the Assigned to and Assignment group fields with a hardcoded value, or you can use a script. We have got the group we want to use in a property, so this option is perfect. Follow these steps:
- Name : Assign to External Team
- Table : Maintenance [x_hotel_maintenance] ...
Get ServiceNow: Building Powerful Workflows now with the O’Reilly learning platform.
O’Reilly members experience books, live events, courses curated by job role, and more from O’Reilly and nearly 200 top publishers.
Don’t leave empty-handed
Get Mark Richards’s Software Architecture Patterns ebook to better understand how to design components—and how they should interact.
It’s yours, free.

Check it out now on O’Reilly
Dive in for free with a 10-day trial of the O’Reilly learning platform—then explore all the other resources our members count on to build skills and solve problems every day.

ServiceNow Community servicenow community
- English (US)
- English (UK)
- Portuguese (Brazilian)
- ServiceNow Community
- IT Service Management
Difference between assignment rule and data lookup
- Subscribe to RSS Feed
- Mark Question as New
- Mark Question as Read
- Float this Question for Current User
- Printer Friendly Page

- Mark as New
- Report Inappropriate Content
02-15-2017 06:54 AM
Solved! Go to Solution.
- Incident Management
- 10,752 Views

02-15-2017 08:13 AM
View solution in original post
- All forum topics
- Previous Question
- Next Question
03-27-2019 01:29 PM
02-15-2017 08:15 AM
- Troubleshoot to find the missing assignment groups for some of the RITM's in Virtual Agent forum 23 hours ago
- Difference between two columns named "created" under "sc_task_sla table" in Incident Management forum Wednesday
- create a custom view in Virtual Agent forum Wednesday
- Make Assignment Group and Assigned To dependent on each other in ITSM forum Tuesday
- Need to write a client script based on date difference. in Virtual Agent forum Tuesday

About 15 mins
Create Case Queues
Create a case assignment rule, test the case assignment rule.
- Challenge +100 points
Create Case Queues and Assignment Rules
Now that you have your basic support processes and layouts configured for cases, create case queues and assignment rules to route your cases to the correct support teams at Ursa Major Solar.
Create Product Support Tier 1 and Product Support Tier 2 queues so product support cases can be routed to one of these queues based on case criteria and how long the case has been open.

- From Service Setup, enter Queues in the Quick Find box and select Queues .
- Click New and complete the queue details.
- Label: Product Support Tier 1
- Queue email: [email protected]
- Supported Objects: select Case and click Add .
- Queue Members: Click User: (Your Name) in the Available Members list, and click Add to add yourself to the Selected Members list.
- Click Save .
- From the Queue page, click New and complete the queue details.
- Label: Product Support Tier 2
- Queue email: [email protected]

Now, create the Inquiry queue for inquiry cases.
- From the Queues page, click New .
- Enter the queue details.
- Label: Inquiry
- Queue Email: [email protected]
- Queue Members: Click User: Ada Balewa in the Available Members list, and click Add to add her to the Selected Members list.
So, now you have case queues set up and ready to handle different types of cases as they’re created. Next, create and activate a standard case assignment rule to assign cases to the correct team members. This is how cases get sent to specific case queues, like the ones you just created.
- From Service Setup, enter Case Assignment Rules in the Quick Find box and select Case Assignment Rules .
- Click New and enter the rule details.
- Rule Name: Standard Case Assignment
- Select the Active checkbox to make this the active case assignment rule.
Add a rule entry that assigns Product Support cases to the Product Support Tier 1 queue.
- Click the Standard Case Assignment link.
- Under the Rule Entries, click New and enter the details.

- Click Save & New .
Next, add a rule entry that assigns inquiry cases to the Inquiry queue.
- Enter the details.
Now rename the Automated Case User to System. Every time there’s an automated case change from an assignment rule, for example, the automated case user name will show up in the case history. It will now show an automated “system” change, rather than showing your name as the admin, whenever an automated case change occurs.
- Enter Support Settings in the Quick Find box and select Support Settings .
- Click Edit .

You want to make sure the assignment rules work for Ursa Major Solar by creating a case.

- Click the Contacts tab.
- Select Recently Viewed from the dropdown, and click the Pat Stumuller link.
- In the Cases related list, click New .
- Select a record type: Product Support .
- Click Next and enter the case information.
- Click the Case Number for the case you just created. Ensure that the Case Owner is Product Support Tier 1.
By setting up case queues and assignment rules, cases are now automatically routed to the correct teams. Next, escalate higher priority cases to the Product Support Tier 2 team by creating an Escalation Rule.
- Salesforce Help: Rules
- Salesforce Help: Create Queues
- Salesforce Help: Set Up Assignment Rules
- Get personalized recommendations for your career goals
- Practice your skills with hands-on challenges and quizzes
- Track and share your progress with employers
- Connect to mentorship and career opportunities
- Marketing Cloud
Experiences
Access Trailhead, your Trailblazer profile, community, learning, original series, events, support, and more.
Metadata API Developer Guide
Spring '24 (API version 60.0)
Search Tips:
- Please consider misspellings
- Try different search keywords
AssignmentRules
File suffix and directory location.
Assignment rules for an object have the suffix .assignmentRules and are stored in the assignmentRules folder. For example, all Case assignment rules are stored in the Case.assignmentRules file.
AssignmentRules components are available in API version 27.0 and later.
AssignmentRule
Specifies whether the rule is active or not and its definition. Rules are processed in the order they appear within the AssignmentRules container.
Represents the fields used by the rule.
Declarative Metadata Sample Definition
The following is an example file showing two assignment rules on the Case object:
Wildcard Support in the Manifest File
This metadata type supports the wildcard character * (asterisk) in the package.xml manifest file. For information about using the manifest file, see Deploying and Retrieving Metadata with the Zip File .
Best Practices for Optimizing Case Assignment Rules in Salesforce
Salesforce is a powerful customer relationship management (CRM) platform that helps businesses manage various aspects of customer interactions. One critical aspect of customer support is case management in Salesforce , where efficient case assignment rules play a vital role. Optimizing these rules can significantly enhance the effectiveness and efficiency of handling customer inquiries and issues.
Understanding Salesforce assignment rules
Salesforce assignment rules govern the distribution of incoming cases to the appropriate agents or teams. These rules ensure that each case is routed to the most suitable person for prompt resolution. Salesforce queues further facilitate this distribution by acting as virtual storage areas for cases before they are assigned.
There are two types of assignment rules in Salesforce:
- Salesforce Lead Assignment Rules primarily focus on distributing new leads among sales representatives based on predefined criteria such as geography, lead source, or lead score.
- Case Assignment Rules are responsible for Salesforce case distribution. These rules play a pivotal role in the realm of customer support by directing incoming Salesforce support cases to agents or teams equipped with the expertise to resolve specific issues.
As organizations strive to provide seamless experiences for both potential customers and existing clients, mastering these assignment rule types becomes crucial for optimizing customer interactions and nurturing lasting relationships.
The need for optimization
Default assignment rules might not account for specific business needs, leading to uneven case distribution, longer resolution times, and potential customer dissatisfaction. Optimizing Salesforce rules address these issues by ensuring equitable distribution, maximizing agent expertise, and expediting case resolution.
Best practices for Salesforce assignment
- Prioritizing cases . Categorize cases based on urgency or complexity to assign high-priority cases to experienced agents, ensuring quick resolutions.
- Efficient assignment techniques . Implement round-robin assignment or load-based distribution to evenly distribute cases among available agents, preventing bottlenecks.
- Role-based vs. direct assignment. Choose between role-based case assignment, where cases are directed to specific teams or direct assignment, where cases go to individual agents based on expertise.
Advanced Salesforce assignment techniques
- Multi-criteria case assignment. Combine multiple factors such as case type, priority, and customer tier for more accurate case routing.
- Automated case assignment. Leverage Salesforce automation tools like Process Builder and Flow to automate case assignments based on predefined criteria.
- Customized queues. Tailor Salesforce queues to match specific business units or case types, improving case categorization and routing.
Streamlining Salesforce case routing
Salesforce case routing logic.
Understanding Salesforce case routing logic is fundamental for ensuring that customer inquiries and issues are directed to the right personnel with the expertise to address them effectively. The case routing process involves a sophisticated interplay of various factors, such as queue membership, agent skills, workload, and availability. Salesforce’s intelligent algorithms consider these variables to determine the most suitable destination for each case, maximizing the chances of swift resolution.
Caseload balancing
Balancing caseloads in Salesforce goes beyond equal case distribution among agents. This strategic approach boosts customer service quality and agent efficiency. Preventing overload for some and underutilization for others, it curbs burnout and enhances job satisfaction.
Even workloads lead to swift responses, faster resolutions, and increased customer contentment. Moreover, balanced caseloads aid managers in spotting trends, optimizing resource allocation, and refining processes. This practice optimizes operations and fosters a cooperative, productive support environment.
Case escalation and reassignment strategies
Case escalation and reassignment strategies are vital for effective customer support. Escalation involves transferring cases to experienced agents or supervisors to address complex issues promptly. Case reassignment in Salesforce redirects cases to different teams or agents for specialized handling.
These strategies prevent delays, ensure timely resolutions, and uphold customer satisfaction. With clear escalation and reassignment criteria, organizations enhance their support processes, allocate resources efficiently, and build a reputation for adeptly managing diverse customer concerns.
Configuring and customizing assignment rules
Salesforce rule configuration instructions.
- Access setup. Log in to your Salesforce account and navigate to the Setup menu located in the top-right corner of the screen.
- Search for assignment rules: In the Quick Find box, type “Assignment rules” and select what Assignment Rules you need to configure: Lead Assignment Rules or Case Assignment Rules.
- Create a new rule. Click on the “New Assignment Rule” button to start configuring a new rule.
- Define Salesforce rule criteria. Give your rule a descriptive name and set the rule entry criteria. This includes conditions like case origin, type, priority, or other custom criteria that determine how cases are assigned.

- Specify rule actions. Determine what happens when cases meet the specified criteria. You can assign cases to specific users, queues, or use other automation processes.
- Configure rule entry order. If you have multiple assignment rules, specify the order in which they’re evaluated. This is important when cases could meet criteria for more than one rule.

- Activate the rule. Once configured, activate the assignment rule to make it live and start directing cases accordingly.
You can also integrate Salesforce workflow rules to automate follow-up actions after case assignments, enhancing customer communication.
Enhancing case management efficiency: Salesforce support cases best practices
- Utilize case templates. Expedite responses by employing predefined case templates for common issues, ensuring consistent and swift resolutions.
- Leverage macros. Enhance agent productivity with macros that automate multiple actions, reducing manual tasks and accelerating case handling.
- Opt for case cloning. Save time on data entry by cloning similar cases, streamlining the process of creating and managing new cases.
- Update Knowledge bases . Maintain accurate and current knowledge bases to empower agents with reliable information, enabling efficient issue resolution.
- Engage collaboration tools. Employ platforms like Chatter to encourage agent collaboration, fostering knowledge sharing and teamwork for complex cases.
- Notify agents of new assignments promptly and emphasize the importance of case ownership for accountability.
Optimizing case assignment rules in Salesforce is indispensable for efficient case handling. By understanding the fundamentals, implementing best practices, and embracing advanced techniques, businesses can ensure equitable case distribution, expedite resolutions, and enhance customer satisfaction. A well-optimized case assignment system ultimately streamlines support processes and contributes to the overall success of the customer support function.
Advanced Communities is your best partner when it comes to configuring your Salesforce instance or developing a Salesforce Experience Cloud site. In case of any questions feel free to reach out to get professional support when you really need it.
You may be interested in: Maximizing ROI with Salesforce: A Case Study
Share this:
- Renewable Energy
- Artificial Intelligence
- 3D Printing
- Financial Glossary
Product Area
Feature impact.

- What’s Service?
- Service Setup Assistant Features
- Customize Support Settings
- Guidelines for Setting Business Hours
- Guidelines for Creating Support Holidays
- What’s a Case?
- What’s a Case Team?
- Create Case Team Roles
- Predefine Case Teams
- Set Up Email Alerts for Case Teams
- Case Team Fields
- Case Feed Upgrade Process
- Create Permission Sets
- Assign Permission Set
- Assign Custom Profile
- Convert Page Layouts
- Customize the Highlights Panel
- Configure the Case Feed Publisher
- Feed View Settings
- Add the Attachment Component
- Add Case Experts
- Rename Actions and Feed Filters
- Customize Feed Filters
- Add Custom Actions
- Add Custom Components
- Add Actions as Console Components
- Email Drafts
- Enable Email Templates
- Email Draft Approval Process
- Email Approval Send Actions
- Highlight External Feed Items
- Email Notifications for Portal Replies
- Log a Call Action
- Apply a Default Email Template
- Send Email Fields
- Send Email Considerations
- Understand Default Email Fields
- Change Status Action
- Change Owner Action
- Close Case Action
- Case Comment Action
- Add Actions to the Case Page
- Customize Case Hovers
- Set Up Case Merge in Lightning Experience
- Set Up a Customer Feedback Survey
- Create Cases
- Clone Cases
- View Case Lists
- Update Multiple Cases
- Assign Cases
- Share Cases
- View the Case Milestones
- Case Comments
- Create and Edit Case Comments on Case Detail Pages
- Create and Edit Case Comments on Case Edit Pages
- Use Actions to Work with Cases in Case Feed
- Use Feed Filters in Case Feed
- Case Feed and Related Lists
- Find, Attach, and Email Articles with the Case Feed Articles Tool
- View and Edit Cases from the Case Detail Page in Case Feed
- Post on Cases and Experience Cloud Site Questions with the...
- Printable View in Case Feed
- In Lightning Experience
- Work with Case Emails
- Send and Reply to Email
- Add Images and Files
- Use Email Templates
- Work with Draft Emails
- Review and Approve Email Drafts
- Customize with Rich Text
- Set Up a Default No-Reply Email Address
- Merge Fields for Cases
- Close Cases
- Solve Cases
- Delete Cases
- Merge Duplicate Cases from the Cases List View
- Merge Duplicate Cases from the Case Record Home
- Enable Suggested Articles to Solve Cases
- Send Articles from Cases
- Guidelines for Working with Cases
- Case Fields
- Case History
- Case Hierarchies
- Related Cases
- Changes to the Cases and Case Feed Mobile App
- Find What You Need
- What’s Entitlement Management?
- Setup Checklist
- Limitations
- Set Up Lookup Filters
- Give Users Access
- Create Entitlement Templates
- Auto-Add Entitlements to Cases
- Report on Entitlements
- Verify Entitlements
- Terms to Know
- Entitlement Fields
- Customize Page Layouts
- Enable Feed Items
- Set Up the Milestone Tracker
- Limit User Updates
- Create a Milestone
- Auto-Complete Case Milestones
- Where to View Milestones
- Milestone Statuses
- Milestone Actions
- Recurrence Types
- Objects with Milestones
- Milestone Behaviors
- Create a Process
- Customize Fields
- Add a Milestone
- Add a Milestone Action
- Apply a Process to an Entitlement
- How Records Move Through Processes
- How Business Hours Work
- Updating Entitlement Processes
- Creating New Versions
- Using New Versions
- Set Up Service Contracts
- Add Contract Line Items
- Service Contract Fields
- Contract Line Item Fields
- Entitlements in Experience Cloud Sites
- Configure Settings
- Create Assets
- Considerations
- Hierarchical
- Replacements
- Asset Fields
- Add Contact Requests to Experience Cloud Sites
- Contact Request Considerations
- Service Cloud Mobile Access
- Service Console
- Design Your Quick Text Strategy
- Enable Quick Text
- Create Quick Text
- Share Using a Folder
- Share a Single Quick Text
- Insert Quick Text
- Prerequisites
- Irreversible Macros
- Create a Bulk Macro
- Tips for Creating Bulk Macros
- Run a Bulk Macro on Multiple Records
- Add Logic to Macros
- Tips for Creating Macros
- Add and Replace Case Field Values
- Insert Quick Text in a Social Post
- Attach a Knowledge Article to an Email
- Run a Macro
- Clone Macros
- Share a Single Macro
- Search All Text Fields in Macros
- Lightning Experience Considerations
- Email Publisher Actions
- Knowledge Actions
- Custom Quick Actions
- Experience Cloud Site Publisher Actions
- Social Actions
- Keyboard Shortcuts
- Create a Flow to Link Voice Callers to Records
- Create a Flow to Link Contacts to Cases
- Create a Flow to Link Individuals to Messaging Sessions
- Create Channel-Object Linking Rules with a Guided Setup Flow (Beta)
- Add Channel-Object Linking Rules for Voice Calls (Beta)
- Agent Experience for Channel-Object Linking (Beta)
- Automatically Trigger an Action Based on Detected Keywords
- Verify That Contact Lens Is Enabled
- Verify That Contact Lens Speech Analytics Is Enabled
- Update Your Contact Center
- Create a Rule in Amazon Connect That Identifies Intelligence Signals
- Enable Conversation Intelligence in Amazon Connect to Process the...
- Prepare Conversation Intelligence for Partner System Intelligence...
- Create a Conversation Intelligence Rule to Trigger an Action
- Create a Custom Component to Trigger an Action
- Create the Recommendations
- Create the Recommendation Strategy Flow for Next Best Action
- Pass the Rule Name as Input to a Flow
- Add the Einstein Next Best Action Component to the Voice Call Record...
- Set Up an Autolaunched Flow
- Set Up Permissions
- Set Up Console
- Swarm with Actions & Recommendations
- Swarm with Quick Actions
- Swarm with Dynamic Actions
- Set Up Expert Finder
- Set Up Collaboration Tool
- Swarm in Lightning Experience
- Swarm in Slack
- Add Members to Swarm
- Close a Swarm
- Reopen a Swarm
- Take Action in Slack
- Swarming Considerations
- Create a Swarm Report
- Change Slack Channel Name
- Customer Service Incident Management Objects and Fields
- Cases and Incidents
- Example of an Incident
- Enable Customer Service Incident Management
- Customer Service Incident Management Sample Flows
- Considerations for Customer Service Incident Management Flows
- Set Up Customer Service Incident Management Flows
- Set Up Integrations
- Add Related Issues to Case Record
- Report On Customer Service Incident Management
- Create an Incident
- Identify Incident-Related Issues
- Start a Swarm
- Create an Incident Channel
- Set Up an Incident Presence Status
- Create an Incident Queue
- Create an Incident Skill for Skill-Based Routing
- Set Up Routing Configuration for Incidents
- Set Up an Entitlement Process for Incidents
- Add Entitlements to Your Page Layouts
- Add the Milestones Component to the Incident Page Layout
- Create an Entitlement for Incidents
- Manage Incident SLAs with Entitlements and Milestones
- Create a Problem
- Identify Problem-Related Issues
- Enable Broadcast Site Banners
- Create Broadcast Topic
- Assign Broadcast Topic to Network
- Add Site Banner Component
- Enable Broadcast Emails
- Enable Broadcast Alerts
- Add Incident Alerts Utility
- Customize the Incident Alerts All Tab
- Assign Broadcast Topic to Group
- Enable Broadcast Slack Messages
- Create a Broadcast Topic for Broadcast Slack Messages
- Assign a Broadcast Topic to a Slack Channel
- Create a Custom Broadcast Slack Message Template
- Give Users Access to Broadcast Communications
- Add Broadcast Communications to Incident
- Considerations for Broadcast Communications
- Send a Broadcast Alert
- Respond to a Broadcast Alert
- Send a Broadcast Slack Message
- Update a Broadcast Slack Message
- Delete a Broadcast Slack Message
- Send a Broadcast Email
- Add a Broadcast Site Banner
- Deactivate a Broadcast Site Banner
- Create a Change Request
- Create a Work Plan Template
- Create a Work Plan
- Identify Change Request-Related Issues
- Knowledge Help and Resources
- Compare Lightning and Classic Knowledge
- Mobile Limitations
- Plan Your Knowledge Base in Lightning Experience
- Unify Knowledge from Various Sources (Beta)
- Lightning Knowledge Limitations
- Considerations and Limitations for the Lightning Editor
- Considerations and Limitations for Article Personalization for...
- Lightning Article Editor
- Article Personalization for Knowledge
- Configure Knowledge Record Pages with Dynamic Forms
- What’s Next?
- Lightning Knowledge Migration Tool Features and Considerations
- Plan and Sandbox Test Your Migration
- Activation Stage
- Validation Stage
- Migrate a Single Article Type
- Post-Migration Checklist
- Enable Lightning Knowledge
- Lightning Knowledge User Access
- Lightning Knowledge Home and Record Pages
- Record Type Considerations
- Page Layout Considerations
- Plan Your Knowledge Base in Salesforce Classic
- Create Article Types
- Article Type Page Layouts
- Add Custom Fields to Article Types
- Article Type Templates
- Delete an Article Type
- Create Public Groups for Knowledge
- Assign Article Actions to Public Groups
- Enable Knowledge One with Permission Sets
- Enable Knowledge One with Profiles
- Compare Article Widgets for Cases at a Glance
- Articles or Knowledge Tab
- Example Apex for Submitting Articles from Cases
- Use Videos from Any Provider with a Custom Visualforce Page
- Knowledge Settings
- Knowledge Scalability
- Control Data Integrity with Validation Rules
- Define Validation Status Picklist Values
- Modify Default Category Group Assignments for Articles
- Filter Articles with Data Category Mapping
- Create Workflow Actions for Knowledge
- Custom Fields for Articles
- Field-Level Security on Articles
- Article History Tracking (Lightning Experience)
- Article History Tracking (Salesforce Classic)
- Set Up Actions to Insert Articles to Channels (Lightning)
- Set Up Actions to Insert Articles to Case Publishers (Classic)
- Set Up Actions to Share Article URLs in Channels and Case Publishers
- Add Knowledge Pages to Enhanced LWR Sites
- Add the Knowledge Article Component to Enhanced LWR Knowledge Pages
- Create a .csv File for Article Import
- Set Article Import Parameters
- Create an Article .zip File for Import
- Article and Translation Import and Export Status
- Search Highlights and Snippets
- Create Synonym Groups
- Promote Articles in Search Results
- Manage Promoted Search Terms
- Enable Topics for Articles
- Article Search Results
- Use More Case Keywords to Find Articles
- Search for Articles in Lightning Experience
- Search for Articles in Salesforce Classic
- List View Considerations for Lightning Knowledge
- Use the Lightning Knowledge Component
- Share Article URLs in Channels
- Share Articles in Channels in Lightning Knowledge
- Share Article Contents in Case Publishers in Salesforce Classic
- When Are Lightning Authoring Actions Available?
- Create and Edit Articles
- Publish Articles and Translations
- Translate Articles in Lightning Knowledge
- Translate Articles in Salesforce Classic
- Archive Articles and Translations
- Delete Articles and Translations
- Compare Versions of an Article
- Rich Text Fields in Knowledge Articles
- Create and Link to Anchors
- Target Behavior for Smart Links
- Smart Link Considerations
- Create Persistent Links to Lightning Knowledge Articles
- Create Smart Links with the Link Tool in Salesforce Classic
- Salesforce Knowledge Article Versions
- Support a Multilingual Knowledge Base
- Export Articles for Translation
- Import Translated Articles
- Set Up Primary Article and Translation Side-By-Side View
- Keyboard Shortcuts for Data Categories
- Create and Modify Category Groups
- Delete and Undelete Category Groups
- Add Data Categories to Category Groups
- Modify and Arrange Data Categories
- Delete a Data Category
- Activate Data Categories on Your LWR Site
- Add the Network Data Category Object Page (Beta)
- Manage Data Categories on Your LWR Site
- How Category Visibility Differs from Other Salesforce Models
- Category Group Visibility on Roles
- Modify Default Data Category Visibility
- Edit Category Group Visibility
- Category Group Article Visibility Settings Examples
- Choose the Sharing or Access Model for Lightning Knowledge
- Sharing Considerations for Lightning Knowledge
- Service Catalog Permissions
- Catalog Fulfillments
- Create a Catalog Fulfillment
- Create a Data Category Group
- Create a Catalog Category
- Create a Catalog Item
- Create Eligibility Rules for Catalog Items
- Retrieve Catalog Item Metadata
- Catalog Requests
- Setting Up Your Service Catalog Site
- Service Catalog Site Glossary
- Service Catalog Site Resource Hub
- Service Catalog Site Basics
- Determining Your Setup Pathway
- Configuration I: Create and Assign the Admin User Role
- Configuration II: Enable Experience Cloud for Service Catalog
- Configuration III: Create a Service Catalog Site List View
- Service Catalog Site Licensing
- Service Catalog Site Permissions Assignments
- Verify the Service Catalog Pages Installation
- Configure the Home Page
- Configure the Search Page
- Set Up the Service Catalog Pages
- Set Up the Service Catalog Request Page
- Set Up Your Site Navigation Menu
- LWR Service Catalog Site Guidelines
- Add Data Categories to Your Site
- Set Up the Home Page
- Set Up the Search Page
- Set Up the Service Catalog Site Pages
- Change the Data Category Path Shown in Your Site
- Step I: Customize Your Site
- Step II: Set Your Site Administration Settings
- Step III: Take Your Site Live
- Experience Cloud Sites
- Guided Setup Flow
- Service Cloud Voice and Your Telephony System
- Key Concepts
- Use Voice Across Sales and Service
- Planning Checklist
- Choose Your Telephony Model
- Verify that Omni-Channel is Enabled
- Service Cloud Voice Limits and Limitations
- Turn On Voice
- Confirm Your Tax Registration Number
- Create a Contact Center
- Install Your Telephony Provider’s Managed Package
- Create a Partner Contact Center
- Configure an IAM Role
- Use a New Amazon Connect Instance
- Use an Existing Amazon Connect Instance Integrated by Salesforce
- Use an Existing Amazon Connect Instance Integrated by You
- Manage Access
- Configure Your Amazon Connect Instance
- Create a Phone Channel
- Create a Default Phone Channel
- Set Up the Agent Workspace
- Set Up the Supervisor Workspace
- Best Practices for Service Cloud Voice
- Customization Options by Telephony Model
- Voice Call Recordings
- Set Up Org-Wide Sharing for Voice Calls
- Configure Call Transcription
- Disaster Recovery for Service Cloud Voice
- Customize Call Journeys with Amazon Connect Flows
- Configuring Single Sign-On (SSO) with Amazon Connect
- Additional AWS Services Add-on License
- Increase Amazon Service Quotas
- Reach Your Customers Using High-Volume Outbound Calls
- Configure SSO with Salesforce as the Identity Provider
- Configure SSO with Your Own Identity Provider
- Set Up Queue-Based Routing for Calls
- Set Up Queues for Calls
- Add a Queue in the Contact Center
- Map Your Salesforce Queues to Telephony Provider Queues
- Manage Contact Center Queues in Salesforce and Your Telephony...
- Route Calls with Omni-Channel Flows
- Create the Voice Call Record Page
- Set Up the Service Console App for Service Cloud Voice
- Configure the Phone Book for Outbound Calls
- Respect Agent Capacity for Voice Calls (Beta)
- Sync Agent Presence Statuses Automatically
- Map Your Presence Statuses to Amazon Connect
- Grant Agents Access to View Agent Statuses When Transferring Calls
- Customize Call Controls and Voice Extensions
- Let Agents Pause and Resume Voice Call Recordings
- Set Up Desk Phones for Your Contact Center
- Set Up Voice Call Audio for Virtual Desktop Users
- Configure Caller ID
- Set Up Voice ID
- Enable Agents To Test Their Workstations with Voice Status Utility
- Customize Omni Supervisor for Voice
- Enable Listen In for Supervisors
- Auto-Generated Sentiments of Call Conversations
- Triggered Actions Based on Call Conversations
- AI-Generated Work Summaries of Calls
- Integrate Service Cloud Voice with Sales Engagement
- Prepare Your Network
- Try Voice in Your Sandbox
- Resolve Setup Issues with Self-Service Checks
- Test Calls in your Contact Center
- Troubleshoot Service Cloud Voice
- Check Voice Channel Performance
- Monitor Call Quality with Mean Opinion Scores
- Understanding the Difference Between Service Cloud Voice and...
- Understanding Billing for IVR Utterances and Service Cloud Voice...
- Understanding Billing for Telephony Minutes
- How Do I Check My Usage and Billing?
- Service Cloud Voice Minutes Report
- Service Cloud Voice Usage and Cost Report
- Service Cloud IVR Report
- Considerations for Amazon Connect Usage and Billing Reports
- Generate a Salesforce Report for Amazon Connect Usage and Billing
- Frequently Asked Questions
- Migrate an Existing Salesforce Contact Center Created from an XML...
- Update the Key Pair for Your Contact Center
- Manage Contact Center Certificates
- Roll Back a Lambda Update
- Delete a Contact Center
- Delete Voice Call Customer Data
- Train Your Agents on Service Cloud Voice
- Listen In to a Voice Call
- Interrupt a Voice Call with Supervisor Barge-In
- Change Agents or Groups Assigned to Voice Queues
- Analyze Call Recordings for Insights
- View Real-Time Metrics about Your Amazon Connect Contact Center
- Track Contact Center KPIs
- Check Voice Status
- Answer and Make Calls
- Use a Desk Phone
- Enroll Caller in Voice ID
- Add Callers or Transfer Calls
- Pause Call Recording
- View the Sentiments of a Call Conversation
- Listen to and Collaborate on Voice Call Recordings
- Link Calls with Customer Contact Records
- Take Notes on a Call
- Get Up to Speed with Call Transcripts
- Wrap Up After a Call
- Get Support
- Amazon Connect IAM Roles and Provisioning Policies for Service Cloud...
- Prepare for Web-to-Case
- Turn On Web-to-Case
- Generate Your Web Form
- Prevent Spam with reCAPTCHA
- Guidelines and Limits
- Email-to-Case Limits
- Turn On Email-to-Case
- Configure Email-to-Case
- Add Routing Addresses
- Email System Forwarding
- Email-to-Case Considerations
- Email Threading
- Email Threading Limitations
- Limits and Considerations
- Compare Messaging Channel Capabilities
- Messaging Glossary
- Auto-Ending or Inactivating Sessions
- Compare Messaging for In-App and Web to Chat
- Alternative Solutions for Chat Features
- Considerations and Limitations
- Give Non-Agents Access to Messaging for In-App and Web Transcripts
- Prepare Your Org
- Understanding User Verification
- Set Up User Verification
- Troubleshooting User Verification
- User Verification Terms
- Configure a Web Deployment
- Configure a Web Deployment in a Salesforce Site
- Configure an In-App Deployment
- Customize Pre-Chat
- Map Pre-Chat Values in Omni-Channel Flows
- Test Messaging for Web
- Troubleshoot Messaging for In-App and Web Setup
- Update Your Deployment After Upgrading to Enhanced Domains
- Create Customer Flows
- Persist Pre-Chat Inputs Across Messaging Sessions
- Turn On Messaging
- Give Users Access to Messaging
- Route with Omni-Channel Flows
- Route to Queues
- Add Messaging to the Service Console
- Create an Enhanced Channel
- Channel Activation Checklist
- General Considerations
- Upgrade and Migration Considerations
- Compare Standard and Enhanced WhatsApp
- Message Template Categories
- Test Your Channel
- Compare Standard and Enhanced Facebook
- Route Apple Messages Inquiries by Intent and Group
- Add Apple Pay
- Compare Standard and Enhanced SMS
- Terminology
- Number Types
- Carrier Filtering
- SMS Regulations by Country
- Test Your SMS Channel
- Assign Permissions
- Write Effective Broadcast Messages
- Add Broadcast Messages to an App
- Send Broadcast Messages
- Considerations and Limitations for Partner Messaging
- Prepare Your Agents to Use Partner Messaging
- Prepare Your Salesforce Org for Partner Messaging
- Create a Partner Messaging Channel
- Uninstall Partner Messaging
- Customize the Opt-In and Opt-Out Experience
- Delete Messaging Customer Data
- Customize Auto-Responses
- Choose a Component Type
- Create an Enhanced Link
- Create a Question with Static Options
- Set Up a Flow to Send Questions with Options
- Set Up a Flow to Send Time Selectors
- Example Apex Class
- Set Up Post-Chat Surveys
- Troubleshooting Auto-Response Messaging Components
- Create a Secure Form
- Create an Authentication Request
- Set Up a Flow to Send Payment Requests
- Share an External App
- Customize with Formula Templates
- Customize with sObject Formulas
- Supported Formula Functions
- Set Push Notifications for Messaging for In-App
- Send Automated Messages in Enhanced Channels
- Add a Flow or Process
- Troubleshoot Errors
- Customize with Lightning Web Components
- Update Channel Settings
- Add a Bot to Messaging
- Create Messaging Users
- Messaging User Fields
- Customize the Enhanced Conversation Component in the Agent Console
- Report on Messaging Activity
- Add Terms and Conditions Acceptance
- Customize the Enter or Return Key
- Clone Your Messaging for In-App Deployment
- Show the Emoji Keyboard
- Prevent End Users from Sending File Attachments in Messaging for...
- Show Customers an Estimated Wait Time
- Set Business Hours in Messaging for In-App and Web
- Allow End Users to Download a Transcript of a Messaging Session
- Move Channels from Classic to Lightning
- Open Messaging
- Accept a Message
- Start a Messaging Session
- Enable Public Linking on an Asset File
- Send Voice Messages
- Send Messaging Components
- Transfer a Messaging Session
- Inactivate a Messaging Session
- End a Messaging Session
- Messaging Error Codes
- Troubleshoot the Send Message Action
- Create a Channel Menu Deployment
- Add Items to the Channel Menu
- Set Branding for the Channel Menu
- Customize Labels and Translations for the Channel Menu
- Create Channel Menu Code Settings
- Apply the Channel Menu Code Snippet
- Add the Channel Menu to Experience Cloud Sites
- Channel Menu Limitations
- Channel Menu Static Resource Files
- Understand the Details of the Routing Lifecycle
- Prepare to Route to Queues
- How Does Skills-Based Routing Work?
- How Does Skills-Based Routing Differ from Queue-Based Routing?
- Enable Skills-Based Routing
- Create Skills for Skills-Based Routing
- Assign Skills to Service Resources
- Skills-Based Routing Limitations
- Prepare to Route to Agents
- Route to a Bot
- Route Chats to a Queue
- Route Calls to a Queue
- Route Messages to a Queue
- How Does an Omni-Channel Flow Work?
- Create the recordId
- Create the skillList
- Create the prechat
- Create the input_record
- Create the reasonForNotRouting
- Using Multiple Add Screen Pop Actions in an Omni-Channel Flow
- Store Screen Pop Instructions in a Variable
- Make Smarter Routing Decisions by Checking Agent Availability
- Route Work Items to Queues
- Prerequisites to Route Work to Skills
- Add a Skill Requirement Action
- Add a Route Work Action
- Route Work Items Directly to a Specific Agent
- Route Work Items to an Enhanced Bot
- Create Cases for Inbound Calls with an Omni-Channel Flow Template
- Assign an Omni-Channel Flow to a Chat Button
- Assign an Omni-Channel Flow to a Phone Channel
- Assign an Omni-Channel Flow to Route Cases from Email-to-Case
- Invoke an Omni-Channel Flow to Route Non-Real-Time Objects
- Enable Skills-Based Routing Rules from the Routing Configuration
- Map Work-Item Field Values to Skills
- Routing Salesforce and Partner Channels
- External Routing
- Prioritize with Interruptible Capacity
- Compare Standard and Enhanced Omni-Channel
- Enable Omni-Channel
- Set Up Secondary Routing Priority
- Understand Capacity Models
- Set Up a Status-Based Capacity Model
- Configure Work Items as Primary or Interruptible
- Configure After Conversation Work Time
- Service Channel Settings
- Supported Objects for Omni-Channel
- Add the Omni-Channel Component to a Lightning App
- Add the Omni-Channel Component to the Classic Console
- Control Visible Work Item Details in Omni-Channel with Compact Layouts
- Enable Omni Supervisor
- Enable Supervisors to Change Agent Queues and Skills
- Show the Default Actions on Omni Supervisor Tabs
- Create the Screen Flow for the Omni Supervisor Custom Action
- Add the Custom Action to Omni Supervisor Tabs
- Change What Supervisors See in Omni Supervisor
- Create Custom Tabs for Omni Supervisor
- Show All Offline Agents in Omni Supervisor
- Add Omni Supervisor to a Lightning App
- Add Omni Supervisor to the Classic Console
- Presence Status Settings
- Give Users Access to Presence Statuses with Permission Sets
- Give Users Access to Presence Statuses with Profiles
- Presence Configuration Settings
- Set Up Agents’ Capacities
- Create Service Resources for Agents
- Create Queues
- Routing Configuration Settings
- Omni-Channel Routing Model Options
- Associate Routing Configurations and Agents with Queues
- Create a Custom Report Type for Queue Members
- Report on Queue Membership
- Create Custom Report Types for Omni-Channel
- Access Omni-Channel Setup Home
- Compare Live Agent and Omni-Channel Routing for Chats
- Test Your Omni-Channel Implementation
- Agents Tab Fields
- How After Conversation Work Affects Agent Capacity
- Queues Backlog Tab Fields
- Assigned Work Tab Fields
- Skills Backlog Tab Fields
- Wallboard Tab Fields
- Sort and Filter in Omni Supervisor
- Change Queues and Skills Assigned to Agents
- Support and Train Your Agents
- Transfer a Work Item to a Different Skill Set
- Use the Omni-Channel Component to Work with Customers
- Get Help from a Supervisor
Assignment Rules
- View and Edit Assignment Rules
- Differences Between Auto-Response Rules and Workflow Email Alerts
- Escalation Rule Entries
- Escalation Actions
- When do rules execute?
- Limits for Assignment, Auto-Response, and Escalation Rules
- Einstein Case Routing
- How It Works
- Enable Article Recommendations
- Select Fields
- Build and Activate Your Model
- Give Agents Access
- Add the Knowledge Component
- Use Article Recommendations in the Console
- Add Article Recommendations to a Flow
- Sample Flow to Send Recommended Articles in an Auto-Response Email
- Understand Model Quality
- Can My Bots Sound like My Company?
- What Help Do I Need to Get Botting?
- Engaged Sessions, Bot Billing, and Bot Performance
- Einstein Bots Requirements
- Einstein Bots System Limitations
- Bot Data Reference Guide
- Understanding Bot Permissions
- Learn About Einstein Bots Compliance
- Reduce Bias in Einstein Bots
- Plan Your Einstein Bot
- Enable Einstein Bots in a Scratch Org
- Create an Intro Template Bot
- Learn About the Template Bot: Welcome Dialogs
- Learn About the Template Bot: Connect with Sales
- Learn About the Template Bot: Report an Issue
- Learn About the Template Bot: Check Issue Status
- Learn About the Template Bot: Check Order Status
- Learn About the Template Bot: Gather Info from User
- Learn About the Template Bot: Supporting Dialogs
- Create a Bot from Your Data (Beta)
- Explore Einstein Bot System Templates
- Create an Einstein Bot from Scratch
- Clone a Bot
- Use Change Sets to Migrate Bots Between Orgs
- Article Answers Troubleshooting Tips
- Create a Template from an Einstein Bot
- Package an Einstein Bot Template
- Import an Einstein Bot Block
- Create a Block from a Dialog Group
- Package an Einstein Bot Block
- Explore the Einstein Bot Block Library
- What Makes Bots Tick?
- Maintain Chatbot Conversation Quality
- View and Edit Your Bot’s Name and Description
- Add a Bot Profile
- Log Conversations in Bot Event Logs
- Set or Update a Bot Primary Language
- Add or Remove a Secondary Bot Language
- Manage Secondary Language Translations
- Set a Bot Conversation Language
- Connect a Standard Bot to Channels
- Create an Enhanced Bot from Scratch or from a Template
- About Cloning a Standard Bot as an Enhanced Bot
- Clone an Enhanced Bot
- Route Conversations to an Enhanced Bot
- Specify a Default Outbound Omni-Channel Flow
- Transfer Conversations with the Set Routing Type Dialog Step
- Use Pre-Chat with an Enhanced Bot
- Share an External App with an Enhanced Bot (Beta)
- Display an Enhanced Link in an Enhanced Bot
- Send a File with Static Content from an Enhanced Bot
- File with Dynamic Content: Example Apex Class
- Receive a File with an Enhanced Bot
- Question with Dynamic Options: Example Apex Class
- Question with Dynamic Options: Example Flow
- Ask a Question with Static Options with an Enhanced Bot
- Schedule an Appointment with an Enhanced Bot
- Conversation Design
- Error Handling
- Send a Secure Form from an Enhanced Bot (Beta)
- Authenticate a Customer with an Enhanced Bot (Beta)
- Request a Payment with an Enhanced Bot (Beta)
- Considerations for Enhanced Bots
- Add a Dialog
- Set Up a Dialog Message Step
- Set Up a Dialog Question Step with Static Choice Responses
- Set Up a Dialog Question Step with Dynamic Choice Responses
- Set Up a Dialog Question Step with Text Responses
- Introduce Object Search in a Dialog (Beta)
- Add an External Service Action
- Add a Standard Action
- Set Up a Dialog Rule Step
- Clone a Dialog or Dialog Step
- Work with Dialog Groups
- Setting System Bot Dialogs
- Use Map View to Visualize Your Bot
- Navigate Bot Conversations
- Add a Bot Response Delay
- Add a Custom Entity
- Add a Value List Entity
- Add a Custom Variable
- Create Custom Context Variables
- Transfer Bot Conversations to a Queue
- Transfer Bot Conversations to Another Bot
- Use Skills-Based Routing to Transfer Bot Conversations
- Use Exact Matching for Intents
- Turn on the Cross-Lingual Intent Model
- Import Intent Data to a Bot
- Import Intent Data to an Einstein Intent Set
- Export Intent Data for Einstein Bots
- Update an Active Einstein Bot
- Source New Utterances with Intent Sets
- Manage Intent Data in Einstein Intent Sets
- Use Input Recommender to Generate Utterances (Beta)
- Write Utterances for Einstein Bots
- Improve Intent Matching Quality with Bot Training
- Share Your Intent Model Externally (Beta)
- Delete a Dialog with Intent Enabled
- Evaluate How Well Your Bots Understand Your Customers
- Add a Bot Options Menu to the Chat Window
- Preview Your Bot
- Manage Goals
- Navigate Einstein Bot Standard Reports
- View Bot Performance with CRM Analytics
- Troubleshoot Your Bot
- Improve Your Bot
- Enable Classification Apps
- Choosing Fields
- Build Your Model
- Automation Key Concepts
- Configure Prediction Automation
- Case Routing
- Add Case Classification to a Flow
- Save the Einstein Case Recommendations in Your Flow
- Add Classification to the Service Console
- Activate Your Model
- Use Classification Apps in the Console
- Update Your Model
- Enable Einstein Conversation Mining
- Build an Einstein Conversation Mining Report
- Create a Dialog from an Einstein Conversation Mining Report
- Add to a Dialog from an Einstein Conversation Mining Report
- Create an Intent from an Einstein Conversation Mining Report
- Add Excerpts to an Intent from an Einstein Conversation Mining Report
- Move Excerpts Within an Einstein Conversation Mining Report
- Guidelines and Limits for Einstein Conversation Mining Data
- Turn On Service AI Grounding
- Ground with Knowledge
- Ground with Cases
- Knowledge Fields for Einstein Knowledge Creation
- How To Use Einstein Knowledge Creation Responses Across Article Types
- Einstein Knowledge Creation Response Glossary
- Turn On Einstein Knowledge Creation
- Map Einstein Knowledge Creation Responses to Knowledge Fields
- Give Agents Access to Einstein Knowledge Creation
- Draft and Save Knowledge Articles with Generative AI
- Enable Einstein Service Replies
- Service Replies for Chat in the Console
- Service Replies for Chat Usage and Tracking
- Enable Service Replies for Email
- Allow Public Article Sharing
- Service Replies for Email in the Console
- Service Replies for Email Usage and Tracking
- Reply Recommendations Key Concepts
- Build Your Recommendation Model
- Publish Replies
- Multi-Language Support
- Use Recommendations
- Track Your Einstein Reply Recommendation's Performance
- Maintain Your Replies
- Enable Work Summaries
- Create a Quick Action to Store the Generated Messaging Session...
- Add the Wrap Up Component to the Messaging Session Record Page
- Map Outputs to Messaging Session Summary Fields
- Activate Work Summaries for Enhanced Messaging Sessions
- Create a Quick Action to Store the Generated Voice Call Summaries
- Add the Wrap Up Component to the Voice Call Record Page
- Map Outputs to Voice Call Summary Fields
- Activate Work Summaries for Voice Calls
- Add the Wrap Up Component to the Chat Transcript Page
- Map Outputs to Summary Fields
- Show Agents and Supervisors Midconversation Summaries
- Give Agents Access to Work Summaries
- Einstein Copilot (Beta)
- Messaging and Chat, and Voice
- Mid Conversation
- Work Summaries Usage and Tracking
- Service Intelligence Data Refresh
- Service Intelligence Assets
- Create a Data Cloud Salesforce CRM Connection
- Enable Service Cloud Features
- Update the Data Cloud Salesforce Connector Permission Set
- Install the Service Data Kit for Service Intelligence
- Enable CRM Analytics for Service Intelligence
- Install Service Intelligence
- Monitor, Update, and Delete Service Intelligence Apps
- Enable the Propensity to Escalate Insight Component
- Use the Propensity to Escalate Insight Component
- Use the Customer Effort Score Insight Component
- Service Intelligence Cases Dashboard
- Service Intelligence Omni-Channel Dashboard
- Service Intelligence Einstein Conversation Mining Dashboard
- My Performance Dashboard For Agents
- Service Intelligence Knowledge Articles Dashboards
- Explore Service Intelligence Data in Tableau
- Omni Supervisor
- Create Operating Hours with Time Slots
- Create a Service Territory
- Create a Job Profile
- Create and Assign Skills
- Create a Scheduling Rule
- Create a Scheduling Constraint
- Create a Scheduling Objective
- Build Repeating Shift Patterns
- Create Shift Templates
- Create Shift Patterns
- Create Shifts from a Capacity Plan
- Non-Standard Shifts
- Create a Shift Segment Type
- Update a Shift Segment
- Mass Shift Update
- Batch Assign
- Get Candidates
- Troubleshooting Shift Scheduling
- Managing and Viewing Shift Schedules
- Preparing to Use Service Resource Preferences
- Set a Work Preference
- Preparing for Time Sheets and Resource Absences
- Approve Time Sheets and Time-Off Requests
- Submit Your Time Sheet
- Submit Time Off with Resource Absences
- Enable Workforce Engagement and Feature Preferences
- Update Your Analytics App
- Data in an Omni-Channel Queue-Based Workflow
- Data in a Non-Omni Workflow
- User Permission Sets
- Add a Related List to an Object
- Create Omni-Channel Queues
- Workload History and Intelligent Forecast Glossary
- Adjust Your Workload History Data
- Export a Workload History
- Adjust Your Intelligent Forecast Data
- Export an Intelligent Forecast
- Map Job Profiles to Queues
- Capacity Plan Glossary
- Create a Capacity Plan
- Set Average Handle Times
- Optimized vs. Baseline Capacity Plan
- Export Your Capacity Plan
- Real-Time Adherence
- Email Notifications for Intraday Management
- Enable Intraday Management and Real-Time Adherence
- Filter the Intraday Management Dashboard
- View Historical Adherence Metrics
- Scheduling Agents for Shifts
- Allow Agents to See Their Service Resource Profile with an Apex...
- Allow Agents to See Their Assigned Shifts with an Apex Trigger
- View Your Schedule on Agent Home
- Configure an Enablement Site (myTrailhead) to Work with Agent...
- Configure the Omni-Channel Widget to Work with Agent Engagement
- Create a Learning Manager User Profile for Workforce Engagement
- Create an Agent Engagement Learner User Profile
- Map Skills to Learning Content for Agent Engagement
- Assign Learning to Agents with Agent Engagement
- Earn Skills as a Workforce Engagement Agent
- Service Resource Preferences
- Time Sheets and Time-Off Requests
- Case Escalation Rule Queue
- Entitlement Process Queue
- Article Process Actions
- Use Custom Report Types
- Support Reporting Tips
- Send Surveys with Feedback Management
- Deliver Field Service
- Access Messaging and Voice Conversation Data
- Conversation Transcript Export
- Block Sensitive Data in Messaging Sessions
- Set Up Omni-Channel Routing for Chats
- Add Chat to the Console
- Feature Gaps and Expected Behavior
- Service Cloud Chat Cookies
- Embedded Chat and Einstein Bots
- Enable Chat
- Permissions for Support Agents
- Permissions for Support Supervisors
- Create Configurations
- Create Deployments
- Chat Routing Options
- Chat Queuing Options
- Customize Your Branding
- Pre-Chat Forms and Post-Chat Pages
- Set Visibility for the Supervisor Tab Through Profiles
- Set Visibility for the Sessions Tab through Permission Sets
- Set Visibility for the Sessions Tab through Profiles
- Set Up Chat Answers from Knowledge Articles
- Add the Supervisor Panel
- Add a Lookup Component
- Manage Chat Capacity with Omni-Channel
- Create Automated Chat Invitations
- Add Terms and Conditions Acceptance to your Pre-Chat Form
- Block Sensitive Data in Chats
- Let Your Agents Block Visitors
- Create an IP Blocking Rule
- Supported Browsers for Notifications
- Deployment Settings
- Chat Button Settings
- Automated Invitation Settings
- Report on Chat Sessions
- Assign Skills to Agents
- Chat Statuses
- Chat with Customers
- Access Customer Details During a Chat
- Send Quick Text Messages in Chats
- Transfer Files During a Chat
- Attach Articles to Chats
- Attach Records to Chat Transcripts
- Block Unwanted Chat Customers
- End a Chat Session
- Transfer Chats
- Send a Chat Conferencing Request
- Session Records
- Visitor Records
- Transcript Fields
- Transcript Events
- Create a Deployment
- Specify Chat Settings
- Customize the Embedded Pre-Chat Form
- Customize the Embedded Chat Offline Form
- Customize Post-Chat Surveys
- Customize Embedded Chat Labels
- Translate Your Chat Window
- Use Custom Components With Your Chat Window
- Customize Chat Window Branding for a Experience Site
- Customizable Parameters
- Add Your Website to the CORS Allowlist
- Code Settings to an Experience Site
- Set Up Appointment Management
- Embedded Flows
- Experience Site Static Resources
- Test Your Embedded Chat Window
- Embedded Service Cookies
- Einstein Bots Chat
- Salesforce Open CTI
- Salesforce Call Center
- Set Up Your Third-Party Phone in Salesforce with a Guided Setup Flow
- Definition Files
- Required Elements and Attributes
- Specify Values for Elements
- Sample Definition File
- Import a Definition File
- View and Edit
- Customize a Directory
- Add a Directory Number
- Design a Layout
- Assign a Layout
- Remove a User
- What’s a Softphone?
- Create Call Logs in the Softphone
- Put a Caller on Hold Using the Softphone
- Transfer a Call Using the Softphone
- Make a Conference Call Using the Softphone
- Wrap Up a Call Using the Softphone
- Make a Call by Dialing a Number Manually
- Make a Call Using the Call Center Directory
- Make a Call Using Click-to-Dial
- Log In to the Softphone
- Change Your Call Center State
- Edit Your Personal Softphone Settings
- Use the Call Center Directory
- Get Started
- Enable Social Customer Service
- Add Social Accounts to Social Customer Service
- Configure Inbound Social Posts
- Assign Social Customer Service Agents
- Set Feed Tracking
- Social Customer Service Setup Options
- How to Reconnect a Social Account
- Tour the Social Conversations Component
- Configure the Social Conversations Component
- Enable Social Post Approvals
- Enable Moderation for Social Customer Service
- Enable Service Post Reply Without a Case
- Create the Social Action Interface
- Format Case Content from Social Posts
- Default Apex Class Process
- Default Apex Class Reference
- Apex Tests for the Default Apex Class
- Data Populated into Social Objects for Social Customer Service
- Default Apex Class History
- Social Action Tips
- Manage Social Posts
- Manage Social Personas
- Self-Service Portal
- Ideas Sites
- PDF Resources
Assignment rules automate your organization’s lead generation and support processes. Use lead assignment rules to specify how leads are assigned to users or queues. Use case assignment rules to determine how cases are assigned to users or put into queues.
Required Editions and User Permissions
Lead assignment rules can assign leads regardless of whether leads are created manually, are generated from Web-to-Lead forms, or are imported using the Data Import Wizard.
Case assignment rules can assign cases regardless of how cases are created. Cases can be created manually or automatically using Web-to-Case, Email-to-Case, On-Demand Email-to-Case, the Self-Service portal, the Customer Portal, Outlook, or Lotus Notes.
Organizations typically use one rule for each overall purpose. For example, use one lead assignment rule for importing leads and use a different lead assignment rule for web-generated leads. Or use one case assignment rule for standard use and one case assignment rule for holiday use. For each rule type, only one rule can be in effect at any time.
Each rule consists of multiple rule entries that specify exactly how the leads or cases are assigned. For example, your standard case assignment rule can have two entries: cases with “Type equals Gold” are assigned to the “Gold Service” queue, and cases with “Type equals Silver” are assigned to the “Silver Service” queue.
To create an assignment rule, from Setup, enter Assignment Rules in the Quick Find box, then select Lead Assignment Rules or Case Assignment Rules .
Sample Assignment Rule
The following case assignment rule assigns a case to a specific queue based on the account rating:
Rule Name — Hot Account Assignment
Rule Entries:
- Set Up Assignment Rules
Cookie Consent Manager
General information, required cookies, functional cookies, advertising cookies.
We use three kinds of cookies on our websites: required, functional, and advertising. You can choose whether functional and advertising cookies apply. Click on the different cookie categories to find out more about each category and to change the default settings. Privacy Statement
Required cookies are necessary for basic website functionality. Some examples include: session cookies needed to transmit the website, authentication cookies, and security cookies.
Functional cookies enhance functions, performance, and services on the website. Some examples include: cookies used to analyze site traffic, cookies used for market research, and cookies used to display advertising that is not directed to a particular individual.
Advertising cookies track activity across websites in order to understand a viewer’s interests, and direct them specific marketing. Some examples include: cookies used for remarketing, or interest-based advertising.
Cookie List
Using apex:repeat in Visualforce Page
System.NullPointerException: Attempt to de-reference a null object
Assignment rules in Salesforce
- By Ankush Dureja in salesforce
December 6, 2018
Page Contents
What are assignment rules in salesforce ?
Assignment rules in salesforce are used to automatically assign lead or Case to owner( User Or Queue ). Assignment rule is used to automate owner assignment on Case and Lead based on conditions on Case or Lead. For example, there could on lead assignment rule for web-generated leads and one case assignment rule for the holiday use.
Types of assignment rules
There are two type of assignment rules
Lead Assignment Rules
Case assignment rules.
Specify how leads are assigned to users or queues as they are created manually, captured from the web, or imported via the Data Import Wizard.
Determine how cases are assigned to users or put into queues as they are created manually, using Web-to-Case, Email-to-Case, On-Demand Email-to-Case, the Self-Service portal, the Customer Portal, Outlook, or Lotus Notes.
Create or Setup assignment rules
- From Setup, enter Assignment Rules in the Quick Find box, then select either Lead Assignment Rules or Case Assignment Rules .
- Choose New , and then give the rule a name. Specify whether you want this to be the active rule for leads or cases created manually and via the web and email. Then click Save .
- To create the rule entries, click New . For each entry, you can specify:
- Order : Sets the order in which the entry will be processed in the rule, for example, 1, 2, 3. Salesforce evaluates each entry in order and tries to match the criteria of the entry. As soon as a match is found, Salesforce processes the item and stops evaluating the rule entries for that item. If no match is found, the item is reassigned to either the default Web-to-Lead owner, the administrator doing a lead import, or the default case owner.
- Choose criteria are met and select the filter criteria that a record must meet to trigger the rule.For example, set a case filter to Priority equals High if you want case records with the Priority field marked High to trigger the rule. If your organization uses multiple languages, enter filter values in your organization’s default language. You can add up to 25 filter criteria, of up to 255 characters each. When you use picklists to specify filter criteria, the selected values are stored in the organization’s default language. If you edit or clone existing filter criteria, first set the Default Language on the Company Information page to the same language that was used to set the original filter criteria. Otherwise, the filter criteria may not be evaluated as expected.
- Choose formula evaluates to true and enter a formula that returns a value of “True” or “False.” Salesforce triggers the rule if the formula returns “True.” For example, the formula AND(ISCHANGED( Priority ), ISPICKVAL (Priority, “High”) ) triggers a rule that changes the owner of a case when the Priority field is changed to High. If your condition uses a custom field, the rule entry will be deleted automatically if the custom field is deleted.
- User : Specifies the user or queue to which the lead or case will be assigned if it matches the condition. Users specified here cannot be marked “inactive” and they must have “Read” permission on leads or cases.
- Do Not Reassign Owner : Specifies that the current owner on a lead or case will not be reassigned to the lead or case when it is updated.
- Email Template : We can specifies the template to use for the email that is automatically sent to the new owner. If no template is specified, no email will be sent. When assigning a lead or case to a queue, the notification goes to the Queue Email address specified for the queue and all queue members.
- Predefined Case Teams : Specifies the predefined case team(s) to add to a case when it matches the condition. A case team is a group of people that work together to solve cases.
- Replace any existing predefined case teams on the case : Specifies that any existing predefined case teams on the case are replaced with the predefined case teams on the condition, when a case matches the condition.
After creating the entry, click Save , or Save & New to save the entry and create more entries.
Assignment Rule Example
Following is sample Case assignment rule which assigns case to different queues based on Billing Country, Account SLA and customer type:
For more details about assignment rules please refer to assignment rules official link.
Assignment rules in Salesforce trailhead
Good luck for creating Assignment rules in Salesforce 🙂
- Assignment rules , Assignment rules Salesforce , Case Assignment rules , Lead Assignment Rules , salesforce , sfdc
Ankush Dureja
Permanent link to this article: https://www.sfdcpoint.com/salesforce/assignment-rules-in-salesforce/
Skip to comment form

- Stremove.com on August 2, 2020 at 9:10 am
Case Assignment Rules Determine how cases are assigned to users or put into queues as they are created manually, using Web-to-Case, Email-to-Case, On-Demand Email-to-Case, the Self-Service portal, the Customer Portal, Outlook, or Lotus Notes.

- Dayene on August 25, 2020 at 7:01 pm
Hi! What about when I want my assignment to change when the Lead status is changed? I’ve created two criterias. First when the status is new and second when the status has other values. But when the Lead is updated and the status changes the assignment doesn´t follow this change and it does not assignment the Lead Owner correctly. Thanks.

- Vrushabh LEngade on October 27, 2020 at 3:51 pm
Use Escalation Rules and escalate the case to another user or queue

- subhasini on December 23, 2021 at 6:19 pm
Hi Ankush Dureja, there is a interview question on assignment and the question is : What will happen if the user becomes inactive(or user is deactivated) on whom the rule is assigned. Please reply me ASAP
Leave a Reply Cancel reply
Your email address will not be published.
Popular Posts
- Navigation Service in LWC(Lightning Web Components) 16 comments
- Modal/Popup Lightning Web Component(LWC) 6 comments
- Batch Apex Example In Salesforce 17 comments
- for:each template directives in LWC 1 comment
- Wrapper Class in Apex Salesforce 20 comments
- Get Record Id in Lightning Web Component 9 comments
- Lightning Web Components(LWC)Tutorial 4 comments
- template if:true Conditional Rendering LWC 8 comments
- Triggers in Salesforce 5 comments
- Lightning Web Component(LWC) Toast Messages 13 comments
- May 2023 (1)
- March 2023 (1)
- January 2023 (1)
- November 2022 (1)
- October 2022 (1)
- September 2022 (2)
- August 2022 (2)
- June 2022 (1)
- February 2022 (1)
- January 2022 (1)
- September 2021 (2)
- August 2021 (1)
- June 2021 (2)
- May 2021 (2)
- April 2021 (2)
- January 2021 (2)
- December 2020 (1)
- October 2020 (1)
- September 2020 (1)
- August 2020 (2)
- June 2020 (2)
- May 2020 (20)
- April 2020 (10)
- March 2020 (6)
- February 2020 (6)
- January 2020 (2)
- December 2019 (6)
- November 2019 (3)
- March 2019 (1)
- February 2019 (1)
- January 2019 (2)
- December 2018 (7)
- November 2018 (4)
- October 2018 (2)
- June 2018 (1)
- April 2018 (1)
- March 2018 (1)
- January 2018 (1)
- December 2017 (2)
- November 2017 (1)
- October 2017 (2)
- September 2017 (2)
- August 2017 (1)
- July 2017 (1)
- May 2017 (2)
- April 2017 (8)
- October 2016 (1)
- June 2015 (1)
- February 2015 (1)
- October 2014 (1)
- August 2014 (1)
- June 2014 (4)
- May 2014 (1)
- April 2014 (2)
- March 2014 (4)
- February 2014 (22)
Recent Posts
- How Salesforce Einstein GPT is changing the Game for Small-Medium Enterprises
- What are the benefits of Salesforce health cloud?
- salesforce customer 360 overview and features
- Difference Between Workflow Process Builder and Flow
- Salesforce Integration Interview Questions And Answers
- Salesforce developer interview questions
- Salesforce Admin Interview questions
- Salesforce Lightning Interview Questions
- Salesforce Field Service Implementation
- Salesforce Course Details | Eligibility, Fees, Duration
Recent Comments
- luqmaan s on Pagination using StandardSetController with wrapper class
- Santosh on Get Record Id in Lightning Web Component
- Micky on custom label in visualforce page
- Syed Wassim on salesforce order of execution
- NoviceDev on Avoid recursive trigger in salesforce
TOTAL PAGEVIEWS
- SFDC Share Point
Our Facebook page
https://www.facebook.com/sfdcpoint
© 2024 Salesforce Blog.
Made with by Graphene Themes .
Privacy Overview
IMAGES
VIDEO
COMMENTS
Assignment lookup rules mainly provide the functionality of changing any field value and not just the assignment fields. Assignment Rules: This module appears under the 'System Policy application' menu. It helps to automatically assign the tasks to a particular user or a particular group using the assigned_to and assignment_group fields ...
Loading... Loading...
Assignment Rules in Salesforce: Imagine this: You're a lone wolf in the Salesforce jungle, battling a relentless tide of leads and cases. Hours melt away as you manually assign each one, feeling ...
Loading... Loading...
DeveloperBuild, test, and deploy applications. DocumentationFind detailed information about ServiceNow products, apps, features, and releases. ImpactAccelerate ROI and amplify your expertise. LearningBuild skills with instructor-led and online training. PartnerGrow your business with promotions, news, and marketing tools.
Assignment rules are a set of criteria that are defined by businesses to determine how records should be assigned to users or teams within the Salesforce system. These criteria can be based on several factors, such as the record type, location, record status, or the user's role or territory. For example, a company may set up an assignment rule ...
Routing and assigning customer service cases - Product Documentation: Tokyo - Now Support Portal. Loading... The case routing feature uses matching rules and assignment rules to identify customer service cases that meet certain conditions and then route those cases to customer service agents. Create one or more.
Assignment Rules are a simpler alternative to Data Lookup. While Data Lookup is very powerful, allowing you to set any field, it does involve a quite a bit of configuration, including creating a new table. In contrast, an Assignment Rule uses the simpler condition builder to specify when it should run.
We would like to show you a description here but the site won't allow us.
Here is a video on task assignment rules, data lookup rules, and the order of their execution in ServiceNow.📒 ServiceNow CSA Exam Guide 2022 - https://bit.l...
From Service Setup, enter Case Assignment Rules in the Quick Find box and select Case Assignment Rules . Click New and enter the rule details. Select the Active checkbox to make this the active case assignment rule. Click Save . Add a rule entry that assigns Product Support cases to the Product Support Tier 1 queue.
Assignment, Priority & Data Lookup in ServiceNowFollow Me : https://www.facebook.com/rohitkumar0094Follow Our Page: https://www.facebook.com/snowexpert33Tele...
AssignmentRules. Represents assignment rules that allow you to automatically route cases to the appropriate users or queues. You can access rules metadata for all applicable objects, for a specific object, or for a specific rule on a specific object. The package.xml syntax for accessing all assignment rules for all objects is: <types>.
Access setup. Log in to your Salesforce account and navigate to the Setup menu located in the top-right corner of the screen. Search for assignment rules: In the Quick Find box, type "Assignment rules" and select what Assignment Rules you need to configure: Lead Assignment Rules or Case Assignment Rules. Create a new rule.
Salesforce Lead Assignment Rule Example. Here's a quick example: Criteria #1: If State = California, assign to Stacy. Criteria #2: If Country = United Kingdom, assign to Ben. Criteria #3: If Country = France, assign to Lucy. Criteria #4: If Annual Revenue is greater than $500,000,000 USD, assign to "High Roller Queue".
Here are some search tips. Assignment rules automate your organization's lead generation and support processes. Use lead assignment rules to specify how leads are assigned to users...
Define the criteria by which vulnerable items (VIs) are automatically assigned to an assignment group for remediation. Starting with v15.0 of Vulnerability Response, the table labels for vulnerability.
The skill-based assignment rule is a part of the round robin assignment rule, which assigns tickets to agents based on their skills. For example, if there is a ticket referring to a technical issue, the agents assigned to it should possess technical knowledge to understand the issue. In that case, the skill requirement for the agent will be ...
When a lead or opportunity flows into Dynamics 365, the assignment rules are applied to the records. If the condition or conditions in the assignment rules are met, the record is automatically ...
Loading... Loading...
Assignment rules are specific conditions detailed to determine how a case or lead may get assigned. Escalation rules, on the other hand, define the specific conditions that may determine how cases ...
Create or Setup assignment rules. From Setup, enter Assignment Rules in the Quick Find box, then select either Lead Assignment Rules or Case Assignment Rules. Choose New, and then give the rule a name. Specify whether you want this to be the active rule for leads or cases created manually and via the web and email. Then click Save.
A Data lookup definition was created with proper Matcher table, Matcher Field Definition and Setter Field Definition in "dl_definition" record. Also, corresponding "Assignment Data Lookups" entries are