- Grades 6-12
- School Leaders
FREE Poetry Worksheet Bundle! Perfect for National Poetry Month.

Google Slides 101: Tips and Tricks Every Teacher Needs To Know
Everything you need to become an expert in no time!

Google Slides is a favorite teaching tool for many educators, both in person and online. With a huge selection of free features and options, this powerhouse allows teachers to create dynamic, interactive presentations that really engage their students. Whether you’re new to Google Slides or are looking to up your game, these resources will help you make the most of it.
Start with the basics
If this is all new to you, watch this video to see how to create simple Google Slides. It walks you through the process one step at a time. Plus, grab a free Google Slides Cheat Sheet from Shake It Up Learning .
Share slides with your students

You aren’t limited to using slideshows to accompany in-class presentations. Share them with students to use when studying, assign them as homework or for asynchronous learning, or create interactive slides (more on that below). Assigning Google Slides to your students is easy in Google Classroom. Teaching With Jennifer Findlay shows you how it’s done.
Use themes and templates

Jeoparty! Theme from SlidesCarnival
Google Slides themes are a pre-set group of colors, fonts, backgrounds, and layouts. You may sometimes see themes called “templates”—these two terms are interchangeable and work in the same way. Themes/templates allow you to enter your own information but save you a lot of time by taking care of the overall look and layout for you.

Doodles Theme from SlidesMania
You’ll find a variety of themes built into the program itself (watch the Google Basics video above to see how to use them). You’ll also find thousands more available for free or purchase online. Using them is generally as simple as clicking a link and then choosing “Use Template” to customize.
Add sounds to Google Slides

Adding sounds like music or narration can make your slide presentation a lot more interesting. Play bird songs in a lesson on ornithology, listen to a concerto as you discuss Mozart, or even create your own read-aloud. Narrated slides are terrific for asynchronous learning situations too. Learn how to add audio from Fluxing Well.
Don’t forget video
The nice thing about embedding a video directly in your Google Slides presentation is that you (or your students) don’t have to worry about clicking over to another window or website. Instead, you can simply set the video to play automatically (or once the Play button is clicked). You can use YouTube videos, videos from other sites, or those you’ve created yourself. (Pro tip: You can set a video to start and stop at any time you like !)
Make your Google Slides interactive
If you think a slideshow is something for students to sit and watch passively, Google Slides is here to prove you wrong. Have kids click on correct answers, type in text, and a whole lot more. This in-depth video demonstrates the entire process. Get more info from Super Sass and Science Class.
Choice boards are a popular way to make slides interactive. This video has the quick how-to.
Drag-and-drop slides are another terrific way to draw learners into a slide presentation. It’s amazing how much of a difference this makes in student engagement!
Link to internal slides and external sites
Adding links really ups the interactivity of your slides and turns them into self-directed activities in a snap. You can link kids to other pages in the slides for self-checking assessments or to external sources like websites or Google Classroom docs. This is one (easy) skill every teacher should master.
Check out Google Slides add-ons
Google Slides itself has lots of features, but you can also get lots of (often free) add-ons to make certain tasks easier. Add-ons are available to make diagrams, find better images, and display math equations … just to name a few. Ditch That Textbook has a list of 20 add-ons all teachers should try here.

Source: Maneuvering the Middle
One add-on teachers swear by is Pear Deck . It makes it easy to drop in formative assessments and evaluate student progress. The basic program is free for all users; learn how it works here .
Get in on the Bitmoji classroom trend
Those Bitmoji classrooms that are all the rage are right at home on Google Slides. Learn more about these virtual classrooms here, including how to make your own.
If you’re really ambitious, you can “animate” your Bitmoji to create a cool effect that kids will enjoy. It takes a bit of time, but as this video shows, it’s really not that hard to do.
Teach students to use Google Slides

Once students know how to use the program, there are all sorts of awesome assignments they can take on. Even elementary kids can learn how it works. Two Boys and a Dad has an awesome free project to get them started. Once they’ve got the basic skills, here are a few ideas to try.
Challenge your students to create an e-book using slides. Have them illustrate their creative writing, or try it for a different twist on a standard report. Get the quick tutorial from Shake Up Learning.
Digital interactive notebooks make it easy for you to monitor student progress, online or in-person. Plus, no more worries about kids “forgetting” to bring their notebook! Two Boys and a Dad shows you how they work. Make your own, or find ready-to-use templates on the web like this one from Student Savvy .
Looking for more ways to use Google Slides? Learn How Teachers Can Plan and Use Virtual “Stations” Online.
Plus, 30+ Virtual Learning Platforms and Tools for Teachers and Kids .

You Might Also Like

How Teachers Can Plan & Use Virtual “Stations” Online
You can still use these effectively! Continue Reading
Copyright © 2023. All rights reserved. 5335 Gate Parkway, Jacksonville, FL 32256
A Beginner’s Guide To Google Slides In The Classroom
By Kathleen Morris
You’re probably familiar with the range of free, web-based tools offered by Google within its Google Drive service?
These tools include Google Docs, Google Sheets, Google Forms, and Google Slides. They’ve become staples in classrooms, homes, and businesses around the world.
For teachers and students, Google Slides is one of the most exciting and versatile tools on offer.
Maybe you’ve heard of Google Slides and you’re wondering how you can use it in the classroom?
Or perhaps, you’ve dabbled with Google Slides but you’re not sure exactly how it can be used beyond presentations?
Or are you a blogger wondering how Google Slides can complement your blog posts?
This post explains:
What is google slides.
How to create a Google Slides presentation
How teachers and students can use Google Slides in the classroom (7 creative examples)
How to embed Google Slides into your blog posts (PDF and video tutorial included)
Using Google Slides in Remote Learning
You’re probably familiar with Microsoft PowerPoint — the software used to create and present slideshows?
Google Slides is similar except it’s hosted online and allows for multiple people to collaborate on the same presentation in real time.
Quick facts about Google Slides:
- It’s free.
- You can start with a blank document or use a pre-designed template.
- It’s available via the web , a mobile app ( Android , iOS , Windows, BlackBerry), and as a desktop application on Google’s ChromeOS .
- PowerPoint files can be imported into Google Slides and then edited. Your Google Slides presentations can be exported as a PowerPoint file, PDF, JPEG, PNG and more.
- Images and video can be added to presentations. As of April 2019, audio can also be added (this feature is currently being rolled out — see below for more details).
- There are many sharing options for your Google Slides presentation. It can be private, you can share it with select people, or you can share it publicly on the web. You can choose whether people can view or edit your presentation.
- If you’re collaborating with others on a Google Slides presentation, you can chat, leave comments, and work simultaneously on the same presentation.
- Your work is automatically saved as you work on your presentation.
- You can present your slides within the platform (View > Present). You can either plug your computer into a screen or use Chromecast or AirPlay to show a live audience. You can also present virtually via Google Hangouts.
- You can add real-time automatic captions when you present in Google Slides. Find out more here .
- There are many add-ons available for Google Slides. These are tools from 3rd party developers to add more functionality to Google Slides. Most add-ons are free but some have paid premium versions. Learn more about add-ons by reading Eric Curts’ post: 9 Awesome Add-ons to Supercharge Google Slides.
- Google Slides presentations can be embedded in blogs and websites.
Here’s a graphic summary of the above. Feel free to share it with colleagues who want to learn more about Google Slides.

How To Start A Google Slides Presentation
You’ll need a Google Account to access Google Slides. There’s a high chance you already have one! This is the same username/password you use for Gmail and other Google Products. You might also have a school Google account.
If you haven’t got a Google account yet, you can sign up here:
Google Drive is the place where your Google Slides presentations are stored. It’s also one of the ways you can start a new Google Slides presentation.
You access your Google Drive on the web through this URL:
Click on New in the top left-hand corner. Then click on Google Slides and either Blank Presentation or From a template .
Other Ways To Start A New Google Slides Presentation
- You can go straight to your Google Slides collection to view past Slides and create a new one using this URL https://docs.google.com/presentation
- presentation.new
- You can also start a new Slides presentation in the app ( Android | iOS )
Using Google Slides Offline
Rolling out from late April 2019 , there’s a new way to access Google Slides when you’re offline or have poor internet connection.
The first step is to enable offline access in your Drive settings.
How to enable offline access for Google Slides:
- Go to your Google Drive and click the gear icon at the top right corner
- Select Settings > General and select “Sync Google Docs, Sheets, Slides, and Drawings files to this computer” so you can edit offline.
- You can then right-click on any file in your Google Drive and select “Available offline” from the menu (while connected to the internet).
- You’ll need the free Chrome Google Docs Offline extension to access your offline documents.
Check out the full instructions to access Google Slides offline on any device here .
How To Make A Google Slides Presentation
You’ll notice when you start a new Google Slides presentation, using the methods described above, you have the option to build a blank presentation or work from a pre-designed template.
Whatever option you choose, creating your presentation is straightforward.
Here are the basics of creating a Google Slides presentation.
- You add text via text boxes which you can drag around to suit.
- Use the + button on the top left to add a new slide
- Right-click on your slide on the left navigation panel to duplicate it (this can be easier than building a slide from scratch). Duplicate is also found under the “Slide” menu.
This diagram shows the basic functions you will use most with Google Slides. Feel free to share it with your students or colleagues.
Click on the image to enlarge it.

Learn More About Google Slides
Learn more about getting started with Slides with the G Suite Learning Centre.
“ Get started with Slides ” is an easy to follow tutorial that’s suitable for both teachers and students.
Video Tutorials: Google Slides Overview
This two-minute video tutorial provides a simple overview of Google Slides basics.
After a more detailed video? Check out David Lee’s 12-minute introduction to Google Slides.
New Feature: Add Audio To Google Slides
In April 2019, Google began rolling out the ability to add audio to Google Slides presentations. This long-requested function could be very handy for teachers and students.
Audio can be great for reflection, narration, feedback, and all sorts of creative projects.
Want more examples of how audio can enhance Google Slides for teachers and students? Kasey Bell has written a blog post that shares 25 Ways to Use Audio in Google Slides Projects .
Although the ability to add audio is a great new feature, you can’t record audio directly into your Slides presentation.
As Eric Curts explains,
You see, even though we can now add audio to a Google slideshow, there isn’t a simple built-in recording button. Instead you need to record the audio separately with another program, then save it to Drive, and then add it to a slide.
Thankfully, Eric has put together a helpful collection of 4 Free and Easy Audio Recording Tools for Google Slides .
The tools Eric recommends to make audio recordings are:
- ChromeMP3 Recorder from HablaCloud
- Online Voice Recorder
- Beautiful Audio Editor
- TwistedWave
You can find out all about this process and how exactly you insert audio into Google Slides in Eric’s blog post , podcast , or video .
Using Google Slides In The Classroom: The Basics
The simplest and most obvious way to use Google Slides is to create a slide deck. That is, a collection of slides put together to form a presentation.
A slide deck is used to support an oral presentation.
There are many times when teachers or students might need a basic slide deck:
- Teachers can create a slide deck to support the lessons they’re presenting to students.
- Students can make a Slides presentation to accompany an oral presentation that’s part of their classwork.
- Students or teachers can create slide decks when they need to showcase learning or share school programs (e.g. information evening, school assembly, parent-teacher night, etc.).
- Teachers can collaborate on a slide deck for a conference or staff meeting presentation.
Apart from these basic uses, there is so much more you can do with Google Slides.
Let’s take a look…
7 Creative Ways To Use Google Slides In The Classroom
Kasey Bell isn’t wrong when she calls Google Slides the Swiss Army knife of G Suite. Let’s take a look at some creative ways you could use Google Slides in the classroom.
1) Introduce Your Class
Alethea Vazquez is a teacher who participated in the Student Blogging Challenge with her students a number of times. Her students collaborated on a great Google Slides presentation to introduce themselves on their class blog.
In this post , Alethea explains how she carried out this process. It involved giving students a Slides template that they could edit.
Take a look at the end result. This is perfect for an About page on a class blog.
2) Make Choose Your Own Adventure Stories
Remember those Choose Your Own Adventure books that were popular in past decades?
Creating a similar style of “interactive fiction” is a creative way to use Google Slides. It includes a certain amount of planning as teacher Kevin Hodgson explains in this post .

Here’s an example of interactive fiction using Google Slides by Kevin Hodgson. He shared this on his class blog as an example for students.
Tutorials For Choose Your Own Adventure Stories
- Check out this post by Eric Curts for a detailed explanation
- Jake Miller has made a useful GIF to explain the instructions
- This resource from Google explains how to make a collaborative “If-then Adventure Story”
As Kevin Hodgson says,
Most of my students really enjoy this writing, as it is very different from traditional pieces we do, but a few do struggle with the unconventionality of it. That’s OK, too, for what I am trying to show them is that writing is not one form, but many forms and always adaptable.
3) Try Collaborative Storytelling And Research
Two students in Linda Yollis’ third grade class collaborated together on a Google Slides presentation for the Student Blogging Challenge .
They shared their experiences of traveling to London with their own families and included some great research.
They embedded their presentation on their personal blogs — check out “Jodie Bloom’s blog and “Sarah Gold’s” blog . These are pen names.
4) Compile Individual Slides Into One: Poetry Example
Sometimes you might want students to all contribute one slide to a group presentation.
There are two ways to do this:
- You can start a new Slides presentation and share this template with the class. You would assign a slide number to each student. You just need to make sure students don’t interfere with other students’ slides.
- Or, you can have students create their own new Slides presentation and then share their completed slide with you. You can then compile all slides into one group Slides presentation. These instructions from Erintegration explain how to do this.
Here’s an example I made with students where they wrote their own Haiku poem. The students could write a few examples in their own Slides presentation and share their favorite one with me for the class compilation.
5) Share Photos Of Work That’s Not Digital
Google Slides doesn’t have to just be used to share digital work. It can be used to share and present any work students complete in the classroom.
Here’s an example where my students created their own Wacky Wednesday rhyme and illustration after studying the Dr. Seuss book.
I took photographs of all the students’ work and put them in a Google Slides presentation.
Readers were invited to guess the ‘wacky’ things they found in the students’ pictures.
Tip: Make A Photo Slideshow With PowerPoint
I found the easiest way to do this was to add the album of images to a PowerPoint presentation. You just need to go to Insert > Photo Album > New Photo Album. PowerPoint can position one image per slide automatically.
You then save your PowerPoint and import it into Google Slides ( these instructions show you how).
6) Flip Your Classroom: Create A Self Guided Lesson
Google Slides is a great way to help someone work through a lesson, either in a live classroom setting, or in their own time.
You’ve probably heard of the term “flipped classroom”? This is where students can learn content outside of the classroom freeing up face-to-face class time for rich discussions, projects, collaborations and so on.
Teachers can prepare Google Slides presentations that walk students through lessons. Students can work through these presentations at their own pace and in their own time. A similar model can be used for staff professional development.
Here is an example from instructional technology coach, Noah King. Noah used a blog post I wrote about how to teach students to research online to create a Slides presentation to use with 5th graders.
Read more about this Slides presentation here .
7) Make Images
Google Slides offers a blank canvas where creations can be download into image formats like JPEG and PNG.
For those reasons, it’s a great way for students and teachers to make images that they can print or use digitally.
Examples of images you could create in Google Slides:
- Blog headers
- Other blog images (e.g. see the example of the promotional graphic at the start of this post. These are great to share on social media).
- Certificates
- Photos with captions
- Flowcharts, mindmaps, or other graphic organizers
- How-to tutorials
- Classroom labels
Note : Another option for making images is Google Drawings. In this Venn diagram, Tony Vincent shows us how Google Drawings and Google Slides are the same and different.
Be sure to follow Tony on Twitter or Instagram as he often shares tips for using Google Slides and other tech tools.

How To Make A Graphic Or Image Using Google Slides
#1 open google slides.
You can work with a blank presentation or a template.
#2 Change your image size (optional)
If you want your image to be a certain size (e.g. the size of your blog header), you can change this in File > Page Setup > Custom . You can enter the dimensions you’re after in inches, centimeters, points, or pixels.
Tip : If you’re making a blog header, you’ll find the required dimensions in Customizer as demonstrated here .

#3 Make your background transparent (or another color)
If you want your image to ha ve a transparent background, cli ck on File > Change background .
Then choose Transparent (or another color).
If you select a transparent background, there will be no background when you download your image as PNG or JPEG.

#4 Create your design
Add the text, images, and shapes that you’d like on your design.
Tip : If you want to experiment with a design element but you’re not sure if you’ll like it, duplicate your slide before making your changes. Then you can choose the one you like best.
Right-click on the slide in the navigation panel and select “Duplicate slide”.
#5 Save your design as an image

You’ll then have an image file that you can print or use in your digital creations.
Here is a simple blog header image I made with Google Slides by modifying a template.

These 7 examples are only the tip of the iceberg of ways you could use Google Slides in the classroom.
We’d love you to share your own examples in a comment. Scroll down to find the comment box.
How To Embed Google Slides In Your Blog Post Or Page
As you’ve seen, Google Slides can be used in so many different ways. You can amplify this learning even more by sharing your work with an authentic audience on your blog.
Google Slides presentations can be easily embedded in blog posts or pages using HTML code (don’t worry if you’ve never done this before — it’s easy).
Note : If you’re using Edublogs, you’ll need Edublogs Pro or CampusPress in order to embed HTML code. This is to prevent misuse by spammers.
Let’s take a look at how to embed a Google Slides presentation into a blog post or page. You’ll find the written instructions below and then a video and PDF version.
This is a two-step process. First, you need to get the embed code from your Slides presentation then add it to your blog.
Step One: Get the embed code for your Slides presentation
1) open your slides presentation.
You can go to your Drive or directly to your Slides collection to find your presentation. Double click on the presentation to open it.
2) Publish to the web
Go to File > Publish to the web
You’ll find File in the top left-hand corner of your page.

Click on Embed . There are a few options to control the size and speed of the slides. Changing these options isn’t essential (medium is usually a good size).
Click on Publish .

You’ll receive a warning that you’re about to publish to the web. Press OK .

3) Copy the embed code
After you press OK, your HTML embed code will appear in a box. You need to copy this code to add to your blog post or page.
How to copy:
- Click on the text to highlight it if it’s not already highlighted
- Press Control C (Windows) or Command C (Mac)
- Alternatively, right-click and press Copy
Note : If you ever want to unpublish your Slides presentation so it’s not available on the web, repeat these steps and click on the small arrow at the bottom of the box that says Published content and settings . Select Stop publishing .

Step Two: Add the embed code to your blog post or page
These instructions show how to add your Slides presentation to a blog post. The same process applies to pages.
1) Open your post
Go to your blog dashboard and open the post you’re working on. Or, go to Posts > Add New .
2) Add Media
Place your cursor where you want the Slides presentation to appear and then click on the Add Media button.
3) Insert Embed Code
In the Add Media window, click on the Insert Embed Code tab on the left.

4) Paste Embed Code
Paste the embed code into the Insert Embed code box.
How to paste:
- Press Control V (Windows) or Command V (Mac)
- Alternatively, right-click and select Paste

When you’ve finished writing your post, click Publish .

You should now see your embedded Slides presentation when you view the published post. You can also preview your post to see what it looks like before publishing.
Here’s an example of an embedded Google Slides presentation.
Video: How To Embed A Google Slides Presentation
This 3 minute video takes you through the process described above.
PDF: How To Embed A Google Slides Presentation
You’re welcome to print this 2 page PDF to show your students or colleagues how to embed their Google Slides presentation into a blog post or page.
>> Click here to download a copy of the PDF
Using google slides in remote learning.
If you’re teaching remotely, you’ll need to offer your students a planner or lesson descriptions.
Some teachers put their planners in a Google Slides presentation.
Don’t forget to add these Slides presentations to a blog, LMS, or website so they don’t get lost).
- You can include text, links, and videos of yourself teaching to a Slides presentation amongst other things.
- One major benefit is you can copy and edit your planner so you don’t have to start from scratch each day.
- Check out this post by Alice Keeler for more advice on using Slides in remote learning.
Here’s an example from US kindergarten teacher Megan Peschke @MeganPeschke ). Don’t be put off by the age group. This idea could be adapted for any age!
Click here to view the Google Slides presentation in a new tab .
Instructions for Editing and Using Megan’s Google Slides
1. Click on this link:
2. You will be prompted to make a copy (screenshot below).
3. The Slides will be saved in your Google Drive.
4. You can edit the Google Slides to suit.

SlidesMania have also published a fantastic free weekly planner template that can be used in Google Slides or PowerPoint. Find it here.

Google Slides is a versatile way for teachers and students to create, collaborate, and present. There’s a lot you can do with Google Slides beyond a standard oral presentation.
Many teachers and students enjoy embedding their Google Slides presentations into a blog post or page. Sharing work with an authentic audience yields many benefits!
How are you using Google Slides?
Do you have any tips or examples to share?
Do you have any questions about Google Slides?
Leave a comment below. We’d love to hear from you.
Further Reading
You might also be interested in reading:
A Beginner’s Guide To Google Photos
Canva In The Classroom: Getting Started, Example Designs, And Tips!
Six Tools To Create Interactive Learning Content On Your Blog

Share This Post:
15 thoughts on “ a beginner’s guide to google slides in the classroom ”.
I love using Slides. I sent a Google slide presentation last week to my students via Google classroom and a few students couldn’t open it. It verified I had shared. Have you heard about this issue before?
Hi! I sent out several google slides for my student to do, alphabet work. When I go in as him, I can see that he did the activity, but there is no turn in button.
Hi Andrea, I assume this is a Google Classroom issue? I haven’t used Google Classroom before so I’m sorry I can’t help!
Is there a way to present Google Slides on individual student chromebooks through Google so that I am controlling the pace of the presentation?
Good question, I’m unsure about that, however, there are lots of users on Twitter who might know. If you use Twitter you could try reaching out to someone like @JakeMillerTech @EricCurts. They’re great with things like this. Good luck!
Once you learn how to use Google Slides, I have a whole section about the other useful features of Google Suites – Work smarter not harder
http://asoundmind.edublogs.org/2019/04/03/ingenuitys-arts-education-conference-resources-4519/
Good Source to learn Google Slides!
Great for students trying to learn google slides, simplifies the entire process and just makes it so much easier to understand.
this is such a great source to help with google docs lots of descriptions and videos.
What an awesome resource! Is it ok if I share the link this information with my staff during a tutorial on Google Slides? Please and thank you!
Hi Jean, We appreciate any sharing. Thanks!
This is a great introduction to google slides! I can definitely use the directions for adding google slides to a blog! This should make it much easier. Thanks!
Thank you for this great insight. I am currently studying technology and how to effectively implement it in the classroom.
This is very helpful and informative especially since I am currently taking a computer class.
So glad it helps!
Leave a Reply Cancel reply
Login with:
Your email address will not be published. Required fields are marked *
Blog > Interactive PowerPoint presentations in class
Interactive PowerPoint presentations in class
03.08.2023 • #powerpoint #tips.
Presentations can be a great way to make your lessons exciting and informative and to informative and to better communicate information to your students. Many students do not feel engaged and integrated enough with normal presentations. To increase the attention span and arouse enthusiasm, interactive elements such as quizzes, word clouds or feedback rounds can help, to significantly increase learning success.
Common problems that arise during presentations in class
Presentations are a central element of the learning process, but they often involve challenges that need to be overcome. We have highlighted four common problems that often accompany presentations in class:
1. Lack of interaction
Standard PowerPoint presentations offer limited opportunities for audience interaction and engagement. They lack features to gather feedback or answer questions in real time and respond to requests.
2. Student passivity
Students are often forced into a passive role when the focus is only on the slides and the presenter simply delivers them in a heavy-handed manner.
3. Time managementt
Creating good presentations can take a lot of time and can be a difficult task for some.
4. Information Overload
Too much information at once, without a break can overwhelm and scare away younger students in particular. It's hard to focus on what's important and grasp the key messages.
4 ideas for interactive presentations in classes
Interactive presentations demonstrably increase learning success and retention. This is also confirmed by a study of the Keele University . The results here show very clearly to what extent involving the audience increases attention as well as knowledge transfer. It was found that the grades of the participants improved by 3.7%, as well as and the failure rate was reduced by 4.4% over the whole school year. were reduced.
1. Interactive classroom engagement
Students can ask questions anonymously and provide interactive feedback. This encourages active participation in the classroom and creates an open learning environment. Teachers could respond spontaneously to questions or interesting discussion points and customize lessons.
Here are some ways to better engage students in the classroom:
- Voting on the desired teaching material : Teachers can include an interactive survey where students choose from a variety of topics they would like to learn more about in class. This allows students to help shape the lesson and contribute their interests.
- Surveys in which subject areas the students need more support : Teachers can start a survey to identify areas where students are having difficulty or need more explanation. This can help to tailor the lessons to the needs of the students.
- Anonymous questions about ambiguities in specific subject areas : For example, students can use SlideLizard to anonymously ask questions about topics they didn't fully understand. These questions can then be discussed in class to clarify misunderstandings and deepen understanding.
2. Brainstorming and unleashing creativity
Interactive slides enable teachers and students to collaboratively brainstorming sessions into the presentation, and to create a presentation. The feature allows ideas to be collected and structured on virtual pinboards. and structure them. The result is an interactive collaboration that unleashes creativity and promotes the exchange of ideas. encourages.
Here are some ideas on how to incorporate brainstorming in the classroom:
- Brainstorming for possible solutions : When addressing complex problems or challenges, teachers can ask students to brainstorm different solutions together on an interactive slide. This encourages teamwork and creative thinking.
- Collection of ideas for projects : Teachers can use an interactive slide where students can collect creative ideas for upcoming projects. These ideas can then be discussed and developed together.
- Solutions for social challenges : Students can brainstorm and discuss ideas for addressing real-world social problems such as poverty, inequality, or pollution.
3. Learning with quizzes
Interactive quizzes are a highlight of PowerPoint presentations. Teachers can check what students have already learned in a playful way and track the learning success. The students in turn experience a motivating sense of achievement when they answer the quiz questions correctly. This makes the learning process not only entertaining, but also effective.
Here are some concrete ideas for how teachers can use quizzes in a meaningful way in the classroom:
- Short knowledge tests during the presentation : Teachers can include a short quiz after each section of a presentation to ensure that students understand the key concepts before moving on to the next section.
- Preparation for exams : Teachers can create more comprehensive quizzes that cover the entire subject matter and help students prepare for upcoming exams.
- Continuous knowledge checks : Teachers can create regular, short quizzes to ensure that knowledge learned builds and deepens consistently over time.
4. Flexibility in teaching through discussions
Additional slides can also be used or set aside to be be flexible to the needs of the students. Teachers can react spontaneously to respond spontaneously to questions or interesting discussion points and individually.
Here are some ways teachers can use discussions to engage students more fully in the classroom:
- Small group discussions : Teachers can divide students into small groups and have them discuss on different slides. Each group can then present their findings or conclusions.
- Feedback and reflexion : After a presentation or lecture, teachers can ask questions on a slide that encourage students to reflect on what they have heard. These questions can then be discussed together.
- Visualize discussions as a word cloud : The students' contributions and thoughts from a discussion can be visualized on a slide as a word cloud. Frequently mentioned words are displayed larger, which draws the focus to dominant topics or trends. This provides a visual summary of the discussion and encourages analysis of the most important aspects.
Tips: Create interactive presentations
One tool that can help you create interactive presentations is SlideLizard. SlideLizard offers a wide range of interactive features, such as word clouds, polls, quizzes or feedback rounds for your teaching. You can integrate the interactive slides directly into your PowerPoint presentation and the results of polls or word clouds during the lesson are automatically visualized in real time. Learn more about interactive teaching with SlideLizard here.
Using interactive PowerPoint presentations with SlideLizard allows teachers to take teaching to a new level and overcome these problems. By combining word clouds, quizzes, interactive feedback sessions, and brainstorming sessions, SlideLizard creates an inspiring learning environment where students can actively participate in the classroom and unlock their potential. Let's use this creative and innovative approach to unleash the potential of visual connection and take teaching in schools to a new level. Learning can be so much fun!
Related articles
About the author.

Annika Fachberger
Annika is dedicated to graphics and videos. At SlideLizard she supports the design team with her creative ideas.

Get 1 Month for free!
Do you want to make your presentations more interactive.
With SlideLizard you can engage your audience with live polls, questions and feedback . Directly within your PowerPoint Presentation. Learn more
Top blog articles More posts

Elegant Architecture - Free PowerPoint Template

Corporate Design in Presentations - the Key to Strengthening Corporate Identity

Get started with Live Polls, Q&A and slides
for your PowerPoint Presentations
The big SlideLizard presentation glossary
Valedictory speech.
A valedictory speech is given in order to say goodbye, usually at graduation. It should inspire listeners and functions as a send-off into "real life".
B2C means Business to Customer. A B2C event is hosted by a company for its customers. It's important for gaining new customers and for satisfieing regular clients.
Manuscript Speech
For a manuscript speech, the speaker has an entire manuscript to read from. The benefit is that, as every single word is scripted, no important parts will be missed. However, speeches that are fully written down often seem unnatural and may bore the audience.
Informative Presentations
An information presentation is created when no solution is currently available. Facts, data and figures or study results are presented and current processes are described.
Be the first to know!
The latest SlideLizard news, articles, and resources, sent straight to your inbox.
- or follow us on -
We use cookies to personalize content and analyze traffic to our website. You can choose to accept only cookies that are necessary for the website to function or to also allow tracking cookies. For more information, please see our privacy policy .
Cookie Settings
Necessary cookies are required for the proper functioning of the website. These cookies ensure basic functionalities and security features of the website.
Analytical cookies are used to understand how visitors interact with the website. These cookies help provide information about the number of visitors, etc.
- Google Classroom
- Google Workspace Admin
- Google Cloud
Get started with Google Slides
Learn how to use Google Slides to create engaging presentations, make fewer class copies, and more.
Find tips and tricks from teachers like you
Explore topics one-by-one.
- What is Google Slides
- Accessing Google Slides
- Creating a presentation in Google Slides
- Adding and editing content
- Presenting Google Slides
- Sharing Google Slides
Discover training lessons and related resources to accelerate your learning
Error loading content :( Please try again later
- {[ item.label ]}
{[ collectionContentCtrl.activeTopic.label ]} All resources ({[ collectionContentCtrl.totalItemsCount ]})
{[ item.eyebrow ]}
{[ item.name ]}
{[ item.description ]}
{[ item.featured_text ]}
No results matching your selection :( Clear filters to show all results
Begin your training with Google Slides
Get support from our help center, you're now viewing content for united states..
For content more relevant to your region, choose a different location:
7 Tips for Boosting your Classroom Presentations
Looking to use a Powerpoint or Google Slides presentation in class? Below are some useful tips that you can use to easily share your presentation with your students and help you feel like you are getting the most out of your class time!
1. Make sure everyone can see your presentation
If you are worried your students cannot see your presentation because of the size of the monitor in the classroom you can always:
- Share your presentation with your students before class on Canvas and let them know they can use it as a reference.
- Communicate with your students. Let them know that the monitor in the classroom is on the small side and it is okay for them to bring a device to view the presentation during class./li>
- You can always check out laptops from Media Services and place them around the room, and ask a student to progress the slides as you speak.
- Have students sit in groups and have one student volunteer to have the presentation pulled up on their screen and move forward in the presentation while you are speaking.
2. Print physical copies
If you do not care to have students bring their own devices to class, print out your presentation with a notes section next to each slide for your students to utilize. This way students can see your presentation and also have a place to write down thoughts while you are talking! Learn how to print your presentation in Powerpoint or Google Slides .
3. Utilize large text
Try to steer clear of long wordy slides. Make your text and visuals large and easy to read! This not only helps users see and understand but also helps them to remember the content more easily. Think about adding a visual with a key phrase and elaborate on the slide during your lecture.
4. Visuals can make a big difference!
Making your presentation look good with visuals such as images, photos, or icons on slides can help your learners make a visual connection to what it is you are referencing during class. You can easily find images on open-source sites such as Unsplash or Rawpixel . You can also find free and easy-to-import Google slide and Powerpoint presentation templates on Slidesgo or Canva .
5. Try using a projector
You can request a projector from Media Services to be set up and projected on one of the classroom walls for larger viewing!
6. Think about alternative ways of presenting information
All of the Grace Dodge classrooms have multiple writable surfaces. You can write on all of the walls and tables using an Expo marker!
7. Start a Zoom session for students to join on their devices
On the computer you're using to present, open a Zoom session and share the link with your students. Students can then view the presentation on their own devices. Turning on Live Transcription provides another avenue for students to receive the information you are presenting.
References:
- Teague, Jason Cranford. “8 Tips to Power-up Your Classroom Presentations.” Edutopia , George Lucas Educational Foundation, 12 Nov. 2013, https://www.edutopia.org/blog/8-tips-classroom-presentation-jason-cranford-teague .

Building a Slideshow with Student Learning in Mind

Have you ever used a PowerPoint, Prezi, or other slideshow presentation in your classroom? Chances are that the answer is yes—particularly if you teach upper level subjects which are heavy on content. In theory, slide shows are a great instructional tool. Unfortunately, in practice, many slide presentations can actually work against student engagement [1] . To avoid this, teachers need to be aware of the most effective ways to employ slides in the classroom. Below are some suggestions to help you make the most of this technology.
Why are you using slides? Your purpose will determine how you use this tool. Slide shows can be effectively used to illustrate content, to demonstrate procedures, to direct student interaction, or to review for a test. They should not be used to spoon-feed notes to students. [2] Your purpose determines how you design your slide show.
The most effective slides are clean and easy to read. Use a sans serif font (ie: Ariel or Verdana) in a color that clearly contrasts with the background. Light backgrounds are easiest to read. Ensure that the size of the text is easily seen from a distance. Limit graphics, slide design, animations, and transitions as these tend to distract from the content of the presentation.
Slides with a lot of text overwhelm the listener. In fact, such slides tacitly convey that the students don’t need to listen to what you are saying because they encourage students to focus on reading the text instead. A more effective use of slides is to highlight key words or phrases, or to illustrate what you are saying through well-selected pictures, infographics, or other graphic designs. The slide should be a supplement to your presentation, not be the presentation itself.
Similarly, you should limit yourself to one point per slide (or control the appearance of multiple points so that they coincide with where you are in your presentation). Posting multiple points at once will distract students as they read ahead.
..but only if it is well-chosen and of high quality. Grainy or pixelated images, as well as clip art or watermarked pictures are distracting and detract from your message. Choose high quality images that directly connect to your presentation, and ensure that you are using images that are not restricted by copyright. [4]
While many of us use slides to supplement our lectures, posing questions or problems for students to discuss/solve can turn a teacher-centered medium into a student-centered one. This can be a great way to get students interacting with the material that you have just presented, which will help them move that information from short-term to long-term memory.
For more information on effective use of slide presentations, check out the following resources:
- Making Better PowerPoint Presentations . Vanderbilt University Center for Teaching.
- Effective Use of PowerPoint . University of Central Florida Faculty Center for Teaching and Learning.
- 8 Insights that will Change the Way You Give PowerPoint Presentations. Business Insider.
- What is Good Presentation Design ? Presentation Zen, Gary Reynolds.
- Center for Innovative Teaching and Learning
- Instructional Guide
Teaching with PowerPoint
When effectively planned and used, PowerPoint (or similar tools, like Google Slides) can enhance instruction. People are divided on the effectiveness of this ubiquitous presentation program—some say that PowerPoint is wonderful while others bemoan its pervasiveness. No matter which side you take, PowerPoint does offer effective ways to enhance instruction when used and designed appropriately.
PowerPoint can be an effective tool to present material in the classroom and encourage student learning. You can use PowerPoint to project visuals that would otherwise be difficult to bring to class. For example, in an anthropology class, a single PowerPoint presentation could project images of an anthropological dig from a remote area, questions asking students about the topic, a chart of related statistics, and a mini quiz about what was just discussed that provides students with information that is visual, challenging, and engaging.
PowerPoint can be an effective tool to present material in the classroom and encourage student learning.
This section is organized in three major segments: Part I will help faculty identify and use basic but important design elements, Part II will cover ways to enhance teaching and learning with PowerPoint, and Part III will list ways to engage students with PowerPoint.
PART I: Designing the PowerPoint Presentation
Accessibility.
- Student accessibility—students with visual or hearing impairments may not be able to fully access a PowerPoint presentation, especially those with graphics, images, and sound.
- Use an accessible layout. Built-in slide template layouts were designed to be accessible: “the reading order is the same for people with vision and for people who use assistive technology such as screen readers” (University of Washington, n.d.). If you want to alter the layout of a theme, use the Slide Master; this will ensure your slides will retain accessibility.
- Use unique and specific slide titles so students can access the material they need.
- Consider how you display hyperlinks. Since screen readers read what is on the page, you may want to consider creating a hyperlink using a descriptive title instead of displaying the URL.
- All visuals and tables should include alt text. Alt text should describe the visual or table in detail so that students with visual impairments can “read” the images with their screen readers. Avoid using too many decorative visuals.
- All video and audio content should be captioned for students with hearing impairments. Transcripts can also be useful as an additional resource, but captioning ensures students can follow along with what is on the screen in real-time.
- Simplify your tables. If you use tables on your slides, ensure they are not overly complex and do not include blank cells. Screen readers may have difficulty providing information about the table if there are too many columns and rows, and they may “think” the table is complete if they come to a blank cell.
- Set a reading order for text on your slides. The order that text appears on the slide may not be the reading order of the text. Check that your reading order is correct by using the Selection Pane (organized bottom-up).
- Use Microsoft’s Accessibility Checker to identify potential accessibility issues in your completed PowerPoint. Use the feedback to improve your PowerPoint’s accessibility. You could also send your file to the Disability Resource Center to have them assess its accessibility (send it far in advance of when you will need to use it).
- Save your PowerPoint presentation as a PDF file to distribute to students with visual impairments.
Preparing for the presentation
- Consider time and effort in preparing a PowerPoint presentation; give yourself plenty of lead time for design and development.
- PowerPoint is especially useful when providing course material online. Consider student technology compatibility with PowerPoint material put on the web; ensure images and graphics have been compressed for access by computers using dial-up connection.
PowerPoint is especially useful when providing course material online.
- Be aware of copyright law when displaying course materials, and properly cite source material. This is especially important when using visuals obtained from the internet or other sources. This also models proper citation for your students.
- Think about message interpretation for PowerPoint use online: will students be able to understand material in a PowerPoint presentation outside of the classroom? Will you need to provide notes and/or other material to help students understand complex information, data, or graphics?
- If you will be using your own laptop, make sure the classroom is equipped with the proper cables, drivers, and other means to display your presentation the way you have intended.
Slide content
- Avoid text-dense slides. It’s better to have more slides than trying to place too much text on one slide. Use brief points instead of long sentences or paragraphs and outline key points rather than transcribing your lecture. Use PowerPoint to cue and guide the presentation.
- Use the Notes feature to add content to your presentation that the audience will not see. You can access the Notes section for each slide by sliding the bottom of the slide window up to reveal the notes section or by clicking “View” and choosing “Notes Page” from the Presentation Views options.
- Relate PowerPoint material to course objectives to reinforce their purpose for students.
Number of slides
- As a rule of thumb, plan to show one slide per minute to account for discussion and time and for students to absorb the material.
- Reduce redundant or text-heavy sentences or bullets to ensure a more professional appearance.
- Incorporate active learning throughout the presentation to hold students’ interest and reinforce learning.
Emphasizing content
- Use italics, bold, and color for emphasizing content.
- Use of a light background (white, beige, yellow) with dark typeface or a dark background (blue, purple, brown) with a light typeface is easy to read in a large room.
- Avoid using too many colors or shifting colors too many times within the presentation, which can be distracting to students.
- Avoid using underlines for emphasis; underlining typically signifies hypertext in digital media.
Use of a light background with dark typeface or a dark background with a light typeface is easy to read in a large room.
- Limit the number of typeface styles to no more than two per slide. Try to keep typeface consistent throughout your presentation so it does not become a distraction.
- Avoid overly ornate or specialty fonts that may be harder for students to read. Stick to basic fonts so as not to distract students from the content.
- Ensure the typeface is large enough to read from anywhere in the room: titles and headings should be no less than 36-40-point font. The subtext should be no less than 32-point font.
Clip art and graphics
- Use clip art and graphics sparingly. Research shows that it’s best to use graphics only when they support the content. Irrelevant graphics and images have been proven to hinder student learning.
- Photographs can be used to add realism. Again, only use photographs that are relevant to the content and serve a pedagogical purpose. Images for decorative purposes are distracting.
- Size and place graphics appropriately on the slide—consider wrapping text around a graphic.
- Use two-dimensional pie and bar graphs rather than 3D styles which can interfere with the intended message.
Use clip art and graphics sparingly. Research shows that it’s best to use graphics only when they support the content.
Animation and sound
- Add motion, sound, or music only when necessary. When in doubt, do without.
- Avoid distracting animations and transitions. Excessive movement within or between slides can interfere with the message and students find them distracting. Avoid them or use only simple screen transitions.
Final check
- Check for spelling, correct word usage, flow of material, and overall appearance of the presentation.
- Colleagues can be helpful to check your presentation for accuracy and appeal. Note: Errors are more obvious when they are projected.
- Schedule at least one practice session to check for timing and flow.
- PowerPoint’s Slide Sorter View is especially helpful to check slides for proper sequencing as well as information gaps and redundancy. You can also use the preview pane on the left of the screen when you are editing the PowerPoint in “Normal” view.
- Prepare for plan “B” in case you have trouble with the technology in the classroom: how will you provide material located on your flash drive or computer? Have an alternate method of instruction ready (printing a copy of your PowerPoint with notes is one idea).
PowerPoint’s Slide Sorter View is especially helpful to check slides for proper sequencing and information gaps and redundancy.
PowerPoint Handouts
PowerPoint provides multiple options for print-based handouts that can be distributed at various points in the class.
Before class: students might like having materials available to help them prepare and formulate questions before the class period.
During class: you could distribute a handout with three slides and lines for notes to encourage students to take notes on the details of your lecture so they have notes alongside the slide material (and aren’t just taking notes on the slide content).
After class: some instructors wait to make the presentation available after the class period so that students concentrate on the presentation rather than reading ahead on the handout.
Never: Some instructors do not distribute the PowerPoint to students so that students don’t rely on access to the presentation and neglect to pay attention in class as a result.
- PowerPoint slides can be printed in the form of handouts—with one, two, three, four, six, or nine slides on a page—that can be given to students for reference during and after the presentation. The three-slides-per-page handout includes lined space to assist in note-taking.
- Notes Pages. Detailed notes can be printed and used during the presentation, or if they are notes intended for students, they can be distributed before the presentation.
- Outline View. PowerPoint presentations can be printed as an outline, which provides all the text from each slide. Outlines offer a welcome alternative to slide handouts and can be modified from the original presentation to provide more or less information than the projected presentation.
The Presentation
Alley, Schreiber, Ramsdell, and Muffo (2006) suggest that PowerPoint slide headline design “affects audience retention,” and they conclude that “succinct sentence headlines are more effective” in information recall than headlines of short phrases or single words (p. 233). In other words, create slide titles with as much information as is used for newspapers and journals to help students better understand the content of the slide.
- PowerPoint should provide key words, concepts, and images to enhance your presentation (but PowerPoint should not replace you as the presenter).
- Avoid reading from the slide—reading the material can be perceived as though you don’t know the material. If you must read the material, provide it in a handout instead of a projected PowerPoint slide.
- Avoid moving a laser pointer across the slide rapidly. If using a laser pointer, use one with a dot large enough to be seen from all areas of the room and move it slowly and intentionally.
Avoid reading from the slide—reading the material can be perceived as though you don’t know the material.
- Use a blank screen to allow students to reflect on what has just been discussed or to gain their attention (Press B for a black screen or W for a white screen while delivering your slide show; press these keys again to return to the live presentation). This pause can also be used for a break period or when transitioning to new content.
- Stand to one side of the screen and face the audience while presenting. Using Presenter View will display your slide notes to you on the computer monitor while projecting only the slides to students on the projector screen.
- Leave classroom lights on and turn off lights directly over the projection screen if possible. A completely dark or dim classroom will impede notetaking (and may encourage nap-taking).
- Learn to use PowerPoint efficiently and have a back-up plan in case of technical failure.
- Give yourself enough time to finish the presentation. Trying to rush through slides can give the impression of an unorganized presentation and may be difficult for students to follow or learn.
PART II: Enhancing Teaching and Learning with PowerPoint
Class preparation.
PowerPoint can be used to prepare lectures and presentations by helping instructors refine their material to salient points and content. Class lectures can be typed in outline format, which can then be refined as slides. Lecture notes can be printed as notes pages (notes pages: Printed pages that display author notes beneath the slide that the notes accompany.) and could also be given as handouts to accompany the presentation.
Multimodal Learning
Using PowerPoint can help you present information in multiple ways (a multimodal approach) through the projection of color, images, and video for the visual mode; sound and music for the auditory mode; text and writing prompts for the reading/writing mode; and interactive slides that ask students to do something, e.g. a group or class activity in which students practice concepts, for the kinesthetic mode (see Part III: Engaging Students with PowerPoint for more details). Providing information in multiple modalities helps improve comprehension and recall for all students.
Providing information in multiple modalities helps improve comprehension and recall for all students.
Type-on Live Slides
PowerPoint allows users to type directly during the slide show, which provides another form of interaction. These write-on slides can be used to project students’ comments and ideas for the entire class to see. When the presentation is over, the new material can be saved to the original file and posted electronically. This feature requires advanced preparation in the PowerPoint file while creating your presentation. For instructions on how to set up your type-on slide text box, visit this tutorial from AddictiveTips .
Write or Highlight on Slides
PowerPoint also allows users to use tools to highlight or write directly onto a presentation while it is live. When you are presenting your PowerPoint, move your cursor over the slide to reveal tools in the lower-left corner. One of the tools is a pen icon. Click this icon to choose either a laser pointer, pen, or highlighter. You can use your cursor for these options, or you can use the stylus for your smart podium computer monitor or touch-screen laptop monitor (if applicable).
Just-In-Time Course Material
You can make your PowerPoint slides, outline, and/or notes pages available online 24/7 through Blackboard, OneDrive, other websites. Students can review the material before class, bring printouts to class, and better prepare themselves for listening rather than taking a lot of notes during the class period. They can also come to class prepared with questions about the material so you can address their comprehension of the concepts.
PART III: Engaging Students with PowerPoint
The following techniques can be incorporated into PowerPoint presentations to increase interactivity and engagement between students and between students and the instructor. Each technique can be projected as a separate PowerPoint slide.
Running Slide Show as Students Arrive in the Classroom
This technique provides visual interest and can include a series of questions for students to answer as they sit waiting for class to begin. These questions could be on future texts or quizzes.
- Opening Question : project an opening question, e.g. “Take a moment to reflect on ___.”
- Think of what you know about ___.
- Turn to a partner and share your knowledge about ___.
- Share with the class what you have discussed with your partner.
- Focused Listing helps with recall of pertinent information, e.g. “list as many characteristics of ___, or write down as many words related to ___ as you can think of.”
- Brainstorming stretches the mind and promotes deep thinking and recall of prior knowledge, e.g. “What do you know about ___? Start with your clearest thoughts and then move on to those what are kind of ‘out there.’”
- Questions : ask students if they have any questions roughly every 15 minutes. This technique provides time for students to reflect and is also a good time for a scheduled break or for the instructor to interact with students.
- Note Check : ask students to “take a few minutes to compare notes with a partner,” or “…summarize the most important information,” or “…identify and clarify any sticking points,” etc.
- Questions and Answer Pairs : have students “take a minute to come with one question then see if you can stump your partner!”
- The Two-Minute Paper allows the instructor to check the class progress, e.g. “summarize the most important points of today’s lecture.” Have students submit the paper at the end of class.
- “If You Could Ask One Last Question—What Would It Be?” This technique allows for students to think more deeply about the topic and apply what they have learned in a question format.
- A Classroom Opinion Poll provides a sense of where students stand on certain topics, e.g. “do you believe in ___,” or “what are your thoughts on ___?”
- Muddiest Point allows anonymous feedback to inform the instructor if changes and or additions need to be made to the class, e.g. “What parts of today’s material still confuse you?”
- Most Useful Point can tell the instructor where the course is on track, e.g. “What is the most useful point in today’s material, and how can you illustrate its use in a practical setting?”
Positive Features of PowerPoint
- PowerPoint saves time and energy—once the presentation has been created, it is easy to update or modify for other courses.
- PowerPoint is portable and can be shared easily with students and colleagues.
- PowerPoint supports multimedia, such as video, audio, images, and
PowerPoint supports multimedia, such as video, audio, images, and animation.
Potential Drawbacks of PowerPoint
- PowerPoint could reduce the opportunity for classroom interaction by being the primary method of information dissemination or designed without built-in opportunities for interaction.
- PowerPoint could lead to information overload, especially with the inclusion of long sentences and paragraphs or lecture-heavy presentations with little opportunity for practical application or active learning.
- PowerPoint could “drive” the instruction and minimize the opportunity for spontaneity and creative teaching unless the instructor incorporates the potential for ingenuity into the presentation.
As with any technology, the way PowerPoint is used will determine its pedagogical effectiveness. By strategically using the points described above, PowerPoint can be used to enhance instruction and engage students.
Alley, M., Schreiber, M., Ramsdell, K., & Muffo, J. (2006). How the design of headlines in presentation slides affects audience retention. Technical Communication, 53 (2), 225-234. Retrieved from https://www.jstor.org/stable/43090718
University of Washington, Accessible Technology. (n.d.). Creating accessible presentations in Microsoft PowerPoint. Retrieved from https://www.washington.edu/accessibility/documents/powerpoint/
Selected Resources
Brill, F. (2016). PowerPoint for teachers: Creating interactive lessons. LinkedIn Learning . Retrieved from https://www.lynda.com/PowerPoint-tutorials/PowerPoint-Teachers-Create-Interactive-Lessons/472427-2.html
Huston, S. (2011). Active learning with PowerPoint [PDF file]. DE Oracle @ UMUC . Retrieved from http://contentdm.umuc.edu/digital/api/collection/p16240coll5/id/78/download
Microsoft Office Support. (n.d.). Make your PowerPoint presentations accessible to people with disabilities. Retrieved from https://support.office.com/en-us/article/make-your-powerpoint-presentations-accessible-to-people-with-disabilities-6f7772b2-2f33-4bd2-8ca7-ae3b2b3ef25
Tufte, E. R. (2006). The cognitive style of PowerPoint: Pitching out corrupts within. Cheshire, CT: Graphics Press LLC.
University of Nebraska Medical Center, College of Medicine. (n.d.). Active Learning with a PowerPoint. Retrieved from https://www.unmc.edu/com/_documents/active-learning-ppt.pdf
University of Washington, Department of English. (n.d.). Teaching with PowerPoint. Retrieved from https://english.washington.edu/teaching/teaching-powerpoint
Vanderbilt University, Center for Teaching. (n.d.). Making better PowerPoint presentations. Retrieved from https://cft.vanderbilt.edu/guides-sub-pages/making-better-powerpoint-presentations/

Suggested citation
Northern Illinois University Center for Innovative Teaching and Learning. (2020). Teaching with PowerPoint. In Instructional guide for university faculty and teaching assistants. Retrieved from https://www.niu.edu/citl/resources/guides/instructional-guide
Phone: 815-753-0595 Email: [email protected]
Connect with us on
Facebook page Twitter page YouTube page Instagram page LinkedIn page
The Ultimate Guide to Effective Teacher Presentations: Strategies & Tips

Dianne Adlawan

Teachers, by nature, are considered professional presenters. Their main responsibility is to talk in front of their students to relay educational knowledge, sharpen their minds and skills, and even serve as a second guide alongside their parents. They also speak in front of parents, co-teachers, and school administrators. This just means that preparing for a presentation is already not new to them.
Still, teachers can become so comfortable with their presentation routine that their techniques turn into autopilot. The result of a repetitive task can become tiring and not challenging anymore which may result in students losing interest or attention span in the process.
The tips featured in this article are dedicated to these hard-working professionals. This will help them prepare and perform a better presentation in front of any type of audience.

Why You Should Prepare for a Presentation
- Preparation helps you build to structure your thoughts to create a well-organized presentation. By taking the time to prepare, you can decide what information is most important, plan the flow of the presentation, and make sure that everything is connected and easy to follow.
- Second, it allows you to think ahead of the questions that your audience might ask. Especially if you’re giving a presentation to a group of various audiences, who are curious about the topic at hand. By preparing in advance, you’ll be able to answer any questions they may have, which will not only increase their understanding but also boost your credibility as a teacher.
- Lastly, preparation helps you make the most of your time. Advanced preparation ahead of the presentation can ensure that you’re not wasting time trying to organize your thoughts at the last minute.
Effects of an Organized and Well-Planned Presentation
An audience engages with a speaker who knows their words and poses a confident attitude. While the projector may display clear and concise slides, the presenter is the main ingredient to every presentation.
For teachers, a well-planned lesson presentation helps the teacher maintain the attention and interest of their students, which is crucial for effective learning. Additionally, being organized and prepared will help teachers convey their ideas more effectively and it will help the teacher to feel more confident, which also impacts their teaching and in turn can help to build trust and rapport with their students.
Possible Outcomes of An Unprepared Presentation
Let’s suppose you haven’t allocated enough time to plan and prepare for an important presentation. What could be the potential outcomes?
- Increased Stress and Anxiety: Lack of preparation can lead to increased anxiety and stress, which can not only hinder your ability to deliver a convincing presentation but also hurt your mental health and work balance. It can cause a “mental block,” causing you to lose focus and concentration during your delivery.
- Poor Presentation Delivery: Without proper preparation, your presentation can appear scattered and disjointed. This can lead to an incoherent message that fails to convince your audience.
- Diminished credibility: Delivering an unprepared presentation can harm your reputation as a professional. It can portray you as disorganized and unreliable which could lead your colleagues or students to question your competence and reliability.
Effective Visual and Content Organization Tips
Consider this as the first stage towards an effective teacher presentation. Before moving on to improving your verbal communication cues, let’s enhance first your presentation visuals and content.
Visual Tips
1. add powerpoint animations and different media.
Establishing an attractive slideshow is one of the keys to a successful presentation. This will put a good impression on your audience that you’re prepared just by seeing how well-designed your presentation is. Of course, images add to slideshow attraction, but consider adding another forms of media such as GIFs and videos, as well as animations! Microsoft PowerPoint has a lot of fun & captivating features that you may not be aware of. Check out this example of an easy yet appealing Slide Zoom trick in PowerPoint that you can add to your presentation to wow your audience.
@classpoint.io Did someone say FREE??? Yes, we did. Here are free websites to help you upgrade your next PowerPoint presentation! 😎 #powerpoint #presentation #design #studytok #edutok #tutorial #tipsandtricks #ai ♬ original sound – r & m <33
Read Next: Make Your Presentations POP With This PowerPoint Animation Template
2. Use Readable Font Styles
Make sure to use the best font style that makes your presentation look sleek, readable, and won’t strain your audience’s eyes while reading. We all want to use a fancy font, trust me, I get it. But most of the time, simplicity is beauty, especially if you’re presenting a professional-looking slideshow. Font styles such as Poppins, Tahoma, Verdana, Montserrat, and Helvetica are great examples of font styles that screams simple yet professional to look at.
On the other hand, font styles such as Bradley Hand, Comic Sans, and Chiller are not ideal choices as they are not meant to captivate your audience’s eyes. And another tip is to stick to two or three fonts only!

3. Use Relevant Graphics
Selecting graphics for designing your presentation depends on your audience and the goals you aim to achieve with the presentation. For example, if you are presenting in front of students and your goal is to keep them engaged, motivated, and actively participating, then you might consider incorporating charts, tables, and relevant shapes into your design.
It’s important to remember that your presentation design should align with the theme of your topic.
Free Websites to Upgrade your Presentation Graphics:
- Craiyon. com
- The Noun Project
4. Use Audience Engagement tools to Activate Learning
Want the quickest solution to an engaged audience? Well, it’s audience interactive activities! Adding interactive activities to your presentation can help keep your audience engaged and interested. One of the easiest ways to do this is to use ClassPoint, an audience engagement tool added right into PowerPoint presentations.
With ClassPoint, you no longer need to worry about strategies to keep your students engaged, as this tool transforms PowerPoint into a teacher presentation tool with a teacher toolbelt and student quizzes , polls, and games that make presentations more fun & engaging.
By combining ClassPoint with your presentation techniques, you can focus solely on setting up your lesson content in PowerPoint and allow ClassPoint to handle the rest for achieving a learning-activated presentation lesson .
🔍 Learn more about ClassPoint, the teacher add-in for better lessons & student engagement 👍
5. Use a Laser Pointer
Help focus your audience attention by using a laser pointer!
With the help of a laser pointer device, teachers are able to attract the attention of their audiences and concentrate on essential points in their presentations. Highlighting these main ideas and terms assists the speaker in organizing their speech, preventing distraction, and increasing retention of the information presented.
You can use a physical laser pointer & clicker, or with the addition of ClassPoint into PowerPoint, presenters can easily turn their cursor into a laser or a spotlight . This can make it even easier for students to follow along and is a convenient tool for creating a more captivating teacher presentation.
Secret tip: if you write on your slide with the laser, it will leave disappearing ink! 🪄
Content Tips
1. research and fact-check your presentation.
As educators, it is crucial to equip ourselves with reliable and accurate information before presenting to our students. We have a responsibility to not only educate them but to also mold them into critical thinkers who are equipped with factual knowledge. Without thorough fact-checking, we risk disseminating misinformation and hindering their intellectual growth.
To avoid such situations, we must prioritize research and fact-checking before presenting any information. Conducting research helps us not only in finding accurate information but also in ensuring that the sources we use are reliable and credible. Moreover, taking the time to fact-check demonstrates our commitment to providing students with high-quality education and the desire to create a safe and accurate learning environment.
2. Be Prepared to Anticipate Questions during the Presentation
It is important to be well-prepared for a presentation especially anticipating and addressing questions. This applies particularly to a teacher presentation, as educators face varied expectations and questions. Adequate preparation allows you to organize ideas and justifications, and it can deepen understanding, boost confidence, and improve adaptability. Addressing questions, makes your audiences feel heard and appreciated. This will result in comprehensive presentations, enhanced confidence, improved information flow, and an atmosphere of respect and understanding.
A great & visual way you can elaborate, or explain your material in new ways, is by using ClassPoint’s whiteboard tools added to PowerPoint. ClassPoint’s added toolbar presents teachers with unlimited whiteboard slides they can open whenever they need, and user-friendly yet comprehensive pen tools with available shapes, and text boxes. Plus you can also use ClassPoint’s quick poll or other question types to assess students’ understanding with hard data & insights.
Addressing questions well makes your audience or students feel heard & appreciated leading to improved learning, enhanced confidence, and a respectful, safe learning environment.
3. Provide an Outline Structure of your Content
When you are preparing your presentation, it is best to first create an effective outline structure that will guide your presentation flow and help you focus on the main learning objective. But what you may not be doing, is offering that outline structure to your students, but you should!
Providing students with a clear understanding of what this lesson is about, the structure of the lesson, and what they will be able to take away from it is important. By doing so, you can help students stay focused and follow along with the material. Additionally, you are setting expectations and ensuring that everyone is on the same page, which can help promote student autonomy. So, include an outline at the start of your presentation lesson.
Step-by-Step Strategies for a Successful Presentation
Before presentation, know your audience, your students, or observers.
Once you have completed your deck, you may want to add a guide script and any additional notes with important points you don’t want to forget or you want to highlight in your presentation to impress your students .
Practice your presentation delivery/lesson
Practice delivering your presentation give you a chance to fine-tune your content and get your facts down. This will help you become more comfortable with the material and identify areas that need improvement. You can practice in front of a mirror, record yourself and watch it back, or even rehearse with a colleague or friend. When practicing, pay attention to your posture, tone of voice, and pacing. By doing so, you’ll be able to deliver a confident and engaging presentation that will captivate your audience.
Use a friendly tone of voice and pace
Adjust your tone to match your message, and avoid speaking too quickly so that your audience will get the chance to absorb the information you’re sharing. By being mindful of these aspects, you will capture your audience’s attention and leave them feeling informed and inspired.
Use engaging body language
Body language is essential for engaging your audience during a presentation. Stand up straight, make eye contact, and use hand gestures to emphasize important points. You can also move around the classroom to keep your students’ attention. By using engaging body language, you’ll be able to convey your message more effectively and keep your students interested throughout the presentation. You’ve got this!
During Presentation
Create an icebreaker.
Having an icebreaker is a warm-up for your students’ brains, allowing you to focus and engage with the material being presented. It also helps break down any barriers or tension between the presenter and the audience, making for a more relaxed and welcoming atmosphere. Additionally, an icebreaker provides an opportunity for the presenter to showcase their creativity and personality, adding an extra level of excitement and engagement to the presentation.
Good thing that ClassPoint has numerous features to help you perform an entertaining and unforgettable icebreaker. Here are some examples that you can use during an icebreaker.
- Quick Poll : Quick Poll allows you to create interactive polls right inside your presentation. When used as an icebreaker, it can engage the audience, initiate discussions, and provide valuable insights that help tailor the content to participants’ preferences.
- Word Cloud: Presenters can ask thought-provoking questions related to the topic or general interest. Using Word Cloud, the audiences can answer through their mobile which can be instantly seen as collective responses, with the most frequently mentioned words appearing larger.
- Short Answer : In short answer, you can challenge your audiences’ thought process in a short-form writing activity with no options to get from to test their ability to understand.
- Image Upload : Using single image, audiences can interpret what they feel like, or their mood using only the photos in their gallery or surroundings. A creative yet fun way for an icebreaker!
Speak clearly
Effective communication is crucial when presenting important information to students. Speaking clearly helps ensure that students understand the concepts being taught and follow instructions effectively. As a teacher, it’s important to focus on clear speech to promote effective communication and help your students comprehend the material being presented.
Pay attention to your audience’s attention
Since distractions are aplenty, attention spans are dwindling, it’s important for presenters to captivate their audience’s attention right from the beginning. For teachers, when speaking in front of your class, you should not only focus on the content of your presentation but also on your students’ attention.
To ensure that your students won’t start drifting away or zoning out, start with a compelling opening that immediately grabs their attention. Use vivid storytelling, examples, or demonstrations to engage your students and drive home your message. Don’t forget the power of humor, and never be afraid to be yourself – authentic, passionate, and confident.
Add Personality: share short relatable stories
“A great personality makes everyone feel energized; just like a flower’s fragrance that freshens ups the complete surrounding.” 29 Personality Quotes to Achieve Greatness
As to what is stated in the quote, having a positive and vibrant personality affects the overall mood of your surrounding, it can capture the audience’s attention and maintain their interest throughout the presentation. While the ultimate goal is to deliver a presentation rich with new learnings and knowledge, adding humor can do no harm to lift up the mood in the room. You might want to start by segueing a short story that your students can relate to and make interactions by encouraging them to share a story too or ask questions.
Post-Presentation Reflection
Take the comments by heart.
Receiving feedback from your students is a great way for evaluating the efficacy of a teacher presentation. This can help you identify areas where you can improve and tailor your teaching tactics to better suit the needs of your students. Listening to your students’ feedback can also promote a feeling of cooperation and enable them to become more actively involved in the learning experience. So, don’t be afraid to ask for feedback and take it to heart in order to continually improve your presentations.
Experienced educators understand that they are perpetually crafting their skills, and feedback from their audience brings an opportunity for professional advancement. In addition, accepting audience feedback illustrates esteem and worth for the students’ views. It promotes a feeling of cooperation and enables students to become more actively involved in the learning experience.
Preparing for a presentation is essential for teachers to deliver engaging and impactful content to their students. By structuring thoughts, anticipating questions, and preparing ahead, teachers can achieve a well-organized presentation that will enhance the students’ understanding and leave them feeling confident.
By following our strategies and tips teachers can achieve successful lessons using PowerPoint presentations. And, with the help of an advanced educational technology tool like ClassPoint, teachers can create dynamic and memorable presentations that their students will enjoy and actively participate in.
Try out ClassPoint today and experience a whole teacher presentation in PowerPoint! ✨
About Dianne Adlawan
Try classpoint for free.
All-in-one teaching and student engagement in PowerPoint.
Supercharge your PowerPoint. Start today.
500,000+ people like you use ClassPoint to boost student engagement in PowerPoint presentations.
- [email protected]
Teaching with PowerPoint Presentations
Introduction
PowerPoint presentations are used in many different fields due to their ability to organize and structure information, create a consistent format, and provide the audience with visuals. Educators often use this type of presentation in their classrooms in order to guide the class through a lecture. The effectiveness of PowerPoint presentations is often debated, but most agree that when created in the right way, these presentations have many benefits for students of all ages. The amount of information on each slide, the type of transition between slides, the color of the background, and the number of slides are all factors to consider when teaching with PowerPoint Presentations, and there are many resources out there that will help guide you when you begin creating your own presentation.
Nowadays, technology is being used in the classroom more often than not as a tool to aid educators in teaching their students course content. PowerPoint presentations are often utilized by educators during lectures, which is why there are many resources available online to provide them with the best strategies to create and present these presentations in their classes.
Lesson Plans
- The 4 Best PowerPoint Lesson Plans for Middle School : Applied Educational Systems has put together four of the best lesson plan ideas to teach middle schoolers how to use PowerPoint. Each of the lesson plans (An Introduction to Microsoft PowerPoint, the Basics of Building a PowerPoint Presentation, More Features in Powerpoint, and the Do’s and Don’ts of Effective Presentations) includes a brief introduction and an activity for students to practice the skills that they have learned. By the end of these lessons, students will be able to create a new presentation, practice working with text and images, make their presentations interesting, and apply the principles of effective presentations to their own.
- PowerPoint Lesson Plan for Elementary Students : Perkins provides a class project which requires students to create “All About Me” PowerPoints while learning how to add text, pictures, sound effects, videos, and other features to their presentations. Directions call for students to be split into groups to put together multiple slides that will eventually be combined for a whole class presentation. Topics for each slide include students’ names, families, pets, favorite foods, favorite colors, favorite subjects, etc. This lesson plan gives educators a fun way to have younger students learn how to create PowerPoint presentations for their own use or future educational purposes.
- How Can I Use PowerPoint More Effectively? : In this article, David Forrest discusses strategies educators can utilize to make their PowerPoints more effective in the classroom. Forrest first recommends deciding on the role of your PowerPoint, which could be a lecture outline, note-taking aid (fill-in-the blank slides), visual aid, timed quizzes, or others. He also talks about the appearance of each slide because less is more in this situation, as the last thing any educator wants is for their students to become distracted from content by their presentation. Lastly, the author goes over how educators should prepare for technological failure or anything else going wrong during their PowerPoint presentation. This piece is a good one for educators to read before creating their own presentations!
- PowerPoint in the Classroom : NCBI provides a few different articles on whether PowerPoints are necessary or pointless in the classroom. Ultimately, despite the fact that some of the authors of these articles see PowerPoint presentations as unnecessary, their points of view give insight on what not to do when creating your own presentation, such as adding too much information per slide. Taking all of the arguments given in the articles into consideration will help you decide the best way to begin using PowerPoint presentations in your classroom.
- PowerPoint in Education : This brief article goes over the ways in which you can present your PowerPoint presentation most effectively in order to help students retain the most information. There are proper ways to use various technologies in the classroom, and in the case of PowerPoints, this author believes that the “intelligent use” of Powerpoint presentations is when the information presented is in the form of complicated graphs or figures and alphanumeric information. However, in cases where students are expected to retain certain information and concepts, traditional presentations would be best.
Informational Sites
- NIU – Teaching with PowerPoint : NIU runs through the ways to design effective PowerPoint presentations and the best practices when using this online software. First, the author describes how educators should design their presentation, including how to prepare for the presentation, slide content, the number of slides, emphasis on content, clip art, and a final check of the PowerPoint. Next, the use of PowerPoint handouts and tips for the actual presentation itself are detailed. Lastly, NIU explains how to enhance teaching and learning with PowerPoint and suggests ways to engage students with the presentation.
- Making Better PowerPoint Presentations : Vanderbilt University has put together a page on Baddeley and Hitch’s model of working memory (which relates to how students retain information received through different sensory domains), student preferences for PowerPoint (characteristics they like or don’t like and when students learn more), and resources for making better PowerPoint presentations.
- UW – Teaching with Powerpoint : UW provides educators with information on when and how to use a PowerPoint, which ultimately depends upon each individual’s teaching style, and the options for using PowerPoints (illustrated lectures, instructions, paper proposals, discussion prompts, test or quiz answers, grammar exercises, and student projects). At the end of the piece, a few additional resources, including a video, online tutorial, and essay, are given to help educators learn how to teach with PowerPoints in the best way.
PowerPoint presentations have many different purposes, but in the classroom, their main purpose is to help direct the lesson or lecture, while also giving students the opportunity to follow along and better understand the material. Presentations can also be a great resource for students to study off of before an assessment or use as a note-taking aid during class. Overall, the resources provided above will be useful when you are putting together PowerPoint presentations for your curriculum material. Take all of these tops into consideration, but remember to make it your own!
Additional Resources
- The Impact of Using PowerPoint Presentations on Students’ Learning and Motivation in Secondary Schools : ScienceDirect published an informational article on the impact of using PowerPoint presentations on students’ learning and motivation in secondary schools. In this article, the results of a study which investigated the effectiveness of PowerPoint presentations in teaching English and whether students prefer this learning process over traditional teaching styles are provided. The results support the notion that PowerPoint presentations can be used as an effective tool in the classroom. Taking a look at this piece may cause you to consider using these presentations in your classroom!
Sign up to receive our monthly newsletter!
- Academy 4SC
- Educators 4SC
- Leaders 4SC
- Students 4SC
- Research 4SC
Accountability
Center for Teaching & Learning
Using slides in classroom teaching.
Numerous articles have been written about the pros and cons of using PowerPoint, KeyNote, or other slide presentation tools in the classroom. Slides have become a standard tool for professors and depending on how they’re used, they can clarify and complement or detract from an instructor’s lecture. For better or worse, slides have become a lecturing standard. Below, we offer some tips for keeping your lectures interesting and share some links to resources and commentary.
Eight Tips for Design and Delivery:
Keep slides light on text. Slides shouldn’t be the used as your lecture notes. If you pack them with text, they’ll probably not be read. If you don’t intend for your students to read the slides, then use an image instead or a simple concept on the slide, allowing your narrative to deliver definition and context . Use handouts for dense amounts of information.
Don’t read your slides out loud . Research as shown that not only are people are unable to effectively listen and read at the same time, particularly when new terms and concepts are being introduced, MRI tests show that the 2 activities use the same parts of the brain and they directly compete with each other, creating frustration rather than learning. If a slide has some text on it (remember not to use much), allow sufficient quiet time for people to read the content. Talk about it, but don’t read it .
Don’t aim for comprehensiveness. This may seem paradoxical to effective teaching, but consider exercising communicative discipline with both your slides and spoken lecture. If you try to shoehorn in exhaustive amounts of information, you might only overload your students and bury the basics that you most want them to understand.
Present images with (or without) your text. The Picture Superiority Effect is a well researched phenomenon in which pictures are more likely to be remembered than words. Therefore, pictures and diagrams are best understood either in isolation or with spoken information only. (“ Cognitive Load theory ” by John Sweller)
Avoid using transitions and animations. Some people feel these techniques will “jazz up” a presentation, but remember that there are many people for whom these effects are a visual distraction that impedes their ability to stay focused on the message. A simple fade is the exception.
Create legible slides. Use big enough fonts in contrasting colors. Appropriate font size varies based on the audience size and scale of the room. Here are some guidelines from Think Outside the Slide .
Black out the screen when it’s not relevant. There may be times in your lecture that you want more focus on listening (or you need to stray from what’s on the slide). Slides can go stale if they’re up too long, especially when they aren’t on topic anymore. To temporarily blacken the screen, press the “b” key (for black). To bring it back, press “b” again.
Know your lecture as though you didn’t have slides. In other words, try not to rely on the slides as your lecture blueprint. If you are prepared to give the lecture without it, you’ll be more relaxed, less tempted to read from slides, and your lecture will flow.
Resources and Tutorials
- 10 Tips to Make Your Slides More Effective
- Making Better PowerPoint Presentations from Vanderbilt University, Center for Teaching
- Garr Reynolds, an expert in the field of presentation, provides numerous tips on slide design and delivery at on his website . His blog, Presentation Zen , is another resource. And his talk to employees at Google is interesting, as well.
- “ Absolute Powerpoint ” Ian Parker, 2001. The New Yorker
- Teaching Naked—When Computers Leave Classrooms, So Does Boredom , Jeffrey Young, 2009. The Chronicle of Higher Education
- “ PowerPoint is Evil ,” by Edward Tufte, Wired Magazine
PowerPoint could lead us to believe that information is all there is. According to [the late Clifford Nass, who was a Professor of Communication at Stanford University,] PowerPoint empowers the provider of simple content... ...but it risks squeezing out the provider of process—that is to say, the rhetorician, the storyteller, the poet, the person whose thoughts cannot be arranged in the shape of an AutoContent slide.
The Tech Edvocate
- Advertisement
- Home Page Five (No Sidebar)
- Home Page Four
- Home Page Three
- Home Page Two
- Icons [No Sidebar]
- Left Sidbear Page
- Lynch Educational Consulting
- My Speaking Page
- Newsletter Sign Up Confirmation
- Newsletter Unsubscription
- Page Example
- Privacy Policy
- Protected Content
- Request a Product Review
- Shortcodes Examples
- Terms and Conditions
- The Edvocate
- The Tech Edvocate Product Guide
- Write For Us
- Dr. Lynch’s Personal Website
- The Edvocate Podcast
- Assistive Technology
- Child Development Tech
- Early Childhood & K-12 EdTech
- EdTech Futures
- EdTech News
- EdTech Policy & Reform
- EdTech Startups & Businesses
- Higher Education EdTech
- Online Learning & eLearning
- Parent & Family Tech
- Personalized Learning
- Product Reviews
- Tech Edvocate Awards
- School Ratings
8 Ways to Service an Air Conditioner
3 ways to stop a baby from vomiting, 3 ways to save instagram highlights, skills needed for reading comprehension: everything you need to know, how to change the language in android, 3 ways to permanently delete facebook messages, how to tie the sides of a shirt: 8 simple steps, phonics rules: everything you need to know, how to fill a flask: 8 steps, 3 ways to treat skin disease in hamsters, how to use google slides in the classroom.
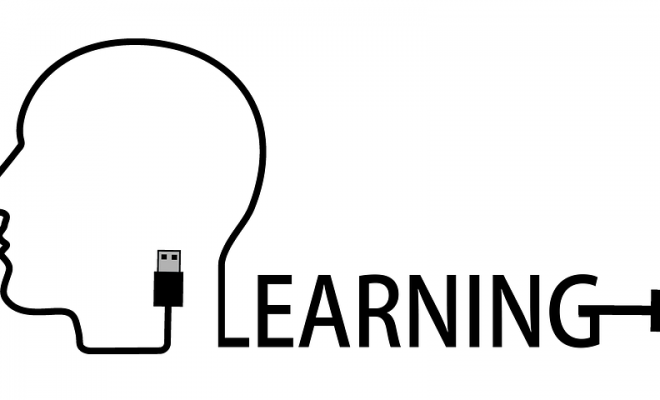
Google Slides is a presentation product; it is quite similar to the more-familiar PowerPoint. But since it is part of the Google suite of products, it is free to use. It can be a powerful classroom resource. Here are six ways to use Google Slides in the classroom:
First, there is simply no justification for giving a lecture in the age of Google Slides. Teachers can supplement what they are saying with a visual presentation that, research shows, will make it far more likely that students will remember what they have been taught since they will not only have heard but also have seen the information. Visual aids can also be added.
Second, Google Slides makes it easy to encourage student participation. Pear Deck and Poll Everywhere are two edtech tools that make it possible to solicit feedback from within Google Slides. These can be powerful tools for both formative assessment as well as increasing student engagement in the lesson.
Third, teachers can encourage collaborative learning in a number of ways with Google Slides. An assignment could be designed so that each student creates their own slides; once combined into one presentation, students can learn from each other. Or, small groups can collaborate on one slide presentation in real-time and then present their slides to the class, allowing for an engaging student presentation.
Fourth, teachers can use Google Slides to flip the classroom. The traditional model is to learn new material at school and then practice it at home, but Slides makes it simple to flip that model: students can use a teacher-created slide presentation to learn new material at home, and then they can practice it during class time. One great feature of Google Slides is that it is easy to integrate other Google products, such as Sheets (which are spreadsheets), charts, or graphs.
Fifth, students can use Google Slides as the digital equivalent of notecards in order to brainstorm, research, organize, and then present their research projects to the class. Or, Google Slides could become digital notecards used to memorize vocabulary or other materials. Google Slides could even be used as a log, journal, or tracker with a new slide for each day (or week) to track student performance, to write a daily diary, or to record books read.
Sixth, Google Slides have many of the features of a drawing program. This means that students can draw on a slide. Or paint on it. Or make shapes. Or create a comic strip. Since slides can be viewed out of order, students can even use them to create a “choose your own adventure” style writing assignment.
How to Future Proof Your School District’s ...
How to flip a parent teacher conference.

Matthew Lynch
Related articles more from author.

Five Ways to Personalize Edtech Professional Development
Using the Google Classroom Comment Bank
How do i invite co-teachers to google classroom.
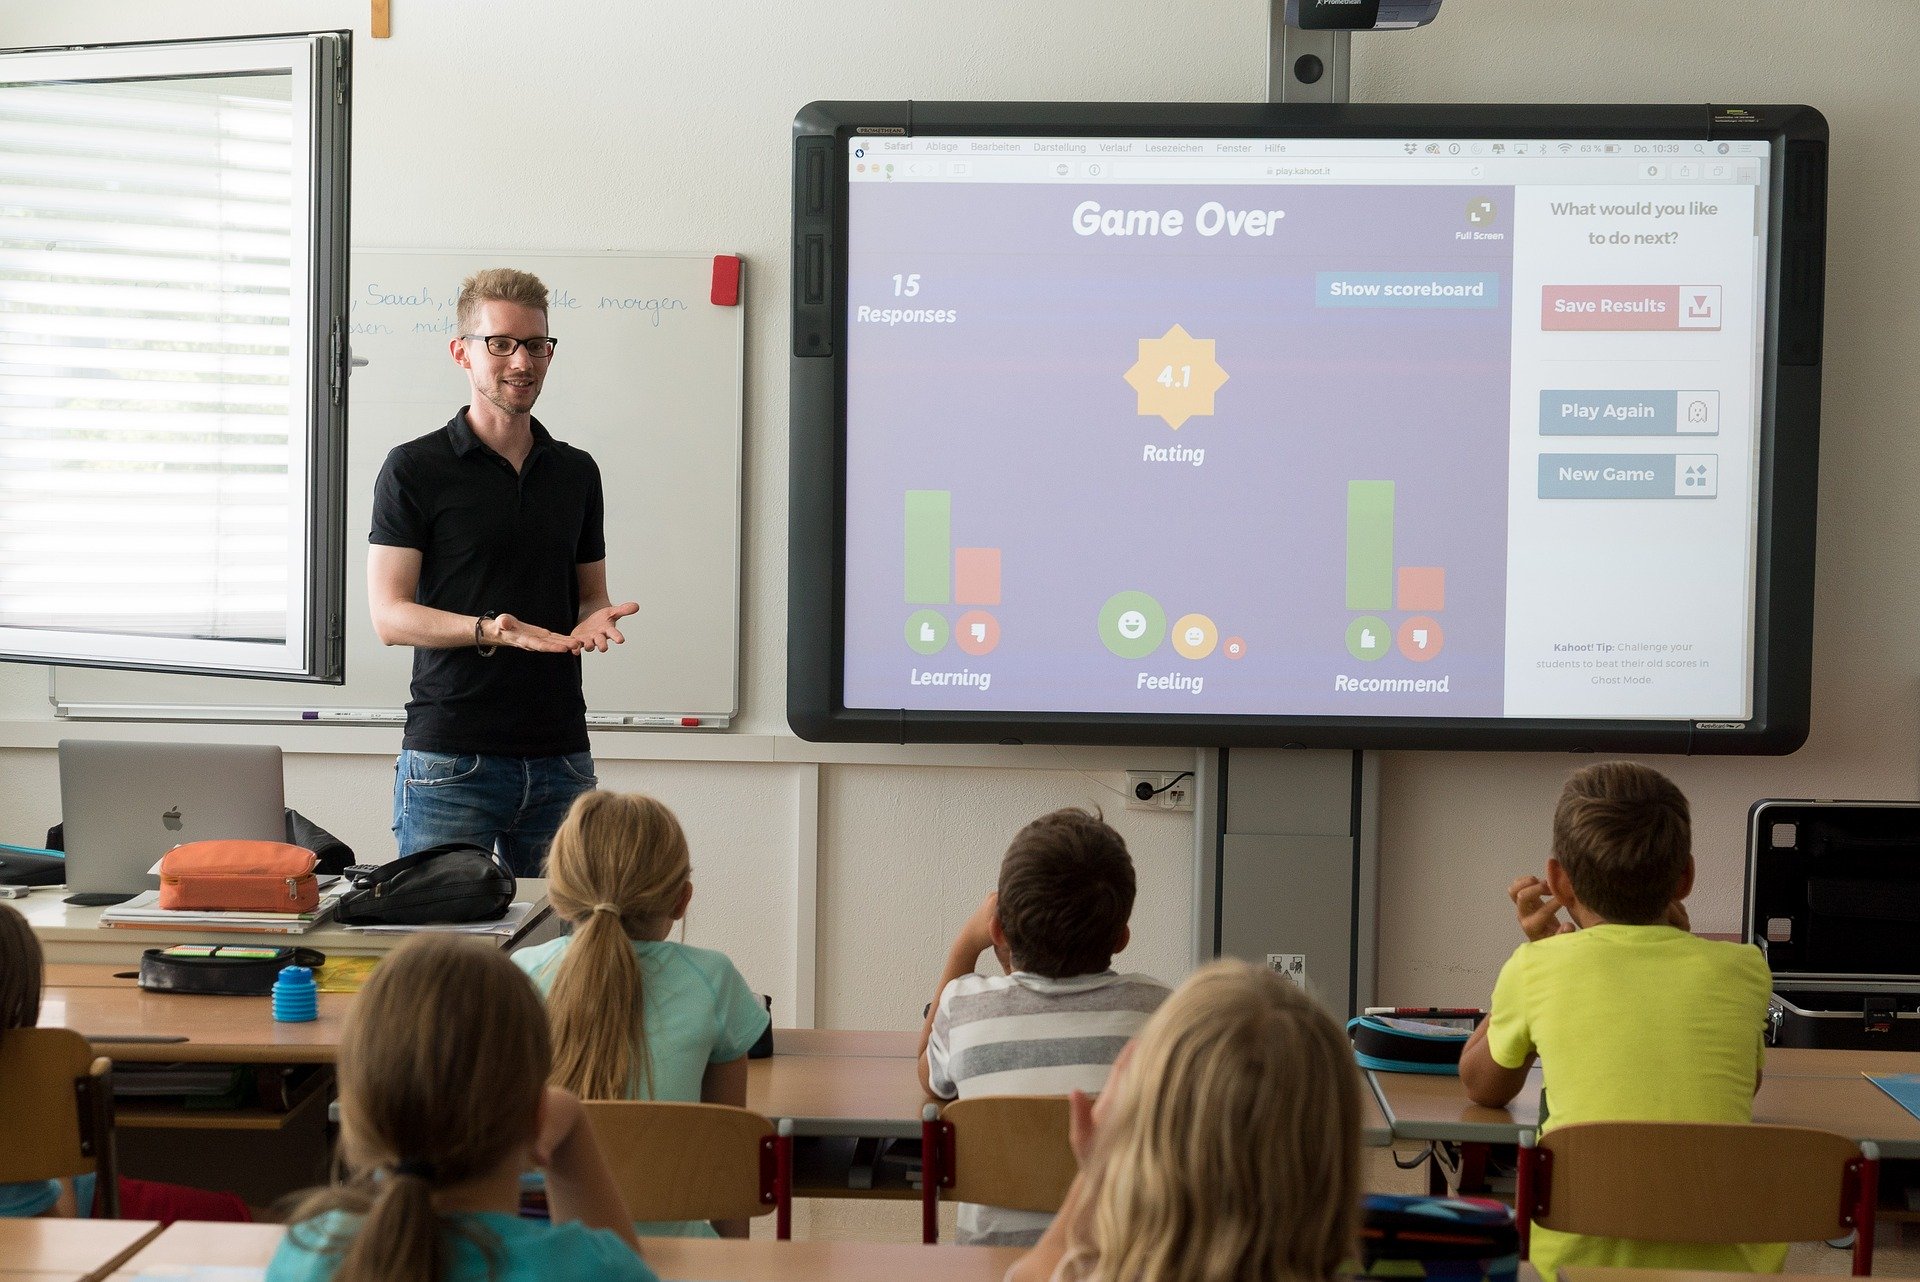
Why Are Some Educators Still Reluctant to Use Technology in the Classroom?

Gamify Reading for Maximum Student Engagement

Apps and Tools to Teach Students Financial Literacy

Cloud Storage

Custom Business Email

Video and voice conferencing

Shared Calendars

Word Processing

Spreadsheets
Presentation Builder

Survey builder

Google Workspace
An integrated suit of secure, cloud-native collaboration and productivity apps powered by Google AI.
Tell impactful stories, with Google Slides
Create, present, and collaborate on online presentations in real-time and from any device.
- For my personal use
- For work or my business

Jeffery Clark
T h i s c h a r t h e l p s b r i d g i n g t h e s t o r y !

E s t i m a t e d b u d g e t

Make beautiful presentations, together
Stay in sync in your slides, with easy sharing and real-time editing. Use comments and assign action items to build your ideas together.

Present slideshows with confidence
With easy-to-use presenter view, speaker notes, and live captions, Slides makes presenting your ideas a breeze. You can even present to Google Meet video calls directly from Slides.

Seamlessly connect to your other Google apps
Slides is thoughtfully connected to other Google apps you love, saving you time. Embed charts from Google Sheets or reply to comments directly from Gmail. You can even search the web and Google Drive for relevant content and images directly from Slides.

Extend collaboration and intelligence to PowerPoint files
Easily edit Microsoft PowerPoint presentations online without converting them, and layer on Slides’ enhanced collaborative and assistive features like comments, action items, and Smart Compose.

Work on fresh content
With Slides, everyone’s working on the latest version of a presentation. And with edits automatically saved in version history, it’s easy to track or undo changes.

Make slides faster, with built-in intelligence
Assistive features like Smart Compose and autocorrect help you build slides faster with fewer errors.

Stay productive, even offline
You can access, create, and edit Slides even without an internet connection, helping you stay productive from anywhere.
Security, compliance, and privacy

Secure by default
We use industry-leading security measures to keep your data safe, including advanced malware protections. Slides is also cloud-native, eliminating the need for local files and minimizing risk to your devices.
Encryption in transit and at rest
All files uploaded to Google Drive or created in Slides are encrypted in transit and at rest.
Compliance to support regulatory requirements
Our products, including Slides, regularly undergo independent verification of their security, privacy, and compliance controls .
Private by design
Slides adheres to the same robust privacy commitments and data protections as the rest of Google Cloud’s enterprise services .

You control your data.
We never use your slides content for ad purposes., we never sell your personal information to third parties., find the plan that’s right for you, google slides is a part of google workspace.
Every plan includes

Collaborate from anywhere, on any device
Access, create, and edit your presentations wherever you are — from any mobile device, tablet, or computer — even when offline.

Get a head start with templates
Choose from a variety of presentations, reports, and other professionally-designed templates to kick things off quickly..

Photo Album

Book Report

Visit the Slides Template Gallery for more.
Ready to get started?
The Innovative Instructor
Pedagogy – best practices – technology.

PowerPoint in the Classroom
Do you use PowerPoint (or Keynote, Prezi or other presentation software) as part of your teaching? If yes, why? This is not meant to be a question that puts you on the defensive, rather to ask you to reflect on how the use of a presentation application enhances your teaching and fits in with other strategies to meet your learning objectives for the class.
A key point from that post to reiterate: “Duarte reports on research showing that listening and reading are conflicting cognitive processes, meaning that your audience can either read your slides or listen to you; they cannot do both at the same time. However, our brains can handle simultaneous listening to a speaker and seeing relevant visual material.”
It’s important to keep this in mind, particularly if your slides are text heavy. Your students will be scrambling to copy the text verbatim without actually processing what is being said. On the other hand, if your slides are used as prompts (presenting questions or key points with minimal text) or if you don’t use slides at all, students will have to listen to what you are saying, and summarize those concepts in their notes. This process will enhance their understanding of the material.
An article in Focus on Teaching from August 1, 2012 by Maryellen Weimer, PhD asks us to consider Does PowerPoint Help or Hinder Learning? Weimer references a survey of students on the use of PowerPoint by their instructors. A majority of students reported that all or most of their instructors used PowerPoint. Weimer’s expresses the concern that “Eighty-two percent [of students surveyed] said they “always,” “almost always,” or “usually” copy the information on the slides.” She asks, “Does copying down content word-for-word develop the skills needed to organize material on your own? Does it expedite understanding the relationships between ideas? Does it set students up to master the material or to simply memorize it?” Further, she notes that PowerPoint slides that serve as an outline or use bulleted lists may “oversimplify” complex content, encourage passivity, and limit critical thinking.
Four journal articles from Cell Biology Education on PowerPoint in the Classroom (2004 Fall) present different points of view (POV) on the use of PowerPoint. Although written over a decade ago, most of the concepts are still relevant. Be aware that some of the links are no longer working. From the introduction to the series:
Four POVs are presented: 1) David Keefe and James Willett provide their case why PowerPoint is an ideal teaching software. Keefe is an educational researcher at the Center for Technology in Learning at SRI International. Willett is a professor at George Mason University in the Departments of Microbial and Molecular Bioscience; as well as Bioinformatics and Computational Biology. 2) Kim McDonald highlights the causes of PowerPointlessness, a term which indicates the frequent use of PowerPoint as a crutch rather than a tool. She is a Bioscience Educator at the Shodor Education Foundation, Inc. 3) Diana Voss asks readers if PowerPoint is really necessary to present the material effectively or not. Voss is a Instructional Computing Support Specialist at SUNY Stony Brook. 4) Cynthia Lanius takes a light-hearted approach to ask whether PowerPoint is a technological improvement or just a change of pace for teacher and student presentations. Lanius is a Technology Integration Specialist in the Sinton (Texas) Independent School District.
These are short, op-ed style, pieces that will further stimulate your thinking on using presentation software in your teaching.
For more humorous, but none-the-less thought provoking approach, see Rebecca Shuman’s anti-PowerPoint tirade featured in Slate (March 7, 2014): PowerPointless . With the tagline, “Digital slideshows are the scourge of higher education,” Shuman reminds us that “A presentation, believe it or not, is the opening move of a conversation—not the entire conversation.”
Shuman offers a practical guide for those, like her, who do use presentation software, but seek to avoid abusing it. “It is with a few techniques and a little attention, possible to ensure that your presentations rest in the slim minority that are truly interactive and actually help your audience learn.” Speaking.io , the website Shuman references, discusses the use of presentation software broadly, not just for academics, but has many useful ideas and tips.
For a resource specific to academic use, see the University of Central Florida’s Faculty Center for Teaching & Learning’s Effective Use of PowerPoint . The experts at the Center examine the advantages and challenges of using presentation software in the classroom, suggest approaches to take, and discuss in detail using PowerPoint for case studies, with clickers, as worksheets, for online (think flipped classes as well) teaching, the of use presenter view, and demonstrate best practices for delivery and content construction.
Macie Hall, Senior Instructional Designer Center for Educational Resources
Image Source: CC Oliver Tacke https://www.flickr.com/photos/otacke/12635014673/
One thought on “ PowerPoint in the Classroom ”
This post offers a well-framed discussion of the pedagogical choices behind presentation choices we make in our classes–thanks!
Leave a Reply Cancel reply
Your email address will not be published. Required fields are marked *
- Online Games
- Online Courses
- Online Edu Jobs
- Media Releases
- Digital Marketing
- Content Marketing
More Trending News

Sharing is caring!
Are you a teacher looking for easy yet effective ways to spice up your classroom or tutorial presentations with free tools?
Or perhaps you are a teacher trainee or student in need of designing exciting presentations.
Most teaching staff, trainees, and students will have free access to Microsoft Office and Google but wonder how to use PowerPoint or Google Slides and which software offers easier, more effective, and useful functions to create engaging, interactive, and impressive classroom presentations.
In this guide, we will take you through the most asked questions about PowerPoint Presentations and Google Slides Presentations to help you work out which software is the best match for you to showcase your physical or virtual classroom presentations.
Editorial note: both programs offer cloud storage options, and you should always check your organization’s guidelines or policies regarding data protection before you add any personal or sensitive data in such documents that you may share via the internet.
A Glance at Microsoft PowerPoint & its Best Features
Many teaching staff and students may be unaware of the options PowerPoint provides. It includes features for word editing, painting, highlighting, charting, and session administration. It is a presentation (PPT)-based application that consists of slideshows with images, movies, and other elements that make a lecture more engaging and fascinating when used right.
So, here’s how to easily use the best features without spending hours on one presentation.
How To Use Microsoft Office PowerPoint?
PowerPoint presentations function similarly to slide shows. You divide a concept or a narrative into slides to express it. Consider each slide to be a blank piece of paper for the content that will help you convey your main lesson input.
1. Select a theme
- When you launch PowerPoint, you’ll see various pre-installed styles and layouts. A theme is a presentation layout with matching colours, typefaces, and visual effects like shadowing, ripples, and others – this can be overwhelming so just pick one that goes with your topic or subject, don’t overthink it!
- Select New from the File tab on the Ribbon, and afterward pick a theme.
- On the right side, PowerPoint displays a sample of the theme with four color variants to pick from.
- Click Create or select a colour variant before clicking Create.
For more information check out some Microsoft tutorials .
2. Add a Slide
- Select the bottom half of the new Slide on the Home tab, and then select a slide arrangement.
- If you’ve chosen a theme, it may give you different types of slides that you can add, duplicate, delete or change.
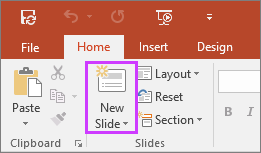
For more information head to: https://support.microsoft.com/en-us/office/add-rearrange-duplicate-and-delete-slides-in-powerpoint-e35a232d-3fd0-4ee1-abee-d7d4d6da92fc
3. Preserve your demonstration
- Choose Save from the File menu.
- Choose or navigate to a folder.
- Enter a title for your PowerPoint in the File username field, then click Save.
For more information check: https://support.microsoft.com/en-us/office/save-your-presentation-file-34377c9c-a1e5-44e1-9c3f-e6e72ee6c541
4. Add your text to your Slide
- Choose a text box and start to write.
- If you’ve chosen a theme you will already have text boxes available, but these can be edited, duplicated, or deleted.
5. Format the text
- Highlight the text.
- Select Format from the Drawing Tools menu.
- Displays the Drawing Tools options on the PowerPoint ribbon.
1. Choose one of the various choices:
- Select Text Fill and then colour to modify the colour of your text.
- To modify the colour of your text’s outline, select Text Outline and then a colour.
- To add a shadowing, reflecting, shine, curve, 3-D movement, or transformation, pick Text Effects and then the desired effect.
- If you use a theme the text formatting will already be set, but you can change it according to your needs.
For more information check:
- https://support.microsoft.com/en-us/office/change-the-fonts-in-a-presentation-0109d7b7-4f3e-4d0a-b8a8-2604f21e977f
- https://support.microsoft.com/en-us/office/change-the-color-of-text-on-a-slide-26773c77-daad-4ef2-bed9-bf7ab3eed348
- https://support.microsoft.com/en-us/office/add-bullets-or-numbers-to-text-a6f1b87e-fca8-47da-ade9-5d99b7f41f04
- https://support.microsoft.com/en-us/office/format-text-as-superscript-or-subscript-e989637a-12ec-4fe5-8b04-345342408abd
6. Add images to your Slide
- Choose one of the options on the Insert tab:
- To enter a photo from your local disc or an internal network, select Pictures, search for the image and then select Insert.
- To import a photo from the internet, select Online Pictures and browse for an image in the search field.
- Choose a photo and then press the Insert button.
7. Shapes and Icons added to your Slide
- Shapes or icons may be used to show your slider.
- Choose Shapes or icons from the Insert tab, and then choose a design from the list that opens.
- To design the design, press and move on the slide area.
- On the ribbon, click the Format or Shape Format option. To rapidly apply colour and design (including shade) to the selected shape, visit the Shape Styles library.
8. Include speaker notes
- Slides work best when you don’t jam too much-written content into them. You may include user data and short notes in your speaker notes and resort to them while you talk.
- To access the notes pane, select the notes icon in PowerPoint at the bottom of the window.
- Begin entering your notes in the Notes window underneath the slide by clicking inside it.
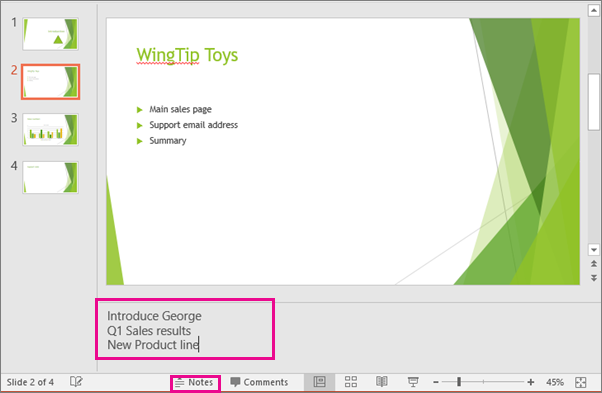
- https://support.microsoft.com/en-us/office/add-speaker-notes-to-your-slides-26985155-35f5-45ba-812b-e1bd3c48928e
- https://support.microsoft.com/en-us/office/print-slides-with-or-without-speaker-notes-02952fc2-2921-4305-b8b2-e98644a93e06
9. Deliver your speech in your Presentation
- Choose one of the options on the Slide Show tab:
- To commence the session from the first slide, click From Beginning in the Start Slide Show group.
- Displays the Slide Show tab on the PowerPoint ribbon.
- If you aren’t on the first slide and wish to begin where you are, click From Current Slide.
- If you need to show to those who are not available, click Present Online to create an online session, and then select one of the following scenarios:
- Send your PowerPoint presentation to a remote audience through the internet.
- While delivering your slide show, refer to your speaker notes.
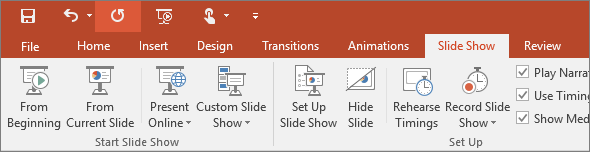
10. How To Embed A Video/YouTube Video In PowerPoint?
Embed a video in powerpoint.
- Navigate to the page where you wish to insert the material in PowerPoint.
- Select the Insert tab on the toolbar menu, then Video, and finally Online Video.
- The Insert Video dialogue box is shown.
- Paste the embed code into the From a Video Embed Code box and hit Enter.
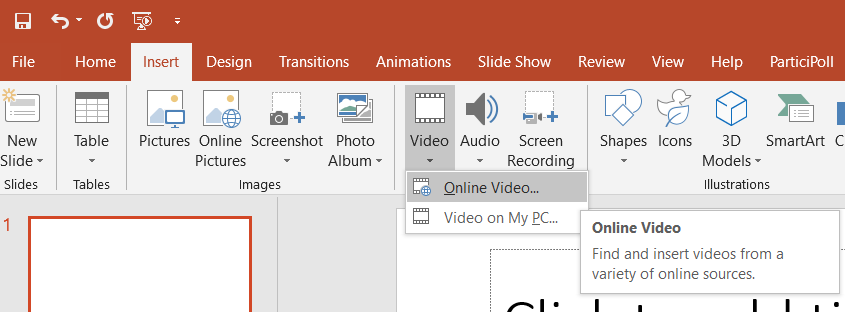
For more information check: https://www.youtube.com/watch?v=Wq2Lz2kANzU
Secret Classroom Presentation Hack
For a classroom presentation, if you embed a video relating to the topic you were teaching, it will be more illustrious. For example, if a history lesson on the Harappan civilization is being taught, a video showing the ruins would make the lecture more interesting and memorable. If you have footage of museum visits with your own commentary that would give your lesson a more personal insider touch.
11. How To Add Music To PowerPoint?
The below-mentioned steps can be used to see how to add music to PowerPoint:
- Choose Audio, then Audio on My PC, from the Insert tab.
- Navigate to the particular song or audio file you wish to utilize in the File menu, then pick Insert.
- Select Play in Background on the Playback tab when the sound icon is chosen on the slide.
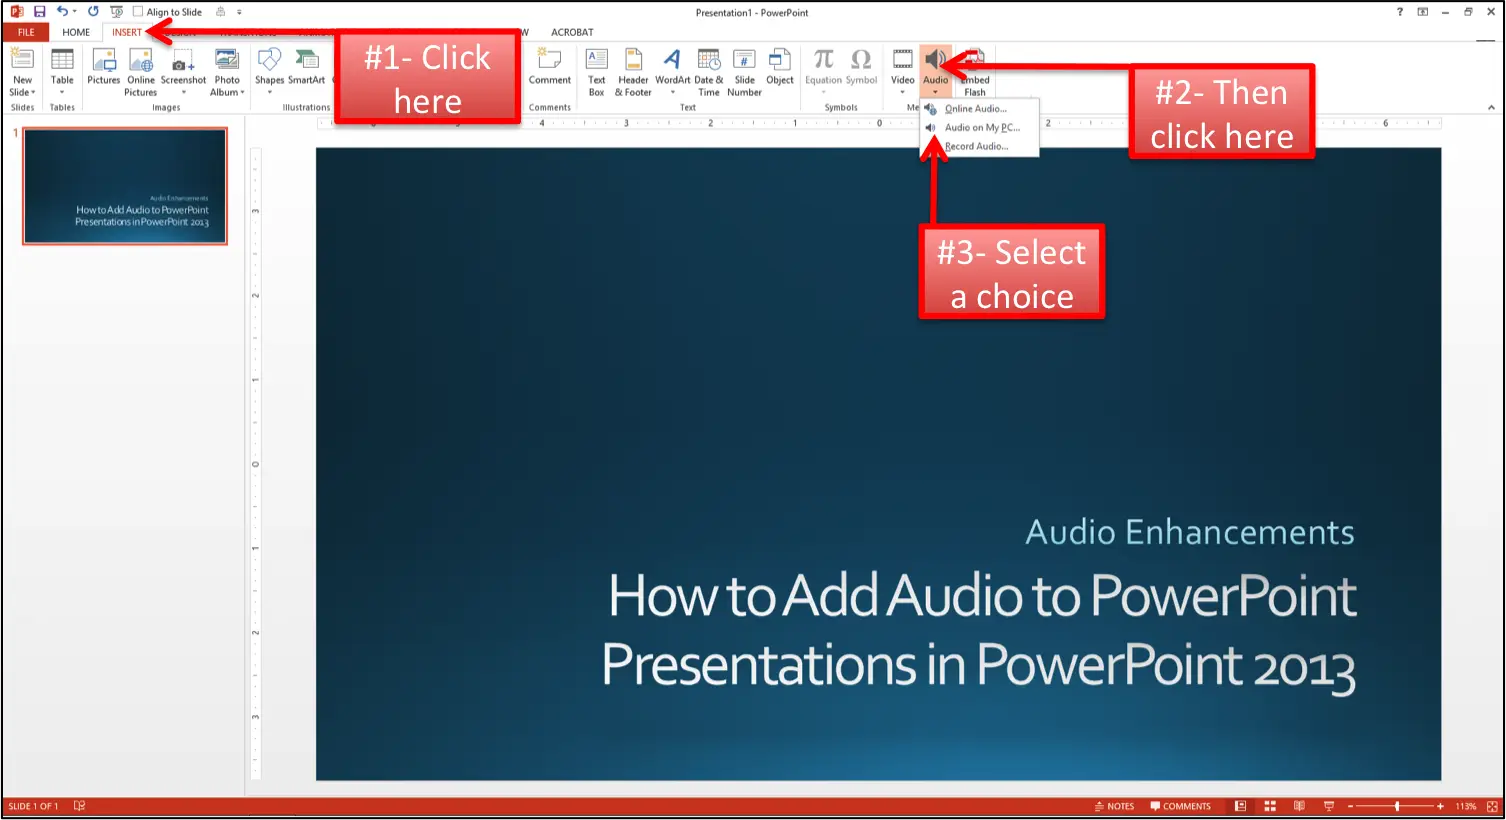
For more information check: https://www.youtube.com/watch?v=tBiwTRLVOd0
Secret Classroom Presentation Hack
We all know how boring and monotonous classes can be at times. So, why not add a bit of the kid’s favourite tunes or movie soundtracks to break out of the monotony and give them a break?
12. How To Delete A Slide In PowerPoint?
Below are the steps on how to delete a slide in PowerPoint:
- Choose your slide.
- You can remove one or more slideshows at the same time:
- Delete a single slide by right-clicking and selecting Delete Slide.
- Hold Ctrl and choose the slideshows you want, now right-click and locate Delete Slide
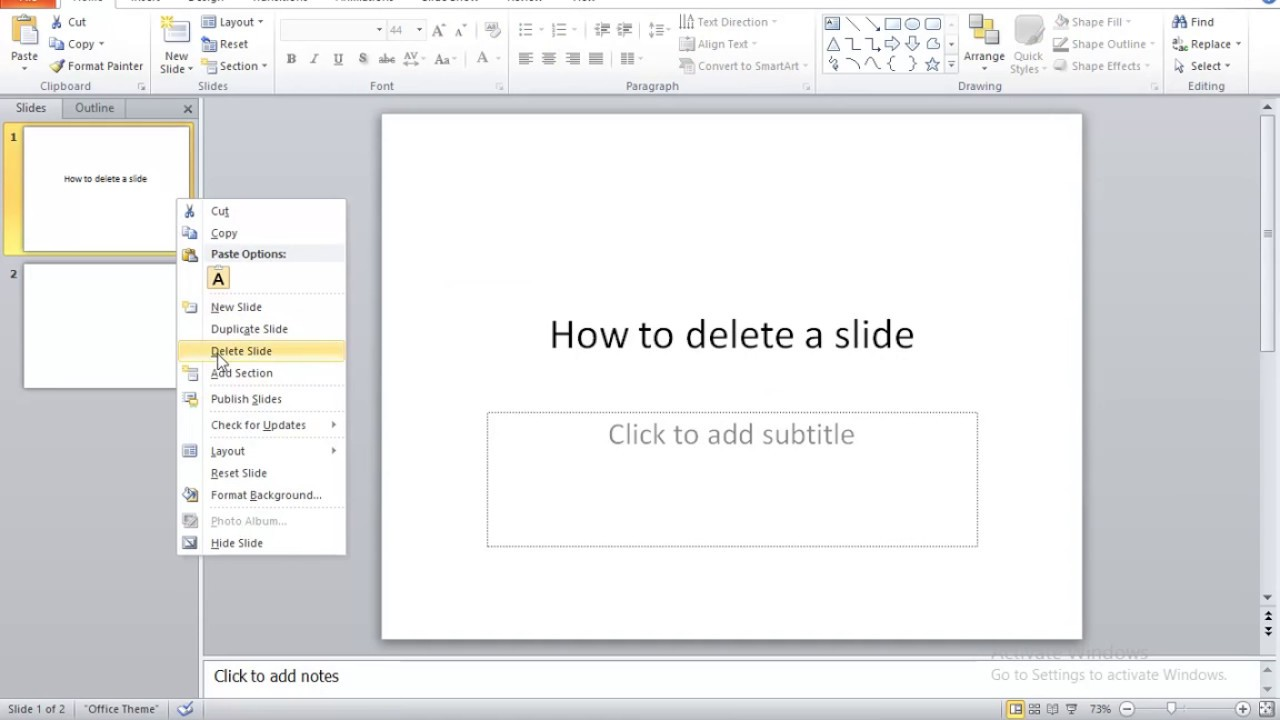
For more information check: https://www.youtube.com/watch?v=v4uTj62d7sA
If by any chance, you insert or create a slide not favourable for a classroom presentation, you won’t have to worry anymore. Just simply delete it with one click. This also keeps your presentation flexible and you can easily add or remove slides as you go along.
13. How To Insert A GIF Into PowerPoint?
You can insert an animated GIF (or cartoon) into a PowerPoint presentation in the same way that you would any other photo file. You may enter a GIF file from your computer’s storage disk or Dropbox. Follow the below steps to know how to insert gif into PowerPoint.
- Choose the slide on which you wish to attach the dynamic GIF.
- Select Picture > Picture from File on the Home tab of the menu.
- Browse to the folder of the moving GIF you wish to include, make sure the data file ends in.gif, pick the image, and afterward, PowerPoint choose Insert.
For more information check: https://www.youtube.com/watch?v=Q84D5PDiUfQ
Secret Classroom Presentation Hack
GIFs can be cute and fun to look at. So, why not add relevant GIFs in certain slides to make the class enraptured by the whole lecture? Visual learners will greatly benefit from such content.
14. How To Convert PowerPoint To Google Slides?
Google Drive has transformed group collaboration by offering tools that allow numerous individuals to create and modify documents at the same time. When working alone, though, many people still choose to utilize the Microsoft suite of applications.
This might be an issue if you use Microsoft PowerPoint to produce a presentation when you want to distribute it to colleagues for comments or adjustments. Below we have mentioned complete steps on how to convert PowerPoint slides to Google slides.
By importing a PowerPoint document, you may convert it to Google Slides.
- Launch Google Drive.
- In the top left-hand corner of the screen, click “New.”
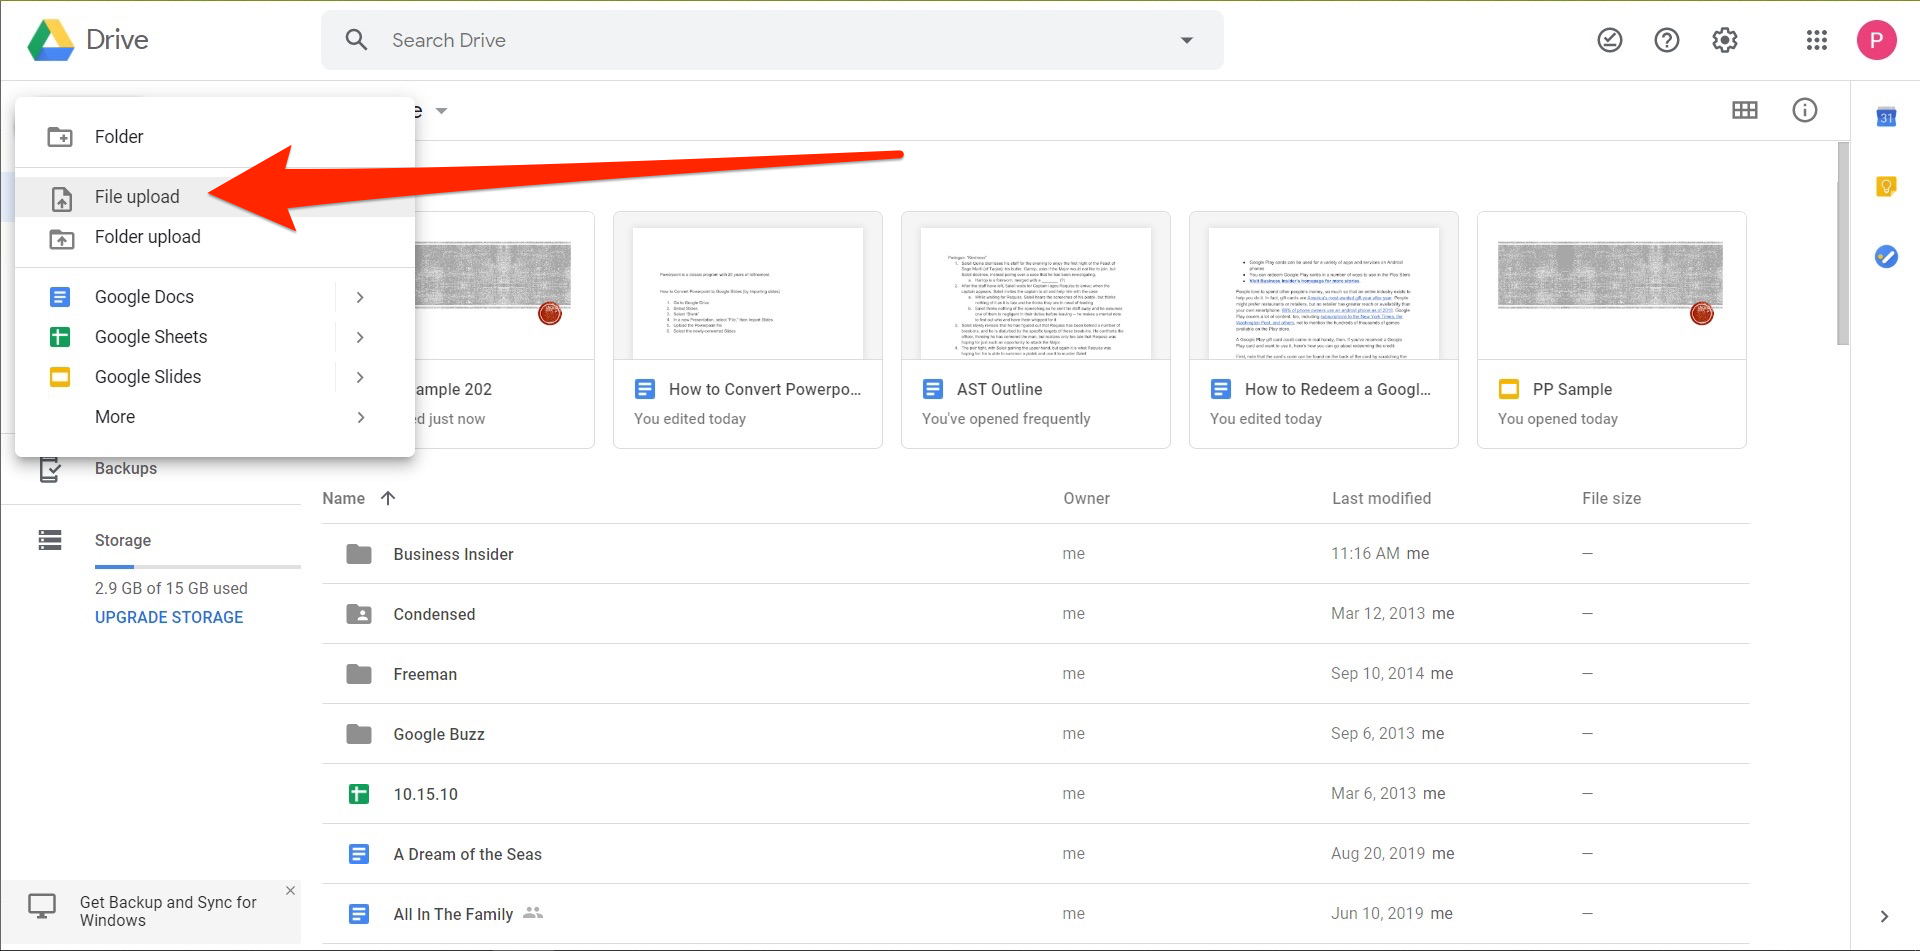
- Choose the PowerPoint document you want to use.
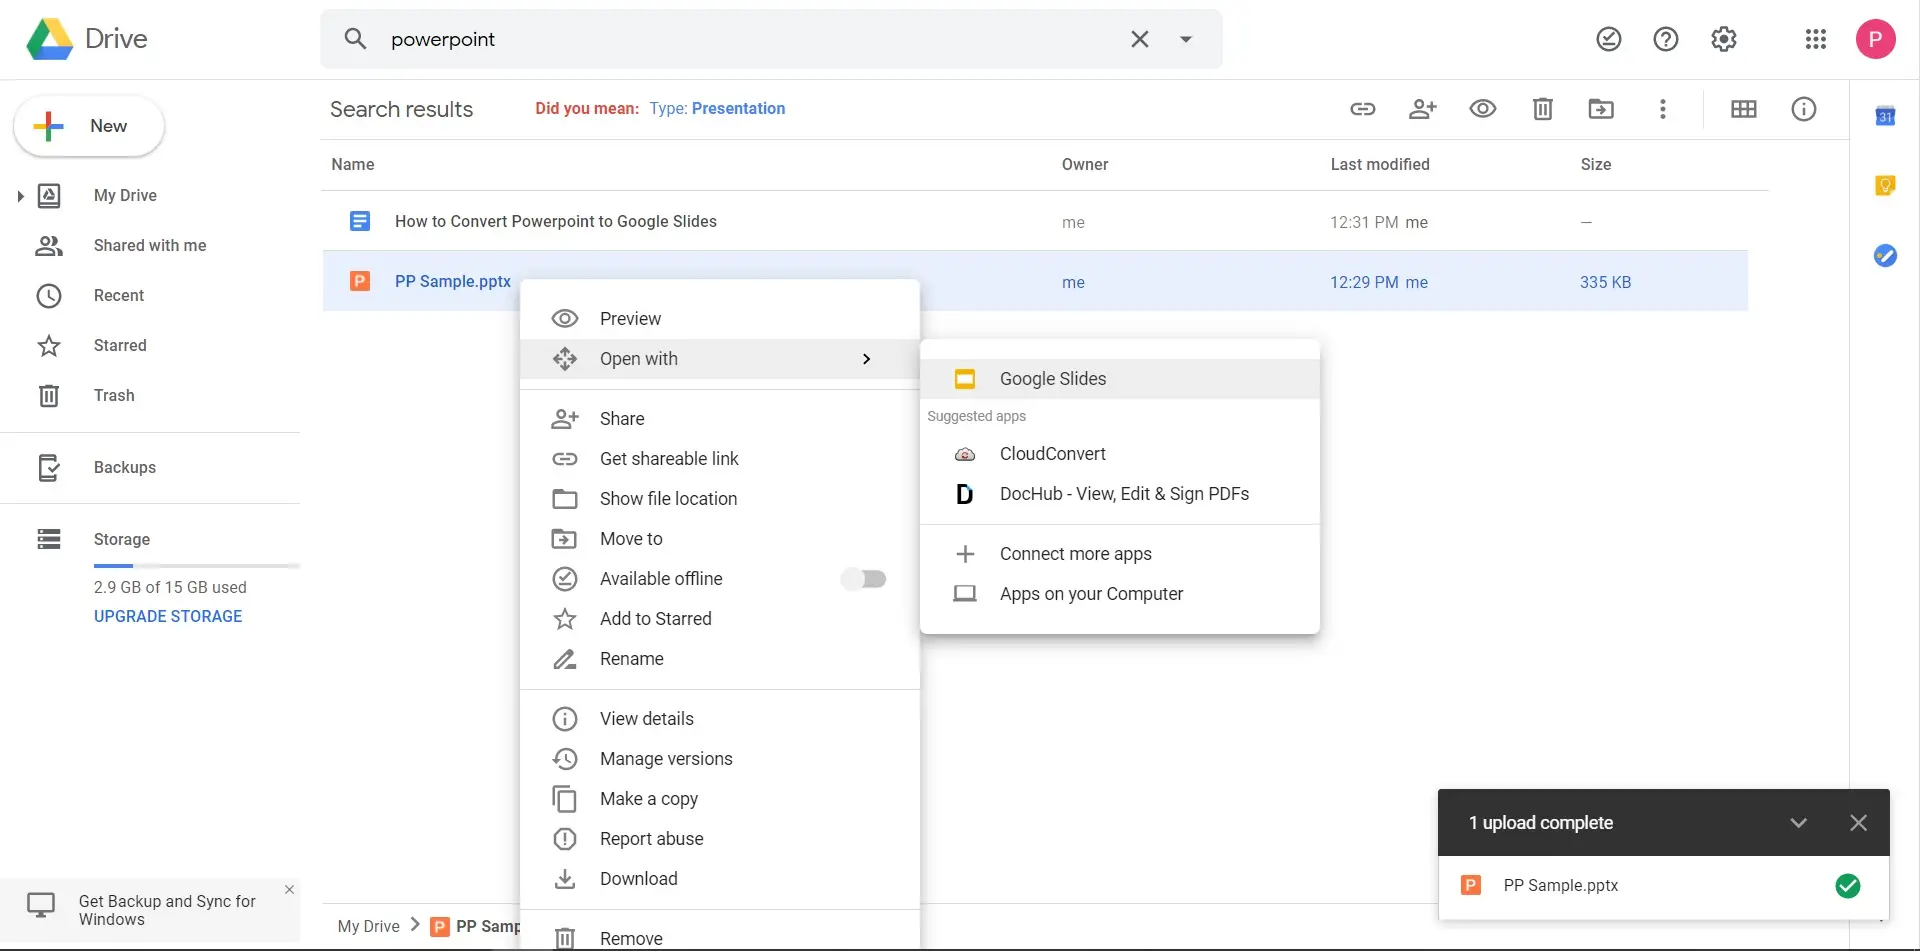
- Click the “File” button.
- Click the “Save as Google Slides” button.
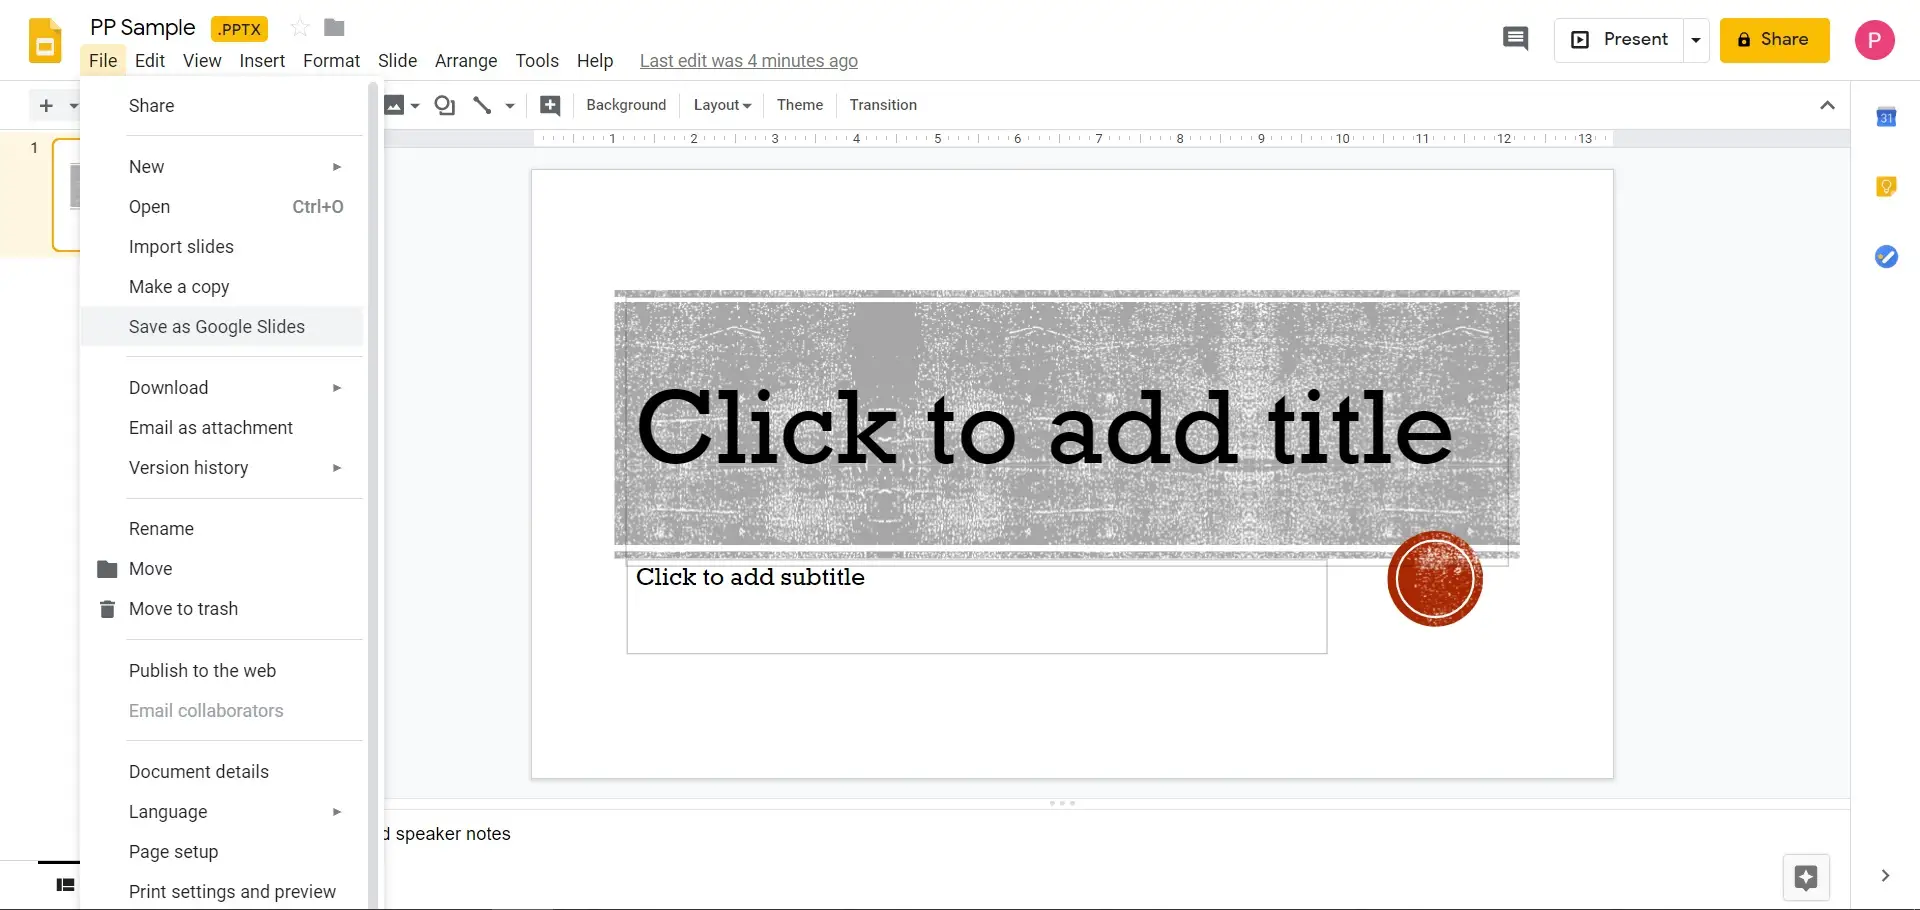
There is another way:
Importing PowerPoint slides into Google Slides to transform a PowerPoint to Google Slides
- Navigate to Google Drive.
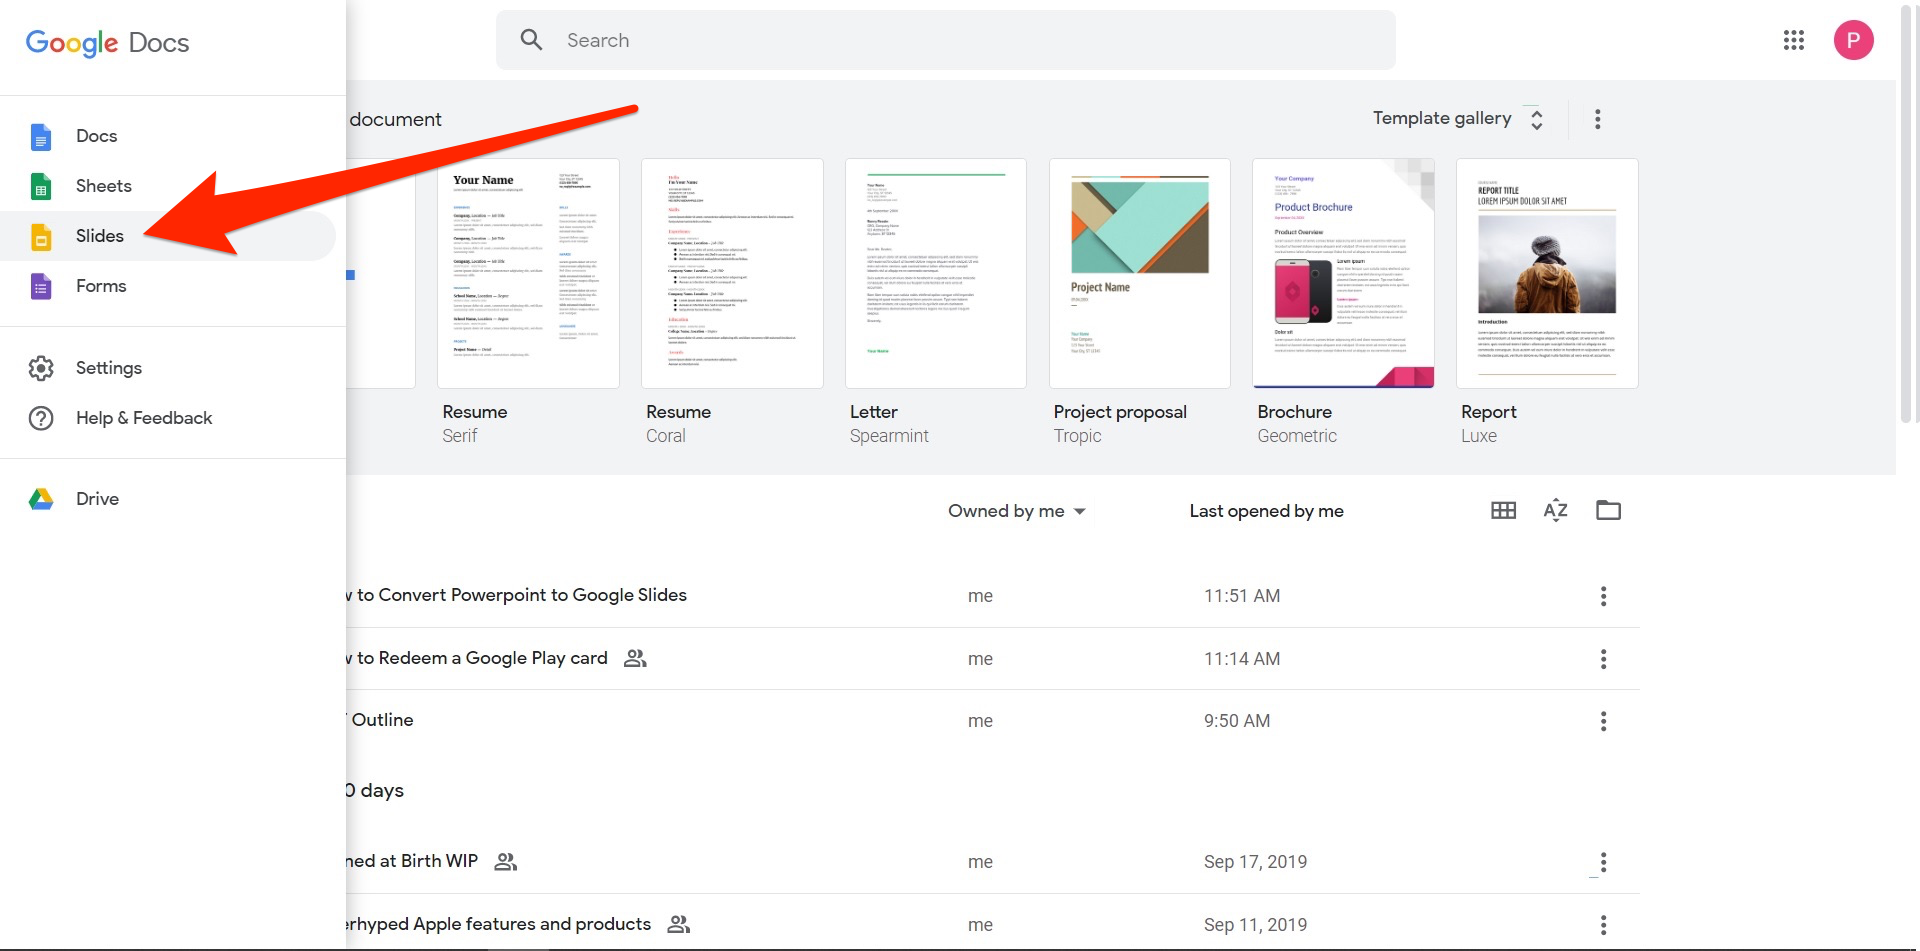
- Save the PowerPoint file to your computer.
- Go to the recently converted Slides folder.
A Glance At Google Slides & its Best Features
Google Slides is an excellent tool for generating professional presentations that can be easily shared.
Even if you understand the fundamentals of Google Slides, you could be unaware of all its capabilities.
There are some fantastic strategies you can utilize to conserve energy and create an even larger impression with your Google Slides demonstration, but you can’t utilize those if you don’t understand what they are.
How To Use Google Slides?
1. begin using google slides.
Google Slides is the company’s premier presentation program, and it is available on the web as a component of Google Drive. Consider Slides to be the presenting tool for Google Docs and Google Forms . It’s absolutely free to use—the only requirement is that you have a Google account.
2. Create a new presentation
Go to Google Drive after you’ve logged into your Google Account. Create a Google PowerPoint by going to File > New > Google Slides > Blank Presentation. You’ll be sent to a different page with an empty presentation.
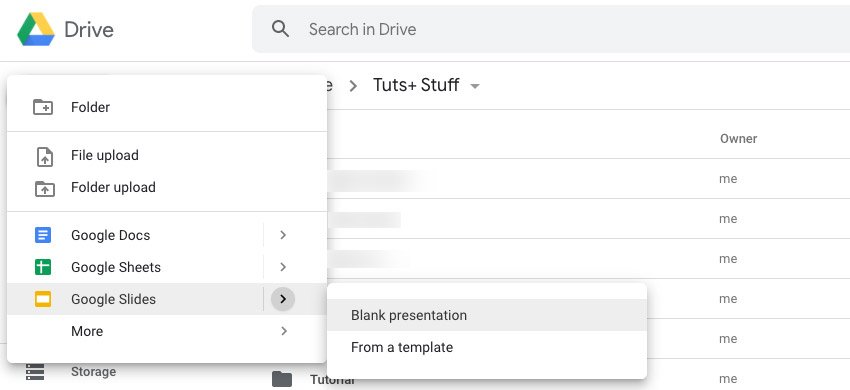
For more information check: https://cms-assets.tutsplus.com/cdn-cgi/image/width=850/uploads/users/151/posts/35331/image/new-google-slides-blank-presentation.jpg
3. Adding Title and Subtitle
- Click wherever it says to add title and write in the name of the Google slideshow to add a title. You may also provide a caption or leave it empty.
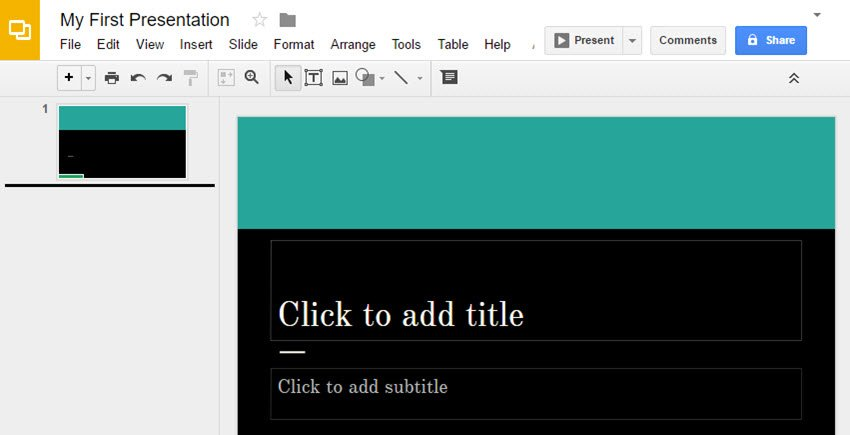
4. Adding More Slides and working on them
- Once you’re satisfied with the design of the title slide, you may proceed with the rest of your show. Click the Plus button in the upper left corner of the screen to add new slides. This will build a new slideshow with a Title and Body arrangement.
- Click More to show additional text possibilities, then select the body checkbox to display more text options. This enables you to make a bulleted list.
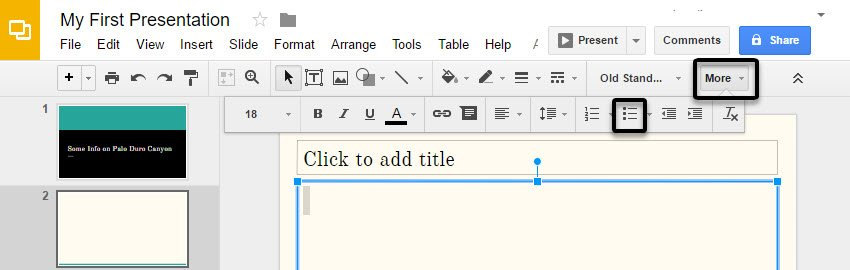
5. Uploading Pictures to Slides
- There are various methods for including photos in your presentation. Upload a picture from your computer, Google+ account, or Google Drive. Use a webcam to take a photograph. Alternatively, use the Insert picture window to search Google or stock photographs.
6. Adjusting Motions and Transitions in Slides
- Click the Transition button to add a segue. An Animations sidebar will emerge, and you can then adjust the motions in your Google presentation from there.
- The Slide submenu controls the animations that occur between slides. There are six different ways to transition. Select an option from the drop-down list.
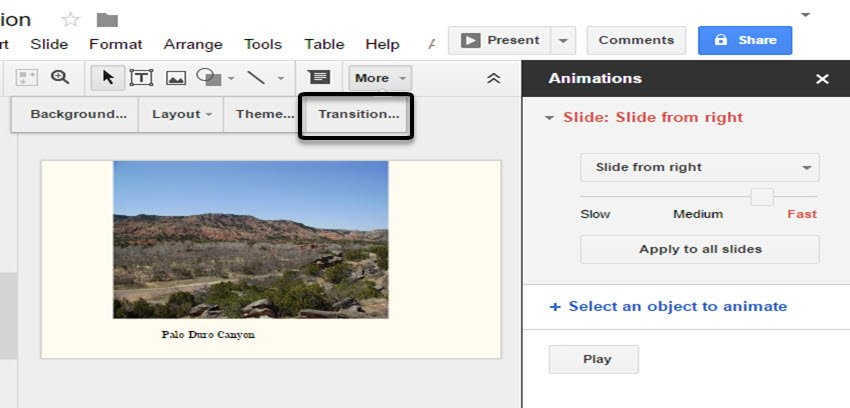
7. Slide Presentation
- After you’ve done the lecture, select the Present icon to show off your skills.
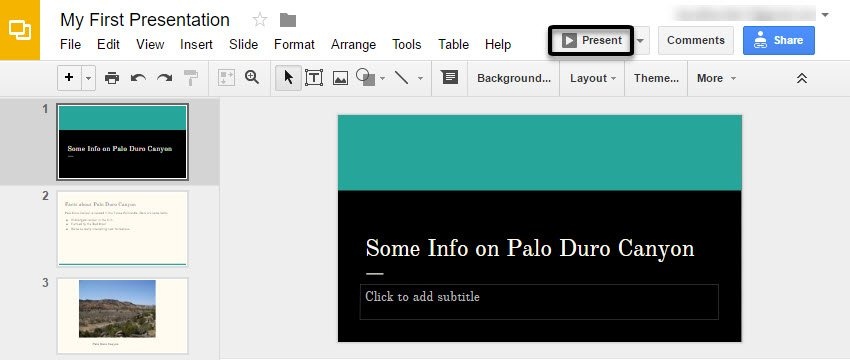
8. How To Add Audio To Google Slides?
Below are steps to be followed to know how to add audio to Google slides:
- At the top, select the “Insert” tab.
- Inside this “Insert” drop-down menu, choose “Audio.”
- Locate the audio track you wish to put in your Google Drive.
- The playback bar allows users to play, stop, and go forward.
- You may modify your soundtrack on the left side.
For more information check: https://www.youtube.com/watch?v=7HgPaeCVViA
This is a great tool to use if a teacher feels sick or is on leave. All they must do is record their audio and give the presentation to someone else to be played on the specified dates.
9. How To Embed A Video/YouTube Video In Google Slides?
Embedding A Video In Google Slide:
- Pick the Video alternative from the dropdown menu by clicking the Insert tab. Insider/Abbey White
- Choose which YouTube clip you want to include in your Google Slides demonstration.
- Copy and paste the URL of the desired YouTube video into the text field.
- Choose the video from your Drive that you wish to publish to Google Slides.

For more information head to Google .
It will be more engaging for a classroom presentation if you incorporate a video related to the topic you are presenting or even one of a recent class trip related to the topic. Videos might enhance the discussion and participation among students, and they can even add their own videos from a school project to expand the presentation.
10. How To Add Music To Google Slides?
- Google Slides does not allow you to attach audio files to slideshows, but it does allow you to upload videos.
- You may play the music by immediately adding a YouTube video to your show and using the video player performance settings.
- The video will play until you advance to the next page.
11. How To Delete A Slide In Google Slides?
- Open a Google Slides slideshow on your PC.
- Select the slide you wish to erase on the left. If you wish to remove multiple slides, hold down the Shift button and click them at the same time.
- On your keypad, click Delete or Backspace.
12. How To Insert A GIF Into Google Slides?
- Choose “Insert,” then “Image,” then lastly “By URL” from the top toolbar. First, choose “Insert” from the menu bar.
- Copy and paste the URL into the field. Insert the URL of your GIF here.
- When the GIF appears, click “Insert.” Select “Insert” from the drop-down menu.
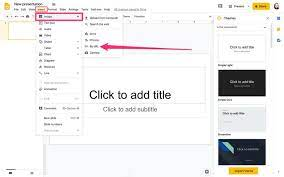
For more information check: https://www.youtube.com/watch?v=V0NzmFTyz8U
Google Slides or PowerPoint – have you decided?
Hopefully, our extensive guide on how teaching staff, tutors, or students can create the best (virtual) classroom presentations with Google Slides and PowerPoint has provided some valuable insights. With the advent of ongoing online classes and eLearning as well as online teaching and tutoring , these presentations have become crucial for all educators and learners.
If you are a teacher, lecturer, or tutor, you can be assured that your students are going to pay the utmost attention to such a visually engaging class presentation with either program as both offer various useful features. And, if you are a student, you can be certain that you are going to impress your teachers and classmates with these presentation ideas and obtain the highest grades.
Author Profile

Latest entries
Author Archives

- create classroom presentations in google slides
- create classroom presentations in powerpoint
- guide to google slides in classroom
- how to use powerpoint in google classroom
- powerpoint tutorial
UK Education Blog

The UK Education Blog provides regular news and insights into education, EdTech, eLearning, teaching and everything education professionals, parents and carers looking after children and students would want to know.
Navigating Mobile Bingo Gaming With Confidence
Top education conferences & egaming events to attend in 2024, the most played & top-rated egames & their best egaming features players love, distance learning, 4 best online courses for business students, 6 best saxophone online courses to help you learn to play saxophone like a pro, how edtech and the internet has made education more accessible, popular categories.
- learning 59
- student life 47
- Online Education 30
- Teaching 29
- education 27
- Media Releases 27
- schooling 23
- graduate 15
- online games 15
- Press Releases 14
© UK Education Blog
- Content Publishing Policy
- Content Copyright
- Privacy Policy
[mc4wp_form id=”872″]
12 Interactive PowerPoint Activities Your Students will Love

At Slides with Friends, we're all about trying to make your life as a teacher a little bit easier. We want to provide as many tools, tips, and as much support as possible. That's why we share on topics like Review Games , Student Wellness Activities , and Tools for Measuring Student Engagement .
While we usually focus on how you can use Slides with Friends specifically, we want to bring you something a little different this time. We've compiled 12 of our favorite interactive PowerPoint activities you can use with your students. All of the activities are designed to engage your students in ways they'll love. Even better, these activities let you use a tool you're probably already familiar with.
And read to the end for an exciting new announcement!
Annotated Images
Annotated images let you teach history (or literature! or geography!) using detailed annotated images from your latest lesson. We're big fans of using visuals in the classroom. And with good reason! A study released by the Journal of Education and Practice found visual information is mapped better in students' minds across multiple types of thinking skills. By introducing more visuals to a lesson plan, and using tools like PowerPoint, lessons are more likely to be remembered.

You can introduce annotated images on PowerPoint by picking out relevant images and adding captions or labels to them and presenting them as you teach. You can add descriptions, draw arrows, or points of interest on the image.
Check out this fun example from Ditch That Textbook .

Even better, provide a few unique images of the lesson you just presented and have the students create their own annotations. Then, as a class, have each student present their image in PowerPoint.
Photos as Story Prompts
More visual learning! Using photos as storytelling prompts can be a great way to spark your student's creativity! PowerPoint is an ideal platform to display the photos, as it provides you the flexibility and versatility to show one photo at a time in case you want the students to focus exclusively on that image.
Simply ask them to write a story based on the photo in 1-3 sentences, and compare answers afterward. Encouraging different interpretations of a single image also helps foster critical thinking skills and encourages students to use their own perspectives when expressing their ideas.
Interactive Maps
Interactive maps are a fantastic way for students to learn about their world without leaving the classroom! And one of the easiest ways to show off these maps is through PowerPoint. Plus, PowerPoint makes adding hyperlinks to specific places (like pins), so you can click through areas of interest without having to open up a separate browser page.
If you're looking for a simple tutorial on how to create a lesson-based interactive map, check out this one from eLearning Industry . For more exploratory maps, check out the tutorial below (which includes the free template!).
Battleship Review Game
We love a good game here at Slides with Friends, so it shouldn't be a surprise to see so many options on this list. However, before doing research for this article, we had no idea Battleship could be played on PowerPoint!
In the template below, you can add words and to reveal the space beneath the words, students have to:
- Conjugate the Verb
- Use the Word in a Sentence
- Define the Word
Or one of any fun combinations.
We love this idea for language classes especially, but can also be used for vocabulary in any subject.
You can check out the whole presentation here.
Crossword Puzzle
Crossword puzzles are a timeless and popular way of testing knowledge and keeping minds alert. They can be used in the classroom to reinforce concepts and skills related to any subject, making them a great teaching tool. Crosswords can help students learn new vocabulary words, polish their grammar, understand history or science topics better, or firm up mathematics concepts.
And an easy way to do a crossword in the classroom is by using PowerPoint. You simply need to create a blank and a filled puzzle on PowerPoint and then fill it out with your class.
Check out this step-by-step guide on the best way to quickly create a crossword puzzle in PowerPoint.
Tests and quizzes are absolutely no fun, so if you can find an easy way to quiz your students in a fun way, that's a win-win! One of our favorite ways to do this is by creating a quiz show on PowerPoint.
By using those hyperlinks we mentioned above, you can easily create your own questions, assign point values, and include sound effects (or music!) to make your students feel like they're actually in a game show!
This 6 Steps to Create a Multiple Choice Quiz is a great way to start designing your next PowerPoint quiz. If you're looking for multiple ways to create a quiz show for your students, check out the detailed tutorial below .
Video Gallery
We've talked quite a bit about visuals here, not just because PowerPoint is a great tool for visuals, but because visuals are so extremely helpful in the classroom.
One way to incorporate visual activities into your classes with PowerPoint is by creating video galleries. This is especially useful if you have limited access to videos and need to play them in a certain order.
You can create a video gallery presentation by manually inserting the clips into slides or creating a series of hyperlinks to take the class through certain processes. You can also add captions, notes, and questions for further discussion.
Scavenger Hunt
A fun activity to incorporate in your classroom through the power of PowerPoint is a review scavenger hunt.
Scavenger hunts can be an engaging way to go over the material and test knowledge at the beginning or end of a unit. PowerPoint is a great tool to use when designing a scavenger hunt if you are working with students online. With the tool, you can hide clues in images, ask questions that are linked to hyperlinks, and even add video clips as hints.
Scavenger hunts also offer quite a bit of versatility in the classroom. You can have students work individually or in groups, depending on your goals for the lesson.
You can reference our Virtual Scavenger Hunt guide, which includes several hunt lists, for ideas on what to bring to your students.
Choose Your Own Adventure
PowerPoint slides can also be used to create engaging interactive experiences. PowerPoint's slide-linking feature allows you to jump between slides with the click of a button, providing users with their own “Choose Your Own Adventure”-style gaming experience. As a result, you can create an interactive story with a different ending each and every time.
While this activity will take quite a bit of upfront work, once you have it done, you can use it for countless classes.
We highly recommend this tutorial by The Training Lady on how to plan out your next PowerPoint adventure!

Picture Reveal
Picture Reveal is a great PowerPoint activity that encourages students to think critically. In this activity, you can present an obscured picture and provides clues as to what it could be. Students must then utilize their knowledge and logic skills to work out what the picture is by eliminating incorrect answers based on the clues provided until they eventually get the correct answer.
Picture reveals are a great way to review material from previous lessons or current topics. They can also act as an introduction to a new lesson. Plus, we can't stress this enough, visuals!
Word Search
Word search games are a great way to review vocabulary and help students learn new words. Using PowerPoint, you can create custom word searches by entering the target vocabulary words in a grid. Then draw lines connecting each letter to form words! You can even add visuals that correspond with the theme of your word search for an extra challenge.
Word search games are perfect for when you have some leftover time during class or if you want to review material from earlier units. A PowerPoint word search is also great for helping students recognize spelling patterns in unfamiliar words and promoting active learning as they look for the hidden words in the puzzle.
Student Presentation

One of the best ways to get your students engaged in the classroom is to have them lead the show. And PowerPoint is such an awesome tool for students to present their own material.
With a little guidance, you can have older students create mini-presentations about topics they've studied in class or even on their own. Not only will this allow you to assess what they've retained from studying, but it also allows your students to practice public speaking skills and become more comfortable with online presentations - essential in today's digital world!
With PowerPoint, you can easily turn any student project into an engaging presentation everyone will enjoy.
Use Slides with Friends for Your PowerPoint Activities
PowerPoint has been a vital tool in the teacher toolbox for decades. There are so many fantastic ways to use PowerPoint to engage and interact with your classroom.
Slides with Friends is excited to announce a new feature for our slide decks - A PowerPoint upload!
Now you can create your slides in an already-known program, or use slide shows you've already made, and with a click of a button upload them to Slides with Friends!

Slides with Friends brings classroom PowerPoint activities to the next level by enabling real-time collaborative engagement from all of your students. By combining your PowerPoint presentations with Slides with Friends live word clouds, polling, trivia, and quizzes, as well as photo sharing, you really can fully involve your students in every lesson.
Subscribe for more articles like this
Try slides with friends for free.
The easiest way to host meetings your team will love
Engagement delivered to your inbox
We'll email you 1-2x per month with brand new, ready-to-run events and ideas. Subscribe to stay ahead of the curve and keep your lessons, meetings, and events fresh and engaging.
Create Dream Explore
Educational Resources for Educators
How to Use Google Slides in the Classroom

With the success of my post about how to use google forms in the classroom I thought I would create a post for how to use Google Slides in the classroom. Google Slides is probably one of the most used Google tools in my classroom. I use Google Slides and Google Forms daily. Google Forms is used every day for my digital math warm-ups (they are self-grading and save me so much time).
Google Slides I use for various things like our digital readers notebooks and for almost all of my science and social studies. For science and social studies I created hyperlinked slides that allow my students to be self paced and independent while learning the content knowledge that they need in oder to complete a research project or other hands on activities.
Read on for some awesome ideas!
There are a great many ways for students to use Google Slides in the classroom. This is the list of my favorite ways.
Top 15+ Ways to Use Google Slides in the Classroom:


The form you have selected does not exist.

[…] can also check out this post for how to use Google Slides in the classroom and this post for how to use Google Forms in the […]
[…] might be interested in my post on how to use Google Slides in the classroom or how to use Google Forms in the […]
[…] If you’re looking for more ways to be physically distanced in the classroom using Google Slides then check out this post. […]
- Latest on the Blog
- Privacy Policy and Disclosure
create_dream_explore

- Our Mission
Using Collaborative Slide Decks to Promote Engagement
With a little bit of prep, teachers can set up a digital version of the popular gallery walk to foster collaboration in the classroom.

It can feel challenging to know how to transition into collaborative work in a meaningful way during instruction—a way that allows each student to share their ideas with peers, which we know is a critical skill.
There are many ways to approach this instructional goal , but perhaps the most successful strategy I’ve stumbled upon this year is that of collaborative slide deck competitions. Though they do require some prep work, the in-class experience and student learning that they yield has made them one of my favorite routines in the classroom.
Collaborative Slide Decks
It’s common for teachers, after students do an individual exploration (example: reading a short text and marking it up for keywords or questions), to ask them to form groups and compile their thinking on poster paper, which they share with classmates through a gallery walk.
While I know this activity works great for many, this year I’ve found a different path: I ask students to create a collaborative Google Slides deck, each group taking ownership over their slide. Unlike posters that eventually pile up and get recycled, collaborative slide decks become living documents to use in the classroom.
Teacher Prep Work
To prepare for this activity, I look at the different outputs I’m hoping students will produce and pre-populate a slide deck with relevant prompts for each.
I always include a sample slide that is fully completed (using a different text or situation); I also ensure that there are enough blank slides for each group and that the “share” settings allow everyone to both access and edit the document.
Pre-Activity Work for Students
Giving students time to invest in their individual findings and interpretations before group work is key.
When teaching a poem, for example, I have all students read it individually and make initial annotations. They then have tangible ideas to share with each other. It’s helpful to share the outputs you want students to be working toward, whether a specific type of annotation (example: Marisa Thompson’s TQE Method ) or guiding questions you’ve shared with the class. It’s important to ensure that students are independently heading in a shared direction.
Finally, I recommend walking students through a sample slide deck before they begin their independent work. This allows them to see what they will work on as a group and will help to make their independent work feel purposeful.
Transitioning Into the Activity
When everyone has done their independent work and you’re ready to transition into the group stage, make sure that each group knows which slide they own. I have one member from each team add their group name to the slide.
At this point, I’ve found it important to have students close their computers and share individual findings with each other before beginning the digital activity. If you skip this stage, groups can fall into the trap of having a handful of members type up what they found individually—and you miss the important opportunity to give each student a chance to voice aloud their findings and questions.
I have students take roles in their group: Only one or two take the role of the recorders. Others can support them in completing the slide (editors); make sure that all voices are represented on the slide (advocates); and get support from me while keeping an eye on the time (logistics). I give students 10–15 minutes to complete the slide, sharing a running clock on the screen.
For you as the teacher, this is a great time to circle the room and observe group dynamics. You can also monitor the digital slides to see each group’s progress unfold.
Classroom Applications
This year, I’ve used collaborative slide decks in my English classes for three activities.
TQE close-reading with a new text: When reading a short story or article, I ask students to annotate with their own thoughts and questions. As a group, they then determine the most meaningful and arrive at collective epiphanies or deeper understandings, which they share on their slide.
Mini-background research: When starting a new novel, I create slides for different pieces of historical context that will help students understand the text. Students try to learn as much as they can individually, within a given time window, then work collaboratively to share and cross-check what they’ve found, presenting findings via a collaborative slide deck.
Targeted skill analysis: My students applied and discussed poetry analysis skills (e.g., connotation, shifts, analogies, etc.) by independently identifying them in a text, then collaborating to share their findings via slides while discussing different interpretations or findings and deliberating about how to come to consensus.
Post-Activity Engagement
Once the activity timer is up, I lock access to the slide deck so that students can only view it. I then have students dive into other groups’ slides. One way to do so is through a stationary gallery walk: They explore the others’ slides and make notes on what they feel is most interesting or important, then share with the class what they learned from peers’ works.
You can also have students vote anonymously via a Google Form about which slide is most impressive to them and why, which creates space for you to collect peer affirmations focused on learning. I like to then go through each slide as a class and celebrate a specific finding or choice that students made.
Collaborative slide decks become excellent resources to support further learning—a tool to come back to later in the unit to track growth. They also help absent students to access the day’s learning.
Sometimes it feels like collaborative learning is an either-or experience: You can lean into the collaboration or instead prioritize the learning.
This is a false choice, I believe, and I’ve found this activity to be one of the most reliable ways to do both. It breaks up the classroom routine, gets students working with a collective purpose, and lends a helpful document to use in your classroom going forward.
Number of items in cart: 0
- Your cart is empty.
- Total: $0.00
What Are the Key Benefits of Using PowerPoint in Teaching and Learning?

Table of Contents
The Importance of PowerPoint Presentation in Teaching
An education-based PowerPoint presentation templates have become an integral part of teaching in today’s classrooms. They provide educators with a versatile tool for delivering engaging and interactive lessons. PPT presentations also offer numerous benefits for students, including the ability to improve concentration and comprehension levels.
Additionally, by using PowerPoint slides in conjunction with other instructional materials, such as textbooks and handouts, teachers can ensure that all students are able to access the information being presented in class. PowerPoint presentations can be a powerful tool for teaching and learning when used effectively.
The main reason behind this is that PowerPoint presentations enable you to interact with your audience psychologically. So, here we’re going to discuss the power of PowerPoint in education.
In most cases, presentations are designed for businesses and applied very commonly in business areas. Moreover, presentation slides are likewise used in the education sector and can make your educational or research content compelling.
Let’s get started. Scroll now to read the key benefits of using PowerPoint in teaching and learning .
Why PowerPoint Templates Are the Best Tool for Teaching?

PowerPoint templates are an excellent tool for teaching. They provide a consistent and professional look to your presentations and help keep your ideas organized. Presentation templates also make updating and changing your slides easy, so you can always keep your presentations fresh and up-to-date.
When teaching a subject like biology, getting your audience interested in what you have to say is essential. PowerPoint templates can help you set the tone for your presentation and reinforce the type of content you will discuss. There are various templates out there, so you can find one that will let you teach your subject efficiently and keep things neat and organized.
In addition, PPT slides can be easily shared with other teachers so that you can collaborate on projects and assignments. Overall, PowerPoint templates are a versatile and valuable tool for any teacher. With their help, you can create engaging and informative presentations to help your students learn and succeed.
How PowerPoint Templates Let You Engage Your Students or Audience?

At present, it’s more important than ever to be able to engage your audience. Whether you’re giving a PPT presentation to a group of students or speaking to a potential client, you need to be able to capture their attention and keep them engaged.
One way to do this is by using PowerPoint templates. With templates, you can create visually appealing and informative presentations. By using engaging visuals and helpful content, you can ensure that your audience stays interested in what you’re saying.
In addition, templates can help you save time when creating presentations. All you need to do with everything already laid out for you is add your content. Accordingly, templates can help you create professional and effective presentations.
Although presentation skills are essential for everyone, they are particularly important for educators. After all, a large part of a teacher’s job is to present information to students engagingly and effectively. Fortunately, there are some simple tips that can help to improve any presentation.
- First, it is important to be well prepared. This means clearly understanding the material that will be covered and knowing how to effectively communicate it to the audience.
- It is also significant to be aware of the audience’s level of knowledge and adjust the presentation accordingly.
- Finally, it is significant to be confident and keep the presentation interesting using various techniques such as humor, stories, or multimedia elements.
By following these tips, any teacher can deliver a successful presentation.
How to Create an Educational Presentation Quickly?

PowerPoint templates are a great way to teach your students detailed data. For your lessons to be practical, you need your students to focus and pay attention, so having templates allows them the tools they need to learn more effectively.
It’s a wise way of helping children in school hone their PowerPoint skills. Many children feel overwhelmed when they have to start creating presentations from scratch-templates give them a structure they can follow and tweak to make their own.
Additionally, templates can be reused multiple times, which saves you time in the long run. With so many benefits, it’s no wonder that PowerPoint templates are becoming increasingly popular in educational settings.
If you’re finding a way to help, your students learn more effectively, consider using PowerPoint templates in your next lesson.
However, you can create an informative and engaging presentation with some preparation and organization. Here are a few tips to help you get started:
- Choose a subject that is interesting and relevant to your audience.
- Gather information and resources on the topic.
- Outline your presentation content.
- Create visuals or slides to accompany your presentation content.
- Practice giving your presentation.
- Time yourself so you can keep it within the desired time frame.
Let’s walk through the best practices to create a unique educational PPT presentation.
Choose a Subject That Is Interesting and Relevant to Your Audience
When creating an educational PowerPoint, choosing a subject that is interesting and relevant to your audience is essential.
This will help engage the audience and ensure that they learn from the presentation.
Also, choosing a relevant topic will help keep the audience’s attention focused on the PowerPoint. There are a few different ways to determine what subject would be most exciting and pertinent to your audience. One way is to consider the age range of the audience.
Another way is to think about what type of information would be most helpful to them. Additionally, you can research the interests of the audience ahead of time. Considering these factors, you can choose a subject for your PowerPoint that will be both interesting and relevant to your audience.
Gather Information and Resources on the Topic
If you want to create an educational PPT presentation, it’s essential to gather information and resources on your topic first. This will ensure that the PowerPoint is informative and accurate.
There are a few different ways to go about gathering information. One option is to do some online research. Another option is to visit a library and look for books or articles on the topic.
Once you have brought together all the necessary information, you can start putting together your PowerPoint presentation. Remember to include only appropriate information and to present it in an organized and visually appealing way.
If a little effort is put into creating a PowerPoint, you can come up with an educational presentation that you will like.
Outline Your Presentation Content
You will need to describe your content thoroughly when creating educational PowerPoint slides. This will be useful to organize your thoughts and ensure that your presentation is cohesive and informative. Begin by brainstorming the main points that you want to cover.
Then, create an introductory presentation outline, including an introduction, body, and conclusion. Once you have a general overview of your content, you can begin to flesh out the details. In the body of your presentation, include supporting evidence for each point you make.
In conclusion, summarize the key points of your presentation and leave your audience with something to think about. By wisely and efficiently editing and structuring your content, you can create a captivating and interactive PowerPoint lesson that is both informative and interesting.
Create Visuals or Slides to Accompany Your Presentation Content
You must include visual components to reveal information in an instructional PowerPoint presentation. It will help to engage the audience and provide them with a more immersive experience.
Additionally, visuals can help clarify and strengthen the key points you are trying to communicate. If used effectively, they can also help to add interest and excitement to your presentation.
When choosing visuals, be sure to select ones that are high quality and relevant to your topic. Avoid using too many visuals, as this can overwhelm your audience.
Instead, focus on choosing a few useful visuals to support your presentation and help your audience understand your message better.
Practice Giving Your Presentation
Whether you are allowed to give a speech, practice builds expertise. By practicing your presentation, you can ensure that you are delivering your material in the most effective way possible.
Being careful with your delivery, body language, and overall clarity is essential when practicing. Remember that eye contact is key and that you want to project confidence in your ability to speak on the topic at hand.
It can also be helpful to tape-record yourself so that you can listen back and identify areas that may need improvement. With a bit of practice, you will be capable of giving an educative and memorable presentation.
Time Yourself So You Can Keep It Within the Desired Time Frame
If you’re planning for an educational presentation, it’s important to time yourself stay within the desired time frame. This can be exceptionally important if you’re giving a presentation to a group of students who have a limited attention span.
You can ensure that your presentation stays on track and doesn’t run over by timing yourself. There are a few different ways to time yourself. One option is to use a stopwatch or timer.
Another option for keeping track of where you are in your presentation is periodically checking the clock.
Whichever method you choose, ensure you give yourself enough time to practice to stay within the desired time frame when giving your presentation.
How an Educational PowerPoint Presentation Skyrocket Your Success

A well-designed PowerPoint slide can be the key to success in any educational setting. A PowerPoint presentation can help students grasp complex concepts and remember key points by organizing visually appealing and easy-to-understand information.
Additionally, a PPT presentation can add excitement and interest to a dull lecture or dry text. When used effectively, a PowerPoint presentation can engage students and encourage them to participate actively in learning.
As a result, an investment in a professional educational PowerPoint presentation can pay off handsomely in terms of student success.
PowerPoint templates are must-haves for both inexperienced and veteran educators. One of the top reasons is that it saves hours of manual work and struggles.
For instance, if you’ve picked a premium customizable education PPT template, it only requires a couple of minutes to edit and craft your presentation layout. It means you can develop professional PPT presentation infographics within half an hour.
There are countless templates that educators can use for a wide variety of subjects, including maths, science, humanities studies like literature and history, and many more.
It allows your children to have a hands-on, experiment-based curriculum where they can visualize key concepts while paying attention to multimedia elements tools provided by PowerPoint templates along the way.
Now, let’s walk through the top tips to present an impactful educational PPT presentation that will comprehensively drive knowledge to your potential audience.
- Arrange your presentation objective in a way that attracts your audience and familiarizes the area of discussion in seconds. You can use animated PPT templates or other visual aids to make it attractive and appealing.
- Try to insert at least one brief one-liner highlighting the relevance and benefits of learning that particular topic.
- Include self-image or videos to personalize your presentation content.
- Add animations and slide transitions to explain the key learning steps.
- Include charts, maps, infographics , images, and graphs that illustrate your topic at hand. A well-organized chart could be vital to driving your point home. Regarding corporate PowerPoint presentations , adding Gantt Charts and other business-related details is better.
- Avoid having several ideas on one single slide. It may overwhelm your viewers.
- Leave a little more white space around each element in your PPT slide.
- No need to add every sentence you intend to speak on your PowerPoint slide. Instead, add sharp points that are easily read and comprehended. Then, explain it.
It is not surprising that technology has fundamentally changed education. In former times, the only way to learn about a topic was to hear a lecture from a professor in a classroom. Today, virtual presentations have become an essential tool for educators. There are many reasons why online presentations are so valuable in education. So, learn how to create virtual presentations that capture your audience’s attention .
Advantages of Purchasing Fully Editable PowerPoint Presentation Templates for Teaching
As we discussed above, PowerPoint templates are a great teaching tool for many reasons. They allow the presentation to maintain a uniform look and feel, which is key for understanding the message. Moreover, it can quickly add sense to your teaching.
It is the only wise choice to purchase a fully-editable premium PowerPoint presentation layout for teaching purposes. Then, you can professionally teach your audience the way you want to educate them.
Here are the top reasons why one should turn to fully editable premium education PPT infographics:
- Fully editable PPT themes for education will let you overcome the stress of starting with a blank slate each time.
- All premium education PowerPoint layouts are made with plenty of ideas and unique designs to effectively present your education or research topic.
- When you have a fully editable PPT theme, you will easily add videos, images, and your brand logo.
- You can edit and customize anything in the layout without losing quality in minutes. There is no need to have any design skills to edit and customize them.
- These editable PowerPoint presentation templates will help you save hours of manual work and confusion.
Top Points to Keep in Mind While Preparing a PowerPoint for Teaching

Characteristics that your students like about education PowerPoint slides are:
- Graphs, charts, and maps can increase the understanding of content.
- Bulleted lists that let them focus on the top ideas.
- Animations and slide transitions are the best visual aids.
- Cliparts and creative layouts.
- Present your ideas in short phrases rather than lengthy paragraphs.
- Spoken words with images are better than pictures with text.
Note: Cliparts are the perfect choice to get your audience’s attention in seconds. It is helpful in education PowerPoint presentations for small children and students. However, try to avoid Cliparts if your presentation is for technical students or medical students.
Characteristics that your students don’t like about education PowerPoint slides are:
- Too many ideas on a single slide.
- Templates with too many colors.
- Irrelevant images and WordArts decrease understanding and learning compared to presentation layouts with no picture or animation.
Find the Best Education PowerPoint Presentation Slides for Teaching
PowerPoint presentations have a great power to share your ideas comprehensively, especially for educational purposes. Therefore, picking the suitable PowerPoint presentation template that fits well will help you significantly convey your presentation.
Moreover, choosing the appropriate theme or design is the base part of the entire PPT presentation.
There may be several PPTs available in the free source, but always remember that they may not assure you the quality and features needed for a powerful PowerPoint template.
Therefore, it will be wise to pick a premium PPT template designed by professionals . Selecting an ideal template for creating an attention-grabbing educational presentation is crucial if you wish to make your presentation’s tone professional. Thus, say goodbye to typical, boring PowerPoint templates that ruin your presentation.
Explore the top highlights of our exclusive educational PowerPoint presentation template below:
- 100% Fully editable PowerPoint slides & design elements.
- 2 Aspect ratio (4:3 & 16:9).
- One-time purchase (Free download for life).
- Unlimited downloads (Come back anytime to download the files again).
- Lifetime free updates (We update by adding more slides regularly).
- Lifetime free customer care support.
There you can view the best-in-quality education or research topic presentation themes designed by our expert graphic designers.
You can find a selection of creative, unique PPT themes here at FlySlides , in addition to education PowerPoint templates or research presentation PPT slides. All our premium PowerPoint templates are fully customizable and come with unlimited download and update options.
Besides our PPT templates, we also have a tremendous selection of fully customizable Keynote presentation templates and Google Slides themes . So it’s up to you to select your preference. With FlySlides, you can quickly create your education presentations on PowerPoint, Keynote, and Google Slides.
You can also refer to:
- Tips to Develop a Powerful Business Presentation .
- 10 Proven Tips to Make a Great Sales Presentation .
What’s more, Look into our library and take a look at our templates. They’re available in as many presentations as you want and skyrocket your success as a PowerPoint presenter. Why waste your precious time? Just explore our top selection of PowerPoint presentation layouts for education and find the best templates for your next presentation .
Written by FlySlides Editorial Team
FlySlides is one of the leading and high-quality Free and Premium PowerPoint, Google Slides & Keynotes Templates providers on the internet.
FlySlides is one of the leading and high-quality premium PowerPoint, Google Slides & Keynotes Templates provider on the internet
Subscribe To Our Newsletter
Subscribe to our newsletter, and receive updates, free templates, and amazing special offers
Follow Us On Social Media
Follow us for instant notification and updates
Recent Blog Posts
Recently published blog posts

How to Create Virtual Presentations That Wow Your Audience

How to Create a Visual Brand Identity That People Love?

10 Tips on How to Make a Perfect Sales Presentation

12 Essential Tips to Create a Powerful Business Presentation

13 Important Tips for Finding the Perfect PowerPoint Presentation Template
Recent templates.
Check out some of the latest presentation templates

Timeline Bundle Infographic Diagrams Keynote Template

Unsorted Timelines Infographic Diagrams Keynote Template

Timeline Bundle Infographic Diagrams Google Slides Template (Theme)

Unsorted Timelines Infographic Diagrams Google Slides Template (Theme)

Timeline Bundle Infographic Diagrams PowerPoint (PPT) Template

Unsorted Timelines Infographic Diagrams PowerPoint (PPT) Template
Read more interesting posts.

- Data, AI, & Machine Learning
- Managing Technology
- Social Responsibility
- Workplace, Teams, & Culture
- AI & Machine Learning
- Diversity & Inclusion
- Big ideas Research Projects
- Artificial Intelligence and Business Strategy
- Responsible AI
- Future of the Workforce
- Future of Leadership
- All Research Projects
- AI in Action
- Most Popular
- The Truth Behind the Nursing Crisis
- Work/23: The Big Shift
- Coaching for the Future-Forward Leader
- Measuring Culture

The spring 2024 issue’s special report looks at how to take advantage of market opportunities in the digital space, and provides advice on building culture and friendships at work; maximizing the benefits of LLMs, corporate venture capital initiatives, and innovation contests; and scaling automation and digital health platform.
- Past Issues
- Upcoming Events
- Video Archive
- Me, Myself, and AI
- Three Big Points
How to Create Slides That Suit Your Superiors: 11 Tips
When you’re pitching ideas or budgets to execs in your organization, you need to deliver slides that fit those particular people just right. This checklist identifies the key considerations.

- Workplace, Teams, & Culture
- Leadership Skills

Carolyn Geason-Beissel/MIT SMR | Getty Images
I recently interviewed 20 of my customers, all in senior roles at Fortune 100 companies, and asked them their biggest pain point in presenting to higher-ups and even colleagues. What I heard consistently was that it can feel like Goldilocks bouncing from one option to the next, testing to figure out what’s “just right.” Does the audience want deep reports? Sparse slides? Something in between? Like … what?
Teams often come to presentation meetings with vast amounts of backup content just in case an exec wants to take a deep dive on any given point. There’s often a struggle to anticipate every direction attendees might want to go. It’s frustrating, and it’s not efficient.
Get Updates on Transformative Leadership
Evidence-based resources that can help you lead your team more effectively, delivered to your inbox monthly.
Please enter a valid email address
Thank you for signing up
Privacy Policy
There are many ways to build slides. I’m not just talking about crafting them well versus poorly. I’m talking about all of the important decisions regarding how to organize them, how much text to use, when to lean into a chart, the best ways to use bullets and color, and whether to include an appendix with additional information. Before you make your next proposal or request of the executive team, use this list of 11 tips for your next set of slides as a guide.
Four Things You Must Have in Every Exec’s Slides
Before we drill down into the harder aspects, the ones where your executives’ tastes may vary widely, let’s quickly cover four aspects that you can consider the building blocks — the basics you should never proceed without.
Start with an executive summary. Begin the slide deck with a tight executive summary that follows a three-act structure. First, start with stating the current realities. Second, clearly state the problem or opportunity your idea addresses and its potential impact. Third, explain how your recommendation solves the problem or exploits the opportunity and the next steps you’re proposing.
Have a logical organization. The arc of the deck — the package from beginning to end — should make sense. If your audience reads only the headline of every slide, the order should be coherent and make most of the case for you. The content below each slide’s headline must support the statement made in the title. Remove everything that doesn’t support your point; as writers will tell you, you sometimes need to “kill your darlings” when you’re editing.
Begin the slide deck with a tight executive summary that follows a three-act structure.
Make it skimmable. Help your audience to quickly grasp the point without getting bogged down in details. Create a clear visual hierarchy. Guide the reader’s eye through the content: Use bold headings, bullet points, and numbered lists to break down information into digestible pieces. Highlight key takeaways or conclusions in a different color or font size to draw attention to these critical points.
Focus on concise insights. Succinct statements with clear insights are everyone’s jam. Every slide should serve a purpose and contribute directly to the decision-making process. Distill complex information. Don’t use 100 words when 20 words will nail it. If you’re having difficulty trimming, consider using company-approved AI tools to help you take out the fluff.
Five Preferences to Confirm With the Person You Want to Reach
Now we’ll delve into what your particular audience does and does not want. If you haven’t yet, start by asking the person you’re presenting to what they generally prefer. They probably know themselves well but have not been asked to articulate how they like to receive information.
Ask how dense is too dense. Some executives prefer detailed slides with comprehensive data. Others favor a more high-level approach. You’re weighing how to balance informative content with readability, ensuring that slides are not overloaded yet are sufficiently detailed to support decision-making.
Confirm the delivery format and timing. Some execs like information presented to them. Others prefer a pre-read of the material followed by a discussion. I always recommend our tool Slidedocs (I’ve written a free e-book on them), which are visual documents using both words and images. The templates help presenters organize their thoughts into a document for a pre-read or a read-along. They are designed to be skimmable and able to travel through your organization without the help of a presenter.
I’m a huge fan of pre-reads and prefer to use my time in meetings to ask questions and build alignment. If your audience didn’t review your material in advance, ask at the top of the meeting whether they would like you to present it or would prefer to read through it and then discuss it.
Find out how much data visualization they prefer. Charts, graphs, photos, and illustrations often communicate complex data more clearly than words alone. When execs can see what you’re saying, they often can better understand the impact of your idea. Does the exec want to understand exact numbers? Bar charts allow them to move their eyes across a series of specifics. Does the exec want to know the shape of a trend over time? Line charts can show the pattern. (See “Classic Charts Communicate Data Quickly.”) Some prefer charts with annotations that draw attention to what you think is the most important point. Others want to make their own conclusions from the data.
One of my clients, the CEO of a massive commercial real estate company, doesn’t want anything visualized. He prefers numbers, only in a table, and only in two colors — black and red. You might think this is archaic. But the fact that he’s clear to his teams about what he wants takes all the mystery out of how to communicate with him.
When the stakes are high, have a conceptual thinker help with diagrams and concepts. If you don’t have one on your team, and when it’s high stakes, find an internal designer to help you or hire one. You can’t afford to have the baby (your idea) thrown out with the bathwater (terrible slides).
Identify which details need spelling out. How well do the people you’re presenting to know the landscape and function of the company and products you’re talking about? For example, if your engineering team threw a slide into a deck about an issue that requires executive approval, do the execs all speak geek? Or do you need to explain the technology so that they will really understand the ask? Either eliminate internal jargon and acronyms or unpack those bits, especially if your proposal deeply involves expertise outside of the executives’ domain.
Ask whether appendices will be useful. When you’re organizing a presentation, you often troll data, read through complicated reports, and even hire external experts to figure out what’s best for the company. Do your execs want access to that supporting data? You can add a document to the end of the presentation as an appendix to show all of the data and source material. This allows the main content of the slides to remain focused and accessible while still providing comprehensive background information for those who want more.
Two Tips to Improve Your Presentation Skills
Getting materials in place is the biggest step. They will be your best tools for selling your ideas. But there are two extra areas to pay attention to as a presenter: how you handle questions and how you use every experience to improve.
Anticipate questions, and practice your answers. Before you have your meeting, gather a small team to challenge every point you make. Invite colleagues you trust to role-play as “a rapidly inquisitive exec” or “the doubting naysayer exec” so you are prepared to present your idea well. They’re gonna grill you, and practicing will help you remain unruffled when it happens.
Related Articles
Ask for feedback after the presentation. Establish a feedback loop with those you presented to. Ask what worked well and how you can improve. If attendees don’t have the time, find people who have had their ideas funded and talk to them about what they did that worked. Advice and some perspective will help you nail your performance even better next time.
Empathetically understanding your audience members and how they process information, whether it’s executives or peers, sets up your ideas for success. Clarity creates efficiency. When a presentation fits just right, you’ve given your great thinking the best chance of moving through your organization and having maximum impact.
About the Author
Nancy Duarte is CEO of Duarte Inc. , a communication company in the Silicon Valley. She’s the author of six books, including DataStory: Explain Data and Inspire Action Through Story (Ideapress Publishing, 2019).
More Like This
Add a comment cancel reply.
You must sign in to post a comment. First time here? Sign up for a free account : Comment on articles and get access to many more articles.

- SUGGESTED TOPICS
- The Magazine
- Newsletters
- Managing Yourself
- Managing Teams
- Work-life Balance
- The Big Idea
- Data & Visuals
- Reading Lists
- Case Selections
- HBR Learning
- Topic Feeds
- Account Settings
- Email Preferences
How to Make a “Good” Presentation “Great”
- Guy Kawasaki

Remember: Less is more.
A strong presentation is so much more than information pasted onto a series of slides with fancy backgrounds. Whether you’re pitching an idea, reporting market research, or sharing something else, a great presentation can give you a competitive advantage, and be a powerful tool when aiming to persuade, educate, or inspire others. Here are some unique elements that make a presentation stand out.
- Fonts: Sans Serif fonts such as Helvetica or Arial are preferred for their clean lines, which make them easy to digest at various sizes and distances. Limit the number of font styles to two: one for headings and another for body text, to avoid visual confusion or distractions.
- Colors: Colors can evoke emotions and highlight critical points, but their overuse can lead to a cluttered and confusing presentation. A limited palette of two to three main colors, complemented by a simple background, can help you draw attention to key elements without overwhelming the audience.
- Pictures: Pictures can communicate complex ideas quickly and memorably but choosing the right images is key. Images or pictures should be big (perhaps 20-25% of the page), bold, and have a clear purpose that complements the slide’s text.
- Layout: Don’t overcrowd your slides with too much information. When in doubt, adhere to the principle of simplicity, and aim for a clean and uncluttered layout with plenty of white space around text and images. Think phrases and bullets, not sentences.
As an intern or early career professional, chances are that you’ll be tasked with making or giving a presentation in the near future. Whether you’re pitching an idea, reporting market research, or sharing something else, a great presentation can give you a competitive advantage, and be a powerful tool when aiming to persuade, educate, or inspire others.
- Guy Kawasaki is the chief evangelist at Canva and was the former chief evangelist at Apple. Guy is the author of 16 books including Think Remarkable : 9 Paths to Transform Your Life and Make a Difference.
Partner Center
Resources from Past Open Classroom Programs
Some Open Classroom instructors make copies of their presentations available or share supplemental resources with the audience. We use this page to post that information.
- Losing HER Voice: Mental Health Implications of Abortion Restrictions – Download slides and reference list .
January 2024
- Sex Chatting: Tools for Expanding Sexual Self-Efficacy and Teaching Sex Education – Download Brochures and PDF zip file .
December 2023
- 2023 Clinical Practice Guidelines for PTSD: Leading Psychotherapy Recommendations for Adults – View the presentation slides , view CPG and PTSD resources and CPG and PTSD references .
- Navigating Implementation Challenges in Prolonged Exposure Therapy and Cognitive Processing Therapy – view the presentation slides and view resources .
- Write Effective ChatGPT Prompts to Boost Research Productivity (Part 1) – view the presentation slides
- Preventing Suicide Through Safety Planning – presentation slides
- Supporting Families to Promote Child Safety and Well-Being – presentation slides
- Infant and Early Childhood Mental Health: Supporting Families and Improving Child Outcomes – view the presentation slides
- Anti-oppressive and De-colonial Approaches to Community Engagement in St. Louis – presentation slides
- Social Work and Human Service Leadership: The Disconnect and Strategies Forward – presentation slides
- Reframing Aging: Current Perspectives on Older Adults and Aging Society – presentation slides
December 2022
- Iran’s Gen Z: The Leadership of Young Women and Girls in the National Uprising – resources from the panel and a statement from Amnesty International on at-risk Iranians.
- Strategies to Support Multilingual Learning in U.S. Schools – resources from the SALaMA Series presentation
November 2022
- Social Work Responds to the Election from Jason Ostrander and Charles Lewis – presentation slides
- AI, Machine Learning, and Macroeconomic Aspects of Health and Health Policies – Prof. Feng’s presentation slides
October 2022
- Collaborative Approaches to Addressing Historical and Multi-Generational Trauma – presentation slides
- Collaborating with Family Peer Advocates in Child Mental Health Research – slides from Mary Acri & Priscilla Shorter
- Research Findings, Training Issues, and Capacity Expansion for Family & Youth Peer Support and Advocacy – slides and references
September2022
- Collaborative Research Methods to Elevate the Voices of Youth, Adult Caregivers, and Providers in Child and Family-Focused Studies: Mary McKay and Brittany Mihalec-Adkins – presentation slides
- Developing and Maintaining Partnerships for Implementation in Child Welfare Systems – presentation slides
- If You Do Nothing Else, Please Take Time to Listen: Black Families and the Child Welfare System – presentation slides and references
- Voting is Social Work: Researches Speak Out – from Adelaide Sandler & Shannon Lane , Mimi Abramovitz , and Jenna Powers – presentation slides
- Robotics, Artificial Intelligence, Ethics, and Sustainability – presentation slides
- The Monkeypox Outbreak: Insights and Impacts – presentation slides from Dr. Cherabie
August 2022
- Tips and Tools for Helping Kids Thrive in the Upcoming School Year – presentation slides
- The Power of 3 Campaign: A Webinar Event – slides and resources from the panel
- PTSD and the COVID-19 Pandemic – slides , references , and resources from Dr. Megan Keyes’ presentation
- Advocacy & Allyship With Asian American Pacific Islander Communities – additional resources
- Leveraging the Collective – additional resources
- Loss & Grief in COVID-19:Navigating the Grief Process – slides , references , and resources from Dr. Megan Keyes’ presentation
Feburary 2022
- Solving Social Work’s Critical Leadership Problem – slides from Barry Rosenberg’s lecture
- Is Professionalism a Racist Construct? – presentation resources
January 2022
- Race & Human Trafficking – Dr. Shima Rostami presentation slides
- Engaging Parents in Child Behavioral Health – slides from Dr. Trish Kohl’s presentation
- Disability & Inclusion – slides from Dr. Srilatha Juvva’s talk
- Spatial Epidemiology – slides from Dr. Deborah Salvo’s talk
December 2021
- Understanding St. Louis’ Nonprofit Sector – access slides regarding the regional indicators report
- On Sport for Development – slides from Dr. Lombe Mwambwa’s presentation
October 2021
- Driving Equity 2030 – slides from the first panel regarding the Brown School’s strategic plan
- Engaging Families in Preventing Youth Suicide – slides from Ryan Lindsay’s presentation
- From Isolation to Full Community Inclusion – slides from Mark Keeley’s Inclusive Perspectives talk
- Improving Child and Adolescent Mental Health – slides from Leyla Ismayilova’s presentation
- Teenage Brain – select slides from Lorien Carter’s presentation. Recommended resources
September 2021
- Disability-Inclusive Workplaces – slides from Susanne Bruyere’s presentation
- School-Based Suicide Prevention Strategies – slides from Ryan Lindsay’s talk
August 2021
- Science and Strategies to Support Tweens and Teens in Pandemic Recovery and a Rapidly Changing World – slides from Stephanie Krauss’ talk
- Fear of Needles and the Unknown: Compassionately Addressing Vaccine Hesitancy – Slides from Beth Brawley’s presentation
- Mindfulness for the School Year – Slides from Meg Krejci’s presentation
- Digital Dating Abuse – Slides from Kaleigh Cornelison’s presentation
- Authentic Advocacy – Slides from Ian Forber-Pratt’s presentation
February 2021
- Understanding the Pandemic as a Shared Traumatic Experience – Dr. Hasmik Chakaryan’s slides. View the Open Classroom lecture
- Pro-Trump Era Resistance: Hope & Mobilizing Among Black Families – slided from Brown School Associate Professor Sheretta Butler Barnes. View this presentation that reviewed findings from her study of factors that influenced self-esteem and resiliency among African American teens.
January 2021
- Managing in the Multi-Generational Workplace – presentation from Brown School Senior Lecturer Janelle Barker Gibson offered this Open Classroom about generational difference in the workplace.
December 2020
- Adaptive Coping & Stress Management – In partnership with Open Classroom, Dr. Megan Keyes has assembled a three-part series for health and public health workers. View the first webinar . Dr. Keyes’ slides and resources are also available. Slides and resources from the second webinar are also available.
- Supporting LGBT Older Adults – View Slides. Brown School Alumna Sherrill Wayland delivered this Open Classroom presentation on supporting older LGBT adults during the pandemic.
November 2020
- Sleep Disruption – Dr. Megan Keyes created a presentation specific to disrupted sleep and the pandemic.
October 2020
- Virtual Facilitation – view slides. Steven Harowitz provided this Open Classroom with 5 Tips for Virtual Facilitation.
- Immigration Policy – view slides. Washington University alumnus Javad Khazaeli of Khazaeli Wyrsch LLC delivered this Open Classroom talk on the racism inherent in current US immigration policy.
- Inclusive Democracy – view slides. Dr. Gena McClendon delivered an Open Classroom about inclusive democracy and voter suppression.
- Caring for Yourself & Your Team in the Era of Uncertainty – Brown School Alumna Kaleigh Cornelison provided this Open Classroom talk on self-care and care of others while we telecommute and manage new stressors. Her slides are available here . Additional resources referenced can be found here .
- Increasing Engagement with Clients with PTSD – view slides. Drs. Megan Keyes and Julie Mastnak provided an Open Classroom lecture regarding evidence-based therapies, PTSD, and the pandemic.
- Introversion, Extroversion, and the Pandemic – view slides and resources. Brown School Professional Development presenter Chris Frey offered this Open Classroom talk on strategies to manage the impact of social distancing on introverts and extroverts.
- Pandemic Stress – view slides. Megan Keyes developed this Open Classroom program for us. She assembled these resources and shares these references .
- Messaging Your Issue – view slides. Open Classroom teamed up with the Grand Challenges for Social Work to produce this webinar on Messaging Your Issue for Policy Audiences .
- Health Policy & Economics – view slides. The Brown School’s Dr. Timothy McBride provides this Open Classroom lecture on the health policy and economic challenges of the pandemic.
- How Small Businesses Support a Community and How to Protect Them – view slides. Brown School Professor of the Practice Heather Cameron provided this Open Classroom talk .
- Implementation Science – view slides. Drs. Ana Bauman and Rebecca Lengnick-Hall of the Brown School provided this Open Classroom discussion entitled “Your Intervention is Ready…Now What?”
- Tracking the Social & Economic Impact of COVID-19 – view slides. The Brown School’s Professor Matthew Kreuter delivered this Open Classroom lecture discussing the work of the Health Communication and Research Laboratory to track impacts of the pandemic on people’s needs for services like food and housing. The HCRL also has this website where you can learn more about their work.
- Virtual Service Delivery – view slides. Brown School alumnus Carl Josehart provided this Open Classroom talk about Jewish Family Service of Houston’s response to the pandemic – how they shifted their service delivery, while staying connected to key stakeholder’s.
- Nutrition Security During the Pandemic – view slides. Lora Iannotti provided this presentation for Open Classroom.
- Food & Chemical Safety During the Pandemic – view slides. Dr. Angela Hobson provided this Open Classroom lecture .
- Finding & Using Big Data – view slides. Professor Brett Drake provided this Open Classroom presentation .
- Housing Advocacy – view slides. The Brown School’s Molly Metzger teamed up with Jacki Langum from ArchCity Defenders to provide this Open Classroom presentation on Local Housing Advocacy and the Pandemic . Recommended readings . The talk referenced this FEMA toolkit .
- Modeling and the Pandemic – view slides. Brown School Professor Doug Luke offered this Open Classroom talk sharing how some of the same modeling technology behind video games and animation is useful to understanding a pandemic.
- 2020 Census – view slides. Open Classroom teamed up with the Kathryn M. Buder Center for American Indian Studies to sponsor this talk by Brown School alum Lindsey Manshack on the implications of the 2020 Census for Native American communities.
- Public Mental Health – The Brown School’s Dr. Alexis Duncan provided this Open Classroom presentation to give an overview of the field of public mental health and its relevance to the COVID-19 pandemic.
- Race & Equity – view slides. The Brown School’s Dr. Darrell Hudson offered this Open Classroom presentation on privileging equity after the pandemic. Additional resources were suggested by Theresa Kuou of the Gephardt Institute for Civic and Community Engagement.
- Engaging Families – view slides. From the Brown School’s Open Classroom series, Mary McKay delivered this webinar entitled “I Went for an Intake and Never Went Back.” She recommends these additional webinars to people interested in learning more about this topic.
- Epidemiology 101 – view slides. From the Brown School’s Open Classroom series, Dr. Kim Johnson shares an overview of basic epidemiology concepts and relates them to the current pandemic.
- Major Gift Solicitation – view slides. Professor of Practice Barry Rosenberg gave this talk .
- Reintegration of Children in Families – view slides. Ian A. Forber-Pratt created this Open Classroom presentation to share a practice model around reunification and reintegration of children to families.
- Culturally and Linguistically Appropriate Standards (CLAS) in Health Care – view slides. Dr. Vetta Sanders Thompson hosted an Open Classroom session regarding CLAS in health care, along with a conversation regarding health equity. View her talk . Additional resources she recommends are found here and here .
- Age & The Coronavirus – view slides. As part of the Brown School’s Open Classroom series, Nancy Morrow-Howell presented a webinar on age and the Coronavirus. Recording of her talk . List of resources that were developed in response to the talk.
Use Keynote Remote to control your Keynote presentation
You can control your Keynote presentation from an iPhone, iPad, or iPod touch using Keynote Remote.
Check your requirements
Link keynote remote to your mac, link keynote remote to another iphone or ipad, use keynote remote.
Keynote Remote is included with Keynote for iPhone and iPad. To use Keynote Remote to control your presentation, here's what you need:
An iPhone, iPad, or iPod touch with Keynote 2.1 or later for iPhone or iPad
A Mac with Keynote for Mac 6.1 or later
A remote device linked to your Mac or another iPhone, iPad, or iPod touch
You can play your presentation on your Mac and remotely control it with your iPhone, iPad, or iPod touch.
Turn on Wi-Fi on your iPhone or iPad and turn on Wi-Fi on your Mac .
On your Mac, open Keynote.
From the menu bar, choose Keynote > Settings (or Preferences), click Remotes, then select the "Enable" checkbox.
On your iPhone or iPad, tap Continue.
On your Mac, next to the name of your iPhone or iPad, click Link.
Make sure that the four-digit passcode that appears matches on both devices, then click Confirm on your Mac.
After you link your devices, learn how to use Keynote Remote .
You can play your presentation on iPhone or iPad and remotely control it with another.
Turn on Wi-Fi on both devices .
Open your Keynote presentation on the device with the presentation.
On the device that you want to use as a remote, open the Keynote app.
On the presentation device, tap Link next to the remote device.
Make sure that the four-digit passcode that appears matches on your devices, then click Confirm.
After you link Keynote Remote to your Mac, iPhone or iPad, follow these steps to control your slideshow.
Tap Play, then choose what you want to do:
To move to the next or previous slide, swipe in either direction.
To end the presentation, tap the Close button or swipe down with two fingers.
If your devices can't stay connected, connect both devices to the same Wi-Fi network on your Mac and on your iPhone or iPad .
Before playing your slideshow, you might want to turn on Do Not Disturb on your Mac and on your iPhone or iPad .
Use Keynote with Apple Watch
Learn how to use AirPlay to play your presentation from Keynote to an Apple TV.
Explore Apple Support Community
Find what’s been asked and answered by Apple customers.
Contact Apple Support
Need more help? Save time by starting your support request online and we'll connect you to an expert.
IMAGES
VIDEO
COMMENTS
1. Use as Many Slides as You Need. It's a common myth that better presentations use fewer slides. This is simply not the case. I once sent an education conference presentation to the organizers so they could preview it in advance of my speaking. They wrote back, concerned that my 45-minute presentation had 116 slides.
Google Slides itself has lots of features, but you can also get lots of (often free) add-ons to make certain tasks easier. Add-ons are available to make diagrams, find better images, and display math equations … just to name a few. Ditch That Textbook has a list of 20 add-ons all teachers should try here. Source: Maneuvering the Middle.
Let's take a look at some creative ways you could use Google Slides in the classroom. 1) Introduce Your Class. Alethea Vazquez is a teacher who participated in the Student Blogging Challenge with her students a number of times. Her students collaborated on a great Google Slides presentation to introduce themselves on their class blog.
We have highlighted four common problems that often accompany presentations in class: 1. Lack of interaction. Standard PowerPoint presentations offer limited opportunities for audience interaction and engagement. They lack features to gather feedback or answer questions in real time and respond to requests. 2.
Resource library Training courses Get product help Sign into Classroom For K12 Educators certification programs Google workspace for education overview. ... Get started with Google Slides. Learn how to use Google Slides to create engaging presentations, make fewer class copies, and more. Watch video.
Share your presentation with your students before class on Canvas and let them know they can use it as a reference. Communicate with your students. Let them know that the monitor in the classroom is on the small side and it is okay for them to bring a device to view the presentation during class./li>
In theory, slide shows are a great instructional tool. Unfortunately, in practice, many slide presentations can actually work against student engagement. To avoid this, teachers need to be aware of the most effective ways to employ slides in the classroom. Below are some suggestions to help you make the most of this technology. Know your purpose.
It's better to have more slides than trying to place too much text on one slide. Use brief points instead of long sentences or paragraphs and outline key points rather than transcribing your lecture. Use PowerPoint to cue and guide the presentation. Use the Notes feature to add content to your presentation that the audience will not see.
2. Use Readable Font Styles. Make sure to use the best font style that makes your presentation look sleek, readable, and won't strain your audience's eyes while reading. We all want to use a fancy font, trust me, I get it. But most of the time, simplicity is beauty, especially if you're presenting a professional-looking slideshow.
Learn how to use Google Classroom to assign your students to create or customize a slideshow presentation. Google Classroom integrates very well with Google ...
PowerPoint presentations are used in many different fields due to their ability to organize and structure information, create a consistent format, and provide the audience with visuals. Educators often use this type of presentation in their classrooms in order to guide the class through a lecture. The effectiveness of PowerPoint presentations ...
Moody Library, Suite 201. One Bear Place. Box 97189. Waco, TX 76798-7189. [email protected]. (254) 710-4064. PowerPoint is common in college classrooms, yet slide technology is not more effective for student learning than other styles of lecture (Levasseur & Sawyer, 2006). While research indicates which practices support learning and clarifies ...
Using Slides in Classroom Teaching. Numerous articles have been written about the pros and cons of using PowerPoint, KeyNote, or other slide presentation tools in the classroom. Slides have become a standard tool for professors and depending on how they're used, they can clarify and complement or detract from an instructor's lecture.
Spread the loveGoogle Slides is a presentation product; it is quite similar to the more-familiar PowerPoint. But since it is part of the Google suite of products, it is free to use. It can be a powerful classroom resource. Here are six ways to use Google Slides in the classroom: First, there is simply no justification for giving a lecture in the age of Google Slides. Teachers can supplement ...
Present slideshows with confidence. With easy-to-use presenter view, speaker notes, and live captions, Slides makes presenting your ideas a breeze. You can even present to Google Meet video calls ...
Further, she notes that PowerPoint slides that serve as an outline or use bulleted lists may "oversimplify" complex content, encourage passivity, and limit critical thinking. Four journal articles from Cell Biology Education on PowerPoint in the Classroom (2004 Fall) present different points of view (POV) on the use of PowerPoint. Although ...
So often, people think of presentation slides as just that: a visual aid for delivering a presentation in front of an audience. But these slide apps (like Google Slides and PowerPoint in Office 365) really are powerful tools for delivering interactive user experiences.They can also create visually stimulating products to deliver a message and valuable content.
Choose the PowerPoint document you want to use. After publishing, right-click and choose "Open With," then "Google Slides.". Click the "File" button. Click the "Save as Google Slides" button. There is another way: Importing PowerPoint slides into Google Slides to transform a PowerPoint to Google Slides.
PowerPoint is a great tool to use when designing a scavenger hunt if you are working with students online. With the tool, you can hide clues in images, ask questions that are linked to hyperlinks, and even add video clips as hints. Scavenger hunts also offer quite a bit of versatility in the classroom.
Top 15+ Ways to Use Google Slides in the Classroom: 1. Presentations: This one may seem obvious but I definitely want to mention it. Many teachers think that slideshow presentations are only for older students…this is simply NOT true! When I taught grade 2 they were able to make slideshows.
Text in a PowerPoint is easier to read than notes on a blackboard. Teachers can easily modify lessons for different classes. Teachers can use PowerPoint to update flashcards. PowerPoint is also useful in creating presentations for parents on their student's progress. It's easy to share a PowerPoint presentation with other teachers and students.
Unlike posters that eventually pile up and get recycled, collaborative slide decks become living documents to use in the classroom. Teacher Prep Work To prepare for this activity, I look at the different outputs I'm hoping students will produce and pre-populate a slide deck with relevant prompts for each.
PowerPoint templates are an excellent tool for teaching. They provide a consistent and professional look to your presentations and help keep your ideas organized. Presentation templates also make updating and changing your slides easy, so you can always keep your presentations fresh and up-to-date. When teaching a subject like biology, getting ...
Make it skimmable. Help your audience to quickly grasp the point without getting bogged down in details. Create a clear visual hierarchy. Guide the reader's eye through the content: Use bold headings, bullet points, and numbered lists to break down information into digestible pieces.
Images or pictures should be big (perhaps 20-25% of the page), bold, and have a clear purpose that complements the slide's text. Layout: Don't overcrowd your slides with too much information.
Resources from Past Open Classroom Programs Some Open Classroom instructors make copies of their presentations available or share supplemental resources with the audience. We use this page to post that information. March 2024 Losing HER Voice: Mental Health Implications of Abortion Restrictions - Download slides and reference list. January 2024 Sex Chatting: Tools for Expanding
To use a different layout, tap the Layout button, then select an option. To move to the next or previous slide, swipe in either direction. To highlight or point to parts of a slide during a presentation, tap Highlighter button, then choose an option. To close Highlighter, tap the Close button.