Reference management. Clean and simple.

How to make a scientific presentation

Scientific presentation outlines
Questions to ask yourself before you write your talk, 1. how much time do you have, 2. who will you speak to, 3. what do you want the audience to learn from your talk, step 1: outline your presentation, step 2: plan your presentation slides, step 3: make the presentation slides, slide design, text elements, animations and transitions, step 4: practice your presentation, final thoughts, frequently asked questions about preparing scientific presentations, related articles.
A good scientific presentation achieves three things: you communicate the science clearly, your research leaves a lasting impression on your audience, and you enhance your reputation as a scientist.
But, what is the best way to prepare for a scientific presentation? How do you start writing a talk? What details do you include, and what do you leave out?
It’s tempting to launch into making lots of slides. But, starting with the slides can mean you neglect the narrative of your presentation, resulting in an overly detailed, boring talk.
The key to making an engaging scientific presentation is to prepare the narrative of your talk before beginning to construct your presentation slides. Planning your talk will ensure that you tell a clear, compelling scientific story that will engage the audience.
In this guide, you’ll find everything you need to know to make a good oral scientific presentation, including:
- The different types of oral scientific presentations and how they are delivered;
- How to outline a scientific presentation;
- How to make slides for a scientific presentation.
Our advice results from delving into the literature on writing scientific talks and from our own experiences as scientists in giving and listening to presentations. We provide tips and best practices for giving scientific talks in a separate post.
There are two main types of scientific talks:
- Your talk focuses on a single study . Typically, you tell the story of a single scientific paper. This format is common for short talks at contributed sessions in conferences.
- Your talk describes multiple studies. You tell the story of multiple scientific papers. It is crucial to have a theme that unites the studies, for example, an overarching question or problem statement, with each study representing specific but different variations of the same theme. Typically, PhD defenses, invited seminars, lectures, or talks for a prospective employer (i.e., “job talks”) fall into this category.
➡️ Learn how to prepare an excellent thesis defense
The length of time you are allotted for your talk will determine whether you will discuss a single study or multiple studies, and which details to include in your story.
The background and interests of your audience will determine the narrative direction of your talk, and what devices you will use to get their attention. Will you be speaking to people specializing in your field, or will the audience also contain people from disciplines other than your own? To reach non-specialists, you will need to discuss the broader implications of your study outside your field.
The needs of the audience will also determine what technical details you will include, and the language you will use. For example, an undergraduate audience will have different needs than an audience of seasoned academics. Students will require a more comprehensive overview of background information and explanations of jargon but will need less technical methodological details.
Your goal is to speak to the majority. But, make your talk accessible to the least knowledgeable person in the room.
This is called the thesis statement, or simply the “take-home message”. Having listened to your talk, what message do you want the audience to take away from your presentation? Describe the main idea in one or two sentences. You want this theme to be present throughout your presentation. Again, the thesis statement will depend on the audience and the type of talk you are giving.
Your thesis statement will drive the narrative for your talk. By deciding the take-home message you want to convince the audience of as a result of listening to your talk, you decide how the story of your talk will flow and how you will navigate its twists and turns. The thesis statement tells you the results you need to show, which subsequently tells you the methods or studies you need to describe, which decides the angle you take in your introduction.
➡️ Learn how to write a thesis statement
The goal of your talk is that the audience leaves afterward with a clear understanding of the key take-away message of your research. To achieve that goal, you need to tell a coherent, logical story that conveys your thesis statement throughout the presentation. You can tell your story through careful preparation of your talk.
Preparation of a scientific presentation involves three separate stages: outlining the scientific narrative, preparing slides, and practicing your delivery. Making the slides of your talk without first planning what you are going to say is inefficient.
Here, we provide a 4 step guide to writing your scientific presentation:
- Outline your presentation
- Plan your presentation slides
- Make the presentation slides
- Practice your presentation

Writing an outline helps you consider the key pieces of your talk and how they fit together from the beginning, preventing you from forgetting any important details. It also means you avoid changing the order of your slides multiple times, saving you time.
Plan your talk as discrete sections. In the table below, we describe the sections for a single study talk vs. a talk discussing multiple studies:
The following tips apply when writing the outline of a single study talk. You can easily adapt this framework if you are writing a talk discussing multiple studies.
Introduction: Writing the introduction can be the hardest part of writing a talk. And when giving it, it’s the point where you might be at your most nervous. But preparing a good, concise introduction will settle your nerves.
The introduction tells the audience the story of why you studied your topic. A good introduction succinctly achieves four things, in the following order.
- It gives a broad perspective on the problem or topic for people in the audience who may be outside your discipline (i.e., it explains the big-picture problem motivating your study).
- It describes why you did the study, and why the audience should care.
- It gives a brief indication of how your study addressed the problem and provides the necessary background information that the audience needs to understand your work.
- It indicates what the audience will learn from the talk, and prepares them for what will come next.
A good introduction not only gives the big picture and motivations behind your study but also concisely sets the stage for what the audience will learn from the talk (e.g., the questions your work answers, and/or the hypotheses that your work tests). The end of the introduction will lead to a natural transition to the methods.
Give a broad perspective on the problem. The easiest way to start with the big picture is to think of a hook for the first slide of your presentation. A hook is an opening that gets the audience’s attention and gets them interested in your story. In science, this might take the form of a why, or a how question, or it could be a statement about a major problem or open question in your field. Other examples of hooks include quotes, short anecdotes, or interesting statistics.
Why should the audience care? Next, decide on the angle you are going to take on your hook that links to the thesis of your talk. In other words, you need to set the context, i.e., explain why the audience should care. For example, you may introduce an observation from nature, a pattern in experimental data, or a theory that you want to test. The audience must understand your motivations for the study.
Supplementary details. Once you have established the hook and angle, you need to include supplementary details to support them. For example, you might state your hypothesis. Then go into previous work and the current state of knowledge. Include citations of these studies. If you need to introduce some technical methodological details, theory, or jargon, do it here.
Conclude your introduction. The motivation for the work and background information should set the stage for the conclusion of the introduction, where you describe the goals of your study, and any hypotheses or predictions. Let the audience know what they are going to learn.
Methods: The audience will use your description of the methods to assess the approach you took in your study and to decide whether your findings are credible. Tell the story of your methods in chronological order. Use visuals to describe your methods as much as possible. If you have equations, make sure to take the time to explain them. Decide what methods to include and how you will show them. You need enough detail so that your audience will understand what you did and therefore can evaluate your approach, but avoid including superfluous details that do not support your main idea. You want to avoid the common mistake of including too much data, as the audience can read the paper(s) later.
Results: This is the evidence you present for your thesis. The audience will use the results to evaluate the support for your main idea. Choose the most important and interesting results—those that support your thesis. You don’t need to present all the results from your study (indeed, you most likely won’t have time to present them all). Break down complex results into digestible pieces, e.g., comparisons over multiple slides (more tips in the next section).
Summary: Summarize your main findings. Displaying your main findings through visuals can be effective. Emphasize the new contributions to scientific knowledge that your work makes.
Conclusion: Complete the circle by relating your conclusions to the big picture topic in your introduction—and your hook, if possible. It’s important to describe any alternative explanations for your findings. You might also speculate on future directions arising from your research. The slides that comprise your conclusion do not need to state “conclusion”. Rather, the concluding slide title should be a declarative sentence linking back to the big picture problem and your main idea.
It’s important to end well by planning a strong closure to your talk, after which you will thank the audience. Your closing statement should relate to your thesis, perhaps by stating it differently or memorably. Avoid ending awkwardly by memorizing your closing sentence.
By now, you have an outline of the story of your talk, which you can use to plan your slides. Your slides should complement and enhance what you will say. Use the following steps to prepare your slides.
- Write the slide titles to match your talk outline. These should be clear and informative declarative sentences that succinctly give the main idea of the slide (e.g., don’t use “Methods” as a slide title). Have one major idea per slide. In a YouTube talk on designing effective slides , researcher Michael Alley shows examples of instructive slide titles.
- Decide how you will convey the main idea of the slide (e.g., what figures, photographs, equations, statistics, references, or other elements you will need). The body of the slide should support the slide’s main idea.
- Under each slide title, outline what you want to say, in bullet points.
In sum, for each slide, prepare a title that summarizes its major idea, a list of visual elements, and a summary of the points you will make. Ensure each slide connects to your thesis. If it doesn’t, then you don’t need the slide.
Slides for scientific presentations have three major components: text (including labels and legends), graphics, and equations. Here, we give tips on how to present each of these components.
- Have an informative title slide. Include the names of all coauthors and their affiliations. Include an attractive image relating to your study.
- Make the foreground content of your slides “pop” by using an appropriate background. Slides that have white backgrounds with black text work well for small rooms, whereas slides with black backgrounds and white text are suitable for large rooms.
- The layout of your slides should be simple. Pay attention to how and where you lay the visual and text elements on each slide. It’s tempting to cram information, but you need lots of empty space. Retain space at the sides and bottom of your slides.
- Use sans serif fonts with a font size of at least 20 for text, and up to 40 for slide titles. Citations can be in 14 font and should be included at the bottom of the slide.
- Use bold or italics to emphasize words, not underlines or caps. Keep these effects to a minimum.
- Use concise text . You don’t need full sentences. Convey the essence of your message in as few words as possible. Write down what you’d like to say, and then shorten it for the slide. Remove unnecessary filler words.
- Text blocks should be limited to two lines. This will prevent you from crowding too much information on the slide.
- Include names of technical terms in your talk slides, especially if they are not familiar to everyone in the audience.
- Proofread your slides. Typos and grammatical errors are distracting for your audience.
- Include citations for the hypotheses or observations of other scientists.
- Good figures and graphics are essential to sustain audience interest. Use graphics and photographs to show the experiment or study system in action and to explain abstract concepts.
- Don’t use figures straight from your paper as they may be too detailed for your talk, and details like axes may be too small. Make new versions if necessary. Make them large enough to be visible from the back of the room.
- Use graphs to show your results, not tables. Tables are difficult for your audience to digest! If you must present a table, keep it simple.
- Label the axes of graphs and indicate the units. Label important components of graphics and photographs and include captions. Include sources for graphics that are not your own.
- Explain all the elements of a graph. This includes the axes, what the colors and markers mean, and patterns in the data.
- Use colors in figures and text in a meaningful, not random, way. For example, contrasting colors can be effective for pointing out comparisons and/or differences. Don’t use neon colors or pastels.
- Use thick lines in figures, and use color to create contrasts in the figures you present. Don’t use red/green or red/blue combinations, as color-blind audience members can’t distinguish between them.
- Arrows or circles can be effective for drawing attention to key details in graphs and equations. Add some text annotations along with them.
- Write your summary and conclusion slides using graphics, rather than showing a slide with a list of bullet points. Showing some of your results again can be helpful to remind the audience of your message.
- If your talk has equations, take time to explain them. Include text boxes to explain variables and mathematical terms, and put them under each term in the equation.
- Combine equations with a graphic that shows the scientific principle, or include a diagram of the mathematical model.
- Use animations judiciously. They are helpful to reveal complex ideas gradually, for example, if you need to make a comparison or contrast or to build a complicated argument or figure. For lists, reveal one bullet point at a time. New ideas appearing sequentially will help your audience follow your logic.
- Slide transitions should be simple. Silly ones distract from your message.
- Decide how you will make the transition as you move from one section of your talk to the next. For example, if you spend time talking through details, provide a summary afterward, especially in a long talk. Another common tactic is to have a “home slide” that you return to multiple times during the talk that reinforces your main idea or message. In her YouTube talk on designing effective scientific presentations , Stanford biologist Susan McConnell suggests using the approach of home slides to build a cohesive narrative.
To deliver a polished presentation, it is essential to practice it. Here are some tips.
- For your first run-through, practice alone. Pay attention to your narrative. Does your story flow naturally? Do you know how you will start and end? Are there any awkward transitions? Do animations help you tell your story? Do your slides help to convey what you are saying or are they missing components?
- Next, practice in front of your advisor, and/or your peers (e.g., your lab group). Ask someone to time your talk. Take note of their feedback and the questions that they ask you (you might be asked similar questions during your real talk).
- Edit your talk, taking into account the feedback you’ve received. Eliminate superfluous slides that don’t contribute to your takeaway message.
- Practice as many times as needed to memorize the order of your slides and the key transition points of your talk. However, don’t try to learn your talk word for word. Instead, memorize opening and closing statements, and sentences at key junctures in the presentation. Your presentation should resemble a serious but spontaneous conversation with the audience.
- Practicing multiple times also helps you hone the delivery of your talk. While rehearsing, pay attention to your vocal intonations and speed. Make sure to take pauses while you speak, and make eye contact with your imaginary audience.
- Make sure your talk finishes within the allotted time, and remember to leave time for questions. Conferences are particularly strict on run time.
- Anticipate questions and challenges from the audience, and clarify ambiguities within your slides and/or speech in response.
- If you anticipate that you could be asked questions about details but you don’t have time to include them, or they detract from the main message of your talk, you can prepare slides that address these questions and place them after the final slide of your talk.
➡️ More tips for giving scientific presentations
An organized presentation with a clear narrative will help you communicate your ideas effectively, which is essential for engaging your audience and conveying the importance of your work. Taking time to plan and outline your scientific presentation before writing the slides will help you manage your nerves and feel more confident during the presentation, which will improve your overall performance.
A good scientific presentation has an engaging scientific narrative with a memorable take-home message. It has clear, informative slides that enhance what the speaker says. You need to practice your talk many times to ensure you deliver a polished presentation.
First, consider who will attend your presentation, and what you want the audience to learn about your research. Tailor your content to their level of knowledge and interests. Second, create an outline for your presentation, including the key points you want to make and the evidence you will use to support those points. Finally, practice your presentation several times to ensure that it flows smoothly and that you are comfortable with the material.
Prepare an opening that immediately gets the audience’s attention. A common device is a why or a how question, or a statement of a major open problem in your field, but you could also start with a quote, interesting statistic, or case study from your field.
Scientific presentations typically either focus on a single study (e.g., a 15-minute conference presentation) or tell the story of multiple studies (e.g., a PhD defense or 50-minute conference keynote talk). For a single study talk, the structure follows the scientific paper format: Introduction, Methods, Results, Summary, and Conclusion, whereas the format of a talk discussing multiple studies is more complex, but a theme unifies the studies.
Ensure you have one major idea per slide, and convey that idea clearly (through images, equations, statistics, citations, video, etc.). The slide should include a title that summarizes the major point of the slide, should not contain too much text or too many graphics, and color should be used meaningfully.
Get in touch
555-555-5555

Limited time offer: 20% off all templates ➞

Scientific Presentation Guide: How to Create an Engaging Research Talk
Creating an effective scientific presentation requires developing clear talking points and slide designs that highlight your most important research results..
Scientific presentations are detailed talks that showcase a research project or analysis results. This comprehensive guide reviews everything you need to know to give an engaging presentation for scientific conferences, lab meetings, and PhD thesis talks. From creating your presentation outline to designing effective slides, the tips in this article will give you the tools you need to impress your scientific peers and superiors.

Step 1. Create a Presentation Outline
The first step to giving a good scientific talk is to create a presentation outline that engages the audience at the start of the talk, highlights only 3-5 main points of your research, and then ends with a clear take-home message. Creating an outline ensures that the overall talk storyline is clear and will save you time when you start to design your slides.
Engage Your Audience
The first part of your presentation outline should contain slide ideas that will gain your audience's attention. Below are a few recommendations for slides that engage your audience at the start of the talk:
- Create a slide that makes connects your data or presentation information to a shared purpose, such as relevance to solving a medical problem or fundamental question in your field of research
- Create slides that ask and invite questions
- Use humor or entertainment

Identify Clear Main Points
After writing down your engagement ideas, the next step is to list the main points that will become the outline slide for your presentation. A great way to accomplish this is to set a timer for five minutes and write down all of the main points and results or your research that you want to discuss in the talk. When the time is up, review the points and select no more than three to five main points that create your talk outline. Limiting the amount of information you share goes a long way in maintaining audience engagement and understanding.

Create a Take-Home Message
And finally, you should brainstorm a single take-home message that makes the most important main point stand out. This is the one idea that you want people to remember or to take action on after your talk. This can be your core research discovery or the next steps that will move the project forward.
Step 2. Choose a Professional Slide Theme
After you have a good presentation outline, the next step is to choose your slide colors and create a theme. Good slide themes use between two to four main colors that are accessible to people with color vision deficiencies. Read this article to learn more about choosing the best scientific color palettes .
You can also choose templates that already have an accessible color scheme. However, be aware that many PowerPoint templates that are available online are too cheesy for a scientific audience. Below options to download professional scientific slide templates that are designed specifically for academic conferences, research talks, and graduate thesis defenses.

Step 3. Design Your Slides
Designing good slides is essential to maintaining audience interest during your scientific talk. Follow these four best practices for designing your slides:
- Keep it simple: limit the amount of information you show on each slide
- Use images and illustrations that clearly show the main points with very little text.
- Read this article to see research slide example designs for inspiration
- When you are using text, try to reduce the scientific jargon that is unnecessary. Text on research talk slides needs to be much more simple than the text used in scientific publications (see example below).
- Use appear/disappear animations to break up the details into smaller digestible bites
- Sign up for the free presentation design course to learn PowerPoint animation tricks

Scientific Presentation Design Summary
All of the examples and tips described in this article will help you create impressive scientific presentations. Below is the summary of how to give an engaging talk that will earn respect from your scientific community.
Step 1. Draft Presentation Outline. Create a presentation outline that clearly highlights the main point of your research. Make sure to start your talk outline with ideas to engage your audience and end your talk with a clear take-home message.
Step 2. Choose Slide Theme. Use a slide template or theme that looks professional, best represents your data, and matches your audience's expectations. Do not use slides that are too plain or too cheesy.
Step 3. Design Engaging Slides. Effective presentation slide designs use clear data visualizations and limits the amount of information that is added to each slide.
And a final tip is to practice your presentation so that you can refine your talking points. This way you will also know how long it will take you to cover the most essential information on your slides. Thank you for choosing Simplified Science Publishing as your science communication resource and good luck with your presentations!
Interested in free design templates and training?
Explore scientific illustration templates and courses by creating a Simplified Science Publishing Log In. Whether you are new to data visualization design or have some experience, these resources will improve your ability to use both basic and advanced design tools.
Interested in reading more articles on scientific design? Learn more below:

Data Storytelling Techniques: How to Tell a Great Data Story in 4 Steps

Best Science PowerPoint Templates and Slide Design Examples

Free Research Poster Templates and Tutorials
Content is protected by Copyright license. Website visitors are welcome to share images and articles, however they must include the Simplified Science Publishing URL source link when shared. Thank you!
Online Courses
Stay up-to-date for new simplified science courses, subscribe to our newsletter.
Thank you for signing up!
You have been added to the emailing list and will only recieve updates when there are new courses or templates added to the website.
We use cookies on this site to enhance your user experience and we do not sell data. By using this website, you are giving your consent for us to set cookies: View Privacy Policy
Simplified Science Publishing, LLC
Princeton Correspondents on Undergraduate Research
How to Make a Successful Research Presentation
Turning a research paper into a visual presentation is difficult; there are pitfalls, and navigating the path to a brief, informative presentation takes time and practice. As a TA for GEO/WRI 201: Methods in Data Analysis & Scientific Writing this past fall, I saw how this process works from an instructor’s standpoint. I’ve presented my own research before, but helping others present theirs taught me a bit more about the process. Here are some tips I learned that may help you with your next research presentation:
More is more
In general, your presentation will always benefit from more practice, more feedback, and more revision. By practicing in front of friends, you can get comfortable with presenting your work while receiving feedback. It is hard to know how to revise your presentation if you never practice. If you are presenting to a general audience, getting feedback from someone outside of your discipline is crucial. Terms and ideas that seem intuitive to you may be completely foreign to someone else, and your well-crafted presentation could fall flat.
Less is more
Limit the scope of your presentation, the number of slides, and the text on each slide. In my experience, text works well for organizing slides, orienting the audience to key terms, and annotating important figures–not for explaining complex ideas. Having fewer slides is usually better as well. In general, about one slide per minute of presentation is an appropriate budget. Too many slides is usually a sign that your topic is too broad.

Limit the scope of your presentation
Don’t present your paper. Presentations are usually around 10 min long. You will not have time to explain all of the research you did in a semester (or a year!) in such a short span of time. Instead, focus on the highlight(s). Identify a single compelling research question which your work addressed, and craft a succinct but complete narrative around it.
You will not have time to explain all of the research you did. Instead, focus on the highlights. Identify a single compelling research question which your work addressed, and craft a succinct but complete narrative around it.
Craft a compelling research narrative
After identifying the focused research question, walk your audience through your research as if it were a story. Presentations with strong narrative arcs are clear, captivating, and compelling.
- Introduction (exposition — rising action)
Orient the audience and draw them in by demonstrating the relevance and importance of your research story with strong global motive. Provide them with the necessary vocabulary and background knowledge to understand the plot of your story. Introduce the key studies (characters) relevant in your story and build tension and conflict with scholarly and data motive. By the end of your introduction, your audience should clearly understand your research question and be dying to know how you resolve the tension built through motive.
- Methods (rising action)
The methods section should transition smoothly and logically from the introduction. Beware of presenting your methods in a boring, arc-killing, ‘this is what I did.’ Focus on the details that set your story apart from the stories other people have already told. Keep the audience interested by clearly motivating your decisions based on your original research question or the tension built in your introduction.
- Results (climax)
Less is usually more here. Only present results which are clearly related to the focused research question you are presenting. Make sure you explain the results clearly so that your audience understands what your research found. This is the peak of tension in your narrative arc, so don’t undercut it by quickly clicking through to your discussion.
- Discussion (falling action)
By now your audience should be dying for a satisfying resolution. Here is where you contextualize your results and begin resolving the tension between past research. Be thorough. If you have too many conflicts left unresolved, or you don’t have enough time to present all of the resolutions, you probably need to further narrow the scope of your presentation.
- Conclusion (denouement)
Return back to your initial research question and motive, resolving any final conflicts and tying up loose ends. Leave the audience with a clear resolution of your focus research question, and use unresolved tension to set up potential sequels (i.e. further research).
Use your medium to enhance the narrative
Visual presentations should be dominated by clear, intentional graphics. Subtle animation in key moments (usually during the results or discussion) can add drama to the narrative arc and make conflict resolutions more satisfying. You are narrating a story written in images, videos, cartoons, and graphs. While your paper is mostly text, with graphics to highlight crucial points, your slides should be the opposite. Adapting to the new medium may require you to create or acquire far more graphics than you included in your paper, but it is necessary to create an engaging presentation.
The most important thing you can do for your presentation is to practice and revise. Bother your friends, your roommates, TAs–anybody who will sit down and listen to your work. Beyond that, think about presentations you have found compelling and try to incorporate some of those elements into your own. Remember you want your work to be comprehensible; you aren’t creating experts in 10 minutes. Above all, try to stay passionate about what you did and why. You put the time in, so show your audience that it’s worth it.
For more insight into research presentations, check out these past PCUR posts written by Emma and Ellie .
— Alec Getraer, Natural Sciences Correspondent
Share this:
- Share on Tumblr


An official website of the United States government
The .gov means it’s official. Federal government websites often end in .gov or .mil. Before sharing sensitive information, make sure you’re on a federal government site.
The site is secure. The https:// ensures that you are connecting to the official website and that any information you provide is encrypted and transmitted securely.
- Publications
- Account settings
Preview improvements coming to the PMC website in October 2024. Learn More or Try it out now .
- Advanced Search
- Journal List
- PLoS Comput Biol
- v.17(12); 2021 Dec
Ten simple rules for effective presentation slides
Kristen m. naegle.
Biomedical Engineering and the Center for Public Health Genomics, University of Virginia, Charlottesville, Virginia, United States of America
Introduction
The “presentation slide” is the building block of all academic presentations, whether they are journal clubs, thesis committee meetings, short conference talks, or hour-long seminars. A slide is a single page projected on a screen, usually built on the premise of a title, body, and figures or tables and includes both what is shown and what is spoken about that slide. Multiple slides are strung together to tell the larger story of the presentation. While there have been excellent 10 simple rules on giving entire presentations [ 1 , 2 ], there was an absence in the fine details of how to design a slide for optimal effect—such as the design elements that allow slides to convey meaningful information, to keep the audience engaged and informed, and to deliver the information intended and in the time frame allowed. As all research presentations seek to teach, effective slide design borrows from the same principles as effective teaching, including the consideration of cognitive processing your audience is relying on to organize, process, and retain information. This is written for anyone who needs to prepare slides from any length scale and for most purposes of conveying research to broad audiences. The rules are broken into 3 primary areas. Rules 1 to 5 are about optimizing the scope of each slide. Rules 6 to 8 are about principles around designing elements of the slide. Rules 9 to 10 are about preparing for your presentation, with the slides as the central focus of that preparation.
Rule 1: Include only one idea per slide
Each slide should have one central objective to deliver—the main idea or question [ 3 – 5 ]. Often, this means breaking complex ideas down into manageable pieces (see Fig 1 , where “background” information has been split into 2 key concepts). In another example, if you are presenting a complex computational approach in a large flow diagram, introduce it in smaller units, building it up until you finish with the entire diagram. The progressive buildup of complex information means that audiences are prepared to understand the whole picture, once you have dedicated time to each of the parts. You can accomplish the buildup of components in several ways—for example, using presentation software to cover/uncover information. Personally, I choose to create separate slides for each piece of information content I introduce—where the final slide has the entire diagram, and I use cropping or a cover on duplicated slides that come before to hide what I’m not yet ready to include. I use this method in order to ensure that each slide in my deck truly presents one specific idea (the new content) and the amount of the new information on that slide can be described in 1 minute (Rule 2), but it comes with the trade-off—a change to the format of one of the slides in the series often means changes to all slides.

Top left: A background slide that describes the background material on a project from my lab. The slide was created using a PowerPoint Design Template, which had to be modified to increase default text sizes for this figure (i.e., the default text sizes are even worse than shown here). Bottom row: The 2 new slides that break up the content into 2 explicit ideas about the background, using a central graphic. In the first slide, the graphic is an explicit example of the SH2 domain of PI3-kinase interacting with a phosphorylation site (Y754) on the PDGFR to describe the important details of what an SH2 domain and phosphotyrosine ligand are and how they interact. I use that same graphic in the second slide to generalize all binding events and include redundant text to drive home the central message (a lot of possible interactions might occur in the human proteome, more than we can currently measure). Top right highlights which rules were used to move from the original slide to the new slide. Specific changes as highlighted by Rule 7 include increasing contrast by changing the background color, increasing font size, changing to sans serif fonts, and removing all capital text and underlining (using bold to draw attention). PDGFR, platelet-derived growth factor receptor.
Rule 2: Spend only 1 minute per slide
When you present your slide in the talk, it should take 1 minute or less to discuss. This rule is really helpful for planning purposes—a 20-minute presentation should have somewhere around 20 slides. Also, frequently giving your audience new information to feast on helps keep them engaged. During practice, if you find yourself spending more than a minute on a slide, there’s too much for that one slide—it’s time to break up the content into multiple slides or even remove information that is not wholly central to the story you are trying to tell. Reduce, reduce, reduce, until you get to a single message, clearly described, which takes less than 1 minute to present.
Rule 3: Make use of your heading
When each slide conveys only one message, use the heading of that slide to write exactly the message you are trying to deliver. Instead of titling the slide “Results,” try “CTNND1 is central to metastasis” or “False-positive rates are highly sample specific.” Use this landmark signpost to ensure that all the content on that slide is related exactly to the heading and only the heading. Think of the slide heading as the introductory or concluding sentence of a paragraph and the slide content the rest of the paragraph that supports the main point of the paragraph. An audience member should be able to follow along with you in the “paragraph” and come to the same conclusion sentence as your header at the end of the slide.
Rule 4: Include only essential points
While you are speaking, audience members’ eyes and minds will be wandering over your slide. If you have a comment, detail, or figure on a slide, have a plan to explicitly identify and talk about it. If you don’t think it’s important enough to spend time on, then don’t have it on your slide. This is especially important when faculty are present. I often tell students that thesis committee members are like cats: If you put a shiny bauble in front of them, they’ll go after it. Be sure to only put the shiny baubles on slides that you want them to focus on. Putting together a thesis meeting for only faculty is really an exercise in herding cats (if you have cats, you know this is no easy feat). Clear and concise slide design will go a long way in helping you corral those easily distracted faculty members.
Rule 5: Give credit, where credit is due
An exception to Rule 4 is to include proper citations or references to work on your slide. When adding citations, names of other researchers, or other types of credit, use a consistent style and method for adding this information to your slides. Your audience will then be able to easily partition this information from the other content. A common mistake people make is to think “I’ll add that reference later,” but I highly recommend you put the proper reference on the slide at the time you make it, before you forget where it came from. Finally, in certain kinds of presentations, credits can make it clear who did the work. For the faculty members heading labs, it is an effective way to connect your audience with the personnel in the lab who did the work, which is a great career booster for that person. For graduate students, it is an effective way to delineate your contribution to the work, especially in meetings where the goal is to establish your credentials for meeting the rigors of a PhD checkpoint.
Rule 6: Use graphics effectively
As a rule, you should almost never have slides that only contain text. Build your slides around good visualizations. It is a visual presentation after all, and as they say, a picture is worth a thousand words. However, on the flip side, don’t muddy the point of the slide by putting too many complex graphics on a single slide. A multipanel figure that you might include in a manuscript should often be broken into 1 panel per slide (see Rule 1 ). One way to ensure that you use the graphics effectively is to make a point to introduce the figure and its elements to the audience verbally, especially for data figures. For example, you might say the following: “This graph here shows the measured false-positive rate for an experiment and each point is a replicate of the experiment, the graph demonstrates …” If you have put too much on one slide to present in 1 minute (see Rule 2 ), then the complexity or number of the visualizations is too much for just one slide.
Rule 7: Design to avoid cognitive overload
The type of slide elements, the number of them, and how you present them all impact the ability for the audience to intake, organize, and remember the content. For example, a frequent mistake in slide design is to include full sentences, but reading and verbal processing use the same cognitive channels—therefore, an audience member can either read the slide, listen to you, or do some part of both (each poorly), as a result of cognitive overload [ 4 ]. The visual channel is separate, allowing images/videos to be processed with auditory information without cognitive overload [ 6 ] (Rule 6). As presentations are an exercise in listening, and not reading, do what you can to optimize the ability of the audience to listen. Use words sparingly as “guide posts” to you and the audience about major points of the slide. In fact, you can add short text fragments, redundant with the verbal component of the presentation, which has been shown to improve retention [ 7 ] (see Fig 1 for an example of redundant text that avoids cognitive overload). Be careful in the selection of a slide template to minimize accidentally adding elements that the audience must process, but are unimportant. David JP Phillips argues (and effectively demonstrates in his TEDx talk [ 5 ]) that the human brain can easily interpret 6 elements and more than that requires a 500% increase in human cognition load—so keep the total number of elements on the slide to 6 or less. Finally, in addition to the use of short text, white space, and the effective use of graphics/images, you can improve ease of cognitive processing further by considering color choices and font type and size. Here are a few suggestions for improving the experience for your audience, highlighting the importance of these elements for some specific groups:
- Use high contrast colors and simple backgrounds with low to no color—for persons with dyslexia or visual impairment.
- Use sans serif fonts and large font sizes (including figure legends), avoid italics, underlining (use bold font instead for emphasis), and all capital letters—for persons with dyslexia or visual impairment [ 8 ].
- Use color combinations and palettes that can be understood by those with different forms of color blindness [ 9 ]. There are excellent tools available to identify colors to use and ways to simulate your presentation or figures as they might be seen by a person with color blindness (easily found by a web search).
- In this increasing world of virtual presentation tools, consider practicing your talk with a closed captioning system capture your words. Use this to identify how to improve your speaking pace, volume, and annunciation to improve understanding by all members of your audience, but especially those with a hearing impairment.
Rule 8: Design the slide so that a distracted person gets the main takeaway
It is very difficult to stay focused on a presentation, especially if it is long or if it is part of a longer series of talks at a conference. Audience members may get distracted by an important email, or they may start dreaming of lunch. So, it’s important to look at your slide and ask “If they heard nothing I said, will they understand the key concept of this slide?” The other rules are set up to help with this, including clarity of the single point of the slide (Rule 1), titling it with a major conclusion (Rule 3), and the use of figures (Rule 6) and short text redundant to your verbal description (Rule 7). However, with each slide, step back and ask whether its main conclusion is conveyed, even if someone didn’t hear your accompanying dialog. Importantly, ask if the information on the slide is at the right level of abstraction. For example, do you have too many details about the experiment, which hides the conclusion of the experiment (i.e., breaking Rule 1)? If you are worried about not having enough details, keep a slide at the end of your slide deck (after your conclusions and acknowledgments) with the more detailed information that you can refer to during a question and answer period.
Rule 9: Iteratively improve slide design through practice
Well-designed slides that follow the first 8 rules are intended to help you deliver the message you intend and in the amount of time you intend to deliver it in. The best way to ensure that you nailed slide design for your presentation is to practice, typically a lot. The most important aspects of practicing a new presentation, with an eye toward slide design, are the following 2 key points: (1) practice to ensure that you hit, each time through, the most important points (for example, the text guide posts you left yourself and the title of the slide); and (2) practice to ensure that as you conclude the end of one slide, it leads directly to the next slide. Slide transitions, what you say as you end one slide and begin the next, are important to keeping the flow of the “story.” Practice is when I discover that the order of my presentation is poor or that I left myself too few guideposts to remember what was coming next. Additionally, during practice, the most frequent things I have to improve relate to Rule 2 (the slide takes too long to present, usually because I broke Rule 1, and I’m delivering too much information for one slide), Rule 4 (I have a nonessential detail on the slide), and Rule 5 (I forgot to give a key reference). The very best type of practice is in front of an audience (for example, your lab or peers), where, with fresh perspectives, they can help you identify places for improving slide content, design, and connections across the entirety of your talk.
Rule 10: Design to mitigate the impact of technical disasters
The real presentation almost never goes as we planned in our heads or during our practice. Maybe the speaker before you went over time and now you need to adjust. Maybe the computer the organizer is having you use won’t show your video. Maybe your internet is poor on the day you are giving a virtual presentation at a conference. Technical problems are routinely part of the practice of sharing your work through presentations. Hence, you can design your slides to limit the impact certain kinds of technical disasters create and also prepare alternate approaches. Here are just a few examples of the preparation you can do that will take you a long way toward avoiding a complete fiasco:
- Save your presentation as a PDF—if the version of Keynote or PowerPoint on a host computer cause issues, you still have a functional copy that has a higher guarantee of compatibility.
- In using videos, create a backup slide with screen shots of key results. For example, if I have a video of cell migration, I’ll be sure to have a copy of the start and end of the video, in case the video doesn’t play. Even if the video worked, you can pause on this backup slide and take the time to highlight the key results in words if someone could not see or understand the video.
- Avoid animations, such as figures or text that flash/fly-in/etc. Surveys suggest that no one likes movement in presentations [ 3 , 4 ]. There is likely a cognitive underpinning to the almost universal distaste of pointless animations that relates to the idea proposed by Kosslyn and colleagues that animations are salient perceptual units that captures direct attention [ 4 ]. Although perceptual salience can be used to draw attention to and improve retention of specific points, if you use this approach for unnecessary/unimportant things (like animation of your bullet point text, fly-ins of figures, etc.), then you will distract your audience from the important content. Finally, animations cause additional processing burdens for people with visual impairments [ 10 ] and create opportunities for technical disasters if the software on the host system is not compatible with your planned animation.
Conclusions
These rules are just a start in creating more engaging presentations that increase audience retention of your material. However, there are wonderful resources on continuing on the journey of becoming an amazing public speaker, which includes understanding the psychology and neuroscience behind human perception and learning. For example, as highlighted in Rule 7, David JP Phillips has a wonderful TEDx talk on the subject [ 5 ], and “PowerPoint presentation flaws and failures: A psychological analysis,” by Kosslyn and colleagues is deeply detailed about a number of aspects of human cognition and presentation style [ 4 ]. There are many books on the topic, including the popular “Presentation Zen” by Garr Reynolds [ 11 ]. Finally, although briefly touched on here, the visualization of data is an entire topic of its own that is worth perfecting for both written and oral presentations of work, with fantastic resources like Edward Tufte’s “The Visual Display of Quantitative Information” [ 12 ] or the article “Visualization of Biomedical Data” by O’Donoghue and colleagues [ 13 ].
Acknowledgments
I would like to thank the countless presenters, colleagues, students, and mentors from which I have learned a great deal from on effective presentations. Also, a thank you to the wonderful resources published by organizations on how to increase inclusivity. A special thanks to Dr. Jason Papin and Dr. Michael Guertin on early feedback of this editorial.
Funding Statement
The author received no specific funding for this work.
- Google Slides Presentation Design
- Pitch Deck Design
- Powerpoint Redesign
- Other Design Services

- Design Tips
- Guide & How to's
How to prepare a scientific presentation
Putting together a scientific presentation might be a pretty challenging undertaking. However, with careful preparation and planning, it can turn into a rewarding experience.
In this article, we’ll discuss the purpose, presentation methods, and structure of an excellent scientific ppt, as well as share essential tips on how to introduce a scientific presentation, so dive in!

What’s a scientific presentation
A scientific presentation is a formal way to share an observation, propose a hypothesis, show and explain the findings of a study, or summarize what has been discovered or is still to be studied on the subject.
Professional scientific presentations aid in disseminating research and raise peers’ awareness of novel approaches, findings, or issues. They make conferences memorable for both the audience and the presenter.
Presentation methods
The three major presentation methods that are frequently used at large conferences include platform (oral), poster, and lecture presentations. Although appearing seemingly different at times, they all have the same requirements and difficulties for successful execution, and their main prerequisite is you, the presenter.
An effective presenter should have led the research, taken part in the analysis, and written the abstract and manuscript, which means the presenter should be fully knowledgeable about the topic at hand.
Scientific presentation structure
For the majority of scientific presentations, it is advisable to follow the traditional structure:
Title → Introduction/Background → Methods → Results → Discussion → Conclusion → Acknowledgements.
1. Introduction
The main elements that make up the introduction include the background of the study, the research problem, the significance of the research, the research objectives, research questions, and/or hypotheses.
The background is the premise upon which the study’s problem is built. It usually consists of one or two sentences.
After the background usually comes the research problem, which is made up of one or two sentences with clear statements. These can be anything from conflicting findings to a knowledge gap your scientific presentation PowerPoint addresses.
The justification part should briefly outline how the findings will contribute to the problem’s solution. It can also discuss the possible implications of the study in not more than two sentences.
Next comes the purpose of the study, which has to outline your goals and relate to the study’s title.
You may wrap up the introduction by listing the objectives of your study, research questions, or hypotheses. The study’s objectives describe the specific steps that must be taken to accomplish the goal. Please note that the objective can be turned into a research question and a research question, in turn, into a hypothesis.
2. Methodology
This section of your presentation should include a relevant study area map. It is recommended that you adequately describe the research design and use diagrams like flowcharts whenever possible.
Additionally, explain the procedures for obtaining the data for each objective, research question, and hypothesis. Finally, state the statistical analysis procedures used.
3. Results and discussion
An oral presentation will always include both the results and the discussion. However, the slides will only contain the results.
You can use tables and figures together, but they shouldn’t be applied to the same data set.
The results of your scientific PowerPoint presentation have to be organized in the same order as the objectives, research questions, and hypotheses. Still, describing and discussing the obtained results should be done off-head.
During your presentation, explain the findings in the tables and figures, pointing out any patterns. Also, discuss the results by assigning reasons to patterns, comparing the results with earlier research, and offering interpretations and implications for your findings.
4. Conclusion
Your presentation’s final section should offer closing remarks on the study’s key findings, not restate the results. Discuss the findings and their implications and make recommendations for additional research briefly and concisely.
If you include in-text references in your slides, always provide external references on a separate slide.
Prepare your title slide before beginning the research’s introduction section. Your name, your institution or department, the title of the presentation, and its date should all be included on the title slide.
Last but not least, your second slide should include the scientific presentation outline.
3 things to pay attention to when creating a scientific presentation
Color is a powerful tool for setting a pattern. It can make it easier for the reader or the audience to follow you and comprehend the connection between the subjects you are presenting.
According to our design experts, you have to create a natural flow of information and emphasize information that the reader has to see first (e.g., title or main image). Secondary data has to be less prominent, not to take priority. This all can be achieved through colors. Striking colors will quickly grab the audience’s attention. Meanwhile, a grayscale will be more discreet, making it ideal for secondary information.
Pro tip: Select one or two primary colors for your presentation, then use them repeatedly on the slides.

2. Typography
Font selection is crucial for the overall success of your presentation. Therefore, make sure your text is simple to see and read even if the person is sitting a considerable distance from the screen. Separate paragraphs and headings and stick with three different fonts at most (e.g., Helvetica, Gotham).
Remember that your audience will be looking at the slides while you are speaking, so avoid putting too much text on them.
Pro tip: Use a different font for your headline but ensure it doesn’t create the “comic sans” effect.
Visual aids such as charts, graphs, and images are indispensable for effectively conveying information and grabbing the audience’s attention, but you must choose them carefully.
Make sure to move from this to this:
Pro tip: If there’s a diagram, chart, or other visual that you don’t plan to walk your audience through, cut it.

Here’s a good scientific presentation example to follow:

Now that you know how to make a scientific presentation and what to pay attention to when creating one, let’s move on to the scientific presentation tips from the best designers of our professional presentation services .
Top 10 tips on how to present a scientific paper
Tip #1: Know your audience
View the presentation as a dialogue with the audience rather than a monologue, and always consider the interests and expertise of your audience. This will help you tailor your scientific presentation to their level of knowledge and interests.
Tip #2: Make use of PowerPoint
PowerPoint is an excellent tool for presenting scientific research if appropriately used. Generally, this involves inserting a lot of relevant visuals and minimum words with a font size of 24 points and above.
Tip #3: Tell your audience about your research rather than its background
Focus on discussing the research that you are directly contributing to. The background information should only include the bare minimum. People don’t attend conferences to hear a review of previous work. They do so to learn about new and intriguing research, so use the allotted time to your advantage.
Tip #4: Practice and rehearse
Always practice your presentation of science thoroughly before giving it to anyone. By doing so, you’ll gain a better understanding of the material and make sure your presentation flows smoothly.
Tip #5: Keep to the time limit
A basic rule of thumb is to keep your presentation to 80% of the allotted time. If you are given 55 minutes to deliver your presentation, prepare 45 minutes worth of information: 15 minutes for introduction, 25 for the main aspects of your presentation, 5 to summarize and conclude, and leave the last ten for a Q&A session.
A well-done abstract, a set of carefully chosen viewgraphs, a brief “cheat sheet,” and an outline (perhaps placed in the corner of each viewgraph) should all help you stay on track throughout your presentation.
Tip #6: Don’t read from the slides
Reading from slides is commonplace in various fields, but do you really find it interesting to hear someone read their conference presentation? If reading is an absolute must, then our experts advise you to do it in such a way that no one in the audience notices it. Writing your text in a conversational tone and reading with emotion, conviction, and variations in tone is a great trick to achieve that.
Tip #7: Summarize the key points
Reiterate your main message and briefly touch on your main points in your conclusion. By doing so, you can ensure that your audience will remember the most crucial details of your presentation.
Tip #8: Use effective communication techniques
When delivering your presentation, use appropriate body language and effective communication techniques. These include maintaining eye contact with the audience, speaking clearly and at a reasonable volume, and conveying enthusiasm about your work. Remember, genuine enthusiasm accounts for 90% of a speaker’s success.
Tip #9: Engage the audience
Always ask questions and use polls or other interactive tools to interact with your audience and encourage discussion.
Tip #10: Dress for success
When preparing to give a scientific presentation, dress up professionally. This will help convey two crucial messages: you respect your audience and are willing to conform.
Wrapping up
Following the above science presentation structure and tips, you can create clear, informative, and engaging slides that effectively communicate your message to the audience. However, if you’re still wondering how to start a scientific presentation or need a PowerPoint makeover , don’t hesitate to contact our dedicated design experts!
At SlidePeak, we know that building a visually captivating presentation may be a real challenge for researchers and scientists. That’s why we’ve developed several services, including presentation redesign and creation from scratch by qualified scientific, technical, and medical designers who can make your work stand out both in science and creativity.
With over a decade of experience in presentation design, SlidePeak is trusted by thousands of researchers and scientists worldwide. So, submit your scientific presentation order today, and let dedicated experts turn your ideas into professional slides that will help you make an impact!
#ezw_tco-2 .ez-toc-widget-container ul.ez-toc-list li.active::before { background-color: #ededed; } Table of contents
- Presenting techniques
- 50 tips on how to improve PowerPoint presentations in 2022-2023 [Updated]
- Keynote VS PowerPoint
- Types of presentations
- Present financial information visually in PowerPoint to drive results

Crafting an engaging presentation script

- Business Slides
Franchise presentation: what it is and how to create an effective one

Annual report design templates and tips: how to tell a great story with financial data in 2023
- - Google Chrome
Intended for healthcare professionals
- Access provided by Google Indexer
- My email alerts
- BMA member login
- Username * Password * Forgot your log in details? Need to activate BMA Member Log In Log in via OpenAthens Log in via your institution
Search form
- Advanced search
- Search responses
- Search blogs
- How to prepare and...
How to prepare and deliver an effective oral presentation
- Related content
- Peer review
- Lucia Hartigan , registrar 1 ,
- Fionnuala Mone , fellow in maternal fetal medicine 1 ,
- Mary Higgins , consultant obstetrician 2
- 1 National Maternity Hospital, Dublin, Ireland
- 2 National Maternity Hospital, Dublin; Obstetrics and Gynaecology, Medicine and Medical Sciences, University College Dublin
- luciahartigan{at}hotmail.com
The success of an oral presentation lies in the speaker’s ability to transmit information to the audience. Lucia Hartigan and colleagues describe what they have learnt about delivering an effective scientific oral presentation from their own experiences, and their mistakes
The objective of an oral presentation is to portray large amounts of often complex information in a clear, bite sized fashion. Although some of the success lies in the content, the rest lies in the speaker’s skills in transmitting the information to the audience. 1
Preparation
It is important to be as well prepared as possible. Look at the venue in person, and find out the time allowed for your presentation and for questions, and the size of the audience and their backgrounds, which will allow the presentation to be pitched at the appropriate level.
See what the ambience and temperature are like and check that the format of your presentation is compatible with the available computer. This is particularly important when embedding videos. Before you begin, look at the video on stand-by and make sure the lights are dimmed and the speakers are functioning.
For visual aids, Microsoft PowerPoint or Apple Mac Keynote programmes are usual, although Prezi is increasing in popularity. Save the presentation on a USB stick, with email or cloud storage backup to avoid last minute disasters.
When preparing the presentation, start with an opening slide containing the title of the study, your name, and the date. Begin by addressing and thanking the audience and the organisation that has invited you to speak. Typically, the format includes background, study aims, methodology, results, strengths and weaknesses of the study, and conclusions.
If the study takes a lecturing format, consider including “any questions?” on a slide before you conclude, which will allow the audience to remember the take home messages. Ideally, the audience should remember three of the main points from the presentation. 2
Have a maximum of four short points per slide. If you can display something as a diagram, video, or a graph, use this instead of text and talk around it.
Animation is available in both Microsoft PowerPoint and the Apple Mac Keynote programme, and its use in presentations has been demonstrated to assist in the retention and recall of facts. 3 Do not overuse it, though, as it could make you appear unprofessional. If you show a video or diagram don’t just sit back—use a laser pointer to explain what is happening.
Rehearse your presentation in front of at least one person. Request feedback and amend accordingly. If possible, practise in the venue itself so things will not be unfamiliar on the day. If you appear comfortable, the audience will feel comfortable. Ask colleagues and seniors what questions they would ask and prepare responses to these questions.
It is important to dress appropriately, stand up straight, and project your voice towards the back of the room. Practise using a microphone, or any other presentation aids, in advance. If you don’t have your own presenting style, think of the style of inspirational scientific speakers you have seen and imitate it.
Try to present slides at the rate of around one slide a minute. If you talk too much, you will lose your audience’s attention. The slides or videos should be an adjunct to your presentation, so do not hide behind them, and be proud of the work you are presenting. You should avoid reading the wording on the slides, but instead talk around the content on them.
Maintain eye contact with the audience and remember to smile and pause after each comment, giving your nerves time to settle. Speak slowly and concisely, highlighting key points.
Do not assume that the audience is completely familiar with the topic you are passionate about, but don’t patronise them either. Use every presentation as an opportunity to teach, even your seniors. The information you are presenting may be new to them, but it is always important to know your audience’s background. You can then ensure you do not patronise world experts.
To maintain the audience’s attention, vary the tone and inflection of your voice. If appropriate, use humour, though you should run any comments or jokes past others beforehand and make sure they are culturally appropriate. Check every now and again that the audience is following and offer them the opportunity to ask questions.
Finishing up is the most important part, as this is when you send your take home message with the audience. Slow down, even though time is important at this stage. Conclude with the three key points from the study and leave the slide up for a further few seconds. Do not ramble on. Give the audience a chance to digest the presentation. Conclude by acknowledging those who assisted you in the study, and thank the audience and organisation. If you are presenting in North America, it is usual practice to conclude with an image of the team. If you wish to show references, insert a text box on the appropriate slide with the primary author, year, and paper, although this is not always required.
Answering questions can often feel like the most daunting part, but don’t look upon this as negative. Assume that the audience has listened and is interested in your research. Listen carefully, and if you are unsure about what someone is saying, ask for the question to be rephrased. Thank the audience member for asking the question and keep responses brief and concise. If you are unsure of the answer you can say that the questioner has raised an interesting point that you will have to investigate further. Have someone in the audience who will write down the questions for you, and remember that this is effectively free peer review.
Be proud of your achievements and try to do justice to the work that you and the rest of your group have done. You deserve to be up on that stage, so show off what you have achieved.
Competing interests: We have read and understood the BMJ Group policy on declaration of interests and declare the following interests: None.
- ↵ Rovira A, Auger C, Naidich TP. How to prepare an oral presentation and a conference. Radiologica 2013 ; 55 (suppl 1): 2 -7S. OpenUrl
- ↵ Bourne PE. Ten simple rules for making good oral presentations. PLos Comput Biol 2007 ; 3 : e77 . OpenUrl PubMed
- ↵ Naqvi SH, Mobasher F, Afzal MA, Umair M, Kohli AN, Bukhari MH. Effectiveness of teaching methods in a medical institute: perceptions of medical students to teaching aids. J Pak Med Assoc 2013 ; 63 : 859 -64. OpenUrl

- Presentation Skills
Can Presentation Science Improve Your Presentation?
Search SkillsYouNeed:
Rhubarb The blog at SkillsYouNeed
- Rhubarb Front Page -guidelines for contributors-
- 22 Effective PowerPoint Presentation Tips
- Essential Strategies to Boost Your Public Speaking Confidence
- What is a Pitch Deck and Why Do You Need One?
- Enhancing Creativity: A Guide to Harnessing Mid-Journey Prompts for Image Creation
- Strategic Planning for Conference Success - A Step-by-Step Guide for Teams
- Effective Presentation Skills for Professionals
- Presentation Skills: Using AI To Help You Thrive in Your Presentations
- Mastering Soft Skills to Deliver Impactful Presentations
- How to Present Statistics and Analytics in an Effective Manner?
- 7 Tools to Improve Your Presentation Skills
- Five Reasons Why Singing Lessons Will Be a Game Changer for Your Public Speaking Efforts
- Captivating Presentations: Techniques to Engage and Retain Your Audience
- How Can AI Help in Creating Winning Presentations?
- How to Dress to Impress During an Important Presentation
- How to Present Effectively to your Colleagues
- How to Become a Better Public Speaker
- How You Can Improve Your Video Editing Skills
- What is Your Story? How to Identify Your Story from Raw Data
- Why Public Speaking and Communication Are So Important to Your Career
- Preparing for Oral Presentations
- Learn Better Presentation Skills with TED Talks
- How to Get People to Actually Listen to What You’re Saying
- 7 Public Speaking Tips For Introverts
- Psychological Secrets for Effective Presentations
Subscribe to our FREE newsletter and start improving your life in just 5 minutes a day.
You'll get our 5 free 'One Minute Life Skills' and our weekly newsletter.
We'll never share your email address and you can unsubscribe at any time.
Scientific research points to a best practice for creating presentations. But, interestingly, the research also shows that most presentations go against these research findings!
We have come to expect a low level of engagement from PowerPoint presentations: they are usually slow, tedious, confusing, and, ultimately, deal-breaking. It seems okay to deliver something average, because the person before you just delivered something average…
Indeed, few people give honest or helpful feedback to presenters, so we tend to just grin and bear it. Yet we often dread having to sit through presentations, and the phrase “Death by PowerPoint” exists for good reason.
But times are changing. Awareness of presentation design agencies is increasing, and alternative software is emerging: both factors are now influencing how presentations look and behave.
Indeed the standard of PowerPoint is also changing, with Microsoft adding features regularly to the 365 version, yet few people can use it really well. No matter what your ability is with the software, you can still do a lot of simple things to transform your presentations!
In this article, we want to focus on how scientific presentation guidance can help you to build a better presentation:
- 3 rules of brain science
- 3 steps to a great presentation structure
Get both of these areas right, and your audience will have a much better experience. And so will you!
3 Brain Rules:
These are essential when it comes to presentations:
Brain rule #1: Respect the limits of working memory
The human brain learns by transferring information from its working memory into its long-term memory.
Since the aim of every presentation is to be remembered (at least it should be!), we need to make the most of what working memory can and can’t do. The main hurdle is that working memory has a limited capacity: it can only hold a certain amount of new information at any one time. So this means you can’t just present everything, in any old way, and expect your audience to get it.
There are a number of methods you can employ that will assist in the transfer of your information from working memory to long-term memory. One of them being the use of templates for scientific presentation that already have a definitive structure which will not allow you to overload your audience with text. Visually appealing PowerPoint templates are a great way to organize your presentation and make it more clear and engaging for the audience.

Scientific methods to help your slides be easier to recall:
Coherence principle – be clutter free!
Learning improves when multimedia is free from extraneous information. This may sound obvious, but make sure you remove all objects, pictures, animation, logos, gloss and shine that do not contribute to your message. This applies to everything, including charts – check out Edward Tufte’s “ChartJunk” . One simple bit of advice to follow is to not show both data labels and an axis: by keeping only one, you can visually clean up the number of lines, text and objects within the chart. Cleaner looking charts are faster to understand, and they look and feel better too.
Spatial Contiguity – use space judiciously!
Learning improves when words are placed near relevant pictures.
For example, a pie chart with a legend takes longer for the brain to understand than a pie with labels on top of the slices (or close by).
You may find that legends look “tidier”, but your audience’s brains will find them tougher to digest. It’s just a little thing, but these little things really add up!
Redundancy principle
This proves that learning reduces when information is redundant – such as reading verbatim from your slides.
Your audience doesn’t need to both read and listen to information – we look at this in more depth in the next brain rule. Other redundancies could be visual items like a logo. It takes up screen space and is ultimately ignored by the viewers - so you may need to question whether you need it at all? And if it’s not being ignored, well, that’s even worse as it’s distracting your audience! Either way, (apart from keeping marketing/compliance happy) you probably don’t need it on every slide.
Brain rule #2: Address the visual & verbal channels
Humans use separate brain channels to process visual input and verbal input. So, let’s relate this fact to presentations:
A typical presentation is ineffective because the majority (if not all) of its content is Text with Narration . So during a presentation, the audience is overloaded by two sources of information hitting just one channel: the verbal channel.
Note: it’s often assumed that text is processed by the visual channel, since we read with our eyes, but in fact it’s internally processed by the ears as we listen to ourselves read.
Therefore both text and narration go via the verbal channel, overloading that one channel and creating a split attention effect. Your audience will attempt to listen and read at the same time. It’s just not possible to do both simultaneously (even if people think they can!) and attention will be lost.

The human brain is at its most effective when it processes information simultaneously via both the visual and verbal channels. Therefore there’s one sure-fire way to make your presentation better, and that is to address both channels in a complementary way!
Simply put , use images and narration.
However, be careful, as using the wrong image can do more harm than good! It is way too easy to adopt the “yeah yeah, I know, add images” mantra. Many people think adding images is the answer to creating great presentations: but it’s very common for presentations to contain narration, text and poorly targeted images. This renders slides equally ineffective at communicating with your audience.
Poorly targeted images do more harm than no images – they provide conflicting visual and verbal information. What’s more, visuals that are decorative are highly likely to prompt the brain to wander…
…for example, since we can’t control what each individual will start day dreaming about, use photographic imagery with great care. Photos may look amazing in slides, but your audience will often remember the photos, and their feelings/thoughts associated with them, rather than your message!
To sum up, it’s been shown that people have 6x better recall when both verbal and visual channels are used in perfect harmony! This is called ' Dual Coding Theory '.
Brain rule #3: Guide your audience’s attention
Whilst it’s important to get audience attention as early as possible, you’ll also need to hold it. And that’s the hard part.
Remember that your audience will usually be thinking of 101 different things when they sit down for your presentation (and expecting another ‘Death by PowerPoint’ experience!)
So as your presentation progresses, and you reach the nitty-gritty slides, there are a number of important measures you can employ to assist the mind to process the information on your slides.
You can make things much easier on your audience’s working memory by presenting new information in a way that follows a familiar pattern . Familiar devices would be things like a graphical pattern, a recognised order, a recognisable structure or concept. By tapping into your audience’s prior knowledge, their working memory is much more likely to be able to process and transfer your new information into long-term memory.
Signalling principle is another useful and technique – it shows that learning improves when attention is focused on important parts of the presentation.
This could be through the simple use of arrows or icons to direct attention to the important area of the slide. Or it could be the use of a particular colour for your key points, whether for shading or for text. Headlines themselves are a good signal and will help your audience to understand a complex slide by telling them what they need to know first. Remember to use them sparingly: you don’t want to overload either!
Graphics & visuals are great when you need to simplify a complex idea, something abstract or a highly detailed system or process.
An illustration may be easier for the mind to understand than a lengthy text explanation, but some graphics may still be difficult to understand immediately.
In such cases where the visual is not perfectly intuitive, you can use a technique we mentioned earlier: the Spatial Contiguity principle. By adding text to the relevant parts of the visual it describes, you can effectively guide attention and assist learning. You can also use animation to introduce parts of the diagram bit by bit.
Animation: Whilst it is proven that animation commands attention, we do not want the movement to distract from the key messages in the narration or on the slide.
For this reason, we recommend using animation only where necessary: i.e. to control the flow of information (e.g. content to appear in sync with narration).
Of course if you’re creating a video-type presentation, using motion animation, then the timing needs to be fast and dynamic – waiting for a drawn-out animation to finish is a very bad thing indeed.
Simply put , your animation must serve a strict purpose.
Now you know some of the science, follow these 3 steps to help you reach your presentation goal.
If you can engage, connect, and make your audience want to act, then you know you’ve given a good presentation.
Step 1: Choose story thread
The first few slides of your presentation are key. Generally, you will have your audience’s attention at the very start – but it won’t last long if you don’t show them relevance! Your job is to keep their attention.
You do this by ensuring your initial slides make them want to focus on the rest of your story. Your opening needs to set the scene, establish your story and show your audience that your presentation is relevant to them. By getting your audience interested, they are more likely to participate in your story.
We typically use 4 slides to set the scene. With ‘Call to action’ (4) being the most important of your presentation. It’s your purpose slide, and is the reason you’re presenting.
It may feel strange to state your purpose so early on, but it’s a highly effective technique. Your audience wants to know your purpose and their purpose – so tell them.
We credit Cliff Atkinson from Beyond Bullet Points for this highly effective structure

Addressing the audience’s needs will help you connect with their emotions, persuade them they want to participate in your story, and focus them on the path forward.
Step 2: Plan priority & sequence
Your next step is to validate and expand on the opening slides. This is the meat of your presentation – and with a lot of information to pass on, this is where it can get messy!
If you present your audience with an unstructured, unprioritised series of slides, the limited capacity of their working memory will be overwhelmed and they won’t take much in.
Plan your key messages
So plan a hierarchy of ideas, and then work out which are your priority messages. This helps to guide your audience to exactly where they should focus their working memory.
You need to employ a system which will help you clarify your content by prioritising your slides strategically.
2-4 key messages is typical, and 3 is common: you don’t want much more than that. Each key message should tie in closely with your call to action. If your key message doesn’t back up your purpose, then it’s unlikely to be the right message for your audience.
Carefully plan the words you’ll use and the angle of the key message. Keep your audience at the heart of your messages: they should benefit from everything you tell them.
We recommend using a ‘tree diagram’ to map the priority of your points.
- Level 1: each of your key messages is Level 1.
- Level 2: at the next level, you have slides that support your Level 1 key messages with evidence, explanation or detail.
- Level 3: these slides in turn support each Level 2 slide if necessary.
Any information that doesn’t fit into this system of supporting your key messages probably shouldn’t be in your presentation. Get rid of it!
In slide sorter view, your presentation will start to look like this:

Step 3: Write your headlines
Once you’re happy with Steps 1 and 2, you can then start going into the detail. Each slide should integrate seamlessly into your story by using the right headline, narration and carefully designed graphics.
If even one aspect goes out of sync, you risk losing your audience’s attention as their brain tries to figure out exactly what’s going on!
The way you should write your headlines is quite different to the way they’re often written. You’ll recognise ineffective headlines like ‘Who we are’ or ‘Financial report’. This kind of headline doesn’t help. A headline should tell your audience something. It’s a waste of time and space to use your headline to simply sum up the subject area you’re about to cover in your slide. This won’t focus your audience at all. You need to make the most of your headlines.
Your headline should cover the key message of the slide , so make sure your most important point is in there. Not only will you prepare your audience for what’s to come but, if they switch off and miss what you’re saying, at least they’ll take the key point from your headline!
If you want scientific proof of the value of well written headings, click to read more: How the Design of Presentation Slides Affects Audience Retention.
When you compile your slides you need to:
- Write your headlines first They should be concise and written in complete sentences, with subject and verb in active voice. They should be clear, direct, specific and conversational. They should also be relevant and link your ideas across slides, so the story flows.
- Then plan your narration Keep your narration in the notes area and not on the slides! Also keep your slides free from unnecessary text, and make sure your narration is relevant to each headline.
- Then add graphics that match your headlines & narration The visuals are the trickiest to get right. Most presentations use ‘decorative’ visuals that might look great, but don’t add substance. Such visuals are distracting and will draw focus away from the point you’re trying to make.
Visuals should match your goal, whether your presentation is to inform or motivate, or to sell or persuade - each of these goals will dictate which type of graphic will work best on your slides. You also need to take into account the visual literacy of your audience - measuring both their applicable prior knowledge as well as their individual visual ability.
Look at your slides in slide sorter view. Read the headlines across the top and see if your story flows from one slide to another. If it doesn’t, rewrite your headlines!
Further Presentation Tips:
Passion & purpose:.
Believe in yourself and your subject matter. Give yourself a goal and be passionate about it. This is incredibly important. If you’re not passionate, then it’s much harder for the audience to believe you.
Remember the audience is on your side: they don’t want you to fail, so take support from them and deliver the message you have planned with confidence.
Try not to sit or stand still with your head down just reading from notes. Move around, gesticulate, use facial expressions and other body language to help the communication process.
Perfection:
Mistakes are human, understandable and no big deal. It’s how you recover from mistakes that shows your professionalism.
Your audience won’t even notice some mistakes (e.g. content order) so don’t worry, don’t mention it and simply move on. They may notice other mistakes (e.g. information error) so do mention it, apologise, and move on. Feeling less stressed about perfection makes mistakes less likely to occur.
Know your audience. Show them as early as you can that you understand who they are, and what challenges they face. Look at trends, competition, and key issues. Make sure your presentation is targeted to them. If you have a new audience for your next presentation – retarget that presentation too.
That’s it!
We hope that you’ll feel better equipped to not only create scientifically improved presentations, but also to understand why it’s so important to adhere to presentation science.
About the Author
Philippa Leguen de Lacroix is the co-founder and director of UK presentation design company Presented. Presented specialise in improving presentation design with science. Presentations are then more memorable, and create a far more enjoyable experience for the audience.
Continue to: Top Tips for Effective Presentations
See also: Presentation Method Mastering Soft Skills to Deliver Impactful Presentations How Can AI Help in Creating Winning Presentations?
Introduction
Presentation methods, delivering a presentation, study methods, discussion: transform, acknowledgements, how to prepare and deliver a scientific presentation : teaching course presentation at the 21st european stroke conference, lisboa, may 2012.
- Split-Screen
- Article contents
- Figures & tables
- Supplementary Data
- Peer Review
- Open the PDF for in another window
- Get Permissions
- Cite Icon Cite
- Search Site
Andrei V. Alexandrov , Michael G. Hennerici; How to Prepare and Deliver a Scientific Presentation : Teaching Course Presentation at the 21st European Stroke Conference, Lisboa, May 2012 . Cerebrovasc Dis 1 April 2013; 35 (3): 202–208. https://doi.org/10.1159/000346077
Download citation file:
- Ris (Zotero)
- Reference Manager
Background: A scientific presentation is a professional way to share your observation, introduce a hypothesis, demonstrate and interpret the results of a study, or summarize what is learned or to be studied on the subject. Presentation Methods: Commonly, presentations at major conferences include podium (oral, platform), poster or lecture, and if selected one should be prepared to PRESENT: P lan from the start (place integral parts of the presentation in logical sequence); R educe the amount of text and visual aids to the bare minimum; E lucidate (clarify) methods; S ummarize results and key messages; E ffectively deliver; N ote all shortcomings, and T ransform your own and the current thinking of others. We provide tips on how to achieve this. Presentation Results: After disclosing conflicts, if applicable, start with a brief summary of what is known and why it is required to investigate the subject. State the research question or the purpose of the lecture. For original presentations follow a structure: Introduction, Methods, Results, Conclusions. Invest a sufficient amount of time or poster space in describing the study methods. Clearly organize and deliver the results or synopsis of relevant studies. Include absolute numbers and simple statistics before showing advanced analyses. Remember to present one point at a time. Stay focused. Discuss study limitations. In a lecture or a podium talk or when standing by your poster, always think clearly, have a logical plan, gain audience attention, make them interested in your subject, excite their own thinking about the problem, listen to questions and carefully weigh the evidence that would justify the punch-line. Conclusions: Rank scientific evidence in your presentation appropriately. What may seem obvious may turn erroneous or more complex. Rehearse your presentation before you deliver it at a conference. Challenge yourself to dry runs with your most critically thinking colleagues. When the time comes, ace it with a clear mind, precise execution and fund of knowledge.
Over time communication standards between -scientists have evolved along with improved scientific method, increasing scrutiny of analyses and upholding to the highest level of evidence anything we call research. Scientific presentation is a professional way of sharing your observation, introducing a hypothesis, demonstrating and interpreting the results of a study, or -summarizing what has been learned or is to be studied on the subject. Professional presentations help disseminate research, make peers aware of novel approaches, findings or problems. These presentations make conferences memorable for both presenters and the audience. Anyone can recall the most exciting and most boring, the most clear and most convoluted, the most ‘-seriously?!' and the most ‘wow!!' presentations. Most presentations, however, fall in the in-between level of ‘so what?', ‘I did not quite get it …', or ‘maybe'. This means that all the work the authors have put in did not result in a paradigm shift, -advancement, or even ‘well, this is good to know' kind of an impact. We struggle to shape up our young presenters to make their science clear and visible, their presence known and their own networks grow.
Having initially struggled in preparing and delivering presentations ourselves, and having seen the many baby steps of our trainees now accomplished or shy of a track record, we have put together these suggestions on how to start, organize and accomplish what at first sight looks like a daunting task: presenting in front of people, many of whom may have expertise way beyond your own or who are scrutinizing every bit of data and ready to shred any evidence you might have to pieces. Unfortunately, there is no other way to advance science and become recognized than to survive this campaign from conception of a project to publication. This campaign has its own (often interim and hopefully not singular) culmination in a scientific presentation. This presentation also comes with question and answer sessions and importantly, with you and the audience possibly coming out of it with new messages, new thinking and even energy for breakthroughs, no matter how small or large the leap would be. So let's explore how to prepare and deliver a scientific presentation.
Currently, the common types of presentations at major conferences include podium (oral, platform), poster or lecture. Although seemingly different and at times some being more desirable over others, they all share the same prerequisites and challenges for successful execution. We will examine common threads and identify unique aspects of each type of these presentations. However, the first prerequisite for any scientific presentation (successful or not) is you, the presenter.
An effective presenter should have led the study, participated in the analysis and drafting of the abstract and manuscript, i.e. the presenter should know the subject of his or her talk inside out. One should therefore be prepared to PRESENT:
P lan from the start (place integral parts of the presentation in logical sequence);
R educe the amount of text and visual aids to the bare minimum;
E lucidate (clarify) methods;
S ummarize results and key messages;
E ffectively deliver;
N ote all shortcomings, and
T ransform your own and the current thinking of others.
So, as the scuba-diving instructors say: plan the dive, and dive the plan. The most important parts of scientific presentations should follow the logic of delivering the key messages. For the original presentations (platforms or posters), it is easy to simply follow the accepted abstracts, most often structured following the IMRaD principle: Introduction, Methods, Results and Discussion (Conclusions).
Lecture format, content and logical flow of information often depend on the topic choice, which should be appropriate to the level of audience [ 1 ], time allotment and the target audience. Most competitive conferences offer short times even for invited lecturers as experts are expected to demonstrate cutting edge science, which assumes that the audience is already knowledgeable and the expert is capable of delivering information that sparks new thinking. The suggestion here to both novice and experienced speakers is to quickly summarize why the subject of presentation is important (catch audience attention [ 2,3 ]), where we are now (show the landscape of completed studies that established the common knowledge or conundrums, equipoise, etc.) and to move then to the latest advancements (this may include just-in publications, ongoing or planned future research or the most provocative take on the evidence out there).
Turning back to original presentations, advice is available on how to write abstracts following the IMRaD principle [ 4 ] and how to draft subsequent manuscripts [ 5 ]. We cannot stress enough the need to quickly follow-up the abstract submission with drafting the full manuscript. If the authors complete a manuscript before the presentation at a conference, the presenter will have a luxury of material to work with to compile either a set of slides for the podium or text and illustrations for the poster. If a manuscript was drafted and reviewed by coauthors, the challenge for a presenter is going to be a good one: trim down most sentences as both slides and posters benefit from short statements (not even full sentences) and large font sizes so that text can be easily read from a distance. Put yourself into the audience: your slides should be readable from the last row of a large room or a huge ballroom and your poster should be still readable from at least 2 m. The latter will allow better poster viewing by several people during guided poster tours or when a small group gathers spontaneously to view it.
This logically brings us to the second step: use bare minimum of any type of information to deliver your -presentation. Minimum text, minimum lines, minimum images, graphs, i.e. provide only the essential information as the audience attention span is short. Brevity, however, should not compromise quality: you should always stride to have the highest quality visual aids since these leave an impression on the audience [ 6 ] and good quality graphics are attributes of effective presentations [ 3 ].
At the same time, we cannot overemphasize the need to stick to time limits set for a specific presentation. Presenters should test their presentation in ‘real life' at home to their friends or at work in front of colleagues and ask for criticism. It is better to get criticism from members of the department (including your boss) than in a huge auditorium. Use a simple rule: an average talking time is 1 min per slide in oral presentations. You can then see how little you really can allocate to each slide if you load your talk with the most complicated visual presentation of data.
Let's go to the specifics. The ‘Introduction' slide usually includes a very brief description of background and should explicitly state the research question. Call it ‘Introduction and Study Purpose'. Adding a separate slide for study aims lengthens the talk. Fewer slides also reduce the chance of making an error when advancing them on the podium that can send presenters into further time deficit and stress, a commonplace even with those who know how to right-click.
Methods should have bullet points, not necessarily full sentences since you will be speaking over slides projecting or in front of the poster to connect brief statements showing behind you. The basic rule is not to read your slides or poster, nor tell the audience to read what the slide or poster says. Think of your slides or display material as a reminder to yourself of what you are supposed to say in detail and leave the noncritical words out of the slide and off the poster as it is an even easier source to pack with unreadable information. When you develop a presentation imagine you are a novice to the field who would like to be educated and taken on a journey while seeing and hearing the presentation. What can I learn in these few minutes? As the presenter, also think ‘what can I pass to the audience in these few minutes?' Further advice on how to plan, focus and arrange material to support key messages is available [ 7,8 ].
Results are the key part of any scientific presentation, podium, poster or lecture, and the most time, space and careful ascertainment should be allotted to this section as is necessary and feasible. It is vital to pack your presentation with data that support your key messages. Remember, a picture is worth a thousand words but show only quint-essential images or graphs. If appropriate include statistics and make this easy in structure, i.e. use formats or values known by everybody such as odds ratios, Kaplan Meier curves, etc. (do not forget to include these data in the abstract as abstracts without data, numbers and calculations are often low rated or rejected). After presenting data, show what you think of that or what the limitations are since you thought more about this than the audience, at least through preparation of your own presentation.
The last two concluding paragraphs (poster), comments (this section of a lecture), or slides (podium) are supposed to cover study limitations and conclusions. These should be the most carefully thought through, strategically worded and evidence-based part of your presentation. Your reputation depends on the quality of data interpretation. Also, think about a take-home message with the main message you want to be remembered. When practicing your presentations, deliver your talk to your nonmedical spouse, boyfriend or girlfriend: by the end of your presentation he or she should be able to repeat the take home message with best-prepared presentations.
After conclusions, an ‘Acknowledgements' slide is nice to have at the end showing whom you are grateful to, but it will not rescue a hopeless presentation. The ‘thanks to my colleagues' should not come at the expense of time, quality and content of your scientific presentation. There is no need to thank multiple people like they often do at the Oscars. You have to rationally consider who and when to acknowledge if their functions were important to your work but they were not listed among coauthors. If you received funding to support your work, it is very important where appropriate or at the end of the presentation to acknowledge your sponsors or grant providers (such as NIH Institute and grant number, MRC grant, INSERM or DFG labels, etc.). The higher the scientific level of the grant donors, the more your presentation will be recognized.
While preparing any part of your presentation, remind yourself to check whether the included material is any good and worthy of inclusion. You can simply ask, ‘am I wasting time during the oral presentation or space in the poster by including this and that?' The answer lies in checking if this material is directly related to the study aim, data obtained, or in support of conclusions drawn.
Table 1 summarizes how you should structure the sequence of slides for the podium presentation. If you are only given 8 min to present + 2 min for questions (10 min total), you can see that with 8 mandatory slides you are already at the limit of 1 min per slide. In due course, we will give you tips on how to reallocate time within your presentation to expand the Methods and, most importantly, the Results section as needed.
Basic structure for a podium presentation of an original paper

Always clarify study methods. Posters offer a greater freedom since you can show details of your experimental setup or the methodology of your study design. A podium presentation often requires abbreviated mention of key elements of design, scales, inclusion/exclusion criteria, intervention or dependent variables and outcomes. This requires diligent work with your coauthors and biostatisticians to make sure that you are brief but clear and sufficient.
A well-assembled Methods section will lead to a shorter Results summary since your clear statement of the study aim and key methodology logically leads to audience anticipation of the primary end-point findings. There are key messages and delivered data points that distinguish effective and clear presentations from those resulting in confusion and further guesswork.
Effective presenters capture audience attention and stay focused on key messages [ 1,2,3,6,7,8 ]. A study was performed at scientific conferences asking reviewers to identify the best features of effective presentations [ 3 . ]The most frequent comments on best features of presentations with respect to ‘content' were identifying a key concept (43% of presentations) and relevance (43%). Best features in evaluations of ‘slides' were clarity (50%), graphics (27.3%) and readability of the text and font size (23%). Finally, best features in ‘presentation style' were clarity (59%), pace (52%), voice (48%), engaging with the audience (43%), addressing questions (34%) and eye contact (28%) [ 3 ].
Here are some tips on how to avoid forcing yourself to rush during a talk. Before you start (usually in the intermission or just before your session) familiarize yourself with the podium and learn how to advance slides and operate the pointer or point with the mouse. If you stumble at the beginning, you start your presentation with a time deficit.
Get to the podium while you are being introduced and start right away (it is the responsibility of the moderator to properly announce you, your team and the title of the talk and it is the responsibility of the conference organizers to have your title slide showing during the moderator's announcement). Do not read or repeat your study title. Thank the moderators and while the title slide is showing you may consider briefly thanking your coauthors/mentor here in just a few seconds.
Show the ‘Conflicts of Interest' slide next and disclose if any conflicts are related to the study subject. If they exist, conflicts should be acknowledged briefly but clearly. Do not show a slide with several conflicts and tell the audience ‘here are my conflicts' and switch to the next slide. It is important to simply say, ‘pertinent to this study I have …' or ‘this study includes an off-label or investigational use of …'. Now you are logically ready to turn to the subject of your presentation.
Start with a brief summary of what is known and why is it important to investigate the subject. This -introduces the audience to the subject of research and starts the flow of logic. If you are facing a challenge to present a complex study within in a short allotted period of time (such as 8 min for podium or a just a few minutes during a guided poster tour), do not waste time. You may cut to the chase and simply say why you did the study. Coming with straight forward messages, which are authentic and concerned about the scientific question, gets you more credit with the audience than careful orchestration of a perceived equipoise. However, we have digressed.
For an effective message delivery, identify two people towards opposite far ends of the audience and speak as if you are personally talking to one of them at a time and alternate between them. If lights shining in your face are too bright, still look towards the back of the room (or from time to time directly into the camera if your talk is being shown on monitors in a large ballroom) and do not bury your head into the podium or notes that you might have brought with you. The nonverbal part of any presentation and the presenter's body language are also important [ 6 ]. At all cost avoid bringing notes with you to any scientific presentation since you should have practiced your talk enough to remember it or you should be familiar with the subject of your lecture to the point that even if you have just been woken up, you can still maintain an intelligent conversation. Do not count on ‘it will come to me' - practice your talk! Further advice on effective presenting skill is available [ 2 ].
Remember that at international conferences many attendees are not native English-speaking people. Thus speak slowly and train your voice for best possible pronunciation! This recommendation is applicable to natives of English-speaking countries too. Native English speakers from the UK, Commonwealth countries and the USA tend to speak fast, with a variety of accents that international audiences may not understand easily while the interpreters may not be able to keep up. When speaking, do not turn away from the audience and look at your slide projection on the main screen or at your poster all the time. If it is necessary to remind yourself what to talk about next, advance the slide, briefly glance at it, turn to the audience and continue your presentation. Turn to your slide again only if you have to use a laser pointer or a mouse on the computer screen. Do so briefly, underline the important finding, point to the key part of an image and avoid long circular pointer motions around the whole text line or big areas of graphic illustrations. It is distracting. Try to use the pointer only when necessary and do not read your slides with the pointer constantly aiming at where you are reading.
When presenting your methods, clearly state the type of study, e.g. retrospective analysis, case series, -cohort or controlled trials, etc., and describe patient inclusion/exclusion criteria. If too numerous, only list the major ones. As an example, in a clinical trial of a fibrinolytic agent the list of exclusion criteria could be very extensive, so how can you present this on a dime? Your slide should focus on the key inclusion criteria since a patient who did not have those was obviously excluded, and an audience at a stroke conference is generally familiar with multiple exclusion criteria for tissue plasminogen activator treatment. So, your slide or poster may have the following in it (highlighted in bold ) to which you may add the plain text in your (limited) verbal statements:
Our Major Inclusion Criteria: were
• total Pre-treatment NIHSS score >6 points
• Presence of mismatch on MRI determined by -( EPTITHET ) trial criteria
• Age <80 years and
• Time from symptom onset <8 h
After that, you may omit including a slide with the long list of exclusions in favor of time. If there is a -specific contraindication new to the treatment agent in your study, you could say ‘in addition to well-known contraindications for systemic thrombolysis, patients were excluded if they had …' at the end of showing the ‘Major Inclusion Criteria' slide as shown above. Similarly, in a poster, list only the most relevant inclusion and exclusion criteria and walk the audience through the methods without stumbling on too many detail -disclosures. The audience will lose track of where you are going.
It is important to keep a balance between sufficient disclosure of study methods and the length of this part of your presentation. It is always helpful if you have a prior study that used a similar or from which you developed your methodology that has already been published - you may show a reference to this study and move on faster without sacrificing the quality. For example, ‘ultrasound tests were done by experienced sonographers using a previously published standard protocol', ‘CT scans were read independently using the ASPECTS score', and ‘sICH was defined by the SITS-MOST criteria'. Say this while showing or pointing to the line and published source reference on your visual aid.
Clearly organize and deliver the Results section. Include absolute numbers and simple statistics before showing advanced analyses. Remember not to show data in Methods and equally so do not introduce new methods when presenting Results. As a rule, describe characteristics of the general study population or balance/imbalances between target and control groups. Follow this by a slide that shows the primary end-point findings or observations that directly address the study aim or research question. This follows the logic of a scientific presentation and will help you avoid deviations to side observations no matter how unexpected or valuable they seem. Stay the course, address the main question first and only then show additional findings. When presenting a poster, point to the area where the key results are displayed. Unlike a slide presentation or lecture where the audience is forced to see one slide at a time, busy posters could be distracting. Posters that are heavily packed with graphs, images, tables and text are often difficult to follow during a brief guided poster presentation tour. It is the presenter's responsibility to drive the audience attention to key results in a logical sequence. When you present a graph, start by telling the audience what is shown and in what units on each access, and briefly point to the numbers on each axis.
Remember to present one point at a time. It makes common sense but sometimes may be difficult to follow if complex experiments or studies with multiple confounding variables have to be navigated through a brief presentation. Do not lose sight of your original research question or the objective of your lecture. Remember what you have shown so far, and what logically should be shown next. If you are pressed on time or made a mistake while advancing slides, take a deep breath and relax. Clear state of mind will buy you time. Racing thoughts such as ‘I have to cover that and that, and oh, that too' are not helpful. Dry runs, or practice presentations are essential for you to master the material that you need to present.
After finishing the Results part of your presentation, remember not to introduce more new results in Discussion and Conclusions. That surprise is hard for the audience to process. If you'd like to reemphasize the main finding, use the following suggestion. Let's say your goal was to show the prevalence of a new syndrome in your study population and you found it to be 24% (your primary research question). Unexpectedly, you also found that patients with this syndrome have an increased risk of dying (RR 2.08, 95% CI 1.23-4.34). These numbers and statistics obviously belong to the Results section. However, you want to stress in your conclusion once again how important your finding is. You can present it as follows: ‘Conclusions: nearly a quarter of stroke patients can be affected by this new syndrome and, if present, it doubles the patient chance of dying in hospital'. This recaps the main finding and makes practical interpretation of the relative risk estimate.
Before you jump into Conclusions, however, we always encourage presenters to note and openly discuss current study limitations. This improves your own assessment for biases and ranking of the level of obtained evidence. If you do not disclose the obvious study limitations, you will most likely receive questions after your presentation that will point to these shortcomings. Thus, instead of a positive discussion of how your study advances our knowledge, the discussion with the audience will focus on shortcomings and the key message may be lost with the negative audience response. Unlike Twitter™ or future media-based quick popularity scores, science can only advance when it endures the highest scrutiny (even though in the future presenters may be concurrently judged by the audience as our technologies improve). Regardless, if you are a good scientist, prepare yourself to stand the ground if the evidence is behind you. Be proactive, acknowledge study limitations and how you attempted to control for biases, etc.
In a lecture or a podium talk or when standing by your poster, always think clearly, have a logical plan for presentation parts that should be covered next, gain audience attention, make them interested in your subject, excite their own thinking about the problem, listen to questions and carefully weigh the evidence that would justify the punch-line. This will support your conclusions!
With posters, we often see a Discussion section but no conclusions listed, or they are listed in the abstract but not in the poster itself. This will lead to an obvious question after you stop presenting: ‘So, what is your take on this?' Our advice is, have your conclusions listed and be prepared to defend them point-by-point as the question and answer part could be challenging. If you do not understand the question, ask for clarification rather than talk nonsense.
To arrive at the right conclusions, you have to rank scientific evidence in your presentation appropriately. What may seem obvious may turn erroneous or more complex at a closer look by experts. Helpful hints here include you maintaining careful documentation while you are conceiving the project, designing it with your colleagues and consulting with a biostatistician on all steps taken in ascertaining the study population, interventions, end-point data collection and bias verification. Put all methodological issues against your findings and this will give you an idea of the strengths and weaknesses of your study. Preparing and delivering your presentation is a great experience to see if your knowledge and gained expertise stand up to peer scrutiny.
Rehearse your presentation before you deliver it at a conference. Challenge yourself to dry runs with your most critically thinking colleagues. Quite often, it is not the presentation itself but these questions, comments and subsequent late night debates with your colleagues that bring new thinking, advance our understanding and spark new ideas. This is the chance to transform your own current thinking and that of your peers. Think about your upcoming presentation, whether it is a podium, poster or lecture, as an opportunity, a launch pad, a reward for the hard work you did to bring this project to the attention of the scientific community.
When time comes, ace it with a clear mind, precise execution and fund of knowledge.
Before his first oral presentation in English, Dr. Alexandrov was nervous and asked his mentor, Dr. John W. Norris, for a dry run. Dr. Norris generously came to listen to him at 10 p.m. the night before, and Dr. Alexandrov survived his talk.
Email alerts
Citing articles via, related articles.
- Online ISSN 1421-9786
- Print ISSN 1015-9770
INFORMATION
- Contact & Support
- Information & Downloads
- Rights & Permissions
- Terms & Conditions
- Catalogue & Pricing
- Policies & Information
- People & Organization
- Stay Up-to-Date
- Regional Offices
- Community Voice
SERVICES FOR
- Researchers
- Healthcare Professionals
- Patients & Supporters
- Health Sciences Industry
- Medical Societies
- Agents & Booksellers
Karger International
- S. Karger AG
- P.O Box, CH-4009 Basel (Switzerland)
- Allschwilerstrasse 10, CH-4055 Basel
- Tel: +41 61 306 11 11
- Fax: +41 61 306 12 34
- Contact: Front Office
- Experience Blog
- Privacy Policy
- Terms of Use
This Feature Is Available To Subscribers Only
Sign In or Create an Account

The Craft of Scientific Presentations
Critical Steps to Succeed and Critical Errors to Avoid
- © 2013
- Latest edition
- Michael Alley 0
College of Engineering, Pennsylvania State University, University Park, USA
You can also search for this author in PubMed Google Scholar
- Introduces the assertion-evidence slide structure that has been proven to effectively communicate the work of highly regarded engineers and scientists
- Provides a new chapter detailing a fresh approach to communicating with the public, with best practices from distinguished speakers
- Goes beyond the topic of handling nervousness to explore the more valuable topic of how to achieve confidence
- Includes supplementary material: sn.pub/extras
290k Accesses
34 Citations
12 Altmetric
This is a preview of subscription content, log in via an institution to check access.
Access this book
- Available as EPUB and PDF
- Read on any device
- Instant download
- Own it forever
- Compact, lightweight edition
- Dispatched in 3 to 5 business days
- Free shipping worldwide - see info
Tax calculation will be finalised at checkout
Other ways to access
Licence this eBook for your library
Institutional subscriptions
Table of contents (19 chapters)
Front matter, chapter 1 introduction.
Michael Alley
Chapter 2 Speech: The Words You Say
Critical error 1 giving the wrong speech, critical error 2 boring your audience, chapter 3 structure: the strategy you choose, critical error 3 trying to cover too much, critical error 4 losing the audience from the start, critical error 5 losing the audience on the trail, critical error 6 not anticipating the audience’s bias, chapter 4 visual aids: your supporting cast, critical error 7 following the defaults of powerpoint, critical error 8 following the common practices of powerpoint talks, critical error 9 not accounting for murphy’s law, chapter 5 delivery: you, the room, and the audience, critical error 10 not preparing enough, critical error 11 drawing words from the wrong well, critical error 12 not paying attention, critical error 13 losing composure, chapter 6 conclusion.
- adopted-textbook NY
- assertion-evidence structure
- communicating to the general public
- conference presentations
- confidence in presentations
- effective presentations
- effective slides
- guide to presentations
- handling nervousness
- humor in presentations
- planning a scientific presentation
- preparing conference talks
- presenting science
- rethinking PowerPoint
- sceience communication techniques
- scientific presentations
- technical presentations
About this book
The Craft of Scientific Presentations, 2nd edition aims to strengthen you as a presenter of science and engineering. The book does so by identifying what makes excellent presenters such as Brian Cox, Jane Goodall, Richard Feynman, and Jill Bolte Taylor so strong. In addition, the book explains what causes so many scientific presentations to flounder. One of the most valuable contributions of this text is that it teaches the assertion-evidence approach to scientific presentations. Instead of building presentations, as most engineers and scientists do, on the weak foundation of topic phrases and bulleted lists, this assertion-evidence approach calls for building presentations on succinct message assertions supported by visual evidence. Unlike the commonly followed topic-subtopic approach that PowerPoint leads presenters to use, the assertion-evidence approach is solidly grounded in research. By showing the differences between strong and weak presentations,by identifying the errors that scientific presenters typically make, and by teaching a much more powerful approach for scientific presentations than what is commonly practiced, this book places you in a position to elevate your presentations to a high level. In essence, this book aims to have you not just succeed in your scientific presentations, but excel.
About the Author
Michael Alley has taught workshops on presentations to engineers and scientists on five continents, and has recently been invited to speak at the European Space Organization, Harvard Medical School, MIT, Sandia National Labs, Shanghai Jiao Tong University, Simula Research Laboratory, and United Technologies. An Associate Professor of engineering communication at Pennsylvania State University, Alley is a leading researcher on the effectiveness of different designs for presentation slides.
From the reviews of the second edition:
“Alley’s book as an important and must-read guide for anyone in the scientific field. Professors, researchers and students will greatly benefit from Alley’s work. The book also has the benefit of being short and concrete–a plus for the busy scientist.” (Philosophy, Religion and Science Book Reviews, bookinspections.wordpress.com, March, 2014)
Authors and Affiliations
About the author, bibliographic information.
Book Title : The Craft of Scientific Presentations
Book Subtitle : Critical Steps to Succeed and Critical Errors to Avoid
Authors : Michael Alley
DOI : https://doi.org/10.1007/978-1-4419-8279-7
Publisher : Springer New York, NY
eBook Packages : Physics and Astronomy , Physics and Astronomy (R0)
Copyright Information : Springer Science+Business Media, LLC, part of Springer Nature 2013
Softcover ISBN : 978-1-4419-8278-0 Published: 31 August 2011
eBook ISBN : 978-1-4419-8279-7 Published: 21 June 2013
Edition Number : 2
Number of Pages : XIX, 286
Number of Illustrations : 6 b/w illustrations, 53 illustrations in colour
Topics : Physics, general , Popular Science, general , Engineering, general , Job Careers in Science and Engineering
- Publish with us
Policies and ethics
- Find a journal
- Track your research
Home Blog Presentation Ideas How to Create and Deliver a Research Presentation
How to Create and Deliver a Research Presentation

Every research endeavor ends up with the communication of its findings. Graduate-level research culminates in a thesis defense , while many academic and scientific disciplines are published in peer-reviewed journals. In a business context, PowerPoint research presentation is the default format for reporting the findings to stakeholders.
Condensing months of work into a few slides can prove to be challenging. It requires particular skills to create and deliver a research presentation that promotes informed decisions and drives long-term projects forward.
Table of Contents
What is a Research Presentation
Key slides for creating a research presentation, tips when delivering a research presentation, how to present sources in a research presentation, recommended templates to create a research presentation.
A research presentation is the communication of research findings, typically delivered to an audience of peers, colleagues, students, or professionals. In the academe, it is meant to showcase the importance of the research paper , state the findings and the analysis of those findings, and seek feedback that could further the research.
The presentation of research becomes even more critical in the business world as the insights derived from it are the basis of strategic decisions of organizations. Information from this type of report can aid companies in maximizing the sales and profit of their business. Major projects such as research and development (R&D) in a new field, the launch of a new product or service, or even corporate social responsibility (CSR) initiatives will require the presentation of research findings to prove their feasibility.
Market research and technical research are examples of business-type research presentations you will commonly encounter.
In this article, we’ve compiled all the essential tips, including some examples and templates, to get you started with creating and delivering a stellar research presentation tailored specifically for the business context.
Various research suggests that the average attention span of adults during presentations is around 20 minutes, with a notable drop in an engagement at the 10-minute mark . Beyond that, you might see your audience doing other things.
How can you avoid such a mistake? The answer lies in the adage “keep it simple, stupid” or KISS. We don’t mean dumbing down your content but rather presenting it in a way that is easily digestible and accessible to your audience. One way you can do this is by organizing your research presentation using a clear structure.
Here are the slides you should prioritize when creating your research presentation PowerPoint.
1. Title Page
The title page is the first thing your audience will see during your presentation, so put extra effort into it to make an impression. Of course, writing presentation titles and title pages will vary depending on the type of presentation you are to deliver. In the case of a research presentation, you want a formal and academic-sounding one. It should include:
- The full title of the report
- The date of the report
- The name of the researchers or department in charge of the report
- The name of the organization for which the presentation is intended
When writing the title of your research presentation, it should reflect the topic and objective of the report. Focus only on the subject and avoid adding redundant phrases like “A research on” or “A study on.” However, you may use phrases like “Market Analysis” or “Feasibility Study” because they help identify the purpose of the presentation. Doing so also serves a long-term purpose for the filing and later retrieving of the document.
Here’s a sample title page for a hypothetical market research presentation from Gillette .

2. Executive Summary Slide
The executive summary marks the beginning of the body of the presentation, briefly summarizing the key discussion points of the research. Specifically, the summary may state the following:
- The purpose of the investigation and its significance within the organization’s goals
- The methods used for the investigation
- The major findings of the investigation
- The conclusions and recommendations after the investigation
Although the executive summary encompasses the entry of the research presentation, it should not dive into all the details of the work on which the findings, conclusions, and recommendations were based. Creating the executive summary requires a focus on clarity and brevity, especially when translating it to a PowerPoint document where space is limited.
Each point should be presented in a clear and visually engaging manner to capture the audience’s attention and set the stage for the rest of the presentation. Use visuals, bullet points, and minimal text to convey information efficiently.

3. Introduction/ Project Description Slides
In this section, your goal is to provide your audience with the information that will help them understand the details of the presentation. Provide a detailed description of the project, including its goals, objectives, scope, and methods for gathering and analyzing data.
You want to answer these fundamental questions:
- What specific questions are you trying to answer, problems you aim to solve, or opportunities you seek to explore?
- Why is this project important, and what prompted it?
- What are the boundaries of your research or initiative?
- How were the data gathered?
Important: The introduction should exclude specific findings, conclusions, and recommendations.

4. Data Presentation and Analyses Slides
This is the longest section of a research presentation, as you’ll present the data you’ve gathered and provide a thorough analysis of that data to draw meaningful conclusions. The format and components of this section can vary widely, tailored to the specific nature of your research.
For example, if you are doing market research, you may include the market potential estimate, competitor analysis, and pricing analysis. These elements will help your organization determine the actual viability of a market opportunity.
Visual aids like charts, graphs, tables, and diagrams are potent tools to convey your key findings effectively. These materials may be numbered and sequenced (Figure 1, Figure 2, and so forth), accompanied by text to make sense of the insights.

5. Conclusions
The conclusion of a research presentation is where you pull together the ideas derived from your data presentation and analyses in light of the purpose of the research. For example, if the objective is to assess the market of a new product, the conclusion should determine the requirements of the market in question and tell whether there is a product-market fit.
Designing your conclusion slide should be straightforward and focused on conveying the key takeaways from your research. Keep the text concise and to the point. Present it in bullet points or numbered lists to make the content easily scannable.

6. Recommendations
The findings of your research might reveal elements that may not align with your initial vision or expectations. These deviations are addressed in the recommendations section of your presentation, which outlines the best course of action based on the result of the research.
What emerging markets should we target next? Do we need to rethink our pricing strategies? Which professionals should we hire for this special project? — these are some of the questions that may arise when coming up with this part of the research.
Recommendations may be combined with the conclusion, but presenting them separately to reinforce their urgency. In the end, the decision-makers in the organization or your clients will make the final call on whether to accept or decline the recommendations.

7. Questions Slide
Members of your audience are not involved in carrying out your research activity, which means there’s a lot they don’t know about its details. By offering an opportunity for questions, you can invite them to bridge that gap, seek clarification, and engage in a dialogue that enhances their understanding.
If your research is more business-oriented, facilitating a question and answer after your presentation becomes imperative as it’s your final appeal to encourage buy-in for your recommendations.
A simple “Ask us anything” slide can indicate that you are ready to accept questions.
1. Focus on the Most Important Findings
The truth about presenting research findings is that your audience doesn’t need to know everything. Instead, they should receive a distilled, clear, and meaningful overview that focuses on the most critical aspects.
You will likely have to squeeze in the oral presentation of your research into a 10 to 20-minute presentation, so you have to make the most out of the time given to you. In the presentation, don’t soak in the less important elements like historical backgrounds. Decision-makers might even ask you to skip these portions and focus on sharing the findings.
2. Do Not Read Word-per-word
Reading word-for-word from your presentation slides intensifies the danger of losing your audience’s interest. Its effect can be detrimental, especially if the purpose of your research presentation is to gain approval from the audience. So, how can you avoid this mistake?
- Make a conscious design decision to keep the text on your slides minimal. Your slides should serve as visual cues to guide your presentation.
- Structure your presentation as a narrative or story. Stories are more engaging and memorable than dry, factual information.
- Prepare speaker notes with the key points of your research. Glance at it when needed.
- Engage with the audience by maintaining eye contact and asking rhetorical questions.
3. Don’t Go Without Handouts
Handouts are paper copies of your presentation slides that you distribute to your audience. They typically contain the summary of your key points, but they may also provide supplementary information supporting data presented through tables and graphs.
The purpose of distributing presentation handouts is to easily retain the key points you presented as they become good references in the future. Distributing handouts in advance allows your audience to review the material and come prepared with questions or points for discussion during the presentation.
4. Actively Listen
An equally important skill that a presenter must possess aside from speaking is the ability to listen. We are not just talking about listening to what the audience is saying but also considering their reactions and nonverbal cues. If you sense disinterest or confusion, you can adapt your approach on the fly to re-engage them.
For example, if some members of your audience are exchanging glances, they may be skeptical of the research findings you are presenting. This is the best time to reassure them of the validity of your data and provide a concise overview of how it came to be. You may also encourage them to seek clarification.
5. Be Confident
Anxiety can strike before a presentation – it’s a common reaction whenever someone has to speak in front of others. If you can’t eliminate your stress, try to manage it.
People hate public speaking not because they simply hate it. Most of the time, it arises from one’s belief in themselves. You don’t have to take our word for it. Take Maslow’s theory that says a threat to one’s self-esteem is a source of distress among an individual.
Now, how can you master this feeling? You’ve spent a lot of time on your research, so there is no question about your topic knowledge. Perhaps you just need to rehearse your research presentation. If you know what you will say and how to say it, you will gain confidence in presenting your work.
All sources you use in creating your research presentation should be given proper credit. The APA Style is the most widely used citation style in formal research.
In-text citation
Add references within the text of your presentation slide by giving the author’s last name, year of publication, and page number (if applicable) in parentheses after direct quotations or paraphrased materials. As in:
The alarming rate at which global temperatures rise directly impacts biodiversity (Smith, 2020, p. 27).
If the author’s name and year of publication are mentioned in the text, add only the page number in parentheses after the quotations or paraphrased materials. As in:
According to Smith (2020), the alarming rate at which global temperatures rise directly impacts biodiversity (p. 27).
Image citation
All images from the web, including photos, graphs, and tables, used in your slides should be credited using the format below.
Creator’s Last Name, First Name. “Title of Image.” Website Name, Day Mo. Year, URL. Accessed Day Mo. Year.
Work cited page
A work cited page or reference list should follow after the last slide of your presentation. The list should be alphabetized by the author’s last name and initials followed by the year of publication, the title of the book or article, the place of publication, and the publisher. As in:
Smith, J. A. (2020). Climate Change and Biodiversity: A Comprehensive Study. New York, NY: ABC Publications.
When citing a document from a website, add the source URL after the title of the book or article instead of the place of publication and the publisher. As in:
Smith, J. A. (2020). Climate Change and Biodiversity: A Comprehensive Study. Retrieved from https://www.smith.com/climate-change-and-biodiversity.
1. Research Project Presentation PowerPoint Template
A slide deck containing 18 different slides intended to take off the weight of how to make a research presentation. With tons of visual aids, presenters can reference existing research on similar projects to this one – or link another research presentation example – provide an accurate data analysis, disclose the methodology used, and much more.
Use This Template
2. Research Presentation Scientific Method Diagram PowerPoint Template
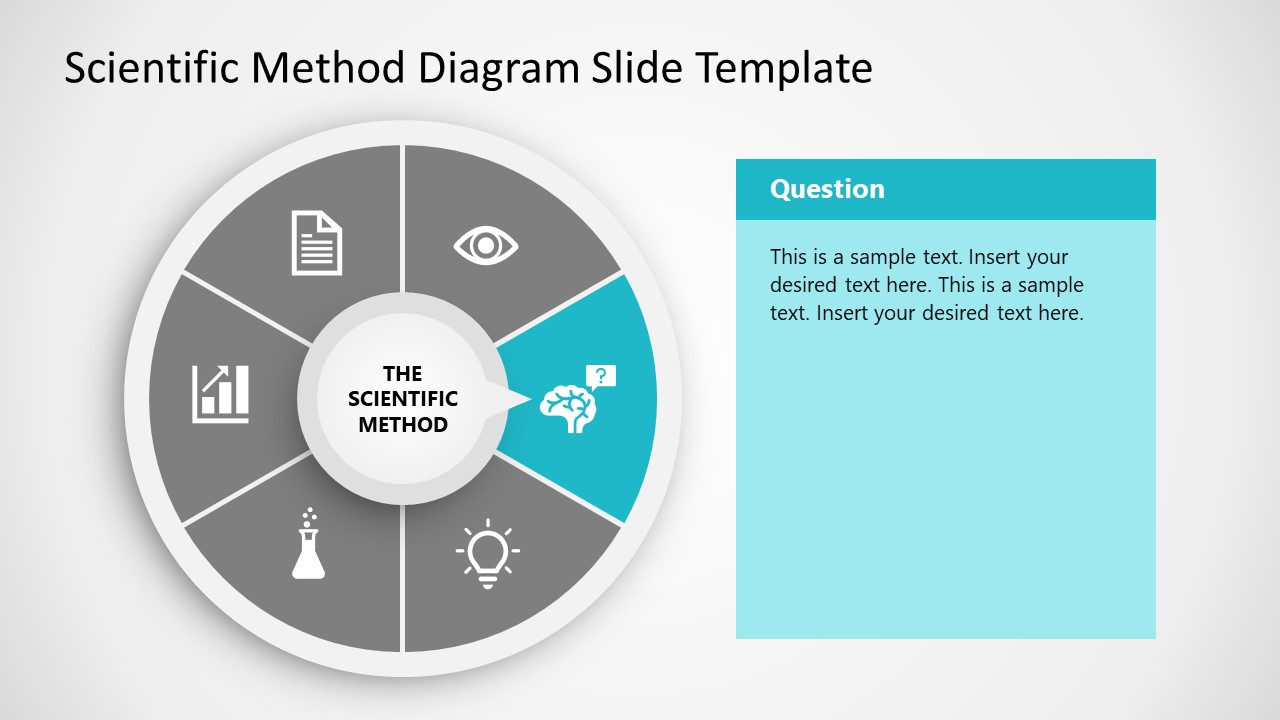
Whenever you intend to raise questions, expose the methodology you used for your research, or even suggest a scientific method approach for future analysis, this circular wheel diagram is a perfect fit for any presentation study.
Customize all of its elements to suit the demands of your presentation in just minutes.
3. Thesis Research Presentation PowerPoint Template

If your research presentation project belongs to academia, then this is the slide deck to pair that presentation. With a formal aesthetic and minimalistic style, this research presentation template focuses only on exposing your information as clearly as possible.
Use its included bar charts and graphs to introduce data, change the background of each slide to suit the topic of your presentation, and customize each of its elements to meet the requirements of your project with ease.
4. Animated Research Cards PowerPoint Template

Visualize ideas and their connection points with the help of this research card template for PowerPoint. This slide deck, for example, can help speakers talk about alternative concepts to what they are currently managing and its possible outcomes, among different other usages this versatile PPT template has. Zoom Animation effects make a smooth transition between cards (or ideas).
5. Research Presentation Slide Deck for PowerPoint
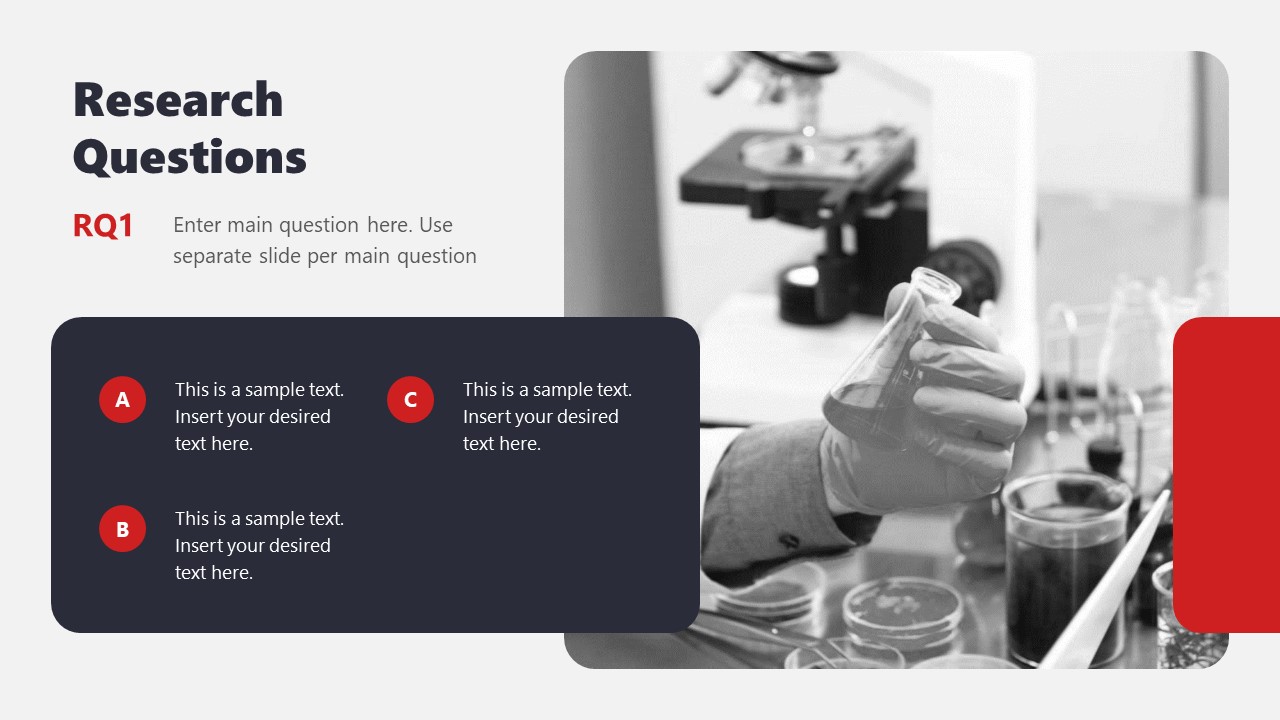
With a distinctive professional style, this research presentation PPT template helps business professionals and academics alike to introduce the findings of their work to team members or investors.
By accessing this template, you get the following slides:
- Introduction
- Problem Statement
- Research Questions
- Conceptual Research Framework (Concepts, Theories, Actors, & Constructs)
- Study design and methods
- Population & Sampling
- Data Collection
- Data Analysis
Check it out today and craft a powerful research presentation out of it!
A successful research presentation in business is not just about presenting data; it’s about persuasion to take meaningful action. It’s the bridge that connects your research efforts to the strategic initiatives of your organization. To embark on this journey successfully, planning your presentation thoroughly is paramount, from designing your PowerPoint to the delivery.
Take a look and get inspiration from the sample research presentation slides above, put our tips to heart, and transform your research findings into a compelling call to action.

Like this article? Please share
Academics, Presentation Approaches, Research & Development Filed under Presentation Ideas
Related Articles

Filed under Design • March 27th, 2024
How to Make a Presentation Graph
Detailed step-by-step instructions to master the art of how to make a presentation graph in PowerPoint and Google Slides. Check it out!

Filed under Presentation Ideas • February 29th, 2024
How to Make a Fundraising Presentation (with Thermometer Templates & Slides)
Meet a new framework to design fundraising presentations by harnessing the power of fundraising thermometer templates. Detailed guide with examples.

Filed under Presentation Ideas • February 15th, 2024
How to Create a 5 Minutes Presentation
Master the art of short-format speeches like the 5 minutes presentation with this article. Insights on content structure, audience engagement and more.
Leave a Reply
- Skip to primary navigation
- Skip to main content
- Skip to primary sidebar
- Skip to footer
Bringing the World's Best Biology to You
Designing Effective Scientific Presentations
- Duration: 42:08
00:00:00.17 You're probably tuning into this talk because you're interested in improving your speaking skills 00:00:03.26 and you know, let's face it, none of us really have had a lot of explicit training 00:00:08.20 in presentation as scientists. 00:00:11.03 So, ok, we're not experts. We may not be experts at public speaking, 00:00:16.26 but I would actually suggest to you that we are all experts at listening to talks. 00:00:20.20 Think about the number of hours that each of us has sat in a chair, in a lecture room, 00:00:26.15 in a seminar, in an auditorium, listened to journal clubs, to all kinds of talks, 00:00:33.24 we've spent hours and hours and hours listening to talks. 00:00:37.14 So we're experts at knowing what a good talk is because we know what we want delivered as an audience member. 00:00:44.23 So, if you think about it, why do we go to a talk? 00:00:47.20 Well, we're interested, obviously, in learning some about interesting and novel science. 00:00:52.19 We are going to listen to speakers who we think are credible and knowledgeable 00:00:58.24 and doing novel work. 00:01:01.00 We are responsive to speakers who are enthusiastic and who just keep us awake 00:01:08.28 and we want a talk that is well organized, clear, 00:01:11.11 a talk that we can follow, a talk that's not laden down with jargon 00:01:16.23 and a talk that gives us enough background to understand 00:01:19.12 what's going on, we want to be able to see the data, understand it, interpret it 00:01:23.12 and then make our own decision about the science. 00:01:26.23 So, we're all experts at listening to talks, why can't we just translate what we know 00:01:31.07 we want as an audience member into how we give a talk as individuals. 00:01:37.07 Let's think about something; how many times have we each seen a slide like this. 00:01:41.25 We've seen it a zillion times, right, we're sitting there, in a chair, 00:01:46.06 listening to a seminar, a slide like this comes on. 00:01:49.05 And we have no idea of what to look at. 00:01:52.20 Are we supposed to read all of this text? 00:01:55.07 Are we supposed to look at this figure, or that figure 00:01:58.13 or that figure? 00:01:59.17 We're overwhelmed visually and we've all seen this slide a thousand times. 00:02:02.29 Now, I just want to make a quick disclaimer. 00:02:05.18 This was not my work and I'm not suggesting for a second that the authors of this really gorgeous paper 00:02:12.01 would have shown a slide like that. 00:02:14.24 But, if I were giving a journal club on that topic, I might have produced a slide like this for you 00:02:19.16 in trying to tell you about these data. 00:02:22.07 So, when we think about what we know instinctively is just a disaster, why do we keep doing it 00:02:28.18 again and again and again? 00:02:31.03 I think that we need to know some basic rules about power point 00:02:34.19 and how to structure a talk 00:02:36.13 in order to enable these visuals to work effectively 00:02:39.24 as we're teaching, as we're speaking about our own science, 00:02:44.05 as we're presenting journal clubs. 00:02:45.26 So, what I'm going to do is first of all go through some basics about power point 00:02:48.24 and then we're going to think about how you structure a talk 00:02:52.26 in order to lead a member of the audience through the data 00:02:56.28 in a way that they will understand each piece that you're presenting and 00:03:00.26 be able to really understand what the take-home message is. 00:03:03.05 First of all, what font should you use? 00:03:06.08 It turns out that some of the default fonts in power point and keynote 00:03:10.16 are exactly wrong. The font you should use is a Sans Serif font. 00:03:14.13 What is a Sans Serif font? 00:03:15.03 San Serif fonts are fonts without little doober-hicky lines 00:03:20.06 and stuff at the bottom of letters. 00:03:22.04 And that's to be contrasted with Serif fonts, which have all the little doober-hickies at the bottom of each letter. 00:03:28.19 So, why do you use one and not the other? 00:03:30.20 Well, visual psychophysicists have discovered that using a Sans Serif font when you're projecting text 00:03:39.18 onto a screen like this makes it easier for the audience to read the text 00:03:44.08 quickly. These fonts down here, the Serif fonts, this is the font if you have novel you were going to read it in bed, 00:03:50.17 it's very easy to read. 00:03:52.07 And that's why books are printed with Serif fonts, 00:03:55.03 but you should choose, and there are a range of choices that you can make, 00:03:59.12 one of the Sans Serif fonts for your scientific presentations. 00:04:02.11 How big should your font be? 00:04:04.26 Again, be careful of some of the default font sizes. 00:04:08.16 One of the defaults in Power Point is astronomically huge, 00:04:11.24 bigger than this one right here, it's like 42. 00:04:14.11 It's way too big! You don't need that. 00:04:15.21 So, the range of font sizes that you should use are shown here. 00:04:19.06 Anywhere from 18 down to 36, with one exception. 00:04:24.01 We often, in our scientific presentations, will want to insert a reference to a published paper, 00:04:28.15 which isn't really the focus of the slide, but we want to have it up there 00:04:33.02 for scientific accuracy. 00:04:34.10 So, under those circumstances, you might use a 14 point 00:04:38.12 font, to put your reference at the bottom of the slide. 00:04:42.06 Other than that, just work in this range and you'll be good. 00:04:45.04 Avoid using capital letters. This makes it clear why. 00:04:49.05 It's actually really hard to read all capitols. 00:04:51.16 And secondly, in this age of email, I think we all know that capitalizing everything 00:04:57.19 is the visual equivalent of shouting at someone. 00:05:00.19 So it's just not polite. In addition, when you're thinking about titles 00:05:04.26 or how you would actually capitalize words, 00:05:07.21 use a sentence format. In other words, don't capitalize every word 00:05:11.21 of your title or your text down here. 00:05:15.10 Having capitals of every word slows down the eye and makes it difficult to read. 00:05:20.17 So, remember, the text and the slide is really there for the audience to be able to read quickly 00:05:26.07 and easily. 00:05:27.20 Color schemes are really important and thinking about the background of your slides. 00:05:33.27 Now, we've all seen a lot of slides that have 00:05:37.05 very fancy backgrounds and in fact, 00:05:40.03 you want the simplest possible background. 00:05:42.21 For example, a plain white background with dark letters, 00:05:45.29 either black or blue. 00:05:48.28 That works very well; it's high in contrast 00:05:51.05 and the only thing that appears on the slide is the information that your audience needs 00:05:56.02 to understand this slide in the context of your talk. 00:05:59.21 Avoid using the fancy patterned backgrounds. 00:06:05.03 You don't need your company or university logo 00:06:08.16 on every slide. You do not need a DNA double helix 00:06:11.19 running down every slide. 00:06:12.22 All of that is extraneous. Maybe it might appear on your first slide, 00:06:16.12 but then get rid of it. 00:06:18.08 Streamline it down to as simple as possible and think about the contrast of letters. 00:06:24.08 So dark against light works really well, 00:06:26.17 light against darks works very well. A black background with white letters 00:06:30.12 or bright yellow. Again, high contrast, easy for the audience to read. 00:06:35.12 When should you use which? Well, if you were to give a talk 00:06:39.19 for example, at a very large symposium, with hundreds of people, 00:06:44.06 a very big room, psycophysically, and in terms of the projector, 00:06:49.19 the contrast is greatest if you use a dark background 00:06:52.24 and light letters, under that context. 00:06:55.03 So it's easier to project at high contrast. 00:06:58.10 If you're teaching in a small room, or you're in a circumstance where you're worried about people staying awake, 00:07:07.00 then I would use a white background, with dark letters. 00:07:10.16 That is actually more effective. 00:07:13.13 However, you do want to think about your science. 00:07:15.24 For example, in my science, I use a lot of fluorescence, photomicrographs, where I actually prefer a dark background 00:07:25.20 because the contrast, I want people to be dark adapted so they can really see my data. 00:07:30.22 So in one of my scientific seminars, regardless of whether I'm in a small room or a big room 00:07:35.01 I use a black background. 00:07:36.27 It just works better for my science. 00:07:38.27 There are certain color combinations that you should avoid. Red/green is bad: 00:07:44.04 this is incredibly difficult to look at. In addition, a large fraction of the population is red-green color blind 00:07:51.15 and finally, red is really angry color. I actually saw an entire seminar once 00:07:56.15 with the background color of the slides that was red and 00:08:01.15 I was so agitated by ten minutes into the talk, so avoid that. 00:08:05.02 Other color combinations can be equally bad 00:08:09.07 and this is bad not because the colors are unpleasant 00:08:13.07 but because the contrast here is not big enough 00:08:16.22 for an audience member to actually read 00:08:19.16 the letters against this background. This is important because in science we're often 00:08:24.06 creating, for example, these cartoons, of, for example, of a signal transduction pathway, 00:08:30.19 where you want each protein to be a different color. 00:08:32.03 So we're always looking for a new color for a new protein as we're going through 00:08:36.19 a flow of talk, but we want to make sure that each protein that might in fact be this blue color 00:08:43.14 would then have a label on top of it that's high contrast. For example, for this, it might be black instead of green. 00:08:49.23 Let's think now about how to lay out a slide visually in Power Point 00:08:53.21 so that it's really easy for an audience member to follow the content of your talk. 00:08:59.20 First of all, I strongly recommend that every slide a heading at the top 00:09:04.20 and the best heading is actually a statement, a simple sentence 00:09:08.28 that says in plain english what the bottom line of the slide is. 00:09:13.11 Now you might say, Sue, excuse me, this is not a statement, and you're right 00:09:17.12 ok, busted, this is really going through an outline for this particular talk, but in my science talks 00:09:22.22 every slide is headed by a statement. 00:09:26.10 If you're going to include text in a slide, it's very important to just limit the amount of text. 00:09:32.22 I really, strongly urge you to use no more than two lines of text 00:09:38.16 in a text block. Why is that? 00:09:40.14 The minute you show a big block of text like this, I have lost you as an audience member. 00:09:45.21 You don't know at this point whether you should be reading all of this stuff or listening to me. 00:09:51.03 And if you as an audience member are now distracted and confused about what you should be doing, 00:09:56.21 I as a speaker have lost control of my talk. 00:09:59.25 So, don't use things like this, there's one exception, there might be a wonderful quotation that you want to include in your talk. 00:10:07.05 For example, a quote from The Double Helix or a quote from the beautiful writings of Ramon y Cajal 00:10:15.08 if you're a neurobiologist. And under those circumstances it's great to include the full text. 00:10:20.05 What I recommend you do if you do include a quotation, is rather than read it word by word, 00:10:25.06 instead sort of paraphrase it as you're going along. 00:10:27.13 You might say, well, the reason for limiting blocks of text to just two lines is 00:10:32.01 if it goes on forever, people in the audience are going to have to make this huge effort 00:10:36.08 to read it and that will preclude them from paying attention to what you're saying. 00:10:40.12 So, you can paraphrase a quote, that's very effective, unless it 00:10:43.29 is very poetic and you want to do a dramatic reading, and that's fine too. 00:10:47.21 Lists should be short; try to limit your lists to just three items. 00:10:54.01 Avoid like mad long lists and if you're going to have a list, 00:10:57.24 I strongly recommend that you use the animation feature in PowerPoint 00:11:02.13 to unveil your list one at a time. 00:11:05.22 So, when you're talking about item one in your talk, 00:11:07.17 that will appear. And only when you're ready to talk about item two 00:11:12.28 does that second item appear 00:11:14.24 and likewise, when you're ready to include item three, that will come up as well. 00:11:18.25 Be very generous in a slide with empty space. 00:11:23.01 It's more effective, it's more powerful for the audience. 00:11:26.19 And this is why. If you start to just load your slide with stuff, 00:11:30.11 it's visually overwhelming and often, you can get into a situation, 00:11:35.28 we've all been in seminars before, where something is very, very, very close to the edge of the slide 00:11:41.10 and there's a slight misalignment between the projector 00:11:45.06 and the screen that then results in stuff getting cut off. 00:11:49.16 And we've all been at talks, where someone says "oh, I'm sorry, If you could have seen the slide, 00:11:53.28 then you would have been able to read it." 00:11:55.26 Well, just leaving some space at the different edges, the boundaries of the slide 00:12:00.08 and don't forget about leaving some space at the bottom. 00:12:03.14 If you're in a room where everyone is sitting at the same level, 00:12:07.27 people in the back are trying to see over one another's head, 00:12:11.07 so if you're stuff is too close to bottom, some people in the back can't see it. 00:12:14.26 So, leave space on all three sides and a little space at the top, again for the misalignment problem. 00:12:19.25 Ok, let's think about the style of these slides. I urge you 00:12:25.17 most wholeheartedly to include a simple image 00:12:31.17 on every slide. 00:12:33.01 What, most slides? No, every slide. 00:12:35.28 In every slide of one of my scientific presentations, there is an image. 00:12:40.02 Why is that? Here's the deal. 00:12:43.03 We audience members who are listening to a talk take in and process information 00:12:48.28 in quite different ways from one another. Some of us 00:12:52.22 are readers and that's the reason for having a sentence at the top of each slide. 00:12:57.03 Some of us are going to take in information by reading. 00:13:00.11 Others of us are very visual. If we have an image on the slide, 00:13:04.11 then that appeals to the vision, we're primates, we're very visually oriented 00:13:08.17 so we communicate through pictures. 00:13:10.28 And the third way we talk in information is by listening. 00:13:13.23 The ideal, the perfect power point slide represents an absolutely 00:13:20.22 synchronous match between a simple statement at the top, 00:13:25.13 a simple visual and what you as a speaker are saying. 00:13:30.00 So that the same content is being delivered through all three channels 00:13:34.25 at the same time, without any distractions. 00:13:38.15 Make your slides simple, limit the number of stuff you included in each slide 00:13:44.09 and just make one or two points from each slide. 00:13:47.00 Now, we've all heard this rule, maybe most of us have heard a rule, 00:13:51.11 how many slides should you show in a particular scientific presentation? 00:13:55.15 And the rule that I learned and the rule that perhaps you learned as well, 00:13:58.27 the rule is you show one slide per minute. 00:14:02.10 So, if you're giving a twenty minute talk, 00:14:03.28 you show twenty slides. I would argue now 00:14:08.00 that that might have been true when slides were actually on film 00:14:12.07 and difficult to manipulate and there was no such thing as animations. 00:14:15.19 Now that we have tools like PowerPoint and Keynote, 00:14:19.08 that enable us to build content progressively in slides and to have things that are simple, 00:14:24.27 simple points, that we can easily change from talk to talk, 00:14:29.10 that rule doesn't really hold anymore. 00:14:31.10 And I don't think there is a firm rule, I think it really depends on the amount of information 00:14:35.14 that you're delivering in a talk. 00:14:37.13 So, make your slides simple, 00:14:39.22 don't worry about this one slide per minute rule and rather, get feedback from, as you practice a talk, 00:14:48.04 get feedback from your colleagues 00:14:49.25 about whether you're overwhelming people 00:14:51.22 with too much data and number of slides. 00:14:54.03 If your slides are simple, you can show more than one per minute. 00:14:57.09 We have all seen talks where a slide like this comes up 00:15:01.12 and what does the speaker do? The speaker does this, 00:15:04.01 the speaker says, "I know this slide is really busy, but, the only thing I really want you to look at 00:15:08.23 is this set of data right here". 00:15:11.15 We've been there, right? I've been there, you've been there. 00:15:14.24 What has the speaker just told you? 00:15:16.27 The speaker's just said, I'm too lazy to have created a slide 00:15:20.01 that is actually tailored for what I want to show you. 00:15:22.20 And we as audience members are looking at all of this stuff, 00:15:26.19 we, even if we're told to look at this, I mean, how many of us behave? 00:15:29.29 I, personally, I'm looking this and I'm wondering about that, 00:15:33.22 so the speaker has not only shown a little bit of disrespect, 00:15:37.07 and laziness to us, in my opinion, 00:15:39.27 but in addition, the speaker has lost us as audience members 00:15:43.20 because we're now wandering around the slide 00:15:46.03 and wondering, we're having our own thoughts. 00:15:48.29 So, if you're going to show a slide like this, simply take the data that 00:15:53.16 you want to show, eliminate everything else and put that up. 00:15:57.11 And then explain the data completely. 00:16:01.20 Explain to the audience what the axes are, what each color is, and remember 00:16:06.07 that this is the very first time that anyone in the audience has seen this particular graph. 00:16:12.06 You've seen it a thousand times, you get it intuitively, like that, 00:16:15.18 but they won't. So, just show the data that you want to explain 00:16:19.26 and explain the data that you show. 00:16:21.26 In other words, here's the simple rule: 00:16:24.20 if you're not going to take the time to explain it, get rid of it completely. 00:16:28.07 It doesn't belong there. 00:16:29.17 I want to show you an example of a figure that I used to show in one of my scientific presentations. 00:16:35.14 And it's a brain and it's got some protein and it shows the distribution of those proteins in the brain. 00:16:41.15 It's a pretty simple figure, the content doesn't matter to us. 00:16:45.21 But I want to show you what this figure looked like before I put it into the talk in this format. 00:16:51.12 Here's what the figure looked like in the actual paper that I took it from. 00:16:56.15 It had all of these extra labels that were extraneous, 00:16:59.16 I was never going to explain 00:17:01.07 that MGE stands for the medial ganglionic eminence because it's not relevant to the talk 00:17:06.13 so, what did I do? I took this figure, 00:17:08.22 I put it into Photoshop and I got rid of all of that, 00:17:12.01 leaving only a little landmark, the eye, to orient the audience to what we were saying. 00:17:17.20 So, you can take complex figures, export them, and simply them 00:17:22.29 in order to fit perfectly with your presentation. 00:17:26.14 We have all seen a lot of, especially with the introduction of Keynote, 00:17:33.27 some very fancy transitions between slides. 00:17:37.12 What do me mean by transition? Well, 00:17:39.05 in my talk so far, when I've advanced the slides, you simply see the new slide. 00:17:43.14 Remember when Keynote came out and the first time you were at a talk 00:17:48.06 and the speaker advanced to the next slide 00:17:50.06 and the slide formed a box, and the box rotated in 3 dimensions and then a new slide appeared 00:17:57.25 and you thought "Oh, that's really cool, that was wild!" 00:18:00.11 and then the speaker got their advance and they advanced to the second slide and 00:18:04.28 the slide then did a big spiral and then the new slide appeared 00:18:09.24 and by the third or fourth time that the speaker did that, you felt nauseated. 00:18:13.19 We, yeah, so avoid these fancy transitions, they are not in service of the talk. 00:18:18.18 There is an exception though. 00:18:21.03 There are some transitions that actually illustrate 00:18:22.09 in a very subtle way, actions. Here’s an example. 00:18:25.22 This is a slide that I've shown in some of my presentations 00:18:30.11 that have talked about the migration of neurons in the developing brain. 00:18:35.02 And in this particular talk, the point I wanted to make was that we would take out neurons 00:18:40.14 from a very small region and culture them. So, I used a very simple wipe transition. Watch this,s 00:18:45.04 it's subtle but, there's the transition. 00:18:49.04 It actually wipes from one side to the other. That sort of mimics the act 00:18:52.11 of taking something out of the brain and putting it into culture. 00:18:55.13 So, that's a sensible use, another sensible use would be if you're going to zoom in on something, 00:19:00.22 if you're going to zoom in on this region, you might use a zoom transition. 00:19:04.09 Apart from that, just advance from one slide to the next with a simple transition. 00:19:09.06 Don't drown the audience with data. 00:19:15.02 What makes a talk memorable is when a speaker communicates 00:19:20.26 a couple of take-home messages in a way that presents just enough data 00:19:27.02 to be convincing, but not so much data that the audience is just flooded with information 00:19:33.27 and can't process it. 00:19:36.02 Less is more and here's a way to think about it. Those of us who are biologists 00:19:41.00 are used to culturing cells in minimum essential medium. 00:19:44.17 Just enough of the critical nutrients and elements and vitamins, 00:19:55.07 that a cell needs to survive and nothing extra. Minimum essential medium. 00:20:00.05 Now, if you take out any one of those elements in the medium, 00:20:05.07 the cells will die. Adding more doesn't add any value to your culture. 00:20:11.18 So, if we think about minimum essential media, we can also think about 00:20:17.15 minimum essential data. Just the data that you need 00:20:21.09 to convince the audience of the credibility of your science and no more. 00:20:25.29 That's really difficult and, I think, that's the most difficult decision that we have to make 00:20:32.00 in terms of presenting a seminar. What is just enough? 00:20:36.26 And where's the line between just enough and not too much. 00:20:39.22 For that, experience helps a lot, but also getting feedback from your colleagues, 00:20:43.12 when you're practicing your talk, 00:20:44.22 to ask people, can I get rid of this? What can go? 00:20:48.19 Don't ask what can I add, ask what can go? To make this convincing and thorough, 00:20:54.02 and yet not too much. 00:20:56.04 So, I think we all realize it's really easy to use PowerPoint badly, 00:21:00.01 right? So, we've seen a zillion examples like this, of people presenting journal clubs or seminars 00:21:06.03 you see a slide like that, we as audience members, 00:21:09.28 are visually overwhelmed, we're lost, we don't know what to look at 00:21:12.21 we can't read this stuff, it's too much to read, we're distracted. 00:21:16.11 The minute a slide like this goes up, the speaker has lost the audience completely. 00:21:20.24 So, it takes a lot of work, don't get me wrong, it takes time 00:21:24.22 to use PowerPoint or Keynote effectively in a seminar because you have to think carefully 00:21:30.03 about what you need to present, what you NEED to present, 00:21:33.12 not what you want to present, 00:21:33.27 not what you'd love to present, but what you need to present 00:21:37.16 and to present it using clear, simple graphics 00:21:41.08 and clear, simple text. So, in fact, let's go through an exercise. 00:21:47.03 Let's take that previous slide, from this lovely paper from JCB, 00:21:51.04 which I actually presented for a journal club many years ago. 00:21:54.15 Let's take that previous slide, which is figure 2 from that paper, 00:21:57.10 and let's see how we can break it down into its minimum essential components. 00:22:02.10 The first decision that we have to make in terms of looking at all the data in this figure 00:22:06.10 is what stays and what goes. What's the minimum essential data? 00:22:10.07 What are, excuse my grammatical error there, what are the minimum essential data? 00:22:14.11 that we need in order to present in our journal club. 00:22:17.24 And we might decide at that point that this particular part of the figure, panel b, can go. 00:22:21.23 It's not essential, but everything else is. 00:22:24.01 So, how do we present that? Well, let's deploy our PowerPoint rules 00:22:28.00 in this context. First of all, I'm going show you how I'd present panel a. Look at it for a second, 00:22:33.25 it's got some results in a gel and it's got some images of cells. 00:22:37.15 How might I do that? Well, 00:22:39.15 here's the first figure, here's the first slide in presenting this figure. 00:22:44.09 Notice that there's a sentence at the top, and then I've taken the data 00:22:49.09 from the figure and I've added some stuff over here. 00:22:52.08 I've added two labels that help the audience 00:22:54.14 understand immediately that this is a PCR product and this is actually a Western blot. 00:22:59.15 So I've added some stuff to be helpful to the audience, but I've simplified 00:23:02.07 their focus, so there's a good match between showing this and having the text. 00:23:07.21 And what I would be saying if I were actually presenting a journal club. 00:23:11.00 And then, using a simple animation, 00:23:13.22 I would then unveil the rest of this panel. 00:23:17.10 And I've added something for this audience down here, 00:23:19.06 showing you that this is actually a photomicrograph of MDCK cells. 00:23:25.01 So that's panel a, presented in really two parts, 00:23:28.11 using a simple animation and some additions. 00:23:29.27 The next thing I might want to show actually comes from panel c, 00:23:34.29 of that figure. And I've added a bunch of stuff here to be audience friendly. 00:23:39.25 First of all, notice that there's a sentence at the top, a statement of what's going on. 00:23:44.04 I'm showing just one simple panel, I've added a label, 00:23:48.15 and I've added this statement to help the audience that 00:23:50.21 we're looking down at the surface of these cells. 00:23:52.28 from the lumen. 00:23:54.28 I've also added some color coding so that they know what proteins are visualized 00:24:00.19 in different colors. That wasn't in the original figure, I added that 00:24:04.22 because who is this slide for? It's for the audience. 00:24:06.04 The audience needs this. And then using an animation, we'll then show a side view 00:24:11.01 of the same cells, that' s the control cells. Now watch what happens. 00:24:14.17 Two things happen; the sentence at the top changes, 00:24:17.18 cause there's a new message, and we've added the contrasting view 00:24:21.24 of the cells that have this particular protein knocked down. 00:24:25.26 Let's now think about the last part, a new sentence that really states that 00:24:30.29 this protein is essential for these cells to form little microvilli 00:24:34.13 and in the absence of protein, they don't. 00:24:37.15 So, now we've presented that complicated figure in a few parts using some simple animations 00:24:44.06 in a very audience-friendly format. 00:24:46.07 So, what's the bottom line with PowerPoint? 00:24:48.18 Make simple slides, simple slides, that make one or two points. 00:24:52.06 Build your content progressively using animations, rather than present everything all at once. 00:24:58.02 Just show one, PowerPoint and Keynote, they're all about control. 00:25:02.29 They're controlling what people see, what you're saying, and what they're reading 00:25:08.19 and have all those match at the same time. 00:25:10.19 And remember, if you're not going to talk about it, just leave it out. 00:25:15.06 If you're not going to explain it, it doesn't belong there at all. 00:25:18.07 It goes. Ok, that's what I wanted to tell you about PowerPoint, I hope that's helpful. 00:25:24.12 And now we want to transition into thinking more broadly 00:25:27.24 about how to structure a talk. 00:25:31.14 So that its organization is clear to the audience. 00:25:35.14 And I think about it as almost taking someone by the hand 00:25:37.24 and walking them through the science, right, 00:25:39.19 and saying, here's what I want you to see now 00:25:42.29 and here's the path that we’re following, here's where we've just been 00:25:44.13 and here's where we're going. 00:25:46.02 So, a good talk is like a good paper, it has a structure, 00:25:49.14 right, a good talk starts out with a big question 00:25:53.28 and then we build content over time, we go through the meat of the talk 00:25:57.11 and then we end with a conclusion that basically reaches back out to the big issues that we started with. 00:26:02.24 Same way as we write a paper, why are so bad at actually doing this at talks? 00:26:06.21 Well, if we discipline ourselves to do it, I think we can do it better. 00:26:10.02 I'd like to show you an example from one of my own seminars 00:26:12.22 of how I actually structure an introduction to define the really big question 00:26:18.02 and then give enough background information 00:26:20.20 to enable the audience to be able to follow the meat of the talk 00:26:25.18 in the middle. 00:26:26.10 And as I'm doing that, I also want to show you a trick that I've learned 00:26:31.18 that I think is extraordinarily effective at giving good talks. 00:26:36.29 And that's an idea that I call something like a home slide 00:26:41.15 or a home image. It's a picture, 00:26:44.23 maybe a cartoon, an image of some sort, that is going to signal to the audience 00:26:50.18 that you're at a point in the talk where you're going to make a transition. 00:26:53.17 It's a little signal to the audience to perk up 00:26:55.14 because you're going to tell them where you've just been, 00:26:59.00 what it means and where you're going next. 00:27:00.21 So, as I show you the introduction to one of my talks, 00:27:04.01 I'm going to build up into a home slide that you'll see a little bit later, 00:27:09.03 is going to come up again and again and again 00:27:10.23 at transitions. You might feel a little bit jarred 00:27:13.23 because now the background of the slide is going to change from white to black 00:27:16.21 and this jarred feeling that you might experience 00:27:19.12 is one of the reasons that I think it's actually quite important in a talk 00:27:21.12 to keep the same color background throughout the entire thing. 00:27:25.06 So, here we go. So, here's the first slide from my standard seminar and notice first of all 00:27:30.02 that my name and institution appear right here. 00:27:32.20 Why is that? Well, because people in the audience may be taking notes 00:27:36.12 and they might want to write down your name 00:27:37.04 and they'll want to know how to spell it correctly, 00:27:39.11 so it's a courtesy to them. 00:27:41.00 So, as I start in my talk, I start to discuss 00:27:45.02 a kind of analogy between the brain, which is what we study 00:27:48.13 and a computer chip, because each of them has to make really specific connections with one another, 00:27:55.03 the brain during development and the computer chip in a factory. 00:27:57.21 And I make kind of a joke and see if people laugh and 00:27:59.13 gauge the humor level of my audience at that point. 00:28:03.22 And then I show the audience the cells that I actually work on, the actual circuitry of the brain 00:28:11.08 that my lab studies, in the cerebral cortex 00:28:14.01 and then I frame the major question that my lab is interested in, 00:28:17.03 which really has to do with the question of how it is that these individual neurons in the brain know 00:28:22.22 what kind of connections to form, what are the molecular mechanisms 00:28:26.04 that guide those choices about cell fate and connectivity. 00:28:29.00 At this point then, I introduce the two cell types that the talk will focus on, 00:28:35.07 two sets of neurons that you'll see have different colors 00:28:38.17 and then I introduce two questions that the talk will address 00:28:42.29 during the course of the next however long it is, maybe a forty-five minute seminar. 00:28:47.20 One question having to do with the fate of the yellow cells 00:28:50.20 and another question having to do with the fate of the blue cells. 00:28:55.11 And that, basically then, launches me into the actual data part of the talk. 00:29:02.03 This particular image right here is the "home image" 00:29:07.23 or the home slide that I was referring to 00:29:09.19 just a minute ago. 00:29:11.23 And as you'll see, this image is going to reappear again and again and again 00:29:16.06 in my talk during transitions. And we'll see just in a couple of minutes how that can get played out 00:29:21.08 and how it can be extraordinarily effective in enabling the audience to follow a talk. 00:29:27.04 Ok, so, now we've built up an introduction and we're ready for the middle, right? 00:29:30.26 So, we're ready for the middle of the talk, which is the meat. 00:29:34.20 But, there's a problem. And that is that 00:29:38.21 audiences have fairly limited attention spans. 00:29:42.26 This is an interesting graph, so let's look at a little bit of data. 00:29:46.25 This is a plot of the percentage of a class that's paying full attention to a lecturer 00:29:52.00 over the time during which the lecture is being delivered. 00:29:56.01 Ok, there's some good news, right? 00:29:57.29 The good news is right here, in your introduction, people are actually kinda tuned in and listening. 00:30:02.07 And here's the bad news, which is that ok, let's face it, 00:30:06.17 depending on how compelling the lecturer is, 00:30:10.06 it might be here, or it might be way down there, 00:30:14.11 but the bottom line is that at no, under no circumstance are you ever going to get 00:30:20.01 100% audience attention for your entire talk. 00:30:24.17 Why is that? Well, think about being a member of the audience. 00:30:28.09 Why does this happen? It's because we're human! We have thoughts, 00:30:33.06 we have thoughts that intrude on our attention span, 00:30:37.07 we have thoughts about, oh my gosh, did I remember to load that gel or turn off the power supply, 00:30:43.23 we have thoughts about whether we actually are going to be on time getting the kids from daycare, 00:30:50.10 we have thoughts about someone we just met, 00:30:52.21 you know, we have all these random thoughts that intrude, 00:30:54.29 so we're human and we're going to space out. 00:30:58.20 We then, as speakers have two choices, 00:31:00.02 one is we could say, eh, ok, someone spaced out, take no prisoners, you spaced out, forget it. 00:31:06.02 You're just never going to understand anything else I say. 00:31:09.11 Or, we can just acknowledge the fact that the audience is human, 00:31:13.02 that every single member of an audience is going to tune out at some point. 00:31:19.23 And we can build in a mechanism within our talk to enable them to catch up. 00:31:24.25 So, obviously, I kind of recommend the latter. 00:31:27.18 So, if the middle is the meat of the talk and it's the time when the audience is going to zone out at some point, 00:31:33.18 why? Because they're just people! Well, what are we going to do about it? 00:31:38.13 What I suggest you do is to visualize the middle of the talk in the following way. 00:31:45.02 You're going to have a series of episodes, or data dives, 00:31:51.02 that you're going to present 00:31:52.22 little stories, and as you're presenting a particular story, you're going to start at a level 00:31:59.07 that's fairly untechnical and you might actually get pretty deep into the data. 00:32:02.21 To a level that's really going to appeal really just to specialists in your fields. 00:32:07.07 Now, if we were to give a talk and start presenting our data, and we've all been at seminars where people do this, 00:32:12.11 where we just go down into depth and then we just do data, data, data, data, data, data, data, data 00:32:18.28 and then we conclude and it's over, we've lost people along the way. 00:32:23.12 So, this structure, this visual structure here, is a way of planning your talk 00:32:30.09 so that you can think about diving down into data and then coming up for air 00:32:36.24 and it's at these transition points between data dives 00:32:40.00 that you use your home image to basically let the audience members 00:32:44.10 catch up and know where you've just been, 00:32:48.10 what you're concluding from that part of the data, 00:32:50.24 and where you're going to go next. 00:32:51.28 So, let's look at an example of one of those data dives from one of my seminars. 00:32:57.23 You've already seen the introduction to the seminar, you've already seen how I introduced 00:33:03.10 my home slide. At this point in my talk, I've gone through a review of the literature, 00:33:08.26 the first data dive and I'm now beginning part two of the talk. 00:33:11.23 And here's the beginning of that section. So, once again, you see 00:33:15.14 this home image and you see the two questions. 00:33:17.09 We're half way through the talk, but I'm summarizing part one 00:33:20.17 and getting ready to introduce the second set of questions. 00:33:24.09 At this point, then, I now start to explain that as we focus on the blue cells, 00:33:33.00 that we're going to be looking at the role of a separate protein 00:33:36.26 that is actually expressed in a subset of neurons within the different layers. 00:33:42.18 And then I explain that we've generated knock-out mice in which we've inserted 00:33:45.19 a reporter into the cells that normally express this protein 00:33:49.26 so that we can see their axonal connections. 00:33:51.06 And now, we don't really need to focus on the data, but look, there's a sentence, 00:33:56.24 at the top that basically says what I just told you, 00:34:00.01 then we see a simple figure from the controls 00:34:01.15 in which I would point out that what I want the audience to look at 00:34:05.25 are the blue axons that label the connections between the two hemispheres. 00:34:09.01 That's in the control, then we look at the mutant, the thing I'm going to emphasize 00:34:13.17 is the absence of those connections here. 00:34:15.25 Now, we're going to look at it from the side, same stuff, sentence, two simple images, 00:34:20.28 words will match the content, were I really delivering the seminar to you. 00:34:25.08 And then, I tell you what I told just told you. 00:34:28.21 I just told you that the blue cells express this protein, that they form this type of connection 00:34:34.05 and then I say, you know, in the first part of the talk, 00:34:37.06 I told you about another pathway. 00:34:39.18 So, you might be wondering, what is the relationship between these two pathways? 00:34:43.03 So, then I will go on to actually test that connection, by presenting more data 00:34:50.17 that would then build up into a small conclusion slide 00:34:53.26 showing you that this protein represses the expression of this gene. 00:34:58.27 So, simple graphics that really emphasize the bottom line, 00:35:04.28 the story that I'm telling you, with the minimum essential data. 00:35:07.15 Ok, so we've gone through the meat, thinking about data dives, coming back, making transitions. 00:35:13.00 Now let's think about how to conclude a talk. 00:35:15.22 Here's the good news, is that as you say 00:35:18.29 and now, in conclusion, look what happens to the attention level of your audience. 00:35:23.23 It's like, oh, it's over, hey, I better see what I just saw. 00:35:28.02 So, that's good news, now you've got one more really good chance to deliver your take-home to the audience effectively. 00:35:34.05 There's a danger to this though, as well, and that's the danger of hearing 00:35:40.21 for example, forty minutes into a talk someone say, "Oh, to conclude", 00:35:46.08 and our, we're like, "oh, good, you know, actually, they're ending twenty minutes early, that's great, 00:35:49.19 I can actually get a little bit more work done today." 00:35:51.14 So, they say in conclusion, blah blah blah, blah blah blah, and then, they say 00:35:56.09 "and now in part two of my talk" and what's our response as an audience? 00:36:00.15 We're like, "oooh, dude, no". Why is that? It's because it was a false ending. 00:36:05.13 And it got us all excited. So, if you're going to conclude part one of your talk, 00:36:08.19 do the audience of favor of saying, 00:36:11.29 to some sum up this first part of the seminar, and that way you won't create a false expectation. 00:36:16.20 But, the good news is, you will perk up interest as you signal your conclusion, 00:36:21.13 and that means that you have one last chance to really reiterate your specific conclusions 00:36:28.29 and most of us remember to do that. 00:36:30.00 But it's easy to forget to sort of back out to the big picture. 00:36:34.07 And return to the beginning, to have your talk come full circle, 00:36:37.26 so that you're really ending by revisiting the big questions 00:36:43.08 that you introduced at the very first part of the talk. 00:36:47.04 So, again, here's how I would do it in my talk, just as a visual 00:36:50.16 example of how one might think about this. 00:36:53.10 Concluding up, now, sentence at the top, the same diagram that you've seen before, 00:36:57.27 about this repression and now adding other things you haven't seen in the data, 00:37:01.29 but I would add that, just to remind them, 00:37:04.12 that at least one of these mechanisms works through the modulation of chromatin, 00:37:08.15 they would have seen that slide already. 00:37:10.29 I would then connect it back to the first part of the talk 00:37:13.12 and talk about a little switch that had gotten set up. 00:37:16.06 I would then refer back even earlier to a part of the talk that you didn't see, 00:37:20.26 now going back to the really big picture, 00:37:23.08 questions about how different types of neurons emerge over time. 00:37:26.29 Many of these questions are still unanswered and therefore represent a frontier in my field. 00:37:33.18 I would then wrap up by acknowledging, of course, the colleagues that have contributed to the work over time 00:37:38.19 and then, here's a trick, 00:37:40.27 as you get to the very end of your talk, 00:37:43.15 rather than leaving up your acknowledgements slide, 00:37:46.15 have your conclusion slide appear at the very end. 00:37:50.01 For the question and answer period. 00:37:51.21 Why is that? Well, it helps the audience. 00:37:54.19 Remember everything is in service of the audience and I actually have the misfortune 00:37:58.10 of working on three genes, all of which have names that end in two and none of which are memorable 00:38:03.07 by anyone who doesn't work on them. 00:38:05.09 So, by putting this picture up, I'm enabling the audience to actually ask intelligent questions. 00:38:12.02 First, you know, if they're struggling to remember which gene they had a question about 00:38:15.22 and secondly, when I'm answering a question, 00:38:18.15 I can actually use the visuals to explain my answer. 00:38:21.24 And that turns out to be very helpful. 00:38:23.09 So, I really recommend that at the end of your talk, 00:38:26.18 during Q and A, put your summary slide back up again. 00:38:29.08 It's helpful for you and for the people attending your talk. 00:38:32.18 Ok, so what have I just told you about organizing a great talk? 00:38:37.04 First of all, use PowerPoint wisely. 00:38:40.09 Have very clean, minimal slides. 00:38:43.29 Secondly, start out with a broad introduction, so that everyone in the audience 00:38:49.06 understands the big questions that are compelling in your field 00:38:53.08 and then introduce the specifics gradually, 00:38:55.16 giving them just enough background information so that they can follow the data, 00:38:59.29 but not so much that they're overwhelmed. 00:39:01.22 Third, think of the talk as consisting of these episodes, 00:39:06.01 or little data dives, in which you're going to go 00:39:09.26 at a point into your data, remember the minimum essential data, 00:39:13.17 and then you're going to go into some depth, but then you come up for air 00:39:17.20 and allow the audience to regroup, see where you've just been, 00:39:21.01 frame the next question, and then get there logically, rather than just going through data, data, data, data, 00:39:27.20 which was just going to leave people in the dust. 00:39:29.14 A very effective way of making these transitions explicit 00:39:36.24 is to design a home slide or a home image 00:39:39.26 that is a signal to the audience that you're at a point of transition 00:39:45.00 and they will perk up and it will help them to understand the flow of your talk. 00:39:48.06 And finally, your conclusion here is just the opposite of the introduction. 00:39:53.10 You start more specific with what you've learned, but then end up broad again. 00:39:57.15 So, is this all you need to know to give a great talk? 00:40:00.07 No way! Right? I mean, these are just some basic rules or suggestions or advice 00:40:07.04 about how to create slides that are user-friendly, audience-friendly, 00:40:11.23 and how to structure your talk so that it's well organized and very, very clear, 00:40:16.15 and simple for an audience to follow. 00:40:19.02 But there are a lot of things that go into giving a great talk. 00:40:22.01 There's the whole performance aspect of speaking. 00:40:25.17 There's the actual scientific content, 00:40:28.24 but at least in terms of performance, you can practice that, 00:40:33.18 you can and should rehearse your talks. 00:40:36.17 In fact, the entire time, from the first day of graduate school, all the way, well into being a tenured professor, 00:40:45.13 at Stanford, I rehearsed every talk, every lecture, 00:40:51.03 every journal club, that I gave. 00:40:52.17 Every one of them. And finally, I got so comfortable with speaking 00:40:55.07 I don't actually have to do it anymore. 00:40:58.00 But that means rehearsing, out loud and often in front of an audience, 00:41:02.09 dozens and dozens and dozens of talks, 00:41:04.20 get feedback and practice the way you're going to speak. 00:41:08.23 Have the words rehearsed and get some input from your colleagues 00:41:13.15 about whether you've identified effectively 00:41:16.08 the minimum essential data for the talk. 00:41:18.18 Secondly, have yourself videotaped. 00:41:20.19 Go and watch yourself and see what you do. 00:41:22.24 See if you're gesturing naturally and so on. 00:41:24.21 So, those kinds of aspects of delivery are much more effectively done one on one, 00:41:29.23 rather than through a format like this. 00:41:32.14 Another great resource that I highly recommend is a wonderful book, by Michael Alley, 00:41:37.25 called The Craft of Scientific Presentations. 00:41:39.12 If you're going to have just a single book on scientific presentations in your bookshelf, I personally would recommend this one. 00:41:46.02 It's a terrific model and it's actually the basis of a lot the information that I've presented to you today. 00:41:51.08 Well, that's it! Thank you so much, I hope this has been helpful 00:41:54.05 and I wish you every success with your talks in the future.
- Educators of Adv. Undergrad / Grad

Talk Overview
What is the best way to give scientific presentations that engage and inform your audience? Dr. McConnell gives helpful advice on preparing and presenting an effective scientific talk. She reviews the basics of PowerPoint or Key Note and gives advice on choosing fonts, colors and slide styles. She also recommends ways to structure your talk so the audience stays awake and engaged. Her final recommendation is practice, practice, practice! Whether you are a graduate student presenting journal club or a tenured professor giving an invited lecture, this talk is sure to prove useful.
Speaker Bio
Susan mcconnell.

Susan McConnell received her Ph.D. in Neurobiology from Harvard University and did a postdoctoral fellowship in the Department of Neurobiology at Stanford School of Medicine. She joined the faculty of the Department of Biology at Stanford in 1989. McConnell is a University Fellow in Undergraduate Education, an appointment that recognizes faculty who have made an… Continue Reading
More Talks in Professional Development

Related Resources
M. Alley. (2003) The Craft of Scientific Presentations. Springer.
P. Kenny (1982) A Handbook of Public Speaking for Scientists and Engineers. Institute of Physics Publishing.
Reader Interactions
Monzur Hossain says
March 15, 2019 at 10:30 am
Just wonderful and motivating
May 10, 2023 at 5:00 am
Thanks a lot.
Leave a Reply Cancel reply
Your email address will not be published. Required fields are marked *
Find a Video
- Search All Videos
- Search YouTube
- Short Films
- All Playlists
- All Speakers
- Videos in Other Languages
- Biochemistry
- Bioengineering
- Cell Biology
- CRISPR-Cas Technology
- Development and Stem Cells
- Genetics and Gene Regulation
- Human Disease
- Microbiology
- Neuroscience
- Plant Biology
- Professional Development
For Educators
- Educator Newsletter
- Educator Resources
- Flipped Courses
- Online Courses Resources
- All Educator Resources
Educators Recommend
- Cells of the Immune System
- Discovering Cell Cycle Regulators
- Genome Engineering with CRISPR-Cas9
- Hardy-Weinberg Equilibrium
- Next Generation Sequencing
- Semi-Conservative Replication of DNA
- Toll-Like Receptors in Adaptive Immunity
Free Courses
- Free Online Courses
- Take a Free Course
- Learn Microscopy
- Intro to Microscopy
Career Development
- Professional Development Courses
- Professional Development Talks
- Career Exploration
- Biomedical Workforce
- NRMN Resources
Best of iBiology
- Short Science Films
- Meselson and Stahl
- Doudna & Charpentier’s Nobel Prize
- Decoding Ancestral Knowledge
- Microscopy Series
- Short Microscopy Series
- Famous Discoveries
- Bench to Bedside
- Share Your Research
- Our Mission
- Science Communication Lab
- Financial Conflict of Interest Policy

NASA's Juno provides high-definition views of Europa's icy shell
I mages from the JunoCam visible-light camera aboard NASA's Juno spacecraft supports the theory that the icy crust at the north and south poles of Jupiter's moon Europa is not where it used to be. Another high-resolution picture of the icy moon, by the spacecraft's Stellar Reference Unit (SRU), reveals signs of possible plume activity and an area of ice shell disruption where brine may have recently bubbled to the surface.
The JunoCam results recently appeared in the Planetary Science Journal and the SRU results in the journal JGR Planets .
On Sept. 29, 2022, Juno made its closest flyby of Europa, coming within 220 miles (355 kilometers) of the moon's frozen surface. The four pictures taken by JunoCam and one by the SRU are the first high-resolution images of Europa since Galileo's last flyby in 2000.
True polar wander
Juno's ground track over Europa allowed imaging near the moon's equator. When analyzing the data, the JunoCam team found that along with the expected ice blocks, walls, scarps, ridges, and troughs, the camera also captured irregularly distributed steep-walled depressions 12 to 31 miles (20 to 50 kilometers) wide. They resemble large ovoid pits previously found in imagery from other locations of Europa.
A giant ocean is thought to reside below Europa's icy exterior, and these surface features have been associated with "true polar wander," a theory that Europa's outer ice shell is essentially free-floating and moves.
"True polar wander occurs if Europa's icy shell is decoupled from its rocky interior, resulting in high stress levels on the shell, which lead to predictable fracture patterns," said Candy Hansen, a Juno co-investigator who leads planning for JunoCam at the Planetary Science Institute in Tucson, Arizona. "This is the first time that these fracture patterns have been mapped in the southern hemisphere, suggesting that true polar wander's effect on Europa's surface geology is more extensive than previously identified."
The high-resolution JunoCam imagery has also been used to reclassify a formerly prominent surface feature from the Europa map.
"Crater Gwern is no more," said Hansen. "What was once thought to be a 13-mile-wide impact crater—one of Europa's few documented impact craters—Gwern was revealed in JunoCam data to be a set of intersecting ridges that created an oval shadow."
The Platypus
Although all five Europa images from Juno are high-resolution, the image from the spacecraft's black-and-white SRU offers the most detail. Designed to detect dim stars for navigation purposes, the SRU is sensitive to low light. To avoid over-illumination in the image, the team used the camera to snap the nightside of Europa while it was lit only by sunlight scattered off Jupiter (a phenomenon called "Jupiter-shine").
This innovative approach to imaging allowed complex surface features to stand out, revealing intricate networks of cross-cutting ridges and dark stains from potential plumes of water vapor. One intriguing feature, which covers an area 23 miles by 42 miles (37 kilometers by 67 kilometers), was nicknamed by the team "the Platypus" because of its shape.
Characterized by chaotic terrain with hummocks, prominent ridges, and dark reddish-brown material, the Platypus is the youngest feature in its neighborhood. Its northern "torso" and southern "bill"—connected by a fractured "neck" formation—interrupt the surrounding terrain with a lumpy matrix material containing numerous ice blocks that are 0.6 to 4.3 miles (1 to 7 kilometers) wide. Ridge formations collapse into the feature at the edges of the Platypus.
For the Juno team, these formations support the idea that Europa's ice shell may give way in locations where pockets of briny water from the subsurface ocean are present beneath the surface.
About 31 miles (50 kilometers) north of the Platypus is a set of double ridges flanked by dark stains similar to features found elsewhere on Europa that scientists have hypothesized to be cryovolcanic plume deposits.
"These features hint at present-day surface activity and the presence of subsurface liquid water on Europa," said Heidi Becker, lead co-investigator for the SRU at NASA's Jet Propulsion Laboratory in Southern California, which also manages the mission. "The SRU's image is a high-quality baseline for specific places NASA's Europa Clipper mission and ESA's (European Space Agency's) Juice missions can target to search for signs of change and brine."
Europa Clipper's focus is on Europa—including investigating whether the icy moon could have conditions suitable for life. It is scheduled to launch on the fall of 2024 and arrive at Jupiter in 2030. Juice (Jupiter Icy Moons Explorer) launched on April 14, 2023. The ESA mission will reach Jupiter in July 2031 to study many targets (Jupiter's three large icy moons, as well as fiery Io and smaller moons, along with the planet's atmosphere, magnetosphere, and rings) with a special focus on Ganymede.
Juno executed its 61st close flyby of Jupiter on May 12. Its 62nd flyby of the gas giant, scheduled for June 13, includes an Io flyby at an altitude of about 18,200 miles (29,300 kilometers).
More information: C. J. Hansen et al, Juno's JunoCam Images of Europa, The Planetary Science Journal (2024). DOI: 10.3847/PSJ/ad24f4
Heidi N. Becker et al, A Complex Region of Europa's Surface With Hints of Recent Activity Revealed by Juno's Stellar Reference Unit, Journal of Geophysical Research: Planets (2023). DOI: 10.1029/2023JE008105
Provided by NASA
")
The fusion of two sisters into a single woman suggests that human identity is not in our DNA
The biologist alfonso martínez arias defends that genes do not define the uniqueness of a person, citing the example of karen keegan, who has two genomes.

Two eggs fertilized by two sperm coincided in a uterus and, instead of giving rise to two sisters, they fused to form a single person: Karen Keegan. When she was 52 years old, this woman from Boston suffered very serious kidney failure, but luckily she had three children willing to donate a kidney to her. The doctors did genetic tests to see which offspring was most compatible and they got a major surprise: the test said that two of them were not her children. The reality was even more astonishing: Karen Keegan had two different DNA sequences , two genomes, depending on the cell you looked at. Biologist Alfonso Martínez Arias maintains that this chimeric woman is conclusive proof that DNA does not define a person’s identity.
The most inspiring science book of all time is The Selfish Gene , according to a survey carried out by the Royal Society of the United Kingdom. In this famous work from 1976, British biologist Richard Dawkins defended that the DNA molecule uses the human being as a mere envelope in order to be transmitted to the next generation and become immortal. “We are survival machines, robot vehicles blindly programmed to preserve the selfish molecules known as genes,” Dawkins stated. Almost half a century later, Martínez Arias refutes this perspective of the selfish gene and proposes a much more romantic alternative: the altruistic cell. “ An organism is the work of cells . Genes merely provide materials for their work,” he says in The Master Builder , a fascinating and provocative book from the London publisher Basic Books that will also be published in Spanish this year.
Martínez Arias, 68, argues that the DNA sequence of an individual is not an instruction manual or a construction plan for their body, but a box of tools and materials for the true architect of life: the cell. The Madrid-born biologist argues that there is nothing in the DNA molecule that explains why the heart is located on the left, why there are five fingers on the hand or why twin brothers have different fingerprints. Cells are what “control time and space,” he proclaims. They are the ones who know where right and left are, and where exactly a person’s foot or an elephant’s trunk should end.
The biologist spent four decades at the University of Cambridge, investigating how a solitary cell with a unique DNA sequence — the fertilized egg — is capable of multiplying and becoming an individual with billions of cells specialized in various tasks. “The question often arises as to how it is possible that such similar genomes can build such different animals as flies, frogs, horses and humans. However, the real wonder is how the same genome can build structures as different as an eye and a lung in the same organism. Let’s give the cells the credit they deserve,” says Martínez Arias, who in 2021 left his chair of Genetics at Cambridge to join Pompeu Fabra University in Barcelona.

The scientist remembers the global surprise after the birth of the first cloned cat, called Copy Cat, on December 22, 2001. Her DNA was identical to that of a calico cat — white, orange and black — yet Copy Cat had white and tabby fur. The two supposed clones looked nothing alike. The researchers had copied the genetic information from a cell that had the orange gene inactivated. The American company that sought to enrich itself by selling identical clones , Genetic Savings & Clone, had to close down in 2006. “People didn’t want a cat with the same genes as their pet, they wanted a cat that was exactly the same and behaved in the same way,” notes Martínez Arias. “That is simply impossible.”
The researcher uses a legendary phrase from his British colleague Lewis Wolpert (1929-2021): “It is not birth, marriage, or death, but gastrulation which is truly the most important time in your life.” Martínez Arias compares this phase of embryonic development to a cellular dance with a perfect choreography. About 14 days after a sperm and an egg come together, the resulting ball, of about 400 cells, will begin gastrulation: a dance that lasts six days and ends with the tiny sphere becoming the first sketch of the individual. In this new 20-day structure, the three axes of the future person are already distinguishable: left and right, up and down, belly and back.

These first days of pregnancy are an enigma, due to the obvious physical and ethical barriers to directly observing the process, but Martínez Arias’ team in Cambridge overcame the difficulties in 2020 with an ingenious alternative. The Spaniard and his lab colleagues used a chemical cocktail to induce embryonic stem cells — derived from leftover embryos from fertility clinics — to form a three-dimensional structure similar to the result of gastrulation: a sketch of a person, but without the seed of the brain or the tissues that would generate the placenta. This historic advance was announced in Nature , a repository of the best world science.
Martínez Arias believes that these structures that partially imitate the human embryo, called gastruloids, “unequivocally show that cells are the masters of construction, and that there is no blueprint in the genome to direct what they do.” The biologist marveled, for the first time in history, at something very similar to what happens in a mother’s womb: a perfect choreography in which cells communicate with each other, through forces and chemical signals, and end up occupying their place as if they knew exactly what their destination was. “This ability to self-organize could be a fundamental property of cells,” hypothesizes the researcher, who cites the spectacular techniques of the French neurobiologist Alain Chédotal to visualize the cellular structure of embryos.

The Pompeu Fabra researcher notes that his colleague Susanne van den Brink discovered that gastruloids were only formed if a specific number of cells were used: about 400. Cells know how to count. If the 400 are not there, the dance of gastrulation does not begin. They all have the same DNA molecule in their nucleus, but each cell reads only a few sections, specializing in certain tasks. That is why a brain cell will not look anything like a skin cell, despite having the same DNA and descending from the same fertilized egg. “Gastruloids are proof that a confederation of cells has the ability to work together, interpret signals from each other and the environment and choose which genes to use and when,” says the biologist. “Genes are not our identity,” he repeats over and over again.
For Martínez Arias, the new science of the cell is rewriting the story of life. “We still don't know much about how cells are organized to use the genome, but the answers are out there, starting to manifest in our embryo-like cellular wonders or organoids. The century that is already underway is, and will be, the century of the cell,” he proclaims.
Sign up for our weekly newsletter to get more English-language news coverage from EL PAÍS USA Edition
More information

Researchers identify new genetic form of Alzheimer’s that is present in millions of people

Researchers discover the genetic cause of the most common brain malformation
Archived in.
- Pompeu Fabra
- Francés online
- Inglés online
- Italiano online
- Alemán online
- Crucigramas & Juegos

This page has been archived and is no longer updated
Poster Presentations
Poster presentations may not seem as prestigious as oral presentations, but they are a great opportunity to interact with other scientists in your field in a reasonably structured way. Just like oral presentations, they force you to crystallize your thoughts about your research and, in this way, focus on its essence. After the conference, you can usually hang your poster in the hallway of your laboratory. Thus, you promote your work to passersby and have a support at hand if you must unexpectedly present your research to visitors.
Being accepted for a poster session at a conference means you must first create the poster itself, then prepare to interact with visitors during the session. At some conferences, you may also have a chance to promote your poster through an extremely brief oral presentation.
Creating your poster
Typically, the scientists who attend a poster session are wandering through a room full of posters, full of people, and full of noise. Unless they have decided in advance which posters or presenters to seek out, they will stop at whatever catches their eyes or ears, listening in on explanations given to other people and perhaps asking an occasional question of their own. They may not be able to see each poster clearly — for example, they may be viewing it from a meter's distance, from a sharp angle of incidence, or over someone else's shoulder. In such situations, they will not want to read much text on the poster — not any more than attendees at a presentation will want to read much text on a slide.
Accordingly, you should design your poster more like a set of slides than like a paper, using all the recommendations given for slides earlier in this series (see Creating Presentation Slides ). Strive to get your messages across in a stand-alone way: State each message as a short sentence, then illustrate it as visually as possible. In fact, one simple way to prepare a poster is to create a set of slides, print them full-size on A4 or US-letter-size paper, and pin the sheets next to one another like a comic strip.
Scientists often feel obliged to include a large amount of factual information on their posters: their affiliation (with postal address, e-mail address, telephone number, etc.), bibliographical references, funding sources, and the like. Although visitors may well want to take all or part of this information home, few of them actually want to read it on a poster, let alone write it on a notepad while standing in front of a poster. Such information is therefore best placed in a one-page handout that is available at the poster's location — perhaps with a reduced version of the poster on the other side. If these details are included on the poster itself, they should be out of the way, such as in the top-right corner or at the very bottom, so they do not interrupt the logical flow of content on the poster.
Presenting your poster
Promoting your poster.
Even without a formal opportunity to promote your poster, and especially when your poster session is later in the conference, you may have many informal moments to introduce your work through chance encounters during coffee breaks or social events. Instead of giving people business cards, you might prepare and distribute small, bookmark-like handouts with your name, affiliation, e-mail, and an invitation to come and see your poster.
This page appears in the following eBook
Topic rooms within Scientific Communication

Within this Subject (22)
- Communicating as a Scientist (3)
- Papers (4)
- Correspondence (5)
- Presentations (4)
- Conferences (3)
- Classrooms (3)
Other Topic Rooms
- Gene Inheritance and Transmission
- Gene Expression and Regulation
- Nucleic Acid Structure and Function
- Chromosomes and Cytogenetics
- Evolutionary Genetics
- Population and Quantitative Genetics
- Genes and Disease
- Genetics and Society
- Cell Origins and Metabolism
- Proteins and Gene Expression
- Subcellular Compartments
- Cell Communication
- Cell Cycle and Cell Division
© 2014 Nature Education
- Press Room |
- Terms of Use |
- Privacy Notice |

Visual Browse
Staff Presentation | Applications for Permits to Site Interstate Electric Transmission Facilities
Item E-2 | News Release
Good morning, Chairman Phillips and Commissioners.
Item E-2 is a draft final rule that revises the Commission’s regulations governing applications for permits to site electric transmission facilities under section 216(b) of the Federal Power Act.
In the Energy Policy Act of 2005, Congress established a limited Federal role in electric transmission siting, which has traditionally resided solely with the States, by adding section 216 to the Federal Power Act. Section 216(a) directs the Department of Energy (or “DOE”) to study electric transmission congestion and authorizes DOE to designate national interest electric transmission corridors (or “National Corridors”). Section 216(b) authorizes the Commission, under specified circumstances, to issue permits to build or modify electric transmission facilities in National Corridors. Pursuant to this statutory authority, the Commission added Part 50 to its regulations to define the permit application process, and the Commission modified existing Part 380, which implements the National Environmental Policy Act of 1969 (or “NEPA”).
In the Infrastructure Investment and Jobs Act of 2021 (or “the IIJA”), Congress amended section 216 in part to clarify the circumstances giving rise to the Commission’s jurisdiction. With respect to the Commission’s siting authority, the IIJA clarified that the Commission may issue a permit if a State has denied an application. The Act also amended section 216(e) to require the Commission to determine, as a precondition to a permit holder exercising eminent domain authority, that the permit holder has made “good faith efforts to engage with landowners and other stakeholders early in the applicable permitting process.”
To align the Commission’s regulations with the IIJA and to update certain regulatory requirements, the Commission issued a Notice of Proposed Rulemaking (or “NOPR”) on December 15, 2022, proposing revisions to Parts 50 and 380. The Commission received over fifty comments in response to the NOPR, including from 14 State commissions, which informed the determinations in the draft final rule.
The draft final rule adopts many of the regulatory changes proposed in the NOPR and makes additional modifications and clarifications throughout Parts 50 and 380. However, the draft final rule reconsiders the NOPR proposal to eliminate the existing policy of a one-year delay between the filing of the relevant State siting applications and the commencement of the Commission’s pre-filing process. The NOPR proposal would have allowed State siting proceedings and the Commission’s pre-filing process to proceed simultaneously. But after further consideration and review of comments, including those shared by State commissioners at the February 28, 2024, meeting of the Joint Federal-State Task Force on Electric Transmission, the draft final rule declines to adopt the NOPR proposal to allow simultaneous processing.
I will now highlight a few of the regulatory changes adopted in the draft final rule.
First, consistent with the IIJA’s amendments to section 216, the draft final rule clarifies that the Commission has the authority to issue permits to construct or modify electric transmission facilities in a National Corridor if a State has denied a siting application. The draft final rule also updates and clarifies the definitions and project notification requirements set forth in Part 50.
Second, the draft final rule codifies the Applicant Code of Conduct. Compliance with the code of conduct is one way that an applicant may demonstrate that it has made good faith efforts to engage with landowners early in the applicable permitting process as required by section 216(e)(1). The Applicant Code of Conduct includes recordkeeping and information-sharing requirements for engagement with affected landowners, as well as general prohibitions against misconduct. The draft final rule also allows for alternative methods of demonstrating that an applicant meets the “good faith efforts” statutory standard.
Third, the draft final rule requires applicants to develop engagement plans that describe completed and planned outreach to environmental justice communities and Indian Tribes. A Tribal Engagement Plan is being added to the draft final rule in response to comments. Applicants will provide this information as part of a Project Participation Plan, which must be filed early in the pre-filing process. The information gathered through tailored engagement will inform the application.
My colleague, Maggie Suter, from the Office of Energy Projects will now highlight some of the environmental information that an application must include.
The draft final rule updates and clarifies the environmental information required for existing applicant-prepared resource reports. The draft final rule also includes three new resource reports in which applicants must provide information regarding a proposed project’s impacts on air quality and environmental noise, on environmental justice communities, and on Tribal resources.
As part of the new Air quality and environmental noise resource report, and consistent with the Commission’s obligations under NEPA and the Clean Air Act, the applicant must estimate emissions and noise from the proposed project and the corresponding impacts on air quality and the environment. The report must also describe any proposed mitigation measures. In addition, the draft final rule establishes an operational noise limit for proposed substations and related facilities at nearby noise-sensitive areas, such as schools, hospitals, or residences.
In the new Environmental justice resource report, the applicant must begin by using current guidance and data to identify environmental justice communities within the area of potential project impact. Once environmental justice communities have been identified, the applicant must describe the impacts of project construction, operation, and maintenance on those communities. In addition, the resource report must discuss cumulative impacts, describe any proposed mitigation measures, and describe any community input received on the proposed mitigation measures.
The new Tribal resources resource report consolidates existing requirements that the applicant submit information describing the proposed project’s effects on Indian Tribes, Tribal lands, and Tribal resources. The report also includes new requirements that the applicant identify potentially affected Tribes and describe the impacts of project construction, operation, and maintenance on Tribes and Tribal interests. The draft final rule modifies the NOPR proposal by requiring the applicant to describe any proposed mitigation measures to avoid or minimize impacts on Tribal resources as well as any input received from Tribes on the proposed measures.
If adopted by the Commission, the draft final rule will become effective 60 days after publication in the Federal Register .
Staff would like to thank all team members that contributed to this rulemaking, including staff from the Office of Energy Projects, the Office of General Counsel, the Office of Public Participation, the Office of Electric Reliability, the Office of Energy Policy and Innovation, and the Office of Energy Market Regulation.
This concludes our presentation. We are happy to answer any questions you may have.
Latest News
Innovations and efficiencies in generator interconnection workshop, staff presentation | building for the future through electric regional transmission planning and cost allocation, ferc takes on long-term planning with historic transmission rule.
IMAGES
VIDEO
COMMENTS
Related Articles. This guide provides a 4-step process for making a good scientific presentation: outlining the scientific narrative, preparing slide outlines, constructing slides, and practicing the talk. We give advice on how to make effective slides, including tips for text, graphics, and equations, and how to use rehearsals of your talk to ...
Below is the summary of how to give an engaging talk that will earn respect from your scientific community. Step 1. Draft Presentation Outline. Create a presentation outline that clearly highlights the main point of your research. Make sure to start your talk outline with ideas to engage your audience and end your talk with a clear take-home ...
Oral Presentation Structure. Like scientific papers, oral presentations at a conference or internal seminar are for sharing your research work with other scientists. They, too, must convince the ...
For a 15-minute conference presentation, this number of slides will likely work well (about one slide per minute), but fewer or more may work, too, depending on how these slides are designed and ...
1. Open with a Research Question. Here's how to start a scientific presentation with ease: share your research question. On the first slide, briefly recap how your thought process went. Briefly state what was the underlying aim of your research: Share your main hypothesis, mention if you could prove or disprove them.
Improving a presentation can help you think about your own research. A well-designed presentation is not a 'data dump' or an exercise in advanced PowerPoint techniques. It is a coherent ...
Presentations with strong narrative arcs are clear, captivating, and compelling. Orient the audience and draw them in by demonstrating the relevance and importance of your research story with strong global motive. Provide them with the necessary vocabulary and background knowledge to understand the plot of your story.
The "presentation slide" is the building block of all academic presentations, whether they are journal clubs, thesis committee meetings, short conference talks, or hour-long seminars. A slide is a single page projected on a screen, usually built on the premise of a title, body, and figures or tables and includes both what is shown and what ...
First is a two part set of videos that walks you through organizing a presentation. Part 1 - Creating an Introduction for a 10-15 Minute Scientfic Presentation. Part 2 - Creating the Body of a 10-15 Minute Presentation: Design/Methods; Data Results, Conclusions. Two additional videos should prove useful: Designing PowerPoint Slides for a ...
Tip #2: Make use of PowerPoint. PowerPoint is an excellent tool for presenting scientific research if appropriately used. Generally, this involves inserting a lot of relevant visuals and minimum words with a font size of 24 points and above. Tip #3: Tell your audience about your research rather than its background.
Delivery. It is important to dress appropriately, stand up straight, and project your voice towards the back of the room. Practise using a microphone, or any other presentation aids, in advance. If you don't have your own presenting style, think of the style of inspirational scientific speakers you have seen and imitate it.
Scientific research points to a best practice for creating presentations. But, interestingly, the research also shows that most presentations go against these research findings! We have come to expect a low level of engagement from PowerPoint presentations: they are usually slow, tedious, confusing, and, ultimately, deal-breaking.
Scientific presentation is a professional way of sharing your observation, introducing a hypothesis, demonstrating and interpreting the results of a study, or -summarizing what has been learned or is to be studied on the subject. Professional presentations help disseminate research, make peers aware of novel approaches, findings or problems. ...
The Craft of Scientific Presentations, ... Alley (Virginia Tech) provides examples through words and images about how to best convey ideas and meaning by understanding, connecting with, and engaging the audience. … This is a valuable work for academic and research libraries supporting, in particular, faculty, researchers, and graduate ...
Clearly define the purpose and impact of the presentation. ... Scientific presentations rely heavily on auditory and visual learning, so props offer an alternative way of learning, kinesthetic learning. Although it may be difficult to incorporate props into every presentation, especially as online-based presentations become more popular, apps ...
In the case of a research presentation, you want a formal and academic-sounding one. It should include: The full title of the report. The date of the report. The name of the researchers or department in charge of the report. The name of the organization for which the presentation is intended.
The result highlighted in your title will help you to focus your talk so that the solutions you present lead to this overarching result. Here is the general pattern: 1. Present the first part of ...
avoid distractions: empty your pockets, turn off phone. face the audience, not the screen. don't block the view of the screen. if handouts, distribute them before or after, not during your talk. speak loudly and clearly. repeat key points and full terms of abbreviations. express your enthusiasm in your topic.
In this three-part lecture, you will learn (a) how to design your PowerPoint or Keynote slides, (b) how to organize your talk, and (c) how to confidently deliver your research seminar. This series will help trainees and research scientists alike improve their presentation skills.
Dr. McConnell gives helpful advice on preparing and presenting an effective scientific talk. She reviews the basics of PowerPoint or Key Note and gives advice on choosing fonts, colors and slide styles. She also recommends ways to structure your talk so the audience stays awake and engaged. Her final recommendation is practice, practice, practice!
Scientific Presentations. Presenting science to an audience of peers is among the most fundamental of job skills. Yet, few scientists receive training in how to present, beyond the occasional ad hoc critique during the weekly lab meeting, or the odd rehearsal leading up to a thesis defense.
The term 'scientific presentation' used in this course refers to talks that scientists make in order to report their work to the scientific community: how this particular scientist found an important question and discovered a possible answer to that question. Through making such presentations scientists aspire to receive a variety of ...
An important new study has advanced how heart failure is detected in women -- meaning more female patients can be diagnosed and at an earlier stage. Researchers led by teams from the Universities ...
NASA's Juno provides high-definition views of Europa's icy shell. Story by Science X staff. • 1h • 4 min read. Jupiter's moon Europa was captured by the JunoCam instrument aboard NASA's ...
The most inspiring science book of all time is The Selfish Gene, according to a survey carried out by the Royal Society of the United Kingdom. In this famous work from 1976, British biologist Richard Dawkins defended that the DNA molecule uses the human being as a mere envelope in order to be transmitted to the next generation and become immortal.
Poster Presentations. Poster presentations may not seem as prestigious as oral presentations, but they are a great opportunity to interact with other scientists in your field in a reasonably ...
Good morning, Chairman Phillips and Commissioners. Item E-2 is a draft final rule that revises the Commission's regulations governing applications for permits to site electric transmission facilities under section 216(b) of the Federal Power Act.. In the Energy Policy Act of 2005, Congress established a limited Federal role in electric transmission siting, which has traditionally resided ...