How to Use a Mac With PowerPoint: A Step-by-Step Guide
Using a Mac with PowerPoint is simple. First, make sure you have PowerPoint installed on your Mac. You can find it at the App Store or through a Microsoft 365 subscription. Open PowerPoint, and you’ll be greeted with a range of templates to start your presentation. From here, you can add text, images, and animations to create an engaging slideshow. Once done, you can present directly from your Mac or save your presentation to share with others.
After you’ve completed your PowerPoint presentation on your Mac, you’ll have a professional and compelling visual aid to support your speech or lecture. You can also share it with others or export it into different formats such as PDF, video, or even a web page.

Introduction
Are you ready to impress your audience with a stunning presentation? If you’re a Mac user, fear not – using PowerPoint on your macOS is as smooth as on any Windows PC. Let’s be honest, presentations are a part of life: whether you’re a student, a professional, or just someone with a story to tell, at some point, you’re going to need to put some slides together. PowerPoint for Mac has all the tools you need to create a presentation that’s both visually captivating and content-rich.
Why is this important? Well, PowerPoint presentations are a staple in the professional world. They’re used for everything from business pitches to academic lectures. Knowing how to create an effective PowerPoint presentation on your Mac could be the difference between persuading your audience or leaving them unimpressed. And who is this relevant to? Everyone! Whether you’re a newbie to presentations or a seasoned speaker looking to refine your skills, this guide will help you master PowerPoint on your Mac.
Step-by-Step Tutorial: Using PowerPoint on a Mac
Before jumping in, let’s clarify what you’ll achieve by following these steps. By the end, you’ll be able to create, edit, and present a PowerPoint slideshow on your Mac.
Step 1: Install PowerPoint
Install PowerPoint on your Mac from the App Store or through a Microsoft 365 subscription.
After installing PowerPoint, you’ll need to sign in with your Microsoft account to activate the software, then you’ll be ready to start creating your presentation.
Step 2: Open PowerPoint
Open PowerPoint and choose a template or open a blank presentation.
PowerPoint offers a variety of templates to suit different presentation styles. If you choose to start with a blank slate, you’ll have complete creative freedom.
Step 3: Add Content
Add slides and content such as text, images, and shapes to your presentation.
Remember to keep your slides simple and not clutter them with too much content. Visual aids should support your speech, not replace it.
Step 4: Customize Your Slides
Customize your slides’ design with themes, colors, and animations.
This step is where you can get creative with your presentation’s look and feel. Just be sure not to go overboard with animations – they should enhance your presentation, not distract from it.
Step 5: Present Your Slideshow
Present your slideshow directly from your Mac or save it to share with others.
You can start your presentation by clicking the ‘Slide Show’ tab and then ‘Play from Start’. Make sure you practice your presentation beforehand to ensure everything runs smoothly.
| Benefit | Explanation |
|---|---|
| User-Friendly Interface | PowerPoint for Mac has a clean and intuitive interface, making it easy for users to navigate and find the necessary tools. |
| Compatibility with Windows | Files created in PowerPoint for Mac are compatible with PowerPoint on Windows, ensuring seamless sharing and collaboration. |
| Multimedia Integration | PowerPoint for Mac allows for easy integration of multimedia elements such as audio, video, and images, enhancing the presentation’s impact. |
| Drawback | Explanation |
|---|---|
| Cost | PowerPoint for Mac requires a purchase or a Microsoft 365 subscription, which may be a barrier for some users. |
| Learning Curve | While user-friendly, new users may still face a learning curve to utilize all the features effectively. |
| System Requirements | PowerPoint can be resource-intensive, potentially affecting performance on older Mac models. |
Additional Information
Now, let’s sprinkle in some extra tidbits that could elevate your PowerPoint game on a Mac. First off, did you know that PowerPoint for Mac supports real-time collaboration? Yup, you can work with your teammates on the same presentation at the same time, no matter where you are. And if you’re all about shortcuts, PowerPoint for Mac has plenty. For instance, pressing Command + Shift + N instantly creates a new slide.
Another neat feature is the Presenter View, which lets you see your notes, the upcoming slide, and a timer, all while the audience only sees the current slide. And for those who value accessibility, PowerPoint for Mac has tools to make presentations more accessible, including options for larger text and high contrast. Just remember, when using PowerPoint on a Mac, you have all the essentials at your fingertips to create presentations that are not just informational, but also memorable.
- Install PowerPoint on your Mac from the App Store or Microsoft 365.
- Open PowerPoint and select a template or start with a blank presentation.
- Add and customize your slides with text, images, and animations.
- Present directly from your Mac or save your presentation for later use.
Frequently Asked Questions
Can i use powerpoint on a mac.
Yes, PowerPoint is available for Mac users and can be downloaded from the App Store or included in a Microsoft 365 subscription.
Is PowerPoint for Mac different from Windows?
While there are some differences in design and available features, PowerPoint for Mac offers a comparable experience to the Windows version.
Can I collaborate with others using PowerPoint for Mac?
Absolutely! PowerPoint for Mac supports real-time collaboration, allowing multiple users to work on the same presentation simultaneously.
Can I open a PowerPoint presentation made on a Mac on a Windows PC?
Yes, presentations made in PowerPoint for Mac are compatible with PowerPoint for Windows, ensuring easy file sharing and collaboration.
Does PowerPoint for Mac support Presenter View?
Yes, Presenter View is available in PowerPoint for Mac, providing speakers with a private view of their notes and upcoming slides while presenting.
In conclusion, mastering the use of PowerPoint on a Mac can be a game-changer for anyone looking to create impactful and persuasive presentations. Whether you’re a student, educator, entrepreneur, or professional, the ability to present your ideas clearly and attractively is invaluable.
So, dive in, explore the features, and harness the power of PowerPoint on your Mac to captivate your audience. Remember, a well-crafted presentation can be the key to success. Happy presenting!

Matthew Burleigh has been writing tech tutorials since 2008. His writing has appeared on dozens of different websites and been read over 50 million times.
After receiving his Bachelor’s and Master’s degrees in Computer Science he spent several years working in IT management for small businesses. However, he now works full time writing content online and creating websites.
His main writing topics include iPhones, Microsoft Office, Google Apps, Android, and Photoshop, but he has also written about many other tech topics as well.
Read his full bio here.
Share this:
Join our free newsletter.
Featured guides and deals
You may opt out at any time. Read our Privacy Policy
Related posts:
- Can I Convert My Powerpoint to Google Slides?
- How to Save Powerpoint as PDF with Notes
- How to Drag Slides From One PowerPoint to Another: A Step-by-Step Guide
- How to Make a Powerpoint Slide Vertical in Powerpoint 2013
- How to Set Time for Slides in Powerpoint
- How to Check Word Count on Powerpoint 2010
- Can a PowerPoint Presentation Created on a PC Run on a Mac? Here’s How
- How to Change Hyperlink Color in Powerpoint 2010 (An Easy 5 Step Guide)
- How to Unhide a Slide in Powerpoint 2013
- How to Insert Slides from Another Presentation in Powerpoint 2010
- What Are Benefits of PowerPoint? A Comprehensive Guide
- How to Create a PowerPoint Presentation Step by Step: 2024 Guide
- How Is Microsoft PowerPoint Used in Business: A Comprehensive Guide
- How to Combine PowerPoint Presentations With Different Orientations
- How to Convert a PowerPoint to Word and Edit with Ease
- How to Change the Font on All Slides in Google Slides
- How to Insert Check Mark in Powerpoint for Office 365
- How to Delete Multiple Slides in Google Slides
- How to Change Line Spacing in Powerpoint for Every Slide at Once
- How to Loop a Slideshow on Powerpoint 2013
- Editorial Process
- Why Trust Us?
- Affiliate Linking Policy
- Privacy Policy
- Terms of Service
Weekly Must-Reads View All
How to fix ‘your disk is almost full’ on mac: 9 best ways.
Clean up your Mac disk for peak performance
How to Clean Up Your Mac: 8 Easy Methods
Quickly clean your Mac to speed it up
How to Shut Down MacBook: 3 Quick Ways
Quick ways to shut down your Mac
What Is AppleCare for Mac? Coverage, Plans, and Benefits
Protect your Mac with AppleCare
Phone (407) 777-2211
Email [email protected]
Address 1317 Edgewater, Dr #4609 Orlando, Florida 32804
Popular Topics
- wi-fi connectivity issue
- What to Do With Your Old MacBook? 13 Useful Ways to Reuse an Old Mac
- What Software Comes With MacBook
- What Is the MacBook Flexgate Issue and How to Fix It
- What Is the MacBook Flexgate Issue
- volume issue
- video compression
- ventura install
- Update macOS on Your Mac
Trending Now View All

- Mac Tips and Tricks
How to Make a Slideshow on a Mac: 3 Quick Ways
Reviewed by
Hashir Ibrahim
Last updated: September 28, 2024
Expert verified
To make a slideshow on a Mac:
- Open Photos and select the images you want.
- Go to File and select Play Slideshow .
- Pick a Theme and add Music if desired.
- Click Play Slideshow to start.
- Use the arrow keys to move through slides, and press Escape to exit.
Tried and Tested ✅: The methods and steps mentioned in this article have been tried and tested firsthand by Ojash Yadav on his MacBook Pro M3 and rechecked for errors on Hashir’s MacBook Air M2.
I remember the first time I had to make a slideshow on my Mac—it felt tricky at first, but I quickly discovered some simple options. In this post, I’ll share the methods that I found to be the easiest and most effective.
How to Make a Slideshow on a Mac
Here are the three quick and easy ways to make a slideshow on a Mac.
1. Create a Slideshow in Photos
The Photos app lets you easily create beautiful slideshows by arranging images, adding music, and applying themes.
a. Create an Instant Slideshow in Photos
Here’s a step-by-step guide on how to create a slideshow using the Photos app on a Mac:
- Launch the Photos app by searching for it in Spotlight search.

- Navigate to the photos you want to include in your slideshow. You can select individual photos by holding down the Command ⌘ key while clicking each photo.
- With your photos selected, click File in the menu bar and choose Play Slideshow .

- A new pop-up menu will appear. You can choose a Theme and Music for your slideshow. Once you’re done, click the Play Slideshow button.

- It will start the slideshow in fullscreen.
You can navigate the slideshow using your keyboard. Press the left and right arrow keys to switch between slides. Tap the Spacebar to stop the slideshow and the Escape key to close it.
b. Create a Custom Slideshow in Photos
You can use the Photos app slideshow project tool to create a more custom and sophisticated slideshow. Here’s how to create a custom slideshow in Photos:
- Click File in the menu bar and navigate to Create > Slideshow > Photos .

- A new window will appear. Select New Slideshow from the dropdown and give the slideshow a name. Then, click OK .

- Select the photos you want to include in the slideshow and click the Add button in the top-right corner.

- You can click the icons in the right strip to customize your slideshow’s appearance.
- To modify slide transitions, positioning, font style, and zoom level, click the Theme icon and pick from the list.

- Click the Music icon to select your slideshow’s music.
- To tweak the slideshow’s length, access the Duration menu and drag the Custom slider. Alternatively, check the Fit to Music feature to synchronize the slideshow’s duration with your chosen soundtrack.
- Configure transitions via the Transition dropdown, which will be applied to all slides.
- Check the Scale photos to fit screen option to ensure images are displayed optimally.
- Activate the Loop feature if you want the slideshow to replay indefinitely, restarting after the concluding slide.
- Click the Preview button to view your slideshow. Click it again to stop the slideshow.

- The Play button also initiates the slideshow.
- To exit the slideshow, press the Escape key.
Did you know? You can export your Photos slideshow as a video by selecting File > Export > Slideshow . This lets you easily share it on social media or with friends and family.
2. Make a Slideshow With Preview
The Preview app allows you to quickly view images in a simple slideshow format with minimal setup. Here’s how to make a slideshow on a Mac in the Preview app:
- Launch the Preview app from the Dock or the Applications folder.

- A new window will open. Navigate to the location where your images are saved and select the ones you want in a slideshow. Click Open .

- This will open all selected images in a Preview window. Select all the images in the left sidebar by pressing Command ⌘ + A .

- With all your images open in Preview, go to View in the menu bar and select Slideshow .

- Navigate through the slideshow using the left and right arrow keys on your keyboard.
- Press the Spacebar to pause or play the slideshow.
- Use the Escape key to exit the slideshow.
3. Make a Slideshow in Keynote
Keynote enables you to create highly customizable slideshows with advanced transitions, animations, and media integration. Here’s how to make a slideshow on a Mac using Keynote:
- Open Keynote by searching for it in the Spotlight search.

- Upon opening, Keynote will present you with various templates. Choose one that fits the style of your slideshow.

- Click Slide in the menu bar and select New Slide .

- Alternatively, click the Add Slide button in the top toolbar.

- You can choose different slide layouts based on content (e.g., title slides, content slides, photo slides).
- Drag and drop photos, videos, or text into the slide placeholders.
- Use the Media button in the toolbar to insert images, videos, and music directly from your library.

- Click a slide, then choose the Animate button in the toolbar.
- Select Add an Effect to choose from various slide transitions. You can also add object animations for individual elements within a slide.

- If you want the slideshow to play automatically, go to Document > Document in the top right corner and check Automatically play upon open . Adjust the slide duration as desired.

- Click the Play button in the top toolbar to view your slideshow.

- Save your project by going to File > Save .

- To export the slideshow as a video or another format, go to File > Export To and choose your desired format.

Large image files or long slideshows with many transitions can slow down your Mac, especially on older models. Make sure to save your project regularly to avoid losing progress.
Create Slideshows on Your Mac Quickly
Whether you’re using the Photos app for a quick and simple presentation, Preview for a rapid image display, or Keynote for a more intricate and interactive experience, Mac ensures a seamless and efficient process.
Here are some more tips for you:
- If you want to add a voice-over to your slideshow, you can easily record audio on your Mac .
- When uploading a slideshow video to social media, compressing the video could be a helpful step.
- You can take a screenshot on your Mac and add that to a slideshow.
Frequently Asked Questions
How do i delete a slideshow on mac, can i add animations to my slideshows on mac, can i share my slideshow on social media, how do i export my slideshow as a video, can i add videos to my slideshow on mac, can i add text to my slides on mac.

Hi there! I'm Ojash, a tech journalist with over a decade of experience in the industry. I've had the privilege of contributing to some of the world's largest tech publications, making my mark as a respected Mac expert. My passion lies in exploring, using, and writing about MacBooks, and I enjoy sharing my expertise to help others make informed decisions and get the most out of their MacBook experience. Join me as we delve into the fascinating world of MacBooks together!
I'm Hashir, a tech journalist with a decade of experience. My work has been featured in some of the top tech publications like MakeUseOf and MakeTechEasier. I have a bachelor's degree in IT, a master's in cybersecurity, and extensive knowledge of Apple hardware, specifically MacBooks. As the senior writer at MacBook Journal, I write in depth guides that help you solve any issues you have with your mac and unbiased reviews that help you make the right buying decisions.
You May Also Like

What Is AirPlay? Everything About Apple’s Streaming Technology
Unlock the power of Apple's AirPlay for seamless streaming

How to Change the Time on Your MacBook: 5 Best Methods
Effortlessly Change and Manage Time on Your MacBook


How to Play PC Games on Mac: 10 Best Methods
Written by Ojash Reviewed by Hashir Ibrahim Last updated: July 27, 2024 Expert
How to Make a PowerPoint on Mac? (A Step-by-Step Guide)
If you’ve ever wanted to create a professional-level PowerPoint on your Mac, you’re in luck! In this step-by-step guide, we’ll walk you through the entire process from start to finish.
By the end of this guide, you’ll be a PowerPoint pro on your Mac!
Short Answer
When you are finished, you can save your presentation and share it with others.
What is Keynote?
Keynote provides users with a wide range of tools and features, including customizable slides, themes, animations, and more.
How to Open Keynote on Mac
Opening the Keynote app on a Mac computer is quite simple.
You can then double-click on the Keynote icon to open the app.
You can then type in “Keynote” in the search bar and hit the “Enter” key.
You can customize your slides by adding text, images, and other media.
With the Keynote app, you can easily create a professional-looking PowerPoint on a Mac computer.
Creating a PowerPoint on a Mac
Keynote is the presentation software for Mac computers, and it makes creating a presentation simple and easy.
You can also customize the layout of your slides, allowing you to add different elements and adjust their placement.
With the Keynote app, creating a professional-looking PowerPoint on a Mac computer is easy and stress-free.
Customizing the Slides
Customizing the slides is an important part of creating a stunning PowerPoint presentation on a Mac.
To add text to your slides, simply select the text box and type in your desired text.
Additionally, Keynote offers a range of themes and animations to help you further customize your presentation.
To access the themes and animations, simply click on the Themes or Animations tabs in the upper right-hand corner of the app.
So, if youre looking to create an impressive presentation, the Keynote app is the perfect tool for the job.
Adding Text, Images, and Media
To add text, select the text box icon from the top menu, and then type in the text you want to include in the text box.
To add images, click the Add Image icon from the top menu, and then select an image from your computer, or add an image from the web.
To do this, click the Add Audio or Add Video icon from the top menu, and then select the audio or video file you want to include.
Once you have added all the elements, you can save your presentation as a .pptx file and share it with others.
Utilizing Themes and Animations
With the help of themes and animations, you can create a presentation that is visually appealing and engaging.
You can also choose from several animation styles to give your presentation a more dynamic feel.
For instance, you can use animations to draw attention to a particular slide or element in your presentation.
From there, you can customize your slides with the desired theme and animations.
With the help of themes and animations, you can create a presentation that is visually appealing and will help to emphasize certain points you want to make.
Saving and Sharing Your PowerPoint
To save your PowerPoint, click the File menu at the top of the Keynote window and then click Save.
To export your presentation to a PDF file, click the File menu and then select Export.
Here, you can enter the email addresses of the people you would like to share your presentation with.
This will open up the presentation in the Keynote app and you can make any changes that you wish.
Final Thoughts
Creating a professional-looking PowerPoint on a Mac computer doesn’t have to be difficult.
So get to it and start making your own PowerPoint today!
Recent Posts
Keynote User Guide
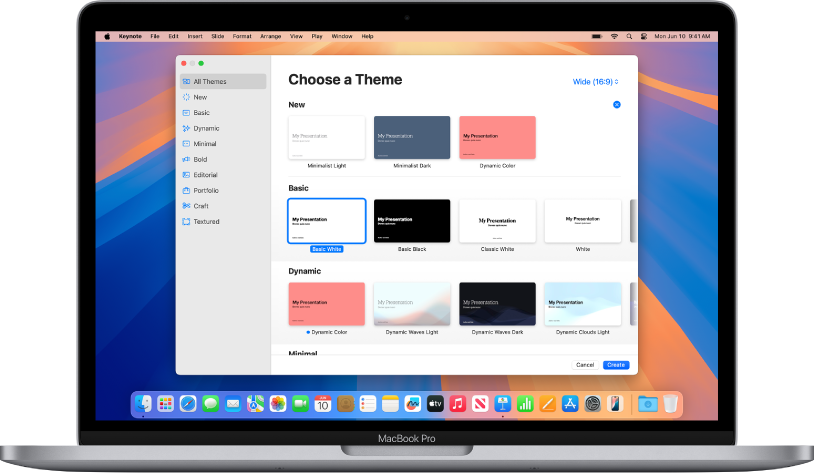
Get started with a theme
All presentations begin with a theme—a set of predesigned slide layouts you can use as a starting point. Replace the theme’s images and text with your own, then add more slides as needed.
- Create a presentation
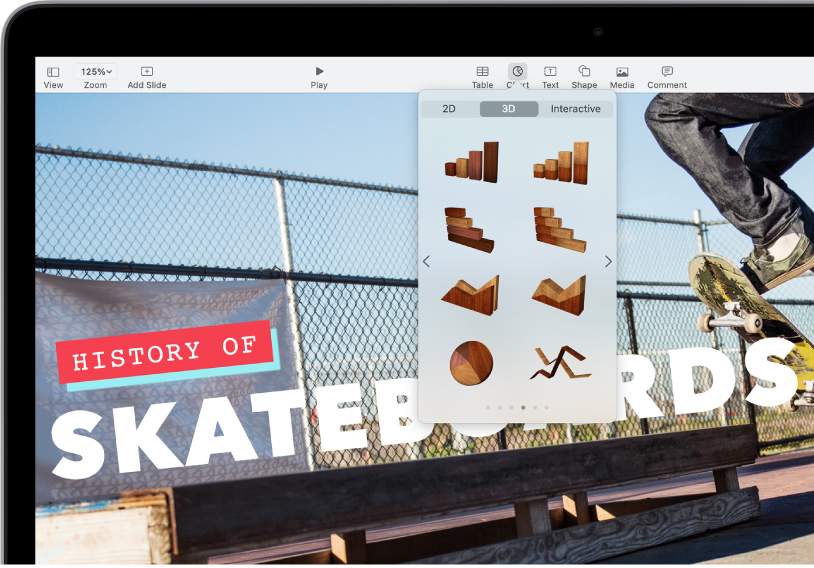
Add text, photos, charts, and more
Add objects like text boxes, tables, charts, shapes, and media (images, audio, and video) to any slide. You can layer objects, resize them, and link them to webpages or other slides in your presentation.
- Intro to images, charts, and other objects
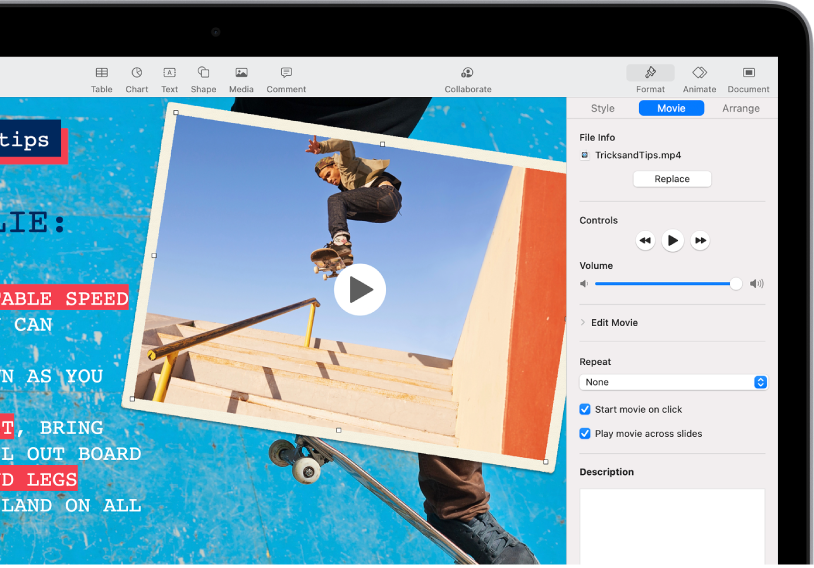
Lights, camera, action
Bring your presentation to life with movies, live video, recorded narration, music, and more.
Add video or audio
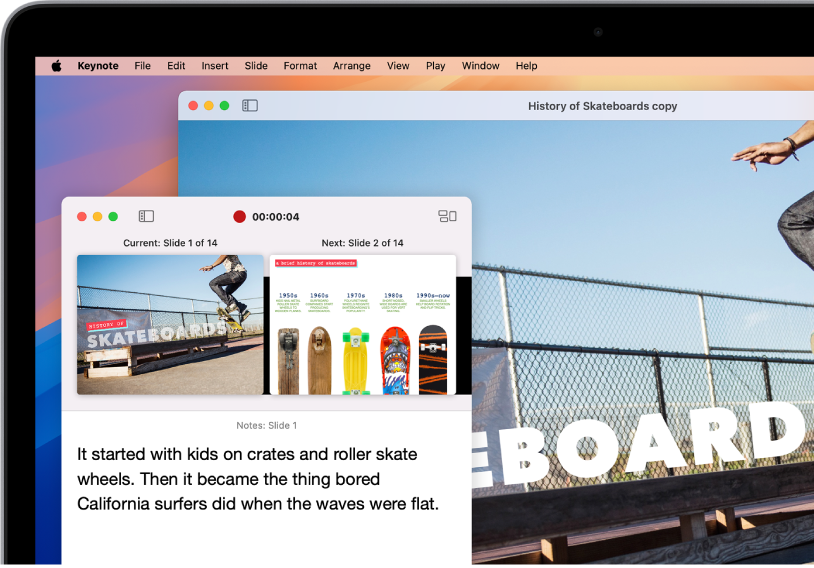
Present in any situation
Play a presentation during a video conference, virtually with multiple presenters, as a movie with recorded narration, and more.
Play a presentation
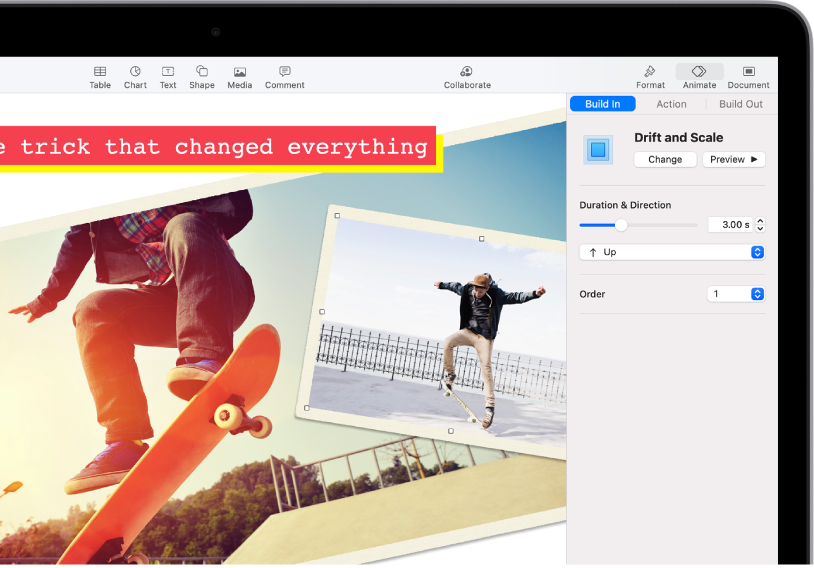
Wow them with animation
Add visual effects or animations to captivate your audience. For example, add a transition so each slide dissolves into the next, or make each word in a title bounce onto the slide.
Add transitions between slides
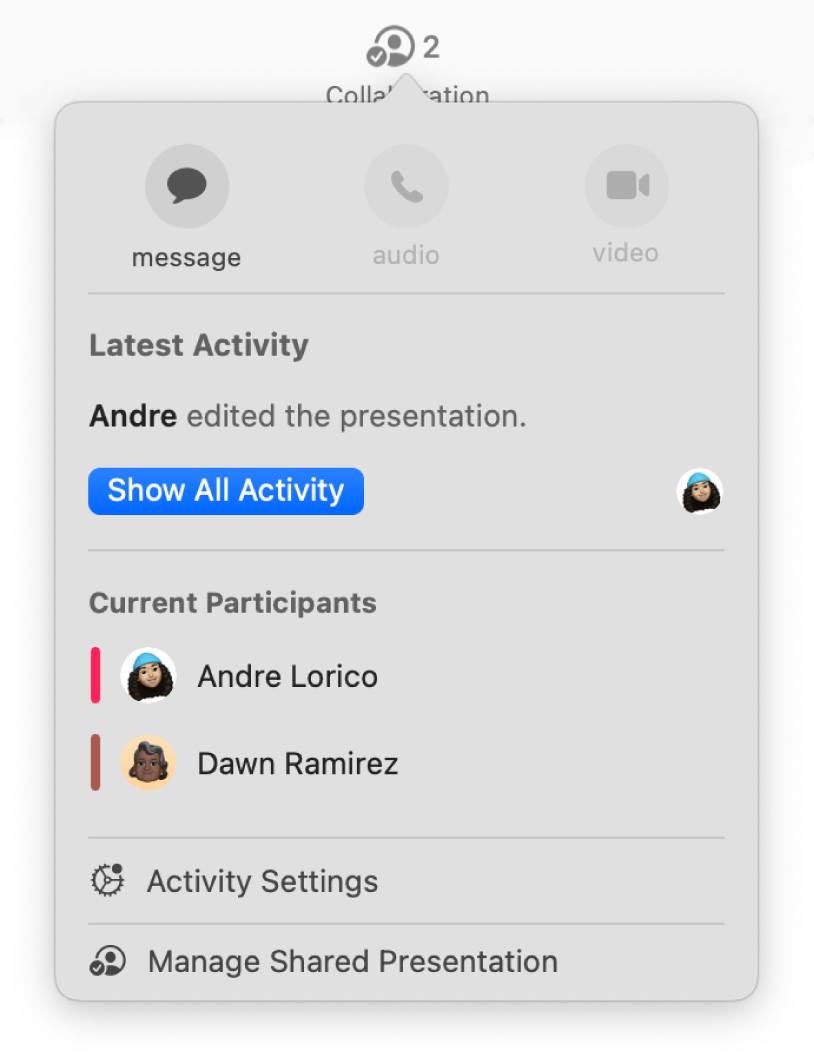
Collaborate in real time
Invite others to work with you on your presentation. Everyone you invite can see changes as they’re made, but you control who can edit or only view the presentation.
- Intro to collaboration
This guide helps you get started using Keynote 14.2 on your Mac. (To see which version of Keynote you have, choose Keynote > About Keynote from the Keynote menu at the top of your screen.) To explore the Keynote User Guide, click Table of Contents at the top of the page, or enter a word or phrase in the search field.
If you need more help, visit the Keynote Support website .
Keynote User Guide for Mac
- What’s new in Keynote 14.2
- Intro to Keynote
- Choose how to navigate your presentation
- Open or close a presentation
- Save and name a presentation
- Find a presentation
- Print a presentation
- Undo or redo changes
- Show or hide sidebars
- Quick navigation
- Change the working view
- Expand and zoom your workspace
- Customize the Keynote toolbar
- Change Keynote settings on Mac
- Touch Bar for Keynote
- Create a presentation using VoiceOver
- Add or delete slides
- Add and view presenter notes
- Reorder slides
- Group or ungroup slides
- Skip or unskip a slide
- Change the slide size
- Change a slide background
- Add a border around a slide
- Show or hide text placeholders
- Show or hide slide numbers
- Apply a slide layout
- Add and edit slide layouts
- Change a theme
- Add an image
- Add an image gallery
- Edit an image
- Add and edit a shape
- Combine or break apart shapes
- Draw a shape
- Save a shape to the shapes library
- Add and align text inside a shape
- Add 3D objects
- Add lines and arrows
- Animate, share, or save drawings
- Add video and audio
- Record audio
- Edit video and audio
- Add live video
- Set movie and image formats
- Position and align objects
- Use alignment guides
- Place objects inside a text box or shape
- Layer, group, and lock objects
- Change object transparency
- Fill shapes and text boxes with color or an image
- Add a border to an object
- Add a caption or title
- Add a reflection or shadow
- Use object styles
- Resize, rotate, and flip objects
- Move and edit objects using the object list
- Add linked objects to make your presentation interactive
- Select text
- Copy and paste text
- Use dictation to enter text
- Use accents and special characters
- Format a presentation for another language
- Use phonetic guides
- Use bidirectional text
- Use vertical text
- Change the font or font size
- Add bold, italic, underline, or strikethrough to text
- Change the color of text
- Change text capitalization
- Add a shadow or outline to text
- Intro to paragraph styles
- Apply a paragraph style
- Create, rename, or delete paragraph styles
- Update or revert a paragraph style
- Use a keyboard shortcut to apply a style
- Adjust character spacing
- Add drop caps
- Raise and lower characters and text
- Format fractions automatically
- Create and use character styles
- Format dashes and quotation marks
- Format Chinese, Japanese, or Korean text
- Set tab stops
- Format text into columns
- Adjust line spacing
- Format lists
- Add a highlight effect to text
- Add mathematical equations
- Add borders and rules (lines) to separate text
- Add or delete a table
- Select tables, cells, rows, and columns
- Add or remove rows and columns
- Move rows and columns
- Resize rows and columns
- Merge or unmerge cells
- Change the look of table text
- Show, hide, or edit a table title
- Change table gridlines and colors
- Use table styles
- Resize, move, or lock a table
- Add and edit cell content
- Format dates, currency, and more
- Create a custom cell format
- Highlight cells conditionally
- Format tables for bidirectional text
- Alphabetize or sort table data
- Calculate values using data in table cells
- Use the Formulas and Functions Help
- Add or delete a chart
- Change a chart from one type to another
- Modify chart data
- Move, resize, and rotate a chart
- Change the look of data series
- Add a legend, gridlines, and other markings
- Change the look of chart text and labels
- Add a chart border and background
- Use chart styles
- Animate objects onto and off a slide
- Animate objects on a slide
- Change build order and timing
- Add transitions
- Present on your Mac
- Present on a separate display
- Present during a FaceTime call
- Use a remote
- Make a presentation advance automatically
- Require a password to exit a presentation
- Play a slideshow with multiple presenters
- Rehearse on your Mac
- Record presentations
- Check spelling
- Look up words
- Find and replace text
- Replace text automatically
- Set author name and comment color
- Highlight text
- Add and print comments
- Send a presentation
- Invite others to collaborate
- Collaborate on a shared presentation
- See the latest activity in a shared presentation
- Change a shared presentation’s settings
- Stop sharing a presentation
- Shared folders and collaboration
- Use Box to collaborate
- Create an animated GIF
- Post your presentation in a blog
- Use iCloud Drive with Keynote
- Export to PowerPoint or another file format
- Reduce the presentation file size
- Save a large presentation as a package file
- Restore an earlier version of a presentation
- Move a presentation
- Delete a presentation
- Password-protect a presentation
- Lock a presentation
- Create and manage custom themes
- Transfer files with AirDrop
- Transfer presentations with Handoff
- Transfer presentations with the Finder
- Keyboard shortcuts
- Keyboard shortcut symbols
Unsupported browser
This site was designed for modern browsers and tested with Internet Explorer version 10 and later.
It may not look or work correctly on your browser.
- Presentations
How to Create a Basic Keynote Presentation (On Your Mac)
The best apps find the sweet spot between power and ease-of-use. And that's exactly the balance that you'll find in Apple Keynote, the best tool to build a presentation on macOS and iOS.

This tutorial will serve as a Keynote how to use guide. You'll see how easy it can be to build Keynote presentations in Mac for free. Let's learn more!
Apple Keynote Explained: What Is a Keynote Presentation?
Apple Keynote is one of the most powerful tools to build a presentation on the macOS ecosystem. One advantage to the Keynote app is that it's got the feel of an Apple-designed piece of software, with a focus on design and ease-of-use.
If you've used Microsoft PowerPoint to build a presentation, you'll feel right at home in the Keynote app. But Keynote is simplified and streamlined, with the essential features that every presenter needs.

Another great part of Keynote is that it works beautifully on iOS devices. Thanks to iCloud Drive, saving your presentation in the cloud will help you pick up where you left off on your mobile device. While PowerPoint and Google Slides have mobile apps, they often feel like afterthoughts with features missing or limited.
Best of all, Keynote is free. For macOS and iOS users, the Keynote app is the least expensive way to build a presentation.
For a deeper dive into the app and how to use it, make sure to check out the Keynote tutorial below:

How to Use Apple Keynote
You might be wondering how to use Keynote to build your next presentation. While the app has an intuitive interface that lends itself to beginners, it helps to have a few pointers. Here are four steps you can take to learn how to use Keynote to make a presentation.
1. Explore the Keynote App Interface
If you're switching to the Keynote app from another piece of presentation software, my favorite tip is to spend time familiarizing yourself with the interface. If you've got a general understanding of the interface, you'll know where to go when you want to accomplish a task.

- Slide thumbnails live on the left side of Keynote by default. You can click on a slide thumbnail to switch to it, and also drag to re-order slides in the sidebar to resequence them.
- The key tools run across the top of the app and span practically every action you need to build a slide. You'll notice key actions like Add Slide, Play, and the center icons (Table, Chart, Text, Shape, Media) that help you add the corresponding content blocks to your slide.
- The center part of the Keynote app is your canvas, where you can drag and drop content blocks to build out your slide.
- The format option lives on the right side. With an object selected, click on it to open the options to adjust the style of an object, like the color, chart style, or font-face depending on the content selected.
Keynote's interface is mostly intuitive. It also is similar enough to other apps like PowerPoint that it's easy to start using. Think about how these tools fit together so that you'll always know where to look for the needed tool.
2. Learn to Add and Customize Content
Slides are ultimately made up of content. That might include text boxes, charts and graphs, images, and more. In this section, let's customize two key slides from the VERA Keynote template by adding content examples.

Advanced Keynote templates like VERA already have content on the slide that. You can simply click in the content boxes and type over the placeholder to add your text.
If you want to add additional content, you can click on the corresponding content type above the canvas. For my Keynote example, I'll click on Media, then Choose, and browse to an image stored on my computer. Then, just click and drag to reposition any of the elements.

Believe it or not, this is pretty much everything you need to know to build up a slide. Add content, reposition it, and update it with your specifics. These repeated simple steps come together to build your slide.
3. Learn How to Use Format and Style Tools
What if you want to adjust the font face? Or the color of a shape? The answer is that all of the tools live in the same menu.
With any object selected, click on the Format button near the upper right menu area in Keynote. You'll see a brand-new panel in Keynote that'll help you transform the selected object.

Another stylistic tool that you can use to capture your audience is animation. Keynote Animations are an advanced (but crucial) part of building effective slides. Check out the tutorial below
4. Learn Presenter Tools
No matter what app you use to give a presentation, you should think of your slides as support to what you're saying. Apps like Keynote help you build a presentation that'll give you confidence when presenting.
Two of my favorite features in Keynote are Presenter Notes, and the presenter view, which are complementary features that keep important information front and center.

To add presenter notes, go to the View menu and choose Show Presenter Notes. You'll see a new box open below the Keynote canvas where you can type in your notes. In the screenshot above, you can see an example.
When you're ready to present, press the Play button on Keynote's tools. One screen will show your presentation, while a second display will tee up speaking aids including the Presenter Notes you added. Keep those notes front-and-center as you present to an audience.

Also, you can use Keynote's mobile apps as a remote to advance slides on macOS. Make sure to download the Keynote Remote app for iOS to turn your mobile device into a presenting tool.
Best Keynote Presentation Template Examples
The section above covered the essentials of how to build Keynote presentations. However, one of the best resources that presentation professionals use is pre-built templates from professional designers.
This is the central value of Envato Elements . On Elements, a single subscription with simple licensing unlocks more than a million assets - including thousands of professional Keynote presentation templates.

When you source a Keynote presentation template from Envato Elements , you fast track the process of designing one of the best Keynote presentations. You don't have to know how to make presentations on Mac from scratch when you use a template as a starting point.

If you're wondering how to make presentations on Mac, a template might just be the answer. When you download a template for the Keynote app, it already includes placeholders and ideas that you can update with your content. Templates are really just a starting point for using Keynote to build a presentation.
5 Best Keynote Presentation Templates from Envato Elements
Envato Elements features a deep library of templates that help you learn how to make a presentation on macOS. There are so many options that it helps to have a guide to top Keynote presentation templates.
Let's take a look at five of the best Keynote presentations that you can build with templates from Envato Elements.

With 65 unique slide designs, Elnia is a classic example of how templates help you build Keynote presentations. Each of them serves a different purpose, like creating a welcome slide, showcasing your team, and showcasing a project timeline. This template features 16 color variants that help you build your best Keynote presentation yet.
2. Groningen

Groningen might be the right template if you want to create a Keynote presentation on Mac that highlights your business. The clean, graphical slides are the perfect way to illustrate business concepts. Download it, drop your company details in, and you'll have quickly built a Keynote presentation that stands out.

The custom, fancy image masks help you build one of the best Keynote presentations that fits with modern design trends. It's got a minimal and bold look-and-feel that'll help your audience zone in on key slide content.
4. Look Book

For the fashion-centric and forward-thinking audience, look no further than the Look Book template. Using Keynote is easier when you start with a template like Look Book that already has all of the slide designs to fit the category. You can also use this template when learning how to make a slideshow on Mac.

Mouve is a great general-purpose template for the Keynote app. It features custom animations that go beyond Keynote's built-in effects to help capture and keep an audience's attention. When you want to make a presentation on Mac with a sense of motion, make a Mouve!
If Envato Elements isn't your style, you can also source top-notch Keynote templates from Envato Market . On Envato Market, you pay for templates one-at-a-time, which can help you keep the total cost of your presentation low.
Whether you choose Elements or Market , use the round-ups below for the top Keynote presentation template selections:

Learn More About Using Apple Keynote
This tutorial is really just the start of your Keynote presentation learning path. With a Keynote template from the section above and a few extra learning resources, you're well on your way to learning how to make a presentation on Mac.
For a comprehensive look at Apple's top-notch presentation software, make sure to check out the resource How to Use Apple Keynote (Ultimate Tutorial Guide.)
Also, check out the Keynote tutorials below to continue your Keynote mastery:
Build a Keynote Presentation Today
Now that you've learned a bit about Apple's Keynote app, it's time to go build a Keynote presentation of your own! Keynote's ease-of-use and smooth learning curve can help you develop a presentation in less time than any other app.
Don't forget: using a source like Envato Elements or Envato Market is one way to save yourself hours of design work. You can build one of the best Keynote presentations by simply using one of the templates as a starting point.
Editorial Note : This Keynote tutorial was originally published in December of 2013 by Hannah Williams . It's been completely revised and updated to include new information.


IMAGES
VIDEO
COMMENTS
Create a presentation in Keynote on Mac. To create a new presentation, you first choose a theme to use as a starting point. Themes use coordinated fonts and colors for a unified look and often include placeholders that you can replace with your own content.
Install PowerPoint on your Mac from the App Store or Microsoft 365. Open PowerPoint and select a template or start with a blank presentation. Add and customize your slides with text, images, and animations. Present directly from your Mac or save your presentation for later use.
Easily make a slideshow on a Mac using Photos, Preview, or Keynote. Learn the quickest methods to create stunning slideshows with ease.
You’ll learn what Keynote is and how to open it on your Mac, how to create a PowerPoint, customize the slides, add text, images, and media, utilize themes and animations, and finally, save and share your PowerPoint.
Learn how to use Keynote for Mac to create and deliver polished presentations with animations, photos, videos, charts, slide transitions, and more.
You don't have to know how to make presentations on Mac from scratch when you use a template as a starting point. All of these templates can be used to build a Keynote presentation on macOS, thanks to Envato Elements.