

What is ‘Presentation, Practice, Production’ (PPP)?
And how can i best use it in my classroom.

Presentation, practice, production (PPP) is a lesson structure, a way to order activities in your lessons.
Although quite old and heavily criticised over the years, PPP is probably the most commonly used lesson structure in teaching English to foreign learners today. It’s also still widely taught to new teachers and seen on initial teacher training courses like the CELTA and CertTESOL.
Most course books that you’re likely to use will structure their chapters in ways similar or the same as PPP, meaning that you’ll get a lot of exposure to this method.
As the name suggests, there are three stages to this lesson structure, which we’ll look at now.
Thanks for reading Barefoot TEFL Teacher! Subscribe for free to receive new posts.
The ‘presentation’ stage
This is where the language is introduced, or ‘presented’ to the learners, usually by introducing a context or situation. For example, you could:
Tell or act out a short story or anecdote ( “I woke up this morning with a nasty cold… AHHH-CHOOO! I went to the doctor and…”)
Play a short audio clip
Show a clip from a movie or TV show.
Show objects you’ve brought in (e.g. newspaper cuttings, plane tickets, hobby materials)
The aim is to ensure students understand the context and get them thinking about it. You could elicit ideas or suggestions from students, get them to talk to each other about what they know or think about the situation, etc. This also helps them start to remember the language and vocabulary they already know about the topic (or ‘activate the schemata’, if you want the fancy term for it).
The ‘practice’ stage
The ‘practice’ stage is when students use the language in a controlled way. This stage is sometimes divided into two — a controlled practice and a freer practice. Again, among many things, you could get students to:
Drill sentences or sounds, chorally or individually.
Substitution drill in pairs
Sentence matching activities
Gap-fill exercises
Pair work asking and answering questions
The aim of this stage is accuracy . Error correction is important in this stage, so monitor the students closely and take time to correct errors immediately. A delayed error correction section after the activity would be useful for target language errors that seem to be common.
The ‘production’ stage
The ‘production’ stage is where the language is used more openly. Things like:
Communication tasks
Collaborative tasks
Discussion activities
The focus of this stage is using the language as fluently and naturally as possible , as students would do outside of the classroom.
Theory behind Presentation, Practice, Production
This is where PPP gets criticised. It started in the 1960s, and language learning theory has developed considerably since then. Academics who study second language acquisition get annoyed at how PPP doesn’t tick any of the boxes for how we’re supposed to learn a language and yet is still so widespread.
Some learning assumptions behind presentation, practice, production are:
Students should be told the grammar rules and then practice them (a deductive approach).
Language learning is a skill like any other and should be practised as such.
There should be a high level of teacher control, slowly handed over to learners as the lesson progresses.
Language is a series of items that can be learned in sequence.
The target language should be practised by removing unnecessary language to help focus.
All of these have been shown that this isn’t how we best learn languages (in fact, the opposite is largely true!).
However, it isn’t all bad. Here’s my opinion on the advantages and disadvantages of PPP:
It’s easy to learn for new teachers.
It’s very flexible.
It’s easy to plan for and has a logical progression.
It works for most types of classes, including larger classes.
Most course books use this or a similar method to structure their lessons and chapters.
Disadvantages
Research shows that it may not be the best way to teach/learn a language.
Weaker learners may overuse the target language from the practice session, so it sounds unnatural.
Learners may not know how to use the target language in different contexts.
It can be boring if used repeatedly for higher-level students.
Thoughts on Presentation, Practice, Production
Academics are often far removed from the classroom and the real world, studying the individual phenomenon in isolation.
I’ve often seen a light bulb moment for students whilst teaching PPP (although one could argue that it’s not strict PPP, and it’d be hard to isolate the teaching method from other variables). Teaching over a period of time with this method, you do see students improve. Consider also that it’s not done in isolation — you should be getting your learners to interact in English naturally and read extensively outside of class, for starters.
Presentation, practice, production works. Maybe not as well as something like task-based learning (TBL), but TBL takes longer to plan and implement, which becomes very difficult when your teaching hours are high.
Sure, so it might not be theoretically perfect, but it does work.
How to adapt the PPP method
Also, I believe it has evolved from the ‘traditional’ PPP approach described above. Here are some ways you can adapt the classic PPP structure:
Spend more time in the presentation stage eliciting.
Turn the deductive aspect of explicit grammar instruction into an inductive aspect (so learners have to figure out the patterns themselves).
Add collaborative tasks during the practice stage, which learners must use the target language to complete successfully.
Include meta-learning strategies so students can learn how to learn.
Include more incidental language throughout the class so learners hear language in a more natural context.
Change the final stage into a task, such as you’d find in task-based learning .
These changes turn PPP into something else, a blended approach that addresses many of the criticisms of PPP.
Other structures have sought to improve upon the model of PPP. Variants include ESA (engage, study, activate) and CAP (context, analysis, practice)
However, the simplicity of PPP and its notoriety have kept it the most widely used model. I doubt it’s going away any time soon.
If you liked this article, you’ll love my books:

📝 Lesson Planning for Language Teachers - Plan better, faster, and stress-free (4.5 ⭐ , 175 ratings).
👩🎓 Essential Classroom Management - Develop calm students and a classroom full of learning (4.5 ⭐, 33 ratings).
🏰 Storytelling for Language Teachers - Use the power of storytelling to transform your lessons (4.5 ⭐, 11 ratings).
🤖 ChatGPT for Language Teachers - A collection of AI prompts and techniques to work better, faster (4.5 ⭐, 10 ratings).
💭 Reflective Teaching Practice Journal - Improve your teaching in five minutes daily (4.5 ⭐, 16 ratings).
📄 PDF versions available here.
Ready for more?
How to Create an Effective Lesson Plan Presentation
Regardless of the subject or content you’re teaching, having a lesson plan in place prepares you for class by offering detailed guidelines for the session. The lesson plan doesn’t have to be lengthy or complex—it just needs to include elements about what you’re teaching, the method of presenting this material, and what objective and goals you wish your students to achieve as part of the curriculum.
Why Lesson Plans Are Important
It’s crucial for teachers to prepare their lessons in advance and implement the best teaching approaches. Attending a session without a lesson plan can be counterproductive for both students and teachers. Without the right preparation beforehand, classes can end up being unproductive or confusing.
Below are a few reasons why you should consider lesson planning:
Lesson Planning is Handy for Classroom Management
Developing the lesson plan from the learning objectives provides flexibility in adapting to different teaching methods and classroom management techniques. For instance, hybrid or online classes require a different delivery approach from the traditional classes, which means making modifications to any existing plans. With the right foresight and plan in place, classes can stay on topic and effective. Such circumstances underscore how crucial lesson plans are in ensuring that the class runs smoothly, regardless of the learning environment.
Lesson Planning Creates Student Success
Various studies have shown that students benefit immensely from and appreciate well-structured lessons. Thus, success is more likely when students engage and show interest in the material being taught. Using a curriculum guide, teachers can develop valuable lesson plans based on specific objectives and goals (what’s intended for students to learn).
Lesson Planning Is Central to Teacher Success
Teachers’ success is, to some extent, pegged on students’ success. Besides that, the documents you develop as part of the lesson planning process are often part of your assessment by school administrators. What’s more, as you advance your teaching career, your lesson plans serve as a repository for your expanding body of knowledge. Thus, the significance of lesson planning cannot be overlooked when it comes to advancing your career as an educator.
Lesson Planning is Vital in Student Assessment
Lastly, lesson plans turn the learning sessions into clear objectives for students and a way to gauge their understanding of the subject matter. One notable benefit of the lesson plan is tailoring the assessment to a particular objective while considering students’ specific needs. You can use common assessment methods such as quizzes, tests, and homework assignments.
How to Write a Lesson Plan
Lesson plans include different sections that clarify questions students might have about the subject on hand. What are the lesson objectives? What subjects will be covered during the session? How long will the course take?
- Introduction – As the lesson commences, it’s good to have a concise yet vivid introduction about what the lesson will cover. The ideal practice is to create a memorable title for every lesson to create a general understanding of the learning material students will be interacting with.
- **Lesson Objectives –**This section is critical as it allows the students to ascertain each lesson. When it comes to objectives, it is crucial to consider the acquired skills you expect the students to gain by the end of the session. Each objective should be measurable and actionable; meaning after every session, students should be able to apply what they’ve learned.
- Learning Activities – This should be a detailed account of how each activity will lead the class to achieve its predetermined goals. To create valuable activities, consider how each learning activity fits each objective, and the requirements students need.
- Practice – Practices are primarily intended to assess students’ comprehension of the material and aid in memorizing what they have learned in class. Therefore, it is crucial to include this in the lesson plan so that assessments can always be done at the appropriate time.
Today, lesson planning has been made less time-consuming and easier, thanks to smart whiteboards for the classroom . A digital whiteboard like the Vibe Board Pro provides unmatched performance that shows you know your craft and are way ahead of the pack.
Download Our New E-book
The Future of Learning
Download Our New E-book The Future of Learning
Read our privacy policy .
We’ve sent you an email with the PDF download link. Enjoy!
Can't wait? Read now
How Smart Whiteboards Simplify Lesson Plan Creation and Presentation
Not only does using a smart whiteboard make learning accessible , it’s also a great way of enhancing and enriching your lesson plans with interactive activities for the class. Smart whiteboards function as a touch screen for all; during class sessions, you and your students can use it as a digital whiteboard to create a space where students’ engagement, knowledge, and teamwork are appreciated.
While the smart whiteboard aids in making your lesson more engaging, interactive, and educational, you as the teacher can still customize your teachings to what you want them to be. This helps in foiling any hitches in your lesson presentation and makes switching from one topic to another seamless.
Below are more specific ways how smart whiteboards make your lesson plan presentation better:
Take Advantage of Built-in Templates
Once you invest in a smart whiteboard, make sure to take advantage of the wide variety of built-in lesson planning templates. You can use these templates to improve lesson plans while leveraging the technology associated with smart whiteboards. Even better, these templates can be easily customized for every lesson plan and cover different subject matters, allowing you to create new lesson plans without always starting from scratch quickly. How cool is that?
Organize and Present Lesson Plans Better
Smart whiteboards combine the power of the traditional whiteboard and a TV/projector into one hub, allowing you to write on the board while concurrently projecting it to the classroom. This allows you to conduct lesson plan presentations on a larger scale while also letting students see what’s going on.
For instance, if you’re presenting on an extensive topic involving multiple subtopics, a smart whiteboard will help you walk students through each subtopic with ease. Begin with the presentation divided into primary or main sections, highlight key definitions, and add infographics and videos to ensure that every student understands the tiniest detail.
Additionally, you can get students involved in the lesson plan presentation by asking questions, polling them on key points, or allowing them to follow along on their tablets or laptops.
Record Lesson Plan Presentations
Another benefit of using smart whiteboards in the classroom is that a lesson plan presentation can be recorded and accessed long after the session is over. This allows your students to access the material on their own time.
Final Words: Creating a Lesson Plan Presentation
Lesson plan presentation offers students the first interaction with the material they will learn. Take your time, appreciate the process, and create an attractive and comprehensive lesson plan that will encourage your students to have deep and thoughtful learning experiences. Even better, all of this can be made easier with smart whiteboard technology. Leave the spiral notebooks and sticky notes at home. A smart whiteboard is all you need.
What is the presentation stage in lesson planning?
Presentation is usually the core of the lesson plan. During this stage, theteacher introduces the topic and the key subject matter the students need to master. Presenting with smart whiteboards is exceedingly easy and less time-consuming.
What are the 5 steps in lesson planning?
The five steps are:
- Objective: A learning concept or objective is introduced.
- Warm-up: Revise the previous lesson
- Presentation: Present the material using suitable tools and techniques.
- Practice: Students try to apply what they have learned.
- Assessment: Evaluate whether the objectives were achieved
How does lesson planning help teachers?
Planning lessons in advance allows teachers to arrive at class each day prepared to introduce new concepts and facilitate engaging discussions rather than improvising as they go. In other words, without a lesson plan, teachers may be left scrambling, making students lose interest in the material to be learned.
Subscribe to get updates on all things at Vibe
EnglishPost.org
PPP Framework in Teaching: Presentation, Practice and Production
The PPP Teaching Framework is a model to describe the typical stages of language teaching lesson.
The PPP Teaching framework consist of four main stages: Warm-up, Presentation, Practice and Production and is used to teach speaking and writing lessons.
There is a variation when we use this framework to teach Listening and Reading skills .
The framework that we use to teach passive skills is the PDP framework which stands for Pre, While and Post
Let’s check all that you need to know to use the PPP Framework correctly
Table of Contents
PPP Framework: Criticism
Stages of the ppp framework, presentation, important considerations when planning lessons, considerations when teaching listening and reading, how to teach listening, how to teach reading , questions to ask yourself when creating ppp or pdp lessons, short quiz: how much did you learn, more on english language teaching.
This framework for teaching language classes is often criticized because:
- It forces students to use certain grammar structures and vocabulary.
- Since it forces students to use a target structure and vocabulary, this reduces the learner opportunities to use the language in spontaneous ways.
These are the stages of the PPP Framework:
- It’s an activity at the start of the class to warm up the learners. They tend to be short, dynamic activities.
- It is recommended that the warm- up is related to the topic studied during that class.
- In my opinion, the most important thing about a dynamic warm-up is that you continue with dynamic activities during the presentation, practice and production stage.
In the presentation stage, teacher introduces:
You can introduce the vocabulary and grammar in two different ways.
- Deductively : This involves the learners being given a general rule, which is then applied to specific language examples
- Inductively: This approach starts with examples and asks learners to find rules
Important things to take into account:
- Choose the vocabulary and grammar structures necessary for your students to succeed.
- Don’t introduce vocabulary and grammar that won’t be used during the lesson.
- Try not to introduce lots of words. Keep new words to a maximum of 20 per lesson.
- Get students involved in the presentation of the vocabulary and grammar so you can reduce teacher talking time and encourage learner-centered instruction
The practice stage aims to provide opportunities for learners to use the target structure and vocabulary used during class.
This stage is also controlled practiced since the tasks prepared by the teacher have controlled results.
Teacher should try to use the vocabulary and structures during the presentation stage for obvious reasons:
- What’s the point of introducing vocabulary and grammar you aren’t going to use?
- How can you expect students to succeed if you use different vocabulary and grammar to the one you taught in the presentation stage?
All meaningful activities which give students the opportunity to practice the language more freely.
It is impossible to be wrong if:
- Your activities encourage peer to peer interaction.
- Students are taught grammar inductively.
- Your lesson is made up of task that maximize student talking time.
- Students stand up and talk to others.
- There are games and activities that are fun and meaningful.
- Your scaffolding is good because students can do what you want them to do.
The Presentation, Practice and Production is usually used to teach speaking, writing or grammar.
If you want to focus on listening and reading, you have to take into account the PDP Framework
This framework is an approach to teaching reading and listening skills lessons.
PDP means Pre- During (while) and Post
The basic idea is:
- Try to help students to know a little about what they’re going to read or listen before they read or hear it
- Give them a reason to read or listen by setting questions or other reading listening tasks
- Ask them to do something with the information they get from the reading or listening.
The Framework for teaching listening is called Pre, While and Post.
Check out these resources to understand more about this framework
- 12 Types of Pre-Listening Activities
- 12 Examples of While-Listening Activities
- 10 Types of Post-Listening Activities for the ESL Classroom.
The Framework for teaching reading is called Pre, While and Post
- Stages for Teaching Reading
- 15 Examples of Pre-Reading Activities
- 10 Examples of While-Reading Activities
- 10 Examples of Post-Reading Activities
- Making Reading Communicative
These are some important questions that you should ask yourself when creating a PPP or PDP Lesson.
- Are the activities of the PPP lesson plan linked to each other?
- Are the activities of the PDP lesson plan linked to each other?
- Do the activities belong to the right stage of the lesson? For example, is the pre-reading activity an actual pre-reading activity?
- Is the lesson plan based on reality and not on impossible and unrealistic expectations
- Is the evaluation strategy measuring what you need to measure?
- Are activities engaging to the learner?
These are some statements that you should analyze and assign to a category of the PPP Framework
The categories being: Presentation (A), Practice (B) and Production (C)
- Teacher directs the activities during this stage ( )
- Teacher provides feedback to students ( )
- Activities include drills and multiple choice exercises ( )
- Students produce oral and written texts ( )
- Teacher uses visual aids to demonstrate a situation ( )
- Teacher describes grammar rules ( )
- Activities include oral presentations by the students ( )
- The teacher doesn’t necessarily intervene in this stage ( )
- Language is presented in context ( )
- Exercises in this stage can be productive or receptive ( )
I hope that you found everything that you were looking for about the PPP Framework
These are some posts with more ideas and information to teach English
- 5 Challenges English Language Learners Face
- 10 Characteristics of Teacher-Centered Instruction
- The Most Effective Classroom Seating Arrangements
- 15 Awesome ESL Games and Activities
ESL Classroom Activities: Dictogloss
- Approaches and Methods in Language Teaching

I am Jose Manuel, English professor and creator of EnglishPost.org, a blog whose mission is to share lessons for those who want to learn and improve their English
Related Posts

Syllabus Design: Situation Analysis

Testing: Reliability, Validity and Practicality

My English Language
English language resources for efl students and teachers.

PPP Technique in TEFL
Presentation, practice and production.
The PPP technique in teaching is a common way to introduce students to new words and concepts. This can be especially useful in the EFL classroom. The PPP method in English teaching is a three-step lesson plan and teaching approach that helps the student learn, understand and practice new vocabulary.
The three stages of a PPP lesson
There are three stages in a PPP TEFL lesson.
Firstly, the teacher presents the new word, an event which involves the presentation of pronunciation and spelling in context.
Next, the teacher allows the students to practice the new word in a controlled setting, making sure the student has understood the vocabulary and usage properly.
Lastly comes the production stage, where there is a period of less-controlled practice and an informal assessment of learning. This is where the students get chance to use the new word or phrase in an original way and to relate it to their knowledge and experiences.
These three stages of a PPP lesson help the student to consolidate the new word in their mental vocabulary bank.
The sequence of a PPP lesson in EFL teaching
This EFL teaching method of presentation, practice and production is an approach that follows a definite sequence:
- The teacher presents the new vocabulary and explains the form of the language in a meaningful context.
- The students practise this new vocabulary through controlled activities such as worksheets or question and answer activities to check comprehension.
- The students use or produce what they have learned in a communicative activity such as a role-play, communication game, or question and answer session.
Teaching English using the PPP technique
Each stage of the Presentation, Practice and Production lesson must be planned well to be effective. However, the PPP method in TEFL is a highly flexible approach to teaching and there are many different activities a teacher can employ for each stage.
Presentation can include mime, drawing and audio. In fact, it is a good idea to try to engage with the students’ different senses to get across the meaning of the new word, using visual, kinaesthetic (movement) and audio techniques.
It is also important to make sure that students have understood the new word before encouraging them to practise it. It is often fun and highly effective for students to play games to practise vocabulary and to produce it.
Current debate about the PPP technique in TEFL
In recent times, there has been increasing debate surrounding the PPP method of teaching, with many critics asking if teachers should be using the PPP technique so often in the EFL classroom.
Some critics of the PPP method in TEFL think it can be too formal and structured, with too little focus on student interaction. However, we think the PPP technique in EFL teaching offers a very flexible base from which to construct a lesson that is highly student-centred.
For ideas on ways to present new vocabulary and check comprehension , and activities which allow students to practice and produce their vocabulary , please browse this PPP teaching section.
- Is the PPP method old fashioned or is it still a useful and effective way to teach?
- Do you use the PPP technique in TEFL?
- What is your favourite way to present new vocabulary?
Let us know your thoughts in the comments box below.
9 thoughts on “ PPP Technique in TEFL ”
may I know who is the actual founder of PPP technique?
Sorry Sifa, we don’t know who originally developed the PPP technique. Can any readers help?
Yes, it was Jeremy Harmer. 😉
Thanks for this information, Miri! If any readers want to check out Jeremy Harmer’s explorations of the PPP technique, you can read more in his book: ‘How to Teach English’, published by Longman.
Catherine may you please help me with the same book by Jeremy Harmer, on soft copy I will highly appreciate it.
Hi Grace, Jeremy Harmer’s book can be found online to read or download at academia.edu.
It PPP useful and used in teaching reading?
Hi Muharram, thanks for your question. Yes the PPP method can be used to teach all areas of language, including reading.
In this type of lesson, any new target words would be presented in the early part of the class (pre-reading) before the student meets the vocabulary within a longer written text. While reading the text during the ‘practice’ stage, students should be able to identify the individual ideas expressed and understand how the new words are used in context.
After reading, students can analyse the material and discuss the text, hold a questions/answer session or write about it in the production stage. This helps them deepen their understanding and test their reading comprehension. I hope this gives you a few ideas – I’ll be adding more details about using the PPP method to teach reading and writing soon.
Can somebody help me with these questions of Unit 3 i-to-i (180 hour units) please:
Match the description to the stages to make a complete PPP lesson. The aim of the lesson is expressing past habits with ‘used to’ + infinitive. For example, When I was younger, I used to watch cartoons.
The teacher repeats the model sentence with natural linking, stress and intonation. The class repeats.
1)Teacher asks, “Did he play football in the past?” (Yes) “Does he play football now?” (No).
2)Teacher says ‘used to’ + infinitive can be used to talk about things we regularly did in the past, but don’t do now.
3)The students answer conversation questions about their childhood to introduce them to the topic.
4)The teacher asks some individuals how many people share their thoughts on living in London and corrects some errors if they are made.
5)The learners use the target language to talk about how their lives are different now they live in London and compare their country’s cultures to the UK.
6)The teacher writes the model sentence on the board. When I was younger, he used to play football. Draws a box round ‘used to’ and writes ‘infinitive’ over play.
7)Learners choose an activity they enjoyed as children then walk round the class asking if other people used to do the same thing. For example, Did you use to watch cartoons?
Leave a Reply
Your email address will not be published. Required fields are marked *
- Call us for help +1 347 434 9694
- Request a callback
Choose your country or territory
- PPP In The EFL Classroom
Join a global community of over 200,000 TEFL teachers working throughout the world! Enrol me!
- Classroom Considerations, Teacher's Toolkit
Me: Okay, time for me to do some lesson planning for tomorrow.
Also me: *yawn*
Lesson planning is one of those unfortunate things that are a necessary evil in the English as a Foreign Language classroom. Lesson planning can be downright boring if we’re honest, but it is something that needs to be done in order to teach the best lessons we can. The bottom line, you’re stuck with lesson planning (sorry!). But it doesn’t have to be as arduous as you think.
Let’s talk about one very common lesson plan structure which can make your lesson planning as easy as, well, PPP!
PPP in the EFL classroom
Here’s the lowdown on PPP in the EFL classroom.
If you’ve even taken one look at the course content on your TEFL course, you should be familiar with PPP. PPP stands for Presentation, Practice, and Production. t is a very common lesson plan model that is used in English as a Foreign Language classrooms around the world.
Why is PPP so common in EFL classrooms?
PPP is not rocket science. Nor is it brain surgery. This is probably the reason it is so widely used in EFL classrooms.
Once you have understood the basics of a PPP lesson, it’s super easy to slot your activities into the lesson plan framework, thus creating a lesson plan which you know will be logical and which will flow.
A breakdown of PPP
A PPP lesson is divided into three stages: not surprisingly, Presentation, Practice and Production.
The Presentation stage is basically the beginning of the lesson.
It starts with a warmer and/or a lead-in to get the students engaged and interested in the topic (or to wake them up if your lesson is at the end of the day!).
Then the teacher presents the target language of the lesson. There are a number of ways this can be done, such as presenting the language in context, eliciting the language, or telling a personal anecdote.
The teacher then tells the students the rules of the particular language structure and explains the meaning, form, and pronunciation.
The second stage is the Practice stage .
In this stage, the learners do activities to practice the target language, which requires total accuracy. These activities are, by their very nature, the controlled practice of the language.
The final stage is the Production stage .
This is when the students do more activities, but this time they are less controlled and freer. In other words, the learners are free to use the target language in whichever way they wish in the activity set up by the teacher.
The advantages of PPP
There are many advantages to using PPP in the EFL Classroom. The obvious advantage of PPP is that it is simple and straightforward. Once you have gotten the hang of the different activities you can do in the EFL classroom, it is simply a matter of plugging them into the relevant stage and your lesson should make sense.
It also provides a structure with which to plan your lessons. As long as you are clear on your aims, it helps you to plan your lesson and imagine the different steps you need to take in order to accomplish your aims.
The disadvantages of PPP
Unfortunately, there are a few disadvantages to PPP lessons.
Firstly, it is very easy to get stuck in the PPP framework .
In other words, all your lessons end up exactly the same. Of course, many of our lessons are very similar, but it’s easy to become lazy and use the exact same activities for your lessons. PPP is good like that, in that you can be confident your lessons will be effective, but you can become complacent when it comes to interest levels. As a result, your lessons can become samey .
Another disadvantage is that many teachers place too much emphasis on the Presentation stage, believing this to be the most important stage. What happens here is that the students have no opportunity to practice the language, which is actually what we want them to do.

A PPP lesson plan example
Let’s now look at an example of a traditional PPP lesson, teaching the present perfect to Intermediate learners.
Read more: An Explanation Of The Present Perfect
Presentation
The teacher puts up a map of the world on the board. In green, she has marked countries she has been to. In blue, she has marked countries she would like to go to. She asks the students to guess what the different colours mean.
Once they have correctly guessed, she boards a few example sentences, such as
I have been to India.
I have never been to France.
Have you been to Mexico?
She then explains – while eliciting as much as possible. The teacher then focuses on meaning, form and pronunciation.
The students then complete a grammar exercise, in which they complete a gap fill. As a second practice activity, the students must decide whether a set of sentences are grammatically correct or not.
The students finally discuss in partners which countries they have been to and which they would still like to visit. The students then change partners and repeat the conversations. The teacher gets feedback from the class and does a delayed error correction activity.
Alternatives to PPP
Of course, PPP is not the only way to structure an EFL lesson plan.
There are many other frameworks that work just as well, such as ARC , TTT , and TBL . Each has its advantages and disadvantages. Which one you will use in your classroom will depend on your learners, the target language, and you.
Using PPP in the EFL classroom is a great idea for beginners.
While you are starting out as a TEFL teacher, we recommend you adopt the PPP lesson plan structure just for the simple fact that it’s logical and straightforward. When you have a bit of experience under your belt then you should definitely branch out and try your hand at a few other lesson plan structures.
But until then, go forth and Present, Practice and Produce!
The above information about PPP is very informative and helpful for the beginners like me .I would appreciate if you post more informative articles about language lessons at the initial stage. thanks a lot
Follow us on social networks, join our newsletter - get the latest news and early discounts

Sign up to our newsletter
Follow us on social networks, sign up to our e-newsletters – get the latest news and early discounts
Accreditation Partners
The TEFL Academy was the world’s first TEFL course provider to receive official recognition from government regulated awarding bodies in both the USA and UK. This means when you graduate you’ll hold a globally recognised Level 3 (120hr) Certificate or Level 5 (168hr) Diploma, meaning you can find work anywhere and apply for jobs immediately.

- 4.89 Average
- 3444 Reviews
Eranne Hancke...
I studied the Level 5 Tefl course, I thoroughly enjoyed the course as it challenged me and often made me think out of the box. The combination of short quizzes…
Anne Clarisse O...
The Level 5 TEFL Course with TheTEFLAcademy helped me out a lot and answered many questions I had in regards to teaching English, both to adults and kids. They help…
Mikaila Rachel ...
So incredibly put together and such a lovely team of people to work with!
Candice Kapp...
Very good course! Taught me everything about English that I needed to know. Gave me lots of helpful information needed for teaching. They give you access to their job board…
Louise Morrison...
I highly recommend the TEFL Academy. I have just completed the Level 5 online TEFL course with them. The course was very comprehensive and easy to follow. Learning was kept…
Nadine Olivia M...
I have had a passion for teaching within me since a very young age, after a bad experience on my first attempt of teaching I thought it wasn't for me.…
Product added to your cart
You have added to your cart:
- Close window
Request call back
Please leave your details below and one of our TEFL experts will get back to you ASAP:
ASAP Morning Afternoon Evening
Would you like us to update you on TEFL opportunities, jobs and related products & services?
Yes, keep me updated No, but thanks anyway!
I consent to the Privacy Policy *
Thank you! Your message has been sent!
Download the TEFL World Factbook
Please enter your details in order to download the latest TEFL World Factbook.
Thank you for downloading the TEFL World Factbook!
If the TEFL World Factbook did not download > Click Here To Download
Download the Online Teaching Guide
Please enter your details in order to download our Online Teaching Guide.
Thank you for downloading our Online Teaching Guide!
If the Online Teaching Guide did not download > Click Here To Download
- Download Prospectus
Please enter your details in order to download our latest prospectus.
Thank you for downloading our prospectus!
We hope you enjoy reading our prospectus, we have tried to make it as useful as possible! Please get in touch if you have any questions.
If the prospectus did not download automatically > Click Here To Download
- TEFL Courses
- TEFL Course Locations
- Teach English Online
- Teaching Opportunities
- How TEFL works
- Why Choose Us?
- Charity Partnership
- Accreditation
- Meet Our Alumni
- Meet Our Trainers
- Company Profile
- Testimonials
- View All TEFL Courses
- View All Online TEFL Courses
- Online TEFL Course (Level 3 - 120hrs)
- Online TEFL Course (Level 5 - 168hrs)
- Combined TEFL Course (Level 5 - 168hrs)
- Observed Teaching Practice Course (Level 5 - 40hrs)
- TEFL Top-up Courses
- Online TEFL Courses Preview
- Online TEFL Jobs
- Teaching English Online Blogs
- Download Online Teaching Guide
- Teaching English Online & 1:1 Top-up Course
- Teach English Abroad
- TEFL Internships
- TEFL Volunteering
- Teaching Without A Degree
- Beginner's Guide to TEFL
- TEFL Knowledge Base
- Certificate Verification
You are using an outdated browser. Please upgrade your browser or activate Google Chrome Frame to improve your experience.
Creating PPP Lesson Plans: How to Teach ESL Effectively Using Presentation, Practice and Production
Want your students to be enthused, energetic learners?
Here’s a secret: It’s all in the lesson plan.
Using the PPP structure for your lessons will help you stay on track, deliver new material effectively and most importantly, help your students build new English skills.
PPP is a lesson plan template that consists of Presentation (P1), Practice (P2) and Production (P3) , and it’s often used for ESL (English as a Second Language) classes. It focuses on giving students a solid foundation for new concepts, then encouraging them to apply these on their own.
Read on to find out how to deliver awesome ESL lessons with the PPP template!
What Makes an ESL Lesson Plan Exceptional?
How to make esl lesson plans with a ppp template, 1. presentation, 2. practice, 3. production.
Download: This blog post is available as a convenient and portable PDF that you can take anywhere. Click here to get a copy. (Download)
- Clear aims and objectives. First off, make sure you have a good understanding of your main goal for the lesson and how you propose to reach that goal. It’s also a great idea to share these with your students so they’ll know exactly what they will accomplish.
- Grading. Careful, we’re not talking about correcting work and giving letter grades here! This is the concept of climbing a hill, starting off with something easy or relatable to your students and then making the material more challenging as you ascend.
- PPP structure. This is one of the most used lesson plan formats in ESL. PPP (presentation, practice, production) allows you to develop a structured, graded and time-efficient lesson plan that conveys the material in an understandable way.
- Effective time breakdown. Knowing when you should talk and when you should allow your students to engage is another key component. One strategy is jotting down time limits for each activity in the margins of the lesson plan sheet. For the PPP structure, a good time allotment might be 15 minutes of Presentation (P1), 20 minutes of practice (P2) and 25 minutes of production (P3).
- Relevant material. Take a few moments to gauge your student’s level, their interests, hobbies, work and home life. Consider showing videos, trending articles and other native content that your students would enjoy. For instance, FluentU features English videos like movie trailers and TV series clips, with interactive subtitles and transcripts for learners.
Let’s go through each step of the PPP template:

Presentation is the first step, and it’s also the most important. This is your time to shine because it’s the main part of teaching : you’ll be explaining new concepts to your eager students.
At this stage, teachers should talk approximately 75% of the time.
Make your lesson exciting and relatable
Remember how boring it was when you had a teacher who only lectured, with little enthusiasm? Well, don’t be that teacher—break the mold and become animated. Students learn through context, so tell a story or use resources that excite students to learn more. Peaking interest is essential.
To lead students into the lesson, you can start with something familiar, such as material discussed in a previous class. For example, if you’re talking about house vocabulary, focus on the bedroom first, then break down the vocabulary inside of the bedroom.
Show visuals like photos and videos
Use visuals to stimulate understanding and get your students curious about a topic.
If you are presenting key places in a city or town, using pictures of your students’ town/s will invoke interest and be relevant to their world.
For teaching home-related vocabulary, you can display photos from your home, relating them to relevant vocabulary. After that, show your students how to use vocabulary nouns with prepositions of place through statements like “The toaster is on the counter.”
Ask thoughtful questions
Once introduction is complete, you can then guide your students to analyze the material more closely. You are still in control of your classroom so keep presenting, but ask questions and make your students think more about what it is they are seeing and hearing.
Questions are also great for checking if students understand the new material. Don’t let them off the hook so easily. Try not to tell them answers, allowing them to work it out in English!

Practice is the second stage of the PPP lesson plan template. This is when you will hand over a bit of control to your students and let them try out the new material themselves. If your presentation was well-developed and awesome, your students will be more than ready to jump in.
In this stage, you will give your students a set of tasks or activities . These tasks should be challenging and only solvable with the new material, but not too difficult.
The students will do most of the talking since they’ll be going over the material with you and their classmates. Generally, you can aim to let your students speak 65% of the time and just jump in every now and then to point out something new or answer questions.
Guide your class through exercises
For a smooth transition into the practice stage, do exercises together with your students first, or work through questions together.
To continue with the same example of rooms in a house, a great practice activity would be to let your students label nouns and prepositions of place around the room. There are many techniques for this, and you can go around the room looking out for trouble areas and helping out as needed.
Do pair and group practice
Once your students get more used to the material, you can begin pair and group activities.
Allowing students to brainstorm and work together will encourage them to communicate more and learn about their classmates. For groupwork, you can even divide the class and organize a contest to make them more eager to focus on the material.

Production is the final stage in a PPP lesson plan. This is also referred to as the fluency stage—your students will now be like birds leaving the nest for the first time.
In the production stage, teacher talk time is at its lowest and almost nonexistent. Let your students be creative and develop their own work , speaking 90% of the time to your meager 10%. It’s important for them to gain confidence in English on their own.
Set up writing or speaking activities
Most production activities involve writing or speaking, and sometimes both are combined if necessary. This allows your students to build confidence and be creative when using the new material, as it’s solely in their hands.
Carrying our example house vocabulary lesson through the final step, you can now let your students craft a short story or presentation involving the many things they have in their own home. They can write a script and present it to the class during production.
Encourage production through groupwork
Similar to the previous stage, you can separate your class into pairs or groups for production. They can construct dialogues, monologues, scripted plays and so on together.
One great pair exercise you can use is to have two students create a script using the new material and then let them act it out in front of the class.
A great, fun and material-rich lesson will keep your students encouraged to learn more and build their confidence as English speakers.
So for lesson plan success, be sure to construct a well-developed and exciting lesson plan using the PPP template. Good luck, and enjoy!
Enter your e-mail address to get your free PDF!
We hate SPAM and promise to keep your email address safe

PPP TEFL Teaching Methodology
What is presentation, practice and production (ppp).
During your SEE TEFL certification course you will become more familiar with an established methodology for teaching English as a foreign language known as 3Ps or PPP – presentation, practice, production. The PPP method could be characterized as a common-sense approach to teaching as it consists of 3 stages that most people who have learnt how to do anything will be familiar with.
The first stage is the presentation of an aspect of language in a context that students are familiar with, much the same way that a swimming instructor would demonstrate a stroke outside the pool to beginners.
The second stage is practice, where students will be given an activity that gives them plenty of opportunities to practice the new aspect of language and become familiar with it whilst receiving limited and appropriate assistance from the teacher. To continue with the analogy, the swimming instructor allowing the children to rehearse the stroke in the pool whilst being close enough to give any support required and plenty of encouragement.
The final stage is production where the students will use the language in context, in an activity set up by the teacher who will be giving minimal assistance, like the swimming instructor allowing his young charges to take their first few tentative strokes on their own.

Advantages of the PPP (3Ps) Method
As with any well-established methodology, PPP has its critics and a couple of relatively new methodologies are starting to gain in popularity such as TBL (task based learning) and ESA (engage, study, activate) . However, even strong advocates of these new methodologies do concede that new EFL (English as a foreign language) teachers find the PPP methodology easiest to grasp, and that these new teachers, once familiar with the PPP methodology, are able to use TBL and ESA more effectively than new trainees that are only exposed to either TBL or ESA.
Indeed, there are strong arguments to suggest that experienced teachers trained in PPP use many aspects of TBL and ESA in their lessons, and that these new methodologies are in truth, the PPP methodology with some minor adjustments.
At this stage you might well be asking, It’s all very well having a clear methodology for how to teach but how do I know what to teach? The language that we call English today has absorbed a great many influences over the last thousand years or so. It has resulted in it becoming a language that can provide us with a sparklingly witty pop culture reference from a Tarantino script, 4 simple words spoken by Dr. Martin Luther King that continue to inspire us today, and something as simple and mundane as a road traffic sign.
The Job of the EFL Teacher
As EFL teachers our job is to break down this rich and complex language into manageable chunks for our students. These chunks of language are what EFL teachers call target languageWe are going to look at an example of what a piece of target language might be and then you will be given more detail on how this would be taught in a PPP lesson before finally watching three videos with some key aspects of each stage of the lesson highlighted for you.
During the course we will spend a great deal of time in the training room equipping you with the tools to employ a successful methodology for teaching the English language. You are going to get opportunities to both hone these skills in the training room and put them into practice in authentic classroom settings.
Of course you might be thinking, I don’t have any experience of being in a classroom! How on earth am I going to cope with standing at the front of a class with 20 plus pairs of eyes looking at me waiting to see what I do?
All good TEFL courses are designed to train those with no teaching experience whatsoever. We will spend the first part of the course in the training room making you familiar with all the new skills you will need whilst giving you opportunities to practice them in a supported and controlled environment.

Only after that, will you be put in an authentic classroom environment. It goes without saying that the first time anybody stands up and delivers their first lesson will be a nerve-racking experience. However, it is also an experience that mellows over time, and one that all teachers remember fondly as time goes by and they feel more at home in a classroom.
There will be some of you out there with experience of teaching in a classroom already. You may be well versed in employing many different methodologies and strategies in your classroom already, but many or most will have been with native English speaking students, or those with a near-native levels of English. This means that some of the skills we will be equipping you with may feel a little alien at first, but your experience will not prove to be a hindrance. Indeed, you will already have successful classroom management skills that can be adapted to fit a second language classroom fairly easily and other trainees on the course will benefit from your presence.
In addition, some of the skills that you will learn on the course can also be adapted to work in a classroom of native speakers too, and it is not unusual for experienced teachers to comment on exactly this after completing a good TEFL course.
Target Language in an EFL Lesson
Recall how it is the job of the EFL teacher to break down the rich tapestry of the English language into manageable bite-size chunks, suitable for study in an average study period of 50 minutes. As mentioned, we refer to these chunks as target language. As EFL teachers we will select target language that is appropriate for both the skill level and the age of the students.
The target language that you will see being presented in the videos is Likes and dislikes for 6 food items.
The teacher you will watch in the video has a clear aim, which is to ensure that:
**By the end of the lesson, students will know the names of 6 food items in English and will be able to express whether or not they like them in a spoken form by entering into a simple dialogue consisting of,
- Do you like ___?,
- Yes, I like ___., or
- No, I don’t like ___.
The six food items are ___. In short, the students will be able to name the 6 food items by the end of the lesson and tell whether they like them or not.**
Presentation – Part 1 of PPP
You may have delivered a few presentations in your time but the type of presentation we deliver in a second language classroom will differ quite a bit from those. For a start, you were speaking to proficient users of the English language about something they were, most likely, vaguely familiar with anyway. In an EFL classroom we don’t have those luxuries, so we have to be careful about the language we use and how clearly we present the new language that we wish for our students to acquire.
Let’s look at 4 key things that should be occurring in an effective second language classroom presentation:
1 – Attention in the Classroom
Learners are alert, have focused their attention on the new language and are responsive to cues that show them that something new is coming up. A simple way to ensure some of the above is if the teacher makes the target language interesting to the students.
The language will of course, be of more interest to the students if it is put into some type of context that the students are familiar with. In the case of likes and dislikes for young learners a visual associated with a facial expression will be something they can relate to. Naturally, the easier it is for them to relate to the context, the more likely they are to be interested in the language presented.
In the case of the target language for the videos a smiley face visual and a sad face visual on the whiteboard linked to the phrases I like ___. and I don’t like ___., respectively. A teacher might make exaggerated facial expressions whilst presenting these ideas to make the ideas both fun and easy to perceive for the students. This is often referred to as contextualization in EFL classrooms.
2 – Perception and Grading of Language
We want to ensure that the learners both see and hear the target language easily. So if a whiteboard is being used, it should be well organized with different colors being used to differentiate between different ideas. If images are being used, there should be no ambiguity as to what they represent and sounds made by the teacher should not only be clear, but should be repeated and the teacher needs to check the material has been perceived correctly, and can do this by asking the students to repeat the sounds he or she is making.
Learners will be bombarded with a series of images corresponding to sounds made by the teacher during the presentation stage and it is the teacher’s responsibility to ensure that they are not overloaded with information and that clear links are being made between the images and the associated sounds.
Therefore, there is an onus on the teacher not to use any unnecessary language at this stage. That is to say the grading of their language should be appropriate for the level of their students and the language they use should consist of the target language and any other essential language required to present the ideas clearly such as commands like listen! The commands should, whenever possible, be supported by clear body language.
3 – Target Language Understanding
The learners must be able to understand the meaning of the material. So in the case of likes and dislikes they perhaps need to see an image of a happy face and associate it with liking something and a sad face and associate that with disliking something.
We also need to have a way of checking if the learners did indeed, understand the material presented without asking the question, Do you understand? as this invariably triggers the response yes! from learners who are keen to please their teacher and not to lose face. We, as teachers, need to be a little more imaginative in checking our student’s understanding of material presented. Ideally, we should be checking the learners’ understanding in context. In the videos you will see, expect to see the teacher doing this during the presentation stage.
4 – Short-term Memory in the Classroom
The learners will have to retain the information from the presentation and use it further on in the lesson when we have consolidated their learning of the material and we will give them an opportunity to produce it on their own.
For the target language to be retained by the learners, it needs to be engaging and we need to consider that different learners will remember the material in different ways. Some by the way the material is seen, others by the way it is heard, and others if it is associated with a physical movement perhaps. We need to make sure our presentation has something to enable all these types of learners to retain the information.
Presentation Stage of a PPP EFL Lesson with subtitles
Practice – Part 2 of PPP
Practice can roughly be defined as the rehearsal of certain behaviors with the objective of consolidating learning and improving performance. Below are some of the characteristics of an effective language practice:
1 – Practice Validity
The practice activity must have learners rehearsing the skill or material it purports to practice. So in the case of the lesson you will view shortly, it must have the learners practicing both the food vocabulary items and the structure of the dialogue, i.e.,
- Yes, I like ___, or
2 – Pre-learning
Before we ask our learners to practice new language, we must have ensured that they have some understanding of the new language. We will have done this during the presentation stage. If they have not had the new language clearly presented to them and been aided in being given some understanding of it, then they (the learners) will not be practicing at this stage but will be going through another initial learning stage. Worse still, they will feel like they are being tested on something they haven’t been allowed to gain an understanding of.
3 – Volume (Amount) of Practice
Here, we are referring to the number of opportunities every student in the class has to practice the new language and not the level of sound. The more opportunities each student has to practice the target language, the more effective this stage of the lesson is.
So in the case of likes and dislikes, we might give the students individual worksheets where they have to fill in some part of the dialogue and the name of a food.
4 – Success Orientation
The students should have an opportunity to practice the new language and in order for this to happen they need an activity that both stretches them and is a task they can complete because of course, if it wasn’t, they wouldn’t be getting any opportunity to practice.
5 – Issuing Activity Instructions and Managing the Activity
Of course, whilst it is important to select an appropriate activity, it is equally important to issue clear and unambiguous instructions for the activity itself so all of your students are clear as to what is expected of them. We will be issuing instructions for the activity in the student’s second language so we need to make use of clear visuals to support any language we have to use and strong demonstrations of what is expected.
Managing the activity should consist of the teacher being mobile during the activity, offering praise and being on hand to show struggling students where relevant information may be found on the whiteboard.
Practice Stage of PPP EFL Lesson with subtitles
Production – Part 3 of PPP
The students have now had the target language presented to them clearly and have had an opportunity to practice it in a controlled environment. If we return to the swimming instructor analogy, it is now time to let them take their first few tentative strokes in the pool on their own with supervision and encouragement from the instructor.
As with the practice stage, we have to initiate an activity that allows them opportunities to use the target language in the classroom. In fact, the characteristics of a production stage activity are quite similar to the practice stage with one key difference and that is, student autonomy.
During this stage, the students will be producing the target language with minimal assistance from the teacher as opposed to the practice stage where the teacher will be on hand to assist students rehearse target language that has only just been presented to them.
Here are some of the key aspects of a production stage activity:
1 – Volume (Amount) of Production
As with practice, we want to create as many opportunities for our students to produce the target language albeit this time, more independently. This means we avoid activities where the students speak to the teacher as this allows limited opportunities (the students have to wait their turn before they get a chance to speak to the teacher). Instead for spoken activities, we look to get the students speaking in pairs, speaking to each other as much as possible, whilst we as the teachers go around the classroom offering minimal assistance but lots of positive reinforcement.
2 – Production Validity
Again, we should initiate an activity that allows the students to produce the target language that we presented to them and not a variation on it (although this is not strictly true with higher level students).
So, in the case of likes and dislikes for food, we should set up an activity where the students are saying, Do you like pineapple? as opposed to, What do you think of pineapples?
3 – Production Contextualization
The activity should simulate a real–life situation where they (the students) may use the target language. In the case of likes and dislikes for food this might be a menu with images of the food items or perhaps a series of images of the food items to prompt the dialogue,
- Yes, I like ____, or
Note that a successful production activity will also have aspects that set it apart from a practice activity, including:
4 – Student Autonomy
Students will be speaking, using the target language, with ideally, little or no support from the teacher.
They shouldn’t be looking things up on either the whiteboard or on any materials they have on their desk (e.g. a completed practice worksheet) so a teacher may choose to erase information from the whiteboard for this stage and the teacher might also choose to get students to clear their desks.
5 – Issuing Instructions for an Activity
As with the practice stage whilst it is important to select an appropriate activity, it is equally important to issue clear and unambiguous instructions for the activity itself so all of our students are clear as to what is expected of them. We will be issuing instructions for the activity in the student’s second language so we need to make use of clear visuals to support any language we have to use and strong demonstrations of what is expected, just as we will have done during the practice stage.
6 – Correcting Errors During the Activity
It is important that the students get as many opportunities to speak using the newly acquired language. Therefore, a teacher shouldn’t be drowning them out by speaking at length, over the top of them to correct any errors. This obviously differs from the practice where students expect the teacher to assist them as they rehearse (not produce) newly acquired language.
Clever use of body language by the teacher will enable them to be discrete in correcting errors and will allow them to offer much needed encouragement to students as well.
Production Stage of a PPP EFL Lesson with subtitles
- TEFL Student Online Training Task (password protected)
American English Education
美 国 英 语 教 育 American English Education
The Three P’s of Lesson Planning
"PPP" means
Presentation, Practice, and Production.
“ Presentation ” is the part of the lesson when the target language (the language to be taught to the students) is presented to the students generally through eliciting and cueing of the students to see if they know it and then providing the language if no one does.
The target language is usually put on the board either in structure (grammar-type) charts or in dialogs. Presentation features more "teacher talk" than the other stages of the lesson, generally as much as 65-90% of the time. This portion of the total lesson can take as much as 20-40% of the lesson time.
Next comes the “ Practice ” section when the students practice the target language in one to three activities that progress from very structured (students are given activities that provide little possibility for error) to less-structured as they master the material. These activities should include as much "student talk" as possible and not focus on written activities, though written activities can provide a structure for the verbal practices.
Practice should have the "student talk time" range from 60-80 percent of the time with teacher talk time being the balance of that time. This portion of the total lesson can take from 30-50% of the lesson time.
" Production " is the stage of the lesson when the students take the target language and use it in conversations that they structure and use it to talk about themselves or their daily lives or situations. Production should involve student talk at as much as 90% of the time and this component of the lesson can/should take as much as 20-30% of the lesson time.
As you can see the general structure of a PPP lesson is flexible, but an important feature is the movement from controlled and structured speech to less-controlled and more freely used and created speech. Another important feature of PPP (and other methods too) is the rapid reduction of teacher talk time and the increase in student talk time.
Notes: One of the most common errors untrained teachers make is that they talk too much .
Do you know what TPR is? It is one of the main teaching methods taught at ABIE. Learn about it here .
Everyone knows, learning a second language is difficult. There are three main types of styles in which individuals are often categorized under when it comes to learning. Are you one of these learning types? Click here to find out what learning type you are .
Home Blog Education How to Present a Lesson Plan
How to Present a Lesson Plan

First days are always exciting, and expectation builds up about the contents of the task ahead, especially if you’re starting a class as a student or professor. This interaction will be significant because it will establish and define the subjects to be covered and the set of expectations flowing from the instructor towards the audience.
Perhaps you are ready to begin your career as a teacher and need some guidance; otherwise, you are a seasoned instructor searching for a refresher in your program. No matter which of the above you represent, the truth of the matter is that you are probably seeking a better way to introduce the subjects you’ll be teaching to your students.
What is a lesson plan?
A lesson plan will be the set of subject matter materials you will be teaching during a specific timeframe. The lesson plan should be an index that students can constantly consult to understand better the parts of the learning journey they will go through during each session.
Teachers and professors should have a lesson plan template that happens in every session. This is different from a syllabus because, in the latter case, the whole curriculum of the program will be laid out; however, for each lesson, there should be one individual lesson plan example to guide the instructor in the set timeframe.
When building the materials for the class or lesson’s attention, it’s always essential to share elements like the purpose or rules that guide the learning process . This article will explore the best way to present a lesson plan and drive a learning session successfully from the instructor or professor’s view.
How to write a lesson plan
Education nowadays guides different sorts of students and target specific learning needs. Therefore, it’s important and relevant to understand how lesson plans can change and be varied to truly implement the best learning path for your students. Once you have this part figured out, the next step is to understand how you will transmit the information and use a PowerPoint Presentation to simplify creating and presenting a lesson plan to your students.
Lesson plans will comprise several different sections that will clarify the first questions students can have: How long will the course be? Will it be an online course ? What will be the main objectives? Which subjects will be discussed along with the class?
1. Introduction
As the lesson begins, it’s essential to place a brief yet descriptive introduction about what the session will cover. A good practice is to create a catchy title for each lesson to have an overall understanding of the information they will be receiving.
Example: Digital Marketing Basics: Industry background, historical review years 1980-2010. In this session, we will cover the birth of digital marketing, including all the touchpoints that shaped today’s industry.
2. Audience
If your class is a one-time-only or recurring session, or even a blended learning journey, it’s essential to explain to your students who this class is for; this will allow them to calibrate their expectations about the matter to be taught ahead.
Example: This lesson is directed to professionals who work in traditional marketing, business owners, or communication specialists seeking to have a profound understanding of how digital marketing came to be.
3. Lesson Objectives
This piece is critical because it will allow the students to assess the intention of each lesson. When thinking about the objectives, it’s vital to consider the acquired skills we expect our students to have at the end of the class. Like any other goals in life or business, each one should be actionable and measurable, meaning after each class, students should be able to use what they have learned and put into action the concepts.
Example : Understand and be able to create a timeline framework of reference to explain the story of the Internet.
4. Materials
Suppose the lesson requires using any specific materials, physical or not, including any software or hardware necessary. In that case, it´s important to list or include within the lesson plan so students can set clear expectations on what they might require. This is particularly important if the session you will be delivering requires them beforehand to bring anything.
Example :
- Computer
- Scratch paper
5. Learning Activities
We´ve covered all the logistics by this point; however, now we need to start sharing the actual activities during the lesson. Ideally, this is a play-by-play of how each activity will guide the lesson towards the already established objectives. To add the list of learning activities that will be helpful for your students, take into account how all of them align with each goal and the requirements students need.
Make sure that you add variety to the activities that you are proposing, go ahead and research trends of how many other teachers or professors, students will appreciate your search to engage them in learning.
Also, consider how much time they will take so that you can note it in the next section.
- Create a timeline on the wall with the most important moments of digital marketing history, including creation of social media, mainstream of email, etc.
Time periods
Pairing each learning activity with a specific timeframe will be useful both for instructors and students. Make sure you calculate a reasonable amount of time for each activity and list it within the lesson plan so everyone can set correct expectations. Assigning time slots for each exercise will also help students and teachers stay on track with the lesson and not waste valuable time invested in learning.
Example : Creation of a timeline – 45 min

How to present a lesson plan
We have now listed the components of the lesson plan structure, everything looks beautiful in the draft, but now we need to start planning how we will present the program to the students. This part is challenging because you have to choose a template that makes sense for you and will be helpful for your students to understand.
A PowerPoint presentation is a great way to showcase all the contents of the lesson plan, however, the trick is to decide how you want to structure it.
Lesson Plan Design
By this point, you’ve structured a lesson plan template that can go through any test. Nevertheless, creating the materials to accompany it can be a key in the commitment generates between the students and the professor.
Design and Style
Before adding any text to your presentation template , think about the requirements you have: Does the academic institution where you work require the use of logos? Do you have to follow any visual guidelines? This might be important for the cohesiveness of your presentation.
It’s essential to think about how you would like to present the lesson plan. You may want to keep it simple and have a 1 pager and talk through it to understand your students fully, or perhaps you need to create one full presentation where every slide will be a relevant piece of information. Let’s explore this a bit further.
One Pager Lesson Plan
If your style is more towards simplicity, this is a great solution: succinct, minimalistic, and straight to the point. You can complete a one-page lesson plan with bullets of the relevant data and send it out to students. A great advantage of this format is that you can either send it as a PDF or even as a single image (JPG or PNG), exporting it directly from PowerPoint.
One significant advantage is that your students will only have to check for one source by choosing this simple format when revising the lesson during the class or afterward.
Several pages lesson plan
Almost like a syllabus, a more extended presentation will include several slides so you can include the information in different formats.
For example, you can use the first slide to include the lesson title; afterward, a new slide can define the purpose or introduction of the lesson. In the upcoming slides, you can include materials, contents, and even ad charts or similar to explain how grades will be affected by each lesson’s assignments on the upcoming slides.
Text in the presentation
It’s always good to follow the reliable practices of presentations and include the necessary information without overwhelming students. Don’t add an excessive amount of text to one slide; actually, make sure that every piece of data is helpful for students to plan their time both during and after class.
However, if you will be sending out the presentation to your students before reviewing it, consider that they will be using it for their reference to follow through with your lesson. So make sure all the information is easy to read and accessible.
Additional elements
Learners of all sorts have become increasingly visual, so don’t be afraid to add infographics, images, photographs, icons or any other elements to make your lesson plan presentation more appealing visually.

Final Words
Remember the lesson plan presentation will be the first approach your students will have with the subject matter. Take your time, enjoy the process, and create comprehensive and attractive lesson plan slides that will inspire your students to have thoughtful and deep learning.
1. 1-Slide Lesson Plan PowerPoint Template
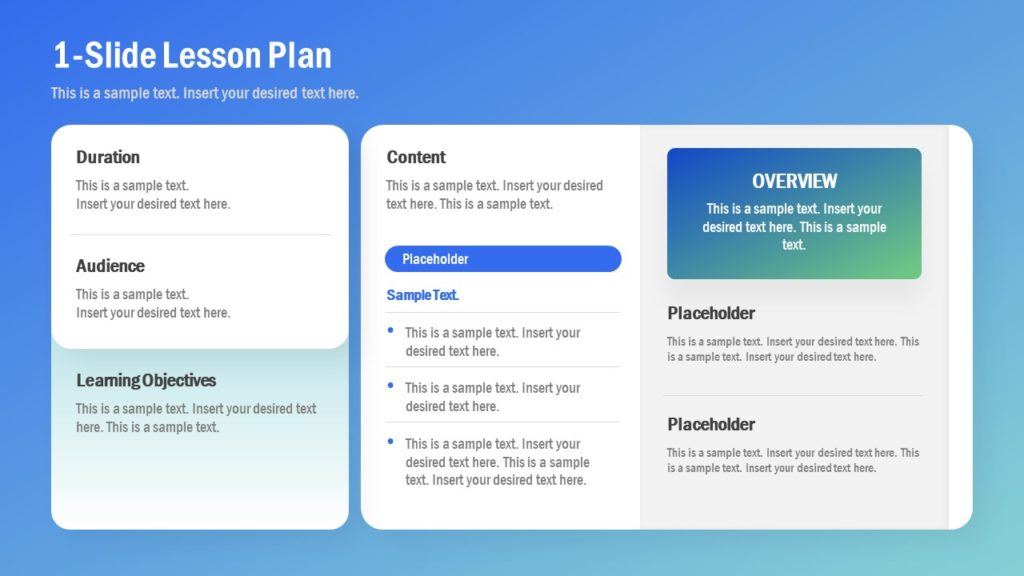
Create a simple and minimalist one-pager lesson plan for your academic uses, course planning, and even as student handouts, with this eye-catching PowerPoint template.
Use This Template

Like this article? Please share
Learning Experience, Learning Styles, Presentation Approaches, Presentation Tips, Presentations Filed under Education
Related Articles

Filed under Google Slides Tutorials • May 3rd, 2024
How to Work with Google Slides Version History
Go back to previous changes or check who edited your presentation. Learn how to work with Google Slides Version History here.

Filed under Google Slides Tutorials • April 29th, 2024
Best Google Slides Add-Ons
Optimize your Google Slides experience by installing the best Google Slides add-ons available in the market. Full list with photos.

Filed under Design • April 23rd, 2024
How to Create the Perfect Handouts for a Presentation
Learn how to create effective handouts for presentations and the recommended structure for handouts with this guide.
Leave a Reply
- Headphones for Schools
- Customer cases
- Become a reseller
Language education , Language Teaching Strategies
Using the ppp lesson structure to teach grammar and vocabulary.
More about us

Understanding the grammatical elements and key vocabulary of a language are essential parts of achieving a good degree of fluency. Without them, it is pretty difficult to communicate clearly with a native language speaker. Grammar and vocabulary can therefore be seen as structural parts of a language and usually require a specific teaching methodology to deliver effectively.
Deductive approaches to teaching grammar and vocabulary are commonly used in this regard and form part of initial teacher training courses like the CELTA and CertTESOL . In such approaches a teacher presents a rule / structure to the class and the class then produces language based on that rule. This technique easily fits into a lesson structure known as PPP (Presentation, Practice and Production) . This blog post explores the PPP language lesson plan structure in detail, outlining how and where it can be most effectively used in English language and foreign language teaching classrooms.
The PPP lesson structure

As outlined in the image above, the PPP model consists of three progressive stages, which combine to engage and motivate language learners. Best practice suggests that a 60-minute lesson should feature equal time (i.e 20 minutes) to each stage – language teachers can therefore plan out their lessons in advance allowing enough time to address any issues that students may encounter. It is worth noting that this structure therefore works best with classes of uniform ability – otherwise less able students can be left behind if the key learning outcomes have not been fully understood. (Remember to check out our other post for ideas on how to tailor lessons based on students’ different language levels ).
Let’s work through each of the PPP stages in turn.
1. The ‘Presentation’ Stage
In this stage the teacher presents the new grammar concept or vocabulary in a meaningful context or situation to their learners. Building up stories on the board, using realia (e.g newspaper cuttings, household items, hobby materials), flashcards and miming are fun ways to present the language. Short audio or film clips can also be highly effective.
The aim of this stage is to ensure that the students understand the context you are presenting and to get them to start thinking about it. Always try to get their thoughts on the context you’ve presented – ask them if they have been in this situation, has a family member? How did it make them feel and what happened next? This helps students to bring the situation to life and helps them remember previous scaffolding on the topic (i.e grammar and vocab that they already know).
2. The ‘Practice’ Stage
In this stage, students begin to use the elements of the target language that they learnt previously through activities developed by the educator. The stage is usually controlled by the teacher and learners practice saying or writing the language structure or vocabulary correctly. Teachers should certainly model and correct if mistakes occur.
Typical practice stage activities include:
- Drill sentences / sounds – individually, in pairs or whole class
- Multiple-choice exercises
- Gap fill tasks
- Directed, paired conversation practice
The aim of these practice activities is building students’ accurate use of target language. If common errors persistently occur, then a specific exercise or recap session might be useful.
3. The ‘Production’ Stage
Once learners have demonstrated that they fully understand the key learning points and are able to demonstrate this without mistakes in controlled exercises, they can move onto the (free) production stage. In this stage, students are encouraged to use the target language as fluently and naturally as possible to replicate use outside of the language classroom.
Typical production stage activities include
- Communication tasks (e.g presentations, speeches, debates, articles)
- Collaborative tasks
- Discussion activities
In this stage the teacher should not intervene or correct whilst students are “producing” language. Rather if mistakes have been made, it is better to address them after the exercise has been completed.
Advantages and disadvantages of the PPP lessons in language teaching
As with all language teaching strategies and lesson structures, the PPP approach is not 100% guaranteed to work brilliantly in all classrooms and with all students. A review of the literature relating to the PPP approach identifies a number of advantages and disadvantages which we summarise below.
- The PPP method is easy to adopt and is good for new language teachers
- The approach is widely applicable and can be used very flexibly
- It’s easy to plan a lesson around and has a clear, logical structure for students (and educators) to follow
- Evidence suggests that teachers trained on this method are more likely to use new teaching methods than those who do not.
Disadvantages
- It encourages and prioritises accuracy over fluency
- The presentation stage is too teacher-focused and has limited student engagement
- It can become boring to students if used repeatedly, particularly for higher language proficiency students
- Research suggests that it might not be the most effective way to teach or learn a language
As always, our recommendation would be to test it and try it in your setting and then tailor it to your specific circumstances. Maybe see how some form of learner-focused guided discovery could be incorporated into the presentation stage. Collaborative learning activities could, for example, also be included in the practice stage and a task, such as you might find in a task based learning approach would also fit well into the final stage.
How do Sanako products help educators to teach using the PPP lesson plan?
Sanako produces a range of language learning and teaching tools that help educators to improve their students’ reading skills. For example our browser-based language teaching solution Sanako Connect supports educators across all stages of the PPP language teaching approach.
- PRESENTATION – Educators can create distinctive contexts and situations in Sanako Connect using a wide variety of easily uploadable stimulus materials including text files, PDFs, presentations, audio clips, video, and web pages.
- PRACTICE – Test students’ understanding of grammar concepts and key vocabulary by creating exercises and questions for them to answer through gap-fill and multiple-choice quizzes.
- PRODUCE – Students can be easily divided into pairs or group discussions and be assigned role play and discussion activities. Outputs and deliverables can be collected, and reviewed on the same platform.
If you’d like to find out more about how Sanako’s dedicated language teaching solutions could transform your approach to teaching English or other modern languages, please contact us now to arrange your FREE demo!

This blog post was last updated 26 September, 2023.
Block "feature-request-pop-up" not found
Become a partner
Welcome to the new Eslbase
While our appearance has changed, you'll still find all the resources that you found before. Thanks for visiting :-)
Search Eslbase
How to plan a tefl lesson.
What is a TEFL lesson plan and what should it include? A step by step guide to planning lessons for English language teaching.

Why plan lessons?
Every TEFL lesson needs a plan. The level of detail it contains, and whether it is mainly in your head or mainly on paper, will vary depending on your training and experience, the type of class (one-to-one classes often have a much more fluid plan, for example) and the time that you have available to plan.
The main reason to have a plan for a TEFL lesson is to know, firstly, the aim of your lesson and, secondly, what you’re going to do during the lesson in order to achieve that aim. If you don’t know what you want your students to be able to do by the end of the lesson, you risk them going away feeling that they haven’t achieved anything.
What should a TEFL lesson plan include?
Everything that you might want to include in your plan derives from the main aim and how you’re going to achieve it. What materials do you need for the activities that you’ve planned in order to achieve your aim? How long will each of these activities take? What problems might your students have in dealing with a particular activity or language point? And so on.
As we said, for most teachers it is impractical to plan every lesson with this amount of detail. But these kinds of detail should at the very least be in your head, even if the paper version is just a few scribbled lines – and writing a few plans in this way is the best way to get yourself into the habit of thinking about these kinds of detail when you’re planning, even if you don’t have the time to actually write them.
Although there are other possibilities, here’s a list of the main things to include in a detailed lesson plan:
Main aim Subsidiary aims Personal aims Materials Anticipated problems and solutions
And for each stage of the lesson itself:
Timing Stage aims Activities Focus
We’ll have a look at each one more closely. At the end is an example plan for this Used to lesson .
What should the main aim be? Ideally it should come from a course plan which outlines a logical progression of aims for every lesson in a course. How does this lesson that you’re teaching today fit into the bigger picture of what your students want or need to achieve on the course? The aim might be based on a language point (grammatical, lexical or phonological), or it might be based on a skill (reading, writing, listening or speaking).
The key is to think not in terms of what you want to teach, but in terms of what you want your students to be able to do . By thinking from your students’ perspective you are more likely to choose activities which will help them achieve this aim, rather than activities which are easy for you to teach. If your aim is grammar or vocabulary based, you also avoid the risk of “teaching” the form and then thinking “okay, they’ve got it, job done”.
So, instead of “to teach will and going to” or “to practice listing for gist” try “to enable students to discuss future plans using will and going to” or “to develop students’ ability to identify the main ideas in a reading text”. Think along the lines of “ to help / to enable / to develop/ to improve… ” rather than “to teach / to practice”.
It’s also a good idea to make a note of how you will recognise when your students have achieved the main aim. This can help you afterwards to critically analyse your lesson, think about ways to improve it if they didn’t achieve the aim, and decide what further work is needed on a particular language point or skill.
Subsidiary aims
You may also have some secondary aims that you would like to work on. In the “Used to” lesson below the main aim is based on a language point, but we do some listening work to provide the context for presenting this language, so we take the opportunity to develop the students’ listening skills. We also introduce some vocabulary, not just because we need it to understand the text, but because we would like our students to be able to use this vocabulary outside the lesson.
Personal aims
You might also have something that you want to achieve on a more personal level. Maybe in your last lesson you weren’t happy with your board work and you want to improve on this. If there are several aspects of your teaching that you want to improve or develop, try focusing on one at a time here – work on it for a few lessons until you’re happy with it, then move on to the next one.
What materials will you need for each of your activities? Make sure you won’t need to run back to the photocopier during the class by going through all the stages of your lesson one by one – have you forgotten anything?
Anticipated problems and solutions
Take a little time to go through the stages of your lesson and anticipate the problems your students may have and what you will do if these problems crop up. Anticipating the unexpected allows you to, as far as is possible, avoid the danger of being left stranded without an answer. This can help you feel more confident and deliver a more effective lesson.
Think in terms of vocabulary in a text that you may have to pre-teach in some way, potential issues with pronunciation and how you’re going to deal with them, possible lack of student imagination in creative tasks, possible confusion of tenses and how you’re going to resolve this, and so on. It’s important to be precise here. If you say “students may be unfamiliar with some words in the text” it doesn’t really help you to prepare a solution. If you say “students may be unfamiliar with the words “to give up, to quit…”, you can think about the best way to present or elicit the meaning of each.
Stages of the lesson
Now we come to the lesson itself. There are four things to consider here:
Your lesson has a fixed length and so you’ll need to think about the timing of each activity. This helps you to know that you have planned a long enough lesson, and during the lesson itself will serve as a self-check to make sure you achieve what you want to achieve. If you find that you haven’t planned enough material, make sure any new activities you add contribute to your lesson aim – avoid the temptation to crow-bar in activities that don’t really fit. You could also go back and think about the activities you already have – could you expand on them or change them in any way?
These are the aims of the individual stages of your lesson, as opposed to the main aim of the lesson as a whole. There should be a logical progression here towards achieving the main aim. Stage aims should answer the question “Why am I doing this?” rather than “What am I doing?” – the answer to this second question comes in the next column.
The stages that you include in your lesson will depend, of course, on the type of lesson. The “Used to” lesson follows a traditional PPP (presentation, practice, production) model. We therefore expect to see a stage where the language is presented in some way. This could be a situational presentation, a presentation from a text, or one of a number of different techniques to present new language. We also expect to see some practice stages, probably some restricted followed by some freer practice. These stages could be either oral or written. Finally, we expect to see a production stage or, as we have called it in this lesson, authentic practice.
This is what you actually do at each stage of the lesson. Be specific here. Instead of “Look at and discuss pictures”, break it down and say exactly how you’re going to do this: “Students look at photos of children doing things; Students discuss in pairs whether or not they did these things in the past and whether or not they do them now”. Being this specific will help keep you on track and ensure that you don’t forget a crucial part of an activity.
This tells you whether the activity is pair-work (S-S), group work (S-S-S), a teacher-led activity (during the presentation stage, for example – T-Ss) and so on. This can show you whether or not you have a range of different activity types – is your lesson too teacher-centred? Is every activity pairwork? Have you mixed up the groups for different activities? Here’s the used to lesson plan:
This lesson follows a typical PPP (Presentation, Practice, Production) model. With this model we first present or elicit the language in some way. The students then practise it in more or less controlled situations and finally produce it in a more authentic situation. Have a look below for more about these practice and production stages.
PPP is just one of several possible lesson models – as such we have not covered all of the possible lesson stage types and have only touched on some of the terminology that you might include in these stages. But we’ll expand on some of the terminology and stages that we have mentioned in more detail here:
A lead in activity is designed to “warm the students up” – to generate interest and get them thinking about the topic. When you introduce a topic, for example with pictures, a video or some questions, you activate in your students’ minds a mental image or expectation based on their existing knowledge of the topic. This mental image is often called a schema , and so we can say that the aim of a lead-in stage is to “activate your students’ schemata”. Your students’ existing knowledge and experience can then be used to personalise the lesson.
Target language
The aim of the presentation stage is to present or elicit the target language – the language that we want the students to be able to use correctly in order to achieve the aim of our lesson. There are different ways to do this – in this case the teacher elicits the meaning of the target language with a series of concept questions before giving the target sentence itself.
Manipulating form
By this we mean that the teacher presents (or elicits) the question and negative forms of the target language, as well as, perhaps, other examples in the first, second or third person.
Restricted/controlled practice
The first practice stage, where the teacher drills the pronunciation of the target language, is very restricted, in the sense that students focus entirely on the sentence containing the target language. There is no opportunity at this stage to incorporate other language. The practice stage of PPP lessons tends to start with restricted practice in this way, and then gradually move on to less restricted and eventually much more authentic practice.
In the less restricted practice stage of this lesson, students are given the chance to circulate and ask each other questions (using the material that was gathered during the lead in). The focus is still very much on the target language, but much less restricted or controlled than the previous exercise.
Authentic/Free/Fluency practice
Finally, the students are given the opportunity to produce the target language in a much freer context. The activity in this lesson encourages them to talk about the past, and they may naturally use the target language during their conversations, but they are also free to use other language. There shouldn’t be any pressure on the students at this stage to use the target language, and you may find that they don’t use it very much at all. This is why we can call this stage authentic practice – in an authentic situation we wouldn’t use “used to” in every sentence when communicating with someone – we would maybe use it once or twice in addition to other forms.

Keith Taylor
Keith is the co-founder of Eslbase and School of TEFL . He's been a teacher and teacher trainer for over 20 years, in Indonesia, Australia, Morocco, Spain, Italy, Poland, France and now in the UK.
Grammar for English Teachers
Learn everything you need to feel confident with grammar as a teacher Online course - Save £20 in May
Related posts

TEFL lesson plan: Teaching infinitives of purpose using a James

“Used to” lesson plan

10 TEFL Activities with Little Preparation

10 Tips for Giving and Checking Instructions in an ESL

How to Design Language Practice Activities

How to choose resources when teaching English to children
41 comments.
Gordon Ross
Thank you for this. I am currently studying to be a TEFL teacher, and I’m glad I have found your website. The information you are sharing is very clear and well explained.
Yasmine Almokhtar
It’s well organized and so helpful, thank you so much for this clarification
Maisaa Dahdal
Very useful. Many thanks.
That was clear and well explained. Thank you
Patrick Serge MONGBO
So happy to have these cues on lesson planning. Very simple understandable and useful for teachers especially beginners. Pat Serge tefl Inspector
Spastic-Tactician
I love the emphasis on thematic connection between lesson stages. I train public school teachers in Japan and the most important thing I do for them is to help them begin to plan the connections in their lessons, their units, and their terms. Student motivation is a fragile thing. Creating and maintaining engaging thematic connections that carry through every stage, every activity, each one informing the next and building on the previous is absolutely crucial to supporting that motivation. Textbooks don’t provide this kind of goal-focused thematic connection. It can only come from the dedicated preparation of the teacher. Your section about the importance of putting the work in before lessons is, as such, a super important part of this article. One suggestion: I am not a fan of calling the final stage “production”. Production is a word that carries a machine-like, robotic connotation and… alarmingly, that is exactly what I often see in the final stages of lessons I observe. Students robotically spitting out what they think they should say. I prefer calling the final stage “Use” (My preferred acronym is SPU, Show, Practice, Use). When we think in terms of having students actually USE language or communicative strategies, rather than simply producing them, we sharpen our aim when choosing or designing activities. This subtle change in thinking can help us think about language as a communicative device rather than as a barrier to overcome for students, and THAT is key.
How can we check the effectiveness of the presentation stage, how can we take student feedback?
Checking understanding of the language as you present it is very important. In this lesson it is done with concept checking questions, in this part of the plan:
“Did he smoke in the past? Yes- Once or many times? Many times- Does he smoke now? No “He used to smoke T repeats with other examples”
You can see some more detail about this in this post about the lesson: https://www.eslbase.com/teaching/used-to-lesson-plan
…and in this post about concept checking questions: https://www.eslbase.com/tefl-a-z/concept-questions
Hope that helps.
James Tringle
I am just got through teaching in several public schools in Vietnam over the past year. I basically used the lesson plans from “Family and friends” to teach the classes. Oh by the way I had an average of 55+ kids in each class.
Hi Eslbase, good morning. I am doing my TEFL Training Course and I have come across your website and I find it very useful for my assignments. Thanks a bunch for this.
I am also a tefl student and and doing a lesson plan on comprehension Finding it a bit difficult. Please help. Thanks
Hi Eve, thanks for your comment, and we’re glad you find the site useful!
Good Day I am struggling with the TEFL lesson plan that i must draw up. It should have the following stages. 1. Warmer, Pre teach vocab,and reading.
Hi Cherell – can you give us some more info about the plan?
i plan to do celta and found this lesson plan extremely well planned and organised.just great….
I am a TESOL student and getting ready for my practicum lessons. I was very nervous and felt like i have all the information jumbled up in my head. But this detailed lesson plan, step by step scaffolding and checklist is perfect! Thank you!
An excellent grammar lesson plan! I’m a TEFL student, and in fact, my field is not teaching, am a translator, so please I need your help for a detailed plan: Main aim: lexis, sub aim: speaking. Thank u in advanced!
Hi, am doing am assignment on a lesson and not lesson plan. The question is what are the four stages of a lesson and their activites. Please help.
Thank you so much well explained.
Many thanks for this clear presentation of the lesson plan. Just preparing for my first TP!
Holona Chetty
Well I like to say I paid money for a TEFL course which has everything that you mentioned (for free) .Thanks for sharing!
Well explained. What about demos and language analysis, when or on what stage must it be engaged?
Abdul Rahim Chaudhary
Awesome! But it is not here to select the final stages I.e. Controlled practice and production stage. Edit it please so we could copy and past for print. Thanks
This is very helpful – good to get it from a different perspective rather than just passing the course basis – thank you
I’d say an important stage was missing – final feedback! Students want to know what they did well/badly on in the final task as well as checking that they have the ‘right’ answers in more controlled practice. Other than that, a sound lesson plan for CELTA candidates. I did CELTA over 7 years ago and would have appreciated this then :)
Thanks for pointing this out zbd – we missed off the bullet point for “Feedback” for the last two activities. I’ve added these now.
Hi , I am writing my graduation paper on ESL lesson stages and lesson time management, and , I’d point out that you did a fine job and didn’t miss anything. The PPP lesson planning paradigm doesn’t require evaluation, which is by all means required by 5E Instructional Model: engage, explore, explain, elaborate and evaluate. So, probably, that is the reason you omitted feedback, which is optional in PPP.
I am a teacher trainer and I found this guide to be a very clear resource. THANK YOU!
Thanks Kimberly for your feedback.
Hi, this is a great example of lesson plan. Would it be ok if we used in our training sessions at our school?
Hi Eduardo – please feel free to use this for your training sessions.
Jose fermin
This is a very detailed PPP lesson plan. I’m a CELTA trainee and thought it was awesome!
Thanks Jose, we’re glad you found it helpful.
Hi, this Grammar Lesson Plan is excellent. Is it possible for me to obtain a copy by email? This is the best plan I have seen for a long time.
Hi Cara, thanks for your comment! Unfortunately we’re unable to send this by email – you’re welcome to copy and paste from this page though!
Hi! Thanks for letting us copy and paste it
I am a CELTA student and I have to say that this LP is excellent and inspirational! a great reference to come back for ideas! thank you so much!
Jeremias Rui Albino
Great. This is one of the clearest PPP Lesson Plans I’ve ever seen.
Thanks Gordon, and good luck with your studies. Keith
I’m glad you found it useful!
Hi Yasmine, I’m glad you found it helpful!
Leave your comment (Cancel Reply)
- Professional development
- Planning lessons and courses
Student presentations
In this article I would like to give you a few tips and some advice on what I've learned from helping students prepare and deliver presentations.

- Why I get students to do presentations
- Syllabus fit
- Planning a presentation lesson
- Classroom Management
Why I get students to do presentations Presentations are a great way to have students practise all language systems areas (vocabulary, grammar, discourse and phonology) and skills (speaking, reading, writing and listening). They also build confidence, and presenting is a skill that most people will need in the world of work. I find that students who are good presenters are better communicators all round, since they are able to structure and express their ideas clearly.
- Presentation skills are extremely useful both in and outside the classroom. After completing a project, a presentation is a channel for students to share with others what they have learned. It is also a chance to challenge and expand on their understanding of the topic by having others ask questions. And in the world of work, a confident presenter is able to inform and persuade colleagues effectively.
- Presentations can also form a natural part of task based learning. By focussing on a particular language point or skill, the presentation is a very practical way to revise and extend book, pair and group work. The audience can also be set a task, for example, a set of questions to answer on the presentation, which is a way of getting students to listen to each other.
Syllabus fit Normally the presentation will come towards the end of a lesson or series of lessons that focus on a particular language or skill area. It is a type of freer practice. This is because the students need to feel relatively confident about what they are doing before they stand up and do it in front of other people. If I have been teaching the past simple plus time phrases to tell a story, for example, I give my students plenty of controlled and semi controlled practice activities, such as gapfills, drills and information swaps before I ask them to present on, say, an important event in their country's history, which involves much freer use of the target grammar point.
Planning a presentation lesson Normally a presentation lesson will have an outline like this:
- Revision of key language areas
- Example presentation, which could be from a textbook or given by the teacher
- Students are given a transcript or outline of the presentation
- Students identify key stages of the example presentation – greeting, introduction, main points in order of importance, conclusion
- Focus on linking and signalling words ('Next…', 'Now I'd like you to look at…', etc.). Students underline these in the transcript/place them in the correct order
- Students are put into small groups and write down aims
- Students then write down key points which they order, as in the example
- Students decide who is going to say what and how
- Students prepare visuals (keep the time for this limited as too many visuals become distracting)
- Students practise at their tables
- Students deliver the presentations in front of the class, with the audience having an observation task to complete (see 'Assessment' below)
- The teacher takes notes for feedback later
It is important that the students plan and deliver the presentations in groups at first, unless they are extremely confident and/or fluent. This is because:
- Shy students cannot present alone
- Students can support each other before, during and after the presentation
- Getting ready for the presentation is a practice task in itself
- When you have a large class, it takes a very long time for everyone to present individually!
I find it's a good idea to spend time training students in setting clear aims. It is also important that as teachers we think clearly about why we are asking students to present.
Aims Presentations normally have one or more of the following aims:
- To inform/ raise awareness of an important issue
- To persuade people to do something
- Form part of an exam, demonstrating public speaking/presentation skills in a first or second language
I set students a task where they answer these questions:
- Why are you making the presentation?
- What do you want people to learn?
- How are you going to make it interesting?
Let's say I want to tell people about volcanoes. I want people to know about why volcanoes form and why they erupt. This would be an informative/awareness-raising presentation. So by the end, everyone should know something new about volcanoes, and they should be able to tell others about them. My plan might look like this:
- Introduction - what is a volcano? (2 minutes)
- Types of volcano (5 minutes)
- Volcanoes around the world (2 minutes)
- My favourite volcano (2 minutes)
- Conclusion (2-3 minutes)
- Questions (2 minutes)
Classroom Management I find that presentation lessons pass very quickly, due the large amount of preparation involved. With a class of 20 students, it will probably take at least 3 hours. With feedback and follow-up tasks, it can last even longer. I try to put students into groups of 3 or 4 with classes of up to 20 students, and larger groups of 5 or 6 with classes up to 40. If you have a class larger than 40, it would be a good idea to do the presentation in a hall or even outside.
Classroom management can become difficult during a presentations lesson, especially during the final presenting stage, as the presenters are partly responsible for managing the class! There are a few points I find effective here:
- Training students to stand near people who are chatting and talk 'through' the chatter, by demonstration
- Training students to stop talking if chatter continues, again by demonstration
- Asking for the audience's attention ('Can I have your attention please?')
- Setting the audience an observation task, which is also assessed by the teacher
- Limiting the amount of time spent preparing visuals
- Arranging furniture so everyone is facing the front
Most of these points are self-explanatory, but I will cover the observation task in more detail in the next section, which deals with assessment.
Assessment The teacher needs to carefully consider the assessment criteria, so that s/he can give meaningful feedback. I usually run through a checklist that covers:
- Level - I can't expect Elementary students to use a wide range of tenses or vocabulary, for example, but I'd expect Advanced students to have clear pronunciation and to use a wide range of vocabulary and grammar
- Age - Younger learners do not (normally) have the maturity or general knowledge of adults, and the teacher's expectations need to reflect this
- Needs - What kind of students are they? Business English students need to have much more sophisticated communication skills than others. Students who are preparing for an exam need to practise the skills that will be assessed in the exam.
I write a list of language related points I'm looking for. This covers:
- Range / accuracy of vocabulary
- Range / accuracy of grammar
- Presentation / discourse management- is it well structured? What linking words are used and how?
- Use of visuals- Do they help or hinder the presentation?
- Paralinguistic features
'Paralinguistics' refers to non-verbal communication. This is important in a presentation because eye contact, directing your voice to all parts of the room, using pitch and tone to keep attention and so on are all part of engaging an audience.
I find it's a good idea to let students in on the assessment process by setting them a peer observation task. The simplest way to do this is to write a checklist that relates to the aims of the lesson. A task for presentations on major historical events might have a checklist like this:
- Does the presenter greet the audience? YES/NO
- Does the presenter use the past tense? YES/NO
And so on. This normally helps me to keep all members of the audience awake. To be really sure, though, I include a question that involves personal response to the presentation such as 'What did you like about this presentation and why?'. If working with young learners, it's a good idea to tell them you will look at their answers to the observation task. Otherwise they might simply tick random answers!
Conclusion Presentations are a great way to practise a wide range of skills and to build the general confidence of your students. Due to problems with timing, I would recommend one lesson per term, building confidence bit by bit throughout the year. In a school curriculum this leaves time to get through the core syllabus and prepare for exams.
Presentations - Adult students
- Log in or register to post comments
Presentation Article
Research and insight
Browse fascinating case studies, research papers, publications and books by researchers and ELT experts from around the world.
See our publications, research and insight
- Try for free
Lesson Plan Procedures: A Guide for Teachers

Lesson Plan Procedures
In this article, we will explain how to properly perform a lesson plan in school by diving deeper into lesson plan procedures. We will discuss the three major steps involved in lesson plan procedures and share how teachers can self-evaluate their lesson plan success.
What is a Lesson Plan Procedure?
Lesson plan procedures are the sequence or step-by-step guidelines detailing how a teacher plans to deliver a lesson to students. This includes the activities, methods, materials, and timing necessary to effectively facilitate learning.
Typically, there are three stages of a lesson plan that make up the lesson plan procedure. These stages are the motivational opening, the development of the lesson, and the closing of the lesson. However, there may also be some form of formal or informal periodic assessment. Periodic assessment throughout a lesson will alert you to any misconceptions or misunderstandings students may have long before they conclude the lesson.
Let’s take a closer look at the three major stages of effective lesson planning.

The Three Stages of Lesson Plan Procedures
Step 1: the motivational opening.
The first stage of a lesson plan is critical! It’s how you’ll stimulate students’ interest in the topic.
Start by asking students a thought-provoking question, such as, “How would you like to sleep for four months every year?” or “Did you know we can measure any tree on the playground without climbing it?”Other attention-grabbing openers can include the use of models, maps, apparatus, or a demonstration.
When starting a lesson, don’t make the mistake of assuming what students know. For example, just because students studied American history in elementary school, had a basic history course in middle school, and are now in your high school history class, don't assume they know all there is to know about American history. Take the time to find out. Bottom line: Always know what your students know!
Step 2: The Development of the Lesson
The development of a lesson plan is the heart of any lesson. It’s the portion where you teach and students learn.
This vital stage is when students will obtain valuable information, manipulate data, and engage in active discovery through total involvement. Include some of the following elements in this stage:
- Lesson methodologies. Not only is it important to give some thought as to what you're going to teach, it is equally significant that you consider the methods of presentation as well. I'm sure you've been in a class where the only method of instruction was dry, stale lectures. You undoubtedly found the class boring and wearying. The same fate awaits your students if you provide them with an overabundance of one type of teaching methodology to the exclusion of others. (These are addressed in Lesson Methodologies )
- Problem-solving. As I discuss in another article , problem-solving is an inherent part of any lesson. Providing students with the opportunities to solve their own problems in their own way is a valuable motivational technique.
- Creative thinking. Learning is much more than the memorization of facts. Any lesson must allow students opportunities to manipulate data in new and unusual ways.
- Hands-on activities. It's critical that students have sufficient opportunities to create products based on what they learn. These might include but are not limited to posters, dioramas, charts, graphs , mobiles, notebooks, portfolios , and models.
- Students critique the directions or set up for a presentation or demonstration.
- Students verbalize the steps they're taking during the completion of an activity.
- Students manipulate objects or devices and verbalize their feelings about their actions.
- Students work in small groups to share information learned and how it relates to prior knowledge.
- Students graph or illustrate significant points on the chalkboard for class critique.
Teaching Tip! When creating lesson plans, consider both short-term and long-term projects for students. This will keep the learning experience interesting as you switch up styles.

Step 3: The Closing of the Lesson
The closing of the lesson is a vital stage where you recap key points and help students consolidate their learning. It’s an opportunity to review the lesson's objectives and assess whether they have been met. This can be done through summary discussions, quizzes, or reflective activities.
It's also important to provide an outlook for the next lesson, thus creating a seamless transition and maintaining students' interest.
Teaching Tip! To keep your students engaged, try ending the lesson on a cliffhanger. This can be by proposing a question or telling them an enticing bit of information (e.g.“, Tomorrow I'll bring in a creature with eight eyes. You won't want to miss it!”).
Lastly, it’s good practice to end the lesson on a positive note to boost students' confidence and encourage them to look forward to the next session.
Self-Evaluation in Creating Lesson Plan Procedures
As you write lessons, include a brief section at the end that allows you to self-evaluate. This will be important when and if you decide to teach the lesson again. It will also provide you with some important insights relative to your perceived level of success.
You might consider some of these self-evaluative questions:
- “How was my pacing?”
- “Did students understand the content?”
- “Did students understand the important concepts?”
- “Did I use my time appropriately?”
- “What changes should I make the next time I teach this lesson?”
- “Were students engaged and involved?”
- “What new activities or procedures could I include?”
- “Did I present the lesson well?”
Featured High School Resources

Related Resources

About the author

Digital Content Manager & Editor
About haley.
14 Practical Tips to Improve Your Presentation Skills
- The Speaker Lab
- May 11, 2024
Table of Contents
Ever felt complete dread and fear at the thought of stepping up to deliver a presentation? If so, you’re not alone. The fear of public speaking is more common than you might think, but with the right presentation skills , it’s a hurdle that can be overcome.
In this article, we’ll help you master basic confidence-building techniques and conquer advanced communication strategies for engaging presentations. We’ll explore how body language and eye contact can make or break your connection with your audience; delve into preparation techniques like dealing with filler words and nervous habits; discuss tailoring content for different audiences; and much more.
Whether you’re prepping for job interviews or gearing up for big presentations, being prepared is key. With adequate practice and the proper attitude, you can crush your speech or presentation!
Mastering the Basics of Presentation Skills
Presentation skills are not just about speaking in front of a crowd. It’s also about effective communication, audience engagement, and clarity. Mastering these skills can be transformative for everyone, from students to corporate trainers.
Building Confidence in Presentations
Becoming confident when presenting is no small feat. But fear not. Even those who feel jittery at the mere thought of public speaking can become masters with practice and patience. Just remember: stage fright is common and overcoming it is part of the process towards becoming an effective presenter.
Taking deep breaths before you start helps calm nerves while visualizing success aids in building confidence. Also, know that nobody minds if you take a moment to gather your thoughts during your presentation—everybody minds more if they cannot understand what you’re saying because you’re rushing.
The Role of Practice in Enhancing Presentation Skills
In line with old wisdom, practice indeed makes perfect, especially when improving presentation skills. Consistent rehearsals allow us to fine-tune our delivery methods like maintaining eye contact or controlling body language effectively.
You’ll learn better control over filler words through repeated drills. Plus, the extra practice can help you troubleshoot any technical glitches beforehand, saving you the sudden panic during your actual presentations.
Remember that great presenters were once beginners too. Continuous effort will get you there sooner rather than later.
Find Out Exactly How Much You Could Make As a Paid Speaker
Use The Official Speaker Fee Calculator to tell you what you should charge for your first (or next) speaking gig — virtual or in-person!
Body Language and Eye Contact in Presentations
The effectiveness of your presentation can hinge on more than just the words you say. Just as important is your body language .
Impact of Posture on Presentations
Your posture speaks volumes before you utter a word. Standing tall exudes confidence while slouching could signal nervousness or lack of preparation.
If there’s one lesson to take away from our YouTube channel , it’s this: good presenters know their message but great ones feel it through every fiber (or muscle) of their being. The audience can sense that energy when they see open body language rather than crossed arms.
Maintaining Eye Contact During Your Presentation
Eyes are often called windows to the soul for a reason. They’re communication powerhouses. Making eye contact helps build trust with your audience members and keeps them engaged throughout your speech.
Avoid staring at note cards or visual aids too much as this might give an impression that you’re unprepared or uncertain about your chosen topic. Instead, aim to maintain eye contact between 50% of the time during presentations. This commonly accepted “50/70 rule” will help you exhibit adequate confidence to your audience.
If stage fright has gotten a hold on you, take deep breaths before you start speaking in order to stay calm. Make sure that fear doesn’t disrupt your ability to maintain eye-contact during presentations.
If body language and eye contact still feel like a lot to manage during your big presentation, remember our golden rule: nobody minds small mistakes. It’s how you handle questions or mishaps that truly makes a difference—so stay positive and enthusiastic.
Preparation Techniques for Successful Presentations
Presentation skills are like a craft that requires meticulous preparation and practice. Aspects like visual aids and time management contribute to the overall effectiveness of your delivery.
The first step towards delivering an impactful presentation is research and organization. The content should be well-researched, structured logically, and presented in simple language. This will make sure you deliver clear messages without any room for misinterpretation.
Dealing with Filler Words and Nervous Habits
Nervous habits such as excessive use of filler words can distract from your message. Luckily, there are plenty of strategies that can address these issues. For instance, try taking deep breaths before speaking or using note cards until fluency is achieved. In addition, practice regularly to work on eliminating these verbal stumbling blocks.
Avoiding Distractions During Presentations
In a digital age where distractions abound, maintaining focus during presentations has become an even more crucial part of the preparation process. This video by motivational speaker Brain Tracy provides insights on how one could achieve this level of focus required for effective presentations.
Maintaining Confidence Throughout Your Presentation
Confidence comes from thorough understanding of the chosen topic combined with regular practice sessions before the big day arrives. Make use of note cards or cue cards as needed but avoid reading from them verbatim.
Taking control over stage fright starts by arriving early at the venue so that you familiarize yourself with the surroundings, which generally calms nerves down considerably. So next time you feel nervous before a big presentation, remember—thorough preparation can make all the difference.
Engaging Your Audience During Presentations
Connecting with your audience during presentations is an art, and mastering it can take your presentation skills to the next level. Making the message conveyed reach an emotional level is essential, not just conveying facts.
Understanding Your Target Audience
The first step towards engaging your audience is understanding them. Tailor the content of your presentation to their needs and interests. Speak in their language—whether that be professional jargon or everyday slang—to establish rapport and ensure comprehension.
An effective presenter understands who they’re speaking to, what those individuals care about, and how best to communicate complex ideas understandably.
Making Complex Information Understandable
Dense data or complicated concepts can lose even the most interested listener if presented ineffectively. Breaking your key points down into manageable chunks helps maintain attention while promoting retention. Analogies are especially useful for this purpose as they make unfamiliar topics more relatable.
Audience Participation & Questions: A Two-Way Street
Incorporating opportunities for audience participation encourages engagement at another level. It allows listeners to become active participants rather than passive receivers of knowledge.
Consider techniques like live polls or interactive Q&A sessions where you invite questions from attendees mid-presentation instead of saving all queries until the end.
This gives you a chance not only engage but also address any misunderstandings right on spot.
- Treat each question asked as an opportunity—it’s evidence someone has been paying attention. Even challenging questions should be welcomed as they demonstrate an engaged, thoughtful audience.
- Encourage participation. It can be as simple as a show of hands or the use of interactive technologies for live polling during your presentation. This keeps your audience active and invested in the content.
Remember, your presentation isn’t just about putting on a show—it’s about meaningful interaction.
Free Download: 6 Proven Steps to Book More Paid Speaking Gigs in 2024
Download our 18-page guide and start booking more paid speaking gigs today!
Presentation Skills in Specific Contexts
Whether you’re nailing your next job interview, presenting an exciting marketing campaign, or delivering insightful educational content, the context matters. Let’s take a look.
The Art of Job Interviews
A successful job interview often hinges on effective communication and confidence. Here, the target audience is usually small but holds significant influence over your future prospects. Body language plays a crucial role; maintain eye contact to show sincerity and interest while open body language communicates approachability.
Bullet points summarizing key experiences are also helpful for quick recall under pressure. This allows you to present your chosen topic with clarity and positive enthusiasm without relying heavily on note or cue cards.
Pitching in Public Relations & Marketing
In public relations (PR) and marketing contexts, presentations need to capture attention quickly yet hold it long enough to deliver key messages effectively. Visual aids are valuable tools here—they help emphasize points while keeping the audience engaged.
Your aim should be highlighting presentation benefits that resonate with potential clients or partners, making them feel as though ignoring such opportunities would mean missing out big time.
Educational Presentations
An educational setting demands its own unique set of presentation skills where deep understanding trumps flashy visuals. You must make complex information understandable without oversimplifying essential details—the use of analogies can be beneficial here.
Keeping the audience’s attention is critical. Encourage questions and participation to foster a more interactive environment, enhancing learning outcomes for all audience members.
Tips for Becoming a Great Presenter
No single method is suitable for everyone when it comes to speaking in public. However, incorporating continuous improvement and practice into your routine can make you an exceptional presenter.
Tailor Your Presentation to Your Audience
Becoming an excellent speaker isn’t just about delivering information; it’s also about making a connection with the audience. So make sure that you’re taking setting, audience, and topic into consideration when crafting your presentation. What works for one audience may not work for another, so be sure to adapt your presentation styles according to the occasion in order to be truly effective.
The Power of Practice
The art of mastering public speaking skills requires practice —and lots of it . To become a great presenter, focus on improving communication skills through practice and feedback from peers or mentors. Try to seek feedback on every speech delivered and incorporate those pointers in your future presentations. Over time, this cycle of delivery-feedback-improvement significantly enhances your ability to connect with audiences and convey ideas effectively.
If you’re looking for examples of good speakers, our speech breakdowns on YouTube provide excellent examples of experienced presenters who masterfully utilize speaking techniques. Analyzing their strategies could give you great ideas for enhancing your own style.
Finding Your Style
A crucial part of captivating any audience lies in how you deliver the message rather than the message itself. Developing a unique presentation style lets you stand out as an engaging speaker who commands attention throughout their talk. Through — you guessed it — practice, you can develop a personal presentation style that resonates with listeners while showcasing your expertise on the chosen topic.
Your body language plays a pivotal role here: open gestures communicate confidence and enthusiasm towards your subject matter, two qualities essential for keeping audiences hooked. Similarly, using vocal variety adds dynamism to speeches by emphasizing points when needed or creating suspense during storytelling parts of your talk.
Cultivating Passion & Enthusiasm
Showcasing genuine passion for the subject helps keep listeners engaged throughout even lengthy presentations. Sharing stories related to the topic or expressing excitement about sharing knowledge tends to draw people in more than mere data recitation ever could.
Recognize that everybody is distinctive; don’t expect identical results from every speaker. The path to becoming a great presenter involves recognizing your strengths and working tirelessly on areas that need improvement.
FAQs on Presentation Skills
What are good presentation skills.
Good presentation skills include a clear message, confident delivery, engaging body language, audience understanding, and interaction. They also involve effective preparation and practice.
What are the 5 steps of presentation skills?
The five steps of presenting include: planning your content, preparing visual aids if needed, practicing the delivery aloud, performing it with confidence, and finally post-presentation reflection for improvements.
What are the 5 P’s of presentation skills?
The five P’s stand for Preparation (researching your topic), Practice (rehearsing your talk), Performance (delivering with confidence), Posture (standing tall), and Projection (using a strong voice).
What are your presentation skills?
Your personal set of abilities to deliver information effectively is what we call your presentation skill. It can encompass public speaking ability, clarity in speech or writing as well as visual communication talent.
Mastering presentation skills isn’t an overnight process, but practice and perseverance will put you well on your way to becoming an effective speaker.
You’ve learned that confidence plays a crucial role in effective presentations, so take deep breaths, make eye contact, and keep your body language open. As always, preparation is key. Tackle filler words head-on and get comfortable with visual aids for impactful storytelling.
Remember the importance of audience engagement — it’s all about understanding their needs and tailoring your content accordingly. This way, complex information turns into digestible insights.
Above all else: practice! After all, nothing beats experience when it comes to improving public speaking abilities.
- Last Updated: May 9, 2024
Explore Related Resources
Learn How You Could Get Your First (Or Next) Paid Speaking Gig In 90 Days or Less
We receive thousands of applications every day, but we only work with the top 5% of speakers .
Book a call with our team to get started — you’ll learn why the vast majority of our students get a paid speaking gig within 90 days of finishing our program .
If you’re ready to control your schedule, grow your income, and make an impact in the world – it’s time to take the first step. Book a FREE consulting call and let’s get you Booked and Paid to Speak ® .
About The Speaker Lab
We teach speakers how to consistently get booked and paid to speak. Since 2015, we’ve helped thousands of speakers find clarity, confidence, and a clear path to make an impact.
Get Started
Let's connect.
Copyright ©2023 The Speaker Lab. All rights reserved.
Topic: Presentation Skills

As you can see in the slide (giving presentations)
Step into the world of presentations with this handy lesson! Students explore vocabulary for structuring presentations, read the text of a presentation and watch a video on how to communicate ideas clearly.

Presentation: putting skills into action
With this lesson plan, students practise giving a presentation in English by doing a lot of different speaking activities. The lesson is the third of the three-part series of lessons about delivering presentations.

Moving through your presentation
With this lesson plan, students learn plenty of useful phrases for presentations in English. They also prepare presentation excerpts, and learn how to start a presentation. The lesson is the second of the three-part series of lessons about delivering presentations.

How to nail that presentation
In this lesson about business presentations in English, students discuss presentation structures in depth, watch a video with tips on giving presentations, and learn useful words and phrases related to the topic. The lesson is the first of the three-part series of lessons about delivering presentations.

The city of the future is here
With this lesson plan based on a video about Toyota’s city of the future students learn some useful language for presentations and then practise their presentation skills.

The chair that conquered the world
This lesson plan about the chair that conquered the world includes a variety of tasks for students to learn new vocabulary related to describing furniture design and practise their presentation skills.

How do you like your milk?
In this lesson, students will learn advanced cooking verbs, discuss different types of milk and do an English class project.

Apple’s legendary keynotes
The objective of this lesson plan is to teach students some adjectives for describing products and show them a video analysing Apple’s legendary keynotes.
Subscribe to get premium content
Subscribe to get access to professional, ready-to-use lesson plans in both digital and printable formats . Discover a variety of lesson types: Standard Lessons, Speaking Classes, Critical Reading Club worksheets and Flipped Classroom lesson plans.
Username or Email Address
Remember Me
IMAGES
VIDEO
COMMENTS
Oct 24, 2020. Presentation, practice, production (PPP) is a lesson structure, a way to order activities in your lessons. Although quite old and heavily criticised over the years, PPP is probably the most commonly used lesson structure in teaching English to foreign learners today.
What is the presentation stage in lesson planning? Presentation is usually the core of the lesson plan. During this stage, theteacher introduces the topic and the key subject matter the students need to master. Presenting with smart whiteboards is exceedingly easy and less time-consuming. What are the 5 steps in lesson planning? The five steps are:
The PPP Teaching Framework is a model to describe the typical stages of language teaching lesson. The PPP Teaching framework consist of four main stages: Warm-up, Presentation, Practice and Production and is used to teach speaking and writing lessons. There is a variation when we use this framework to teach Listening and Reading skills.
The three stages of a PPP lesson There are three stages in a PPP TEFL lesson. Firstly, the teacher presents the new word, an event which involves the presentation of pronunciation and spelling in context.. Next, the teacher allows the students to practice the new word in a controlled setting, making sure the student has understood the vocabulary and usage properly.
A PPP lesson is divided into three stages: not surprisingly, Presentation, Practice and Production. The Presentation stage is basically the beginning of the lesson. It starts with a warmer and/or a lead-in to get the students engaged and interested in the topic (or to wake them up if your lesson is at the end of the day!).
This first Presentation stage of the lesson enables learners to explore the language's meaning, form and use before they are expected to practice using the new language. An advantage of this Presentation stage is that it lets you focus learners' attention on studying a specific language point or vocabulary set.
Practice is the second stage of the PPP lesson plan template. This is when you will hand over a bit of control to your students and let them try out the new material themselves. If your presentation was well-developed and awesome, your students will be more than ready to jump in. In this stage, you will give your students a set of tasks or ...
The PPP method could be characterized as a common-sense approach to teaching as it consists of 3 stages that most people who have learnt how to do anything will be familiar with. The first stage is the presentation of an aspect of language in a context that students are familiar with, much the same way that a swimming instructor would ...
Presentation - Practice - Production, or PPP, is a method for teaching structures (e.g. grammar or vocabulary) in a foreign language. As its name suggests, PPP is divided into three phases, moving from tight teacher control towards greater learner freedom. Note that some writers1use the name to refer to a specific method that focuses on ...
PPP. PPP is a paradigm or model used to describe typical stages of a presentation of new language. It means presentation, production and practice. The practice stage aims to provide opportunities for learners to use the target structure. Criticism of this paradigm argues that the freer 'practice' stage may not elicit the target language as it ...
Presentation, Practice, and Production. "Presentation" is the part of the lesson when the target language (the language to be taught to the students) is presented to the students generally through eliciting and cueing of the students to see if they know it and then providing the language if no one does. The target language is usually put on ...
A lesson plan will be the set of subject matter materials you will be teaching during a specific timeframe. The lesson plan should be an index that students can constantly consult to understand better the parts of the learning journey they will go through during each session. Teachers and professors should have a lesson plan template that ...
STAGE 1: INTRODUCTION This stage provides interest and motivation to the students. Before starting the class, this stage focuses on the greetings, warm-up or lead-in, review, class arrangement and presentation of objectives. Regardless of the amount of time available for the lesson, this part should only last 5-10 minutes. To set a purpose
The PPP lesson structure. As outlined in the image above, the PPP model consists of three progressive stages, which combine to engage and motivate language learners. Best practice suggests that a 60-minute lesson should feature equal time (i.e 20 minutes) to each stage - language teachers can therefore plan out their lessons in advance ...
Plan your Practice Stage with care! This is one of the most important stages in a lesson. It's too important to leave to chance. There is a clear and specific process to follow. The four steps of the Practice Stage. The aim is to lead the students from 'controlled' to 'freer' drills. This means:
The aim of the presentation stage is to present or elicit the target language - the language that we want the students to be able to use correctly in order to achieve the aim of our lesson. There are different ways to do this - in this case the teacher elicits the meaning of the target language with a series of concept questions before ...
The PPP method's production phase is the third and final stage. It often includes games and activities give students some structure while using target language.A language production game/activity is one that allows the students to freely produce the language that has just been practiced. Never ask the student to produce something that you ...
Normally a presentation lesson will have an outline like this: Revision of key language areas; Example presentation, which could be from a textbook or given by the teacher; Students are given a transcript or outline of the presentation; Students identify key stages of the example presentation - greeting, introduction, main points in order of ...
The first phase is an introduction or starter activity, which includes the presentation of the learning objectives for that lesson. In the second phase, the teacher presents new information about the topic, possibly demonstrating a skill, or developing learners' knowledge. The third phase gives the children a chance to put their new knowledge ...
Lesson plan procedures are the sequence or step-by-step guidelines detailing how a teacher plans to deliver a lesson to students. This includes the activities, methods, materials, and timing necessary to effectively facilitate learning. Typically, there are three stages of a lesson plan that make up the lesson plan procedure.
Tried and tested lesson plans can be repeated with other classes and adapted to suit other levels. Also there is nothing like the feeling of a good lesson when students are learning in a positive atmosphere that you have helped to create. This is unlikely to happen by chance. The purpose of a lesson plan is to provide us with a lesson framework.
Presentation. Practice. Production. 1. Introduction, Warm-Up, Revision. Before putting your students directly to sleep by beginning a long lecture, it is best to complete a warm-up type exercise. If you plan on introducing a new lesson, take this as a good time to set the scene of the lesson.
Instead, aim to maintain eye contact between 50% of the time during presentations. This commonly accepted "50/70 rule" will help you exhibit adequate confidence to your audience. If stage fright has gotten a hold on you, take deep breaths before you start speaking in order to stay calm.
Business. In this lesson about business presentations in English, students discuss presentation structures in depth, watch a video with tips on giving presentations, and learn useful words and phrases related to the topic. The lesson is the first of the three-part series of lessons about delivering presentations. Unlimited Plan Show.