Presentation Template in Word
Download Numerous Templates In Different File Formats Such As Microsoft Word Or Pdf. Use Template.net You Can Create Outputs Such As Marketing Templates To Word Cloud Handouts. These Are Templates That You Can Easily Edit And Use Even If You Do Not Have Any Adobe Illustrator Or Photoshop Experience.
- Presentation
- Presentation Agenda
- Presentation Design
- Presentation Outline
- Promotion Presentation
- Project Presentation
- Professional Presentation
- Process Presentation
- Organization Presentation
- Minimalist Presentation
- Marketing Presentation
- Infographic Presentation
- Event Presentation
- Business Presentation
- Business Plan Presentation
- Basic Presentation
- Presentation Roadmap
There's nothing better than to have the perfect presentation to impress your audience. Create a professionally made presentations with our equally well-written presentation templates. We offer you 100% customizable documents with different designs and formats. All editable templates are suitable for any business and academic purposes—whether for company meetings, restaurant sales, research studies, thesis presentations, insurance agencies, etc. You will have our printable templates downloaded in your devices within minutes! These ready-made templates are made available for personalizing in any device you have with all versions of Microsoft Word. Stop wasting time and get your presentations done without any hassle with our presentation templates today!

How to Prepare Presentations with Microsoft Word
A presentation is a process of presenting a product or topic to an audience intended to inform and demonstrate that particular subject. Creating the perfect presentations will support your pitch and could get you to the next level of your objectives. Presentation materials could be a series of creative slides, brochures , flyers , or posters . The document is your key to impress your viewers. Don't have any idea on how to start one? Feel free to read further to find tips and steps on how to create a presentation effectively.
1. Determine the Presentation's Purpose
First and foremost, you should know the purpose of your presentation materials. Are you using it to present new products or project proposals ? Do you want to show annual sales? You need to consider your intentions to deliver precise information to your audiences.
2. Choose a Layout Design
Presentations come in different layouts. You need to incorporate your design into the purpose of your material. Most presentation materials have simple arrangements with minimal designs. Others prefer their content to have beautiful backgrounds and a clean layout that makes it look appealing. For example, you are doing a presentation for annual sales report. You can choose designs that help you emphasize datasheets and numbers for your material to be readable.
3. Pick a Presentation Template
If you don't want to waste time creating presentations from scratch, look for presentation templates on our site that fits your preferences well. These ready-made templates come with unique and aesthetic designs that you can freely adjust. You will find different styles and themed materials to suit any field you are assigned. The editable templates are downloadable in any device you have, along with its graphic designs in file formats like Microsoft Word.
4. Come Up with Essential Details
Once you have your presentation templates with you, start filling in the details you need. Presentations need to be short and precise. You have to summarize your topics no matter how broad it is. Even if it's an annual business report or proposals , your audiences won't be interested in it if you have wordy slides to present. Make sure you have displayed the critical areas of your topic and have it straightforward.
5. Finalize Infographics
It is better to add infographics like charts , timelines, and illustrations on your presentation to avoid making your material dull and boring. Audiences prefer visual content than texts. They take in more information expressed through figures and images than have it in paragraphs. Infographics will also help you summarize your topics and allow you to squeeze them in one graph or chart.
6. Make your Presentation Engaging
Presentations are more fun and enjoyable if you often interact with your viewers. Get your audience to participate in your discussion as much as possible—it prevents your viewers from getting bored. If you are doing a presentation for a product, it is better to bring in a prop like a physical sample, to entertain your viewers more. It's also the same if you are presenting services. Try handing our marketing brochures and flyers to your audiences to have them more engaged.
Get Instant Access to 50,000+ MS Word Templates
- Access to 1 Million+ Templates & Tools
- 500,000+ Microsoft 365 Templates including Excel, Powerpoint, Publisher, Outlook & PDF
- Unlimited access to Design & Documents AI editors
- Professionally Made Content and Beautifully Designed
- Instant Download & 100% Customizable

Feb 23, 2021
Export Word documents into PowerPoint presentations
Mohit Anand
- Add our blog to your RSS feed reader" href="/rss/blog.xml" data-bi-name="RSS Subscription" data-bi-id="rss_feed" data-bi-bhvr="120" data-bi-socchn="RSSSubscription" title="Microsoft 365 Insider Blog RSS" target="blank" class="d-inline-block">
Hi, Office Insiders, my name is Mohit Anand, and I’m a Program Manager on the PowerPoint team. I’m glad to share that a new scenario is now available in Word for the web . You can now export Word document s in to PowerPoint presentation s .
Word document s to PowerPoint presentation s
Have you ever wished you could easily export an existing Word document into a great PowerPoint presentation? If so, the wait is over!
When you use the Export command, it creates a presentation based on all the summarized sections of the document. It also adds imagery, icons, videos, themes, and fonts using AI.
How it works
To turn your Word document into a PowerPoint presentation:
- Open any document you want to convert into a presentation in Word for the web.
- Click File > Export > Export to PowerPoint presentation .
- When prompted , choose a design theme for your presentation.
- Click Open presentation to re view the results in PowerPoint for the w eb.
- The presentation w ill be created in the OneDrive root folder of the user who used this option.

Scenarios to try
- Open a Word document and explore the available PowerPoint themes.
- Open a Word document that is mostly text and see which AI-backed assets are added by clicking on Export .
Known Issues
- This feature is currently only available in English.
- It is not available in the Internet Explorer and Safari browser.
- We only support text content for the transformation to presentation, other media content support is not currently available. You can add your own media to the presentation after you have exported your Word document.
Availability
Export your document to PowerPoint presentation is rolling out to all Word for the web users shortly .
Features are released over some time to ensure that things are working smoothly. Therefore, we highlight features that you may not have because they’re slowly releasing to larger numbers of Insiders. Additionally, sometimes we remove elements to further improve them based on your feedback. Though this is rare, we also reserve the option to pull a feature entirely out of the product, even if you, as Insiders, have had the opportunity to try them.
Feedback
If you have any feedback or suggestions, you can submit them by clicking Help > Feedback.
Learn more about what other information you should include in your feedback to ensure it’s actionable and reaches the right people.
We’re excited to hear from you! Sign up for the Office Insider newsletter , and you’ll get the latest information about Insider features in your inbox once a month.
Sorry, JavaScript must be enabled to use this app.
How to insert a word document into PowerPoint: Step-by-Step Guide
Inserting a Word document into PowerPoint can be a game-changer when you’re trying to create a dynamic presentation. With just a few clicks, you can integrate all the information from a Word doc into your slides, making it easier for your audience to follow along. So, let’s dive in and learn how to do it!
Step by Step Tutorial on How to Insert a Word Document into PowerPoint
Before we jump into the steps, know that inserting a Word document will save you loads of time copying and pasting text. You can insert the whole document, or just parts of it, into your presentation.
Step 1: Open your PowerPoint presentation
To start, open the PowerPoint presentation where you want to insert the Word document.
Opening PowerPoint is as simple as clicking on the icon on your desktop or searching for it in your computer’s search bar. Once the program is open, you can either create a new presentation or open an existing one where you want to insert the document.
Step 2: Click on the "Insert" tab
Look for the "Insert" tab at the top of the PowerPoint window and click on it.
The "Insert" tab is where all the magic happens. It’s where you can add all sorts of things to your slides, like pictures, charts, and yes, documents!
Step 3: Select "Object" in the "Text" group
Within the "Insert" tab, you’ll find a group labeled "Text." Click on "Object" located in this group.
When you click on "Object," a dialog box will pop up that offers you several options for what kind of object you want to insert. This is where you’ll be able to insert your Word document.
Step 4: Choose "Create from file" and browse for your Word document
In the dialog box, select "Create from file," then click "Browse" to find and select your Word document.
Choosing "Create from file" allows you to insert the document as is, without any need to modify it first. Once you’ve found the file, select it and click "OK."
Step 5: Decide whether to link to the Word document
You have the option to link to the Word document. If you choose this, any changes made to the Word file will update in PowerPoint.
Linking to the Word document can be handy if you’re working on a document that’s frequently updated. However, if the file is final, you might not want to link it.
Step 6: Click "OK" to insert the Word document into your slide
After making your choice about linking, click "OK," and your Word document will be inserted into your PowerPoint slide.
And just like that, your document is now a part of your PowerPoint presentation! You can resize and move the object around on your slide to fit your layout.
After completing these steps, your Word document will be successfully inserted into your PowerPoint presentation. You can now manipulate the document within your slide, zoom in on specific sections, or scroll through the pages.
Tips for Inserting a Word Document into PowerPoint
- Make sure your Word document is finalized before inserting it to avoid unnecessary edits in PowerPoint.
- If you link the Word document, remember that any changes made to the original file will reflect in the presentation.
- Keep your Word document short and concise; lengthy documents can be overwhelming in a presentation.
- Consider breaking up the document into sections and inserting them on different slides for clarity.
- Use the "Format Object" options in PowerPoint to enhance the inserted document’s appearance with borders or effects.
Frequently Asked Questions
Can i edit the word document once it’s inserted into powerpoint.
No, you can’t directly edit the Word document in PowerPoint. You’ll need to edit the original Word file and then re-insert or update the link in PowerPoint.
Will the formatting from the Word document transfer over to PowerPoint?
Yes, most formatting will transfer over, but some complex elements may not appear exactly as they do in Word.
What if I only want to insert part of the Word document?
You can either edit the Word document before inserting it or take a screenshot of the part you want and insert it as an image.
Can I insert a Word document into PowerPoint on a Mac?
Yes, the process is similar on a Mac. You’ll use the "Insert" tab and the "Object" option to insert the Word document.
Is it possible to insert a Word document into an existing text box in PowerPoint?
No, you cannot insert a Word document into an existing text box. The document is inserted as an object that can be resized and moved, but not within a text box.
- Open your PowerPoint presentation
- Click on the "Insert" tab
- Select "Object" in the "Text" group
- Choose "Create from file" and browse for your Word document
- Decide whether to link to the Word document
- Click "OK" to insert the Word document into your slide
Inserting a Word document into PowerPoint is a seamless way to enhance your presentation without the hassle of manually copying text. It’s a straightforward process that can save you time and keep your slides looking professional and uniform. Whether you’re presenting in a classroom, a boardroom, or at a conference, the ability to incorporate a Word document directly into your PowerPoint slides is an invaluable skill.
Remember, once inserted, treat the document as you would any other element in PowerPoint. Resize it, position it, and make sure it complements your presentation’s overall flow. And don’t forget, if you link the document, any updates you make in Word will automatically reflect in PowerPoint, keeping your content fresh and up-to-date.
Now that you know how to insert a word document into PowerPoint, start integrating your reports, essays, and other documents into your presentations to create a more dynamic and informative experience for your audience. Happy presenting!

Matt Jacobs has been working as an IT consultant for small businesses since receiving his Master’s degree in 2003. While he still does some consulting work, his primary focus now is on creating technology support content for SupportYourTech.com.
His work can be found on many websites and focuses on topics such as Microsoft Office, Apple devices, Android devices, Photoshop, and more.
Share this:
- Click to share on Twitter (Opens in new window)
- Click to share on Facebook (Opens in new window)
Related Posts
- How to Rotate a Powerpoint Slide Presentation
- How to Insert Word Doc into PowerPoint: A Step-by-Step Guide
- How to Download a Google Slides Presentation as a Powerpoint File
- How to Insert an Excel Spreadsheet Into Powerpoint: A Step-by-Step Guide
- How to Do a Powerpoint Google Slides Presentation Conversion
- How to Make Google Slides Vertical (5 Quick Steps)
- How to Insert Slides from Another Presentation: Powerpoint 2024 Guide
- How to Add a Hyperlink on Google Slides
- How to Add a New Slide in Google Slides: A Step-by-Step Guide
- How to Delete a Slide in Powerpoint 2010: Step-by-Step Guide
- How to Merge Files in Powerpoint: A Step-by-Step Guide
- How to Delete Multiple Slides in Google Slides: A Step-by-Step Guide
- How to Hide a Slide in Powerpoint 2010: A Step-by-Step Guide
- How to Make a Powerpoint Slide Vertical in Powerpoint 2013: A Step-by-Step Guide
- How to Convert Powerpoint to Google Slides: A Tech Solution
- How to Remove Slide Numbers in Powerpoint 2019: Easy Steps
- How to Insert a File Into a Word 2013 Document: A Step-by-Step Guide
- How to Duplicate a Slide in Powerpoint: A Step-by-Step Guide
- How to End Powerpoint on Last Slide in Powerpoint 2010: A Step-by-Step Guide
- How to Insert a Google Slides Page Number: Step-by-Step Guide
Get Our Free Newsletter
How-to guides and tech deals
You may opt out at any time. Read our Privacy Policy
- Billing Plan
- Payment Method
- Notifications
- OCR Converter
- Video Converter
- Audio Converter
- E-book Converter
- Image Converter
- Archive Converter
- Vector Converter
- Document Converter
- Video to MP3
- PDF Converter
- Image to PDF
- Image to Word
- Unit Converter
- Time Converter
- Video Compressor
- Image Compressor
- GIF Compressor
- MP3 Compressor
- WAV Compressor
- Compress PDF
- Compress JPEG
- Compress PNG
- Video to GIF
- WEBM to GIF
- APNG to GIF
- GIF to APNG
- Video Trimmer
- API Job Builder
- API Documentation
- File Conversion API
- Image Conversion API
- Audio Conversion API
- Document Conversion API
- PDF Conversion API
- MP4 Conversion API
- Video Conversion API
- JPG to PDF API
- Video to MP3 API
- HEIC to JPG API
- PDF to JPG API
- Webp to PNG API
- PDF to WORD API
- MP4 to MP3 API
- Webp to JPG API
- WORD to PDF API
- HTML to PDF API
- Website Screenshot API
- Video Compression API
- Compress PDF API
- Image Compression API
PPT to WORD Converter
Convert PPT to WORD online, for free.
- From Device
- From Dropbox
- From Google Drive
- From OneDrive

Drop any files here!
- Reset all options
- Apply from Preset
- Save as Preset
How to Convert PPT to WORD?
- Click the “Choose Files” button to select your PPT files.
- Click the “Convert to WORD” button to start the conversion.
- When the status change to “Done” click the “Download WORD” button
Easy to Use
Simply upload your PPT files and click the convert button. You can also batch convert PPT to WORD format.
Best Quality
We use both open source and custom software to make sure our conversions are of the highest quality. In most cases, you can fine-tune conversion parameters using “Advanced Settings” (optional, look for the icon).
Free & Secure
Our PPT to WORD Converter is free and works on any web browser. We guarantee file security and privacy. Files are protected with 256-bit SSL encryption and automatically delete after a few hours.
- MP4 Converter
- MP3 Converter
- HEIC to JPG
Document & Ebook
- PDF to Word
- EPUB to PDF
- EPUB to Mobi
Archive & Time
- Pound to KG
- KG to Pound
- Feet to Meter
- Collage Maker
- Image Resizer
- Color Picker
Mobile Apps
- Collage Maker Android
- Collage Maker iOS
- Image Converter Android
- Image Converter iOS
© FreeConvert.com v2.24 All rights reserved (2024)
- Bahasa Indonesia
How to Convert PowerPoint to Word: A Step-by-Step Guide
Converting a PowerPoint presentation to a Word document can be a useful skill, whether you’re looking to create handouts, collaborate on content, or just prefer the Word format. It’s a pretty straightforward process that involves a few simple steps using Microsoft Office’s built-in features. After reading this paragraph, you’ll have a basic understanding of how to convert your PowerPoint file into a Word document.
Step by Step Tutorial: Converting PowerPoint to Word
Before jumping into the steps, it’s important to understand that converting your PowerPoint to Word will create a new document that displays the content of your slides in Word format. This can be handy for editing or sharing in a more universally accessible format.
Step 1: Open your PowerPoint presentation
First things first, you need to have your PowerPoint presentation open. Make sure it’s the final version, as any changes made after conversion won’t be reflected in the Word document.
Opening your PowerPoint presentation is the initial step in the conversion process. Ensure that all the information you want to convert is included and that you’re satisfied with the layout and content of your slides.
Step 2: Click on ‘File’ in the top-left corner
Once your PowerPoint is open, you’ll need to access the File menu to begin the conversion process.
Clicking on ‘File’ will bring up a list of options, including ‘Save As’ and ‘Export,’ which are the two main routes you can take to convert your PowerPoint into a Word document.
Step 3: Select ‘Export’ from the drop-down menu
After clicking on ‘File,’ you’ll see an option labeled ‘Export.’ Click on this to move forward with the conversion.
In the ‘Export’ menu, you’ll find different options for how you can convert and save your PowerPoint presentation. You’ll want to look for ‘Create Handouts.’
Step 4: Choose ‘Create Handouts’
Within the Export menu, you’ll see an option to ‘Create Handouts.’ This is the feature that will allow you to convert your PowerPoint slides into a Word document.
When you choose ‘Create Handouts,’ a new menu will pop up, giving you a few different options for how your content will appear in the Word document.
Step 5: Select ‘Create Handouts in Microsoft Word’
Click on the ‘Create Handouts in Microsoft Word’ button to initiate the conversion process.
After clicking this button, you’ll be prompted to choose how you want the slides to be arranged in the Word document. You can choose to have slides with notes next to them, blank lines next to the slides for audience notes, or just the slides themselves.
Step 6: Choose your page layout and click ‘OK’
Decide how you want your slides to be laid out in the Word document. You can have them appear as thumbnail images with or without accompanying notes.
Once you’ve selected your desired layout, click ‘OK.’ The PowerPoint will then convert and open as a Word document, which might take a few moments depending on the size of your presentation.
After completing these steps, you’ll have a new Word document with the content of your PowerPoint slides. You can now edit, format, and save this document just like any other Word file.
Tips: Making the Most of Your PowerPoint to Word Conversion
- Save your PowerPoint presentation before starting the conversion process to ensure you don’t lose any work.
- Consider the layout of your slides and how they will translate to a Word document. Some complex designs might not convert cleanly.
- If you have extensive notes in your PowerPoint, make sure to choose a layout that includes these in the Word document.
- Review and edit your converted Word document to fix any formatting issues that may have arisen during conversion.
- Save your new Word document in a location you’ll remember, and consider giving it a descriptive name that differentiates it from the original PowerPoint file.
Frequently Asked Questions
What versions of microsoft office do i need to convert powerpoint to word.
You will need a version of Microsoft Office that includes both PowerPoint and Word. Generally, any version from Office 2007 onwards should have this capability.
Can I convert a PowerPoint to Word on a Mac?
Yes, the process is similar to the one described above for Windows. The menus might look slightly different, but the overall process is the same.
Will animations and transitions in PowerPoint transfer to Word?
No, animations and transitions are specific to PowerPoint. When you convert to Word, these will not be included in the document.
Can I convert a PDF of a PowerPoint presentation to Word?
While it’s not the same process, you can use a PDF converter tool to convert a PDF into a Word document. However, the formatting may not be as clean as converting directly from PowerPoint.
What should I do if my formatting looks off after converting?
You may need to manually adjust the formatting in your Word document. This could include fixing line breaks, image placement, and text formatting.
- Open your PowerPoint presentation.
- Click on ‘File’ in the top-left corner.
- Select ‘Export’ from the drop-down menu.
- Choose ‘Create Handouts’.
- Select ‘Create Handouts in Microsoft Word’.
- Choose your page layout and click ‘OK’.
Converting a PowerPoint presentation to a Word document is a useful skill that can make your content more accessible and easier to distribute. Whether you’re a student wanting to create study guides or a professional needing to share presentation notes, mastering this process can save you time and make your work more versatile. Remember, the key is to carefully choose the layout that best fits your needs and to make any necessary formatting adjustments once the conversion is complete. With these tips and steps in mind, you’re ready to convert your PowerPoint to Word with confidence.

Matthew Burleigh has been writing tech tutorials since 2008. His writing has appeared on dozens of different websites and been read over 50 million times.
After receiving his Bachelor’s and Master’s degrees in Computer Science he spent several years working in IT management for small businesses. However, he now works full time writing content online and creating websites.
His main writing topics include iPhones, Microsoft Office, Google Apps, Android, and Photoshop, but he has also written about many other tech topics as well.
Read his full bio here.
Share this:
Join our free newsletter.
Featured guides and deals
You may opt out at any time. Read our Privacy Policy
Related posts:
- Can I Convert My Powerpoint to Google Slides?
- How to Create Powerpoint Handouts in Microsoft Word: A Step-by-Step Guide
- How to Save Powerpoint as PDF with Notes
- How to Convert a PowerPoint to Word and Edit with Ease
- How to Check Word Count on Powerpoint 2010
- How to Convert PPT to Word: The Ultimate 2024 Guide
- How to Drag Slides From One PowerPoint to Another: A Step-by-Step Guide
- How to Convert PowerPoint Presentations to HTML: A Step-by-Step Guide
- How to Make a Powerpoint Slide Vertical in Powerpoint 2013
- How to Convert Google Slides to PDF
- How to Change a PowerPoint to a Handout Layout: A Step-by-Step Guide
- How to Set Time for Slides in Powerpoint
- How to Embed a Word Document Into PowerPoint 2000: A Step-by-Step Guide
- How to Convert an Adobe PDF to Word: A Step-by-Step Guide
- How to Convert HTML Pages Into Powerpoint: A Step-by-Step Guide
- How to Do Handout Formats on a PowerPoint for a Mac: Step-by-Step Guide
- How to Convert DBF to XLS: A Step-by-Step Guide
- How Do You Print Handouts in Powerpoint 2010?
- How to Change Hyperlink Color in Powerpoint 2010 (An Easy 5 Step Guide)
- How to Convert an Adobe Pagemaker 6.5 File to Word: A Step-by-Step Guide
- Irresistible Tech Gifts for That Special Dad
- Killer Smartphone Deals We Love
How to Add PowerPoint Slides Into a Word Document
Insert PowerPoint slides as individual images
- Brock University
What to Know
- In Word, go to Insert > Add from Files and select the PowerPoint file. Choose Insert Slide for each slide you want to add.
Use the Picture Format menu to adjust each inserted slide.
When you want to use PowerPoint slides in a Microsoft Word document, use the Add from Files tool to import one or more slides from a PowerPoint presentation as images to the Word file. We show you how to do it using Microsoft Word for Microsoft 365, Word 2019, Word 2016, and Word for Mac.
How to Insert PowerPoint Slides Into a Word Document
Slides from an existing PowerPoint presentation can be inserted as an image into a blank document or an existing document.
Open an existing or blank Word document, then position the cursor where you want to insert the PowerPoint slide.
Go to the Insert tab and select Add from Files .
Select the PowerPoint file that contains the slides you want to add to the Word document.
If the file isn't listed, select Show More Files to browse the filesystem and choose a file.
In the Insert From File panel, find the slide you want to insert as an image and select Insert Slide to insert it into the document.
The slide appears as an image. It can only be edited with photo tools.
Considerations
In old versions of Microsoft Office , it sometimes made sense to export PowerPoint content into Word to mark it up with the speaker's notes and other information. However, PowerPoint has advanced such that these workarounds no longer prove as helpful.
PowerPoint presentations can be exported in different formats including PDF, several image formats, several movie formats, and a rich-text outliner format. Use these export formats as an alternative to a multi-step Word process.
Get the Latest Tech News Delivered Every Day
- How to Make an Image Background Transparent in PowerPoint
- How to Add Page Numbers in PowerPoint
- Converting PowerPoint Presentations to Word Documents
- How to Merge PowerPoints
- Converting PowerPoint Slides to Word Documents
- How to Add a Background Picture to PowerPoint Slides
- Create Pictures From PowerPoint Slides
- How to Print PowerPoint Slides With Notes
- A Beginner's Guide to Text Wrap in PowerPoint
- How to Link or Insert Excel Files to Word Documents
- How to Make a PowerPoint Presentation
- How to Insert PDF Files Into PowerPoint Presentations
- Copy Slides to Another PowerPoint Presentation
- How to Add Pages to a PDF
- Use PowerPoint Slide Finder
- Insert a Picture Inside Text on a PowerPoint Slide
- Summarize PowerPoints with AI
- Summarize Word documents with AI
- Summarize PDF with AI
- Generate PowerPoints with AI from text
- Create Presentation with AI
- GPT for Presentations
- Chat with Document Groups
- Import files from Cloud
- Request Demo
- October 26, 2023
- Comments Off on Generate PowerPoint with AI from any Word document
- Artificial Intelligence
- Generate PowerPoint with AI from any Word document
We are excited to announce a new feature that allows you to generate PowerPoint presentations from any Word document! SlideSpeak uses the latest AI technology to analyze the content of your document and design professional slides for you.
In this post, we’ll walk through how to use this new feature step-by-step. Soon you’ll be creating stunning presentations with just a few clicks!
Microsoft itself has released a bunch of content around its new AI Copilot feature. In the most recent video they have talked about AI is going to change how we all work with PowerPoint, you can check it out here .
Quick note: if you’re looking for a guide to turn PDFs into stunning PowerPoints, check out our latest post: https://slidespeak.co/blog/2024/02/19/how-to-convert-pdfs-to-powerpoint-with-ai/
How generating PowerPoint with SlideSpeak works
Here is an overview of how SlideSpeak can turn your Word content into a PowerPoint presentation:
- Upload Document: Upload your Word doc to SlideSpeak.
- Review Document: See the document in the SlideSpeak interface. In chat, you can ask the AI questions about the content.
- Generate Presentation: Click the “Generate presentation” button to start creating the PowerPoint.
- AI Generates Slides: SlideSpeak’s AI will analyze the document and design slides based on the content. This may take a few minutes.
- Preview & Download: View a preview of the generated presentation and download the PowerPoint file.
Here’s a more detailed step-by-step tutorial:
Let’s go through this process step-by-step to see just how easy it is to create a PowerPoint presentation with SlideSpeak’s AI.
Step 1: Upload Your Document
Head over to the SlideSpeak App and upload your Word document. You can do this by clicking the upload button on the homepage and selecting your file.
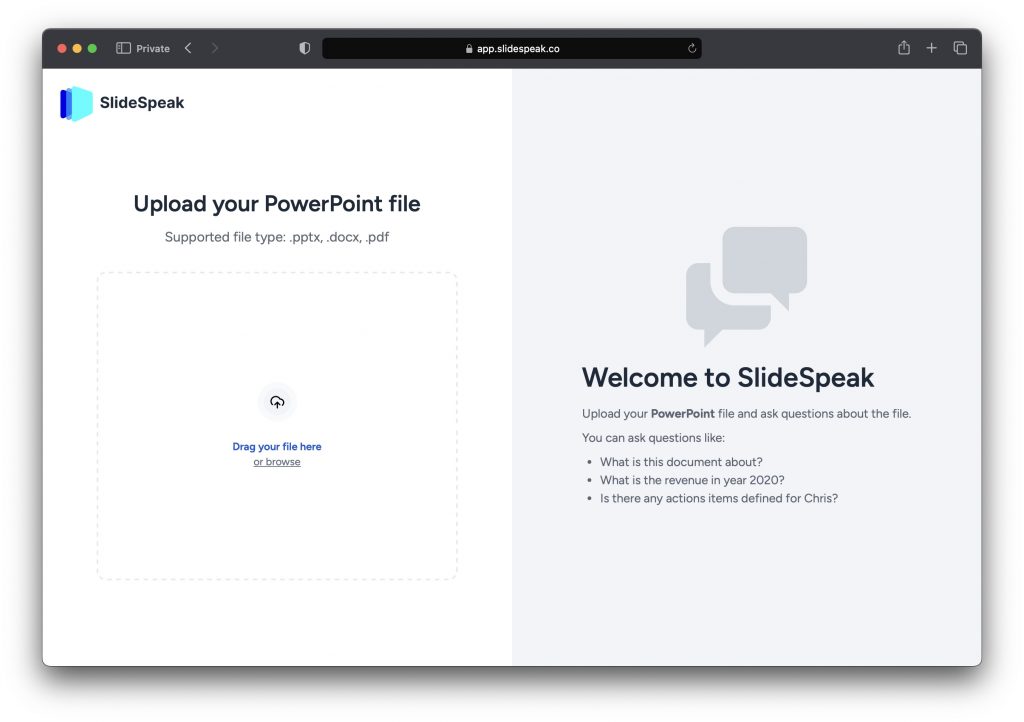
Once uploaded, you’ll see the content of your document appear in the SlideSpeak interface.
Step 2: Review the Document
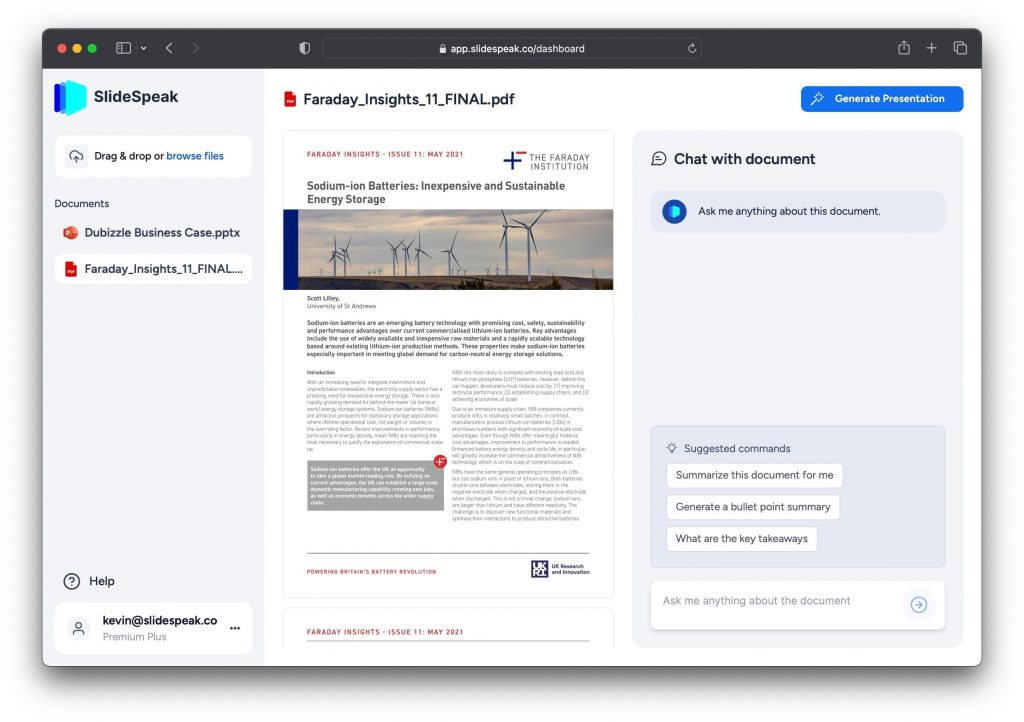
Now you can quickly review the document and get familiar with the content. If you have any questions, you can chat with SlideSpeak’s AI assistant in the sidebar.
Ask things like:
- What are the key points in this document?
- Generate me a summary for this document?
- How should this content be structured for a presentation?
The AI will provide helpful recommendations to improve the generated slides.
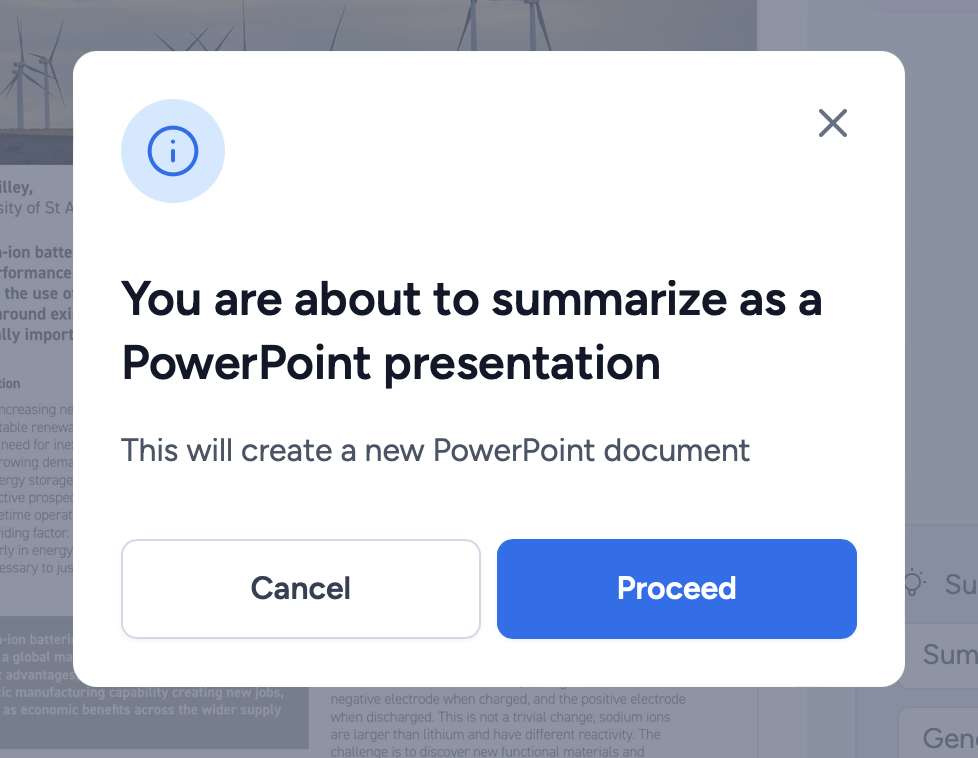
Step 3: Generate the Presentation
Once you’re ready, click the “Generate Presentation” button at the top right of the screen.

A dialog will pop up to confirm you want to start generating the PowerPoint. Click “Proceed”!
Step 4: AI Generates Slides
Now SlideSpeak’s AI technology will get to work analyzing your document and automatically designing professional PowerPoint slides. This may take a few minutes depending on the length of your document.
You’ll see a progress bar that keeps you updated on the status. Sit back and let the AI do the heavy lifting!

Step 5: Preview and Download
In just a few minutes, your new PowerPoint presentation will be ready! SlideSpeak will show you a preview of the slides the AI has designed.
You can flip through them to see how the AI extracted key points from your document and created stunning slides. If you’d like to make any tweaks, you can edit the slides here.
When you’re satisfied, click the download button to save the PowerPoint file to your computer.
Note: Downloading the full PowerPoint file is currently only available for paid SlideSpeak plans. On our free plan you can preview the slides online and download as images.
And that’s it! In just a few easy steps, SlideSpeak has turned your Word document into a professional, on-brand PowerPoint presentation thanks to the power of AI.
Generating PowerPoint slides from Word documents is a gamechanger for creating presentations quickly and easily. SlideSpeak makes it simple to upload your content and let advanced AI design the perfect slides for you.
With this new feature, you can now instantly convert your existing content into presentation decks that look fantastic. No more starting from scratch or wrestling with slide layouts in PowerPoint!
Try out generating AI-powered presentations from your Word files today with SlideSpeak!
What file formats can you generate a presentation from?
Currently, SlideSpeak supports generating PowerPoint presentations from Word documents (DOCX files) and PDF files. Simply upload one of these file types to have our AI technology design slides based on the content. Also check out our other blog post about how to create PowerPoint presentations from a PDF: https://slidespeak.co/blog/2024/02/19/how-to-convert-pdfs-to-powerpoint-with-ai/ .
Do you also support generating presentations for Google Slides?
Not directly, but you can easily transfer a generated PowerPoint file to Google Slides. First, generate the presentation in SlideSpeak and download the PowerPoint file. Then head over to Google Slides and go to File > Import, selecting the PowerPoint file to bring it into Slides. See this help article for step-by-step instructions.
Are there any other designs for the generated presentations?
Right now our AI uses one professional design template to generate the slides. We plan to add support for more slide templates and customization options in the future, but for now it’s a clean, modern template.
Can you directly generate PowerPoint presentations with ChatGPT?
No, ChatGPT is a conversational AI that only handles text interactions. It does not support uploading files or generating slide decks directly. SlideSpeak uses more advanced AI technology tailored for powerpoint generation from documents.
Let me know if you would like me to expand or modify the FAQ section in any way. I’m happy to add more questions and answers as needed!
How long does it take to generate a presentation?
The time it takes to generate a PowerPoint presentation depends on the length of your uploaded Word/PDF document. For a 10-15 page document, expect it to take around 5 minutes. Longer documents with 50+ pages could take 10-15 minutes to generate slides. You’ll see a progress bar after clicking the generate button so you know the status.
For a quick summary of your documents you can also just use our AI summary feature, check it out here .
What elements from my document will be converted into slides?
Our AI will analyze headings, text paragraphs, images, tables, and lists in your document. It identifies key points, summaries, and data to structure into individual slides with appropriate text, bullet points and visuals. The goal is to capture all the important information and structure it effectively for a presentation.
Related Post

How to create PowerPoint from Excel

- May 13, 2024
- Comments Off on How to create PowerPoint from Excel

How to Generate Multiple-Choice Questions from a PDF with AI
- Comments Off on How to Generate Multiple-Choice Questions from a PDF with AI

Add Speaker Notes with AI to Presentations
- April 18, 2024
- Comments Off on Add Speaker Notes with AI to Presentations
AI generate presentations and summaries.
Summarize and generate PowerPoint files with ChatGPT. Upload, chat, and gain new insights from your presentations. Use SlideSpeak AI to boost your productivity.
- Help Center
- Affiliate Program 💵
- Call us: +1 (512) 777-1759
- Compress PowerPoint
- Convert PowerPoint to PDF
- Convert PowerPoint to PSD
- Convert PowerPoint to Figma
- Convert PDF to Word
- Terms of Service
AI Presentation Generator
AI Presentation Maker
AI Image Generator
WORD to PPT
Reports to PPT
Outline to PPT
Research Papers to PPT
PDF Summarizer AI
WORD Summarizer AI
File Summarizer AI
Document Summarizer AI
Convert to PPT
AI Summarizer
Convert WORD to PPT with AI
Summarize a WORD Document into a PowerPoint Presentation
Select and upload a Word document that needs to be summarized for a presentation.

Choose from a variety of presentation template styles and select the one that best represents your content.

Relax and Watch the Magic Happen. Sit back and let AI do the heavy lifting for you! Get a customized design and stunning presentation filled with informative and professional content.

You can then edit the presentation using your preferred application, such as MS PowerPoint or Google Slides, or with our online AI Presentation Maker.

Superfast presentation creation
Join 500K professionals & educators
✓ Create with AI ✓ Convert to PPT with AI ✓ Compatible with PowerPoint ✓ Built in templates ✓ Auto Layout
How-To Geek
I use this awesome microsoft word feature for distraction-free writing.
Write with no distractions!
Quick Links
What is focus mode, enable focus mode for distraction-free writing, access ribbon without leaving focus mode, change background in the focus mode, turn off focus mode when formatting documents, key takeaways.
- Focus mode is a handy feature in Microsoft Word that hides the ribbon and other elements from the interface, allowing you to write without distractions.
- To enable Focus mode, go to the "View" tab and click on "Focus." You can also click the "Focus" button in the bottom-right corner. To exit it, press the Escape key.
- You can temporarily make the ribbon appear by moving the cursor to the top edge of Microsoft Word. Also, you can change the background of the white space on the sides of the pages.
The distractions caused by the ribbon, sidebar, and other elements in Microsoft Word's default interface have always made writing long documents cumbersome for me. This changed when I began using Focus mode, a feature that eliminates this clutter and provides a clean, plain interface for writing.
As the name suggests, Focus mode simplifies the workspace by concealing the ribbon and other interface elements in Microsoft Word, leaving only the document visible on the screen. It is a helpful feature tailored for writers, students, and professionals who create lengthy documents.
With fewer distractions and a clear, uncluttered view of the document, I find it much easier to concentrate on my writing.
To enable Focus mode on Windows, open the document you wish to work on in Microsoft Word. Then, navigate to the "View" tab in the ribbon. Within the Immersive section, click on "Focus." Alternatively, you can quickly enable Focus mode by clicking on the "Focus" button located at the bottom-right corner of the screen.
On macOS, go to the "View" menu and click "Focus." You can also activate Focus mode by clicking on the "Focus" button in the bottom-right corner of the window.
Microsoft Word lets you access the ribbon without having to exit Focus mode each time you need to adjust formatting or use other options. Simply move your mouse to the top edge of the screen to reveal the ribbon.
Once you're finished using the commands, drag the cursor down from the top edge, and the ribbon will automatically disappear, returning you to distraction-free writing.
While Focus mode hides unnecessary elements from view, there's one bit of clutter that you can't eliminate: the free space on the sides of pages. However, a workaround I've found helpful is to change the background of this space to Birch, creating the sensation of writing on a piece of paper resting on a wooden table.
To change the background in Focus mode, hover over the top edge of the screen to reveal the ribbon, then navigate to the "View" tab. Expand the "Background" menu and select "Birch."
It's worth noting that this background change is temporary; once you exit Focus mode, it reverts to the default page color you've selected .
While Focus Mode in Microsoft Word is great for improving concentration while writing, remember to turn it off when formatting your document. This ensures the ribbon stays visible, giving you continuous access to formatting options. This way, you won't have to reveal the ribbon intermittently by hovering over the top edge of the screen.
To exit Focus mode, move your cursor to the top of the screen and click on the "Focus" option (on Windows) or "Exit" button (on macOS). Alternatively, you can press the Escape key.
Hopefully, you now clearly understand what the Focus mode does, how to enable it, and how to exit it when you're finished writing. If you haven't been using the Focus mode in Microsoft Word, I encourage you to try it and see how it boosts your productivity and helps you maintain concentration.

Our expert, award-winning staff selects the products we cover and rigorously researches and tests our top picks. If you buy through our links, we may get a commission. Reviews ethics statement
- Services & Software
How to Get Microsoft 365 for Free
You could get Microsoft Word, Excel, PowerPoint and other apps for free, saving up to $100 a year with these tips.

- National Silver Azbee Award for Impact/Investigative Journalism; National Gold Azbee Award for Online Single Topic Coverage by a Team; National Bronze Azbee Award for Web Feature Series

- Apple software beta tester, "Helps make our computers and phones work!" - Zach's grandparents

You can use Microsoft Office apps for free.
Microsoft 365 is a productivity suite that includes programs such as Word, PowerPoint, Outlook and OneDrive cloud storage. Because these tools are useful for work and school, you’ll likely want access to them.
A paid Microsoft 365 membership is the most common way to enjoy these apps, and you’ve got multiple tiers to pick from, starting with the $2 a month or $20 a year Microsoft 365 Basic plan. Normally, you’ll pay anywhere from $20 to $100 annually for a subscription depending on the plan you pick. You can sometimes bag Microsoft 365 at no cost.
Here’s how to get Microsoft 365 for free.
Get Microsoft Office 365 Education free if you're a student or a teacher
Say you're a student, teacher or faculty member with an active school email address. You're probably eligible to get access to Office 365 for free through Microsoft, with access to Word, Excel, PowerPoint, OneNote and Teams, plus other classroom tools.
All you have to do is punch in your school email address on this page on Microsoft's website: Office 365 Education . In many cases, you'll be instantly granted access thanks to an automated verification process. If you attend an institution that needs to be verified, it might take up to a month to confirm your eligibility.
College students can also get Microsoft 365 Personal for $3 a month with a valid school email address.

More Tech Tips
- The Best Windows 11 Features
- Ways to Help Your Old Laptop Last Longer
- 5 Ways to Make Your Chromebook More Secure
How to get Microsoft 365 for free if you're not a student or faculty member
Not everyone can take advantage of an email address through an academic institution to get the Microsoft Office suite at no cost. Thankfully, anyone can get a one-month free trial of Microsoft 365. You do need to enter a credit card number. If you don't cancel your subscription before the month is up, you'll be charged $100 for a one-year subscription to Microsoft 365 Family (formerly called Office 365 Home).
The good news is that you can access a number of apps online for free, including Word, Excel, PowerPoint, OneDrive, Outlook, Calendar, My Content, Skype, Designer and Clipchamp as long as you don't need the full suite of Microsoft 365 tools. Here's how to get them:
1 . Go to Microsoft365.com .
2 . Click Sign up for the free version of Office under the "Sign in" button.
3 . Log in to your Microsoft account or create one for free . If you already have a Windows, Skype or Xbox Live login, you have an active Microsoft account.
4 . Select the app you want to use and save your work in the cloud with OneDrive.

Use the browser-based version of the Microsoft Word app for free.
So what's the catch for the free version?
You might be saying, "Wait a minute, if I can get all of those apps for free, why pay for Microsoft 365 in the first place?" The functionality of the free apps is limited, so they only run in your web browser and you can only use them while you're actively connected to the internet -- there’s no online version. They also have fewer features than the full Microsoft 365 versions.
There are still benefits to the free version, including the ability to share links to your work and collaborate in real-time, similar to what the Google Workspace (formerly G Suite) productivity tools allow. If you're looking for basic versions of each of these apps, the free version should work well for you.
For more productivity coverage, check out what Microsoft 365 Basic offers customers , all of the best features in Windows 11 and how to take screenshots in Windows 10 or 11 . You can also take a look at CNET's list of the best Windows laptops .

- Yes, You Really Need a Password Manager. Here's How to Set One Up Today
- If You Value Your Privacy, Change These Browser Settings ASAP
- Low Storage on Windows 11? Here's How to Free Up Disk Space on Your PC
Services and Software Guides
- Best iPhone VPN
- Best Free VPN
- Best Android VPN
- Best Mac VPN
- Best Mobile VPN
- Best VPN for Firestick
- Best VPN for Windows
- Fastest VPN
- Best Cheap VPN
- Best Password Manager
- Best Antivirus
- Best Identity Theft Protection
- Best LastPass Alternative
- Best Live TV Streaming Service
- Best Streaming Service
- Best Free TV Streaming Service
- Best Music Streaming Services
- Best Web Hosting
- Best Minecraft Server Hosting
- Best Website Builder
- Best Dating Sites
- Best Language Learning Apps
- Best Weather App
- Best Stargazing Apps
- Best Cloud Storage
- Best Resume Writing Services
- New Coverage on Operating Systems
Ctrl/Cmd + cliquer pour sélectionner jusqu’à 3 langues cibles
Choisir un document
- PDF scannés inclus
- HTML (page HTML)
- Texte (fichiers textes bruts)
- PHP (fichiers PO ou POT)
- .NET (fichiers RESX)
- Java (fichiers PROPERTIES)
- Flex (fichiers PROPERTIES)
- iPhone (fichiers STRING)
- Android (fichiers XML)
- Fichiers XML personnalisés
- Tout site web exporté en fichiers XML
- CSV (fichiers délimités par un séparateur)

Traduction de vers
La traduction a échoué
Traduction de à
Votre document semble être en
- Analyse du fichier en cours
- Fichier analysé
- Pages numérisées détectées Texte extrait via OCR
- Vérification de la langue et du format en cours
- Vérification de la langue et du format terminée
- Conversion du .pdf en .docx (Word) en cours
- Conversion du .pdf en .docx (Word) terminée
- Traduction en cours
- Traduction terminée
- Finalisation
Votre PDF compte pages tandis que votre abonnement se limite à 10 pages par PDF
Traduction % terminée
sur mots traduits
- Télécharger le DOCX converti
- Télécharger le fichier source
- Télécharger tous les fichiers (archive)
Crédits additionnels requis
Pour finaliser la traduction, veuillez acheter des crédits additionnels.
Finaliser la traduction
Vous pouvez maintenant finaliser votre traduction
Traduction finalisée de à mots traduits
- Télécharger le PDF traduit
Inviter un réviseur
Rejoignez nos utilisateurs et profitez d'une traduction de qualité exceptionnelle
Merci beaucoup! Tellement impressionnée par l’IA de votre site.
Mes collègues étaient impressionnés par la qualité des traductions PowerPoint réalisées avec Reverso Documents. Certains se sont inscrits à leur tour !
J’ai pu traduire mon livre avec Reverso Documents. Puis, il m’a suffit de le réviser sur la plateforme avant publication. Cela m’a fait gagner beaucoup de temps.
Traduisez facilement un Word, PDF, PowerPoint, Excel...
- Importez votre document : contrat, livre, présentation, ...
- Choisissez la langue de traduction : Anglais , Espagnol , Français , Allemand , Arabe , Russe et beaucoup d'autres.
- Téléchargez votre document traduit avec une mise en page préservée. De plus, la traduction convertit un PDF en Word.
Une traduction de qualité exceptionnelle
Reposez-vous sur la traduction neuronale Reverso qui combine les dernières avancées en intelligence artificielle (IA) et une expérience unique de plus de 10 ans
Révisez votre traduction
Révisez et éditez votre traduction grâce à une interface simple, tout-en-un, avec des dictionnaires contextuels et des synonymes intégrés. Vous pouvez même inviter un réviseur externe ou un traducteur pour vérifier ou peaufiner votre traduction. Sauvegardez vos modifications et utilisez cette mémoire de traduction pour vos prochains projets.
Votre contenu et vos données sont en sécurité
Reverso est une société européenne, qui applique les réglementations de protection des données personnelles. Votre contenu reste votre propriété entière et exclusive.
Traduction instantanée. Sans carte de crédit.
Une qualité de traduction automatique exceptionnelle
Société européenne, données et contenus en sécurité
Edition collaborative et mémoire de traduction
Limite de taille
Le téléchargement de documents est limité à 120Mo.
Confirmation
Etes-vous sûr de vouloir supprimer ce projet ? Toutes vos révisions seront supprimées et il sera complètement effacé!
Etes-vous sûr de vouloir annuler cette traduction ?
Modifier le nom du projet
Message d'erreur.
Oups, quelque chose s'est mal passé. Veuillez réessayer
Votre compte a été supprimé avec succès. Nous espérons vous revoir bientôt sur Reverso Documents !
Vous pouvez inviter quelqu'un que vous connaissez pour faire des révisions et gérer avec lui les détails de son travail.
Invitez un réviseur que vous connaissez
Un réviseur est généralement une personne compétente dans la langue cible connaissant votre domaine ou votre document.
Le réviseur travaillera en ligne seulement.
A tout moment, vous pouvez suivre les modifications effectuées et décider de les prendre en compte ou pas.
Vous pouvez gérer les réviseurs depuis la page << Mon Compte >>
Êtes-vous sûr de vouloir supprimer les documents sélectionnés ?
Êtes-vous sûr de vouloir supprimer tous vos documents?
Inscrivez-vous pour continuer
Inscrivez-vous pour traduire votre document.
Free All-in-One Office Suite with PDF Editor
Edit PDFs like Word
Convert, merge, split, scan, and sign PDFs
More than PDF: Use Word, Excel, and PPT for FREE
Windows • MacOS • Linux • iOS • Android

Select areas that need to improve
- Didn't match my interface
- Too technical or incomprehensible
- Incorrect operation instructions
- Incomplete instructions on this function
Fields marked * are required please
Please leave your suggestions below
- Quick Tutorials
- Practical Skills
How to Convert PPT to PDF for Teachers
As teachers, we often find ourselves juggling countless responsibilities, from lesson planning to grading assignments. Amidst this whirlwind of tasks, converting PowerPoint presentations to PDFs can sometimes feel like an unnecessary hurdle. But trust me, I've been there, and I understand the frustration. This guide is your one-stop shop for converting PPTs to PDFs with ease, ensuring your valuable content reaches your audience seamlessly.
Reasons for Converting PPT to PDF
Let's start with a fundamental truth: PowerPoint (PPT) and PDF are like two different languages – they simply can't understand each other. Trying to open a PPT file in a PDF viewer will lead to a compatibility error.
To bridge this gap and ensure your audience can seamlessly access and engage with your presentation content, converting PPT to PDF is your secret weapon. Here's why this conversion is a game-changer for teachers:
Print Perfection:
The Advantage: PDFs are designed for printing. They guarantee that your slides and handouts look exactly as they do on your screen, with no formatting mishaps.
In the Classroom: Imagine distributing crisp, clear handouts of your lecture notes. Or picture yourself confidently presenting at a workshop with perfectly formatted materials. Converting to PDF makes this a reality, ensuring your printed materials look professional and polished.
Presentation Prowess:
The Advantage: PDFs are the universal language of document sharing. They maintain consistent formatting across different devices and software, eliminating the dreaded "it looks different on my computer" issue.
Sharing with Confidence: Whether you're emailing lesson materials to students or sharing presentation slides with colleagues, PDFs ensure that everyone sees the same high-quality visuals and layout, regardless of their device or operating system.
Universal Compatibility:
The Advantage: PDFs are universally compatible, meaning they can be opened and viewed on virtually any device with a PDF reader.
Reaching Every Student: This is a game-changer in today's diverse classrooms. Students can access PDF presentations on their laptops, tablets, or smartphones, ensuring that everyone stays on the same page, no matter their device preference.
Converting PPT to PDF Online Using WPS PDF Tools
Converting PowerPoint presentations to PDF format is made easy and convenient with WPS PDF Tools. This online tool provides a simple and efficient way to convert your PPT files to PDF, and the best part is, it's completely free. Follow these step-by-step instructions along with images to convert your PPT to PDF effortlessly:
Step 1: Access WPS PDF Tools Visit the WPS PDF Tools website by clicking on the following link: WPS PDF Tools
Step 2: Upload Your PPT File Once you're on the WPS PDF Tools website, you'll see a clear interface with a "Choose File" button.
Step 3: Convert to PDF After the file has finished uploading, simply click on the "Convert" button. WPS PDF Tools will then process your PPT file and convert it into a PDF format.
Step 4: Download Your PDF Once the conversion process is complete, you'll be provided with a download link for your newly converted PDF file. Click on the "Download" button to save the PDF file to your computer.
Step 5: Enjoy Your Converted PDF Congratulations! You've successfully converted your PowerPoint presentation to PDF format using WPS PDF Tools. You can now use your PDF file for printing, sharing, or any other purposes you may have.
By following these simple steps, you can quickly and efficiently convert your PPT files to PDF format using WPS PDF Tools, all for free. Say goodbye to compatibility issues and hello to seamless document conversion.
Converting PPT to PDF on Desktop or Mobile
For those who frequently need to convert PowerPoint presentations to PDF, WPS Office proves to be an excellent choice. Whether you're working on a desktop or mobile device, WPS offers seamless conversion capabilities. Let's explore how to convert PPT to PDF using WPS Office on both desktop and mobile platforms:
If you're using a Windows or Mac desktop, WPS Office software provides an efficient solution for converting PPT to PDF. Follow these simple steps:
Step 1: Open Your Presentation
First, open WPS Office on your desktop. Navigate to the presentation you want to convert by clicking on the 'Open' button or by selecting the file from the 'Recent Documents' section.
Step 2: Access the Export Option
Once your presentation is open, go to the 'File' menu located at the top-left corner of the screen. This will open a dropdown menu with several options.
Step 3: Select 'Export to PDF'
In the dropdown menu, look for the 'Export to PDF' option. This might be under a sub-menu such as 'Export' or 'Save As', depending on the version of WPS Office you are using.
Step 4: Configure PDF Settings
After selecting 'Export to PDF', a new window will appear, allowing you to customize various settings for your PDF file. Here are some key settings you might consider adjusting:
Range: You can choose to export the entire presentation or only specific slides by specifying a range.
Output Format: Ensure the format is set to PDF.
Options: Depending on your needs, you can tweak additional settings like including or excluding hidden slides, exporting only notes, or adjusting the resolution for images.
Step 5: Choose the Destination Folder
Decide where you want to save the PDF file. You can navigate through your computer’s directories to select the desired folder. Make sure to give your file a recognizable name to avoid any confusion later.
Step 6: Export the File
Once all settings are configured, click on the 'Export' or 'Save' button. The conversion process will begin, and within a few moments, your PDF file will be ready in the chosen directory.
For users on the go, whether you have an Android or iOS device, the WPS Office app offers convenient conversion capabilities. Follow these steps to convert PPT to PDF on your mobile device:
Open the WPS Office app on your mobile device. Navigate to and open the PowerPoint presentation you want to convert.
Tap on the 'Tools' or 'Menu' icon, typically found in the bottom or top corner of the screen (it often looks like three dots or lines).
Step 3: Select Export to PDF
From the menu that appears, select Output as PDF.
Step 4: Export the File
Tap the 'Export' or 'Save' button. The app will convert your presentation to a PDF and save it in the chosen location.
By following these straightforward steps, you can effortlessly convert PPT to PDF using WPS Office on both desktop and mobile devices, ensuring compatibility and ease of use wherever you go.
Use Word, Excel, and PPT for FREE, No Ads.
Edit PDF files with the powerful PDF toolkit.
Microsoft-like interface. Easy to learn. 100% Compatibility.
Boost your productivity with WPS's abundant free Word, Excel, PPT, and CV templates.
Easy Conversion of Documents with WPS Office
WPS Office not only excels in converting PowerPoint presentations to PDF but also provides seamless conversion for a wide range of document formats. With its intuitive interface and powerful features, WPS Office ensures that your documents are easily accessible and compatible across platforms. Plus, WPS documents are fully compatible with Microsoft Office formats, eliminating any compatibility concerns.
Example Converting Word to PDF : Converting Word documents to PDF format is a straightforward process with WPS Office. Follow these steps:
Step 1: Open Your Document: Launch the WPS Office app and locate your Word document.
Step 2: Access Export Option: Look for the export function, usually denoted by an arrow or labeled "Tool”
Step 3: Select PDF Format: Choose "PDF" as the output format from the menu.
Step 4: Configure Settings (Optional): Adjust any additional settings if needed, such as layout or security.
Step 5: Choose Destination: Select where you want to save the PDF file.
Step 6: Convert and Save: Initiate the conversion process. Once done, confirm the PDF is saved correctly.
With WPS Office, converting documents to PDF format and ensuring compatibility across platforms has never been easier. Whether you're a teacher, student, or professional, WPS Office provides the tools you need to streamline your document conversion tasks and enhance productivity.
Perfecting Your PDF with WPS AI.
In the realm of education, leveraging the full potential of PDF documents is crucial for educators aiming for excellence in their instructional materials and administrative tasks. With WPS AI at your disposal, enhancing and perfecting your PDFs becomes not just a possibility, but a seamless reality tailored to meet the unique needs of teachers. Let's explore some of the recommended features of WPS AI PDF specifically designed for educators:
1. Rapid Summarization For Lesson Plans: WPS AI PDF offers a powerful feature that swiftly summarizes documents such as lesson plans. By condensing lengthy content into concise summaries, this feature saves time and enhances efficiency for teachers.

2.Keyword Extraction For Study Guides: The AI-powered keyword extraction feature efficiently extracts terms and concepts from study guides. This aids teachers in identifying and emphasizing essential points for student comprehension,ultimately facilitating effective teaching and learning.

3. Enhanced Search For Curriculum: With advanced search capabilities, WPS AI PDF enables teachers to quickly locate specific content within curriculum documents. This feature streamlines the process of finding relevant information, allowing educators to focus more time on teaching and less time on searching.

4.Seamless Conversion for Classroom Materials: WPS AI PDF seamlessly converts teaching materials such as presentations, handouts and worksheets to PDF format while preserving formatting and quality. This ensures that educators can create professional-looking classroom materials with ease.
By using WPS AI PDF, educators can greatly improve how they manage and prepare documents, which in turn enriches the teaching and learning experience. With a range of advanced features designed specifically for educators, WPS Office is an essential tool for streamlining educational workflows and achieving academic excellence. Keep in mind that some of these features are exclusive to Pro and Ultimate versions.
Q1. How can I Save PowerPoint Presentations as PDF files?
You can save your PowerPoint presentation as a PDF by clicking on "File" > "Save As" > Selecting "PDF (*.pdf)" from the dropdown menu and then clicking "Save".
Q2. How can I Convert PowerPoint to PDF and Video?
To convert your PowerPoint to PDF, follow the same steps as saving as PDF. To convert to video, click on "File" > "Export" > "Create a Video", select your options, and click "Create Video".
Converting PPT to PDF is an essential skill for teachers in today's digital age. Whether you're using free online tools like WPS PDF Tools or the versatile WPS Office software, the process is simple and efficient. By converting your PowerPoint presentations to PDFs, you ensure compatibility, accessibility, and professional presentation of your educational materials. And with the added power of WPS AI, you can take your PDFs to the next level, optimizing them for both instructional and administrative purposes.
- 1. 10 Professional Teaching Presentation Examples for Teachers Teach with Ease and Style!
- 2. How to Compress PDF [For Teachers]
- 3. Delete Pages from PDF for Teachers
- 4. How to Create a Fillable Form in Word [For Teachers]
- 5. How to Edit a PDF [For Teachers]
- 6. How to Convert PDF to Word [For Teachers]
15 years of office industry experience, tech lover and copywriter. Follow me for product reviews, comparisons, and recommendations for new apps and software.
QBE Foundation opens applications for a selection of $40,000 local grants
The QBE Foundation has today opened applications for its annual local grants program, offering charities and community organisations working in both climate resilience and inclusion, the opportunity to receive a $40,000 grant.
Grants of $40,000 each will be provided to high impact community initiatives operating in Australia that support community organisations.
Chris Esson, QBE Foundation Co-Chair, highlighted that the grants are an important way for QBE to support charities who are working to make a difference in areas of need.
“At QBE we have witnessed the benefits brought about by previous grant recipients and eagerly anticipate the opportunity to drive even more positive change through this year's program.
“We believe that promoting climate resilience and fostering inclusivity are fundamental to our mission of promoting a stronger future. It's truly rewarding to be able to assist community organisations that share our values.”
Deadly Coders, a community-managed not-for-profit and one of eleven recipients of last year’s grants, has been on a mission to ignite learning and career pathways in STEM for Aboriginal and Torres Strait Islander primary and secondary schools across Australia.
Grant Maher, CEO of Deadly Coders, said, “Deadly Coders overcomes barriers that prevent Aboriginal and Torres Strait Islander people from completing their education, entering the workforce, and reaching their full potential and life prospects.
The 2023 $40,000 inclusion grant is enabling Deadly Coders to run a series of STEM workshops for Aboriginal and Torres Strait Islander students. Collaborating with indigenous experts who provide mentorship, Deadly Coders are providing a hands-on and engaging curriculum.
“Indigenous perspectives can also bring unique insights to scientific research and technological innovation,” says Maher.
“Economically, a diverse STEM workforce is essential for Australia’s competitiveness on the global stage. STEM industries are rapidly evolving, and innovation often comes from diverse teams with varied perspectives, which is why we believed this application was so important and a worthy winner. We are so grateful to the QBE Foundation for also seeing its worth and supporting us with this grant.”
The QBE Foundation will be accepting applications across the following categories:
- Climate Resilience
- QBE Employee Choice
For eligibility criteria and how to apply, please visit the QBE Foundation webpage.
Applications will be accepted from 3 June to 3 July 2024 (9am AEST), with the recipients to be announced later this year, subject to change.
About the QBE Foundation
The Australia Pacific QBE Foundation is committed to creating strong, resilient, and inclusive communities across Australia, New Zealand, and the Pacific. We work in partnership with community organisations, with a focus on both climate resilience and inclusion – two areas where we believe we can have the greatest impact.
Find out more information on our QBE Foundation webpage .
For more information: Alyssia El Gawly External Communications Specialist QBE Australia +61 481 234 346 Email: [email protected]
- Add an image
- Draft and add content
- Rewrite text
- Chat with Copilot
- Create a summary
- Copilot in Word on mobile devices
- Create a new presentation
- Add a slide or image
- Summarize your presentation
- Organize your presentation
- Use your organization's branding
- Copilot in PowerPoint for mobile devices
- Draft an Outlook email message
- Summarize an email thread
- Suggested drafts in Outlook
- Email coaching
- Get started with Copilot in Excel
- Identify insights
- Highlight, sort, and filter your data
- Generate formula columns
- Summarize your OneNote notes
- Create a to-do list and tasks
- Create project plans in OneNote

Create a new presentation with Copilot in PowerPoint
Note: This feature is available to customers with a Copilot for Microsoft 365 license or Copilot Pro license.
Create a new presentation in PowerPoint.

Select Send and Copilot will draft a presentation for you!
Edit the presentation to suit your needs, ask Copilot to add a slide , or start over with a new presentation and refine your prompt to include more specifics. For example, "Create a presentation about hybrid meeting best practices that includes examples for team building.”
Create a presentation with a template
Note: This feature is only available to customers with a Copilot for Microsoft 365 (work) license. It is not currently available to customers with a Copilot Pro (home) license.
Copilot can use your existing themes and templates to create a presentation. Learn more about making your presentations look great with Copilot in PowerPoint .

Enter your prompt or select Create presentation from file to create a first draft of your presentation using your theme or template.

Edit the presentation to suit your needs, ask Copilot to add a slide , organize your presentation, or add images.
Create a presentation from a file with Copilot
Note: This feature is available to customers with a Copilot for Microsoft 365 license for full options, or a Copilot Pro license for limited options.

With Copilot in PowerPoint, you can create a presentation from an existing Word document—or a PDF if you have a Copilot for Microsoft 365 (work) license. Point Copilot in PowerPoint to your document, and it will generate slides, apply layouts, create speaker notes, and choose a theme for you.

Select the document you want from the picker that appears. If you don't see the document you want, start typing any part of the filename to search for it. You can use a Word document—or, if you have a Copilot for Microsoft 365 (work) license, you can use a PDF, and encrypted documents are available as well.
Note: If the file picker doesn't appear, type a front slash (/) to cause it to pop up.
Select Send and Copilot will draft a presentation for you!
Best practices when creating a presentation from a Word document
Leverage word styles to help copilot understand the structure of your document.
By using Styles in Word to organize your document, Copilot will better understand your document structure and how to break it up into slides of a presentation. Structure your content under Titles and Headers when appropriate and Copilot will do its best to generate a presentation for you.
Include images that are relevant to your presentation
When creating a presentation, Copilot will try to incorporate the images in your Word document. If you have images that you would like to be brought over to your presentation, be sure to include them in your Word document.
Start with your organization’s template
If your organization uses a standard template, start with this file before creating a presentation with Copilot. Starting with a template will let Copilot know that you would like to retain the presentation’s theme and design. Copilot will use existing layouts to build a presentation for you. Learn more about making your presentations look great with Copilot in PowerPoint .
Tip: Copilot works best with Word documents that are less than 24 MB.
Welcome to Copilot in PowerPoint
Frequently Asked Questions about Copilot in PowerPoint
Where can I get Microsoft Copilot?
Copilot Lab - Start your Copilot journey

Need more help?
Want more options.
Explore subscription benefits, browse training courses, learn how to secure your device, and more.

Microsoft 365 subscription benefits

Microsoft 365 training

Microsoft security

Accessibility center
Communities help you ask and answer questions, give feedback, and hear from experts with rich knowledge.

Ask the Microsoft Community

Microsoft Tech Community

Windows Insiders
Microsoft 365 Insiders
Find solutions to common problems or get help from a support agent.

Online support
Was this information helpful?
Thank you for your feedback.
COMMENTS
Make sure that it contains only text. The headings in the document will become the slide headings in the presentation. Go to File > Export > Export to PowerPoint presentation . In the Export to presentation window, choose a design theme for your presentation, and then select Export . Word exports and transforms the document, applying the design ...
The editable templates are downloadable in any device you have, along with its graphic designs in file formats like Microsoft Word. 4. Come Up with Essential Details. Once you have your presentation templates with you, start filling in the details you need. Presentations need to be short and precise.
Present a document online using the Office Presentation Service. Learn about 3 Word presentation features that let you independently read through the document. Skip to primary navigation
To turn your Word document into a PowerPoint presentation: Open any document you want to convert into a presentation in Word for the web. Click File > Export > Export to PowerPoint presentation. When prompted, choose a design theme for your presentation. Click Open presentation to re view the results in PowerPoint for the w eb.
Note: If you would like content inside the slides in the Word document to automatically update when the original PowerPoint presentation is edited, select the "Paste link" option. After you click "OK," the presentation will automatically open in a new Word document. To edit any of the content inside the slides, simply double-click the slide and start editing!
Step 4: Choose "Create from file" and browse for your Word document. In the dialog box, select "Create from file," then click "Browse" to find and select your Word document. Choosing "Create from file" allows you to insert the document as is, without any need to modify it first. Once you've found the file, select it and click "OK."
If you want to create a PowerPoint presentation from a Word document, you can use the Send to PowerPoint feature. This feature allows you to send the heading...
Click File > Export > Export to PowerPoint Presentation (preview), and the presentation window will display a few different design themes. Choose the theme most appropriate to the content. If you ...
Here are a few things to keep in mind in terms of converting Microsoft Word documents to PowerPoint presentations. These points might be updated over time. The feature began rolling out in early 2021: The ability to convert PowerPoint presentations is currently only available in Word for the web. The option is currently only available in English.
Click the "Choose Files" button to select your PPT files. Click the "Convert to WORD" button to start the conversion. When the status change to "Done" click the "Download WORD" button.
Step 1: Open your PowerPoint presentation. First things first, you need to have your PowerPoint presentation open. Make sure it's the final version, as any changes made after conversion won't be reflected in the Word document. Opening your PowerPoint presentation is the initial step in the conversion process. Ensure that all the information ...
Open an existing or blank Word document, then position the cursor where you want to insert the PowerPoint slide. Go to the Insert tab and select Add from Files . Select the PowerPoint file that contains the slides you want to add to the Word document. If the file isn't listed, select Show More Files to browse the filesystem and choose a file.
Step 3: Generate the Presentation. Once you're ready, click the "Generate Presentation" button at the top right of the screen. Generate Presentation feature in SlideSpeak. A dialog will pop up to confirm you want to start generating the PowerPoint. Click "Proceed"! Confirmation for Generating PowerPoint.
Join 500K professionals & educators. Elevate your presentations with our AI-powered Word to PPT converter. Effortlessly turn Word documents into compelling PowerPoint slides using advanced AI summarization. Perfect for creating impactful presentations for business, academic, or personal projects.
For Word documents, I paste formatted sections into my PowerPoint, ensuring text consistency and professionalism. This seamless integration makes my presentations informative and visually cohesive. Organizing Slides and Content for Impact. Effective organization of slides can elevate your presentation from average to exceptional.
The distractions caused by the ribbon, sidebar, and other elements in Microsoft Word's default interface have always made writing long documents cumbersome for me. This changed when I began using Focus mode, a feature that eliminates this clutter and provides a clean, plain interface for writing.
You're probably eligible to get access to Office 365 for free through Microsoft, with access to Word, Excel, PowerPoint, OneNote and Teams, plus other classroom tools.
Traduisez facilement un Word, PDF, PowerPoint, Excel... Importez votre document : contrat, livre, présentation, ... Choisissez la langue de traduction : Anglais, Espagnol, Français, Allemand, Arabe, Russe et beaucoup d'autres. Téléchargez votre document traduit avec une mise en page préservée. De plus, la traduction convertit un PDF en Word.
First, open WPS Office on your desktop. Navigate to the presentation you want to convert by clicking on the 'Open' button or by selecting the file from the 'Recent Documents' section. Open Presentation. Step 2: Access the Export Option. Once your presentation is open, go to the 'File' menu located at the top-left corner of the screen.
문서 작성의 필수 도구인 Microsoft Word는 강력한 기능으로 널리 사용되고 있습니다. 하지만 사용자들은 특히 문서를 저장하려고 할 때 프로그램이 멈추는 등의 문제를 자주 겪습니다. 이 기사에서는 Word 문서가 멈추는 원인, 그리고 해결하는 6가지 효과적인 전략을 살펴봅니다.
The QBE Foundation has today opened applications for its annual local grants program, offering charities and community organisations working in both climate resilience and inclusion, the opportunity to receive a $40,000 grant.
When creating a presentation, Copilot will try to incorporate the images in your Word document. If you have images that you would like to be brought over to your presentation, be sure to include them in your Word document. Start with your organization's template. If your organization uses a standard template, start with this file before ...