8 Tips to Power-Up Your Classroom Presentations
Your content has been saved!
Last month, I attended a Back to School Night for parents, sitting through presentation after presentation by teachers, some with slides that helped make their presentation a delight to listen to, and others . . . well, that's why I'm writing this blog post.
The goal of a classroom presentation is to aid you in effectively conveying information in a way that allows students (or their parents) to remember what you said. Unfortunately, for some, the presentation becomes a crutch, and they begin to rely on the slides to tell their story, rather than to help them tell the story.
I've been creating presentations using software like PowerPoint and KeyNote for 20 years, and I've learned a lot about how to most effectively communicate. Here's what I've found.

1. Use as Many Slides as You Need
It's a common myth that better presentations use fewer slides. This is simply not the case. I once sent an education conference presentation to the organizers so they could preview it in advance of my speaking. They wrote back, concerned that my 45-minute presentation had 116 slides. I looked it over and realized they were right! I revised it and sent a presentation with 135 slides back to them. I finished my talk with 5 minutes to spare -- just enough time to take questions -- and the presentation was a huge success.
The number of slides in your presentation is irrelevant. What matters is how well your slides communicate and how much time you spend talking about each slide. Spending five minutes on five slides will almost always be more engaging to your students than spending five minutes on a single slide, even when the information is exactly the same.
In the movie Amadeus , the Emperor of Austria complains to Mozart that his music has "too many notes." Mozart responds, "There are just as many notes as are required. Neither more nor less." Use as many slides as you need to make your point. No more. No less.
2. Minimize Verbosity
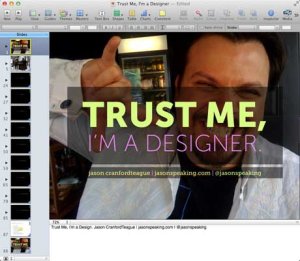
Your slides are there to support what you are saying, not to say it for you. Keep your word count low, and only place one main point on a slide, plus three to five sub-points if absolutely needed. Remember tip #1 above -- don't be afraid to use more slides. They're free! Also, the language in your slides doesn't need to be in complete sentences. Pare the text to as few words as possible, using what's there only to emphasize and reinforce -- not replace -- the words coming out of your mouth.

3. Maximize Visuals
Photos, figures and icons work as visual memory triggers. They help your students remember what it is you're saying. Any time you can add a visual that helps illustrate or reinforce the points you're making in your slides, you should use it. One great way to do this on the cheap is to use public domain or creative commons photos you can find on Flickr or Google .
4. Reduce Noise
Many teachers like to add banners, headers, footers, page numbers and more noise to their slides. Unless the information needs to be on every slide for a vital reason (which is rare), you should remove it. All these redundant elements do is create distractions from the content of your slides. I find this to be especially true of page numbers. Imagine if a movie included a time code at the bottom, constantly reminding you how long you had been watching. All this does is serve to take the viewer out of the moment. Page numbers in slides really don't provide any useful information -- they just remind your students how long they've been watching.
Pursuant to tips #1 and #2, you're not going to win awards by cramming the most content on the fewest slides. Make text and visuals as large as you can. Not only does this make them easier to see and read, but larger images and text make a greater impact to aid memory. There's nothing wrong with filling an entire slide with a photo, and then placing text right on top. You may have to use a transparent background immediately behind the text so that it's clearly readable, but the overall effect is almost always more memorable than just some text beside an image.

6. Highlight What You Are Talking About
While you are presenting, your students may be momentarily distracted taking notes, thinking about what you are saying, glancing out the window, possibly even daydreaming. When they refocus on your slides, though, they need to quickly pick back up where you are, or you risk losing them again.
- Use contrast or call-outs to clearly show the area of the slide you are talking about.
- Reveal bullet points or table rows one at a time so that the last one visible is the one you are talking about.
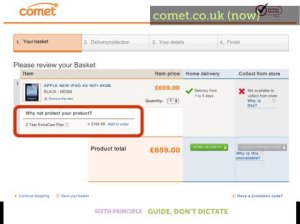
- Use arrows, circles or other pointers to show what you are referencing in specific parts of an illustration, photo or graph.
- Animate and reveal parts of illustrations and graphs (where possible) to build your story rather than showing everything at once.
- Use bold type or different colors to highlight the keywords in any lengthy text.
7. Transition Changes
Humans suffer from an affliction called change blindness -- we have a hard time seeing changes unless there is a clear transition between the states. This is especially a problem in presentations where slides may look very much alike. Most programs include transitions that can be used between slides or on elements in the slides themselves.
My favorite transition is the cross-dissolve -- where the first slide fades down while the next slide fades up -- but different transitions can help illustrate points in your presentation. Are you talking about combustion or the fire of London? Use a flame transition. Talking about photography or Hollywood movies? Use the flashbulb transition. Even "cheesy" transitions help overcome change blindness and aid student memory at the same time.
8. Repeat Yourself Redundantly
It’s OK to repeat the same slide more than once -- especially when using images -- if you are reminding students of an earlier point. Obviously, this is not a license to be monotonous. However, if you want to tie separate ideas together, emphasize a point or splash in a little comic relief, it's perfectly fine to repeat a slide.
Bonus Tip: Make it Funny!
There's little doubt that emotional responses can aid memory. While it can be difficult to apply this power in a classroom slide presentation, humor is easy enough, and adding a bit of levity to your presentations at the right points can work to give students vital memory hooks.
Remember, the point of presentation slides is not to replace you as the teacher, but to help your students understand and remember what you are teaching. Overwhelming them with too much information can be just as harmful as underwhelming them with too little.
- Grades 6-12
- School Leaders
FREE Thanksgiving Worksheet Bundle for Last-Minute Activities 🦃
Google Slides 101: Tips and Tricks Every Teacher Needs To Know
Everything you need to become an expert in no time!

Google Slides is a favorite teaching tool for many educators, both in person and online. With a huge selection of free features and options, this powerhouse allows teachers to create dynamic, interactive presentations that really engage their students. Whether you’re new to Google Slides or are looking to up your game, these resources will help you make the most of it.
Start with the basics
If this is all new to you, watch this video to see how to create simple Google Slides. It walks you through the process one step at a time. Plus, grab a free Google Slides Cheat Sheet from Shake It Up Learning .
Share slides with your students
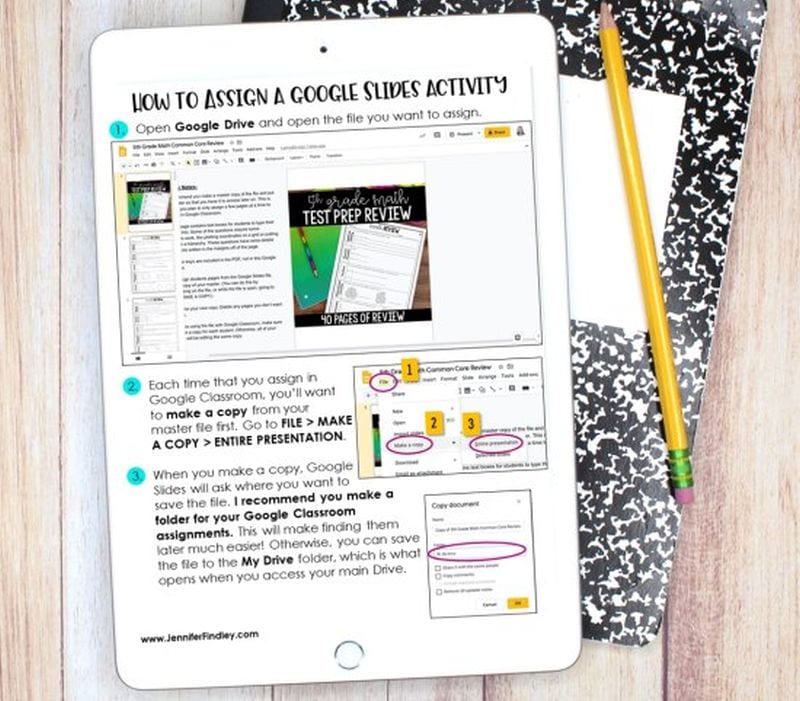
You aren’t limited to using slideshows to accompany in-class presentations. Share them with students to use when studying, assign them as homework or for asynchronous learning, or create interactive slides (more on that below). Assigning Google Slides to your students is easy in Google Classroom. Teaching With Jennifer Findlay shows you how it’s done.
Use themes and templates
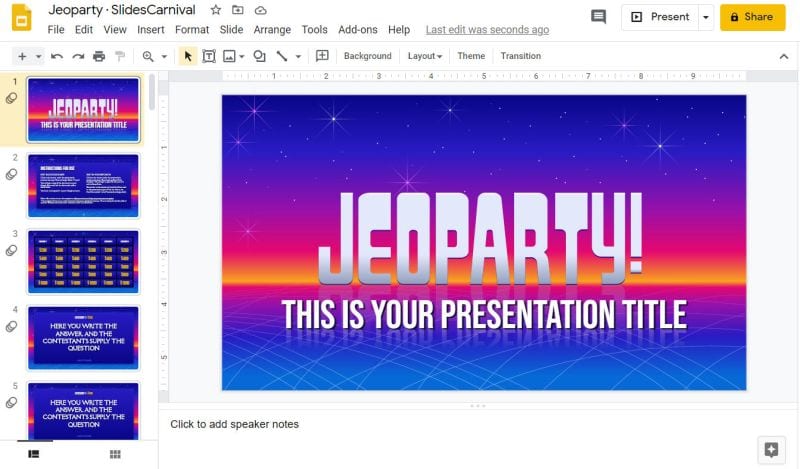
Jeoparty! Theme from SlidesCarnival
Google Slides themes are a pre-set group of colors, fonts, backgrounds, and layouts. You may sometimes see themes called “templates”—these two terms are interchangeable and work in the same way. Themes/templates allow you to enter your own information but save you a lot of time by taking care of the overall look and layout for you.
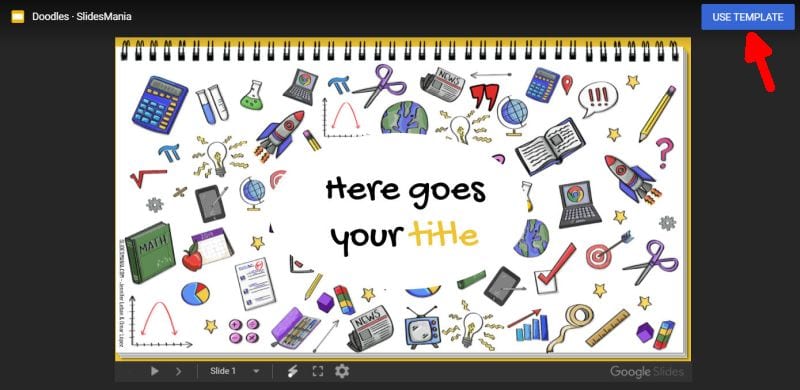
Doodles Theme from SlidesMania
You’ll find a variety of themes built into the program itself (watch the Google Basics video above to see how to use them). You’ll also find thousands more available for free or purchase online. Using them is generally as simple as clicking a link and then choosing “Use Template” to customize.
Add sounds to Google Slides
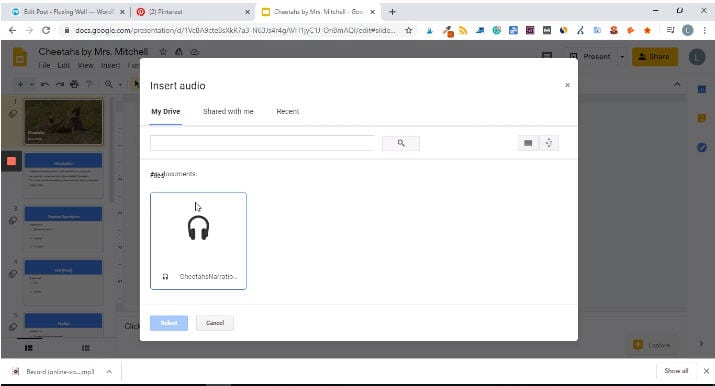
Adding sounds like music or narration can make your slide presentation a lot more interesting. Play bird songs in a lesson on ornithology, listen to a concerto as you discuss Mozart, or even create your own read-aloud. Narrated slides are terrific for asynchronous learning situations too. Learn how to add audio from Fluxing Well.
Don’t forget video
The nice thing about embedding a video directly in your Google Slides presentation is that you (or your students) don’t have to worry about clicking over to another window or website. Instead, you can simply set the video to play automatically (or once the Play button is clicked). You can use YouTube videos, videos from other sites, or those you’ve created yourself. (Pro tip: You can set a video to start and stop at any time you like !)
Make your Google Slides interactive
If you think a slideshow is something for students to sit and watch passively, Google Slides is here to prove you wrong. Have kids click on correct answers, type in text, and a whole lot more. This in-depth video demonstrates the entire process. Get more info from Super Sass and Science Class.
Choice boards are a popular way to make slides interactive. This video has the quick how-to.
Drag-and-drop slides are another terrific way to draw learners into a slide presentation. It’s amazing how much of a difference this makes in student engagement!
Link to internal slides and external sites
Adding links really ups the interactivity of your slides and turns them into self-directed activities in a snap. You can link kids to other pages in the slides for self-checking assessments or to external sources like websites or Google Classroom docs. This is one (easy) skill every teacher should master.
Check out Google Slides add-ons
Google Slides itself has lots of features, but you can also get lots of (often free) add-ons to make certain tasks easier. Add-ons are available to make diagrams, find better images, and display math equations … just to name a few. Ditch That Textbook has a list of 20 add-ons all teachers should try here.
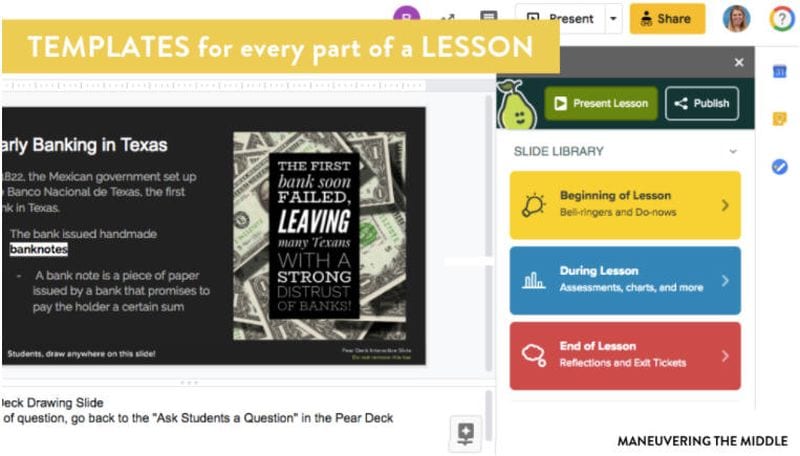
Source: Maneuvering the Middle
One add-on teachers swear by is Pear Deck . It makes it easy to drop in formative assessments and evaluate student progress. The basic program is free for all users; learn how it works here .
Get in on the Bitmoji classroom trend
Those Bitmoji classrooms that are all the rage are right at home on Google Slides. Learn more about these virtual classrooms here, including how to make your own.
If you’re really ambitious, you can “animate” your Bitmoji to create a cool effect that kids will enjoy. It takes a bit of time, but as this video shows, it’s really not that hard to do.
Teach students to use Google Slides
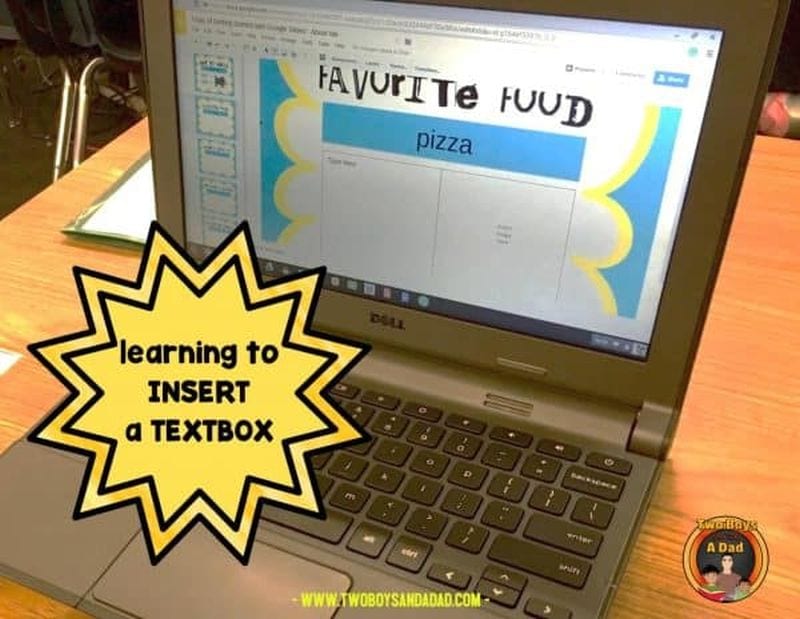
Once students know how to use the program, there are all sorts of awesome assignments they can take on. Even elementary kids can learn how it works. Two Boys and a Dad has an awesome free project to get them started. Once they’ve got the basic skills, here are a few ideas to try.
Challenge your students to create an e-book using slides. Have them illustrate their creative writing, or try it for a different twist on a standard report. Get the quick tutorial from Shake Up Learning.
Digital interactive notebooks make it easy for you to monitor student progress, online or in-person. Plus, no more worries about kids “forgetting” to bring their notebook! Two Boys and a Dad shows you how they work. Make your own, or find ready-to-use templates on the web like this one from Student Savvy .
Looking for more ways to use Google Slides? Learn How Teachers Can Plan and Use Virtual “Stations” Online.
Plus, 30+ Virtual Learning Platforms and Tools for Teachers and Kids .
You Might Also Like
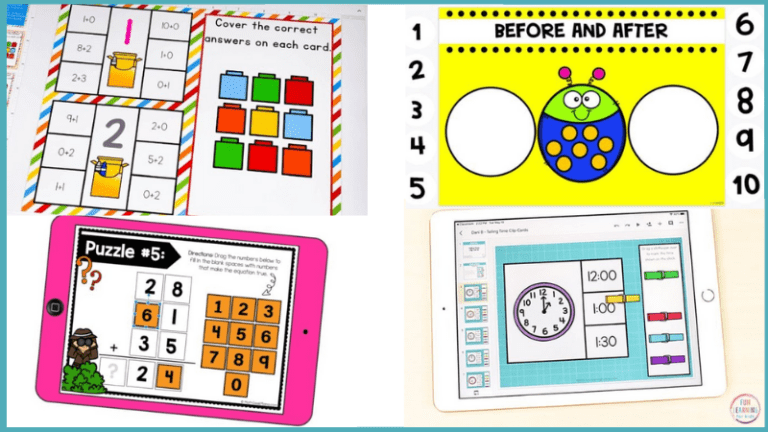
18 Free and Fun Interactive Google Slides for Elementary Math Students
Hands-on math practice for every kind of classroom. Continue Reading
Copyright © 2024. All rights reserved. 5335 Gate Parkway, Jacksonville, FL 32256
Got any suggestions?
We want to hear from you! Send us a message and help improve Slidesgo
Top searches
Trending searches
thankgiving
5 templates

86 templates

tropical island
31 templates
94 templates

thanksgiving
60 templates
Education Presentation templates
Manage your lessons and workshops or present a master’s thesis with these free google slides themes and powerpoint templates. there’s no better visual aid for teachers and students alike., related collections.

Slidesclass
586 templates

1303 templates

1440 templates

638 templates

981 templates
142 templates

1286 templates

4360 templates

- Thesis Defense
1066 templates
435 templates

Teacher Toolkit
122 templates
- Calendar & Weather
- Infographics
- Marketing Plan
- Project Proposal
- Social Media
- Black & White
- Craft & Notebook
- Floral & Plants
- Illustration
- Interactive & Animated
- Professional
- Middle School
- High School
- Career & Technical Education
- Emotional Intelligence
- Foreign Language
- High School Electives
- Language Arts
- Physical Education
- Practical Life
- Social Skills
- Social Studies
- Instagram Post
- Instagram Stories

It seems that you like this template!
Premium template.
Unlock this template and gain unlimited access
Register for free and start downloading now
Artistic expressions and cultural heritage - french - 9th grade.
Download the "Artistic Expressions and Cultural Heritage - French - 9th Grade" presentation for PowerPoint or Google Slides. High school students are approaching adulthood, and therefore, this template’s design reflects the mature nature of their education. Customize the well-defined sections, integrate multimedia and interactive elements and allow space for research...
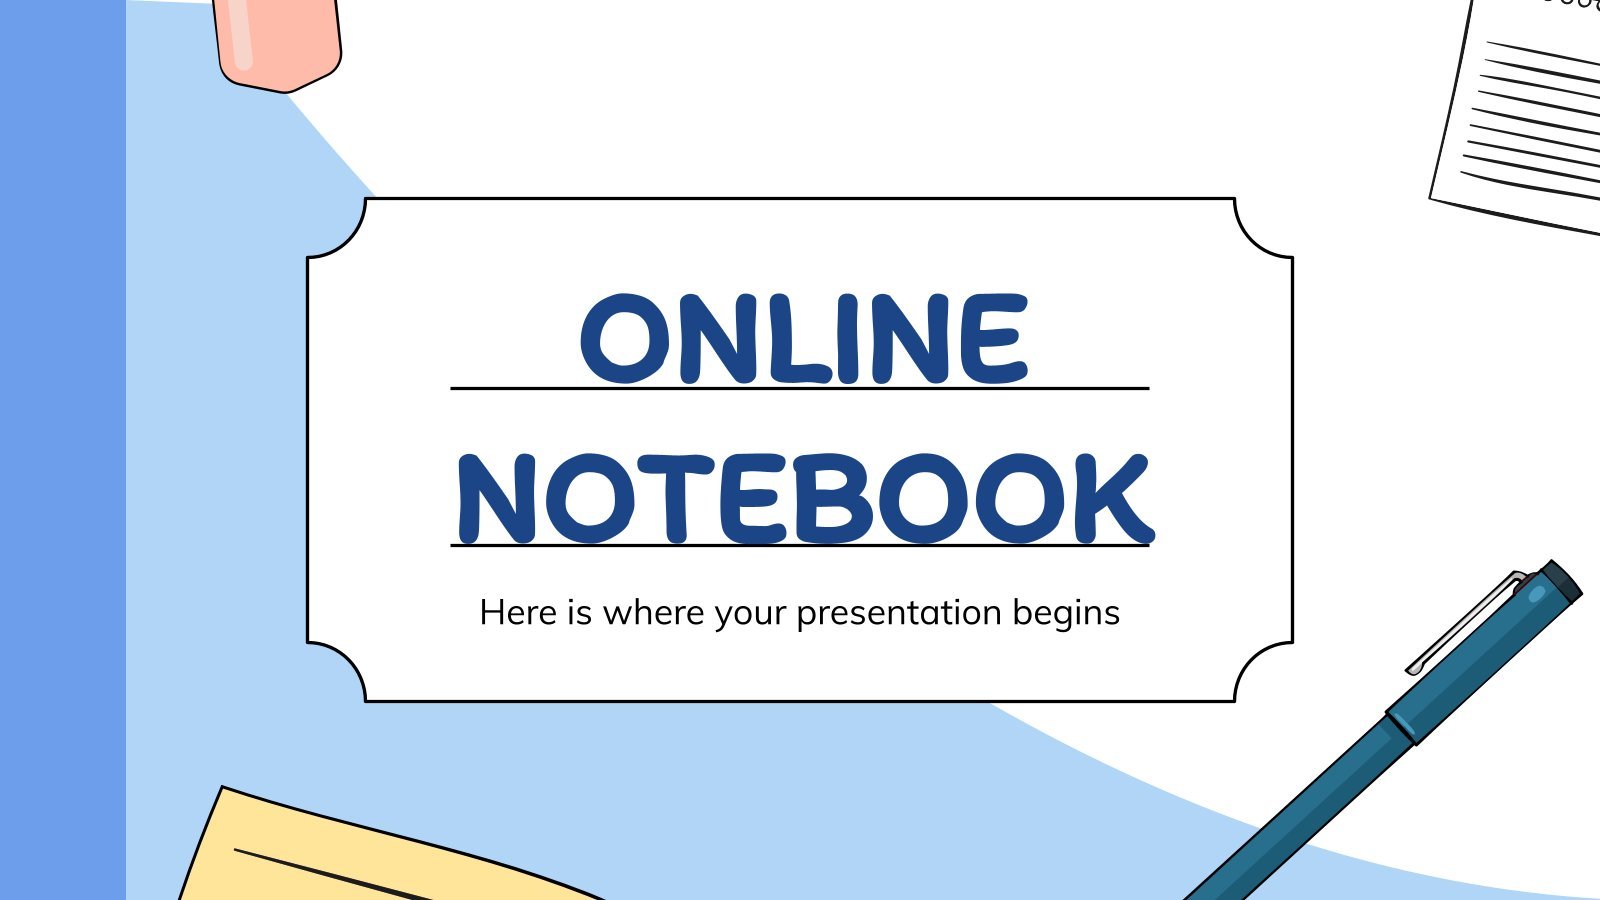
Online Notebook
Use an online notebook to prepare your classes, it doesn’t matter if you are a teacher of a student! In Slidesgo we have just created the perfect template for you.

Create your presentation Create personalized presentation content
Writing tone, number of slides, elegant education pack for students.
The way in which we study has changed drastically in the last year, that's why we need to be more organized than ever. In Slidesgo we want to help your students and have designed this elegant template full of resources for your classes. We added everything you could possibly ask...

Happy Drawing Day
Download the "Happy Drawing Day" presentation for PowerPoint or Google Slides. The education sector constantly demands dynamic and effective ways to present information. This template is created with that very purpose in mind. Offering the best resources, it allows educators or students to efficiently manage their presentations and engage audiences....
Notebook Lesson
These are the last days before the Summer break! We know that there are some pending lessons that you need to prepare for your students. As they may be thinking about their friends and their holidays, catch their attention with this cool template!

STEM Education Workshop for Teachers
Looking for creative ways of getting new students to join a career in STEM? A workshop might be the option you’re looking for! STEM stands for Science, Technology, Engineering and Mathematics, the subjects of the future! Impress the engineers and scientists of the future with this creative presentation for a...
Sketchnotes Lesson
There’s an increasing trend in education regarding visual techniques to help students learn concepts, and it’s called sketchnotes. This free presentation template focuses on this design, so you can turn a lesson into an easy teaching experience.

Problem-based Learning
Download the "Problem-based Learning" presentation for PowerPoint or Google Slides and prepare to receive useful information. Even though teachers are responsible for disseminating knowledge to their students, they also embarked on a learning journey since the day they decided to dedicate themselves to education. You might find this Google Slides...

Study Guide for Middle School Students
Preparing middle school students for success is easier with the right study guide! This template has everything you need to develop a comprehensive study plan for your students. You can use it do give helpful tips, and add checklists and learning activities to help them understand their assignments, review key...
English Vocabulary Workshop
Teaching new words to your students can be a very entertaining activity! Create a vocabulary workshop with this presentation adorned with doodles, wavy shapes and different hues of yellow. Review the objectives, methodology, analysis and conclusions using pie charts, maps or tables.

Special Education Major for College: Learning Disabilities
When teaching, it’s important to know lots of pedagogy and being aware of the different difficulties children might experience as they learn. The sooner teachers identify that a child has problems to read or do math, the sooner special attention will be put into them and the better they will...
Pretty Aesthetic Notes for School
You've seen many notebooks. Now, you'll see the ultimate one! Well, we may be exaggerating a bit, but we're very proud of the aesthetics of this new template! Each slide looks like a page of a notebook, complete with doodles, some stickers and a handwritten font for the titles. It's...

Meet Our Professors
The beginning of the school year is always synonymous with nerves for teachers and students. To break the ice, why not introduce your professors in a different way? We propose you this original template with a dark background and abstract and colorful shapes. It features doodle-style illustrations related to teaching,...

Generation of '27
Generation of '27 is a group of avant-garde poets and artists who began to publish their work in the 20s of the 20th century. To help you explain this interesting part of Spanish literature to your students, we propose you this old-style brown template, with different illustrations of books, pens,...

Back to School
Download the "Back to School" presentation for PowerPoint or Google Slides. The education sector constantly demands dynamic and effective ways to present information. This template is created with that very purpose in mind. Offering the best resources, it allows educators or students to efficiently manage their presentations and engage audiences....
Project Evaluation in Pre-K and Elementary
Download the "Project Evaluation in Pre-K and Elementary" presentation for PowerPoint or Google Slides and prepare to receive useful information. Even though teachers are responsible for disseminating knowledge to their students, they also embarked on a learning journey since the day they decided to dedicate themselves to education. You might...

English for Business and Management Workshop
English is a universal language. When it comes to business exchanges, both parties speaking English fluently can be very useful for the business to succeed. That's why this template is very interesting, as it deals with a workshop for English for business and management. Teach vocabulary related to this topic...
- Page 1 of 576
Register for free and start editing online
How to Present a Presentation in the Classroom: A Comprehensive Guide
Author: Ayan Ahmad Fareedi
writer at MagicSlides
Published 29 July 2024
Discover effective techniques for delivering engaging classroom presentations with this comprehensive guide, including planning, execution, and interaction strategies.
Understanding the Basics of Classroom Presentations
The importance of classroom presentations, key elements of a successful presentation, planning your presentation, choosing the right topic, research and content gathering, structuring your presentation.
- Introduction: Set the stage by introducing your topic and outlining the key points you will cover.
- Body: Divide the main content into sections or themes, each clearly explaining different aspects of the topic.
- Conclusion: Summarize the main points and provide a strong closing that reinforces the significance of your topic.
Creating Visual Aids
Designing effective powerpoint slides, using other visual aids, mastering the delivery, rehearsing your presentation, speaking skills, body language and eye contact, engaging your audience, interactive elements, handling questions, managing presentation nerves, techniques to overcome anxiety, the role of mindset, using technology to enhance presentations, presentation software tools, apps and online resources, after the presentation, seeking feedback, reflecting on your performance, share on socials, create ppt using ai.
Just Enter Topic, Youtube URL, PDF, or Text to get a beautiful PPT in seconds. Use the bulb for AI suggestions.
character count: 0 / 6000 (we can fetch data from google)
upload pdf, docx, png, mp4, pptx, mp3
less than 2 min
Stunning presentations in seconds with AI
Install MagicSlides app now and start creating beautiful presentations. It's free!

Free AI PPT Tools

- About Katie
- Application Essays
- The Journal
31 of the best class presentation tips for students
Katie Azevedo September 20, 2022 communication , grades
By Katie Azevedo, M.Ed.
Giving class presentations is just part of the school experience. Some students dread presenting to their classmates, and others prefer class presentations to written assessments. If you’re new to this, or if you’re just looking for some ideas, I share my best class presentation tips for students in the post below.
Class presentations often involve a visual component, and an audio and delivery component. The tips in this post are for class presentations that involve SLIDES, such as Google Slides or PowerPoint. Therefore, I break down the class presentation tips for students into the following categories:
- text and content
- Audio and delivery class presentation tips
- Bonus class presentation tips to up-level your game
Class presentation tips for VISUALS
The following tips will enhance the visual component of your school presentation. The strategies are further categorized by format, text, and images.
Class presentation tips for slide FORMAT
The visual format of your presentation must be clear and easy to read.
1. Use a slide deck.
This class presentation tip is obvious, but I can’t leave it off the list. If you’re presenting to your fellow students, you will need some kind of visual representation of the information you’re delivering. Very rarely will you present to your class without slides. Google Slides and PowerPoint are the two primary products to make slides.
2. Use the right number of slides.
Class presentations in high school and college will likely be 5 minutes or less. Follow your teacher’s guidelines, of course, but generally, students will use 1-2 slides per minute. (That would be 5-10 slides for a 5-minute presentation.)
3. Use an appropriate slide template and theme.
PowerPoint and Google Slides come with default slide templates (themes). Most of the default templates are suitable for class presentations, and so you should be fine choosing one of those. You can also find templates on the free version of Canva. I like slidesgo.com for free templates (it’s not sketchy – I’ve personally used it. I also like SlidesCarnival.com but you have to import the templates into Canva first, and then export them from Canva into Google Slides or PowerPoint.
4. Use clear fonts.
Pick your font based on clarity, not creativity. Your audience should be able to read your text effortlessly and from the back of the classroom. Here are some rules:
- Avoid cursive / script fonts
- Avoid writing in all capital letters
- Avoid fonts that are entirely in italics (slanted)
5. Use a maximum of two fonts.
Stick to two fonts: one for headings and titles, and one for body text. More than two fonts make your slides hard to read.
6. Use 3-4 colors.
Stick to a basic color palette of no more than four colors. It’s fine to use images that are outside your color scheme, but besides images, avoid too many colors. Most default templates stick to four colors or less, so you’re safe if you use a pre-made template.
7. Use high-contrast text-on-background combinations.
Your text needs to stand out from the background color. Black font on a white background or white font on a black background provides the highest contrast and best readability. This website here provides excellent information and examples about color combinations.

Class presentation tips for slide TEXT and CONTENT
8. start with a simple title slide..
Your teacher will likely require a title slide in the syllabus. Even if it’s not required, make one anyway. A title slide should be simple: the name of the presentation, your name, and a simple graphic or image.
9. Include a roadmap slide.
A roadmap slide (I made up that term, but it works) is like a table of contents. It tells your classmates what they will learn from your presentation. Even if your presentation is only 6 slides long, a roadmap slide can be helpful. Below is an example.

10. Include enough white space.
White space is the blank space that doesn’t contain text or images. White space is very important for readability. In the image below, you can see the impact white space has on readability.

11. Use bullet points.
Whenever possible, use bullet points instead of complete sentences. Most slides should include no more than 5-6 bullet points. If you need to say more, continue the bullet points on another slide.
12. Leave some text off the slides.
Your slides should include minimal to moderate text that you will elaborate on during your class presentation. In other words, don’t cram the slides full of everything you want to share on the topic. The only exception to this rule is if you are not verbally presenting to the class, but are instead just sharing the slides with your classmates to view on their own.
13. Include examples.
Examples make most things clearer. When possible, include an example for all your main points.
14. Include statistics and other quantitative information.
Use numbers in place of text when you can. Numbers and statistics can be easier for your audience to process. Example below:
- Instead of saying this: There is one-third as many Giant Pandas living in 2020 as there were in 2014.
- Say this: Giant Panda population in 2140 = 1864 | Giant Panda population in 2020 = 600 [ source ]
15. Include a summary slide
Consider adding a final summary slide to your class presentation. This is an excellent strategy because it will increase your audience’s understanding of your main points. The text on this slide should be in bullet-point format. The information on this slide might align with the information on your roadmap slide.

Class presentation tips for slide IMAGES
16. include an image or graphical element on each slide..
Every slide should have some kind of graphical element to complement the text. Some slides might even have an image and no text. (You would explain the image in your verbal presentation to the class.) Note: be sure to cite all images.
17. Use images / graphics for illustration and emphasis, not decoration .
Avoid using images for decoration. Images and graphics should do one of the following:
- Add something valuable to the text
- Illustrate the idea on the slide
- Represent the idea on the slide
- Emphasize an element of the slide (such as underlines, stars, etc.)
18. Resize and reformat images.
Resize images and graphics to fit the scale of your slide. It should be big enough to see clearly, but still allow for plenty of white space (Class Presentation Tip #10). You can remove the background of an image using a mobile app, or something like the paid version of Canva or PicMonkey. Again, be sure to cite your images.
19. Use video when appropriate.
If your presentation calls for it, include short video clips. Only use video if it adds value.
20. Use icons for emphasis.
Use icons like stars, 3D shapes, speech bubbles, and arrows to emphasize important text. Keep these icons within your color scheme. You can find free icons within Google Slides and PowerPoint, or you can use Google Images or Canva.
21. Use graphs and charts.
Too much text is confusing. Too many images is boring. Solve this problem by using pie charts, bar graphs and other graphical ways of representing data.
Class presentation tips for SPEAKING
You might have the best slides in the class, but your presentation is not complete until you deliver it to your classmates. The following tips are for improving your audio and delivery.
22. Never read directly from the slides.
Use the slides as a reference, but don’t read word-for-word. How do you do this? First change to the next slide. Then look at it for cues. Next, speak directly to your classmates, making eye contact as your speak. It’s okay to glance back at the slide if you need to.
23. Face your audience.
Your body should always face the audience. Stand or sit either straight on, or at a 45-degree angle. Never have your body square to the presentation screen.
24. Explain the images.
When you present each slide, you should spend some time on the text and some time on the images. If your images add value (which they should), then this should be simple to do.
25. Speak slowly and clearly.
Speak slower than you naturally speak. Practice difficult words until they are smooth.
26. Use verbal transitions between topics.
When you change topics, use transition expressions such as “Next, we are going to look at …” or “Now, let’s move on to …”
27. Practice more than you want to.
Practicing your class presentation over and over improves your delivery and increases your confidence. Practice in front of the mirror, in front of others, or in front of your camera (to be watched later, of course).
Bonus class presentation tips for students: How to up-level your game
The following bonus tips are for students looking to take their class presentations to the next level. Keep in mind that some of the ideas below are best suited for college and university students.
28. Provide a printed note-catcher.
An engaged audience is the best audience. To increase your classmates’ active focus, provide each student a printed note-catcher they can use to follow along with your presentation. PowerPoint and Google Slides both have features that enable you to print out your presentation with the slides on the left and space to take notes on the right.
29. Ask questions and survey your classmates.
Another way to engage your audience is by asking them questions. You can build these questions into the slides themselves, or you can pause your presentation to ask questions before moving to a slide with the answers.
30. Use the Speaker Notes section .
The text on your slides should vary from the words you speak to your classmates during your presentation. Either you practice your presentation so much that you memorize it, or you use the Speaker Notes section on PowerPoint or Google Slides.
31. Open with a question, and close with an answer .
A great class presentation tip for students is to open with a question you pose to your classmates at the beginning, and then close with the answer. You could put the question on its own opening slide and then close with another slide that re-poses the question and features the answer.
For example, if you are presenting on Susan B. Anthony, your question could be Who was Susan B. Anthony? and the answer – which is the point of your presentation – could be Susan B. Anthony was one of America’s greatest champions for freedom and equality of women and slaves. College-level presentations would have more complex question-and-answer pairings than this example, but you get the idea.
Class presentation tips for students – summary notes
It’s important to follow your teacher’s requirements when creating your class presentation. Use these tips and strategies to maximize your grade, impression on the class, and your content delivery – but always consult your syllabus first.
And finally, the greatest tip of all is to PRACTICE. In Tip #27 I emphasize the importance of practicing more than you want to. Watch TED talks and other notable speakers to see how smooth they speak – these presenters have practiced the same presentation hundreds of times. Practice is the key.
More resources
- How to ask for help in school: 4 tips for self-advocacy
- What to do when you’re confused in class
- 5 life skills all students need to be functional adults
Subscribe to ReportCard Newsletter!
Get your FREE download of 25 School Habits and Hacks when you sign up for our newsletter featuring awesome school tricks and tips
I will never give away, trade or sell your email address. You can unsubscribe at any time.
- PRO Courses Guides New Tech Help Pro Expert Videos About wikiHow Pro Upgrade Sign In
- EDIT Edit this Article
- EXPLORE Tech Help Pro About Us Random Article Quizzes Request a New Article Community Dashboard This Or That Game Forums Popular Categories Arts and Entertainment Artwork Books Movies Computers and Electronics Computers Phone Skills Technology Hacks Health Men's Health Mental Health Women's Health Relationships Dating Love Relationship Issues Hobbies and Crafts Crafts Drawing Games Education & Communication Communication Skills Personal Development Studying Personal Care and Style Fashion Hair Care Personal Hygiene Youth Personal Care School Stuff Dating All Categories Arts and Entertainment Finance and Business Home and Garden Relationship Quizzes Cars & Other Vehicles Food and Entertaining Personal Care and Style Sports and Fitness Computers and Electronics Health Pets and Animals Travel Education & Communication Hobbies and Crafts Philosophy and Religion Work World Family Life Holidays and Traditions Relationships Youth
- Browse Articles
- Learn Something New
- Quizzes Hot
- Happiness Hub
- This Or That Game
- Train Your Brain
- Explore More
- Support wikiHow
- About wikiHow
- Log in / Sign up
- Education and Communications
- Presentations
How to Do a Presentation in Class
Last Updated: August 29, 2024 Fact Checked
This article was co-authored by Patrick Muñoz . Patrick is an internationally recognized Voice & Speech Coach, focusing on public speaking, vocal power, accent and dialects, accent reduction, voiceover, acting and speech therapy. He has worked with clients such as Penelope Cruz, Eva Longoria, and Roselyn Sanchez. He was voted LA's Favorite Voice and Dialect Coach by BACKSTAGE, is the voice and speech coach for Disney and Turner Classic Movies, and is a member of Voice and Speech Trainers Association. This article has been fact-checked, ensuring the accuracy of any cited facts and confirming the authority of its sources. This article has been viewed 1,649,554 times.
Doing a presentation in class can be intimidating, but it does not have to be. This wikiHow will give you lots of pointers on how to do a presentation in class with minimal stress .
How to Give a Good Class Presentation
- Practice running your presentation before you give it in class.
- Write down the points you want to remember on note cards.
- Picture yourself doing well to get a boost of confidence before you present.
- Make eye contact with other people in class while you're presenting.
- Speak with a clear voice and vary your inflection to keep it interesting.
Planning the Presentation

- Write down keywords or main ideas. If you need to consult your index cards, you're only going to want to scan the index card for information, not read every last word.
- Most of the time, the act of putting information down on your index cards will help you remember the information. So, while you might not strictly need the note cards, it's a nice security blanket to have if you happen to forget what you were going to say.
- You don't want to be reading straight off your notecards during your presentation.

- Practice in front of your family or friends, or in front of the mirror, when you rehearse your presentation. It's probably better to do it in front of friends who you may not know well, as this will help you replicate the feeling of being in front of the class.
- Ask your friends for feedback after you finish your presentation. Was the presentation long enough? How was your eye contact? Did you stammer at all? Were all the points clearly made?
- Make a critique of your practice performance. Challenge yourself to work on all the things that you believe you can improve during the real presentation. When it comes time to deliver the real deal, you'll feel confident knowing that you've worked extra hard on what was toughest for you.

- Get quotes from reliable sources. Good quotes make a good presentation great. Taking what smart people have said and putting it into your presentation not only makes you look smart, it shows the teacher that you spent time thinking about what other people said.
- Make sure your sources are trustworthy . There's nothing that can quite break your confidence like a fact that turns out to not be a fact. Don't always trust the information you get off the Internet.
Delivering the Presentation

- Studies have shown that smiles are infectious; that means that once you smile, it's hard for everyone else not to smile. So if you want your presentation to go off without a hitch, force yourself to smile. That'll make everyone smile; and maybe those smiles will make you actually smile.

- Think about your intention before you talk to your audience. Do you want to educate, enlighten, or entertain this audience? What is the effect that you want to have on the listener?
- Visualize success before, during, and after your presentation. Be humble about what you do — no need for cockiness — but imagine a successful presentation at all times. Don't let the thought of failure creep into your mind.
- In many ways, your confidence is just as important as the information you're delivering. You don't want to spread misinformation, or skimp on doing your research, but a lot of what you'll be graded on — and what the other students come away with — is going to be your level of confidence. Also if you are confident, you will have a better time exchanging ideas with the class.
- If you need a confidence boost, think big picture. After 10 or 15 minutes, your presentation will be over. What will your presentation matter in the long run? Probably not very much. Try to do the best you can, but if you're getting nervous, remind yourself that there are much more important moments in your life to come.

- Have the goal of looking at every person in the classroom at least once. That way, everyone will feel like you've engaged with them. Plus, you'll look like you know what you're talking about.

- Inflection is the kind of movement that radio DJs put into their voice; it's the ramped-up pitch in your voice when it gets excited. You don't want to sound like you've just seen a lion, but you also don't want to sound like you've just seen a squirrel, either. Vary it up to make the presentation more interesting.

- Tell a story, maybe one with a personal note. Stories are great for history or English presentations. Maybe you can tie your presentation into a little anecdote about a famous historical person?
- Ask a provocative question. Ending with a question is a good way of getting your audience to think about your presentation in an interesting way. Is there a certain conclusion you want them to come to?

What Is The Best Way To Start a Presentation?
Community Q&A
Reader Videos
Share a quick video tip and help bring articles to life with your friendly advice. Your insights could make a real difference and help millions of people!
- Have good posture. Don't cross or fold your arms, keep them open. Don't slouch and keep your back straight. [8] X Research source Thanks Helpful 1 Not Helpful 0
- Don't forget to look at everyone, not just the floor. Don't stare at anyone in particular but 'skim' the class. Thanks Helpful 3 Not Helpful 0
- Try not to argue with your audience. This detracts from your presentation. Just tell them they have an interesting point and that you'll check and get back to them. Thanks Helpful 3 Not Helpful 1
Tips from our Readers
- Don't be afraid to interact with the audience. Ask and answer questions about your presentation. If you're giving a demonstration speech, you could even take volunteers to help out during your presentation.
- If you have a visual aid, don't include a lot of writing on it because your audience will get distracted reading it. Instead of writing out points, bring them up naturally in your presentation.
- If you stress out and can't remember a line, just pause and take a deep breath. Try to pick up right where you left off and keep going so you finish strong.
- If you don't like looking at people's eyes, try looking at the corners of the room or at peoples' foreheads so you still feel engaging with your audience.

- Some people may be so tied up before a presentation that they feel faint and may pass out during their speech. If this describes you, make sure you prepare especially hard and keep your blood sugar up before you present. Thanks Helpful 16 Not Helpful 1
- Don't keep your mobile phone in your pocket or it will interfere with the microphone (if any). Thanks Helpful 15 Not Helpful 6
You Might Also Like

- ↑ https://www.gvsu.edu/ours/oral-presentation-tips-30.htm
- ↑ https://www.uwe.ac.uk/study/study-support/study-skills/presenting-and-working-with-others
- ↑ https://www.bbc.co.uk/bitesize/topics/zcfv4wx/articles/zdn3d6f
- ↑ https://homes.cs.washington.edu/~mernst/advice/giving-talk.html
About This Article

The best way to prepare for your class presentation is to practice in front of a friend or family member. When it’s time to present, make eye contact with your audience and use hand motions to illustrate your points. Don’t forget to smile! Finish strong with a final statistic or provocative question. If you’re still nervous, read on for more advice! Did this summary help you? Yes No
- Send fan mail to authors
Reader Success Stories
Jun 19, 2016
Did this article help you?
Aug 8, 2016
Mar 30, 2016
Saskia Schouten
May 26, 2017
Jun 17, 2016

Featured Articles

Trending Articles

Watch Articles

- Terms of Use
- Privacy Policy
- Do Not Sell or Share My Info
- Not Selling Info
wikiHow Tech Help Pro:
Level up your tech skills and stay ahead of the curve
BibGuru Blog
Be more productive in school
- Citation Styles
How to do a class presentation (11 steps)

The best class presentations combine strong content and visuals with an engaging presentation style. This post offers 11 steps for creating memorable and high-performing class presentations.
1. Review assignment guidelines
Before you can strategize about how to start a class presentation, you need to be certain that you understand the assignment details. Consult materials that your instructor provided, like rubrics, to determine what your presentation needs to cover and what form it should take.
For instance, are you presenting individually or as part of a group? How long should the presentation be? Are you required to have visuals? Knowing these details will help you to plan a successful class presentation.
2. Make a presentation plan
Once you've reviewed the specific assignment details, it's time to make a presentation plan. You can start by making an outline of your talking points. Outlines for class presentations will look similar to those for papers, with sections and subsections that work through your main ideas. You'll want to be precise about what points are essential to communicate to your audience. Also, take some time to decide on a completion timeline to ensure that you're ready on presentation day. Remember to build in time for practice!
3. Choose your visuals
At this point, you'll also want to determine what kind of visual aid(s) you want to use: a handout or a digital presentation, or both? Keep in mind the assignment requirements, but also the audience and the presentation format. For example, are you presenting to a large audience? If so, a handout might not be efficient. Are you presenting in-person or online? If you're preparing an online presentation, a PowerPoint or Google slides presentation will help your audience follow along.
4. Fill out your outline and keep it simple
Now that you've developed a plan for completing your class presentation, you can begin to build out the actual content. If you've created a basic outline, fill it in with some substance. Remember to keep it simple. At around 10-15 minutes, the average in-class presentation can only effectively communicate around three main points. Avoid long quotes or monologues. Your audience may find it difficult to follow longer textual components.
5. Design your visuals with minimal text
Along similar lines, don't simply plop your outline or textual notes into your visuals. Visual aids should be just that: aids that allow your audience to better visualize the main points of your presentation. Large blocks of text on a PowerPoint can be hard to see, so work on creating a digital aid that is mostly comprised on images. When text is appropriate, use bullet points and active words that your audience can remember.
6. Allow time for revisions
Once you've compiled your notes and created your visuals, take some time away from the project. You'll return to your work with fresh eyes. Then, allow time for revision: be sure to proofread your notes, slides, and/or handouts and make sure your visuals are clear. Check to see if any images that you're using appear pixelated on a larger screen and make sure your text is readable from a distance.
7. Check your citations
Many in class presentations will require citations, especially if they are accompanying a paper or another class research project. You can use BibGuru's citation generator to create your citations and copy them to your slides or handout. Consult your assignment guidelines, or ask your instructor, to find out what citation style is required.
8. Practice...and practice again
Give yourself time to practice your presentation in front of an audience before the big day. Familiarize them with the assignment guidelines, as needed, and ask them to time you. You'll need to know if your presentation meets the time requirements. After the first run though, consider these questions:
- Is your presentation too long or too short?
- Are you hitting the main points in a logical sequence that your audience can follow?
- Are your visuals clear?
- Is your delivery fluid or are you pausing too often to look at your notes?
- Are you making eye contact with your audience?
Use your answers to these questions to determine what, if at all, you need to change and then schedule another practice. You should practice your presentation as many times as you need to in order to achieve a fluid delivery.
9. Prepare for technical difficulties
Since most class presentations will include a digital element, be prepared to troubleshoot if there are technical difficulties on presentation day. Always have a back-up plan and be sure to save your visuals in multiple places. Keep a copy of your notes and slides in your email, on a thumb drive, and/or on the cloud. Practice enough so that, in the event that you can't get your visual aid to work, you can still deliver your presentation.
10. Take the stage with confidence
If you've followed your plan, practiced thoroughly, and prepared for possible technical difficulties, you should be ready to take the stage with confidence. Nervousness is absolutely natural, but try your best to relax and breathe. A few shoulder rolls and deep breaths right before the presentation can go a long way to making you feel more focused and centered.
11. Connect with your audience
From the first moment of your presentation, you'll want to establish a strong connection with your audience. Smile, make eye contact, and modulate your voice appropriately. Remember, people exhibit all kinds of facial expressions when they are listening or concentrating, so try not to pay too much attention to individual faces.
Also, although your instructor will be the one grading you, don't simply present to them. Include the entire class in your gaze. Finally, be careful about pace. If you have a tendency to speed up your speech when you're nervous, make a conscious effort to slow down.
The bottom line
Following the tips above will enable you to confidently deliver a class presentation to your instructor and classmates, or to any audience. With solid preparation and ample practice, your next class presentation will be a memorable success.
Frequently Asked Questions about class presentations
The most successful presentations begin with a hook. This could be a short, yet compelling story, an eye-catching visual with brief analysis, or an inspiring quote or statistic. No matter how you begin, ensure that you can fluidly transition to the main substance of your presentation in a way that your audience can easily follow.
Regardless of the subject of your presentation, you can make it interesting for your audience by engaging them through consistent eye contact, a relaxed and confident delivery style, and interactivity. For instance, to keep your audience engaged, you might try including questions or brief activities in your presentation.
Wrap up your presentation by summarizing your key points. You can also end with a provocative question or thought. You should also thank your audience for listening.
Good presentations are well-organized, time-sensitive, clear, and delivered with confidence.
The most common presentation mistakes include: not engaging your audience, using visuals that are overloaded with text, and not practicing enough.

Make your life easier with our productivity and writing resources.
For students and teachers.
- Google Classroom
- Google Workspace Admin
- Google Cloud
Gemini now has added data protection. Chat with Gemini to save time, personalize learning and inspire creativity.
Gemini now has added data protection. chat now ., get started with google slides.
Learn how to use Google Slides to create engaging presentations, make fewer class copies, and more.
Find tips and tricks from teachers like you
Explore topics one-by-one.
- What is Google Slides
- Accessing Google Slides
- Creating a presentation in Google Slides
- Adding and editing content
- Presenting Google Slides
- Sharing Google Slides
Discover training lessons and related resources to accelerate your learning
Error loading content :( Please try again later
- {[ item.label ]}
{[ collectionContentCtrl.activeTopic.label ]} All resources ({[ collectionContentCtrl.totalItemsCount ]})
{[ item.eyebrow ]}
{[ item.name ]}
{[ item.description ]}
{[ item.featured_text ]}
No results matching your selection :( Clear filters to show all results
Begin your training with Google Slides
Get support from our help center, you're now viewing content for united states..
For content more relevant to your region, choose a different location:

IMAGES
VIDEO
COMMENTS
Google Slides lets you build beautiful presentations in your browser, with features like videos, animations, transitions, and more. Collaborate with others in real time, record and share your presentations, and access them from any device.
35 Fantastic Free Google Slides Templates and Themes for Teachers. Add some pizzazz to your presentations! We Are Teachers; StudentSavvy via TeachersPayTeachers. By Jill Staake, B.S., Secondary ELA Education. Sep 28, 2023. Google Slides is free, easy to use, and offers so many cool options.
4. Reduce Noise. Many teachers like to add banners, headers, footers, page numbers and more noise to their slides. Unless the information needs to be on every slide for a vital reason (which is rare), you should remove it. All these redundant elements do is create distractions from the content of your slides.
Google Slides itself has lots of features, but you can also get lots of (often free) add-ons to make certain tasks easier. Add-ons are available to make diagrams, find better images, and display math equations … just to name a few. Ditch That Textbook has a list of 20 add-ons all teachers should try here. Source: Maneuvering the Middle.
Download the "Artistic Expressions and Cultural Heritage - French - 9th Grade" presentation for PowerPoint or Google Slides. High school students are approaching adulthood, and therefore, this template's design reflects the mature nature of their education. Customize the well-defined sections, integrate multimedia and interactive elements and ...
Structuring Your Presentation. Organize your content into a clear, logical structure: Introduction: Set the stage by introducing your topic and outlining the key points you will cover. Body: Divide the main content into sections or themes, each clearly explaining different aspects of the topic. Conclusion: Summarize the main points and provide ...
2. Use the right number of slides. Class presentations in high school and college will likely be 5 minutes or less. Follow your teacher's guidelines, of course, but generally, students will use 1-2 slides per minute. (That would be 5-10 slides for a 5-minute presentation.) 3.
1. Write note cards on index cards. Write main ideas on your index cards. Don't write details, or be stuck with the fate of looking down, staring at your note cards while reading. Put in some fun facts, interactive questions, and other interactive activities on the cards to share with the class.
The best class presentations combine strong content and visuals with an engaging presentation style. This post offers 11 steps for creating memorable and high-performing class presentations. 1. Review assignment guidelines. Before you can strategize about how to start a class presentation, you need to be certain that you understand the ...
Find tips and tricks from teachers like you. What is Google Slides. Accessing Google Slides. Creating a presentation in Google Slides. Adding and editing content. Presenting Google Slides. Sharing Google Slides. Teachers' Lounge.