- Rules for Effective Backups
- Making a List, and Checking it Twice
- Level One – Local Backup
- Remote Backup Solutions
- Verifying Your Backups
- DOS Lesson 1: Operating Systems
- DOS Lesson 2: Booting
- DOS Lesson 3: Internal Commands
- DOS Lesson 4: External Commands; Emergency Boot Disk
- DOS Lesson 5: The Path
- DOS Lesson 6: Syntax and Switches; Help System
- DOS Lesson 7: DOS Filenames; ASCII
- DOS Lesson 8: Format; Copy; Diskcopy; Xcopy
- DOS Lesson 9: The File System
- DOS Lesson 10: Directory Commands
- DOS Lesson 11: DOS Wildcards; File Attributes
- DOS Lesson 12: Expert DIR Use
- DOS Lesson 13: BASIC
- DOS Lesson 14: The EDIT Applet
- DOS Lesson 15: Introduction to Batch Files
- DOS Lesson 16: Practicing Batch Files with ECHO
- DOS Lesson 17: Batch File Variables; Nested Batch Files
- A Brief History of HTML
- The Structure of HTML
- Case Considerations in File Names
- Separation of Structure and Presentation
- Color on the Web
- Using Tables for Layout
- Block-Level and Inline Elements
- ISO Entities
- Images on the Web
- Image Optimization: GIF
- Image Optimization: JPEG
- Web Hosting
- FTP for PCs
- Image Dimensions
- List Headers
- Server Issues and FTP
- Further Directions
- LibreOffice Class at Ohio LinuxFest 2012
- LibreOffice Writer Overview
- LibreOffice Writer Default Template
- LibreOffice Writer Obtaining Other Templates
- LibreOffice Writer: Creating Templates
- LibreOffice Writer Paragraph Styles – What is a paragraph?
- LibreOffice Writer Heading Styles
- LibreOffice Writer Tab Styles
- LibreOffice Writer Working with Paragraph-Level Styles
- LibreOffice Writer Paragraph Styles in Templates
- LibreOffice Writer Character Styles
- LibreOffice Writer List Styles Introduced
- LibreOffice Writer: A Bullet Style Deconstructed
- LibreOffice Writer: A Numbered List Style Deconstructed
- LibreOffice Writer Nested Lists Introduced
- LibreOffice Writer Nested Lists Controlled via Styles
- LibreOffice Writer Page Styles Introduced
- LibreOffice Writer Working With Page Styles
- LibreOffice Writer Frames: Introduction and the Type Tab
- LibreOffice Writer Frame Properties Completed
- LibreOffice Writer Other Frame Styles
- Other Page Layout Options
- A Brochure Project
- LibreOffice Calc: What is a Spreadsheet?
- LibreOffice Calc: Cells
- LibreOffice Calc – Calculations and the Formula Bar
- LibreOffice Calc – Fills, an Introduction
- LibreOffice Calc – Models and “What-If” Analysis
- LibreOffice Calc – A Savings Model
- LibreOffice Calc: Sheet Editing and Navigation
- LibreOffice Calc: Introduction to Charts and Graphs
- LibreOffice Calc: Creating Charts
- LibreOffice Calc: More on Chart Editing
- LibreOffice Calc: Introduction to Functions
- LibreOffice Calc: Financial Functions – Loan Payments
- LibreOffice Calc: More Financial Functions
- LibreOffice Calc: Simple Descriptive Statistics
- LibreOffice Calc: Inferential Statistics Functions
- LibreOffice Calc: Other Functions
- LibreOffice Calc: Data manipulation 1: Sorting and AutoFilter
- LibreOffice Calc: Data Manipulation 2: Standard and Advanced Filters
- LibreOffice Calc: Creating Pivot Tables
- LibreOffice Calc: Working With Pivot Tables
- LibreOffice Calc: Styles and Templates Introduced
- LibreOffice Calc: The Object Model and Using Templates
- LibreOffice Calc: Page Styles and Page Settings
- LibreOffice Calc: Cell Styles
- LibreOffice Calc: Creating a Template with Styles
- LibreOffice Impress: Overview and Guidance
- LibreOffice Impress: Moving Around
- LibreOffice Impress: Outlining and Blank Presentations
- LibreOffice Impress: Creating a Presentation

LibreOffice Impress: Templates and Master Pages
- LibreOffice Impress: Styles and Objects 1. Presentation Styles
- LibreOffice Impress: Styles and Objects 2. Drawing Object Styles
- LibreOffice Impress: Creating A Template for Hacker Public Radio
- LibreOffice Impress: Pictures
- LibreOffice Impress: The Gallery and Themes
- LibreOffice Impress: Slide Layouts and AutoLayout Text Boxes
- LibreOffice Impress: Working With Text Boxes
- LibreOffice Impress: Formatting Text
- LibreOffice Impress: Multimedia
- LibreOffice Impress: OLE Objects, Spreadsheets, and Charts
- LibreOffice Impress: Impress Built-In Charts
- LibreOffice Impress: Tables
- Beginning with VBA: Recording a Simple Macro in Word
- Managing Macros in MS Office
- The Visual Basic Editor
- Fixing Macros
- Some Good Code Tips
- Preparing to Code in VBA
- Intro to GIMP
- Selection Tools
- Paint Tools
- Transform Tools
- Color Tools
- Miscellaneous Tools
- Patterns and Gradients
- Introduction to Layers
- Getting Started With Layers
- Free, Public Domain and Creative Commons Assets
- An Example of Using Layers
- More on Layer Tools and Techniques
- Layer Masks
- A Layer Mask Project
- Blending Layers
- More Free Image Sites?
- Normal Layer Modes: Normal, Dissolve, Color Erase
- Normal Layer Modes: Erase, Merge, and Split
- Lighten Layer Modes
- Dodge and Burn
- Darken Modes
- Contrast Modes
- Inversion Layer Modes
- HSV Components Layer Modes
- LCh Components Layer Modes
- Digitizing photos
- Photo storage, backups, and workflow

Version 4.4
What is a Template?
The terms Template and Master Pages refer to the same thing, but inside the Impress application they are referred to as Master Pages, and they are accessed on the right-hand side of the page. If you as the author do not choose a specific Template to use when creating a new presentation, Impress will base the presentation on the default Template that is built in to Impress. But you can create your own default Template if you like.
First, open up a blank presentation, and make the changes you want. For instance, if you work in a large organization they may well have standards that say that you should use a certain logo, or even a complete slide background. They may specify text colors and fonts, and so on. Templates are a way to contain all of these settings, Styles, and other specifications. If you know you will use the same setup over and over, it may make sense to create a Default Template so all of these settings automatically are applied every time you begin a new Presentation. When your Template has everything you want, save it as a Template by following the instructions below for Saving Templates. Then, to make it the default, go to File–>Templates–Manage, which will open up a similar window. Go to My Templates, click on the Template you just created, and then click the Set as Default button to make it the new Default Template.
Like in Writer, the Master Pages in Impress can contain their own styles, which is very useful. For example, the design of the slides may make it desirable that text be a certain color within the Master Page, and having it contain its own styles helps with this.
Finding Templates Online
In our last tutorial we saw how you can create a presentation that focuses on content by creating a black-and-white presentation. But once you have got your content into shape you will probably want to add some eye appeal to spice up the Presentation. Fortunately there are many available on the Internet:
- http://templates.libreoffice.org/template-center?getCategories=Presentation&getCompatibility=any
- http://www.presentationmagazine.com/free-open-office-impress-templates-91.htm
- http://technology.chtsai.org/impress/
- http://www.free-power-point-templates.com/articles/free-openoffice-and-libreoffice-templates-for-impress/
There are plenty more out there, just do a search for “Impress Templates” or “Impress Backgrounds” in the search engine of your choice and you will find many. I like to find ones I can use and add them to my collection.
Adding Templates
Generally there are two ways you add Templates in any LibreOffice application, and we discussed this previously in regard to Calc Templates (see LibreOffice Calc: The Object Model and Using Templates ). Since that covered the topic in some detail I won’t repeat all of it here, but I will give a brief explanation of what is involved.
In general, Templates are either packaged as stand-alone Template files or as Extensions. For Extensions, go to Tools–>Extension Manager, and click Add. For stand-alone Template files, open the Template Manager by going to File–>New–>Templates, open your My Templates folder if it is not already opened, then look for the Import button. This opens a standard file manager window. Go to where your downloaded Template file is, select it, and click “Open”. Note that a Template should be a file with the extension *.otp, but I have seen many cases where files were distributed as *.odp files instead. Strictly, *.otp is the extension for Templates, but as we discussed previously Templates, Master Pages, and slide Backgrounds are often lumped together in people’s minds as Templates. Since you will encounter this, let’s discuss how to handle these different cases.
- Real Templates – Add as above by going to File–>New–>Templates and using the Import button.
- Presentations with backgrounds added – These are *.odp files, the file format for presentations. For these see the next section on how to deal with a bug.
Saving Templates
There is a very odd bug in Impress that might bite you in trying to save a Template. The problem is that the My Templates folder for Impress does not appear at all in the Template Manager, which makes it very difficult to save a Template, as you might imagine. This is not the case for every version, as far as I can tell, so if you don’t run into it all the better. There is a kludgy workaround:
- Go to File > Save As Template on the main menu bar to open the Template Manager dialog. By default the Template Manager opens at the Documents page.
- Double click on the MediaWiki folder to select it and activate the Save icon, then click the Save icon.
- Specify the template name in the pop-up dialog and click Accept. The template is saved into the MediaWiki folder. This appears in the MediaWiki folder on the dialog page of the file type being saved, which is Presentations.
- Close the Template Manager dialog.
- Go to File > New > Templates on the main menu bar to open the Template Manager dialog again. Note: Closing and opening the Template Manager is necessary so that the following steps can be carried out to move your template into the My Templates folder.
- Select the Presentations tab to open the dialog page for presentations (Figure 32).
- Double-click the MediaWiki folder to open it.
- Select the template you have just added and the file handling controls are displayed.
- Click the Move to folder icon and select My Templates from the drop list that appears. Your template will be moved from the MediaWiki folder to the My Templates folder.
This is not a good thing, and I have filed a bug on it. Perhaps by the time you read this it will be fixed, but at least if you run into it you know what to do. (Thanks to Brian Barker from the LibreOffice Users list for the solution.)
Once you have succeeded in saving a Template to your My Templates folder in Impress, it will appear on the right when you select Master Pages, and you can use the slide background and graphics in other presentations even if you did not start out to base your presentation on the saved Template.
Applying Master Pages
When you select Master Pages in the Sidebar, you will see the ones available to you right next to the Sidebar. At the start, these will be the ones that come with LibreOffice out-of-the-box, but as we saw above you can add to your selection by saving Templates, including ones you downloaded from online sites. Click on the one you want, and it will be applied to your presentation. If you later want to change the one used (and that can be often) you might find that selecting a different one only applies to a slide you have selected. The easiest way to fix that is to go to Slide Sorter, press Ctrl+A to select all, then click on the Master Page you want to use. This will apply the Master to all of the Presentation.
Note also that you do not need to use only one Master for one Presentation. But use some common sense. In a large Presentation with two major sections, it might makes sense to give each section its own Master, but don’t go overboard. Remember that you want the attention to be on you, not on your slides.
Creating Your own Master Pages
Go to View–>Master–>Slide Master to bring up the Master view. When you do, you should see a small floating toolbar called Master View.

Master View toolbar
The first button on the left with the Plus sign lets you create a new Master Page but you may not need to do anything because when you open the Master View it usually gives you a brand new Master to work with. You have a number of options here, including text options. Here is a screenshot of my workspace showing the Styles and Formatting window docked to the left of the Workspace.

Workspace with Styles and Formatting window docked and open
What this is telling you is that many of the elements of the Master Page can be controlled by Styles. For the sake of not having a very long tutorial I am going to put a discussion of Styles off in detail until the next tutorial. Then I will bring the pieces together to create a with a Master Page, and a group of Styles.
Listen to the audio version of this post on Hacker Public Radio !

Advertisements
- Administrivia
- Uncategorized
Audio Podcasts
- This Week In Google
- This Week In Tech
- Smarterware
- The Buzz Machine
- Zwilnik.com
Office Software
- LibreOffice
- Lotus Symphony
- Microsoft Office
- Microsoft Office Templates
- OpenOffice.org
- The Document Foundation
- The Search Engine Optimisers (SEOs) Guide To Excel
- WordPerfect Office

You are using an outdated browser. Please upgrade your browser or activate Google Chrome Frame to improve your experience.
English | 中文 (简体) | Deutsch | Español | Français | Italiano | More...
- What's LibreOffice
- New Features
- Templates & Extensions
- Screenshots
- LibreOffice Fresh
- LibreOffice Stable
- Development versions
- Portable versions & DVD Images
- Release Notes
- Community Support
- Documentation
- Installation Instructions
- Professional Support
- System Requirements
- Accessibility
- Bug Submission Assistant
- Get Involved
- Infrastructure
- Localization
- Native-Lang Projects
- Testing - QA
- Who are we?
- Advisory Board Members
- LibreOffice Certification
- Source Code
- Privacy Policy
- --> --> --> --> --> -->

Presentations done right
Impress is a truly outstanding tool for creating effective multimedia presentations. Presentation edition and creation is flexible, thanks to different editing and view modes: Normal (for general editing), Outline (for organizing and outlining your text content), Notes (for viewing and editing the notes attached to a slide), Handout (for producing paper-based material), and Slide Sorter (for a thumbnail sheet view that lets you quickly locate and order your slides).
Rich content for outstanding presentations
Impress has a comprehensive range of easy-to-use drawing and diagramming tools to add style and sophistication to your presentation. What's more, you can bring your presentation to life with slide show animations and effects. The Fontworks tool permits you to create attractive 2D and 3D images from text. Impress enables you to build and control 3D scenes incorporating a large variety of objects and components.
Stay in control - Master your performance
When the time comes to screen and present your work, you have a powerful Slide Show mode that gives you total command over how your slides are displayed and sequenced, so that you can focus on addressing your audience (which slides get shown; manual or timed slide transition; pointer visible or invisible; navigator visible/invisible; ...).
Impress supports multiple monitors, and the standardly-incorporated Presenter Console Extension gives you yet more control over your slide show presentation, such as the ability to see the upcoming slide, view your slide notes, and control the presentation timer while the audience is looking at the current slide.
A touch of creativity
Impress has a comprehensive range of easy-to-use drawing and diagramming tools to add style and sophistication to your presentation. And you can save even more time by downloading templates from the LibreOffice template repository.
- @libreoffice
- @LibreOfficeBugs
Impressum (Legal Info) | Datenschutzerklärung (Privacy Policy) | Statutes (non-binding English translation) - Satzung (binding German version) | Copyright information: Unless otherwise specified, all text and images on this website are licensed under the Creative Commons Attribution-Share Alike 3.0 License . This does not include the source code of LibreOffice, which is licensed under the Mozilla Public License v2.0 . “LibreOffice” and “The Document Foundation” are registered trademarks of their corresponding registered owners or are in actual use as trademarks in one or more countries. Their respective logos and icons are also subject to international copyright laws. Use thereof is explained in our trademark policy . LibreOffice was based on OpenOffice.org.
Chapter 6 Getting Started with Impress
Presentations in LibreOffice
This document is Copyright © 2010–2016 by the LibreOffice Documentation Team. Contributors are listed below. You may distribute it and/or modify it under the terms of either the GNU General Public License ( http://www.gnu.org/licenses/gpl.html ), version 3 or later, or the Creative Commons Attribution License ( http://creativecommons.org/licenses/by/4.0/ ), version 4.0 or later.
All trademarks within this guide belong to their legitimate owners.
Contributors
Please direct any comments or suggestions about this document to the Documentation Team’s mailing list: [email protected]
Note: Everything you send to a mailing list, including your email address and any other personal information that is written in the message, is publicly archived and cannot be deleted.
Acknowledgments
This chapter is adapted and updated from Chapter 6 of Getting Started with OpenOffice.org 3.3 . The contributors to that chapter are:
Agnes Belzunce Barbara M. Tobias Dan Lewis Jean Hollis Weber Peter Hillier-Brook Claire Wood Stefan A. Keel Linda Worthington Gary Schnabl Michele Zarri
Publication date and software version
Published 23 July 2016. Based on LibreOffice 5.1.
Note for Mac users
Some keystrokes and menu items are different on a Mac from those used in Windows and Linux. The table below gives some common substitutions for the instructions in this chapter. For a more detailed list, see the application Help.
What is Impress?
Impress is the presentation (slide show) program included in LibreOffice. You can create slides that contain many different elements, including text, bulleted and numbered lists, tables, charts, and a wide range of graphic objects such as clipart, drawings, and photographs. Impress also includes a spelling checker, a thesaurus, text styles, and background styles.
This chapter includes instructions, screenshots, and hints to guide you through the Impress environment while designing your presentations. Although more difficult designs are mentioned in this chapter, explanations for creating them are in the Impress Guide . If you have a working knowledge of how to create slide shows, we recommend you use the Impress Guide for your source of information.
To use Impress for more than very simple slide shows requires some knowledge of the elements which the slides contain. Slides that contain text use styles to determine the appearance of that text. Creating drawings in Impress is similar to the Draw program included in LibreOffice. For this reason, we recommend that you also see Chapter 3 Using Styles and Templates and Chapter 7 Getting Started with Draw in this guide. You may also wish to consult the Draw Guide for more details on how to use the drawing tools.
Starting Impress
You can start Impress in several ways, as described in Chapter 1 Introducing LibreOffice .
When you start Impress for the first time, the Presentation Wizard may be shown. See “ Creating a new presentation using the Presentation Wizard ” on page 13 . Otherwise, the main Impress window is displayed.
You can turn the Presentation Wizard on and off in Tools > Options > LibreOffice Impress > General > New document by selecting or deselecting the Start with wizard option.
Main Impress window
The main Impress window (Figure 1 ) has three parts: the Slides pane , Workspace , and Sidebar . Additionally, several toolbars can be displayed or hidden during the creation of a presentation.
You can close the Slides pane or the Sidebar by clicking the X in the upper right corner of each pane or go to View > Slide Pane or View > Sidebar on the Menu bar to deselect the pane. To reopen a pane, go to View on the Menu bar and select Slide Pane or Sidebar again.
You can also maximize the Workspace area by clicking on the Hide/Show marker in the middle of the vertical separator line (highlighted in Figure 1 ). Using the Hide/Show marker hides, but does not close, the Slide pane or Sidebar. To restore a pane, click again on its Hide/Show marker.
The Workspace (normally in the center of the main window) opens in the Normal view. It has five tabs: Normal , Outline , Notes , Handout , and Slide Sorter . These five tabs are called View buttons. Since LibreOffice 5.1, the View buttons are not shown by default; but they can be activated by choosing View > Modes Tab Bar from the menu bar.
The Workspace below the View buttons changes with the chosen view. The workspace views are described in “ Workspace views ” on page 9 .
Figure 1: Main window of Impress; ovals indicate the Hide/Show markers. The View Tab Bar is visible in this image.
Slides pane
The Slides pane contains thumbnail pictures of the slides in your presentation in the order in which they will be shown, unless you change the slide show order. Clicking a slide in this pane selects it and places it in the Workspace . When a slide is in the Workspace, you can make changes to it.
Several additional operations can be performed on one or more slides simultaneously in the Slides pane:
• Add new slides to the presentation.
• Mark a slide as hidden so that it will not be shown as part of the presentation.
• Delete a slide from the presentation if it is no longer needed.
• Rename a slide.
• Duplicate a slide (copy and paste).
• Move a slide to another place in the slide stack by dragging and dropping it to the desired position. If the position is not visible in the slide pane, the slide stack will scroll up or down accordingly.
It is also possible to perform the following operations, although there are more efficient methods than using the Slides pane:
• Change the slide transition following the selected slide or after each slide in a group.
• Change the slide design.
• Change slide layout for a group of slides simultaneously.
The Sidebar has seven sections. To expand a section you want to use, click on its icon or click on the small triangle at the top of the icons and select a section from the drop down list. Only one section at a time can be open.
Shows the layouts included within Impress. You can choose the one you want and use it as it is, or modify it to meet your own requirements. However, it is not possible to save customized layouts.
Here you define the page (slide) style for your presentation. Impress includes several designs for Master Pages (slide masters). One of them – Default – is blank, and the rest have background and styled text.
Go to Format > Styles > Styles and Formatting on the Menu bar or press the F11 key to open the Styles and Formatting dialog, where you can modify the styles used in any master page to suit your purpose. This can be done at any time.
A variety of animations can be used to emphasize or enhance different elements of each slide. The Custom Animation section provides an easy way to add, change, or remove animations.
Provides a number of slide transition options. The default is set to No Transition , in which the following slide simply replaces the existing one. However, many additional transitions are available. You can also specify the transition speed (slow, medium, fast), choose between an automatic or manual transition, and choose how long the selected slide should be shown (automatic transition only).
Here you can edit and apply graphics styles and create new ones, but you can only edit existing presentation styles. When you edit a style, the changes are automatically applied to all of the elements formatted with this style in your presentation. If you want to ensure that the styles on a specific slide are not updated, create a new master page for the slide.
Opens the Impress gallery from which you can insert an object into your presentation either as a copy or as a link. A copy of an object is independent of the original object, so changes to the object have no effect on the copy. A link remains dependent on the original object and changes to the object are reflected in the link.
Opens the Impress navigator, in which you can quickly move to another slide or select an object on a slide. It is recommended to give slides and objects in your presentation meaningful names so that you can easily identify them when using the navigator.
Many toolbars can be used during slide creation. They can be displayed or hidden by going to View > Toolbars on the Menu bar and selecting from the context menu.
You can also select the icons that you wish to appear on each toolbar. For more information, refer to Chapter 1 Introducing LibreOffice .
Many of the toolbars in Impress are similar to the toolbars in Draw. Refer to the Draw Guide for details on the functions available and how to use them.
The Status bar (Figure 2 ), located at the bottom of the Impress window, contains information that you may find useful when working on a presentation. For details on the contents and use of these fields, see Chapter 1 Introducing LibreOffice in this guide and the Impress Guide Chapter 1 Introducing Impress .
Figure 2: Status bar
The sizes are given in the current measurement unit (not to be confused with the ruler units). This measurement unit is defined in Tools > Options > LibreOffice Impress > General .
From left to right, you will find:
• Information area – changes depending on the selection. For example:
• Cursor position – the position of the cursor or of the top left corner of the selection measured from the top left corner of the slide, followed by the width and height of the selection or text box where the cursor is located.
• Unsaved changes – a flag indicating that the file needs saving. Double-clicking on this flag opens the file save dialog.
• Digital signature – a flag indicating whether the document is digitally signed. After the file has been saved, double-clicking on this flag opens the digital signatures dialog.
• Slide number – the slide number currently displayed in the Workspace and the total number of slides in the presentation.
• Page (slide) style – the style associated with the slide, handout, or notes page currently in the Workspace. Double-clicking on the style name opens the slide design dialog.
•. Zoom slider – adjusts the zoom percentage of the Workspace displayed.
•. Zoom percentage – indicates the zoom percentage of the Workspace displayed. Double-clicking on zoom percentage opens the zoom and layout dialog.
You can hide the Status Bar and its information by going to View on the Menu bar and deselecting Status Bar .
Workspace views
Each of the Workspace views is designed to ease the completion of certain tasks. It is therefore useful to familiarize yourself with them in order to accomplish those tasks quickly.
Beginning with LibreOffice 5.1, the Workspace View tab bar is hidden by default. Turn it visible by choosing View > Modes Tab Bar .
Each Workspace view displays a different set of toolbars when selected. These toolbar sets can be customized by going to View > Toolbars on the Menu bar, then check or uncheck the toolbar you want to add or remove.
Normal view
Normal view is the main view for working with individual slides. Use this view to format and design and to add text, graphics, and animation effects.
To place a slide in the slide design area (Normal view) (Figure 1 on page 6 ), click the slide thumbnail in the Slides pane or double-click it in the Navigator (see Chapter 1 Introducing LibreOffice and the Impress Guide for more information on the Navigator).
Outline view
Outline view (Figure 3 ) contains all the slides of the presentation in their numbered sequence. It shows topic titles, bulleted lists, and numbered lists for each slide in outline format. Only the text contained in the default text boxes in each slide is shown, so if your slide includes other text boxes or drawing objects, the text in these objects is not displayed. Slide names are not included either.
Figure 3: Outline view
Figure 4: Outline level and movement arrows in Text Formatting toolbar
Use Outline view for the following purposes:
• Quickly inserting text for fast content creation or editing, when formatting and adding graphic objects is postponed until the final stages of creating the presentation.
• Making changes in the text of a slide:
– Adding and deleting the text in a slide as in the Normal view.
– Moving the paragraphs of text in the selected slide up or down by using the up and down arrow buttons (Move Up or Move Down) on the Text Formatting toolbar (highlighted in Figure 4 ).
– Changing the outline level for any of the paragraphs in a slide using the left and right arrow buttons (Promote or Demote) on the Text Formatting toolbar.
– Moving a paragraph and changing its outline level at the same time using a combination of these four arrow buttons.
• Comparing slides with your outline (if you have prepared one in advance). If you notice from your outline that another slide is needed, you can create it directly in the Outline view or you can return to the Normal view to create it.
Use the Notes view (Figure 5 ) to add notes to a slide. These notes are for your information and are not seen by the audience when the presentation is shown.
Figure 5: Notes view
1) Click the Notes tab in the Workspace.
2) Select the slide to which you want to add notes: click the slide in the Slides pane, or double-click the slide name in the Navigator.
3) In the text box below the slide, click on the words Click to add notes and begin typing.
Handout view
Use this view also to customize the information printed on the handout. Refer to the Impress Guide Chapter 10 Printing, E-mailing, Exporting, and Saving Slide Shows for instructions on printing slides, handouts, and notes.
Go to Insert > Page Number, Insert > Fields, or Insert > Header and Footer on the Menu bar and the Header and Footer dialog opens. Click on the Notes and Handouts tab (Figure 7 ) and select the elements you want to appear on each handout page and their contents. More details on how to use this dialog are provided in the Impress Guide .
Slide Sorter view
Slide Sorter view (Figure 8 ) contains all of the slide thumbnails. Use this view to work with a group of slides or with only one slide.
Figure 8: Slide Sorter view
Customizing Slide Sorter view
To change the number of slides per row:
1) Go to View > Toolbars and select Slide Sorter and Slide View to show or hide the Slide Sorter and Slide View toolbars (Figure 9 ).
2) Adjust the number of slides (up to a maximum of 15).
Figure 9 : Slide Sorter and Slide View toolbars
Moving a slide using Slide Sorter
To move a slide in a presentation in the Slide Sorter:
1) Click the slide and the slide is highlighted (Figure 8 ).
2) Drag and drop the slide to the location you want.
Selecting and moving groups of slides
To select a group of slides, use one of these methods:
• Using the Ctrl key – click on the first slide and, while pressing the Ctrl key, select the other desired slides.
• Using the Shift key – click on the first slide, and while pressing the Shift key, select the final slide in the group. This selects all of the other slides between the first and the last slide selected.
• Using the mouse – click slightly to one side (left or right) of the first slide to be selected. Hold down the left mouse button and drag the cursor until all of the slides you want selected are highlighted.
To move a group of slides, select them and then drag and drop the group to their new location.
Working in Slide Sorter view
You can work with slides in the Slide Sorter view just as you can in the Slide pane. To make changes, right-click a slide and choose any of the following from the context menu:
• New Slide – adds a new slide after the selected slide (see “ New slide ” on page 16 ).
• Duplicate Slide – creates a duplicate of the selected slide and places the new slide immediately after the selected slide (see “ Duplicate slide ” on page 17 ).
• Delete Slide – deletes the selected slide.
•. Rename Slide – allows you to rename the selected slide.
•. Slide Layout – allows you to change the layout of the selected slide.
•. Slide Transition – allows you to change the transition of one or a group of selected slides.
•. Hide Slide – any slides that are hidden are not shown in the slide show.
•. Cut – removes the selected slide and saves it to the clipboard.
•. Copy – copies the selected slide to the clipboard without removing it.
•. Paste – inserts a slide from the clipboard after the selected slide.
Creating a new presentation using the Presentation Wizard
This section describes how to start a new presentation using the Presentation Wizard.
The first thing to do is decide on the purpose of the presentation and set out a plan. Although you can make changes as you go, you will save a lot of time by having an initial idea of who the audience will be, the structure, the content, and how the presentation will be delivered.
When you start Impress, the Presentation Wizard may appear (Figure 10 ).
1) In step 1, under Type , choose one of the options. These options are covered in the Impress Guide .
– Empty presentation creates a blank presentation.
– From template uses a template design already created as the basis for a new presentation. The wizard changes to show a list of available templates. Choose the template you want.
– Open existing presentation continues work on a previously created presentation. The wizard changes to show a list of existing presentations. Choose the presentation you want.
Figure 10: Choosing the type of presentation
2) Click Next . Figure 11 shows the Presentation Wizard step 2 as it appears if you selected Empty Presentation at step 1. If you selected From template , an example slide is shown in the Preview box.
3) Choose a design under Select a slide design . The slide design section gives you two main choices: Presentation Backgrounds and Presentations . Each one has a list of choices for slide designs. If you want to use one of these other than <Original>, click it to select it.
– The types of Presentation Backgrounds are shown in Figure 11 . When you select a presentation background, you will see a preview of the slide design in the Preview window.
– <Original> is for a blank presentation slide design.
Figure 11: Selecting a slide design
4) Select how the presentation will be used under Select an output medium . The majority of presentations are created for computer screen display so it is recommended to select Screen . You can change the page format at any time.
The Screen page is set by default for a 4:3 display (28cm x 21cm) so it is not suitable for modern widescreen displays. Use the Widescreen option instead. You can also change the slide size and proportions at any time by switching to Normal view and selecting Slide > Page/Slide Properties... .
5) Click Next and step 3 of the Presentation Wizard appears (Figure 12 ).
a) Choose the desired slide transition from the Effect drop-down menu.
b) Select the desired speed for the transition between the different slides in the presentation from the Speed drop-down menu. Medium is a good choice for now.
c) Select the presentation type. For most purposes, choose Default; you can change this later. For details on the choices under Automatic, see the Impress Guide .
Figure 12: Selecting a slide transition effect
If you did not select a template in step 1 of the Presentation Wizard, then steps 4 and 5 will not appear after step 3. Click Create and your new presentation is created.
6) Click Next . In step 4 of the Presentation Wizard appears, you can enter information about your company and the presentation you are creating.
Figure 13: Entering information about your presentation
7) Click Next . In step 5, the Presentation Wizard shows a preview of what your presentation will look like (Figure 14 ). If the preview does not appear, select Preview .
8) If you want to create a summary of your presentation, select Create summary .
9) Click Create and your new presentation is created.
You can accept the default values for both Effect and Speed unless you are skilled at creating presentations. Both of these values can be changed later while working with slide transitions and animations. These two features are explained in more detail in the Impress Guide Chapter 9 Slide Shows .
Figure 14: Presentation preview
Formatting a presentation
A new presentation contains only one empty slide. In this section we will start adding new slides and preparing them for the intended contents.
Inserting slides
A new slide can be inserted into a presentation as follows:
1) Go to Slide on the Menu bar and select New Page/Slide .
Or, right-click on a slide in the Slides Pane or Slide Sorter view and select New Slide from the context menu.
Or, right-click in an empty space in the Workspace and select Slide > New Slide from the context menu.
2) A new slide is inserted after the selected slide in the presentation.
Duplicate slide
Sometimes, rather than starting from a new slide you may want to duplicate a slide already included in your presentation. To duplicate a slide:
1) Select the slide you want to duplicate from the Slides Pane.
2) Go to Slide on the Menu bar and select Duplicate Page/Slide .
Or, right-click on the slide in the Slides Pane or Slide Sorter view and select Duplicate Slide from the context menu.
Or, right-click on a slide in the Workspace and select Slide > Duplicate Slide from the context menu.
Or, click on the triangle to the right of the Slide icon in the Presentation toolbar and select Duplicate Page/Slide from the context menu. If the Presentation toolbar is not visible, go to View > Toolbars on the Menu bar and select Presentation from the list.
3) A duplicate slide is inserted after the selected slide in the presentation.
Selecting slide layout
When creating a presentation, the first slide is normally a title slide. You can use either a blank layout or one of the title layouts as your title slide.
Figure 15: Available slide layouts
To create a title, if one of the title layouts has been selected, click on Click to add title and then type the title text. To add text content, depending on the slide layout selected, click on Click to add text . To adjust the formatting of the title, subtitle or content modify the presentation style; see the Impress Guide Chapter 2 Using Slide Masters, Styles, and Templates .
Text and graphical elements can be readjusted at any time during the preparation of the presentation, but changing the layout of a slide that already contains some content can have an effect on the content format. Therefore, it is recommended that you pay particular attention to the layout you select to prevent any loss of content.
To view the names for the included layouts, use the Tooltip feature: position the cursor on an icon in the Layout section (or on any toolbar icon) and its name will be displayed in a small rectangle.
In Tools > Options > LibreOffice > General > Help , select the Extended tips option to get more detailed tooltip information.
To select or change the layout of a slide, select the slide in the Slides Pane so that it appears in the Workspace and select the desired layout from the Layouts section in the Sidebar. Several layouts contain one or more content boxes. Each of these content boxes can be configured to contain text, movies, images, charts or tables.
You can choose the type of content by clicking on the corresponding icon that is displayed in the middle of the content box as shown in Figure 16 . If you intend to use the content box for text, click on Click to add text .
Figure 16: Selecting content type
Modifying slide elements
A slide contains elements that were included in the slide master, as well as those elements included in the selected slide layout. However, it is unlikely that the predefined layouts will suit all your needs for your presentation. You may want to remove elements that are not required or insert objects such as text and graphics.
Although Impress does not allow you to create new layouts, you can resize and move the layout elements. It is also possible to add elements without being limited to the size and position of the layout boxes.
To resize a contents box, click on the outer frame so that the resizing handles are displayed. To move it, place the mouse cursor on the frame so that the cursor changes shape. You can now click and drag the contents box to a new position on the slide.
To remove any unwanted element:
1) Click the element to highlight it. The resizing handles show that it is selected.
2) Press the Delete key to remove it.
Changes to any of the layouts included in Impress can only be made using View > Normal , which is the default. Attempting any changes by modifying a slide master, although possible, may result in unpredictable results and requires extra care as well as a certain amount of trial and error.
Adding text
To add text to a slide that contains a text frame, click on Click to add text in the text frame and then type your text. The Outline styles are automatically applied to the text as you insert it. You can change the outline level of each paragraph as well as its position within the text by using the arrow buttons on the Text Formatting toolbar (see Figure 4 and “ Outline view ” on page 9 ) or using the Tab key while positioning the cursor at the beginning of the paragraph. For more information on text, see “ Adding and formatting text ” on page 20 .
Adding objects
To add any objects to a slide, for example a picture, clipart, drawing, photograph, or spreadsheet, click on Insert then select from the drop down menu what type of object you want to insert. For more information, see “ Adding pictures, tables, charts, and media ” on page 25 .
Modifying the appearance of all slides
To change the background and other characteristics of all slides in the presentation, you need to modify the master page or choose a different master page as explained in “ Working with slide masters and styles ” on page 28 .
A Slide Master is a slide with a specified set of characteristics that acts as a template and is used as the starting point for creating other slides. These characteristics include slide background, objects in the background, formatting of any text used, and any background graphics.
LibreOffice uses three terms for a slide that is used to create other slides: master slide , slide master , and master page . This book uses the term slide master, except when describing the user interface.
Impress has a range of slide masters and these are found in the Master Pages section of the Sidebar. You can also create and save additional slide masters or add more from other sources. See the Impress Guide Chapter 2 Using Slide Masters, Styles, and Templates for more information on creating and modifying slide masters.
If all you need to do is to change the background, you can use a shortcut:
1) Select Slide > Page/Slide Properties... and go to the Background tab on the Page Setup dialog that opens.
2) Select the desired background between solid color, gradient, hatching, and bitmap.
3) Click OK to apply it.
4) A dialog opens asking if the background should be applied to all the slides. Click Yes if you want all the slides modified and Impress will automatically modify the master page for you.
Inserting and correctly formatting a background is beyond the scope of this chapter, but you can find all the information you need in the Draw Guide Chapter 4 Changing Object Attributes or in the Impress Guide Chapter 6 Formatting Graphic Objects .
Modifying the slide show
By default the slide show will display all the slides in the same order as they appear in the slide sorter, without any transition between slides. You need to use keyboard input or mouse interaction to move from one slide to the next.
You can use Slide Show on the Menu bar to change the order of the slides, choose which ones are shown, automate moving from one slide to the next, and other settings. To change the slide transition, animate slides, add a soundtrack to the presentation, and make other enhancements, you need to use functions in the Sidebar. See the Impress Guide for details on how to use all of these features.
Adding and formatting text
Many of your slides are likely to contain some text. This section gives some guidelines on how to add text and change its appearance. Text used in slides is contained in text boxes . For more information on adding and formatting text, see the Impress Guide Chapter 3 Adding and Formatting Text .
You can add two types of text boxes to a slide:
• Choose a predefined layout from the Layouts section of the Sidebar and do not select any special content type. These text boxes are called AutoLayout text boxes.
Figure 18: Text toolbar
Using AutoLayout text boxes
1) Make sure Normal view is selected.
2) Click in the text box that reads Click to add text .
3) Type or paste your text in the text box.
Using text boxes
2) Click on the Text icon on the Standard or Text toolbar or use the keyboard shortcut F2 . If the Standard or Text toolbars are not visible, go to View > Toolbars on the Menu bar and select Standard or Text .
3) Click and drag to draw a box for the text on the slide. Do not worry about the vertical size and position as the text box will expand if needed as you type.
4) Release the mouse button when finished. The cursor appears in the text box, which is now in edit mode (a colored border shown in Figure 19 ).
5) Type or paste your text in the text box.
6) Click outside the text box to deselect it.
You can move, resize, and delete text boxes. For more information, see the Impress Guide Chapter 3 Adding and Formatting Text .
Figure 19: Creating and editing text boxes
Vertical text
Quick font resizing.
Impress has an Increase Font icon and a Decrease Font icon on the Text Formatting toolbar (highlighted in Figure 20 ) to increase or decrease the font size of selected text. The amount by which the font size changes depends on the standard sizes available for the font in use.
Figure 20: Quick font resizing on Text Formatting toolbar
AutoLayout text boxes can automatically resize fonts to let the box contain all the text you insert. If you insert a long piece of text, the font size may shrink to fit into the box. Otherwise, the font keeps its default size.
Pasting text
Text may be inserted into the text box by copying it from another document and pasting it into Impress. However, pasted text will probably not match the formatting of the surrounding text on the slide or that of the other slides in the presentation. This may be what you want on some occasions; however, in most cases you want to make sure that the presentation style is consistent and does not become a patchwork of different paragraph styles, font types, bullet points and so on. There are several ways to ensure consistency in your presentation.
Pasting unformatted text
It is normally good practice to paste text without formatting and apply the formatting later. To paste text without formatting:
• Use the keyboard shortcut Ctrl+Shift+V and select Unformatted text from the Paste Special dialog that opens.
• Or click on the small triangle next to the Paste icon in the Standard toolbar and select Unformatted text from the context menu.
The unformatted text will be formatted with the outline or paragraph style at the cursor position in an AutoLayout text box or with the default graphic style in a normal text box.
Formatting pasted text
Figure 21: Text Formatting toolbar
Figure 22: Sidebar Character section
If you are pasting the text into an AutoLayout text box, you need to apply the appropriate outline style to the text to give it the same look and feel as the rest of the presentation.
1) Paste the text in the desired position.
2) Select the text you have just pasted.
3) Select Format > Default formatting on the Menu bar.
4) Use the four arrow buttons on the Text Formatting toolbar (highlighted in Figure 4 on page 9 ) to move the text to the appropriate position and give it the appropriate outline level.
– Left arrow promotes a list entry by one level (for example from Outline 3 to Outline 2). You can get the same result by placing the cursor at the beginning of the paragraph and pressing the Shift + Tab keys.
– Right arrow button demotes a list entry by one level. Press the Tab key to get the same result after placing the cursor at the beginning of the paragraph.
– Up arrow moves a list entry up in the list order.
– Down arrow moves a list entry down in the list order.
5) Apply any necessary manual formatting to the text to change font attributes, tabs, and so on.
If you are pasting text in a text box , you can still use styles to format the text quickly. Only one graphic style can be applied to the pasted text, as follows:
3) Select the desired graphical style to format the text.
4) Apply any necessary manual formatting to the text to change font attributes, tabs, and so on.
Creating bulleted and numbered lists
The procedure to create a bulleted or numbered list is quite different depending on the type of text box used, although the tools to manage the list and customize the appearance are the same. In AutoLayout text boxes, the outline styles available are, by default, bulleted lists. For normal text boxes an additional step is required to create a bulleted list.
AutoLayout text boxes
AutoLayout text boxes included in the available layouts are already formatted as a bulleted list. Create a slide with a bulleted list as follows:
1) From the Layout pane, choose a slide design that contains a text box.
2) In the text box, click on Click to add text.
3) Type your text and press the Enter key to start a new bulleted point.
The default list type is a bulleted list. Methods for changing the appearance of a list are explained in “ Changing list appearance ” on page 24 .
Create a bulleted list in a text box as follows:
3) Type the text and press Enter to start a new bulleted line.
Creating a new outline level
In AutoLayout text boxes, create a new outline level as follows:
1) If necessary, press Enter to begin a new list entry.
2) To demote a list entry (move it to the right), press the Tab key or click the Demote (right arrow) icon on the Text Formatting toolbar or use the keyboard shortcut Alt+Shift+Right . The list entry moves to the right and is indented to the next outline level.
3) To promote a list entry (move it to the left), press Shift+Tab or click the Promote (left arrow) icon on the Text Formatting toolbar or use the keyboard shortcut Alt+Shift+Left . The list entry moves to the left and is indented at the next higher level.
4) To create a new list entry at the same level as the previous one, press Enter again.
In the AutoLayout text boxes, promoting or demoting an item in the list corresponds to applying a different outline style. The second outline level corresponds to Outline 2 style, the third outline level to Outline 3 style, and so on. A change in level and style produces other changes, for example, to font size, bullet type, and so on.
In text boxes, a new outline level can only be created by using the Tab key to demote the list entry and the Shift+Tab key combination to promote the list entry.
Do not try to change the outline level by selecting the text and then clicking the desired outline style as you would in Writer. Due to the way that presentation styles work in Impress, it is not possible to change the level in this way.
Changing list appearance
For the entire list:
1) Select the entire list or click on the border of the text box so that the resizing handles are displayed.
Figure 23: Bullets and Numbering dialog
3) The Bullets and Numbering dialog (Figure 23 ) contains five pages: Bullets, Numbering type, Image, Position, and Customize.
– If a bullet list is needed, select the desired bullet style from the default styles available on the Bullets page.
– If a graphics style is needed, select one from those available on the Image page.
– If a numbered list is needed, select one of the default numbering styles on the Numbering type page.
– Use the Position page to set the indent and numbering spacing and alignment of your list.
– Use the Customize page to customize the numbering, color, relative size, and character used for your list.
4) For a single list entry, click anywhere in the text and then follow steps 2 and 3 above.
If the list was created in an AutoLayout text box, then an alternative way to change the entire list is to modify the Outline styles. Changes made to the outline style will apply to all the slides using them.
Adding pictures, tables, charts, and media
A contents box can contain pictures, tables, charts, or media as well as text. This section provides a quick overview of how to work with these objects. For more information on adding pictures, tables, charts, or media, please refer to the Impress Guide .
Adding pictures
To add a picture to a contents box:
1) Go to Insert > Image on the Menu bar and then select either From file or Scan .
2) Alternatively, after inserting a new slide, click the Insert Image icon (Figure 16 on page 18 ) on the new slide and select the file from the Insert Image dialog that opens. To see a preview of the picture, select Preview at the bottom of the Insert Image dialog.
3) Move the picture to the desired location.
4) The picture will automatically resize to fill the area of the content box. Follow the directions in the note below when manually resizing a graphic.
When resizing a graphic, right-click the picture. Select Position and Size from the context menu and make sure that Keep ratio is selected. Then adjust the height or width to the size you need. As you adjust one dimension, both dimensions will change to keep the width and height ratio the same, ensuring that the picture will not become distorted. Remember also that resizing a bitmap image will reduce its quality; it is better to create an image of the desired size outside of Impress.
Adding tables
To add basic tables to a slide:
3) Alternatively, and after inserting a new slide into your presentation, click the Insert Table icon (Figure 16 on page 18 ).
4) Select the number of rows and columns required from the Insert Table dialog that opens.
6) Select a design style from the available options for your table in the Table Design deck in the Properties section of the Sidebar (Figure 24 ). If the Table Design section does not automatically open after inserting or selecting a table, click on the Properties icon at the side of the Sidebar.
Selecting from any of the styles in the Table Design section in the Sidebar creates a table based on that style. If you create a table by another method, you can still apply a style of your choice later.
The Table toolbar in Impress offers the same functions as the Table toolbar in Writer, with the exception of the calculation functions Sort and Sum. To use Sum and Sort in your presentation, you have to insert a Calc spreadsheet.
After the table is created, you can modify it by adding and deleting rows and columns, adjusting width and spacing, adding borders, background colors and so on. For more information on working with tables see the Impress Guide Chapter 3 Adding and Formatting Text and the Writer Guide Chapter 9 Working with Tables .
Figure 24: Sidebar Table Design section
Entering data into table cells is similar to working with text box objects. Click in the cell you wish to add data to and begin typing. To move around cells quickly, use the following keyboard options:
• Press the arrow keys to move the cursor to another cell if the cell is empty, or to the next character if the cell already contains text.
• Press the Tab key to move to the next cell on the right and press Shift+Tab to move to the next cell on the left..
Adding charts
To insert a chart in a slide:
2) Alternatively and after inserting a new slide, click on the Insert Chart icon (Figure 16 on page 18 ).
3) Impress will insert a default chart and open the Chart dialog. To modify the chart type, insert your own data and change the formatting, refer to the Impress Guide .
Adding media files
To insert media files, such as music and movie clips, in a slide:
1) Go to Insert > Audio or Video on the Menu bar.
2) Alternatively and after inserting a new slide, click on the Insert Audio or Video icon (Figure 16 on page 18 ).
3) A media player will open at the bottom of the screen and you can preview the media.
4) When an audio file is inserted, the contents box will show a loudspeaker image.
Adding graphics, spreadsheets, and other objects
Graphics, such as shapes, callouts, and arrows, are often useful to complement the text on a slide. These objects are handled much the same way as graphics in Draw. For more information, see the Draw Guide Chapter 7 Getting Started with Draw , or the Impress Guide Chapters 4, 5 , and 6.
Spreadsheets embedded in Impress include most of the functionality of Calc spreadsheets and are capable of performing extremely complex calculations and data analysis. If you need to analyze your data or apply formulas, these operations are best performed in a Calc spreadsheet and the results displayed in an embedded Calc spreadsheet or even better in an Impress table.
Alternatively, go to Insert > Object > OLE Object on the Menu bar. You can select from options that include a LibreOffice 5.0 Spreadsheet. This opens a spreadsheet in the middle of the slide and the menus and toolbars change to those used in Calc. You can start adding data, though you may have to resize the visible area on the slide. You can also insert an existing spreadsheet and use the viewport to select the data that you want to display on your slide.
Impress offers the capability of inserting into a slide various other types of objects such as Writer documents, Math formulas, Draw drawings, or another presentation. For details on using these objects, refer to the Impress Guide Chapter 7 Including Spreadsheets, Charts, and Other Objects .
Working with slide masters and styles
A slide master is a slide that is used as the starting point for other slides. It is similar to a page style in Writer and it controls the basic formatting of all slides based on it. A slide show can have more than one slide master.
A slide master has a defined set of characteristics, including background colors, graphics, gradients; and other objects (such as logos, decorative lines and so on), headers and footers, placement and size of text frames, and text format.
All of the characteristics of slide masters are controlled by styles. New slides that you create using a slide master have styles that are inherited from the slide master which was used. Changing a style in a slide master results in changes to all slides based on that slide master, but you can modify individual slides without affecting the slide master.
Although it is highly recommended to use the slide masters whenever possible, there are occasions where manual changes are needed for a particular slide, for example to enlarge the chart area when the text and chart layout is used.
Slide masters have two types of styles associated with them: presentation styles and image styles . The prepackaged presentation styles can be modified, but new presentation styles cannot be created. For image styles, you can modify the prepackaged styles and also create new image styles.
Presentation styles affect three elements of a slide master: background, background objects (such as icons, decorative lines, and text frames), and text placed on the slide. Text styles are further divided into Notes , Outline 1 through Outline 9 , Subtitle , and Title . The outline styles are used for the different levels of the outline to which they belong. For example, Outline 2 is used for the sub-points of Outline 1, and Outline 3 is used for the sub-points of Outline 2, and so on.
Image styles are not restricted and can affect many of the elements of a slide. Note that text styles exist in both the presentation and image style selections.
Slide masters
Impress comes with a collection of slide masters. These slide masters are shown in the Master Pages section of the Sidebar (Figure 25 ) and has three subsections: Used in This Presentation , Recently Used , and Available for Use . Click the + sign next to the name of a subsection to expand it to show thumbnails of the slides, or click the – sign to collapse the subsection to hide the thumbnails.
Each of the slide masters shown in the Available for Use list is from a template of the same name. If you have created your own templates, or added templates from other sources, slide masters from those templates will also appear in this list.
Figure 25: Sidebar Master Pages section
Figure 26: Master View toolbar
Creating a slide master
Creating a new slide master is similar to modifying the default slide master.
1) Enable editing of slide masters by selecting View > Slide Master on the Menu bar and the Master View toolbar opens (Figure 26 ). If the Master View toolbar does not appear, go to View > Toolbars and select Master View.
3) A new slide master appears in the Slides pane. Modify this slide master to suit your requirements.
4) It is also recommended that you rename this new slide master. Right-click on the slide in the Slides pane and select Rename master from the context menu.
5) When finished creating a slide master, click Close Master View on the Master View toolbar and return to normal slide editing mode.
Applying a slide master
To apply a slide master to all the slides in your presentation:
2) To apply one of the slide masters from the available selection to all slides in your presentation, right-click on it and select Apply to All Slides on the context menu.
To apply a different slide master to one or more selected slides:
1) In the Slide Pane, select the slide or slides where you want to use a new slide master.
2) In the Master Pages section on the Sidebar, right-click on the slide master you want to apply to the selected slides, and select Apply to Selected Slides on the context menu.
Loading additional slide masters
Sometimes, in the same set of slides, you may need to mix multiple slide masters that may belong to different templates. For example, you may need a completely different layout for the first slide of the presentation, or you may want to add to your presentation a slide from a different presentation (based on a template available on the hard disk).
1) Go to Slide > Slide Design on the Menu bar or right-click on a slide in the Slides Pane and select Slide Design from the context menu to open the Slide Design dialog (Figure 27 ). This dialog shows the slide masters already available for use.
2) To add more slide masters, click the Load button to open the Load Slide Design dialog (Figure 28 ).
3) Select in the Load Slide Design dialog the template from which to load the slide master and click OK .
4) Click OK again to close the Slide Design dialog.
5) The slide masters in the template you selected to use are now shown in the Available for use subsection of Master Pages.
Figure 27: Slide Design dialog
Figure 28: Load Slide Design dialog
The slide masters you have loaded will also be available the next time you load the presentation. If you want to delete the unused slide masters, click the corresponding checkbox in the Slide Design dialog. If the slide master was not used in the presentation, it is removed from the list of available slide masters.
To limit the size of the presentation file, you may want to minimize the number of slide masters used.
Modifying a slide master
The following items can be changed on a slide master:
• Background (color, gradient, hatching, or bitmap)
• Background objects (for example, a logo or decorative graphics)
• Size, placement, and contents of header and footer elements to appear on every slide
• Size and placement of default frames for slide titles and content
For more information on modifying slide masters, see the Impress Guide Chapter 2 Using Slide Masters, Styles, and Templates .
1) Select View > Slide Master from the Menu bar. This unlocks the properties of a slide master so you can edit it.
2) Select a slide master in Master Pages in the Slides pane.
3) Select an object on the slide master in the Workspace and the Sidebar will display the property options that can be changed for the selected object. Figure 29 shows a graphic object selected with the Graphic properties section open on the Sidebar.
4) Make all necessary changes to the slide master, then click the Close Master View icon on the Master View toolbar or go to View > Normal on the Menu bar to exit from editing slide masters.
5) Save your presentation file before continuing.
Any changes made to one slide when in Master View mode will appear on all slides using this slide master. Always make sure you Close Master View and return to Normal view before working on any of the presentation slides.
Figure 29: Editing a slide master
The changes made to one of the slides in Normal view (for example, changes to the bullet point style, the color of the title area, and so on) will not be overridden by subsequent changes to the slide master. There are cases, however, where it is desirable to revert a manually modified element of the slide to the style defined in the slide master. To revert back to default formatting, select the element and select Format > Default Formatting from the Menu bar.
Adding text, footers, and fields to all slides
A slide master can have text, footers, or fields added so that they appear on every slide in your presentation. Headers are not normally added to slides.
1) Go to View > Slide Master on the Menu bar to open Master View (Figure 30 ).
2) On the Drawing toolbar, select the Text icon or press the F2 key.
3) Click and drag in the master page to draw a text object and then type or paste your text into the text object.
4) Go to View > Normal on the Menu bar or click on Close Master View on the Master View toolbar when you have finished entering text objects that you want to appear on every slide in your presentation.
To add a footer to your slides:
2) Go to Insert > Field or Insert > Page Number on the Menu bar and time to open the Header and Footer dialog (Figure 31 ).
3) Select the type of date and time and type in the footer text and slide number from the available options in the dialog.
Figure 30: Example master view
Figure 31: Footer dialog in Impress
4) Click Apply to All to apply your changes to all the slide masters in your presentation, or click Apply to apply your changes to the selected slide master in your presentation.
5) Alternatively, you can add the date/time, footer text and slide number directly into their respective areas as shown in Figure 30 .
Normally only footers are used on a slide. To create a header, you can use a text box as explained in “ Text ” on page 33 .
To add a field into an object or as a separate object on a slide, select Insert > Fields on the Menu bar and select the required field from the submenu. If you want to edit this field in your slide, see the Impress Guide Chapter 3 Adding and Formatting Text for more information.
The fields you can use in Impress are as follows:
• Date (fixed)
• Date (variable): updates automatically when you reload a file
• Time (fixed)
• Time (variable): updates automatically when you reload a file
• Author: first and last names listed in the LibreOffice user data
• Page Number: the slide number in Impress
• Page Count: the number of slides in your presentation
• File Name
To change the author information, go to Tools > Options > LibreOffice > User Data on the Menu bar.
To change the number format (1,2,3 or a,b,c or i,ii,iii, and so on) for the number field, go to Slide > Page/Slide Properties... on the Menu bar and then select a format from the Format list in the Layout Settings area.
To change a paragraph style throughout your presentation, open the Styles and Formatting dialog and modify the appropriate presentation style.
Adding comments to a presentation
Impress supports comments similar to those in Writer and Calc.
In Normal View, go to Insert > Comment on the Menu bar to open a blank comment (Figure 32 ). A small box containing your initials appears in the upper left-hand corner of the slide, with a larger text box beside it. Impress automatically adds your name and the current date at the bottom of the text box.
Type or paste your comment into the text box. You can optionally apply some basic formatting to the comment by selecting it, right-clicking, and choosing from the context menu that opens. This menu allows you to apply formatting to selected text, delete the current comment, delete all comments from the same author, or delete all comments in the presentation.
Figure 32: Inserting comments
You can move the small comment markers to anywhere you wish on the slide. Typically you might place it on or near an object you refer to in the comment.
To show or hide the comment markers, choose View > Comments .
Select Tools > Options > User Data to configure the name you want to appear in the comment.
If more than one person edits the document, each author is automatically allocated a different background color for their comments.
Setting up a slide show
As mentioned in “ Modifying the slide show ” on page 20 , Impress allocates reasonable default settings for slide shows, while at the same time allowing for customizing many aspects of the slide show experience. This section covers only some aspects; more advanced techniques are explained in the Impress Guide Chapter 9 Slide Shows .
Most of the tasks are best done in Slide Sorter view where you can see most of the slides simultaneously. Go to View > Slide Sorter on the Menu bar or click the Slide Sorter tab at the top of the Workspace.
One slide set – multiple presentations
In many situations, you may find that you have more slides than the time available to present them or you may want to provide a rapid overview without dwelling on the details. Rather than having to create a new presentation, you can use two tools that Impress offers: hiding slides and custom slide shows.
Hiding slides
1) Select the slide you want to hide in the Slide Pane or Slide Sorter view on the Workspace area.
2) Go to Slide > Hide Slide on the Menu bar or right-click on the slide thumbnail and select Hide Slide from the context menu. Hidden slides are marked by a diagonal bars across the slide.
Custom slide shows
If you want to create a custom slide show from the same presentation:
1) Select the slides you want to use in your custom slide show.
2) Go to Slide Show > Custom Slide Show on the Menu bar.
3) Click on the New button to create a new sequence of slides and save it with a different name. You can have as many slide shows as you want from a single presentation.
Slide transitions
Slide transition is the animation that is played when a slide is changed for the next slide in your presentation. You can configure the slide transition from the Slide Transition section in the Tasks Pane.
2) Select the desired transition, the speed of the animation, and whether the transition should happen when you click the mouse (preferred) or automatically after a certain number of seconds.
3) Click Apply to All Slides to apply the transition for all of your presentation or continue selecting transitions to place between each slide in your presentation.
The Slide Transition section has a very useful choice: Automatic preview. Select its checkbox and when you make any changes in a slide transition, the new slide is previewed in the Slide Design area, including its transition effect.
Slide advance
You can set the presentation to advance automatically to the next slide after a set amount of time from the Slide Transition section in the Sidebar.
1) Go to Advance slide and select the Automatically after option.
2) Enter the required amount of time in seconds that each slide will be displayed.
3) Click on the Apply to All Slides button to apply the same display time to all slides.
To apply a different display time to each slide in your presentation:
1) Go to Slide Show > Rehearse Timings on the Menu bar and the slide show starts.
2) When you are ready to advance to the next slide, mouse click on the display background or press the right arrow or space bar on your keyboard.
3) Impress will memorize the timings for each slide and will advance to the next slide automatically using these timings when you run the slide show.
To restart a slide show automatically after the last slide has been displayed:
1) Go to Slide Show > Slide Show Settings on the Menu bar.
2) Select Auto and the timing of the pause between slide shows.
3) Click OK when you have finished.
Running a slide show
To run a slide show, do one of the following:
• Click Slide Show > Start from first Slide on the Menu bar.
• Press F5 on the keyboard.
If the slide advance is set to Automatically after X sec , let the slide show run by itself.
If the slide advance is set to On mouse click , do one of the following to move from one slide to the next:
• Use the arrow keys on the keyboard to go to the next slide or to go back to the previous one.
• Click the mouse to move to the next slide.
• Press the spacebar on the keyboard to advance to the next slide.
Right-click anywhere on the screen to open a context menu where you can navigate through the slides and set other options.
To exit the slide show at any time including when the slide show has ended, press the Esc key.
Presenter Console
LibreOffice Impress has a Presenter Console function that can be used when an extra display for presentation has been connected to your computer. The Presenter Console (Figure 33 ) provides extra control over slide shows by using different views on your computer display and on the display that the audience sees. The view you see on your computer display includes the current slide, the upcoming slide, any slide notes, and a presentation timer.
For more information and details about using the Presenter Console, see the Impress Guide Chapter 9 Slide Shows .
Figure 33: Impress Presenter Console
Using Impress Remote control
Impress Remote is a mobile application developed by the community for Android and iOS systems that allows you to control a live presentation with a mobile device such as a phone or tablet.
The connection between your mobile device and the computer running your presentation is made through a Bluetooth pairing or a local network connection between the two.
Getting Impress Remote
To get the software, access your mobile device application store, either Google Play Store for Android devices or Apple Store for IOs devices. Search for “Impress Remote” and select the one that is from The Document Foundation and install it in your device.
Connecting the mobile device to the computer
Activate Bluetooth on both devices, then pair the devices. (Refer to the manuals for your mobile device and computer operating system for instructions on enabling, setting up a Bluetooth identifier, and pairing.)
Once the pairing is established, your mobile device is ready to control your presentation.
Enabling remote control in Impress
An Impress slide show with remote control is not enabled by default. To enable it, go to Tools > Options > LibreOffice Impress > General and select Enable Remote Control checkbox in the Presentation area of the dialog (Figure 34 ).
Running a slide show with Impress Remote
To run a slide show using Impress Remote, follow these steps:
1) On both devices, make sure Bluetooth is already enabled and configured.
2) On your computer, open the presentation you would like to present.
3) On your phone:
a) Open Impress Remote from the main menu (Figure 35 ).
b) To select your computer, tap its name. The presentation opened on the computer begins automatically (Figures 36 and 37 ).
To advance the presentation
Tap the slide thumbnail or use the phone’s physical volume up button.
To go backwards
Double-tap the slide thumbnail or use the phone’s physical volume down button.
To skip slide animations and transitions
Swipe left to go to the next slide, or swipe right to go backwards.
To end the presentation, use the Back button of the phone, or open the menu and select Stop slide show .
How To Import and Use Microsoft PowerPoint Templates on LibreOffice Impress
This tutorial will help you importing and using Microsoft PowerPoint templates on LibreOffice Impress . This way, you can immediately create beautiful presentations you really need and want just instantly. From this article, you can download a lot of both academic and general purpose templates including those from Oxford, Harvard, and MIT available for free on the net in PowerPoint PPTX format to later import, save, and convert them to Impress ODP format if you wish. Now let's practice!
( University of Oxford presentation template can be opened, imported, used, very well with LibreOffice Impress along with other impressive number of templates)
Subscribe to UbuntuBuzz Telegram Channel to get article updates.
What you can create
- University of California, Berkeley
- Car racing
- Football
- Motorcycle racing
- Product marketing
- Sales report
- Financial report
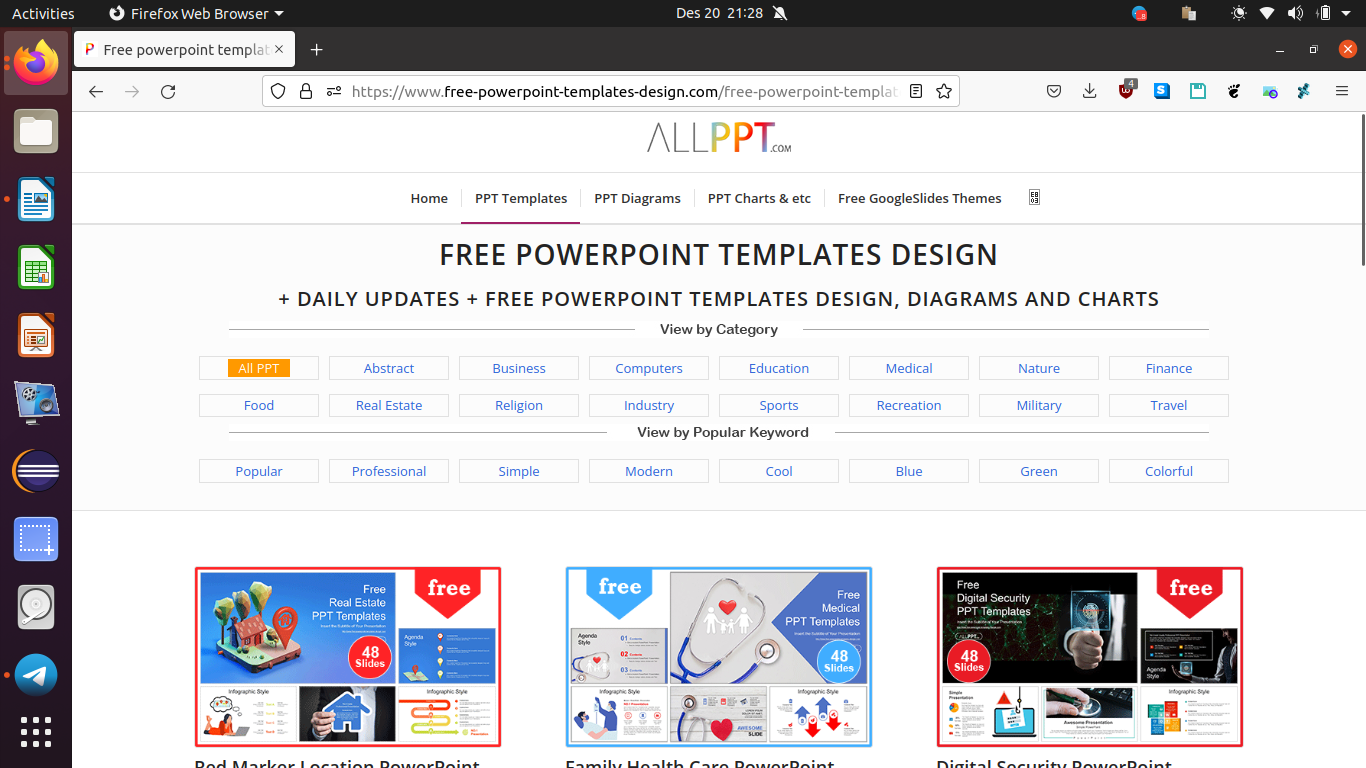
Below is a list of gratis (free of cost) Microsoft PowerPoit template websites. They altogether provide the world most complete digital presentation templates for all purposes possible including mentioned above.
General Resources
templates.office.com
freeppt7.com
templateswise.com
slidehunter.com (CC BY)
smiletemplates.com
slidesgo.com
slidescarnival.com
free-powerpoint-templates-design.com
free-power-point-templates.com
slidesmania.com
presentationgo.com
powerpointify.com
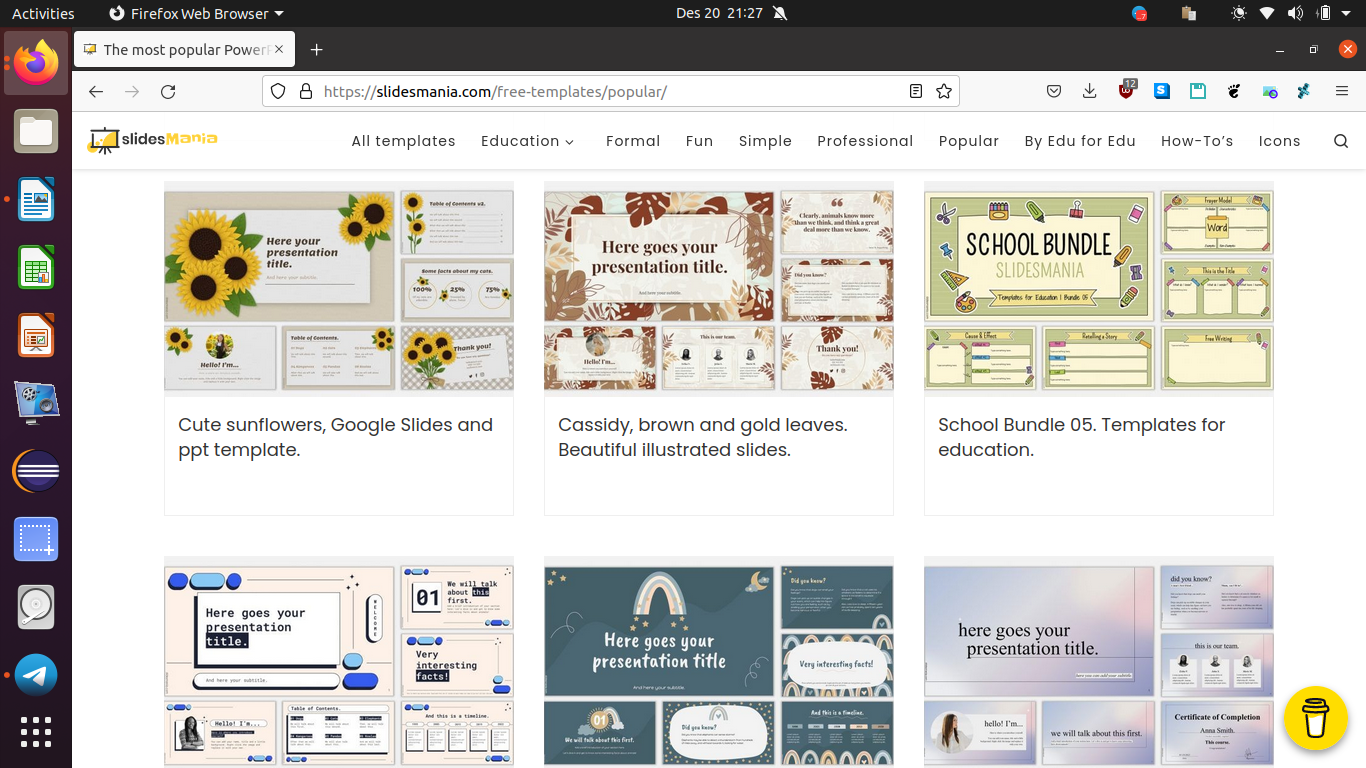
( SlidesMania.com , providing gratis PowerPoint, Impress-compatible templates)
Academic Resources
Cambridge, UK
University of California, Berkeley, US
Harvard, US
TUM, Germany

( Harvard Medical School , representing Harvard, an example of well-known university that provides official presentation template with their logo identity)
Document Format
ppt : PowerPoint 97-2003 old format.
pptx : PowerPoint 2007-365 new format.
potx : PowerPoint template format.
odp : Impress format.
otp : Impress template format, equivalent to potx.
You can use whatever PowerPoint/Impress format available without problems. However, the difference between normal formats ( pptx , odp ) with template formats ( potx , otp ) is that:
1) if you open the file, normal one will show its actual file name on titlebar while template one will show Untitled , and,
2) if you edited them, saving a normal one will change its content while saving a template one will create a new file without changing the original content.
Expected Goals
Your LibreOffice Impress should improve from having just a few to a lot of templates especially those you really need for your purposes. See pictures below, could you notice several new templates named acm, berkeley, and cambridge? Now you can have them too.
Before:
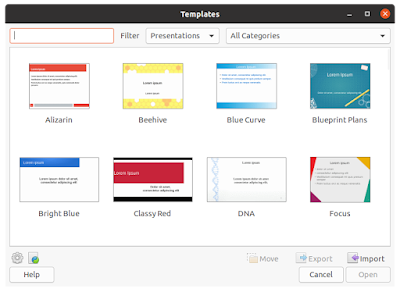
1. Get an PowerPoint template document file.
You can search, find, visit and download them from any of resources above.
2. Open LibreOffice Impress.
3. Open the PowerPoint document.
4. Document opened.
5. Do File > Templates > Save as Template > give it a name according to its original name > select My Templates category > Save > successfully imported a template. For further explanation, read our LibreOffice Templates Use Guide .
6. To use a template, do File > New > Templates > template chooser dialog will show > select a template > Open > a new untitled document with template will show > you are ready to write. Please read LibreOffice Templates Use Guide if you want to learn more.
Template Examples
Impress acm.
Impress UC Berkeley Template

Impress Caltech Template

Impress Cambridge Template
Impress CERN Template

Impress UGM Template
Impress Harvard Template
Impress MIT Template
Impress ITB Template
Impress Telkom University Template
Impress Oxford Template
Impress Stanford Template
Impress TUM Template

Impress Udayana Template
Impress School Education Template
Impress Travel Template
Impress Medical Template
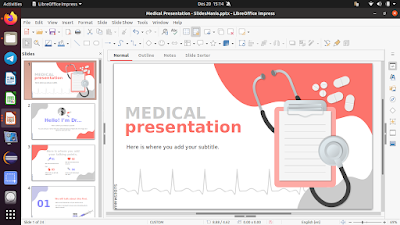
Impress Culinary Template
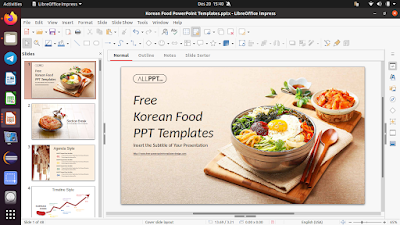
What is LibreOffice?
LibreOffice Templates Download Center
Subscribe by Email
- Ubuntu 22.04 Runs Very Slow and The Solutions
- How To Edit Ubuntu Bootloader Menu Made Simple
- How To Use KDE Partition Manager to Format USB Drive
- How To Boot UEFI on QEMU
- Download Zorin OS 17 with Mirrors, Torrents and Checksums
- How To Change Ubuntu Repository Mirror Sources
- Beginner's Guide To Get Email Account at Disroot
- Convert MP4 to MP3 with FFmpeg
- How To Setup Ubuntu Computer for Chinese Writing Input
- How To Connect QEMU Host-Guest Networks Made Easy
Recent Comments
Impress Guide 7.0
Chapter 1 Introducing Impress
This document is Copyright © 2021 by the LibreOffice Documentation Team. Contributors are listed below. You may distribute it and/or modify it under the terms of either the GNU General Public License ( http://www.gnu.org/licenses/gpl.html ), version 3 or later, or the Creative Commons Attribution License ( http://creativecommons.org/licenses/by/4.0/ ), version 4.0 or later.
All trademarks within this guide belong to their legitimate owners.
Contributors
To this edition.
To previous editions.
Please direct any comments or suggestions about this document to the Documentation Team’s mailing list: [email protected]
Everything sent to a mailing list, including your email address and any other personal information that is written in the message, is publicly archived and cannot be deleted.
Publication date and software version
Published February 2021 . Based on LibreOffice 7.0 .
What is Impress?
Impress is the presentation (slide show) program included in LibreOffice. Impress creates presentations in the ODP format, which can be opened by other presentation software or can be exported in different presentation formats.
You can create slides that contain many different elements, including text, bulleted and numbered lists, tables, charts, and a wide range of graphic objects such as clip-art, drawings and photographs. Impress also includes a spelling checker, a thesaurus, text styles, and background styles.
This chapter introduces the Impress user interface. The remaining chapters in this guide explain all the features available in Impress that can be used to create more sophisticated slide shows.
To use Impress for more than very simple slide shows, requires some knowledge of the slide elements. Slides containing text use styles to determine the appearance of that text. Creating drawings in Impress is similar to using the Draw program included in LibreOffice. See the Draw Guide for more details on how to use the drawing tools.
Starting Impress
You can start Impress in several ways:
From the LibreOffice Start Center that opens when LibreOffice is opened and no other LibreOffice module is open.
Click on Impress Presentation to create a new presentation;
Click on Open File and navigate to the folder where there is an existing presentation.
From the system menu using the standard menu from which most applications are started. Details vary with your operating system. S ee the Getting Started Guide for more information and some examples are listed below:
Start menu in Windows.
Applications menu in Linux with a Gnome desktop.
Applications menu in macOS.
From any open module of LibreOffice, go to File > New > Presentation on the Menu bar, or click on New on the Standard toolbar and select Presentation from the drop-down menu.
When you start Impress for the first time, the main Impress window opens, as default, with the Select a Template dialog displayed ( Figure 1 ). Templates included with Impress are designed to fit the two standard sizes of presentation slides: 4:3 and 16:9 ratios. However, templates will adapt to other sizes that are available and can be selected by going to Slide > Properties > Paper Format on the Menu bar or Format in the Slide section in the Properties deck on the Sidebar.
When LibreOffice was installed on your computer, a menu entry for each component is normally added to your system menu. The exact name and location of these menu entries depend on the operating system and graphical user interface.
The New icon displayed on the Standard toolbar will depend on which LibreOffice module you have open when you want to create a new presentation.
Figure 1 : Select a Template dialog

To start Impress without the Select a Template dialog ( Figure 1 ), deselect Show this dialog at startup in the lower left of the dialog.
In Windows or Linux, go to Tools > Options > LibreOffice Impress > General on the Menu bar and deselect Start with Template Selection under New Document .
In macOS, LibreOffice > Preferences > LibreOffice Impress > General on the Menu bar and deselect Start with Template Selection under New Document .
Main Impress window
The main Impress window ( Figure 2 ) has three main sections : Slides pane, Workspace, and Sidebar. At the top is a menu bar and toolbars. Toolbars can be displayed or hidden during the creation of a presentation.
You can close the Slides pane or Sidebar by clicking the X in the upper right corner of each pane or go to View > Slides pane or View > Sidebar on the Menu bar to deselect the pane. To reopen a pane, select View > Slides pane or View > Sidebar on the Menu bar.
Figure 2 : Impress main window with Hide/Show markers highlighted

You can maximize the Workspace area by clicking on the Hide/Show marker in the middle of the vertical separator line (highlighted in Figure 2 ). Using the Hide/Show marker hides, but does not close, the Slides pane or Sidebar. To restore a pane, click again on its Hide/Show marker.
The Impress Menu bar, at the top of the main window, provides several menus common to all LibreOffice modules. T he commands may differ between the modules for File, Edit, View, Insert, Format, Tools, Window, and Help. Impress has two extra menus for Slide and Slide Show. When you select one of the menus, a sub-menu drops down to show commands. The Menu bar can be customized and for more information, see the Getting Started Guide .
The Workspace (normally the center of the main window) opens in the Normal view. It has four standard views selected using tabs: Normal , Outline , Notes , and Slide Sorter ( Figure 3 ). For more information on workspace views, see “ Workspace views ” below .
If you are using master slides, then master views become available: Master Slide , Master Notes and Master Handout . There are no tabs for master views and can only be selected by going to View on the Menu bar. For more information on master slides, see Chapter 2, Using Slide Masters, Styles, and Templates.
Figure 3 : Workspace view tabs

Slides pane
The Slides pane contains thumbnail images of slides in a presentation in the order in which they will be shown. This slide show order cam be changed and is describe in Chapter 9, Slide Shows. Clicking on a slide image in the Slides pane selects it and places the slide in the Workspace where you can make changes to the displayed slide .
To display or close the Slides pane, go to View > Slides pane on the Menu bar.
To close the Slides pane, click on the X in the right top corner of the Slides pane.
To display or hide the Slides pane , use the Hide/Show marker on the left of the Workspace ( Figure 2 ).
Several additional operations can be carried out on one or more slides in the Slides pane. These additional operations are available from a context menu when you right click in the Slides pane.
Add new slides to a presentation.
Hide a slide so that it will not show in a presentation.
Delete a slide from a presentation.
Rename a slide.
Duplicate a slide (copy and paste).
Move a slide to another position in the slide order by dragging and dropping it to the desired position.
The Impress Sidebar, normally located on the right side of the Workspace, is similar to the Sidebar in the other LibreOffice modules and consists of seven decks. To open a deck, use one of the following methods:
Click on its icon on the right side of the Sidebar.
C lick on Sidebar Settings at the top right of the Sidebar and select a deck from the drop-down list.
Go to View on the Menu bar and select the deck required from the drop down menu.
To display or hide the Sidebar, use one of the following methods:
Go to View > Sidebar on the Menu bar.
Use the keyboard shortcut Ctrl+F5 .
Use the Hide/Show marker on the right of the Workspace ( Figure 2 ).
To close the Sidebar , click on the X in the right top corner of the Sidebar .
To display the Sidebar, click on one of the Sidebar icons to open a deck.
The Properties deck has nine sections allowing you to change slide layout and the format of any objects on a slide. The use of these sections is explained in this user guide.
When a slide is selected and appears in the Workspace, the sections available to change slide layout are Slide and Layouts .
When an object on a slide is selected, the sections available to change object format are Character , Paragraph , Area , Lists , Shadow , Line , and Position and Size .
Slide transition
The Slide Transition deck provides a selection of slide transitions available in Impress, transition speed, automatic or manual transition, and how long a selected slide is shown (automatic transition only). For more information on transitions, see Chapter 9, Slide Shows.
The Animation deck provides an easy way to add, change, or remove animations to different elements or objects on a slide and how they appear during a slide show. For more information on animations, see Chapter 9, Slide Shows.
Master Slides
On the Master Slides deck you define the slide style for your presentation and Impress includes several designs of master slides. The default master slide is blank, but the remaining master slides have backgrounds and styled text. For more information on master slides, see Chapter 2, Using Slide Masters, Styles, and Templates.
On the Styles deck you can quickly apply drawing and presentation styles to a selected object, create new styles for drawing and presentation, and modify both types of styles. When you save changes to a style, the changes are applied to all of the elements formatted with that style in the presentation. For more information on styles, see Chapter 2, Using Slide Masters, Styles, and Templates.
Opens the G allery deck where you can insert an object into your presentation either as a copy or as a link. A copy of an object is independent of the original object. Changes to the original object have no effect on the copy. A link remains dependent on the original object. Changes to the original object are also reflected in the link.
Opens the Navigator deck where you can quickly move between slides in your presentation or select an object on a slide. It is recommended to give slides and objects in your presentation meaningful names so that you can easily identify them when using the navigator. For more information, see “ Navigator ” below .
You should see rulers (bars with numbers) on the upper and left-hand sides of the workspace. If they are not visible, enable the rulers by selecting View > Rulers in the Menu bar. The rulers show the size of a selected object on the page using double lines (highlighted in Figure 4 ). You can also use the rulers to manage object handles and guide lines when positioning objects.
Figure 4 : Rulers showing object size

Figure 5 : Changing ruler units

Figure 6 : Status bar

The page margins in the drawing area are also represented on the rulers. You can change the margins directly on the rulers by dragging them with the mouse. The margin area is indicated by the grayed out area on the rulers as shown in Figure 4 .
To change the measurement units of the rulers, which can be defined independently, right-click on a ruler and select the measurement unit from the drop down list, as illustrated for the horizontal ruler in Figure 5 .
The Status bar ( Figure 6 ), located at the bottom of the main window, contains information that you may find useful when working on a presentation. You can hide the Status bar by going to View on the Menu bar and deselecting Status Bar .
The sizes are given in the current measurement unit and might not be the same as the ruler units. The measurement unit on the Status bar is defined in Tools > Options > LibreOffice Impress > General .
Slide number
The slide number currently displayed in the Workspace and the total number of slides in the presentation.
Information area
This changes depending on the object selected on the slide. Examples are shown in the following table.
Master slide
The master slide associated with the slide or notes page currently displayed in the Workspace. Right-click to pop up a list of available master slides and select one to apply it to the selected slide. Double-click to open the Available Master Slides dialog (for more information, see Chapter 2, Using Slide Masters, Styles and Templates).
Cursor position / Object size
Shows different information depending on whether objects are selected or not.
When no object is selected, the position numbers show the current position (X and Y coordinates) of the mouse cursor.
When an object is selected and being resized with the mouse, the object size numbers show the size of the object (width and height).
If an object is selected, the position numbers shows X and Y coordinates of the upper-left corner and the object size number pair displays the size of the object. These numbers do not relate to the object itself, but to the selection outline, which is the smallest possible rectangle that can contain the visible part or parts of the object.
When an object is selected, clicking in either of these areas opens the Position and Size dialog.
Unsaved changes
Indicates if there are any unsaved changes in your presentation. Clicking this icon saves the document. If the presentation has not been saved before, the Save As dialog opens giving you the opportunity to save the presentation.
Digital signatures
Indicates if your presentation has a digital signature.
Text language
Indicates the language used for any text on your presentation.
When this icon is clicked on, the slide in the workspace zooms to fit in the Workspace.
Zoom slider
When moved, the slide changes its viewing zoom in the Workspace.
Zoom percentage
Indicates the zoom level of the slide displayed in the Workspace. Clicking on zoom percentage opens the Zoom & View Layout dialog where you adjust the settings for zoom factor and view layout.
Figure 7 : Navigator dialog

The Navigator displays all objects contained in a presentation. It provides another convenient way to move around a presentation and find items in it.
To open the Navigator dialog ( Figure 7 ) go to View > Navigator on the Menu bar, or use the keyboard shortcut Ctrl+Shift+F5 . Alternatively, click on Navigator in the Sidebar to open the Navigator deck that is similar in appearance and function as the Navigator dialog.
The Navigator is more useful if you give your slides and objects (pictures, spreadsheets, and so on) meaningful names, instead of leaving them with default names, such as “Slide 1” and “Shape 1” and so on (as shown in Figure 7 ). This will allow you to easily locate a slide or object in your presentation.
Many toolbars can be used during slide creation. To display or hide the various toolbars in Impress, go to View > Toolbars on the Menu bar and select from the drop down menu that appears which toolbars you want to display. For example, the Standard and Drawing toolbars are shown by default, but the Line and Filling and Text Formatting toolbars are not shown.
You can select the icons or buttons that you want to appear on toolbars. To change the visible icons or buttons on any toolbar, right-click in an empty area on the toolbar and select Visible Buttons from the context menu. Visible icons or buttons are indicated by a check mark next to the icon name . Click on an icon name to hide or show it in the toolbar. For more information, see Chapter 11, Setting Up and Customizing Impress and the Getting Started Guide .
The toolbars that are widely used when creating a presentation are as follows:
Standard toolbar
The Standard toolbar ( Figure 8 ) is the same for all LibreOffice modules and is not described in detail in this user guide . By default, it is located just under the Menu bar at the top of the Workspace.
Figure 8 : Standard toolbar

Drawing toolbar
The Drawing toolbar ( Figure 9 ) contains all the necessary functions for drawing various geometric and freehand shapes, and for organizing them in a slide . More information on the Drawing toolbar can be found in Chapter 5, Managing Graphic Objects .
Figure 9 : Drawing toolbar

Line and Filling toolbar
The Line and Filling toolbar ( Figure 10 ) lets you modify the main properties of an object. The icons and pull-down lists vary according to the type of object selected. The Line and Filling toolbar lets you change color, style, and width of a line drawn, fill color and style, and other properties of an object. The object must be selected with a mouse click. If the selected object is a text frame, the Line and Filling toolbar changes to the Text Formatting toolbar ( Figure 11 ).
Figure 10 : Line and Filling toolbar

Text Formatting toolbar
The Text Formatting toolbar ( Figure 11 ) is similar to the Formatting toolbar in LibreOffice Writer and only appears when a text object has been selected in your presentation, automatically replacing the Line and Filling toolbar.
Figure 11 : Text Formatting toolbar

The appearance of the toolbar icons varies depending on your operating system and the selection of icon size and style in Tools > Options > LibreOffice > View . For more information about working with toolbars, see the Getting Started Guide .
Workspace views
The Impress workspace has four standard views selected using tabs: Normal , Outline , Notes , and Slide Sorter . These tabs are normally displayed the top of the Workspace ( Figure 3 ). If the tabs are not displayed, then go to View > Views Tab Bar on the Menu bar. You can also select the different Workspace views by going to View on the Menu bar and selecting a view from the drop down menu.
If you are using master slides, then master views become available in the Workspace: Master Slide , Master Notes and Master Handout . There are no tabs for master views and can only be selected by going to View on the Menu bar and selecting Master Slide , Master Notes or Master Handout . For more information on master slides, see Chapter 2, Using Slide Masters, Styles, and Templates.
Normal view
Normal view is the main standard view for creating individual slides in a presentation. In Normal view you can design slides, add and format any text or graphics, and add any animation effects to text or graphics.
To place a slide in Normal view of the Workspace ( Figure 3 ), either click on the slide thumbnail in the Slides pane or click on the slide name in the Navigator.
Outline view
Outline view in the Workspace ( Figure 12 ) contains all of the slides of the presentation in their numbered sequence. It shows topic titles, bulleted lists, and numbered lists for each slide in outline format. Only the text contained in the default text boxes in each slide is shown. If you have added text boxes or graphic objects to the slides, then these objects are not displayed. Slide names are not included.
Use Outline view for the following:
Making changes in the text of a slide:
Add or delete text in a slide as in Normal view.
Move a paragraph in a slide up or down by using the movement arrows on the Outline toolbar ( Figure 13 ).
Change the outline level of a paragraph in a slide using the left and right arrow buttons on the Outline toolbar.
Figure 12 : Outline view in Workspace

Figure 13 : Outline toolbar

Comparing slides with your outline (if you have prepared one in advance). If you notice from your outline that another slide is needed, you can create it directly in Outline view, or you can return to Normal view to create it.
If the Outline toolbar does not appear when in Outline view, then go to View > Toolbars on the Menu bar and select Outline from the drop down list.
Use Notes view in the Workspace ( Figure 14 ) to add notes to a slide. These notes are not seen when the presentation is shown to an audience using an external display connected to your computer.
1) Click the Notes tab in the Workspace.
2) Click the slide in the Slides pane so that the slide appears in the Workspace.
3) In the text box below the slide, click on the words Click to add notes and begin typing your notes.
You can resize the Click to add notes text box using the resizing handles which appear when you click on the edge of the box. You can also move or change the size of the box by clicking and dragging on the box border.
When text is inserted in the Click to add notes text box, it is automatically formatted using the predefined Notes style that you can find in Presentation Styles in the Styles deck on the Sidebar. You can format the Notes style to suit your needs. For more information, see Chapter 8, Adding and Formatting Slides, and Notes.
Figure 14 : Notes view in Workspace

Figure 15 : Slide Sorter view in Workspace

Figure 16 : Slide View toolbar

Slide Sorter view
The Slide Sorter view in the Workspace ( Figure 15 ) contains all the thumbnails of slides used in your presentation. Use this view to work with one slide or a group of slides.
Customizing Slide Sorter view
To change the number of slides per row in Slide Sorter view:
1) Go to View > Toolbars > Slide View on the Menu bar to show the Slide View toolbar ( Figure 16 )
2) Adjust the number of slides, up to a maximum of 15, in the Slides per Row box.
Changing slide order
Changing the slide order in a presentation of a single slide or a group of slides using Slide Sorter view is as follows:
1) Select a slide or a group of slides .
2) Drag and drop the slide or group of slides at the location you want.
Selecting a group of slides
To select a group of slides, use one of these methods:
Click on the first slide and, while holding the Ctrl key, select the required slides. The selected slides do not have to be next to each other.
Click on the first slide, and while pressing the Shift key, select the final slide for the group. This selects all of the slides between the first and the last slide selected.
Position the cursor slightly to one side and outside the first slide, then click and hold the left mouse button and drag the cursor until all of the slides you want in the group are selected.
Working in Slide Sorter view
You can work with slides in Slide Sorter view just as you can in the Slides pane. To make changes, right-click on a slide and choose one of the following from the context menu:
Cut – removes the selected slide and saves it to the clipboard.
Copy – copies the selected slide to the clipboard without removing it.
Paste – inserts a slide from the clipboard after the selected slide.
New Slide – adds a new slide after the selected slide.
Duplicate Slide – creates a duplicate of the selected slide and places the new slide immediately after the selected slide.
Rename Slide – allows you to rename the selected slide.
Hide Slide – any slides that are hidden are not shown in the slide show.
Delete Slide – deletes the selected slide.
Layout – allows you to change the layout of the selected slide.
Move – allows you to move or reposition the slide in the slide show order.
Creating Presentations
By default, Impress opens with the Select a Template dialog displayed ( Figure 1 ) where you can select a template to use in your presentation. To create a new presentation without using a template, click on Cancel in the Select a Template dialog and a blank slide appears in the Workspace and Slides pane.
The first thing to do is decide on the purpose of the presentation and plan the presentation. Having an idea of who the audience will be, the structure, the content, and how the presentation will be delivered, will save you a lot of time from the start.
To prevent the Select a Template dialog from opening when you create a new presentation, go to Tools > Options > LibreOffice Impress > General on the Menu bar to open Options – LibreOffice Impress – General dialog ( Figure 17 ) and deselect the option Start with New Template Selection .
For more information on creating presentations, slide show options , and presentation settings, see Chapter 9, Slide Shows and Chapter 11, Setting Up and Customizing Impress.
Figure 17 : Options LibreOffice Impress General dialog

Figure 18 : Presentation toolbar

New presentation
When you create a new presentation, Impress shows only one slide in the Slides pane and Workspace ( Figure 2 ). You can add new slides or duplicate slides to your presentation as follows.
Inserting new slide
A new slide is inserted into a presentation using one of the following methods.
Go to Slide > New Slide on the Menu bar.
Ri ght-click in the Slides pane and select New Slide from the context menu.
Use the keyboard shortcut Ctrl+M .
Go to Slide Sorter view in the Workspace, right-click on a slide and select New Slide from the context menu.
C lick on New Slide icon in the Presentation toolbar ( Figure 18 ). If the Presentation toolbar is not visible, go to View > Toolbars on the Menu bar and select Presentation from the drop down list.
A new slide is inserted after the selected slide in the presentation. If a slide is not selected, then the new slide is inserted as the last slide in the presentation.
Duplicate slide
To duplicate a slide, select the slide you want to duplicate in the Slides pane and use one of the following methods. A duplicate slide is inserted after the selected slide in the presentation.
Right-click on a slide in the Slides pane and select Duplicate Slide from the context menu.
Go to Slide Sorter view in the Workspace, right-click on a slide and select Duplicate Slide from the context menu.
Figure 19 : Slide and Layouts sections in Properties on Sidebar

Go to Slide > Duplicate Slide on the Menu bar.
C lick on the Duplicate Slide icon in the Presentation toolbar ( Figure 18 ).
Slide format
Click on Properties on the Sidebar and open the Slide section ( Figure 19 ) to display the format options available for your presentation . The Slide section allows you to quickly format all the slides included in your presentation and select master slides for your presentation. For more information on formatting slides and using master slides, see Chapter 2, Using Slide Masters, Styles, and Templates and Chapter 8, Adding and Formatting Slides and Notes.
Slide layout
By default in Impress, the Title Slide layout is used for the first slide when you create a new presentation. The layouts included in Impress range from a blank slide to a slide with six contents boxes and a title. For more information on slide layouts, see Chapter 8, Adding and Formatting Slides and Notes.
The first slide in a presentation is normally a title slide. The layouts Title Slide , which also contains a section for a subtitle, or Title Only are the most suitable layouts for the first slide in a presentation. For the remaining slides you will probably use the Title, Contents layout.
Impress does not have the functionality to create custom layouts. However, you can resize and move the different elements in a slide layout. For more information, see “ Modifying slide elements ” below .
To view the names for slide layouts, use the tooltip feature. Position the cursor on an icon in the Layout section (or on any other tool icon) in the Properties deck on the Sidebar and its name will be displayed in a small rectangle.
Selecting slide layout
After selecting a slide in your presentation, select a slide layout using one of the following methods:
Click on the required layout in Layouts section of the Properties deck in the Sidebar ( Figure 19 ).
Go to Slide > Layout on the Menu bar and select the required layout from the drop down list.
Right click on a slide in the Slides pane, select Layout from the context menu and select a layout from the drop down list.
Click on Slide Layout on the Presentation toolbar ( Figure 18 ) and select a layout from the options available.
Text and graphic elements can be readjusted at any time during the preparation of a presentation, but changing the layout of a slide that already contains some contents can have a dramatic effect. It is therefore recommended that you pay particular attention to the layout you select. If you do need to change the layout after contents have been added, the contents are not lost though they may need to be reformatted.
Changing slide layout
After selecting a slide in your presentation, change the slide layout using one of the following methods:
Right click on a slide in the Slides pane, select Layout from the context menu and select the required layout from the drop down list.
Click on the Slide Layout icon on the Presentation toolbar ( Figure 18 ) and select a layout from the options available.
Slide contents
Several layouts contain one or more content boxes. Each of these boxes can be configured to contain one of the following elements: slide title, text, table, chart, image or audio/video, as shown in Figure 20 .
Figure 20 : Selecting slide contents type

Slide title – click on Click to add Title and type a title in the text box. Impress enters text editing mode and the Text Formatting toolbar ( Figure 11 ) automatically opens. For more information on formatting text, see Chapter 3, Adding and Formatting Text.
Text – click on Click to add Text and type your contents in the text box. Impress enters text editing mode and the Text Formatting toolbar automatically opens. For more information on formatting text, see Chapter 3, Adding and Formatting Text.
Table – click on Insert Table and the Insert Table dialog opens. Enter the number of columns and rows, then click OK . The dialog closes and a table is inserted into the slide. Impress enters text editing mode and the Text Formatting toolbar automatically opens. For more information on using tables , see Chapter 3, Adding and Formatting Text.
Chart – click on Insert C hart and the Impress default chart is placed in the slide . The Chart Type section in the Properties deck on the Sidebar opens allowing you to edit the chart to your requirements. For more information on using charts , see Chapter 7, OLE, Spreadsheets, Charts, and Other Objects.
Image – click on Insert I mage and a file browser opens. Navigate to where the image you want to use is located. Select the file and click on Open . The image is placed into the slide and the file browser closes . The Image section in Properties on the Sidebar opens allowing you to edit the image file. For more information on using images , see Chapter 4, Adding and Formatting Pictures and Chapter 7, OLE, Spreadsheets, Charts, and Other Objects.
Audio or video – click on Insert A udio or Video and a file browser opens. Navigate to where the audio or video file you want to use is located. Select the file and click on Open . The image is placed into the slide and the file browser closes . The Media Playback section in Properties on the Sidebar opens allowing you to operate the audio or video file. For more information on using audio and video , see Chapter 7, OLE, Spreadsheets, Charts, and Other Objects.
Modifying slide elements
When a slide is inserted into your presentation, it contains elements that were included in the selected slide layout. However, it is unlikely that the predefined layouts will suit all your needs for your presentation. You may want to remove elements that are not required or insert objects such as text and/or graphics.
Although Impress does not have the functionality to create new layouts, it allows you to resize and move the slide elements. It is also possible to add slide elements without being limited to the size and position of content boxes.
It is recommended that changes to slide elements in the layouts included in Impress are only be made using normal view, which is the default. Attempting any changes to a slide element when in master view is possible, but may result in unpredictable results and requires extra care as well as a certain amount of trial and error.
Moving contents box
1) Click on the outer frame so that the selection handles are displayed.
2) P lace the mouse cursor on the frame so that the cursor changes shape. This is normally a clenched hand, but depends on your computer setup.
3) C lick the mouse button and drag the contents box to its new position on the slide, the release the mouse button.
Resizing contents box
2) P lace the mouse cursor on a selection handle the frame so that the cursor changes shape.
3) C lick the mouse button and drag the selection handle on the frame to resize the contents box , then release the mouse button.
Top and bottom selection handles change the height of a contents box.
Left and right selection handles change the width of a contents box.
Corner selection handles change width and height of a contents box.
Removing elements
1) C lick a contents box or an element to highlight it and the selection handles are displayed.
2) Press the Delete or Backspace key to remove the contents box or element .
Adding text
There are two ways of adding text to a slide – contents box or text box. For more information on text, see Chapter 3, Adding and Formatting Text.
Contents box – click Click to add text ( Figure 20 ) in the contents box and type your text. Outline styles are automatically applied to the text as you insert it. You can change the outline level of each paragraph as well as its position within the contents box by using the arrow buttons on the Outline toolbar ( Figure 13 ) and Workspace Outline view ( Figure 12 ).
Text box – click on Text on the Standard toolbar (Figure Figure 8 ) or Drawing toolbar ( Figure 9 ) to select text mode, then click on your slide. A text box is created and the Text Formatting toolbar ( Figure 11 ) automatically opens. Type your text and click outside the text box to end text mode.
Adding images or objects
To add images or objects to a slide, for example a picture, clipart, drawing, photograph, or spreadsheet, click on Insert on the Menu bar and select from the drop down menu the image or object type you require. For more information on adding objects, see the following chapters:
Chapter 4, Adding and Formatting Images
Chapter 5, Managing Graphic Objects
Chapter 6, Formatting Graphic Objects
Chapter 7, OLE, Spreadsheets, Charts, and Other Objects
Modifying slide appearance
To change the background and other characteristics of all slides in the presentation, you need to modify the master slide or select a different master slide .
A master slide is a slide with a specified set of characteristics that acts as a template and is used as the starting point for creating other slides. These characteristics include the background, objects in the background, formatting of any text used, and any background graphics.
Impress has included a range of master slides, found in the Master Slide section on the Properties deck in the Sidebar. You can also create and save additional master slides or add more from other sources. See Chapter 2, Using Slide Masters, Styles, and Templates for information on creating and modifying master slides.
For example, to change the background of an individual slide or a master slide:
1) Right click on a slide or master slide and select Properties from the context menu to open the Slide Setup dialog ( Figure 21 ).
2) Select Background and then select the type of background to use from None , Color , Gradient , Bitmap , Pattern and Hatch.
3) Make your selection from the various properties that are available for each type of background.
4) C lick OK to apply your changes and close the dialog.
Inserting and correctly formatting background is beyond the scope of this chapter. For more information, see Chapter 6, Formatting Graphic Objects.
Modifying slide shows
Figure 21 : Slide Setup dialog - background

By default, a slide show will display all the slides in the same order as they appear in Slide Sorter view on the Workspace ( Figure 15 ) .
Now is a good time to review the entire presentation and answer some questions. Run the slide show at least once (see “ Running a slide show ” below ) before answering them. You may have some questions of your own.
Are the slides in the correct order? If not, some of them will need to be moved.
Is the information well spaced and visible to members of an audience at the back of a large room? They may not be able to see information at the bottom of a slide, so you may need to design your presentation to fit the top three-quarters of the screen.
Would an additional slide make a particular point clearer? If so, another slide needs to be created.
Do some of the slides seem unnecessary? Hide or delete them.
Would animations help some of the slides? This is considered an advanced technique.
Should some of the slides have a different slide transition than others? The transition of those slides should be changed.
If one or more slides seem to be unnecessary, hide the slide or slides, and view the slide show a few more times to make sure they are not needed. To hide a slide, right-click the slide in the Slides pane and select Hide Slide from the context menu. Do not delete a slide until you have done this or you may have to create that slide again.
Once you have answered these and your own questions, make the necessary changes. Making changes is done easily in Slide Sorter view on the Workspace .
Slide order
Change the slide order in your presentation using one of the following methods:
In the Slide Sorter view, click on the slide you want to move and drag it to its new position in the presentation.
In Slides pane , click on the slide you want to move and drag it to its new position in the presentation.
If you want to add animations to slides in your presentation, click on Animation on the Sidebar to open the Animation deck giving access to the various animation options as follows:
Animation category.
Animation effect.
How the animation starts.
Animation direction, duration and delay.
Automatic preview.
Animation is an advanced technique and is beyond the scope of this chapter. For more information on animation, see Chapter 9, Slide Shows.
Slide transitions
To give your presentation a professional look, it is recommended to add transitions between each slide in your presentation. C lick on Slide Transition on the Sidebar to open the Slide Transition deck giving access to the various transition options as follows:
Transition type.
Modify the transition.
How the slide advances in the presentation.
Automatic preview
Adding slide transitions is an advanced technique and is beyond the scope of this chapter. For more information on slide transitions , see Chapter 9, Slide Shows.
Running a slide show
When you have completed your presentation, it is recommended to run a slide show as a test to make sure that everything is to your satisfaction. For more information and details about running a slide show, see Chapter 9, Slide Shows.
1) To run a slide show after completing your presentation, use one of the following methods :
Go to Slide Show on the Menu bar and select Start from First Slide from the context menu or use the keyboard shortcut F5 . The Presenter Console ( Figure 22 ) automatically opens.
Go to Slide Show on the Menu bar and select Start from Current Slide from the context menu or use the keyboard shortcut Shift + F5 . The Presenter Console automatically opens .
2) If the option Automatically after X seconds has been selected, the slide show will automatically run after the selected time has elapsed.
3) If the option On mouse click has been selected, use one of the following methods to move to the next slide.
Click the mouse button to advance to the next slide.
Use the arrow keys on the keyboard to go to the next slide or back to the previous one.
Press the Spacebar on the keyboard to advance to the next slide.
Click on the arrows displayed at the bottom of the Presenter Console to move to the next slide or back to the previous one.
4) When the slide show has ended or to exit the slide show before it has finished, press the Esc key to close the Presenter Console and return to your presentation in Impress.
Presenter Console
The Presenter Console ( Figure 22 ) in LibreOffice Impress can also be used when an extra display for presentation has been connected your computer. The Presenter Console provides extra control over slide shows by using different display views:
O n an external display the audience sees the current slide in the presentation.
O n your computer display you see the current slide, the upcoming slide, any slide notes, and a presentation timer.
For more information and details about using the Presenter Console , see Chapter 9 Slide Shows .
Figure 22 : Impress Presenter Console

How to Create Templates in LibreOffice to Save Time and Increase Productivity

Creating a template in LibreOffice can save you some time for the documents that you use often. It can be a letter, a financial spreadsheet or even a presentation.
Time is one factor that a template can save and on the other hand it provides consistency where a group of people in an organization work together at the same project.
For example, if you are a small organization that has to often issue certificates of experience, instead of copy-pasting from a saved document somewhere, you can create a template. When you need to issue a new certificate of experience, you create a new one from the template, edit it slightly and you are good to go.
LibreOffice comes with a few templates by default but you are not restricted to use just them. You are free to create your own as per your requirements.
I think templates are one of the essential LibreOffice tips that every user should know. Let me show you how to do it.
How to create a template in LibreOffice
First, create the document that you want to reuse with minimal editing. It could be a document, spreadsheet or presentation. I am using a word document in the example but the steps are the same for all of them.
Now go to file and select Save as Template. You will be prompted to give a name and a category from the menu, the press save.

This file will be saved in the LibreOffice template folder in .ots format. You can use these .ots files on other systems that have LibreOffice installed and use the same templates on those systems as well.
How to use templates in LibreOffice
To use a template, select File and then Templates.
Don’t worry! Opening a template LibreOffice creates a copy without affecting the original template. You can edit the document without worrying about your template getting changed.

Once you choose your template, click open. You can edit it as you like.
How to change a template in LibreOffice
Needs may change from time to time and adjustments to your templates can be necessary.
To edit an existing template go to File -> Templates and then right click on the desired template and click edit.

When you finish editing the template, click on save to make the changes permanent.
All in all templates are great not only at reducing the workload on repetitive tasks but also for user mistake proofing. You can take advantage of your computer’s ability to handle a repetitive task but with flexibility. It increases your efficiency.
I’ll keep on sharing more such tips in future. Meanwhile, you may also learn about creating templates to add the “create new document” option in the right click menu context in GNOME .
Dimitrios is an MSc Mechanical Engineer but a Linux enthusiast in heart. His machines are powered by Arch Linux but curiosity drives him to constantly test other distros. Challenge is part of his per
15 LibreOffice Tips to Get More Out of it
Tracking changes and version management with libreoffice, supercharge grammar checking in libreoffice with languagetool, create table of contents, figures and index of tables in libreoffice, how to enable tabbed ribbon interface in libreoffice, it's foss.
Making You a Better Linux User

Great! You’ve successfully signed up.
Welcome back! You've successfully signed in.
You've successfully subscribed to It's FOSS.
Your link has expired.
Success! Check your email for magic link to sign-in.
Success! Your billing info has been updated.
Your billing was not updated.

How to change the template of an Impress presentation?
I’ve got a presentation that was done in Powerpoint using a blank generic template and I’d like to bring it into LibreOffice Impress and do some changes, including changing the template (slide design) to match my other presentations. But everything I’ve tried results in either a blank new document with my preferred template, or the old pptx with the wrong appearance. I may be missing something but would appreciate any suggestions to make this happen, thanks. Bob
Impressum (Legal Info) | Datenschutzerklärung (Privacy Policy) Content on this site is licensed under a Creative Commons Attribution Share Alike 3.0 license.
LibreOffice templates
This site offers 434 free LibreOffice templates that you can customize and print. Available as .ODT or .ODS files for business or personal use, including templates for work, school, and personal use.
Here are the 10 most popular Libre Office templates:

CV Gray Sidebar

Changing Fields Resume

Basic Invoice

Entry-Level Position Resume

Professional Resume Blue

Professional CV Letter

Professional Resume Letter

Generic Business Card

Month Budget Planner

Monthly Bookkeeping Record
Copyright © 2013-2024 by Savetz Publishing , Inc. Contact us . Privacy Policy .
Subscribe to the Free Printable newsletter. (No spam, ever!)
These free LibreOffice templates are easy to download and print. Each template is available in LibreOffice format: just download one, open it in LibreOffice, edit, and print.
Also available: more free printables including templates for OpenOffice , printable signs , and business form templates .
Work and Employment Templates
School and Teacher Templates
Financial Form Templates
Health and Medical Templates
Fax Cover Sheet Templates
Family Tree Templates
Personal Templates
Legal Templates
Letterhead Templates
Planner Templates
Newest Additions
Search All Printables
Search all printables:
Thank you for your suggestion.
We're always adding new printables, and would love to hear your suggestions. What are we missing?
Submit Suggestion Close
LibreOffice 7.0 Help
Changing the Slide Page Background Fill
You can change the background color or the background fill of the current slide or all of the slides in your document. For a background fill, you can use hatching, a gradient, or a bitmap image.
If you want to change the background fill for all of the slides, choose View - Master Slide . To change the background fill of a single slide, choose View - Normal .
You can change the background color or the background fill of the current page or all of the pages in your document. For a background fill, you can use hatching, a gradient, or a bitmap image.
If you want to change the background fill for all of the pages, choose View - Master Page . To change the background fill of a single page, choose View - Normal .
To use a color, gradient, or hatching pattern for the slide page background
Choose Slide - Properties Page - Properties , and then click on the Background tab.
In the Fill area, do one of the following:
Select Color , and then click a color in the list.
Select Gradient , and then click a gradient style in the list.
Select Hatching , and then click a hatching style in the list.
To use an image for the slide page background
You can display an entire image as a slide page background, or you can tile the image to produce a patterned background.
In the Fill area, select Bitmap , and then click an image in the list.
If you want to use a custom image for the slide page background, close the Page Setup dialog, and then choose Format - Area . Click the Bitmaps tab, and then click Import . Locate the image you want to import and click Open . When you return to the Background tab, the image you imported will be in the Bitmap list.
Do one of the following:
To display the entire image as the background, clear the Tile check box in the Position area, and then select AutoFit .
To tile the image on the background, select Tile , and set the Size , Position , and Offset options for the image.
This modification is only valid for the current presentation or drawing document.
To save a new master slide page as a template
Choose View - Master Slide to change to the master slide Choose View - Master Page to change to the master page .
Choose Slide - Properties to change the slide background, or choose other formatting commands. Objects that you add here will be visible on all slides that are based on this master slide. Choose Page - Properties to change the page background, or choose other formatting commands. Objects that you add here will be visible on all pages that are based on this master page. .
Choose View - Normal to close the master view.
Choose File - Templates - Save As Template to save the document as a template.
Enter a name for the template. Do not change the category from "My Templates". Click OK .
Now you can use the Templates window to open a new presentation or drawing based on your new template.
Related Topics
Changing and Adding a Master Slide Page
About Layers
Adding a Header or a Footer to All Slides
Please support us!
IMAGES
VIDEO
COMMENTS
2) Select the template to use as the default LibreOffice presentation template. 3) Right-click on the selected template and select Set as Default from the context menu. 4) Click on Open and a new presentation opens using the new default template and sets the default presentation template in LibreOffice. The next time a new presentation is ...
Impress is the presentation (slide show) program included in LibreOffice. Impress creates presentations in the Open Document Presentation (ODP) format, which can be opened by other presentation software or can be exported in different presentation formats. ... These presentation templates are included when LibreOffice is installed on a computer ...
Impress is the presentation (slide show) program included in LibreOffice. Impress creates presentations in the Open Document Presentation (ODP) format, which can be opened by other presentation software or can be exported in different presentation formats. ... To create a new presentation without using a template, click on Cancel in the Select ...
Go to File > Save As Template on the main menu bar to open the Template Manager dialog. By default the Template Manager opens at the Documents page. Double click on the MediaWiki folder to select it and activate the Save icon, then click the Save icon. Specify the template name in the pop-up dialog and click Accept.
LibreOffice Impress lets you create professional slide shows that can include charts, drawing objects, text, multimedia and a variety of other items. If you want, you can even import and modify Microsoft PowerPoint presentations. For on-screen slide shows, animation, slide transitions and multimedia are a few of the techniques you can use to ...
Impress is a truly outstanding tool for creating effective multimedia presentations. Presentation edition and creation is flexible, thanks to different editing and view modes: Normal (for general editing), Outline (for organizing and outlining your text content), Notes (for viewing and editing the notes attached to a slide), Handout (for producing paper-based material), and Slide Sorter (for a ...
Since LibreOffice 5.1, the View buttons are not shown by default; but they can be activated by choosing View > Modes Tab Bar from the menu bar. ... - Empty presentation creates a blank presentation. - From template uses a template design already created as the basis for a new presentation. The wizard changes to show a list of available ...
Tip. To start Impress without the Select a Template dialog (), deselect Show this dialog at startup in the lower left of the dialog.In Windows or Linux, go to Tools > Options > LibreOffice Impress > General on the Menu bar and deselect Start with Template Selection under New Document.. In macOS, LibreOffice > Preferences > LibreOffice Impress > General on the Menu bar and deselect Start with ...
Where can I download pretty extra templates for LibreOffice Impress?
2. Open LibreOffice Impress. 3. Open the PowerPoint document. 4. Document opened. 5. Do File > Templates > Save as Template > give it a name according to its original name > select My Templates category > Save > successfully imported a template. For further explanation, read our LibreOffice Templates Use Guide.
To create a document from a template: 1) Open the Tempates dialog ( Figure 1) using one of the following methods: Choose File > New > Templates or File > Templates > Manage Templates on the Menu bar. Press the key combination Ctrl+Shift+N. Click the arrow next to the New icon on the Standard toolbar and select Templates.
Create a new blank presentation from the desired template. Copy and paste all the slides from the old presentation. When you put them in the new presentation the right style should be applied. As an alternative you could alter the slide master on each of the old presentation (but it's more work I suppose). Hope it helps!
After a bit of searching, I found that some of the templates uploaded do not have an extension (though it is not certain why.) In those cases, when the template is downloaded the user must save it with the correct extension, in this case ".otp". Then the template will import correctly through LibreOffice's template import function.
From any open module of LibreOffice, go to File > New > Presentation on the Menu bar, or click on New on the Standard toolbar and select Presentation from the drop-down menu. When you start Impress for the first time, the main Impress window opens, as default, with the Select a Template dialog displayed ( Figure 1 ).
How to create a template in LibreOffice. First, create the document that you want to reuse with minimal editing. It could be a document, spreadsheet or presentation. I am using a word document in the example but the steps are the same for all of them. Now go to file and select Save as Template.
w9ran January 13, 2024, 8:59pm #1. I've got a presentation that was done in Powerpoint using a blank generic template and I'd like to bring it into LibreOffice Impress and do some changes, including changing the template (slide design) to match my other presentations. But everything I've tried results in either a blank new document with ...
On a slide in Normal view, select the object you want to animate. Choose Format - Animation, to open the Custom Animation pane in the Sidebar. Click on Add (+) button, and then select an animation effect. In the Custom Animation dialog, click a tab page to choose from a category of effects. Click an effect, then click OK.
The Template Manager allows you to access and organize templates in LibreOffice. LibreOffice comes with a set of built-in templates that can be used to create documents, presentations, spreadsheets or drawings. You may use templates available in the template manager, create your own templates or browse online for additional templates.
Under Categories, select the category of templates. Under Templates, select a template with the master slide master page that you want to apply. To preview the template, click Preview. Click OK. Do one of the following: To apply the master slide to all of the slides in your presentation, select the Exchange background page check box, and then ...
These free LibreOffice templates are easy to download and print. Each template is available in LibreOffice format: just download one, open it in LibreOffice, edit, and print. Also available: more free printables including templates for OpenOffice, printable signs, and business form templates.
Choose Slide - Properties. Page - Properties. , and then click on the Background tab. In the Fill area, select Bitmap, and then click an image in the list. If you want to use a custom image for the slide. page. background, close the Page Setup dialog, and then choose Format - Area.