
How to Insert Timer Into Google Slides? [An EASY Way!]
By: Author Shrot Katewa
![How to Insert Timer Into Google Slides? [An EASY Way!]](https://artofpresentations.com/wp-content/uploads/2021/12/Featured-Image-How-to-Insert-a-Timer-in-Google-Slides.webp "google presentation slide timer")
Whether you want to allow your audience a few seconds to answer a quiz question, or whether you want to let your audience know the time left for the break to end, having a ticking timer on Google Slides is a great way to do that!
But, Google Slides doesn’t provide the option to add a timer by default. So, how do you insert a timer in Google Slides?
To insert a timer in Google Slides, you can add a video that contains a countdown timer. Alternatively, you can also use the “Slide Timer” extension. Using the extension allows cusotmization of text formatting, and a few additional features which are not available when using a video!
This article will provide you with more insights on adding a timer in Google Slides. We will be discussing a few different methods. You will get the step-by-step process along with the images so you too can add it to your presentation!
So, let’s get started!
1. How to Insert a Timer in Google Slides?
I’ve captured all the steps in a video format as well. If you wish to learn by watching a video instead of reading this article, you can do so by clicking on the play button on the video below –
If you prefer learning through reading, you can continue to do so by going through the steps in the rest of the article!
When you need to give your audience time to complete an action such as think of an answer, writing a solution, responding to a question, or perhaps even ensuring that people come back on time after a break, it is good to have a timer displayed on the screen.
This will make sure that everyone is aware of the time left to finish the task required!
Although Google Slides doesn’t offer a direct option to add a timer in the presentation, there are multiple ways to insert a timer in Google Slides.
In this article, we shall take a look at two different methods.
1a. Method 1 – Inserting a Video
The first method includes inserting a video that has a timer. You can use any video for this purpose. The easiest way to find such a video is through YouTube.
One thing to keep in mind is that when you add a YouTube video to the presentation, you will need to make sure that your computer is connected to the internet for the video to work when you are giving the presentation.
For safety purposes, you can perhaps download the video and upload it to the presentation to make sure it works. However, for the purpose of this example, I’ll show you how to add a timer by inserting a video in Google Slides .
Let’s take a look at the steps one-by-one:
Step-1: Search for a Video with a Timer on YouTube
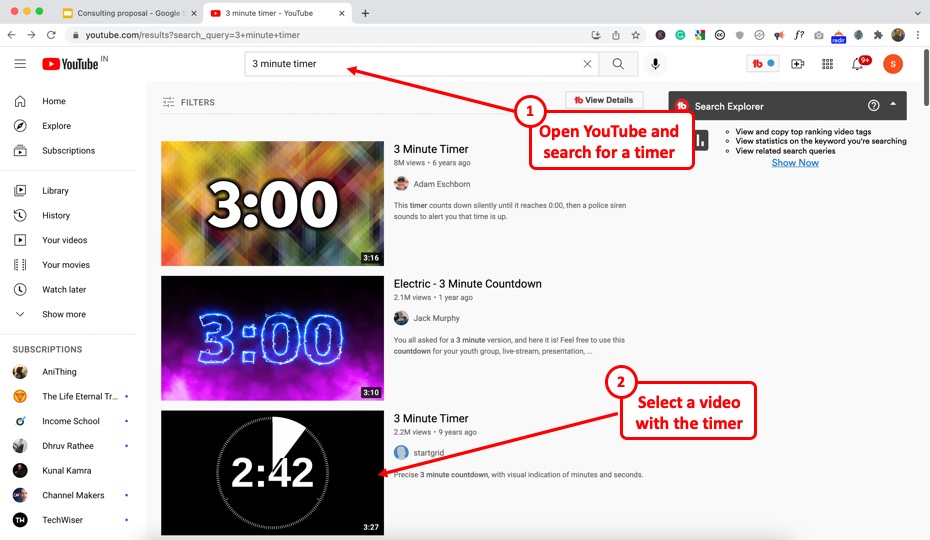
There are a ton of different video options available on YouTube for a timer video. Simply type in the duration of the timer that you want in the search bar.
For the sake of this example, I’ve gone with a 3 minuter timer.
From the options that appear in the search, go with single color background (ideally black). You’ll get to know why, in a minute!
Step-2: Copy the Video URL
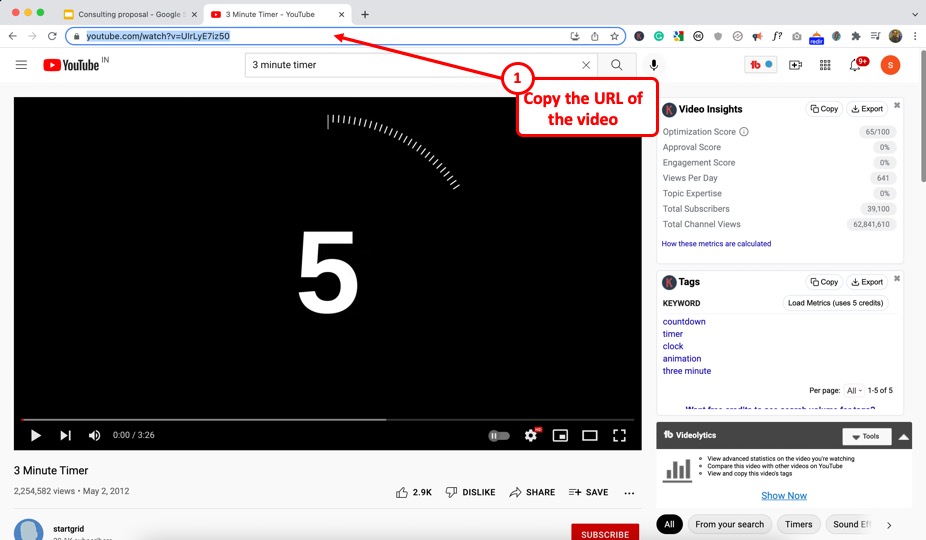
Once you have chosen a video, open it by clicking on it.
Then, click on the address bar. Select the URL and copy it using the “ Ctrl+C ” options. You can also right-click on it and click on “ Copy “.
Step-3: Click on the Option to Insert a Video

Now, go back to your Google Slides presentation. Open the slide where you want to insert the timer.
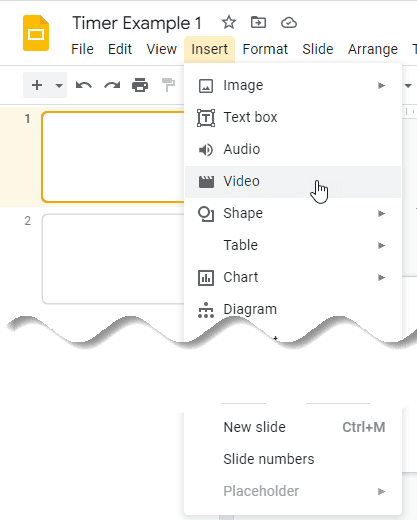
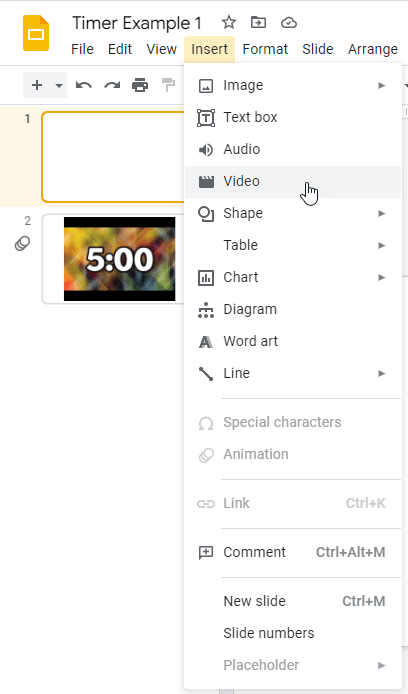
Then, click on the “Insert” tab in the menu bar and select the “Video” option from the “Insert” menu. This will prompt an “Insert video” dialog box.
Step-4: Insert the Video in your Presentation
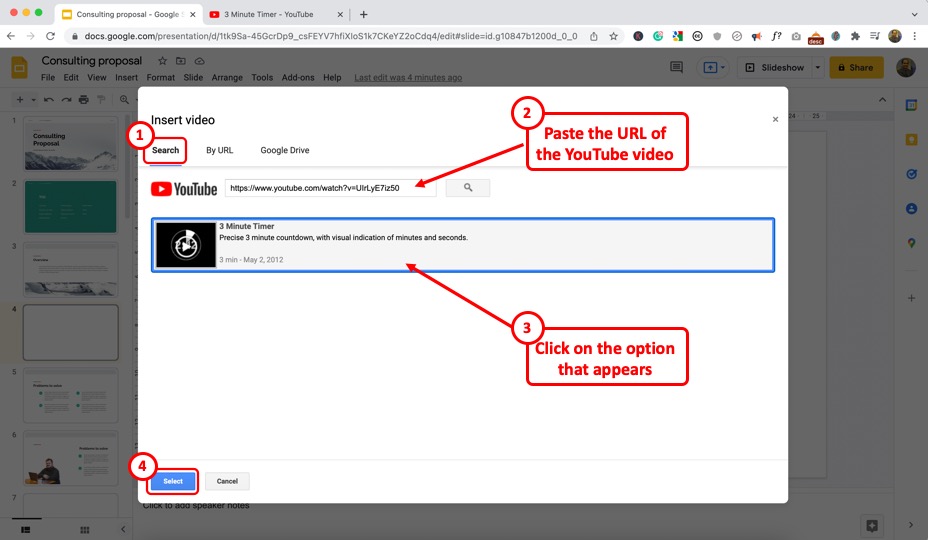
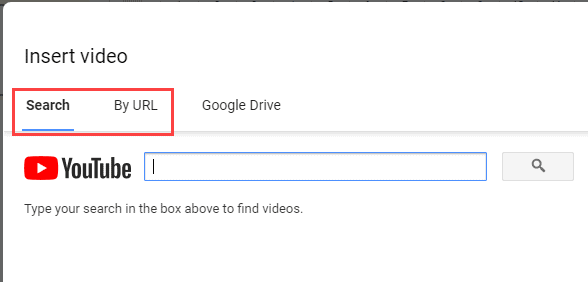
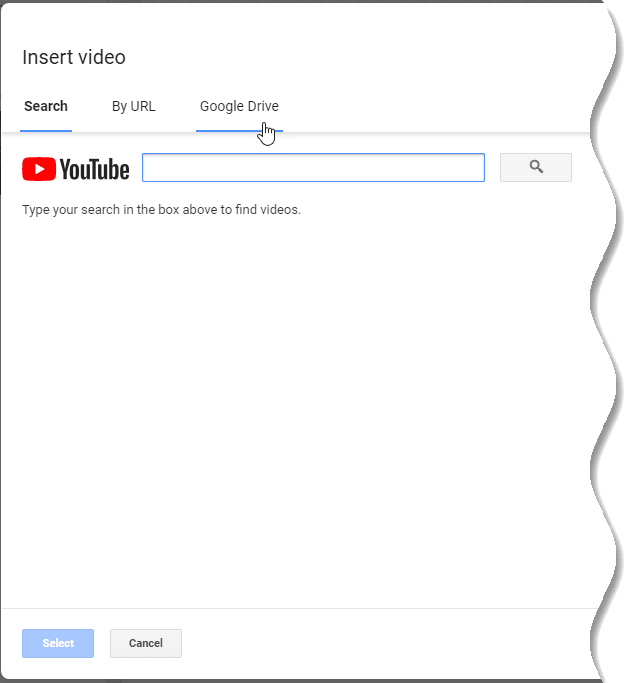
The next step is to insert the video. Click on the “ Search ” tab first. Here, in the search bar, paste the URL (link) that we copied in step 2 and hit enter.
You can also search for a term instead of pasting the link. So, for instance, instead of going on YouTube to find a video, you can also use the search bar here to do the same. But, I usually get much better results faster when I search it on YouTube and paste the link here.
Once you have the video appear below, click on it to select it. Then, click on “ Select ” to insert it on your slide.
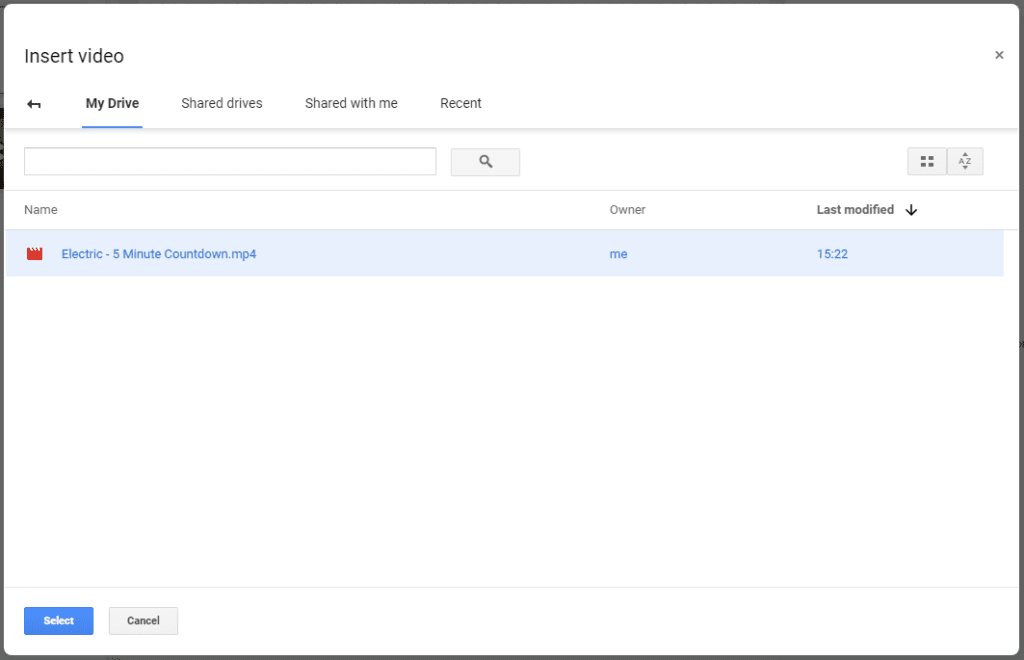
You can also upload a video at this point by clicking on the “ Google Drive ” option. That option will allow you to add a video that you may have either downloaded or perhaps received from your colleague.
Step-5: Adjust the Playback Settings
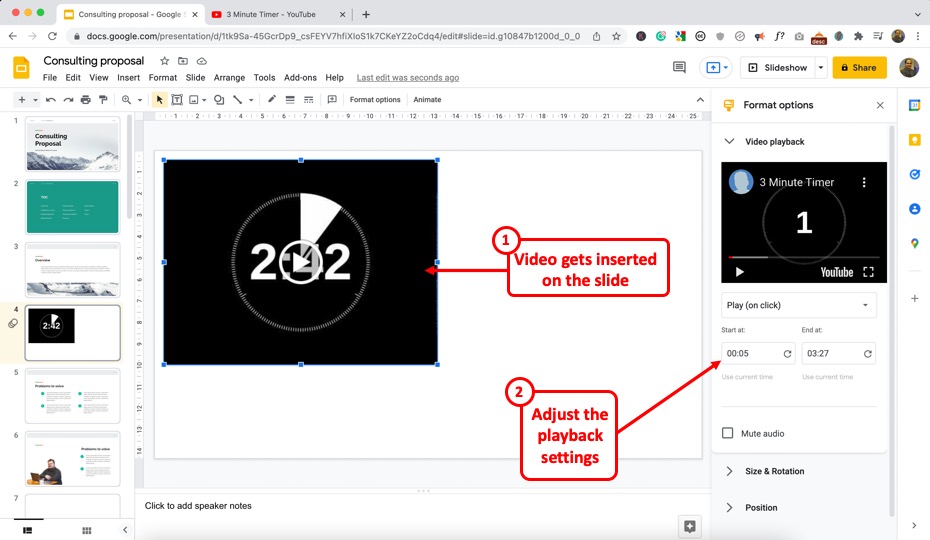
Now, the next step is to adjust the playback settings for the video.
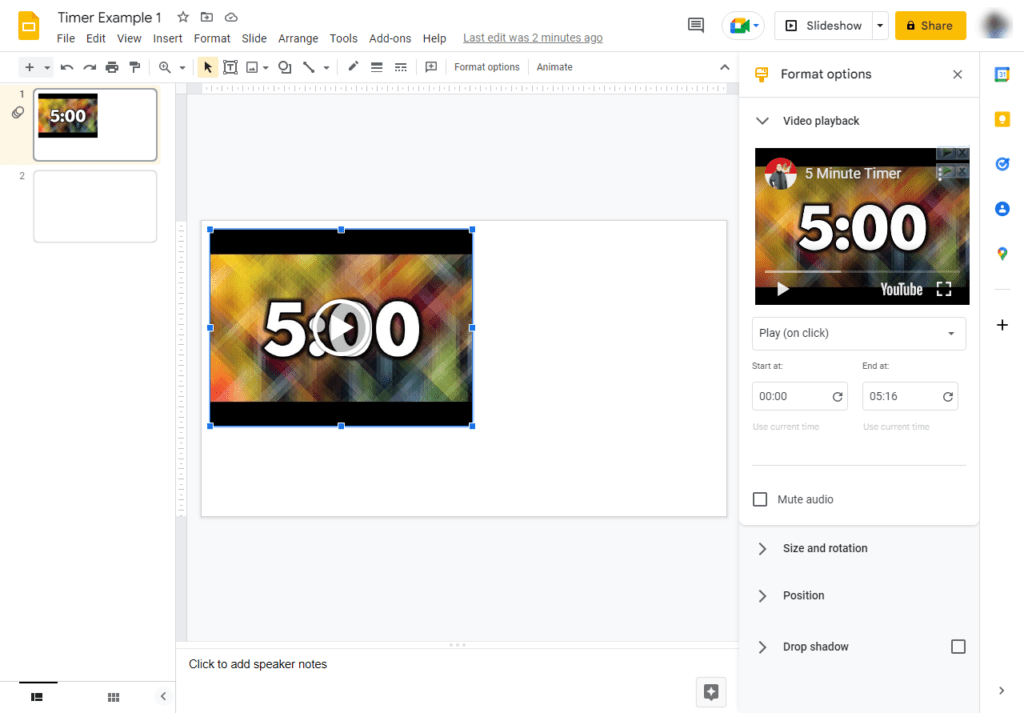
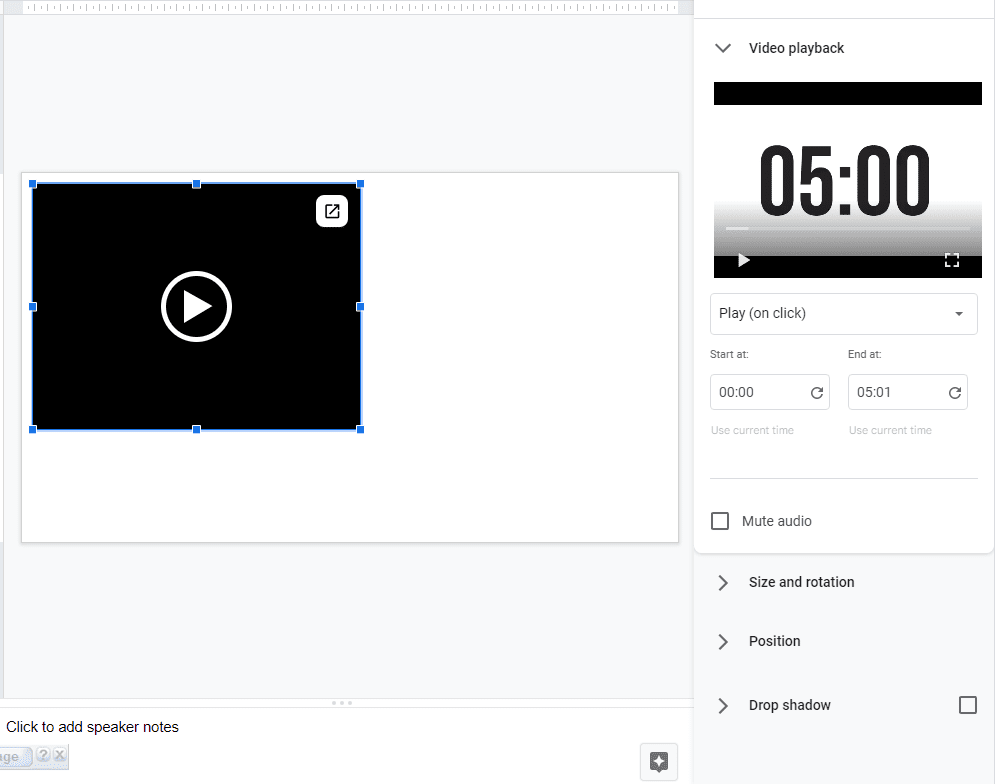
When you insert the video on the slide, the “ Format ” panel on the right should automatically appear. If it doesn’t, simply right-click on the video, and click on the “Format” option.
Here, you can adjust the starting and ending point of the video along with tweaks to a few additional settings.
Step-6: Adjust the Video and Slide Background
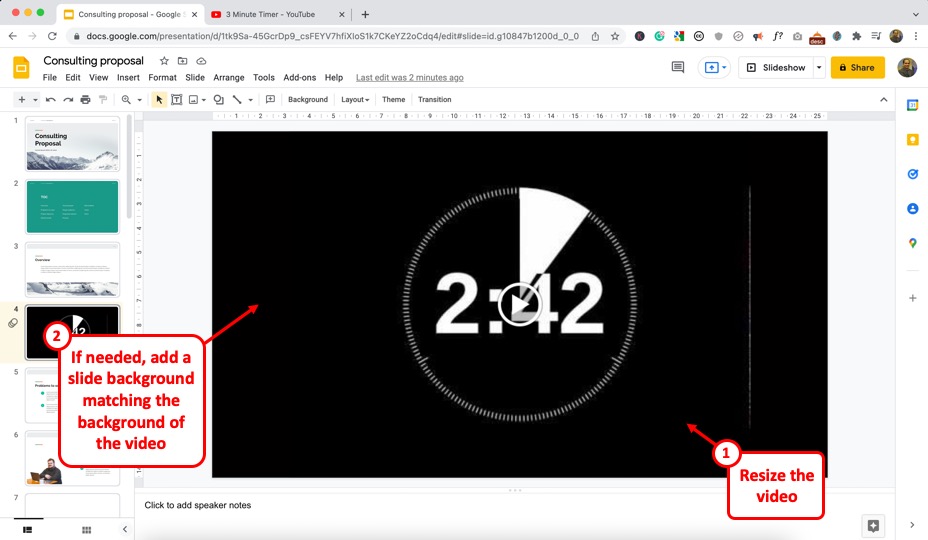
Now, the last thing that I recommend you do is first, make the video as big as possible such that it fits the slide on the top and the bottom.
This will display the video on the complete slide during the slideshow mode.
If there is still some blank space left on the slide, then you can choose to change the slide background to match the background of the video (just the way I’ve done it in the image above).
This is where choosing a video with a monotone background (as mentioned in step 1) comes in handy!
If you are unable to find the color for your slide back in the default options provided that match with the background of the video, you can use the eyedropper tool for color matching in Google Slides .
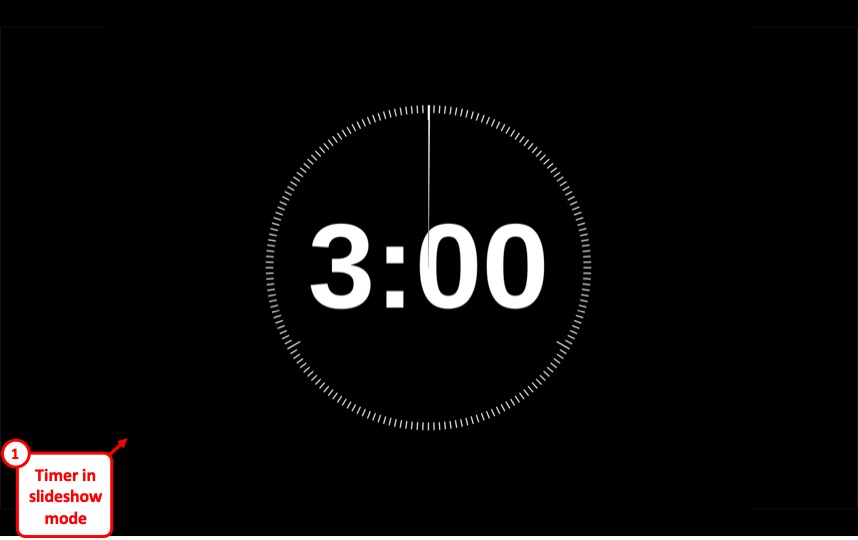
Once you’ve made the changes, simply enter the presentation in the “ Slideshow ” mode and watch the timer tick!
Method 2 – Using the Slides Timer Extension
If you don’t want to add a video to your presentation or if you want more customization to the way the text looks for the timers, and make a few changes to it, you can use the “ Slides Timer ” extension.
The “Slides Timer” extension has been designed by ClayCodes ; a third-party open-source creator.
The Slides Timer extension comes as a Google Chrome browser extension rather than an “Add-on” item.
Through this add-on, all you need to do is type in a simple text-based code and it will convert the code into a function. We shall take a look at the
To add the extension, you have to first click here to find the Slides Timer extension in the Chrome Web Store.
Then follow the 3 quick steps.
Step-1: Click on “Add to Chrome”
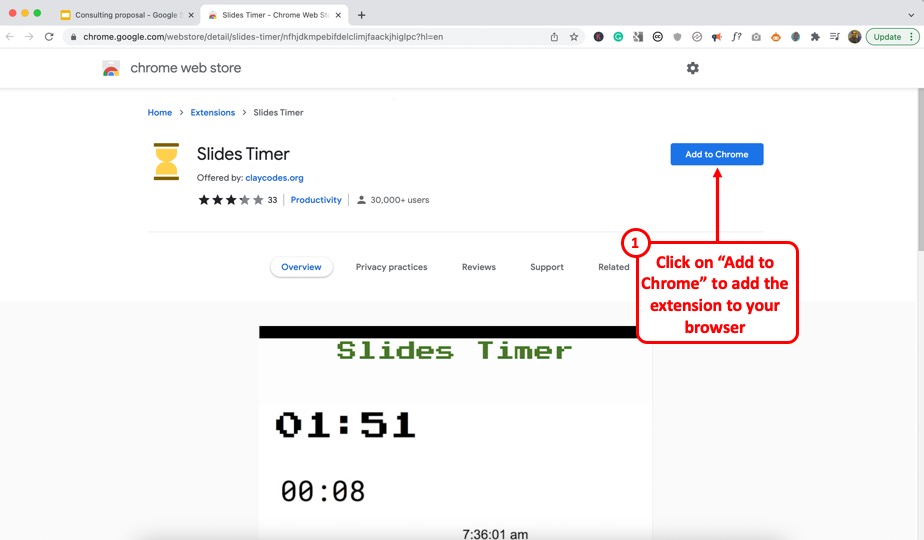
The first step is to click on the “Add to Chrome” button located on the right side of the screen. This will prompt a dialog box.
Step-2: Click on the “Add Extension” button
In the dialog box, click on the “Add Extension” button to allow access to the extension. You will now see another dialog box notifying that the Slide Timer extension has been added.
Step-3: Click on the “Slides Timer” extension

Now all you have to do is open the Google Slides presentation. Then click on the “Extensions” icon which looks like a puzzle piece beside the browser “Search bar” . In the “Extensions” dialog box, click on the “Slides Timer” extension to access a tutorial.
How to Use the Slides Timer Extension?
The Slides Timer extension has various features that you can use. You can create a timer, stopwatch, clock, etc.
To create a countdown timer, you have to first click on the “Text box” icon in the toolbar located right under the menu bar.
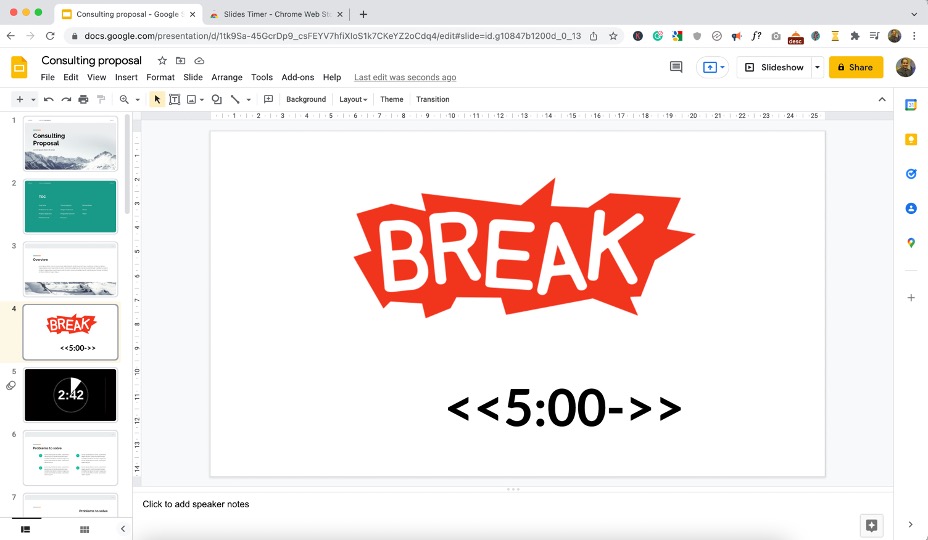
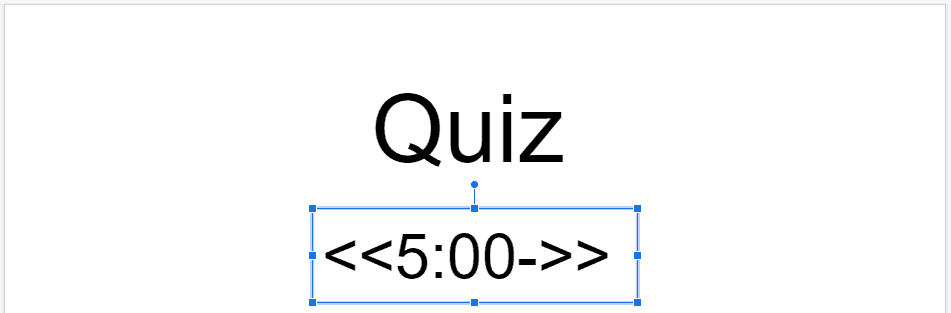
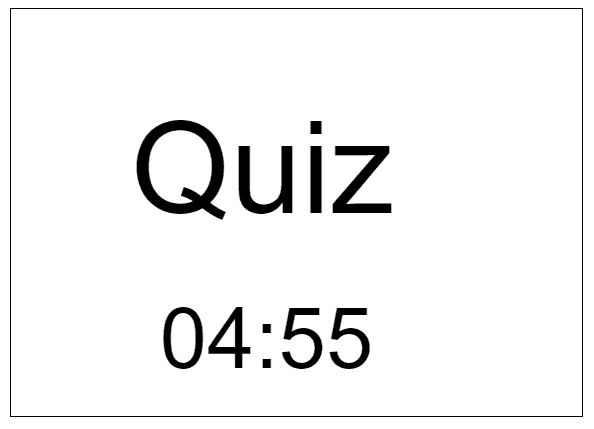
In the text box, type in “<<“preferred time”->>” . For example, for a five-minute countdown, type in “<<5:00->>” in the text box.
Next, click on the “Slideshow” or “Present” option and the text will be automatically converted to a countdown timer.

To create a count-up timer or a stopwatch, type in “<<“preferred time”+>>” in a text box in the slide where you want to add the timer.
For example, if you want the stopwatch to start at zero seconds, type in “<<00:00+>>” . It will be automatically turned into a stopwatch on the “Present” screen.

In the example above, I’ve started my stopwatch from “5:00”. You can see the stopwatch counting up in the slideshow mode in the image above.
You can also display the current time in the local time zone using the Slides Timer extension. To do so, insert a text box in the preferred slide and type in “<<time>>” . In the “Present” screen, this will show the time in the AM/PM format.
To add the current date in your Google Slides presentation slide, insert a text box and type in “<<date>>” . In the “Present” screen, this will turn into “mm/dd/yyyy” format date. This will always show the current date when you present without any manual adjustment.
Move to Next Slide
With Slides Timer, you can also add a timer that automatically moves to the next slide when time is up. For example, you can create a countdown trigger that moves to the next slide after 2 minutes. All you have to do is insert a text box and type in “<<02:00-+>>” .
2. How to Time Your Slides to Autoplay in Google Slides?
Google Slides does provide you with an option to time the slides such that you can set it on “Autoplay” and let the slides automatically keep changing!
This is a great option especially when you are at an event, and you just want put the presentation on the screen, set it, and forget it!
This topic actually deserves an entire article! Thus, I’ve written a separate post to cover the nuances of this topic in great detail in a step-by-step manner. Check out my other article on this topic here !
Credit to benzoix (on Freepik) for the featured image of this article (further edited)
Google Slides
How to Add a Timer to Google Slides: Easy Step-by-Step Guide

Table of Contents
In professional presentations, timing is crucial. Adding a timer to your Google Slides can keep you on track and your audience engaged. In this guide, we’ll explore simple ways to integrate timers, like embedding YouTube countdowns or using timer add-ons. These techniques ensure your presentation flows smoothly and captivates your audience from start to finish.
How Does a Timer Work in Google Slides Presentations?
- Google Slides doesn’t have a built-in timer, but you can include a timer video in your slides.
- Once you add the timer video, you can adjust how it looks to match your presentation.
- Both you and your audience can see the timer ticking down during your presentation.
- You can move the timer around and place it next to your text and pictures, or make it the main focus on a slide.
Two Effective Methods to Add a Timer to Your Google Slides Presentation
Method 1: embedding youtube videos as countdown timers in google slides presentation:.
Step 1: Open Your Google Slides Presentation:
- Go to slides.google.com on your computer.
- Open an existing presentation or create a new one.
Step 2: Select the Desired Slide:
- Choose the slide where you want to embed the timer.
Step 3: Insert the Video:
- Navigate to the top toolbar, click on “Insert,” then select “Video.”
Step 4: Search for the Timer Video:
- In the “Insert video” window, you have multiple options:
- Search directly on YouTube for a countdown timer (e.g., “five-minute timer”).
- Paste a URL of a specific YouTube timer video.
- Use a video from your Google Drive.
- Consider using specific keywords or desired timer lengths for more accurate results.
Step 5: Select and Insert the Timer Video:
- Click on the desired video from the search results or paste the URL.
- Click “Select” to insert it into your slide.
Step 6: Resize and Reposition the Video:
- Click and drag the corners of the video to adjust its size.
- Move the video to the desired position on the slide.
- For precise dimensions and placement, right-click the video, select “Format options,” and then adjust under “Size & Rotation.”
Step 7: Set Video Playback Options:
- Right-click the video and select “Format options.”
- In the “Video playback” section, choose your preferred playback mode:
- “Play (on click)” – to start the video when clicked.
- “Play (automatically)” – for the video to start automatically when the slide appears.
- “Play (manual)” – to control the play manually during the presentation.
- Optional settings include muting the audio and setting specific start and end times.
Step 8: Repeat for Additional Slides (If Necessary):
- If you need the timer on multiple slides, repeat the process for each slide.
Step 9: Adjust as Needed:
- Ensure the timer fits well with your slide’s content and presentation style.
By following these steps, you can effectively embed a YouTube video as a countdown timer in your Google Slides presentation, enhancing its functionality and audience engagement .
Ready to mesmerize your audience? Uncover the secrets to flawless video integration with our comprehensive guide.
Discover more now!
Method 2: Using the Timer Extension for Google Slides:
Step 1: Install the Slides Timer Extension:
- Open Google Chrome or Microsoft Edge.
- Search for “Slides Timer Chrome extension” in the browser’s address bar.
- Click on the “Slides Timer extension” in the search results.
- In the Chrome Web Store, select “Add to Chrome” and then “Add extension” in the notification pop-up.
Step 2: Restart Your Browser:
- After installation, restart your browser to activate the extension.
Step 3: Using Slides Timer in Google Slides:
- Open your Google Slides presentation.
- Click on a slide where you want to add a timer.
- Create a new text box or use an existing one on the slide.
- To set a countdown timer, use the format <<mm:ss>> (e.g., <<05:00>> for a five-minute timer). This will count down to zero.
- For a count-up timer, use the format <<mm:ss+>> (e.g., <<00:00+>> to start counting from zero).
- Advanced timing formats like <<hh:mm:ss>> can also be used for longer durations.
- Place the formatted text within the text box on your slide.
Step 4: Check the Timer Functionality:
- Start the slideshow to see the timer in action.
- During the presentation, you can pause the timer by pressing ‘d’ or reset it by pressing ‘e’.
By following these steps, you can easily incorporate a functional timer into your Google Slides presentations using the Slides Timer extension.
Benefits of Adding a Timer to Your Google Slides Presentation:
- Managing Your Pace : Ensures you cover all points within the allotted time, avoiding rushing or overextending on certain slides.
- Timing Breaks Efficiently : Setting specific times for breaks, helps maintain engagement and focus.
- Optimizing Quiz Duration : Allows precise timing for quizzes, making the session interactive and well-paced.
- Cue for Slide Transitions : This acts as a visual reminder to move to the next slide, ensuring a smooth flow in your presentation.
- Anxiety Relief : Reduces the stress of time management, as the timer visually tracks progress.
- Respectful Timing : Demonstrates consideration for the audience’s time, keeping the presentation concise and on point.
- Enhanced Activities : Improves the efficiency and effectiveness of in-presentation activities through timed visual aids.
- Organized Confidence : Builds presenter confidence with a well-structured and timely managed presentation.
Closing Thoughts
Adding a timer to Google Slides presentations is more than just a technical feature – it boosts professionalism and keeps the audience interested.
While there are some limits to how much you can customize it, the advantages of better time management and focused content delivery are clear.
Practicing with the timer helps you deliver a smooth, well-paced presentation, so it’s a great tool to use for any impactful Google Slides presentation.
Can I set different times for different slides using timers?
Yes, you can choose different times for specific slides to control the pace of your presentation using timers.
Can I customize the appearance of timers to match my presentation theme?
You can personalize the look of timers to match your presentation theme by adjusting font, color, and style options available in many timer tools.
Do timers work smoothly on different devices and browsers?
While timers are designed to work on various platforms, it’s a good idea to test your presentation across different devices and web browsers to ensure seamless compatibility.
How do I add a timer to a specific slide in Google Slides?
To include a timer on a particular slide in Google Slides, you can insert or embed a timer video. You have the option to create your own timer video or download one from the internet.
How can I make sure the timer Is visible but doesn’t distract from the main content?
Place the timer strategically on the slide to ensure it doesn’t obscure important information and blends well with the overall theme. Once you master adding timing to Google Slides, you can effectively leverage timers to enhance your presentations.
Frequently Asked Questions
While timers are designed to work on various platforms, it's a good idea to test your presentation across different devices and web browsers to ensure seamless compatibility.
Place the timer strategically on the slide to ensure it doesn't obscure important information and blends well with the overall theme. Once you master adding timing to Google Slides, you can effectively leverage timers to enhance your presentations.
Save Time and Effortlessly Create Presentations with SlidesAI

How to add a timer to your Google Slides presentation by inserting a video
- You can easily add a timer to your Google Slides presentations, to help you keep track of how long you're taking during a presentation.
- However, Google Slides has no built in timer function, which means the best way to do it is to add a YouTube video with a timer to each slide.
- Visit Business Insider's homepage for more stories .
Time can be vital when you're giving an important presentation at work. Spend too much time on one slide and you could end up running too long and losing your audience, or go too fast and risk leaving people confused.
Adding a countdown timer to your Google Slides presentation can help you avoid those missteps and stay on track.
Here's how to set it up.
Check out the products mentioned in this article:
Lenovo ideapad 130 (from $299.99 at best buy), macbook pro (from $1,299.99 at best buy), how to add a timer to google slides.
1. Go to slides.google.com on your PC or Mac computer and create or open a presentation.
2. Select the slide you want to add a timer to in the left sidebar.
3. In the top toolbar, select "Insert" and then "Video."
4. Search for "five-minute timer," or whatever length timer you desire. If you already have a URL handy, paste it into the search bar and click the video thumbnail when it appears.
5. Alternatively, you can also open a new tab, find a specific timer video on YouTube, and copy and paste that video's URL. You can also use a video from your Google Drive.
6. Click "Select."
7. Resize and reposition the video as desired.
Repeat this process for as many slides as you need. Remember, though, that the video on your slide will be visible to everyone you're giving the presentation to as well.
When you give your presentation, you'll need to click the video to start your countdown timer. Or, you can set it to autoplay when the slide appears in your presentation:
1. Right-click the video and select "Format options."
2. In the side menu that appears, click "Video playback."
3. Check the box that's labeled "Autoplay when presenting."
Related coverage from How To Do Everything: Tech :
How to change the background on your google slides presentation, how to hide specific slides in google slides so they won't show up during a presentation, how to print google slides from your preferred browser on a computer, how to add a gif to google slides using a url, how to change the text color in google slides on your computer or mobile device.
On February 28, Axel Springer, Business Insider's parent company, joined 31 other media groups and filed a $2.3 billion suit against Google in Dutch court, alleging losses suffered due to the company's advertising practices.
Insider Inc. receives a commission when you buy through our links.
Watch: These basement renovations hide slides and secret rooms
- Main content
How to Add Timers to Google Slides (Quick Guide)

To add a timer to google slides, go to ‘Insert’ tab > press “Video” > search “5 minutes timer” > choose a video and “Select”. Alternatively, you can install a timer extension. Adding timers in your slides can help you manage your time effectively during presentations.
They can also be a valuable visual aid for your audience, letting them know how much time they have to ask questions or explore the topic in more depth. While Google Slides doesn’t have a built-in timer, you can do this with just a few clicks.
Here’s a quick step-by-step guide on how to do it:
Step 1: Open Insert Tab
Step 2: search the video, step 3: add the timer video, step 4: resize the video, can i set the timer on autoplay, alternative method to add timers to google slides.
Open your Google Slides presentation. Then go to the ‘Insert’ tab and select “ Video .”

In the video tab, use the search option , and type “ 5 minutes timer ” in the search box. You can also search for timers of different durations or copy a timer video URL from YouTube.

Find your preferred timer video, select it, and click “ Select ” to add it to the current slide of the presentation.

Next, resize and reposition the video to your liking. Keep the video small and place it in one of the corners of the slide.

Note that the timer will be added only to the current slide . So if you want to add the timer to all slides, you need to repeat these steps for each slide . And you will need to click on the video every time you want to start the timer.
You can set the timer video to autoplay. To do this, right-click on the video and then select “ Format Options .”

A new pop-up window will appear. Then, under the Video Playback section, press on “ Play (on click)” and change the option to “ Play (automatically).”

The timer video will start automatically as soon as you move to that particular slide. Now you will not have to worry about starting the timer manually.
You can add timers to Google Slides using the “ Slides Timer ” browser extension, which requires some additional steps.
First, open up your Google Chrome browser and go to the “ Slides Timer ” extension page (search for it). Once you are on the page, press “ Add to Chrome .”

A new pop-up window will appear. Click “ Add extension ” to confirm the installation.

Download and install the extension on your browser. Open your Google Slides presentation, add a text box to your slide, and enter the text “ <<5:00->> ” to set a five-minute countdown timer. You can adjust the duration as needed.

That’s it! you are done. Simply click “ Slideshow ” or “ Present ” to begin the presentation. The countdown timer will replace the text box.

You can also add count-up time by entering “ <<5:00+->> ” in the text box (replace “5” with your preferred duration).

Timers can be a great addition to your presentations, and we recommend using them whenever needed. By using this guide, you can now add timers to your slides using two methods. The first method uses a built-in video search feature from Google, while the second method uses a Chrome extension.
Both methods are pretty easy to follow and only require a few minutes to set up. If you have any questions or comments, please feel free to leave them below.
Related Posts:
")
Home Blog Google Slides Tutorials How to Add a Timer to Google Slides
How to Add a Timer to Google Slides

A countdown timer can be used before a presentation starts or during a break to inform the audience regarding the time remaining in the presentation. It can also help alert the audience to take their seats when the session is about to begin. If you have been wondering how to insert a timer into Google Slides templates , follow the simple instructions below.
How to Insert a Timer in Google Slides
Unlike PowerPoint templates that timer add-ins can customize, you can add a timer to Google Slides by adding a timer video. To do this, go to Insert -> Video .

Add a timer video on YouTube or upload it via Google Drive. You can search for it via YouTube if you don’t have a video available. The countdown timer can include a specific duration (e.g., 5 minutes or 10 seconds).

Select the required video and click Insert to add it to your slide.

Once the timer video is added, it can be customized. You can use drag and drop to place it on a specific location on the slide or resize it. Additional options can be adjusted via the sidebar ( Format Options ). This includes the opportunity to add video duration, select video trigger, and the option to select size, rotation, drop shadow, and alt text. You can also mute the video by checking the Mute option.

Make sure you select what triggers the countdown video. It can be automatically played once you reach the slide in Slideshow mode or enable a manual or on-click trigger for the video playback.

The video can be played and previewed in Google Slides, and you can also run it in Slideshow mode to assess the playback for the audience.

5 Minute Countdown Timer Example in Google Slides
This can help create a customized countdown. Below is an example of a 5-minute countdown timer playing in Slideshow mode in Google Slides.

10 Seconds Countdown Timer Example in Google Slides
Below is an example of a 10-second countdown timer playing in Slideshow mode in Google Slides.

Final Words
To add a countdown timer in Google Slides, you can insert a video from Google Drive or YouTube for the duration you wish to display on screen. The timer can be triggered according to need (automatically, manually, or on-click) to run during the presentation session.

Like this article? Please share
Google Slides, Presentation Ideas Filed under Google Slides Tutorials
Related Articles

Filed under Google Slides Tutorials • March 22nd, 2024
How to Share a Google Slides Presentation
Optimize your presentation delivery as we explore how to share a Google Slides presentation. A must-read for traveling presenters.

Filed under Presentation Ideas • February 15th, 2024
How to Create a 5 Minutes Presentation
Master the art of short-format speeches like the 5 minutes presentation with this article. Insights on content structure, audience engagement and more.

Filed under Design • January 24th, 2024
How to Plan Your Presentation Using the 4W1H & 5W1H Framework
The 4W1H and 5W1H problem-solving frameworks can benefit presenters who look for a creative outlook in presentation structure design. Learn why here.
Leave a Reply
Home » Google Slides » How to Insert a Timer in Google Slides
How to Insert a Timer in Google Slides
You can insert a timer in a Google Slide to count time down or up. For example, this shows your audience know how much time they have left to answer a quiz.
Google Slides does not provide a built-in function to insert a timer. This tutorial shows you how to insert a timer in Google Slides.
3 Methods to insert a timer in Google Slides:
- Add a video of a timer from YouTube
- Add a video of a timer from Google Drive
- Use the Slide Timer extension
Let us begin.
Method #1: Add a Video of a Timer from YouTube
This method makes use of available timer videos on YouTube. You will need to be online for this kind of timer to work.
Step #1: Open your Google Slide presentation
Open your presentation from the Google Slides home screen at slides.google.com .
In the navigation pane on the left, click the slide in which you want to insert the timer.
Step #2: Add the timer video
From the main menu bar, click on the Insert tab.
From the dropdown menu, click on Video .
In the Insert Video dialog box that pops up, you can use either of the two options for inserting a YouTube video:
- Search YouTube
- Enter YouTube video URL
Option #1: Search YouTube
Enter a phrase such as “5-minute video timer” in the search box.
Press Enter or click the magnifying glass icon to start the search.
You will get a list of results, as in the example search below:
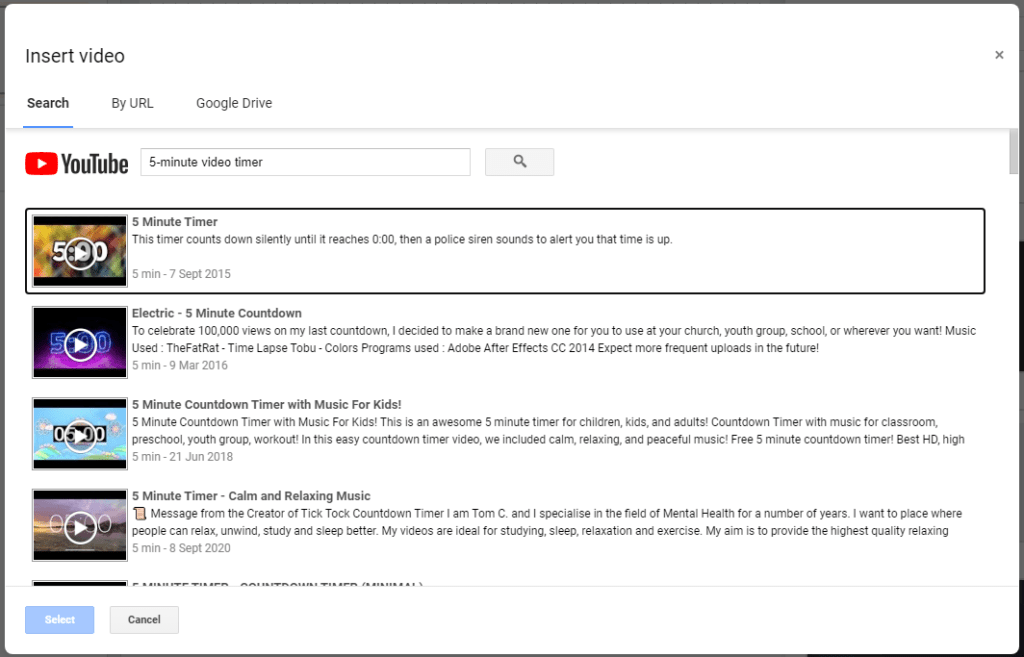
Click the timer that you prefer and click the blue Select button.
The timer video is added to the slide.

Option #2: Enter YouTube video timer URL
This option is the quickest way to get the exact YouTube timer video you want for your presentation.
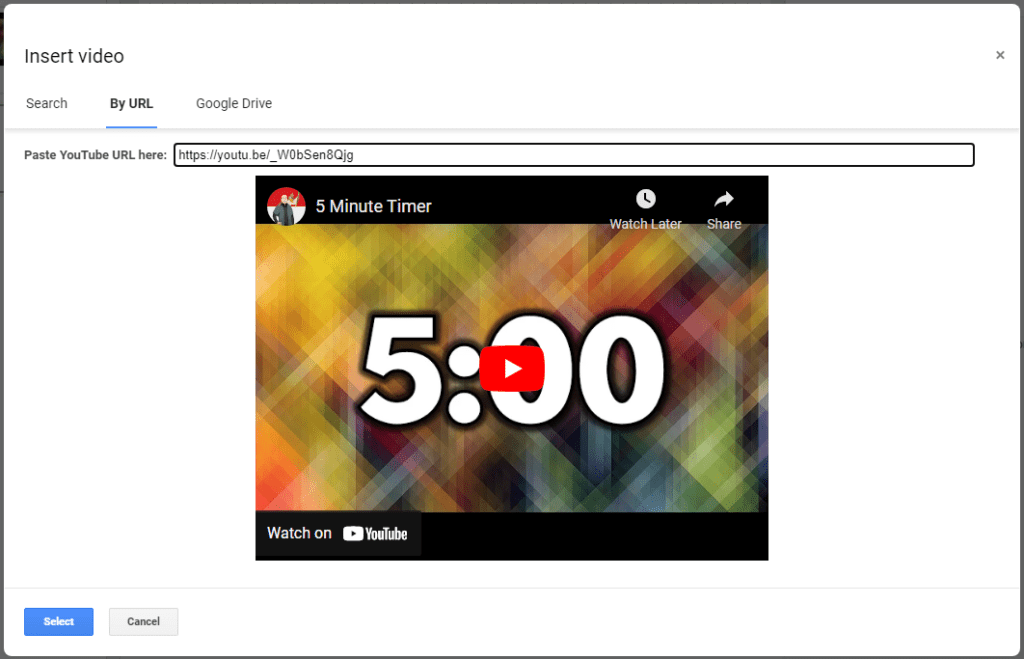
Click By URL in the Insert video dialog box.
Open the YouTube timer video you want in another browser tab.
Click the Share button at the bottom of the video to open the Share dialog box.
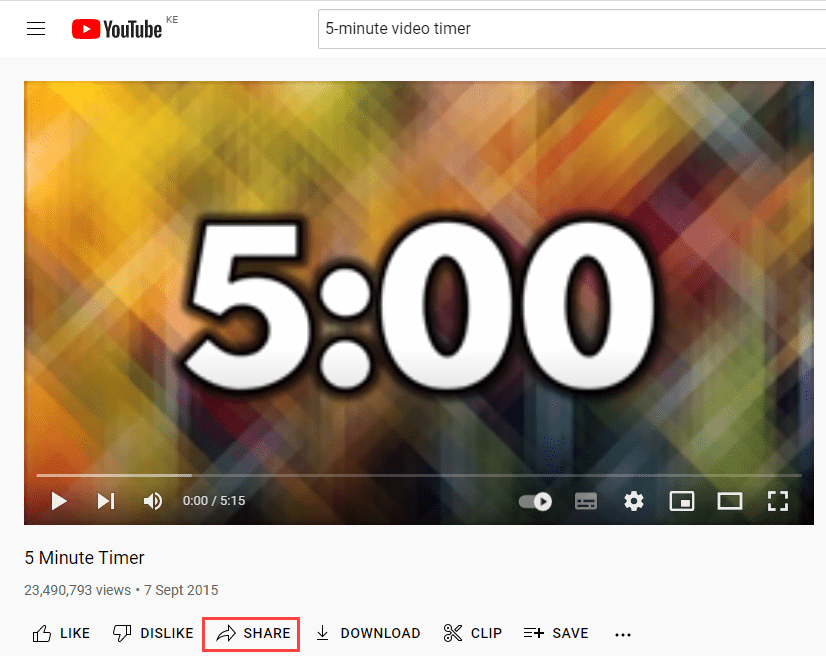
In the Share dialog box that pops up, click COPY to copy the video URL.

Switch back to the Insert video dialog box.
Click in the Paste YouTube URL here box, and press Ctrl + V to paste the timer video URL.
The preview of the video you selected will show up. Click the blue Select button to add the timer video to the slide.
The timer video is added to the slide, as in the example below:
Step #3: Position and resize
Hover the mouse pointer over the timer video and see the cursor turn into a four-headed arrow.
Click and drag the video to your desired location on the slide. As you drag the video, red guidelines appear to assist you in centering the video within the slide.

Resize the video by clicking on and dragging one of the blue boxes on the border of the video.
We suggest you only use the corner boxes when resizing the video to avoid distortion.
Step #4: Set the format options
The behavior of the YouTube timer video depends on the settings you set. You adjust settings in the four options on the Format options pane on the right side of the slide:

Option #1: Video playback
Click on the arrow next to the Video playback option to open the settings.
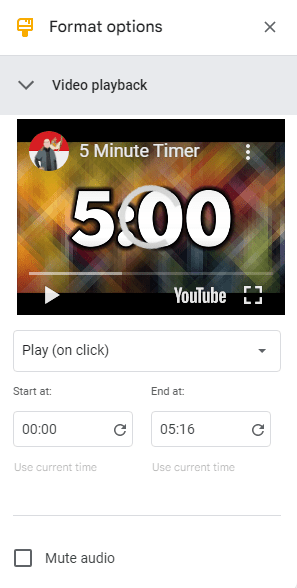
Click the down arrow in the Play drop-down control to see the options that control video playback:

Play (on click ) is the default setting. It means the timer video plays when you advance the slide by a remote clicker, pressing a key, or clicking a mouse.
Play (automatically) – The timer video starts to play without your intervention.
Play (manual) – The timer video plays when you click the play icon on the embedded video.
You can mute the audio on videos by checking the Mute Audio checkbox.
Option #2: Size and rotation
Click the arrow next to the Size and rotation option to open its settings:

You can change the settings in this option to change the size of the video, flip the video or even rotate it. We recommend that you check the Lock aspect ratio checkbox. This ensures that you do not distort the shape of your video as you adjust the settings.
Option #3: Position
Click the arrow next to the Position option to open the settings:

You can change the vertical (x) position and/or the horizontal (y) position of the timer video. Use either the Top left or Center of the video as the starting point or origin.
Option #4: drop shadow.
Click the arrow next to the Drop shadow option to open the settings.

You can adjust these settings to add a shadow effect to the frame of the timer video. Then adjust its color, transparency, angle, distance, and blur radius.
For more information, read How to Embed a YouTube Video in Google Slides .
Method #2: Insert a Timer Video from Your Computer
To insert a timer video stored on your computer in a Google Slide, you must first upload it to Google Drive. If your slide is set to be available offline, your timer video will still be available even if internet connection is lost.
Step #1: Upload the timer video to Google Drive
In your Google account, click the Google apps button to open the Google apps list.
Click the Drive app button to open Google Drive.
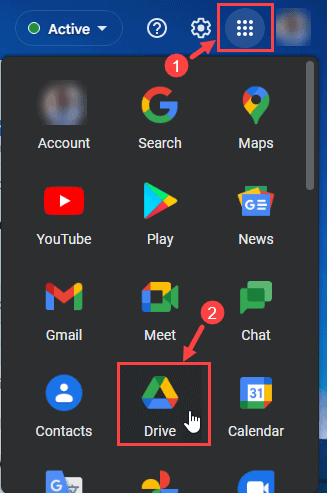
Click the + New button in the top left of Google Drive.
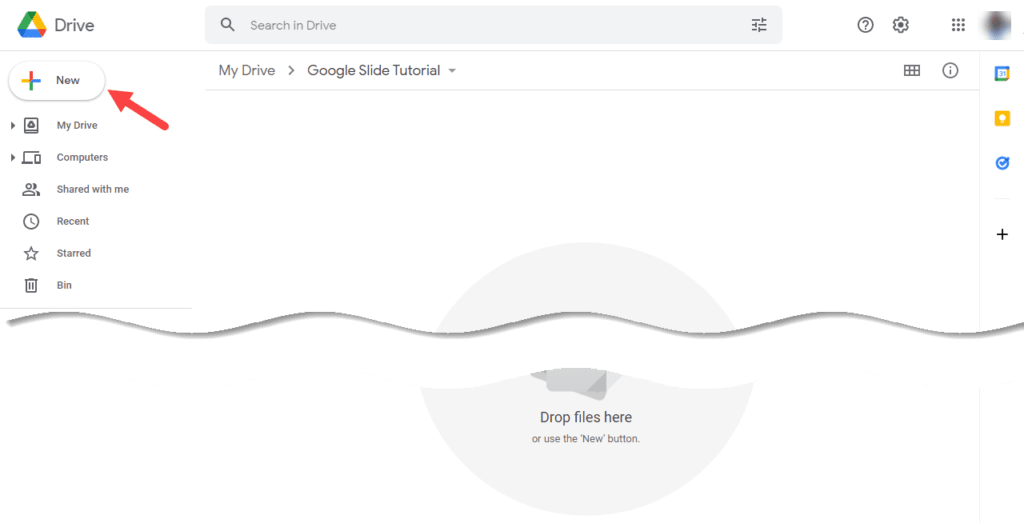
Click File upload on the menu that pops up.
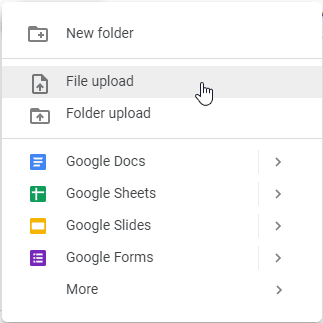
In the Open dialog box that appears, navigate to the folder that stores your video file.
Select the timer video file and click the Open button.
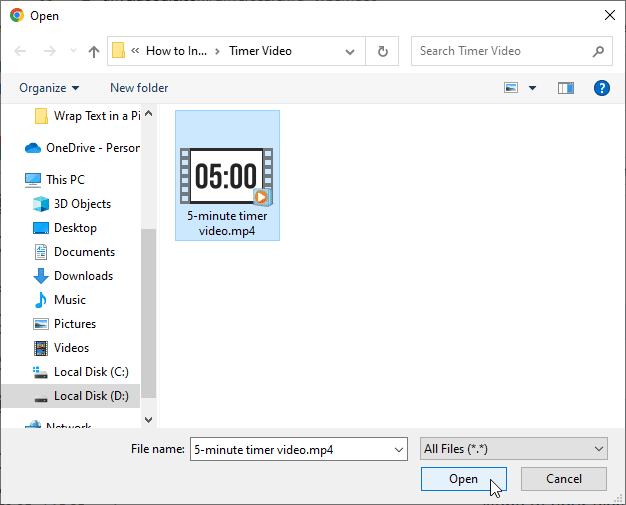
Your timer video file is uploaded to Google Drive as shown in the example below:

Step #2: Insert the video into Google Slide
Click the Google apps button in your Google account.
Click the Slides app button from the apps list to open the Google Slides home screen.

Open your Google Slides presentation. Select the slide to which you want to add the timer video.
From the main menu, click on the Insert tab.
From the drop down that opens, click the Video option.
Click the Google Drive tab on the Insert video dialog box that pops up:
Select the timer video file you uploaded onto Google Drive.
Click the blue Select button to add the video to the Google Slide.
The timer video is inserted.
Resize, position, and apply format settings to the timer video as explained in Method #1.
Method 3: Use the Slides Timer Extension
You can use the Slides Timer extension to insert a timer in Google Slides. The extension allows you to add more customization to the way the text in the timer looks.
Step #1: Open your Google Slides presentation
In the left navigation pane, click the slide in which you want to insert the timer.
Step #2: Insert the timer
Click here to find the Slides Timer extension on Chrome Web Store.
Click the Add to Chrome button to add the extension to the Chrome browser.
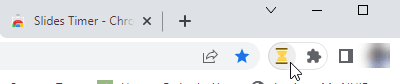
Click the Extensions button on the toolbar.
Then click the pushpin button on Extensions menu to pin the Slides Timer on the toolbar.

Ensure that the Slides Timer extension is visible on the toolbar.
Switch back to your Google Slides presentation.
Click the newly added Slides Timer extension.

You can use the Slides Timer extension to create a count-down or count-up (stopwatch) timer.
Create a count-down timer
In the navigation pane on the left, click the slide to which you want to add the timer.
Click the Text box command on the Google Slides toolbar.
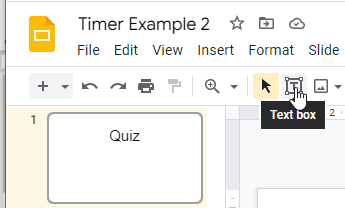
Click inside the slide to insert a textbox.

Type in the textbox your preferred time in the format << time->> . For example, for a 5-minute countdown type in <<5:00->> .
Press Ctrl + F5 or click the Slideshow button on the top right of the slide.
The text is converted to a count-down timer.
Create a count-up timer
Type in the textbox your preferred time in the format << time+>> . For example, if you want the count-up timer to start at 0 (zero) seconds, type in <<00 :00+>> .

The text is converted to a count-up timer.

Google Slides does not have built-in functionality to insert a timer in a slide. This tutorial demonstrated three methods to insert a timer in Google Slide. They involve external means.
You can either insert a video from YouTube or your computer or use the Slide Timer Extension.
Leave a Comment Cancel reply
Save my name, email, and website in this browser for the next time I comment.
- PC & Mobile
- Google Slides
How To Insert a Timer into Google Slides
Lee Stanton Lee Stanton is a versatile writer with a concentration on the software landscape, covering both mobile and desktop applications as well as online technologies. Read more September 29, 2023
During a Google Slide presentation, you should time how long you stay on one slide or give your audience the chance to engage in discussions or answer any questions. You may also need to use a screen countdown during activities or breaks.

Adding a timer to your Google Slides helps you do this seamlessly. In this article, we’ll tell you everything you need to know.
Add a Video Timer to Your Google Slides Presentation
Here are detailed steps for inserting a timer into a Google Slides presentation and how to format the settings.
Select Your Slide
You might want to insert a timer into a slide with content. Alternatively, you might want to create a separate timer slide if you plan on doing a timed activity in your Google Slides presentation. If you need one timer for several slides, insert the video in each slide and adjust the settings individually.
Go to the Video Selection Page
Follow these steps to navigate to your video selection page in Google Slides:

Your video selection page with three tabs will open, and you can select a video timer to insert on your page.
Choose a Video Timer
In the video selection page, choose a video timer for your Google Slides presentation by selecting from these options:
- Look for a video on YouTube

When looking for a video, search for the timer length you’d like to use, for example, “five-minute timer.“ Note that the video hyperlinks to a third-party account when you use the URL or search option. If the uploader deletes the video, you won’t be able to use the timer in a Google Slide presentation.
Using a video timer you’ve uploaded to your Google Drive is a more reliable way of having one for your Google Slides presentation.
Reposition and Resize Your Video
To move your video to a different position or resize it in your Google Slide, click on it and use one of these options:

Edit the Video’s Playback Options
You can set your video in Google Slides to start playing as soon as you switch to a slide, or you can edit when a video plays. Here’s what you need to do:

In the video format options, you can also adjust more playback settings, like muting the audio in the video. if you can’t source a timer with specific requirements, you can make your video timer start and end at a particular time. For example, if you need a 50-second timer or a 10-second timer.
Add a Google Slides Timer Using the Slides Timer Extension
If you’re not keen on adding a video timer to your Google Slides presentation, or if you’d like a more customizable timer, you can try the Slides Timer Google Chrome browser extension. This add-on allows you to input a text-based code which it converts to a function.

- Go to “Slides Timer.”
Uses of the Slides Timer Extension
You can use several useful features with the Slides Timer in your Google Slides presentations.
Here are steps for creating a countdown timer with the Slides Timer:
- Go to the “Text box” icon in the toolbar under the menu.
- In the text box, input “<<“specified time”->>”. For instance, if you want a 3-minute countdown, you’d type “<<3:00->>” in the text box.
- Select “Slideshow” or “Present,” and your text is converted automatically into a countdown timer.
To add a stopwatch or count-up timer using the Slides Timer, input “<<“specified time”+>> in a text box where you like to insert the timer.
Here’s an example: If you need a stopwatch to begin at zero seconds, input “<<00:00+>>.” This automatically turns it into a stopwatch on the “Present” screen.
The Slides Timer Chrome extension can display the current time in a local time zone. To display this, add a text box to your Google Slide, then input “<<time>>.” This shows the time in AM/PM format on the “Present” screen.
To insert the date in a Google Slides presentation slide, add a text box, then input “<<date>>.” This formats the date into “mm/dd/yy” in the “Present” screen. This continuously displays the current date if you present it with no manual adjustment.
Move to the Next Slide
You can also use the Slides Timer to move onto another slide automatically when the time is up. For instance, if you’d like to move to another slide after five minutes, you can add a text box and input “<<05:00-+>>.”
Benefits of Using a Timer in Google Slides
When you’ve mastered how to use timers in your Google Slides presentations, you’ll experience some of these great benefits.
Pace Your Presentation
A video timer in your Google Slides presentation can help you track the time you take to discuss each slide. If your presentation time is limited during a meeting, allocating the time you’d like to take on each slide and using a timer helps you pace yourself. Additionally, you can include everything you need to discuss within your time frame.
There’s also the option to set your timer to automatically advance by moving to the next slide after a specified time so you remain on schedule.
Respecting Other People’s Time
Using a timer in Google Slides ensures your presentation doesn’t infringe on another speaker’s time. Timers also show your audience how much time they have to ask questions or prepare for a transition to the next speaker.
Provides Flexibility
In Google Slides, you can stop a timer early if you’re ready to move to the next slide and have the flexibility to adjust your timer. For example, if you’ve provided time for questions but didn’t get many requests. Or if you’re asked an interesting question that might take longer to answer, or have thought of another idea you’d like to incorporate into your presentation.
Using Visual Aids for Activities
If you’ve incorporated activities in your Google Slides presentation, timers help your audience remain focused as they can see how much time they have to complete an activity.
Timing Breaks
Timers in Google Slides presentations let your audience know how long breaks are, which is especially useful for teachers giving long online lessons.
Organize Your Presentation With Ease
Using a timer in your Google Slides presentations helps track your time on each slide and the time given for activities that your audience can see. Inserting a timer using the steps outlined above includes using the Video and Insert options, and the Slides Timer Google Chrome browser extension. Once you’ve inserted your video in Google Slides, you can resize and position it and edit its playback settings.
Have you ever used timers in your Google Slides presentations? Did they help you keep your presentations well organized? Let us know in the comments section below.
Related Posts

Disclaimer: Some pages on this site may include an affiliate link. This does not effect our editorial in any way.
Lee Stanton September 27, 2023
Lee Stanton September 14, 2023
Send To Someone
Missing device.
Please enable JavaScript to submit this form.
How to add a timer to Google Slides
- Categories: Google Slides
- Comments: 4

One question our incredible Google Slides experts are asked all the time is ‘how do I add a timer to Google Slides?’. And, as we love to delight clients and fellow presentation enthusiasts alike, we’ve come up with an answer!
Now, if you’re not one of the people who’ve asked us this question, you might be wondering why you’d need a timer in Google Slides. Surely, it’s just a case of clicking through each slide as you talk, right? Not so! Our curious questioners have a good point. What do you do if you want to stay on a slide for a set period of time? Perhaps to let your audience engage in a discussion or answer a question? Or what if you want to set a countdown on your screen so your audience know how long their coffee break is?
Sounds great, where do I find the Google Slides timer function?
Erm, we hate to break it to you, but this is a question with no easy answer. Essentially, there are two options. Option A is the in-built autoplay function in Present mode, which allows you to set your deck to switch from slide to slide at set intervals, with no visible timer on the screen. If you want a visible timer on your slides, the only current option is to embed a YouTube video of a timer directly onto your slide. The option you choose will depend on what kind of timer you’re after. We’ll look at the autoplay function first, and then tackle the slightly more complex art of embedding a video.
Using the Autoplay function in Google Slides
Step 1: Enter Present mode
Open up Google Slides and put your chosen deck into Present mode. To do this, either press Ctrl+5 or click on the Slideshow button in the top right-hand corner of your screen.
(If you’ve been presenting without using this function, you’re missing out on a golden opportunity to make yourself look more professional. Find out how to use Present mode effectively in Google Slides .)

Step 2: Locate the Autoplay function
Once you’re in Present mode, hover over the three dots in the bottom left of your screen and you’ll see a box that says Open the options menu .

Click on the dots and a menu will appear.

Step 3: Choose your timings
You can then choose how frequently you’d like your slides to move on, ranging from once a second to once a minute.

You can also choose to play them on a loop, which is handy if you want to play something like a photo presentation in the background during an event.

Step 4: Play your presentation
Once you’ve chosen the timing settings you want, click Play at the top of the pop-up menu.

And that’s it! Your presentation will play automatically following the timings that you’ve specified.
Embedding a timer on screen in Google Slides
If you want to add a visible countdown timer to your slide to give your audience a set period of time for a break or a group activity, the easiest way to do this (at the time of writing) is to head over to YouTube and search for a timer video (yes, these are a thing!).
Step 1: Search for a timer video on Youtube
You can do this without leaving Google Slides. To start, go to Insert in the toolbar and then select Video .

A pop-up will appear that allows you to search YouTube. Type the length of timer you want into the search bar and click the blue Search button. A range of options will pop up. You can choose from different backgrounds and even different music options, but for the purposes of this tutorial I’m going to choose a two-minute timer with a plain black background.

Step 2: Insert the video into your presentation
Click on the video you want to insert and then click Select . The timer will appear on your slide, along with a Format options box to the right of the screen (we’ll cover this in a minute).

You can resize the timer to suit your needs; here, I’ve resized it to fit the slide.

You can use the Format options bar to choose how you want to start the timer – either on a click, automatically, or manually by pressing play.

You can also adjust the exact start and end times of your video.

And finally, if your ideal timer is cursed with irritating background music, you can choose Mute audio (but remember that, if you do mute the video, you won’t be able to hear any audio signals when the timer hits zero).

Voila! One countdown timer to keep your audience on track.
The verdict
Autoplay in Google Slides offers a really straightforward way to pace your presentation if you don’t want to rely on manual clicks to move between slides. However, it’s not visible, so your audience won’t know when the slide is going to advance. Embedding a video timer offers you an easy way to let your audience know what’s happening and when. It’s worth playing around with both functions to see which best meets your needs. The drawback here is that you have to rely on the options available on YouTube, so it’s less customizable. Whichever option you go for, it’s important to rehearse your entire slideshow beforehand to make sure that all the timings fit together as planned. Everyone gets pre-presentation nerves; but practice makes perfect! Visit our ULTIMATE guide to powerful, panic-free presenting for tips that’ll make your next presentation smooth, straightforward, and (dare I say?) enjoyable.
If you’ve found this blog post useful, check out our other blog posts written by our Google Slides gurus, including our handy guide to Google Slides accessibility tools and our six top tips for getting the most out of collaboration with Google Slides . Or, for a deeper dive, check out our ULTIMATE guide to Google Slides .
Related articles
How to present to a meeting in google slides.
- Google Slides
At BrightCarbon, we're always excited to find features that make presenting a more seamless experience! This blog post covers how to use the 'Present to a meeting' button in Google Slides.

The best free Google Slides templates
Google Slides templates are a great starting point to improve the look and feel of your presentation. They’re fab as they’re accessible and low cost, but it’s important to remember that even well-designed presentations can be ineffective if the content is text heavy.

Google Slides: The ULTIMATE guide
- Google Slides / Presentation technology
- Comments: 55
As presentation nerds, we at BrightCarbon have had plenty of opportunity to get to know ins and outs of Google’s browser-based presentation tool. This guide will cover everything you need to know about Google Slides - from the very basics to the most advanced features - and will provide you with the know-how to make brilliant slides, quickly and easily.

thanks dude
Thanks that helped me a lot!!!!!!!!!!!!!!!!!!!1
How can I get my slides to transition by itself after 15 minutes. I have a timer embedded, but I have to click to go to the next slide.
hi thanks for the help
Leave a Reply Cancel reply
Save my name and email in this browser for the next time I comment.
Join the BrightCarbon mailing list for monthly invites and resources
BrightCarbon staff are knowledgeable with excellent skills, and are unfailingly enthusiastic for each new presentation. Sarah Appleton Brown Practice Plus Group

How-To Geek
How to autoplay and loop a google slides presentation.
Play your presentation without touching a thing.
Quick Links
Set up autoplay and loop when presenting, set up autoplay and loop when publishing to the web.
If you don't want to worry about clicking through your slideshow, you can set up Google Slides to play your presentation automatically. Plus, you can have the slideshow loop, so it starts over at the beginning when it ends.
You might be playing your slideshow at a kiosk, during a conference, or publishing it to the web. These are the ideal times to use AutoPlay and Loop in Google Slides . You can automatically present the show and choose the timing between slides. Then, restart the presentation at the beginning each time it ends.
If you plan to start the slideshow and then let it play, you can set up AutoPlay and Loop , or simply one or the other.
Related: How to Loop a PowerPoint Presentation
Start the presentation by clicking "Slideshow" at the top of Google Slides. You can also use the arrow to pick either "Presenter View" or "Start From Beginning" per your preference.
When the slideshow opens, display the Presenter Toolbar by hovering your cursor over the bottom left corner of the presentation.
Click the three dots on the right of the Presenter Toolbar, then move to AutoPlay. You'll see a pop-out menu that lets you select the advance timing for the slides. You can pick from every second up to every minute.
If you also want to loop the slideshow, select "Loop" at the bottom of the pop-out menu.
When you finish, click "Play" to automatically play your presentation.
To stop the slideshow, simply click on a slide. You can then resume AutoPlay from the Presenter Toolbar by selecting "Play" again.
Maybe you plan to publish your slideshow to the web or embed it on a website rather than play it locally. You can set up AutoPlay and Loop as part of the publish settings.
Related: How to Share a Google Docs, Sheets, or Slides File as a Web Page
Go to File > Publish to the Web in the menu.
Choose either "Link" or "Embed" per your intent. Then use the Auto-Advance Slides drop-down box to choose the timing for the slides. Here again, you can pick from every second up to every minute.
To loop the slideshow, check the box for Restart the Slideshow After the Last Slide.
You can then mark the checkbox for Start Slideshow as Soon as the Player loads if you like, so that the viewer doesn't have to take any action to begin the presentation.
When you finish, click "Publish" and confirm to obtain the link or embed code for the slideshow.
To share a Google Slides presentation that doesn't require you to walk viewers through it, remember these steps to automatically play and loop the slideshow.
How to Add a Timer in Google Slides

Adding a timer to your Google Slides presentations can be extremely useful for keeping track of time during presentations. Whether you want to pace yourself or manage activities and breaks, a timer allows you to stay on track.
Since Google Slides does not have a built-in timer function, you need to get creative. The most popular approach is to embed a YouTube countdown timer video onto your slides. There are also browser extensions you can use to add timers.
In this step-by-step guide, you will learn multiple methods for adding timers in Google Slides, along with customization tips.
Step 1: Embed a YouTube Timer Video
Embedding a YouTube video is the easiest way to add a timer in Google Slides. Here is how to do it:
- Open your Google Slides presentation and select the slide where you want to add the timer.
- Click “Insert > Video” in the top menu.
- In the search bar, type “5 minute timer” or any duration you need. Press Enter.
- Hover over the video thumbnail results and click “Select” on your chosen timer.
- Resize and position the video on your slide as needed.
You can search for and embed any length timer video from YouTube. This method allows you to add timers without installing anything extra.
Step 2: Use the Slides Timer Chrome Extension
The Slides Timer extension lets you add timers by simply adding text placeholders.
- Install the Slides Timer extension in Chrome.
- Open your Google Slides presentation.
- On the desired slide, insert a text box and enter: <<5:00>> to add a 5-minute countdown.
- Present the slideshow to view the live countdown timer.
With the Slides Timer extension you can create count up timers, display the current time, date, and more. It’s an easy way to add timers without embedding videos.
Step 3: Set Up Auto-Advance Slide Transitions
You can auto-advance Google Slides to create a slideshow timer effect. Here’s how:
- In your presentation, click “Slide > Transition” in the top toolbar.
- Under Auto-advance, choose your desired time interval.
- Click the “Play” button to preview the auto-advancing slides.
Although this method doesn’t display a visible timer, it transitions slides automatically based on a timed interval you specify.
Customizing Your Google Slides Timer
Once you’ve added a timer using one of the methods above, you can customize it further:
- Resize – Click and drag the edges to resize your timer video or text box.
- Reposition – Click and drag the timer object to move it around the slide.
- Format timer style – For YouTube videos, adjust options like autoplay and start time.
- Keyboard shortcuts – With the Slides Timer extension, press “D” to pause/play, “E” to reset, and “N” to advance to the next slide.
- Loop slideshow – Enable looping in the presentation settings so your timer restarts when it reaches the end.
Take advantage of these options to tweak your timers and get them just right.
Adding Visible Timers vs. Auto-Advance Transitions
There are pros and cons to adding visible timer videos/text compared to auto-advancing slide transitions:
Visible timers
- Pros: Present exact time remaining, pause/resume timing
- Cons: Require extra steps to embed, only show on one slide
Auto-advance transitions
- Pros: Simple to set up, persist across all slides
- Cons: No visible timer, fixed time intervals
So in summary:
- Use visible timers when you want more control to manage discrete activities.
- Use auto-advance when you want a automated slideshow that cycles through at a consistent pace.
Choose the option that best fits your presentation and timing needs.
Presentation Timers – Final Takeaways:
- Add countdown timer videos from YouTube to display an exact timer.
- Install the Slides Timer Chrome extension to easily create text-based timers.
- Auto-advance slides automatically based on fixed time intervals.
- Customize timers by resizing, repositioning, and setting display options.
- Visible timers offer more control, while auto-advance creates seamless slideshow flow.
Adding timers boosts the interactivity and effectiveness of your Google Slides presentations. With the techniques outlined in this guide, you can start timing your presentation slides today.
About The Author
Vegaslide staff, related posts.

How to Add a Timer in Google Slides Presentation

How to Make a Graph in Google Slides

How to Add an Equation in Google Slides

All the Best Google Slides Keyboard Shortcuts


Cloud Storage

Custom Business Email

Video and voice conferencing

Shared Calendars

Word Processing

Spreadsheets
Presentation Builder

Survey builder

Google Workspace
An integrated suit of secure, cloud-native collaboration and productivity apps powered by Google AI.
Tell impactful stories, with Google Slides
Create, present, and collaborate on online presentations in real-time and from any device.
- For my personal use
- For work or my business

Jeffery Clark
T h i s c h a r t h e l p s b r i d g i n g t h e s t o r y !

E s t i m a t e d b u d g e t

Make beautiful presentations, together
Stay in sync in your slides, with easy sharing and real-time editing. Use comments and assign action items to build your ideas together.

Present slideshows with confidence
With easy-to-use presenter view, speaker notes, and live captions, Slides makes presenting your ideas a breeze. You can even present to Google Meet video calls directly from Slides.

Seamlessly connect to your other Google apps
Slides is thoughtfully connected to other Google apps you love, saving you time. Embed charts from Google Sheets or reply to comments directly from Gmail. You can even search the web and Google Drive for relevant content and images directly from Slides.

Extend collaboration and intelligence to PowerPoint files
Easily edit Microsoft PowerPoint presentations online without converting them, and layer on Slides’ enhanced collaborative and assistive features like comments, action items, and Smart Compose.

Work on fresh content
With Slides, everyone’s working on the latest version of a presentation. And with edits automatically saved in version history, it’s easy to track or undo changes.

Make slides faster, with built-in intelligence
Assistive features like Smart Compose and autocorrect help you build slides faster with fewer errors.

Stay productive, even offline
You can access, create, and edit Slides even without an internet connection, helping you stay productive from anywhere.
Security, compliance, and privacy

Secure by default
We use industry-leading security measures to keep your data safe, including advanced malware protections. Slides is also cloud-native, eliminating the need for local files and minimizing risk to your devices.
Encryption in transit and at rest
All files uploaded to Google Drive or created in Slides are encrypted in transit and at rest.
Compliance to support regulatory requirements
Our products, including Slides, regularly undergo independent verification of their security, privacy, and compliance controls .
Private by design
Slides adheres to the same robust privacy commitments and data protections as the rest of Google Cloud’s enterprise services .

You control your data.
We never use your slides content for ad purposes., we never sell your personal information to third parties., find the plan that’s right for you, google slides is a part of google workspace.
Every plan includes

Collaborate from anywhere, on any device
Access, create, and edit your presentations wherever you are — from any mobile device, tablet, or computer — even when offline.

Get a head start with templates
Choose from a variety of presentations, reports, and other professionally-designed templates to kick things off quickly..

Photo Album

Book Report

Visit the Slides Template Gallery for more.
Ready to get started?
Android Police
How to draw on google slides.
Add that personal touch to make unique presentations
Google Slides has features like a digital pen, speaker notes, and autoplay that help you create impressive presentations. It works flawlessly on any device, including Android phones, iPhones, laptops, Macs, PCs, and affordable Chromebooks . One feature that's often overlooked is the drawing option. If you like to sketch, add a unique twist to your slides. It's a fun way to create a visually pleasing presentation. This tutorial shows you how to draw on Google Slides and spruce up your presentations.
When should you use the drawing feature in Google Slides?
There are no rules for drawing on Google Slides if it's an informal presentation for friends or classmates. But exercise restraint if you're making a slideshow for the office or school. You can add annotations, diagrams, and handwritten notes for workplace presentations.
How to add a hanging indent in your Google Slides presentation
How to draw on google slides using the scribble tool.
Google Slides has several shapes and lines in the Insert menu, but that might not be enough for the image you want to create. You can use the Scribble tool to make freehand drawings.
The Scribble feature is unavailable on the mobile app. You can only access basic shapes and lines. Your only option is to create the presentation on the desktop version of Google Slides.
Here's how to draw on Google Slides with the Scribble option:
- Open Google Slides and log in to your account.
- Choose a new slide.
- Click Insert from the toolbar.
- Choose Line .
- You'll see a plus sign as your cursor.
- Hold the left mouse button until you finish drawing.
The drawing is selected after you let go of the left mouse button. The toolbar displays customization options, allowing you to modify the line color and weight. You can also change the start and end points.
Go to Format > Format options to change the size and position. You can also add drop shadows and reflections to your drawings. Google Slides doesn't offer a fill option. However, you can fill shapes with color.
How to insert Google Drawings in Slides
Google Drawings is a simple drawing tool for creating illustrations. It gives you a checkered drawing board to doodle on. You can import the final image to other apps like Google Slides after you finish drawing.
Here's how to make a drawing:
- Other options include Table , Chart , Diagram , and Word Art .
- After you complete your drawing, click File and choose Share .
- Copy the link.
Here's how to use the drawing in Google Slides:
- Open Google Slides .
- Click Insert .
- Paste the link and click Insert Image .
Google Drawing is only available on the web. It doesn't have Android or iOS app versions.
How to draw on Google Slides with the Annotate extension
You can use the Annotate Chrome extension to draw on Google Slides. Here's how to add and pin the extension:
- Open Google Chrome and visit the Chrome Web Store .
- Type Annotate in the search bar.
- Click Add extension .
- After installation is complete, pin the extension so that it's easily accessible.
- Click the puzzle piece button at the top of the screen.
Here's how to use the Annotate extension:
- Go to your Google Slides tab and click the Annotate extension in the upper-right corner.
- Press and hold the left mouse button until you finish drawing.
- The drawing remains on the original slide even if you go to a new one.
- Click Save .
What's the difference between Google Slides templates and themes?
Your annotations appear in your Annotate account under Web Annotations . Don't be alarmed when your drawing disappears if you navigate away from your slide and return. Click Load previous annotations to view your drawings. Although you can't see it in the left sidebar, the drawing appears when you present your slideshow.
Add some quirkiness to make your Google Slides presentations stand out
The tips in the guide should help you include your drawings in your Google Slides presentations and make them unique. Add more flair to your slideshows by adding sound effects, voiceovers, and other audio clips . If you're short on time yet want to impress your audience, try these beautiful Google Slides templates to create professional-looking slideshows in a jiffy.

5 Better Alternatives To Google Slides
I f you're looking to create a compelling presentation to showcase a new idea or persuade others, Google Slides may be the first option that comes to mind. But with few built-in templates, basic themes, and a limited graphics collection, you'll likely have a hard time making your presentation stand out against others.
If you want to make your presentation truly stand out, there are several alternatives to Google Slides that offer extra perks and features to give your presentations an edge. While Google focuses on integrating Slides with its other work-based apps like Sheets and Docs, other presentation apps focus more on design elements, transitions, and themes to help you convey your brand or personal image throughout your presentation.
We've tested these Google Slide alternatives to give you an idea of other available options to deliver impactful presentations. If you're looking for a way to make boring information more fun and engaging, here are the best presentation apps to replace Google Slides.
Read more: Major Graphics Card Brands Ranked Worst To Best
Microsoft PowerPoint
There's a reason so many businesses around the globe use Microsoft PowerPoint. Building its reputation as the go-to option for delivering high-quality presentations, the software generated $100 million in annual sales only three years after its initial release in 1990.
Microsoft PowerPoint may be Google Slides' largest competitor, but there are plenty of unique features that can add an extra flourish to your slides. PowerPoint excels in its impressive library of custom animations and slide transitions, which are fairly limited in Google Slides. Another unique feature is its AI-powered Designer tool. This provides professional design schemes that mirror the words used in your slides. For instance, if your title slide is named "Basketball Team 2024," Designer will automatically suggest pictures and slide layouts associated with basketball.
As PowerPoint has been in development longer than Google Slides, it naturally offers more nuanced features if you're looking for something specific. For example, you can save individual slides as an image file (using .png or .jpeg formats) or as a separate presentation file. There's also a large library of free PowerPoint templates designed to speed up your workflow. Moreover, PowerPoint integrates seamlessly with Microsoft Teams with its PowerPoint Live function, allowing you to easily share your presentation with your co-workers.
Prezi offers an innovative approach to showing presentations with its unique canvas feature. Unlike traditional presentation software, Prezi lets you zoom and pan around a flexible canvas. The canvas may feel distant to something of a presentation program, but there is still some linear order provided thanks to the Timeline view.
Finding ways to visualize data is one of the biggest challenges when dealing with presentation software. Prezi resolves this struggle with the help of its Story Blocks: a series of infographics available in multiple designs to visually represent data. You can easily edit infographics and even add animations to individual shapes. This can help add a story to your presentation and help you emphasize key points.
To further enhance your presentation visually, Prezi offers several topic path settings, which let you change how Prezi transitions from one topic to another. These options include subtopics, which are super helpful for breaking large chunks of information down. If you're looking for a unique, modern approach to presenting information, Prezi is a top pick.
If you're looking to create a professional presentation to convince potential clients about your business idea, Slidebean is a popular choice among professionals with plenty of customization options. One of the issues with Google Slides is its fairly limited template library, which is filled mostly with basic designs. Slidebean offers a better alternative with a broad selection of innovative templates split into categories for convenience.
The app's user interface is easy to navigate so that you can create slides in less time. Each slide has a dedicated Design and Outline tab. You can use the Outline tab to quickly edit the information on each slide without being distracted by all the visual elements. Another productivity-enhancing feature is the ability to generate a presentation theme from your website. Simply enter your URL, and Slidebean will automatically apply the theming to your presentation.
Slidebean is another presentation app to take advantage of AI. Using the Auto-Design feature, you can generate recommended slide layouts based on your existing content. It also features AI text suggestions designed to suit different industries. Overall, Slidebean offers a quicker, more efficient method for creating stunning presentations compared to Google Slides.
Canva is a well-known app among graphic designers, but it's also capable of making stunning presentations. The app also has mobile editions, so you can easily create and edit presentations on your Android phone , iOS device, or tablet. As long as you have an internet connection, you can modify your designs wherever you are.
To get started, head to Canva's online presentation maker . Canva offers a vast range of templates categorized by topic, which easily surpasses the simple templates in Google Slides . While some of the templates are only available to Canva Pro members, there is an ample amount of free templates to help you get started. You'll also find a large selection of stock photos, shapes, and illustrations to create beautiful customized slides.
Because Canva is built for graphic designers, you can access several features to give your presentation consistent theming. These include color palettes, font sets, and even a brand kit that allows you to add your company's fonts (available to Pro members only). One time-saving feature is Canva's Uploads tab, which lets you access recently uploaded media files. This offers a convenient way to copy content between different presentations.
Visme is a powerful visual design tool able to create videos, infographics, and presentations. One of the perks of using Visme is the company's free educational content, which offers advice on how to create impactful content to boost your brand. After signing up, the company also asks whether you're using Visme for your business, education purposes, or personal use to offer personalized tips.
In terms of charts and graphs, Visme offers some of the most impressive features we've seen from a presentation app, so you can effortlessly convey important statistics. From the Data tab, you can access dozens of graph styles to visually represent your data. Then, simply double-click a chart inside your presentation to edit the values instantly in a simple table format.
Another area that Visme excels in is collaboration. You can either generate a link to publish your presentation on the web or share your presentation privately with others. For each team member, you can choose who can view, edit, and comment slides for a seamless workflow. There's also a Slack integration that lets you receive messages whenever changes are made to your presentation. Visme is free for all users, with limited features available in its premium plans.
Read the original article on SlashGear .

IMAGES
VIDEO
COMMENTS
2. Choose a Timing Between Slides. The Auto-advance slides drop-down menu on the Publish to the web screen functions like a Google Slides timer. Let's go to the File menu and click on the Share menu. Next click the Publish to the web option.
You can also right-click on it and click on " Copy ". Step-3: Click on the Option to Insert a Video. Now, go back to your Google Slides presentation. Open the slide where you want to insert the timer. Then, click on the "Insert" tab in the menu bar and select the "Video" option from the "Insert" menu.
Go to slides.google.com on your computer. Open an existing presentation or create a new one. Step 2: Select the Desired Slide: Choose the slide where you want to embed the timer. Step 3: Insert the Video: Navigate to the top toolbar, click on "Insert," then select "Video.". Step 4: Search for the Timer Video:
Go to slides.google.com on your PC or Mac computer and create or open a presentation. 2. Select the slide you want to add a timer to in the left sidebar. 3. In the top toolbar, select "Insert" and ...
To add a timer to google slides, go to 'Insert' tab > press "Video" > search "5 minutes timer" > choose a video and "Select". Alternatively, you can install a timer extension. Adding timers in your slides can help you manage your time effectively during presentations. They can also be a valuable visual aid for your audience ...
In this vide we walk you through how to embed an automatic countdown timer to you Google Slides. This is super easy to do and something that you can get done...
Unlike PowerPoint templates that timer add-ins can customize, you can add a timer to Google Slides by adding a timer video. To do this, go to Insert -> Video. Add a timer video on YouTube or upload it via Google Drive. You can search for it via YouTube if you don't have a video available. The countdown timer can include a specific duration (e ...
In the navigation pane on the left, click the slide to which you want to add the timer. Click the Text box command on the Google Slides toolbar. Click inside the slide to insert a textbox. Type in the textbox your preferred time in the format << time->>. For example, for a 5-minute countdown type in <<5:00->>.
In this tutorial, we cover how to use a timer and clock extension into your Google Slides presentations.📒 Notes & Links 📒1️⃣ Get the Slides Timer Extension...
STEP 1: ADD SLIDES TIMER CHROME EXTENSTION. Start by searching for the Slides Timer extension on the Chrome Web Store. You can do a simple Google search for "Google Slides Timer" in your Google search bar and the first result will be the Slides Timer in the chrome store. Once you find the slides timer extension, you will need to select ...
Go to the Video Selection Page. Follow these steps to navigate to your video selection page in Google Slides: In your Google Slides presentation, click on the "Toolbar.". Select "Insert ...
Open your Google Slides presentation and navigate to the slide where you want to add the timer. Select Video from the Insert menu in the toolbar. In the Insert video window, enter the title or ...
Method 2: Adding a Digital Clock Using "Slides Timer". As I mentioned before, Google Slides doesn't give us the option to add a clock from its menu, but you can use the Chrome extension "Slides Timer.". First, go to "Slides Timer" in the Chrome web Store or type it on the search bar. Click " Add to Chrome " to add the ...
Here's what you'll do. Visit the Chrome Web Store and search for Slides Timer . Click Get to install the extension on your browser. Select Add Extension . Move to Google Slides and select a slide ...
In this video, we cover how to insert clocks, timers, and stopwatches inside of Google Slides.│ Playlist: https://www.youtube.com/playlist?list=PLZ3dKocsKl5Z...
Step 1: Search for a timer video on Youtube. You can do this without leaving Google Slides. To start, go to Insert in the toolbar and then select Video. A pop-up will appear that allows you to search YouTube. Type the length of timer you want into the search bar and click the blue Search button. A range of options will pop up.
Go to File > Publish to the Web in the menu. Choose either "Link" or "Embed" per your intent. Then use the Auto-Advance Slides drop-down box to choose the timing for the slides. Here again, you can pick from every second up to every minute. To loop the slideshow, check the box for Restart the Slideshow After the Last Slide.
Right-click your mouse to bring up the context menu and select "Copy" or Select the URL by clicking on it and press "Ctrl+C" keys on your keyboard to copy the selected URL. Step 3: Now, insert a timer into a Google Slides presentation. Click on the slide where you want to place or insert a timer. In the menu bar, click on "Insert ...
Open Google Chrome, click the Google Apps icon, and select " Google Slides ." Then, click the specific slide in your presentation where you want to add a timer. Go to the Insert tab and click "Video" from the drop-down menu. Select the "YouTube" option and type "countdown timer" (no quotes) in the search bar. Then, press Enter.
The video timer appears on the slide, so both you and the viewers of the presentation can see the timer counting down. You can move the timer around on the page next to text and images or make the timer the only object on the slide. Related: 6 Types of Workplace Presentations (With Tips) How to add a timer to a Google Slides presentation
A countdown timer in Google Slides is a great way of keeping students ontrack when working on a task.
Present the slideshow to view the live countdown timer. With the Slides Timer extension you can create count up timers, display the current time, date, and more. It's an easy way to add timers without embedding videos. Step 3: Set Up Auto-Advance Slide Transitions. You can auto-advance Google Slides to create a slideshow timer effect. Here ...
Use Google Slides to create online slideshows. Make beautiful presentations together with secure sharing in real-time and from any device.
Open Google Slides and log in to your account. Choose a new slide. Click Insert from the toolbar. Choose Line . Select Scribble from the drop-down menu. You'll see a plus sign as your cursor. Hold ...
Delete a Google Slides text box on the web. On your web browser, go to Google.com and follow the steps below. Click Go to Slides. Go to the upper-left corner and choose Blank presentation. Choose ...
It also features AI text suggestions designed to suit different industries. Overall, Slidebean offers a quicker, more efficient method for creating stunning presentations compared to Google Slides ...