Find the perfect PowerPoint presentation template
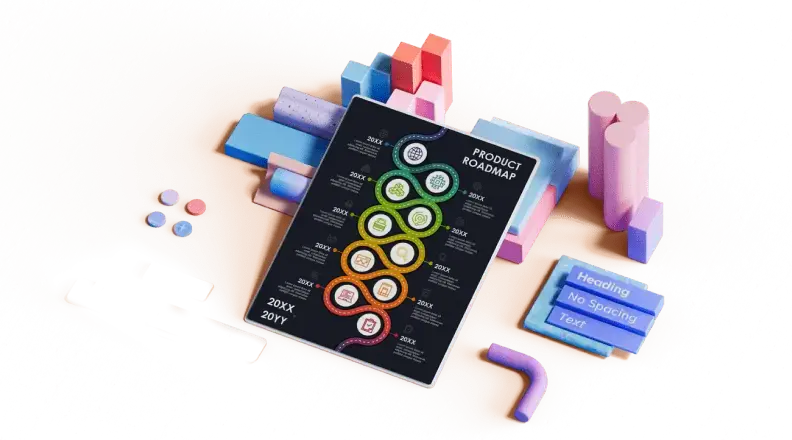
Bring your next presentation to life with customizable powerpoint design templates. whether you're wowing with stats via charts and graphs or putting your latest and greatest ideas on display, you'll find a powerpoint presentation template to make your ideas pop., presentations.
Help your data, insights, and recommendations make a statement with beautiful and easily customizable presentation templates.


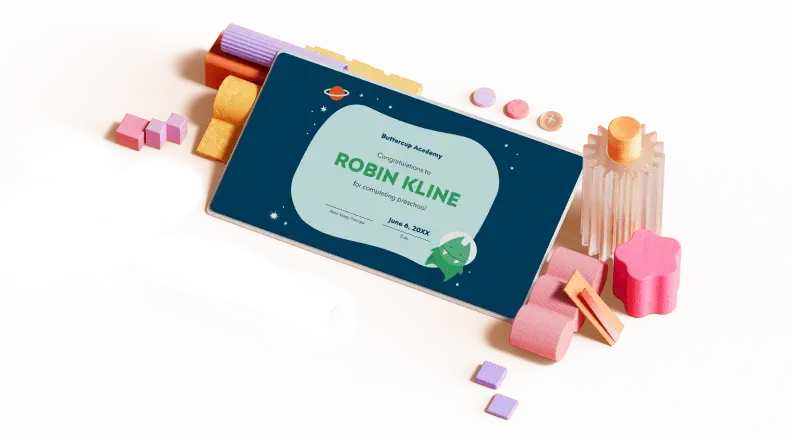
Certificates
Celebrate accomplishments big and small with customizable certificate templates. From gift certificates to awards for finishing a course or training, find a template that highlights their accolades.
Boost visibility for your show, project, or business with easily customizable poster templates. Find templates for all your promotion needs and make them uniquely yours in a flash.

Keep track of whatever you need to in style. From personal planning to promotional calendars, find templates for every kind of project and aesthetic.

Infographics
Say more with less using helpful and easily customizable infographic templates. Add clarity to business presentations, school projects, and more with these helpful templates.
Start with the best PowerPoint templates

Elevate your storytelling
Tips, tricks, and insider advice from our business and design experts
A quick way to create beautiful, powerful PowerPoint presentations
Create captivating, informative content for PowerPoint in just a few minutes—no graphic design experience needed. Here's how:

1. Find the perfect PowerPoint template
2. Customize your creation

3. Show it off
Let's create a powerpoint design, frequently asked questions, where can i find slide templates and themes that i can customize.
To find customizable slide templates and themes, you can explore the business presentations templates or search by PowerPoint templates . Once you find a template that resonates with you, customize it by changing its color scheme, add in your own photos, and swap out the font.
How do I use pre-made PowerPoint templates?
After you've chosen a PowerPoint template to use, customize it. Explore [design tips] on how to customize a deck that resonates with your brand while putting emphasis on the topic at hand. Play with other design elements, like photo shapes, to make each slide unique.
How can I make or edit my own custom PowerPoint templates?
Start from scratch by creating your own PowerPoint template . Follow tips for designs and business presentations so that your unique template is cohesive and relevant to your brand. Incorporate your brand's color scheme and graphics so that all your slides aren't text only.
What kinds templates can I get online for PowerPoint?
You can get PowerPoint templates that have modern designs, animated ones, or even hand-drawn art in each slide. The color schemes range from bold to subtle. Each template's slides are also organized based on what you may want to include in your presentation . You can use the template as a starting point and customize its specific details from theme.
Popular categories

Blog > How to create a PowerPoint Template
How to create a PowerPoint Template
08.27.21 • #powerpointtips.
Today, we are getting into a powerful PowerPoint feature that can save you and your co-workers lots of time. Maybe you are already using them, but since almost 70% of PowerPoint users do not, and if you are one of them you are about to learn some important things. Whether you already know about templates or you’ve never heard of them – we are going to teach you everything you need to know and show you the steps to create your own one.
What is a template and why should I use it?
- A PowerPoint template is a kind of pattern that is predefined for a presentation. It gives a frame for the content and the design of your slides.
- Elements like background, colours, titles, etc. are set beforehand.
- You can save the template separately and reuse it for as many presentations as you need.
- As all the designs and slides have already been defined, you only need to add your custom text and pictures. That saves a lot of time.
- Templates are especially perfect for companies. Make one template that fits the corporate design and any employee can use them from now on, saving time and giving your business a consistent and professional appearance.
Now, learn how to create a template by watching our video or reading the steps below.
The slide master
The Slide Master is the most important tool for creating templates. You can find it by clicking View in the PowerPoint menu (and then clicking on Slide Master ).

In the window on the left you will find a couple of slides that do not (yet) have a design. Also, you will see one slide on top that is slightly larger and connected to the other slides with dashed lines. That one is your Slide Master, your “main slide”. Everything you change there will directly affect all the other slides. You can try it out by setting a different background colour for the Slide Master. The other slides will immediately change colours, too.

Edit slide masters more precisely
We use the main slide to pre-set all our important elements. Once we like how it looks, we can go ahead and adjust each individual slide-template. Here’s a list of things you can/should change:
- Colours: Go to Colours and choose either one of PowerPoint’s predefined palettes or create your own one.
- Fonts: Click Fonts and then Customise Fonts and choose styles for your titles and regular text.
- Background: Go as crazy-creative or minimalistic as you want. Change the background colour, maybe add some shapes, or look for a nice image online that works behind your text. (To do so, right click on your main slide and go to “Format Background”)
- Title: Change the size, style and placement of the title, simply by editing it as you would usually do.
- Text Style: Do the same for your regular text boxes. Define what the bullet points should look like.
- Footer: You can switch the footer elements around, replace them and change them like any regular text.

Using themes
While themes in PowerPoint are similar to templates, they are not the same thing. A theme in PowerPoint is a predefined selection of colors, fonts, effects and backgrounds. So if you are creating a template for your company we recommend you to add a custom theme with the company's brand colors and fonts. Now, if you want to know in more detail what a theme design is in PowerPoint and how to create one, you can read about it in more detail in our blog post, Theme Designs .

Use the right fonts
A very important point with PowerPoint presentations is to choose the right font, because it must be easy to read, but it should also not be boring. In our blog post on the best fonts for your presentations , we have picked some good fonts for you to use.
Advance image design in templates

Rename master slides

Individual Templates for each slide layout
Once you are finished with your main slide, you can go ahead and adjust the other slide layouts. You may find that some look perfect already – you can leave them as they are. For those who don’t, or if you would just like some different slide designs in your template, here are some useful tips on what you can change:
- Background: You may not want the same background on each slide layout. To turn off the background that has been given to the slide (by setting it in the main slide), just tick off the box Hide background graphics in the top Slide Master menu. You are then free to design the background from scratch.
- Footers: On some slides you might not want the footer to show. Disable the Footers checkbox in the task line to make it disappear.
- Title: The same thing works with the title (the checkbox is right there with the Footers )
- Placeholder: Click on Insert Placeholder . You can choose from a variety of placeholders. They can be very helpful because they predefine where a certain element (e.g. image, video,...) should be placed in the presentation.
- Other elements: Of course, you can move, remove and add any other element or object you might need.
TIP: You might need another predefined layout (e.g. for slides that give an overview, for “Contact us” slides, …) You can easily create a template for that as well by right clicking in the grey box on the left with all your layouts and then clicking Insert Layout . By right clicking on that new layout you can go to Rename Layout and call it some name that makes sense. You can treat it like the rest of the layouts and simply adjust it to your needs.

Save your masterpiece and use it for a presentation
When you are satisfied with the look of all your layouts, you can save the template by clicking File and then Save As . You can now choose any folder or use the folder provided by PowerPoint and then save it as a PowerPoint template (*.potx). Close and open PowerPoint again, click on New in the left orange sidebar and then change from Office to Personal or Custom . Your template should now be visible here. Click on it and you can create a new presentation with your predefined layouts. You can also set your template as the default option. To do this, you need to click on the pin at the bottom right of the template and pin it to your list . If for some reason your template was not shown in the start menu OR if you have already created a template-less presentation that should get the template, go to Design at the top of the open presentation, click on the small arrow by the designs and then select Search for designs . There, click on your created template (in the folder where you saved it) and open it. The presentation should now take on your template design.

Related articles
About the author.

Pia Lehner-Mittermaier
Pia works in Marketing as a graphic designer and writer at SlideLizard. She uses her vivid imagination and creativity to produce good content.

Get 1 Month for free!
Do you want to make your presentations more interactive.
With SlideLizard you can engage your audience with live polls, questions and feedback . Directly within your PowerPoint Presentation. Learn more
Top blog articles More posts

Multilingual Polls, Quiz Ranking & Open Text Polls: SlideLizard 2.3 Update

PowerPoint thank you slides - are they required?

Get started with Live Polls, Q&A and slides
for your PowerPoint Presentations
The big SlideLizard presentation glossary
Hybrid event.
When an event consist of both virtual and in-person parts, this is called a hybrid event. This type of event is popular as it combines the benefits of both online and live events.
TOK Presentation
The Theory of knowledge (TOK) presentation is an essential part of the International Baccalaureate Diploma Program (IB). The TOK presentation assesses a student's ability to apply theoretical thinking to real-life situations.
Vocalized pause
A vocalized pause means the pause when the silence between words is filled by the speaker with vocalizations like "um", "uh" and "er".
.ppsm file extension
A .ppsm file includes one or more macro-enabled slides. They are used to show presentations with embedded macros, but not for editing them.
Be the first to know!
The latest SlideLizard news, articles, and resources, sent straight to your inbox.
- or follow us on -
We use cookies to personalize content and analyze traffic to our website. You can choose to accept only cookies that are necessary for the website to function or to also allow tracking cookies. For more information, please see our privacy policy .
Cookie Settings
Necessary cookies are required for the proper functioning of the website. These cookies ensure basic functionalities and security features of the website.
Analytical cookies are used to understand how visitors interact with the website. These cookies help provide information about the number of visitors, etc.
How-To Geek
How to create a custom template in powerpoint.
If you can't find a PowerPoint template that fits your needs, just create your own. Here's how.
Quick Links
Create a custom powerpoint template, save your custom template.
PowerPoint provides extremely useful resources called templates that automatically construct the foundation and framework of your presentation. If you can’t quite find one that’s just right for you, you can create your own. Here’s how to do it.
To create a custom PowerPoint template, you’ll first need to open a blank presentation. You can do so by clicking the “File” tab and then selecting “New” in the left pane.
A large library of templates will appear, but since that’s not what we’re looking for, go ahead and select the “Blank Presentation” option.
Next, you need to choose the slide orientation and size . In the “Customize” group of the “Design” tab, select the “Slide Size” button. A small drop-down menu will appear. Here, click the “Customize Slide Size” option.
The “Slide Size” dialog box will appear. Here, you can (1) adjust the slide height and width or simply select a predefined option from the drop-down menu, and (2) select the slide orientation.
The rest of the template creation will be done in PowerPoint’s Slide Master . The Slide Master allows you to customize a presentation's fonts, headings, and colors in one place, applying the selections to all of your slides. This allows you to maintain consistency throughout the template, as well as eliminating the need to make changes to each individual slide.
Related: How to Change the Default Font in PowerPoint
To access the slide master, click on the "View" tab and then select “Slide Master” in the “Master Views” group.
The Slide Master will appear in the left pane. The Slide Master is the top thumbnail that appears in the pane. Each sub-thumbnail represents each slide layout available in your theme. Edits you make to the Slide Master will affect each slide layout.
This is where the magic happens. First, you can select a unique theme for what will be your PowerPoint template. To do so, select “Themes” in the “Edit Theme” group of the “Slide Master” tab.
A drop-down menu will appear, presenting a large library of themes to choose from. Each theme comes with its own fonts and effects. Browse through the collection and select the one you like.
You can also choose a background style for the theme you chose. Select “Background Styles” in the “Background” group and then select the style you like from the drop-down menu.
If you want to customize the placeholders in the slides, you can do so by selecting one of the options from the “Insert Placeholder” menu. You can find this option in the “Master Layout” group.
Once you’ve selected the slide where you want to insert a placeholder from the pane on left and the type of placeholder you want to insert from the menu, click and drag your cursor to draw the placeholder box.
Repeat this process until you’re happy with the placeholders in your template. Once you’re finished with this, all that’s left to do is save your custom template.
To save the PowerPoint presentation (.pptx) as a template (.potx), click the “File” tab and then the "Save As" button.
In the “Other Locations” group, select the “Browse" option.
The “Save As” dialog box will then appear. Select the box next to “Save as Type” and then choose “PowerPoint Template” from the list of options.
When you select the PowerPoint Template file type, PowerPoint redirects you to the “Custom Office Templates” folder. This is where you’ll want to save your template. Click the “Save” button.
Your template will now be saved and is ready to be used. To find your template next time you open PowerPoint, click the “File” tab and select the “New” button. Next, select the “Custom” tab and then select the “Custom Office Templates" option.
You’ll now see your custom template. Select it to start using your custom PowerPoint template.
- PRO Courses Guides New Tech Help Pro Expert Videos About wikiHow Pro Upgrade Sign In
- EDIT Edit this Article
- EXPLORE Tech Help Pro About Us Random Article Quizzes Request a New Article Community Dashboard This Or That Game Popular Categories Arts and Entertainment Artwork Books Movies Computers and Electronics Computers Phone Skills Technology Hacks Health Men's Health Mental Health Women's Health Relationships Dating Love Relationship Issues Hobbies and Crafts Crafts Drawing Games Education & Communication Communication Skills Personal Development Studying Personal Care and Style Fashion Hair Care Personal Hygiene Youth Personal Care School Stuff Dating All Categories Arts and Entertainment Finance and Business Home and Garden Relationship Quizzes Cars & Other Vehicles Food and Entertaining Personal Care and Style Sports and Fitness Computers and Electronics Health Pets and Animals Travel Education & Communication Hobbies and Crafts Philosophy and Religion Work World Family Life Holidays and Traditions Relationships Youth
- Browse Articles
- Learn Something New
- Quizzes Hot
- This Or That Game New
- Train Your Brain
- Explore More
- Support wikiHow
- About wikiHow
- Log in / Sign up
- Computers and Electronics
- Presentation Software
- PowerPoint Presentations
6 Simple Parts for Beginners to Create a PowerPoint Presentation
Last Updated: December 19, 2022 Fact Checked
Creating a New PowerPoint
Creating the title slide, adding a new slide, adding content to slides, adding transitions, testing and saving your presentation.
This article was co-authored by wikiHow staff writer, Darlene Antonelli, MA . Darlene Antonelli is a Technology Writer and Editor for wikiHow. Darlene has experience teaching college courses, writing technology-related articles, and working hands-on in the technology field. She earned an MA in Writing from Rowan University in 2012 and wrote her thesis on online communities and the personalities curated in such communities. This article has been fact-checked, ensuring the accuracy of any cited facts and confirming the authority of its sources. This article has been viewed 4,321,046 times. Learn more...
Do you want to have your data in a slide show? If you have Microsoft 365, you can use PowerPoint! PowerPoint is a program that's part of the Microsoft Office suite (which you have to pay for) and is available for both Windows and Mac computers. This wikiHow teaches you how to create your own Microsoft PowerPoint presentation on a computer.
Things You Should Know
- Templates make it easy to create vibrant presentations no matter your skill level.
- When adding photos, you can adjust their sizes by clicking and dragging in or out from their corners.
- You can add animated transitions between slides or to individual elements like bullet points and blocks of text.

- If you don't have a Microsoft Office 365 subscription, you can use the website instead of the desktop app. Go to https://powerpoint.office.com/ to use the website version.
- You can also use the mobile app to make presentations, though it's easier to do this on a computer, which has a larger screen, a mouse, and a keyboard.

- If you don't want to use a template, just click the Blank option in the upper-left side of the page and skip to the next part.

- Skip this step if your selected template has no themes available.

- If you're creating a PowerPoint presentation for which an elaborate title slide has been requested, ignore this step.

- You can change the font and size of text used from the Home tab that's in the orange ribbon at the top of the window.

- You can also just leave this box blank if you like.

- You can also click and drag in or out one of a text box's corners to shrink or enlarge the text box.

- On a Mac, you'll click the Home tab instead. [1] X Research source

- Clicking the white slide-shaped box above this option will result in a new text slide being inserted.

- Title Slide
- Title and Content
- Section Header
- Two Content
- Content with Caption
- Picture with Caption

- Naturally, the title slide should be the first slide in your presentation, meaning that it should be the top slide in the left-hand column.

- Skip this step and the next two steps if your selected slide uses a template that doesn't have text boxes in it.

- Text boxes in PowerPoint will automatically format the bulk of your text for you (e.g., adding bullet points) based on the context of the content itself.
- You can add notes that the Presentation will not include (but you'll still be able to see them on your screen) by clicking Notes at the bottom of the slide.

- You can change the font of the selected text by clicking the current font's name and then clicking your preferred font.
- If you want to change the size of the text, click the numbered drop-down box and then click a larger or smaller number based on whether you want to enlarge or shrink the text.
- You can also change the color, bolding, italicization, underlining, and so on from here.

- Photos in particular can be enlarged or shrunk by clicking and dragging out or in one of their corners.

- Remember to keep slides uncluttered and relatively free of distractions. It's best to keep the amount of text per slide to around 33 words or less. [2] X Research source

- Slide content will animate in the order in which you assign transitions. For example, if you animate a photo on the slide and then animate the title, the photo will appear before the title.
- Make your slideshow progress automatically by setting the speed of every transition to align with your speech as well as setting each slide to Advance . [3] X Trustworthy Source Microsoft Support Technical support and product information from Microsoft. Go to source

- If you need to exit the presentation, press Esc .

- Windows - Click File , click Save , double-click This PC , select a save location, enter a name for your presentation, and click Save .
- Mac - Click File , click Save As... , enter the presentation's name in the "Save As" field, select a save location by clicking the "Where" box and clicking a folder, and click Save .
Community Q&A
- If you save your PowerPoint presentation in .pps format instead of the default .ppt format, double-clicking your PowerPoint presentation file will prompt the presentation to open directly into the slideshow view. Thanks Helpful 5 Not Helpful 0
- If you don't have Microsoft Office, you can still use Apple's Keynote program or Google Slides to create a PowerPoint presentation. Thanks Helpful 0 Not Helpful 0

- Your PowerPoint presentation (or some features in it) may not open in significantly older versions of PowerPoint. Thanks Helpful 1 Not Helpful 1
- Great PowerPoint presentations avoid placing too much text on one slide. Thanks Helpful 0 Not Helpful 0
You Might Also Like

- ↑ https://onedrive.live.com/view.aspx?resid=DBDCE00C929AA5D8!252&ithint=file%2cpptx&app=PowerPoint&authkey=!AH4O9NxcbehqzIg
- ↑ https://www.virtualsalt.com/powerpoint.htm
- ↑ https://support.microsoft.com/en-us/office/set-the-timing-and-speed-of-a-transition-c3c3c66f-4cca-4821-b8b9-7de0f3f6ead1#:~:text=To%20make%20the%20slide%20advance,effect%20on%20the%20slide%20finishes .
About This Article

- Send fan mail to authors
Reader Success Stories
Artis Holland
Sep 22, 2016
Is this article up to date?

Oct 18, 2016
Jul 23, 2016
Margery Niyi
Sep 25, 2017
Jul 21, 2016

Featured Articles

Trending Articles

Watch Articles

- Terms of Use
- Privacy Policy
- Do Not Sell or Share My Info
- Not Selling Info
wikiHow Tech Help Pro:
Level up your tech skills and stay ahead of the curve

Reinvent productivity with Copilot for Microsoft 365.
Microsoft PowerPoint

Copilot in PowerPoint
Turn your inspiration into stunning presentations. Get it now when you add Copilot Pro or Copilot for Microsoft 365 to your Microsoft 365 subscription.
Turn your inspiration into stunning presentations
Turn a spark of inspiration into personalized presentations with Copilot in PowerPoint. Copilot will turn existing Word documents into presentations, create new presentations from simple prompts or outlines, or find the best places for impactful imagery—and will help you leave audiences dazzled with skillful storytelling.

Designing slides has never been easier
Create well-designed, impactful slides with the help of Designer and Ideas in PowerPoint.
3D isn't just for the movies
Now you can easily insert 3D objects and embedded animations directly into PowerPoint decks from your own files or a library of content.

Interact naturally using voice, touch, and ink
Easily ink onto a slide, then convert handwritten notes into text and make hand-drawn shapes perfect in seconds.
Nail your next presentation
With Presenter Coach, practice your speech and get recommendations on pacing, word choice, and more through the power of AI.

Be on the same page
Always know where you are in the editing process. With the while you were away feature, track recent changes made by others in your decks.
Task management with PowerPoint and Microsoft 365
Tell your story with captivating presentations.
Originally starting from Free now starting from Free
Sharing and real-time collaboration
PowerPoint for the web
Basic templates, fonts, icons, and stickers
Dictation and voice commands
Works on web, iOS, and Android™
5 GB of cloud storage
Microsoft 365 Personal
Originally starting from $6.99 now starting from $6.99
$6.99 $6.99
(Annual subscription–auto renews) 1
PowerPoint for the web and PowerPoint desktop app for offline use
Premium templates, fonts, icons, and stickers with thousands of options to choose from
Dictation, voice commands, and transcription
Advanced spelling and grammar, in-app learning tips, use in 20+ languages, and more
1 TB (1000 GB) of cloud storage
Premium desktop, web, and mobile apps
Advanced security
Ad-free experience
Works on Windows, macOS, iOS, and Android™
Copilot Pro available as an add-on. *
Microsoft 365 Family
Originally starting from $9.99 now starting from $9.99
$9.99 $9.99
One to six people
Up to 6 TB of cloud storage, 1 TB (1000 GB) per person
Premium desktop, web, and mobile apps
Advanced security
Microsoft Powerpoint
One person
Microsoft 365 Apps for business
Originally starting from $8.25 now starting from $8.25
$8.25 $8.25
Available for up to 300 employes
Desktop versions of Word, Excel, PowerPoint, and Outlook
1 TB of cloud storage per user
Anytime phone and web support
Microsoft 365 Business Standard
Originally starting from $12.50 now starting from $12.50
$12.50 $12.50
Everything in Microsoft 365 Apps for business, plus:
Web, and mobile versions of Word, Excel, PowerPoint, and Outlook
Custom business email ([email protected])
Chat, call, and video conference with Microsoft Teams
10+ additional apps for your business needs (Bookings, Planner, Microsoft Forms, and others)
Automatic spam and malware filtering
Webinars with attendee registration and reporting
New: Collaborative workspaces to co-create using Microsoft Loop
New: Video editing and design tools with Clipchamp
Copilot for Microsoft 365 available as an add-on. **
Add Copilot to your Microsoft plan
Achieve more than ever using AI integrated with Word, Excel, PowerPoint, Outlook, and other Microsoft 365 apps.

Get the PowerPoint mobile app
Ready to create great presentations with Microsoft 365?
See more from microsoft powerpoint.
Collaborate on shared projects
Get commonly used Office features and real-time co-authoring capabilities through your browser.
Jumpstart your design
Show your style and professionalism with templates, plus save time. Browse PowerPoint templates in over 40 categories.
Connect with experts
See what’s new and get classic tips and editors' tricks to help you create, edit, and polish presentations like a pro.
Read about slide presentations
6 slide presentation software tips to impress, host large-scale virtual presentations, how to make a slide show, what’s new in powerpoint.
- [1] Once your paid subscription begins, cancelation policies vary based on your status as a new customer, product, and domain selections on Microsoft. Learn more. Cancel your Microsoft 365 subscription any time by going to the Microsoft 365 admin center. When a subscription is canceled, all associated data will be deleted. Learn more about data retention, deletion, and destruction in Microsoft 365 . Microsoft PowerPoint with a Microsoft 365 subscription is the latest version of PowerPoint. Previous versions include PowerPoint 2016, PowerPoint 2013 , PowerPoint 2010 , PowerPoint 2007 , and PowerPoint 2003. iTunes, iPhone, and iPad are registered trademarks of Apple Inc., registered in the U.S. and other countries. Android is a trademark of Google Inc.
- [*] Copilot Pro benefits are currently available on web, Windows, and macOS and iPadOS. A Microsoft 365 Personal or Family subscription is required to access Copilot in select apps, including Word, Excel, PowerPoint, OneNote, and Outlook. Excel features are currently in preview in English only. Microsoft 365 Personal or Family and Copilot Pro are not available in the same transaction and must be purchased in two separate transactions.
- [**] Copilot for Microsoft 365 may not be available for all markets and languages. To purchase, enterprise customers must have a license for Microsoft 365 E3 or E5 or Office 365 E3 or E5, and business customers must have a license for Microsoft 365 Business Standard or Business Premium.
Follow Microsoft 365
Critical PowerPoint Shortcuts – Claim Your FREE Training Module and Get Your Time Back!
How to Make a PowerPoint Presentation (Step-by-Step)
- PowerPoint Tutorials
- Presentation Design
- January 22, 2024
In this beginner’s guide, you will learn step-by-step how to make a PowerPoint presentation from scratch.
While PowerPoint is designed to be intuitive and accessible, it can be overwhelming if you’ve never gotten any training on it before. As you progress through this guide, you’ll will learn how to move from blank slides to PowerPoint slides that look like these.

Table of Contents
Additionally, as you create your presentation, you’ll also learn tricks for working more efficiently in PowerPoint, including how to:
- Change the slide order
- Reset your layout
- Change the slide dimensions
- Use PowerPoint Designer
- Format text
- Format objects
- Play a presentation (slide show)
With this knowledge under your belt, you’ll be ready to start creating PowerPoint presentations. Moreover, you’ll have taken your skills from beginner to proficient in no time at all. I will also include links to more advanced PowerPoint topics.
Ready to start learning how to make a PowerPoint presentation?
Take your PPT skills to the next level
Start with a blank presentation.
Note: Before you open PowerPoint and start creating your presentation, make sure you’ve collected your thoughts. If you’re going to make your slides compelling, you need to spend some time brainstorming.
For help with this, see our article with tips for nailing your business presentation here .
The first thing you’ll need to do is to open PowerPoint. When you do, you are shown the Start Menu , with the Home tab open.
This is where you can choose either a blank theme (1) or a pre-built theme (2). You can also choose to open an existing presentation (3).
For now, go ahead and click on the Blank Presentation (1) thumbnail.

Doing so launches a brand new and blank presentation for you to work with. Before you start adding content to your presentation, let’s first familiarize ourselves with the PowerPoint interface.
The PowerPoint interface

Here is how the program is laid out:
- The Application Header
- The Ribbon (including the Ribbon tabs)
- The Quick Access Toolbar (either above or below the Ribbon)
- The Slides Pane (slide thumbnails)
The Slide Area
The notes pane.
- The Status Bar (including the View Buttons)
Each one of these areas has options for viewing certain parts of the PowerPoint environment and formatting your presentation.
Below are the important things to know about certain elements of the PowerPoint interface.
The PowerPoint Ribbon

The Ribbon is contextual. That means that it will adapt to what you’re doing in the program.
For example, the Font, Paragraph and Drawing options are greyed out until you select something that has text in it, as in the example below (A).

Furthermore, if you start manipulating certain objects, the Ribbon will display additional tabs, as seen above (B), with more commands and features to help you work with those objects. The following objects have their own additional tabs in the Ribbon which are hidden until you select them:
- Online Pictures
- Screenshots
- Screen Recording
The Slides Pane

This is where you can preview and rearrange all the slides in your presentation.
Right-clicking on a slide in the pane gives you additional options on the slide level that you won’t find on the Ribbon, such as Duplicate Slide , Delete Slide , and Hide Slide .

In addition, you can add sections to your presentation by right-clicking anywhere in this Pane and selecting Add Section . Sections are extremely helpful in large presentations, as they allow you to organize your slides into chunks that you can then rearrange, print or display differently from other slides.

The Slide Area (A) is where you will build out your slides. Anything within the bounds of this area will be visible when you present or print your presentation.
Anything outside of this area (B) will be hidden from view. This means that you can place things here, such as instructions for each slide, without worrying about them being shown to your audience.

The Notes Pane is the space beneath the Slide Area where you can type in the speaker notes for each slide. It’s designed as a fast way to add and edit your slides’ talking points.
To expand your knowledge and learn more about adding, printing, and exporting your PowerPoint speaker notes, read our guide here .
Your speaker notes are visible when you print your slides using the Notes Pages option and when you use the Presenter View . To expand your knowledge and learn the ins and outs of using the Presenter View , read our guide here .

You can resize the Notes Pane by clicking on its edge and dragging it up or down (A). You can also minimize or reopen it by clicking on the Notes button in the Status Bar (B).
Note: Not all text formatting displays in the Notes Pane, even though it will show up when printing your speaker notes. To learn more about printing PowerPoint with notes, read our guide here .
Now that you have a basic grasp of the PowerPoint interface at your disposal, it’s time to make your presentation.
Adding Content to Your PowerPoint Presentation
Notice that in the Slide Area , there are two rectangles with dotted outlines. These are called Placeholders and they’re set on the template in the Slide Master View .
To expand your knowledge and learn how to create a PowerPoint template of your own (which is no small task), read our guide here .

As the prompt text suggests, you can click into each placeholder and start typing text. These types of placeholder prompts are customizable too. That means that if you are using a company template, it might say something different, but the functionality is the same.

Note: For the purposes of this example, I will create a presentation based on the content in the Starbucks 2018 Global Social Impact Report, which is available to the public on their website.
If you type in more text than there is room for, PowerPoint will automatically reduce its font size. You can stop this behavior by clicking on the Autofit Options icon to the left of the placeholder and selecting Stop Fitting Text to this Placeholder .
Next, you can make formatting adjustments to your text by selecting the commands in the Font area and the Paragraph area of the Home tab of the Ribbon.

The Reset Command: If you make any changes to your title and decide you want to go back to how it was originally, you can use the Reset button up in the Home tab .

Insert More Slides into Your Presentation
Now that you have your title slide filled in, it’s time to add more slides. To do that, simply go up to the Home tab and click on New Slide . This inserts a new slide in your presentation right after the one you were on.

You can alternatively hit Ctrl+M on your keyboard to insert a new blank slide in PowerPoint. To learn more about this shortcut, see my guide on using Ctrl+M in PowerPoint .
Instead of clicking the New Slide command, you can also open the New Slide dropdown to see all the slide layouts in your PowerPoint template. Depending on who created your template, your layouts in this dropdown can be radically different.

If you insert a layout and later want to change it to a different layout, you can use the Layout dropdown instead of the New Slide dropdown.
After inserting a few different slide layouts, your presentation might look like the following picture. Don’t worry that it looks blank, next we will start adding content to your presentation.

If you want to follow along exactly with me, your five slides should be as follows:
- Title Slide
- Title and Content
- Section Header
- Two Content
- Picture with Caption
Adding Content to Your Slides
Now let’s go into each slide and start adding our content. You’ll notice some new types of placeholders.

On slide 2 we have a Content Placeholder , which allows you to add any kind of content. That includes:
- A SmartArt graphic,
- A 3D object,
- A picture from the web,
- Or an icon.
To insert text, simply type it in or hit Ctrl+C to Copy and Ctrl+V to Paste from elsewhere. To insert any of the other objects, click on the appropriate icon and follow the steps to insert it.
For my example, I’ll simply type in some text as you can see in the picture below.

Slides 3 and 4 only have text placeholders, so I’ll go ahead and add in my text into each one.

On slide 5 we have a Picture Placeholder . That means that the only elements that can go into it are:
- A picture from the web

To insert a picture into the picture placeholder, simply:
- Click on the Picture icon
- Find a picture on your computer and select it
- Click on Insert
Alternatively, if you already have a picture open somewhere else, you can select the placeholder and paste in (shortcut: Ctrl+V ) the picture. You can also drag the picture in from a file explorer window.

If you do not like the background of the picture you inserted onto your slide, you can remove the background here in PowerPoint. To see how to do this, read my guide here .
Placeholders aren’t the only way to add content to your slides. At any point, you can use the Insert tab to add elements to your slides.
You can use either the Title Only or the Blank slide layout to create slides for content that’s different. For example, a three-layout content slide, or a single picture divider slide, as shown below.

In the first example above, I’ve inserted 6 text boxes, 3 icons, and 3 circles to create this layout. In the second example, I’ve inserted a full-sized picture and then 2 shapes and 2 text boxes.
The Reset Command: Because these slides are built with shapes and text boxes (and not placeholders), hitting the Reset button up in the Home tab won’t do anything.
That is a good thing if you don’t want your layouts to adjust. However, it does mean that it falls on you to make sure everything is aligned and positioned correctly.
For more on how to add and manipulate the different objects in PowerPoint, check out our step-by-step articles here:
- Using graphics in PowerPoint
- Inserting icons onto slides
- Adding pictures to your PowerPoint
- How to embed a video in PowerPoint
- How to add music to your presentation
Using Designer to generate more layouts ideas
If you have Office 365, your version of PowerPoint comes with a new feature called Designer (or Design Ideas). This is a feature that generates slide layout ideas for you. The coolest thing about this feature is that it uses the content you already have.
To use Designer , simply navigate to the Design tab in your Ribbon, and click on Design Ideas .

NOTE: If the PowerPoint Designer is not working for you (it is grey out), see my troubleshooting guide for Designer .
Change the Overall Design (optional)
When you make a PowerPoint presentation, you’ll want to think about the overall design. Now that you have some content in your presentation, you can use the Design tab to change the look and feel of your slides.
For additional help thinking through the design of your presentation, read my guide here .
A. Picking your PowerPoint slide size
If you have PowerPoint 2013 or later, when you create a blank document in PowerPoint, you automatically start with a widescreen layout with a 16:9 ratio. These dimensions are suitable for most presentations as they match the screens of most computers and projectors.
However, you do have the option to change the dimensions.
For example, your presentation might not be presented, but instead converted into a PDF or printed and distributed. In that case, you can easily switch to the standard dimensions with a 4:3 ratio by selecting from the dropdown (A).
You can also choose a custom slide size or change the slide orientation from landscape to portrait in the Custom Slide Size dialog box (B).

To learn all about the different PowerPoint slide sizes, and some of the issues you will face when changing the slide size of a non-blank presentation, read my guide here .
B. Selecting a PowerPoint theme
The next thing you can do is change the theme of your presentation to a pre-built one. For a detailed explanation of what a PowerPoint theme is, and how to best use it, read my article here .
In the beginning of this tutorial, we started with a blank presentation, which uses the default Office theme as you can see in the picture below.

That gives you the most flexibility because it has a blank background and quite simple layouts that work for most presentations. However, it also means that it’s your responsibility to enhance the design.
If you’re comfortable with this, you can stay with the default theme or create your own custom theme ( read my guide here ). But if you would rather not have to think about design, then you can choose a pre-designed theme.
Microsoft provides 46 other pre-built themes, which include slide layouts, color variants and palettes, and fonts. Each one varies quite significantly, so make sure you look through them carefully.
To select a different theme, go to the Design tab in the Ribbon, and click on the dropdown arrow in the Themes section .

For this tutorial, let’s select the Frame theme and then choose the third Variant in the theme. Doing so changes the layout, colors, and fonts of your presentation.

Note: The theme dropdown area is also where you can import or save custom themes. To see my favorite places to find professional PowerPoint templates and themes (and recommendations for why I like them), read my guide here .
C. How to change a slide background in PowerPoint
The next thing to decide is how you want your background to look for the entire presentation. In the Variants area, you can see four background options.

For this example, we want our presentation to have a dark background, so let’s select Style 3. When you do so, you’ll notice that:
- The background color automatically changes across all slides
- The color of the text on most of the slides automatically changes to white so that it’s visible on the dark background
- The colors of the objects on slides #6 and #7 also adjust, in a way we may not want (we’ll likely have to make some manual adjustments to these slides)

Note: If you want to change the slide background for just that one slide, don’t left-click the style. Instead, right-click it and select Apply to Selected Slides .
After you change the background for your entire presentation, you can easily adjust the background for an individual slide.

Inside the Format Background pane, you can see you have the following options:
- Gradient fill
- Picture or texture fill
- Pattern fill
- Hide background
You can explore these options to find the PowerPoint background that best fits your presentation.
D. How to change your color palette in PowerPoint
Another thing you may want to adjust in your presentation, is the color scheme. In the picture below you can see the Theme Colors we are currently using for this presentation.

Each PowerPoint theme comes with its own color palette. By default, the Office theme includes the Office color palette. This affects the colors you are presented with when you format any element within your presentation (text, shapes, SmartArt, etc.).

The good news is that the colors here are easy to change. To switch color palettes, simply:
- Go to the Design tab in the Ribbon
- In the Variants area, click on the dropdown arrow and select Colors
- Select the color palette (or theme colors) you want
You can choose among the pre-built color palettes from Office, or you can customize them to create your own.
As you build your presentation, make sure you use the colors from your theme to format objects. That way, changing the color palette adjusts all the colors in your presentation automatically.
E. How to change your fonts in PowerPoint
Just as we changed the color palette, you can do the same for the fonts.

Each PowerPoint theme comes with its own font combination. By default, the Office theme includes the Office font pairing. This affects the fonts that are automatically assigned to all text in your presentation.

The good news is that the font pairings are easy to change. To switch your Theme Fonts, simply:
- Go to the Design tab in the Ribbon
- Click on the dropdown arrow in the Variants area
- Select Fonts
- Select the font pairing you want
You can choose among the pre-built fonts from Office, or you can customize them to create your own.
If you are working with PowerPoint presentations on both Mac and PC computers, make sure you choose a safe PowerPoint font. To see a list of the safest PowerPoint fonts, read our guide here .
If you receive a PowerPoint presentation and the wrong fonts were used, you can use the Replace Fonts dialog box to change the fonts across your entire presentation. For details, read our guide here .
Adding Animations & Transitions (optional)
The final step to make a PowerPoint presentation compelling, is to consider using animations and transitions. These are by no means necessary to a good presentation, but they may be helpful in your situation.
A. Adding PowerPoint animations
PowerPoint has an incredibly robust animations engine designed to power your creativity. That being said, it’s also easy to get started with basic animations.
Animations are movements that you can apply to individual objects on your slide.

To add a PowerPoint animation to an element of your slide, simply:
- Select the element
- Go to the Animations tab in the Ribbon
- Click on the dropdown arrow to view your options
- Select the animation you want
You can add animations to multiple objects at one time by selecting them all first and then applying the animation.
B. How to preview a PowerPoint animation

There are three ways to preview a PowerPoint animation:
- Click on the Preview button in the Animations tab
- Click on the little star next to the slide
- Play the slide in Slide Show Mode
To learn other ways to run your slide show, see our guide on presenting a PowerPoint slide show with shortcuts .
To adjust the settings of your animations, explore the options in the Effect Options , Advanced Animation and the Timing areas of the Animation tab .

Note: To see how to make objects appear and disappear in your slides by clicking a button, read our guide here .
C. How to manage your animations in PowerPoint

The best way to manage lots of animations on your slide is with the Animation Pane . To open it, simply:
- Navigate to the Animations tab
- Select the Animation Pane
Inside the Animation Pane, you’ll see all of the different animations that have been applied to objects on your slide, with their numbers marked as pictured above.
Note: To see examples of PowerPoint animations that can use in PowerPoint, see our list of PowerPoint animation tutorials here .
D. How to add transitions to your PowerPoint presentation
PowerPoint has an incredibly robust transition engine so that you can dictate how your slides change from one to the other. It is also extremely easy to add transitions to your slides.
In PowerPoint, transitions are the movements (or effects) you see as you move between two slides.

To add a transition to a PowerPoint slide, simply:
- Select the slide
- Go to the Transitions tab in the Ribbon
- In the Transitions to This Slide area, click on the dropdown arrow to view your options
- Select the transition you want
To adjust the settings of the transition, explore the options in the Timing area of the Transitions tab.
You can also add the same transition to multiple slides. To do that, select them in the Slides Pane and apply the transition.
E. How to preview a transition in PowerPoint

There are three ways to preview your PowerPoint transitions (just like your animations):
- Click on the Preview button in the Transitions tab
- Click on the little star beneath the slide number in the thumbnail view
Note: In 2016, PowerPoint added a cool new transition, called Morph. It operates a bit differently from other transitions. For a detailed tutorial on how to use the cool Morph transition, see our step-by-step article here .
Save Your PowerPoint Presentation
After you’ve built your presentation and made all the adjustments to your slides, you’ll want to save your presentation. YOu can do this several different ways.

To save a PowerPoint presentation using your Ribbon, simply:
- Navigate to the File tab
- Select Save As on the left
- Choose where you want to save your presentation
- Name your presentation and/or adjust your file type settings
- Click Save
You can alternatively use the Ctrl+S keyboard shortcut to save your presentation. I recommend using this shortcut frequently as you build your presentation to make sure you don’t lose any of your work.

This is the standard way to save a presentation. However, there may be a situation where you want to save your presentation as a different file type.
To learn how to save your presentation as a PDF, see our guide on converting PowerPoint to a PDF .
How to save your PowerPoint presentation as a template
Once you’ve created a presentation that you like, you may want to turn it into a template. The easiest – but not technically correct – way, is to simply create a copy of your current presentation and then change the content.
But be careful! A PowerPoint template is a special type of document and it has its own parameters and behaviors.
If you’re interested in learning about how to create your own PowerPoint template from scratch, see our guide on how to create a PowerPoint template .
Printing Your PowerPoint Presentation
After finishing your PowerPoint presentation, you may want to print it out on paper. Printing your slides is relatively easy.

To open the Print dialog box, you can either:
- Hit Ctrl+P on your keyboard
- Or go to the Ribbon and click on File and then Print

Inside the Print dialog box, you can choose from the various printing settings:
- Printer: Select a printer to use (or print to PDF or OneNote)
- Slides: Choose which slides you want to print
- Layout: Determine how many slides you want per page (this is where you can print the notes, outline, and handouts)
- Collated or uncollated (learn what collated printing means here )
- Color: Choose to print in color, grayscale or black & white
There are many more options for printing your PowerPoint presentations. Here are links to more in-depth articles:
- How to print multiple slides per page
- How to print your speaker notes in PowerPoint
- How to save PowerPoint as a picture presentation
So that’s how to create a PowerPoint presentation if you are brand new to it. We’ve also included a ton of links to helpful resources to boost your PowerPoint skills further.
When you are creating your presentation, it is critical to first focus on the content (what you are trying to say) before getting lost inserting and playing with elements. The clearer you are on what you want to present, the easier it will be to build it out in PowerPoint.
If you enjoyed this article, you can learn more about our PowerPoint training courses and other presentation resources by visiting us here .
🔒 Unlock the PowerPoint Shortcuts Trusted by Industry Leaders KKR, American Express, HSBC, and More!
Join over 114,880 professionals from diverse fields including consulting, investment banking, advertising, marketing, sales, and business development who have supercharged their PowerPoint game with our proven methods.
✅ Customize compelling presentations effortlessly.
✅ Master time-saving techniques for faster deck creation.
✅ Boost your career prospects with top-notch PowerPoint skills.
Get FREE access to the Critical PowerPoint Shortcuts module of our premium training course by entering your name and email below.
DISCLAIMER: PC Users Only!
We respect your privacy and will keep your info safe and confidential.
About The Author

Popular Tutorials
- How to Strikethrough Text (l̶i̶k̶e̶ ̶t̶h̶i̶s̶) in Word, Excel & PowerPoint
- How to Make Animated Fireworks in PowerPoint (Step-by-Step)
- Strikethrough Shortcut (l̶i̶k̶e̶ ̶t̶h̶i̶s̶) for Word, Excel & PowerPoint
- How to Create a Flash Card Memory Game in PowerPoint (Like Jeopardy)
- Keyboard Shortcuts Not Working: Solved
PowerPoint Tutorial Categories
- Strategies & Opinions
- Shortcuts & Hacks
- Pictures, Icons, Videos, Etc.
- New Features
- Miscellaneous
- Charts & Data Viz
We help busy professionals save hours and gain peace of mind, with corporate workshops, self-paced courses and tutorials for PowerPoint and Word.
Work With Us
- Corporate Training
- Presentation & Template Design
- Courses & Downloads
- PowerPoint Articles
- Word Articles
- Productivity Resources
Find a Tutorial
- Free Training
- For Businesses
We help busy office workers save hours and gain peace of mind, with tips, training and tutorials for Microsoft PowerPoint and Word.
Master Critical PowerPoint Shortcuts – Secure Your FREE Training Module and Save Valuable Time!
⌛ Master time-saving expert techniques.
🔥 Create powerful presentations.
🚀 Propel your career to new heights.
We value your privacy – we keep your info safe.
Discover PowerPoint Hacks Loved by Industry Giants - KKR, AmEx, HSBC!
Over 114,880 professionals in finance, marketing and sales have revolutionized their PPT skills with our proven methods.
Gain FREE access to a full module of our premium PowerPoint training program – Get started today!
We hate spam too and promise to keep your information safe.
You are currently viewing a placeholder content from Facebook . To access the actual content, click the button below. Please note that doing so will share data with third-party providers.
Top searches
Trending searches

49 templates

18 templates

32 templates

42 templates

40 templates

16 templates
Create your presentation
Writing tone, number of slides.

AI presentation maker
When lack of inspiration or time constraints are something you’re worried about, it’s a good idea to seek help. Slidesgo comes to the rescue with its latest functionality—the AI presentation maker! With a few clicks, you’ll have wonderful slideshows that suit your own needs . And it’s totally free!

Generate presentations in minutes
We humans make the world move, but we need to sleep, rest and so on. What if there were someone available 24/7 for you? It’s time to get out of your comfort zone and ask the AI presentation maker to give you a hand. The possibilities are endless : you choose the topic, the tone and the style, and the AI will do the rest. Now we’re talking!
Customize your AI-generated presentation online
Alright, your robotic pal has generated a presentation for you. But, for the time being, AIs can’t read minds, so it’s likely that you’ll want to modify the slides. Please do! We didn’t forget about those time constraints you’re facing, so thanks to the editing tools provided by one of our sister projects —shoutouts to Wepik — you can make changes on the fly without resorting to other programs or software. Add text, choose your own colors, rearrange elements, it’s up to you! Oh, and since we are a big family, you’ll be able to access many resources from big names, that is, Freepik and Flaticon . That means having a lot of images and icons at your disposal!

How does it work?
Think of your topic.
First things first, you’ll be talking about something in particular, right? A business meeting, a new medical breakthrough, the weather, your favorite songs, a basketball game, a pink elephant you saw last Sunday—you name it. Just type it out and let the AI know what the topic is.
Choose your preferred style and tone
They say that variety is the spice of life. That’s why we let you choose between different design styles, including doodle, simple, abstract, geometric, and elegant . What about the tone? Several of them: fun, creative, casual, professional, and formal. Each one will give you something unique, so which way of impressing your audience will it be this time? Mix and match!
Make any desired changes
You’ve got freshly generated slides. Oh, you wish they were in a different color? That text box would look better if it were placed on the right side? Run the online editor and use the tools to have the slides exactly your way.
Download the final result for free
Yes, just as envisioned those slides deserve to be on your storage device at once! You can export the presentation in .pdf format and download it for free . Can’t wait to show it to your best friend because you think they will love it? Generate a shareable link!
What is an AI-generated presentation?
It’s exactly “what it says on the cover”. AIs, or artificial intelligences, are in constant evolution, and they are now able to generate presentations in a short time, based on inputs from the user. This technology allows you to get a satisfactory presentation much faster by doing a big chunk of the work.
Can I customize the presentation generated by the AI?
Of course! That’s the point! Slidesgo is all for customization since day one, so you’ll be able to make any changes to presentations generated by the AI. We humans are irreplaceable, after all! Thanks to the online editor, you can do whatever modifications you may need, without having to install any software. Colors, text, images, icons, placement, the final decision concerning all of the elements is up to you.
Can I add my own images?
Absolutely. That’s a basic function, and we made sure to have it available. Would it make sense to have a portfolio template generated by an AI without a single picture of your own work? In any case, we also offer the possibility of asking the AI to generate images for you via prompts. Additionally, you can also check out the integrated gallery of images from Freepik and use them. If making an impression is your goal, you’ll have an easy time!
Is this new functionality free? As in “free of charge”? Do you mean it?
Yes, it is, and we mean it. We even asked our buddies at Wepik, who are the ones hosting this AI presentation maker, and they told us “yup, it’s on the house”.
Are there more presentation designs available?
From time to time, we’ll be adding more designs. The cool thing is that you’ll have at your disposal a lot of content from Freepik and Flaticon when using the AI presentation maker. Oh, and just as a reminder, if you feel like you want to do things yourself and don’t want to rely on an AI, you’re on Slidesgo, the leading website when it comes to presentation templates. We have thousands of them, and counting!.
How can I download my presentation?
The easiest way is to click on “Download” to get your presentation in .pdf format. But there are other options! You can click on “Present” to enter the presenter view and start presenting right away! There’s also the “Share” option, which gives you a shareable link. This way, any friend, relative, colleague—anyone, really—will be able to access your presentation in a moment.
Discover more content
This is just the beginning! Slidesgo has thousands of customizable templates for Google Slides and PowerPoint. Our designers have created them with much care and love, and the variety of topics, themes and styles is, how to put it, immense! We also have a blog, in which we post articles for those who want to find inspiration or need to learn a bit more about Google Slides or PowerPoint. Do you have kids? We’ve got a section dedicated to printable coloring pages! Have a look around and make the most of our site!

- SUGGESTED TOPICS
- The Magazine
- Newsletters
- Managing Yourself
- Managing Teams
- Work-life Balance
- The Big Idea
- Data & Visuals
- Reading Lists
- Case Selections
- HBR Learning
- Topic Feeds
- Account Settings
- Email Preferences
How to Make a “Good” Presentation “Great”
- Guy Kawasaki

Remember: Less is more.
A strong presentation is so much more than information pasted onto a series of slides with fancy backgrounds. Whether you’re pitching an idea, reporting market research, or sharing something else, a great presentation can give you a competitive advantage, and be a powerful tool when aiming to persuade, educate, or inspire others. Here are some unique elements that make a presentation stand out.
- Fonts: Sans Serif fonts such as Helvetica or Arial are preferred for their clean lines, which make them easy to digest at various sizes and distances. Limit the number of font styles to two: one for headings and another for body text, to avoid visual confusion or distractions.
- Colors: Colors can evoke emotions and highlight critical points, but their overuse can lead to a cluttered and confusing presentation. A limited palette of two to three main colors, complemented by a simple background, can help you draw attention to key elements without overwhelming the audience.
- Pictures: Pictures can communicate complex ideas quickly and memorably but choosing the right images is key. Images or pictures should be big (perhaps 20-25% of the page), bold, and have a clear purpose that complements the slide’s text.
- Layout: Don’t overcrowd your slides with too much information. When in doubt, adhere to the principle of simplicity, and aim for a clean and uncluttered layout with plenty of white space around text and images. Think phrases and bullets, not sentences.
As an intern or early career professional, chances are that you’ll be tasked with making or giving a presentation in the near future. Whether you’re pitching an idea, reporting market research, or sharing something else, a great presentation can give you a competitive advantage, and be a powerful tool when aiming to persuade, educate, or inspire others.
- Guy Kawasaki is the chief evangelist at Canva and was the former chief evangelist at Apple. Guy is the author of 16 books including Think Remarkable : 9 Paths to Transform Your Life and Make a Difference.
Partner Center
- Mobile News
- Mobile Reviews
- Mobile Finder
- Mobile Comparison
- Mobile Recommender
- Laptops/PC News
- Laptops/PC Reviews
- Laptop Finder
- Laptop Comparison
- Laptop Recommender
- Gaming News
- Gaming Reviews
- Tablet Finder
- Wearables News
- Wearables Reviews
- Smart Watches
- Fitness Bands
- Tablet Comparison
- Web Stories
- Samsung Event
- Apple Event
- Home Appliances
- Brand Stories
- Tablet Recommender
- Terms of Use
- Privacy Policy
Copyright © HT Media Limited All rights reserved.
Microsoft PowerPoint Copilot: Know how to use AI features and create innovative presentations
Know how microsoft’s powerpoint copilot will help you create intuitive presentations in a matter of minutes. check out its ai features and how it makes work easy..
In a digital world, we have found several different ways to simplify and automate our tiring tasks. With tech companies offering new tools and features to reduce our workload, technology such as artificial intelligence (AI) has been the biggest provider. One such company is Microsoft which has been continuously upgrading its AI feature across all of its services. Recently, the company announced Copilot integration to its workspace app including PowerPoint which has brought some unique features to simplify presentation development. Know more about PowerPoint Copilot AI features.
What is PowerPoint Copilot?
Copilot for Microsoft PowerPoint is an AI-powered assistant which enables users to create their presentations with ease. Users just have to write conversational prompts to let the AI assistant know how you want your presentation to look and what kind of theme you are looking for. Microsoft Copilot uses natural language processing (NLP) and a cloud-based artificial intelligence (AI) engine to turn user ideas into compelling presentations.
Also read: Gamma app: From creating engaging presentations to webpages, know how this AI tool helps
How to effectively use PowerPoint Copilot?
- The Copilot in PowerPoint provides auto-suggestions for the content, allowing users to refine their work in terms of writing, designing, and more.
- The Copilot enables users to develop PowerPoint from scratch including design and the content required to be added. Later users can customise the presentation based on their preferences.
Also read: Visme AI-powered presentation tool
- Users can also take advantage of Copilot for quick content generation, summarization, and slide organisation.
- Users can take advantage of creating initial drafts and brainstorming ideas. Later with the help of smart suggestions, they can enhance the design and content of the presentation.
- Powerpoint provides effective collaboration features, therefore, user can easily share their presentation with team members for refinement, editing, etc.
Also read: Boost your presentation skills with AI-powered Pitch app
These are some of the unique features which PowerPoint Copilot provides its users. With ease of presentation development, users can save a huge amount of time for tasks that have greater importance. Additionally, it will also help them to improve productivity with other AI tools which Microsoft provides across all of its services. Note that to use AI features on PowerPoint, users will have to opt for its Rs.2000 monthly subscription plan.
One more thing! We are now on WhatsApp Channels! Follow us there so you never miss any updates from the world of technology. To follow the HT Tech channel on WhatsApp, click here to join now!
Catch all the Latest Tech News , Mobile News , Laptop News , Gaming news , Wearables News , How To News , also keep up with us on Whatsapp channel , Twitter , Facebook , Google News , and Instagram . For our latest videos, subscribe to our YouTube channel .
71713409680313
Tips & Tricks

Editor’s Pick

Trending Stories

Trending News
Trending gadgets.
- https://tech.hindustantimes.com/how-to/microsoft-powerpoint-copilot-know-how-to-use-ai-features-and-create-innovative-presentations-71713409680313.html
- https://tech.hindustantimes.com/photos/chatgpt-tips-from-idea-generation-to-editing-assistance-5-ways-it-helps-transform-your-writing-process-71712144071600.html
- https://tech.hindustantimes.com/how-to/google-calendar-hidden-features-know-how-to-smartly-use-the-google-workspace-app-71713247191108.html
- https://tech.hindustantimes.com/how-to/how-to-book-train-tickets-online-using-the-indian-railways-uts-app-step-by-step-guide-71713187488878.html

How To Get Free Access To Microsoft PowerPoint
E very time you need to present an overview of a plan or a report to a whole room of people, chances are you turn to Microsoft PowerPoint. And who doesn't? It's popular for its wide array of features that make creating effective presentations a walk in the park. PowerPoint comes with a host of keyboard shortcuts for easy navigation, subtitles and video recordings for your audience's benefit, and a variety of transitions, animations, and designs for better engagement.
But with these nifty features comes a hefty price tag. At the moment, the personal plan — which includes other Office apps — is at $69.99 a year. This might be the most budget-friendly option, especially if you plan to use the other Microsoft Office apps, too. Unfortunately, you can't buy PowerPoint alone, but there are a few workarounds you can use to get access to PowerPoint at no cost to you at all.
Read more: The 20 Best Mac Apps That Will Improve Your Apple Experience
Method #1: Sign Up For A Free Microsoft Account On The Office Website
Microsoft offers a web-based version of PowerPoint completely free of charge to all users. Here's how you can access it:
- Visit the Microsoft 365 page .
- If you already have a free account with Microsoft, click Sign in. Otherwise, press "Sign up for the free version of Microsoft 365" to create a new account at no cost.
- On the Office home page, select PowerPoint from the side panel on the left.
- Click on "Blank presentation" to create your presentation from scratch, or pick your preferred free PowerPoint template from the options at the top (there's also a host of editable templates you can find on the Microsoft 365 Create site ).
- Create your presentation as normal. Your edits will be saved automatically to your Microsoft OneDrive as long as you're connected to the internet.
It's important to keep in mind, though, that while you're free to use this web version of PowerPoint to create your slides and edit templates, there are certain features it doesn't have that you can find on the paid version. For instance, you can access only a handful of font styles and stock elements like images, videos, icons, and stickers. Designer is also available for use on up to three presentations per month only (it's unlimited for premium subscribers). When presenting, you won't find the Present Live and Always Use Subtitles options present in the paid plans. The biggest caveat of the free version is that it won't get any newly released features, unlike its premium counterparts.
Method #2: Install Microsoft 365 (Office) To Your Windows
Don't fancy working on your presentation in a browser? If you have a Windows computer with the Office 365 apps pre-installed or downloaded from a previous Office 365 trial, you can use the Microsoft 365 (Office) app instead. Unlike the individual Microsoft apps that you need to buy from the Microsoft Store, this one is free to download and use. Here's how to get free PowerPoint on the Microsoft 365 (Office) app:
- Search for Microsoft 365 (Office) on the Microsoft Store app.
- Install and open it.
- Sign in with your Microsoft account. Alternatively, press "Create free account" if you don't have one yet.
- Click on Create on the left side panel.
- Select Presentation.
- In the PowerPoint window that opens, log in using your account.
- Press Accept on the "Free 5-day pass" section. This lets you use PowerPoint (and Word and Excel) for five days — free of charge and without having to input any payment information.
- Create your presentation as usual. As you're using the desktop version, you can access the full features of PowerPoint, including the ability to present in Teams, export the presentation as a video file, translate the slides' content to a different language, and even work offline.
The only downside of this method is the time limit. Once the five days are up, you can no longer open the PowerPoint desktop app. However, all your files will still be accessible to you. If you saved them to OneDrive, you can continue editing them on the web app. If you saved them to your computer, you can upload them to OneDrive and edit them from there.
Method #3: Download The Microsoft PowerPoint App On Your Android Or iOS Device
If you're always on the move and need the flexibility of creating and editing presentations on your Android or iOS device, you'll be glad to know that PowerPoint is free and available for offline use on your mobile phones. But — of course, there's a but — you can only access the free version if your device is under 10.1 inches. Anything bigger than that requires a premium subscription. If your phone fits the bill, then follow these steps to get free PowerPoint on your device:
- Install Microsoft PowerPoint from the App Store or Google Play Store .
- Log in using your existing Microsoft email or enter a new email address to create one if you don't already have an account.
- On the "Get Microsoft 365 Personal Plan" screen, press Skip For Now.
- If you're offered a free trial, select Try later (or enjoy the free 30-day trial if you're interested).
- To make a new presentation, tap the plus sign in the upper right corner.
- Change the "Create in" option from OneDrive - Personal to a folder on your device. This allows you to save the presentation to your local storage and make offline edits.
- Press "Set as default" to set your local folder as the default file storage location.
- Choose your template from the selection or use a blank presentation.
- Edit your presentation as needed.
Do note that PowerPoint mobile comes with some restrictions. There's no option to insert stock elements, change the slide size to a custom size, use the Designer feature, or display the presentation in Immersive Reader mode. However, you can use font styles considered premium on the web app.
Method #4: Use Your School Email Address
Office 365 Education is free for students and teachers, provided they have an email address from an eligible school. To check for your eligibility, here's what you need to do:
- Go to the Office 365 Education page .
- Type in your school email address in the empty text field.
- Press "Get Started."
- On the next screen, verify your eligibility. If you're eligible, you'll be asked to select whether you're a student or a teacher. If your school isn't recognized, however, you'll get a message telling you so.
- For those who are eligible, proceed with creating your Office 365 Education account. Make sure your school email can receive external mail, as Microsoft will send you a verification code for your account.
- Once you're done filling out the form, press "Start." This will open your Office 365 account page.
You can then start making your PowerPoint presentation using the web app. If your school's plan supports it, you can also install the Office 365 apps to your computer by clicking the "Install Office" button on your Office 365 account page and running the downloaded installation file. What sets the Office 365 Education account apart from the regular free account is that you have unlimited personal cloud storage and access to other Office apps like Word, Excel, and Outlook.
Read the original article on SlashGear .

View, manage, and install add-ins for Excel, PowerPoint, and Word
When you enable an add-in, it adds custom commands and new features to Microsoft 365 programs that help increase your productivity. Because add-ins can be used by attackers to do harm to your computer, you can use add-in security settings to help protect yourself.
Note: This article only applies to Microsoft 365 applications running on Windows.
View installed add-ins

You can directly install add-ins from this page or select More Add-ins to explore.
In the Office Add-ins dialog, select My Add-ins tab.
Select an add-in you want to view the details for and right-click to select Add-in details option.
Click a heading below for more information .
Add-in categories explained
Active Application Add-ins Add-ins registered and currently running on your Microsoft 365 program.
Inactive Application Add-ins These are present on your computer but not currently loaded. For example, XML schemas are active when the document that refers to them is open. Another example is the COM add-in: if a COM add-in is selected, the add-in is active. If the check box is cleared, the add-in is inactive.
Document Related Add-ins Template files referred to by open documents.
Disabled Application Add-ins These add-ins are automatically disabled because they are causing Microsoft 365 programs to crash.
Add-in The title of the add-in.
Publisher The software developer or organization responsible for creating the add-in.
Compatibility Look here for any compatibility issues.
Location This file path indicates where the add-in is installed on your computer.
Description This text explains the add-in function.
Note: Microsoft Outlook has one add-in option in the Trust Center: Apply macro security settings to installed add-ins . InfoPath has no security settings for add-ins.
Permanently disable or remove an add-in
To disable or remove an add-in follow these steps:
Select File > Get Add-ins . Alternatively, you can select Home > Add-ins .
In the Office Add-ins dialog, select My Add-ins tab.
Select an add-in you want to remove and right click to select Remove option.
View or change add-in settings
You can see and change add-in settings in the Trust Center, descriptions of which are in the following section. Add-in security settings may have been determined by your organization so not all options may be available to change.
Select File > Get Add-ins .
Select More Add-ins > Manage My Add-ins.
Select Trust Center > Trust Center Settings > Add-ins.
Check or uncheck the boxes you want.
Add-in settings explained
Require Application Add-ins to be signed by Trusted Publisher Check this box to have the Trust Center check that the add-in uses a publisher's trusted signature. If the publisher's signature hasn’t been trusted, the Microsoft 365 program doesn’t load the add-in, and the Trust Bar displays a notification that the add-in has been disabled.
Disable notification for unsigned add-ins (code will remain disabled) When you check the Require Application Extensions to be signed by Trusted Publisher box, this option is no longer grayed out. Add-ins signed by a trusted publisher are enabled, but unsigned add-ins are disabled.
Disable all Application Add-ins (may impair functionality) Check this box if you don't trust any add-ins. All add-ins are disabled without any notification, and the other add-in boxes are grayed out.
Note: This setting takes effect after you exit and restart your Microsoft 365 program.
While working with add-ins, you may need to learn more about digital signatures and certificates , which authenticate an add-in, and trusted publishers , the software developers who often create add-ins.
Manage and install add-ins
Use the following instruction to manage and install add-ins.
To install a new add-in:
You can directly install popular add-ins on the page or go to More Add-ins to explore.
Select the add-in and select Add . Or browse by selecting Store tab in the Office add-in dialog to find other add-ins to install and select Add for that add-in.
To manage your add-ins:
Select File > Get Add-ins and from the bottom, select More Add-ins. Or select Home > Add-ins > More add-ins.
In the Office dialog, select My Add-ins tab. If you are not able to see your add-ins, select Refresh to reload your add-ins.
Select Manage My Add-in to manage and select Upload to browse and add an add-in from your device.
How to cancel a purchased add-in
If you've subscribed to an add-in through the Microsoft 365 Store that you don't want to continue, you can cancel that subscription.
Open the Microsoft 365 application and go to the Home tab of the ribbon.
Select Add-ins and then select More Add-ins > My Add-ins tab to view your existing add-ins.
Select the app you want to cancel and select Manage My Add-ins .
Under the Payment and Billing section choose Cancel Subscription .
Select OK and then Continue .
Once that's complete you should see a message that says "You have cancelled your app subscription" in the comments field of your apps list.
Why is my add-in crashing?
Some add-ins might not be compatible with your organization's IT department policies. If that is the case with add-ins recently installed on your Microsoft 365 program, Data Execution Prevention (DEP) will disable the add-in and the program might crash.
Learn more about DEP
Get a Microsoft 365 Add-in for Outlook
Get a Microsoft 365 Add-in for Project
Taking linked notes
If you're looking for Help on linking notes in OneNote to a Word or PowerPoint document, see Take linked notes .
Excel Windows Add-ins
If you're looking for Help on specific Excel Add-ins, such as Solver or Inquire, see Help for Excel for Windows add-ins .
If you're looking for additional help with Excel add-ins using the COM Add-ins dialog box, see Add or remove add-ins in Excel .
Get a Microsoft 365 Add-in for Excel

Need more help?
Want more options.
Explore subscription benefits, browse training courses, learn how to secure your device, and more.

Microsoft 365 subscription benefits

Microsoft 365 training

Microsoft security

Accessibility center
Communities help you ask and answer questions, give feedback, and hear from experts with rich knowledge.

Ask the Microsoft Community

Microsoft Tech Community

Windows Insiders
Microsoft 365 Insiders
Find solutions to common problems or get help from a support agent.

Online support
Was this information helpful?
Thank you for your feedback.
IMAGES
VIDEO
COMMENTS
When you create a presentation and then save it as a PowerPoint template (.potx) file, you can share it with your colleagues and reuse it again. To create a template, you'll need to modify a slide master and a set of slide layouts. Choose from thousands of free templates to download at Microsoft templates. Windows Web.
Find the perfect PowerPoint presentation template Bring your next presentation to life with customizable PowerPoint design templates. Whether you're wowing with stats via charts and graphs or putting your latest and greatest ideas on display, you'll find a PowerPoint presentation template to make your ideas pop.
Download the "Creative and Bold Theme for Marketing" presentation for PowerPoint or Google Slides and take your marketing projects to the next level. This template is the perfect ally for your advertising strategies, launch campaigns or report presentations. Customize your content with ease, highlight your ideas and captivate your audience...
Select the Date and time placeholder and hit Ctrl + R on your keyboard to align the text to the right. Go up to the Insert tab and in the Text group, select Header & Footer. Click on Date and time so that there is a checkmark next to it. Click on the Date dropdown and select the option as required.
Captivate your audience with our collection of professionally-designed PowerPoint and Google Slides templates. Boost your presentations and make a lasting impression! Back All templates. All Templates ; Color ; Style ; Learn ... Download your presentation as a PowerPoint template or use it online as a Google Slides theme. 100% free, no ...
Create a new PowerPoint presentation and place yourself on the first slide. Go to Insert tab > Picture > This device (you can also try images from Office or Bing). Find the image you saved in the first step and insert it into your presentation. Go to the Design tab and press the PowerPoint Designer tool.
To achieve this, first insert an image placeholder in the slide master (go to Insert placeholder and click on Picture). Next, you need to insert the desired shape on top of the image. You can either insert your own SVG image or use one of the default PowerPoint shapes. Then you have to select both (image placeholder and shape) and click Convert ...
Create a presentation. Open PowerPoint. In the left pane, select New. Select an option: To create a presentation from scratch, select Blank Presentation. To use a prepared design, select one of the templates. To see tips for using PowerPoint, select Take a Tour, and then select Create, . Add a slide.
Watch over my shoulder and learn how to create a PowerPoint template from scratch - starting with your slide master and creating your own slide backgrounds. ...
Create a blank presentation. Open PowerPoint. Select one of the Blank Presentation and start typing. Note: Microsoft 365 subscribers will find Design Ideas based on the words you type. You can browse and select a new look.
Click the "Save" button. Your template will now be saved and is ready to be used. To find your template next time you open PowerPoint, click the "File" tab and select the "New" button. Next, select the "Custom" tab and then select the "Custom Office Templates" option. You'll now see your custom template.
Free online presentation maker. Try our new tool to edit this selection of templates for people that want to let their creativity run free. Create interactive resources easily, quickly and without the need for any software. A really useful tool for teachers and students. Move the content, add images, change colors and fonts or, if you prefer ...
Click Blank Presentation. You can either select here or go to File > New > Blank Presentation . On Mac, simply opening PowerPoint might open a new presentation depending on your settings. If it does, skip this step. 3. Click the Design tab. It's in the editing ribbon above your PowerPoint with File and Home . 4.
1. Open PowerPoint. Click or double-click the PowerPoint app icon, which resembles an orange box with a white "P" on it. This will open the PowerPoint templates page. If you don't have a Microsoft Office 365 subscription, you can use the website instead of the desktop app.
To customize the text in this template, you can work with the built-in text placeholders. To start, click into any text box. Then, press Ctrl + A ( Cmd + A on Mac) to select all the text inside. Type over the text placeholders in a premium professional presentation so that the slides tell your story.
One person. Sharing and real-time collaboration. PowerPoint for the web and PowerPoint desktop app for offline use. Premium templates, fonts, icons, and stickers with thousands of options to choose from. Dictation, voice commands, and transcription. Advanced spelling and grammar, in-app learning tips, use in 20+ languages, and more.
To do that, simply go up to the Home tab and click on New Slide. This inserts a new slide in your presentation right after the one you were on. You can alternatively hit Ctrl+M on your keyboard to insert a new blank slide in PowerPoint. To learn more about this shortcut, see my guide on using Ctrl+M in PowerPoint.
First, let's duplicate the theme. You can achieve this by right-clicking on the .pptx file and clicking Copy in the menu. You can copy and paste the file and rename the new document. Instead of directly editing the template, we'll be copying slides that we'll use in our new document from the original theme file.
While PowerPoint long dominated the presentation industry, Visme's free online presentation maker allows you to create even more beautiful and engaging content. With Visme's engaging presentation maker, you can start with a template, dive into one of our themes with various slide ideas, or mix and match slides from different templates to ...
Open the file that contains the existing slides. Click the thumbnail pane and then select the slides you want: Select all slides: Ctrl+A. Select a subset of the slides: Ctrl+click. Copy the slides (Ctrl+C). Switch to the new file, right-click the thumbnail pane, and under Paste Options select Use Destination Theme: All the copied slides are ...
Amp up your presentations with the ability to pre-record slideshows and pitch decks with Canva's presentation maker. Create talking presentations and make sure that you land every talking point for asynchronous meetings or onboarding presentations. Delight your audience while presenting with Magic Shortcuts.
Slidesgo comes to the rescue with its latest functionality—the AI presentation maker! With a few clicks, you'll have wonderful slideshows that suit your own needs. And it's totally free! How does it work? Try for free our new AI Presentation Generator and create a customizable template in seconds. Explore beyond PowerPoint.
Select the Object You Want to Animate Click on the text box, image, shape, or chart you wish to animate. Access the Animation Tab Navigate to the 'Animations' tab in the PowerPoint ribbon to ...
When in doubt, adhere to the principle of simplicity, and aim for a clean and uncluttered layout with plenty of white space around text and images. Think phrases and bullets, not sentences. As an ...
Open a new Microsoft PowerPoint. Click the Copilot button from the top bar. This will open a Copilot section from the left pane. Now, you can start creating a presentation by asking Copilot to ...
3/6 If you have a PPT prepared but are stuck in limbo, then worry not, as Decktopus enables users to create slide notes for topics for you and your audience to understand easily. The magic button will help you create slide notes effectively. Additionally, you can embed URLs, and custom domains, and add a voice recorder to the slide to make the presentation stand out.
Create a reusable template by saving a PowerPoint file as a PowerPoint template (.potx).. Provide instructions for users of your template. If you create templates for others to use, you can overwrite the text in the default placeholders by adding 'custom placeholder text', which describes or specifies the types of information that you want the users of your template to enter.
Here's how to get free PowerPoint on the Microsoft 365 (Office) app: Search for Microsoft 365 (Office) on the Microsoft Store app. Install and open it. Sign in with your Microsoft account ...
Wepik AI Presentation Maker. This is a free AI tool that you can make simple presentations, and I recommend you try it out. Start off with a prompt to create a sample slide, and then edit your slides by changing the text, colors, and more. The tool also lets you create AI images that you can add to your presentations.
If you're looking for Help on linking notes in OneNote to a Word or PowerPoint document, see Take linked notes. Excel Windows Add-ins. If you're looking for Help on specific Excel Add-ins, such as Solver or Inquire, see Help for Excel for Windows add-ins.