27 Super Hidden PowerPoint Tips and Tricks Only The Pros Know!

Ausbert Generoso

Ever felt like your PowerPoint presentations could use a little magic? You’re not alone. Whether you’re a seasoned presenter or just getting started, there’s a world of PowerPoint tips and tricks waiting for you. In this guide, we’re diving into the nitty-gritty of Microsoft PowerPoint to uncover 30 hidden gems that’ll transform the way you create and deliver slides.
From making your designs pop to streamlining your workflow, these PowerPoint hacks are designed for real-world impact. No jargon, just practical insights that’ll have you presenting like a pro in no time.
Let’s cut through the noise and get straight to the good stuff – your next presentation is about to level up. Ready? Let’s get started.

27 PowerPoint Tips and Tricks That Put The Power in PowerPoint

1. Morph Transition for Seamless Animation

What’s it for: Elevate your presentation by seamlessly animating objects and creating smooth transitions between slides. Morph transition is your key to a dynamic and visually engaging storytelling experience, allowing you to captivate your audience effortlessly.
How to do it:
- Position the same object in different parts on multiple slides
- Select all slides, and go to the Transitions tab.
- Choose “Morph” as the transition effect.
2. SVG Image Integration

What’s it for: Did you think SVG’s only work for websites and professional photo editing tools? They do, too, in PowerPoint! Import high-quality Scalable Vector Graphics (SVG). Maintain image clarity, resize without loss, and enhance your presentations with crisp logos and icons.
- Save your chosen SVG on your device.
- Click on the Insert tab.
- Choose “Pictures” and select your SVG file.
- Adjust the size without compromising image quality.
3. Designer Feature for Quick Layouts

What’s it for: Effortlessly create professional-looking slides with the Designer feature. Receive instant layout suggestions based on your content, saving time and ensuring your presentation looks polished.
- Select a slide.
- Go to the Design tab and click Designer on the far right along the ribbon.
- Select through ready-made slide designs for instant layouts.
4. Insert 3D Models

What’s it for: Amp up your presentations with manipulable 3D models, adding a dynamic dimension. Whether it’s showcasing products or visualizing data, 3D models bring your slides to life.
- Click on the “3D Models” dropdown and proceed to Stock 3D Models.
- Search for a 3D model of your choice and insert.
- Manipulate and customize as needed.
5. SmartArt Graphics for Visual Hierarchy

What’s it for: Convey complex ideas with visual hierarchy using SmartArt graphics. These graphics offer a structured and visually appealing way to organize information, making your content more digestible.
- Go to the Insert tab.
- Select “SmartArt” and navigate through the available categories.
- Select a graphic template that fits your presentation needs.
- Enter your content and customize as needed.
6. Eyedropper Tool for Color Matching

What’s it for: Maintain a cohesive design by using the Eyedropper tool to pick colors from images or elements within your presentation. Ensure consistency and professional aesthetics in every slide.
- Select the editable, native PowerPoint object you wish to customize.
- Go to the Shape Format tab and click on the Shape Fill dropdown.
- Select “More Fill Colors…” and click the eyedropper icon to begin color appropriating.
7. Record and Insert Audio

What’s it for: Infuse personality into your presentation by recording audio directly within PowerPoint. Ideal for adding voiceovers, explanations, or personal touches that enhance audience engagement.
- Click on “Audio” and choose “Record Audio.”
- Record your audio and insert it into the slide.
8. Presenter Coach for Rehearsing

What’s it for: Elevate your presentation skills with Presenter Coach. Receive valuable feedback on pacing, filler words, and more, refining your delivery for a confident and impactful performance.
- Click on the Slide Show tab.
- Choose “Rehearse with Coach” to start practicing.
9. Hyperlink Navigation for Seamless Transitions

What’s it for: Streamline your presentation flow by implementing Hyperlink Navigation. This trick allows you to create clickable links within your slides, enabling effortless transitions between related content or external resources, enhancing the overall navigational experience.
- Select the text or object you want to hyperlink.
- Right-click and choose “Hyperlink” or use the Ctrl+K shortcut.
- Specify the destination, whether it’s another slide, a website, or a file, to create a seamless navigational experience.
10. Alt Text for Accessibility

What’s it for: Improve accessibility by adding descriptive alternative text to images and objects. Ensure inclusivity for visually impaired individuals, making your presentation accessible to a wider audience.
- Right-click on the image or object.
- Choose “Edit Alt Text” and enter a descriptive text.
11. Slide Zoom for Dynamic Navigation

What’s it for: Elevate your presentation’s navigation with Slide Zoom, offering the flexibility to jump to specific slides during a presentation without adhering to a linear sequence. This dynamic feature ensures a more engaging and tailored audience experience.
- Set a master slide where you’d like to put your “mini slides” altogether.
- Navigate to the Insert tab > Zoom dropdown > Slide Zoom.
- Select the slides you want to link onto your master slide and insert.
12. Live Captions and Subtitles

What’s it for: Foster inclusivity by enabling live captions and subtitles in multiple languages. This feature enhances accessibility, making your presentation more engaging and comprehensible for a diverse global audience.
- Go to the Slide Show tab.
- Select “Always Use Subtitles” and choose your language.
13. Password Protection for Security

What’s it for: Safeguard your presentation’s sensitive content by adding a password. This security measure ensures that only authorized individuals can access and view the information, adding an extra layer of protection.
- Navigate to the File tab.
- Select “Info” and click on “Protect Presentation.”
- Choose “Encrypt with Password” and set your password.
14. Animation Painter for Consistent Animations

What’s it for: Maintain a polished and consistent look throughout your presentation by using the Animation Painter. Copy and apply animations across different objects with ease, ensuring a cohesive visual experience.
- Select the object with the same, desired animation as the others.
- Go to the Animation tab.
- Click on “Animation Painter” and apply to other objects.
15. Linked Excel Charts for Real-Time Updates

What’s it for: Integrate linked Excel charts for real-time updates in your PowerPoint presentation. Any modifications made to the linked Excel file automatically reflect in your slides, ensuring data accuracy.
- Copy your Excel chart.
- In PowerPoint, use “Paste Special” and choose “Microsoft Excel Worksheet Object.”
16. Custom Slide Sizes

What’s it for: Tailor your presentation to various screen dimensions by customizing slide sizes. This feature, accessible through the Design tab, ensures your content fits seamlessly across different display settings.
- Navigate to the Design tab.
- Click on the “Slide Size” dropdown and choose “Page Setup”.
- Change “Slide sized for” to Custom.
17. Grid and Guidelines for Precision

What’s it for: Achieve precise object alignment with gridlines and guides. This feature, essential for creating visually polished and organized presentations, ensures your content is visually appealing and professionally structured.
- Go to the View tab.
- Check the “Grids” and “Guidelines” toggles for display options and customization.
18. Slide Master for Consistent Design

What’s it for: Establish a cohesive presentation design by utilizing the Slide Master. This time-saving feature enables you to set consistent layouts, fonts, and colors throughout your presentation.
- Click on “Slide Master” to access and customize master slides.
19. Quick Access Toolbar Customization

What’s it for: Streamline your workflow by personalizing the Quick Access Toolbar with your most-used commands. This customization ensures quick access to essential tools, enhancing efficiency during presentation creation.
- Click on the dropdown arrow on the Quick Access Toolbar.
- Select “More Commands” to customize your toolbar.
20. Ink Annotations for Handwriting

What’s it for: Personalize your presentations with a touch-enabled device using ink annotations. This feature allows you to draw or write directly on slides, adding a unique and handwritten touch to your content.
- Go to the Draw tab and click on Draw to begin drawing.
- Choose “Ink to Text” or “Ink to Shape” for handwriting annotations.
21. Crop to Shape for Image Customization

What’s it for: Unleash your creativity by utilizing the Crop to Shape feature, allowing you to create custom image shapes. This adds a distinctive flair to your presentation, providing a visually dynamic and engaging experience.
- Select the image.
- Navigate to the Picture Format tab.
- Click on “Crop” and choose “Crop to Shape.”
- Select the shape you want your image to have as frame.
22. Slide Show Recording with Narration

What’s it for: Capture your entire presentation, including narration and animations, by recording a self-running slideshow. This feature is invaluable for sharing presentations with a wider audience, ensuring a consistent and engaging delivery.
- Click on “Record Slide Show” and choose recording options.
23. Dynamic Color Scheme Switch for Vibrant Slides

What’s it for: Infuse energy into your presentation by dynamically switching color schemes. This handy trick allows you to quickly experiment with various color palettes, giving your slides a vibrant and fresh appearance in just a few clicks.
- Explore different color options by selecting “Colors” and experimenting with the available palettes. Instantly transform the look of your presentation to match your desired mood and style.
24. Smart Alignment and Distribution for Pixel-Perfect Precision

What’s it for: Attain pixel-perfect precision in your presentation design with the Smart Alignment and Distribution trick. This technique allows you to not only align objects with accuracy but also evenly distribute them horizontally, ensuring a polished and visually appealing layout.
- Select the objects you want to align.
- Navigate to the Format tab.
- Click on “Align” to access options like Align Left, Center, or Right for precise alignment.
- Further refine your layout by choosing “Distribute Horizontally,” ensuring equal spacing between objects and achieving a professional design.
25. Insert Online Videos

What’s it for: Seamlessly integrate online videos directly into your presentation. This feature eliminates the need for external players, offering a smooth and immersive viewing experience for your audience.
- Click on the “Video” dropdown and select Online Movie.
- Paste the video link and your video should be embedded onto your PowerPoint slide.
26. Embed Fonts for Portability

What’s it for: Ensure consistent visual appeal on any device by embedding fonts in your presentation. This is particularly useful when sharing your work with others who may not have the same fonts installed, enhancing portability.
- Go to the File tab.
- Select “Options” and go to the Save tab from the window popup.
- Check “Embed fonts in the file” as well as “Embed all characters”.
27. Text Transformation

What’s it for: Uncover the elegance of text transformation with the Shape Format trick. This hack allows you to access a myriad of text transformation designs, offering a swift and sophisticated way to elevate the visual appeal of your presentation.
- Select the text you want to transform.
- Navigate to the Shape Format tab.
- Click on “Text Effects” and explore the “Transform” options for a variety of stylish text designs. Instantly apply a transformation that suits the tone and style of your presentation.
5 Critical Best Practices to Implement These Pro PowerPoint Tips and Tricks for a Technically Proficient Presentation
Enhance the technical brilliance of your presentation by focusing on these crucial best practices:
1. Streamlined Font Selection
- Practice: Limit your font styles to a maximum of three per slide.
- Why: Simplifying fonts enhances readability, maintains visual consistency, and prevents distraction, ensuring your message is clear and impactful.
2. High-Resolution Images
- Practice: Source HD images from reputable free resource websites like Freepik or Unsplash .
- Why: High-resolution images prevent pixelation, ensuring clarity and professionalism. Crisp visuals contribute to a visually appealing presentation.
3. Cohesive Color Palette
- Practice: Stick to a consistent color palette throughout your slides; use the eyedropper tool for precise color matching.
- Why: A unified color scheme enhances visual harmony, reinforces brand identity, and elevates the overall aesthetics of your presentation.
4. Efficient Data Visualization
- Practice: Use charts and graphs for data-driven slides, choosing appropriate chart types for different data sets.
- Why: Visualizing data through charts improves comprehension, making complex information more accessible and engaging for your audience.
5. Transitions with Purpose
- Practice: Apply slide transitions judiciously. Choose transitions that complement the content and avoid excessive animations.
- Why: Subtle transitions maintain audience focus, while excessive animations may distract from the core message.
Final Thoughts
In presentation-making, technical practices harmonized with thoughtful design is the key to delivering an impactful message. Whether it may be as simple as considering font choices, to incorporating high-resolution visuals, you do not only get to enhance the aesthetics but also ensure your audience’s undivided attention.
Remember, a technically proficient presentation is not just a showcase of information, but also one that leaves a rather immersive experience for those who will see. But at the end of the day, it comes down to your delivery. So, no sweat! You’re doing amazing, rockstar!
Find them useful? Save them, or share these PowerPoint tips and tricks with others to make their day!
About Ausbert Generoso
Try classpoint for free.
All-in-one teaching and student engagement in PowerPoint.
Supercharge your PowerPoint. Start today.
500,000+ people like you use ClassPoint to boost student engagement in PowerPoint presentations.
17 PowerPoint Presentation Tips From Pro Presenters [+ Templates]
Published: April 26, 2024
PowerPoint presentations can be professional, attractive, and really help your audience remember your message.

If you don’t have much experience, that’s okay — I’m going to arm you with PowerPoint design tips from pro presenters, the steps you need to build an engaging deck, and templates to help you nail great slide design.
![→ Free Download: 10 PowerPoint Presentation Templates [Access Now]](https://no-cache.hubspot.com/cta/default/53/2d0b5298-2daa-4812-b2d4-fa65cd354a8e.png "power point presentation tricks")
Download Now
Buckle up for a variety of step-by-step explanations as well as tips and tricks to help you start mastering this program. There are additional resources woven in, and you’ll find expert perspectives from other HubSpotters along the way.
Table of Contents
How to Make a PowerPoint Presentation
Powerpoint presentation tips.
Microsoft PowerPoint is like a test of basic professional skills, and each PowerPoint is basically a presentation made of multiple slides.
Successful PowerPoints depend on three main factors: your command of PowerPoint's design tools, your attention to presentation processes, and being consistent with your style.
Keep those in mind as we jump into PowerPoint's capabilities.
Getting Started
1. open powerpoint and click ‘new.’.
A page with templates will usually open automatically, but if not, go to the top left pane of your screen and click New . If you’ve already created a presentation, select Open and then double-click the icon to open the existing file.

10 Free PowerPoint Templates
Download ten free PowerPoint templates for a better presentation.
- Creative templates.
- Data-driven templates.
- Professional templates.
You're all set!
Click this link to access this resource at any time.
Creating PowerPoint Slides
3. insert a slide..
Insert a new slide by clicking on the Home tab and then the New Slide button. Consider what content you want to put on the slide, including heading, text, and imagery.

- Finally, PowerPoint Live is a new tool that enables you to do more seamless presentations during video calls and may be a better overall match for doing presentations remotely. Check out this video:
11. Try Using GIFs.

12 Free Customizable Resume Templates
Fill out this form to access your free professionally-designed templates, available on:
- Microsoft Word
- Google Docs
- Microsoft PowerPoint
- Google Slides
15. Embed multimedia.
PowerPoint allows you to either link to video/audio files externally or to embed the media directly in your presentation. For PCs, two great reasons for embedding are:
- Embedding allows you to play media directly in your presentation. It will look much more professional than switching between windows.
- Embedding also means that the file stays within the PowerPoint presentation, so it should play normally without extra work (except on a Mac).
If you use PowerPoint for Mac it gets a bit complicated, but it can be done:
- Always bring the video and/or audio file with you in the same folder as the PowerPoint presentation.
- Only insert video or audio files once the presentation and the containing folder have been saved on a portable drive in their permanent folder.
- If the presentation will be played on a Windows computer, then Mac users need to make sure their multimedia files are in WMV format.
- Consider using the same operating system for designing and presenting, no matter what.
16. Bring your own hardware.
Between operating systems, PowerPoint is still a bit jumpy. Even between differing PPT versions, things can change. The easiest fix? Just bring along your own laptop when you're presenting.
The next easiest fix is to upload your PowerPoint presentation into Google Slides as a backup option — just make sure there is a good internet connection and a browser available where you plan to present.
Google Slides is a cloud-based presentation software that will show up the same way on all operating systems.
To import your PowerPoint presentation into Google Slides:
- Navigate to slides.google.com . Make sure you’re signed in to a Google account (preferably your own).
- Under Start a new presentation , click the empty box with a plus sign. This will open up a blank presentation.
- Go to File , then Import slides .
- A dialog box will come up. Tap Upload.
- Click Select a file from your device .
- Select your presentation and click Open .
- Select the slides you’d like to import. If you want to import all of them, click All in the upper right-hand corner of the dialog box.
- Click Import slides.
When I tested this out, Google Slides imported everything perfectly, including a shape whose points I had manipulated. This is a good backup option to have if you’ll be presenting across different operating systems.
17. Use Presenter View.
In most presentation situations, there will be both a presenter’s screen and the main projected display for your presentation.
PowerPoint has a great tool called Presenter View, which can be found in the Slide Show tab of PowerPoint. Included in the Presenter View is an area for notes, a timer/clock, and a presentation display.
For many presenters, this tool can help unify their spoken presentation and their visual aid. You never want to make the PowerPoint seem like a stack of notes that you’re reading off of.
Use the Presenter View option to help create a more natural presentation.
Pro Tip: At the start of the presentation, you should also hit CTRL + H to make the cursor disappear. Hitting the “A” key will bring it back if you need it.
Your Next Great PowerPoint Presentation Starts Here
Now that you have these style, design, and presentation tips under your belt, you should feel confident to create your PowerPoint presentation.
But if you can explore other resources to make sure your content hits the mark. After all, you need a strong presentation to land your point and make an impression.
With several templates to choose from — both in PowerPoint and available for free download — you can swiftly be on your way to creating presentations that wow your audiences.
Editor's note: This post was originally published in September 2013 and has been updated for comprehensiveness.
![Blog - Beautiful PowerPoint Presentation Template [List-Based]](https://no-cache.hubspot.com/cta/default/53/013286c0-2cc2-45f8-a6db-c71dad0835b8.png "power point presentation tricks")
Don't forget to share this post!
Related articles.
![How to Create the Best PowerPoint Presentations [Examples & Templates]](https://blog.hubspot.com/hubfs/powerpoint.webp "power point presentation tricks")
How to Create the Best PowerPoint Presentations [Examples & Templates]
![How to Write an Ecommerce Business Plan [Examples & Template]](https://blog.hubspot.com/hubfs/ecommerce%20business%20plan.png "power point presentation tricks")
How to Write an Ecommerce Business Plan [Examples & Template]
![How to Create an Infographic in Under an Hour — the 2024 Guide [+ Free Templates]](https://blog.hubspot.com/hubfs/Make-infographic-hero%20%28598%20%C3%97%20398%20px%29.jpg "power point presentation tricks")
How to Create an Infographic in Under an Hour — the 2024 Guide [+ Free Templates]
![20 Great Examples of PowerPoint Presentation Design [+ Templates]](https://blog.hubspot.com/hubfs/powerpoint-presentation-examples.webp "power point presentation tricks")
20 Great Examples of PowerPoint Presentation Design [+ Templates]

Get Buyers to Do What You Want: The Power of Temptation Bundling in Sales

How to Create an Engaging 5-Minute Presentation
![How to Start a Presentation [+ Examples]](https://blog.hubspot.com/hubfs/how-to-start-presenting.webp "power point presentation tricks")
How to Start a Presentation [+ Examples]

120 Presentation Topic Ideas Help You Hook Your Audience

The Presenter's Guide to Nailing Your Next PowerPoint
![How to Create a Stunning Presentation Cover Page [+ Examples]](https://blog.hubspot.com/hubfs/presentation-cover-page_3.webp "power point presentation tricks")
How to Create a Stunning Presentation Cover Page [+ Examples]
Marketing software that helps you drive revenue, save time and resources, and measure and optimize your investments — all on one easy-to-use platform

Microsoft 365 Life Hacks > Presentations > PowerPoint Tips: Make The Most of Your Presentation
PowerPoint Tips: Make The Most of Your Presentation
Got a presentation coming up but you’re not that familiar with PowerPoint ? We can help you get started with some easy PowerPoint tips and tricks that’ll help you create an impactful presentation , no matter what the occasion.

Our PowerPoint for beginners tips will show you how to:
- Make an outline.
- Choose a theme.
- Find a font.
- Use visuals.
- Not use too much text.
- Limit your color.
- Use a free online “speaker coach”.

Tell your story with captivating presentations
Powerpoint empowers you to develop well-designed content across all your devices
Outline your presentation before you start. Don’t spend time making unnecessary slides for your presentation. Create an outline before you start. Not only will this make it easier to put the content on the slides, but it will also let you know how many slides you need to make. Rather than winging it and making slides as you go, use your outline to make your slides efficient and organized . Working without an outline can sometimes lead to jumbled slides with more information than you need.
Choose a theme and template. Not everybody is a graphic designer, so coming up with the perfect slide theme and template can seem hard. Thanks to PowerPoint templates, it isn’t. Find a free online template that gives you the design, layout, color scheme, and aesthetic you want. Be sure to choose something that fits what you’re talking about (e.g. Don’t use a whimsical theme with bright colors and butterflies if you’re presenting a serious topic.)
Find the right font . Knowing which font to use for your presentation isn’t always easy. When it comes to the basics of selecting the best font, follow best-practice recommendations that say an easy-to-read sans-serif font is preferred. Fonts like Arial, Calibri, Helvetica, and others like it make for simple fonts that are easy to read. Although, there are some serif fonts that still look great on PowerPoint and are easy to read on high-resolution screens. When you’re building out the format of your slides, a great way to distinguish the title section from the body text is by using a different font for each or bolding your title font.
Use visuals . Words on a page aren’t nearly as engaging as visuals. Keep your audience’s attention during your presentation by using visuals like graphics, animations, photos, and videos. PowerPoint makes it easy to insert clipart, tables, graphs, and much more by using the features built into the program. You can also include gifs and YouTube videos to up the ante on your presentation.
While it’s great to use fun gifs or YouTube videos to enhance your presentation, don’t go crazy. Eventually, your audience will get tired of looking at a five-second loop on a gif as you speak, and videos don’t always have the impact you want. Videos can be distracting to your audience because they change the pace of your presentation, so it’s a good idea to limit the number of videos you include.
Tip: If you’re going to lay words over a picture, use a colored box with the opacity down around 50% to create more contrast between the image and the words.
Limit your text. Your audience doesn’t want to read; they want to listen to you. Don’t fill your slides with long sentences and complex phrasing. Instead, include only the most important points of what you want to say. The PowerPoint 6×6 rule suggests limiting your slides to six lines with a maximum of six words per line. Following this rule makes for slides that include only the most important points while avoiding information overload. Using bullet points is a great way to stick to the 6×6 rule.

Go easy on the colors. Be careful of the colors you use when making a PowerPoint presentation. Too many bright colors can be hard on the eyes and reduce the contrast between the letters, making them hard to read. It’s generally a good idea to use a black or white font with a color that makes the font pop against the background. Black on white is always easy to read, and white looks great against most solid colors. If you’re not sure how a specific font color looks against a background, sit back in your chair, and try to read it. If it’s hard to read with the font and background you have, it’s a good idea to change one or both.
Use a free online “speaker coach”. Rehearsing in front of a mirror is good, but using free speaker coaching software is even better. Do you say “um” a lot? Are you talking too fast? Did you use a culturally insensitive term? A free digital “coach” with built-in AI will catch all that stuff and more.It’s the best way to assess your strengths and weaknesses and identify areas of growth.
These PowerPoint tips are enough to get you started on your presentation. Soon, you’ll be creating and presenting a beautiful deck.
Get started with Microsoft 365
It’s the Office you know, plus the tools to help you work better together, so you can get more done—anytime, anywhere.
Topics in this article
More articles like this one.

How to create an educational presentation
Use PowerPoint to create dynamic and engaging presentations that foster effective learning.

Five tips for choosing the right PowerPoint template
Choose an appropriate PowerPoint template to elevate your presentation’s storytelling. Consider time length, audience and other presentation elements when selecting a template.

How you can use AI to help you make the perfect presentation handouts
Learn how AI can help you organize and create handouts for your next presentation.

How to use AI to help improve your presentations
Your PowerPoint presentations are about to get a boost when you use AI to improve a PowerPoint presentation.
Everything you need to achieve more in less time
Get powerful productivity and security apps with Microsoft 365

Explore Other Categories
Microsoft Office
10 minute read
Top 12 PowerPoint Tips and Hacks for Flawless Presentations

Saikat Basu
Facebook Twitter LinkedIn WhatsApp Email

Join the Microsoft Office conversation on Slack
Ask a question or join the conversation for all things Microsoft Office on our Slack channel.
We’ve all seen our fair share of bad PowerPoint presentations . We can all agree that for a PowerPoint presentation to impress, it needs time and attention to detail.
So how can you ramp up your PowerPoint productivity in the shortest time possible?
That’s where we come in. For starters, follow our proven PowerPoint tips and tricks for business presentations , which are sure to make an impact.
Step up your PowerPoint game
Download our print-ready shortcut cheatsheet for PowerPoint.
1. Keep it simple

Keep your slides simple. It’s the visual backdrop to what you are going to say.
The most recommended PowerPoint tip for your productivity is called simplicity . You may be tempted by the graphical razzmatazz of beautiful images, background, and charts. At the end of the day, PowerPoint is a background visual aid for your talk. It is not the talk.
PowerPoint has lots of bells and whistles. But you don’t have to use them all. For instance, your content may not need the much-maligned bullet points - you can just use one key point per slide instead.
That’s why…
2. Reduce the text

Less is more when it is about the text on your slides.
The average reading speed on a screen is around 100 - 150 words per minute. Too much information on the slide is a distraction and an inattentive audience will lose the message you are trying to convey.
Don’t give them too much to read. Use high-quality pictures and eye-catching graphics instead.
To make information digestible, expert slide designers recommend you write one key idea per slide that is summarized by a clear headline.
Tip: Exploit white space. Create more space between your text, paragraphs, and graphics on your slide.
3. Plan your content first

Think about the message you want to convey and use it to write an outline.
As PowerPoint is such a visual medium, it is easy to get sidetracked with the visuals. So it’s important to chalk out what you want to say and in what order even before you open PowerPoint.
Your slides will come together quickly with the help of PowerPoint design options and you can even choose the right templates if you know your stuff inside out.
Tip: Use brainstorming tools like mind maps, flowcharts, and even storyboards to sketch your content flow.
4. Use PowerPoint Designer for ideas
PowerPoint makes an intelligent guess by looking at the words on your slide and suggests high-quality artwork to complement it. You can pick one of the creative layouts or go back to your own design.
Tip: PowerPoint Designer can also turn lists, processes, or timelines into beautiful graphics too.
5. Use PowerPoint templates

Start with a template to break through any creative blocks.
PowerPoint templates are meant to be the starter plugs when inspiration deserts you or you are design-challenged. PowerPoint ships with a set of readymade templates and there are more available online. Pick one to begin.
Tip: Manpreet Kaur, the head of Corporate Communications at Mercer also suggests you use templates for mining ideas for your own presentation.
Whenever you receive any PowerPoint presentation from any of your clients, business partners, or sellers, make it a point to add them to any folder as a stock for templates for future reference. You can leverage these templates to find inspiration for any icon idea, layout, idea presentation, and number representation on the slides.
6. Edit the Slide Master

To open the Slide Master view, go to the View tab on the Ribbon and select Slide Master .
The first slide on the top is the Slide Master. Any changes to the Slide Master will be applied to all the slides in the presentation.
The Slide Master view also shows all the slide layouts used in PowerPoint. You can also use these Layout Master slides to control the appearance of any group of slides that share a common layout.
Tip: Make changes to the Slide Master before you start filling a presentation with the content.
7. Use PowerPoint Shapes for visuals

PowerPoint Shapes is the most powerful graphical tool in your control.
The multifaceted Shapes feature on the Ribbon gives you infinite ways to use PowerPoint like an illustration program. Look beyond the commonplace rectangle, oval, and rounded rectangle patterns.
Every shape is editable. You can customize any PowerPoint shape and create your own custom designs. They can be formatted with colors, 3-D effects and shadows too.
Tip: Most default shapes are overused. So, you can use your own custom shapes to add interest to a key point or a slide. For instance, you can turn a chevron into a more interesting arrow to illustrate the flow of a process.
8. Choose the right fonts
Choose the right fonts that are modern and pleasing.
It’s well established that fonts have a cognitive impact on how your audience will take in the information.
Sans-serif fonts are preferred for their smooth typefaces. But your typography choices will be influenced by the theme of the content. An artsy presentation can be more liberal with fonts that are decorative.
Also, to create contrast, you can use a technique called font-pairing where two complementary fonts are combined. For instance, use a serif font for titles and pair it with a sans-serif font in the body.
Tip: Want a free font library? Head over to Google Fonts and the collection of 916 free licensed fonts.
9. Use visual metaphors for your data

Visuals help everyone get the context behind data at a faster rate.
Business executives are used to spreadsheets . But that doesn’t mean they will like it in a presentation. Arresting illustrations are far better than bullet points and shoddy SmartArt.
We have talked about shapes and using high-quality photos before. But what if you have to analyze dry data?
Use visual metaphors or analogies to bring out the scale and relationships in the data. Executives can look up numbers, but the right use of an analogy can bring out the context behind it.
For instance, the evolution of man can be used to show the growth of a startup over time.
Tip: When stuck for ideas take inspiration from the best infographics on Slideshare and Pinterest. Infographics are designed to pack a lot of information in a small space.
10. Customize your slides for different audiences

Save yourself a lot of time by reusing your slides for different audiences.
This somewhat lesser-known PowerPoint tip uses a feature called Custom Slideshow to filter what you want your audience to see. Maybe, you want to hide some sensitive information for a lower level of executives while revealing it to those higher up. You do not have to create different slideshows for these two groups.
Create a custom show in five steps.
- On the Ribbon, go to Slide Show > Custom Slide Show , and then select Custom Shows .
- Click the New button in the Custom Shows dialog box.
- In the Define Custom Show box , choose the slides that you want to include in the custom show, and then hit Add .
- You can change the order of the slides with the arrow keys.
- Type a name in the slideshow name box, and then click OK .
Tip: You can also create hyperlinked custom shows that you can jump to from your primary PowerPoint show.
11. Rehearse Your Presentation

Prepare your presentation according to the time allotted.
No PowerPoint tip is useful if you cannot fit the number of slides and the time you take to present them in the schedule. PowerPoint helps you rehearse your presentation before you do it. With the Rehearse Timing feature, you can tweak your delivery according to the time on hand.
A helpful Microsoft Support video walks you through the process.
Tip: Use the timer to check if you're spending too much or too little time on one particular slide. Maybe, explaining the data in a better way can shorten the time.
12. Make your PowerPoint presentations accessible

Go to File > Info > Check for Issues > Check Accessibility
Sharon Rosenblatt, Director of Communications at Accessibility Partners stresses the importance of making presentations more inclusive.
Always use the accessibility checker, and not just if your slideshow is being shared with someone you know has a disability, but you never know where files get sent to.
PowerPoint is all about visuals so it’s more important to finetune the little things that can help make the message easily understood by people who have accessibility challenges.
Tip: Microsoft details the best practices for making all PowerPoint presentations accessible .
The bottom line: Get to the point fast
When you are presenting to busy people, you have to cut the clutter but not lose the message. A successful presentation is about brevity and speed.
A business presentation is also a decision-making tool. So make sure you are presenting the information your audience wants to know. And nothing more.
Yes, they do take some work. But with the help of these PowerPoint tips and tricks, you can start and finish any presentation without losing your sleep.
Want more PowerPoint tips? Then check out these other PowerPoint features that will level up your presentations. Or try taking GoSkills top-rated PowerPoint certification course .
Ready to master Microsoft Office?
Start learning for free with GoSkills courses
Loved this? Subscribe, and join 453,243 others.
Get our latest content before everyone else. Unsubscribe whenever.

Saikat is a writer who hunts for the latest tricks in Microsoft Office and web apps. He doesn't want to get off the learning curve, so a camera and a harmonica claim an equal share of his free time.

Recommended
Should You Switch to Microsoft 365? What You Need to Know in 2024
We break down what Microsoft 365 is, and what makes it different from lifetime licenses.

28 Best Microsoft Office Add Ins in 2024
Supercharge your productivity with our picks of the best Microsoft Office add-ins for Word, Excel, PowerPoint, Outlook and OneNote.

What is Microsoft Teams? Everything You Need to Know in 2024
What is Microsoft Teams? Find out in this introductory guide.
© 2024 GoSkills Ltd. Skills for career advancement

PowerPoint Tips, Tricks, and Hacks from 29 Experts

Bryan Jones
- eLearning Development , Posts , PowerPoint
PowerPoint is an extremely powerful tool when used correctly.
But when you’re new to it, it can feel like it’s just blank screens and bullet points.
It can take years (or decades) to fully master it.
But I decided to save you some time…
I asked the world’s leading PowerPoint experts the following question:
What’s your single best PowerPoint tip, trick, or hack?
Below you’ll see responses from some amazing PowerPoint gurus, including: top authors, speakers, instructors, bloggers, and even a handful of PowerPoint MVPs and Microsoft employees!
Enjoy the full tutorials by scrolling below or jump to these sections:
Summary | Presentation Approach | Design | Shortcuts | Delivery | Setup | Beyond Presentations
PowerPoint Presentation Approach Tips
1. Use the Tell ‘n Show method: a headline with a single point and media to support it
To get your audience to understand and remember what you say, use the Tell ‘n’ Show(SM) method. Use the slide title to tell your point–what you want them to remember. For example, write “3rd quarter sales rose 5% over last year” instead of just “3rd quarter sales.” Then use the rest of the slide to show your point with an image, animation, graph, or diagram. Research has shown the students who see slides done like this do better on tests and similarly, your audience will “get” your point more quickly and easily. They’ll be more engaged, too.
Ellen Finkelstein is the President & Owner of Ellen Finkelstein, Inc. She is one of only 12 Microsoft designated PowerPoint MVPs in the United States and is the author of one of the most popular PowerPoint blogs on the web.
2. Don’t open PPT until you have a clear message
Don’t launch PowerPoint until you have a clear message. Many people launch PowerPoint, think what they want to present, add slides, then think again, and add slides again. To compare with an analogy, they are on a fun journey, driving their car, stopping wherever they want, and then driving to wherever they fancy. It’s good to have an amazing journey–but a journey without a destination will get you nowhere. Continuing this analogy, a “clear message” is the destination where you want to go, and you want to take your audience along with you. So make sure you have a message before you begin creating your slides.
Geetesh Bajaj is the Owner of Indezine.com . He is a PowerPoint MVP and the author of the Indezine blog, one of the most visited PowerPoint and presentation websites.
3. Start with the end-scenario in mind
As a designer, I recommend you think more about the end scenario than the beginning. Practical considerations – is this a printout, email attachment, onscreen presentation, interactive discussion tool or combination of those? Where will it be seen – in a stadium, boardroom, café, at their desk? Then consider the conceptual considerations – who is your audience and what do they currently think about your topic? What would you like to change in that thinking? Based on what you know about them, how can you change that thinking? Write those things down, then build your presentation with that at the forefront.
Tom Howell is the Agency Director at Synapsis Creative. He was recently designated a PowerPoint MVP by Microsoft. His presentation blog is a must-read for anyone looking to improve their presentation design.
4. Tease the audience by revealing info in parts
Do you struggle to hold your participant’s attention – especially when your training topic is dull and boring? There’s a secret technique I use that works like a charm every time. It is… “Tease your audience by revealing your information in parts” Let me give you an example… Want to present a Framework? Present just the skeletal structure first. Explain the context. Then reveal the first step. Explain. Then reveal the next step and so on. Your audience can’t take their eyes off, till you finish your explanation. Why does this work so well? Studies have shown that as humans – we experience ‘tension’ when we leave things incomplete. We feel subconsciously compelled to pay attention to the task till we see it finished. It’s called the ‘Zeigarnik effect’. Try it in your next presentation. All you need is to apply a simple custom animation to your visuals – to reveal information in stages.
Ramgopal is the Director and Co-Owner of PrezoTraining . He also runs a popular YouTube Channel focusing on PowerPoint .
5. Don’t open PowerPoint first. Instead, sketch on a notepad
The first step on PowerPoint is…don’t open PowerPoint. Sketch out your presentation on a notepad (regular or digital) and plan out the whole thing. Then rewrite, numbering and ordering your thoughts. That’s your slide order.
Doug Thomas is a Video and Webinar Creator at Microsoft. He has created and appeared in over 250 videos at office.com.
PowerPoint Design Tips
6. Use transparent overlays on images for text contrast
My favorite trick to do in PowerPoint is to create transparent overlays over slides, videos, photographs in PowerPoint! First, you create a rectangle to cover up the slide > Then you set it to a solid color or a gradient > You right click, set the transparency of each color to around 20% or any value you like depending on the project > and there you have it! You can dim photos, create duo-tone overlays, darken, brighten, add exposure, add a vignette or do pretty much anything regarding colors with this type of object! Best part is – you can freely copy it between slides or even separate PowerPoints! Awesome to know about and use 🙂
Andrzej Pach is an Online Instructor for Udemy & Skillshare. He also hosts one of the most popular YouTube channels to focus on PowerPoint with over 2 million views and 19,000 subscribers.
7. Go big with visuals. Bleed photos and videos to the edge
Go big with your visuals. My top tip to presentation designers of all levels is a simple, elegant, and often overlooked technique: bleed your inserted photographs and videos all the way to the edges. Insert your image. Scale (don’t stretch!) and crop appropriately. If next is necessary, set it in a semi-transparent shape with sufficient contrast against the text color. Think about some of the best presentations you’ve ever seen. Think also about your favorite movies and TV shows. Their images take up all available screen space. Yours can too.
Tony Ramos is the Director of the Presentation Guild and the Owner of TonyRamos.com. He was the first blogger on the internet to cover PowerPoint topics. Tony is an expert designer and producer of PowerPoint presentations and proposal graphics.
8. Create quick native PPT icons using your subtract and combine tools
Create quick native PPT icons using your subtract and combine tools.
Bethany Auck is the Founder and Creative Director of SlideRabbit . As a presentation and communication specialist, she helps clients build high quality presentations, from basic slide design to complex animations and infographics.
9. Structure clean layouts by using a grid system on slide masters
Keep your layouts clean and well-structured by implementing a grid system with guides on the pasteboard of your master slide.
Stephy Lewis is a Senior Designer for Aerotek and a Director of the Presentation Guild . She is a top visual designer of presentations and websites.
10. Find a beautiful, fresh font pair. One for headers and one for body
When I create PowerPoint tutorials on YouTube I am always thinking about techniques that would be really simple to implement and yet would have the biggest positive impact. So if you have 2 minutes to transform your presentation from good to awesome, I would suggest looking at your fonts. Find a beautiful, fresh looking font pair (one font for the headers and one for the body) and you can instantly change how your presentation feels and looks like. I am planning to do a video soon on this topic, so please visit my YouTube channel in the near future, if you are interested in awesome font pairs for your ppt 🙂 Good luck everyone!
One Skill (aka Kasparas Tolkusinas) is the CEO of One Skill PowerPoint Tutorials. He hosts one of the most popular PowerPoint YouTube channels , with over one million views and 14,000+ subscribers.
11. Create an arrow with broken SmartArt
I have an easy favorite that I often use. You know the arrow type that looks like a Nike Swoosh logo? The ones that start at a point then become thicker as they softly curve up or down? I have an easy hack that uses broken SmartArt to create such an arrow. Of course, if you have the newest version of PowerPoint (2016/Office 365), you can insert this arrow style as an icon, but it’s not easily editable (other than to recolor). Do this instead: 1) Insert > SmartArt > Process > Upward Arrow (or Descending Process) | 2) Ungroup | 3) Ungroup again | 4) Delete all extra shapes and text boxes, leaving only the arrow. You’re left with an adjustable arrow that allows you to use the yellow handles to change the swoosh width and arrow head size. Rotate, Flip Vertical, Flip Horizontal, or resize to further customize.
Sandra Johnson is the Owner and Chief Presentation Officer at Presentation Wiz and is Vice President of the Presentation Guild. She has also been designated only 1 of 12 Microsoft PowerPoint MVPs in the United States.
PowerPoint Shortcuts, Tricks, and Hacks
12. Power-crop photos with SmartArt
The favorite hack is Power Cropping a bunch of photos in seconds. (1) In PowerPoint select a bunch of odd sized (or shaped) photos (2) Navigate to the Picture Tools Format Tab (3) Open up the Picture Layout drop down (4) Select a SmartArt layout (Bending Picture Semi-Transparent Text is my favorite) (5) CTRL+SHIFT+G to ungroup the graphic twice. It’s a great little PowerPoint hack that not a lot of people know about.
Taylor Croonquist is the Co-Founder of NutsAndBoltsSpeedTraining.com . He is the guru of time-saving PowerPoint tips. If you want to be blown away by how fast someone can whip a PPT into shape, check out his blog or videos.
13. Use Ctrl + arrow keys to nudge objects on the screen
Here’s a quick and easy one I share in my PowerPoint for eLearning 101 classes: Want to move something just a smidge using the arrow keys? You may notice that it’s hard to get to juuuuust the right spot using the arrow keys. Try holding down the [Control] key with the arrow keys and watch as your slide objects move by just a pixel at a time.
AJ Walther is the Chief Creative Officer at IconLogic. She is also the instructor for several PowerPoint courses: PowerPoint for eLearning 101 and 201 , and the author of 2 PowerPoint books.
14. Use SmartArt to break bullet points into text boxes
Use SmartArt as a tool to eliminate bullet points and “chunk” your information out visually. Select your text box of bullet points and either right-click or choose from the Home tab “Convert to SmartArt.” Select a SmartArt graphic that contains horizontal boxes. Select the newly created SmartArt containing your text, right-click and ungroup it twice, giving you text in rectangles. Now, delete any extraneous SmartArt items (i.e. arrows) and format the boxes however you like. Voila, you have magically turned a page of bullet points into visual chunks—much easier to read!
Nolan Haims is the Principal of Nolan Haims Creative. He leads a team of visual design professionals dedicated to all types of visual communication. Nolan blogs at Present Your Story and hosts the popular Presentation Podcast.
15. Create “smoky letters” with PPT’s new Morph transition
Magic Smoky Letters! I recently went on a crazy experimentation spree (channeling my inner mad scientist!) with the Morph transition and discovered this bizarre but very cool “smoky letters” trick. Let’s say, for instance, that you want the word TEXT to come out as smoke from a chimney (or fireplace, tailpipe, cigar, teapot, magic lamp, etc.). You first put a picture of the chimney on your slide. Next, you create smoke “seeds” by inserting a rectangle and editing one of the points (Format – Shape – Edit Points) – then making 4 copies of this rectangle (one for each letter in TEXT). Make these “seeds” tiny and transparent, then place on top of the chimney (where you want the smoke to come out). Next, duplicate the slide and on this new slide, delete the “seeds” on the chimney. Then, vectorize the word TEXT (by writing it in a text box, putting it on top of a colored rectangle, selecting both objects and going to Merge Shapes – Fragment and deleting the stuff around TEXT). Finally, add a Morph transition to the second slide, and you’re done! Simply view in presentation mode and prepare for your jaw to drop… check out this trick with more details and examples here .
Lia (aka “P-Spice”) is a management consultant with a passion for making presentations more innovative and “spicy.” She hosts a popular YouTube channel on PowerPoint with over 4 million views and 36,000+ subscribers focused on creative animation and design tricks. She is also the author of the Spicy Presentations blog .
16. Convert text to an image if the custom font might not be installed.
One of my favorite frustration-busters involves a work-around when I know my client won’t have a custom font installed. For example, if the slide would benefit from a gorgeous script as an accent element, I will turn that piece of text into an image. I do this by selecting the font as an object, copying it and then pasting it as a picture (either right click to paste or use the paste button in the Home menu). Now I know the “text” will display as designed on any computer.
Lori Chollar is the Co-Founder of TLC Creative Services, Inc .
PowerPoint Presentation Delivery Tips
17. Use the notes panel for detailed printed notes
I’m a College Professor and use PowerPoint for Lecture notes. Many students want detailed lecture notes, but get bored quickly reading mountains of text on a slide. So I use the “Notes Pages” panel for detail while keeping the slides simple – I urge students to read the notes which may contain more information than given in a lecture. If printing out the slides, it is essential to use “Notes Pages” print layout option.
Dr Eugene O’Loughlin is a Lecturer in Computing at the National College of Ireland. He also hosts one of the most popular YouTube channels that covers PowerPoint topics and has over 12 million views and 26k+ subscribers.
18. Leverage “Presenter View” and “sections” when there are multiple presenters
Increase the power of Presenter View with PowerPoint Sections. Sections are used to organize slides within a presentation by grouping slides and giving each group a name. In addition, Presenter View leverages these Sections that can be seen in Presenter View’s Grid Layout. When running a presentation with multiple presenters, or an awards show with multiple award categories, I add lots of PowerPoint sections. The ability to minimize live-show stress and find the correct section to jump to is amazing!
Troy Chollar is the Co-Founder of TLC Creative Services, Inc. He is also a Microsoft designated PowerPoint MVP, PowerPoint blogger , and host the popular Presentation Podcast.
19. Use “triggers” to create interactive presentations
Create interactive presentations with triggers to start animations through hot spots on a slide. You can reveal specific parts of a diagram, make something change color by clicking it, or give people multiple choice questions and have the correct answer pop-up. It takes seconds to do and works brilliantly, particularly with visual slides. Right click on any animation, choose Timing, then Triggers in the pop-up window, and choose which object you click to start (trigger) the animation. You can have multiple triggers on one slide and multiple animations triggered by the same object. It makes really compelling and effective presentations.
Richard Goring is the Director at BrightCarbon. He creates compelling and persuasive presentations using visuals and diagrams. Richard also blogs at the Bright Carbon blog and has a post on this trigger technique mentioned above.
20. Use a formatted “Notes” page for presentation handouts.
I open the most eyes when I discuss how to use the Notes page to create handouts that are contained within the same PPTX file as the slides. Most people have never spent even a second in the Notes master so they never knew you could globally reformat the Notes pages to allow them to better accommodate the creation of handout pages.
Rick Altman is the Director of R. Altman and Associates and the Conference Host of The Presentation Summit . If you looking to create PowerPoints that don’t suck, he literally wrote the book on it.
PowerPoint software and hardware setup tips
21. add “align” to your quick access toolbar.
Tired of eyeballing that slide to see if all the objects are all even or in the same grid? That is why my favorite tip is to make Align one of your favorites on your QAT. Imagine a slide that might introduce three speakers’ headshots and captions but they are not aligned or equidistant from each other. Let’s fix it. Select all three objects – click on the first object, then press and hold CTRL when you click on the others. You can also use SHIFT and your mouse to draw a box over what you want to align – I call it a “Lasso”. To arrange the three headshots, click on the Format Tab in the Picture tools, you will see an option to align objects. You can choose to center objects horizontally, vertically or to a box of text. You do the same when working with shapes, text boxes, SmartArt graphics, and WordArt by selecting Format in the Drawing Tools. The result: your objects snap to the grid and the smart guide lines that appear on your slide will help confirm it.
Sharyn Fitzpatrick is the Editor of PresentationXpert and the Chief Marketing, Communications, and Webinar Guru at Marcom Gurus. She also lives in my home town (Los Altos), is a raving Penn State fan, and a former competitive swimmer!
22. Customize your “quick access” toolbar with frequently used buttons
I don’t have a ton of keyboard shortcuts in PowerPoint, but I do customize my toolbar. When I do that (right-click on the toolbar at the very top of the window), I can add any button I want, especially the alignment buttons, which makes life a lot easier when you’re working with different slide objects such as text, images, and graphs. In Excel, my favorite keyboard shortcut is CTRL+1 (CMD+1 on Macs), which will bring you to the Format menu. And it works for everything–cells, line charts, bar charts, axis labels, gridlines, whatever you need.
Jonathan Schwabish is the Founder at PolicyViz.com and a Senior Fellow at the Urban Institute. He is well known in the presentation community for his presentation book Better Presentations and his expertise in data visualization.
23. Name screen elements on the “Selection Pane” for easy design layering and more
The Selection Pane is one of PowerPoint’s best kept secrets. By default, it’s hidden in the “Select” menu on the “Home” tab. I add it to my Quick Access Toolbar and keep the Selection Pane open anytime I’m working in PowerPoint. Once open, you can name all the objects on the screen. This really helps when you’re trying to change the layering order of the objects, add animations, and more. You can also hide objects by clicking the “eye” icon next to each object. That’s really helpful for revealing objects beneath that layer. Without the selection pane, both layering and animations are next to impossible.
Bryan Jones is the Founder and President of eLearningArt. He runs a stock photo and template site to help people build better presentations and graphics. He also blogs frequently about eLearning, PowerPoint, and presentations .
24. In a dark working environment, change the default interface for more contrast
When I’m working in a dark environment (at night in my office, backstage at a conference, etc.), I find it extremely helpful to change PowerPoint’s interface from the bright white and orange to black or at least dark grey. To do this, click File, then Account, then select Black or Dark Grey from the Office Theme dropdown. Note that _these_ Office Themes control your interface elements such as the Ribbon and the workspace; they aren’t the same Office Themes that you may think of when we talk about PowerPoint templates and themes. (Thanks for naming everything the same, Microsoft!)
Echo Swinford is a PowerPoint Corporate Presentation and Template Expert at Echosvoice . She is designated as 1 of only 12 Microsoft PowerPoint MVPs in the United States. Echo also authored a book on building PowerPoint templates and is the President of the Presentation Guild .
25. Get a good external mouse. One with a scroll wheel can zoom in and out
A comfortable external mouse is a must-have for quick toolbar navigation and graphics editing. Make your work even speedier by choosing a mouse with a scroll wheel. In PowerPoint, hold the Ctrl/Command key and scroll forward or backward to change the Zoom level. Go from big picture to the smallest details in an instant.
Julie Terberg is a Presentation Expert, Visual Communicator at Terberg design. She is a designated Microsoft PowerPoint MVP, author of a book on creating PowerPoint templates, and is the Art Director for the Presentation Guild.
Think beyond PowerPoint presentations
26. think of ppt as a tool beyond liner presentations.
Strangely enough, my best tip/hack is to start seeing PowerPoint as a tool that can do much more than linear presentations. Here are a few examples: 1) Produce better visuals & handouts at the same time by moving text to the notes pane, and design your Notes Master so it has your corporate colors and logo 2) Use PowerPoint’s screen capture tool (PPT2010 and up), or screen recording tool (PPT2013 and up) to create quick tutorials without needing other software 3) Get to know the drawing/shape tools to create your custom graphics and save them as images.
Chantal Bossé is the Owner of CHABOS, Inc. where she helps clients, such as TEDx speakers, maximize their presentation impact. She is also a designated Microsoft PowerPoint MVP.
27. Export to video and PDF to make content portable and reach a wider audience.
Exporting to video and PDF is a quick and easy way to make your content much more portable and mobile-friendly to reach a wider audience. The PDF option allows you to totally rethink your documents and make the switch to interactive “e-books”. The video option gives you a super flexible MP4 video file that you can use virtually anywhere. To see an example of each, visit this tutorial .
Mike Taylor is a Learning Technologist at Mindset Digital, as well as a former Community Manager at Articulate He is also a frequent speaker and popular blogger.
28. Hyperlink between slides to create a non-linear experience
Hyperlinking: Many who build eLearning with PowerPoint rely too much on the default linear slide 1- slide 2 -next-next-next setup. Learning to hyperlink across slide decks enables you to build interesting interactions like branching simulations and quizzes with scaffolded feedback. It takes patience and thinking through but isn’t technically difficult. Another tip: Figure out how to do the planning/layout the way that works best for you: I like to use Post-It notes I can move around. Others like to draw it out, and still others use the PPT flowcharting tools.
Jane Bozarth is an E-Learning Coordinator for the State of North Carolina. She is the author of several popular books, including Better Than Bullet Points: Creating Engaging e-Learning with PowerPoint.
29. Build clickable prototypes and hyperlink from any object to other slides
Creating prototypes is tough, right? Difficult software, expensive too. But wait… Do you realize that PowerPoint can be used to build prototypes? One of the coolest and simplest features that you’ll find in PowerPoint is the ability to put hyperlinks on any object on your slide and have it link to other slides. This way you can mock up any kind of e-learning, interactive job aid, software simulation or app you’d like and get a real feel of how it would work. Just create the screens you need for your prototype, add clickable areas (transparent shapes are great for that!) and voila!
Jeff Kortenbosch is a Performance Consultant at Bright Alley. He’s a PowerPoint guru and has a series of YouTube videos where he teaches users how to draw in PowerPoint.
29 PowerPoint Tips, Tricks, and Hacks Summarized
- Use the Tell ‘n Show method: a headline with a single point and media to support it | Ellen Finkelstein
- Don’t open PPT until you have a clear message | Geetesh Bajaj
- Start with the end-scenario in mind | Tom Howell
- Tease the audience by revealing info in parts | Ramgopal
- Don’t open PowerPoint first. Instead, sketch on a notepad | Doug Thomas
- Use transparent overlays on images for text contrast | Andrzej Pach
- Go big with visuals. Bleed photos and videos to the edge | Tony Ramos
- Create quick native PPT icons using your subtract and combine tool. | Bethany Auck
- Structure clean layouts by using a grid system on slide master. | Stephy Lewis
- Find a beautiful, fresh font pair. One for headers and one for bod. | One Skill
- Create an arrow with broken SmartArt | Sandra Johnson
- Power-crop photos with SmartArt | Taylor Croonquist
- Use Ctrl + arrow keys to nudge objects on the screen | AJ Walther
- Use SmartArt to break bullet points into text boxes | Nolan Haims
- Create “smoky letters” with PPT’s new Morph transition | Lia (P-Spice)
- Convert text to an image if the custom font might not be installed | Lori Chollar
- Use the notes panel for detailed printed notes | Dr Eugene O’Loughlin
- Leverage “Presenter View” and “sections” when there are multiple presenters | Troy Chollar
- Use “triggers” to create interactive presentations | Richard Goring
- Use a formatted “Notes” page for presentation handout. | Rick Altman
PowerPoint Software and Hardware Setup Tips
- Add “align” to your Quick Access Toolbar | Sharyn Fitzpatrick
- Customize your “quick access” toolbar with frequently used buttons | Jon Schwabish
- Name screen elements on the “Selection Pane” for easy design layering and more | Bryan Jones
- In a dark working environment, change the default interface for more contrast | Echo Swinford
- Get a good external mouse. One with a scroll wheel can zoom in and out | Julie Terberg
Think Beyond PowerPoint Presentations
- Think of PPT as a tool beyond liner presentations | Chantal Bossé
- Export to video and PDF to make content portable and reach a wider audience | Mike Taylor
- Hyperlink between slides to create a non-linear experience | Jane Bozarth
- Build clickable prototypes and hyperlink from any object to other slides | Jeff Kortenbosch

Get your free download
Get your free download.
How-To Geek
8 tips to make the best powerpoint presentations.
Want to make your PowerPoint presentations really shine? Here's how to impress and engage your audience.
Quick Links
Table of contents, start with a goal, less is more, consider your typeface, make bullet points count, limit the use of transitions, skip text where possible, think in color, take a look from the top down, bonus: start with templates.
Slideshows are an intuitive way to share complex ideas with an audience, although they're dull and frustrating when poorly executed. Here are some tips to make your Microsoft PowerPoint presentations sing while avoiding common pitfalls.
It all starts with identifying what we're trying to achieve with the presentation. Is it informative, a showcase of data in an easy-to-understand medium? Or is it more of a pitch, something meant to persuade and convince an audience and lead them to a particular outcome?
It's here where the majority of these presentations go wrong with the inability to identify the talking points that best support our goal. Always start with a goal in mind: to entertain, to inform, or to share data in a way that's easy to understand. Use facts, figures, and images to support your conclusion while keeping structure in mind (Where are we now and where are we going?).
I've found that it's helpful to start with the ending. Once I know how to end a presentation, I know how best to get to that point. I start by identifying the takeaway---that one nugget that I want to implant before thanking everyone for their time---and I work in reverse to figure out how best to get there.
Your mileage, of course, may vary. But it's always going to be a good idea to put in the time in the beginning stages so that you aren't reworking large portions of the presentation later. And that starts with a defined goal.
A slideshow isn't supposed to include everything. It's an introduction to a topic, one that we can elaborate on with speech. Anything unnecessary is a distraction. It makes the presentation less visually appealing and less interesting, and it makes you look bad as a presenter.
This goes for text as well as images. There's nothing worse, in fact, than a series of slides where the presenter just reads them as they appear. Your audience is capable of reading, and chances are they'll be done with the slide, and browsing Reddit, long before you finish. Avoid putting the literal text on the screen, and your audience will thank you.
Related: How to Burn Your PowerPoint to DVD
Right off the bat, we're just going to come out and say that Papyrus and Comic Sans should be banned from all PowerPoint presentations, permanently. Beyond that, it's worth considering the typeface you're using and what it's saying about you, the presenter, and the presentation itself.
Consider choosing readability over aesthetics, and avoid fancy fonts that could prove to be more of a distraction than anything else. A good presentation needs two fonts: a serif and sans-serif. Use one for the headlines and one for body text, lists, and the like. Keep it simple. Veranda, Helvetica, Arial, and even Times New Roman are safe choices. Stick with the classics and it's hard to botch this one too badly.
There reaches a point where bullet points become less of a visual aid and more of a visual examination.
Bullet points should support the speaker, not overwhelm his audience. The best slides have little or no text at all, in fact. As a presenter, it's our job to talk through complex issues, but that doesn't mean that we need to highlight every talking point.
Instead, think about how you can break up large lists into three or four bullet points. Carefully consider whether you need to use more bullet points, or if you can combine multiple topics into a single point instead. And if you can't, remember that there's no one limiting the number of slides you can have in a presentation. It's always possible to break a list of 12 points down into three pages of four points each.
Animation, when used correctly, is a good idea. It breaks up slow-moving parts of a presentation and adds action to elements that require it. But it should be used judiciously.
Adding a transition that wipes left to right between every slide or that animates each bullet point in a list, for example, starts to grow taxing on those forced to endure the presentation. Viewers get bored quickly, and animations that are meant to highlight specific elements quickly become taxing.
That's not to say that you can't use animations and transitions, just that you need to pick your spots. Aim for no more than a handful of these transitions for each presentation. And use them in spots where they'll add to the demonstration, not detract from it.
Sometimes images tell a better story than text can. And as a presenter, your goal is to describe points in detail without making users do a lot of reading. In these cases, a well-designed visual, like a chart, might better convey the information you're trying to share.
The right image adds visual appeal and serves to break up longer, text-heavy sections of the presentation---but only if you're using the right images. A single high-quality image can make all the difference between a success and a dud when you're driving a specific point home.
When considering text, don't think solely in terms of bullet points and paragraphs. Tables, for example, are often unnecessary. Ask yourself whether you could present the same data in a bar or line chart instead.
Color is interesting. It evokes certain feelings and adds visual appeal to your presentation as a whole. Studies show that color also improves interest, comprehension, and retention. It should be a careful consideration, not an afterthought.
You don't have to be a graphic designer to use color well in a presentation. What I do is look for palettes I like, and then find ways to use them in the presentation. There are a number of tools for this, like Adobe Color , Coolors , and ColorHunt , just to name a few. After finding a palette you enjoy, consider how it works with the presentation you're about to give. Pastels, for example, evoke feelings of freedom and light, so they probably aren't the best choice when you're presenting quarterly earnings that missed the mark.
It's also worth mentioning that you don't need to use every color in the palette. Often, you can get by with just two or three, though you should really think through how they all work together and how readable they'll be when layered. A simple rule of thumb here is that contrast is your friend. Dark colors work well on light backgrounds, and light colors work best on dark backgrounds.
Spend some time in the Slide Sorter before you finish your presentation. By clicking the four squares at the bottom left of the presentation, you can take a look at multiple slides at once and consider how each works together. Alternatively, you can click "View" on the ribbon and select "Slide Sorter."
Are you presenting too much text at once? Move an image in. Could a series of slides benefit from a chart or summary before you move on to another point?
It's here that we have the opportunity to view the presentation from beyond the single-slide viewpoint and think in terms of how each slide fits, or if it fits at all. From this view, you can rearrange slides, add additional ones, or delete them entirely if you find that they don't advance the presentation.
The difference between a good presentation and a bad one is really all about preparation and execution. Those that respect the process and plan carefully---not only the presentation as a whole, but each slide within it---are the ones who will succeed.
This brings me to my last (half) point: When in doubt, just buy a template and use it. You can find these all over the web, though Creative Market and GraphicRiver are probably the two most popular marketplaces for this kind of thing. Not all of us are blessed with the skills needed to design and deliver an effective presentation. And while a pre-made PowerPoint template isn't going to make you a better presenter, it will ease the anxiety of creating a visually appealing slide deck.
Top 15 PowerPoint Tips and Tricks for Engaging Presentations
Link Copied
Share on Facebook
Share on Twitter
Share on LinkedIn

Unleash Your Inner Slide Jedi!
PowerPoint is a powerful and the most trusted tool for creating presentations and visual aids that can help you effectively communicate your message. However, it's essential to prevent common hitches that can lower the impact of your presentation. In this blog post, we will share 15 best PowerPoint tips and tricks to help you create engaging and effective presentations that captivate your audience from start to finish.
Top15 Powerpoint Tips and Tricks
A good PowerPoint presentation is really important because it serves as a visual aid that enhances the significance of your message. It provides a platform for organising and presenting information in a clear, concise, and engaging manner.
1. Keep it Simple and Concise
One of the most crucial PowerPoint tips is to keep your slides simple and uncluttered. The main aim here is to deliver a message as easily as possible. Do not insert a lot of content, especially long paragraphs. Minimalistic content Simplicity allows your audience to focus on your key message without distractions. Keep pointers or short phrases to highlight your main points, keeping the text concise and easily readable.
2. Use High-Quality Visuals
Another helpful Powerpoint tips and tricks is to focus on the visuals. Apart from content, there should also be a visual theme throughout the presentation in order to keep it captivating. There are several enticing templates available on Microsoft PowerPoint. Making use of the 'Arrange' feature ensures the proper alignment of objects. Avoid generic stock images that don't add value to your content.
3. Know Your Audience
This is one of the most important PowerPoint presentation tips. It is important to resonate with your audience, and in order for that to happen, curate your presentation according to the audience's knowledge of the subject. Meaning prepare your presentation according to the subject knowledge base inherited by the audience. Do not go all rocket science with a topic for a beginner-level audience. Customise it to be more engaging and intriguing.
4. Emphasise Key Points with Infographics
One of the cool PowerPoint tricks is the glory of infographics. The addition of infographics is a useful way to illustrate complex information in a visually attractive and easy-to-understand form. Utilise charts, graphs, and diagrams to showcase data, statistics, or processes. Infographics make your content more engaging and memorable, enabling your audience to grasp information quickly.
5. Embed Your Fonts
An informative PowerPoint tip is to embed fonts that are downloaded from a third-party source. The simple reason behind this is PowerPoint tends to replace foreign fonts with default fonts if not downloaded. This will completely change the layout of your presentation. To embed fonts, go to Files<Options<Save<Preserve Fidelity when sharing this presentation<Embed fonts in the file.
6. Track Changes
Following our list of PowerPoint tips and tricks is the track changes feature. Turning on the Track Changes features ensures a smooth collaboration among team members. It is a way to keep a record of all activities that occurred on the slides. One can also leave comments alongside slides for their teammates to make edits for a perfect presentation.
7. Choose Suitable Slide Transitions
One of the best PowerPoint presentation tips is to use smooth transitions between slides. One can use transitions to create seamless and professional transitions that guide your audience's attention. It is completely up to the user to manage the slide transition, but using too many can create distraction. You may more effectively manage the amount of information you provide to your audience at once by employing a couple for each slide. Explore our blog on Google slide hacks to help you create impactful and memorable presentations that captivate your audience.
8. Optimise Font Choices and Consistency
The choice of font has a big impact on how readable and visually appealing your presentation is overall. Select readable typefaces that are easy to see at a distance. To guarantee a unified and professional appearance, stick to a font scheme of no more than two or three throughout your presentation. One of the most basic yet powerful PowerPoint tips.
9. Leverage Color Contrast
In order to ensure readability and visual impact, colour contrast is crucial. Choose contrasting colours for the backdrop and text to make the content easy to read. Refrain from employing eye-straining colours that clash or are extremely bright. A carefully considered colour scheme improves the overall appearance and aids in efficiently communicating your message. Isn't it among the cool PowerPoint tricks?
10. Make the Presentation More Convenient
Next on our list of PowerPoint tips and tricks is convenience. The convenience PowerPoint provides is that one can easily convert the Berenstain into a PDF document. Professionals who are unable to attend your event in person may occasionally express interest in your presentation. Next, you can send the files by email or post this PDF for download on a website. Additionally, you may export your presentation as a video that viewers can see whenever it's convenient for them.
11. Incorporate Audio and Video
Your presentation's degree of engagement can be raised by including audio and video components. As one of the creative PowerPoint tips and tricks, one can make smart use of them to support writing or offer instances from real-world situations. On the other hand, pay attention to file sizes and make sure the video and audio are excellent and pertinent to your subject.
12. Rehearse and Time Your Presentation
Perfectionism is attained with practice. Practice your presentation several times to make sure you deliver it smoothly and on schedule. Despite being one of the common PowerPoint presentation tips, maintaining your audience's interest and making sure you cover all the important issues without rushing are dependent on timing. Explore more by pondering our blog on PowerPoint presentation tips to get your aims and ideas across to the audience smoothly.
13. Utilise Speaker Notes
Speaker notes are an invaluable tool to help you stay on track during your presentation. They act as a script or outline, reminding you of key points, transitions, and supporting details. Utilise speaker notes to maintain a confident and organised delivery, ensuring you cover all essential aspects of your presentation.
This is Your Only Tip to Score the Perfect Student Accommodation!
Book your student accommodation through amber today!
14. Utilise a Remote Control
If at all feasible, move your slides forward with a remote control. This gives you the freedom to walk about, interact with the audience, and keep eye contact. Using a remote control gives your presentation a more dynamic and engaging delivery overall. Isn't it one of the cool PowerPoint tricks?
15. Seek Feedback for Continuous Improvement
One of the most important PowerPoint tips and tricks is not to be hesitant to ask for criticism of your presentation. Feedback offers insightful viewpoints and useful insights that assist you in identifying areas that require further development and improvement. Accept helpful criticism to improve your presenting abilities and produce future presentations that are even more captivating and powerful.
Incorporating these 15 best PowerPoint tips and tricks will empower you to create engaging and effective presentations that captivate your audience. By keeping your slides simple, utilising high-quality visuals, and maintaining a consistent design, you can deliver a memorable presentation that effectively communicates your message. Lastly, explore our webstory on the top 8 presentation tools for students to get introduced to some life-changing presentation tools that will boost your creativity and imagination.
Frequently Asked Questions
What is the 555 rule in powerpoint, how can i improve my ppt, how can i improve my powerpoint presentation skills over time, what is the golden rule of ppt, how to start a presentation.
Your ideal student home & a flight ticket awaits
Follow us on :

Related Posts

How to Become a Tutor as a Student?

UCAS Appliation 2024: Latest Updates On Application & Deadline
.jpg)
Career Mapping: What is it and how to do it?

Planning to Study Abroad ?

Your ideal student accommodation is a few steps away! Please fill in your details below so we can find you a new home!
We have got your response

amber © 2024. All rights reserved.
4.8/5 on Trustpilot
Rated as "Excellent" • 4800+ Reviews by students
Rated as "Excellent" • 4800+ Reviews by Students
Utility Menu
- Contact Sales
- GoTo Connect
- GoTo Meeting
- GoTo Webinar
- GoTo Training
- Products In Practice
- 10 PowerPoint Tricks For Wow-Worthy Presentations - GoToWebinar
10 PowerPoint tricks for wow-worthy presentations

As a business professional, you’ve probably dabbled in the art of PowerPoint. And if you host webinars regularly, I’m sure you’ve picked up a few tricks to spice up your presentations and make them more engaging too.
Whether you’re a PowerPoint newbie or an emerging pro, here are 10 cool PowerPoint tips and tricks you’ll want handy for your next presentation.
POWERPOINT BASICS EVERYONE SHOULD KNOW
1. Don’t settle for the basic, built-in PowerPoint templates
PowerPoint templates make your lives easier. Templates mean you don’t have to design everything from scratch. Just select your layout, add your content, make a few edits here and there, and you’re done. So why not use the basic templates in PowerPoint? In case you’ve forgotten what they look like, here’s a refresher:

Millions of people have used these templates in their presentations. If you don’t want your presentation to look like a copy-paste, stay away from the built-in templates.
The good news is there are other free and premium templates out there beyond the ones Microsoft provides. In fact, at 24Slides.com , you can download premium templates for free. These PowerPoint designers understand the psychology behind effective presentations, and you can borrow from the best.
2. Use Format Painter to save time
Format Painter does one thing and one thing only: it saves you time. Tons of it, in fact. Here’s where you find this nifty time-saver on your PowerPoint ribbon:

If you’ve ever tried copy and pasting one element’s format to many other elements on the same slide, or on 100 other slides, you know how time-consuming the process is.
Without Format Painter, formatting elements goes something like this:
- Format one element and remember all the different settings.
- Format the second element and then try to remember all the settings from the first element.
- Look at the clock and realize you’ve wasted 10 minutes.
With Format Painter, however, all you do is:
- Click the first element.
- Hit Format Painter.
- Click the second element.
That’s it! If you want to copy the first element’s format and paste into more than one element, just double-click Format Painter and click each element you want to format one by one. When you’ve formatted all the elements, hit ESC on your keyboard. It’s that easy.
POWERPOINT ANIMATION TRICKS
3. Animate a flowchart to make it come alive
Flowcharts are a great way to display complex information. However, you may not want to show an entire flowchart at once. Instead, you want each point to appear at the right time so you can discuss each point verbally.
Here’s how you animate a flow chart in PowerPoint:

- Click the first element, point, or process in your flowchart. Then select an animation from the Animations tab.
- Define each element’s animation and timing settings.
- You can also open the Animations Pane to view and adjust your animation settings.
- Repeat steps 1 and 2 for all elements in your flowchart. Make sure you preview the whole flowchart animation and edit as necessary.
4. The Zoom feature for Office 365 subscribers
If you have an active Office 365 subscription, you can use the Zoom feature on the insert tab. As you can see in the screenshot below, there are three Zoom options:
- Summary Zoom
- Section Zoom

The Zoom feature is great when you want to jump from one section or slide to another. Let’s say you want to go from Slide 10 to Slide 55. In a regular PowerPoint presentation, you’d have to go through slides 11 to 54. But with Zoom, you can instantly go from slide 10 to 55 before your audience has a chance to lose interest. Of course, you’d have to plan ahead and know which slide you want to skip to.
The Summary Zoom feature creates a summary slide which is similar to a ‘table of contents’ for your slides. You can insert this summary slide anywhere you want, it doesn’t have to be the first slide in your presentation.
The Section Zoom feature allows you to jump from one section to another, while the Slide Zoom feature allows you to jump to any slide in your presentation.
EVEN MORE POWERPOINT TRICKS FOR ADVANCED USERS
5. Use a video background for your slides
We’ve all used background images on PowerPoint, but did you know you can also use a video as a background?
Simply drag and drop your video on to your slide and resize it to cover the entire slide. If you’re short on video, go to Coverr.co for free stock videos.
If your video is only a few seconds long, and won’t last the length of your slide’s discussion, just loop it. To loop your video:
- Click the video to access the Video Tools menu, then click the Playback tab.
- Check Loop Until Stopped.

With your video background in place, you can add shapes, texts, or any other elements you want to use as your slide’s foreground.
6. Make global changes to your presentation
Editing your slides one by one is super time-consuming. If you want to change your entire presentation’s look, go to the Design tab and choose from the available themes in the Themes section.

However, if you want more control over the colors and fonts, go to the Variants section (still in the Design tab). Click the drop-down to display color and font settings.

You can play around with the different settings – you can use custom colors and fonts to your heart’s content – to achieve the look you want for your presentation.
Lastly, if you want to add a logo, company tagline, or website address to all slides, go to View > Slide Master. To insert elements you want to appear on all your slides, simply click on the Insert tab and insert the elements you want to appear globally.
7. Embed fonts in your presentation
Make sure your custom or branded fonts are in PowerPoint. If your fonts aren’t installed on the computer you use to run your presentation, PowerPoint will automatically replace your font with a default font and mess up your alignment and the overall look of your presentation.
Here’s how you do it:

- Go to File > Options > Save.
- Go to the section, ‘Preserve Fidelity when sharing this presentation’ then tick on the ‘Embed fonts in the file’ box.
- You’ll have two options here. You can either (1) embed only the characters used in the presentation, or (2) you can embed all characters if you want other people to edit the file too.
- Hit the OK button.
8. Create your own icons in PowerPoint
You can download free icons from sites like IconStore.co or even from 24Slide’s Template site (you’ll find icons in the ‘Other’ category).
If you have an Office 365 subscription, you can insert an icon straight from your PowerPoint ribbon. Go to Insert > Icons and browse hundreds, if not thousands, of free icons.
But when you want to use something unique — and you have the time and the creativity — you can do it on PowerPoint using Shapes.
To begin, go to Insert > Shapes. If you have two or more shapes, click on them and the following options will appear in Drawing Tools > Merge Shapes: Union, Combine, Fragment, Intersect and Subtract.

Play around with the different options and let your creativity run wild. You’ll soon have a library of your own unique icons which you can then use in your presentations.
9. Work with multiple images on a single slide
Working with multiple images on one slide is tricky if you’re manually moving, reshaping, and resizing each image by hand. Luckily for you, PowerPoint has a powerful trick.
Hit CTRL+A on your keyboard to highlight all the images. Now you can access the hidden Picture Tools menu. Click on Format > Picture Layout and select the layout you want to use.

Once you’ve selected your layout, your images will be converted to a SmartArt graphic. Now you can rearrange your images. However, it will still behave like a SmartArt graphic.
To disable SmartArt properties, you need to re-convert the graphic back to Shapes. Simply click the graphic to access the SmartArt Tools menu, click on Design > Convert > Convert to Shapes.

POWERPOINT PDF Tricks
10. Save your PowerPoint presentation as a PDF
Sometimes you may want to preserve your PowerPoint format and layout and have it viewed as a PDF. You have two easy ways to do it:
- Option 1. Go to File > Save As. Choose the location where you want to save your file. In the Save as type drop-down, choose PDF.
- Option 2. Go to File > Export > Create PDF/XPS Document.

Final Thoughts
There are hundreds of tricks you can do on PowerPoint. But the 10 PowerPoint tricks covered in this article will help you improve your presentation design skills. You can finally bid adieu to ‘death by PowerPoint’ and start wowing your audience with your awesome presentations.
Top 25 Microsoft PowerPoint Tips and Tricks You Need to Know
Microsoft PowerPoint is a very useful tool to help with a presentation. It provides a high impact medium to help you get the main thrust of your presentation across to your audience.
A presentation consists of a number of slides, showing information about each topic that you are talking about. This gives structure to your presentation, and it also acts as a prompter to remind you of what you should be talking about, so that you do not miss off a topic.
The slides can be easily printed out to give to the audience as handouts. The audience may easily forget various topics, and a handout of the slides enables them to refer back afterwards.
These points cover not only ways to do things when setting up your presentation, but also general information to help get your points across. The first four tips are all about how to make your presentation amenable to your audience, whereas the rest are to do with creating your slides.
Do Not Put Too Much Information on a Slide
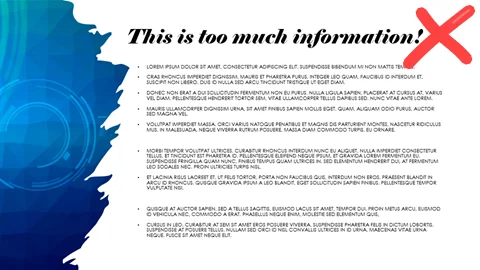
A common mistake that is made is that too much information is placed on a slide.
The audience will be too busy trying to read it all and will not concentrate on what you are saying.
The other problem here is that the more information that you put onto a slide, the smaller the font point size that you have to use. Even when shown onto a big screen, small text can be very hard to read, especially for people sitting at the back.

The slide should show a skeleton of information which you can then talk around and elaborate on.
Turn your slide into bullet points , and use animations to make each point appear one by one. This way, the audience cannot ‘read ahead’ and lose focus on what you are saying.
Choose Your Color Scheme Carefully

The color and format of each slide is very important. Each slide needs to be consistent in design, otherwise the presentation will end up looking like a hotchpotch of material.
Do not overdo the colors on each slide. A blaze of color might look magnificent, but it is extremely distracting to the audience.
Make sure that the text on a slide is readable, even from a distance. Make sure that someone sitting in the back row can read it.
Choose the text color with sufficient contrast so that it stands out from the background. White lettering on a gray background does not work! Black text on a white background may seem boring, but the task is to get your message across.
Position Yourself Facing The Audience

PowerPoint presentations are usually done on a laptop, with output going to a large screen.
Use the F3 key (depending on laptop) to display the presentation both on the big external screen and the laptop screen. You can also use Windows Key + P to do this.
When giving your presentation, you can then sit to one side of the big screen with your back to it with the laptop in front of you.
You can keep your focus on the audience without having to keep turning round to see what the big screen is showing and where you are in the presentation.
If an audience member asks a question, you can easily answer it without having to lose eye contact with the questioner.
Always do a Complete Rehearsal Before Hand

As in any presentation, it is important to run through your presentation in the environment that you will be using to make sure that nothing will go wrong.
If possible, use your colleagues to form a sample audience, and get them to sit as far away as possible, so they can highlight anything that is not getting through to them. Another pair of eyes is always useful!
With a presentation, you only get one chance to run it, so you need to ensure that everything is right first time.
Having a rehearsal also helps you see how the presentation works and gets you into a rhythm of working with each slide.
You may also have a time constraint on how long the presentation should run, and this will give you the chance to edit if you look like over running.
Use PowerPoint Templates

PowerPoint has a number of stock templates which can be used as the basis for your presentation. These have already been prepared to show your text in the best possible way.
To access the templates, click on File to go backstage, and then click on New in left-hand pane of the screen.
You can select templates in various categories by clicking on the individual words in the Suggested Searches
Use Animations to Display Text as Needed
If a slide appears in your presentation which has several points already on it, the audience is in danger of reading ahead of you, and missing out on what you are saying about each point.
You can keep the text hidden until you click the mouse, and then it will magically slide onto the slide, keeping pace with your dialogue.
To animate text, select the text to be animated first of all.
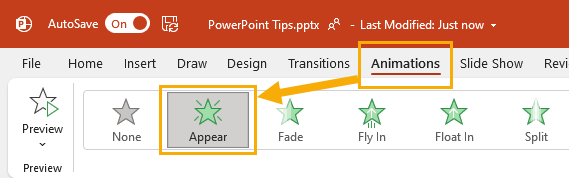
Click on Animations in the ribbon and then select how you want to see your text appear on screen using the Animation group.
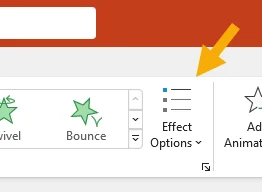
The Effect Options icon gives you extra choices as to how you want to see the text appear. For example, you can have text appear from the top or the bottom.
Move Backwards in a Presentation
When you are doing a presentation and clicking the mouse to bring on each slide or animation, you can easily click twice by mistake, and your presentation moves forward before you have had time to talk about the slide.
This is very easily done, particularly if you are nervous about presenting.

This can be embarrassing, but it can easily be remedied. Simply press SHIFT + P and this will take you back one step. Hopefully, the audience will not notice what has happened!
You may also need to go back to a slide if an audience member asks a question that relates to a previous slide.
Print Presentation with Space for Note Taking
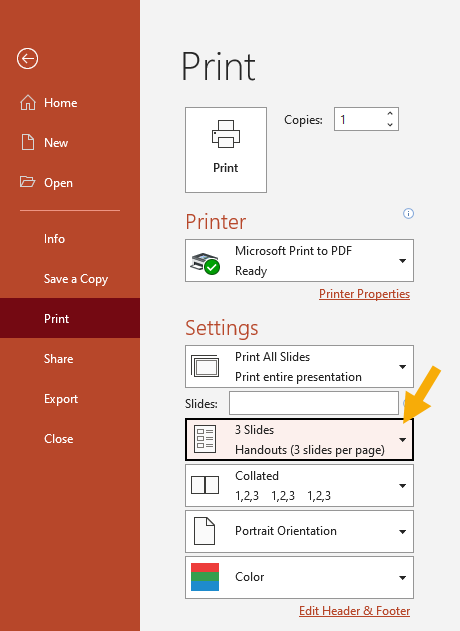
You can print out all the slides in your presentation by pressing CTRL + P . This will give you options for printing, and you can print multiple copies.
This is ideal for distributing handouts to your audience. They may wish to manually add notes to each slide, or just use it as a reminder.
Choose the 3 slides per page option to give people space to take their own notes.
See all Slide Show Shortcut Keys
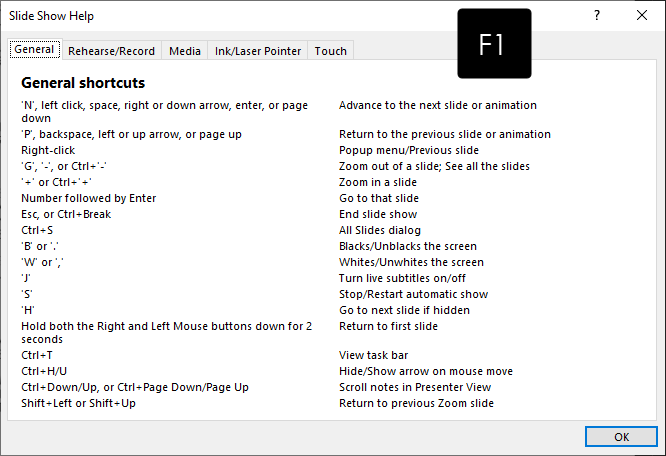
When the presentation is running, press F1 and a pop-up window will be displayed showing shortcut keys to control the appearance of the presentation.
Draw on Your Slides While Presenting
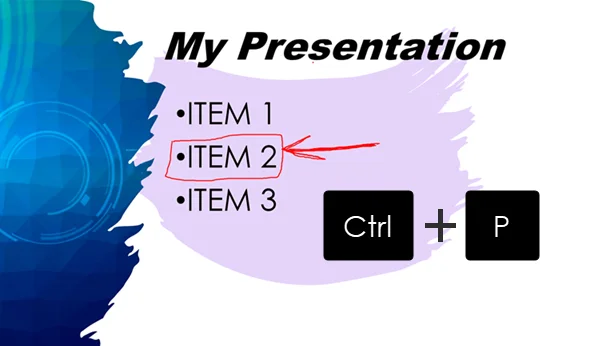
You might need to highlight or emphasize a point during a presentation which you had not anticipated when preparing your slides.
Luckily can draw on your slides during a presentation by pressing CTRL + P . This will change the cursor to a pen dot (not to be confused with the printing shortcut tip).
Insert a Chart
Charts are a very good way of conveying information quickly, and they can be made to look interesting with different chart types and colors.
Charts can be copied directly from Excel and pasted onto a slide.
Interestingly, the chart is a linked object, and will be automatically updated when the host Excel chart data changes. However, this could lead to problems if the host Excel file is deleted or is moved to another location.

You can also insert a chart into a slide by selecting Insert on the ribbon, and then clicking on the Chart icon in the Illustrations group. This will display a pop-up window which will allow you to select the chart type.
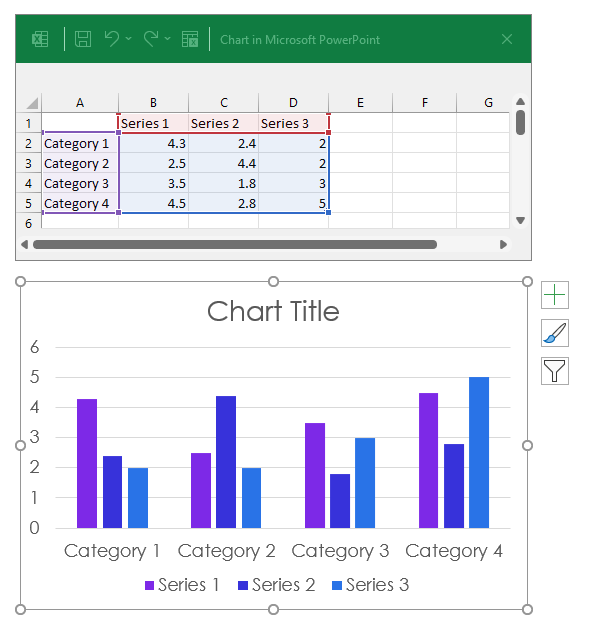
The chart will then be displayed on the slide and an Excel spreadsheet style grid is also shown. You can paste data into the grid from other sources, such as an Excel spreadsheet, or you can enter it manually.
The highlighted area in the data grid represents the chart data area. This is automatically filled with sample data, but you can use it like a spreadsheet to add your own data.
Use the Shift Key When Inserting Shapes
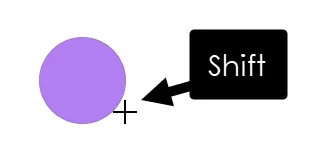
When inserting a shape (such as a line, a square, or a circle) onto a slide, it can end up being not quite how you want to see it. For example, your line could end up not quite straight, or your circle could end up as an oval.
When you insert a shape and you go to draw the shape on the slide, hold down the SHIFT key and then draw it. This will produce a straight line, or a perfect circle.
Use Transitions
You can create some very spectacular special effects when the presentation moves to the next slide by using Transitions .
You can make an object like a shape, picture or text change to a different size or shape, but to do it as if it appears to be squashed into the new shape.
This requires several steps to set this up:
- Create two new blank slides
- On the first slide insert a shape ( Insert on the ribbon and then Shape in the Illustrations group). Choose a rectangle or a trapezium or any other shape that you wish to use.
- On the Home tab of the ribbon, click on the Select icon in the Editing group, and click on Selection Pane in the drop-down window that appears.
- A pane will appear on the right-hand side of the screen showing your new shape. Double click on the shape name and edit it to !!Shape . The name must have two exclamation marks at the start of it.
- On the second blank slide, repeat the process of inserting a new shape and renaming it. Edit the name to !!Shape using exactly the same name as for the shape on the first slide.
- Click on the new shape on the second slide and select the Transitions tab from the ribbon. Select the Morph icon in the Transition to This Slide group.
- Run the presentation. You will see that when you move from slide 1 to slide 2, your first shape transforms to the second shape in stages.
This is a very amazing effect, and is bound to help keep your audience interested.
Insert a Picture
You can easily insert a picture onto a slide. This could be a picture of a company building or product. It could also be a company logo, which would provide a corporate identity throughout the presentation.
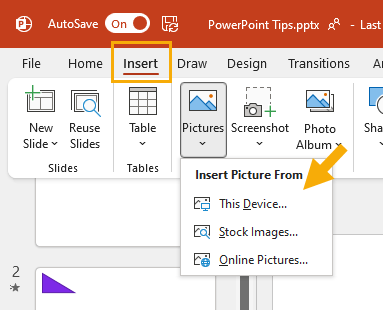
Select the Insert tab on the ribbon and then choose Pictures in the Images group. Select Online Pictures in the drop-down. If you want to inset a picture from your PC, select This Device in the drop-down and a file browser will be displayed.
This will display all the types of pictures found, such as planes, animals, etc. Click on your type and then select a picture from the subsequent display.
Images found online might be copyrighted and you might not have the right to use them. Use the Stock Images option when inserting an image to use royalty free images provided by Microsoft.
The picture will then appear on your slide in rectangular format.
You can change the shape of the picture by using the Crop feature.
Click on the picture and you will be in the Format tab of the ribbon. Click on the Crop icon in the Size group and click on the Size to Shape option in the drop-down.
This will display a pop-up menu of shapes. Click on the required shape like a circle, and your picture will now appear as an oval.
Remove the Background from a Picture
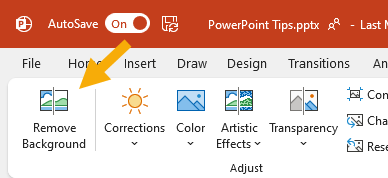
This is a very handy function which will allow you to remove the background from a picture and just leave the main object.
This process has several steps to it:
- Create a new blank slide
- Insert a picture as detailed in tip 13 above
- Click on the Picture Format tab in the ribbon and click on Remove Background on the far left of the ribbon
- This will remove most of the background, but some may still be there
- Click on Mark Areas to be Removed in the ribbon. The cursor will change to a pen
- Use the pen to mark further areas to be removed
- However careful you are, some areas may be removed that you want to keep. If this happens, click on Mark Areas to Keep in the ribbon, and use the pen cursor to define the removed part of the image. This will then be re-instated.
A big advantage of this methodology is that you can copy and paste your new image into another application.
Record Audio
You can add an audio commentary on to your slides. This would be helpful if the presentation is not being given to a general audience, but is being individually distributed to audience members by email.
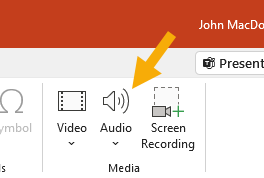
Click on Insert tab in the ribbon, and then click on Audio in the Media group of the ribbon. Select Record Audio from the drop-down list.
A pop-up window will appear. Click on the red record button and speak your message. Click on the blue square to stop the recording.
Click OK , and an audio logo will appear on your slide in the middle of the slide. You can select the audio logo and drag it to a different place on the slide if you wish to make it less obtrusive.
When the slide is played, recipients will hear your message.
Insert a Video Clip
You can add a video clip to a slide. This could be a short message from the CEO, or an endorsement from a satisfied customer.
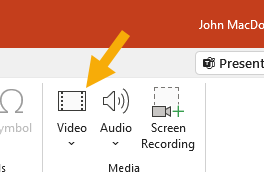
Click on the Insert tab in the ribbon and click on Video in the Media group of the ribbon. Select Video on My PC from the drop-down list. This will display a file browser which will allow selection of a huge number of video file types.
Select a file and click OK . The video will be added to the slide and will automatically play when the slide is presented.
Layering Objects
As objects such as shapes, pictures, or text are added to a slide, they are effectively layered, so that an object may partially obscure another object.
This may not be how you want to see these objects, and you wish to change the order in which they are layered.
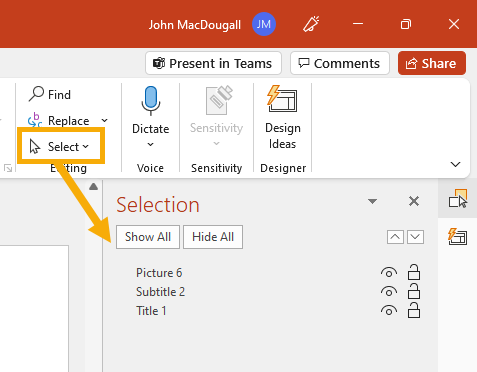
Click on the Home tab of the ribbon, and then click on Select in the Editing group of the ribbon and select choose Selection Pane from the options.
A list of objects on the slide will be displayed in the order that they are layered.
To change the layering order, simply click on the object name in the selection pane, and drag it to the top of the list. This will instantly change the order and will be reflected on the slide.
Spell Checking
Checking the spelling on a presentation is very important. You do not want to be let down by obvious mistakes in front of an audience.
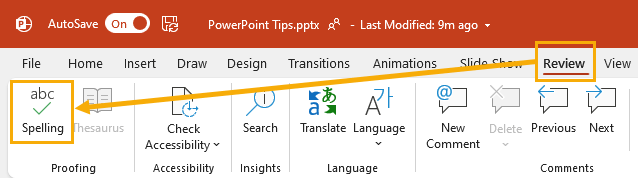
Click on the Review tab in the ribbon and then click on Spelling in the Proofing group of the ribbon.
This will check through all the slides in the presentation, and display possible corrections in the spelling pane on the right-hand side of the slide.
Creating Symbols on a Slide
Where you are using text on a slide, you can type in a certain sequence of characters to get a specific symbol
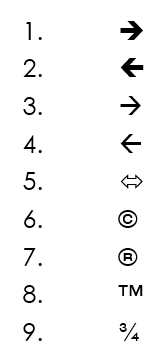
- Two equals signs ( = ) followed by a greater than sign ( > ) will produce a large arrow pointing to the right.
- A less than sign ( < ) followed by two equals signs will produce a large arrow pointing to the left.
- Two hyphens ( – ) followed by a greater than sign ( > ) will produce a smaller arrow pointing to the right.
- A less than sign ( < ) followed by two hyphens ( – ) will produce a smaller arrow pointing to the left.
- A lesser than sign ( < ) followed by an equals sign ( = ) followed by a greater than sign ( > ) will give a double arrow.
- An opening bracket followed by followed by a closing bracket (c) will give a copyright symbol.
- An opening bracket followed by followed by a closing bracket (r) will give a registered symbol.
- An opening bracket followed by followed by a closing bracket (tm) will give a trade mark symbol.
- To insert a fraction, type the fraction like this 3/4 and then press the space bar.
Protect Your Presentation
If you are distributing your presentation to individual audience members by email, you may want to stop them making changes.
If the presentation is for an audience environment and is saved to a public folder, you may also want protection on it.
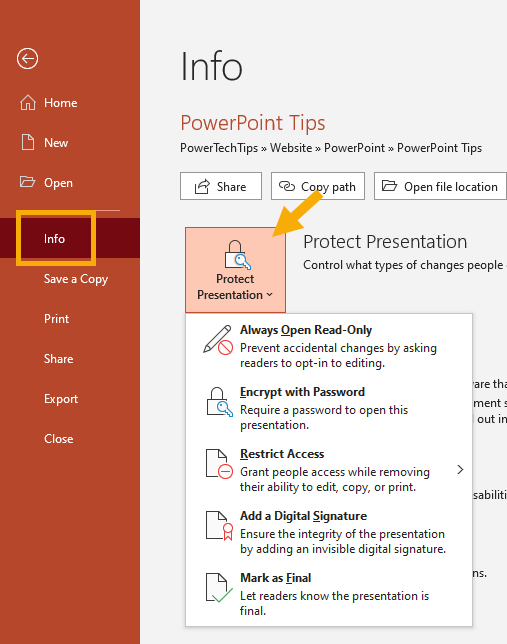
To access the protection settings, you click on File on the ribbon and then select Info from the menu on the left-hand side of the screen.
Adding Comments to a Slide
There may be more than one person creating the presentation, and it is handy to set up a means of communication between the multiple authors as to why they have done something on a slide.
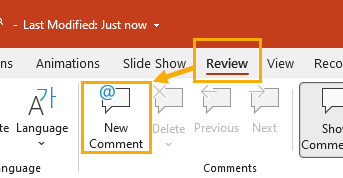
You can add a comment attached to a specific element of the slide like a text box, picture or icon by selecting it and then clicking on Review in the ribbon, and then clicking on New Comment in the Comments group.
This will open the Comments pane on the right-hand side of the slide, and a text box will appear to allow you to enter your first message.
You then close the Comments pane, and other authors can view your comment by clicking on the Comment icon in the top-left hand corner of the slide. They can then add a reply so that a trail of discussion builds up.
The Comments icon does not form part of the presentation and will not appear.
@ Mention a User in a Comment
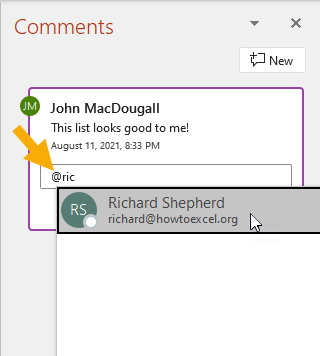
If your PowerPoint file is saved in SharePoint then you will be able to mention your colleagues in comments.
Type an @ symbol and then start typing their name. Select the person you want to mention from the list after typing out the first few letters of their name.
The person mentioned will get an email notification that they were mentioned with a link to the file so they can open it and respond.
Shortcut Keys
Shortcut keys are very useful when you do not want to go through all the menu steps on the ribbon. This is a list of the main ones, but it is not exhaustive.
Use the Eyedropper
You can use this useful function to copy background colors from different objects like another shape or text.
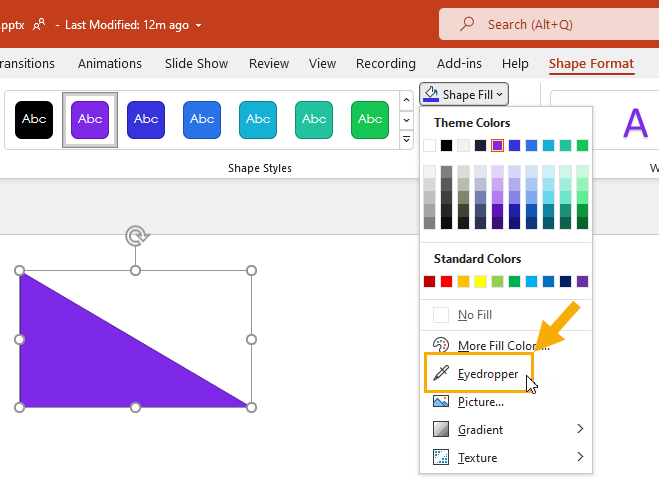
A simple example is to insert two shapes onto a slide. Set them to different background colors by right clicking on each shape and selecting Format Shape from the pop-up menu.
Click on the first shape and then click on Shape Fill in the Drawing group of the Format ribbon.
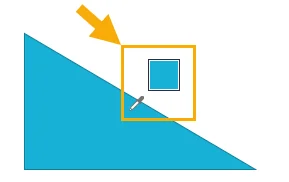
Click on EyeDropper in the drop-down menu and a small square box will appear. Drag this box around the slide. You will notice that as it moves it picks up the color of what is hovering over.
When you find the right color, press RETURN and the background color of the first shape will change to the selected color.
Align Objects
When you add objects such as shapes, pictures, or text to a slide, they may not be very neatly aligned. This makes the display look ragged and unprofessional.
To solve this, select all the objects to be aligned by dragging the cursor across.
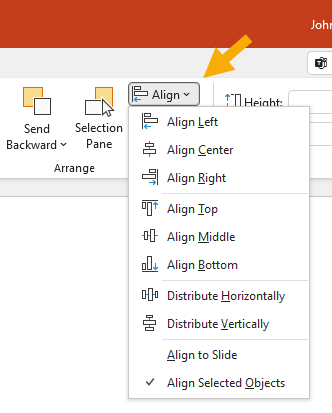
A Shape Format tab will now appear in the ribbon. Click on the Format tab and then click on Align in the Arrange group of the ribbon, and a drop-down will be displayed with options of how you want the objects aligned.
Once you have selected the required option, the slide will be updated and the objects will be properly aligned.
Using Gridlines
You can switch on gridlines on your slide to help you with aligning and shaping objects.
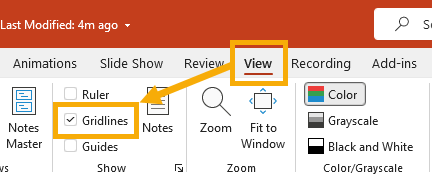
Click on the View tab in the ribbon, and then check the box for gridlines in the Show group of the ribbon. The slide will display gridlines to help with alignment, size and shape.
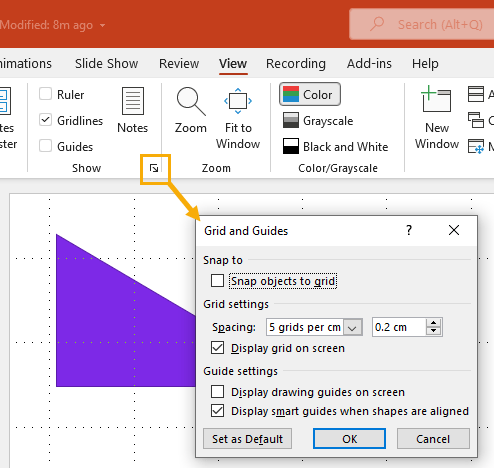
By clicking on the small arrow in the bottom right-hand corner of the Show group in the ribbon, you will get options to change the size of the grid, and also to use the grid as a snap grid so that objects will line up perfectly against the gridlines.
The gridlines are not visible when the slide is presented.
PowerPoint is an enormously flexible tool not only for producing an exciting and professional presentation, but also in terms of what can be achieved with graphics and video.
A lot of these tips and tricks are not necessarily apparent to the user, but they can save a lot of time and produce a really professional presentation.
Hopefully, it will inspire you to create a presentation that gets your message across to the audience in an outstanding way.
About the Author

Richard Shepherd
Subscribe for awesome tech videos 😃
- Microsoft SharePoint Tips
- Microsoft OneNote Tips
- Microsoft PowerPoint Tips
- Microsoft Outlook Calendar Tips
- Microsoft Forms Tips
- Microsoft To Do Tips
- Microsoft Outlook Online Tips
- Microsoft Power Automate Tips
- Microsoft Word Tips

Related Articles

26 Amazing Microsoft To Do Tips and Tricks You Need to Know
Dec 6, 2021
Not everyone loves to be organized. But it's the key to being successful. Most of us forget small things such as...

25 Microsoft Forms Tips and Tricks
Sep 21, 2021
Microsoft Forms gives users the power to easily create questionnaires, surveys, polls, and quizzes. These can be sent...

25 Outlook Calendar Tips and Tricks
Sep 9, 2021
Outlook is renowned for being among the most popular email clients, but integrated within it is a calendar that can...

Hi Richard, good tips for PPTx. I have a couple of macros in PPTm, using good old VBA. If I open macros.pptm while editing a file.pptx then I can use those macros from the custom toolbar. Give me your email so U can share my macros. Thanks, Phil

Thanks for the update on PowerPoint presentation. It is very educative and interesting.
Get the Latest Tech Tips
Write for us.
Are you a tech enthusiast with a talent for writing great content? Come write for us!
Follow us on social media to stay up to date with the latest in tech!
10 Cool PowerPoint Tips and Tricks You (Probably) Didn’t Know About
PowerPoint is a versatile tool capable of many amazing tasks. It has lots of great features but unfortunately, most users aren’t even utilizing half of the software’s capabilities.
Today, we’re going to change that. In this guide, we share some of the best PowerPoint tips and tricks for doing cool things with the presentation maker.
You’ll learn cool tricks like inserting QR codes in PowerPoint slides, converting presentations to videos, removing the background of images, and much more.
These PowerPoint tips will not only allow you to design presentations more easily but they will also help impress your audience. Let’s dive in.
2 Million+ PowerPoint Templates, Themes, Graphics + More
Download thousands of PowerPoint templates, and many other design elements, with a monthly Envato Elements membership. It starts at $16 per month, and gives you unlimited access to a growing library of over 2,000,000 presentation templates, fonts, photos, graphics, and more.

Ciri Template

Animated PPT Templates
Fully animated.

BeMind Minimal Template

Pitch PowerPoint

Minimal PPT Templates
Clean & clear.
Explore PowerPoint Templates
Third-Party PowerPoint Templates

We wanted to start the list with a bit of an obvious but important tip: Use third-party PowerPoint templates!
Microsoft PowerPoint comes with a set of default templates pre-packaged with the software. These free templates are pretty good but they have been used by everyone, over and over again, to the point that anyone could immediately recognize which template you’re using by looking at the slide design.
The worst part is that it will allow your audience to tell how little effort you’ve put into designing the presentation.
What most users don’t realize is that you can download templates from third-party marketplaces and use them to create unique presentations. These templates are made by professional designers and they will immediately make your slideshows look ten times better.
You can check out our best PowerPoint template collection for some inspiration.
Use ChatGPT to Write the Slides
ChatGPT is an AI tool that revolutionized the way we work and made our everyday tasks so much easier and simpler. Now, you can use it to write the slides of your presentations. Here’s how it works:
First, go to the ChatGPT website and start a new chat. Create an account if you don’t have one already. It’s free!

Now ask ChatGPT to write the slides of your presentation. Give it as many details as you can. Specify the topic, how many slides your presentation has, ask it to include quotes and statistics, break down information into bullet points, etc.
Once it generates the copy, you can simply copy and paste the text directly into your slideshow. Make any adjustments as necessary.

You can take this a step further and use AI art generators to create unique illustrations, icons, and infographics for your presentation. Midjourney and DALL-E are some of the top tools you can use for this task. Just be mindful of their copyright policies if you plan on using the images for commercial projects.
This tip is not exclusive to PowerPoint. But if designing presentations is part of your job, it will make your life so much easier. Don’t be afraid of the AI tools, learn to take advantage of them.
Experiment With Color Schemes

Colors play a key role in every presentation. It helps set the mood and tone of your slideshow and has a huge impact on the success of your presentation.
As you know, there are psychological effects behind the colors you use. With the right colors, you can evoke emotions in your audience to make each slide in your presentation more impactful.

Experiment with different color schemes for your presentation designs. You can use a tool like Color Hunt to find beautiful color palettes for your slideshows. But always keep in mind to pick colors that are appropriate for your topic, audience, and your brand.
Contrast Is Key

Speaking of colors, you can also use them to create a strong contrast between the content and the background. For example, using a dark color for typography on a light background will highlight the text much more effectively. Or you can use colored shapes to bring attention to specific parts of a slide.
The same can be said about fonts. Using unique fonts will go a long way to help create contrast in your presentation. Check out our guide on choosing fonts for PowerPoint to learn more.
Take Advantage of Add-Ins

PowerPoint has a built-in store full of add-ons (or add-ins as it’s called in the software). And it’s one of the most underused features of PowerPoint.
This store is filled with amazing third-party tools that can supercharge your work and slideshows. There are hundreds of tools in this store you can install and use for free.
Explore the PowerPoint Add-Ins store and see what you can find. One of our favorites is the tool for adding QR codes to slides directly from the slide editor. We’ll explain it more in the next tip.
Add QR Codes In Slides
Using QR codes in PowerPoint presentations has two great benefits. One, it will make things much easier for you to share links, apps, and resources with your entire audience. Two, it will encourage the audience to engage and interact with your presentation.
Normally, you have to use online tools or apps to generate QR codes. But you can use a PowerPoint add-in to create QR codes directly from the slide editor.

Simply go to Insert > Get Add-ins and search for the Personalized QR Code Generator.

After installing the QR code tool, you can instantly generate QR codes and embed them into your slides to share links. The free version of this plugin will leave a small watermark in the QR code but it’s barely visible. Using QR codes is much cooler and more effective than sharing links as plain text.
Design Cool Image & Text Masks

Image masking is a popular effect used in graphic design for making photos and images appear more creative. With image masks, you can give unique shapes to images rather than boring and old square shapes. You can use it to make your slides look more interesting.

We found a simple YouTube tutorial that shows you how to design liquid image masks in PowerPoint.
You can also use text masks to create cool typography effects in PowerPoint. And yes, there’s a YouTube tutorial for that too. Try using these effects in your next presentation.
Instantly Remove Image Backgrounds
Have you been using Photoshop to remove the backgrounds of images? Well, now you don’t have to. Because PowerPoint has a tool that lets you get rid of image backgrounds with just a few clicks. Here’s how it works.

Select an image in your slideshow and go to the Picture Format tab then select the Remove Background option on the top-left side.

This tool will automatically make a selection of the background. If it clips into areas of the main object, use the Mark Areas tool to fix the selection. Then click the Keep All Changes button to finish.

Now you have a PNG-style JPG image without a background.
Design Posters & Flyers

PowerPoint can be used to create many cool things than just presentations. You can use it for simple graphic designs, such as posters and flyers.
You can use pre-made PowerPoint poster templates to easily make posters or flyers in vertical layout using the app. We also have a step-by-step guide on how to make posters in PowerPoint . Check them out to learn more.
This can be a huge money-saver when you have to design a quick poster for a project and don’t have access to software like Photoshop.
Export to Video & PDF
If you want to share your presentation with a wide audience, one of the best ways to do that is to convert your presentation into video format. That way, your audience will be able to watch your presentation even if they don’t have access to Microsoft PowerPoint software.

PowerPoint has a built-in function to help you with that process. Go to the File menu and select Export. From there you can choose the Create a Video option to convert your entire presentation into a video.
It’s perfect for creating video content for YouTube, online courses, and schools too. You can also export your presentation in PDF format or even turn it into a Word document.
In Conclusion
These are just a few of the cool PowerPoint tips and tricks we’ve found to be quite interesting. It’s surprising how much you can do with an app like PowerPoint. If you want to learn more cool PowerPoint tricks, be sure to check out our other guides.
Start with 7 tips for finding the perfect PowerPoint template . Also, read our 10 pro PPT tips guide. And our how to give a fun presentation guide has some useful tips too.
15 PowerPoint Tips & Tricks To Improve Your Presentations
Creating a presentation in PowerPoint will be significantly easier if you know a few tips and tricks. We’ve shown you how to change the size of your slides, insert a PDF , add music , and how to make your PowerPoint more engaging.
Whether you’re brand new to creating PowerPoint presentations or you’re a pro, you can improve further by incorporating new PowerPoint design ideas.
1. How to Lock an Image in PowerPoint
Locking an image in a PowerPoint presentation will prevent the image’s proportions or aspect ratio from getting distorted or out of scale.
To lock an image in PowerPoint, follow the steps below:
- Right-click on the image and select Size and Position .

- Check the box labeled Lock aspect ratio .

It’s also possible to lock an image or object so it cannot be resized or moved around the slide at all. This feature may be missing from most PowerPoint desktop versions. You might be able to right-click on an image, shape, or object and select Lock .
If you don’t see that option, one workaround is to place objects into the master slide. To learn how, read how to edit master slides in PowerPoint .
2. Loop a Slideshow in PowerPoint
If you plan on continuously running a PowerPoint slide show, you can set the slideshow to loop instead of having to restart it manually.
- Open the PowerPoint you want to loop.
- Select the Slide Show tab.
- Select the Set Up Slide Show button.

- Check the box labeled Loop continuously until ‘Esc.’

- Select the OK button.
You’ll need to press the Esc key to end the looped PowerPoint presentation. Clicking on the final slide in your deck or pressing the right arrow key on your keyboard will cause the slideshow to restart.
3. How to Reduce the Size of a PowerPoint
PowerPoint files can become large if you’ve inserted high-resolution images or media files. We’ve got a few PowerPoint tips and tricks that can help reduce the size of your PowerPoint file.
- Embed only the font characters used in your presentation by selecting File > Options > Save in the menu on the left.

- If you’ve chosen to embed fonts in the file, select the Embed only the characters used in the presentation option.

- Select File > Options > Advanced .
- Under Image Size and Quality , check the box labeled Discard editing data .
- To further reduce the size of your PowerPoint, uncheck the box labeled Do not compress images in file and opt for a lower default resolution for your images.

- In the Picture Format tab, select the Compress Pictures button. You can choose whether to apply compression options to all images or only the picture you’ve chosen.
- Check the box labeled Delete cropped areas of pictures , and select Use default resolution . Press OK .

By reducing the size of your PowerPoint file, you’ll make the file easier to store and email.
4. How to Add and Print PowerPoint Notes
Add speaker notes to help the presenter remember what to say during the presentation by selecting the Notes button at the bottom of the PowerPoint. Type a script or just a few notes as reminders.

To print the presentation with the notes, select Notes Pages in the Settings section of the Print dialog box.
5. How to Edit PowerPoint Backgrounds
To add, remove, or edit a background graphic from your slides using the PowerPoint desktop app, you’ll need to select Slide Master from the View menu. Then, on the left, select the slide master or one of the layouts that appears below it: Right-click and select Format Background . Check a box labeled Hide background graphics .

If you’re using PowerPoint in a browser, you might have noticed there is no slide master. When you use the online version, you can directly add, remove, or edit any graphics that appear on a slide.
6. How to Link to Another Slide in the Presentation
Linking to another slide in the same presentation can be helpful if you anticipate the need to skip part of your presentation due to time constraints or refer back to a previous slide. It is as simple as adding a hyperlink.
- Select the text, image, or shape you want to use as a link.
- Select Insert > Link or right-click and select Hyperlink .
- In the Insert Hyperlink dialog box, under Link to , select Place in This Document .

- Choose which slide you want to link to and press the OK button.
7. Stay Consistent by Using the Format Painter
Consistency is a hallmark of a well-designed PowerPoint presentation. For example, slide headings should have the same color, font, and font size throughout the deck. Using the format painter makes standardizing all the headings and element labels in your presentation quick and easy.
- Select the content that has the formatting you like.
- In the Home tab, select the Format Painter .
- Next, select something else, and the formatting of the first element will automatically be applied.

Simple. To apply formatting to multiple elements, double-click the Format Painter and repeat step #3 above until you’ve applied the formatting to all the elements you want. Press the Esc key to stop using the Format Painter.
8. Look Smart with SmartArt
PowerPoint’s built-in SmartArt feature will help take your presentations to the next level. With SmartArt, you can convert plain, boring text to engaging graphics.
- Select the text you want to convert into a graphic.
- On the Home tab, select Convert to SmartArt .

- Select the option you like the most. As you move your mouse over the different options, you’ll see what your text looks like converted to that SmartArt option.
- If you’d like a SmartArt option that allows you to add pictures, select More SmartArt Graphics .
- In the menu on the left, select Picture .

- Select the option you like best.
- To add an image, select an image icon in a SmartArt element and choose whether to insert an image from a file on your computer or from an online source like Bing.

The SmartArt gallery has dozens of options to choose from. One of them is bound to make your slide more engaging.
9. Align Your Objects
You’ve used the Format Painter to ensure your formatting is consistent throughout your presentation. While you’re at it, make sure all your objects are perfectly aligned using PowerPoint’s Align tool.
- Select the objects you want to align by holding down Shift as you select each object.
- In the Format tab, select Align .
- Choose how you want the selected object to align.

- To distribute three or more objects evenly, select the objects, and then select Align and either Distribute Horizontally or Distribute Vertically .
Being intentional about how objects on your slides are aligned goes a long way to making a professional-looking presentation.
10. How to Use Picture Layout
When you’re working with a slide with one or more images, try using PowerPoint’s built-in Picture Layout tool. It’s SmartArt for images.
- Select all the images on the slide (hold down Shift to select multiple images).
- In the Picture Tools menu, select Format > Picture Layout .

- Mouse over the options to find the Picture Layout you like best, and select it.
If you decide you don’t want to use a Picture Layout, you can convert your images back to Shapes by selecting Design > Convert > Convert to Shapes .
11. Be Sparing with the Slide Transitions
Once you discover that you can add animations between slides, you might be tempted to try them all. However, you should remember the cardinal rule of PowerPoint presentations: less is more. If you absolutely must use a transition, stick to the simple ones like Cut and Fade .
- Select a slide.
- From the Transitions tab, select a transition.

- Select Effect Options if it’s available to choose additional settings for the transition.

- Select Preview to see the transition in action.

12. Use Animations Wisely
While you’re toning down your slide transitions, make sure you’re using animations judiciously, too. Animating text or objects on a slide can help the flow of your presentation, but too many animations can be distracting. Be discerning about when and where you use them.
To add animations and effects:
- Select the text or object you want to animate.
- On the Animations tab, select an animation.

- Next, select Effect Options to choose an effect. Note, the Effect Options will be different depending on which animation you have selected.

You can select different ways to start the animations. In the Timing section of the Animations tab, choose when to start the animation.

- On click . This option will start the animation when you click the slide.
- With previous . Choose this option if you want the animation to play at the same time as the previous animation in the sequence.
- After previous . The animation will begin immediately after the prior one concludes.
- Duration . This option allows you to make an effect last longer or shorter.
- Delay . Add some time before an effect begins.
To change the order your animations play:
- Select an animation marker on a slide (or toggle on the Animation Pane by selecting it in the Advanced Animation section of the Animation tab and select an animation in the list.)

- In the Timing section of the Animation tab, select either Move Earlier or Move Later .

To add an animation to a group of objects:
- Press Ctrl and select multiple objects.
- Select Format > Group > Group to create a group.
- Choose an animation from the Animations tab.
If you use them the right way, animations can make your presentation clearer and easier for viewers to understand.
13. K.I.S.S.

PowerPoint slides are most effective when they’re simple. When you include only the most important information on your slides, you make it easier for people to digest and remember your message. You can always say more about the topic, but don’t pack the slide with more content than you need. After all, your audience should be listening more than reading.
14. Seek Out High Quality Templates, Images, and Graphics
When you keep it simple, that means using images and graphics that look good. We’ve rounded up some great stock photo sites and places to get beautiful PowerPoint templates .
15. Export the Presentation as a Video
When you’re happy with your presentation, export it as a video:
- Select File > Export .

- Choose Create a video .

- Select the quality of the video and whether to use recorded timings and narrations.

- Set the duration of each slide.
- Select the Create Video button.
- Navigate to the folder where you want to save the video file.
- Select the Save button.
By implementing these tips and tricks, you’ll take your presentations to the next level!
However, perhaps despite all the tips and tricks you’ve learned, you’ve decided to swear off the software entirely. So many PowerPoint presentations have put audience members to sleep that we now have a term for it: “death by PowerPoint.” In that case, say goodbye to Powerpoint, and check out these seven alternatives to PowerPoint that you can use online.

Maggie Marystone is a freelance technology writer, human rights worker, and storyteller based in Chicago. Read Maggie's Full Bio
Read More Posts:

Leave a Reply
Your email address will not be published. Required fields are marked *
- Agency of record
- Creative strategy
- Design on demand
- Design at scale
- Design for startups
- Communications
- Sales enablement
- Presentations
- Startups & entrepreneurs
- Video & motion graphics
- Design process
- Partnership & pricing
12 simple PowerPoint tips and tricks to save you time

Creating a PowerPoint presentation is an exciting, but often time-consuming experience.
Because of this, it can be tempting to delay it until the last minute, then scramble to finish your latest pitch deck in the final hours before the deadline.
Fortunately, it doesn’t need to be like that. You can prevent last-minute panic by following a few simple PowerPoint tips and tricks that will help you deliver your presentations without a hitch.
Master the slide master

The master slide—if you haven’t heard about it, your life is about to change.
A master slide (or slide master, used interchangeably) is a place where you can edit fonts, images, headers and footers of all your slides at the same time. Such changes apply to all slides, which means no more slide-by-slide deletions adding an hour to your workday.
The first thing you should do is include footer design and page numbers in the slide master.
Common things you’d want to include in your presentation’s footers are time and date, chapter of the presentation, or your logo.
Page numbers are another no brainer—adding them allows for automatic numbering and consistency in formatting across the presentation. It will make your presentation look neat and just a bit more professionally designed .
Both are simple to do—just add the footer on the bottom center and the page number on the bottom right!

You can also use the master slide option to create your own templates .
The process is similar: edit the slide master and your set of slide layouts, then save your presentation as a PowerPoint template , like this:

Once you do that, you can easily reuse it and share it with others.
Save time with the align objects tool

If you’ve ever tried to align objects in PowerPoint by hand, you understand the pain. But fear not—those days are over with this next tool!
For our quality managers, the Align Objects tool is a go-to tool to ensure presentations are pixel perfect. It gives your presentations a clean, professional look, while saving you time (and as we promised in the title, many a headache as well).
How do you do it?
It’s actually super simple:
First, select all the items you want aligned , like the stars below.

Then, under the Arrange tab of the default Quick Access Toolbar, select Align → Align Center and Align Middle .

If you did it right, you will end up with a lovely arrangement of objects. Neat!

Always be on-brand with the pick up style tool (PC only)
Memorable presentations often have a distinct visual style.
But while complimentary colors, just-right proportions and striking visuals are great, it all gets lost unless everything follows the same guidelines.
However, making sure everything does can be a time sink.
That’s why we love using the Pick Up and Apply Style tools. It’s a quick and easy way to format shapes and text to brand standards and give your whole presentation a unique look.
The Pick Up tool will grab all the characteristics of the selected shape or text box and keep those characteristics until you pick up new ones. Then you can apply those properties to other shapes and text. This is a quick and easy way to format shapes and text to brand standards.
The shortcut for the Pick Up Style tools are worth remembering:
- Pick Up Style: CTRL+SHIFT+C
- Apply Style: CTRL+SHIFT+V
With their use, you can quickly turn two visually different objects…

…into similar ones:

Insert circular images the smart way
Here’s a cool trick to impress your coworkers with:
When in need of inserting circular images, insert a circle and then use the image fill options to select the picture you want to use .
Let’s say we want to introduce our team, for example. The blue circles will be where we will add the images:

Right-click a circle and click Format Shape .

A new tab will open on the right side of the screen.

Select Picture or texture fill and select the picture you want.

Finally, adjust the transparency, offset, scale and alignment as desired.
The result:

Use gridlines for better alignment
Gridlines are a tool you can use to improve your layout skills.
Let’s use the above example:
I want to create a professional layout for my team’s introduction.

However, I’m not really sure where to position the objects. So, to help me, I can turn on gridlines .

Now that I see the lines, I can place the object where I want it:

That looks good.
All that’s left is duplicating and aligning (don’t forget to use tip no. 2!) like so:

And voilà, we have a layout!
Use the PowerPoint video compression option
Using multimedia files or videos in your presentations could result in a very heavy file, so a good trick is to use the Powerpoint video compression option.
To do that, go to File → Info → Compress Media .

Select the quality you want and it’s done!

Your file will be reduced significantly – using the 720p option, the initially almost 14 MB file was reduced to just 4,3 MB.

Work faster with the Animation Painter Tool
When animating various objects that use the same actions, it’s useful to use the Animation Painter Tool . This will copy the animation from the original object to the new one and save you time so you don’t have to animate each one individually.
- Select the object with the animation you wish to copy.
- On the Animations tab of the toolbar click Animation Painter .

- Click on any object you’d like to apply the animation to. Done!
BONUS TIP for Mac users
You didn’t think we’d forget you, wonderful Mac users?
While the PC has its own PowerPoint tricks, so does Mac. Here’s one:
Use OpenOffice to convert your icons or any Illustrator vector into an editable vector for PowerPoint or Keynote.

This will allow you to save time in the round of changes and have more professional results.
Get designin’, get time savin’
PowerPoint is a tool like any other—the more you use it, the better at it you become.
The PowerPoint tips and tricks shown here will go a long way towards making the program a friend, not a foe in your everyday quest for meaningful communication and beautiful presentations.
Save this article in your favorites and keep using the tools we’ve shared – we promise that they will be second nature in no time!

- Originally published on April 21, 2020
Redefine what's possible with SketchDeck.
Subscribe to our newsletter, redefine what’s possible with sketchdeck., related reading.

9 PowerPoint Tips and Tricks to Make You a Better Presenter
Are you creating your very first PowerPoint presentation ? Maybe you’ve worked with PowerPoint for years, but you’ve never been satisfied with your slideshows. Whatever the case may be, you’re looking for a few PowerPoint tips and tricks to help.
We’ve got you covered!
In this article, we share nine PowerPoint tricks you can use to make your presentations more engaging and effective. Sound interesting? Then let’s get started!
Table of Contents
1. Understand Your Goals
Why are you creating this PowerPoint presentation? Are you looking to convey important information to a colleague? Are you planning to use it in a sales pitch?
When you know what you want to accomplish with the presentation, you can make sure all of your content and design choices work towards that specific goal.
For example, if you’re creating an internal presentation to be shared with company leaders, you might not need to put as much effort into its design. Why? Because your audience doesn’t need to be sold with flashy visuals. They just need to understand the information you share.
So before you do anything else, ask yourself, “Why am I making this presentation?” Then let your answer guide every PowerPoint decision you make.
2. Get to Know Your Audience
Do you know what you want to accomplish with your PowerPoint presentation? Good, now it’s time to focus on the audience you’ll deliver it to. Who are these people?
Take a moment to get to know the folks watching your presentation. That way you can cater it to them and use PowerPoint tricks you know they’ll appreciate.
Let’s return to our previous example and pretend that you’re creating an internal presentation for company leadership. These people already have an intimate understanding of the products you sell. As such, you probably don’t need to create PowerPoint slides that explain product features like you would if you were giving a sales presentation to potential customers.
This is really important! One of the best ways to improve your presenting skills is to learn about your unique audience and adjust your presentation to match.
3. Don’t Overcomplicate Things
You might want to jazz up your presentations in every possible way, but this is usually a mistake. Instead, look to simplify whenever possible and avoid complications.
What does this look like in a real-world scenario? Here are a few ideas:
Use Bullet Points: Nobody wants to read a wall of text—especially in a PowerPoint presentation. Break information down into manageable chunks via bullet points.
Add More Slides: If you have a lot to say, increase the number of PowerPoint slides you use. That way your slides are never packed with too much information.
Choose Quality Visuals: Images and videos are perfect for PowerPoint presentations because they relay information quickly. We’ll talk more about visuals in a bit. For now, just know that they can help you easily simplify your presentation.
PowerPoint tips and tricks aren’t always fancy. Sometimes the best thing you can do is simplify your presentation. Learn to do that and your presenting skills will improve!
4. Move Beyond Stock Templates
PowerPoint templates aren’t bad; they’re just overused. This is why we suggest moving beyond stock templates and creating customized slides for your presentations.
We won’t lie, to do this effectively you need an eye for design. It helps if you have years of experience, too. If that doesn’t sound like you, don’t worry. You can easily increase the quality of your presentations by downloading premium templates from 24slides.com .
Whether you create your own slides from scratch or download premium templates from a company like 24Slides, make sure your presentations don’t look like everyone else’s.
5. Prioritize Visuals Over Text
Remember when we said we’d talk about PowerPoint visuals? Now is the time!
Visuals will allow you to convey information more efficiently. They’ll also make your presentation more engaging . Seriously, who wants to stare at plain white slides? Fortunately, there are plenty of visuals you can use for your next presentation:
Images and Videos: The easiest way to incorporate visuals into your PowerPoint presentations is to add still images. But if you want to get fancy, add a video to your slideshow instead! Coverr.co has tons of stock video footage you can use for free.
Charts and Graphs: Is your presentation data heavy? Then consider incorporating a few charts and graphs to make the information easier for your audience to understand.
Shapes and Icons: Finally, use PowerPoint Shapes to add shapes and icons to your presentations. Can’t find the right visual in PowerPoint’s database? Make your own by editing stock shapes into custom creations. It’s really easy to do!
Of all the PowerPoint presentation tips and tricks out there, this is one of the most important. Oftentimes the difference between a killer presentation and boring one is quality visuals. Work hard to get your visuals right and the quality of your presentations will skyrocket.
6. Choose the Right Colors and Fonts
Images, videos, and charts are important, but they aren’t the only design elements available to you. Pay attention to the colors and fonts you use as well.
When it comes to color, choose hues that match the emotional tone of your presentation . For example, when sharing exciting news, use bright colors such as red and orange. When detailing areas of improvement, stick with blues and purples, which have been known to help people feel calm and relaxed—emotions you want to create after delivering bad news.
What about fonts? Again, match them to your presentation.
A marketing-themed slideshow, for instance, might use fancier fonts than a sales-themed slideshow. Why? Marketing is often seen as a more creative field than sales, which means fancy fonts might be more accepted by marketers than they would be by salespeople.
No matter what, make sure your fonts are easy to read! If they aren’t, what’s the point?
7. Elevate Your Presentation With Audio
Did you know you can add audio to your PowerPoint presentations? You totally can!
Imagine how much more effective your product demo slideshows will be when they include actual customer interviews. Or how much more engaging your marketing slideshows will be when the soundtrack for your favorite action movie is playing in the background.
Audio has the potential to make your next PowerPoint presentation stand out, grab your audience’s attention , and help them remember your slideshow for weeks afterwards. That’s why this is one of our favorite PowerPoint tips and tricks. Give it a try!
8. Be Careful With Transitions
Slide transitions can help bring your PowerPoint presentations to life. They can also make them look super cheesy if you’re not careful.
PowerPoint offers a bunch of different transitions, ranging from simple swipes to ripple and vortex effects. They’re really easy to add, too. All you have to do is:
- Select a slide, then click the “Transitions” tab.
- Choose a transition from the drop-down menu.
- Click “Effects Options” to edit the transition.
- Click “Preview” to see the transition in action.
Here’s what we recommend: choose a maximum of three transition types per presentation. This will give your slideshow a feeling of consistency. And don’t feel the need to add a transition to every slide. Use them sparingly so as not to bore your audience.
9. Rehearse Your Presentation
Last, but certainly not least, rehearse your presentation before you give it!
This is so simple. Unfortunately, tons of people forget to do it and their performance suffers as a result. Don’t let this happen to you. Make time to practice—preferably in front of a mirror or, even better, a camera. That way you can see yourself and analyze your delivery.
Maybe you say “um” too often. Maybe you make a distracting motion with your fingers throughout your presentations. We all have weird tics when public speaking. Recording yourself will allow you to see your personal tics and eliminate them.
Final Thoughts
There are plenty of PowerPoint tips and tricks on the internet. The nine listed above are our favorites because they’re easy to implement and have the potential to completely transform your slideshows. We encourage you to give them a try ASAP!
Do you have to deliver a PowerPoint presentation to a remote audience? Use ClickMeeting ! Our video conferencing solution is loved by tens of thousands of happy customers in 125+ countries around the world and has all the bells and whistles you need.
The best part is, you can use ClickMeeting for free for 30 days. Start your trial today and gain access to all of our platform’s features without even sharing your credit card number.

Posted by Jacob Thomas
Content writer @ ClickMeeting
Time to move your events online. Do it with ClickMeeting

Leave a reply
Your email address will not be published. Required fields are marked *

- Onsite training
3,000,000+ delegates
15,000+ clients
1,000+ locations
- KnowledgePass
- Log a ticket
01344203999 Available 24/7
Top 9 PowerPoint Tips and Tricks for Your Presentations
Explore these essential PowerPoint Tips to elevate your presentation skills. From mastering design principles to engaging storytelling techniques, our blog reveals the secrets to creating captivating slides that leave a lasting impression. Learn how to make your content shine with these expert PowerPoint Tips and make your next presentation truly outstanding.

Exclusive 40% OFF
Training Outcomes Within Your Budget!
We ensure quality, budget-alignment, and timely delivery by our expert instructors.
Share this Resource
- Microsoft Dynamics 365 Fundamentals (ERP) MB920
- Microsoft Access Training
- Microsoft Dynamics 365 Fundamentals (CRM) MB910
- Microsoft Word Course
- Microsoft Dynamics 365 Marketing MB220

According to Talent.com , a PowerPoint Specialist in the UK makes about £40,000 annually on average. In this blog, you will learn about the top 10 PowerPoint Tips to make to improve your presentation. Let's dive in deeper in to learn more!
Table of Contents
1) Best PowerPoint Tips and Tricks
a) Choose the right design theme
b) Use consistent and professional fonts
c) Create a visual hierarchy with headings and subheadings
d) Utilise engaging images and graphics
e) Keep slides simple and minimalistic
f) Incorporate relevant charts and graphs
g) Add transitions and animations
h) Practice and rehearse your presentation
i) Engage your audience with interactive elements
2) Conclusion
Best PowerPoint Tips and Tricks
Creating a captivating and impactful PowerPoint Presentation involves utilising various tips and techniques. Let's explore these best PowerPoint Tips and Tricks in detail to elevate the quality of your PowerPoint Presentation s.
Choose the right design theme

1) Audience and purpose: Tailor the theme to suit your audience and the purpose of your PowerPoint Presentation. Consider their preferences, expectations, and the context in which the presentation will be delivered.
2) Brand consistency: If representing a company or organisation, incorporate brand colours, logos, and visual elements into the design theme. This helps maintain consistency and reinforces brand recognition.
3) Visual appeal and readability: Strike a balance between visual appeal and readability. Choose clean and minimalist themes that provide a clear backdrop for your content. Avoid designs that are too busy or distracting.
4) Match the tone and topic: Select a theme that aligns with the tone and topic of your presentation. Formal presentations benefit from sleek and professional themes, while creative or informal presentations may require more playful or artistic themes.
5) Preview and test: Before finalising your design theme, preview it on multiple slides to ensure consistency and coherence. Test it with different content types, such as text, images, and charts, to ensure it works well across the entire presentation.

Use consistent and professional fonts
Choosing the right fonts for your PowerPoint Presentation is crucial to maintain a polished and professional look. Here are some tips to ensure consistency and professionalism:
1) Prioritise readability: Select clear and easy-to-read fonts. Avoid overly decorative styles. Sans-serif fonts like arial or calibri are safe choices for presentations.
2) Establish font hierarchy: Use different font styles for headings, subheadings, and body text. Make headings stand out with bold or larger fonts. Use regular or italic fonts for body text.
3) Limit font choices: Stick to two or three fonts throughout the PowerPoint Presentation. Consistency creates a cohesive design and avoids clutter.
4) Consider brand guidelines : Adhere to brand guidelines for font recommendations, if applicable. Consistency with brand fonts enhances professionalism.
5) Ensure font compatibility: Use widely available fonts or embed them in the PowerPoint file to maintain the intended appearance on different devices.
6) Test legibility: Check the legibility of your PowerPoint Presentation on various screens and projectors. Adjust font sizes if needed for optimal readability.
By using consistent and professional fonts, you enhance the visual appeal and readability of your PowerPoint Presentation.
Create a visual hierarchy with headings and subheadings
Creating a visual hierarchy with headings and subheadings in your PowerPoint Presentation helps organise information and guide your audience through the content. Follow these PowerPoint Presentation Tips to establish a clear visual hierarchy:
1) Use appropriate heading levels : Utilise heading levels such as H1, H2, H3, and H4 to indicate the importance and structure of your content. Assign the highest level (H1) to the main title or main sections and subsequent levels to subheadings and nested sections.
2) Differentiate with font styles: Apply different font styles to headings and subheadings to make them stand out. Use larger, bolder, or different font colours for headings and slightly smaller or regular fonts for subheadings. This contrast helps the audience quickly identify and navigate through the content.
3) Consistency and alignment: Maintain consistency in the formatting of headings and subheadings throughout your presentation. Use the same font, colour scheme, and alignment for each heading level. Align headings and subheadings consistently to the left or centred for a neat and organised look.
4) Whitespace and spacing: Utilise whitespace and appropriate spacing around headings and subheadings to create visual separation from surrounding content. Ample spacing helps improve readability and emphasises the hierarchical structure.
5) Hierarchy with indentation: If applicable, use indentation to visually represent the hierarchy of your content. Indent subheadings slightly to the right to demonstrate their relationship to main headings. This technique aids in visually organising complex information.
Take your Microsoft Office skills to the next level – sign up for our Power Apps and Power Automate Training !
Utilise engaging images and graphics

1) Relevance and quality: Choose relevant visuals that support your message. Opt for high-quality images that are visually appealing and clear, avoiding pixelation or low-resolution graphics.
2) Convey emotions: Select visuals that evoke emotions and resonate with your audience. Use images that inspire, evoke empathy, or convey the desired mood. Graphics, such as icons or illustrations, can visually represent concepts or ideas.
3) Use infographics and charts: Simplify complex information by using infographics and charts. These visuals present data in an easily understandable format, helping your audience grasp key points.
4) Balance and placement: Maintain a balanced distribution of visuals across your slides. Avoid overcrowding by limiting the number of visuals per slide. Place visuals strategically alongside relevant text to enhance understanding and reinforce your message.
5) Consistency in style: Create a cohesive visual experience by maintaining consistency in the style and appearance of your visuals. Use a harmonious colour palette, consistent font styles, and design elements throughout.
6) Cite sources: When using visuals from external sources, provide proper attribution to respect copyright and intellectual property rights. Include a reference or citation to acknowledge the source of the visual content.
Remember, visuals should complement and reinforce your message without overpowering it. Thoughtfully selected and well-placed images and graphics can significantly enhance audience engagement and understanding, making your PowerPoint Presentation more memorable.
Want to enhance your productivity and proficiency in using Microsoft software? Register for our Microsoft SharePoint Course . Join now!
Keep slides simple and minimalistic
Simplicity and minimalism are key principles for creating effective PowerPoint slides. By following these guidelines, you can enhance the impact of your presentation:
1) Limit text: Avoid overcrowding slides with excessive text. Use concise and focused sentences or bullet points to convey key information. Avoid overwhelming your audience by keeping minimal text.
2) Use clear and legible fonts : Choose fonts that are easy to read from a distance. Sans-serif fonts like arial or calibri work well. Ensure that the font size is large enough for readability, even in the back of the room.
3) Embrace white space : Allow for sufficient white space on each slide. White space creates a sense of balance and improves visual clarity. It helps direct attention to the main content and prevents slides from appearing cluttered.
4) Utilise visuals: Incorporate relevant visuals such as images, charts, or graphs to support your message. Visuals can convey information more effectively than text alone. Ensure visuals are high-quality, uncluttered, and directly related to the content.
5) Consistent design elements : Maintain a consistent design throughout your slides. Use the same colour scheme, font styles, and layout across all slides to create visual coherence. Consistency fosters a professional and polished look.
6) One idea per slide : Focus on one main idea or concept per slide. Keep your message clear and concise to avoid overwhelming your audience. This allows them to absorb information easily and follow along smoothly.
7) Minimal transitions and animations: Limit the use of transitions and animations. Use them sparingly and purposefully to enhance the presentation's flow and emphasise key points. Overusing animations can be distracting.
By keeping slides simple and minimalistic, you create a visually appealing and impactful PowerPoint Presentation.
Unlock your full potential and optimise your productivity with our comprehensive Microsoft Office 365 Masterclass. Sign up now!
Incorporate relevant charts and graphs

1) Choose the right chart type: Select an appropriate chart or graph type that supports your message. You can choose bar graphs, line graphs, pie charts, and scatter plots are common options. Consider your data and the story you want to convey.
2) Simplify and focus: Keep charts and graphs simple. Avoid overcrowding with excessive data or details. Highlight key information and use clear labels to aid understanding.
3) Thoughtful use of colour: Enhance the clarity and emphasise insights with strategic colour usage. Maintain consistent colour schemes. Avoid using too many colours that may distract you.
4) Clear labels and annotations : Label axes, data points, and significant elements clearly. Add annotations or callouts for context. This helps the audience interpret the data accurately.
5) Tell a compelling data story : Use charts and graphs to tell a coherent story. Present data logically, emphasising trends or comparisons. Provide clear explanations and insights.
6) Visually pleasing design : Design charts and graphs with a clean and professional aesthetic. Use appropriate fonts, consistent styles, and a pleasing layout. Simplify unnecessary elements for clarity.
Add transitions and animations
Incorporating transitions and animations in your PowerPoint Presentation enhances visual appeal and flow. Follow these tips for effective use:
1) Purposeful transitions: Apply transitions between slides to create a seamless flow. Choose transitions that complement your content without being distracting.
2) Consistency: Maintain consistency in transition styles throughout the presentation. A cohesive look adds professionalism.
3) Animate key elements: Use animations to draw attention and reinforce important points. Gradually reveal information or highlight data and visuals. Ensure animations aid understanding.
4) Timing and pace: Set appropriate timing for transitions and animations. Avoid rapid or slow transitions that disrupt the flow. Maintain a consistent pace.
5) Rehearse and test: Practice your presentation with transitions and animations. Test on different devices to ensure smooth execution.
6) Complement content and style: Align transitions and animations with the tone and content. Use subtle animations for formal presentations and dynamic ones for creative topics.
By incorporating purposeful transitions and animations, you add visual interest and engagement to your PowerPoint Presentation.
Practice and rehearse your presentation
Practising and rehearsing your PowerPoint Presentation is essential for delivering a confident and polished performance. Follow these tips to make the most of your practice sessions:
1) Familiarise yourself: Become familiar with your content, slide flow, and key talking points. Understand the structure and message of each slide.
2) Practice out loud: Speak your presentation out loud rather than just reading it silently. Practice articulating your ideas clearly and confidently.
3) Timing and pace: Pay attention to the timing and pace of your delivery. Practice to ensure you stay within the allocated time frame and maintain a steady pace.
4) Use visual cues: If using cue cards or notes, practice incorporating them seamlessly into your presentation. Use them as visual aids without relying too heavily on them.
5) Seek feedback : Practice in front of a mirror, colleagues, or friends. Seek feedback on your delivery, body language, and overall presentation style. Make necessary improvements based on their suggestions.
6) Refine and polish: Use practice sessions to refine your content, eliminate unnecessary filler words, and ensure smooth transitions between slides.
By dedicating time to practice and rehearse your presentation, you'll feel more confident, deliver a smoother performance, and effectively engage your audience.
Utilise the duplicate slides feature
Save valuable time and streamline your PowerPoint creation process by utilising the duplicate slides feature. This handy feature allows you to quickly duplicate existing slides and make necessary modifications, eliminating the need to recreate slides from scratch. Here's how you can benefit from it:
1) Efficiency : Duplicating slides helps maintain consistency in design and formatting, especially when creating multiple slides with similar content or layout.
2) Time-saving : Instead of starting from scratch, duplicate slides that have the desired layout, placeholders, or elements and make the necessary adjustments. This significantly speeds up your slide creation process.
3) Consistency : When working on collaborative presentations, duplicating slides ensures consistency across different sections, maintaining a cohesive look and feel throughout.
4) Reusability : Save time by duplicating slides from previous presentations that contain relevant content or visuals. Customise them to suit your current presentation, allowing you to repurpose and leverage existing material.
Engage your audience with interactive elements
In order to create an engaging and interactive PowerPoint Presentation, consider incorporating interactive elements. Follow these tips to captivate your audience:
1) Polls and surveys : Integrate live polls or surveys into your PowerPoint Presentation to actively involve your audience.
2) Q&A sessions: Encourage your audience to share their thoughts on the topic or ask questions.
3) Group activities: Break your presentation into smaller groups for discussions or activities.
4) Interactive quizzes: Include interactive quizzes or games related to your content.
5) Hands-on demonstrations: Incorporate live demonstrations or interactive exercises that allow your audience to participate in practical activities related to the topic.
6) Technology integration: Utilise technology tools like audience response systems, online collaboration platforms, or interactive whiteboards to facilitate interaction and collaboration.
By incorporating interactive elements, you transform your PowerPoint Presentation into an engaging and participatory experience.
Conclusion
We hope you read this blog and understand the Top 10 PowerPoint Tips. Creating a compelling PowerPoint Presentation requires careful attention to various elements. By following the tips mentioned above, you can enhance the effectiveness of your presentation and deliver a memorable experience to your audience.
Unlock your full potential with our comprehensive Microsoft Office Training and elevate your workplace productivity!
Frequently Asked Questions
Upcoming office applications resources batches & dates.
Thu 6th Jun 2024
Thu 4th Jul 2024
Thu 8th Aug 2024
Thu 5th Sep 2024
Thu 10th Oct 2024
Thu 7th Nov 2024
Thu 5th Dec 2024
Get A Quote
WHO WILL BE FUNDING THE COURSE?
My employer
By submitting your details you agree to be contacted in order to respond to your enquiry
- Business Analysis
- Lean Six Sigma Certification
Share this course
Our biggest spring sale.

We cannot process your enquiry without contacting you, please tick to confirm your consent to us for contacting you about your enquiry.
By submitting your details you agree to be contacted in order to respond to your enquiry.
We may not have the course you’re looking for. If you enquire or give us a call on 01344203999 and speak to our training experts, we may still be able to help with your training requirements.
Or select from our popular topics
- ITIL® Certification
- Scrum Certification
- Change Management Certification
- Business Analysis Courses
- Microsoft Azure Certification
- Microsoft Excel Courses
- Microsoft Project
- Explore more courses
Press esc to close
Fill out your contact details below and our training experts will be in touch.
Fill out your contact details below
Thank you for your enquiry!
One of our training experts will be in touch shortly to go over your training requirements.
Back to Course Information
Fill out your contact details below so we can get in touch with you regarding your training requirements.
* WHO WILL BE FUNDING THE COURSE?
Preferred Contact Method
No preference
Back to course information
Fill out your training details below
Fill out your training details below so we have a better idea of what your training requirements are.
HOW MANY DELEGATES NEED TRAINING?
HOW DO YOU WANT THE COURSE DELIVERED?
Online Instructor-led
Online Self-paced
WHEN WOULD YOU LIKE TO TAKE THIS COURSE?
Next 2 - 4 months
WHAT IS YOUR REASON FOR ENQUIRING?
Looking for some information
Looking for a discount
I want to book but have questions
One of our training experts will be in touch shortly to go overy your training requirements.
Your privacy & cookies!
Like many websites we use cookies. We care about your data and experience, so to give you the best possible experience using our site, we store a very limited amount of your data. Continuing to use this site or clicking “Accept & close” means that you agree to our use of cookies. Learn more about our privacy policy and cookie policy cookie policy .
We use cookies that are essential for our site to work. Please visit our cookie policy for more information. To accept all cookies click 'Accept & close'.
Home Blog PowerPoint Tutorials How To Crop an Image in PowerPoint
How To Crop an Image in PowerPoint

Images play a crucial role in enhancing the visual appeal of your PowerPoint presentations. Whether you’re trying to highlight a specific part of a photo, remove unnecessary elements, or create custom shapes, the cropping tool can be helpful to enhance the presentation design. In this article, we’ll explain you how to crop images in PowerPoint, from the very basic technique to advanced options.
Why Crop Images in PowerPoint?
Cropping images can significantly improve your presentation by improving visual focus, eliminating unnecessary parts, creating custom shapes and effects, and enhancing overall design aesthetics.
By carefully cropping images, you can draw attention to the most important parts, remove distractions, and ensure that your visuals align perfectly with your slide design.
Preparing to Crop in PowerPoint
Before you start cropping, you need to insert and select an image in your PowerPoint slide.
To insert an image, go to the Insert tab, click on Pictures , and choose This Device (for local images) or Stock Images or Online Pictures to find the perfect image for your presentation.
Select the image you want to insert and click Insert . Once the image is in your slide, select it. You’ll see sizing handles around the image, indicating that it’s selected and ready for cropping.
Now, how to crop the picture in PowerPoint? Let’s follow the steps below:
1. Open the Crop Tool
With the image selected, go to the Picture Tools Format tab. This tab only appears when an image is selected.
In the Size group, click on the Crop button. Black cropping handles will appear on the corners and edges of the image.

2. Adjust the Crop Handles
Click and drag the black cropping handles to adjust the cropping area. The image outside the cropping area will be dimmed to show the part that will be removed.
You can drag the corner handles to crop the image while maintaining its aspect ratio. Drag the side handles to crop the width or height independently.

3. Move the Crop Area
If you want to reposition the cropping area without changing its size, click and drag the image itself. This will move the image within the cropping frame, allowing you to focus on a specific part of the image.
4. Apply the Crop
Once you’re satisfied with the cropping area, apply the crop by clicking outside the image. Alternatively, you can press Enter to confirm the crop.
Advanced Cropping Options in PowerPoint
PowerPoint offers more advanced cropping options to enhance your images.
One useful feature is cropping to a specific shape. To crop a picture to fit in a shape, you can follow the steps below:

With the image selected, go to Picture Tools Format > Crop dropdown > Crop to Shape , and choose a PowerPoint shape from the gallery, such as a circle, star, or triangle.

The image will be cropped to fit the selected shape, and you can adjust the size and position as needed.
Another advanced option is Aspect Ratio cropping in PowerPoint . To crop an image and fit to a specific aspect ratio, follow the steps below:
Select the image and go to Picture Tools Format > Crop dropdown > Aspect Ratio , then choose a predefined aspect ratio, such as 16:9 or 4:3.
The image will be cropped to fit the selected ratio, ensuring that it maintains the correct proportions. For instance, cropping an image to a 16:9 ratio can make it fit perfectly within a widescreen slide layout.
You can also use the aspect fill and aspect fit options for more precise control. Aspect Fill fills the shape with the image, possibly cropping some parts, while Aspect Fit fits the entire image within the shape, possibly leaving some empty space. These options are available under Picture Tools Format > Crop dropdown.
Tips and Tricks for Effective Cropping
To maintain image quality while cropping, avoid excessive cropping that reduces the resolution and quality of your image.
If you’re unhappy with the crop, you can use the reset option to undo the changes.
To undo the crop entirely, go to Picture Tools Format > Reset Picture to revert to the original image.
Combining cropping with other adjustments, such as brightness and contrast, can further enhance your image. Experiment with different cropping techniques to find what works best for your presentation.
Be mindful of overcropping, which removes too much of the image and loses important details. On the other hand, cropping too little may retain unwanted elements that distract from the main focus. Also, ignoring aspect ratios can lead to distorted images, so always consider the aspect ratio when cropping.
Cropping images in PowerPoint is a simple yet powerful technique to improve the visual impact of your presentations. Whether you’re using basic or advanced cropping methods, these tools can help you create more engaging and professional slides. Experiment with the techniques discussed in this article, and don’t hesitate to explore other image editing options in PowerPoint.

Like this article? Please share
Crop Pictures, PowerPoint Shapes, Resize Filed under PowerPoint Tutorials
Related Articles

Filed under PowerPoint Tutorials • December 12th, 2023
How to Make a Shape Transparent in PowerPoint
Improve the aesthetics of your slides by learning how to make a shape transparent in PowerPoint. An ideal resource for creating complex graphic effects.

Filed under PowerPoint Tutorials • September 17th, 2023
How To Insert Swimlane in PowerPoint
Swimlane diagrams may seem challenging to create, but in reality, they are a powerful tool to express processes that can be handled with professional PowerPoint templates. Learn step-by-step how to create your own swim lane diagram in PowerPoint here!

• September 8th, 2023
Strategic Planning Process Templates For PowerPoint Presentations
Access a list of some very fine strategic planning process templates for PowerPoint that can be used for making business and academic presentations.
Leave a Reply
Blog – Creative Presentations Ideas
infoDiagram visual slide examples, PowerPoint diagrams & icons , PPT tricks & guides

Presenting Monthly Business Report with Charts and Tables in PowerPoint
Last Updated on May 27, 2024 by Agnieszka
Are you doing regular business reviews? Whether it is monthly or quarterly reports, consider using a visual way of explaining your data on slides. In this blog post, we’ll explore the benefits of presenting your monthly business report in PowerPoint and how visual elements can enhance clarity and engagement for your audience.
The graphics presented here are crafted by our team and the result of over two decades of experience in designing corporate presentations.
Get all the graphics presented here – click on the slide pictures to see and download the source illustration. Check the full a Monthly Business Report with Financial Performance Review (PowerPoint Template) .
What is a Company MBR?
MBR stands for Monthly Business Review and it is an internal “all hands” regular presentation where a company looks at how well it’s doing, checks important numbers, and sees if it’s meeting its goals.
Monthly management reports help the company see how it’s doing financially and operationally. They let the management team see what’s been happening and make proper decisions for the future.
If you want to make your business performance tracking look nice and easy to understand, try using a visually appealing presentation format. Here are some examples to inspire you!
What is Included in a Monthly Report?
The typical structure of a corporate MBR presentation that includes as financial review has the following sections:
- General overview of the Month – an Executive summary
- Revenue status – Month & YTD
- Gross margin status – Month & YTD
- Expenses overview – Month & YTD
- Cashflow status
- Accounts Receivable status
- Review of Monthly operational goals
- Next month or other period outlook
We show you an easy way to present the data of the monthly business report. To design this information we added simple shapes to arrange slide. Using rectangular outlines and simple shapes with visual elements such as icon of a financial document keeps your audience from feeling overwhelmed by the text and the content is easy to read.
Presenting an Executive Summary of a Monthly Report
MBR presentation usually starts with an executive summary, to wrap up the most important facts and show them in the beginning.
This is especially important when the MBR presentation is longer or when you want the audience to scan through major results right from the start. Sometimes the main decision-makers need to get such an overview at the beginning, e.g. because they will delegate details by discussions and run to other meeting
Here’s how you can show such an executive summary on one slide. Select the key facts, such what’s your
- top line e.g. this month revenue, compare it with last year revenue of the same month
- what’s bottom line
- what’s outlook for the next month

Idea of such slide design: in the picture above you can see how to create this layout. There are three parts composed of connector shapes. By composing a slide in this way, we create hierarchies of the key facts. It would be good to consider what information should be at the top and what at the bottom.
Each of the factors we highlight thanks to adding icons and distinctive color. At the end, you can add some picture in the background to enhance the overall aesthetics of the slide. Images can help tell a story and convey a message more effectively than text alone. In this case, the colors refer to factors in the picture for better visual appeal.
Presenting KPI Dashboard with Business Units Performance
When you want to show several key financial indicators altogether of your MBR on one slide, below you see an example of how you can organize such information on one concise page.
Notice the clear layout, with each indicator clearly labeled and accompanied by relevant data.

If you need to add a lot of data on one slide, we suggest adding visual elements such as charts in their simplest form – without axis details, repeating legends, and short number format. Additionally, the use of color and spacing helps to emphasize important information while maintaining visual clarity.
Keep the text on each slide short and to the point thanks to the audience reading a slide much faster, but if it’s necessary to add more data on one slide, just remember about white space, visual consistency, and emphasizing key data.
Showing Main Profit Drivers
If you want to present also more qualitative data such as text explanation of your main business lines profit drivers and their analysis, you can create such slide with short text information about each of the main drivers.
From the design point of view, you can organize it as follows below.

We arranged visuals in a logical sequence, reading flow is underlined visually by adding section numbers or letters. Remember to use white space and a cohesive look (font styles, sizes, and colors). You don’t want to overdesign. A balanced arrangement ensures the slide remains visually appealing and easy to read.
The importance is also a clear contrast between text and background color, especially if the slide has a lot of text and is quite small in size. You can also add visuals such as icons or images to complement the text.
Presenting Monthly Revenue Analysis
Do you need to show a table with reviews of sales, and budget per business line?
You can boost up standard Excel table and create customized nice-looking tabular form in PowerPoint.
See 2 slides below, and check how we designed such a financial table, using table colors and some additional graphics. Notice the use of enough space between text elements to enhance readability and avoid overcrowding. Ensure consistency of colors and shape styles throughout the slide for a cohesive and professional appearance.

The table for presenting monthly revenue analysis is a typical form allowing you to showcase comparison data. You can enhance it using PowerPoint table tools. To highlight key metrics we used formatting features like bold and color text to emphasize important figures or trends within the table.
If you would like to have more custom tables we suggest adding the shapes for column headings ensuring clarity for the audience. Additionally, you can use visual elements like color-coded cells or icons to draw attention to significant changes or outliers in the data.

In the second sample of the table with financial analysis, we show you how to create a design, that looks professional and easy to read. You can use an ordinary table with your data and highlight the main data using distinctive color for each of the factors. Then you can use dashed lines and the color of the table lines. It improves the design of the slide.
Additionally, we added a place for brief analysis or commentary text to provide context and insights into the financial data presented.
Presenting Monthly OPEX Data Chart
To show monthly operational expenses, you can customize the Excel bar chart in the following way, to present a monthly business report in a more engaging way.

We added a custom arrow shaped under each bar chart column to underline the status of Actual versus Estimated value per cost center. Here arrows are manually added, as there is no way to add them automatically in PowerPoint. It takes a minute more but you get the advantage of using nicer non-default custom signs, that make your presentation look different than default charts.
You can also consider creating separate data legend, adding bigger icons representing 3 categories:
- estimated expenses expressed as paper with planned financial figures
- actual expenses illustrated by icon showing giving money away
- difference shown as plus minus sign
In the end, adding a subtle picture in the background can create a nice visual touch. However be careful so the picture will be only a light addition to your content, not the main element.
Showing Debt Structure in A/R Section of MBR Presentation
The financial review part of the MBR report can contain an Account Receivable dashboard and cash flow development charts.
If you need to present a structure of debt, here is a slide with debt structure analysis.
We reused the Excel table and transformed it into a more readable form, showing various levels of debt by age, their monetary value, and percentage.

To create a nicer design, you can embed such a debt table with part of the picture, as we did on the bottom. Notice how this is done, so the picture does not overlap data presentation. The design trick we used here is making a table with a white background.
Usually, you also need some place for commenting on the debt structure. For that, we created a separate comment box on the right where you can add a text description of the debt analysis. That can be especially useful if you present a monthly business report that will be read without direct presentation.
Finish with Presenting the Action Plan for Next Month
At the end of the MBR presentation usually people also present next month’s outlook with next month’s targets and action plan.
We are sharing an example of how we designed such a slide presenting a set of goals, objectives, and actions in an easy-to-understand form. We used a table for that, as it’s easy to expand and gives a structure to the presented information. There is an important last column with a place to show who’s responsible for a specific action, so task assignment is clearly presented. This allows you to make people accountable or discuss eventual reassignments during the meeting.

On this slide we used the tips, which we wrote about in the previous examples. We designed the table using simple shapes with shadow and color to highlight and harmonize the column headers. To improve visual effects we added dashed lines inside the table.
Key Tips How to Present Monthly Business Report
When you create a presentation of your monthly business report, keep these few tips thanks your presentation will be more eye-catching and easier to remember:
- use a highlight color to emphasize key factors and headlines,
- customize tables and charts for clear structure and readability,
- keep the layout simple and clean,
- remember about white space and contrast text,
- consider using graphics such as icons or subtle background images to complement the text and enhance visual appeal.
By following these basic design principles, you can create a compelling presentation that leaves a lasting impact on your audience.
Resource: Monthly Business Report with Financial Performance Review PowerPoint Template
The examples above used the graphics from an Monthly Business Report with Financial Performance Review (PPT Template). All slides are available in the infoDiagram collection of presentation graphics.
Moreover, you can extend your data presentation with the Listed Company Financial Report Presentation (PPT Template) right here.
How to Add a Slide to an Existing PowerPoint Presentation
- Recent Posts
- How to Add Bullet Points in PowerPoint: A Step-by-Step Guide - May 25, 2024
- Where is Slide Master in PowerPoint: A Comprehensive Guide for Beginners - May 25, 2024
- How to Use Copilot in PowerPoint: A Step-by-Step Guide - May 25, 2024
Adding a slide to an existing PowerPoint presentation can be a quick and easy task. Whether you need to add a slide for a new point you want to make or to break up a long presentation, there are several ways to do it.

One option is to use the “New Slide” button located on the Home tab of the PowerPoint ribbon. Clicking on this button will insert a new slide with a default layout that can be customized to fit your needs. Another option is to use the “Reuse Slides” feature to add a slide from another presentation. This can be helpful if you have a slide that you want to use in multiple presentations without having to recreate it each time.
Regardless of which method you choose, it is important to keep the overall flow and organization of your presentation in mind. Adding too many slides can make your presentation feel cluttered and overwhelming, while too few slides can make it feel incomplete. By striking the right balance and using the right tools, you can add slides to your presentation that enhance your message and engage your audience.
JUMP TO TOPIC
Opening PowerPoint and Starting Fresh
Navigating the powerpoint interface, setting up your slide layouts, adding and importing slides, organizing slide structure, applying themes and formatting, utilizing slide master for consistency, reusing slides from other presentations, managing sections and organization, keyboard shortcuts for efficiency, using the sidebar and thumbnail pane, saving and sharing your presentation, creating a new powerpoint presentation.

When it comes to creating a new PowerPoint presentation, there are a few things you need to keep in mind. In this section, I will guide you through the process of opening PowerPoint, navigating the interface, and setting up your slide layouts.
To open PowerPoint, simply click on the program icon on your desktop or search for it in your Start menu. Once it opens, you can choose to start a new presentation or open an existing one. If you choose to start a new presentation, you will be presented with a blank slide.
The PowerPoint window consists of several different areas. The ribbon at the top of the screen contains all of the tools you will need to create and edit your presentation. The slide pane on the right-hand side of the screen displays a thumbnail view of your slides. The main work area in the center of the screen is where you will create and edit your slides.
Before you start adding content to your slides, you need to set up your slide layouts. This will help ensure that your presentation looks consistent and professional. To access the slide layout options, click on the “Slide Layout” button in the “Home” tab of the ribbon.
From here, you can choose from a variety of pre-designed slide layouts or create your own custom layout. You can also choose a theme for your presentation, which will apply a consistent design to all of your slides.
Overall, creating a new PowerPoint presentation is a straightforward process. By following these steps and taking the time to set up your slide layouts, you can create a professional-looking presentation that effectively communicates your message.
Working with Slides
When it comes to creating a PowerPoint presentation, it’s essential to have a good understanding of how to work with slides. Slides are the building blocks of your presentation, and they allow you to organize your content in a logical and visually appealing way. In this section, I will cover the basics of adding and importing slides, organizing slide structure, and applying themes and formatting.
Adding a new slide to an existing PowerPoint presentation is a straightforward process. To do this, you can either copy an existing slide or create a new one. To create a new slide, you can click on the “New Slide” button located in the “Home” tab. From there, you can choose the slide layout that best suits your needs.
If you want to add a slide from another presentation, you can do that too. Simply open the presentation that you want to add a slide to, click where you want to add the slide, and then select “Reuse Slides” from the “New Slide” dropdown menu. This will allow you to browse for the presentation you want to import slides from.
Organizing your slides is crucial to creating a well-structured and cohesive presentation. One way to do this is by using the Slide Sorter view. This view allows you to see all of your slides at once and rearrange them as needed. You can also group your slides into sections to help organize your content further.
Another way to organize your slides is by using placeholders. Placeholders are preformatted areas that allow you to insert text, images, and other content into your presentation easily. You can customize these placeholders to fit your needs and create a consistent look and feel throughout your presentation.
Applying themes and formatting to your slides is an effective way to enhance the visual appeal of your presentation. PowerPoint offers a wide range of built-in themes and formatting options that you can use to customize your slides. You can also create your themes and formatting options to match your branding or personal style.
To apply a theme to selected slides, you can click on the “Themes” dropdown menu in the “Design” tab and select the theme you want to use. You can also customize the fonts, colors, and background of your slides by using the “Format Background” and “Format Font” options.
In conclusion, working with slides in PowerPoint is an essential skill that can help you create engaging and visually appealing presentations. By understanding how to add and import slides, organize slide structure, and apply themes and formatting, you can take your presentations to the next level and impress your audience with your creativity and professionalism.
Advanced Slide Management
When creating a presentation, it is essential to maintain consistency in design and formatting. One way to achieve this is by utilizing the Slide Master. The Slide Master allows you to create a template for your presentation, which can then be applied to all slides in the presentation. This feature is especially useful for businesses and organizations that want to maintain a consistent look and feel across all their presentations.
To access the Slide Master, go to the View tab, click on Slide Master, and then select the layout you want to modify. You can then add elements such as logos, headers, and footers to the master slide. Any changes made to the Slide Master will be applied to all slides that use that particular layout.
Reuse slides from other presentations is a time-saving feature that allows you to import slides from other presentations. This feature is especially useful when creating a new presentation that requires slides from a previously created presentation. To reuse slides from other presentations, go to the Home tab, click on the arrow below New Slide, and then select Reuse Slides. You can then browse and select the presentation from which you want to import slides.
Managing sections and organization is an essential aspect of creating a well-structured presentation. You can use sections to group related slides together, making it easier to navigate through the presentation. To add sections, go to the Home tab, click on Section, and then select Add Section. You can then name the section and drag and drop slides into it.
Another way to manage organization is by using the Slide Sorter view. The Slide Sorter view allows you to see all the slides in your presentation and rearrange them as needed. To access the Slide Sorter view, go to the View tab and click on Slide Sorter.
In conclusion, advanced slide management is an essential aspect of creating a well-structured and visually appealing presentation. By utilizing features such as the Slide Master, reusing slides, and managing sections, you can save time and create presentations that are consistent and easy to navigate.
PowerPoint Tips and Tricks
As someone who has used Microsoft Office for years, I have picked up a few tips and tricks that make creating presentations a breeze. Here are some of my favorites:
Using keyboard shortcuts can save you a lot of time when creating a PowerPoint presentation. For example, pressing Ctrl + M will add a new slide with the same layout as the previous one, which is great if you want to keep a consistent look throughout your presentation. Another useful shortcut is Ctrl + S, which saves your presentation quickly.
The sidebar and thumbnail pane are two features in PowerPoint that can help you navigate your presentation quickly. The sidebar shows a preview of all your slides, so you can easily jump to any slide you want. The thumbnail pane shows a miniature version of your slide, which can be useful when rearranging slides or adding new ones.
Once you have finished your presentation, you will want to save it and share it with others. To save your presentation, simply click on the “Save” button in the top left corner of the screen. You can save your presentation as a PowerPoint file or as a PDF, which is useful if you want to share it with people who don’t have PowerPoint.
To share your presentation with others, you can use Microsoft’s OneDrive service, which allows you to upload your presentation to the cloud and share it with others. Alternatively, you can save your presentation to a USB drive and share it that way.
Tip: When sharing your presentation, make sure to check that all the fonts and images are embedded, so that they show up correctly on other people’s computers.
In summary, using keyboard shortcuts, the sidebar and thumbnail pane, and OneDrive can make creating and sharing PowerPoint presentations a breeze. With these tips and tricks, you’ll be able to create professional-looking presentations in no time.
Related posts:
- How to Enable Copilot in PowerPoint: Step-by-Step Guide
- Find the Slide Navigation Pane in PowerPoint: A Quick Guide
- Share PowerPoint for Collaborative Editing: A Step-by-Step Guide
- Vielen Dank für Ihre Aufmerksamkeit PowerPoint: Tips for a Professional Presentation
- Bullet Pointing in PowerPoint: A Simple Guide
- Mastering Uniformity: How to Make All Text Boxes the Same Size in PowerPoint
- How to Repair PowerPoint on Windows 10: A Step-by-Step Guide
- How to Rearrange Slides in PowerPoint: A Step-by-Step Guide
- How to Grant Editing Permission in PowerPoint
- How to Export Gantt Chart from MS Project to PowerPoint: A Step-by-Step Guide
- Delete Recordings on PowerPoint: A Step-by-Step Guide
- How to Use Morph in PowerPoint: A Step-by-Step Guide
Leave a Comment Cancel reply
Save my name, email, and website in this browser for the next time I comment.
IMAGES
VIDEO
COMMENTS
27 PowerPoint Tips and Tricks That Put The Power in PowerPoint Before we begin, we'll tell you a little secret. There's a direct add-in that you can use to supercharge your PowerPoint presentations! ClassPoint, the #1 audience engagement tool, lets you access a ton of interactive features with activities, slide show tools, gamification, and ...
Here are a handful of PowerPoint presentation tips and tricks to help you avoid missteps. 37. Stop With the Sound Effects. Sound effects are distracting and outdated. In most cases avoid it. Skip sound effects if you want to learn how to make your PowerPoint stand out without distractions. (Image source: Envato Elements.)
The ultimate compilation of PowerPoint tips and tricks to enhance your skills using Microsoft PowerPoint. I've combined long-established tips and tricks feat...
These PowerPoint presentation tips and tricks give you confidence to make you a skilled presenter. Editorial Note : This post was first published in February of 2019. Our staff updates this post regularly — adding new, exciting PowerPoint tips and templates (with special help from Brenda Barron , Andrew Childress and Sarah Joy ).
1. Open PowerPoint and click 'New.'. A page with templates will usually open automatically, but if not, go to the top left pane of your screen and click New. If you've already created a presentation, select Open and then double-click the icon to open the existing file. Image Source.
We can help you get started with some easy PowerPoint tips and tricks that'll help you create an impactful presentation, no matter what the occasion. Our PowerPoint for beginners tips will show you how to: Make an outline. Choose a theme. Find a font. Use visuals. Not use too much text. Limit your color.
1. Keep it simple. Keep your slides simple. It's the visual backdrop to what you are going to say. The most recommended PowerPoint tip for your productivity is called simplicity. You may be tempted by the graphical razzmatazz of beautiful images, background, and charts. At the end of the day, PowerPoint is a background visual aid for your talk.
PowerPoint Presentation Approach Tips. 1. Use the Tell 'n Show method: a headline with a single point and media to support it. To get your audience to understand and remember what you say, use the Tell 'n' Show (SM) method. Use the slide title to tell your point-what you want them to remember.
A step-by-step tutorial on my top 20 Microsoft PowerPoint tips and tricks for 2021. The PPT Tips and tricks are the latest and greatest features, and include...
A good presentation needs two fonts: a serif and sans-serif. Use one for the headlines and one for body text, lists, and the like. Keep it simple. Veranda, Helvetica, Arial, and even Times New Roman are safe choices. Stick with the classics and it's hard to botch this one too badly.
12 Top PowerPoint Presentation Hacks. PowerPoint design hacks serve two purposes. They save you time, and they help you serve up impressive designs to wow your audience. What's more, you don't need to be a design expert to use the 12 PowerPoint design hacks we'll cover. Here's our list: 1. Use the Guides.
Minimalistic content Simplicity allows your audience to focus on your key message without distractions. Keep pointers or short phrases to highlight your main points, keeping the text concise and easily readable. 2. Use High-Quality Visuals. Another helpful Powerpoint tips and tricks is to focus on the visuals.
1. Don't settle for the basic, built-in PowerPoint templates. PowerPoint templates make your lives easier. Templates mean you don't have to design everything from scratch. Just select your layout, add your content, make a few edits here and there, and you're done.
10 Tips for Effective PowerPoint Presentations. Tip #1: Choose an Interesting Topic. Tip #2: Do Some Deep Research. Tip #3: Use an Amazing Presentation Tool. Tip #4: Pick Out a Presentation Template. Tip #5: Keep Your Audience in Mind. Tip #6: Add Eye-Catching Headings and Text. Tip #7: Keep it Engaging With Animations.
So Flickr users, you still have to visit the site to download great, high-resolution Creative Commons free-to-use images in your presentation. 8. Add Grids and Rulers. Lining things up in ...
Position Yourself Facing The Audience. PowerPoint presentations are usually done on a laptop, with output going to a large screen. Use the F3 key (depending on laptop) to display the presentation both on the big external screen and the laptop screen. You can also use Windows Key + P to do this.
If you want to learn more cool PowerPoint tricks, be sure to check out our other guides. Start with 7 tips for finding the perfect PowerPoint template. Also, read our 10 pro PPT tips guide. And our how to give a fun presentation guide has some useful tips too. PowerPoint Templates. Microsoft PowerPoint (PPT) is the go-to choice for creating ...
As of now, PowerPoint allows to rotate or flip text boxes, Word art, pictures, and shapes. To do this, just click on the object and go to the Shape Format tab. From here, click on "Rotate" to get features like Rotate 90 degrees left/right, flip vertical/horizontal, and more options. 15. Use the New Zoom Feature.
Select the Set Up Slide Show button. Check the box labeled Loop continuously until 'Esc.'. Select the OK button. You'll need to press the Esc key to end the looped PowerPoint presentation. Clicking on the final slide in your deck or pressing the right arrow key on your keyboard will cause the slideshow to restart. 3.
16 PowerPoint tips and tricks. Here are 16 tips and tricks for making a great PowerPoint presentation: 1. Know your audience. Before you begin preparing a PowerPoint presentation, consider your audience. Personalize your presentation format and message based on what your audience might already know about the subject and how much it could engage ...
Then you can apply those properties to other shapes and text. This is a quick and easy way to format shapes and text to brand standards. The shortcut for the Pick Up Style tools are worth remembering: Pick Up Style: CTRL+SHIFT+C. Apply Style: CTRL+SHIFT+V. With their use, you can quickly turn two visually different objects….
Of all the PowerPoint presentation tips and tricks out there, this is one of the most important. Oftentimes the difference between a killer presentation and boring one is quality visuals. Work hard to get your visuals right and the quality of your presentations will skyrocket. 6. Choose the Right Colors and Fonts
1) Best PowerPoint Tips and Tricks. a) Choose the right design theme. b) Use consistent and professional fonts. c) Create a visual hierarchy with headings and subheadings. d) Utilise engaging images and graphics. e) Keep slides simple and minimalistic. f) Incorporate relevant charts and graphs.
To summarize a PowerPoint presentation effectively, it's important to review the entire presentation first. This allows you to get a sense of the overall flow and the key themes. Pay attention to the title slides and the concluding slides, as they often contain the main message and summary points.
Take advantage of the Slide Show tab. This tab offers a variety of tools that can help you create a more engaging presentation, including zooming and scrolling. By mastering these tips and tricks, you'll be well on your way to creating professional presentations that are sure to impress your audience.
Tips and Tricks for PowerPoint Efficiency. As someone who frequently uses PowerPoint to create presentations, I've learned a few tips and tricks to make the process more efficient. In this section, I'll share some of my personal insights on how to improve your PowerPoint workflow. Reusing Slides and Importing Content
Images play a crucial role in enhancing the visual appeal of your PowerPoint presentations. Whether you're trying to highlight a specific part of a photo, remove unnecessary elements, or create custom shapes, the cropping tool can be helpful to enhance the presentation design. ... Tips and Tricks for Effective Cropping. To maintain image ...
By following these basic design principles, you can create a compelling presentation that leaves a lasting impact on your audience. Resource: Monthly Business Report with Financial Performance Review PowerPoint Template. The examples above used the graphics from an Monthly Business Report with Financial Performance Review (PPT Template).
PowerPoint Tips and Tricks. As someone who has used Microsoft Office for years, I have picked up a few tips and tricks that make creating presentations a breeze. Here are some of my favorites: Keyboard Shortcuts for Efficiency. Using keyboard shortcuts can save you a lot of time when creating a PowerPoint presentation.