

A Beginner’s Guide to Webpack
Share this article

What Is Webpack?
Webpack main concepts, how webpack works.
- What’s New in Webpack 5
Getting Started
Transpiling modern javascript to es5, working with styles, asset management, speed up the development process with webpack-dev-server, clean up the output, frequently asked questions (faqs) about webpack.
Nowadays, we’re forced to use many accessory tools to facilitate, speed up and optimize our web development workflow. Often, though, such tools add an extra layer of complexity into the stack. As a result, we need to utilize additional time and effort to learn, understand and use these tools correctly. The same is true for webpack .
When using webpack for the first time, it can be difficult to understand how it works and how it should be used. Although it has good documentation, it can be daunting for novices, and it has a steep learning curve. However, webpack is worth learning and can save considerable time and effort in the long run. In this tutorial, I’ll introduce all the core concepts to help you get started.
Note: in this tutorial I’ve used webpack 5.9.0.
As its core, webpack is a static module bundler. In a particular project, webpack treats all files and assets as modules. Under the hood, it relies on a dependency graph. A dependency graph describes how modules relate to each other using the references ( require and import statements) between files. In this way, webpack statically traverses all modules to build the graph, and uses it to generate a single bundle (or several bundles) — a JavaScript file containing the code from all modules combined in the correct order. “Statically” means that, when webpack builds its dependency graph, it doesn’t execute the source code but stitches modules and their dependencies together into a bundle. This can then be included in your HTML files.
Now, to expand the above cursory overview, let’s explore the main concepts webpack uses.
Webpack has some main concepts which we need to understand clearly before digging in its practical implementation. Let’s examine them one by one:
- Entry : the entry point is the module that webpack uses to start building its internal dependency graph. From there, it determines which other modules and libraries that entry point depends on (directly and indirectly) and includes them in the graph until no dependency is left. By default, the entry property is set to ./src/index.js , but we can specify a different module (or even multiple modules) in the webpack configuration file.
- Output : the output property instructs webpack where to emit the bundle(s) and what name to use for the file(s). The default value for this property is ./dist/main.js for the main bundle and ./dist for other generated files — such as images, for example. Of course, we can specify different values in the configuration depending on our needs.
- Loaders : by default, webpack only understands JavaScript and JSON files. To process other types of files and convert them into valid modules, webpack uses loaders. Loaders transform the source code of non-JavaScript modules, allowing us to preprocess those files before they’re added to the dependency graph. For example, a loader can transform files from a CoffeeScript language to JavaScript or inline images to data URLs. With loaders we can even import CSS files directly from our JavaScript modules.
- Plugins : plugins are used for any other task that loaders can’t do. They provide us with a wide range of solutions about asset management, bundle minimization and optimization, and so on.
- Mode : typically, when we develop our application we work with two types of source code — one for the development build and one for the production build. Webpack allows us to set which one we want to be produced by changing the mode parameter to development , production or none . This allows webpack to use built-in optimizations corresponding to each environment. The default value is production . The none mode means that no default optimization options will be used. To learn more about the options webpack uses in development and production mode, visit the mode configuration page .
In this section, we’ll examine how webpack works. Even a simple project contains HTML, CSS and JavaScript files. Also, it can contains assets such as fonts, images, and so on. So, a typical webpack workflow would include setting up an index.html file with the appropriate CSS and JS links, and the necessary assets. Also, if you have many CSS and JS modules which depend on each other, they need to be optimized and properly combined in one unit ready for production.
To do all this, webpack relies on configuration. Starting from version 4 and above, webpack provides reasonable defaults out of the box, so creating a configuration file is not required. However, for any non-trivial project you’ll need to provide a special webpack.config.js file, which describes how the files and assets should be transformed and what kind of output should be generated. This file can quickly become monolithic, which makes it hard to understand how webpack does its job unless you know the main concepts behind its working.
Based on the provided configuration, webpack starts from the entry points and resolves each module it encounters while constructing the dependency graph. If a module contains dependencies, the process is performed recursively against each dependency until the traversal has completed. Then webpack bundles all the project’s modules into a small number of bundles — usually, just one — to be loaded by the browser.
What’s New in Webpack 5
A webpack 5 release was announced in October 2020 . The post is quite long and explores all the changes made to webpack. It’s impossible to mention all changes and it’s unnecessary for a beginner’s guide like this. Instead, I’ll try to put a small list with some general highlights:
- The build performance is improved with Persistent Caching. Developers can now enable a file-system–based cache, which will speed up the development builds.
- The Long Term Caching is also improved. In webpack 5, changes made to the code that don’t affect the minimized bundle version (comments, variable names) won’t result in cache invalidation. Also, new algorithms were added which assign short numeric IDs to modules and chunks and short names to exports in a deterministic way. In webpack 5, they’re enabled by default in production mode.
- Improved bundle size, thanks to better Tree Shaking and Code Generation. Thanks to the new Nested Tree-Shaking feature, webpack is now able to track access to nested properties of exports. The CommonJs Tree Shaking allows us to eliminate unused CommonJs exports.
- The minimum supported Node.js version has increased from 6 to 10.13.0 (LTS).
- The codebase is cleaned up. All items marked as deprecated in webpack 4 are removed.
- Automatic Node.js polyfills are removed. Previous versions of webpack have included polyfills for native Node.js libraries like crypto . In many cases they are unnecessary and increase the bundle size drastically. That’s why webpack 5 stops automatically polyfilling these core modules and focuses on front-end–compatible modules.
- As an improvement of development, webpack 5 allows us to pass a list of targets and also support versions of target. It provides automatic determination of the public path. And also, it offers automatic, unique naming, which prevents conflicts between multiple webpack runtimes that use the same global variable for chunk loading.
- The webpack-dev-server command is now webpack serve .
- Asset modules are introduced, which replace the uses of file-loader , raw-loader , and url-loader .
Please open the announcement link above to find more complete and detailed information about all the updates.
Finally, if you’re coming from webpack 4, here’s the migration guide .
Note: you can find the files for our project in the GitHub repo .
Now that we have a solid theoretical foundation, let’s implement it in practice.
To start, we’ll create a new directory and switch to it. Then we’ll initialize a new project:
Next, we need to install webpack and webpack CLI (command line interface) locally:
Now, the content of the generated package.json should be similar to the following:
Besides being a package manager, npm can be used as a simple task runner. We can create webpack tasks by including the name of our task followed by its instructions in the scripts section of the package.json file. Let’s try this now. Open package.json and change the scripts object to the following:
Within the scripts property, npm allows us to reference locally installed Node.js packages by their names. We use that and the --mode flag to define dev and build tasks, which will run webpack in development ( npm run dev ) and production ( npm run build ) mode respectively.
Before we test the tasks we’ve just created, let’s create a src directory and put an index.js file in it so that it contains console.log("Hello, Webpack!"); . Now we can already run the dev task to start webpack in development mode:
As I mentioned before, webpack sets the default entry point to ./src/index.js and the default output to ./dist/main.js . So what webpack does when we run the dev task is to get the source code from index.js file and bundle the final code in a main.js file.
Great! It works as expected. But to verify that we get the correct output, we need to display the result in the browser. To do that, let’s create an index.html file in the dist directory:
Now, if we open the file in the browser, we should see the Hello, Webpack! message in the console.
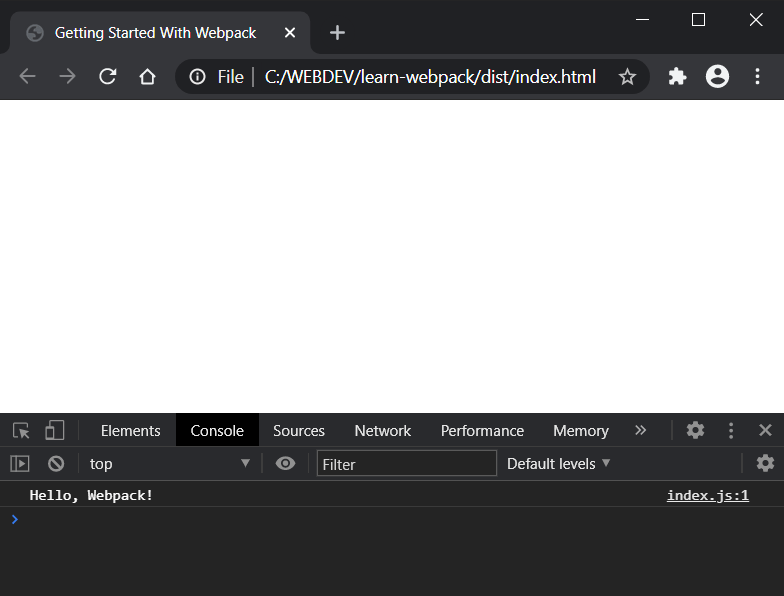
So far, so good. But writing our index.html file manually can be problematic in some cases. For example, if we change the name of our entry point, the generated bundle will be renamed, but our index.html file will still reference the old name. So, we’ll need to update our HTML file manually every time we rename an entry point or add new one. Fortunately, we can easily fix that with the html-webpack-plugin . Let’s install it now:
Note: notice that I have typed html-webpack-plugin@next instead of just html-webpack-plugin . At the time of writing, the former is the proper version for webpack 5, and the latter is the version for webpack 4. This could change in future, so for the actual version check the html-webpack-plugin repo .
At this point, to activate the plugin, we need to create a webpack.config.js file in the root directory with the following content:
As you can see, to activate a webpack plugin, we need to include it in the file and then add it to the plugins array. If needed, we also pass options to the plugin. See the html-webpack-plugin repo for all available options and the ability to write and use your own templates .
Let’s run webpack now to see what will happen:
Let’s open the index.html . As we can see, the plugin automatically creates an updated index.html file for us, which uses the title option from the configuration:
Let’s now expand our project and specify custom names for the entry and output properties. In webpack.config.js we add the following before the plugins property:
Here, we change the entry file to app.js and the output folder to deploy . We also tweak the name of the generated bundle file slightly. Now it will start with the name of the entry (“main”) followed by the word “bundle” and the .js file extension.
Now, we’ll create an src/component.js file:
Next, we rename index.js to app.js to reflect our changes, and replace its content with the following:
Now, let’s run webpack again:
Let’s examine and clarify the information from the webpack output. After the “Compilation finished” message you can see the files generated in the deploy directory ( main.bundle.js and index.html ). Below them, you can see the source files: the entry module ( app.js ) and its dependency ( component.js ).
So now, in the deploy folder, we have the newly generated bundle file main.bundle.js . If we open the index.html file in the browser, we should see Hello, Webpack! displayed on the page.
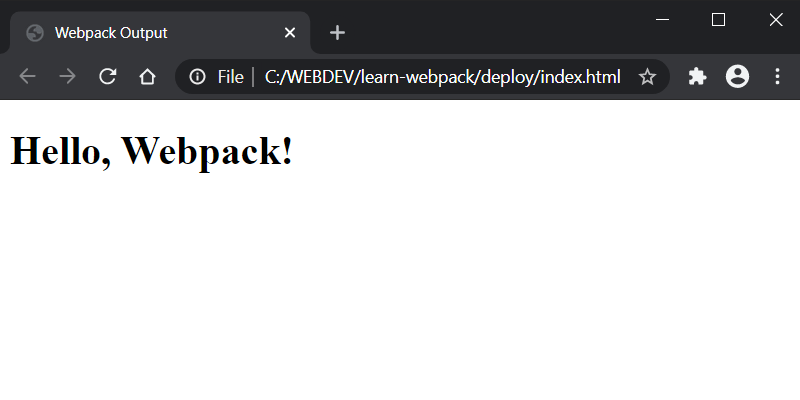
Also, if we check the source of index.html , we’ll see that the value of the src property in the script tag is updated to main.bundle.js .
At this point, we can delete the dist folder, which webpack generated initially, because we won’t need it anymore.
In this section, we’ll discover how ES6 can be transpiled to ES5-compliant code that works in all browsers. Let’s start by running the following command:
Here, I run webpack with devtool option set to inline-source-map in order to render the code more readable. This way I can demonstrate the code transpilation from ES6 to ES5 more clearly.
Next, let’s open main.bundle.js :
As you can see, the modern ES6 features (the arrow function and the const declaration) from component.js module are not transformed to ES5-compliant code by default. To make our code work in older browsers, we must add the Babel loader:
Then, in webpack.config.js add module after the output property:
When we define rules for a webpack loader, there are usually three main properties we need to define:
- test , which describes what kind of files should be transformed.
- exclude , which defines the files that shouldn’t be processed from the loader(s), if we have such.
- use , which tells which loader(s) should be used against the matched modules. Here, we can also set the loader options, as we’ve just done with the presets option.
Run the following command again:
This time, the code in main.bundle.js is compiled:
Perfect. Now we can use the modern JS features, and webpack will transform our code so it can be executed by older browsers.
In this section, we’ll see how we can add some styles to our project. To do this, we need to install two loaders:
- css-loader parses the CSS into JavaScript and resolves any dependencies
- style-loader outputs our CSS into a <style> tag in the HTML document.
Let’s add the necessary configuration in webpack.config.js :
Here, the order of loaders is important. They’re evaluated in reverse order — that is, from right to left and from bottom to top. In our case, the css-loader is evaluated first, followed by the style-loader .
Now, let’s create a file src/style.css :
Then we import it into app.js :
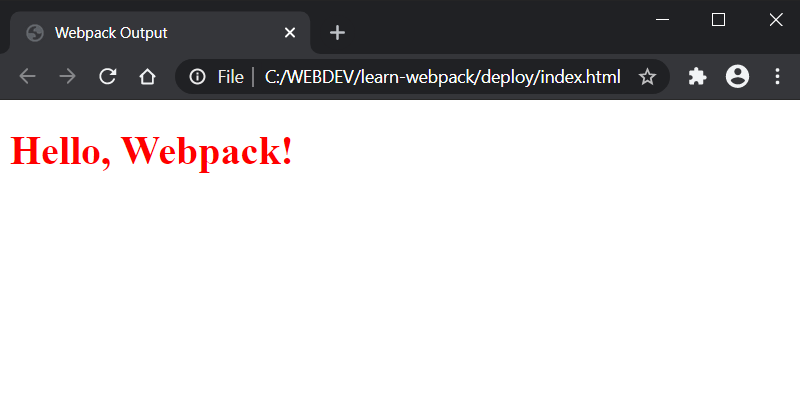
When we run webpack ( npm run dev ) and then open the index.html , we should see the Hello, Webpack! message in red color.
Most often your project will contain assets such as images, fonts, and so on. In webpack 4, to work with assets, we had to install one or more of the following loaders: file-loader , raw-loader , and url-loader . In webpack 5, as we saw earlier, this is not needed anymore, because the new version comes with the built-in asset modules .
Here, we’ll explore an example with images. Let’s add new rule in the webpack.config.js :
Here, the type asset/resource is used instead of file-loader .
Now, to test the loader we’ll create an image-component.js file, in the src directory, with the following content:
Here, we import our image as a module and use it to create an <img/> tag. To make the above code work, you need to download the image and then rename it to image.png and put it in the src directory.
The next thing is to import our image component in app.js :
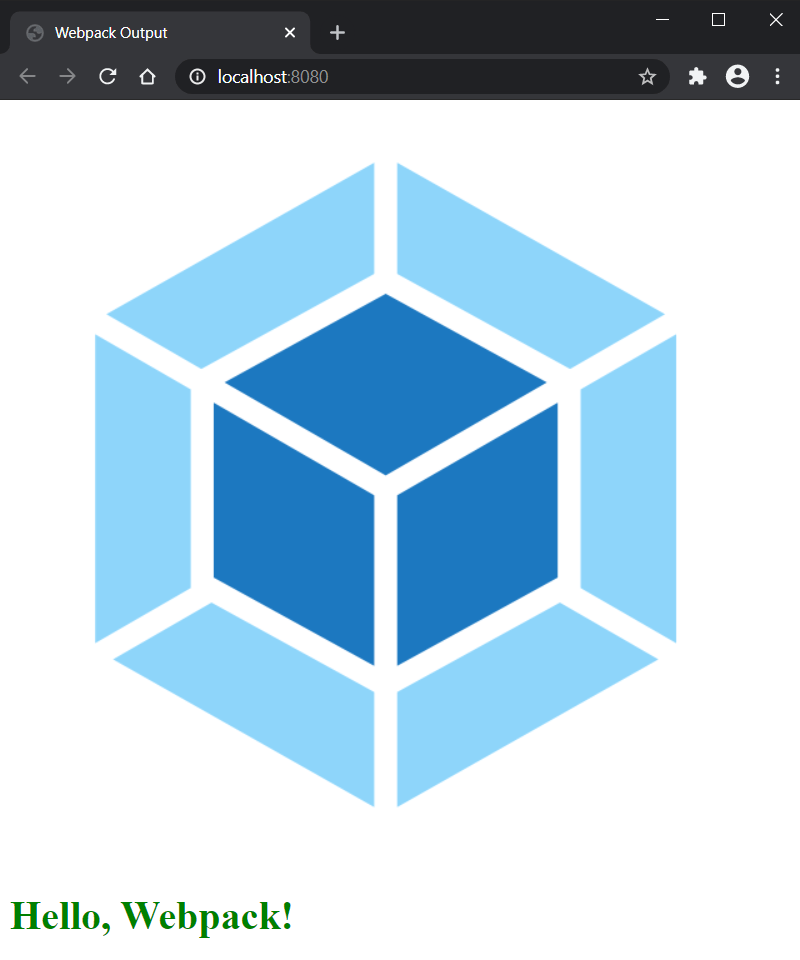
And voila. Now, when we run webpack ( npm run dev ) and open the page, we should see the image above the Hello, Webpack! message.
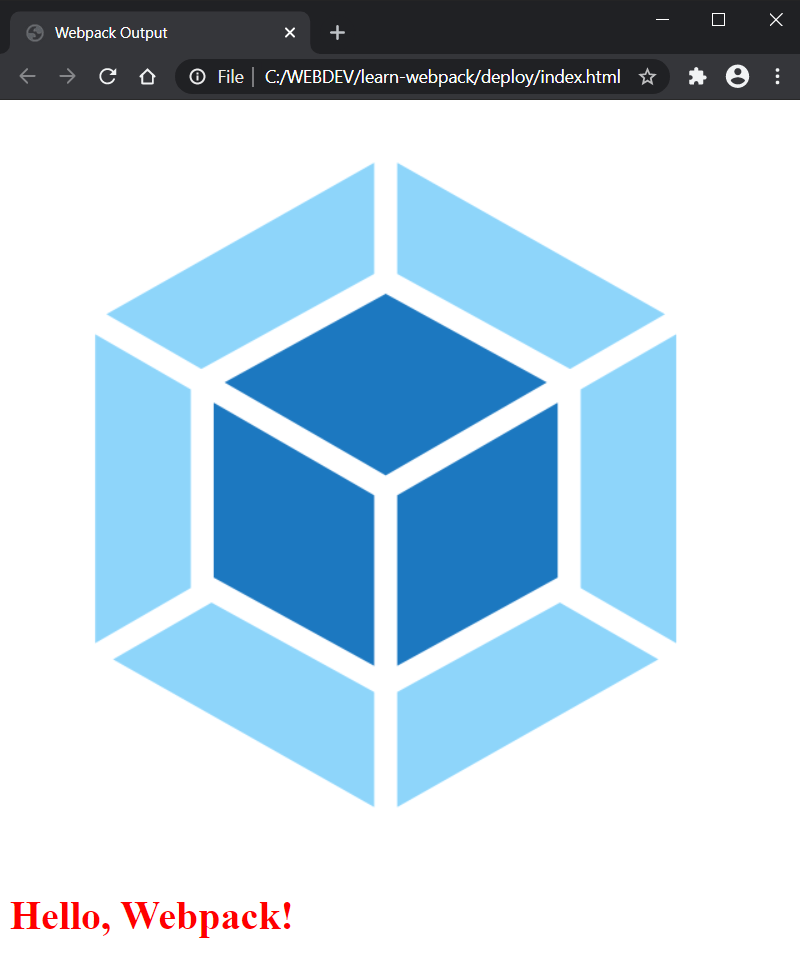
If you take a look at the deploy folder right now, you’ll find three files generated in it: a1af828b4e65d37668e1.png , main.bundle.js , and index.js . Here’s what webpack does behind the scenes: the image is added to the deploy folder and assigned a unique hash, followed by the image extension. The image is then included in the newly generated main.bundle.js file as a module. Finally, an index.html file is generated with reference to the main.bundle.js file.
Currently, we need to rebuild our code every time we make a change. Fortunately, webpack offers a live-reloading web server which automatically builds and refreshes the page. To install it, run the following:
We need to update our dev script, in package.json , to use the server:
Now let’s configure the server in webpack.config.js by adding the following property after the output :
This tells webpack-dev-server to serve the files from the deploy directory and to open the entry page automatically.
Now, if we run webpack ( npm run dev ), we should see how the page is automatically opened in the browser on http://localhost:8080 .
Note: After running the webpack-dev-server you won’t find any files in the deploy folder (it will be empty) because the server doesn’t write any output files after compiling. Instead, it keeps bundle files in memory and serves them as if they were real files mounted at the server’s root path. See the webpack development guide for more information. However, when you run the build command, the deploy folder will be populated with the generated files as expected.
If we now change any of the source files and save them, the web server will automatically reload the page after the code has been compiled. Try to change the color property in our CSS file to green, for example, and you should see how the color is updated appropriately in the page.
As our project progresses, the deploy folder might become quite cluttered. On every build, webpack will generate the bundles and put them in the deploy folder, but it doesn’t keep track of which files are actually in use by your project. So it’s a good practice to clean the deploy folder before each build, so that only the files in use will be generated. To do this, we need to install and configure the clean-webpack-plugin :
In webpack.config.js :
Now, run webpack ( npm run build ) and inspect the deploy folder. You should now only see the files generated from the build without old and unused files. To test it, create a simple text file which is not used in the project and run the build script again. After the compilation the file will be deleted.
Webpack is a useful and powerful tool. This tutorial introduces only the core concepts, but webpack offers many more features, plugins, and different techniques to apply them, which you can adopt as your knowledge grows. Here’s a list of resources I suggest for further exploration of webpack’s capabilities:
- Official webpack Documentation . The documentation offers you structured information about webpack’s main concepts and configuration, as well as plugins and loaders you can use in your project, and basic guides and API references.
- Webpack 5: From Apprentice to Master . A complete manual which dives deeply into each webpack aspect. Written by Juho Vepsäläinen, a core developer of webpack.
- Webpack: The Core Concepts . A great introductory video course by Sean Larkin, one of webpack’s maintainers.
What is the difference between Webpack and other module bundlers?
Webpack is a powerful module bundler that bundles JavaScript files for usage in a browser. Unlike other module bundlers, Webpack has a rich plugin system that allows you to customize its functionality. It also supports a variety of file types, not just JavaScript, including CSS, images, and fonts. This means you can manage all your assets in one place. Additionally, Webpack has a feature called “code splitting” that allows you to split your code into various bundles which can then be loaded on demand or in parallel.
How can I configure Webpack for multiple environments?
Webpack allows you to have separate configuration files for different environments like development, testing, and production. This can be achieved by creating separate configuration files for each environment and using the ‘webpack-merge’ utility to merge the common configuration with the environment-specific configuration. This way, you can have specific settings for each environment without duplicating code.
How does Webpack handle CSS?
Webpack can handle CSS files using loaders. Loaders are transformations that are applied to the source code of a module. To process CSS files, you can use the ‘style-loader’ and ‘css-loader’. The ‘css-loader’ interprets ‘@import’ and ‘url()’ like ‘import/require()’ and will resolve them, while the ‘style-loader’ injects CSS into the DOM.
What is Hot Module Replacement in Webpack?
Hot Module Replacement (HMR) is a feature in Webpack that allows modules to be updated at runtime without the need for a full refresh. This can significantly speed up development as it allows you to see changes without losing the state of the application.
How can I optimize my Webpack build for production?
Webpack provides several ways to optimize your build for production. This includes minifying your code using plugins like ‘UglifyJsPlugin’, eliminating unused code with ‘tree shaking’, and splitting your code into chunks using the ‘SplitChunksPlugin’. You can also use the ‘DefinePlugin’ to create global constants which can reduce code size and improve performance.
How can I use Webpack with Babel?
Babel is a popular JavaScript compiler that allows you to use next-generation JavaScript today. To use Babel with Webpack, you need to install the ‘babel-loader’ and configure it in your Webpack configuration file. This will allow Webpack to process your JavaScript files with Babel before bundling them.
Can I use Webpack with TypeScript?
Yes, you can use Webpack with TypeScript. To do this, you need to install the ‘ts-loader’ or ‘awesome-typescript-loader’. Then, you can configure Webpack to process your TypeScript files with these loaders before bundling them.
How can I handle images with Webpack?
Webpack can handle images using the ‘file-loader’ or ‘url-loader’. These loaders allow you to import images in your JavaScript files, and Webpack will process them and include them in your bundle.
Can I use Webpack with React?
Yes, you can use Webpack with React. Webpack can handle JSX syntax (used in React) with the help of ‘babel-loader’. You can also use the ‘react-hot-loader’ for hot module replacement in your React components.
How can I debug my Webpack configuration?
Webpack provides a variety of options for debugging. You can use the ‘debug’ option in your configuration file to enable debug mode. You can also use the ‘devtool’ option to control how source maps are generated. Additionally, Webpack provides detailed error messages and stack traces to help you debug your configuration.
I am a web developer/designer from Bulgaria. My favorite web technologies include SVG, HTML, CSS, Tailwind, JavaScript, Node, Vue, and React. When I'm not programming the Web, I love to program my own reality ;)

How to build modern applications with WEBPACK
How far can we get with Webpack’s default configuration?
I had the privilege of speaking at GDG Devfest last month with a talk that was centered around using webpack in our modern day applications. You can check out the slides here .
Daily, I get to work as an Engineer and/or consultant with amazing and fast-paced teams, and webpack seems like the recurring factor throughout these teams (we use ReactJs for most of our applications). Initially, my talk was supposed to focus on using webpack with frontend frameworks/libraries like ReactJS, Vue, Angular etc.
Before submitting my proposal, I decided to run a mini survey to know what people thought about webpack. To my surprise, a lot of people labeled webpack as “Only used with frameworks” which was far from the truth. Still others said that “setting up webpack was daunting”. This led me to focus more on using webpack with Vanilla JS and seeing how far we could go with webpack’s default configuration.
WHAT IS WEBPACK?
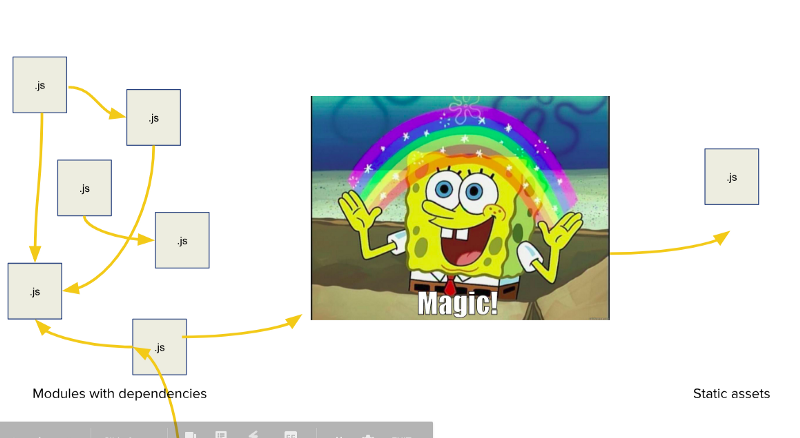
I personally define webpack as a tool that takes many Javascript modules and merges them into one Javascript module that can be sent off to the browser.
I know, it’s an oversimplification of what webpack does, but people seem to understand it. To explain more, webpack is a bundler that looks for Javascript modules with dependencies (basically, Javascript files that need code from other Javascript files), squashes them together, and then produces a Javascript file or files that have no dependencies. That way they can easily be shipped to the browser.
History of Webpack
To understand the problems that webpack tries to solve, we need to know a little bit about the history of webpack itself. To keep this section very short, I’ve just outlined two important tools and one concept:
- Google Web Toolkit : This is a framework from Google that converts Java to Javascript (I know, right?). It has one feature that seems to be my personal favorite feature in webpack which is “code splitting”. (I will explain code splitting in a subsequent article.)
- Modules_Webmake : This is the library that webpack originates from. It’s essentially a tool that allows us to organize our Javascript files for the browser the same way we do for NodeJS (awesome).
- IIFE: means immediately invoked function expression. This is basically a Javascript function that is called or invoked the same time as it was created.
Immediately Invoked Function Expression
I broke this into its own section because I had to explain further. This is an example of an IIFE:
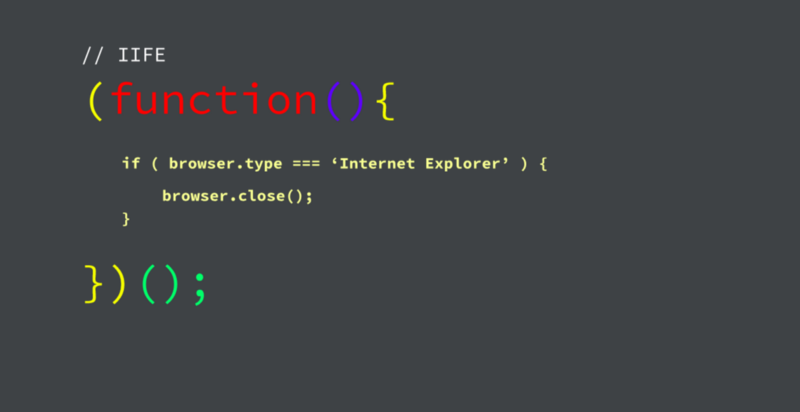
If we were to place this function in our script tag, this would run immediately. The script tag is loaded by the browser. It’s kind of equivalent to attaching a function to window.onload but with an added advantage.
Because of the way closures work in Javascript, all the variables that were declared in the IIFE are scoped within that function. This means I wouldn’t have issues like namespace clashes in my codebase but at the same time, I still have access to the functions exposed by the IIFE.
Why Webpack?
So, what are the problems we face today that webpack helps us solve?
First, we have the issue of script tags. I have worked on a codebase where each HTML page has at the very least 30 script tags arranged in a very precise order. I know some might say that isn’t really an issue, but the browser will have to make one request per file which can hurt your “time to load”. Also the script tags can get hard to manage, where rearranging just one could break the application (I tried that ?).
Second, we still have the issue of namespacing where the global namespace can get cluttered. I know we are very creative people especially when it comes to naming variables, but then when you work on a larger team there are times where the variable names just clash with each other. Or even your future self might think of the same name again (yeah it happens).
I know some organizations that make it habit for their developers to always keep their variables within the scope of their function, but we can’t always rely on that (or on this ). In the end, it just makes separation of concern difficult.
Third, remember I mentioned that webpack originated from modules_webmake. Because webpack allows us to organize our files the same way we do in NodeJS (using CommonJS), we have the added benefit of writing modular code which scales really well (just ask people that use frontend frameworks).
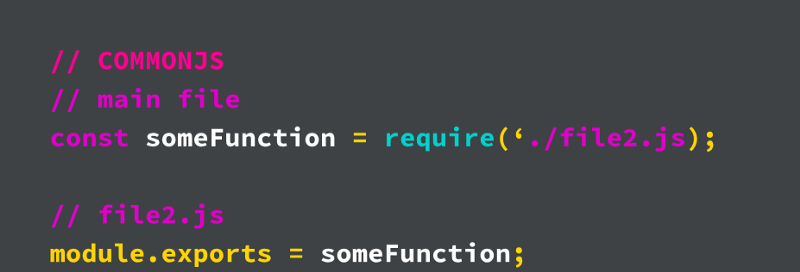
I won’t explain too much about CJS as this isn’t the point of the article. But you can say it’s a JS module system used in NodeJS .
Webpack allows us to use this module and even the “better” ES module system in the browser without any issue (Webpack handles it in a smart way). This helps us write really modular and maintainable code where a JS file can handle a single functionality (Single Responsibility Principle).
ES Modules (ESM)

This is another module system that, believe it or not, is already implemented by current browsers. But unfortunately, it has it’s limitations there. Webpack also allows us to use this module with no issue (as webpack still converts it in the end), but I found that using ESM makes most codebases I have worked on more readable. I would have loved to dive deeper into this but that isn’t the aim of this article. For a better explanation I would recommend this amazing article .
How does Webpack work?
I know I said earlier that Webpack is magic but I lied. To put it as simply as possible:
- Webpack takes a path to a single entry point, which is a JS file, and looks for import statements (it could either be ESM or CJS).
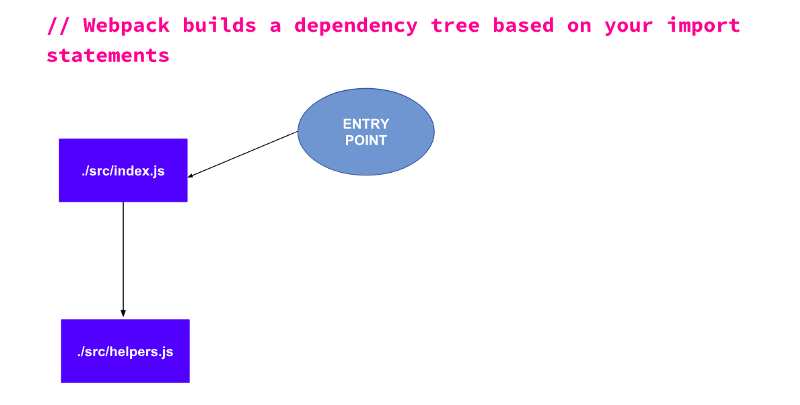
- It then traverses the imported file, also looking for more import statements, while it creates a dependency graph in the process.
To explain better, take a look at the image:
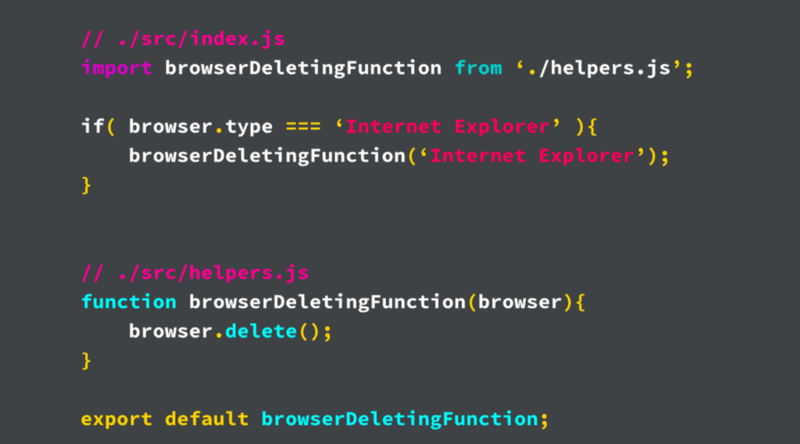
I have two files there, index.js and helpers.js These two files perform different functions, but I am importing and using the function in helpers.js in my index.js file. By default, Webpack’s entry point is ./src/index.js and from there it tries to build the dependency graph as shown below:
How to get started
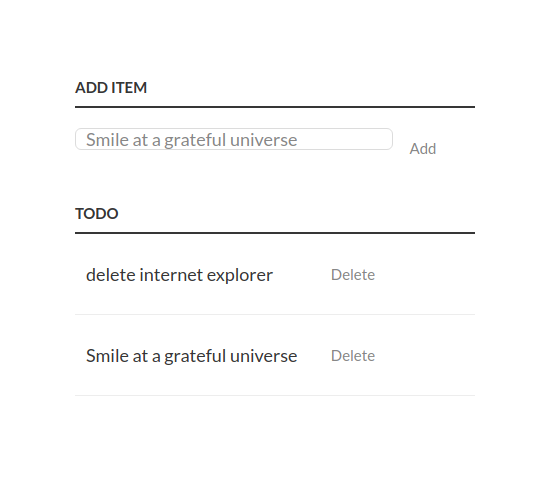
To get a better understanding of how webpack works, we are going to build a simple TODO app. It will have just the basic add and delete functionality and we are going to bundle it using Webpack’s default configuration (so no webpack config file). This is what the app will look like:
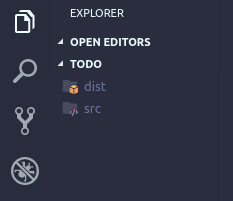
The first step is to create a new project directory and create two folders, a folder named dist and another named src . By default, Webpack’s entry point is the path ./src/index.js and it outputs the bundled JS into ./dist/main.js — that’s why we are creating the two folders.
In the dist folder you can create the index.html file. This is not necessary for webpack as the file can be placed anywhere within the project directory and you can just make reference to the main.js file. In the end, your project structure should look like this:
In the src folder we will create the index.html file where we will start the implementation of our TO-DO app’s functionalities. But first, let’s populate the index.html file. Since creating a TO-DO app isn’t part of this tutorial I will just show the code below:
Let us now make it functional. We are going to break the two functions (Add and Delete) into their own files and then import them into index.js . We will create two files in our src folder named addTask.js and deleteTask.js . Your project structure should now look like this:
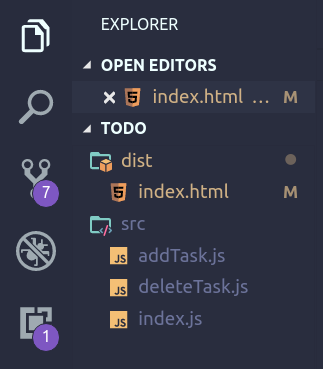
We can now start adding the necessary logic, so let’s implement the deleteTask.js first because it has no dependencies. Paste this in your deleteTask.js file:
All that is going on in that file is we are creating the deleteTask function and then exporting it as a default export.
We can now implement the addTask function. In the addTask.js file add the following code:
In this one, we first of all import the deleteTask.js file. By default, if no extension is specified in the import, webpack automatically assumes that it’s a .js file. Then we have the function that creates the list item containing the task that was entered in the form. The only thing to note is that we are attaching the delete function to the click handler of the delete button. Then we create the actual addTask function and export it.
We will then need to import our addTask function into index.js . Paste the code below into your index.js file:
This is pretty straightforward: we are importing the addTask function and attaching it to the click handler for the addTaskButton . If you followed the steps above you should be good to go.
Finally, to get our main.js file we need to run Webpack through our codebase. For this step, make sure you have NodeJS installed on your system, then we will install webpack globally using this command:
Once it’s done installing run the following command:
It will bundle up our file successfully but we should see a warning in the terminal like this:

Webpack is just warning us that we didn’t specify a mode . We could leave it as is and run the code, everything should work fine. But if you don’t like the warning then you can run Webpack like this:
And you’re good to go.
Wrapping up
If you got lost along the way you can always use the GitHub repo for reference (It has some CSS styling in it, though).
I hope this article was able to show you what Webpack has to offer (just the basics, with no configuration whatsoever). In subsequent articles, I will try to show how to set up various custom configurations for features like code splitting , lazy loading and configuring Webpack to work with multi-page applications.
In order to keep this article as basic as possible, I avoided the use of a package.json file in the article. The use of a package.json file and installing webpack locally is the most scalable way of using webpack and I will go into it in my next article on using Webpack.
To help navigate the coming articles, it will really help if you can drop a comment of what you would like to see explained or implemented regarding Webpack. ??
I will like to especially thank Sean T. Larkin , Israel Obiagba and Hassan Sani for their feedback in making the article better than initially planned. You all rock!
Software Developer @Oozou
If you read this far, thank the author to show them you care. Say Thanks
Learn to code for free. freeCodeCamp's open source curriculum has helped more than 40,000 people get jobs as developers. Get started
Advisory boards aren’t only for executives. Join the LogRocket Content Advisory Board today →

- Product Management
- Solve User-Reported Issues
- Find Issues Faster
- Optimize Conversion and Adoption
- Start Monitoring for Free
Building micro-frontends with webpack’s Module Federation

Good frameworks exist out there that help us create micro-frontends such as single-spa and OpenComponents. But what if we don’t want to integrate a different framework in our architecture? Let’s take a look at how to implement micro-frontends in our Vue apps.

In this article, we will discuss how to dramatically simplify our app architecture by using webpack 5’s Module Federation to consume and share micro-frontend components with example code.
What is module federation?
Module federation is a JavaScript architecture invented by Zack Jackson . This architecture allows the sharing of code and dependencies between two different application codebases.
The code is loaded dynamically, and if a dependency is missing, the dependency will be downloaded by the host application, which allows for less code duplication in the application.
What are micro-frontends?
The concept of micro-frontends has been gaining traction in recent times. The push for microservices has also brought about the same implementation to the modern web in the form of micro-frontends. As the monolith app scales, it becomes difficult to maintain, especially across several teams working on the same app.
We can look at micro-frontends as feature-based, where there are different teams and each team handles a particular feature component while another team handles something else. In the end, all teams merge the different components they have built to form one application.
Developers made use of frameworks like single-spa and OpenComponents to achieve this, but with the new release of webpack 5 and the module federation, we can easily achieve the same goal, but way easier.
The advantages of micro-frontends
Adopting a micro-frontend approach to building your web applications is probably the best strategy. This is especially true if you are building a large-scale web application with many moving parts or applications that are branched out into sub-applications where you want some consistency in the overall look.
Let me highlight a few reasons you might want to switch to the micro-frontend approach:
- Adopting a micro-frontend approach will allow us to create an end-to-end feature architecture. This approach will allow us to develop and deploy features locally, without the need for large-scale deployment infrastructures
- With a smaller and more optimized bundle size, micro-frontends provide an overall better developer and user experience as a result of shared components and dependencies that can be lazy loaded whenever we want
- One of the biggest advantages for me is the ability for teams of developers working on that particular product to be able to pick a technology stack of their choice without fear of incompatibility with the other team’s code
How do we split our apps?
These are some ways developers split large apps:
- By page — In our frontend applications, sometimes having different pages run at the same time in the browser can cause a crash in older devices, so the safest way is to split by page. If you have good routing, you can run separate, specific micro-apps for every page, which is also good for the developers on your team, because they will always work on that one page assigned to them
- By functionality — If you have one page with multiple things features performing different operations, you can split those big features into smaller apps and make it an independent application running that specific feature
- By section — You can also split your applications by section, with different apps sharing the same section or components
Proof of concept
We have explained some concepts about micro-frontends and module federation. Now it’s time for a proof of concept.
Here, we will demonstrate how we can use the module federation to create micro-frontends in Vue. To test this out, we will be spinning up two different apps, so we can create a micro-frontend in one of them and share it with the other.
First, we create a folder to host the two Vue applications:
It is in the vue-mf folder we will run our Vue application. We won’t be using the Vue CLI here. Instead, we will be using the new release of webpack, which is webpack 5, to set up the Vue application.
We will name the two applications we want to share components as Company and Shop respectively. We create a folder for each of them in the vue-mf folder and then grab a webpack starter file of Vue created by Jherr from GitHub into each folder:
Let’s take a look at the file structure now that we have set up the app:
When we open up one of the app folders, this is the structure:
Set up webpack config
So we have two apps, Company and Shop , which are exactly the same for now. When we survey the file structure, we take a look at the package.json . We have our webpack loader, CSS loader, and all the basic loaders and webpack stuff we need:
If we take a look at the webpack.config.js file, we can see that our public path is set to port 8080 . We can also see webpack checking for our file extensions and using the appropriate loaders.
The important thing to take note of here is our Vue loader plugin used in parsing our files and the Module federation plugin from webpack 5 we have imported and used, which will allow us to perform sharing functionality. We will get back to the configuration of the ModuleFederationPlugin later in this tutorial.
Over 200k developers use LogRocket to create better digital experiences
N.B., make sure to set the public path and dev server port in the other application (Shop) to port 8081 , so we can be able to run both apps simultaneously.
Create components to be shared
In our application, the App.vue file will serve as the homepage, so let’s add some markup:
The header component is one part of an application we would like to share between applications. Let’s say one of the teams of developers decides to build the header, so we create a header component that we can share in the two applications.
In the src folder in our Company app, we will create a header component. To do this, we create a Header.vue file, and in it, we create the header component:
After creating the header, navigate to App.vue and import the header component:
We can now start our development server by navigating to each folder and running:
Right now our app looks like this in the Company app.

Exposing the header component through the Module Federation plugin
We now have our header in the Company app, we would like to use it in the Shop app. So we head over to the webpack configuration in the Company app:
In the webpack Module Federation configuration, we set the name to the app name, which is Company , and remoteEntry.js to be our filename. When we navigate to the remoteEntry.js file name, we see the code related to the components and dependencies we want to share. We also exposed the header component with its location.
Now, if we restart our server and navigate to http://localhost:8080/remoteEntry.js , we will see this:
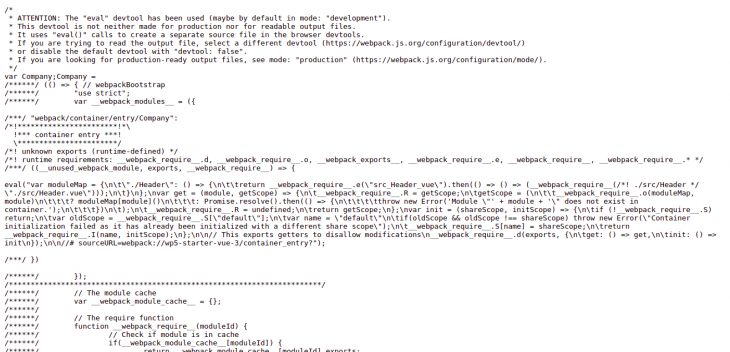
Now grab the remote entry URL and switch to the webpack configuration file in our Shop app:
Here, we give the plugin a name of Shop and set the remote to remoteEntry URL. Then in our App.vue file in the Shop app, we import and use the header component from our Company app:
If we restart our server, we can see that the shop page now has the header component, meaning we have successfully shared the component between the two apps. Yay!
N.B., if the team working on the header decides to push a new update for the header component, the Shop app team will immediately see the update once the Shop app is refreshed.
Sharing app state between federation modules
Let’s say you are using a state manager in your Vue application like Vuex. You might be asking yourself how you might have state, share it between the two components, and also have it update. So, let’s install Vuex for both apps:
Once we have installed Vuex, navigate to the bootloader.js file in our Company app, where we initialize our Vue app. Here, we import our store and create a state:
If, for instance, this is an ecommerce store where we want to display the number of cart items we have in our cart, we create a cartItems state and display it in our company header. Then go to our header component, access the state, and display it:
We have successfully set up our state, but the problem with this is if we start the server for both apps and check the Company app, we can see the header display with the state:

But if we navigate to the Shop app, we can no longer see the shared header component anymore, much less the state we added. Instead, we get an error message that says we can’t read the state of undefined, because in our Shop app, we haven’t set up any store.
To rectify this problem, we copy all the code we have in the bootloader of the Company app and paste it into the bootloader.js file of the Shop app. This time, we changed the cartCount state to 12 . If we restart the server, we now have our header in the Shop app, with cart items of 12 .
Let’s say we want to mimic the addition of more shop items to the cart, so in the Shop app, we add a button that increments the cartCount state:
If we restart the Shop application, we can see that the items in the header now update. Yay!
- GitHub source code
- webpack 5’s Module Federation
We have come to the end of this tutorial.
Here, we discussed how to dramatically simplify our app architecture by using webpack 5 ’s Module Federation to consume and share micro-frontend components with example code.
Whether you should or should not adopt micro-frontends depends on the kind of project you are building, because this approach will not be the best for small applications or businesses. A micro-frontend architectural approach is your best bet when working on a large project with distributed teams.
Share this:
- Click to share on Twitter (Opens in new window)
- Click to share on Reddit (Opens in new window)
- Click to share on LinkedIn (Opens in new window)
- Click to share on Facebook (Opens in new window)

Stop guessing about your digital experience with LogRocket
Recent posts:.

ReScript vs. TypeScript: Overview and comparison
Many modern web developers are embracing emerging technologies that improve the speed of development as well as the quality of […]

Using Pavex for Rust web development
The Pavex Rust web framework is an exciting project that provides high performance, great usability, and speed.

Using the ResizeObserver API in React for responsive designs
With ResizeObserver, you can build aesthetic React apps with responsive components that look and behave as you intend on any device.

Creating JavaScript tables using Tabulator
Explore React Tabulator to create interactive JavaScript tables, easily integrating pagination, search functionality, and bulk data submission.

3 Replies to "Building micro-frontends with webpack’s Module Federation"
Thanks for writing this. I think you should check out the articles and work of Florian Rappl like https://dev.to/florianrappl/11-popular-misconceptions-about-micro-frontends-463p . We recently migrated away from a larger monolith and first tried module federation. Did not work out well, as this made everything quite tight and spaghetti.
Micro frontends when done right require a lot more than just some tool like module federation.
Nice Article 👍
const HtmlWebPackPlugin = require(“html-webpack-plugin”); is missing webpack.config.js
Leave a Reply Cancel reply

Navigation Menu
Search code, repositories, users, issues, pull requests..., provide feedback.
We read every piece of feedback, and take your input very seriously.
Saved searches
Use saved searches to filter your results more quickly.
To see all available qualifiers, see our documentation .
- Notifications
"Webpack is Awesome" presentation.
unindented/webpack-presentation
Folders and files, repository files navigation, webpack is awesome.
I think Webpack is an awesome tool, but not enough people know it. I want to change that.
Daniel ( @unindented )
Front-end developer at Yammer
What is Webpack
- Module bundler
- Understands CJS and AMD
- Creates one or many bundles
- Treats every asset as a module
- Gives you hooks to transform modules
- Gives you hooks into the bundling process
Webpack is a module bundler, in the lines of RequireJS and Browserify , but it is much better suited for big projects.
The main differences with those other tools are:
It handles both CommonJS and AMD syntaxes (plus ES6 modules through loaders).
It allows you to split the dependency tree into chunks loaded on demand.
It can extract dependencies that are common to multiple entry points into their own chunk.
It can treat any asset as a requireable module, and transform it, through the use of loaders.
It allows you to customize almost every part of the bundling process through plugins.
Docs: webpack.github.io/docs/
Examples: github.com/.../examples
The docs are really dense, but they are not bad. You just need to spend time with them.
The examples are useful once you understand the underlying concepts.
Single Entry
Simplest example: an app with a single entry point.
Via command line:
... or via config:
webpack.config.js
Keeping things in a configuration file is the way to go for non-trivial setups.
If your config file is called webpack.config.js you don't even have to specify the --config parameter to webpack .
The runtime overhead compared to Browserify and RequireJS:
- Webpack : 243b + 20b per module + 4b per dependency
- Browserify : 14.7kb + 0b per module + (3b + X) per dependency
- RequireJS : 415b + 25b per module + (6b + 2X) per dependency
Multiple Entries
Next step: an app with multiple entry points. Think https://twitter.com/ , https://twitter.com/settings/account , etc.
Webpack outputs a bundle-entry1.js containing entry1.js plus greeter.js , and a bundle-entry2.js containing entry2.js plus greeter.js . The number between curly braces (e.g. {1} ) tells you which chunks contain that module.
This is not a good solution for a web application, as a user will probably hit multiple entry points in a session, and would have to download common dependencies multiple times.
The CommonsChunkPlugin plugin identifies dependencies that are shared among the entry points, and puts them into their own chunk. You end up with bundle-entry1.js containing entry1.js , bundle-entry2.js containing entry2.js , and bundle-common.js containing greeter.js .
In this simple example it may seem overkill, but when you are depending on huge libraries, like jQuery, Moment or Angular, it is totally worth it.
Module Resolution
Having to specify paths to dependencies can be a pain, specially when you have to move things around. Webpack allows you to tweak how modules are resolved.
Webpack will try to find your dependency in those directories.
It's pretty common to apply transformations to modules. Think CoffeeScript to JavaScript, or Less to CSS. That's the job of loaders.
greeter.coffee
We are telling Webpack that all files ending with .coffee should go through the coffee loader. We are also telling it to try the .coffee extension when resolving modules.
Much better than inlining, as all your configuration is in one place, so it's much easier to change things.
HTML, CSS, Assets
Loaders can help you with much more than transforming CoffeeScript to JavaScript.
You can use the file and url loaders to process assets like images. The url loader is just like file , but allows you to inline dependencies under certain conditions.
The html and css loaders are able to identify dependencies in HTML files (e.g. <img src="foo.gif" /> ) and CSS files (e.g. background-image: url('bar.png') ) respectively.
CSS files need to go through yet another loader, style , to be injected into the head of the HTML document.
If you want to extract CSS content into its own file, you can use the ExtractTextPlugin plugin.
Busting Caches
You even have cache-busting hashes built in.
Pre/Post Loaders
You can also specify pre- and post-loaders. Here we'd be running our JavaScript files through two linting libraries, and through a code instrumenting library.
The order in which loaders are applied is the following:
- The file is read from the filesystem
- module.preLoaders are applied
- module.loaders are applied
- Inlined loaders are applied
- module.postLoaders are applied
Plugins allow us to hook into different phases of the bundling process. For example, the I18nPlugin plugin replaces occurrences of the \_\_ function with strings from a dictionary (e.g. __("Hello World") is replaced with "Hello World" or "Hola Mundo" , depending on the current locale).
The DefinePlugin plugin allows us to define free variables, like DEBUG and LANGUAGE . The value of those variables is specified in the config file.
webpack.config.js (continued)
We are generating a bundle for each of the languages in the langs object, storing the language code in the LANGUAGE variable.
We are also defining the value of DEBUG through an environment variable.
When we bundle the app with the DEBUG environment variable set to true , we see the debugging statement.
The DEBUG variable got replaced with true .
If we don't specify the DEBUG environment variable, the condition in the if statement is always false. That's why the whole block gets dropped by UglifyJS when we enable optimizations with the -p flag, and we don't see the debugging statement in the output.
A context is created if your request contains expressions, so the exact module is not known at compile time.
You can also create contexts by hand through the require.context function.
Here we are using that functionality to require a random module from the lib folder.
Webpack includes all modules matching our regular expression in the bundle.
At runtime it does the right thing.
Why would anyone want to do this?
- Require resource based on locale
- Require all components to build a gallery
Context Replacement
Some third-party libraries, like Moment, also create contexts when processed through Webpack.
Why is the bundle so big?
Webpack is creating a context and including all locales in the bundle.
We can use the ContextReplacementPlugin plugin to manipulate the context. Here, we are only including the English locale.
The resulting bundle is much smaller, because we've left all other locales out.
Load On Demand
If your app is big, you may want to load some things on demand, rather than upfront. You can do so through require.ensure if you are using CommonJS syntax, or require if you are using AMD syntax.
require.ensure does not evaluate the module. require does.
Calling require.ensure here will create a split point that will put b into its own chunk. This chunk will be loaded on demand when the bar method is called.
You can see that b has been split into its own chunk.
You can see this in action by launching webpack-dev-server .
The webpack-dev-server is a little express server, which uses the webpack-dev-middleware to serve a bundle.
When you make a change, webpack-dev-middleware will recompile only the modules that are affected by it.
If you run webpack-dev-server with hot module replacement enabled, you can inject your changes into the runtime as you make them.
Circular Dependencies
Circular dependencies are handled the same way as in Node.js.
When you create a loop in the dependency graph, the requiring module will get a reference to an incomplete module.exports from the required module. If you are adding properties by doing module.exports.foo = ... , the incomplete object will receive them eventually. But if you declare your exports by doing module.exports = ... , you will be creating a new object which the requiring module has no way to access.
At that point, a is an empty object.
One possible solution is to defer the calls to require .
We could also move our module.exports statement above the require calls.
Dependency Visualization
http://webpack.github.io/analyse/
We can output stats from the bundling process, and query the information.
The analyse tool draws a pretty graph of all the modules, and gives us all sorts of useful details.

- Source maps
- Ignore dependencies
- Dedupe dependencies
- Loaders for every format
https://unindented.github.io/webpack-presentation/
Contributors 104
- JavaScript 68.0%
Create your presentation
Topic the prompt cannot be less than 5 characters or more than 300, writing tone, pages the number of pages cannot be less than 6 or more than 20.

professional

AI Presentation Maker
Presentations don't need to be a chore anymore – the AI Presentation Maker is here to save the day! This powerful technology will create impressive slides with just a few clicks , so you can impress your audience with zero stress. The best part – it’s 100% free!

Generate presentations in minutes
Put the magic of AI to work for you and make stunning presentations in no time! Wepik's AI Presentation Maker is your one-stop shop for designing top-notch slides with a professional flair . Uncover a world of possibilities – enter your topic, choose a style, and let artificial intelligence do the hard work while saving precious minutes from your day!
Customize your AI presentation online
Once your new, AI-generated presentation is fresh off the oven, you can make any needed changes with the help of our intuitive editing tool. You'll have access to resources from Freepik and Flaticon libraries as well as editing tools for color modifications, text changes, rearranging elements, and more. To save time on each project there's also the option of direct integration with any existing brand kit making it easier than ever before to get a stunning final result!

How does it work
Introduce your topic.
Whatever your presentation needs, be it New Year celebrations or a business plan proposal, artificial intelligence will do the hard work. Just type in , and watch as everything clicks into place and magically appears before your eyes!
Find the perfect style
You're just a few steps away from creating the presentation of your dreams. With 5 diverse styles to choose between – doodle, simple, abstract, geometric, or elegant – you'll be ready to captivate any audience!
Make any edits you want
Like the result, but need to make a few changes? We’ve got you covered! Open your newly generated presentation on the online editor and change colors, include your brand assets, and much more. The sky is the limit!
Download the final result for free
When your presentation is ready for the world, you can easily and securely share it with anyone . Export in PDF format or generate a unique link to send directly – the choice is all yours!
Explore more features
Take your visual content to the next level with Wepik's powerful tools . With Wepik, you can easily create attention-grabbing content using the AI Image Generator, customize great pictures with our Photo Editor, and maintain consistency across all platforms with the Brand Kit. Unleash your creativity and explore all the amazing features that Wepik has to offer today!

Frequently asked questions
What is an ai-generated presentation.
An AI-generated presentation is a type of automated presentation that is created using artificial intelligence (AI) technology . It uses natural language processing (NLP) to analyze user input and generate content that conveys a message engagingly and comprehensively. These presentations open up exciting possibilities for business, education, and digital marketing. From sales pitches to lectures or campaigns – AI is transforming how we deliver content and engage audiences!
Is the resulting presentation customizable?
Yes, absolutely! You may love the generated result, but need to make some modifications. To do so, simply go to Wepik’s user-friendly online editor and open your creation. If your presentation is all about corporate, don’t forget to include your company’s name, for example, or even include more images to make it more unique. Of course, you can edit any simple aspect , from the color palette to any font. The decision is all yours!
Can I upload files into my presentation?
Sure! Complete your brand-new presentation with your images , which you can upload in a beat from Wepik’s editor. If you’re feeling creative, try the Text-to-image feature to generate unique pictures with the help of your new best friend: artificial intelligence! Of course, you can also check Freepik’s image gallery , which has everything you can dream of. Whatever you choose is sure to make it stand out!
Is Wepik’s AI Presentation Maker free?
Of course, it is! But not only this one – all our powerful features and tools , including Text-to-image, the social media scheduler, and the background remover, have cost zero . That means there's no excuse not to take your business branding up a notch!
Are there more presentation designs available?
Yes! Search for inspiring designs in the Presentations category. From educational presentations to business projects – there are endless possibilities of beautiful templates available at your fingertips.
How can I download my presentation?
Get the most out of your presentation with multiple download formats . Easily click on “download” and get a polished PDF copy , or select “present” to project the final results live! With just one more simple step – clicking “share” - you can send this powerful result in a flash by simply copying an automatically generated link straight away. It's that easy!
Learn more about presentations

7 good ways to end your presentation speech
As the saying goes, “Beginning in itself has no value, it is an end which makes beginning meaningful”. The conclusion of a presentation speech is just as important as its opening. How you wrap up your presentation has a real impact on how people remember it. Will they leave feeling energized and ready to make […]

How to make a perfect startup pitch deck for investors
Are you an entrepreneur looking to secure funding for your startup? If so, one of the most crucial components of your fundraising strategy is a well-crafted pitch deck that can effectively communicate your business idea, market opportunity, and growth potential. Creating a pitch deck can be daunting, but it is a necessary step in the […]

9 effective tips to start a presentation successfully
Don’t let nerves get the best of you next time it’s your turn to make a presentation! Oral communication is one of the most valued skills in a professional career, and knowing how to make good presentations will be highly appreciated in your professional environment. Today, we’re here to give you the ultimate top-notch tips […]

How to use Wepik’s AI Presentation Maker
Welcome to the presentation revolution! In our tutorial today, we’re going to reveal how Artificial Intelligence can turbocharge your presentations. With the revolutionary AI Presentation Maker, you’ll be able to make those brilliant ideas shine like never before – quickly transforming them into polished slides that will blow away your audience. Let’s get started now […]

What’s New – create presentations with artificial intelligence
Wepik, the online design platform, has launched a new tool that will revolutionize the way we create presentations. Thanks to its integrated Artificial Intelligence technology, this new AI Presentation Maker allows users to generate attractive and professional presentations in just a few minutes. The AI Presentation Maker is the perfect solution for those who want […]

I needed to make posters to find participants for a scientific study. With the help of Wepik, finding a design that suits my needs the best, has been very easy and intuitive!
Africa Gómez
Psychologist

The dynamism of the website has allowed me to work easily and quickly to make incredible designs for campaigns. I appreciate that it can be adapted to different formats!
Antonio Martin
CDO Marketing Digital

An excellent tool, I can send presentations of the products with a great design to my potential customers. Easy to use, very intuitive, and in only a few minutes, I have everything I need!

Wepik makes my job much easier to create content for social media, posters, and even invitations to promote my events. Since I discovered Wepik, I don't use any other editor!
Marta Rodriguez
Marketing Specialist

An essential platform in my everyday work and projects. It allows me to use elements that in other design platforms, would certainly be premium. I highly recommend it!
Marina Benítez
Founder of Pez Magazine
Wepik ahora disponible en español Llévame

Tree Shaking
Tree shaking is a term commonly used in the JavaScript context for dead-code elimination. It relies on the static structure of ES2015 module syntax, i.e. import and export . The name and concept have been popularized by the ES2015 module bundler rollup .
The webpack 2 release came with built-in support for ES2015 modules (alias harmony modules ) as well as unused module export detection. The new webpack 4 release expands on this capability with a way to provide hints to the compiler via the "sideEffects" package.json property to denote which files in your project are "pure" and therefore safe to prune if unused.
Add a Utility
Let's add a new utility file to our project, src/math.js , that exports two functions:
src/math.js
Set the mode configuration option to development to make sure that the bundle is not minified:
webpack.config.js
With that in place, let's update our entry script to utilize one of these new methods and remove lodash for simplicity:
src/index.js
Note that we did not import the square method from the src/math.js module. That function is what's known as "dead code", meaning an unused export that should be dropped. Now let's run our npm script, npm run build , and inspect the output bundle:
dist/bundle.js (around lines 90 - 100)
Note the unused harmony export square comment above. If you look at the code below it, you'll notice that square is not being imported, however, it is still included in the bundle. We'll fix that in the next section.
Mark the file as side-effect-free
In a 100% ESM module world, identifying side effects is straightforward. However, we aren't there quite yet, so in the mean time it's necessary to provide hints to webpack's compiler on the "pureness" of your code.
The way this is accomplished is the "sideEffects" package.json property.
All the code noted above does not contain side effects, so we can mark the property as false to inform webpack that it can safely prune unused exports.
If your code did have some side effects though, an array can be provided instead:
The array accepts simple glob patterns to the relevant files. It uses glob-to-regexp under the hood (Supports: * , ** , {a,b} , [a-z] ). Patterns like *.css , which do not include a / , will be treated like **/*.css .
Finally, "sideEffects" can also be set from the module.rules configuration option .
Clarifying tree shaking and sideEffects
The sideEffects and usedExports (more known as tree shaking) optimizations are two different things.
sideEffects is much more effective since it allows to skip whole modules/files and the complete subtree.
usedExports relies on terser to detect side effects in statements. It is a difficult task in JavaScript and not as effective as straightforward sideEffects flag. It also can't skip subtree/dependencies since the spec says that side effects need to be evaluated. While exporting function works fine, React's Higher Order Components (HOC) are problematic in this regard.
Let's make an example:
The pre-bundled version looks like this:
When Button is unused you can effectively remove the export { Button$1 }; which leaves all the remaining code. So the question is "Does this code have any side effects or can it be safely removed?". Difficult to say, especially because of this line withAppProvider()(Button) . withAppProvider is called and the return value is also called. Are there any side effects when calling merge or hoistStatics ? Are there side effects when assigning WithProvider.contextTypes (Setter?) or when reading WrappedComponent.contextTypes (Getter?).
Terser actually tries to figure it out, but it doesn't know for sure in many cases. This doesn't mean that terser is not doing its job well because it can't figure it out. It's too difficult to determine it reliably in a dynamic language like JavaScript.
But we can help terser by using the /*#__PURE__*/ annotation. It flags a statement as side effect free. So a small change would make it possible to tree-shake the code:
This would allow to remove this piece of code. But there are still questions with the imports which need to be included/evaluated because they could contain side effects.
To tackle this, we use the "sideEffects" property in package.json .
It's similar to /*#__PURE__*/ but on a module level instead of a statement level. It says ( "sideEffects" property): "If no direct export from a module flagged with no-sideEffects is used, the bundler can skip evaluating the module for side effects.".
In the Shopify's Polaris example, original modules look like this:
components/index.js
package.json
For import { Button } from "@shopify/polaris"; this has the following implications:
- include it: include the module, evaluate it and continue analysing dependencies
- skip over: don't include it, don't evaluate it but continue analysing dependencies
- exclude it: don't include it, don't evaluate it and don't analyse dependencies
Specifically per matching resource(s):
- index.js : No direct export is used, but flagged with sideEffects -> include it
- configure.js : No export is used, but flagged with sideEffects -> include it
- types/index.js : No export is used, not flagged with sideEffects -> exclude it
- components/index.js : No direct export is used, not flagged with sideEffects, but reexported exports are used -> skip over
- components/Breadcrumbs.js : No export is used, not flagged with sideEffects -> exclude it. This also excluded all dependencies like components/Breadcrumbs.css even if they are flagged with sideEffects.
- components/Button.js : Direct export is used, not flagged with sideEffects -> include it
- components/Button.css : No export is used, but flagged with sideEffects -> include it
In this case only 4 modules are included into the bundle:
- index.js : pretty much empty
- configure.js
- components/Button.js
- components/Button.css
After this optimization, other optimizations can still apply. For example: buttonFrom and buttonsFrom exports from Button.js are unused too. usedExports optimization will pick it up and terser may be able to drop some statements from the module.
Module Concatenation also applies. So that these 4 modules plus the entry module (and probably more dependencies) can be concatenated. index.js has no code generated in the end .
Mark a function call as side-effect-free
It is possible to tell webpack that a function call is side-effect-free (pure) by using the /*#__PURE__*/ annotation. It can be put in front of function calls to mark them as side-effect-free. Arguments passed to the function are not being marked by the annotation and may need to be marked individually. When the initial value in a variable declaration of an unused variable is considered as side-effect-free (pure), it is getting marked as dead code, not executed and dropped by the minimizer. This behavior is enabled when optimization.innerGraph is set to true .
Minify the Output
So we've cued up our "dead code" to be dropped by using the import and export syntax, but we still need to drop it from the bundle. To do that, set the mode configuration option to production .
With that squared away, we can run another npm run build and see if anything has changed.
Notice anything different about dist/bundle.js ? The whole bundle is now minified and mangled, but, if you look carefully, you won't see the square function included but will see a mangled version of the cube function ( function r(e){return e*e*e}n.a=r ). With minification and tree shaking, our bundle is now a few bytes smaller! While that may not seem like much in this contrived example, tree shaking can yield a significant decrease in bundle size when working on larger applications with complex dependency trees.
What we've learned is that in order to take advantage of tree shaking , you must...
- Use ES2015 module syntax (i.e. import and export ).
- Ensure no compilers transform your ES2015 module syntax into CommonJS modules (this is the default behavior of the popular Babel preset @babel/preset-env - see the documentation for more details).
- Add a "sideEffects" property to your project's package.json file.
- Use the production mode configuration option to enable various optimizations including minification and tree shaking (side effects optimization is enabled in development mode using the flag value).
- Make sure you set a correct value for devtool as some of them can't be used in production mode.
You can imagine your application as a tree. The source code and libraries you actually use represent the green, living leaves of the tree. Dead code represents the brown, dead leaves of the tree that are consumed by autumn. In order to get rid of the dead leaves, you have to shake the tree, causing them to fall.
If you are interested in more ways to optimize your output, please jump to the next guide for details on building for production .
Further Reading
- Debugging Optimization Bailouts
- Issue 6074 - Add support for more complex selectors for sideEffects
16 Contributors

IMAGES
VIDEO
COMMENTS
Getting Started. Webpack is used to compile JavaScript modules. Once installed, you can interact with webpack either from its CLI or API. If you're still new to webpack, please read through the core concepts and this comparison to learn why you might use it over the other tools that are out in the community.
Every little bit helps, and we appreciate even the smallest contributions. This list shows 100 randomly chosen backers: webpack is a module bundler. Its main purpose is to bundle JavaScript files for usage in a browser, yet it is also capable of transforming, bundling, or packaging just about any resource or asset.
To install it, run the following: npm install webpack-dev-server --save-dev. We need to update our dev script, in package.json, to use the server: "dev": "webpack serve --mode development". Now ...
Next up we need to add webpack, so we can bundle our app together. Not only bundle, but we will also require hot reloading which is possible using the webpack dev server. $ npm i webpack webpack-dev-server webpack-cli --save--dev. The --save--dev is to specify that these modules are just dev dependencies. Now since we are working with React, we ...
Learn Webpack from Colt Steele in this full tutorial course. It begins with a simple question: "What is webpack?" Quickly we move on to installing Webpack,...
Guides. This section contains guides for understanding and mastering the wide variety of tools and features that webpack offers. The first is a guide that takes you through getting started. The guides get more advanced as you go on. Most serve as a starting point, and once completed you should feel more comfortable diving into the actual ...
For more information, please read Alexandrine Boissière's presentation on "An Efficient Static Assets Pipeline With Webpack", which describes why Webpack is a good choice for a static ...
This is what the app will look like: J.K. The first step is to create a new project directory and create two folders, a folder named dist and another named src . By default, Webpack's entry point is the path ./src/index.js and it outputs the bundled JS into ./dist/main.js — that's why we are creating the two folders.
Introduction to Webpack 5.0 Presentation. Webpack is a free and open-source module bundler for JavaScript. It is made primarily for JavaScript, but it can transform front-end assets such as HTML, CSS, and images if the corresponding loaders are included. [9] Webpack takes modules with dependencies and generates static assets representing those ...
Therefore, Webpack will then head over to host/webpack.config.js to determine if SubA is a bundle that can be requested remotely. Sure enough, Webpack will be able to see that SubA is actually ...
Note: Webpack outputs a bundle-entry1.js containing entry1.js plus greeter.js, and a bundle-entry2.js containing entry2.js plus greeter.js.The number between curly braces (e.g. {1}) tells you which chunks contain that module. This is not a good solution for a web application, as a user will probably hit multiple entry points in a session, and would have to download common dependencies multiple ...
Here, we will demonstrate how we can use the module federation to create micro-frontends in Vue. To test this out, we will be spinning up two different apps, so we can create a micro-frontend in one of them and share it with the other. First, we create a folder to host the two Vue applications: mkdir vue-mf.
the good parts*... and some other stuff too Dustin Schau
webpack is a module bundler. Its main purpose is to bundle JavaScript files for usage in a browser, yet it is also capable of transforming, bundling, or packaging just about any resource or asset.
HTTP2: Webpack's AgressiveSplittingPlugin (in latest!!) HTTP2: Dependency Tree driven Push Manifest Usability: Complete overhaul of the main interface Optimization: Module Inlining and Concatenation (Rollup) DevTools: Working with Multiple Browser Teams to Bring DevTools custom instrumentation and UI's for webpack.
Webpack 5's Module Federation is a revolutionary feature that brings a new level of flexibility to the world of web development. It allows for better code sharing, independent deployments, and a ...
Practical Module Federation - The official book on Webpack Module Federation by Jack Herrington & Zack Jackson "Practical Module Federation" is the first, and only, book on Webpack 5's innovative new live code sharing mechanism. It walks you through everything you need to do to start with Module Federation. It covers the internal implementation of Module Federation, and how Module Federation ...
Concepts. At its core, webpack is a static module bundler for modern JavaScript applications. When webpack processes your application, it internally builds a dependency graph from one or more entry points and then combines every module your project needs into one or more bundles, which are static assets to serve your content from.
I see, npm install -g webpack didn't work for me either. But it does with npm install webpack - make sure you are in the app root folder when you call npm install webpack then check if the module exists in node_modules folder. It also seems that webpack needs fsevents (optional) module on linux systems - I'm using Windows so I'm not sure - try installing fsevents also
Webpack presentation. This repository contains sample code used for the webpack presentation, a short introduction to webpack, describing its benefits over a task runner and basic usages on how to use it.. How to run samples ? Clone the repository. Install dependencies with: npm install. Go into desired examples folder, for example: cd 01-basic-example/ ...
Note: Webpack outputs a bundle-entry1.js containing entry1.js plus greeter.js, and a bundle-entry2.js containing entry2.js plus greeter.js.The number between curly braces (e.g. {1}) tells you which chunks contain that module. This is not a good solution for a web application, as a user will probably hit multiple entry points in a session, and would have to download common dependencies multiple ...
An AI-generated presentation is a type of automated presentation that is created using artificial intelligence (AI) technology.It uses natural language processing (NLP) to analyze user input and generate content that conveys a message engagingly and comprehensively. These presentations open up exciting possibilities for business, education, and digital marketing.
Tree shaking is a term commonly used in the JavaScript context for dead-code elimination. It relies on the static structure of ES2015 module syntax, i.e. import and export.The name and concept have been popularized by the ES2015 module bundler rollup.. The webpack 2 release came with built-in support for ES2015 modules (alias harmony modules) as well as unused module export detection.