

Record your presentation
You can record your PowerPoint presentation—or just a single slide—and capture voice, ink gestures, and your video presence. The completed recording is like any other presentation. You can play it for your audience in Slide Show or you can export it as a video file. So instead of just handing the deck to someone, people can see your presentation with all your passion and personality intact.
Record is an improved version of Record Slide Show for PowerPoint for Windows. The feature replaces the older experience and provides enhanced capabilities for capturing your presentations for later viewing.

What's new?
New access points for recording a video of the presentation .

New features added for recording video
The new Record window has two screens: Record and Export .
When you select Record , the Record screen opens by default.

If you select Export in the top right of the Record screen, the Export screen opens.

You can switch between the Record and Export screens using the Record and Export buttons in the top bar of the window.
New features added to the Record window
You'll see the following new features in the Record window:

You can also use the seek bar to skip to any point while you're previewing the video on the current slide.
New Export window
The Export window is another change with the Record feature. After recording, you’ll be lead through instructions to create a shareable video file of your presentation. By default, the video is in Full HD 1080p resolution in an mp4 format and will be saved to the same location where the presentation is stored.

The exported video includes all recorded timings, narration, animations, transitions, media, ink, and laser pointer gestures. If there's no recorded timings for a slide in the presentation, the slide will be displayed for 5 seconds in the exported video by default.
By default, the exported video has the same filename as the presentation, but you can create a unique filename for the exported video, if you want.
Depending on the size of your presentation, it may take a few minutes to export. After the export starts, you can track its progress in the Export window. You can also exit the Record window and track the progress in the status bar in PowerPoint.
The Customize Export button takes you to the backstage export menu to change resolution and time spent on each slide in the exported video.
Recording tips
Recordings are added to the presentation on a per-slide basis. If you want to change a recording, you can re-record one or more slides. You can rearrange the order of slides in a recorded presentation without having to re-record anything. This also means it's easy to pause for a break while recording a presentation.
PowerPoint doesn't record audio or video during transitions between slides, so be sure not to narrate while advancing the slide. There's also a brief buffer of silence at the beginning and the end of each slide.
Use video preview to make sure everything is set up correctly before recording.
Presentation recording works best with touch-screen PCs that have a web camera but you can use an external webcam and/or microphone.
If you're using PowerPoint on a tablet or laptop and you're inking with a stylus, you can use an external camera and microphone to minimize stylus noise.
After you finish your first slide recording, play it back to make sure your audio and video are set up the way you expect.
You can adjust and edit the size of video and ink in edit view.

Need more help?
Want more options.
Explore subscription benefits, browse training courses, learn how to secure your device, and more.

Microsoft 365 subscription benefits

Microsoft 365 training

Microsoft security

Accessibility center
Communities help you ask and answer questions, give feedback, and hear from experts with rich knowledge.

Ask the Microsoft Community

Microsoft Tech Community

Windows Insiders
Microsoft 365 Insiders
Was this information helpful?
Thank you for your feedback.
Blog > Record voice narration for PowerPoint
Record voice narration for PowerPoint
01.11.21 • #presentation #powerpoint #voiceover #narration.
In this blog post, you'll learn how you can add a narration for your PowerPoint presentation. Adding audio or video narration can be very helpful, especially in a time where many seminars and meetings have to be conducted online. If you would rather give your presentation using a live stream (which has many benefits), scroll down to the bottom and learn how you can do that!
Here's what you need for recording:
- a microphone (your computer's microphone should do)
- a finished set of PowerPoint slides
- a video camera (only if you want to record video as well)
- Open your PowerPoint presentation or create a new one.
- In the taskbar, select Slide Show . Then click Record Slide Show .
- Choose the option Record from Beginning .

- You'll now get to a different view, which we'll call "Recorder View". Here's an overview:

- In the bottom right corner, you'll see three icons. The one on the left is for switching the microphone on/off. Make sure this function is turned on. The icon in the middle is for turning on/off your camera. You can choose if you want to switch the video recording on or not. The last icon is only available if you've chosen the video recording function. If the function is enabled, you'll be able to see a video preview.
- In the top right corner under "Settings", you can choose what microphone (and camera) you'd like to use. This is only relevant if you have an external recording device that you would like to use. If you're recording with your computer, you don't have to set anything here.
- Now it's time to record. Click the big red Record button on the top left and start speaking.
- Tip: You can either record all the slides at once without pressing pause, or you record each slide individually, then click pause, then go on to the next slide and record again. However, it's important to note that PowerPoint creates an individual audio file for each slide, even if you record all at once.
- Important : PowerPoint does not record during transitions, so only speak when you're on a slide.

- You can also draw on your slides with the painting tools on the bottom. These drawings will be saved to your presentations.
- On the bottom left corner, you'll see what slide you're on. You can also see two time counts. The first one is for the recording on the current slide, the second one is for the recording of the presentation overall.
- If you want to delete the whole voiceover, click Clear and Clear Recordings on all Slides . If you only want to delete the recording on the specific slide you are on, click Clear Recording on current Slide.
- If you want to re-record the audio from one slide after deleting it, just go to that slide and click Record again. Record what you want to say, then click Stop when you're done.
- Once you're done, leave the Recorder View. Click the small x in the top right corner or hit Esc .
- You can now either save the presentation as a regular PowerPoint file (just click Save and you're done) or as a video. If you'd like a video, follow the instructions below:
Save Presentation as Video
- Go to File in the PowerPoint taskbar

- Choose Export on the left, then Create a Video .

- Select the quality you'd like. We recommend Full HD (1080p).
- In the following drop-down menu, make sure Use Recorded Timings and Narrations is selected.

- The setting Seconds spent on each slide is only for the slides where there is no recording (if you have recordings on all of your slides, you can just ignore this setting.)
- Click Create Video and choose where the video should be saved. The video creation might take a while, so don't close PowerPoint right away!

Live interaction with polls & quizzes
If you prefer to give a talk where you can also interact with your audience, then the free software SlideLizard is the ideal solution! Using live polls , Q&A and feedback , your presentations will become even more exciting and interactive. SlideLizard integrates directly with PowerPoint, making it a breeze to use.

Can I record a presentation in PowerPoint?
Yes, PowerPoint also allows you to record your presentation with voice and video narration. You can read about how this works in our blog .
How can I record a presentation in PowerPoint with audio and video?
At first create your presentation. For the recording you will need a microphone (the one on your computer should do), your finished presentation and a video camera (if you also want to record a video). We have created a tutorial on our blog where you can read the further steps.
Related articles
About the author.

Pia Lehner-Mittermaier
Pia works in Marketing as a graphic designer and writer at SlideLizard. She uses her vivid imagination and creativity to produce good content.

Get 1 Month for free!
Do you want to make your presentations more interactive.
With SlideLizard you can engage your audience with live polls, questions and feedback . Directly within your PowerPoint Presentation. Learn more
Top blog articles More posts

SlideLizard 1.6 Update
Best Sources for free Icons to use in PowerPoint Presentations

Get started with Live Polls, Q&A and slides
for your PowerPoint Presentations
The big SlideLizard presentation glossary
.potx file extension.
A .potx file is a file which contains, styles, texts, layouts and formatting of a PowerPoint (.ppt) file. It's like a template and useful if you want to have more than one presentation with the same formatting.
Slide Master
To create your own Template in PowerPoint it is best to use the Slide Master. After updating the Slide Master with your design, all slides (fonts, colours, images, …) adapt to those of the Slide Master.
Valedictory Speech
A valedictory speech is given in order to say goodbye, usually at graduation. It should inspire listeners and functions as a send-off into "real life".
Audience Dynamics
Audience Dynamics means the motivations, attitudes, beliefs and values, which influence the listener's behaviour.
Be the first to know!
The latest SlideLizard news, articles, and resources, sent straight to your inbox.
- or follow us on -
We use cookies to personalize content and analyze traffic to our website. You can choose to accept only cookies that are necessary for the website to function or to also allow tracking cookies. For more information, please see our privacy policy .
Cookie Settings
Necessary cookies are required for the proper functioning of the website. These cookies ensure basic functionalities and security features of the website.
Analytical cookies are used to understand how visitors interact with the website. These cookies help provide information about the number of visitors, etc.

How to Record in a PowerPoint presentation Audio & Video.
Recording audio and video in a PowerPoint presentation can improve the overall effectiveness and impact of your presentation because it can make it more interesting and keep your audience engaged.
Microsoft PowerPoint 2013 and later versions allow you to record your presentation with audio and video, so you can enhance your slides with voice narration or by recording yourself during the narration via the camera.
In this guide we show, how you can record your voice or yourself while presenting a Microsoft PowerPoint Presentation and how to insert an audio or video file to a Presentation. You will also learn how to save the presentation as a video file or as a PowerPoint Show after you have finished recording audio/video.
How to Record or Insert Audio or Video in a PowerPoint Presentation.
There are two ways to include audio and video in your PowerPoint presentation: record a slide show with audio from your microphone and video from your camera, or add external audio and video to your presentation from a file.
* Note: As mentioned above, to add sound and video to a PowerPoint presentation you should have Microsoft PowerPoint 2013, 2016, 2019 or PowerPoint for Office 365.
1. Record your Audio & Video to PowerPoint.
2. Insert External Audio or Video files to PowerPoint.
Method 1. Record your Sound and Video to a PowerPoint Presentation.
To record your voice narration and/or yourself while presenting the slides in a presentation:
Step 1. Configure Microphone & Camera Settings.
Before recording your audio/video to a PowerPoint presentation, make sure that your microphone and camera settings are properly configured.
To adjust your microphone and camera settings for optimal quality:
1. Press Windows + I keys to open Windows Settings.
2 . Go to System > Sound and under Input Settings select your microphone device and make sure the input volume is set to at least 80%

3. When done, go to Bluetooth & devices > Cameras > Connected Cameras and ensure that your camera is recognized by the system.

Step 2. Record Audio and Video to PowerPoint Slideshow.
Before you start recording audio/video in a presentation, it's important to know that audio cannot be recorded during animations and slide transitions. So, to avoid interruptions of your speech during the presentation, remember to leave a brief pause of 1-2 seconds in your narration at the beginning and end of each slide.
1. Open the PowerPoint presentation in which you want to record audio and video.
2. From the Slide Show tab (or the Recording tab), click the Record Slide Show button and choose either Record from Current slide or Record from Beginning, depending on which point you want to add audio/video.

3. The presentation will open in a recording window in full-screen mode.

4. Click the SETTINGS button at the top-right corner and ensure the correct microphone and camera devices are selected.

5. Use the Microsoft and Camera icons in the bottom right corner of the screen to turn off the input of the Microphone or Camera device if it is not needed during the presentation.

6. When you are ready, click the RECORD button to start recording your voice and/or camera input and present your slides.

7. Use the arrow keys to navigate through slides (forward only). Remember that you cannot go back or forward to a slide that already has a recording. This is to prevent accidentally recording over an existing recording.

8. If there are videos in your slides, click on them to start or stop the playback.

9. Use the Pen , Highlighter , or Laser icons from the bottom right corner to annotate your slides.
![clip_image026[3]](https://www.wintips.org/wp-content/uploads/2023/06/clip_image0263_thumb.png "clip_image026[3]")
10. Look at the bottom left corner to find out the time counts for the current slide and the entire presentation.
![clip_image028[3]](https://www.wintips.org/wp-content/uploads/2023/06/clip_image0283_thumb.png "clip_image028[3]")
11. If a slide already contains a recording, you will see a video preview or a speaker icon displayed at the bottom right corner.
- To re-record audio/video to a slide, click CLEAR and select Clear Recording on Current Slides .
- To delete all recordings, click CLEAR and select Clear Recordings on All Slides .
![clip_image030[3]](https://www.wintips.org/wp-content/uploads/2023/06/clip_image0303_thumb.png "clip_image030[3]")
12. To pause or stop recording using the Pause and Stop buttons.
![clip_image032[3]](https://www.wintips.org/wp-content/uploads/2023/06/clip_image0323_thumb.png "clip_image032[3]")
13. When finished Close the recording window (or right-click and select End Show ).
![clip_image034[3]](https://www.wintips.org/wp-content/uploads/2023/06/clip_image0343_thumb.png "clip_image034[3]")
Step 3. Preview your Recordings on the Presentation.
After completing the recording, it is crucial to review the recordings of each slide before exporting the file as a PowerPoint show or video. To preview your recordings in your PowerPoint presentation:
1. Go to the Slide Show tab and click either From Beginning or From Current Slide to start playback.

2. Make sure each slide has a record and timing by changing the View to Slide Sorter .
![clip_image038[3]](https://www.wintips.org/wp-content/uploads/2023/06/clip_image0383_thumb.png "clip_image038[3]")
3. On each slide where audio has been recorded you will see an audio icon along with the time/duration of the recording.

4. When you are satisfied with your recordings, you can move on to the next steps and export the entire presentation, including your audio and videos, either as a PowerPoint Show as a video file.
Step 4. Save the Presentation as a PowerPoint Show.
If you want to export your Presentation as a PowerPoint Show (.ppsx), which is useful if you want your presentation to be viewed even on computers that don't have the Microsoft PowerPoint app installed, do the following:
1. Click on File and select Save As .

2. Choose the location where you want to save the file and select PowerPoint Show (*.ppsx) format from the Save as type drop-down menu.
![clip_image044[3]](https://www.wintips.org/wp-content/uploads/2023/06/clip_image0443_thumb.png "clip_image044[3]")
3. Then, click Save to save the file as a PowerPoint Show.
![clip_image046[3]](https://www.wintips.org/wp-content/uploads/2023/06/clip_image0463_thumb.png "clip_image046[3]")
Step 5. Save Presentation to Video.
If you prefer to export your PowerPoint SlideShow as a video file, follow these steps:
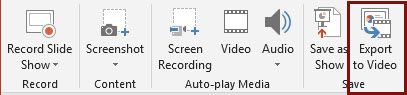
1. Click on File and select Export .

2. Then Click the Create a Video option and select the preferred video quality from the first drop-down menu (e.g., Full HD 1080p ).

3. Then select the Use Recorded Timings and Narrations option in the next drop-down menu.

4. Then adjust the Seconds spent on each slide for the slides without recordings.
![clip_image054[3]](https://www.wintips.org/wp-content/uploads/2023/06/clip_image0543_thumb.png "clip_image054[3]")
5. Finally, click the Create Video button and select the location to save the video.

6. Now wait for the PowerPoint to finish creating the video, as it may take some time depending on the performance of your computer.
7. Once the video is created, you can play it using any video player of your choice.
Method 2. Add External Audio and/or Video to a PowerPoint Presentation.
Instead of directly capturing audio and video within PowerPoint, you can insert an external audio or video file in your presentation.
Step 1. Adding an audio archive to a PowerPoint presentation.
To insert an audio file from your computer (such as pre-recorded narration, background music), to a slide:
1. Open your PowerPoint presentation and navigate to the specific slide where you want to add the audio.
2. Then, go to the Recording tab, click on the Audio button, and select the Audio on My PC option.

3. Then, choose the desired audio file from your device and click Insert .

4. The added audio file will appear as a small speaker icon in your presentation.
![clip_image062[3]](https://www.wintips.org/wp-content/uploads/2023/06/clip_image0623_thumb.png "clip_image062[3]")
5. When you click on the speaker icon, the Playback tab will appear in the Ribbon. Move to the Playback tab and click the Play in Background option if you want the audio to play across all slides.
![clip_image064[3]](https://www.wintips.org/wp-content/uploads/2023/06/clip_image0643_thumb.png "clip_image064[3]")
Step 2. Adding a Video file to a PowerPoint Presentation.
If you want to insert a video file from your PC, inside a Presentation.
1. Open the presentation and navigate to the specific slide where you want to add the audio.
2. Switch to the Recording tab and click on the Video button.
![clip_image066[3]](https://www.wintips.org/wp-content/uploads/2023/06/clip_image0663_thumb.png "clip_image066[3]")
3. Then, select the video file that you want to add in the slide and click Insert .
![clip_image068[3]](https://www.wintips.org/wp-content/uploads/2023/06/clip_image0683_thumb.png "clip_image068[3]")
4. Resize the video window as needed, and then customize the Playback settings from the Playback tab.
![clip_image070[3]](https://www.wintips.org/wp-content/uploads/2023/06/clip_image0703_thumb.png "clip_image070[3]")
Step 3. Exporting or Saving the Presentation.
Once the audio and video files are inserted, you can export the presentation to a video file or save it as a PowerPoint show. To do that:
1. Select the Recording tab:
- Select Save as Show to save the file as a PowerPoint show, or…
- Export to Video to export the file as a video.
![clip_image072[3]](https://www.wintips.org/wp-content/uploads/2023/06/clip_image0723_thumb.png "clip_image072[3]")
That's it! Let me know if this guide has helped you by leaving your comment about your experience. Please like and share this guide to help others.
We're hiring
We're looking for part-time or full-time technical writers to join our team! It's about a remote position that qualified tech writers from anywhere in the world can apply. Click here for more details.
- Recent Posts

- Fix: 0x80070426 in Xbox app, Microsoft Store or in Windows Update. - May 1, 2024
- FIX: Not in a hypervisor partition, VT-x is Disabled in BIOS in VirtualBox' (Solved) - April 29, 2024
- How to Disable or Remove BitLocker from Windows RE. - April 24, 2024

Konstantinos Tsoukalas
Related posts.

How to , Tutotial , Windows , Windows 10 , Windows 11
Fix: 0x80070426 in Xbox app, Microsoft Store or in Windows Update.
")
FIX: Not in a hypervisor partition, VT-x is Disabled in BIOS in VirtualBox' (Solved)

How to Disable or Remove BitLocker from Windows RE.
Leave a reply cancel reply.
Your email address will not be published. Required fields are marked *

Want to create or adapt books like this? Learn more about how Pressbooks supports open publishing practices.
Working with Video (Kaltura, Canvas, Zoom, and PowerPoint)
Recording an individual or group presentation with PowerPoint 365 or 2019
These instructions are for Office 365 or Office 2019 for Windows . You can download Office 365 from IUWare for free . Office 2019 is available on all computer lab Windows computers and via IUAnyWare . (See instructions on setting up and using IUAnyWare .)
If you are using a Mac
If you are using the latest version of Office 365, you can export a presentation narrated in Slide Show as a video file which can then be submitted as a previously recorded video . Note that when you export your presentation as a video, any narrated audio that was recorded in Slide Show will play, but other embedded media files will not play .
You can also record audio onto slides in Keynote and export them to a QuickTime .mov file which can then be submitted as a previously recorded video .
Video Walkthrough
Instructions.
The following steps presume you have Office 365 or 2019 on a Windows computer.
- The Recording tab does not appear on the Ribbon in PowerPoint 365 or 2019 by default so you may need to enable it. Go to File > Options and choose “Customize Ribbon.”
- On the right side list of Main Tabs scroll down to Recording, check the box next to it, and click “OK.”
- Check and make sure your microphone and webcam (if using) are recording properly by clicking the small microphone and video camera icons at the bottom right of the recording screen.
- Click the red “Record” button at the top left to start. You can stop after each slide and review your recording or you can continue through the whole presentation. If you continue, make sure to pause between slides. The 1-2 seconds of silence allow PowerPoint to tell what audio goes with what slide.
- When you are done, click the “X” at the top right to finish.
- Select the quality you would like the video to be. Normally 1080p (the default) is fine and leave “Use Recorded Timings and Narrations ” selected.
- Click “Create video” and tell PowerPoint where to save your video file. The small black status bar at the bottom of PowerPoint will show you the progress of your export. Do not do anything else in PowerPoint while a video is processing or it will cancel the job.
- Once the video has been processed, you are ready to upload your video to Kaltura and submit. See submitting a previously recorded video for instructions.
Group Recording with PowerPoint
If your group prefers to record the individual sections independently and at least one person has Office 365 or 2019 or can access it at a computer lab, you can compile your separate recordings in PowerPoint. Each person in the group would
- begin with a copy of the master PowerPoint file,
- delete the slides that they are not responsible for recording,
- record their audio and/or video on their slides only, and
- send the file with their recorded slides to the group member responsible for putting together the slide deck.
The person putting the slides together would add the other members’ slides into their PowerPoint file and export it to video.
Recording tips
- Team members using Powerpoint for Mac or an older version of PowerPoint for Windows can record audio onto their slides by using the “Audio” option on the “Add” tab on the Ribbon. To do this,
- open your PowerPoint file in the version of PowerPoint that you have
- go to the Insert tab,
- click the Audio button and choose “Record audio”
- Starting from the same PowerPoint file is very helpful for the person who is compiling the recorded slides.
- After your video is created, the person who will submit the assignment for the group will upload the video file to their Kaltura account.
Submit Your Assignment
See Upload a previously recorded video for instructions on adding your video to Kaltura. Then, based on your instructor’s instructions, submit your video in one of the two following ways.
- Submit your video by embedding it in a text box in an Assignment or Discussion .
- Submit your video by adding it to the Kaltura: Media Gallery for your course
Verify the Automatic Captions on Your Video
All video uploaded to Kaltura is automatically mechanically captioned using speech-to-text technology. If you’ve ever used speech-to-text, you know it’s never 100% accurate so you need to check your captions and edit as needed to make sure they are correct and not saying anything embarrassing. The mechanical captions appear fairly quickly on short videos once they’re uploaded. You can check them either in Kaltura: My Media if it is available in your course, or at Kaltura Mediaspace. Instructions on checking and editing your captions are at Accessible Videos in this book.
Note on Video Processing
When a video is first uploaded to Kaltura you will see a “media is being processed” animation where you expect your video to be.
Please be patient. Processing time depends on the length of the video and the number of other videos Kaltura is processing. It will appear once it has completed processing, though you may need to refresh your page to see it. You can embed a video that is still processing in Kaltura .
A Canvas Semester Checklist Copyright © by Trustees of Indiana University is licensed under a Creative Commons Attribution-NonCommercial-ShareAlike 4.0 International License , except where otherwise noted.
Contribute to the Microsoft 365 and Office forum! Click here to learn more 💡
April 9, 2024
Contribute to the Microsoft 365 and Office forum!
Click here to learn more 💡
PowerPoint Forum Top Contributors: Steve Rindsberg - John Korchok - Bob Jones AKA: CyberTaz ✅
May 10, 2024
PowerPoint Forum Top Contributors:
Steve Rindsberg - John Korchok - Bob Jones AKA: CyberTaz ✅
- Search the community and support articles
- Microsoft 365 and Office
- Search Community member
Ask a new question
Embedded video won't play in export or preview after recording voiceover for slide.
I am trying to record a PowerPoint presentation with an embedded video. When I record my voiceovers with the slides, all sounds well. When I get to a slide with an embedded video, I press play and keep recording during the entire length of the video. When I stop and preview the video, it does not show the video playing and only the title screen; additionally there is no sound for the video - just silence and the title screen during the 5 minutes it was playing. When I try to export the recording, I get an error message that says, "Some of the media in this presentation cannot be included in this video. Do you want to continue without including the media?" All embedded videos are from YouTube. How can I solve this problem?
- Subscribe to RSS feed
Report abuse
Reported content has been submitted
Replies (5)
- Microsoft Agent |
Dear Lindsey,
I did a test and it seems that I can't reproduce the issue in our environment.
May I know whether the issue occurs suddenly in your environment?
How do you record the embedded video with your voiceover? May I know whether you use Record>From Beginning to record the presentation>play the video>add your voiceover with your microphone?

If yes, please check whether the microphone is turned on when you recording the presentation.
After recording it, you should be able to click on the animation icon to check the recording result and then click on Record>Export to Video>Create a Video to export the recording to a video.
If it is convenient, upload a full screenshot of the Account page in the PowerPoint application for our reference. You can access teh page via clicking on File>Account.
Note: Remove any private information before uploading the screenshots.
Thank you for your effort and time.
Cliff | Microsoft Community Moderator
Was this reply helpful? Yes No
Sorry this didn't help.
Great! Thanks for your feedback.
How satisfied are you with this reply?
Thanks for your feedback, it helps us improve the site.
Thanks for your feedback.
I have attached screenshots below. The first is of the account. The second is a sample of a slide that I am reading while it records. This slide records perfectly fine. The third screenshot is of a video embedded in the slide. When I am recording and I press play, the video plays. However when I exit the recording, it only records what is shown in the screenshot with no sound or video.

Thanks for your updates.
May I know whether the issue happened to you before?
May I know whether you use Record>From Beginning to record the presentation>play the video>add your voiceover with your microphone? Could you confirm whether the microphone is turned on when you recording the presentation?
If it is convenient, I suggest you go to Control Panel>Programs>right-click on the Office applications' icon>Change>check whether there is an Online Repair option. If yes, run it, restart the computer and then do a test to see the result.
It seems that you aren't using the latest version number of the PowerPoint application, If you can update the version number, I suggest you update it and do a test again to see and let us know the outcome at your side. If no, you may contact the company administrator to help you update the version number.
Update history for Microsoft 365 Apps (listed by date) - Office release notes | Microsoft Learn
Welcome to share any updates at your convenience.
Like I've said multiple times, the recording function works perfectly fine to record my voice and yes, the microphone is on. The issue is when the record function is used to record a slide with an embedded video, it appears to be recording fine. But when the recording is ended and I preview the slide it just shows the placeholder icon for the video and complete silence while the video is playing. No images or sound. Have you ever tried to record a presentation with an embedded video? That is what you need to try to replicate this issue.
Thanks for your updates and confirmation.
I did a test again in our environment and I can't reproduce the issue.
Could you go to Control Panel>Programs>right-click on the Office applications' icon>Change>check whether there is an Online Repair option? If yes, run it, restart the computer and then do a test to see and let us know the result.

Question Info
- For business
- Norsk Bokmål
- Ελληνικά
- Русский
- עברית
- العربية
- ไทย
- 한국어
- 中文(简体)
- 中文(繁體)
- 日本語
Search for: Search Button
- PowerPoint video audio compression tricks and traps
PowerPoint offers compression embedded video and audio files, reducing the overall file size. But these options aren’t where you might expect to find them, aren’t selective and need to be used with care.
Three media size compress options explained
Beware compression, all video/audio or nothing, how much space is used.
There is compression option for media files (video or audio) to a suitable quality level and make it compact. This feature will not only help you in improving the video/audio playback performance but will also save disk space.
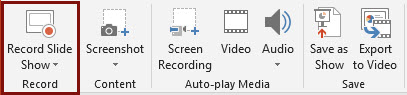
You’d expect compress options to appear on the special ribbon tabs like Video Format or Playback or audio tools, but they’re not. Instead go to File | Info | Media Size and Performance.
This is a PowerPoint feature that hasn’t changed in many years. Here’s the same options in PowerPoint 2010 where the only change is the labels on the three choices were less specific.
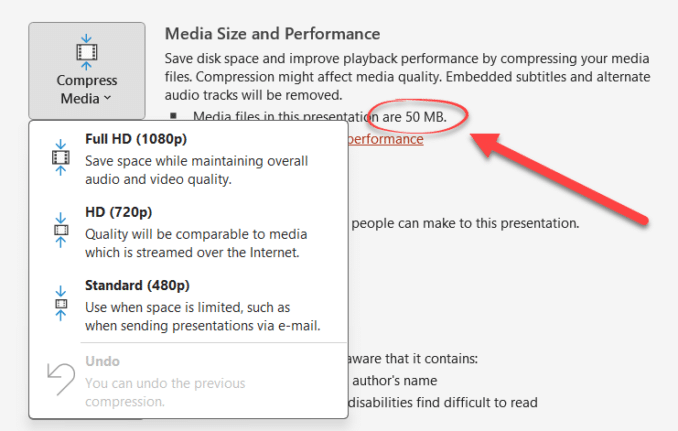
Here you have three options to compress the media file:
- Full HD (1080p) / Presentation Quality – This helps in saving space while at the same time maintaining the overall audio and video quality. Use this for big screen presentations that you want to appear at their best. Keep in mind that higher quality video needs a more powerful computer to playback smoothly and well.
- HD (720p) / Internet Quality – Here the quality of the video after compression will be comparable to the video which is mostly streamed over the internet. It’s enough for most situations including online events.
- Standard (480p) / Low Quality – This option as the name suggests produces video of low quality hence can be used when file size is more important than video quality. Since Internet connections and online storage are so much better these days, it’s not as commonly used as it once was.
The compression options will not only reduce the quality of video it will also remove any cropped/edited parts of the video.
It will also remove subtitles linked to a video and also alternate audio tracks on a video file (e.g multiple languages).
ONLY compress media in a presentation if you have an original video/audio saved separately, either in another version of the presentation or as separate media files. I always keep original / best resolution videos safely separate from anything in a PPTX file — just in case.
These compression options apply to all the media in a presentation. There’s no option to compress some files (e.g. higher quality video or audio) leaving other media unchanged.
To selectively compress media files you have to edit them separately then import into PowerPoint in the smaller form.
A PowerPoint presentation file (PPTX etc) can get much bigger when audio and especially video is added. You can see how much extra space is used from File | Info | Media Size and Performance and look for the little bullet-point item.

In this case, a single video has expanded a presentation file from a mere 5MB to 55MB! Not a lot by modern standards but still a big increase.
Choosing HD (720p) shrunk that video down by more than 40MB

PowerPoint shows the new size (50MB down to 8.8MB) and has the option to Undo the change.

Undo compression
You also have the option to revert back to the original file after compressing it. For this click on “Undo” option. While Undo is handy, we suggest you keep the original full resolution video/presentation and compress a copy.
When you choose any one of the above mentioned compression options, “Compress Media” window pops open which will show the status of the compression in progress.
- PowerPoint Photo Album
- Record Narration and Timings to PowerPoint
- Making PowerPoint files smaller
About this author

Office-Watch.com
Office 2021 - all you need to know . Facts & prices for the new Microsoft Office. Do you need it? Office LTSC is the enterprise licence version of Office 2021.
Office 2024 what's known so far plus educated guesses. Microsoft Office upcoming support end date checklist.
Latest from Office Watch
- Paste Text Only gets a Word shortcut and confusion
- Try a faster Microsoft 365 secure login
- Use free Copilot to summarize Word documents
- Ear 👂 symbol in Word, Excel, PowerPoint and Outlook
- Great image Resize options now in Windows
- Making pictures smaller - some more options.
- Use the Force with your PowerPoint & online backgrounds
- Star Wars look in Word and PowerPoint
- Happy Star Wars Day - with Microsoft Office
- How to save an Outlook attachment without knowing it
- Two ways to pay for Copilot with Microsoft Office
- PowerPoint trim video reaches the web
- What is ‘grounding’ in Copilot?
- Import EML MSG and OFT files with Outlook (new)
- The Outlook setting everyone should check
- Microsoft Teams is changing its name to … Teams
- In person vs virtual event option in Outlook
- Tag your In-person events in Outlook
- Generative ‘Smart’ Erase returns to Designer
IMAGES
VIDEO
COMMENTS
PowerPoint for Microsoft 365 PowerPoint 2021 PowerPoint 2019 More... You can record your PowerPoint presentation—or just a single slide—and capture voice, ink gestures, and your video presence. The completed recording is like any other presentation. You can play it for your audience in Slide Show or you can export it as a video file.
Learn how to record a PowerPoint Presentation with audio and video simply by using the build-in PowerPoint functionalities and tools. You will learn how to...
Creating a Narrated Video in PowerPoint (Office 365) CONVERT OLDER POWERPOINTS . If your PowerPoint is saved in an older .ppt file format, you should first convert the file to the newer .pptx file format before recording. Recording using the older .ppt format often causes problems such as missing or unplayable recordings.
Learn how to add or record audio, such as music, narration, or sound bites, to your Microsoft PowerPoint presentation. Find out more at: https://msft.it/6008...
Once you're done recording, you can preview the video and re-record if necessary. When you're ready, the new experience allows you to quickly create a video to share with others directly within the flow. Your recording - including your video, voice, slides, and annotations - are all captured and recorded as part of the presentation.
To record and hear any audio, your computer must be equipped wi... You can add audio, such as music, narration, or sound bites, to your PowerPoint presentation.
Recording Studio lets you make a video of your entire PowerPoint presentation. Not just the slides but hear the presenter talking and even seeing the presenter/s on screen, pointing or drawing on slides. The video you make can be shared and streamed just like any other video. gives users the ability to easily share their presentations including ...
Tutorial. Open your PowerPoint presentation or create a new one. In the taskbar, select Slide Show. Then click Record Slide Show. Choose the option Record from Beginning. You'll now get to a different view, which we'll call "Recorder View". Here's an overview: In the bottom right corner, you'll see three icons.
1. Open the PowerPoint presentation in which you want to record audio and video. 2. From the Slide Show tab (or the Recording tab), click the Record Slide Show button and choose either Record from Current slide or Record from Beginning, depending on which point you want to add audio/video. 3.
In this video, learn how present a presentation, record the presentation with audio and video, and distribute the presentation using a various methods. ... Record a PowerPoint presentation ...
1. Add audio to a PowerPoint presentation. Go to the Recording tab, click the Audio button select Audio on My PC…. You could also select the Record Sound option to record your narration to add it to the slide. Then, select the audio file from your device and then click Insert.
Select "File" from ribbon. Open "Options". Select "Customise ribbon". Ensure "Recording" is checked off the right panel list. Click "Record slide show" from the recording tab. You will see three options. Pick the one best suited to your presentation. The clear options will remove narration and timing effects.
The person putting the slides together would add the other members' slides into their PowerPoint file and export it to video. Recording tips. Team members using Powerpoint for Mac or an older version of PowerPoint for Windows can record audio onto their slides by using the "Audio" option on the "Add" tab on the Ribbon. To do this,
Today's video will show you how to add and record audio narration to your slides in Microsoft PowerPoint. You'll need to make sure you have a recording devic...
If you can't see Record slide show button under Slide show tab, we would like to suggest you check whether you can see this option after checking Recording tab. On the File tab of the ribbon, click Options. In the Options dialog box, click the Customize Ribbon tab on the left. Then, in the right-hand box that lists the available ribbon tabs ...
Recording PowerPoint Presentations with Office 365. The desktop version of PowerPoint that Detroit Mercy students and employees can download from Office 365 has pretty excellent recording features. Remember, if you're providing a video (or audio) lecture, you need to provide your students with a transcript of the spoken content. ...
Hello Shawn! I want to share my experience to help you record PowerPoint. Start the PowerPoint program. Then, open the Insert menu and click on Audio. You can either record your voice in PowerPoint directly or insert audio files into a PowerPoint. If you do not see the Record option, I recommend you use a free MP3 recorder.
I understand you're having trouble with "Record A PowerPoint presentation with audio and video." I understand the problem and would like to help you better in your situation. It is currently not possible to install Microsoft 365 or the Windows or Mac desktop versions of Office 2016 on a Chromebook, only the Microsoft 365 apps can be accessed ...
A video showing how to Record Audio Dialog on PowerPoint Slides and Export to Video using Office 365 for Windows. Presentation outline below 👇👇👇0:00 Intro...
After recording it, you should be able to click on the animation icon to check the recording result and then click on Record>Export to Video>Create a Video to export the recording to a video. If it is convenient, upload a full screenshot of the Account page in the PowerPoint application for our reference.
Three media size compress options explained. Here you have three options to compress the media file: Full HD (1080p) / Presentation Quality - This helps in saving space while at the same time maintaining the overall audio and video quality. Use this for big screen presentations that you want to appear at their best.