

Presenting with cameo
With cameo , you can insert your live camera feed directly on a PowerPoint slide. You can then apply the same effects to your camera feed as you can to a picture or other object, including formatting, transitions, and styles.
Cameo is available to Microsoft 365 subscribers in the desktop app for Windows or macOS or in the web app. (For desktop apps, it is available in the Current Channel and also in the Semi-Annual Channel beginning with January 2023.)

Select Insert > Cameo . A placeholder for the camera feed will appear on the slide.

Note: In a shared document, only you see your video feed.
In the Camera tab, select the arrow below the Preview button to select other cameras. Only one video feed can be used on a slide.
Use the tab to apply effects like Camera Styles , Camera Shape , Camera Border , and Camera Effects . You can also arrange or overlay the camera feed like you would any other picture or object on the slide or in the Navigation Pane .

Use the picture anchors to adjust the size and placement on the slide.
You can also cut-and-paste the camera feed, plus use Animations and Transitions , like Morph . Design Ideas also work with cameo.
To present while using cameo, on the ribbon, select Slide Show > From Beginning .
Tip: Alternatively, presentations that contain a cameo can also be viewed with PowerPoint Live in a Teams meeting. PowerPoint Live detects cameo on a slide and automatically switches to cameo mode. Any Teams camera settings (such as background effects and filters) are automatically be inherited by cameo in the PowerPoint Live session in Teams. For more information, see Cameo in PowerPoint Live in Teams .
Record customized camera feeds with cameo in PowerPoint for Mac
Personalize your PowerPoint video story with a live camera feed
More details: Integrate a live camera feed into your presentation
Present from PowerPoint in Microsoft Teams
Use the Morph transition in PowerPoint
PowerPoint for the web now supports adding and editing a cameo.
Insert a cameo
In Normal view, select the Insert tab on the ribbon.
Select Cameo .
Select the cameo placeholder on the slide.
Select the Camera Format tab.
Use the options on the Camera Format tab to customize the look of the camera. You can use predefined camera styles or manually apply a shape and border.
Preview the live camera
Select the Slide Show tab, then select From Current Slide .
Caution: If you are opening cameo for the first time on PowerPoint for the web, you will need to grant camera permissions on the browser.

In slide show view, near an edge of the screen, a toolbar appears.
If necessary, at the right end of the toolbar, select More, then select which camera on your device you want to use.

Need more help?
Want more options.
Explore subscription benefits, browse training courses, learn how to secure your device, and more.

Microsoft 365 subscription benefits

Microsoft 365 training

Microsoft security

Accessibility center
Communities help you ask and answer questions, give feedback, and hear from experts with rich knowledge.

Ask the Microsoft Community

Microsoft Tech Community

Windows Insiders
Microsoft 365 Insiders
Was this information helpful?
Thank you for your feedback.
How-To Geek
How to use a live camera feed in microsoft powerpoint.
Be the star of your presentation and give it that personal touch.
Quick Links
Requirements for the cameo feature, insert the cameo object on a slide, customize the cameo object, control the camera while presenting.
Do you want to be visible on-screen while presenting your slideshow? If you've got a webcam handy, you can put yourself on every slide in your Microsoft PowerPoint presentation using the Cameo feature.
You can place the camera feed anywhere on your slide, size it to your liking, apply a style, add an effect, and arrange it with other items on your slide.
As the president of your company, leader of a charitable organization, or developer of a new product, this is a great way to bring a personal touch to your presentation. Rather than just hearing your voice using narration , your audience can see your face as well.
As of July 2022, the PowerPoint Cameo feature is available to Office Insiders and rolling out to Microsoft 365 subscribers on Windows and Mac in the coming months.
To use this feature, you must grant permission for PowerPoint to use the camera on your device.
On Windows, open your Settings from the Start menu and select "Privacy." On the left, choose "Camera." On the right, turn on the toggles for Allow Apps to Access Your Camera and Allow Desktop Apps to Access Your Camera.
On Mac, open the System Preferences from your Dock or the Apple icon in your menu bar and select "Security & Privacy." Open the Privacy tab and on the left, choose "Camera." On the right, check the box for Microsoft PowerPoint.
You can place the Cameo element on one slide or all. If you use it on multiple slides, the feed continues seamlessly through each slide in the presentation.
Choose a slide, go to the Insert tab, and select "Cameo" in the Camera section of the ribbon.
You'll see the Cameo object appear on your slide.
To choose the camera you want to use, if you have more than one, select the object and go to the Camera tab that appears. Click the Preview (Camera Preview on Mac) drop-down arrow on the left side of the ribbon and pick the camera you want to use.
Currently, virtual cameras are not supported for the feature.
You can then drag to move it anywhere you like and drag a corner or edge to resize it.
To see a preview of the Cameo, either click the camera icon inside the object or the Preview (Camera Preview on Mac) button on the Camera tab.
Like images and videos you insert , you can customize the Cameo object too. Give it a new style, add a border, or apply an effect.
Select the Cameo object and head to the Camera tab that appears. On the left, use the Camera Styles box to pick a shape with an effect like shadow or a frame.
To the right of the Camera Styles, you can also use the Camera Shape, Camera Border, and Camera Effects drop-down menus to select different options.
You can use the Design Ideas on the Home tab for options on how to lay out the slides using Cameo.
To arrange the Cameo with other slide elements, use the tools in the Arrange section. You can bring the Cameo forward or send it behind other objects , align it to the left, right, or center, or rotate it. On the far right, you can use the crop and size options.
You can begin your presentation as you normally would by picking an option in the Start Slide Show section of the ribbon on the Slide Show tab.
During the slideshow, use the Toggle Camera icon to turn the camera off and on.
The Cameo feature in PowerPoint lets you add a live camera feed for a completely personalized presentation. Are you going to give it a try?
For more, learn how to set the preview image for a video or how to trim a video right in PowerPoint .
- Slide Design Fundamentals
- Presentation Fundamentals
- App Tips & Tricks
How to use PowerPoint Cameo
September 7, 2022
Learn how to integrate live camera feeds directly into your PowerPoint slides with the Cameo feature. This is available both in Windows and Mac versions of PowerPoint. In this step-by-step tutorial, discover how to control and modify live camera feeds like move, resize, crop, and apply transitions or styles to the camera feed. Additionally, see how to use PowerPoint Designer to transform the look of your slides. PowerPoint Cameo empowers you to embed live camera feeds into your slides with minimal effort. In a virtual or recorded setting, it allows you to connect with your audience in new ways. It’s a great tool to practice and test out your presentation for an upcoming live streaming event regardless of the streaming platform like Microsoft Teams or Zoom.
Introduction
Called Cameo, this new feature rolled out to all Microsoft 365 users in the middle of 2022. To use Cameo, click the Insert tab and click the Cameo button on the far right. A video placeholder will appear in the bottom right corner of the slide. In the Ribbon, a new Camera tab will appear. The default view is with Preview turned off. You can click the small video icon to turn on Preview or use the Preview button in the Camera tab. If you have more than one camera the Preview button will have a drop-down arrow and you can select the camera you want to use.
Modifying the video placeholder
The unique thing about this feature is that the video placeholder is an object just like a shape, text box, or image. This allows you to make modifications that aren’t always possible in live streaming services like Zoom. First off you can move the placeholder to a different spot on the slide. Looking at the Camera tab, you can see that there are several options to change the shape from a standard rectangle. If these options aren’t exactly what you want, you can use the Change Shape drop down and select any of the shapes on that menu. [choose the cloud shape or tear drop] Other options include adding a border And the Effects menu provides different settings for shadow, reflection, and glow. With the placeholder selected you can resize it and your video image resize along with it. You can also crop the placeholder. This is great if you want to cut unwanted background. If you like using the Designer option it can be used with the video placeholder added. Clicking the Designer button will provide [design ideas in Windows] several different options for you to choose that are specific to Cameo and the video placeholder.
Applying video placeholder settings to other slides
The big thing to remember is that the video placeholder is unique to the individual slide. Any modifications you make will not be carried over to the next slide. Fortunately, you have a couple of options. If you haven’t designed your overall slide deck, you can duplicate the slide from the Thumbnail Pane. The advantage here is that the placeholder will be in the exact same spot as all the other slides. If you are adding the video placeholder as one of your last steps, you can copy the placeholder and paste it onto the different slides. All of the settings, like shape, shadow, etc. are preserved. You can use the Gridlines option to make your placement more consistent if that is important. You can turn these one from the View tab. You can also create a template designed to include the video placeholder.
Presenting with Cameo
When you are ready to present you have a few options. Within the Microsoft ecosystem, you can use this option to present via Teams. You can also use this with video streaming services like Zoom. Just remember to mute your video on the streaming platform.
I’d love to hear your thoughts about this new feature. In the Comments section, let me know if you’ve used it and what do you like and/or dislike about it.

About the Author
Jennifer Sharkey is known as the Virtual Presentation Specialist. Being passionate about seeing people shine and be heard, she leans into her 20+ years of public speaking experience and uses what she has learned from presenting, both in-person and virtually, to small groups all the way up to 5000 people. Jennifer draws from her experience as an associate professor, academic librarian, and coach to help holistic coaches master virtual presentations to grow their business. Her unique immersive program provides practical strategies and methods to build confidence, engage audiences, and generate authenticity and authority.
Privacy Overview
Byte Bite Bit
How to Present Cameo in PowerPoint: Enhancing Presentations with Celebrity Videos
Cameo is a transformative feature for PowerPoint presentations. With this tool, we can integrate our live camera feed into the slides, allowing for a more dynamic and engaging presentation. Whether we’re addressing an audience in a large conference room or connecting with remote participants in a Teams meeting, the versatility of Cameo helps us maintain eye contact and a sense of presence throughout the presentation.

We find the ability to customize our on-screen appearance beneficial for keeping the audience focused on the most important points. By positioning ourselves within the slides and controlling when we appear, we can direct the audience’s attention more effectively. This personal touch helps to convey our message more compellingly, making the presentation more memorable for our viewers.
- 1.1 Accessing the Cameo Feature
- 1.2 Camera Permissions and Privacy Settings
- 1.3 Inserting and Positioning the Camera Feed
- 2.1 Modifying Camera Feed Style
- 2.2 Adjusting Camera Shape and Border
- 2.3 Applying Video Effects and Transitions
- 3.1 Embedding Live Camera Feeds for Dynamic Slides
- 3.2 Adding Pre-Recorded Videos to Your Deck
- 4.1 Navigating the Presenter and Slide Show Views
- 4.2 Utilizing Microsoft Teams Integration
- 4.3 Gathering Audience Feedback and Iterating
Setting Up Cameo in PowerPoint

In this section, we’ll guide you through using Cameo to integrate a live camera feed into your PowerPoint slides. We’ll cover accessing the feature, ensuring camera permissions, and inserting your camera feed into the presentation.
Accessing the Cameo Feature
To start using Cameo, we need to insert it into our slide. In PowerPoint for both Windows and Mac, this process is rather straightforward. We simply go to the Insert tab and select Cameo . When selected, a placeholder for your camera will be added to the slide. From there, we’ll use the Camera tab to manage our feed.
Camera Permissions and Privacy Settings
Before inserting the camera feed, we need to ensure that PowerPoint has the necessary permissions to access our camera.
On Windows , we navigate to Settings > Privacy > Camera and toggle on the permission for PowerPoint.
For Mac users, we open System Preferences , select Security & Privacy , then click the Privacy tab. Here, we’ll grant camera access to PowerPoint. These steps keep our camera feed private until we choose to display it during presentations.
Inserting and Positioning the Camera Feed
With permissions set, it’s time to integrate the live camera feed. After adding the Cameo placeholder, select the Preview icon in the placeholder to activate the feed. Then position the feed where you prefer it on your slides.
We can add the Cameo feature to one slide or multiple slides depending on our need. If used on multiple slides, the feed continues seamlessly through each slide in our presentation. This ensures that our audience experiences a smooth and integrated presentation that harnesses the power of live video to complement our message.
Customizing the Cameo Display
Customizing the Cameo display in PowerPoint allows us to personalize how our camera feed is integrated into presentations. Careful customization can elevate the professionalism of our slides, keep the audience engaged, and make our message more impactful.
Modifying Camera Feed Style
When we talk about customizing camera feed styles, we’re referring to the visual aesthetics of our live feed in PowerPoint’s Cameo feature. PowerPoint offers a range of camera styles that determine how our video looks on the slides. For instance, we can choose a style that corresponds with our presentation theme or one that enhances our presence on the screen.
Decorative borders can frame us neatly, and subtle shadows can add depth to our appearance. We can even adjust the brightness and contrast right from the Recording tab to make sure we’re seen clearly.
Adjusting Camera Shape and Border
The shape of our camera feed can significantly affect the visual flow of our PowerPoint presentation. Using the Cameo feature, we can select various shapes such as circles, squares, or rounded rectangles.
We can choose to have a clean-cut edge or a soft drop shadow border around our video feed. Adjusting the camera shape and border to complement our slide design creates a cohesive visual experience.
Applying Video Effects and Transitions
Transitions and effects are key to a dynamic presentation. The Cameo feature in PowerPoint allows us to apply effects such as fading in or out of our live camera feed. Furthermore, we can use the Morph transition, giving our camera feed a smooth, professional movement as we transition between slides.
The Designer tool can also suggest design ideas to help us apply transitions and effects effectively, ensuring that our message is delivered with clarity and impact.
Incorporating Live and Recorded Elements
We can elevate our presentations by incorporating live and recorded content, ensuring that our slides not only convey information but also engage our audience. We can embed live camera feeds directly into our slides or include pre-recorded videos to enhance the narrative of our slideshow.
Embedding Live Camera Feeds for Dynamic Slides
- Position your camera to capture the desired angle and subject.
- In the PowerPoint desktop app for Windows or macOS, select the slide where you’ll embed the live feed.
- Click on ‘Insert’ and choose the ‘Camera’ option to add a live camera feed as an object on your slide.
- Customize the camera feed using the same formatting tools available for pictures and other objects; this includes resizing, cropping, and applying various styles.
Our camera feed then becomes part of the slide, real-time, enhancing our interaction with the audience. We can move through the presentation without needing to toggle between different applications or screens.
Adding Pre-Recorded Videos to Your Deck
- Choosing the video that best complements your slide’s content.
- Navigating to the ‘Insert’ tab on your PowerPoint ribbon and selecting ‘Video’.
- Picking the option to insert video ‘From File’ and choosing the desired video file.
Once the video is on the slide, we can adjust its size and placement, apply formatting effects, and even trim the video length within PowerPoint. We ensure the recorded video aligns with our slide’s message and seamlessly integrates with our overall deck.
Presentation Tips and Advanced Features
In this section, we’ll explore how to masterfully navigate through Presenter and Slide Show views, make the most of Microsoft Teams integration, and harness audience feedback to refine your presentations using PowerPoint Cameo.
Navigating the Presenter and Slide Show Views
When we’re presenting with PowerPoint, having a grasp on Presenter View and Slide Show View is crucial. Presenter View offers us a behind-the-scenes control panel, allowing us to see not only the current slide but also our notes and a preview of upcoming content. To access this feature, we select the “Slide Show” tab and then click on “From Beginning” or “From Current Slide.”
Utilizing Microsoft Teams Integration
Microsoft Teams enhances our PowerPoint presentations by allowing us to share with a broader audience seamlessly. When using PowerPoint Live in Teams, we simply upload our presentation into a Teams meeting, providing us with the flexibility to present from anywhere.
Gathering Audience Feedback and Iterating
Feedback is the backbone of improvement. After our presentation, it’s beneficial to collect audience insights. Within Microsoft Teams, we can use features like polls and Q&A sessions to gauge audience engagement. Then, we can use the “Design Ideas” functionality in PowerPoint to refine our slides based on the feedback.
Implementing audience suggestions can help us align our content more closely with their expectations. Our goal is to continuously modify and enhance our presentations leveraging the power of audience feedback.
Related posts:
- Fix Roku Not Adding Channels: Your Quick Troubleshooting Guide
- Fix Steam Takes Forever to Open: Quick Solutions for Faster Access
- Fix Volume Mixer Not Working on Windows 11: Quick Solutions Guide
- Fix Windows License Will Expire Soon on Windows 11: Effective Solutions for Renewal
- Fix Zoom Not Showing Upcoming Meetings: Quick Solutions for Seamless Scheduling
- Genshin Impact Failed to Connect to Server: Quick Fixes and Solutions
- Gigabyte BIOS ID Check Error: Quick Solutions for a Smooth Boot-up
- Why GPU Starts Artifacting Under Load: Unveiling Causes and Solutions
- LGA vs BGA: Comparing Surface Mount Technology Packages
- Mark All Messages as Read in Outlook: Quick Guide to Inbox Management
- Microsoft Teams Shifts: Streamlining Workforce Management and Scheduling
- MS Word Hide or Unhide Text: A Simple Guide to Controlling Visibility
Leave a Comment Cancel reply
Save my name, email, and website in this browser for the next time I comment.
- Skip to main content
- assistive.skiplink.to.breadcrumbs
- assistive.skiplink.to.header.menu
- assistive.skiplink.to.action.menu
- assistive.skiplink.to.quick.search
Space Tools
- Content Tools
- A t tachments (46)
- Page History
- Page Information
- Resolved comments
- View in Hierarchy
- View Source
- Export to PDF
- Export to HTML
- Export to Word
- Copy Page Tree
Breadcrumbs
2021x version news.

This release introduces significant performance and scalability upgrades in key product areas: migration, converting between frameworks, building matrices, Merge, Teamwork Cloud project load, Teamwork Cloud project saving, table loading, Excel and CSV files import, and such common modeling tool operations as Copy/Paste, Find, Numbering, Element Selection, and Validation. Additionally, this version adds support for the UAF 1.1 Profile, new diagrams and tables, and a number of usability and traceability improvements.
The released version is also packed with a few improvements that extended the usage of Simulink import and Modelica export. We introduce the new SysML 1.6 specification support, including new concepts such as Conjugated Interface Block, « AddFlowPropertyValueOnNestedPortAction » stereotype, additional Binding Connector notation, renamed compartments, enumerations, and more.
Version 2021x adds the ability to use layers in diagrams, automatically create legends, present diagrams or predefined sequences of diagrams in full screen to stakeholders, create compositions and aggregations in matrices, and use predefined element type filters when searching for the necessary model elements. Additionally, the Excel/CSV file import functionality has been reviewed and refreshed, and numerous improvements to Excel/CSV synchronization functionality in tables have been added.
Last but not least, project merge has been extended to give users the option to show only the changes in directly modified diagrams, hide Target and Equivalent Changes by default, and choose a specific ancestor calculation algorithm depending on merge scenario and expected outcome.
Contact your sales representative, and don't forget to give us your feedback on Twitter or Facebook .
UAF Features
Converting between frameworks
Building matrices, uaf 1.1 profile support, diagrams and tables, usability improvements, traceability improvements, sysml features, proxy ports in fmu and simulink import, simulink model import to activities.
- Simulink composite signals export
IBD-based selective Modelica export
Sysml 1.6 support, client-side performance improvements, partial data loading in tables.
- Increased Excel and CSV files Import Speed
Common Operations
Profiling changes in the uml 2.5.1 metamodel.
Teamwork Cloud-related Performance Improvements
Project Merge
- TWC Project Load
- TWC Save to Local
System Requirements
Discontinued products, from teamwork server to teamwork cloud, from cameo collaborator for alfresco to cameo collaborator for teamwork cloud, modeling and infrastructure, layers based on legends, intelligent legend creation, presentation mode, renewed excel/csv file import, extended excel and csv sync, composition and aggregation relationships in dependency matrix, other improvements, collaboration, other features, performance improvements in uaf.
In this version, projects containing 1, 5, and 10 million elements were tested in both UPDM and UAF scopes. After receiving the results, improvements in migration, converting between frameworks, and building matrices were made for better performance.
The migration from UPDM2 to UAF 1.1 and from UAF 1.0 to UAF1.1 has been optimized and takes less time than in earlier versions.

The comparison of migration time depending on the project size
The conversion between frameworks has been optimized. The following table shows the results of converting a project containing approximately 2 million elements and hundreds of framework packages, which needed to be moved or renamed:
The scope for predefined matrices is no longer set by default. Now all matrices will start to build after the row and column scope is selected ( https://jira.nomagic.com/browse/UPDM-11385 )
Methods and Standards
Beginning with this version, the UAF 1.1 profile is supported. Therefore the following migrations will be necessary:
- UAF 1.0 to UAF 1.1. Learn more about the changes >>
- UPDM 3 (UAF 1.0 beta) to UAF 1.1. Note that there is no direct migration in this case. Learn more about the migration process >>
- UPDM 2.1 to UAF 1.1. Learn more about the changes >>

Evolution of standards
Back to Top
- New Actual Enterprise Phases Gantt Chart shows how actual enterprise phases change over time. Learn more >>
- New Date and Time Summary Table depicts all dates and times specified in the ISO8601 date-time format. Learn more >>
- New Personnel Forecast , Resources Forecast , and Standards Roadmap diagrams are implemented, improving the way they are created and used. The Personnel Forecast , Resources Forecast , and Standards Roadmap diagrams created with earlier versions of the modeling tool will be marked as deprecated and will be available only for review purposes.

- A technology preview of the Hierarchical Measurements table. Please note that if you open a project created with earlier versions, the Measurement tables of those projects will be empty. However, you can create them anew.
- The new Personnel Gantt Chart property Display Actual Persons in Different Lines was implemented. Now you can choose to see each Actual Person in separate lines.
In the Gantt chart Options area, you can choose to mark a required period of time. One of the following Marking Modes are available:
- None . Nothing will be marked.
- Period of Time . Choose to mark a period of time. For this mode, you can select the Start and End dates to be marked.
- Period of Actual Enterprise Phase . Choose to mark a period of the Actual Enterprise Phase. The time frame will be marked according to the Start and End dates set for the selected Actual Enterprise Phase.
The Create Association on Part Creation project option is set to True. This means that when you create parts in the Part compartment of the Resource and Operational performers, the appropriate association is also created in the model.

The Implementation matrices have been enhanced. Now, b y default, the traceability is shown according to the following criteria:
- Mapping Using Milestone (Actual Resources and Resources)
- Mapping Using Milestone (Resources Performers)
- Mapping Using Milestone (Service Specification)
- Mapping Using Milestone (Actual Resources)
You may hide some mapping rules from a Matrix by changing the Dependency criteria in the Specification window.

Learn more about working with the implementation matrices >>
- The new version of the UJTL version (20200115) is now available. You can choose the library version when creating a new project.
When an old project (UAF 1.0 or UPDM2) is opened with the latest version (UAF plugin), stereotypes for nonDSL'ed associations should be applied:
- when the association is between OperationalAgent, the <<OperationalAssociation>> stereotype is applied.
- when the association is between ResourcePerformer, the <<ResourceAssociation>> stereotype is applied.
- Operational Signal/Resources Signal now applies automatically for the DSL'ed signal.
- ownsActualProject renamed to managesActualProject,
- responsibleForActualResponsibility renamed to ownsActualResponsibility ,
- responsibleForActualProjectMilestones,
- responsibleForActualResponsibility renamed to managesActualResponsibility .
When working with the predefined matrices, you can make some changes to the default settings, such as changing the row or columns element type, dependency criteria, or directions. You can restore the following settings to default at any time:
- Description
- Dependency Criteria
- Show Elements
- Column Element Type
- Row Element Type
- New system options are implemented. One is for setting the default plugin and the other to display which plugin is installed. Learn more >>
FMU and Simulink import now support Proxy Port creation. Once you have imported the external FMU/Simulink model, you can select the Proxy Port to be created in your model and then specify an existing or create a new Interface Block to be used as its type.
Selecting the Proxy Port and an Interface Block upon the external model import.
Learn more about FMU and Simulink import >>
You can import the Simulink model by dragging and dropping the Simulink file (*.slx) directly onto the Activity diagram. The Activity (stereotyped by « SimulinkBlock » ) which is assigned as behavior for the Call Behavior Action and its Input and/or Output Pins are created in the model.

Simulink import to Activity diagram.
Learn more about Simulink import >>
Simulink composite signals export
You can now select how to export Proxy Port or Interface Block with multiple Flow Properties (composite signals): as bus Creators/Selectors or as bus In/Out ports.

Learn more about Simulink export >>
You can now use the Internal Block Diagram to select what to export to Modelica. Only parts, ports, and connectors appearing in this diagram are exported, rather than the entire model. See whole vs partial export comparison in the image below.

The difference between whole (exporting Block) and partial (exporting IBD) export to the Modelica file.
Learn more about Modelica export >>
As of version 2021x the SysML Plugin supports the SysML 1.6 specification which brings the following improvements:
- One more way to model conjugated ports is to create the Conjugated Interface Block which has the same features as its original Interface Block except that its Directed Features and Flow Properties are reversed (conjugated). Learn more about Conjugated Interface Block >>
- The ability to change the Binding Connector notation keyword from "equal" to sign "=". Learn how to create Binding Connector >>
- The new stereotype « AddFlowPropertyValueOnNestedPortAction » is created which enables values added to a flow property to propagate out through a specified behavioral port of an object executing the action, rather than all behavior ports exposing the flow property. It also enables values added to a flow property to propagate into objects.
- The AdjunctProperty principal type is changed from Element to NamedElement.
- The « PropertySpecificType » stereotype is renamed to « pst ».
- The Value Type compartment attributes is renamed to properties .
- The initialValue compartment is renamed to initial values .
- The s ignal receptions compartment is renamed to receptions.
- The FlowDirection, FeatureDirection and ControlValue enumerations are renamed to FlowDirectionKind , FeatureDirectionKind and ControlValueKind respectively .
Learn more about SysML 1.6 support >>
Back to top
Experience enhanced table loading and scrolling performance! Thanks to the newly-introduced Load Partially mode, data is now loaded in only visible rows. There is no longer a need to wait until data is calculated in the entire table. Additionally, fast scrolling has improved; it is now considerably smoother.

A chart comparing the opening time of Requirement Table having 7 standard columns with a different number of requirements.
Learn more about partial loading in tables >>
Increased Excel and CSV files Import Speed
The import performance of data from an Excel or CSV file into the modeling tool adds a great experience while managing a large scope of data. The data import time using the table sync feature is significantly faster compared with the previous version (19.0 SP4). Also, the d ata import using the new Excel/CSV Import dialog is even better in comparison to Excel/CSV Sync feature . The import of 61k elements takes only 2 minutes (see the chart below).

A chart comparing data import from Excel and CSV files using the Excel/CSV Sync and Excel/CSV Import dialogs.
- Copy/Paste. Now you can copy and paste data 2-4 times faster depending on the specific scenario.

A chart comparing the copy&paste operation time in various scenarios.

A chart comparing the Find operation speed in 19.0 SP4 and 2021x projects containing 1M, 2M, and 5M elements (including used projects).
- Numbering . Creating the first numbered element, copying/pasting numbered elements, renumbering elements recursively, and updating the last element ID is now 30-840 times faster.

A chart comparing the Numbering operations speed in 19.0 SP4 and 2021x projects containing 10M elements (including used projects).
Element Selection. Now you can search and select the needed elements (e.g., in the Select Element and Quick Find dialogs as well as drop-down lists) approximately 40-50 times faster.

A chart comparing the element selection speed in 19.0 SP4 and 2021x projects containing 5M elements (including used projects).
- Validation . The active validation of the model now takes less than a second (0.8s after 5M project load and 0.5s after diagram load).

A chart comparing the active validation speed after the project and diagram load in 19.0 SP4 and 2021x projects containing 5M elements (including used projects).
Significant changes have been implemented in the UML metamodel for improved performance. The InstanceSpecifications, Slots, and ValueSpecifications are no longer used to store profiling data. Instead, new model element types and properties are introduced, while some have been removed (see the diagram below).

Profiling changes in the UML metamodel.
As shown in the figure above, Element references the TaggedValue that is used to specify the Boolean, Integer, Real, String, or Element values of the applied stereotype properties. This approach uses fewer model elements to store profiling data, which leads to a decrease in the total number of elements in SysML and UAF projects by 40-80%.
Note . Expressions based on the previously implemented profiling data storing metamodel no longer work, meaning that they have to be updated manually.
Teamwork Cloud-related Performance Improvements
Project Merge has undergone considerable performance improvements. The modeling tool version 2021x requires approximately 4-5 times less memory to successfully merge two server project branches, compared to 19.0 SP4.

A chart comparing merge memory consumption in different modeling tool versions.
Furthermore, the merge operation speed has increased by 20-70% in 2021x compared to 19.0 SP4. Both frequent (between close project versions) and infrequent (between distant project versions) merges can now be performed much faster!

Charts comparing merge performance in Speed and Memory modes.
Twc project load .
Project load memory and speed improvements have been implemented for Teamwork Cloud. The modeling tool now requires only 2GB of heap to load a 2M SysML project (first and second time) when working with TWC projects compared to 8GB in 19.0 SP4. Additionally, as a result of the UML metamodel changes, SysML projects are now opened 2-3 times faster.
Note . Received results cover the project load only, excluding validation, diagramming, and further modeling tool feature usage.

Charts comparing project load memory and speed improvements between different modeling tool versions.
- Three projects (sizes ranging from 1M to 2M) in 19.0 SP4 and the same projects in 2021x (sizes ranging from 750k to 1M) were used to run the tests.
- Migration time is excluded because projects that had already been migrated were used for testing.
TWC Save to Local
In 2021x, great attention is paid to the memory consumption improvements. Saving a Teamwork Cloud project locally now requires less memory. For example, a 2M SysML project now consumes only 4GB of RAM, compared to 20GB in 19.0 SP4.

A chart comparing memory consumption when saving a TWC project as a local one between different modeling tool versions.
RAM and disk space requirements have been updated taking into consideration different sizes of large models. Learn more about recommended system requirements >>
1 the project elements count is different due to the profiling data storing metamodel optimized in 2021x. 2 these memory requirements are indicative and may vary by project specifics.
Diagrams can get extremely crowded as a model evolves. For example, when highlighting a chosen piece of information, only one specific aspect of the system becomes a challenge. For your convenience, you can now filter diagrams by the selected Legend items to make only the necessary diagram layers stand out.

Filtering the diagram by the selected Legend item.
Learn more about layers based on Legends >>
Do you feel that Legend creation is a tiresome activity? Not at all! From now on, you can create Legends more easily than ever before: extract them automatically from the elements displayed on your diagram instead of relying on a manual creation. Additionally, you can now automatically extract Legend items for the existing Legends. Once the Legend items are created, you can customize their adornments representation. They can now be displayed as rectangular shapes or extended lines to represent paths and shapes in greater detail.

Extracting the Port Types legend according to the elements displayed on the diagram as symbols.
Learn more about extracting Legends >>
You can now present diagrams in full screen without showing user interface components, such as a model browser, diagram palette, status bar, and toolbars. That is not all! You can also define the sequence of diagrams to present one after another.

Diagram in the enabled Presentation Mode.
Learn more about Presentation Mode >>
You can import data from an Excel/CSV file directly to the model without installing Excel and CSV Import Plugins (read more about discontinued products ). From now on, the newly created Excel/CSV Import dialog brings an easy to use and clearly understandable graphical user interface. It allows you to import content with just a few clicks by selecting the Excel/CSV file and specifying element mapping options. Additionally, you can save your maps to reuse them, collect saved maps in groups, manage those groups, and use an entire group instead of a single map for data import.

The Excel/CSV Import dialog with specified options for satisfy relationship import.
Learn more about Excel/CSV file import >>
Three improvements expanded the data synchronization between Excel or CSV files and a model:
- Unique elements. Elements to be synchronized can now be identified not only by their name, but also by element property or tag value.
- Direct relationships. From now on, you can import direct relationships between the source and target elements as easily as other elements.
- Relationship ends. When importing relationships between different elements, you can select a specific property or tag to identify the source and target end of the relationship.

New mapping options in the Excel/CSV Sync Options dialog: Identification Property, Identify Relationship (end) Source by, Identify Relationship (end) Target by.
Learn more about Excel/CSV Sync in tables >>
You can now define relationships between the elements in your model more accurately! The latest release gives you the ability to create and display Composition and Aggregation relationships in a Dependency Matrix.

Creating and displaying Composition, Aggregation, and Association in a Dependency Matrix.
Learn more about Composition and Aggregation creation >>
Applying Legend items to the same element is more convenient since they are now grouped by Legend.
A reference from the image shape to the attached image is now created when attached images are displayed as diagram shapes.
The Diagram Tabs Limit is set to 20 to prevent high memory utilization. You can change this environment option at any time.
The smart autocompletion command Ctrl + Space now works for the Change Event expression in a State Machine diagram.
In the Select Element and Quick Find dialogs, e lements can now be filtered by their types to narrow down search results.
- The Jython 2.7.2 version is now supported.
- The MARTE Profile version 1.2 is now supported.
- The Reader Edition is now available for all the 2021x version modeling tools. Contact your sales executive to request the license.
The development of the following plugins is discontinued:
- To create Views and Viewpoints diagrams using the modeling tool with no plugins installed, use the Cameo Collaborator Publisher plugin or the SysML plugin instead.
- The DockBook Library Profile is no longer available.
- Methodology Wizard Plugin.
- QVT Plugin.
- Excel Import Plugin. We highly recommend using Excel/CSV Sync or Excel/CSV Import features instead.
- CSV Import Plugin. We highly recommend using Excel/CSV Sync or Excel/CSV Import features instead.
- LieberLieber Embedded Engineer plugin.
- Project Element Counter plugin.
- MBSE plugin.
- Web portal reports are no longer available. For more effective model publishing and reviewing on the web, use Cameo Collaborator . You can also use Web Publisher (Simple HTML) or Web Publisher 2.0 ReportWizard templates to generate HTML reports.
- WSDL Code Engineering and WSDL diagrams are no longer available.
- C# Code Engineering and C# Professional Edition are no longer available.
- CIL and CIL Disassembler Code Engineering are no longer available.
The News Reader (RSS) is no longer available. The notification at the right bottom corner of the modeling tool will inform you about the new version release instead.
- The no_install_mac.zip and 32-bit installation files are no longer offered for download.
- The Project Usage Map Profile is no longer available.
- The JavaScript Nashorn is deprecated with the intention of removing it. We highly recommend using JavaScript Rhino instead.
- Cameo Workbench
- Cameo Inter-Op
- ParaMagic Lite
- FAS. From now on, download it here: https://sourceforge.net/projects/fas4md .
- SYSMOD. From now on, download it here: https://sourceforge.net/projects/sysmod4md/ .
Teamwork Server is no longer supported in the latest release. Teamwork Cloud should be used as a product for collaborative modeling and model version control. Customers still using Teamwork Server must migrate their server projects to TWC 19.0 series first and then upgrade to TWC 2021x.
Learn how to migrate from Teamwork Server to Teamwork Cloud >>
From version 2021x, Cameo Collaborator for Alfresco is no longer supported. We recommend using Cameo Collaborator for Teamwork Cloud instead.
Learn the benefits of Cameo Collaborator for Teamwork Cloud compared to Cameo Collaborator for Alfresco >>
Learn how to migrate your documents and comments from the Alfresco server to Teamwork Cloud >>
Detecting Changes in Diagrams During Merge
You can now specify in the Environment Options dialog whether to compare only the direct or all the changes in diagrams during the Project Merge and Project Comparison operations. By default, only the changes made by the user in loaded (open) diagrams are analyzed, leaving out unintentional diagram changes that occurred due to indirect changes in the model. This feature not only eases both merge and project comparison processes for the user, since the number of diagrams with changes is considerably reduced but also optimizes modeling tool performance.

An Environment option to specify the changes to detect in diagrams.
Learn more about diagram changes in model merge and project comparison >>
Further Merge Usability Improvements
The model merge has undergone further usability improvements. From now on, changes from the Target and Equivalent Changes are automatically hidden by default; only the Source changes are shown. As a result, fewer changes need to be reviewed by the user.
Additionally, the model merge has been extended by adding a capability to select which ancestor calculation algorithm to use. You now have the freedom to choose a Branch Point as an ancestor for your merges. This is especially useful when merge results become too complex to understand and analyze due to previously rejected changes. By default, the Lowest Common Parent ancestor calculation algorithm is used.

Selecting the ancestor for future merges in the Merge Project dialog.
Learn more about merge types in Teamwork Cloud >>
Report Wizard

A bar chart displaying the performance testing of report generation from Report Wizard 19.0 SP4 and 2021x using Web Publisher 2.0.

The progress bar with the success percentage shown above when generating reports using Web Publisher 2.0.
A more effective tool of the Document Report Designer diagram is now available for conveniently drafting and designing new extensive templates of the Microsoft Word Document (DOCX) format. Discover more about Document Report Designer >>

Document Report Designer for drafting and designing new templates of the Microsoft Word Document (DOCX) format.

Spreadsheet Report Designer for designing and generating the Microsoft Excel Spreadsheet (XLSX) format.
Web Publisher 2.0 now has the Quick properties panel, at the lower left (similar to MagicDraw), to show the documentation settings in the Documentation tab and properties in the Properties tab of elements selected in the diagram and from the Containment tree. Learn more about the new Quick properties panel >>

The Quick properties panel: Documentation and Properties tabs.
The capability of $report.isEmpty(obj) has been specially improved to check HTML String whether it is empty or not. Learn more about using this report tool >>
The multi-field sorter is now available as a function for sorting a collection of elements in ascending or descending order by deploying multiple sorting properties, rather than merely a single property as in previous versions. Find out more about the multi-field sorter >>
You can now sort elements by using a tag in applied stereotypes, regardless of being customized. Learn more about this capability of the sorter tool >>
You can utilize a new sorter function for sorting elements as they appear in the Containment tree. Discover how to use this sorter tool >>
- With a new option reducing XML meta-data file name length, the error of Web Publisher 2.0 files with lengthy names has been fixed. Know more about this report variable in Web Publisher 2.0 >>
- Single or double quotes can now be interchangeably used in both of the #includesection and #sectionBegin directives and $import.includeSection(templateName, sectionName) of the Import Tool.
- You can now access and list property objects (including DSL) classified in the PropertyGroup of customized stereotypes. See how the report tool works this way >>
- Reference bookmarks and their links can be created for DOCX numbered items. Learn about using these bookmark tools >>
- Functions for displaying lists of properties in property groups for given elements and stereotypes are ready to use. Learn how to use this group of report tools >>
- The automatic UAF, SysML, and BPMN project migration using the Teamwork Cloud Migrate Projects to Version functionality has been enhanced. The projects are migrated silently and now no additional confirmation is required. However, if you have both, UAF and UPDM projects in your repository, be advised to perform the Migrate Projects to Version using the same environment as your project. Learn more >>
Key issues fixed
- The issues concerning the All Views report have been fixed. The matrices and Producing/Consuming OperationalActivities/Functions are now included.
- The issue where the PartProperty stereotype instead of ReferenceProperty stereotype was applied for the role when the Aggregation relation is created has been fixed.
- The additional stereotype is no longer applied for the element with custom stereotypes after migration from UPDM2 to UAF.
- [UPDM2] The issue where redundant Block stereotypes were applied for specific Environment elements has been fixed. Now only Value Type is applied for Condition, Climate, and LightCondition elements in SysML Compliance mode.
- [UPDM2] The validation rule COR2071 no longer fails in a valid situation.
- [UPDM2] The issue where incorrect metaclass element is created with Impelemnts stereotype applied when solving validation rules COM2023 and COM2047. Now the Abstract relation with the « Implements » stereotype is created.
- A resources tag value of Call Activity now is set when the BPMN compliance mode is ON.
- The issue where Operational Object Flow was not keeping project settings when BPMN compliance mode is ON has been fixed.
Version news of servers and plugins
- Teamwork Cloud 2021x
- SysML Plugin 2021x
- Cameo Simulation Toolkit 2021x
- UAF Plugin 2021x
- Cameo DataHub 2021x
- Cameo Safety and Reliability Analyzer 2021x
Cameo Enterprise Architecture documentation
- Cameo Enterprise Architecture 2021x
News of earlier versions
- CEA 19.0 LTR SP4
- CEA 19.0 LTR SP3
- CEA 19.0 LTR SP2
- CEA 19.0 LTR SP1
- CEA 19.0 LTR
- CEA 18.5 FR
- CEA 18.4 FR
- CEA 18.3 FR
- Product News Archive
No Magic, Inc. Copyright © 1998 – 2024 No Magic, Incorporated, a Dassault Systèmes company – All Rights Reserved.
How to Record Customized Camera Feeds With Cameo in PowerPoint
Want to create compelling presentations? Learn how to record customized camera feeds with Cameo in PowerPoint for an engaging audience experience.
The widespread adoption of remote work and virtual meetings has led many people and organizations to realize they don't have to be physically present in the same conference room to make presentations. In fact, you don't even need to conduct them live.
However, recording your PowerPoint slides with your face on them requires technical know-how and third-party apps like OBS. This makes recording presentations a bit difficult and discourages people from doing it.
Thankfully, Microsoft has addressed this issue in PowerPoint 365 with the Cameo feature. Here's what it is and how to use it.
What Is Cameo in PowerPoint?
Cameo is a PowerPoint feature that lets you add your webcam or any other camera feed into your presentation. This makes it easier to present virtually, as your audience can see you from within your slides.
Previously, you needed a third-party app like OBS to overlay yourself on your presentation. You can also use a green screen overlay in Capcut or other similar apps to achieve the same effect. However, this takes a lot of effort and know-how.
But with this feature, you can do it from inside PowerPoint with just a few clicks. Here's how to insert a cameo into your slides.
- Go to Insert > Cameo .
- You can edit the object as you wish, much like any other shape on PowerPoint. You can also click on the options in the Designer pane on the right side of the screen to help you work faster.
- Once you're happy with its placement on your slide, click on the Preview button to see your live video.
With that, you can start presenting your PowerPoint slides via screen sharing while still keeping yourself on the screen.
How to Record Your PowerPoint Presentation With Cameo
You can also insert a cameo from Record > Cameo . Clicking on this will bring you to the same menu tab and insert a placeholder object for your video. However, even if you didn't set up Cameo beforehand, you can insert it directly while recording your presentation. Here's how:
- Go to Record > From Beginning or Record > From Current Slide .
- Click on the Red icon to start recording your presentation.
- Go through your presentation as usual. For more information, check out our guide on turning your presentations into videos .
- Once you've finished, click the Red icon again to stop recording.
- Change the File Name as needed, then click Browse to select the location where you will save your recorded video.
- Once done, click Export Video .
With that, you don't have to spend much effort to add your video feed to your PowerPoint presentation recording. However, the app only places your video at one location across every slide; it might cover some of your content. That's why it's better to use the Cameo feature when you're building or editing your PowerPoint presentation.
If you're unhappy with your recording, press the Retake Video on the left of the record icon. You can pick between On Current Slide or On All Slides .
What You Need to Record Customized Camera Feeds
You need a webcam and a Microsoft 365 account to record your customized camera feed. Furthermore, you cannot use Cameo or record presentations in the PowerPoint web app. You need to download and install it on your computer to use these features.
The Cameo feature is already available on Microsoft PowerPoint 365 in Windows and Mac. However, recording your presentation with Cameo is only available on Windows. As of the time of writing, this feature isn't available for the main PowerPoint 365 for Mac version.
If you're running macOS, you must be a Microsoft 365 Insider to get this feature. However, since the Cameo recording feature is already announced in the Microsoft 365 Insider blog , we hope it will be available in the mainstream PowerPoint for Mac version in a few months.
Recording Your Presentations Is Now Much Easier
The Cameo feature has made presenting PowerPoint slides in video calls easier. And with the recording function, you no longer need a third-party app to put your video over your presentation.
You can integrate it into each slide, allowing you to control where you are on your screen. And you also save a lot of time and effort, as you can record and save your presentation as a video from within Microsoft PowerPoint.
PowerPoint Tips Blog
Helping you with presenting, PowerPoint, and speaking
Add a customizable, live web feed with Cameo
August 29, 2022 by Ellen Finkelstein 4 Comments

What if you could present with a resizable webcam of you on the slide?
And what if you could then export the presentation as a video?
PowerPoint now offers a way for you to add a customizable, live web feed that appears on the slide, as you can see here.
It has more features than the ones that come with online meeting software, like Zoom or GoToWebinar and you can even animate it!
Finally, you can export your presentation as a video, including the Ccameo window.
Cameo is available to Microsoft 365 subscribers in the desktop app for Windows or macOS. If you have an older, permanent (not subscription) version or if you’re using PowerPoint on the web, you won’t have this feature.
Setting up Cameo
To insert a live camera feed into your current slide, follow these steps:

- Choose Insert > Cameo. A default cameo window appears on your slide.
- To turn the camera on (or off), click the camera object at the bottom left. You can also use the Preview button on the Camera Format tab that appears when you select the cameo window. Note: If you have more than one camera, you can choose the one you want to use by clicking the Preview button’s down arrow.
- The Designer pane might open. (If not, choose the Design tab, then Design Ideas.) A cool feature is that Designer (which provides you with suggested layouts) can create layouts that include Cameo. Choose one if you want.
- Choose your preferred Cameo style from the Camera Styles area, as shown below. These are similar to Picture Styles although there are fewer options. You can also click the tiny arrow at the bottom right to open the Format Camera pane. There you’ll have more options.
- To add a Cameo to your next slide, just copy and paste it. The copy can use a different style and be a different size. Tip: Use the Morph transition between 2 slides to morph the change from one style and size to another.

Remember that you have to design your slides to make room for the Cameo window. This will become obvious as you practice with the live web feed.
Note: PowerPoint has to have permission to use your camera. My Cameo worked without doing anything but if you’re having difficulty, search for Camera Privacy Settings on your computer.
Tip: You can put objects in front of the cameo window. A semi-transparent shape works well as you see here.

You don’t have to put the Cameo on every slide but there will be more continuity if you do.
Presenting with Cameo
You can then present and your audience will see you in the Cameo.
Obviously, the advantage of Cameo is when you’re presenting virtually. After all, if you’re presenting in person, people can see the whole you and don’t need to see you in a webcam window.
Only one application at a time can be accessing the camera on your computer, so you need to turn off the video in your virtual meeting software. For example, in Zoom, just turn off your video to allow PowerPoint to use your webcam.
Tip: Practice looking directly at your webcam so your eyes don’t make it seem as if you’re looking down.
Exporting a presentation with Cameo to a video
Finally, you can export the result of your presentation as a video. You present to yourself (others can be watching) and then turn it into a video.
Follow these steps:
Warning: When you record, your Cameo windows will be converted to videos on your slide. If you want to present live again using the Cameo windows, make a copy of your presentation and save one to be used live in the future. If you don’t do this, you’ll have to re-insert all of the Cameo windows from scratch.
- Have your Cameo windows all set and active (you can see yourself moving). If one is active, they’ll all be active.
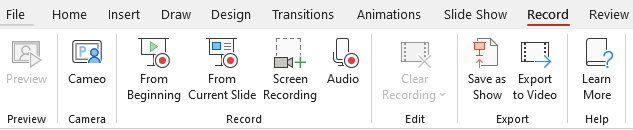
- Click the Record tab, shown above.
- Choose From Beginning (or from Current Slide). You’ll go into Slide Show view (this screen is called the Recording Studio).
- Be sure to click the red Record button at the top and you’ll see a 3-2-1 countdown. You can now present as usual. The only difference is that the Cameo is there.
- When you’re done, click the last slide to end the recording and exit Slide Show view. You’ll see a screen letting you export to video. Your presentation file name is there and by default, the video will have the same name and be saved in the same location, but you can change that if you want.
- You can click Customize Video to change the resolution and other settings.
- When you’re ready, click Export Video, as shown below. You’ll see a progress bar and then a window that says, “Video exported successfully.”
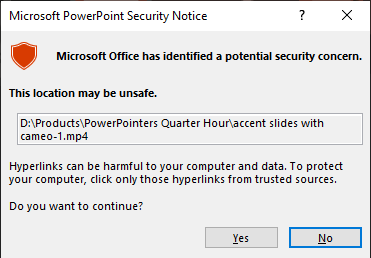
- Strangely, you’ll always see the warning shown below that the location may be unsafe, at least I do. I have no idea why and since I trust my own computer, I click Yes to continue.
- Click the View and Share Video button. Your video will play in your default video player.
- Click Exit to exit the screen.
You can also choose the Retake button to rerecord. Choose On Current Slide or On All Slides.
What’s next?
How do you think you would use this feature? Would you use it mostly for live, virtual presentations or to create a video? Is it significantly better than Zoom’s webcam feature?
Please leave a comment and use the Share buttons to share with your colleagues!
Related posts:
- Add taped narration to a presentation
- Free PowerPoint alternatives–Microsoft Office Web Apps
- Add notes in PowerPoint in Slide Show view
- Create a screenshot and screen recording in PowerPoint
4 Leave a Reply
How can you add a virtual background to Cameo

This is good news! I use PowerPoint in my presentation and it’s good to know we can now add a customizable, live web feed that appears on the slide. I’ll do that on my next slide! Thanks!

Oh, I did have a little bit of a hard time the first time and didn’t try it again until I read your article about checking Camera Privacy Settings. After tinkering with the camera settings, it worked!

Michael, glad you got it working!
- 541-383-2340 907-375-8324
- [email protected]
- CLIENT LOGIN
SUBSCRIBE TO OUR NEWSLETTER
Add a Live Camera Feed to Your PowerPoint Slide Show

First off, do note that this feature is still rolling out, so you might not see it immediately. When you do, however, here’s how you play with it.
- Open up a new or existing presentation in PowerPoint.

But sometimes a video make it all much easier to figure out how you can take advantage of this feature:
It’s a very cool feature to add more life and interactivity to your presentations.
Images courtesy Microsoft .
- Apr 27, 2022
- no comments
Leave a Reply Cancel Reply
Your email address will not be published.

Apr 20, 2023
Record customized camera feeds with cameo in PowerPoint for Mac
Ridhima Gupta
- Add our blog to your RSS feed reader" href="/rss/blog.xml" data-bi-name="RSS Subscription" data-bi-id="rss_feed" data-bi-bhvr="120" data-bi-socchn="RSSSubscription" title="Microsoft 365 Insider Blog RSS" target="blank" class="d-inline-block">
Hey, Office Insiders! My name is Ridhima Gupta, and I’m a Product Manager on the Office Video team. Previously, we let you know about adding a live camera feed with cameo in PowerPoint for Mac . Today, we’re excited to announce that cameo is now available when recording slide shows, allowing you to personalize your camera feed for recorded video stories in PowerPoint for Mac.
Record customized camera feed with cameo
You can now make the video recording of your presentation even more personal and create immersive stories. With cameo supported when recording slide shows in PowerPoint for Mac, you can customize your camera feed’s appearance before you record. You can apply your favorite camera styles, shapes, and sizes to cameo, and choose the perfect place on the slide for your camera feed.
How it works
- Open a presentation that you want to record and share.
- On the Recording tab, select Cameo to add your custom camera feed to the slides.

- To review your video, click the Play preview button.
- If you’re not satisfied, select the Delete button, and then select the Record button to re-record your video. Don’t worry, your camera will appear just as you styled 😊
- When you’re happy with your recording, select Export to export your presentation as a video.

Tips and tricks
- Impress your audience with creative storytelling with different text and camera layouts, such as adding text in front or behind your camera feed.
- Create an engaging story using the power of transitions when moving from slide to slide by clicking the Transitions tab, and then selecting the one you want to use —such as Morph, Fade, and Wipe.

- Find the best place on your slide for your camera feed and get helpful recommendations by selecting Design > Designer .
Requirements
In order to use this feature, you must
- Use a computer equipped with a webcam and microphone.
- Have granted camera permissions to PowerPoint in your computer’s privacy settings.
Availability
This feature is rolling out to Insiders running Beta Channel Version 16.72 (Build 23032701) or later.
Don’t have it yet? It’s probably us, not you.
Features are released over some time to ensure things are working smoothly. We highlight features that you may not have because they’re slowly releasing to larger numbers of Insiders. Sometimes we remove elements to further improve them based on your feedback. Although this is rare, we also reserve the option to pull a feature entirely out of the product, even if you, as an Insider, have had the opportunity to try it.
We want to hear from you! Please click Help > Feedback to send us your thoughts about this feature.
Sorry, JavaScript must be enabled to use this app.
IMAGES
VIDEO
COMMENTS
Do one of the following: In the main menu, click Window > Enter Presentation Mode . In the bottom right corner of the status line, click the Presentation Mode icon. In the smart manipulator toolbar of the diagram you want to present, click the Presentation Mode icon. You can enter Presentation Mode from any diagram in a defined sequence.
Select Insert > Cameo. A placeholder for the camera feed will appear on the slide. Select the Preview icon in the placeholder to turn on the camera feed. Note: In a shared document, only you see your video feed. In the Camera tab, select the arrow below the Preview button to select other cameras. Only one video feed can be used on a slide.
Cameo is a PowerPoint experience that seamlessly integrates your camera feed into your presentation, letting you customize how and where you want to appear o...
Open a PowerPoint presentation in Windows. To insert cameo into all slides at once, go to Insert > Cameo > All Slides. You'll see the default circle cameo in the corner on all your slides. To apply a personalized cameo thumbnail on all slides, insert a single cameo on a slide by going to Insert > Cameo.
In this step-by-step tutorial, learn how you can integrate live camera feeds directly into your slides with the cameo feature in PowerPoint for Windows.Cameo...
Choose a slide, go to the Insert tab, and select "Cameo" in the Camera section of the ribbon. You'll see the Cameo object appear on your slide. To choose the camera you want to use, if you have more than one, select the object and go to the Camera tab that appears. Click the Preview (Camera Preview on Mac) drop-down arrow on the left side of ...
To use Cameo, click the Insert tab and click the Cameo button on the far right. A video placeholder will appear in the bottom right corner of the slide. In the Ribbon, a new Camera tab will appear. The default view is with Preview turned off. You can click the small video icon to turn on Preview or use the Preview button in the Camera tab.
To test the Cameo feature with Teams, you will need a presentation containing a Cameo placeholder. To prepare this PowerPoint presentation yourself, ... Cameo mode selection in the dropdown will only be available if a PowerPoint Live deck being presented already has Cameo object inserted in the slide. To create decks with cameo objects, ...
1. Create a presentation in PowerPoint or open an existing one. 2. To view a live video feed with cameo, select Insert > Cameo and notice that a cameo thumbnail appears in your slide. Insert cameo on iPad. 3. To show a preview of cameo, select a cameo and go to Cameo > Preview. NOTE: This functionality is not yet available on the web.
Cameo in PowerPoint . At Ignite in September, we announced cameo, the PowerPoint experience that seamlessly integrates your camera feed into your presentation, letting you customize how and where you want to appear on your slides and offering layout recommendations via Designer in PowerPoint for optimal viewing.We're excited to announce that this feature is currently available in our Office ...
Navigating to the 'Insert' tab on your PowerPoint ribbon and selecting 'Video'. Picking the option to insert video 'From File' and choosing the desired video file. Once the video is on the slide, we can adjust its size and placement, apply formatting effects, and even trim the video length within PowerPoint.
To insert a live camera feed into your current slide, select Insert > Cameo. 3. To turn the camera on and off, simply click on the camera object (you can also use the Preview button on the Camera tab). 4. To change the source of the camera feed, click the down arrow on the Preview button (found on the Camera tab) and select the option you want. 5.
2021x Version News. Released: February 12, 2021. This release introduces significant performance and scalability upgrades in key product areas: migration, converting between frameworks, building matrices, Merge, Teamwork Cloud project load, Teamwork Cloud project saving, table loading, Excel and CSV files import, and such common modeling tool ...
Here's how: Go to Record > From Beginning or Record > From Current Slide . In the recording screen, click on the Camera icon at the top. This will insert a round object containing your video in your slides' lower-right-hand section. Click on the Red icon to start recording your presentation. Go through your presentation as usual.
PowerPoint now has an object called Cameo which is a camera of you, crop it, change shape, move or morph between slides, use it when you present online with ...
Step 1: Create Your Presentation. Build the presentation as normal, adding the Cameo object to each slide. To insert the camera placeholder select Cameo from the Insert ribbon tab. Adjust the size and position of the object on the slide and format the object using the Camera ribbon tab to best fit your content.
3. To add a cameo placeholder to a slide, select Slide Master>Insert Placeholder>Cameo, and then select the location you want your cameo to appear. NOTE: When you insert the cameo on your slide, a cameo object will show up on all slides in the same place using this new layout. 4. To format your cameo placeholder to fit your slide design and ...
Setting up Cameo. To insert a live camera feed into your current slide, follow these steps: Choose Insert > Cameo. A default cameo window appears on your slide. To turn the camera on (or off), click the camera object at the bottom left. You can also use the Preview button on the Camera Format tab that appears when you select the cameo window.
Open up a new or existing presentation in PowerPoint. To insert a live camera feed, select "Insert -> Cameo". You can turn the camera on/off by clicking on the camera object or by using the "Preview" button on the "Camera" tab. If you have multiple cameras connected to your computer, you can hit the drop-down on the "Preview ...
Open a presentation that you want to record and share. On the Recording tab, select Cameo to add your custom camera feed to the slides. Use the Camera Format options to customize your camera using styles, shapes and size, and then select the CameraPreview button to review your live camera feed.
The Cameo feature in Microsoft PowerPoint (new version with Office 365) allows you to embed your camera/webcam within a presentation and apply filters, anima...
PowerPoint Cameo has arrived, and allows you to add your webcam feed into presentations, meaning you can arrange yourself around your content. Learn what you...