
Paper Helicopter Experiment
This post uses affiliate links that may earn VistaThink a commission at no additional cost to you. Read more in the Private Policy . Thanks for your support!
A paper helicopter experiment is a fantastic hands-on, and low-budget way for students to explore cause and effect relationships in experimental design. These models offer teachers easy STEM activities with paper and generate authentic data in the classroom. In fact, there are so many paper helicopter materials, lessons, and instructions online, it’s hard to know where to start!
Simple quantifiable scenarios can be examined and several criteria for success can be defined and explored. Paper helicopters provide educators with easy-to-do experiments to help students learn the scientific method.
The ASTC Science World Society concisely explains the many levels of inquiry teachers can offer students when conducting paper helicopter experiments. These levels of investigation range from more structured to less structured which suits various grade levels and abilities.
Paper helicopter lessons with more structure would generally target lower grade levels. More open assignments are suitable for independent students at the higher grade levels where the teacher acts as a facilitator. Teachers of all experience levels can take advantage of the learning opportunities provided by experimenting with paper helicopters.
Paper Helicopter Lesson Outline
The specific paper helicopter lesson outlined in this blog post targets students in upper elementary and middle school. It can be extended above and below these grade levels as well. This lesson covers methods of data gathering and provides teachers with easy-to-use activity resources.
This paper helicopter experiment is a simple introduction to experimental design and will target this testable science question:
Does changing the blade length of a paper helicopter affect how long it stays in the air? (Keep reading, however, this question needs a bit of clarification.)
The NGSS Standards do apply! Examples:
- 3-5-ETS1-3 Engineering Design – Plan and conduct an investigation collaboratively to produce data to serve as the basis for evidence, using fair tests in which variables are controlled and the number of trials considered.
- MS-ETS1-2 Engineering Design – Evaluate competing design solutions using a systematic process to determine how well they meet the criteria and constraints of the problem.
How Does a Helicopter Work?
In basic terms, an actual helicopter is a type of aircraft that creates lift (an upward force of air) with horizontally spinning rotor blades. These rotor blades are sometimes referred to as simply rotors or blades.

The physics of paper helicopters are different from real helicopters. Traditional paper helicopters do not use a power source to spin their blades and create lift. These models are typically created with two blades and dropped from a fixed height and spin as they descend.
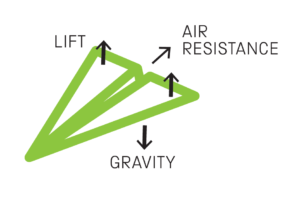
Paper helicopters spin because of the earth’s gravity, lift, and configuration of the rotors. When dropped, the helicopter’s mass experiences gravity, and it naturally falls to the floor which causes paper blades to bend slightly upward due to lift. The lift force of the air pushes on each of the blades equally but in opposite directions, horizontally and vertically. As a result of the horizontal equal, opposite, and offset forces, the helicopter spins around as it descends.
The helicopter descends due to unbalanced forces: The weight of the helicopters is greater than the lift force of air.
2BrokeScientists studied the airflow around a helicopter and found that there were high-pressure areas under the blades. This high pressure results in equal and opposite opposing forces that cause the spin.
Framing the analysis in terms of Newton’s Third Law of Motion , a pair of equal and opposite forces acting horizontally under each blade and on the body of the paper helicopter cause rotation.
Simple Paper Helicopter
A simple paper helicopter can be made easily at home or school. Multipurpose U.S. letter-size printer paper (8.5 x 11 inches, 21.6 x 27.9 cm) works well for the model. The design is simple to make with only a few cuts and folds, and its parts can be easily adjusted to examine changes regarding flight behavior. To conduct the paper helicopter experiment, we should know the parts first!
Paper Helicopter Parts
The paper helicopter parts are similar to a real helicopter’s parts. The common paper helicopter with two blades has four major parts:
Blades – These two parts are identical rectangles arranged vertically at the top of the helicopter. These parts are sometimes called rotors , blades , rotor blades , wings , or even propellers . The blades provide the lift and are factors that cause the helicopter to spin. The width of the two blades together equals the width of the paper template used to make the helicopter. The thickness of the blades is one layer of paper.
Body – The top of the body of the paper helicopter connects to the blades. The body shape is a rectangle and is perpendicular to the blades. It is located between the blades and the tail. It is as wide as the paper template used to make the helicopter. The thickness of the body is one layer of paper.
Tail – The top of the tail connects to the bottom of the body. The thickness of the tail is three layers of paper. The width of the paper helicopter tail is one-third the width of the template. The tail provides the paper helicopter flight stability.
Stabilizer – The stabilizer is essentially the bottom tip of the tail. A horizontal fold in the tail creates the stabilizer. This fold also provides the paper helicopter flight stability by shifting the model’s center of mass downward.
Independent, Dependent, and Controlled Variables
The paper helicopter experiment requires that you control some variables, change others, and look for cause and effect. A variable is a characteristic or quantity that can be measured or counted in an experiment. Most experiments for this age group account for three kinds of variables: independent, dependent, and controlled.
Independent variables are manipulated by the researcher. These variables are changed and studied to determine if they are the cause in a cause-and-effect relationship. Independent variables are not influenced by other variables. Sometimes independent variables are not manipulated by the researcher but monitored to see how their changes may affect other variables. For example, time (seconds, days, years) is an independent variable that can be tracked to see how it may affect other variables (e.g., the growth of a plant).
Dependent variables are what researchers observe, measure, or count in an experiment. Changes in dependent variables depend on various influences. Independent variables are factors that may change a dependent variable.
Why are Variables Important in an Experiment?
That’s the point of an experiment: To find out what may or may not influence a dependent variable! These types of variables are the “effect” in a cause-and-effect relationship.
Controlled variables are variables that the researcher does not allow to change. The variables are maintained to be constant so that they do not influence any of the dependent variables. Variables that are kept the same for every measurement and test in an experiment, ensure that the dependent variables produce data that are as accurate as possible.
Knowing variables’ roles helps researchers be systematic with their observations, accurately collect relevant data, and be logical with their scientific thinking.
How Do You Make a Paper Helicopter Fall Slower?
A common problem to examine is how to make a paper helicopter fall slower. In other words, many paper helicopter designers want to know how to make a paper helicopter that stays in the air the longest. A simple two-rotor paper helicopter is a good design choice to study this common problem.
The researcher can manipulate any of the four helicopter parts to determine what factors affect the flight time of a paper helicopter. By adjusting a part of the helicopter, researchers are manipulating the independent variable to determine if this change affects the time the helicopter stays in the air (time in the air is the dependent variable). Parts of the helicopter that do not change from a standard model to an adjusted model, are considered control variables.
Paper Helicopter Variables
To ensure that testing is fair so that cause-and-effect data are a reliable source of information, the three types of paper helicopter variables need to be defined. For our paper helicopter experiment example, the independent, dependent, and controlled variables are identified as follows.
I ndependent Variables :
- blade length (which changes the body height)
- body height (which changes when the rotor blade length is adjusted)
Dependent Variable :
Controlled Variables (Helicopter Parts):
- rotor blade width and thickness
- body width and thickness
- tail length, width, and thickness
- stabilizer length, width and thickness
Controlled Variables (Materials and Conditions):
- paper size and mass
- drop height
- drop start time
From a persnickety perspective, there are more variables to control like the angle between the blades and the body. This should be 90 degrees by the way. How deep you go as far as what variables are controlled–what you look at–depends on the students’ age group and experience.
By taking into account the types of variables in an experiment, our actually scientific inquiry question for the paper helicopter experiment is:
Does changing the blade-length-to-body-height ratio of a paper helicopter affect how long it stays in the air?
It’s important to note that since paper helicopters easily offer many cause-and-effect relationships to explore, students may eagerly start changing parts of the helicopter to see what happens–how flight changes. Once students get their hands on a template, without focused guidance, teachers may see many different configurations, and helicopters being thrown up into the air.
The time to be creative with designs to more freely explore flight dynamics is after a procedural scientific experiment is conducted.
Paper Helicopter Experiment Considerations
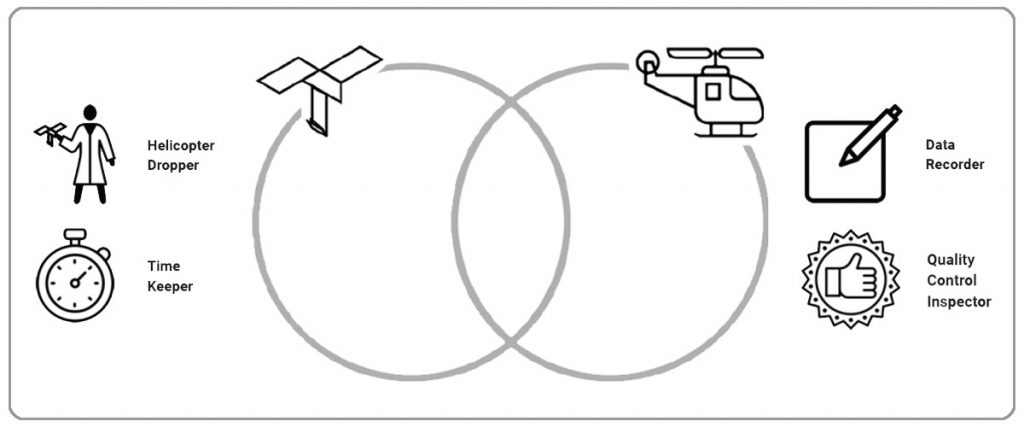
If you are conducting the paper helicopter experiment in a classroom, you will need to set up a testing area. Two paper helicopter models are needed as well to explore how to make a paper helicopter fall slower. It may be easiest to refer to each model by their blade lengths: shorter-blade model and longer-blade model.
The student tester usually holds the completed helicopters away from their body and just above their head while standing on a chair. This drop distance is sufficient for comparing two different helicopters. Make sure there is enough clearance between the tester and any objects or observers to not interfere with the paper helicopters’ descent (i.e., to avoid introducing unwanted variables).
Having multiple students drop the two different helicopter types from the same height and at the same time can provide a simple and solid experimental design.
Here’s an example from NASUWT showing three students testing paper helicopters at once:
How Many Trials Should a Good Experiment Have?
What is a trial in a science experiment? A trial is one of many tests that make up the experiment itself. For example, each time you drop the paper helicopter from a fixed height to see if increasing the blade length increases how slowly a paper helicopter falls, you are conducting a trial.
We want a good experiment–one that offers fair testing and produces not only accurate data but lots of accurate data. The more trials we have, the more evidence we have that random factors are not influencing the outcome.
Other ways to think about the role of trials are: How many trials in an experiment should you conduct to get valid results? How many trials are required to validate a hypothesis? We want the results to truly represent what we are investigating.
So, how many trials should a good experiment have? As many as possible. Three trials minimum seems to be a consensus. With easy-to-test paper helicopters, students can conduct many trials in a short period of time. Multiple helicopters can be tested at once as well. With a design such as the aluminum foil boat investigation , fewer trials are possible because it takes more time to prepare and test.
How to Collect Data in a Science Experiment
If you can gather as much good data as possible without too much logistic fuss, do it! For example, provide half of your class with the shorter-blade paper helicopter template. The other half of the class would be given the longer-blade helicopter template.
When ready, the two helicopter groups could be separated, face each other, hold up their models at the same height, and then drop them simultaneously. Repeat as needed. Students should keep their hands and arms as far away from the helicopters as possible, holding the tips of the blades before release.
Videos of the experiment offer easily reviewable data that would offer a more sound determination to see if longer or shorter rotor blades cause a paper helicopter to stay in the air the longest. Each model type should be clearly identified especially if relying on videos for data analysis.
Other Ways to Collect Data
There are other ways to collect data while ensuring a fair test. Establishing a fixed height from the floor (i.e., controlling the distance-flown variable) can be done by hanging a small mass from the classroom ceiling with thread.

One successful set-up I have used has a paper clip on one end of a thread with a piece of blue painter’s tape on the other end. The top end with the paper clip is tucked into the metal drop ceiling frame grid, and the piece of blue paper tape has enough mass to hang down properly and be easily visible. I prefer not to have a paper clip hanging on the lower end because if hit or smacked for “fun” it could hurt someone’s hand, stick in the ceiling, etc.
A distance of 200 cm from the tape to the floor is a good distance to establish as a controlled variable for dropping and observing paper helicopters. Place six to eight of these paperclip-thread systems around the classroom to create testing spaces for groups of two to four students.
Paper Helicopter Flight Times
The easiest and quickest way to determine which paper helicopter model falls more slowly may be the aforementioned multi-copter drop method with or without a video recording. So, if you need a quick and easy STEM activity, go this route.
Another way to perform a fair test requires a stopwatch. After setting up the six to eight test stations around the classroom with the paperclip, thread, and blue painter’s tape, each group of students can perform the 200 cm drop and time the helicopter models multiple times.
If students do, say, ten trials for each model they should have sufficient data to minimize random factors. Each group’s ability to time the drops accurately will factor into the integrity of the results. Measuring the paper helicopters’ times over a fixed distance will also produce data that can be analyzed mathematically. Some examples of mathematical analyses are:
- represent and interpret data in a chart or graph
- measures of center (e.g., average time for each model)
- measures of variability (e.g., differences in trial times for each model)
Other Simple Paper Helicopter Launcher Ideas
There are other ways to launch paper helicopters rather than dropping them from your hand. For example, two meter sticks, side-by-side, can launch two to four helicopters at once. Two people are needed to hold the ends of the meter sticks. A bit of practice helps to keep the sticks level at a prescribed height and to separate them at the same time for launching.

With the two-stick method, you can launch even more helicopters at once using longer pieces of wood. Consider using two 1 in. x 2 in. x 8 ft. furring strip boards for launching seven to ten paper helicopters at once with just two people.
Paper Helicopter Experiment Lesson Plan
The focus of this paper helicopter investigation explores how the independent variables of blade length and body height together affect time aloft. Remember that, the blade length cannot be changed without changing the body height (unless we change the mass, which is a variable we are controlling). This means for both types of helicopters:
Blade length (shorter) with body height (taller) = equals = Blade length (longer) with body height (shorter)
And, as a reminder, our paper helicopter scientific inquiry question is:
Lesson Plan Parts and Documents
Paper Helicopter Template – There are four free printable pdf templates (8.5 x 11 inches, 21.6 x 27.9 cm). Each helicopter template is one page with the two types of helicopters:
- paper helicopter template with instructions and labels
- paper helicopter template with instructions (no labels)
- paper helicopter template with minimal instructions
- paper helicopter template no instruction (just cutting and folding lines)
Choose the template that makes the most sense for your students. Generally, the lower the grade level, the more instruction, and guidance are needed to make a paper helicopter.
Teacher Lesson Plan Outline
Grade Levels 4 – 7 (8 – 10 works too!)
Time How deep do you want to go? What is the grade level? Are you looking for a quick STEM activity or a long-term stem project ? Consider 45 minutes (one class) to 90 minutes (two classes), and keep in mind any extension activities.
Scientific Inquiry Question Does changing the blade-length-to-body-height ratio of a paper helicopter affect how long it stays in the air?
If you’re working with lower grade levels, or want to simplify the question, pose it like this: Does changing the blade length of a paper helicopter affect how long it stays in the air?
Standards Connections Common Core Next Generation Science Standards (NGSS)
Elementary School
- 3-5.Engineering Design
- 3-PS2-1 Motion and Stability: Forces and Interactions
Middle School
- MS.Engineering Design
- MS-PS2-2 Motion and Stability: Forces and Interactions
Materials and Set-Up (for the multi-test station method)
- Stopwatch (can be an online version )
- 8.5 x 11.5-inch paper helicopter template – one per group
- Group of two to four students students
- Six to eight helicopter test stations spaced about the classroom. A testing station consists of a thread hanging from the ceiling vertically that ends with a piece of tape 200 cm above the floor.
Paper Helicopter Experiment Lesson Documents
If you would like additional instructional activities to extend the paper helicopter activity and go deeper into learning, check out the Paper Helicopter Experiment (purchase link) resources at TPT !
You’ll find all the resources shared in this blog post, plus :
- teacher lesson presentation with custom graphics
- paper helicopter experiment report template
- pre/post test
- reading comprehension activity
- thinking routines writing activity
- group member role definitions
- vocabulary definitions for the paper helicopter experiment
- vocabulary definitions for the scientific method
Books about Paper Helicopters and Flight
Check out this captivating collection of books (paid links) that explore the fascinating world of flight. From exploring the mechanics of flight and the similarities between living creatures and machines to unraveling the story of the Wright Brothers, these books provide an immersive experience of the wonders of aviation.
Planes, Jets and Helicopters: Great Paper Airplanes Make your own fantastic flying paper aircraft! Instructions to fold paper, fly, and troubleshoot paper planes and helicopters from standard 8.5 by 11-inch paper. No glue, scissors, or tape required! Two dozen fold and fly designs with fold-by-fold illustrated instructions.
Science Comics: Flying Machines: How the Wright Brothers Soared A National Science Teachers Association Best STEM Book Winner in 2017! A delightfully illustrated comic about the history of the Wright brothers told by Katharine Wright Haskell, the younger sister of American aviation pioneers Wilbur and Orville Wright.
Planes, Gliders and Paper Rockets: Simple Flying Things Anyone Can Make–Kites and Copters, Too! A STEM-oriented book for older students who have access to tools and want to go beyond paper designs. Great for going deep into making hands-on, DIY flying crafts with everyday materials!
Paper Helicopter Experiment Summary
Teachers, are you searching for an engaging and cost-effective STEM activity to foster scientific thinking among your upper elementary and middle school students? High school students as well can benefit from the paper helicopter experiment!
This exciting low-budget DIY activity encourages students to develop essential scientific thinking skills by creating hypotheses, gathering relevant data, and interpreting results to draw conclusions. As a result, they will gain invaluable skills that will serve them well in future studies.
But the benefits don’t stop there! The paper helicopter experiment also allows students to explore various scientific concepts such as gravity, lift, and air resistance. Students will better understand these essential scientific principles by testing different blade sizes.
The paper helicopter experiment’s simplicity and low-cost nature make it an excellent starting point for Year 1 students to learn the MYP Design Cycle . Students can better understand the design process by identifying a problem related to helicopter design, creating a prototype, testing and evaluating their design, and communicating their findings.
To get started, check out the free resources in this blog post and on TPT ! They offer step-by-step instructions for building a paper helicopter and comprehensive tips for conducting the experiment and analyzing results. So what are you waiting for? Get started on this exciting hands-on STEM activity today!

- Quality Improvement
- Talk To Minitab
Learning Design of Experiments with Paper Helicopters and Minitab
Topics: Design of Experiments - DOE , Minitab Statistical Software , Articles
This article was written by g uest blogger Matthew Barsalou , Statistical Problem Resolution Master Black Belt and Engineering Quality Expert at BorgWarner Turbo Systems Engineering GmbH with over 15 years of experience in quality.
The late statistician George E. P. Box, along with Soren Bisgaard and Conrad Fung, used a paper helicopter to teach statistics. The idea originated with Kip Rogers of Digital Equipment and is useful for demonstrating factorial designs. Decades after Box, Bisgaard and Fung’s publication, the DOE helicopter has become a useful staple of DOE training.
The paper helicopter provides a way to quickly explain basic DOE concepts. It also offers an easy-to-do experiment you can analyze using Minitab.
We can’t just declare we want a high-quality helicopter. Quality must be clearly defined.
To perform a DOE with a paper helicopter we need to identify the desired output, which would be our response variable.
A good helicopter is one which stays in the air for a longer time, so the response variable would be flight time as measured from the time the helicopter is dropped from a height of 2 meters until the time it hits the floor. Without defining the test conditions it could be possible that sample helicopters would be dropped from different heights, in which case our DOE results would be not be valid.

Test factors that influence flight time must also be identified. For the helicopter experiment, the factors could be paper type, rotor length, leg length, leg width and paper clip. The helicopter experiment levels are varied by using two different types of paper, using longer or shorter leg and rotor lengths and adding or removing a paper clip.
Here’s how to make the paper helicopters.

- Step 1: Cut the paper to a width of 5cm.
- Step 2: Cut the paper the length of paper rotor length plus leg length, and add 2 cm for the body.
- Step 3: Cut dotted lines at Leg A and Leg C. The length of each cut is 5 cm minus leg width divided by 2.
- Step 4: Fold leg A onto leg B.
- Step 5: Fold leg C onto leg B.
- Step 6: Fold rotor A and rotor B in opposite directions. They should form 90° to the body and be 180° away from each other.
- Step 7: For the paper clip version: Add a paper clip to the bottom of the leg
| Factor | Low setting (-) | High setting (+) |
|---|---|---|
| Paper type | Light | Heavy |
| Rotor length | 7.5 cm | 8.5 cm |
| Leg length | 7.5 cm | 12.0 cm |
| Leg width | 3.2 cm | 5.0 cm |
| Paper clip on leg | No | Yes |
Table 1: Helicopter factors
Designing the Experiment
Statisticians and Six Sigma black belts should know how to set up and perform the calculations in a designed experiment by hand. However, computer programs make DOE a much simpler task, particularly for people who need to perform experiments only occasionally.
To create a fractional factorial design in Minitab Statistical Software, go to Stat > DOE > Factorial > Create Factorial Design where we can select the desired design.

Resolution is the degree to which effects are aliased with other effects. In other words, aliased effects are mixed and can’t be estimated separately. This can also be referred to as confounding, and it results from not testing every possible combination of factors.
This is a disadvantage of a fractional factorial design. However, not testing every possible combination can be a significant advantage in time and expense over a full factorial design. If you’re not sure what resolution you should use, click on Display Available Designs… to see a list of designs and resolutions.

We typically use three levels of resolution: Resolution III, IV and V. There is no confounding of main effects with each other in these three resolution types; however, in a Resolution III design, main effects will be confounded with 2-factor interactions. This is a problem because 2-factor interactions are quite common in practice. Resolution IV designs do not have 2-factor confounding with main effects, but 2-factor interactions are aliased with other 2-factor interactions, and main effects are confounded with 3-factor interactions.
We try to use Resolution IV designs instead of Resolution III designs when possible because they have less aliasing, but still require fewer experimental runs than higher resolution experiments.
Resolution V designs have the added advantage that no 2-factor effects are confounded with other 2-factor effects; however, 2-factor effects are aliased with 3-factor effects, and main effects are aliased with 4-factor effects. This is a good thing, as 3-factor and above interactions are rarely significant in practice.
The confounding problem can be eliminated by performing a full factorial design. However, this requires more experimental runs, which might be prohibitive in terms of both time and money.
Looking at the Display Available Designs… option in Minitab, we can conduct a fractional factorial experiment using either a Resolution III or a Resolution V design for the 5-factor helicopter experiment. A Resolution III design would only need 8 runs, but because of the extreme confounding, the Resolution V design that requires 16 test runs is the better option. Click on Designs… and select the desired design.
As you set up the experiment, Minitab also asks for the number of blocks. Blocks are simply homogenous groupings of measurements that can be used to account for variation. The default value is one because, ideally, everything is homogenous.
The helicopter experiment will be set up so that there is only one experimental block. Each type of paper will come from the same source. The helicopters will all be built by the same person using the same scissors and ruler. If we used paper clips from two manufacturers or had some other potential causes for variation, then we would need separate blocks. Fortunately, this is not the case.

After you select your design, click Factors to enter the names and levels of the variables in your experiment. To change the name of a factor, type the name of the factor over the letter in the name field. The factor settings can also be renamed by replacing the default values of -1 and 1 with the actual factor levels.
When you’ve completed the dialog box, Minitab creates the experimental design and displays it in a Minitab worksheet. The Session Window above the worksheet provides a description of the selected design with the resulting alias structure.

In the resulting Minitab worksheet, the experimental results are entered into column C10. We can name the column “Flight time” because that is our experimental response variable.

A randomized run order is provided in the “RunOrder” column. Without randomization there is a risk that the experimental results will reflect unknown changes in the test system over time – such as if the scissors grow dull, resulting in slightly different cuts.
Minitab’s default setting for a designed experiment is one replicate. If you observe a lot of variation in the process or the resulting measurements, you can use Stat > DOE > Modify Design to add replicates to your design. Suppose the person making the helicopters had difficulty cutting a straight line so all edges are not uniform; the differences in results may reflect this variation. Replicating runs minimizes the effects of this kind of unanticipated variation.
Gathering the Experimental Data
Variability can have a major impact on experimental results, so take steps to reduce the variability. Have the same person make all helicopters and have them use the same pair of scissors and ruler. Drop the helicopters from a height of 2 meters, and identify the drop point clearly to ensure consistency. A higher or lower starting point would affect flight time, and this could throw off the results. The helicopters must also be held and released the same way, or variation in our data might be the effect of the release method and not the design of the helicopter.
The Minitab worksheet below contains the experimental results listed under “Flight time” in column C10.

Analyzing the Data
After running the experiment and entering the collected data in the Minitab worksheet, select DOE > Factorial > Analyze Factorial Design…

Significant factors are those that influence the response as they changed from one setting to another. When you click OK, Minitab provides an ANOVA table as well as a Pareto chart of effects, which make it very easy to identify significant factors.

With all our factors included in the model, we have no degrees of freedom left for Error, and you need at least 1 degree of freedom to calculate p-values. But while we can’t accept this model based on the ANOVA results, we can use the normal plot or Pareto chart to identify factors and interactions that are not significant.

At this point, the experimenter would typically begin eliminating these factors, rerunning the analysis until only significant factors and interactions are left. This is usually referred to as “reducing the model.” As factors are removed from the model, additional degrees of freedom become available for the calculation of p-values. The number of models you need to evaluate depends on the number of factors in your analysis.
Reducing the model takes only one step with Minitab’s stepwise DOE tool. To use this feature, return to Analyze Factorial Design… (or hit Ctrl+E to open your most previous dialog box). Select C10 “Flight time” as the response, then click Stepwise…
The stepwise regression feature makes it simple and fast to select the optimal model for your data by automatically removing factors to find the model that best fits your data. You can choose from four stepwise analysis methods: Stepwise, Forward selection, and Backward elimination, and Forward Information Criteria. In Backward elimination, all factors are included in the initial analysis, and then non-significant factors are removed one by one. In Forward selection, we start with an empty model and search for significant terms. This can be a useful tool when you have a situation like we currently have: Too many terms with too few runs.

Regardless of the stepwise method you use, the model Minitab selects contains the same significant factors shown below:

To help you interpret your results, Minitab can also provide main effects and interaction plots. Select DOE > Factorial > Factorial Plots… Because we have already analyzed the results, Minitab automatically selects the factors used in our model:

Clicking OK gives us plots of the significant main effects and interactions. The main effects plot shows the results of changing from one setting to another for each factor. Be cautious with these. You can only directly interpret main effects that are *not* involved in a significant interaction. This is why we only select B and E, because the A*C interaction overrides the main effects.
The main effects plot shows we have longer flight times with the paper clip off, and longer rotor length. The interaction plot shows the interactions between the factors.
This interaction tells us about these two factors. With heavy paper, leg length DOEs not matter much. With light paper, leg length has a much larger impact. Here it shows us our longest flight is with light paper and short leg length.

Finally, we can use the Response Optimizer to find the combination of factor settings that will give us the longest flight time. Select Stat > DOE > Factorial > Response Optimizer… Our goal is to maximize the flight length.

The optimizer produces the following graph showing the optimal factor settings in red, and the predicted response for helicopters made with those settings in blue. Take note that factor D DOEs not appear, as our analysis did not flag it as significant. Because it has no statistically significant impact on flight time, we can choose the setting for Factor D based on other considerations, such as cost:

For the data we collected, our analysis with Minitab indicates the optimal helicopter settings are lighter paper, longer rotor length, shortest, and no paperclip on the leg.
To design an even better helicopter, we could repeat the entire DOE using even lighter paper and longer helicopter blades. A 50 cm wing may be bigger, but that does not mean it will be better. You may be able to predict the ideal settings based on a DOE result, but you should always be cautious when extrapolating beyond the data set, or the result may be a crashing helicopter.
Check out Minitab's training options or download a free trial to learn more.

You Might Also Like
- Trust Center
© 2023 Minitab, LLC. All Rights Reserved.
- Terms of Use
- Privacy Policy
- Cookies Settings
Grab the FREE Biology Welcome Pack !
How Helicopters Work: A STEM Challenge
The focus is on lessons that are accessible and adaptable for multiple ages. When possible, I try to provide hands-on experiments. If that isn’t possible or the process is difficult to visualize, my goal is to create a hands-on activity that will illustrate the concept and reinforce the learning. Make sure to check out our other great physical science explorations.
Don’t forget to grab the template for today’s lesson.
Our Physics and Engineering Journey
We are focusing on physics and engineering this semester after studying human anatomy in the fall. We have been using a book to work through several physics and engineering lessons this semester. The book has been a little disappointing. The directions are often lacking and so many of the links don’t work that it becomes a bit of an issue to try to get through the lessons.
One of these frustrating lessons was on a paper helicopter experiment. We basically got the topic and then had to start from scratch. The good news is that there is lots of great information about helicopters out there and we had a great time. We actually were able to do more than anticipated by allowing our imaginations and curiosity to drive innovation.
How Helicopters Work
Helicopters work based on changes in air pressure that result in lift. As the blades rotate it causes a pressure shift that results in build up of pressure under the blades and a decrease in pressure above that moves the air and the helicopter.
You can see the example of lift using this toy. This toy is based on an ancient Japanese design known as a taketombo. You spin the toy and release. The spin is fast enough to create the pressure changes resulting in lift. As the blades slow down, the toy falls.
What We Did
We couldn’t really make a helicopter (not yet) so in order to illustrate how helicopters work, we designed our own in this paper helicopter experiment. These are known as roto-copters. These float down because it isn’t rotating quickly enough to cause lift, but it is rotating enough to cause a slight change and create drag. This results in slowing down the speed of descent.
Check out this Video to Make Your Own.
Grab this project and so much more
After you make the primary design and get them to “fly”. Experiment with aspects of the design: fold the blades differently; add more weight; add additional blades; keep it open ended. Challenge teams to see whose copter can stay in the air the longest.

Similar Posts

Simple Circuit Projects to Light Up the Holidays!
It is the time year where we are trying to…

How to use the 5E model to explore liquids.
I have said it before, but kids are natural scientists….
Properties of Water Lesson Plan – Biology Teaching Ideas
Capture Curiosity with the Properties of Water – Step 1…

Dual Enrollment? That is the Question.
We are finishing up our last week of The Science…

Beginner’s Guide to Kitchen Chemistry. Using Everyday Items to Teach Chemical Concepts.
Kids love blowing up things! At least my kids do. …
Beach Trip Science
We have been busy loving on our kids and spending…

Science Fair Guide: Helicopter
In addition to the helicopter materials, you’ll need a tape measure.
Ask a Question
What shape and size of paper cutout causes the helicopter to fly the farthest?
Gather Information
The rubber band helicopter relies on the paper cutout to redirect the rubber band’s energy to the propeller. Without it, the energy would be wasted spinning the craft stick.
However, if the paper is too heavy, then excessive energy will be required to make the helicopter fly.
The total surface area of the paper has an effect on how much energy is diverted to the propeller. Additionally, whether the surface area is close to the center of rotation (the craft stick) or farther away also matters.
Make a Hypothesis
Using the information above, make an educated guess about which type of paper cutout will work the best. Your hypothesis should be a simple statement, such as: “A wide and narrow rectangle will help redirect the most of the rubber band’s energy to the propeller” (This is not necessarily the best hypothesis; it’s just an example).
Conduct an Experiment
Create 3-7 different paper cutouts of varying shapes and sizes. Try making: a 2x2" square, a 2" circle, a 2x6" rectangle, a 2x6"-wide bowtie shape, and a 2x6"-wide diamond shape.
One at a time, attach the paper cutout to the helicopter.
Fly the helicopters sideways instead of straight up. This way, you can measure the effectiveness of the paper cutout by using a tape measure to measure the distance the helicopter flies.
Fly each paper cutout three times. This will ensure that no single test skews your results.
If you accidentally mess up one of the tests, then redo the test and record in your notes why you chose to not include the results of one test. For example, "The propeller bumped into my sleeve during launch."
Setup the Controls
Controls are measures put in place to prevent unintended things from affecting your results.
Follow these procedures to ensure your data is accurate:
Test a helicopter without any paper 3 times and record the results to ensure that the paper cutout has an effect at all.
Wind up the helicopters the same number of turns each test. Your goal is to test the paper cutouts, not how much energy is put into the rubber bands.
Each time you test a new paper cutout, put fresh rubber bands on the helicopter. The rubber bands can stretch out and loosen over time, which would make each subsequent flight slightly less powerful.
Fly the helicopters when it’s not windy.
Collect Data
Record the distance of each test for each paper cutout. When finished, add up the results for each paper cutout, then divide by 3 to get an average distance. For example, if one paper cutout flew 12', 10', and 14', then 11+12+13 divided by 3 is an average of 12'.
Your data might look something like this (this is not real data; don’t use in your conclusion):

In addition to the helicopter materials , you’ll need a tape measure.
View the Helicopter project

Make Observations
Describe any additional observations you made during the experiment. Be sure to include things might have affected your results such as flying errors, wind during some tests, or anything else unexpected.
Draw Conclusions
Look at your data and conclude which paper flap works the best.
Present Findings
Present your main conclusion in a visual form, such as writing the average distance flown onto each paper cutout, and creating a graph that shows the distance the each one travelled.
Summarize your hypothesis, experiment method, the controls you put in place, and your raw data.
Write your conclusion, and explain why you think the results are the way they are.
Paper Helicopters: Scientific Method & Experimental Design
September 4-6
For those who were absent, here's the quick run-down on what you need to do... you will find all notes and expectations associated with this activity in the attachments section below.
- Create a paper helicopter using the directions provided here .
- Make 5 more helicopters of various sizes, shapes, etc. Try messing with how you fold the propellers, how much weight you add to the bottom, etc.
- Generate a list of all the things you observe about the helicopters you have made and how they perform.
- Use your observations to generate some questions about paper helicopters and how well they fly.
- Come up with a hypothesis for your question -- remember it must be testable!
- Explore (and even copy!) all the class notes below in order to relate the scientific method and the concepts of variables to your paper helicopters and your proposed hypothesis.
- Complete the Paper Helicopter Wrap-Up assignment attached below.
- Turn in your work!!!
Suggested Searches
- Climate Change
- Expedition 64
- Mars perseverance
- SpaceX Crew-2
- International Space Station
- View All Topics A-Z
Humans in Space
Earth & climate, the solar system, the universe, aeronautics, learning resources, news & events.

Hubble Rings in a New Galactic View
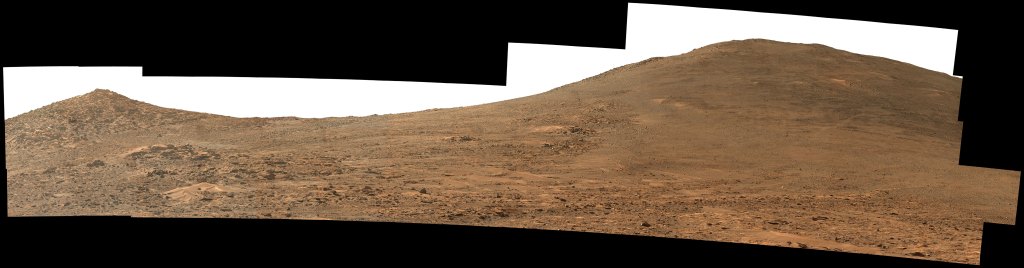
NASA’s Perseverance Rover to Begin Long Climb Up Martian Crater Rim

NASA Citizen Scientists Spot Object Moving 1 Million Miles Per Hour
- Search All NASA Missions
- A to Z List of Missions
- Upcoming Launches and Landings
- Spaceships and Rockets
- Communicating with Missions
- James Webb Space Telescope
- Hubble Space Telescope
- Why Go to Space
- Commercial Space
- Destinations
- Living in Space
- Explore Earth Science
- Earth, Our Planet
- Earth Science in Action
- Earth Multimedia
- Earth Science Researchers
- Pluto & Dwarf Planets
- Asteroids, Comets & Meteors
- The Kuiper Belt
- The Oort Cloud
- Skywatching
- The Search for Life in the Universe
- Black Holes
- The Big Bang
- Dark Energy & Dark Matter
- Earth Science
- Planetary Science
- Astrophysics & Space Science
- The Sun & Heliophysics
- Biological & Physical Sciences
- Lunar Science
- Citizen Science
- Astromaterials
- Aeronautics Research
- Human Space Travel Research
- Science in the Air
- NASA Aircraft
- Flight Innovation
- Supersonic Flight
- Air Traffic Solutions
- Green Aviation Tech
- Drones & You
- Technology Transfer & Spinoffs
- Space Travel Technology
- Technology Living in Space
- Manufacturing and Materials
- Science Instruments
- For Kids and Students
- For Educators
- For Colleges and Universities
- For Professionals
- Science for Everyone
- Requests for Exhibits, Artifacts, or Speakers
- STEM Engagement at NASA
- NASA's Impacts
- Centers and Facilities
- Directorates
- Organizations
- People of NASA
- Internships
- Our History
- Doing Business with NASA
- Get Involved
NASA en Español
- Aeronáutica
- Ciencias Terrestres
- Sistema Solar
- All NASA News
- Video Series on NASA+
- Newsletters
- Social Media
- Media Resources
- Upcoming Launches & Landings
- Virtual Events
- Sounds and Ringtones
- Interactives
- STEM Multimedia

Primary Instrument for Roman Space Telescope Arrives at NASA Goddard

Artemis Emergency Egress System Emphasizes Crew Safety
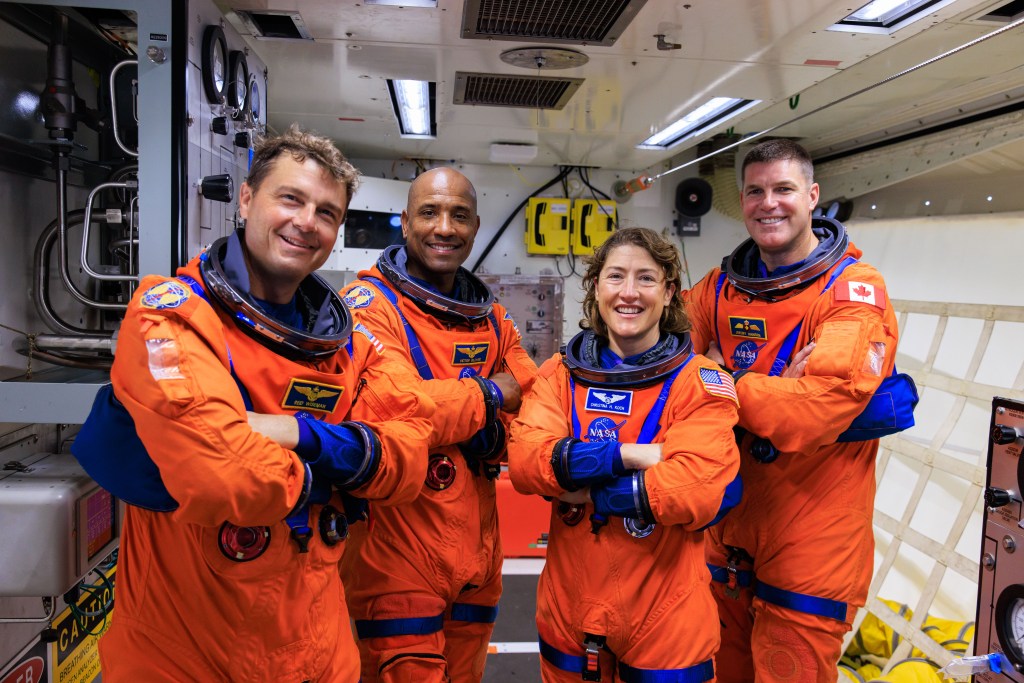
What’s New With the Artemis II Crew

Food in Space

NASA-Designed Greenhouse Gas-Detection Instrument Launches

Airborne Surface, Cryosphere, Ecosystem, and Nearshore Topography

Amendment 42: A.30 Understanding Changes in High Mountain Asia Deferred to ROSES-25

The Summer Triangle’s Hidden Treasures

Solar Eclipse Data Story Helps the Public Visualize the April 2024 Total Eclipse

EXCITE (EXoplanet Climate Infrared TElescope)

NASA Selects 5 New Roman Technology Fellows in Astrophysics

Orville Wright and National Aviation Day

Ideas for Celebrating National Aviation Day

National Aviation Day 2024 Celebrates Faces of Flight

Perseverance Pays Off for Student Challenge Winners

Amendment 41: DRAFT F.13 Lunar Terrain Vehicle Instruments Program Released for Community Comment.

NASA Tests Deployment of Roman Space Telescope’s ‘Visor’

How Do I Navigate NASA Learning Resources and Opportunities?

NASA Demonstrates ‘Ultra-Cool’ Quantum Sensor for First Time in Space

55 Years Ago: NASA Group 7 Astronaut Selection

There Are No Imaginary Boundaries for Dr. Ariadna Farrés-Basiana

Astronauta de la NASA Frank Rubio

Diez maneras en que los estudiantes pueden prepararse para ser astronautas
Out for a spin — paper helicopters.

Grade Levels
Grades K-4, Grades 5-8
Physical Science, Flight and Aeronautics
Play and Learn
By building and test flying two different paper helicopters, you will learn how the size of the Mars helicopter, Ingenuity’s, rotor blades are important for it to be able to fly in the thin atmosphere of Mars.
Out for a Spin
Advertisement
Show your children how to make paper helicopters for home experiments
Most children can fold a paper plane, but Alom Shaha prefers paper helicopters – and they are better for experimenting with
By Alom Shaha
24 August 2022

Emily Robertson
THERE is a deep satisfaction to be had from making and throwing a paper plane. From the number I have had fly across my classrooms, I have been able to ascertain that most children over the age of 11 know how to make one, albeit of varying quality.
I wouldn’t be doing my job properly if I didn’t encourage further experiments. They might investigate the factors that contribute to a good flight, and find out for themselves the importance of precise folding and the exact position of the centre of mass. Apparently, real scientists also do this sort of thing and get their work …
Sign up to our weekly newsletter
Receive a weekly dose of discovery in your inbox! We'll also keep you up to date with New Scientist events and special offers.
To continue reading, subscribe today with our introductory offers
No commitment, cancel anytime*
Offer ends 2nd of July 2024.
*Cancel anytime within 14 days of payment to receive a refund on unserved issues.
Inclusive of applicable taxes (VAT)
Existing subscribers
More from New Scientist
Explore the latest news, articles and features

Self-centred, spoiled and lonely? Examining the only child stereotype
Subscriber-only

A slight curve helps rocks make the biggest splash

How to unsnarl a tangle of threads, according to physics

A microscopic diving board can cheat the second law of thermodynamics
Popular articles.
Trending New Scientist articles
Please check our Hours & Admission page for changes to our operating hours.
- Become a Member
- Book an event
SCIENCE EXPERIMENTS FOR KIDS
Making paper helicopters.
Use up those extra office supplies while giving your kids a quick science lesson

This animal is not on exhibit in the habitats. It is one of our Animal Ambassadors and is used in public and school programs.
Download a PDF of this experiment
“Falling with style” is how Woody famously described Buzz Lighyear’s flight in “Toy Story,” but he might have been describing these paper helicopters too.
Paper helicopters are a fun activity that demonstrates gravity, drag and thrust. Using paper, scissors, and a few paper clips to make helicopters, you too can design something to fall with style. Use the attached template for the design of the helicopters, or design your own! Even Woody and Buzz would be impressed.
GATHER THIS:
- Paper clips
- Color pencils
THEN DO THIS:
- Cut along all of the solid lines of the helicopter pattern.
- Fold the lower sections (C & D) toward each other along the dotted lines.
- Hold the folded sections and place a paper clip at the end.
- Fold the top blades (A & B) in opposite directions.
- Hold the helicopter high above your head. Release!
- Try shaping your blades or using different amounts of weight. You can also try uneven blades.
- Did the helicopter rotate clockwise or counter-clockwise?
- How can you make it rotate in the opposite direction?
- Does the height you drop it from affect its flight?
- How does the weight (paperclips) affect the flight?
- If you cut the blades unevenly how does it affect the helicopter’s travel? How?
WHAT IS HAPPENING?
When the helicopter falls, air pushes up against the blades and bends them up just a little. When air pushes upward on the slanted blade, some of that thrust becomes a sideways – or horizontal – push.
The helicopter doesn’t move sideways through the air because there are two blades, each getting the same push but in opposite directions. The two opposing thrusts work together to cause the toy to spin.
Like this experiment? Explore more flight science with the CuriOdyssey Flight Science Kit in the CuriOdyssey Shop !
WHAT THIS TEACHES:
Skills: Scientific process, fine motor skills, observation
Themes: Gravity, drag, lift
Join the CuriOdyssey Community
Contact Us History Jobs Mission, Values & Equity Statement News & Media Privacy Policy Site Map
1651 Coyote Point Drive San Mateo, CA 94401 Ohlone Land Acknowledgement 650-342-7755 [email protected]
CuriOdyssey is a 501(c)(3) non-profit, Tax ID 94-1262434

Why do Helicopters Spin?
Activity length, engineering forces and motion, activity type, exploration.
We engage children’s natural curiosity about the world; we encourage them to formulate questions and then to actively seek answers to those questions, using whatever tools are at their disposal.
With the increased focus on inquiry-based learning in the BC curriculum, Science World supports teachers to integrate inquiry learning into their classrooms.
Inquiry-based learning requires guidance from the teacher to support students’ progression along the inquiry continuum.
Levels of Inquiry (adapted from Banchi and Bell, “The Many Levels of Inquiry”, 2008.)
| Teacher provides question and procedure. | Teacher provides question and procedure. | Teacher provides question. | Teacher provides support. |
| Students follow directions to confirm the results. “Traditional” lab. | Students generate an explanation based on evidence they’ve collected. | Students design procedure to test question and resulting explanations. | Students generate questions; design and carry out investigations; and draw conclusions. |
This Helicopter activity can be adapted for any level of inquiry. Primary students who have less experience benefit from starting at the confirmation or structured levels of inquiry. It is important, at all levels of inquiry, that teachers help guide students through their thought processes (meta-cognition) based on their observations.
Question for investigation : overarching goal of an investigation written as a question.
Independent variable : variable changed in a science experiment to test a dependent variable.
Dependent variable : variable that is “dependent” on the independent variable. It is the variable that is being tested in a science experiment.
Hypothesis : a proposed explanation made as a starting point for further investigation.
Prediction : a statement about what might happen in the future.
Results : outcome of investigation
Background Science
Air has mass and takes up space. When the helicopter is dropped, the air’s resistance slows down the helicopter. As the helicopter falls, the resistance from the air pushes the blades up into a slanted position. In this position, the air under one blade is pushing one way and the air under the other blade is pushing the opposite way. These two forces of air push the blades around and make it spin. The faster the blades spin, the less the air can get by, and the slower the helicopter falls. The fall produces drag, which resists the force of gravity.
Describe how force can be applied to move an object.
Per paper helicopter: 1 copy of the Paper Helicopter Template student (on ordinary paper). Teacher tip: pre-cut template for younger students. scissors 1 paperclip
Additional supplies to test variables: scrap paper tape several paperclips several copies of the helicopter template on different weights of paper.
Key Questions
- What can we change?
- What do you think might happen?
- Was your guess (or prediction) correct?
- Did you get the result you wanted?
- What other changes would you make?

Part 1: Set up
- Present the class with a paper helicopter and the other half of the 8.5” x 11” paper it was cut out of. The paper should be folded twice lengthwise.
- Have students make predictions about how the paper and the helicopter will fall. Prompt with questions like “What might happen when I let go?” “Why?” Record predictions on the board.
- Drop the paper helicopter and the piece of paper from the same height at the same time. What was the result (a result could be: which one landed first)?
Part 2: Activity
- Discuss results. Which prediction was correct?
- Pose the over-arching question: What makes the paper helicopter spin?
- Students construct their own helicopters and test them.
- What happens to the helicopter as it falls?
- Why do you think the helicopter falls to the ground?
- Why does the helicopter spin?
- Why does the helicopter drop slowly?
Ask Questions for a structured or guided inquiry:
- What could we change to make the helicopter spin faster?
- What could we change to make the helicopter spin slower?
- What could we change to make the helicopter fall slower?
- What could we change to make the helicopter fall faster?
Teacher tip: For grades K-1, you may wish to divide the class into groups, but have the entire class work on one of the suggested questions.
Guide students as they choose an independent variable (the element that we change). These could include length of wings, stiffness of paper, number of paperclips, etc. Collect suggestions from students and choose (as a group) which one(s) to test.
Select a dependent variable and establish how to measure it. The modified helicopters could be measured in different ways. For primary students, compare the original helicopter (which serves as the control) to the modified helicopter by dropping both at the same time. Older students could time their helicopters, or count the number of spins by attaching flagging tape to the paperclip at the helicopter’s base. To count the spins, students would count how many times the flagging tape has wound around the helicopter.
Ask Questions for a more open inquiry:
If students are more experienced with inquiry, they may pose their own questions to explore. Help students form their own question for investigation (ones that can be answered with an experiment) with starters such as: “What might happen if…” or include the phrase “does the____ make a difference?” or “How does ____ affect ____ ?”
- Ask: What can we change on the helicopters? (eg. length of wings, width of wings, number of paperclips, etc.) ( Independent Variables )
- Ask: What do you think we might see? (eg. speed of fall, number of spins, etc.) ( Dependent Variables)
Experiment and Observe
- Predict outcome (“What do you think will happen?”) . Students may share with a partner what they think will happen or they can draw a picture.
- Example: “If we _____________, then the helicopter will ___________.”
- Observe & record Results. Students may draw pictures of their observations. Students repeat each experiment a few times to avoid anomalies.
- Ask the students: “Was the result what you predicted?” Do the students have more questions? Repeat the process!
- Have students demonstrate their helicopters and share the changes they made. Ask: What have you learned about the helicopter? What questions do you have now?
- Have students modify their helicopters to meet specific targets, i.e. Build a helicopter that will take 2 minutes to fall from the ground from a height of 3 metres.
Other Resources
Science World | Paper Helicopter Template
About the sticker
Artist: Jeff Kulak
Jeff is a senior graphic designer at Science World. His illustration work has been published in the Walrus, The National Post, Reader’s Digest and Chickadee Magazine. He loves to make music, ride bikes, and spend time in the forest.
Comet Crisp
T-Rex and Baby
Artist: Michelle Yong
Michelle is a designer with a focus on creating joyful digital experiences! She enjoys exploring the potential forms that an idea can express itself in and helping then take shape.
Buddy the T-Rex
Science Buddies
Artist: Ty Dale
From Canada, Ty was born in Vancouver, British Columbia in 1993. From his chaotic workspace he draws in several different illustrative styles with thick outlines, bold colours and quirky-child like drawings. Ty distils the world around him into its basic geometry, prompting us to look at the mundane in a different way.
Western Dinosaur
Time-Travel T-Rex
Related Resources
Why do hoopsters fly (on the road pre-visit activity), why inquiry science world is a charitable organization that engages british columbians in science and inspires future science and technology…, in these activities students explore the impressive force of air and learn how air pressure affects their daily lives., hoopsters: ring wing glider, in this activity, students make their own paper plane hoopsters, with adult help, then have fun making them fly the…, parachute design and drop, in this make and take, students exploit the force of drag to make a parachute that will drop as slowly…, discovering a way for people to take flight is undoubtedly one of the most awe-inspiring feats of human ingenuity…, related school offerings.

Tinkering with Air Machines

Visit Eureka! Gallery
We believe that now, more than ever, the world needs people who care about science. help us fund the future and next generation of problem solvers, wonder seekers, world changers and nerds..
Homeschool Science for Kids
Science designed for your homeschool family
Rotation: Paper Helicopter
May 2, 2016 By Janice VanCleave

Things that rotate turn around a center point.
Rotate means to turn around a fixed center point or axis; Two dimensional objects, such as the CD shown, rotate around a stationary center point; Three dimensional objects turn around a stationary axis, which is an imaginary line running through the object;
The top shown is an example of a 3-D object rotating about its axis , which is an imaginary stationary line running through the top.
The Sun and planets in our solar system all rotate about their axis.
Discover Rotation for Yourself
Make paper helicopters. 1. Fold a piece of copy paper in half from side-to-side. Fold the paper in half again in the same direction. 2. Unfold the paper and cut along the fold lines to form four strips about 2 inches (5 cm) wide. 3. The pattern shows where one of the paper strips is to be cut and where it is to be folded. Note : The two horizontal cut lines are midway between the top and bottom of the strip.

Then bend the right wing forward toward you and the left wing backwards.
Before testing the helicopter, ask kids to predict which direction the paper will rotate. This is also called a hypothesis.
The direction of rotation must have a reference of observation. Observe the rotation from above the falling craft.
5. Now it is the time to test the predictions (hypotheses). Give the following instructions:
- Hold the body of the helicopter with your thumb and index finger placed under the wings.
- Hold your arm as high as possible and drop the craft. Try not to let the craft hit against your body or clothes.

Trouble Shooting
If the paper doesn’t rotate well, often it is because the wings have been bent too much. Correct this problem by laying the paper flat and gently rub your fingers over the wings.
Results: Observing the falling helicopter from above, the wings rotate in a counterclockwise direction around the crafts axis which exits between the two wings and the end of the tail.
Before giving any explanations for why the paper craft rotates, introduce the following challenge
Science Challenge
How can the paper helicopter be modified so that it rotates in the opposite direction.
I have had some really interesting idea, especially from young kids.
- Hold the paper helicopter in your other hand.
- Turn and face the opposite direction before dropping it.
- Give the paper a twist in the clockwise direction just before you drop it. One girl insisted that this works and it did. The variable that I had not considered was the height the paper was dropped. The girl was short and the falling time was not long enough for the helicopter to “recover” and fall counterclockwise.
Give kids an opportunity to test different hypothesis. They will discover that when the wings are bent in the opposite direction, the helicopter will spin clockwise.
Why the Paper Helicopter Rotates As the paper helicopter falls, its wings hit against the air. The air is free to rush out from under the wings in all directions except where the wings attach to the body of the craft. When the right wing is folded toward you and the left wing folded backwards, the force of the air against the body of the helicopter causes it to rotate.
Think about it!
Air is pushing on the body in two different directions. The result is that the paper rotates in the direction of the the two turning forces acting on it. Flip the wings in the opposite direction and Voila’ the helicopter rotates in the opposite direction of clockwise.
Books with More Rotating Activities
1. 204 sticky, gloppy, wacky, & wonderful experimentsexperiment #15 demonstrates why the rotation direction of venus is reversed from that of earth., 2. super science models : stars and constellations that are above the horizon in the northern hemisphere appear to rotate as a unit around polaris. .

Share this:

Related posts:
- Earth’s Axis Orientation/Rotation Affects Day/Night
- All About Flying Squirrels
Make it fly
A paper plane, glider or helicopter falls to the ground much more slowly and more gracefully than a scrunched-up piece of paper – as the designs in this activity show. It’s all thanks to the forces generated by air pressing on and moving over the surface of the paper.
Printable downloads
follow these steps….

Think and talk about…
- Which design travels fastest and why do you think this is?
- Why do these designs behave differently to a scrunched-up piece of paper?
- How do your paper planes compare with the shapes of real planes you’ve seen?
Investigate…
Which way does the helicopter spin? Can you make it spin the other way?
What do you notice if you make the front of the plane heavier?
Make your own plane design and see if you can make it travel further than the others.
Did you know?
In December 2010 a paper aeroplane thrown by Takuo Toda in Hiroshima, Japan, stayed in the air for 29.2 seconds – a world record.
What’s the science?
Moving through air also creates a kind of friction called air resistance, or ‘drag’, which tends to slow down anything moving through the air.
Science in your world
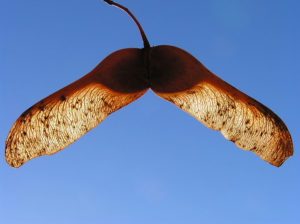
Look out for these designs in nature as well.
Related resources

Can you make milk move without touching it?
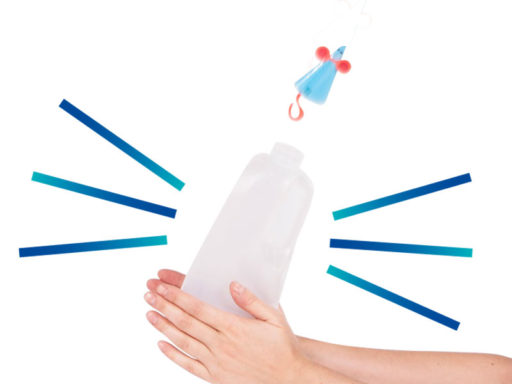
Rocket mice
Make a paper mouse fly like a rocket using a milk bottle and some air pressure.
Kitchen science
Step-by-step instructions for science activities and experiments to do in the classroom or at home.
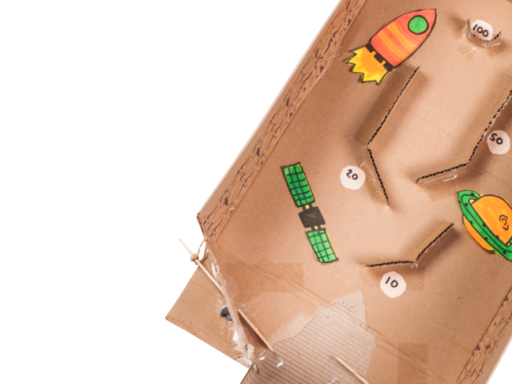
Pinball machine
Build your own pinball machine and use it to explore Newton’s Laws of Motion while challenging your friends!
Paper Helicopter Experiment

What educators are saying
Description.
Detailed paper helicopter experiment lesson to investigate this inquiry question:
Does changing the blade length of a paper helicopter affect how long it stays in the air?
Lesson files include:
- teacher lesson presentation with custom graphics (12 slides)
- paper helicopter experiment report template (4 pages)
- paper helicopter templates
- pre/post-test
- reading comprehension activity
- thinking routines writing activity
- group member role definitions and activity
- vocabulary definitions for the paper helicopter experiment
- vocabulary definitions for the scientific method
PDF and Google slides format.
See the blog post Paper Helicopter Experiment for more details.
Questions & Answers
- We're hiring
- Help & FAQ
- Privacy policy
- Student privacy
- Terms of service
- Tell us what you think
IMAGES
COMMENTS
A simple paper helicopter can be made easily at home or school. Multipurpose U.S. letter-size printer paper (8.5 x 11 inches, 21.6 x 27.9 cm) works well for the model. The design is simple to make with only a few cuts and folds, and its parts can be easily adjusted to examine changes regarding flight behavior.
Instructions: Cut around the outside of the helicopter. Cut along the solid lines. Fold the side pieces in to form the body of the helicopter. Fold one wing toward you and one wing away from you to form the rotor. Fold the helicopter body up about 1 cm from the end. Use the paper clip to hold this fold. Drop the helicopter from a high place and ...
Here's how to make the paper helicopters. Step 1: Cut the paper to a width of 5cm. Step 2: Cut the paper the length of paper rotor length plus leg length, and add 2 cm for the body. Step 3: Cut dotted lines at Leg A and Leg C. The length of each cut is 5 cm minus leg width divided by 2. Step 4: Fold leg A onto leg B.
5. Hold the helicopter high abov e y our he ad, with the bla de s on t op and t h e f ol d e d s e c t i on wi t h the paper clip pointing down. Re le as e ! 6. For further testing a nd inv e s t i ga ting, y ou ca n als o s ta nd on a s t ool or t ak e y our he l i c op t e r t o t he
What We Did. We couldn't really make a helicopter (not yet) so in order to illustrate how helicopters work, we designed our own in this paper helicopter experiment. These are known as roto-copters. These float down because it isn't rotating quickly enough to cause lift, but it is rotating enough to cause a slight change and create drag.
1. Construct a helicopter according to the instructions on the last page of this lab. 2. Stand up. Hold the helicopter from its tip between your thumb and index finger. Extend your arm upward and release your helicopter. Observe its flight. 3. Make three observations of the flight of the helicopter.
Conduct an Experiment. Create 3-7 different paper cutouts of varying shapes and sizes. Try making: a 2x2" square, a 2" circle, a 2x6" rectangle, a 2x6"-wide bowtie shape, and a 2x6"-wide diamond shape. One at a time, attach the paper cutout to the helicopter. Fly the helicopters sideways instead of straight up.
Use your observations to generate some questions about paper helicopters and how well they fly. Come up with a hypothesis for your question -- remember it must be testable! Explore (and even copy!) all the class notes below in order to relate the scientific method and the concepts of variables to your paper helicopters and your proposed hypothesis.
Type. Play and Learn. By building and test flying two different paper helicopters, you will learn how the size of the Mars helicopter, Ingenuity's, rotor blades are important for it to be able to fly in the thin atmosphere of Mars. Out for a Spin. Build and test different paper helicopters.
Most children can fold a paper plane, but Alom Shaha prefers paper helicopters - and they are better for experimenting with. By Alom Shaha. 24 August 2022 ...
THEN DO THIS: Cut along all of the solid lines of the helicopter pattern. Fold the lower sections (C & D) toward each other along the dotted lines. Hold the folded sections and place a paper clip at the end. Fold the top blades (A & B) in opposite directions. Hold the helicopter high above your head. Release!
a) add paper clips to one: the heavier one spins more and reaches the ground first. b) make one with longer rotor blades than the other: the one with the longer rotor blades takes longer to reach the ground (more surface area to experience air resistance - think of a parachute). One large and one small helicopter.
Box's paper helicopter has been used to teach experimental a helicopter that maximizes flight time when it is dropped from design for more than a decade. It is simple, inexpensive, and a fixed height. Because the helicopter is constrained to fit on a provides real data for an involved, multifactor experiment.
It is the variable that is being tested in a science experiment. Hypothesis: a proposed explanation made as a starting point for further investigation. Prediction: a statement about what might happen in the future. ... Present the class with a paper helicopter and the other half of the 8.5" x 11" paper it was cut out of. The paper should be ...
• Your completed helicopter should look like the photograph above. Paper Helicopters This is a practical hands-on session in which students will develop scientific knowledge using paper helicopters to demonstrate the science of forces and motion. By changing one variable at a time, students develop a knowledge of fair testing. LD Name LD Sophie
Discover Rotation for Yourself. Make paper helicopters. 1. Fold a piece of copy paper in half from side-to-side. Fold the paper in half again in the same direction. 2. Unfold the paper and cut along the fold lines to form four strips about 2 inches (5 cm) wide. 3.
Students will create a hypothesis about how each design will impact the fall rate and accuracy of the paper. Students will also recreate the experiment using the standard helicopter. This will be ...
Take the A4 sheetof paper. Fold it in half, as shown, then unfold it. After that, fold the two top corners in to make a point. Now fold the edges in again so theymeet in the middle from the tip. Once that's done, fold the plane in half again. Now fold the diagonal edge down to meet the straight edge on each side, making the wings.
The main emphasis will be introducing the students to "the scientific method.". After some exposure to the terms used to describe the scientific method, students will conduct a paper helicopter experiment in which they use all the methods of science. Students will work in groups of four for their experiment. TERMS USED: Process related ...
Box's paper helicopter has been used to teach experimental design for more than a decade. It is simple, inexpensive, and provides real data for an involved, multifactor experiment. Unfortunately it can also further an all-too-common practice that Professor Box himself has repeatedly cautioned against, namely ignoring the fundamental science ...
methodology for paper helicopter experiment to optimize the . performance. To achieve this goal one paper helicopter is . designed by using A4 size paper. To do this, some simple . items ...
Description. Detailed paper helicopter experiment lesson to investigate this inquiry question: Does changing the blade length of a paper helicopter affect how long it stays in the air? Lesson files include: teacher lesson presentation with custom graphics (12 slides) paper helicopter experiment report template (4 pages) paper helicopter templates.
• Paper clips are important for the balance of the paper helicopter. • Paper clips (at least one) must be attached to the end of the paper helicopter body according to the marking. In order to design the experiment we use Minitab statistical software [6] which makes this task easier. For this experiment, we will use a 2 level factorial ...