- An Ordinary Man, His Extraordinary Journey
- Hours/Admission
- Nearby Dining and Lodging
- Information
- Library Collections
- Online Collections
- Photographs
- Harry S. Truman Papers
- Federal Records
- Personal Papers
- Appointment Calendar
- Audiovisual Materials Collection
- President Harry S. Truman's Cabinet
- President Harry S. Truman's White House Staff
- New Materials
- Research Procedures
- Collection Policy and Donating Materials
- Truman Family Genealogy
- Research Room Regulations
- To Secure These Rights
- Freedom to Serve
- Events and Programs
- Featured programs
- Civics for All of US
- Civil Rights Teacher Workshop
- High School Trivia Contest
- Teacher Lesson Plans
- Truman Library Teacher Conference 2024
- National History Day
- Student Resources
- Truman Library Teachers Conference
- Truman Presidential Inquiries
- Student Research File
- The Truman Footlocker Project
- Truman Trivia
- The White House Decision Center
- Three Branches of Government
- Electing Our Presidents Teacher Workshop
- National History Day Workshops from the National Archives
- Research grants
- Truman Library History
- Contact Staff
- Volunteer Program
- Internships
- Educational Resources

You're the Author: WWI Propaganda Creation Project
In this lesson, students will view a variety of examples of WWI propaganda posters and discuss their message and why they were important for the war effort. After the discussion, students will create their own examples of WWI propaganda posters.
To inform students why WWI propaganda posters were so effective and important for the war effort.
- Define the concept of propaganda.
- Explain why the use of propaganda was of particular significance during this time period.
- Evaluate the different strategies and tools used in the creation of propaganda.
- Demonstrate their knowledge of propaganda characteristics, strategies, and tools by creating their own piece of propaganda.
- 9-12.AH.3.CC.B - Evaluate the motivations for United States’ entry into WWI.
- 9-12.AH.3.PC.D - Assess the impact of WWI related events, on the formation of “patriotic” groups, pacifist organizations, and the struggles for and against racial equality, and diverging women’s roles in the United States.
WWI Propaganda posters - examples can be found at http://www.ww1propaganda.com/ , http://www.loc.gov/pictures/collection/wwipos/background.html , http://americanhistory.si.edu/collections/object-groups/women-in-wwi/war-posters , and other various internet and print sources
DAY 1 Students will walk into the classroom that has various examples of WWI propaganda posters (see primary sources above) on the walls. Students will walk around the classroom examining the posters and write quick notes about the posters. Students will pay close attention to:
- Message/theme
- Effectiveness
- Author/organization
After students have had time to examine the posters, the class will discuss propaganda What does propaganda mean? Propaganda is information that is spread for the purpose of promoting a cause or belief. During WWI, posters were used to
- Recruit men to join the army
- Recruit women to work in the factories and in the Women’s Land Army
- Encourage people to save food and not to waste it
- Keep morale high and encourage people to buy government bonds
Why were propaganda posters needed during WWI? Countries only had small standing, professional armies at the start of the war They desperately needed men to join up and fight Most people did not own radios and TVs had not yet been invented The easiest way for the government to communicate with the people was through posters stuck on walls in all the towns and cities How were men encouraged to join the army? Men were made to feel unmanly and cowardly for staying at home How were women used to encourage men to join the army? Women were encouraged to pressurise their husbands, boyfriends, sons, and brothers to join up How was fear used? Some posters tried to motivate men to join up through fear Posters showed the atrocities that the Germans were said to be committing in France and Belgium People were encouraged to fear that unless they were stopped, the Germans would invade Britain and commit atrocities against their families How were women encouraged to work in the factories or to join the army or the land girls? When the men joined the war, the women were needed to do their jobs There was a massive need for women in the factories, to produce the weapons, ammunition and uniforms needed for the soldiers There was a major food shortage and women were desperately needed to grow food for the people of Britain and the soldiers in France Posters encouraged everyone to do their bit Through joining up Through working for the war effort By not wasting food Through investing in government bonds Why are WWI propaganda posters important? For historians today, propaganda posters of WWI reveal the values and attitudes of the people at the time They tell us something about the feelings in Britain during WWI Class will discuss the assignment (poster creation) Students will begin brainstorming ideas for their own propaganda posters in small groups Students will begin creating their propaganda posters
DAY 2 Students will continue working to create their propaganda posters
DAY 3 Students will be given 15 minutes to finish their posters and hang them up around the classroom Students will walk around the room and look at the posters created by their classmates Students will play close attention to:
Directions: You will create an effective propaganda poster on one of the topics below that could have been used in World War I. • Possible topics: • Enlistment and recruitment • The role of women • Financing the war • Food conservation • Aiding our allies • Entering the war • Guidelines • The poster will be drawn or printed (using photoshop or etc) on 8 ½” by 11” paper and graded on your use of message/theme, creativity, neatness, historical accuracy, explanation, and use of characteristics/techniques


- Biographies and Features
- Morgenthau Holocaust Project
- Timeline: FDR Day by Day
- Research the Archives
- The Pare Lorentz Center
- Student Resources
- Summer Activities
- Social Media
- Museum Visit
- Research Visit
- Field Trips & Group Visits
- Museum Store
- What is a Presidential Library
- The Roosevelt Story
- Events & Registration
- Press and Media
- Program Archives
- Search FRANKLIN
- Plan a Research Visit
- Digital Collections
- Featured Topics
- Morgenthau Project
- Teaching Tools
- Civics for All of US
- Resources for Students
- Distance Learning
- Teacher Workshops
- Field Trips
- NAIN Teachers Conference
- Activities at Home
- 75th Anniversary
- History of the FDR Library
- Library Trustees
- Tell Us Your Roosevelt Story
- Intern and Volunteer
- Donate TODAY!
- Ways To Give
- Get Involved
- Roosevelt Institute
- RI Annual Reports for Roosevelt Library
Create a Propaganda Poster
Web content display web content display, create a propaganda poster activity.
Posters are an eye-catching way to convey important information quickly and easily and can help remind people to be part of the solution in dangerous and trying times.
CATEGORY: Visual Arts, Research, Current Events, Writing
GRADE LEVEL: Elementary, Middle and High School
SUGGESTED TIME: 30-60 minutes
MATERIALS/RESOURCES REQUIRED: Paper, pencil, crayons, colored pencils, computer
DISCOVERY OBJECTIVES: To learn how simple images, colors and words can evoke powerful emotions, transmit complex information and inspire action, or inaction.
TAG US IN SOCIAL MEDIA: Post a picture of your work to social media with the hashtag #fdractivities
Historic Context:
America entered World War II as a result of the Japanese attack on Pearl Harbor on December 7, 1941. Millions of young men and women rallied to their nation’s defense by joining the armed forces, or taking to the machines of production back on the homefront. Some fought the war with machine guns, others with machine presses, but still others fought with pens, palettes and paint brushes as a great need arose to rally and inform every citizen that their help and cooperation was necessary to win the war.
The word was spread by powerful propaganda and information posters that appeared almost everywhere overnight. With eye catching colors and images, emotions like fear, patriotism and a call to duty were awakened in ordinary citizens. Other posters served as reminders to do everything from conserve gas, purchase war bonds to help finance the war, and to keep information secret. These posters made every person in the country an active part of fighting, and winning, the war.
To see examples of WWII posters, explore our digital artifact collection of posters from our 2018 special exhibition “ THE ART OF WAR: American Poster Art 1941-1945 ."
Activity Steps/Procedures:
- Wash their hands often
- Cover coughs and sneezes with their elbows
- Keep six feet of distance from others
- What colors would you use?
- What images would you draw?
- What words would you use?
- What emotions would your posters evoke?
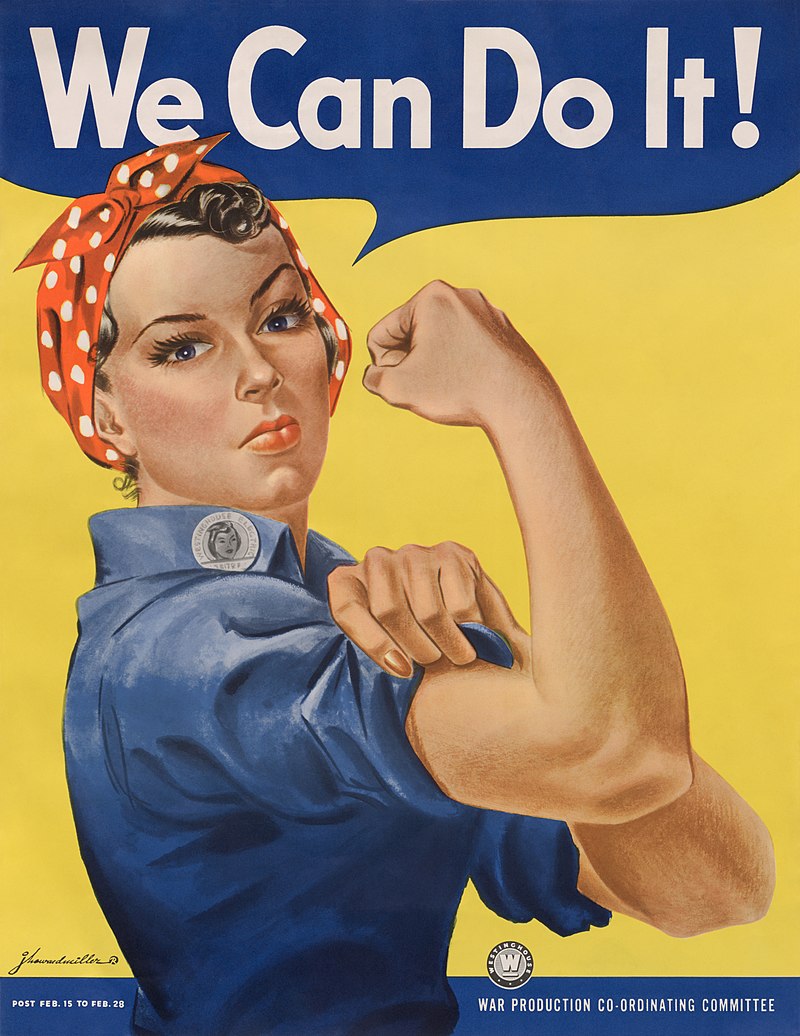
- What makes this such a powerful and inspiring poster?
- Why do you suppose the image of a woman is used and not a man?
- What feelings and emotions does the poster make you feel?
Questions to Consider:
questions to consider:.
- How do the propaganda/information posters we see around us today differ from those used during World War II?
- Why is it important for the government to share information and keep people informed?
- Why is it important for everyone to do their part in a national crisis?
A Step Beyond:
- What action is the poster designed to get people to do, or not do?
- Why would doing, or not doing, that action be important?
- What emotions does the poster stir up?
- What images, colors or words does it use to do so?

Mission Statement
The Library's mission is to foster research and education on the life and times of Franklin and Eleanor Roosevelt, and their continuing impact on contemporary life. Our work is carried out by four major areas: Archives, Museum, Education and Public Programs.
- Research the Roosevelts
- News & Events
- Historic Collections
- Accessibility
- Terms & Conditions
Module 10: World War II (1941-1945)
Assignment: wwii propaganda poster.
Step 1: To view this assignment, click on Assignment: WWII Propaganda Poster .
- Get Started
Learning Lab Collections
- Collections
- Assignments
My Learning Lab:
Forgot my password.
Please provide your account's email address and we will e-mail you instructions to reset your password. For assistance changing the password for a child account, please contact us
You are about to leave Smithsonian Learning Lab.
Your browser is not compatible with site. do you still want to continue.
Log In | Register
- Plan A Visit
- The Arsenal of Democracy
- Live Shows at BB's Stage Door Canteen
- Dining — The American Sector and Soda Shop
- Museum Campus
- Beyond All Boundaries
- Give to the Museum
- Capital Expansion
- Become A Member
- Name A Theater Seat
- Planned Giving
- Donate A Vehicle
- Donate An Artifact
- Corporate Sponsorships
- Donor Privacy Policy
- Honor Roll of Charter Members
- Brick Program
- Personal Tribute Pages
- Tribute Gifts
- $10 for Them
- Research A Veteran
- WWII Veteran Statistics
- Teachers & Students
- Public Programming
- Educational Travel
- Knit Your Bit
- Educational WWII Wargaming
- International Conference on WWII
- Speakers Bureau
- Family Activities
- Museum Blog
- Digital Collections
- WWII Yearbooks
- The Science & Technology of WWII
- The Classroom Victory Garden Project
- Kids Corner
- Past Speakers Archive
- Campaigns of Courage
- Liberation Pavilion
- Capital Campaign Donors
LESSON PLAN:
Winning over hearts and minds: analyzing wwii propaganda posters.
Propaganda played a key part in the United States’ war effort. Although much more subtle, propaganda was as much a weapon of the war as manpower and ammunition. In addition to the radio broadcasts, movies, and comic books, over 200,000 poster designs were produced during WWII by the Office of War Information (OWI), The Treasury Department, branches of the armed force, and recruitment bureaus. These groups used many propaganda types (fear, bandwagon, etc.) and many themes (conservation, recruitment, etc.) to win over the hearts and minds of Americans.
Objective: By examining propaganda posters from WWII students will increase their knowledge of propaganda tools and develop an understanding of the specific goals and strategies used by the U.S. government and OWI during WWII.
Grade Level: 7-12
Standards: History Thinking Standard 2—the student comprehends a variety of historical sources and appreciates historical perspectives as revealed through the arts.
Content Era 8 (1929-1945) Standard 3C—the student understands the effects of the war at home.
Time Requirement: One class period.
Download a printable pdf version of this lesson plan
Directions:
1. Distribute the following to students:
- Types of Propaganda Sheet
- Poster Analysis Sheet
- Student Worksheets
2. Using the "Types of Propaganda” sheet and the Propaganda Fact Sheet, have a brief discussion of the different types of propaganda. Make sure students are clear in their understanding of the types of propaganda before they begin their individual work.
3. Have students first complete the worksheets and then the poster analysis.
4. As a class, go over the gallery of posters and the analysis questions. Discuss any additional questions students may have about propaganda, the posters, or WWII.
Assessment:
Assessment will include class discussion, completed worksheet, and poster analysis questions.
Enrichment:
Have students create a WWII era Propaganda Poster or a poster for a current social/political issue. Students may also write a research paper on WWII Propaganda or research WWII posters further and give a presentation to the class.
Poster Gallery for Discussion:
Directions: After choosing a poster, examine it carefully and answer the following questions.
1. For whom is this poster intended?
2. What is the poster trying to get the audience to do?
3. What is the theme of the poster?
4. What symbols, key words or well known images are used?
5. Is the use of the symbol/image/word successful?
6. What is the emotion conveyed by the poster?
7. How would you change the image to make it more powerful?
8. What type of propaganda does the poster use?
9. How successful do you think this poster was during WWII?
10. Would a similar image have the same impact in today’s society? Why or why not?
About the Posters
Poster One—(Bandwagon): The poster encourages everyone join the war effort-to build arms for victory.
Poster Two—(Fear): The poster shows children in the shadow of the Nazis. If you do not buy war bonds-the Nazis will come for your children (fear).
Poster Three—Euphemism and Fear: The poster shows a sailor dead on the beach-but his death is called a “loss.” The poster also uses fear as a motivator for not speaking out of turn.
Poster Four—Glittering Generalities: The poster shows a women canning food and supporting rationing. It is “patriotic” to do these things (it is a glittering generality because patriotic means different things to different people).
Poster Five—Transfer: The poster shows men fighting in the American Revolution and WWII. If you believe that the Revolutionary War was necessary (for liberty) then of course you should fight in this war (for liberty). The poster transfers the importance of and reason for the American Revolution to WWII.
Poster Six—Testimonial: The poster shows Santa telling everyone to buy war bonds. There are few more recognizable images then Santa. Children and adults would have recognized the image.
Back to Main
TAKE ACTION:
Education projects:.
- ABOUT THE MUSEUM
- SPECIAL EVENTS
- PRIVACY POLICY
The National WWII Museum tells the story of the American Experience in the war that changed the world - why it was fought, how it was won, and what it means today - so that all generations will understand the price of freedom and be inspired by what they learn.
Sign up for updates about exhibits, public programming and other news from The National WWII Museum here.
945 Magazine Street New Orleans, LA 70130, Entrance on Andrew Higgins Drive PHONE: (504) 528-1944 - FAX: (504) 527-6088 - EMAIL: [email protected] | Directions
Skip to Main Content of WWII
A lesson in wwii propaganda posters.
The Museum's collection of wartime posters inspires Iowa students to draw their own.

The National WWII Museum strives to help teachers explore the history and lessons of World War II with their students. Using an object-based learning experience, educational technology, and its world-class exhibits, artifacts, archives, and oral histories, the Museum takes history beyond the pages of textbooks and into the hands of curious students .
Recently, one teacher used Museum resources related to WWII propaganda posters to take a lesson a step further by turning it into a hands-on, student-created art project. Andrew Bouska and Nick Nelson, teachers at Ankeny High School in Ankeny, Iowa, showed examples of WWII Allied propaganda posters to his students before challenging them to design posters using their own original ideas and slogans. Bouska mailed copies of his student’s artwork, several examples of which are presented here.
The National WWII Museum always loves to see how teachers and students are using its lesson plans, resources, and materials. If you are using WWII history in your classroom in unique and exciting ways, please email us so that we can share your good work in making history come alive: [email protected].
Among the participating artists: Kassidy Adams, Kiana Baccam, Joya Cleven, Hallie Evans, Carly McCoy, Riley Owen, Samantha Parr, Katelyn Schaeffer, Maddi Schulte, Alyssa Smith, and Bre Steim.

Explore Further

Keep in Touch: Letters of Hope
During this webinar, Linda Hope, daughter of Bob Hope, and The National WWII Museum will discuss her father’s legacy by examining some of the letters he received, emphasizing how this translates to current classrooms and how letter writing can still make an impact on active military communities today.

The History of European Antisemitism
Learn about the origins, evolution, and persistence of antisemitism in European history. In this webinar, teachers will gain the knowledge and resources needed to help students better understand the trajectory and development of antisemitism.

The 320th Barrage Balloon Battalion: The African American Heroes of the D-Day Invasion
Students will learn about the brave men of the 320th Barrage Balloon Battalion and their extraordinary mission to help protect US soldiers during the D-Day Invasions on June 6, 1944.

S. Neil Fujita: Cover To Cover
S. Neil Fujita was an American citizen born to parents of Japanese American ancestry. Like more than 120,000 other Japanese Americans, Fujita and his family were forcibly relocated and incarcerated during World War II.

Tinkering with Found Objects: A STEAM Webinar
Learn about the story of Edwin Nye, an American Prisoner Of War held by the Japanese during World War II and later the father to Bill Nye “The Science Guy.”

The Holocaust: One Teen's Story of Persecution and Survival
Hear personal recorded testimony from Eva Schloss, the stepsister of Anne Frank and survivor of Auschwitz.

STEM Innovation: from the Computer to Artificial Intelligence
World War II was the catalyst for many technological advances, including creating the world’s first computer—an invention that has revolutionized the world we live in.

Development of Drugs and Vaccines: Lessons from World War II
As the world implements a vaccination program for Covid-19, we can look to WWII history to learn more about the process.
How to Design an Impactful Propaganda Style Poster
Hello all! Simon here for today’s tutorial. The gigantic vector element bundle is a super exciting bundle for me, and it’s all because of Shepard Fairey . I promise this statement will make sense in a few seconds.
After going through the bundle’s content, I decided to create a propaganda style poster. Elena Pimonova’s various iconic elements are perfect as a source of simple, high impact iconography, and the various patterns by Dreaming Lucy are a superb nod to the OBEY aesthetic .
WHAT WE’RE CREATING:

GETTING STARTED
The idea was born when toying with the patterns. I remembered this awesome tutorial from the GoMediaZine that Jeff Finley wrote a long while back.

From there, I looked up a bit of inspiration :

The best piece though was this old booklet by ConEd about atomic energy. It’s so good I’ve used it as a my color palette source.

Our work will take place in Illustrator. I wanted to see if I could find ways to replicate some of my texturing processes and effects in there rather than Photoshop. We’ll make a heavy use of opacity masks, and to a lesser extent of clipping masks . Opacity masks work the same way than layer masks do in Photoshop: black is transparent, white is opaque, and the grays in between provide various degrees of transparency. I’d like to suggest a bit of quick reading before you jump into the tutorial with me:
- Opacity Mask Basics: Illustrator (via Bittbox)
- Use opacity masks to create transparency (via Adobe)
- Opacity Masks (via Shutterstock)
Also, I’ve primarily used the freebie area’s High Resolution Dirty Textures for most of my worn effects. You should have these close-by, they’ll highly helpful. Note that you could use any grunge texture pack of your choosing. You just won’t have the same effects I do.
All set and done? Let’s get to it!
STEP 1: DOCUMENT SETUP
No mysteries here. We’re working in an 18″x24″ canvas. Since we’re working in vectors, PPI/DPI don’t matter too much, although I’d stay at 300 dpi if I were you. Also, CMYK colors will make your pre-press people and printer happy.

Let’s add some guides to help us place all the elements later in the design process. Vertically, I have guides at 1″, 2″, 9″, 16″, and 17″ . Horizontally, I have guides at 1″, 2″, 12″, 22″, and 23″ .

STEP 2: LET’S TALK COLORS
Before we actually start designing, we need to focus on color first. Remember the ConEd booklet cover spread?
I’m going with the same color palette than the front cover: dark blue, yellow, and faded orange. The paper will provide us with a fourth, off-white, color. I’m also going to follow the dark background/light and/or contrasting design elements scheme.
My colors are as follows:
- Dark blue: #272C39
- Yellow: #F0C237
- Pale orange: #CD7B55
- Off-white: #EBE1BD

Create a dedicated layer for the color palette (and the cover image if you’d like). I’ll also use that layer to store the pattern tile and the other building blocks for the poster as I progress. Leave it locked, unless you need to select, copy, and paste elements from it.

STEP 3: THE BACKGROUND
Color sandwich.
The background’s rough edge effect is obtained through a clipping mask. Start by creating a rectangle (covering the full canvas) for the off-white part ( #EBE1BD ) of the background.

Don’t forget the dedicated layer group, and the proper layer naming practices and etiquette.

Next, add another 18″x24″ rectangle on top of it, dark blue this time ( #272C39 ).

Next, we need to create the rough edge around the blue rectangle, so the off-white one shows through. We’ll be using one of Ember Studio’s Grunge banners & boxes to accomplish it.
First, navigate to ember-studio\grunge-banners-and-boxesgrunge-boxes.ai . You can see that the boxes are made of shapes, overlayed with splatters and other grunge elements.

I’ve highlighted the shape we’ll be using below.

Start by duplicating the element ( CTRL/CMD+C , then CTRL/CMD+F to paste it in place), and drag it aside for a bit of tweaking. I’ll be doing these tweaks straight into Ember Studio’s document, but feel free to bring the shape back into the Resources layer group of your main canvas instead (unlock it first!).

The shape doesn’t have the proper aspect ratio for our canvas, features a dark gray grunge pattern of sort, and features some distracting ink splatters at the top that we’ll remove.
Start by ungrouping the interlocking pieces ( Right click menu > Ungroup or SHIFT+CTRL/CMD+G ).

Delete the dark gray pattern.

With your direct selection tool ( A ), delete the little splatters that are a bit far from the general shape.

Once the shape is cleaned to your taste, rotate it clockwise 90° .

This is where the magic happens: we’re going to size it so it’ll be an appropriate layer mask for our final piece. Start by assigning it a size of 17″x23″ . Make sure the little chain link between the dimension box is inactive, in order to be able to give the shape a new aspect ratio.

From there, copy and paste the transformed shape into your main document. It should be above your blue rectangle, and centered within the canvas.

If you pay close attention, the shape is slightly off-centered, due to the ink drops at its top right.

I fixed this by turning the guides back on, and manually adjusting the shape’s main outline on the guides closest to the canvas border. This gave me a final size for the shape of around 17″x22.15″. Tweak this to your liking.

Once the shape is size and placed to taste, it’s time to actually create the clipping mask with it. Select both the black shape and the blue rectangle.

Proceed to Right click > Make clipping mask .

Ignore the potential warning.

And we have ourselves a rough-edged background.

After a little bit of cleanup and renaming, my layer palette looks like this:

Patterning it up
It’s finally time to add one of Dreaming Lucy ‘s pattern. Grab your favorite from her collection. I’m using the following tile from dreaming-lucy\72_vintage_seamless_patterns\Vector\Vintage_seamless_patterns.ai . The color you grab it in doesn’t matter, as we’re going to change it anyways.

Copy and paste the tile in your Resources layer group .

Ungroup it ( SHIFT+CTRL/CMD+G ), and delete its background. Proceed to change the color to our off-white ( EBE1BD ). Make also sure it’s sized at around 2″x2″ . The size of the tile will determine the scale of the pattern.

When happy with the size of the tile and its color, simply drag and drop it into your Swatches palette .

Next, create a 22″x28″ rectangle , centered on your canvas. It should be placed above your Blue rectangle clip group . Select the pattern swatch we created just before as its fill, and boom, a pattern-filled rectangle happens. Note: reuse at will on any other shape, with any pattern tile.

You’re probably wondering why we created a host rectangle for our pattern that’s bigger than our canvas. This question will be answered now: we’re going to rotate the pattern to give it a bit of dynamism. I’m using an angle of 6° .

This is shaping up nicely, but I have an issue. The pattern tile is too small compared to my canvas, and is overwhelming.

To fix it, let’s double the size of the pattern rectangle. Mine went from a height of around 30″ to 60″ , which gives a much nicer result. Feel free to move the rectangle around a bit for any desired alignment effects.

Next, we’re going to hide all the excess pattern that overflows the canvas. Above the pattern-filled rectangle, create a canvas fitting rectangle. Its color doesn’t matter.

Select both that newly created rectangle and the pattern one, and create a clipping mask.

And here’s our result: a neatly patterned background.

After a bit of cleanup in the layers, here’s what my palette looks like:

STEP 4: THE FIRST OPACITY MASK
My background looks better: the big tile helps it to breath and not feel too intense. But it’s still very present. In order to fix this, we’ll use one of the dirty texture from the freebie area. The pack offers 7 textures. I’ll be using Dirty4 in this case.

The process is somewhat similar to the one of pasting a texture in a layer mask when using Photoshop. Start by placing the texture above the Pattern clip group ( File > Place or SHIFT+CTRL/CMD+P ). Size at will. Note that my texture is centered in the canvas, and sized at 18″ wide .

Proceed to select both the texture and the Pattern clip group .

From there, head to the Transparency palette ( SHIFT+CTRL/CMD+F10 ). Hit that Make mask button.

The result is a faded pattern, much like if we had pasted a texture in a layer mask in Photoshop.

Not happy with the placement of the grunge fades? You can move the texture around. Make sure that the textured elements are selected, and head back to the Transparency panel . Select the layer mask, deactivate the chain link, and move the texture around or transform it at will.

Here’s my final texture placement.

STEP 5: TYPE
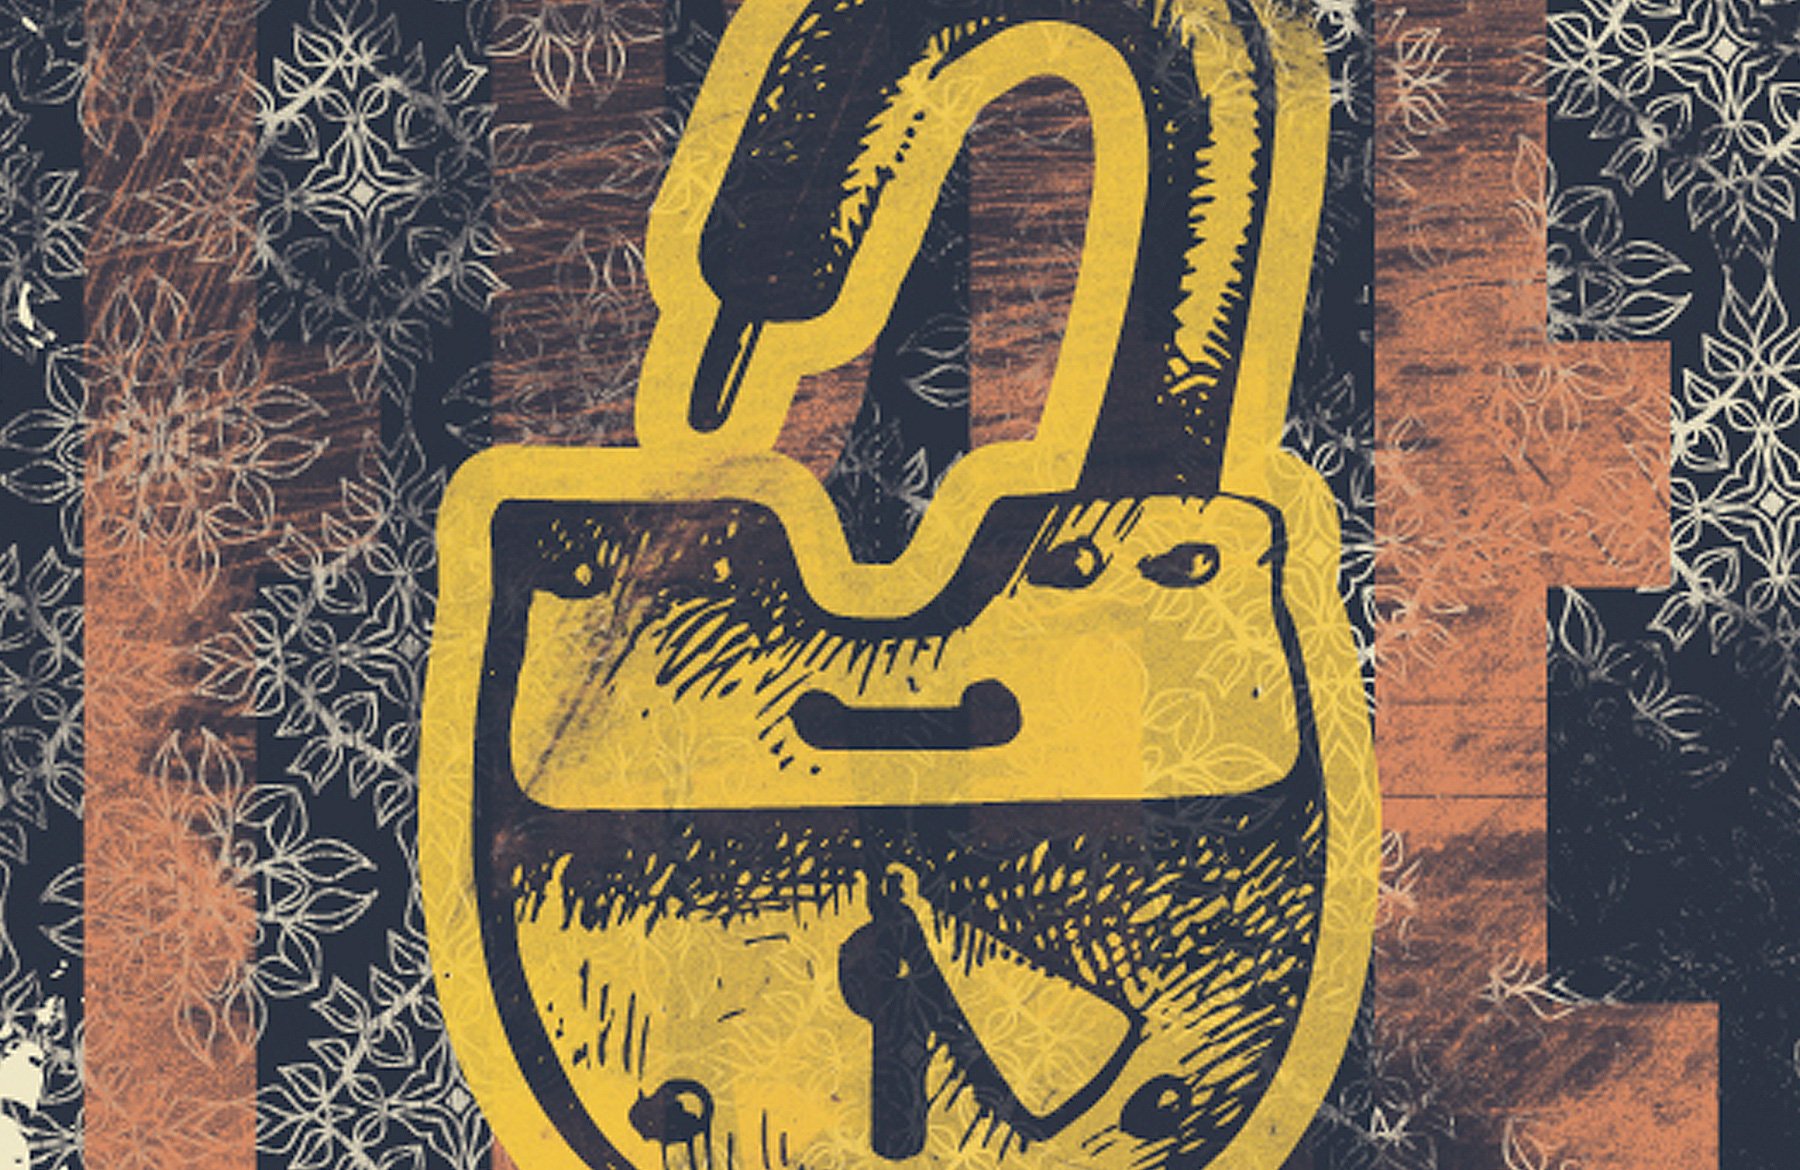
My wife and I marathon-ed through the Matrix movies recently. One of the taglines for the series was “ Free you mind .” This taglines is what motivated the use of the lock and key as main iconography for the poster. The type is heavily faded in the background, kind of like a ghost.
Since I wanted my type piece to be very big in the canvas, I chose a condensed industrial sans-serif as my typefaces. After trying a few, I ended up going with League Gothic Condensed . Its letter forms are very elegant, yet posess a bit of that industrial ruggedness.

I wrote my copy on 2 lines: “ Free / your mind ,” all in uppercase. “Free” is sized at 1296 points , and “your mind” at 537 points . Both elements’ kerning is set to Optical . Their color is our pale orange ( #CD7B55 ). Finally, the type block is visually centered at the center of the canvas.

In order to fade the type piece in the background of the piece, I’ve used the Dirty4 texture again, although sized and placed differently.
Place the texture in the file again. Make sure it covers the canvas.

Select the type and texture, and make it a transparency mask . In this specific instance, one of the texture’s most interesting characteristics is its heavily scratched zone at the top.

The result is visually striking, but still a bit strong.

Hit the Invert mask check box in the transparency panel. This inverts the content of the mask, and, in our case, makes for a stronger fading effect.

And our type piece is done! Time to switch to iconography.
STEP 6: ILLUSTRATIVE ELEMENTS
Which ones are we using.
As stated before, the illustrative elements of our poster are to be found in Elena Pimonova’s hand drawn lock and key set. Navigate to elena-pimonova\Keys-And-Locks-Set\Keys & Locks set.eps .
I chose the open lock in reference to the poster’s tagline. The key got picked because it was the one looking the simplest, and most fitting for the lock.

We’ll have to prepare the lock and the keys a bit before we can use them in the design. Most importantly, we’ll need to give them a background color, and an outline. Start by copying the elements to your Resources layer group .

The main piece
We’ll start with the lock. Start by creating a pasted in front copy ( CTRL/CMD+C – CTRL/CMD+F ).

Lock your top copy.

Now, select the bottom copy and change its color to our yellow ( #F0C237 ).

Next, head to Object > Path > Offset path , and apply the following settings:

Select all the yellow lock, and merge its various bits and pieces together with the Pathfinder .

We almost have a complete solid color in the background. Use the pentool or the blob brush to fill the holes.

Once the holes are filled, merge the yellow background together once more.

Once the process is completed, place the lock’s background behind our earlier copy. Change the lock’s color to our blue. The lock is ready.

The key is next. Actually, we’ll have a pair of keys, but that’s not a concern right now. Follow a similar process to give the key a background, and the same path offset value. This is important for visual consistency.

Placing the elements in our composition
Propaganda posters are simple and straight to the point. Hence my very simple composition: the lock centered, with a pair of keys underneath.
Start by creating a new layer for our visual elements, and transfer them in there. By the way, have you kept your layers organized so far?

I’ve resized my lock to be 13″ tall . It’s currently centered in the canvas.

Let’s create that pair of keys. I almost wanted to do a blue one and a red one, but the limited color palette of the poster didn’t work too well for that.
In order to add a little dynamism in the piece, I’ve given my key a -30° angle.

Place the key under the lock. Their proportions don’t match very well.

Now’s the perfect time to adjust that. My key is now close to 5″ wide .

It’s time to create the key’s mirrored twin. Simply select both the key and its background, and head to Right click > Transform > Reflect .

Don’t forget to hit the Copy button instead of OK to get Illustrator to automatically duplicate the key in the new orientation.

Visually space the keys to form a centered, supporting banner-like element for the lock. The space left between the two keys could be the same than the one left between the side curves of the lock and the top of the keys.

Once you’re satisfied with your alignments, simply center the whole block of visual elements within the canvas.

Finishing touched
As for the type, we’re going to fade our lock and keys a bit with our set of dirty textures. The goal is to be a bit more subtle with our effect though, as we don’t want the main pieces of the poster to be obliterated to oblivion.
First, the lock. We’ll be using the less grunge, more noisy area of Dirty3 .

Start by placing it in the canvas.

Here’s a view of it in place. I’ve rotated it 90° clockwise . I’ve also lowered its opacity so you can better understand its placement compared to the lock.

Once the placement suits you, proceed as we did earlier to fade the lock a bit.

Finally, the keys are the last piece of the puzzle left. We’re going to use the big noisy part of Dirty1 to wash them out a bit.

And we’re done! Have a look:
WRAP UP THOUGHTS
Well, this is the end of another tutorial. I hope it helped you guys learn a few new techniques to play with textures in Illustrator, as well as get a taste of OBEY-style propaganda art.

I hope you had as much going through the tutorial as I had writing it. Don’t hesitate to share your outcomes on the Design Cuts Facebook page . Was there anything unclear? Ask questions in the comment section, or ping me on twitter: @simonhartmann .
Remember, there’s just a few days left to grab the Gigantic Vector Elements Bundle for 91% Off. This collection features hundreds of best-selling vectors, including all of those featured in today’s lesson. This is your last chance to get the entire bundle before it expires:
The Gigantic Vector Elements Bundle (91% Off)
Share this article
Keep learning.

6 lovely comments from our community
Just thank you so much for this incredible tutorial!
Hey Gustavo,
Thank you so much for your comment!
You are so welcome, I really hope that you have enjoyed following this one and that you have picked up some new tips or tricks too :)
I have loved this art style for so many years. Thank you for posting this wonderful tutorial!
That is great to hear, Loren! I’m so pleased to hear you loved this tutorial :)
This was unhelpful
Thank you so much for your comment and I’m so sorry to hear this tutorial was not helpful for your specific projects. If there is anything that you are looking to learn in particular please do not hesitate to let us know, and if we do not have a tutorial on this already, we can certainly see if we can include this in future for you Ted :)
Leave us a comment Cancel reply
Your email address will not be published. Required fields are marked *
- Terms of Use
War News | Military History | Military News
Create your own wwii style propaganda poster online.
- War Articles
We are proud to bring you the Keep Calm-o-matic.
Just enter the pithy saying of your choice, choose a few simple options, and before you can say ‘coalition government’ you’ll have your very own Government-approved motivational slogan. You can enter up to five lines of text. The middle line (line 3) is in a smaller font to the other lines. The default values have been chosen to match the original ‘keep calm’ poster as closely as possible.
Have a go here www.keepcalm-o-matic.co.uk
propaganda poster activity
All Formats
Resource types, all resource types.
- Rating Count
- Price (Ascending)
- Price (Descending)
- Most Recent
Propaganda poster activity

WWII Propaganda Posters Activities and Project Print & Digital

- Google Apps™

WORLD WAR 1 Propaganda Posters Analysis Cooperative Activity - Print & Digital

WWI Propaganda Poster Activity

- Word Document File

5.20 WWII Propaganda Poster Analysis Activity with PowerPoint

Propaganda Poster Activity
Progressive Era Propaganda Poster Activity

Propaganda Poster Activity Template and Rubric

World War I Propaganda Poster Project - Engaging Historical Activity

- Google Docs™

APUSH & US History - Analyzing World War I Propaganda Posters PPT Activity - WWI
Propaganda Poster Project - Propaganda Poster Activity

WWI Propaganda Poster Stations Activity

WWI: American Home Front and Propaganda Poster Activity

A Global Conflict Propaganda Poster | World War I | Digital Learning Activity

- Google Drive™ folder

Russian Revolution Create a Propaganda Poster Activity

Animal Farm Propaganda Poster & Speech Activity

America Enters World War One (I) Propaganda Poster Activity (Google Comp)

- Internet Activities

Propaganda Advertisement Project - Poster , Film, Creative Activity , AP Language

World War I Propaganda Poster Worksheet w/ Poster Activity
APUSH & US History- Analyzing World War II Propaganda Posters PPT Activity - WWII

Propaganda Techniques Activity | Analyze Nazi Posters Mini-Lesson | Paragraphs

Propaganda Poster & Essay Activity - World War I -updated 2023
WWI Culminating Activity - Trench Letter or Propaganda Poster

World War 2 (WW2) Propaganda Poster Activity Worksheet

WWII Propaganda Poster Design Elements Analysis Activity
- We're hiring
- Help & FAQ
- Privacy policy
- Student privacy
- Terms of service
- Tell us what you think
- My Storyboards
Propaganda and Animal Farm
In this activity, activity overview, template and class instructions, more storyboard that activities.
- This Activity is Part of Many Teacher Guides

As students read Animal Farm , they may find it helpful to analyze propaganda both as a technique used in history, and also in the novel, as the use of propaganda is essential to both the revolution on the farm and Napoleon's takeover.
After discussing what propaganda is, students can select examples of propaganda, such as one of Squealer's speeches, and create a poster that could have been hung somewhere on the farm. The posters should not have to directly quote any speeches, but students will want to draw imagery and inspiration from them, and they should be able to explain their choices of rhetoric.
If you'd like to extend the activity to connect with history, students can research propaganda from the Russian revolution and adapt it to the Animalism movement of Animal Farm .
For additional templates to add to this assignment, check out our poster template gallery .
(These instructions are completely customizable. After clicking "Copy Activity", update the instructions on the Edit Tab of the assignment.)
Student Instructions
Create a propaganda poster for Animal Farm .
- Click "Start Assignment".
- Identify an example of propaganda in Animal Farm .
- Using appropriate text, images, and scenes, create a poster for your chosen example.
- Save and exit when you're done.

Lesson Plan Reference
Grade Level 9-12
Difficulty Level 3 (Developing to Mastery)
Type of Assignment Individual
Type of Activity: Propaganda
- [ELA-Literacy/RL/11-12/3] Analyze the impact of the author’s choices regarding how to develop and relate elements of a story or drama (e.g., where a story is set, how the action is ordered, how the characters are introduced and developed)
- [ELA-Literacy/RL/11-12/4] Determine the meaning of words and phrases as they are used in the text, including figurative and connotative meanings; analyze the impact of specific word choices on meaning and tone, including words with multiple meanings or language that is particularly fresh, engaging, or beautiful. (Include Shakespeare as well as other authors.)
- [ELA-Literacy/W/11-12/4] Produce clear and coherent writing in which the development, organization, and style are appropriate to task, purpose, and audience. (Grade-specific expectations for writing types are defined in standards 1–3 above.)
- [ELA-Literacy/W/11-12/6] Use technology, including the Internet, to produce, publish, and update individual or shared writing products in response to ongoing feedback, including new arguments or information
(You can also create your own on Quick Rubric .)
How To Analyze the Use of Figurative Language in Conveying Propaganda
Choose a reading, identify the propaganda, spot figurative language, analyze the persuasiveness of the language, reflect and discuss, frequently asked questions about propaganda and animal farm, how does "animal farm" employ propaganda, what impact does propaganda have on the farm's animals, animal farm.

Try 1 Month For
30 Day Money Back Guarantee New Customers Only Full Price After Introductory Offer
Learn more about our Department, School, and District packages

- Thousands of images
- Custom layouts, scenes, characters
- And so much more!!
Create a Storyboard
IMAGES
VIDEO
COMMENTS
A lesson plan for 12th grade students to create their own propaganda posters on topics related to World War I. Students will view examples of WWI propaganda posters and learn about their message, effectiveness, slogans, and tools. Students will also discuss the role of propaganda in the war effort and evaluate their own poster creation.
2. Choose one of the following WWI propaganda poster topics: • Buying victory bonds • Saving/conserving food • Joining the army • Demonizing the enemy • Women and the war effort 3. Create a slogan or wording to support the ideas of your poster. 4. Create a design for your poster. • Your poster should a standard 8.5 x 11 piece of paper.
posters that encouraged people to join the Army and Navy, to not waste food, to volunteer their time, and to help pay for the war by buying War Bonds. Many posters encouraged people to Get in the Scrap. These posters are known as propaganda posters. MATERIALS + WWII propaganda poster examples + Paper + Art supplies: markers, colored pencils,
Students will create a product: modern-day propaganda poster. Closure: Students will upload their work to a class blog. They will create a self-reflection blog post, as well as a critical response to three other class members' posters. They will also provide three responses to a class member who has commented on their own work.
Create a Propaganda Poster Activity. Posters are an eye-catching way to convey important information quickly and easily and can help remind people to be part of the solution in dangerous and trying times. CATEGORY: Visual Arts, Research, Current Events, Writing. GRADE LEVEL: Elementary, Middle and High School. SUGGESTED TIME: 30-60 minutes
Module 10 Assignment: WWII Propaganda Poster. For this assignment, you will review WWII propaganda posters and create a poster of your own. Step 1: Review the WWII propaganda posters in the National Archives and the FDR Presidential Library and Museum. Be sure to focus on those from World War II. Look for dates or other cues as to the time ...
Microsoft Word - 4-a-4-all_e.doc. Description: In this lesson, students learn to analyze some basic propaganda techniques. Students will look at the way images and words are combined to create effective propaganda messages. Students will demonstrate their understanding of this by creating their own First World War propaganda poster.
In 1942 President Franklin Roosevelt created the Office of War Information to distribute and control pro-American propaganda during World War II. To accomplish this goal the Office of War Information recruited Hollywood movie studios, radio stations, and the print media. In a general sense, the goal of this effort was to promote hatred for the ...
Assignment: WWII Propaganda Poster. Step 1: To view this assignment, click on Assignment: WWII Propaganda Poster. Step 2: Follow the instructions in the assignment and submit your completed assignment into the LMS.
The Committee of Public Information formed by George Creel and other propaganda-producers used advertising techniques from businesses to make appeals to the average citizen and encourage them to make a difference. This assignment will ask you to connect each piece of propaganda to one of four major goals of the U.S. government during the war ...
Discuss any additional questions students may have about propaganda, the posters, or WWII. Assessment: Assessment will include class discussion, completed worksheet, and poster analysis questions. Enrichment: Have students create a WWII era Propaganda Poster or a poster for a current social/political issue.
Step 1. With your photos prepared, you're ready to make a start on creating your own propaganda poster. Go to File > New Document. From the options along the top of the screen, choose Print . We'll create the poster at a standard size of 24 by 36 inches. However, we will need to accommodate a bleed width too.
This resource includes 8 WWII propaganda posters and a graphic organizer handouts for students to complete as they examine each poster. The chart asks for information such as symbols/wording and to describe the overall message of the poster. There is an added assignment with instructions for students to create their own propaganda poster.
As a final project, students created their own posters using a propaganda strategy from Animal Farm, and they wrote artist statements explaining their creative choices. As you examine the posters, it may be useful to read through our list of propaganda techniques to understand the visual strategies that students are using.
Recently, one teacher used Museum resources related to WWII propaganda posters to take a lesson a step further by turning it into a hands-on, student-created art project. Andrew Bouska and Nick Nelson, teachers at Ankeny High School in Ankeny, Iowa, showed examples of WWII Allied propaganda posters to his students before challenging them to ...
of support they need. Depending on the time available, you may choose to distribute fewer posters or assign some for work outside of class. 4. Discuss different interpretations developed by the students or student groups. Ask the students to consider how effective these posters were as propaganda, playing on the emotions of the viewers in wartime.
Propaganda is information or ideas used to promote or injure a cause, movement, nation, etc…Your assignment is to create a propaganda poster or pamphlet related to World War I, the current war against terrorism, an aspect of life at West Forsyth, or some other (approved) topic. Think of an appropriate slogan or quote.
Start by assigning it a size of 17″x23″. Make sure the little chain link between the dimension box is inactive, in order to be able to give the shape a new aspect ratio. From there, copy and paste the transformed shape into your main document. It should be above your blue rectangle, and centered within the canvas.
Create your own WWII Style Propaganda Poster Online. We are proud to bring you the Keep Calm-o-matic. Just enter the pithy saying of your choice, choose a few simple options, and before you can say 'coalition government' you'll have your very own Government-approved motivational slogan. You can enter up to five lines of text. The middle ...
Do NOT copy and paste a poster from online onto your poster. If you do, you will receive a ZERO for this assignment! You will not be graded on your ability as an artist, but rather your ability to create an interesting, visually appealing, and meaningful propaganda poster. This project must be completed individually.
Zip. This resource includes 8 WWII propaganda posters and a graphic organizer handouts for students to complete as they examine each poster. The chart asks for information such as symbols/wording and to describe the overall message of the poster. There is an added assignment with instructions for students to create their own propaganda poster.
For additional templates to add to this assignment, check out our poster template gallery. Copy Activity* Template and Class Instructions ... Create a propaganda poster for Animal Farm. Click "Start Assignment". Identify an example of propaganda in Animal Farm. Using appropriate text, images, and scenes, create a poster for your chosen example. ...