Presentation font size: Dos and don’ts
- Categories: PowerPoint design , Google Slides
- Comments: 1

It’s no secret that at BrightCarbon we generally recommend keeping text on slides to a minimum . The main reason you need to avoid lots of text in presentations is because it’s virtually impossible to read and listen to someone speaking at the same time. In a presentation, you want to allow the audience to listen to the presenter while looking at an appropriate visual or diagram with minimal words, so that it all comes together seamlessly. Whereas, with documents like reports – while you can create them in PowerPoint – they aren’t presentations; there won’t be anyone talking over them. So you can (and possibly should) have a lot more text.
So, when you are using text in a presentation or document, how do you decide what size it should be? We’ve found there’s no hard-and-fast rule for how big or small text on slides should be. Each presentation has its own unique requirements – it all depends on what you’re using the slides for, what you’re hoping to achieve with them, and how your audience will be viewing them. Accessibility considerations also come into play, as well as readability across different typefaces and devices.

Determining appropriate text size
One way to decide on the right size for your text is to consider the height of each line of text in proportion to the total height of the slide . For example, in a sales or training presentation, the height of the title (per line) should take up approximately 4% of the slide’s total height; headers around 3%; and copy text around 2%.

This principle can be applied to text appearing in other types of presentation, too. For example, in a keynote presentation, the height of the text should take up around 6.5% of the slide’s total height. And in a document or report, aim for the height of the title text to take up around 4% of the slide’s total height; headers around 3%; and copy text around 1.5%.
When deciding on the right font size for a face-to-face presentation, it’s also worth considering how close audience members should be seated to the screen in order to be able to read the text easily. Check out presentation expert Dave Paradi’s table on comfortable viewing distances for text in presentation visuals [1] for more on this.
Our text size recommendations
We called upon our team of designers to determine what size they would make the text in a set of example slides. To create the slides, we used PowerPoint’s default widescreen slide size (19.05cm x 33.86cm, or 7.5”13.33”), and Arial – one of the most commonly used fonts.
The examples covered three different use-cases where text is sometimes used:
- A sales or training presentation. Small amounts of text can be used to point out key features and emphasise value and benefits.
- A keynote presentation. You want the audience to focus on the presenter during a keynote presentation, so the amount of text on each slide should be kept to a minimum. This means any text you do use can be much larger.
- A document or report. Text can generally be slightly smaller in stand-alone, static documents like reports, as readers will jump around the page to find the information they’re looking for.
Based on our team’s responses, we’d make the following recommendations:
Use-case 1: Presentation font size for a sales or training presentation
Top tip : As a general rule, aim to keep the number of different font sizes you use across your presentation to a minimum – ideally, no more than three different sizes per slide. And try to use font sizes consistently. For example, if you’ve used 20pt for headers on one slide, make sure headers on other slides are the same size.
Use-case 2: Presentation font size for a keynote presentation
Top tip : If you’re also using text labels or callouts in a keynote presentation, then make sure the font is slightly smaller than the rest of your text – ideally no smaller than 28pt.
Use-case 3: Font size for a document or report
Top tip : It’s also worth using visual hierarchies to help readers navigate documents like these – check out our blog post for tips on how to do this.
Hopefully, our recommendations help you to decide what size text on your slides should be. Remember, every presentation is different and will have its own individual requirements – for guidance on your particular use-case, get in touch and we’ll be happy to look over your slides. And if you want more help with upping your sales presentations’ font game, have a read of our article packed with typography tips and tricks!
[1] PARADI, D. 2008. Comfortable Viewing Distance for Text on Presentation Visuals [online]. Available from: https://thinkoutsidetheslide.com/wp-content/uploads/2012/08/ViewingDistanceTable16x9.pdf [Accessed 14 November 2022].
Related articles
Mastering high-impact conference presentations.
- PowerPoint design / Visual communication
Conference presentations are really hard to get right compared to day-to-day presentations. How do you tackle bigger stages, bigger rooms, bigger audiences and higher stakes?

Insights from a presentation templates expert
- PowerPoint design / Industry insights
A PowerPoint template is the foundation on which polished and professional presentations are built. We interview BrightCarbon’s new Templates Lead, Gemma Leamy, and pick her brains on the ideal process for creating robust PowerPoint templates.

115 PowerPoint Christmas cards to download and share!
- PowerPoint design
- Comments: 45
It's Christmas! After a late night with too much eggnog and brandy snaps we set ourselves a challenge to see who could come up with the wildest PowerPoint Christmas card! So it's the day after the night before, and through blurry eyes we can reveal our efforts...

thank you so much that was helpful
Leave a Reply Cancel reply
Save my name and email in this browser for the next time I comment.
Join the BrightCarbon mailing list for monthly invites and resources
BrightCarbon creates compelling visuals and storylines, helping us to convey value in a fiercely competitive marketplace. Neil Davidson Deltek

- Locations and Hours
- UCLA Library
- Research Guides
- Research Tips and Tools
Poster Presentations
- Size, Layout, and Text
Elements of a Poster
Change size in powerpoint, using the ruler, grid, and guides in powerpoint, more powerpoint training, template resources, font choice, text alignment.
- Colors and Images
Your poster should include these elements:
- Author(s), with affiliations and emails
If your poster is a representation of a research study, you will want to include the following sections:
- Introduction or objective
- Conclusions and/or discussion
- Acknowledgements
If your poster is a representation of an event or other kind of project, you may want to forego formal abstract sections in favor of the 5 Ws:
- Who (introduce the author, organization, or community)
- What (what did you do? how did you do it?)
- Where (where did you do it?)
- When (when did it take place?)
- Why (what are the outcomes, implications, or future possibilities?)
To change the size in Powerpoint:
- Go to the Design tab and choose "Slide Size" (it's on the right size of the ribbon)
- Choose "Custom Slide Size"
- Change "Slides sized for:" to "Custom"
- Fill in your desired width and height.
Click the View tab to see checkboxes that will allow you to turn on the Ruler, Grid, and Guides (click the image below to see a screenshot).

Ruler : Allows you to see the dimensions of your slide. You'll see a vertical and horizontal ruler.
Grid : By default, the gridlines are 1 inch apart. Right click in white space of your poster to get more options for spacing. This enables precise alignment.
Guides : By default, you'll get one horizontal and one vertical guide placed in the center of your poster. Right click on a guide to add more guidelines, or to delete one. You can use Guides to invisibly define columns of your poster, margins, and more. This gives you manual control, alternatively, you can use Smart Guides (see below).
Smart Guides : Powerpoint has a built-in system for showing you alignment as you move objects around. The video below demonstrates what Smart Guides look like.
Once you've got your slide layout set, you'll want to start creating Shapes and Text Boxes. Here are some tips and tricks for working with objects:
- Use Ctrl+D to duplicate any object.
- Then you can format them all at once, identically!
- You can also group them, for easier movement and alignment (right click to see the Group option).
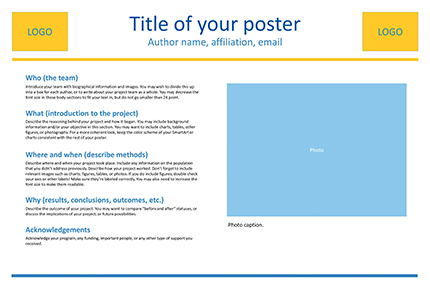
Most posters are landscape (horizontal) orientation. The title/author(s) will be across the top, with 3–4 columns below that contain the rest of the poster elements. Make sure you leave plenty of white space in your design—a poster crammed full of text and images is very difficult to read.
Here is an example of a 2 column poster layout using the 5 Ws for headings (who, what, where, when, and why):
Use the links below to download this template and other similar templates in two sizes: 24x36 and 36x48. These templates include a variety of placeholder elements for photos and figures.
- 2 column Powerpoint template, size 24x36
- 3 column Powerpoint template, size 24x36
- 3 column Powerpoint template, size 36x48
- 4 column Powerpoint template, size 36x48
Below are some additional web resources where you can search for templates. Keep in mind that you may need adjust the size of a template for your own poster. Alternatively, you can use the resources on this page to design your own layout in Powerpoint.
- David Geffen School of Medicine poster templates Although this is labeled for the sciences, the information can be used in many disciplines.
- Penn State poster template
- PhD Posters
- MakeSigns.com poster templates
- The body of your poster should have a minimum 24 point font . Viewers should be able to read your smallest text from a few feet away.
- The title of your poster should have a 50+ font size, depending on the size of your poster and the length of the title.
- Do not use all uppercase letters for the title or body of the poster.
- Avoid using more than 2 or 3 different fonts in one poster.
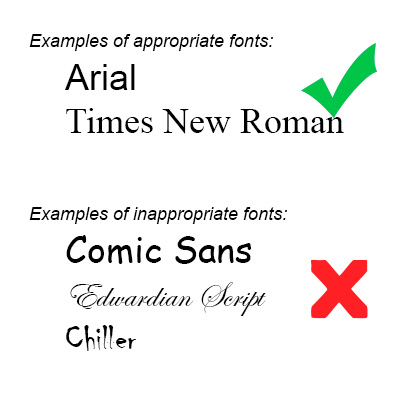
- Stick with basic fonts like Times New Roman or Georgia for serif, or Arial or Helvetica for sans-serif. Avoid elaborate, difficult-to-read, or cartoon-like fonts.
- In general, left-align your text boxes (with the possible exception of your title and any image captions). Avoid centering the text on your whole poster.
- << Previous: Home
- Next: Colors and Images >>
- Last Updated: Nov 9, 2023 2:31 PM
- URL: https://guides.library.ucla.edu/posters

The Ultimate Font Size Guide for Decks & Presentations
Ah the classic font size debacle. Anyone who has ever made a deck (read: nearly everyone on the planet) has experienced the struggle of choosing the right font sizes for different elements of the deck.
Set the font size too small and people will complain about readability. Set the font size too large and you can’t get enough information on the slide to communicate your point.
The classic recommendation is to keep your font size to a minimum of 30pt for any text in your presentation. Or the even more vague suggestion to “make the font big enough so even the person in the back of the room can read it.” These are ok recommendations, but are not the most helpful, especially considering the broad range of use cases for decks these days.
Fear not! Some simple rules can be used to make sure you are using the right size fonts for the right reasons.
Start With Your Use Case
Decks have become one of the most widely used communication mechanisms across work and life. However, not all decks are used for the same purpose.
Sometimes you want to throw together a deck to quickly share visual inspiration for a new website design. Sometimes you put together a deck to stand up in front of a room of people to present something inspiring. Sometimes you have to put together a detailed deck sharing the results from your latest project.
Across these use cases, the decks are sometimes meant to be viewed by an audience while you are speaking over the slides while, other times, the deck is meant to read independently. So first things first, make sure you determine whether the deck you are building is meant for a live presentation or meant for someone to consume on their own.
Font Size Recommendations for Live Presentations
If you are building a deck with the intention of presenting it live, you do need to do some thinking about your audience and the “room” you will be presenting in. To some extent, regardless of whether you are presenting in a physical room, over a web conference, or in a hybrid situation, the same principles apply.
Titles & Main Headlines
When you are presenting live, sometimes you don’t even need a slide title - you may be using the entire slide to communicate one big point via one sentence or statement. Either way, you want your titles and main points to be large and easy to read. We recommend that these titles and main headlines are at least 60pt font.
After your titles or main headlines, most of the text in your deck will be “supporting text” that makes up the body of the content. Supporting body text will be the most common, highest volume text in a presentation deck. Typically, we recommend that supporting text for a live presentation is at least 40pt as this is a size that is generally very readable for almost any attendee.
Captions, Footers, and Labels
Outside of your titles and body, you will also need to use smaller fonts throughout your deck for things like captions, footers, and labels, as well as other key notes. This text is meant to simply be reference text, not the main content of a slide. Even though the readability requirements for this type of text isn’t as important as titles and body, it is still important to use a font size that is reasonably easy to read. We recommend that you use 20pt font size for all captions, footers, and labels in a live presentation deck.
Font Size Recommendations for Leave Behind Decks
Not all decks are meant to be consumed in “presentation” format. In fact, one of the most common use cases for decks is for a “leave behind” or a “read ahead” where the content is consumed by an individual asynchronously. If your goal is to build a deck that’s meant to be consumed by someone async, not in a presentation format, the rules around font sizes do change compared to the best practice sizes for live presentations.
For a leave behind format, the title will typically serve the traditional need of being a short summary of the content on the slide. Slide titles look best when they are positioned in the upper left hand corner of the slide and stay on one line. Sometimes titles will be long and need to go into two lines, but we recommend keeping slide titles relatively short. You have the rest of the slide to provide additional detail, so keep the title very focused. For these use cases, title text can be slightly smaller, around 40pt font.
When you are building a deck for a leave behind or read ahead use case, you will probably have a lot of body text. The body text will most likely be on every slide and is where the consumers of your deck will spend most of their time. We recommend that supporting body text in leave behind decks is set to 20pt font. This aligns with the best in class web design standards for body text readability, so it is a safe bet.
In this use case, you can get away with fairly small font size for captions, footers, and labels since you know the reader will be able to zoom in if they need to read small text. Since this text is more reference text and not the main content, you shouldn’t have nearly as much of it in your deck. The best practice here is to make sure the font size for captions, footers, and labels is set to at least 12pt font.
In Conclusion
Decks are used for many different purposes, ranging from a keynote presentation in front of thousands of people to a read ahead report on the latest marketing campaign. Depending on your use case, you will have very different font size requirements, so it’s most important that you define and understand your use case before you dive into the details on how you should size your fonts.
If you are performing a live presentation, keep your title fonts to 60pt or more, your body text to 40pt or more, and your captions, footers, and labels to 20pt or more. If you are creating a leave behind deck, keep your titles to 40pt or more, your body to 20pt or more, and your captions, footers, and labels to 12pt or more.
Choosing the right fonts can mean the difference between frustrating an audience and really connecting, so choose wisely!
If you want to include Airtable visualizations or charts on Google Sheets data in your next presentation, be sure to try Superchart for free.
Want to give Superchart a try? Try it out for Free!
Level up your skills.

How to Make a Graph in Google Sheets - Beginner's Guide
Other blog posts you might like.


An official website of the United States government
The .gov means it’s official. Federal government websites often end in .gov or .mil. Before sharing sensitive information, make sure you’re on a federal government site.
The site is secure. The https:// ensures that you are connecting to the official website and that any information you provide is encrypted and transmitted securely.
- Publications
- Account settings
Preview improvements coming to the PMC website in October 2024. Learn More or Try it out now .
- Advanced Search
- Journal List
- PLoS Comput Biol
- v.17(12); 2021 Dec
Ten simple rules for effective presentation slides
Kristen m. naegle.
Biomedical Engineering and the Center for Public Health Genomics, University of Virginia, Charlottesville, Virginia, United States of America
Introduction
The “presentation slide” is the building block of all academic presentations, whether they are journal clubs, thesis committee meetings, short conference talks, or hour-long seminars. A slide is a single page projected on a screen, usually built on the premise of a title, body, and figures or tables and includes both what is shown and what is spoken about that slide. Multiple slides are strung together to tell the larger story of the presentation. While there have been excellent 10 simple rules on giving entire presentations [ 1 , 2 ], there was an absence in the fine details of how to design a slide for optimal effect—such as the design elements that allow slides to convey meaningful information, to keep the audience engaged and informed, and to deliver the information intended and in the time frame allowed. As all research presentations seek to teach, effective slide design borrows from the same principles as effective teaching, including the consideration of cognitive processing your audience is relying on to organize, process, and retain information. This is written for anyone who needs to prepare slides from any length scale and for most purposes of conveying research to broad audiences. The rules are broken into 3 primary areas. Rules 1 to 5 are about optimizing the scope of each slide. Rules 6 to 8 are about principles around designing elements of the slide. Rules 9 to 10 are about preparing for your presentation, with the slides as the central focus of that preparation.
Rule 1: Include only one idea per slide
Each slide should have one central objective to deliver—the main idea or question [ 3 – 5 ]. Often, this means breaking complex ideas down into manageable pieces (see Fig 1 , where “background” information has been split into 2 key concepts). In another example, if you are presenting a complex computational approach in a large flow diagram, introduce it in smaller units, building it up until you finish with the entire diagram. The progressive buildup of complex information means that audiences are prepared to understand the whole picture, once you have dedicated time to each of the parts. You can accomplish the buildup of components in several ways—for example, using presentation software to cover/uncover information. Personally, I choose to create separate slides for each piece of information content I introduce—where the final slide has the entire diagram, and I use cropping or a cover on duplicated slides that come before to hide what I’m not yet ready to include. I use this method in order to ensure that each slide in my deck truly presents one specific idea (the new content) and the amount of the new information on that slide can be described in 1 minute (Rule 2), but it comes with the trade-off—a change to the format of one of the slides in the series often means changes to all slides.

Top left: A background slide that describes the background material on a project from my lab. The slide was created using a PowerPoint Design Template, which had to be modified to increase default text sizes for this figure (i.e., the default text sizes are even worse than shown here). Bottom row: The 2 new slides that break up the content into 2 explicit ideas about the background, using a central graphic. In the first slide, the graphic is an explicit example of the SH2 domain of PI3-kinase interacting with a phosphorylation site (Y754) on the PDGFR to describe the important details of what an SH2 domain and phosphotyrosine ligand are and how they interact. I use that same graphic in the second slide to generalize all binding events and include redundant text to drive home the central message (a lot of possible interactions might occur in the human proteome, more than we can currently measure). Top right highlights which rules were used to move from the original slide to the new slide. Specific changes as highlighted by Rule 7 include increasing contrast by changing the background color, increasing font size, changing to sans serif fonts, and removing all capital text and underlining (using bold to draw attention). PDGFR, platelet-derived growth factor receptor.
Rule 2: Spend only 1 minute per slide
When you present your slide in the talk, it should take 1 minute or less to discuss. This rule is really helpful for planning purposes—a 20-minute presentation should have somewhere around 20 slides. Also, frequently giving your audience new information to feast on helps keep them engaged. During practice, if you find yourself spending more than a minute on a slide, there’s too much for that one slide—it’s time to break up the content into multiple slides or even remove information that is not wholly central to the story you are trying to tell. Reduce, reduce, reduce, until you get to a single message, clearly described, which takes less than 1 minute to present.
Rule 3: Make use of your heading
When each slide conveys only one message, use the heading of that slide to write exactly the message you are trying to deliver. Instead of titling the slide “Results,” try “CTNND1 is central to metastasis” or “False-positive rates are highly sample specific.” Use this landmark signpost to ensure that all the content on that slide is related exactly to the heading and only the heading. Think of the slide heading as the introductory or concluding sentence of a paragraph and the slide content the rest of the paragraph that supports the main point of the paragraph. An audience member should be able to follow along with you in the “paragraph” and come to the same conclusion sentence as your header at the end of the slide.
Rule 4: Include only essential points
While you are speaking, audience members’ eyes and minds will be wandering over your slide. If you have a comment, detail, or figure on a slide, have a plan to explicitly identify and talk about it. If you don’t think it’s important enough to spend time on, then don’t have it on your slide. This is especially important when faculty are present. I often tell students that thesis committee members are like cats: If you put a shiny bauble in front of them, they’ll go after it. Be sure to only put the shiny baubles on slides that you want them to focus on. Putting together a thesis meeting for only faculty is really an exercise in herding cats (if you have cats, you know this is no easy feat). Clear and concise slide design will go a long way in helping you corral those easily distracted faculty members.
Rule 5: Give credit, where credit is due
An exception to Rule 4 is to include proper citations or references to work on your slide. When adding citations, names of other researchers, or other types of credit, use a consistent style and method for adding this information to your slides. Your audience will then be able to easily partition this information from the other content. A common mistake people make is to think “I’ll add that reference later,” but I highly recommend you put the proper reference on the slide at the time you make it, before you forget where it came from. Finally, in certain kinds of presentations, credits can make it clear who did the work. For the faculty members heading labs, it is an effective way to connect your audience with the personnel in the lab who did the work, which is a great career booster for that person. For graduate students, it is an effective way to delineate your contribution to the work, especially in meetings where the goal is to establish your credentials for meeting the rigors of a PhD checkpoint.
Rule 6: Use graphics effectively
As a rule, you should almost never have slides that only contain text. Build your slides around good visualizations. It is a visual presentation after all, and as they say, a picture is worth a thousand words. However, on the flip side, don’t muddy the point of the slide by putting too many complex graphics on a single slide. A multipanel figure that you might include in a manuscript should often be broken into 1 panel per slide (see Rule 1 ). One way to ensure that you use the graphics effectively is to make a point to introduce the figure and its elements to the audience verbally, especially for data figures. For example, you might say the following: “This graph here shows the measured false-positive rate for an experiment and each point is a replicate of the experiment, the graph demonstrates …” If you have put too much on one slide to present in 1 minute (see Rule 2 ), then the complexity or number of the visualizations is too much for just one slide.
Rule 7: Design to avoid cognitive overload
The type of slide elements, the number of them, and how you present them all impact the ability for the audience to intake, organize, and remember the content. For example, a frequent mistake in slide design is to include full sentences, but reading and verbal processing use the same cognitive channels—therefore, an audience member can either read the slide, listen to you, or do some part of both (each poorly), as a result of cognitive overload [ 4 ]. The visual channel is separate, allowing images/videos to be processed with auditory information without cognitive overload [ 6 ] (Rule 6). As presentations are an exercise in listening, and not reading, do what you can to optimize the ability of the audience to listen. Use words sparingly as “guide posts” to you and the audience about major points of the slide. In fact, you can add short text fragments, redundant with the verbal component of the presentation, which has been shown to improve retention [ 7 ] (see Fig 1 for an example of redundant text that avoids cognitive overload). Be careful in the selection of a slide template to minimize accidentally adding elements that the audience must process, but are unimportant. David JP Phillips argues (and effectively demonstrates in his TEDx talk [ 5 ]) that the human brain can easily interpret 6 elements and more than that requires a 500% increase in human cognition load—so keep the total number of elements on the slide to 6 or less. Finally, in addition to the use of short text, white space, and the effective use of graphics/images, you can improve ease of cognitive processing further by considering color choices and font type and size. Here are a few suggestions for improving the experience for your audience, highlighting the importance of these elements for some specific groups:
- Use high contrast colors and simple backgrounds with low to no color—for persons with dyslexia or visual impairment.
- Use sans serif fonts and large font sizes (including figure legends), avoid italics, underlining (use bold font instead for emphasis), and all capital letters—for persons with dyslexia or visual impairment [ 8 ].
- Use color combinations and palettes that can be understood by those with different forms of color blindness [ 9 ]. There are excellent tools available to identify colors to use and ways to simulate your presentation or figures as they might be seen by a person with color blindness (easily found by a web search).
- In this increasing world of virtual presentation tools, consider practicing your talk with a closed captioning system capture your words. Use this to identify how to improve your speaking pace, volume, and annunciation to improve understanding by all members of your audience, but especially those with a hearing impairment.
Rule 8: Design the slide so that a distracted person gets the main takeaway
It is very difficult to stay focused on a presentation, especially if it is long or if it is part of a longer series of talks at a conference. Audience members may get distracted by an important email, or they may start dreaming of lunch. So, it’s important to look at your slide and ask “If they heard nothing I said, will they understand the key concept of this slide?” The other rules are set up to help with this, including clarity of the single point of the slide (Rule 1), titling it with a major conclusion (Rule 3), and the use of figures (Rule 6) and short text redundant to your verbal description (Rule 7). However, with each slide, step back and ask whether its main conclusion is conveyed, even if someone didn’t hear your accompanying dialog. Importantly, ask if the information on the slide is at the right level of abstraction. For example, do you have too many details about the experiment, which hides the conclusion of the experiment (i.e., breaking Rule 1)? If you are worried about not having enough details, keep a slide at the end of your slide deck (after your conclusions and acknowledgments) with the more detailed information that you can refer to during a question and answer period.
Rule 9: Iteratively improve slide design through practice
Well-designed slides that follow the first 8 rules are intended to help you deliver the message you intend and in the amount of time you intend to deliver it in. The best way to ensure that you nailed slide design for your presentation is to practice, typically a lot. The most important aspects of practicing a new presentation, with an eye toward slide design, are the following 2 key points: (1) practice to ensure that you hit, each time through, the most important points (for example, the text guide posts you left yourself and the title of the slide); and (2) practice to ensure that as you conclude the end of one slide, it leads directly to the next slide. Slide transitions, what you say as you end one slide and begin the next, are important to keeping the flow of the “story.” Practice is when I discover that the order of my presentation is poor or that I left myself too few guideposts to remember what was coming next. Additionally, during practice, the most frequent things I have to improve relate to Rule 2 (the slide takes too long to present, usually because I broke Rule 1, and I’m delivering too much information for one slide), Rule 4 (I have a nonessential detail on the slide), and Rule 5 (I forgot to give a key reference). The very best type of practice is in front of an audience (for example, your lab or peers), where, with fresh perspectives, they can help you identify places for improving slide content, design, and connections across the entirety of your talk.
Rule 10: Design to mitigate the impact of technical disasters
The real presentation almost never goes as we planned in our heads or during our practice. Maybe the speaker before you went over time and now you need to adjust. Maybe the computer the organizer is having you use won’t show your video. Maybe your internet is poor on the day you are giving a virtual presentation at a conference. Technical problems are routinely part of the practice of sharing your work through presentations. Hence, you can design your slides to limit the impact certain kinds of technical disasters create and also prepare alternate approaches. Here are just a few examples of the preparation you can do that will take you a long way toward avoiding a complete fiasco:
- Save your presentation as a PDF—if the version of Keynote or PowerPoint on a host computer cause issues, you still have a functional copy that has a higher guarantee of compatibility.
- In using videos, create a backup slide with screen shots of key results. For example, if I have a video of cell migration, I’ll be sure to have a copy of the start and end of the video, in case the video doesn’t play. Even if the video worked, you can pause on this backup slide and take the time to highlight the key results in words if someone could not see or understand the video.
- Avoid animations, such as figures or text that flash/fly-in/etc. Surveys suggest that no one likes movement in presentations [ 3 , 4 ]. There is likely a cognitive underpinning to the almost universal distaste of pointless animations that relates to the idea proposed by Kosslyn and colleagues that animations are salient perceptual units that captures direct attention [ 4 ]. Although perceptual salience can be used to draw attention to and improve retention of specific points, if you use this approach for unnecessary/unimportant things (like animation of your bullet point text, fly-ins of figures, etc.), then you will distract your audience from the important content. Finally, animations cause additional processing burdens for people with visual impairments [ 10 ] and create opportunities for technical disasters if the software on the host system is not compatible with your planned animation.
Conclusions
These rules are just a start in creating more engaging presentations that increase audience retention of your material. However, there are wonderful resources on continuing on the journey of becoming an amazing public speaker, which includes understanding the psychology and neuroscience behind human perception and learning. For example, as highlighted in Rule 7, David JP Phillips has a wonderful TEDx talk on the subject [ 5 ], and “PowerPoint presentation flaws and failures: A psychological analysis,” by Kosslyn and colleagues is deeply detailed about a number of aspects of human cognition and presentation style [ 4 ]. There are many books on the topic, including the popular “Presentation Zen” by Garr Reynolds [ 11 ]. Finally, although briefly touched on here, the visualization of data is an entire topic of its own that is worth perfecting for both written and oral presentations of work, with fantastic resources like Edward Tufte’s “The Visual Display of Quantitative Information” [ 12 ] or the article “Visualization of Biomedical Data” by O’Donoghue and colleagues [ 13 ].
Acknowledgments
I would like to thank the countless presenters, colleagues, students, and mentors from which I have learned a great deal from on effective presentations. Also, a thank you to the wonderful resources published by organizations on how to increase inclusivity. A special thanks to Dr. Jason Papin and Dr. Michael Guertin on early feedback of this editorial.
Funding Statement
The author received no specific funding for this work.
- Google Slides Presentation Design
- Pitch Deck Design
- Powerpoint Redesign
- Other Design Services

- Guide & How to's
How to present a research paper in PPT: best practices
A research paper presentation is frequently used at conferences and other events where you have a chance to share the results of your research and receive feedback from colleagues. Although it may appear as simple as summarizing the findings, successful examples of research paper presentations show that there is a little bit more to it.
In this article, we’ll walk you through the basic outline and steps to create a good research paper presentation. We’ll also explain what to include and what not to include in your presentation of research paper and share some of the most effective tips you can use to take your slides to the next level.
Research paper PowerPoint presentation outline
Creating a PowerPoint presentation for a research paper involves organizing and summarizing your key findings, methodology, and conclusions in a way that encourages your audience to interact with your work and share their interest in it with others. Here’s a basic research paper outline PowerPoint you can follow:
1. Title (1 slide)
Typically, your title slide should contain the following information:
- Title of the research paper
- Affiliation or institution
- Date of presentation
2. Introduction (1-3 slides)
On this slide of your presentation, briefly introduce the research topic and its significance and state the research question or objective.
3. Research questions or hypothesis (1 slide)
This slide should emphasize the objectives of your research or present the hypothesis.
4. Literature review (1 slide)
Your literature review has to provide context for your research by summarizing relevant literature. Additionally, it should highlight gaps or areas where your research contributes.
5. Methodology and data collection (1-2 slides)
This slide of your research paper PowerPoint has to explain the research design, methods, and procedures. It must also Include details about participants, materials, and data collection and emphasize special equipment you have used in your work.
6. Results (3-5 slides)
On this slide, you must present the results of your data analysis and discuss any trends, patterns, or significant findings. Moreover, you should use charts, graphs, and tables to illustrate data and highlight something novel in your results (if applicable).
7. Conclusion (1 slide)
Your conclusion slide has to summarize the main findings and their implications, as well as discuss the broader impact of your research. Usually, a single statement is enough.
8. Recommendations (1 slide)
If applicable, provide recommendations for future research or actions on this slide.
9. References (1-2 slides)
The references slide is where you list all the sources cited in your research paper.
10. Acknowledgments (1 slide)
On this presentation slide, acknowledge any individuals, organizations, or funding sources that contributed to your research.
11. Appendix (1 slide)
If applicable, include any supplementary materials, such as additional data or detailed charts, in your appendix slide.
The above outline is just a general guideline, so make sure to adjust it based on your specific research paper and the time allotted for the presentation.
Steps to creating a memorable research paper presentation
Creating a PowerPoint presentation for a research paper involves several critical steps needed to convey your findings and engage your audience effectively, and these steps are as follows:
Step 1. Understand your audience:
- Identify the audience for your presentation.
- Tailor your content and level of detail to match the audience’s background and knowledge.
Step 2. Define your key messages:
- Clearly articulate the main messages or findings of your research.
- Identify the key points you want your audience to remember.
Step 3. Design your research paper PPT presentation:
- Use a clean and professional design that complements your research topic.
- Choose readable fonts, consistent formatting, and a limited color palette.
- Opt for PowerPoint presentation services if slide design is not your strong side.
Step 4. Put content on slides:
- Follow the outline above to structure your presentation effectively; include key sections and topics.
- Organize your content logically, following the flow of your research paper.
Step 5. Final check:
- Proofread your slides for typos, errors, and inconsistencies.
- Ensure all visuals are clear, high-quality, and properly labeled.
Step 6. Save and share:
- Save your presentation and ensure compatibility with the equipment you’ll be using.
- If necessary, share a copy of your presentation with the audience.
By following these steps, you can create a well-organized and visually appealing research paper presentation PowerPoint that effectively conveys your research findings to the audience.
What to include and what not to include in your presentation
In addition to the must-know PowerPoint presentation recommendations, which we’ll cover later in this article, consider the following do’s and don’ts when you’re putting together your research paper presentation:
- Focus on the topic.
- Be brief and to the point.
- Attract the audience’s attention and highlight interesting details.
- Use only relevant visuals (maps, charts, pictures, graphs, etc.).
- Use numbers and bullet points to structure the content.
- Make clear statements regarding the essence and results of your research.
Don’ts:
- Don’t write down the whole outline of your paper and nothing else.
- Don’t put long, full sentences on your slides; split them into smaller ones.
- Don’t use distracting patterns, colors, pictures, and other visuals on your slides; the simpler, the better.
- Don’t use too complicated graphs or charts; only the ones that are easy to understand.
- Now that we’ve discussed the basics, let’s move on to the top tips for making a powerful presentation of your research paper.
8 tips on how to make research paper presentation that achieves its goals
You’ve probably been to a presentation where the presenter reads word for word from their PowerPoint outline. Or where the presentation is cluttered, chaotic, or contains too much data. The simple tips below will help you summarize a 10 to 15-page paper for a 15 to 20-minute talk and succeed, so read on!
Tip #1: Less is more
You want to provide enough information to make your audience want to know more. Including details but not too many and avoiding technical jargon, formulas, and long sentences are always good ways to achieve this.
Tip #2: Be professional
Avoid using too many colors, font changes, distracting backgrounds, animations, etc. Bullet points with a few words to highlight the important information are preferable to lengthy paragraphs. Additionally, include slide numbers on all PowerPoint slides except for the title slide, and make sure it is followed by a table of contents, offering a brief overview of the entire research paper.
Tip #3: Strive for balance
PowerPoint slides have limited space, so use it carefully. Typically, one to two points per slide or 5 lines for 5 words in a sentence are enough to present your ideas.
Tip #4: Use proper fonts and text size
The font you use should be easy to read and consistent throughout the slides. You can go with Arial, Times New Roman, Calibri, or a combination of these three. An ideal text size is 32 points, while a heading size is 44.
Tip #5: Concentrate on the visual side
A PowerPoint presentation is one of the best tools for presenting information visually. Use graphs instead of tables and topic-relevant illustrations instead of walls of text. Keep your visuals as clean and professional as the content of your presentation.
Tip #6: Practice your delivery
Always go through your presentation when you’re done to ensure a smooth and confident delivery and time yourself to stay within the allotted limit.
Tip #7: Get ready for questions
Anticipate potential questions from your audience and prepare thoughtful responses. Also, be ready to engage in discussions about your research.
Tip #8: Don’t be afraid to utilize professional help
If the mere thought of designing a presentation overwhelms you or you’re pressed for time, consider leveraging professional PowerPoint redesign services . A dedicated design team can transform your content or old presentation into effective slides, ensuring your message is communicated clearly and captivates your audience. This way, you can focus on refining your delivery and preparing for the presentation.
Lastly, remember that even experienced presenters get nervous before delivering research paper PowerPoint presentations in front of the audience. You cannot know everything; some things can be beyond your control, which is completely fine. You are at the event not only to share what you know but also to learn from others. So, no matter what, dress appropriately, look straight into the audience’s eyes, try to speak and move naturally, present your information enthusiastically, and have fun!
If you need help with slide design, get in touch with our dedicated design team and let qualified professionals turn your research findings into a visually appealing, polished presentation that leaves a lasting impression on your audience. Our experienced designers specialize in creating engaging layouts, incorporating compelling graphics, and ensuring a cohesive visual narrative that complements content on any subject.
#ezw_tco-2 .ez-toc-widget-container ul.ez-toc-list li.active::before { background-color: #ededed; } Table of contents
- Presenting techniques
- 50 tips on how to improve PowerPoint presentations in 2022-2023 [Updated]
- Keynote VS PowerPoint
- Types of presentations
- Present financial information visually in PowerPoint to drive results

- Design Tips
8 rules of effective presentation

- Business Slides
Employee training and onboarding presentation: why and how

How to structure, design, write, and finally present executive summary presentation?
- Mar 9, 2021
Which Fonts to Use on Your Scientific Poster
Choosing the right font (A.K.A. typeface) for your scientific poster is all about two things: readability and style.
But with thousands of fonts to choose from, it can be overwhelming.
So where do you start? You’ve come to the right place.
Here is what you need to know to choose a clear and stylish font for your scientific poster.

Serif or sans serif?
A serif font is one with those little bits on the end of the characters, the little moustaches. And, like a moustache, those little bits are just for style - they might be cool, but they’re not necessary.
What’s more, a serif font tends to give off a sophisticated, yet dated, vibe. As you want to your poster to reflect the innovative and contemporary research you’re conducting, it’s a good idea to stay away from serif fonts.

You need a font that is without serif, that’s sans serif. We recommend downloading your next favourite Sans Serifs fonts at Creative Fabrica . 👈
How many fonts?
Like so much of good design: less is more.
One or two fonts is all you need. If you have more fonts than this, your poster will look like a ransom note received in the mail.
As you know, it’s a good idea to make the headers clearly visible so help the viewer navigate the poster.
You can do this by making the headings bold or ALL CAPS. If you like the look of all caps, I strongly recommend against using any long headings. Long chucks of all caps is very difficult to read. So keep your headings short.
Decorative fonts
Look, I get it. You found the Disney font and you want to use it on your poster. A decorative font may be tempting, but it’s just not helpful - they’re very rarely easier to read than the standard sans serif fonts available. Take a look below to see what I mean.

Comic Sans?
Comic Sans is a sans serif font, it’s also fun - can we use it on our scientific posters?
Every time a scientist uses Comic Sans a graphic designer dies
BUT there is one exception. That is if your poster IS a comic!
If that’s the case, go for it! In this context Comic Sans is perfect and it would almost be a crime not to use it. Here’s a comic-style graphical abstract that is a perfect partner for the much maligned Comic Sans.

Bigger is better. At Animate Your Science, we believe posters are best served as a visual representation of your abstract. It’s about starting a conversation and that’s it - the rest is up to you.
So a poster with few elements, that can be seen from across the room, is perfect.
For this we recommend the following font sizes as a minimum for your text (based on an A0 size):
Headers : 40
Body text : 36
Your body text should be easily readable from 1 metre away.
To check that you have the right sizes, I suggest zooming in on your poster to 100 %. Then, take a step back to a metre or so. If you can clearly read the body text, then at a minimum, your text is big enough. You can use the same technique to test the sizes of your headers and title too.
Some suitable fonts
You have plenty of fonts to choose from. You’re not even limited to those default fonts installed on your computer. Check out Font Squirrel , Dafont , and 1001freefonts where you can download some new fonts for free.
For some ideas, check out these fonts:

That’s plenty of info dedicated to fonts for your scientific poster, so thanks for hanging in there with me.
But, we’ve only just scratched the surface on what makes a great scientific poster.
To properly cover this topic, we’ve developed a whole online course: How to Design an Award-Winning Scientific Poster. You can learn at your own pace and arm yourself with the tools, templates, skills and knowledge to create your own award-winning scientific posters. We’ve had excellent feedback on the 33 video lessons, 3 hours of learning and 8 templates & downloads included - so we’re confident that you’ll love it too.

Take-Away Points
One or two fonts
Sans serif is your friend
Make it large enough to be easily readable
Dr Tullio Rossi
Dr Flynn Slattery
#scicomm #poster #science
Related Posts
How to select the best images for your scientific poster
How to write engaging headings to make your scientific poster pop!
How to effectively incorporate citations into your scientific poster

Standard Font Size For Papers: A Comprehensive Guide
The standard font size for academic papers is typically 12-point. Still, it’s essential to consider the specific formatting style required (like APA or MLA) and any guidelines from journals or publishers.
Always follow the instructions given by your instructor, institution, or publisher. We will delve into the world of standard font size for papers. We’ve got you covered, from understanding a standard font size to determining the appropriate sizes for headings, subheadings, paragraphs, and tables. Say goodbye to formatting woes and hello to polished and professional-looking papers!

Table of Contents
How To Determine The Standard Font Size For Papers

Determining the standard font size for papers can depend on various factors, including the specific style guide or formatting requirements of the institution or publication you are writing for. Most academic papers are typically written in 12-point font size, such as Times New Roman or Arial.
This standard font size ensures the text is legible and easy to read. However, it is always important to check the specific guidelines provided by your instructor or publisher, as they may have different requirements regarding font size.
Additionally, it is worth noting that some disciplines or journals may have their preferred font sizes, so it is essential to know any specific guidelines that apply to your field of study.
General Rules For Font Size
Following the general rules is essential regarding font size in academic papers. While the standard font size is usually 12 points, it is important to consider any specific guidelines from your instructor or chosen formatting style.
Different academic disciplines may have varying requirements, so it is crucial to consult the appropriate style guide or ask your instructor for their preferred size. Selecting a legible font that is easily read at the chosen size is advisable. Avoid using excessively small or large fonts, negatively impacting readability and overall presentation.
Font Size For Headings And Subheadings

It’s important to ensure they are appropriately sized for readability and professionalism regarding font size for paper headings and subheadings. While the standard font size for papers is typically 12 points, headings and subheadings can range from 14 to 16 points.
It’s crucial to follow the formatting guidelines provided by your instructor or publisher, as different academic disciplines may have specific requirements. Maintaining consistency in font size throughout your paper is key. Using the appropriate font size, you can enhance the overall appearance and legibility of your headings and subheadings, making your paper more organized and user-friendly.
Font Size For Paragraphs
Regarding to paragraphs in academic papers, the font size typically used is 12 points. This standard font size ensures readability and enhances the comprehension of the content. Selecting a font size that doesn’t strain the reader’s eyes or make the text challenging to read is crucial. Avoid using smaller font sizes, as it may lead to eye strain.
On the other hand, using a larger font size may give the impression of unprofessionalism. To maintain consistency and professionalism, it is essential to adhere to the font size guidelines provided by your institution or publisher. Remember, readability plays a vital role in effectively conveying your message.
Font Size For Tables
The standard recommendation is to use a font size of 10 to 12 points when it comes to font size for tables in papers. This ensures that the text within the table remains readable and clear. However, it’s essential to consider the complexity of the table and the amount of information presented.
If your table contains intricate details or small cells, you may need to use a slightly larger font size for readability. Remember to maintain consistency throughout your paper and follow any specific guidelines provided by your instructor or publisher.
Why Is The Standard Font Size Important?
The standard font size is crucial for ensuring readability and consistency in your document. Using standard font size makes it easier for your intended audience to read and understand the content. Additionally, it adds a professional touch to your paper, which is highly valued in academic and professional environments.
How To Set The Standard Font Size For Papers

Setting the standard font size for papers is essential to formatting academic and professional documents. The most commonly used font size for papers is 12 points, as it provides a good balance between readability and conserving space. However, it is always advisable to check the specific guidelines provided by your institution or organization, as they may have their own requirements.
When setting the font size, apply it consistently throughout the document to maintain a professional appearance. Additionally, consider other factors, such as line spacing and margins, to ensure that your paper meets all necessary formatting standards.
Things To Keep In Mind While Setting The Standard Font Size For Papers

While setting the standard font size for papers, several things must be remembered. Firstly, adhering to the guidelines provided by your institution or publication is crucial. These guidelines may have specific requirements or recommendations for font size.
Consider the font’s readability and legibility, making sure it’s easy on the eyes. Opting for a standard font size, such as 12-point, is generally the best choice for easy reading. Use legible font styles like Times New Roman, Arial, Calibri, Georgia, or Helvetica.
Adjusting the font size for headings and subheadings can create a visual hierarchy and make your paper more organized. Remember to heed any additional instructions or preferences from your intended audience or instructor. By following these guidelines, you can ensure that your paper looks professional and is easy to read.
Using the standard font size for papers is essential for maintaining consistency and readability in your work. It helps ensure that your content is accessible to readers and meets the expectations of academic or professional requirements.
You can create a well-structured and visually appealing document by following the general rules for font size and setting appropriate sizes for headings, subheadings, paragraphs, and tables. Remember to consider the guidelines provided by your institution or target audience when determining the standard font size for your papers.
Frequently Asked Questions
Is 11 or 12-point font standard.
The standard font size for papers is typically 12 points, although some institutions may accept 11 points. However, it’s always best to check your specific guidelines.
Is Size 12 Font Too Big?
No, size 12 font is not too big. It is a standard and widely accepted font size that offers readability and ensures the text is easy to read. However, it’s important to always check guidelines or requirements from your instructor or publisher and adjust the font size accordingly.
What Is The Recommended Font Size For Readability In Academic Papers?
The recommended font size for academic papers is typically 12 points, although specific guidelines may vary among scholarly journals. For optimal readability, it is essential to use a legible font like Times New Roman or Arial and ensure proper formatting, including line spacing and margins.
Does The Font Size Vary Based On The Formatting Style?
Yes, the font size can differ depending on the formatting style. APA and MLA styles suggest a font size of 12 points. However, other formatting styles may have their own guidelines, so it’s crucial to refer to the appropriate style guide for accurate recommendations.
How Can I Use The Standard Font Size For Papers?
To use the standard font size for papers, opt for 12-point Times New Roman or Arial. Ensure consistency in your font size throughout the paper. Instead of relying on a larger font, use bold, italics, and underline sparingly for emphasis.

David Egee, the visionary Founder of FontSaga, is renowned for his font expertise and mentorship in online communities. With over 12 years of formal font review experience and study of 400+ fonts, David blends reviews with educational content and scripting skills. Armed with a Bachelor’s Degree in Graphic Design and a Master’s in Typography and Type Design from California State University, David’s journey from freelance lettering artist to font Specialist and then the FontSaga’s inception reflects his commitment to typography excellence.
In the context of font reviews, David specializes in creative typography for logo design and lettering. He aims to provide a diverse range of content and resources to cater to a broad audience. His passion for typography shines through in every aspect of FontSaga, inspiring creativity and fostering a deeper appreciation for the art of lettering and calligraphy.
Related posts:
- 5 Best Excel Fonts: Enhance Your Spreadsheets The best Excel fonts size depends on the user’s specific needs and preferences. Generally, experts recommend a font size between 10 and 12 points for readability. However, it is important to consider the amount of data displayed and the size...
- The Biggest Font For Essays: Boost Your Word Count Writing essays can be challenging, and meeting the word count requirement can be even more daunting. It’s a common struggle for many writers to find ways to increase their word count without sacrificing the quality of their work. One practical...
- The Ultimate Guide To Best Font For Numbers In Excel Excel is an indispensable tool for data analysis and visualization; as such, it is important to pay attention to the visual appearance of your spreadsheets. One often overlooked aspect of spreadsheet design is the font handy for numbers. Choosing the...
- Font Size For Resume 2020 – A Guide To Finding The Perfect Fit Choosing the appropriate font size for your resume in 2020 is critical to creating a professional and visually appealing document. The font size for resume 2020 refers to. The specific measurement used for the text throughout your resume, including headings,...
Leave a Comment Cancel reply
Save my name, email, and website in this browser for the next time I comment.
Writing Resources
- Student Paper Template
- Grammar Guidelines
- Punctuation Guidelines
- Writing Guidelines
- Creating a Title
- Outlining and Annotating
- Using Generative AI (Chat GPT and others)
- Introduction, Thesis, and Conclusion
- Strategies for Citations
- Determining the Resource This link opens in a new window
- Citation Examples
- Paragraph Development
- Paraphrasing
- Inclusive Language
- International Center for Academic Integrity
- How to Synthesize and Analyze
- Synthesis and Analysis Practice
- Synthesis and Analysis Group Sessions
- Decoding the Assignment Prompt
- Annotated Bibliography
- Comparative Analysis
- Conducting an Interview
- Infographics
- Office Memo
- Policy Brief
- Poster Presentations
- PowerPoint Presentation
- White Paper
- Writing a Blog
- Research Writing: The 5 Step Approach
- Step 1: Seek Out Evidence
- Step 2: Explain
- Step 3: The Big Picture
- Step 4: Own It
- Step 5: Illustrate
- MLA Resources
- Time Management
ASC Chat Hours
ASC Chat is usually available at the following times ( Pacific Time):
If there is not a coach on duty, submit your question via one of the below methods:
928-440-1325
Ask a Coach
Search our FAQs on the Academic Success Center's Ask a Coach page.
PowerPoint Presentation Tips
PowerPoint Resources

PowerPoint Presentation Guidelines
- The Outline
- The 10 Rule
- The 20 and 30 Rule
Before You Start: Outline Your PowerPoint Presentation

How to Create a PowerPoint Outline in Word
Links to relevant resources.
Creating Powerful PowerPoint Presentations
Downloading Office 365
NU PowerPoint Template
Was this resource helpful?
- << Previous: Poster Presentations
- Next: White Paper >>
- Last Updated: Apr 10, 2024 2:12 PM
- URL: https://resources.nu.edu/writingresources

Want to create or adapt books like this? Learn more about how Pressbooks supports open publishing practices.
Scientific Posters
Characteristics of a scientific poster.
- Organized, clean, simple design.
- Focused on one specific research topic that can be explained in 5-15 minutes.
- Contains a Title, Authors, Abstract, Introduction, Materials & Methods, Results, Discussion, References and Acknowledgements.
- Has four to ten high-resolution figures and/or tables that describe the research in detail.
- Contains minimal text, with figures and tables being the main focus.
Scientific Poster
A scientific poster ( Fig.1 ) is an illustrated summary of research that scientists and engineers use to present their scientific discoveries to larger audiences. A typical poster is printed on paper with dimensions of 36-inches (height) by 48-inches (width).
Figure 1. Scientific Poster

Posters are displayed at events such as symposiums, conferences and meetings to show new discoveries, new results and new information to scientists and engineers from different fields. A large event can have hundreds of posters on display at one time with scientists and engineers standing beside their individual posters to showcase their research. A typical interaction between a poster presenter and an audience member will last 5-15 minutes.
Scientific posters are organized systematically into the following parts (or sections): Title, Authors, Abstract, Introduction, Materials and Methods, Results, Discussion, Acknowledgments and References ( Table 1 and Fig. 2 ). Organizing a poster in this manner allows the reader to quickly comprehend the major points of the research and to understand the significance of the work.
Table 1. Characteristics of a Scientific Poster

The most important parts of a scientific poster will likely be its figures and/or tables because these are what an audience will naturally focus their attention on. The phrase “a picture is worth a thousand words” is certainly true for scientific posters, and so it is very important for the poster’s author(s) to create informative figures that a reader can understand. The “ideal” figure can be challenging to create. Providing too much information in a figure will only serve to confuse the reader (or audience). Provide too little information and the reader will be left with an incomplete understanding of the research. Both situations should be avoided because they prevent a scientist from effectively communicating with their audience.
Authors use different sizes of font for their poster text ( Table 2 ). The general rule is to use a font size that can be read from a distance of 3-feet (1 meter), which is the approximate distance that a person will stand when viewing a poster. The largest fonts (e.g., 40-120 point font) will be used for the title, author list and institutions. Section headings will use 30-40 point font. Section text, table captions, figure captions and references will typically use 20-30 point font. Font sizes smaller than about 20-points can be difficult for an audience to read and should only be used for the References and Acknowledgements sections ( Table 2 ).
Table 2. Poster Font Size and Style

A poster abstract contains all text (no figures, no tables) and appears at the beginning of the poster ( Fig. 2 ). An abstract is one paragraph containing 200-300 words in length. The Introduction section ( Fig. 2 ) appears after the abstract and typically contains 100-200 words of text, a figure(s) and/or table(s) and a caption for each figure and table consisting of 25-100 words for each caption. The Material and Methods sections ( Fig. 2 ) appears third and consists of 100-200 words of text, a figure(s) and/or table(s) and a caption for each figure and table consisting of 25-100 words for each caption. This is followed by the Results section and Discussion section ( Fig. 2 ). Each of these sections contain 100-200 words of text, a figure(s) and/or table(s) and a caption for each figure and table consisting of 25-100 words for each caption. Sometimes these two parts of a poster are combined into one large section titled Results and Discussion. Some posters contain a Conclusion section, which follows the Discussion section. The example shown is Figure 2 does not contain a Conclusion section. The final parts of a poster are the References and Acknowledgements sections ( Fig. 2 ).
Figure 2. Parts of a Scientific Poster

An audience will focus most of their attention on the poster title, abstract, figures and tables. Therefore, it is important to pay particular attention to these parts of a poster. A general rule is that less text is best and a figure is worth a thousand words. The text contained within a poster should be reserved for the most important information that a presenter wants to convey to their audience. The rest of the information will be communicated to the audience verbally by the scientist during their presentation.
Its very important for a scientist to thoroughly understand all the data and information contained within their poster so that they can effectively communicate the research to an audience both verbally (i.e., during their presentation) and visually (i.e., using the figures and tables contained within the poster). It is also important that the References section of a poster contains a thorough summary of all publications pertinent to the research presented in the poster. This way, if an audience member wants more information on a particular topic (e.g., instrument, technique, method, study site) the presenter can direct the audience to the publication(s) where more information can be found.
Scientific Posters: A Learner's Guide Copyright © 2020 by Ella Weaver; Kylienne A. Shaul; Henry Griffy; and Brian H. Lower is licensed under a Creative Commons Attribution-NonCommercial 4.0 International License , except where otherwise noted.
Share This Book
Designing slides for your presentation
- General tips
- Chunking information
Select the right font and font size
When creating your presentation remember that your audience will be spread out in an auditorium or classroom. Text heavy presentations should be avoided. However, it is important that what is displayed can be viewed!
Use a set font and colour scheme. Different styles can be distracting to the audience and you want them, to focus on what you present, not the way you present.
Good fonts to use are Arial, Tahoma and Verdana.
Use CAPITAL letters for emphasis . Overuse of capital letters can make the text hard to read, diminish their use for emphasis, and conceal acronyms.
Italics should be used for quotations , to highlight thoughts or ideas and for book, journal or magazine titles.
Here are suggested font sizes for presentations.
- Title: size 40
- Subtitle or bullet point: size 32
- Content: Text should be no smaller than size 24.
Choosing the right background
Remember, it's a presentation, not a colour competition, use caution, general information and tips.
- Your presentation slides or video should only be considered a guide for what you are presenting . Omit long texts, and use short sentences or bullet points.
- You should not have 50 slides for a 15 minutes presentation. Aim for a maximum of one slide per minute .
- Aim to present one idea per slide.
Stortz et al. (2002) have compiled a great selection of tips that can help you construct your oral presentation.
- In Good Videos section of this site you can see a series of videos outlining some useful tips for when you are in front of your audience.
- Try doing a Google search for "presentations skills" . But it is important to know how to filter the information that is useful for you. A great part of the information is not directed towards academic literacy, but to the business environment. Although there are differences between the two, there is still information that overlaps. This overlap is important for a large number of students, since these skills are transferable, and will be useful later in your careers.
Helping you and your audience to stay focused
Most people can remember 3-5 things at a time (often only 3).
Chunking the information can help you to easily recollect what to say and your audience to remember your main points.
Chunk your presentation into 3 chunks
Chunk each section into 3 chunks
Chunk your PowerPoint slides into a maximum of 3 points per slide
You can practise this by doing the exercise in this section.
Use the model to start brainstorming your slides
Try to bring in what you have learnt about slides design and what you have done while planning .
Use the file below as a guide to start your presentation and remember to chunk.

This file can be used to construct your slide presentation.
- Select text to style.
- Paste youtube/vimeo url to add embeded video.
- Click + sign or type / at the beginning of line to show plugins selection.
- Use image plugin to upload or copy/paste image searched from internet or paste in snip/sketched image from snap tool
Microsoft Office
10 minute read
How to Choose the Best Font for PowerPoint Presentations

Saikat Basu
Facebook Twitter LinkedIn WhatsApp Email
An image on a slide may speak a thousand words, but you do need text to explain the finer details. And that’s where choosing the best font for PowerPoint presentations becomes a critical exercise. In short, if you want to make a flawless PowerPoint presentation , you must pay attention to your fonts.
The interesting thing about fonts is that each has a personality. It’s like the three-piece suit that will be out of place at a barbeque but is perfect for an evening at the Savoy.

Want to learn more?
Take your Microsoft Office skills to the next level with our comprehensive (and free) ebook!
Why is choosing the right fonts so critical?
Slides aren’t like the pages of a book. They are billboards on the highway.
When you run through your slides, they will linger for just a few seconds. The words on the slides have to capture interest, send the right message, and support the visuals in those few seconds.
Fonts influence your audience by setting the tone and atmosphere of the presentation. The right choice of fonts or font pairings can make your text stand out by separating it from other elements around it. Typefaces are also brand symbols that help the audience relate to it through the presentation.
Before you get into the deep end, let’s learn the distinction between two major font types.
What are serif and sans serif fonts?
Times New Roman is the classic example of a serif font. The letters have tiny extensions that appear to connect them together in words as one letter leads to the next.
Newspapers and magazines use serif fonts for body text as they are easier to read. Serif fonts have distinct line heights that make them more legible in dense copy.

They lose this clarity if you pack them together in the body. That’s why designers recommend sans serif fonts for titles, headings, and captions in your slides.

The critical font pair: title vs body text
All Microsoft PowerPoint presentations by default start with two fonts — one font for the headings and one for the body text. This font pairing decides the entire look of the presentation. The theme plays an important role in the font choices and even blank presentations give you a theme to build upon.
The first question you may have to answer is how big your fonts should be? The simple answer is that it depends. Factors like screen size and room size dictate the limits of font size. Font sizes can hinge upon you emailing the presentation or delivering it live on stage or on a PC screen in a remote meeting.
Also, all fonts have an optimum size for legibility. Arial is clear at 12pts while Times New Roman is readable at 10pts.
Most presentation experts recommend these size ranges. The thumb rule — a larger font size with less text on screen is always good.
The default slide in PowerPoint starts with 60pts for section headers and 24pts for body font.
- Header Font: Between 26 and 42 point
- Body Font: Between 18 and 24 point
You can use the same font for both, but that can limit the visual impact of your slide.
10 tips for choosing the best font for PowerPoint presentations
Never sacrifice readability for style. With that motto in mind, follow these Microsoft PowerPoint tips to choose the best fonts for your business presentation or any other.
1. Choose two fonts
Three fonts can be a crowd. Choose two fonts wisely and use size, contrast, and color to combine them for visual interest. Font pairing is a critical part of PowerPoint presentations and you will have to spend a lot of time on this decision. The second font shouldn’t be too unlike or too similar to the primary typeface where you miss the distinction.
Tip: There are many font pairing tools available on the web. But play the TypeConnection typography game if you want to get better at it yourself.
2. Choose standard fonts
You want your presentation to look the same on all devices. Choose from standard fonts and you won’t have to rescue your slides from turning into a mishmash on another screen. You can be more imaginative if you are presenting to children or at Comic Con, but standard fonts are the safest bet always.
Tip: Here’s a complete list of fonts available on Windows 10 .

3. Avoid script fonts and decorative text
Script fonts like Lucida Calligraphy or Gothic fonts like Century are always difficult to read. You can use them if the topic of the talk demands it.
4. Create visual interest with serif and sans serif fonts
As we emphasized earlier, serif and sans serif fonts have their own advantages and disadvantages. You can pair them and tap into their strengths.

5. Select color and create contrast
Go for font colors that are a part of your brand. Using color swatches and precise Hexadecimal or RGB values ensures colors stay consistent across slides.
Also, you might have to check your slide for accessibility for all as someone in the audience can be color blind and may not be able to decipher red or green.
Tip: There are many color palette generators available on the web for free. Try Coolors .
6. Have contrasting text and background colors
Fonts must stand out against the background. The higher the contrast between the two, the better the readability across the room will be. Use the color wheel to pick the background and the font colors. Opposite colors on the color wheel clash with each other and have the maximum contrast. For instance, orange on blue.
Always use the same background on each slide. Text against white backgrounds is not legible in a larger room. For the best results, opt for dark slides with light-colored text.
Tip: Go through a gallery of well-designed PowerPoint templates or use PowerPoint Designer as a shortcut to grasp the interplay of contrast.

7. Less is more with caps and italics
Don’t capitalize all the letters in the body text as it is difficult to read. Selectively use caps for acronyms and for emphasis. Similarly, choose italics sparingly for quotes or highlighting the names of books, authors, and journal titles, etc.
You can make a creative choice by using italic text sparingly for impact or you can also substitute them with subtle formatting to the standard fonts.
Tip: Caps and italics may be able to work with specific fonts, but you may need access to those fonts. You can use Picsart's text editor to play around with text that may suit your presentation better.
8. Limit the use of animated fonts
Animated fonts can be distracting. Avoid animating your text or use it only if it serves a functional purpose. Ask yourself if it adds clarity to your data or is just a cute effect.
9. Keep an eye on font tracking and kerning
Learn these two typography terms and you will have an easier time placing your words on the slide. Kerning adjusts the spacing between two adjacent letters in a font. Tracking adjusts the space between all letters together. Both influence the readability of text.
For instance, you can avoid using narrow or condensed typefaces. Instead, pick a thicker font and tweak it with tracking and kerning within PowerPoint.
For more on changing the spaces between text, read this Microsoft support article .
Tip: Play the KernType typography game to get familiar with the basics of the two principles.

10. Make interesting shape effects
It doesn’t always have to be just about fonts and simple colors. The Shape Effects panel on PowerPoint gives you a lot of control over the finished appearance of text on the slide.
For instance, you can adjust the transparency of the letters. You can also “texturize” the words by using pictures to fill the words instead of a solid fill color.
- Select the word and right click.
- From the context menu, click on Format Text Effects.
- The Format Shape panel is displayed on the right.
- Select Text Options > Text Fill & Outline.
- Choose Picture or texture fill.
You can now use an image or any texture to decorate your words. Picture or texture fills are a creative way to use standard fonts but still make them stand apart on your slides. Of course, never overdo it.
Tip: Shape effects go well with thicker fonts.

15 of the most versatile fonts you can use in PowerPoint
These fonts (and a few more) are versatile because they are standard fonts and are available on both Windows and macOS. You don’t have to go after fancy typefaces just yet. Focus on your layout. Use the design pointers from the above list and give your slides an attractive makeover.
- Franklin Gothic
- Times New Roman
- Palatino
Think of typography in PowerPoint as design
Practice with your eye. Play one font against the other for interesting unions. Typography isn’t just for selecting fonts and using them to occupy your slide with words. It is an essential design element in any place where visual communication matters. You can design your presentations faster once you work out how fonts work together and learn a bit about color theory.
Want to learn more about how good design comes together? Start with some of the basic and advanced PowerPoint techniques .
Ready to master Microsoft Office?
Start learning for free with GoSkills courses
Loved this? Subscribe, and join 443,301 others.
Get our latest content before everyone else. Unsubscribe whenever.

Saikat is a writer who hunts for the latest tricks in Microsoft Office and web apps. He doesn't want to get off the learning curve, so a camera and a harmonica claim an equal share of his free time.

Recommended
Should You Switch to Microsoft 365? What You Need to Know in 2024
We break down what Microsoft 365 is, and what makes it different from lifetime licenses.

28 Best Microsoft Office Add Ins in 2024
Supercharge your productivity with our picks of the best Microsoft Office add-ins for Word, Excel, PowerPoint, Outlook and OneNote.

What is Microsoft Teams? Everything You Need to Know in 2024
What is Microsoft Teams? Find out in this introductory guide.
© 2024 GoSkills Ltd. Skills for career advancement
Want to create or adapt books like this? Learn more about how Pressbooks supports open publishing practices.
13.1 Formatting a Research Paper
Learning objectives.
- Identify the major components of a research paper written using American Psychological Association (APA) style.
- Apply general APA style and formatting conventions in a research paper.
In this chapter, you will learn how to use APA style , the documentation and formatting style followed by the American Psychological Association, as well as MLA style , from the Modern Language Association. There are a few major formatting styles used in academic texts, including AMA, Chicago, and Turabian:
- AMA (American Medical Association) for medicine, health, and biological sciences
- APA (American Psychological Association) for education, psychology, and the social sciences
- Chicago—a common style used in everyday publications like magazines, newspapers, and books
- MLA (Modern Language Association) for English, literature, arts, and humanities
- Turabian—another common style designed for its universal application across all subjects and disciplines
While all the formatting and citation styles have their own use and applications, in this chapter we focus our attention on the two styles you are most likely to use in your academic studies: APA and MLA.
If you find that the rules of proper source documentation are difficult to keep straight, you are not alone. Writing a good research paper is, in and of itself, a major intellectual challenge. Having to follow detailed citation and formatting guidelines as well may seem like just one more task to add to an already-too-long list of requirements.
Following these guidelines, however, serves several important purposes. First, it signals to your readers that your paper should be taken seriously as a student’s contribution to a given academic or professional field; it is the literary equivalent of wearing a tailored suit to a job interview. Second, it shows that you respect other people’s work enough to give them proper credit for it. Finally, it helps your reader find additional materials if he or she wishes to learn more about your topic.
Furthermore, producing a letter-perfect APA-style paper need not be burdensome. Yes, it requires careful attention to detail. However, you can simplify the process if you keep these broad guidelines in mind:
- Work ahead whenever you can. Chapter 11 “Writing from Research: What Will I Learn?” includes tips for keeping track of your sources early in the research process, which will save time later on.
- Get it right the first time. Apply APA guidelines as you write, so you will not have much to correct during the editing stage. Again, putting in a little extra time early on can save time later.
- Use the resources available to you. In addition to the guidelines provided in this chapter, you may wish to consult the APA website at http://www.apa.org or the Purdue University Online Writing lab at http://owl.english.purdue.edu , which regularly updates its online style guidelines.
General Formatting Guidelines
This chapter provides detailed guidelines for using the citation and formatting conventions developed by the American Psychological Association, or APA. Writers in disciplines as diverse as astrophysics, biology, psychology, and education follow APA style. The major components of a paper written in APA style are listed in the following box.
These are the major components of an APA-style paper:
Body, which includes the following:
- Headings and, if necessary, subheadings to organize the content
- In-text citations of research sources
- References page
All these components must be saved in one document, not as separate documents.
The title page of your paper includes the following information:
- Title of the paper
- Author’s name
- Name of the institution with which the author is affiliated
- Header at the top of the page with the paper title (in capital letters) and the page number (If the title is lengthy, you may use a shortened form of it in the header.)
List the first three elements in the order given in the previous list, centered about one third of the way down from the top of the page. Use the headers and footers tool of your word-processing program to add the header, with the title text at the left and the page number in the upper-right corner. Your title page should look like the following example.

The next page of your paper provides an abstract , or brief summary of your findings. An abstract does not need to be provided in every paper, but an abstract should be used in papers that include a hypothesis. A good abstract is concise—about one hundred fifty to two hundred fifty words—and is written in an objective, impersonal style. Your writing voice will not be as apparent here as in the body of your paper. When writing the abstract, take a just-the-facts approach, and summarize your research question and your findings in a few sentences.
In Chapter 12 “Writing a Research Paper” , you read a paper written by a student named Jorge, who researched the effectiveness of low-carbohydrate diets. Read Jorge’s abstract. Note how it sums up the major ideas in his paper without going into excessive detail.

Write an abstract summarizing your paper. Briefly introduce the topic, state your findings, and sum up what conclusions you can draw from your research. Use the word count feature of your word-processing program to make sure your abstract does not exceed one hundred fifty words.
Depending on your field of study, you may sometimes write research papers that present extensive primary research, such as your own experiment or survey. In your abstract, summarize your research question and your findings, and briefly indicate how your study relates to prior research in the field.
Margins, Pagination, and Headings
APA style requirements also address specific formatting concerns, such as margins, pagination, and heading styles, within the body of the paper. Review the following APA guidelines.
Use these general guidelines to format the paper:
- Set the top, bottom, and side margins of your paper at 1 inch.
- Use double-spaced text throughout your paper.
- Use a standard font, such as Times New Roman or Arial, in a legible size (10- to 12-point).
- Use continuous pagination throughout the paper, including the title page and the references section. Page numbers appear flush right within your header.
- Section headings and subsection headings within the body of your paper use different types of formatting depending on the level of information you are presenting. Additional details from Jorge’s paper are provided.

Begin formatting the final draft of your paper according to APA guidelines. You may work with an existing document or set up a new document if you choose. Include the following:
- Your title page
- The abstract you created in Note 13.8 “Exercise 1”
- Correct headers and page numbers for your title page and abstract
APA style uses section headings to organize information, making it easy for the reader to follow the writer’s train of thought and to know immediately what major topics are covered. Depending on the length and complexity of the paper, its major sections may also be divided into subsections, sub-subsections, and so on. These smaller sections, in turn, use different heading styles to indicate different levels of information. In essence, you are using headings to create a hierarchy of information.
The following heading styles used in APA formatting are listed in order of greatest to least importance:
- Section headings use centered, boldface type. Headings use title case, with important words in the heading capitalized.
- Subsection headings use left-aligned, boldface type. Headings use title case.
- The third level uses left-aligned, indented, boldface type. Headings use a capital letter only for the first word, and they end in a period.
- The fourth level follows the same style used for the previous level, but the headings are boldfaced and italicized.
- The fifth level follows the same style used for the previous level, but the headings are italicized and not boldfaced.
Visually, the hierarchy of information is organized as indicated in Table 13.1 “Section Headings” .
Table 13.1 Section Headings
A college research paper may not use all the heading levels shown in Table 13.1 “Section Headings” , but you are likely to encounter them in academic journal articles that use APA style. For a brief paper, you may find that level 1 headings suffice. Longer or more complex papers may need level 2 headings or other lower-level headings to organize information clearly. Use your outline to craft your major section headings and determine whether any subtopics are substantial enough to require additional levels of headings.
Working with the document you developed in Note 13.11 “Exercise 2” , begin setting up the heading structure of the final draft of your research paper according to APA guidelines. Include your title and at least two to three major section headings, and follow the formatting guidelines provided above. If your major sections should be broken into subsections, add those headings as well. Use your outline to help you.
Because Jorge used only level 1 headings, his Exercise 3 would look like the following:
Citation Guidelines
In-text citations.
Throughout the body of your paper, include a citation whenever you quote or paraphrase material from your research sources. As you learned in Chapter 11 “Writing from Research: What Will I Learn?” , the purpose of citations is twofold: to give credit to others for their ideas and to allow your reader to follow up and learn more about the topic if desired. Your in-text citations provide basic information about your source; each source you cite will have a longer entry in the references section that provides more detailed information.
In-text citations must provide the name of the author or authors and the year the source was published. (When a given source does not list an individual author, you may provide the source title or the name of the organization that published the material instead.) When directly quoting a source, it is also required that you include the page number where the quote appears in your citation.
This information may be included within the sentence or in a parenthetical reference at the end of the sentence, as in these examples.
Epstein (2010) points out that “junk food cannot be considered addictive in the same way that we think of psychoactive drugs as addictive” (p. 137).
Here, the writer names the source author when introducing the quote and provides the publication date in parentheses after the author’s name. The page number appears in parentheses after the closing quotation marks and before the period that ends the sentence.
Addiction researchers caution that “junk food cannot be considered addictive in the same way that we think of psychoactive drugs as addictive” (Epstein, 2010, p. 137).
Here, the writer provides a parenthetical citation at the end of the sentence that includes the author’s name, the year of publication, and the page number separated by commas. Again, the parenthetical citation is placed after the closing quotation marks and before the period at the end of the sentence.
As noted in the book Junk Food, Junk Science (Epstein, 2010, p. 137), “junk food cannot be considered addictive in the same way that we think of psychoactive drugs as addictive.”
Here, the writer chose to mention the source title in the sentence (an optional piece of information to include) and followed the title with a parenthetical citation. Note that the parenthetical citation is placed before the comma that signals the end of the introductory phrase.
David Epstein’s book Junk Food, Junk Science (2010) pointed out that “junk food cannot be considered addictive in the same way that we think of psychoactive drugs as addictive” (p. 137).
Another variation is to introduce the author and the source title in your sentence and include the publication date and page number in parentheses within the sentence or at the end of the sentence. As long as you have included the essential information, you can choose the option that works best for that particular sentence and source.
Citing a book with a single author is usually a straightforward task. Of course, your research may require that you cite many other types of sources, such as books or articles with more than one author or sources with no individual author listed. You may also need to cite sources available in both print and online and nonprint sources, such as websites and personal interviews. Chapter 13 “APA and MLA Documentation and Formatting” , Section 13.2 “Citing and Referencing Techniques” and Section 13.3 “Creating a References Section” provide extensive guidelines for citing a variety of source types.
Writing at Work
APA is just one of several different styles with its own guidelines for documentation, formatting, and language usage. Depending on your field of interest, you may be exposed to additional styles, such as the following:
- MLA style. Determined by the Modern Languages Association and used for papers in literature, languages, and other disciplines in the humanities.
- Chicago style. Outlined in the Chicago Manual of Style and sometimes used for papers in the humanities and the sciences; many professional organizations use this style for publications as well.
- Associated Press (AP) style. Used by professional journalists.
References List
The brief citations included in the body of your paper correspond to the more detailed citations provided at the end of the paper in the references section. In-text citations provide basic information—the author’s name, the publication date, and the page number if necessary—while the references section provides more extensive bibliographical information. Again, this information allows your reader to follow up on the sources you cited and do additional reading about the topic if desired.
The specific format of entries in the list of references varies slightly for different source types, but the entries generally include the following information:
- The name(s) of the author(s) or institution that wrote the source
- The year of publication and, where applicable, the exact date of publication
- The full title of the source
- For books, the city of publication
- For articles or essays, the name of the periodical or book in which the article or essay appears
- For magazine and journal articles, the volume number, issue number, and pages where the article appears
- For sources on the web, the URL where the source is located
The references page is double spaced and lists entries in alphabetical order by the author’s last name. If an entry continues for more than one line, the second line and each subsequent line are indented five spaces. Review the following example. ( Chapter 13 “APA and MLA Documentation and Formatting” , Section 13.3 “Creating a References Section” provides extensive guidelines for formatting reference entries for different types of sources.)

In APA style, book and article titles are formatted in sentence case, not title case. Sentence case means that only the first word is capitalized, along with any proper nouns.
Key Takeaways
- Following proper citation and formatting guidelines helps writers ensure that their work will be taken seriously, give proper credit to other authors for their work, and provide valuable information to readers.
- Working ahead and taking care to cite sources correctly the first time are ways writers can save time during the editing stage of writing a research paper.
- APA papers usually include an abstract that concisely summarizes the paper.
- APA papers use a specific headings structure to provide a clear hierarchy of information.
- In APA papers, in-text citations usually include the name(s) of the author(s) and the year of publication.
- In-text citations correspond to entries in the references section, which provide detailed bibliographical information about a source.
Writing for Success Copyright © 2015 by University of Minnesota is licensed under a Creative Commons Attribution-NonCommercial-ShareAlike 4.0 International License , except where otherwise noted.
Font sizes: Design for the last row!
How large should texts in presentations be so that they can also be read in the back rows here is the answer.
For the correct PowerPoint font size, Guy Kawasaki’s rule of thumb is: “The smallest font size you should use is the age of the oldest viewer divided by two. Therefore, it is better not to use references and footnotes in the presentation, both belong in the handouts and are no longer recognizable from row 2 anyway. From our experience, font sizes below 14 points are not suitable for a presentation that is held. For headlines you should use at least 26 points when creating your slide master .
You should also avoid too small font sizes for charts and diagrams. Especially if you are presenting to a larger audience.
PowerPoint font size for reading presentations:
If you create a PowerPoint presentation to be sent by e-mail and then read on the monitor or printed (reading presentation = all information is on the slides), then slightly different rules apply: at least 10-12 points for continuous text and 16 points for headlines.
Line spacing is also important!
For the line spacing (ZAB) you should set approx. 120%-130% of the font size. If the line spacing corresponds to the point size of the font, the text is uncomfortable to read. The line spacing (ZAB) is too BIG if it is >150% of the font size.
Very long lines are harder to read and should be softly wrapped with SHIFT + ENTER! Maximum 40 to 60 characters per line.
The size of the slides also plays an important role: the smaller the slide, the larger the font size.
16:9 widescreen film 33,87 x 14,29 cm and 4:3 film 25,4 x 19,05 cm
Hold presentation Heading: approx. 26. point // Continuous text: 14 – 16 point.
Reading presentation Heading: from 16 points // Continuous text: 10 – 12 points.
16:9 wide screen slide in the format 25,4 x 19,05 cm (old 16:9 format)
Hold presentation Heading: approx. 33 points // Continuous text: 18 – 21 points.
Reading presentation Heading: from 21 points // Continuous text: 13 – 13 points.
The optimal line spacing (ZAB): Rule of thumb: factor approx. 120%-130% of the font size. Alternatively, select “Simple” in PowerPoint line spacing.
We optimize your presentations!
Donald Völker Managing Director, Creative Director
Fon +49 (0) 4108-419 888 E-Mail d.voelker@v2-powerpoint.de
Related Posts
Company presentation: building correctly, how to: pitch decks for start-ups, how to create an exemplary sales presentation, next post slide design: waste space.
- +49 (0) 4108 - 419 888
- Color Palettes
- Superhero Fonts
- Gaming Fonts
- Brand Fonts
- Fonts from Movies
- Similar Fonts
- What’s That Font
- Photoshop Resources
- Slide Templates
- Fast Food Logos
- Superhero logos
- Tech company logos
- Shoe Brand Logos
- Motorcycle Logos
- Grocery Store Logos
- Beer Brand Ads
- Car Brand Ads
- Fashion Brand Ads
- Fast Food Brand Ads
- Shoe Brand Ads
- Tech Company Ads
- Web and mobile design
- Digital art
- Motion graphics
- Infographics
- Photography
- Interior design
- Design Roles
- Tools and apps
- CSS & HTML
- Program interfaces
- Drawing tutorials

The Sega Logo History, Colors, Font,

Light Up Your Designs with These

How to Measure Brand Loyalty Effectively

The Square Enix Logo History, Colors,
Design Your Way is a brand owned by SBC Design Net SRL Str. Caminului 30, Bl D3, Sc A Bucharest, Romania Registration number RO32743054 But you’ll also find us on Blvd. Ion Mihalache 15-17 at Mindspace Victoriei
Academic Appeal: The 11 Best Fonts for Academic Papers
- BY Bogdan Sandu
- 26 February 2024

Imagine settling into the rhythm of crafting your academic magnum opus—the words flow, ideas chime, yet it all hinges on how your prose meets the reader’s eye. You’re well aware that the best fonts for academic papers don’t just whisper to the intellect; they shout to the discerning critic in each evaluator. Here unfolds a narrative, not merely of typography but your academic saga’s silent ambassador.
In forging this guide, I’ve honed focus on one pivotal, often underestimated player in the academic arena: font selection .
Navigate through this roadmap and emerge with a treasure trove of legible typefaces and format tips that ensure your paper stands hallmark to clarity and professionalism.
Absorb insights—from the revered Times New Roman to the understated elegance of Arial —paired with indispensable formatting nuggets that transcend mere compliance with university guidelines .
Dive deep, and by article’s end, unlock a dossier of sage advice, setting your documents a class apart in the scrutinous world of academic scrutiny. Here’s to typography serving not just as a vessel but as your ally in the scholarly discourse.
The Best Fonts for Academic Papers
Traditional choices and their limitations, times new roman : ubiquity and readability vs. overuse.

The Pittsburgh Penguins Logo History, Colors, Font, And Meaning
The dallas stars logo history, colors, font, and meaning.

You may also like
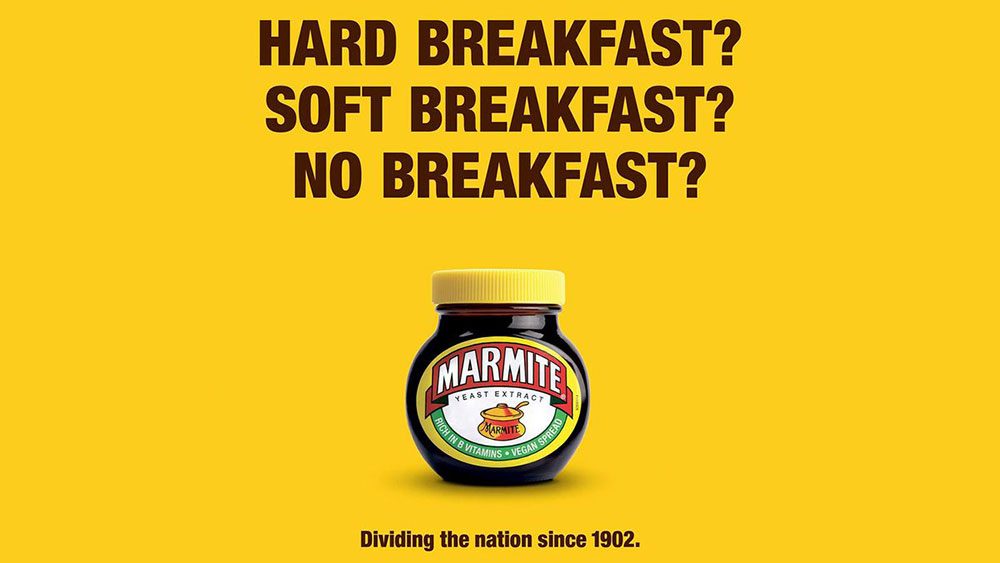
Ad Impact: The 19 Best Fonts for Advertising
- Bogdan Sandu
- 20 December 2023

T-Shirt Typography: 30 Best Fonts for T-Shirts
- 21 December 2023
How to Change Paper Size in PowerPoint

PowerPoint is a powerful tool used by millions of people across the globe to create professional presentations. One of the critical aspects of creating an effective presentation is choosing the right paper size. By default, PowerPoint comes with the standard 8.5 x 11 inches paper size. However, in many instances, this might not be sufficient, and you may need to change the paper size. In this article, we will explore the different aspects of changing paper size in PowerPoint and provide you with a comprehensive guide to do so successfully.
Table of Contents
Understanding the Need for Changing Paper Size in PowerPoint
Changing the paper size in PowerPoint may seem trivial, but it can determine how visually appealing, professional, and effective your presentation looks. Choosing the right paper size ensures that your presentation looks sharp, clear, and well-structured. Depending on the type of presentation, the audience, and the display devices, you may need to change the paper size. For instance, if you are presenting on a widescreen projector, you may need to choose a widescreen paper size to ensure your presentation fills the screen entirely.
Another reason why changing paper size in PowerPoint is important is to ensure that your presentation is optimized for printing. If you plan to print your presentation, you need to choose a paper size that matches the printer’s paper size. This ensures that your presentation prints correctly and looks professional. Additionally, changing paper size can also help you to create handouts that are easy to read and follow. By choosing a paper size that is appropriate for handouts, you can ensure that your audience can easily follow along with your presentation.
It is also worth noting that changing paper size in PowerPoint can help you to create presentations that are accessible to people with disabilities. For example, if you are creating a presentation that will be viewed by people with visual impairments, you may need to choose a larger paper size to ensure that the text and images are clear and easy to read. Similarly, if you are creating a presentation that will be viewed by people with hearing impairments, you may need to choose a paper size that allows you to include captions or subtitles for your audio content.
Different Paper Sizes Supported by PowerPoint
PowerPoint supports a range of paper sizes suitable for various purposes. The standard paper size is the 8.5 x 11 inches, but PowerPoint also supports other paper sizes such as 11 x 17 inches, A3, A4, B4, B5, and many more. Choosing the right paper size depends on various factors such as the content, audience, and display devices. Therefore, it’s essential to understand the different paper sizes supported by PowerPoint to make an informed decision.
When selecting a paper size for your PowerPoint presentation, it’s important to consider the aspect ratio of your slides. The aspect ratio is the proportional relationship between the width and height of your slides. The standard aspect ratio for PowerPoint is 4:3, but there are also widescreen options such as 16:9 and 16:10. Choosing the correct aspect ratio for your presentation can ensure that your slides look their best and are optimized for the display device.
Steps to Change the Paper Size in PowerPoint 2016 and Later Versions
Changing the paper size in PowerPoint 2016 and later versions is relatively easy. Here are the steps:
- Open your PowerPoint presentation.
- Click on the Design tab.
- Click on the Slide Size button in the Customize group.
- Select your desired paper size from the list or choose Custom Slide Size to set a custom paper size.
- Click on OK, and your slide size will change to the selected size.
It is important to note that changing the paper size may affect the layout of your slides. You may need to adjust the size and position of your text boxes, images, and other elements to ensure they fit properly on the new paper size.
Additionally, if you plan to print your presentation, make sure your printer supports the selected paper size. Otherwise, you may need to adjust the paper size in your printer settings or choose a different paper size that is supported by your printer.
How to Change the Paper Size in Earlier Versions of PowerPoint
If you are using an earlier version of PowerPoint such as 2013, 2010, or 2007, the steps to change the paper size are slightly different. Follow these steps:
- Click on the Page Setup button in the Page Setup group.
- Select your desired paper size from the list or choose Custom to set a custom paper size.
It is important to note that changing the paper size in earlier versions of PowerPoint may affect the layout of your slides. You may need to adjust the size and position of your text boxes, images, and other elements to ensure they fit properly on the new paper size. It is recommended to preview your presentation before printing or presenting to ensure everything looks as intended.
Tips for Choosing the Right Paper Size for Your Presentation
Choosing the right paper size for your presentation is essential to ensure its effectiveness. Here are some tips to help you choose the right paper size:
- Consider the display devices: Choose a paper size that matches the aspect ratio of the display devices to ensure that it fills the screen entirely, thereby reducing the chances of pixelation.
- Think about the audience: Consider the preferences, needs, and expectations of your audience before choosing a paper size. A larger size may be more effective if you are presenting to a large audience in a large venue.
- Test before presenting: Always test your presentation on different devices and venues to ensure that the chosen paper size is compatible with all the devices your audience might be using, and it looks consistent and professional.
Another important factor to consider when choosing the right paper size for your presentation is the amount of content you have. If you have a lot of information to present, a larger paper size may be more appropriate to ensure that the text and images are clear and easy to read. On the other hand, if you have less content, a smaller paper size may be more suitable to avoid overwhelming your audience with too much information.
Common Issues Faced While Changing the Paper Size in PowerPoint and How to Fix Them
Changing the paper size in PowerPoint may not always be smooth, and you may encounter some issues. Here are some common ones and how to fix them:
- Text and images may not adjust to the new size: In some instances, text and images may get cut off or distorted while changing paper size. To fix this, select the slides and apply the Autofit feature to adjust the text and images to fit the new size.
- Aspect ratio may get distorted: Changing the paper size may affect the aspect ratio, leading to distorted pictures and videos. To fix this, select the picture or video, click on the Picture Format or Video Format tab, and select the option that retains the aspect ratio.
Another common issue that may arise while changing the paper size in PowerPoint is that the layout of the slides may get disrupted. This can happen when the new paper size is significantly different from the original one. To fix this, you can try adjusting the layout manually by moving the elements around or using the Slide Master feature to make global changes to the layout.
Additionally, changing the paper size may also affect the font size and style of the text on the slides. This can make the presentation look inconsistent and unprofessional. To avoid this, it is recommended to use a standard font size and style throughout the presentation. You can also use the Replace Font feature to quickly change the font style and size of all the text on the slides.
How to Ensure Compatibility of the Changed Paper Size Across Devices
It’s crucial to ensure the compatibility of the changed paper size across devices, as not all devices may support the same paper size. Here are some steps to ensure compatibility:
- Test on multiple devices: Test your presentation on multiple devices to ensure that the chosen paper size is compatible with all of them.
- Save as PDF: To ensure that the presentation retains its formatting, save it as a PDF file so that the paper size is consistent across all devices.
Another important step to ensure compatibility is to check the printer settings before printing. Make sure that the printer is set to the correct paper size and orientation to avoid any issues with the printed document. Additionally, it’s important to communicate the paper size changes to any collaborators or recipients of the document to avoid confusion or formatting issues.
Advantages of Changing Paper Size for Your PowerPoint Presentation
Changing the paper size in PowerPoint can have numerous advantages, such as:
- Improving the visual appeal: Choosing the right paper size can enhance the overall look of your presentation, make it more visually appealing, and improve its professional appearance.
- Optimizing for different devices: Different devices have different screen sizes and display ratios. Changing paper size can optimize your presentation to fit perfectly on all devices, help reach a broader audience, and improve the user experience.
Another advantage of changing paper size for your PowerPoint presentation is that it can help you save printing costs. By choosing a smaller paper size, you can fit more slides on a single page, reducing the number of pages you need to print. This can save you money on paper, ink, and printing services.
Additionally, changing paper size can also help you create more engaging handouts for your audience. By choosing a larger paper size, you can include more detailed information, graphics, and images on your handouts, making them more informative and useful for your audience. This can also help your audience remember your presentation better and refer back to it later.
Best Practices for Changing Paper Size in PowerPoint to Enhance Your Presentation’s Effectiveness
Here are some best practices to follow when changing paper size in PowerPoint:
- Stick to standard sizes unless needed: Unless required, stick to the standard 8.5 x 11 inches paper size, as it is supported by most devices and is a safe choice.
- Consider the audience and venue: Choose a paper size that is suitable for your audience, venue, and display devices.
- Test, test, test: Always test your presentation on different devices, venues, and screen resolutions, so that you can ensure that the chosen paper size is compatible and effective across all.
Changing the paper size in PowerPoint can drastically enhance the effectiveness, professionalism, and visual appeal of your presentation. By following the steps and tips outlined above and implementing best practices, you can effectively change the paper size and optimize it for different devices and venues. Always remember to test your presentation across multiple devices and resolutions to ensure that it looks consistent, professional, and effective across all platforms.
By humans, for humans - Best rated articles:
Excel report templates: build better reports faster, top 9 power bi dashboard examples, excel waterfall charts: how to create one that doesn't suck, beyond ai - discover our handpicked bi resources.
Explore Zebra BI's expert-selected resources combining technology and insight for practical, in-depth BI strategies.

We’ve been experimenting with AI-generated content, and sometimes it gets carried away. Give us a feedback and help us learn and improve! 🤍
Note: This is an experimental AI-generated article. Your help is welcome. Share your feedback with us and help us improve.

IMAGES
VIDEO
COMMENTS
Use-case 2: Presentation font size for a keynote presentation. Text type: No smaller than: Aim for: Body text. 28pt. 48pt or larger. Top tip: If you're also using text labels or callouts in a keynote presentation, then make sure the font is slightly smaller than the rest of your text - ideally no smaller than 28pt.
The body of your poster should have a minimum 24 point font. Viewers should be able to read your smallest text from a few feet away. The title of your poster should have a 50+ font size, depending on the size of your poster and the length of the title. Do not use all uppercase letters for the title or body of the poster.
Set the font size too large and you can't get enough information on the slide to communicate your point. The classic recommendation is to keep your font size to a minimum of 30pt for any text in your presentation. Or the even more vague suggestion to "make the font big enough so even the person in the back of the room can read it.".
The "presentation slide" is the building block of all academic presentations, whether they are journal clubs, thesis committee meetings, short conference talks, or hour-long seminars. ... increasing font size, changing to sans serif fonts, and removing all capital text and underlining (using bold to draw attention). PDGFR, platelet-derived ...
8 tips on how to make research paper presentation that achieves its goals. ... Tip #4: Use proper fonts and text size. The font you use should be easy to read and consistent throughout the slides. You can go with Arial, Times New Roman, Calibri, or a combination of these three. An ideal text size is 32 points, while a heading size is 44.
So a poster with few elements, that can be seen from across the room, is perfect. For this we recommend the following font sizes as a minimum for your text (based on an A0 size): Title: 90. Headers: 40. Body text: 36. Your body text should be easily readable from 1 metre away.
How can you choose the right font size for your corporate presentations? Powered by AI and the LinkedIn community. 1. Consider the context. 2. Simplify the content. 3. Match the design. Be the ...
Avoid using excessively small or large fonts, negatively impacting readability and overall presentation. Font Size For Headings And Subheadings. It's important to ensure they are appropriately sized for readability and professionalism regarding font size for paper headings and subheadings. While the standard font size for papers is typically ...
It depends. You certainly don't want to do what I have seen twice that set the record for smallest font used on a slide in my experience. These presenters used a four point font. No, that is not a typo. Four (4) point! And they expected the audience to be able to read it.
How do you choose the right font size for your slides? Powered by AI and the LinkedIn community. 1. Know your audience and context. Be the first to add your personal experience. 2. Use a ...
Choose a simple and professional font. 2. Use a consistent and coherent font scheme. 3. Use a large and legible font size. 4. Use text sparingly and strategically. 5. Use text alignment and ...
The purpose of your presentation and the viewing platform or format will help determine the size that you should use for your presentation. What are the most common sizes? 4:3. Commonly known as the standard aspect ratio, 4:3 is used where the presentation is intended for print distribution as it can easily adapt to the A4 or Letter paper size ...
• A im for font size to be 30 or no less than 24. ... Treat the presentation like a research paper and cite all sources. This includes images, quotes, tables, and paraphrased information. Citations and references must be provided when quoting and paraphrasing. References.
Authors use different sizes of font for their poster text (Table 2). The general rule is to use a font size that can be read from a distance of 3-feet (1 meter), which is the approximate distance that a person will stand when viewing a poster. The largest fonts (e.g., 40-120 point font) will be used for the title, author list and institutions.
Here are suggested font sizes for presentations. Content: Text should be no smaller than size 24. Your presentation slides or video should only be considered a guide for what you are presenting. Omit long texts, and use short sentences or bullet points. You should not have 50 slides for a 15 minutes presentation.
Most presentation experts recommend these size ranges. The thumb rule — a larger font size with less text on screen is always good. The default slide in PowerPoint starts with 60pts for section headers and 24pts for body font. Header Font: Between 26 and 42 point. Body Font: Between 18 and 24 point.
You should use 10 pt. Times New Roman font in your IEEE format paper. For the paper title, 26 pt. Times New Roman is used. For some other paper elements like table footnotes, the font can be slightly smaller. All the correct stylings are available in our free IEEE format template.
Set the top, bottom, and side margins of your paper at 1 inch. Use double-spaced text throughout your paper. Use a standard font, such as Times New Roman or Arial, in a legible size (10- to 12-point). Use continuous pagination throughout the paper, including the title page and the references section.
If you create a PowerPoint presentation to be sent by e-mail and then read on the monitor or printed (reading presentation = all information is on the slides), then slightly different rules apply: at least 10-12 points for continuous text and 16 points for headlines.. Line spacing is also important! For the line spacing (ZAB) you should set approx. 120%-130% of the font size.
Font size for titles should be 36-44 pt. Font size for all other text should be at least 24-28 pt. But more importantly, keep the text on each slide to a minimum!
Most committees nod approval at sans-serif fonts for figures and tables. Think Arial or Calibri—crisp for data presentation. Main text? Stick to serifs. Sans-serifs are modern, sure, but tradition wins in dissertation style. Is there an ideal font size for academic documents? Size 12 strikes a balance—neither squint-inducing nor space-hogging.
Presentation Font #26: Dela Gothic One. Dela Gothic One is a thick and chunky font with a strong feel. It's ideal for headings on posters, packaging and in titles on presentations. This font has a lot of power and is best paired with a simple sans serif font or even a classic serif like Garamond for body copy.
Here are the steps: Open your PowerPoint presentation. Click on the Design tab. Click on the Slide Size button in the Customize group. Select your desired paper size from the list or choose Custom Slide Size to set a custom paper size. Click on OK, and your slide size will change to the selected size.