

How to create stunning interior design presentation boards
In the dynamic world of interior design, the ability to present a cohesive and visually appealing concept is essential. A well-crafted interior design presentation board can do just that.
An interior design presentation board (including elements like design schematics and mood boards) is more than just a collection of ideas — it’s a vital tool that effectively communicates your vision to your clients.
Want some ideas for creating more effective interior design boards?
In this 7-minute read, you’ll get professional tips for creating presentation boards that not only captivate but also clearly articulate your design intentions. From design schematics to mood boards to board layouts, you’ll get the insights you need to take your presentations to the next level.
Let’s start with a quick look at the basics.
What is a Design Schematic / Presentation Board?

An interior design schematic is a visual representation that outlines the key elements and overall concept of a design project. It serves as a roadmap to guide both the designer and the client through the project’s aesthetic, functional, and spatial decisions.
You might be wondering… What’s the difference between an interior design presentation board, a mood board, and a design schematic?
The Answer: It depends on the project and the designer.
- Similarities: They all feature similar elements (color schemes, material and furnishing suggestions, etc.) and in many cases, designers use the terms interchangeably. All three take place during the Schematic Design phase of the project.
- Mood boards tend to be more conceptual than design schematics and presentation boards. On large projects, you use mood boards earlier on in the Schematic Design phase. But for small and simple projects, a mood board could also serve as the final design schematic/presentation board.
- For larger projects, you will likely present multiple mood boards before deciding on a final design style. Then, you present design boards/design schematics which include to-scale floor plans and 3D renderings of the space along with your final recommendations for color palettes, material choices, and furnishings.
Important: In this article, we’ll refer mostly to interior design presentation boards or design schematics. However, the tips also apply when preparing simple mood boards.
Why You Need a Design Schematic
A design schematic or interior design presentation board is a fundamental tool in interior design that outlines the aesthetic and functional vision of a project. It ensures all stakeholders have a clear, unified understanding of the project’s direction. This enables you and your clients to have effective communication and easier decision-making throughout the design process.
Key reasons to use a design schematic:
- Clear Vision Communication: It bridges the gap between abstract ideas and tangible realities and helps to convey your vision to clients, contractors, and collaborators.
- Efficient Planning: By outlining the project’s scope from the outset, a design schematic allows for efficient allocation of time, materials, and labor.
- Issue Identification: Early visualization helps identify potential design or functionality issues. This lets you make adjustments before implementation and saves you time and money.
- Cohesive Design: Ensures every element, from color schemes to furniture placement, works harmoniously towards the intended aesthetic.
- Client Alignment: Facilitates approval from clients by minimizing misunderstandings and revisions thanks to a detailed preview of the proposed design.
Want some tips for creating a stunning presentation board? Check out the next section.
How to Create an Interior Design Presentation Board
Check out these 5 steps to creating a board that conveys your vision and plan to your client.
1. Choose Digital Board vs Hard Board
In the digital age, the choice between a digital board and a hard board is pivotal. Each medium has its unique advantages and can significantly influence the presentation’s impact.
Digital Boards are versatile and easy to share. This makes them ideal for remote presentations or when working with clients across different locations.
They allow for quick edits and updates, ensuring that the presentation can evolve in real time based on client feedback.
Digital boards also let you include interactive elements, such as links to specific products or immersive 3D renderings .
Hard Boards , on the other hand, provide a tactile experience that digital boards cannot replicate.
They’re particularly effective in showcasing textures, colors, and materials since they let clients physically interact with the elements of the design.
Hard boards excel in face-to-face meetings, where the physical presence of the materials makes a stronger impact on the client and fosters an emotional connection with the design.
So which is better?
It depends on the nature of the project, the preferences of your client, and the context of the presentation. Many designers find value in combining both approaches — using digital boards for their flexibility and convenience, and hard boards for their tangible, persuasive power.
2. Choose Your Inspiration
Selecting the right inspiration is an important step in crafting an interior design presentation board that resonates with your vision and appeals to your client.
Here’s how to approach this critical step:
- Explore Broadly: Begin with a wide-ranging exploration. Look at design magazines, online portfolios, and social media platforms like Pinterest and Instagram. This broad approach helps you uncover diverse styles, trends, and innovative ideas.
- Condense Your Ideas: After gathering a broad array of inspirations, start narrowing down your options. Focus on themes, colors, and elements that align with your client’s preferences and the project’s requirements.
- Create a Mood Board: A mood board is an excellent tool for refining your inspiration. It allows you to compile your ideas into a cohesive visual narrative. This can include textures, colors, furniture styles, and architectural elements.
- Client Collaboration: Involve your client in the inspiration process. This collaboration ensures the final board reflects their taste and expectations while fostering a stronger buy-in for the proposed design.
3. Lay Out the Room

The layout of the room is a critical component since it shows how space will be utilized and how different elements will interact within it.
Here are some tips for creating the layout:
- Start with Measurements: Accurate dimensions are key. Ensure you have a detailed measurement of the space, including doorways, windows, and any structural elements that might influence the design.
- Sketch Multiple Options : Don’t settle on the first layout you design. Sketch multiple configurations to explore various ways the space can be organized. This could include different furniture arrangements, traffic flow, and focal points.
- Use Design Software : There are many design software options available that can help you visualize the room layout in 3D . This can be especially helpful for presenting your ideas to clients, as it gives them a more tangible understanding of the space.
PRO TIP! – Go with a powerful, yet easy-to-use design program like Cedreo . It makes it easy for you to create multiple layouts in a matter of minutes. Plus, even with no previous 3D design experience, you can create 3D floor plans and photorealistic 3D renderings that help take your design boards to the next level!
Incorporate Key Elements
- Furniture Placement: Show how furniture will be arranged for both aesthetic appeal and functionality.
- Lighting: Indicate sources of both natural and artificial light, and how they influence the ambiance of the room.
- Flow: Ensure there’s a logical flow between different areas of the room (and between different rooms).
By carefully choosing your inspiration and thoughtfully laying out the room, you create a solid foundation for your interior design presentation board. Now it’s time to add the design elements.
4. Highlight Fabrics, Colors, and Materials
Choosing the right fabrics, colors, and materials is important for conveying the look and feel of your design.
Here’s how to highlight these elements effectively:
- Fabric Swatches: Include samples of the fabrics you plan to use. This could be for upholstery, curtains or cushions. Real swatches attached to a hard board or high-quality images on a digital board let clients touch and feel the textures.
- Color Palette: Use color swatches to visually communicate the color palette that aligns with the design’s mood and style.
- Materials Board: Similar to fabric swatches, include samples or images of key materials like wood, metal, stone, tile or glass. This helps clients understand the quality and finish of the surfaces in their space.
Considerations for Selection:
- Durability: Choose materials that not only look good but are also suited to the space’s function.
- Sustainability: Whenever possible, opt for eco-friendly materials to improve sustainability.
- Harmony: Ensure that all selected fabrics, colors, and materials complement each other to create a cohesive look.
5. Add Furniture & Decor

Furniture and decor play a significant role in bringing your design board to life.
Some tips for adding these elements to your presentation board:
- Furniture Selection: Carefully select furniture pieces that align with the room’s layout, style, and function. Include images or drawings of these pieces on your board to showcase how they contribute to the overall design.
- Decorative Elements: Incorporate decor items such as art, rugs, and accessories. These elements add personality by making it feel curated and lived-in.
- Annotation: Use brief annotations or labels to describe the significance of each piece. Include details about the material or its intended impact on the space.
PRO TIP! – Design programs like Cedreo make it easy to decorate a space . Cedreo even offers a 1-click decorating option. You select the style and Cedreo saves you loads of time by automatically adding decorations.
Considerations for Furniture and Decor:
- Scale and Proportion: Ensure that furniture and decor are scaled appropriately for the space so they maintain balance and proportion.
- Functionality: Choose pieces that not only look beautiful but also serve the functional needs of the space.
- Personal Touch: Include items that reflect the client’s personality or have a special meaning to them. This makes the space uniquely theirs and creates a stronger emotional connection.
Your board is created… Now it’s time to present it. Keep going to the next section for tips on how to do that.
How to Present Your Design Board to Your Interior Design Clients
Presenting your design board effectively is as crucial as the board’s creation itself. It’s the moment where you communicate your ideas with the goal of getting the client on board with your design.
Here are some key strategies for a successful presentation:
- Set the Scene: Begin with a brief overview of the project objectives and how your design meets these goals. This sets the context for the presentation and primes the client for what they are about to see.
- Walk Through Methodically: Guide your client through the board in a logical order. Start with the layout and then move to the color scheme, materials, furniture, and finally…the decor. This step-by-step approach helps clients understand the rationale behind each decision.
- Be Open to Feedback: Encourage questions and feedback. Remember, your presentation is a two-way conversation. Your openness to their input can lead to a final design that truly resonates with the client.
- Visual and Verbal Narration: Use both visual elements on the board and your verbal explanation to tell the story of the design. Emphasize how each element contributes to the overall vision and functionality of the space.
Get Designing with Cedreo Today!
With the right tools, an interior design project becomes an exciting journey of creativity and innovation. Cedreo is here to support you every step of the way.
Cedreo is engineered to meet the needs of remodelers, architects, interior designers, and builders with features like:
- Effortless 3D Modeling: Create stunning 3D models of your designs quickly and easily.
- High-Quality Renderings: Bring your designs to life with high-resolution renderings that are perfect for presentation boards.
- Streamlined Workflow: Cedreo streamizes your design process, from initial concept to final presentation.
Start transforming your design visions into reality with Cedreo today. With a FREE version , you’ve got nothing to lose. Sign up today !
Take Your Designs to the Next Level with Cedreo
These articles might be of interest to you:.
Explore the articles covering the latest Cedreo’s features, keep up-to-date on 3D home design news, and hear more about what our clients have to say.

Mistakes to Avoid When Creating Interior Design Presentations

How to create successful architecture presentation boards

The Most Popular Residential Roof Styles for Your Designs
Free Site Analysis Checklist
Every design project begins with site analysis … start it with confidence for free!
How to Create a Successful Architecture Presentation Board
- Updated: December 31, 2023

Architecture is as much about effective communication as it is about innovative design. At the heart of this communicative process lies the architecture presentation board, a tool quintessential for architects to convey their vision, ideas, and concepts.
These boards are more than mere visual aids; they are the narrative bridge between an architect’s imaginative conception and the practical world where these ideas may take shape. They are not just a requirement for academic submissions or professional proposals but are a fundamental aspect of the architectural design process.
They serve as a canvas where ideas are visualized, concepts are explained, and designs are brought to life for various audiences, be it clients, peers, competition judges, or the general public.
Understanding how to effectively create and present these boards is crucial, as a well-crafted presentation not only showcases a finished scheme but also reflects the thought process, attention to detail, and the authors ability to communicate complex ideas succinctly and visually.
What are architecture presentation boards used for?
Architecture presentation boards serve several different purposes:
- Students use them to present work to their professors and peers.
- Professionals use them to present designs to clients, committees, shareholders, and exhibitions.
- They may be a means to win a commission, or they may help to take a project into the next stage.
What is the purpose of an architecture presentation board?
Architecture presentation boards are a tool to showcase your work. They are a way to draw your viewers into your design process and methods, providing an overall summary and vision for the project. You are communicating your design and showcasing your artistic skills, and your sense as a designer.
Every successful project has a central concept, a “big picture” theme that gives it purpose. When you look at your project, what is that big idea?
As it is central to your whole project, this will guide you as you prioritize your work and determine the flow of your ideas. The primary purpose of your project is to communicate this central concept in the best way possible.

AutoCAD Template Kit
Format your drawings with the correct set of tools. This CAD template enables you as a designer to spend your time on what matters – the design!

Stop searching for CAD blocks!
How do you layout an architecture presentation board, 01 – structure/order.
Before you begin laying out your presentation board, think about the main points you want to convey. From there, determine what images and graphics will best represent those ideas. Gather all of the information you will need, making a note of what graphics and text you will need to communicate your ideas.
Remember, you are essentially telling a story, so pay close attention to the flow of the narrative as you arrange your elements. Consider the beginning, middle, and end of the story you want to tell.
Depending on the guidelines you are given, you may present your boards side-by-side, as separate boards presented in a sequence, or as one big poster. If no strict parameters are in place, figure out what structure and layout will tell your story the best. While a series of boards will logically convey your story, one big board is often the easiest option.

02 – Orientation
Will your presentation board be oriented in portrait or landscape? Sometimes you will get to make that call, but many times it will be determined for you by your director, client, or professor. Make sure you know beforehand what the parameters are.
If you get to choose, give it some careful thought. Which orientation will give your graphics the room they need to be the most impactful? Which orientation gives your whole project a natural flow for your narrative?
03 – Size
Much like orientation, you may or may not get to decide what size your presentation boards will be. You will often have restrictions that limit you to a specific board size and a certain number of boards.
Make sure you know your limitations before you start working on your layout. Your boards should all be the same size to achieve continuity.
You can use a combination of different sizes to produce a board of equivalent size. For example, a combination of two A1 boards will add up to an A0 board.

04 – Layout
The most common way to organize your layout is by using a grid. Using a grid will help keep the boards in your project consistent.
If you are using InDesign , you can achieve this uniformity by creating a master page that acts as a template for your whole project.
Templates are useful because they can save you a great deal of time, and they ensure uniformity throughout your project. Your grid should include spaces for titles, numbering, your name, and any other information that will repeat on each board.
Before you start laying out your actual boards, sketch out various configurations so you can determine what will work best. You can do a small-scale sketch to get the basic idea of the flow of each board. This allows you to change the arrangement of the elements before you commit to anything on your boards.
You can do this initial phase using software or sketching it out on paper.
After you have determined what type of layout you want to use, estimate how much space you will need for each element on the page. Each graphic needs to be large enough to have an impact. Determine how much space you would like to leave in between each graphic.
Use equal spacing throughout your project to create continuity. Here is an excellent tutorial on planning your layout using Indesign:
The layout of each board should show the relationship between all of the elements. It should be clear to read and follow a logical left-to-right and top-to-bottom progression.
Imagine a viewer looking at your presentation. What do you want them to see first? What is the best way to make them understand your project? Does your layout achieve this?
You should also pay attention to the relationship between each board. Is there a logical progression from one board to the next? Does the sequence make sense? If you will not display the boards in a configuration that makes them all visible at once, make sure you number them, so your viewers follow the correct sequence.
Don’t feel the need to fill every square inch of your presentation board. Leave enough space so that it doesn’t look too busy or cluttered. On the other hand, don’t leave too much space either, or it will look like you didn’t finish the board, didn’t have enough material for the board, or that you didn’t work very hard.
05 – Visual Hierarchy
Some of your images need to garner more attention than others. Consider all of the graphics and text you will be using. Which images are central to your main idea?
The images that are essential for communicating your vision should take up more space in the grid. You should have an image that people can see from a distance and other images that they can see from up close. This creates a visual hierarchy.
What is the most important aspect of your project? Make that the element people can see from a distance. There are ways to accomplish this in addition to making it the largest element on the board. For example, you can use color to draw the viewer’s eye to a particular graphic, especially if the rest of the board is monochromatic.

06 – Background
The background of your presentation board should be simple. This allows the viewer to see all of the elements without the distraction of a busy background. You don’t want anything to detract from the critical details of the board. Your graphics and text should be the primary focus; don’t use bold colors or textures that will detract from that.
A white, or even light gray, background will make your graphics and text stand out. It will give your presentation a professional look that isn’t too busy. You can use other colors if they help convey your central concept; just make sure the background is plain enough that the viewer focuses on the design, not the background.
Be very selective when using a black background, as it may make the text harder to read, and your graphics may not stand out as much as you would like them to.
Whatever color you choose for your background, use it to your advantage. Effective use of negative space can make your design look clean and professional.

07 – Color Scheme
Many professionals and students stick with black, white, and gray for presentation boards. While this can give your boards a professional look, don’t be afraid to add a pop of color. While sticking with greyscale may seem like a safe choice, there is a risk of blacks and greys making your design seem cold and lifeless.
Think about ways you can use color to bring life to your design. You may opt to add just one color, such as green for landscaping, to provide contrast to an otherwise monochromatic presentation. You could also bring in an additional color to represent a particular building material (brick, glass, wood, etc.).
You can also choose a brighter, more eye-catching color, such as yellow or orange, as a feature in your diagrams . Whatever you choose, use the same color across all of your boards to maintain a consistent flow.
If color is one of the main focuses of your project, or if there are details that you cannot adequately represent in greyscale, then you should feel free to delve deeper into the world of color. Don’t limit yourself to merely an accent color in this case, but don’t take it too far and make the mistake of overusing color to the point where it is a distraction.
08 – Font
All of the text throughout your project should be in one font. Don’t use font style as an avenue for creativity; it is more important to make sure the font style and size produce a readable, consistent product.
Sans serif fonts, such as Helvetica or Futura, will give your presentation a clean, minimalist look.
Avoid script or handwriting fonts, as they will not give your boards a clean, professional look. Keep the color of your font dark (black or dark grey work well) to provide contrast to a light background.
Whichever font you select, make sure the style and size are readable for your viewers before you finalize your boards. The best way to do this is to print out your text on an A3 paper, pin it up somewhere, and stand back to see how it will look when it is displayed.

A full breakdown, list, and description of the most popular fonts for architecture can be found here .
09 – Title
The most common placement for a title bar is the top left since your board will most likely follow a left-to-right and top-to-bottom progression. Many successful and professional-looking boards have titles at the top right, at the bottom, or somewhere in the middle.
Choose the position that makes the most sense for your project. As with other design decisions, make sure it does not distract the viewer from seeing the big picture.
Make sure the title placement is consistent from board to board. This consistency will be both visually appealing and professional.
10 – Text
Keep your explanations concise. People are not going to spend much time reading lengthy descriptions, so only include relevant information and keep it short. Remember that your text boxes are part of your visual hierarchy, so utilize the size and alignment to complement your graphics. Consider the various ways you can align the text within the text box. What flows best? What is pleasing to the eye?
Aside from your title, do not use all capitals in your text. Your work will look more professional and be easier to read if you stick with the standard rules of capitalization.
Whenever possible, use a graphic or a sketch, rather than an explanation, to portray an idea. Since this is a graphic presentation, you want your graphics to tell the story, not your text. Include a concise statement that highlights the features of your design. This is basically your sales pitch; lengthy explanations will make you lose your audience.
11 – Image Selection
The selection of images is a critical part of putting your presentation board together. The graphics you choose can make or break your entire design presentation.
You want to select the images that best convey the important details of your project. If you use too many images, your presentation may appear cluttered and confusing. If you use too few images, it may look like you did not put much effort into your presentation.
Over the course of your project, you have generated countless sketches, renderings, models, and drawings. Resist the temptation to include everything just to show how hard you worked. Keep your big picture in mind and determine which images will directly show or best support that idea.

12 – Models
On occasion, a physical model, or even several models showing different aspects of your design, may be required for your presentation board. This is an additional means of communicating your vision to your viewers.
There are several materials you can choose for your model. Card and cardboard are inexpensive and come in various weights, finishes, and colors.
Foam board is also available in various widths and thicknesses. It is generally white, but it also comes in other colors. It is very lightweight and sturdy, making it an ideal material for your presentation board.
Balsawood is another good option. It is easy to work with and comes in varying weights. The material you choose will depend on the look you are trying to achieve as well as how much weight you can adhere to your presentation board.
Your model pieces can be cut by hand with tools such as an X-Acto knife or a scalpel. If you have access to a laser cutter, it will save you some time and give you more precision.

13 – Time Constraints
Give yourself enough time to produce a well-thought-out, effective, visually appealing presentation. You spent a considerable amount of time on your design; it would be a shame to rush through your presentation boards. Give each part of the process enough attention so that your final product really showcases and highlights your talent and hard work.
Time management is critical when working on a big project like this. It can seem overwhelming at first, so split the project into smaller sub-tasks to make it more manageable. Give yourself a deadline for each of those smaller tasks. Make a schedule that shows which tasks you will accomplish each day. Make sure you leave yourself a little wiggle room in case anything unexpected comes up.
What should be included in an architecture presentation board?
Unless you receive explicit instructions regarding what to include in your presentation boards, it is up to you which elements make the cut. When you are deciding what elements to incorporate into your project, reflect on what will best explain your design.
When someone completely unfamiliar with your project is looking at your boards, what do you want them to see?
When deciding what text to include in your project, make sure you include an introduction, your design brief, and any applicable precedents. In addition, you will want to include concise textual explanations as needed throughout your presentation.
For your graphic representations, you want to include the basics: elevations, floor plans, and sections. You can represent these with 3d drawings, perspectives, or renders. You may also include some key features of your design that make it unique, and in addition to highlighting the finished product, select elements that show your concept and design development.
Some additional tips:
- When choosing a perspective view, select one that highlights the best aspects of your design. This graphic is usually the most prominent picture on the presentation board. The hero image!
- You will want to include at least two different elevation views so your viewers can get a sense of the bigger picture.
- Don’t be afraid to include sketches. If you include some sketches that show the progression from a simple idea to the final product, you can communicate your vision as well as your process.
When you are adding all of these elements to your presentation board, make sure each graphic representation of the plan has the same orientation. If one picture has north pointed in one direction and another picture has north pointed in a different direction, it can be disorienting for the viewer.
Likewise, each graphic should use the same scale unless there is one picture that is bigger than the others for the purpose of visual hierarchy.
There is one obvious detail that you may inadvertently overlook. Make sure your name is on your presentation board. If you have more than one board, put your name on each one. The name is in the bottom right-hand corner, but it can also appear in the title bar.

Types of Architectural Presentation Boards
Organizing your architectural presentation sheets into specific categories can be a very effective way to present your projects. There are several types of architectural presentation boards, and the following tips can help you present your project at different stages:
C onceptual board
Concept sheets are a type of presentation board that showcase your initial ideas and approach to a project. They typically include information about the concept behind the project and how design decisions were made. It is important to submit concept sheets before presenting your architectural drawings and renderings.
When creating concept sheets, you may want to include conceptual collages and diagrams to help explain your ideas to the audience. These can be created using 3D modeling software or programs like Adobe Photoshop or Illustrator. The goal of concept sheets is to clearly and simply present the various stages of your project to the review panel.
Site a nalysis board
Before beginning a project, architects perform thorough analyses to determine the needs, conditions, and limitations of the site. This analysis serves as the foundation for the concept development. Site analysis boards may include site analysis, urban scale analysis, sociocultural analysis, analysis of physical conditions, and environmental analysis.
It is important to conduct extensive research and present your findings in a clear and organized way, as analysis boards can help reinforce the concepts presented in your architectural drawings.
It is also important to keep in mind that the jury members may have difficulty understanding analysis presented alongside the architectural drawings.
Technical / Detail Board
Technical drawings are a crucial aspect of architectural projects, as they help to depict the structural elements of a design and guide the construction process. It is important to present technical drawings in a clear and organized manner, particularly in application projects and student projects.
Technical drawing boards should typically include a master plan at a scale of 1/5000 or 1/1000, as well as site plans and floor plans at a scale of 1/500, and sections and elevations at a scale of 1/200. Detail drawings, including system sections and details at scales of 1/20, 1/10, and 1/5, should also be included on the technical drawing boards.
These drawings will help to provide a more complete understanding of the project to the review panel.

Professional Boards
While student projects and competition entries are evaluated by a panel of judges, in professional practice, the client serves as the “jury” for your work. Instead of preparing presentation boards in the same way you would for school or competition projects, it is important to create presentations that will appeal to clients.
The most important factor for most clients is the design of the living space, so it can be helpful to focus on renderings and plain plans rather than technical drawings. The visual appeal of your presentation boards, including the color scheme and atmosphere in the renderings, as well as your ability to effectively present and explain your ideas to the client, will also be important factors in their evaluation of your work.
Programs, Software, and Tools
There are several software applications you can use to build your presentation board. Choose one that you are already familiar with, so you aren’t trying to learn new software while you are doing your layout. That is an added stressor that you just don’t need!
InDesign, Illustrator, and Photoshop are excellent programs, but if you need something a bit more simple, Microsoft Word, Pages, Powerpoint, or Keynote will also work.
InDesign was designed for making presentations. AutoCAD was designed for constructing plans. Photoshop was designed for editing raster images. Illustrator was designed for creating vector art. While some people are able to make their whole presentation using Illustrator, Photoshop, or even PowerPoint, it makes more sense to use each piece of software in a way that takes advantage of its strengths.
You can import files from AutoCAD, Photoshop, and Illustrator into InDesign and take advantage of the strengths of each application.
Before you delve into your own presentation board, do some research. Look online for examples and make a note of the elements you like. Combine that inspiration with your creativity to produce a stunning presentation.
Here are some websites you can use for inspiration:
The President’s Medals Winners
Pinterest – Architectural Presentation Boards
World Architecture Students Community – Presentation Boards
FAQ’s about architecture presentation boards
How do you present an architecture presentation.
Here are some general guidelines for presenting an architecture presentation:
- Define your objective : Clearly define the purpose of your presentation and the main ideas or arguments you want to convey.
- Organize your material : Gather and organize your material in a logical and coherent manner that supports your objectives. This may include drawings, images, models, diagrams, and text.
- Create a clear and visually appealing layout : Use a layout that is easy to follow and that effectively presents your material. Consider using contrast, hierarchy, and balance to guide the viewer’s eye.
- Practice your presentation : Practice your presentation to ensure that you are comfortable with your material and can deliver it in a clear and confident manner.
- Use visual aids effectively : Use visual aids such as slides, drawings, and models to supplement your presentation and help illustrate your points. Avoid overloading the viewer with too much information and focus on presenting the most important ideas.
- Engage your audience : Engage your audience by using a variety of presentation techniques, such as asking questions, using storytelling, and using interactive elements.
- Conclude with a summary : Recap the main points of your presentation and conclude with a clear and concise summary.
Why do architects use presentation boards?
As explained above, architecture presentation boards are commonly used by architects and designers to visually communicate their ideas and designs.
Presentation boards typically consist of a series of large format panels that can be mounted on a wall or a stand. These panels can be used to display a variety of materials, such as drawings, images, models, diagrams, and text.
Presentation boards are an effective way to present a comprehensive overview of a project or design concept, and they can be used to showcase the key features and characteristics of a project.
They are often used in design reviews, presentations, exhibitions, and competitions , and can be a useful tool for architects and designers to communicate their ideas to a variety of audiences, including clients, stakeholders, and reviewers.
Presentation boards can be customized to suit the specific needs of the project and can be designed to effectively convey the key ideas and concepts of the design, enabling architects and designers to effectively present and showcase their work in a clear and visually appealing manner.
To Sum Up…
Even the most exceptional design concept can appear uninspired if you do not present it well.
You have spent weeks, maybe even months, on your design. Don’t sell yourself short by not communicating your vision well. The professional, creative, and aesthetic quality of your presentation will affect how your work is received.

Every design project begins with site analysis … start it with confidence for free!.
Leave a Reply Cancel reply
You must be logged in to post a comment.
As seen on:

Unlock access to all our new and current products for life .
Providing a general introduction and overview into the subject, and life as a student and professional.
Study aid for both students and young architects, offering tutorials, tips, guides and resources.
Information and resources addressing the professional architectural environment and industry.
- Concept Design Skills
- Portfolio Creation
- Meet The Team
Where can we send the Checklist?
By entering your email address, you agree to receive emails from archisoup. We’ll respect your privacy, and you can unsubscribe anytime.
- Design Presentation Boards
Presentation Board Content
Consistency in presentation boards.
- Presentation Boards should all be the same size and orientation (landscape/portrait)
- Common colour scheme
- Same font size, colour and style for titles and lables
- Same Layout/ Grid patern of content
- Consistent style and size of images
- Common Logo/Insignia on each board
Presentation Board Titles & Labels
Grid layout in presentation boards, "reading" a presentation board, left to right or center outward reading order in presentation boards, top -> down reading order in presentation boards, presentation board weighting, framing images in a presentation board, stand back from the presentation board.

Free Design Stuff Ad
Popular Topics

Featured post
What's the best ecommerce platform.

Most Read Articles

Blog Archive
- ► May (2)
- ► April (52)
- ► March (28)
- ► February (18)
- ► January (9)
- ► December (9)
- ► November (17)
- ► October (20)
- ► September (7)
- ► August (14)
- ► July (11)
- ► June (11)
- ► May (12)
- ► April (9)
- ► March (17)
- ► February (8)
- ► December (7)
- ► November (12)
- ► October (30)
- ► September (22)
- ► August (16)
- ► July (4)
- ► June (8)
- ► April (7)
- ► March (3)
- ► February (5)
- ► January (2)
- ► December (3)
- ► November (6)
- ► October (4)
- ► September (4)
- ► August (7)
- ► July (10)
- ► June (4)
- ► May (10)
- ► April (8)
- ► February (9)
- ► January (4)
- ► November (7)
- ► October (5)
- ► September (3)
- ► August (3)
- ► July (1)
- ► January (1)
- ► November (3)
- ► September (1)
- ► August (1)
- ► June (3)
- ► March (11)
- ► November (1)
- ► October (1)
- ► August (2)
- ► June (2)
- ► April (3)
- ► March (1)
- ► February (4)
- ► January (3)
- ► December (2)
- ► November (4)
- ► June (1)
- ► February (1)
- ► December (1)
- ► August (9)
- ► July (2)
- ► May (11)
- ► April (5)
- ► March (36)
- SEO For Images
- Interior Design Styles at a Glance
- Magazine Cover Design Features
- The Most Powerful Words In The English Language
- Create a Cartoon Character
- Top Advertising Techniques In Graphic Design
- White Space In Graphic Design
- Elements of Design
- The Meaning of Shapes
- A Brief History Of The Computer Games Industry
- Want To Be An Interior Designer?
- Interior Design Drawing Techniques
- Interior Design Room Layout Tips
- Interior Design Materials & Finishes
- Interior Design Process
- Furniture Joinery
- Furniture Materials
- Furniture Design Careers
- Furniture Design Process
- Get The Right Paper Size For Your Design
- Want A Career In The Games Industry?
- How To Review A Computer Game
- Games Design Team
- UE4 Start Screen UI
- UE4 Enemy Characters & Animations
- UE4 Enemy AI
- UE4 Custom Static Meshes
- UE4 Pickups
- UE4 BSP & Geometry
- UE4 Custom Textures & Materials
- ► January (18)
- ► November (8)
- ► March (35)
- ► October (3)
- ► September (2)
- 020 8146 5629
Architecture Presentation Board Ideas

- Request a Quote
Being an architect, you understand that showcasing your project effectively to the stakeholders is very essential. The architecture presentation board examples helps make that right impact in the first go. These architecture presentation board drawings ensure that your idea is beautifully expressed and is conceived the same way as you have thought.
But creating and designing the architectural presentation is a challenging task as a slight mismatch or mistake can completely ruin your architectural project. It’s very important to design the presentation board in such a way that it can communicate your ideas cohesively and engagingly.
Best Architecture Presentation Board Ideas
Let’s have a look at 8 critical elements of architectural presentation boards design that’ll help you craft a polished and visually captivating presentation. Just go through these tips and enhance your ability to showcase your architecture projects impactfully and impressively.
What do you mean by an architecture presentation board? How it is helpful?
An architecture presentation board is a visual summary of a project, used by architects to showcase their designs to clients, superiors, or colleagues. It serves as a tool for presenting ideas, attracting clients, and advancing careers. The purpose of an architectural presentation model is to convey essential project information in a self-explanatory manner.
Key elements of an effective architecture presentation board layout include:
- A well-designed layout that organizes and presents information in a logical and visually appealing way.
- Clear and concise text that explains the project’s concept, goals, and solutions.
- High-quality visuals, such as drawings, renderings, and photographs, that illustrate the project’s design and features.
- A consistent visual style that creates a unified and professional look.
Architecture presentation drawings are used by both students and professionals. Students use them to present their work to professors and peers, while professionals use them to present designs to clients, committees, shareholders, and exhibitions.
Top 8 Architecture Presentation Board Tips and Techniques
To help you get started, Renderspoint has exclusively curated some of the best architectural presentation board techniques and tips that must be considered when creating your architecture presentation board. So, let’s get started in our journey to create flawless architecture presentation board tips for clients.
1. Size and Orientation of the Architecture Presentation Board

When creating an architecture presentation model, consider the size and orientation that will best showcase your project. You may have limited options due to restrictions imposed by your director, client, or professor. If you have the freedom to choose, think about which orientation will make your graphics stand out and tell the story of your project most effectively.
Presentation Options:
- Single Large Board : Present your boards side by side as a single large board. You may choose horizontal or vertical architectural presentation boards depending on the requirements of the project.
- Equivalent-Sized Poster : Present your boards as one poster of equal size.
- Separate Boards : Arrange your boards in a sequence, with each board presenting a different aspect of your project.
The orientation and size of your architecture presentation board can influence the structure and layout of your presentation. Choose the option that best suits your project and allows you to communicate your ideas clearly and effectively.
2. Choosing the Right Layout for your Architectural Presentation Board Drawings

It all starts with brainstorming for the right layout. Brainstorm and jot down the main ideas you want to express. Also, work on the images and graphics that will best showcase those concepts. Now start creating small-scale sketches to capture the basic flow of each architecture presentation board. Before finalizing your design, keep experimenting with different element placements until you get the perfect one. You may explore some architectural presentation board layout examples online for some cool and best ideas.
Be very diligent regarding the space allocation. Determine how much space each element will require on the page. Ensure each graphic is impactful and consider the amount of space between elements. Avoid overcrowding or excessive space. By carefully planning the layout of your architecture presentation board, you can ensure that your ideas are communicated clearly and effectively.
Also, work on the size of images. Too small an image will fail to make that impact. Try to go for big and visually appealing images/graphics. You can even approach a 3D architectural rendering firm as 3D renders give a more photorealistic option to impress the stakeholders. Remember, the goal is to create a visually appealing and informative presentation that effectively conveys your project’s message.
3. Structure and Flow for a cohesive Architecture Presentation Board Style

The structure and flow of your architecture presentation board are crucial for effectively communicating your project’s vision. Using a grid structure can simplify the organization of visual elements, while diagramming helps deliver comprehensive information. Consider the narrative flow of your project, ensuring a logical progression from one architecture presentation board to the next. Number your boards if they won’t be displayed simultaneously.
Remember, viewers typically read presentations from left to right and top to bottom. Use visual cues to guide their eyes through your architectural presentation models. Maintain consistency in font, colour, and style throughout your architectural presentation boards. Leave sufficient white space to avoid overcrowding. Finally, proofread your text carefully for errors. By carefully following these professional architectural presentation board techniques, you can create a visually appealing and informative presentation that effectively conveys your architectural vision to your audience.
4. Visual Hierarchy of Architecture Presentation Board: Guiding the Viewer’s Eye

In architecture presentation board, visual hierarchy plays a crucial role in directing the viewer’s attention to specific images. This involves identifying the strongest point of your project and making it the primary focus that catches the eye from a distance. Other images should reveal their details upon closer examination.
Techniques to Create Visual Hierarchy:
- Size : Make the image you want to highlight the largest, ensuring it can be viewed clearly from a distance.
- Colour : Use colour strategically to guide the viewer’s eye toward the main idea on the board.
- Placement : Centre the image you want to highlight and arrange the surrounding content to complement it.
Additional Tips:
- Keep the overall vision of your project in mind when selecting images.
- Choose images that directly display and strongly support your project’s idea.
- Avoid using too many images that will make the board look cluttered and messy.
- Maintain consistency in the style and tone of your images.
By carefully considering visual hierarchy, you can create conversion-ready architectural presentation drawings that effectively communicate your architectural vision and guide the viewer’s eye to the most important elements of your project.
5. Choosing Perfect Colours: Bringing Life and Focus to Your Architecture Presentation Board

This is one of the most critical architectural presentation board techniques that you need to decide very wisely. While black, white, and grey are commonly used in architecture presentation boards, don’t shy away from incorporating colours. However, be mindful of your choices to strike the right balance and avoid overwhelming the viewer. Here’s how you can make strategic use of the colours in your presentation architecture style.
- Introduce hints of colour to bring life to your architecture presentation board.
- Use colour contrast as it helps to draw attention to elements you need to focus on.
- Represent different building materials with unique colours.
- Consider bold colours for diagrams to create a focal point.
Maintain consistency by using the same colour across all architectural presentation boards. This approach ensures a cohesive and seamless flow throughout your presentation. Also, you may explore pre-made colour palettes online for inspiration. Experiment with different colour combinations to find the best fit for your project.
6. Selecting Background Colour: Enhancing Clarity and Focus

The background of your architecture presentation board should be a supporting element, not a distraction. Avoid complex or busy backgrounds that may draw attention away from your graphics and text. Bold colours and textures should be used sparingly, if at all. Here are three key things that you need to keep in mind while selecting a background colour for your architectural presentation board.
- Black Background: Use with Caution
Black backgrounds can be challenging to work with. They can diminish text readability and reduce the impact of graphics. Additionally, black backgrounds can create a cold and boring tone. If you choose to use a black background, ensure that all information remains easily comprehensible.
- White or Light Gray: A Professional Choice
White or light grey backgrounds are typically the best choice for an architecture presentation board. They enhance the visibility of graphics and text, creating a professional and clean appearance. Other colours can be incorporated to align with your central concept but ensure that the background remains plain enough to direct the viewer’s attention to the design.
- Embrace Negative Space
Negative space is your friend. Resist the temptation to fill every space with information. The strategic use of negative space enhances the impact of your design, creating a clean and professional feel.
7. Image Selection: Striking the Right Balance

Choosing the right images is crucial for creating an effective architecture presentation board. Your graphics can either enhance or detract from your overall presentation. Always go for high-quality images/CGI and ensure that they are relevant, engaging, and catchy.
As already stated just use enough images to effectively communicate your project. Avoid overcrowding your architecture presentation board with too many images. strive for a balanced representation that showcases your project’s key aspects.
You may include a variety of images, such as sketches, models, renderings, and drawings. This approach provides a comprehensive overview of your project.
8. Content, Text, and Font: The Impression Makers

An effective architecture presentation board should convey a clear understanding of the project and demonstrate the designer’s commitment and dedication. Key elements to include are internal and external images, isometric and exploded views, perspective cuts, diagrams, volumetry studies, descriptive memorials, and technical drawings. The specific elements used may vary depending on the project’s requirements and nature.
Make sure the text that you place on the architecture presentation board should complement the layout and try to keep it minimum. A crisp, concise, and focused concept statement will make your architecture presentation board more impressive and attention-grabbing.
Additional tips that will enhance your communication power using texts on the architecture presentation board.
- Consider readability, flow, and visual appeal.
- Align text within text boxes for easy reading.
- Complement graphics/images/CGI with text box size and alignment.
- Avoid all capitals except for titles and follow standard capitalization rules.
- Use simple sketches and figures instead of text when possible.
Select a single font type that complements your project’s style. Sans Serif fonts like Futura or Helvetica are popular choices for their clean and modern look. Avoid script or handwriting fonts for a professional appearance. Use dark hues for your font to ensure contrast against a light background. Choose a font and size that is easy to read and create a hierarchy using different font sizes for titles, subtitles, and body text.
Win More Clients with Perfect Architectural Presentation Boards
Hope you liked our tips and techniques to make your architecture presentation board impressive and converting. At, Renderspoint, we offer you the best 3D CGI that will ace up your architecture presentation board styles and help you communicate in a never-like-before way. Reach out to us for eye-catching and engaging 3D visualization such as 3D rendering, modelling, floor plans and more. Feel the magic that our 3D rendering studio experts cast on your images.

Color Psychology in Architectural Design: Meaning & Importance,

Virtual Reality in Architecture: Use, Benefits, Case Study
Get started, make a request.

Open up a new world of Opportunities with Renderspoint. Connect Now!
We’re always excited to hear about new opportunities to make great work

High-Quality & Budget-friendly 3D Rendering Services
Get Impactful, detailed and authentic 3D renders to make your designs resonate with client`s expectations and needs. Partner with us for fully integrated rendering services that make you stand above your competitors!
Introduction
The Architecture Presentation Board is a means of producing visually captivating summaries of design projects. They can be used for a variety of purposes. On an academic level, students use them for their architecture school submissions but they can also assist a client’s imagination or help win a commission on the professional side.
Your drawings, graphics and architecture presentation boards have one main purpose – to communicate your design in all its entirety from the concept to final renderings. If your presentation boards look good, but don’t do their job – you may need to think again.
In order to win over a tutor, client, planning officer or committee it is vital that your scheme is clearly conveyed and easy to understand. In a way it is like a sales pitch, you are selling your design, ideas, concept. So read through this post for some essential tips on designing the best architecture presentation boards!
And remember a great design can be mediocre if it is not presented well.
Scroll to the end to download this article as a handy PDF guide!

Our Top Important Tips for Architecture Presentation Boards
Brief requirements .
A project brief whether it is for a university project or for an architecture competition will typically outline what you need to include in your architecture presentation boards. So make sure you read this through and note down the non negotiables.
Architecture presentation boards usually include floor plans, elevations, and sections along with some sort of perspective views, 3d drawings or renders. There may be a focus on some of the key features of your design, perhaps with brief sentences explaining your scheme. Hand drawings and development work can be good to include if relevant/required.
Going through the brief will also help you determine what content to assign to your boards. For architecture school projects, there may be more than one presentation board to curate. Try to determine each board’s key focus – it could either be to depict your site analysis, conceptual development, material application, technical resolution or final scheme. Generally for competitions you will have to compile all of these key stages on one or two presentation boards.
For more helpful tips on how to dissect your briefs, check out our Architecture Assignments Brief Guide post. It includes a cool Architecture Assignment Planner:
Architecture Assignment Brief Guide – First In Architecture

When you start to plan your architecture presentation board is also crucial. If you begin planning out your boards immediately after reading through your brief, you will get an idea of what you are working towards. You can get as specific as you like with the details. Revisiting this rough plan throughout your design process may help you work on perfecting the images that will best represent your project.
On the other hand, if you plan your boards after completing your project, all the work you have done until then will determine your end result. It would sort of be like piecing all your work together as you would a puzzle. You may end up editing your existing work or even having to create more work to place on your presentation boards.
Either way, take a moment to organise your work. Think of what you are trying to convey. What drawings / images do you have to show as part of your brief/criteria? What are the key elements in your design that you would like to portray?
Collect all this information – list out all the images to be included and what text you would like to put in, then you can start planning the structure of your boards. This will really help you visualise what information will be on your boards and how you are going to communicate your design.

Inspiration
Similar to having precedents for your design, we recommend having an idea of what graphic style you would like to use for your architecture presentation board. Try to bring your work together as a unified selection of drawings with a format, scale and style that work together to create a logical and comprehensive view of the project. Different graphic styles and inconsistencies can cause a lack of clarity and confusion.
For this you can seek inspiration from a variety of sources like Pinterest or Instagram.
If you are finding it difficult to come up with a graphic style for your architecture presentation boards, check out our Pinterest board here:
https://www.pinterest.co.uk/1starchitecture/architecture-presentation-boards/

Representing Architecture
Your architecture presentation board must use graphics and text to represent your design idea and clearly communicate the details and essential aspects of the scheme. It is important to be efficient with the production of drawings, and only use what is necessary to convey your idea. Quality is better than quantity as quantity can lead to confusion.
View your project as if for the first time, and consider how easy or difficult it is to understand the concept and the main elements of the scheme. Only add work you would be confident presenting in person and avoid any unnecessary information.
Architectural Notation
When you plan your architecture presentation boards make sure that you can see the relationship between the drawings.
For example sections and plans should be aligned so it is clear to read. You can even use dashed/dotted lines to highlight these connections.
Every instance of a plan needs to be of the same orientation (north point always in the same place) otherwise it can get very confusing for someone who has not seen the project before.
When showing plans and elevations/sections together, it is beneficial if they are of the same scale and in line. However, if one drawing is more important than the others then it makes sense to show it on a different scale.
Just because it’s a pretty architecture presentation board, don’t forget to include your symbols! Scale bars, section lines and north points often get forgotten, but are important to be included in order to make your drawings and information clear.

We would recommend sketching out the structure of your architecture presentation board before you start, so you can get an idea of the possible configurations you can use and what might work best. A small storyboard sketch or small scale mock up of the presentation can work well as you can adjust the layout until you are happy with the arrangement and alignment.
In general we read design presentations from left to right and from top to bottom, so consider the story of your design and how it will be read. Show the progression and don’t be afraid to experiment.

Use a program you know. The last thing you need to be doing is learning a whole new software program whilst in the panic of putting your boards together. If you have allowed yourself enough time, fair enough. We would recommend InDesign or Photoshop, but Microsoft Word or Pages on the Mac will still give you good results if you are more comfortable using them. Powerpoint or Keynote on the Mac, can be good options, but do check they can print to the size you require the boards to be.
Orientation, setting and size
Confirm whether your architecture presentation boards are supposed to be presented in landscape or portrait orientation. Think of the size your presentation boards are going to be. Ensure you have the right resolution and print settings applied. Check if you are limited by the number of boards and don’t forget to explore relationships between each board, and how they will be read together. Consider numbering the boards to show what comes next.
Ensuring you have set up your presentation board files correctly will help save you loads of time in the end.

Key Information – Title, story, content
Do you need to have a title bar? If so, consider keeping it consistent throughout your architecture presentation boards. This gives a sense of professionalism, and orderliness. Don’t forget to include your details – name, title of project etc and whatever else is applicable.
It’s tempting to get carried away with multiple fonts but please, don’t! Stick to one font, a maximum of two. You can consider using fonts from the same font family for visual coherence.
Use font sizes to create a hierarchy on your architecture presentation boards – e.g. a large font for your titles, a bit smaller for subtitles and standard size for the remainder of your content.
Make sure your chosen font and size is readable. Keep your sentences short and punchy. No one is going to want to read an essay on your presentation board. A picture paints a thousand words!
Consider how to align your text within its text box. What is easier to read? Think about text spacing, and hyphenation and how it appears on your architecture presentation board.
For more advice on fonts and to discover some cool font recommendations, feel free to check out our blog post on the Best Fonts for Architects:
Best Fonts for Architects – First In Architecture
Try to keep your background plain, unless it is featuring one of your key images. Architecture presentation board backgrounds can get a little busy and it can be difficult to see the key details of the board.
A white background will make your images and text stand out and look professional. Most of the board images we are sharing in this post feature white backgrounds, it is clear to see why. The information comes across well, and the background makes the visuals pop on the page.
A background image can often be distracting, so make sure all the information is crystal clear if you decide to go down that route.
The standard architectural style particularly for students appears to be black, white and grey! Grey grey grey! We understand why people sway that way, but sometimes it’s good to break out and use a bit of colour. Agreed there is a place for simplicity, and grey can give a professional atmospheric board, but try to inject some colour.
Think how colour is reflected in your design. If the architecture presentation board is predominantly in black and white or grey, does this make the design feel cold? Consider how colour will have an impact on the overall feel of the scheme. Imagine the function and users of your design. What colours would resonate with these?
As a starting point you can insert colours for natural elements such as the sky, vegetation on your site etc. Experiment with accent colours to highlight key design elements or ideas.
You will also find numerous ready made colour palettes online that you can work with.
Layout options

Consider using a grid to help you organise the visual elements on your architecture presentation board. You can use a simple grid or something more complex. A grid helps you to organise the elements on your page and produce consistency across the architecture presentation board set.
Once you have set up your page size and orientation you can start creating a grid that suits your needs. The grid can include space for title bars, page numbers, and other information that needs to appear on each board. Using a program like InDesign is great as you can set up master pages as templates so you only need to create the grid once and it can then be used on numerous pages.
Keep in mind that the grid can also be used as a guide, so you don’t have to strictly aim for perpendicular lines. You can have elements and images that blend into one another if you want.

Visual Hierarchy
You will want some of your images to receive more visual attention than others, in order to communicate your idea. You can do this by giving certain images more space in the grid than others. If you wish to showcase one compelling visualisation, you can centre this image or make your other content fit around this image. It often works best when this type of image has elements that form the background of the architecture presentation board, for instance an extended sky or landscape.
When you view your architecture presentation board, you want something viewable from a distance (an impact image) 6ft away, and up close. This communicates your visual hierarchy.
Also if you plan to use precedent images on your architecture presentation boards, remember to distinguish them from your proposal images to avoid confusion for the readers.

Example Layouts
There are numerous ways to organise your work onto boards, here are some options to help you visualise:

Landscape Examples:

Portrait Examples:

Give yourself time

It’s a real shame when you have spent weeks/months on a design project, and leave yourself an hour or two to put it together for your architecture presentation boards. It is such a waste. By denying your project the time and care of developing a structure and a plan for how you present your work, you are effectively deducting grades/points there and then. By showing a well thought out presentation, with a clear process and design result, which is easy to engage with you will greatly increase your chances of showing how good your design is and why it should receive a stellar grade!
Our Architecture Presentation Board Templates

We are excited to present a selection of 14 Architecture Presentation Board Templates in Photoshop and Indesign that all have varying layouts and fonts. They are designed to help speed up your process, create a strong design identity, and save you a huge amount of time. This bundle also includes some textured backgrounds to help you experiment!
You can find out more about these here:
Architecture Presentation Board Templates – First In Architecture
You might also be interested in…
We have a dedicated Pinterest board full of architecture presentation board ideas and styles that will really help inspire you:
We also have lots of incredible architecture content. Be sure to check it out:

Download the Guide!
Download this helpful article as a pdf to keep for reference later!
We hope this post helps you come up with some really good architecture presentation boards, and to show off your work to its best.
If you have got some tips and advice to offer to our readers, let us know in the comments below.
And finally, if you found this post useful, do share it with a friend.
Thank you!

Image Credits
Landscape Example 1
https://www.arkxsite.com/site-chapel-_-winners
Landscape Example 2
https://architecturecompetitions.com/teamakersguesthouse
Landscape Example 3
https://archidose.tumblr.com/tagged/student
Landscape Example 4
https://www.kairalooro.com/competition_emergencyoperationcenter/winningproject_mentions.html
Landscape Example 5
https://www.archdaily.com/257270/buenos-aires-new-contemporary-art-museum-competition-results/0412750?next_project=no
Landscape Example 6
https://www.presidentsmedals.com/Entry-49001
Portrait Example 1
http://www.arquideas.net/es/vof1170
Portrait Example 2
https://www.pinterest.es/pin/488710997053933680/
Portrait Example 3
https://www.dezeen.com/2020/06/08/carleton-university-graduates-architecture-vdf-school-shows/
Portrait Example 4
https://www.behance.net/gallery/47245227/The-First-Half-A-War-to-Eywa
Portrait Example 5
https://www.archidiaries.com/result-announced-bauhaus-campus/
Portrait Example 6
http://www.arquideas.net/es/mesc1258
Other recent posts…

Form Follows Function
Introduction ‘Form follows Function’ is a popular architectural principle that was first introduced in 1896 by American architect Louis H. Sullivan (1856–1924) in his essay ‘The Tall Office Building Artistically Considered’. It was actually shortened from the...

Permitted Development Rights for House Extensions
Introduction to Permitted Development Rights When extending a house in the UK, understanding Permitted Development rights is essential. These rights allow certain building works and changes to be carried out without the need for a full planning application,...

Detail Library – New Details March 2024
New Details This month we are excited to share another set of details that have been requested regularly by our members. This set consists of external wall insulation details. In this set we explore a solid blockwork wall with 190mm mineral wool insulation and a...
24 Comments
Really great Emma,
Both in the tips and tricks but also in the observation and selection of images used. (nice to see them properly credited).
An extra tip; when including precedent studies, make it clear what is precedent rather than proposal by grouping, using a background colour or outline, and if they are on multiple pages keep them to the same place on each page.
Although your tutors are familiar with most precedents, confusing a precedent with proposal is embarrassing for all of us!
Hi Caine, Thanks for your comments – much appreciated.
I WAS ABLE TO USE THIS IN MY CLASS EMMA. WITH DUE RESPECT AND PERMISSION. MY STUDENTS WERE IMPRESSED WITH YOUR COLLECTION OF IDEAS. TNKS.
Thank you so much for this post, I’ve always had a bit of a problem with my boards and this will surely help me in the long run.
with what for a program do u make these portfolios ?
Those presentation boards look awesome! 🙂 what for a program is used to do something like that ?
Hi Jeffry, Boards like these can be achieved using a number of programs, most commonly inDesign or Photoshop. If you don’t have access to this software you can also use things like powerpoint or keynote – although you may be more limited with functionality.
Hi, just wondering what do you recommend to be the best way of getting images onto presentation boards? drawing/ rendering the design then scanning, then editing/ enhancing on photoshop? or using revit to draw and render and transferring these to the boards?
If you could reply to this, it would be muchly appreciated! thank you
Hi Stephanie, Thanks for your comment. I think a lot of it is down to what you are comfortable with, and what stage of your project you are presenting. If you are presenting initial ideas then hand drawings / sketches would be suitable for your boards. These would be best scanned in, and adapted in photoshop, adjust the levels and so on, to get the effect you are looking for. However, if you are presenting final work, perhaps some digital renders would be more relevant. Having said that, if you are comfortable with your drawing skills and have chosen to present your project as hand drawn work, then by all means you should draw and hand render your work to then scan in. I would recommend digitising all hand work and putting together on photoshop/inDesign, as it creates a more professional outcome – and also means you can adjust things as you wish. So, consider your time constraints, what can you achieve in the time you have. Consider what you want the desired outcome to be, and what stage of the project are you presenting. It may be that you use a combination of hand drawings, sketch up models, and final revit renders. There is no correct answer, just do what works well for you, and what you will be able to do at the best of your ability. Hope this helps – and best of luck with your work!! Emma
Heyyy how about capitalisation? Does all the writing should be in caps or it could include lower and upper case??? Thanksss
I think that is down to personal choice and how you want it to look. No strict rules on this. Just make sure you are consistent.
how about manual presentation formats?
thank you so much for all the tips! Appreciate it:)
You’re welcome 🙂
I had receive the pdf copy.however it doesnt contain any image
Hi Nurul, the pdf doesn’t have any images as it is for printing without using too much ink. If you want images you can print directly from the article web page.
Great post..Very helpful. Thanks
Hey, Thank you so much, this has been really very helpful as it has always been a task to understand the requirements and needs that have to be considered for architectural sheet presentation as we have a lot of information to put in but what matters is giving the information a hierarchy as to what needs to be included or not . Appreciate it.
Thank you Anand.
Hello Emma, thanks… I have a presentation next week, could you please send me a downloadable copy of that, thanks
can I take your post because your post very exelent
can i know what is a standard word size for an a1 size presentation board???
Hi, it will depend on many factors, like the font you are using, the intended purpose of the presentation board, how much text you are putting on there etc.
Submit a Comment Cancel reply
Your email address will not be published. Required fields are marked *
Submit Comment
This site uses Akismet to reduce spam. Learn how your comment data is processed .
This website uses cookies to improve your experience. We'll assume you're ok with this, but you can opt-out if you wish. Read More

- Houzz Pro Learn
- Business Management
How to Create a Winning Interior Design Presentation in Four Steps
Read on to learn the four can’t-miss steps of creating better interior design presentations, including tips on project presentation, design process integration, and visual presentation tools such as mood boards or a floor plan.

Introduction
The interior design presentation is a defining moment for any design project. Done well, the client presentation shows a homeowner in stunning and vivid detail that the designer gets them, their style, their budget and how they want their space transformed.
Designers who make an impactful and professional interior design presentation that perfectly aligns their vision with their client’s expectations are more likely to get a ‘yes’ more swiftly than other designers who have focused less on mastering the skill. We've broken down the art of client presentations into 4 main steps with real examples and tips to help you level up your presentation game.
Step 1: Preparing For Your Interior Design Presentation
Think of this step in the interior design process as if you were painting a room: The time spent cleaning, taping and spackling the space is rewarded with the clean lines and smooth strokes that make for a successful conclusion to the project. Similarly, it may take some time to adequately prepare for a design presentation, but this crucial foundational work sets the direction and basis for the entire project journey ahead.
Where to Start
Client meeting.
- The first step to learning about the needs of a client is to meet with them to gain a full understanding of their design preferences, lifestyle, budget, and the space challenges they are seeking to solve.
- Perhaps they have already filled out an initial questionnaire which you can review with them in more detail. Walk the rooms with them if possible, learn about their preferred colors and materials and their vision for the space. And, of course, ask plenty of clarifying questions along the way.
Define an Early Concept
- With the information from your initial meeting at hand, along with accurate measurements of the space and other important details such as a room’s square footage or other exact dimensions, now is the time to define an initial concept and design direction.
- The overarching concept you come up with will inform the next steps of the design process. At this early stage, you may even pull out a journal or notebook to sketch out a rough idea to use as the basis of a more detailed, digital version later.
Design Development: Crafting a Narrative
- Along with a drawing, write a description of the concept and list the goals to help steer the plan according to your client’s vision and ensure you are on the same page.
Develop Your Design Ideas
Once the rough idea has been determined, it’s time to start moving forward with translating the multiple concepts and design ideas into a project presentation. This is one of the areas that interior designers most enjoy because it gets the creative juices flowing! Many interior designers find inspiration in past projects, from their product library, and through other favorite design sources.
For a professional interior design presentation, choose design elements and different materials that best fit the initial design concept, like color scheme, floor materials, and other specific details such as fabric swatches. Add in the architectural details and supporting elements such as the furniture plan. Demonstrate the spatial relationships within the space and block out the furniture arrangements.

Step 2: Visual Ideas For Building a Professional Presentation
Now that you’ve worked through the early stages of the process, it’s time to learn how to make an interior design presentation as visually compelling as possible. Putting together an effective interior design presentation requires considering how you will organize your ideas to effectively convey them visually.
Most designers find that pulling all of these design concepts together into a visual presentation helps create a full design picture to aid in the project moving forward. Clients more readily understand what they can see; therefore it’s important to carefully select which interior design presentation tools you’ll use to clearly communicate the concepts and ideas. Here are some factors to consider when choosing client presentation tools.
Physical vs. Digital Design Boards
In today’s reality, not all meetings are held in person. Knowing in advance whether the presentation will be physical or virtual can inform the visualization tool choices. Digital design mockups, floor plans and renderings will save the day for making every detail come alive to bridge the internet divide. Using these digital tools is far less clumsy and awkward than trying to hold up a photo album or mockup board to the camera without bumping the mute button.
There’s more flexibility of choice when presenting face-to-face. More often than not, homeowners expect a design firm to make the best use of the sophisticated digital tools that provide life-like representations of what their future space will look like. Designers presenting in person have the advantage of going hybrid. They may, for example, complement these tech methods with fabric swatches and other design board materials that tap into senses beyond the visual.
Most Common Types of Tangible Client Presentation Boards
physical design boards.
- Some designers rely on physical mood boards to convey their concepts. Many designers opt for a simple foam board to tack on photographs and other images as well as physical samples and swatches to demonstrate textures and relate their vision.
Material Samples
- Flipping through paint colors, caressing furniture fabrics and squaring up tiles can be a delightful part of the home renovation process. Most clients are grateful to be able to touch, feel and see these physical elements for better visualization. Using a sample board to incorporate tangible textures into your interior design presentation can give you an advantage in winning them over.
Digital Presentation Tools
Interior designers are fortunate to have a host of easy-to-use, effective digital interior design presentation tools available to create presentations that wow.
Mood Boards
- Room designs can be physically conveyed as we discussed above, but virtual mood boards are an impressive tool that inspire clients with visuals and life-like examples. Designers use software to present mood boards to their clients that are easily shared and simple to rearrange with a keystroke.
- Designers source material samples and the actual lamp, sofa, rug or table they envision for the space from their digital product library and preferred vendors. Learn more about How to Make an Interior Design Mood Board to dive deeper.
Floor Plans
- A key part of any presentation is the floor plan, whether it is on paper or a screen. They help show architectural details such as the location of windows, doors, and walls, as well as fully furnish the space with furniture pieces, appliances and fixtures.
- Flat, 2D floor plans and blueprints can do the job, but 3D presentations are worth a thousand words, as they are more powerful for first impressions and help more clients see the entire project design in its best light. Designers who use software to make 3D floor plans incorporate all the details of a room into a compelling, life-like rendering that makes it easy for clients to envision the space. See How To Make Stunning Interior Design 3D Floor Plans for more details.
Photographs
- One of the best ways to help clients believe you can create the transformation they are seeking is through utilize the power of imagery. Presenting photorealistic 3D renderings of the proposed project, or example photos from past projects, will help illustrate your skill and boost their confidence in your interior design business’s work.
- Bonus tip: whenever possible, choose images of the interior design projects most similar to the work they are seeking, whether in scope, budget bracket, type of room or design approach. Check out our piece on How to Make an Interior Design Portfolio to learn more about this complementary presentation skill.

Step 3: Presenting the Vision: How to Impress Design Clients
Now that you have worked through the concepts, gathered all your materials and picked the tools to best convey the design plan, it’s time to tie everything together for an impressive delivery. Consider these interior design presentation tips and strategies to fine tune your delivery.
Tailor Your Presentation
- The scope and content of your presentation will differ depending on your audience. When presenting for the first time to a new client, other designers find it valuable to spend extra time helping them get acquainted with you and the professional design services offered. Cover details of your company values, design approach, makeup of your team, typical scope of projects and any other relevant information.
- For repeat clients, you can start with a brief reminder of these details, as well as draw upon the past work completed for them, being sure to include any references or relation to the requested new project.
Showcase Multiple Concepts
- One size may not fit all. Be prepared with more than one design possibility if you find your first one falling flat, or if your clients express a desire to adjust project scope or compare more options.
- The same holds true for the ways you deliver these concepts. Use multiple methods to help the homeowner visualize and understand the design plan.
Communication Tips
- As the leader of the meeting, set the stage immediately to put clients at ease. Briefly explain the agenda, including at what points you will be seeking feedback. One method that will reassure the homeowner is to pause periodically to ask if they have comments or questions.
- At the same time, avoid getting too bogged down on a single point to ensure there is sufficient time to get through the entire presentation.
The Power of Self-Confidence
- Being self-assured and projecting confidence without talking down to clients signals to them that you are more than qualified for the job, whether you run your own interior design business or represent a larger design firm. Use your communication style to further convey how excited you are about working on their home.
- Dress professionally, but avoid attire that is uncomfortable or inauthentic to who you are - your choice of clothing can have a direct impact on how confident you feel.
Avoiding Game Day Jitters
- While it’s certainly effective to review your agenda one final time prior to your meeting, most designers would recommend allowing yourself a few minutes to clear your head beforehand.
- If you are a caffeine fan, resist the temptation to overload on it - you want to project innate confidence and your natural grounded energy, without being overshadowed by artificial energy or the infamous caffeine jitters.
- And one final interior design presentation tip: shake off any residual nerves by standing up and stretching beforehand, and consider adopting a power stance or two to prime your presentation confidence, especially if you are going to be sitting down throughout the presentation.

Step 4: Enhancing Your Interior Design Presentation: Advanced Tips and Practices
Successful interior design presentations create a memorable first impression that will stay with clients long after you close your laptop and pack your swatches away for the drive home. Effective presenters forge a connection with homeowners on multiple levels through effective use of detail, visualization, lighting and more. Here are some more tips for making your design meeting an impactful one:
Demonstrate Attention to Detail
- Make your presentation accurate and detailed. Show your clients that you have considered every aspect of the project, both big and small. Little details like including the exact dimensions of a project space can help demonstrate your sharpness.
Consider your Client
- Pick moments during the presentation to show your clients that you have thoughtfully considered their feedback. For example, if a homeowner prefers a kitchen island with a sink built in, make note of that as you are highlighting the feature.
- The same goes for places where you chose a less expensive option to be cognizant of their budget constraints: clients love to know that they have been listened to.
Leverage Your Expertise
- Look for opportunities to mention your past experience and skills in a particular area - this is another opportunity to leverage your design portfolio if relevant.
Fine Tune Along the Way
- Have alternative ideas in your back pocket that you can pull out as examples in cases where a client balks at a particular paint color or room layout, for example. This demonstrates both your versatility and flexibility as a design pro.
Remember Ambiance
- Clients will better connect emotionally to a design concept when visualizations include effects such as lighting or even sound. Tap all the senses you can, including the tactile features discussed above.
Let’s Get Visual
- The more you can show and not tell, the more connected your clients will be to the presentation. Visualization is not only entertaining, it helps homeowners better understand the concepts and vision.
Imprint Your Brand
- Presentations which are consistent with incorporating logos, company colors and other branding details are more pleasing on the eye, and also leave clients with a lasting impression.

Next Steps: Client Follow up
Before tying a bow on the interior design presentation, set the agenda for what happens next. This may include noting methods for receiving additional feedback and setting a timeline for project signoff. If the clients suggested any major changes during the presentation, let them know when they will receive a revised plan.
Depending on the project, more measurements and additional details may be needed to determine a final budget. And, make it as easy as possible for clients to approve the plans by providing them a way to sign off with an e-signature.
Making effective interior design presentations is one of the best routes toward achieving client satisfaction, securing new clients and keeping current ones coming back for more. Impactful presentations are highly visual, pay close attention to the homeowner’s desires and budget, and provide clients a compelling glimpse of what their space will look like at the project’s end. As a result, mood boards play a central role in every interior designer presentation; if you’re ready to step up your presentation game, try Houzz Pro’s mood board software for the most effortless experience in crafting professional mood boards .
Houzz Pro is the all-in-one tool for marketing, project and client management built specifically for remodeling, build, and design professionals.
Join the conversation by commenting or asking a question below. The Houzz team reads every single comment, and we’ll get back to you by email if you need us!

Want advice delivered to your inbox?
Unlock industry insights and updates for contractors and design pros
By signing up, I agree to the Houzz Terms of Use and Privacy Policy and that Houzz may use my information to contact me about relevant content, products, and services.
More From Houzz Pro Learn
BUSINESS MANAGEMENT
How to Price Your Interior Design Services
HOUZZ PRO NEWS
5 Houzz Pro Enhancements Designers Love
PRO SUCCESS STORIES
Jennifer Messina’s Top Tips On Building Trustworthy Client-Designer Relationships for the Best Possible Outcome

Get the industry-specific content you really want sent directly to your inbox—just sign up below!

Important architecture presentation board tips
Take your love for architecture up a notch: preparing for interior design degrees, Furnishing style advice, Building decor tips
Top 8 Most Important Architecture Presentation Board Tips
Mar 13, 2023

Pexels The best design, drawings, and renders are not enough to land clients. You must successfully create architectural presentation boards that contain all the essential elements clients need to know about the project.
By following the tips below, you can create compelling and inspirational presentation boards that will showcase your skills and land you clients. Keep reading to find out the eight most important architecture presentation board tips.
What are architecture presentation boards?
Architectural presentation boards are tools used by architects to showcase their work. They can communicate their work and present their artistic skills using a presentation board.
An architectural presentation board is like a sales pitch where you sell your ideas, concept, and design to win clients. An architecture presentation board serves several purposes, such as:
- Use for design presentations to clients, superiors, or colleagues
- Can help land clients and earn commissions
- Can help build your career and take your architectural projects to the next level
Types of Architectural Presentation Boards
It is easier to create architectural presentation boards when you can categorize them according to type. Below are four common types of architectural presentation boards:
1. Architecture Site Analysis Board
Architects must undergo data analysis to determine the site’s current condition, needs, and limitations. The results of the analysis are the basis or foundation for your presentation board’s concept development.
A site analysis board may contain urban scale analysis, environmental analysis, analysis of physical conditions, and sociocultural analysis. An analysis board can reinforce the data found in your architectural drawings.
2. Architecture Conceptual Board
Conceptual boards are presentation boards showcasing your initial ideas and how you plan to approach the project. This board contains vital information about the project’s concept development and design process.
You can emphasize your ideas by creating conceptual boards that contain collages and diagrams. Collages and diagrams can be made using modeling software like Adobe Photoshop.
Present your conceptual board to your supervisor or client before showcasing your architectural drawings and renderings. The main goal of a conceptual board is to clearly present all the stages your architectural project will go through.
3. Technical Drawings Board
A technical drawings board is vital because it shows the structural elements of your design and serves as a guide during the construction process. It includes a master plan, site plans, floor plans, sections, and elevation views.
4. Professional Boards
Your presentation boards should be visually appealing to clients. Professional boards focus on renderings and plain plans, which are seen in the design of the living space.
Create professional boards with the appropriate color scheme and renderings. Present your boards best to clients who will evaluate your work.
Tips for a Stunning Architecture Project Presentation Board
Follow the eight tips below for a successful architecture presentation board.
1. Structure and Layout
You must plan and organize what key features you have to include in your presentation board. You have to determine which technical drawings or images you want to present.
It is best to list all the images and content you must include to finalize your presentation board’s overall structure. Doing this helps you to effectively communicate your design to potential clients.
Once you are done finalizing the overall structure of your board, the next step is to organize the elements on your board to have consistency in design if you are to produce multiple boards.
Using a grid can be a helpful tool in organizing the visual elements on your boards. The grid can have space for the page numbers, title bar, and other information.
2. Visual Hierarchy
Another helpful tip is using visual hierarchy to emphasize images on presentation boards. You can choose which image you want to receive the most visual attention in a visual hierarchy. The image you want to highlight the most should be the biggest, which can be viewed from 6ft away.
3. Templates
Using professionally-made presentation templates can help you easily make your presentation boards while saving a lot of time. The use of templates is a useful tip that architects find very beneficial.
Using templates can make your presentation boards look uniform and visually appealing. To try using templates for your presentation board, check out Simple Slides’ infographics slide catalog to browse its entire slide collection.
4. Orientation and Size
When creating your presentation boards, you need to know whether you will be presenting your boards in landscape or portrait orientation. The orientation can also affect the structure and layout of your boards.
Create boards that are of equal sizes. You can present them as separate boards coming in sequence or place two or more boards side by side to create one big presentation board. However you want your boards to be presented, make sure you use the same orientation for all boards for uniformity.
5. Background
Take advantage of negative space. Only include information that is vital to your presentation, and don’t be tempted to fill out these spaces with useless information. The use of negative space helps make your design stand out.
6. Information to Be Included
When considering what information to include in your presentation board, imagine yourself as a third party viewing your board for the first time. Is the information on the board enough to thoroughly explain your design?
If you are presenting more than one board, including your name or company is advisable. Here are other information that must be included on your presentation board:
- Floor plans and elevation
- Perspective view, 3D drawings , and renders.
- Brief sentence explanation about the key features of your design
- Hand drawings (if relevant or required)
7. Color Scheme
Colors can make your presentation board come alive. It redirects your viewers to what you want to emphasize on your presentation board.
Black and grey are the colors commonly used by architecture students for their presentation boards. These colors may look professional. However, constantly using this color combination can make your presentation board look boring.
Pay close attention to your choice of color so your presentation board doesn’t look too boring or overwhelming. You may add pops of color to your presentation boards to give them some life.
8. Image Selection
In the process of making your architectural design, you have made several sketches, models, renderings, and drawings. Choose only the best ones for your presentation board. Avoid adding too many images for this can make your board too overwhelming.
Alternatively, don’t be too conservative to put only a few images for this may also mean that you are not creative enough or you are not putting the necessary effort into your work.
You have worked for months to make your design the best it can be. Your efforts will definitely be rewarded if you put extra effort into making your presentation boards.
The architecture presentation board tips shared above are simple and easy to do. You can definitely close deals with your clients by applying the tips above.
Comments on this Top 8 Most Important Architecture Presentation Board Tips article are welcome.
Contemporary Property Articles – architectural selection below:
House designs
Apartment Designs
House extension designs

Property and Furniture Posts

Ideas on What to Put On a Coffee Table
Restaurant building designs

Comments / photos for the Top 8 Most Important Architecture Presentation Boards Tips page welcome

Best Architecture Presentation Board Ideas
- AEC Marketing
- Digital Asset Management
Posted by: Cinthya Soto
If you’re an architect, you know that one of the most impactful methods for expressing your ideas is creating architecture presentation boards. These boards serve as more than just showcasing your project; they effectively portray your concepts and narrate the story of your design.
However, creating your architecture presentation board can prove challenging. It’s crucial to establish a well-designed layout that maintains a cohesive and engaging narrative. This will enable you to effectively communicate your ideas and elevate the impact of your architecture proposal .
In this blog, we’ll explore ten architecture presentation board concepts, encompassing vital elements necessary for crafting a polished and visually captivating presentation. These ideas include various aspects such as layout, structure, visual hierarchy, color, and more, all contributing to the creation of a professional and visually engaging presentation.
By the end of this blog, you’ll possess the knowledge and confidence necessary to produce a creative and impactful architecture presentation board. This will allow you to showcase your architecture projects accurately and secure new projects.
What Is an Architecture Presentation Board?
Applying all of this information to your architecture presentation board may seem challenging, but with the help of a well-designed layout, you can effortlessly tackle this task.
An architecture presentation board is a visually appealing graphic that effectively summarizes all the ideas of your project. It provides a condensed and clear representation of your design. Architects use architecture presentation boards to showcase their projects and work.
The purpose of a presentation board is to construct a narrative that effectively conveys the essential information of your project in a self-explanatory manner. This enables readers to comprehend each of the proposed solutions with ease.
An architecture presentation board fulfills multiple objectives, including:
- Serving as a tool for presenting designs to clients, superiors, or colleagues
- Assisting in attracting clients and securing commissions
- Contributing to the advancement of your career and elevating your architectural projects to new heights
Architecture presentation boards serve various purposes, being used by both students and professionals. During your time as a student, these presentations are crafted for juries and submissions, allowing you to present your work to professors and peers. In your professional life as an architect, these boards are used to present designs to clients, committees, shareholders, and exhibitions.
In many ways, an architecture presentation board resembles a sales pitch, as you are essentially promoting your design, ideas, and concept to win clients over.
10 Architecture Presentation Board Ideas
While the architecture presentation board may not be the only aspect of the project itself, it certainly has an impact on the audience. Additionally, it can showcase your artistic abilities and design skills.
The structure of an architecture presentation board serves as the platform for combining the key ideas of your project, presenting only the essential elements required for a clear understanding of the proposed concept. Remember, there is no need to incorporate every single detail into the presentation board. It is equally important to be careful with the amount of text used and to maintain focus on the central idea of the project.
To help you get started, let’s take a look at some of the essential concepts (with examples) that must be considered when creating your architecture presentation board. This will help you create a flawless presentation board for clients.
1. Size and Orientation
When designing your architecture presentation board, you will have to determine whether you will be presenting them in landscape or portrait orientation. You can explore different formats to enhance the presentation of your proposal.
However, it’s not certain you’ll get to choose the size or orientation of your presentation boards. You’ll most likely encounter limitations that restrict you to a particular board size and a specific number of boards. Sometimes you will have the opportunity to choose the size and orientation of your presentation boards. However, more often than not, these decisions will be decided by your director, client, or professor. It’s important to ensure that you are aware of the parameters beforehand to avoid any inconsistencies.
If you’re a student, it is common for professors to impose restrictions regarding board sizes and the number of boards. In such cases, you should verify whether your boards should be presented in landscape or portrait orientation.
However, if you have been allowed to decide for yourself, take some time to think about it. Consider which orientation will make your graphics stand out the most and which one will best tell the story of your project.
Apart from deciding whether your board will be in the landscape or portrait orientation, you will have to decide which way you will present your board. Some options include:
- Side by side as a single large board
- As one equivalent-sized poster
- As separate boards arranged in a sequence
Keep in mind, the orientation and size of your boards can also have an impact on the structure and layout of your presentation.

2. Layout
When arranging your architecture presentation board, think about the main ideas you want to express. Then, decide on the images and graphics that will best showcase those concepts. Collect all the required information and take note of the graphics and text that will best convey your concepts effectively.
Before starting the actual layout of your boards, take time to sketch out different versions to identify the most suitable arrangement. Create small-scale sketches to capture the basic flow of each board, enabling you to experiment with different element placements before finalizing your design on the boards themselves. This process allows for flexibility and adjustments to ensure you achieve a complete overview of your ideal layout.
Once you have decided on the layout you want, think about how much space each element will require on the page. Make sure each graphic is big enough to make an impact and consider the amount of space you want to leave between each graphic. Leave enough space so that it doesn’t look crowded or messy, but, avoid leaving too much space as well, as it may give the wrong impression.

3. Structure
Using a grid structure is the most common layout method used among architects because it simplifies the organization of visual elements in your presentation. Several compositions can be used when using a grid structure, such as square or rectangular grids, mixing texts, and images, or even adopting an organic structure.
The grid serves as the fundamental framework for diagramming. Diagramming an architectural presentation board involves the organization and arrangement of graphic and textual elements that deliver comprehensive information about your project. This process ensures a well-structured and cohesive representation of your proposal, providing viewers with an accurate representation of your architectural vision.
Keep in mind, you are essentially narrating a story, therefore you must carefully consider the flow of the narrative as you organize your presentation board. To help you get started, follow these steps:
- Consider the perspective of the individual observing your presentation
- Prioritize what you want them to see first
- Strategize the most effective approach to displaying your project’s story to them
- Evaluate if your structure and layout successfully achieve this objective
Remember, normally, we read presentations from left to right and from top to bottom, so consider the story of your project and how it will be read.
You should also consider how each board in your presentation relates to each other. Assess whether there is a logical progression from one board to the next, ensuring that the sequence flows seamlessly. In case you will not display all the boards simultaneously, consider numbering them to guide your viewers and ensure they follow the correct sequence.

4. Background
The background of your architecture presentation board should not be complex or cause difficulty. We want the viewer to easily see all the elements without any distractions from a busy background. It’s important to avoid anything that may draw attention away from the crucial details of the board. Let your graphics and text take center stage, refraining from using bold colors or textures that may take away the focus from them.
With that being said, be very careful when choosing a black background. It may diminish the readability of text and potentially reduce the impact of your graphics. Moreover, background images, if chosen, can often be distracting. A black background could also set a cold and boring tone. Therefore, if you opt for this approach, make sure that all the information remains easily comprehensible.
On the other hand, going for a white or light gray background will enhance the visibility of your graphics and text, allowing them to stand out effectively. This choice gives your presentation a professional appearance without overwhelming the viewer. While you can incorporate other colors that align with your central concept, ensure that the background remains plain enough for the viewer’s attention to be primarily directed towards the design rather than the background itself.
Regardless of the color you select for your background, use it strategically to your benefit. Embrace the concept of negative space and leverage its power. Include only essential information in your presentation, resisting the temptation to fill empty spaces with irrelevant details. The skillful use of negative space enhances the impact of your design, creating a clean and professional feel.

5. Colors
While we discussed the use of the typical black, white, and gray colors in an architecture presentation board, don’t hesitate to include some colors. However, be mindful of your color choices to strike the right balance, ensuring that your board doesn’t appear dull or overwhelming. Introducing hints of color can bring life to your presentation boards and draw attention to the elements you want to highlight. This will help guide your viewers’ focus to the key aspects of your presentation board.
How you can use colors to make your design more lively? One example is you can add a contrasting color like green for landscaping to a mostly single-color presentation. You can also use a different color to represent specific building materials, such as brick, glass, or wood. These color choices bring visual appeal and improve the overall look of your design.
You can also consider opting for a bold and attention-grabbing color, such as pink or red, to serve as a prominent feature in your diagrams. If you aren’t feeling inspired, there are many pre-made color palettes available online for you to work with.
The choice is yours and whichever color you decide to continue with, make sure to always ensure consistency by using the same color across all of your boards. This approach will help maintain a cohesive and seamless flow throughout your presentation.

6. Visual Hierarchy
When creating your architecture presentation board, leverage visual hierarchy to highlight specific images on your presentation boards. This means you should select which image deserves the most visual attention within the hierarchy. Identify your project’s strongest point that you want to highlight, and make it the main focus that catches the viewer’s eye from far away. You should also incorporate other images that reveal their details when viewed up close.
So, how can you do this effectively? There are various techniques to draw attention to a specific drawing, such as playing with color or size. Don’t be afraid to use up the space you need to display the images that are crucial for your vision. For example, you can make the image you wish to highlight the largest, ensuring it can be viewed clearly from a distance of 6ft. This effectively communicates the visual hierarchy and emphasizes the importance of the highlighted image.
Another method is to use color to direct the viewer’s attention to a specific graphic. By using color in a targeted manner, you can effectively guide the viewer’s eye toward the main idea on the board.
You also have the option to center the image you want to highlight and arrange the surrounding content to complement it. This technique is particularly effective when the image contains elements that serve as the background of the architecture presentation board, such as a large sky or landscape.
For the best outcome, focus on keeping the overall vision of your project in mind and selecting images that directly display and strongly support that idea.

7. Image Selection
Choosing the right images is an important aspect of creating your architecture presentation board. The graphics you select can either make or break your entire presentation board. Throughout the architectural design process, you will generate various sketches, models, renderings, and drawings. Make sure to carefully select the images that effectively communicate the important details of your project.
Keep in mind, using an excessive number of images in your presentation can lead to a cluttered and confusing visual experience for the viewer. However, using enough images may give the impression that you needed to invest more effort into your presentation. Strive for a balanced representation that showcases your project effectively.

8. Content
Not only should your architecture presentation board be easy to understand but it should also demonstrate your full commitment and dedication to your project.
When it comes to planning out the content for your presentation board, consider the following elements to ensure a clear understanding:
- Internal and external images
- Isometric views and exploded views
- Perspective cut
- Diagrams
- Volumetry studies
- Descriptive memorial
- Technical drawings (plans, cuts, and details)
It’s important to note that not all the mentioned items need to be included in every project, as this depends on the specific requirements and nature of each project. However, these elements are valuable resources that can enhance the understanding of your architecture proposal whenever applicable.

9. Text
It’s important to keep text at a minimum on your architecture presentation board. You should write a concise and focused concept statement, avoiding wasting time on lengthy descriptive text that is unlikely to be read. Shoot for a clear and short message that effectively communicates your concept.
Some questions to consider when organizing the text sections in your architecture presentation board include:
- What is easier to read?
- What flows best?
- What is pleasing to the eye?
Moreover, when creating the text for your architecture presentation board, consider the alignment of your text within its designated text box. Think about which alignment is easier to read and pay attention to text spacing and hyphenation to ensure they appear visually pleasing on your presentation board. Don’t forget that the size and alignment of your text boxes should complement your graphics. They are important elements of the visual hierarchy in your presentation.
Some tips to consider when creating the text for your architecture presentation board:
- Do not use all capitals in your text, unless it’s for the title
- Follow the standard rules of capitalization for a professional and easy-to-read presentation board
- When possible, replace text with simple illustrative sketches and figures
Remember, your presentation serves as your sales pitch. Therefore, avoid lengthy explanations that would cause you to lose your audience’s attention and keep your message concise and engaging to effectively capture and maintain their interest.

10. Font
Select an appropriate font for your title and text, using only one font type per project whenever possible. However, you can create variations by adjusting the font size for the title, concept statement, and labeling. Consider using Sans Serif fonts such as Futura or Helvetica, as their sleek and minimalistic style complements modern high-tech designs.
When choosing a font for your architecture presentation board, consider the following:
- Avoid script or handwriting fonts to achieve a clean and professional look
- Keep the color of your font dark (ex. black or dark gray) to provide contrast to a light background
- Choose a font and size that will be easy to read
- Make sure the title font and placement are consistent from board to board
- Use font sizes to create a hierarchy (e.g. a large font for titles, a slightly smaller font for subtitles, and a standard size for the rest of the content.)
The font you choose for your architecture presentation board can significantly impact its success or failure and greatly influence its level of engagement, which is why it’s important to make sure you find the best architecture font .

Choosing the Right Elements
Unless specific instructions are provided to you when creating your architecture presentation board, the choice of elements to include will be up to you. When making these important and creative decisions, consider what elements will effectively express and explain your design most compellingly. Remember to prioritize clarity and coherence to create a successful architectural presentation.
Next Steps
We hope this guide on the best architecture presentation board ideas was helpful. As you begin creating your architecture presentation board, remember that there are several solutions out there to help you make better presentation boards and win more business. When it comes to asset management for AEC and real estate professionals, OpenAsset provides a high-quality software solution.
At OpenAsset, the only Digital Asset Management (DAM) solution designed specifically for firms in the built world, we make it easy to find the digital assets you need. With OpenAsset, you can easily find assets by project or person using keywords or file type. Our secure platform also helps you protect your digital assets by keeping them safe from unauthorized access and accidental deletion. You can also easily share files with team members, clients, and partners using controlled access to files.
To ensure consistency and manage your ever-growing number of digital assets, request a demo with us and learn how OpenAsset can help you manage your digital assets today.
Get OpenAsset DAM Insights

How to Create Winning Proposals
What to read next.

Engineering Lead Generation: 8 Strategies + 5 Tips
Mastering B2B lead generation is a crucial yet challenging task for engineering firms. In fact, 61% of B2B marketers say high-quality leads ...

Understanding the AEC Industry + Top 17 AEC Trends for 2024
As we step into 2024, the Architecture, Engineering, and Construction (AEC) industry stands on the brink of a transformative era, driven by ...

Air vs. OpenAsset
Choosing the right Digital Asset Management (DAM) system can be a game-changer for businesses aiming to streamline their digital asset organ...
6 Tips for Creating and Presenting a Design Board to Your Interior Design Client
Last Updated on April 16, 2024 by SampleBoard

The first step of a successful design project is coming up with an inspiring idea. Great ideas are hard to come by, and if you have got one, you are already halfway through. Still, there is the lion’s share of work ahead, and that is successfully presenting your idea to a client. Fortunately, unlike coming up with the design, presenting it is not a matter of creativity and talent, rather a matter of learning and knowledge. Although all interior designers have different approaches to projects, there are some usual guidelines that should help you find your way.
Content Is the Key
You probably already know how to make design schematics for a project, but it is important to stress out that the very appearance of the board falls behind comparing to quality content. A good rule of thumb is that the center of the board should present some sort of summary positioned into the visual focus. This summary is a good starting point for the presentation.
Keep the Boards Consistent
In most projects, you will be required to present several schematics detailing a variety of aspects of the project. For example, you may show off material boards, technical specifications, color boards, 3D drawings, etc. These boards should be visually similar (color scheme, font size, title style, same layouts, consistent style of the images). It is always useful (especially for beginners) to use a software that offers prepared collage templates and stick to it. Although these programs usually require paying subscription, you can sign up for your 14 day free trial , and see how our software suits you.

Cues on Making a Perfect Board
Start with something that inspires you. It can be a color, photograph, work of art or fabric. Layout the room and place and scale the furniture accurately. You can do that by hand sketching or with dedicated software. Both sketching and using a computer program require some expertise that can be learned in a design school . Finally, you should add personality to your board with accent furniture pieces or standout accessory items.
Preparation Is Confidence and Confidence Is Everything
One last thing is left to be done: the actual presentation of the prepared board to the client. If you have invested a lot of time and energy in creating the schematics, you probably know all you need to know about the project. Still, you should prepare your speech. If you are well prepared, you will be confident, and confidence is the key unlocking every social interaction. Also, enthusiasm is contagious, so show your client just how important the project is to you.
Structuring Is Essential Part of Preparation
Preparation isn’t only learning everything there is to know about the project. You should structure your pitch to make it clear and interesting. That means that your presentation should include the most important observation from your research, your conclusion based on that, the design concept in a few sentences, the way the concept will be conveyed, and the takeaway for the consumer.

Forge a Connection with the Client
When presenting the idea, you should know which present person has the most influence on accepting the design concept. If it is a company, find out who is the decision-maker when it comes to design, if you are presenting to spouses, try to grasp which of them is more interested. After you’ve got that figured out, tailor your presentation to the right person. When working for a company, check business executives’ LinkedIn profiles to find out if there is a special sports team they prefer or some interesting hobby that could help you get to know them better and have a good idea who you are selling to. Combine well thought-out small-talk and a hard-hitting design idea.
A good idea is the beginning of a great project, but all of your efforts will go down the drain if you don’t know how to pitch that idea to a client. These were some tips on how to do that successfully, but try to approach them uniquely, showing off something that separates your design from everyone’s else.

- Home Trends
- Design Styles
- Paint and Color
- Decorating Advice
- Slow Living
- Home Maintenance and Repairs
- Home Exteriors
- Real Estate
- Ask the Contractor
- Garden Design and Landscaping
- Caring for Your Yard
- Celebrations
- Branding and Marketing for Interior Designers
- Resources for Interior Designers
- Design Presentation Templates
- Mood Board and Flat Lay Templates
- Learn Interior Design
Presentation Boards with InDesign

What will I learn?
In this course you will understand and learn how to create a presentation board that can communicate effectively the message of the architecture that is being portrayed.
You will also learn the basic tools of Adobe InDesign to create presentation Boards, how to use typography, what colors to choose in your presentation, what image style to go with when creating boards, main composition components in graphic design, how to tell a story and many more!
Some things we will cover
Composition in presentation boards.
Understand the main methods of composition possible when creating your board.
Use of negative space
More important than knowing: what to include in your presentation board, we need to know what to leave out!
combining image styles
Which image style do I choose? What color palette is best? How big to I put my images? All of this and more will be answered throughout the course.
From your imagination to reality
Who is this course for.
- You are an architect or architecture student.
- You are interested in improving your communication skills.
- You have great architectural ideas but need to portray them better
- You don’t have full knowledge on how to create presentation boards from scratch.
What you can expect
Lifetime access, bonus resources, exclusive feedback, certification granted at completion, take the course on your time, learn the secrets, peek into the course, here is what it will look like inside, click on each chapter to see what´s inside.
- The importance of boards
- how to tell a story
- how to present an argument
- most common mistakes
- Best workflow process for creating a content list
- preliminary sketch of your boards
- folder structure
- workflow conclusions
- Introduction
- Creating a new doc
- Setting up your workspace
- basic interface
- importing images
- display resolution
- frame and content difference
- links panel
- creating text and paragraphs
- using grids and guides
- presentation mode
- shapes and colors
- tips and tricks of indesign
- Grid composition
- main image composition
- blended composition
- Explaining the project and looking at references
- creating the base file
- preliminary board in indesign
- grid layout
- main image layout
- blended layout
- key takeaways
- Presenting the project
- preliminary boards
- extending the sky of a render
- adjusting a floor plan to a sky background
- second presentation board layout
- final adjustments
- alternative layout options
- Best exporting and printing tips
- key takeaways
Meet your instructor
Since I was in school I have had a passion for representation and how as architects we can communicate our ideas through drawings.
For more than six years, Show It Better has a community of more than 500,000 thousand people from more than 150 countries. With over 4,500 online students that have taken previous online courses, we have deepened our passion for architecture and representation.
I think that if you can create a stunning presentation board, then you have 40% of the job done (which is captivating everyone’s attention), and now your design can speak for itself!
If you are interested, join me in this course so we can explore the world of presentation boards and everything there is to it!
Bonus Content
Presentation board templates, exclusive discounts, project files, frequently asked questions..
If you have any other questions, please contact us at [email protected]
The course starts now and never ends! It is a completely self-paced online course. You decide when you start and when you finish.
How does lifetime access sound? After enrolling, you have unlimited access to this course. Across any and all devices you own. You may also download the class videos and pdfs and keep them on your computer.
We would never want you to be unhappy! Please contact us after completing the totality of the course, and we will give you a 30-day full money back guarantee. Terms and conditions apply
Our courses cover each detail and issue we encounter when creating an image, which is sometimes overlooked in a YouTube video. Also, our courses are longer and more specific, so a topic that could typically be covered in twenty seconds in a youtube video will be explained thoroughly in the course.
You will need to sign up and have a user log in, so you can take the course wherever you are!
we have also created
Compelling architecture sections, digital collage course, realistic site plan.
©2024 Show it Better. All Rights Reserved
InVisionApp, Inc.
Inside Design
Why you should use design presentation boards
Clark wimberly, • may 9, 2016.
O ver the years, I’ve learned that there’s something more important in my design process than the actual design: getting my team on board and excited. Without that, my design work doesn’t mean much.
Things sure would be easier if designers could just say “because I said so.” We’d also have worse products and workflow, so thank goodness it doesn’t work like that.
These days, the design process is more collaborative than it’s ever been, and it’s the designer’s responsibility to include all comers and process all feedback.
“It’s the designer’s responsibility to process all feedback.”
That means I’m left constantly presenting my designs, listening to and acting on what people have to say, and repeating the process. On some really tricky projects, I find we spend almost as much time in the meeting room as we did in Sketch .
Put it on the board
My main presentation tool isn’t a slide deck, a prototype, or a collection of animated interactions. It’s all those things, in the form of a presentation board .
An example of how we use Boards here at InVision .
Everything worth sharing, loaded into a central, shareable space. Presentation boards have filled a gap in my workflow by allowing me to collect quick and easy feedback from my team, as quick as I can hit save in my design app.
High-level presentations
Lately, when I’m working on a design project, I’m rarely working on just a web page. Throw in a product, app, or marketing site—or all of the above—and multiply by the dozens of popular device screens and capabilities currently available, and you’ve quickly got a lot of moving pieces.
As a modern designer, I don’t just share a single PSD or Sketch file and call it quits. I’m on the hook for prototypes, animations and interactions, user experience , and more. While I’m capable of designing and building such a wide gamut, presenting every last bit can get tricky.
“Your design work doesn’t mean much if your team isn’t on board with it.”
That’s where a design presentation board comes in handy. It’s a quick and organized way to show everything your design has to offer. Instead of emailing someone only a design source file, or just a link to a working prototype , you can include everything in one space.
A presentation filled with design source files and mockups, working prototypes , and even full-motion animated GIFs paints the entire picture . It shows all levels of your design and planning, beyond what a single tool or mockup can accomplish.
It’s great when a designer can use any tool necessary to get the job done, and it’s even better when presented in a way that makes you forget all that noise.
Share now, share later
I’m not sure the last time I presented an honest slide deck. Meaning, a presentation made entirely in Keynote (or Google Slides, or— shudder —Powerpoint). When I’m speaking with a group, I almost always hop around from a few slides to design, to linked website, to live Sketch file—I go nuts.
Replacing the traditional slide deck with a board just made too much sense. Aside from being easier and quicker to build ( hellllllo, drag and drop ), they’re built from my original design files, which makes for some seriously easy sharing.
And that sharing isn’t just limited to the meeting or presentation itself. Since the board lives at a shareable URL, you can easily distribute the board before your meeting takes place.
“Meetings are most productive when everyone comes ready with something to discuss.”
Even better, people on your team can keep the board as a meeting takeaway, and give more time and thought to the sticky issues that came up during the meeting. Boards are the perfect tool for those sleep on it moments. My favorite design feedback always starts with “After some thought…” .
Collaboration
Once you’ve used a presentation board to share design direction, it’s time to flip around and use them to collaborate. Boards are ideal for collecting feedback, facilitating the handoff, and documenting finished design.
A board loaded with source files and notes is also a smooth way to make the designer/developer handoff at the start of the dev build ( assuming there is a handoff at all, you unicorn ! ). Now that I’m able to organize and group files, along with notes in context, I certainly don’t miss those long back-and-forth email exchanges.
A shared space for design and notes is even more important when you’ve got some non-design, non-technical people on your team. Explaining the design direction and features to everyone on the team, regardless of know-how, is a great way to keep everyone moving in the same direction—and with the same level of confidence.
Get your whole team on board
By clark wimberly.
Clark is a UX designer in Austin, TX. Equal parts freelance, startup, and agency, he’s been rebuilt into a content producer with a designer-friendly interface.
Collaborate in real time on a digital whiteboard Try Freehand
Get awesome design content in your inbox each week, give it a try—it only takes a click to unsubscribe., thanks for signing up, you should have a thank you gift in your inbox now-and you’ll hear from us again soon, get started designing better. faster. together. and free forever., give it a try. nothing’s holding you back..
Interior Design Presentation Tools
- Post category: CGI Interior Design / Interior Design Business
Table of Contents
What is Interior design presentation?
Interior design presentations are visual overviews of a planned design concept that interior designers use to communicate their ideas to clients.
These presentations as part of the design project proposal showcase the designer’s proposed plans for the layout, furnishings, materials, color scheme, and other details for a residential or commercial interior space.
Examples of elements that may be included in an interior design presentation are:
- Floor plans – 2D drawings showing the layout and dimensions of the space
- Furniture arrangements – Digital renderings or models showing furniture placement
- Fabric and finish samples – Physical swatches of proposed fabrics, carpets, tiles, woods, etc.
- Color scheme – A palette of proposed paint colors and accents
- Lighting plan – Technical drawings indicating lighting layout and fixture selections
- Material specifications – A detailed list of all proposed materials and finishes
- Concept boards – Mood boards with inspirational images, materials, and colors
- 3D renderings – Digitally generated imagery showing the designed space in perspective
- Lifestyle vignettes – Styled set-ups showing proposed furniture arrangements
- Project description – An overview of the design concept and goals
Presenting these elements visually allows clients to better understand and provide feedback on the interior designer’s proposed design before implementation. The presentation brings the concepts to life.

George is a seasoned interior designer and property marketing strategist with over 13 years of experience. He specializes in transforming properties into visually stunning spaces, helping clients recognize the potential and beauty in each property. With an impressive international client base of exciting projects throughout Europe and America.
The presentation boards allow the designer to display these details in a graphic, visually-oriented format. They bring together all elements of the design into a cohesive presentation.
An interior design project may be the second biggest commitment for a property after the purchase of the property from a client’s perspective!
overview of the presentation process

The process follows roughly the same path, but the resources and division of labor vary by studio size. Communication and collaboration are key throughout.
Presenting the design is ultimately a team effort.
Solo Designer
- Research – Gather inspiration, analyze client needs
- Concept – Develop overall design direction and color schemes
- Schematic Layouts – Rough space plans
- Design Refinement – Materials, finishes, details
- Production – Create presentation boards, models, renderings
- Presentation – Present to client, get feedback
- Revisions – Refine based on feedback
Small Studio (2-10 designers)
- Research – Conducted collaboratively
- Concept – Team brainstorming session
- Schematic Layouts – Work divided amongst team
- Design Refinement – Collaboration on details
- Production – Divide tasks like boards, renderings
- Presentation – Often presented together
- Revisions – Team approach to refinements
Large Studio (10+ designers)
- Research – Conducted by project designers
- Concept – Presented for group critique
- Schematic Layouts – Work divided by project phase
- Design Refinement – Specialists for materials, etc.
- Production – Often outsourced renderings, models
- Presentation – Led by project designers
- Revisions – Implemented by project team
What are the 3 phases of interior design presentation?
Interior design presentation consists of 3 main phases with up to 13 different elements incorporated under them. Each element builds on the others to create a comprehensive, visual presentation that is part of project proposals.
Interior designers combines the three phases in a strategic way to communicate the design narrative and details.
Typically, an interior design presentation incorporates 4-13 different elements that work together to convey the design concept.
The design process that leads to the presentation can be broken down into several key phases:
Programming Phase: The initial stage where the client’s needs and goals are identified. This informs the overall direction.
Schematic Design Phase: Rough layouts and space planning are developed that align with the programming needs.
Design Development Phase: More detailed design work is done to refine the schematic design, including material selections, lighting plans, etc.
The presentation then pulls visuals, drawings, and samples from these phases to depict the design.
Common elements include:
- Bubble diagrams and hand sketches showing initial concepts
- CAD and hand-drawn floor plans showing layout
- Axonometric drawings demonstrating spatial relationships
- Interior elevations and section drawings showing finishes and architectural details
- Physical and digital materials boards with finish samples
- Digital and physical presentation boards with concept collages, sketches, etc.
- 3D interior modeling studies and renderings bringing the design to life visually where color schemes, references and real life measurements are combined into 3D concept.
Visually Communicating Value with new clients

The goal is to establish trust and rapport through professional, polished presentations focused on collaboration and exemplary service.
Design is problem solving; presentations reflect that philosophy .
Here are some key elements of an interior design business philosophy as it relates to client presentations:
- Communicate don’t dictate – Presentations should facilitate an open dialogue, not just convey demands.
- Educate the client – Take time to explain the rationale behind recommendations.
- Collaborate, don’t confront – Welcome ideas and aim for compromise, not conflict.
- Guide, don’t direct – Gently steer clients towards quality, even if more costly.
- Anticipate needs – Strive to present what clients want before they ask.
- Sell the process – Demonstrate how careful methodology leads to better outcomes.
- Reinforce expertise – Leverage presentations to highlight specialized skills and value.
- Be transparent – Clearly convey all costs, lead times, and constraints. No surprises.
- Make it visual – Show don’t tell; visuals bring concepts to life.
- Think long-term – Build lasting relationships not just transactions.
- Present comprehensively – Demonstrate attention to all details big and small.
- Pursue perfection – Constantly aim to improve presentation skills and tools.
What is Programming Phase?
The programming phase is the first stage of an interior design project. It involves gathering information about the client’s needs and goals for the space.
Key activities in the programming phase include:
- Initial client meeting and site visit – To understand project scope, requirements, and constraints.
- Interviewing stakeholders – Speaking with all end users to identify needs.
- Conducting research – Investigating relevant laws, building codes, regulations.
- Performing analysis – Analyzing site, architecture, existing conditions.
- Defining project goals – Identifying the client’s vision and objectives.
- Determining space requirements – Including sizes, adjacencies, capacities.
- Developing program documentation – Compiling research into a written program.
- Presenting findings – Reporting key details back to client.
The programming phase essentially establishes the “rules of engagement” that guide the design moving forward. The interior designer works collaboratively with the client to define all functional, legal, budgetary and aesthetic goals for the project.
Having a well-defined program provides an effective roadmap as the designer transitions into conceptual development and space planning. It also allows the client to review and approve project expectations before design work proceeds.
The programming phase is a crucial foundation for success.
What is schematic design presentation
A schematic design presentation communicates the initial spatial planning and layout of an interior design project. At this early stage, the presentation typically includes.
- Bubble diagrams – Initial space planning sketches
- Hand-drawn floor plans – Rough layouts showing adjacencies
- Digital floor plans – Preliminary plans from CAD software
- Furniture arrangements – Rough blocking plans for furnishings
- Spatial blocking plans – Generic shapes showing spatial zones
- Area calculations – Basic sizes/capacities for spaces
- Concept sketches – Early hand drawings of ideas
- Mood boards – Inspirational imagery and samples
- Design narratives – Written description of concept and goals
The schematic presentation focuses more on spatial relationships and broad concept rather than refinements. It establishes the foundation that the design will later develop from.
This allows the client to review and approve the proposed spatial layout and functionality before the designer progresses into more detailed design development. The presentation ensures the design is aligned with the client’s programming needs and goals early in the process.
The schematic presentation is an important first step in bringing the client into the design process. It initiates a dialogue that continues through the evolution of the design in subsequent presentations.
What is bubble diagram interior design

A bubble diagram is a basic planning tool used in the early stages of the interior design process. It uses simple shapes and symbols to represent spatial elements.
In interior design, bubble diagrams are typically used during the programming and schematic design phases to explore initial layout options and spatial relationships. Common elements included in an interior design bubble diagram are:
- Circles/bubbles – Indicate rooms and other spaces
- Arrows – Show connections and relationships between spaces
- Squares – Represent fixed elements like stairs, columns
- Text labels – Identify the function of each space
- Size variations – Show relative sizes/proportions of spaces
- Colors – Differentiate space types or zones
Bubble diagrams are quick, flexible tools to experiment with different space planning scenarios. They help identify spatial needs, adjacencies, layout possibilities, and circulation patterns in a low-detail format.
Interior designers use bubble diagrams to collaborate with clients, ensuring the layout meets their functional needs and goals early in the design process. The simplicity of the bubble diagram facilitates effective communication and exploration of options.
Bubble diagrams provide an important starting point that leads into more detailed space planning and interior design development. They reveal opportunities and issues before committing to a layout.
What is material board presentation?
A material board is a key component of many interior design presentations. It allows the designer to physically showcase proposed materials, finishes, and samples to the client.
Examples of items that may be included on a material board are:

- Fabric swatches – Samples of proposed upholstery, drapery, and other fabrics
- Carpet and area rug samples – Carpet tiles, bound rugs, swatches, etc.
- Tile samples – Stone, ceramic, glass, and other tile types
- Wood samples – Stain swatches, veneer samples, solid wood samples
- Wall covering samples – Wallpaper, grasscloth, metal sheets, etc.
- Paint color chips – Chips showing proposed paint colors
- Hardware samples – Knobs, pulls, hinges, lighting, plumbing fixtures
- Accessory samples – Such as pillows, throws, vases
- Natural material samples – Leather, stone, glass, etc.
- Marble, granite, quartz samples – For kitchen and bath surfaces
- Appliance samples – Brochures, spec sheets, swatches
The material board allows the client to see and feel the products being proposed for their space. It brings the materials off the page, helping the client better visualize the designer’s plan. The board serves as a tactile complement to the rest of the presentation.
Interior design project timeline
Between 80 and 90% of design projects feature similar phases and timeline.
- Programming – Gather project goals, requirements, constraints
- Schematic Design – Develop initial space plan and layouts
- Design Development – Refine plans, select finishes, furnishings
- Design Presentation – Present concept to client for review and approval
- Construction Documents – Create detailed drawings and specifications
- Bidding/Estimates – Obtain contractor pricing for construction
- Construction Administration – Oversee and manage installation process
- Furnishings Procurement – Purchase and install furnishings and décor
- Installation Completion – Final walkthrough and handover to client
- Project Closeout – Final documentation, payments, contractor evaluations
The initial design presentation usually occurs after schematic design and design development, allowing the designer to present a comprehensive concept showing the spatial layout, materials, and vision for the project. This presentation is crucial for aligning with the client before moving into construction documentation and implementation. It is a pivotal milestone in the design process timeline.
The tradition of the design presentation
80% of interior designers are not makers but thinkers with a maker’s way of thinking, and only 25% of all designs have mastered their design presentations.
If a great design idea is not presented in the best light to the client, often this leads to a break-up in the relationship between a designer and client.
The presentation is the crossroad that can earn high profits and fame or break the project and it all starts with the interior design process.
Traditionally, young designers are taught in schools and colleges to create design boards composed of 2D drawings, sketches, fabric swatches, little materials samples, and inspirational references. The interior design process is also briefly taught in the design school but often, implementing it requires much more experience and knowledge.
Although this is an excellent tactile way for clients to “experience” the project, if you ask, most designers will tell you that their clients always have hundreds of questions after such presentations.
One may experience the fabric and compare references, but it will have difficulty linking the 2D diagrams and plans with watercolor sketches. All of this creates more work for the designers to explain every element with cutout images or other ways.
The design process of presentation
The design process is the pillar of each project. If a project does not have a well-organized design process, often called “programming,” or “Pre-design planning” the risk of failure and mistakes is high, which will always lead to breaks in relations with clients, loss of profit for the designs, and increased budgets for the client.
Pre-design planning (also Programming) represents a detailed analysis of the client’s needs, requirements, and budget. Everything is put against any architectural or site constraints.
Newbie designers overlook the importance of having even simple programming in place. This shows the clients each step of the project and establishes the designer’s credibility and communication skills.
Analysis, Synthesis, and Evaluation are the three main stages of an interior project.
Analysis – it includes phases of defining and translating the project’s problem.
Synthesis – all potential problems and requests are formulated with one or multiple solutions (for discussion with a client)
Evaluation – often has a few rounds of critical reviews, comparison of pros and cons of each solution.
The importance of the pre-design planning phase is so high that the process can be compared to a business justification and options appraisals, all leading later to better-optimized budgets for the client and increased profits for the designers.

George Nicola
Each of the above phases has multiple stages, and they may have different names for each designer, but in general, they lead to the same outcome – solving the problem. Design teams of 5+ teams often have dedicated programmers in charge of the management and communication. Since every project and company are different, programming varies on the type – the size of the project and the amount of useful information presented by the client.
More on this you can read our article “ How to develop an Interior Design team ?”
Below I will try to explain the most common types of interior design presentation tools and grade them with scores for complexity and effectiveness.
Interior bubble diagrams
Complexity: 4 / 10 Effective: 6 / 10

Think of bubble diagrams as a way of early schematic brainstorming. These diagrams can quickly generate multiple concepts. Each bubble has a rough scale according to the space’s proportion, representing its location and adjoining spaces. Based on an approved diagram, the concept is further developed into a floor plan, hand sketch, or 3D drawing. This technique is used by architects, designers, engineers, marketers, developers, and many more professionals where problem-solving is required.
Interior design hand sketches
Complexity: 8 / 10 Effective: 4 / 10

Hand sketched presentations are the oldest and most widely used tool for presenting three-dimensional interior schemes.
Considered almost an art, they require a lot of time, skills, and techniques to be brought up to a level that design clients can understand and read.
Being able to sketch an interior to such a degree shows your clients you know what you are doing and impress them.
Unfortunately, the downside to this design presentation is that only a tiny percent of clients can understand the details of their future homes in-depth.
Thus interior designers who rely solely on hand sketches need to bring additional tools to support and convey their ideas. Here we’ve explained in-depth the most common types of Interior design hand sketching techniques.
Hand drawn floor plans
Complexity: 7 / 10 Effective: 5 / 10

Floor plans, also known as (horizontal building sections) are drawings depicting the building or room layout as if looking through the ceiling with a horizontal cut approximately at half the wall height.
Floor plans are drawn to scale, which may vary according to project conditions.
Larger-scale plans are used to show the general layout without specific details, and smaller-scale interior floor plans are used for highly detailed presentations.
Hand-drawn floor plans are not common today as it takes a long time and effort to produce, which may have to be amended after each client meeting. NDA Uk has produced valuable insight into sketching the initial concept here .
CAD floor plans
Complexity: 7 / 10 Effective: 6 / 10

CAD floor plans are the modern version of the sketched-by-hand plans, which present a much more refined process, quicker to amend details identified by clients.
In addition, CAD plans benefit from having to vary a variety of graphic annotations for each element and attribute.
These orthographic drawings are abstractions of the idea with a specific goal – illustrating and delineating items are walls, windows, boundaries between spaces, and other new or old elements of the project.
The most significant positive side of CAD plans is flexibility.

Interior Axonometric drawings
Complexity: 7 / 10 Effective: 7 / 10
A large percentage of interior clients have difficulty understanding everything if presented independently without supporting materials, which leads to designers producing early in the project additional support drawings as axonometric drawings
Axonometric drawings can be hand sketched or CAD models; either has its own pros and cons

Interior section drawings
Complexity: 5 / 10 Effective: 6 / 10
Section drawings are vertical planes slicing the volumes of the spaces that form a projected image of the elements of the interiors.
Their main goal is to identify and refine interior details around walls, doors, and window fixtures. It is important to note that there are multiple internal sections and elevations stages as a project progresses.
Interior model study
Complexity: 6.3 / 10 Effective: 8.3 / 10

Interior model studies can be done in 3D software or traditional paper and styrofoam miniature. Primarily used by architects to explore the shape and principal components of buildings, interior designers have adopted the tool for the use of internal exploration. Interior studies are part of the concept design phase when the foundation of the concept is laid. This tool is also known as 3D floor plans in the real estate sector.
Traditional interior design board
Complexity: 3 / 10 Effective: 6 / 10

Design boards (often material presentations) are always put together for the client to understand the overall color-material palette of the project. Meetings often are conducted in-house. This part of the project presentation is important as it covers the colors overall and often may have specific references to ready-to-buy furniture or lighting. Often such design boards are accompanied by floor plans, hand sketches, or sections.
Digital Interior design board
Complexity: 2 / 10 Effective: 5 / 10

Digital design boards are a thing today since it’s much easier to compile and send to the client via e-mail for review. This virtual brother of the traditional design board is used mainly during the preliminary discussions and concept direction. Digital design presentations should be part of the process and work along the actual design board at the end.
Interior 3D drawing
Complexity: 6.2 / 10 Effective: 8 / 10

SketchUp is easy to use and affordable modeling program used by more than 80 million people worldwide. Being the most straightforward and intuitive for building 3D models of interior spaces and not only.
SketchUp models can be exported into 3rd party rendering software since the software does not have an integrated photorealistic renderer.
Many Interior Designers use hand drawings and SketchUp models to help their clients envision the project. Hand-drawn projects often are used for preliminary client meetings for quick hatches and depiction of ideas, while SketchUp is used to refine everything in a highly-accurate Interior 3D drawing.
Since SketchUp is only a modeling software, it does not have an integrated rendering module.
Often designers export rough models and overlay them with digital watercolors or another method of digital painting to make them more appealing and artistic.
Interior 3D rendering
Complexity: 9 / 10 Effective: 9 / 10

Think of Interior 3D renderings as the extension of the Interior 3D drawing tool, the cherry on top of the cake for your interior project.
Interior 3D renderings are the highly refined photoreal product of 3D drawings and models. 3D renderings are images with depicted natural light, colors, shapes, and textures of the interior space in all of its beauty.
This is the most effective tool in a designer’s toolbox. Most savvy designers use 3D renderings combined with the other mechanisms explained above to have maximum impact on their presentation.
This article has the “ Most common 3D rendering questions a designer asks “
Why interior presentation is important?
Thoughtful presentations throughout the design process lead to better outcomes and often save time, costs, and headaches down the road. A picture is worth a thousand words.
Reasons why interior design presentations are important, especially for firms looking to save time and resources:
- Aligns vision – Ensures designer and client are on the same page about design goals and concept direction before moving forward.
- Provides feedback – Allows client to give input on layouts, selections so changes can be made early.
- Validates concepts – Gives the client opportunities to react to and validate the design concepts.
- Manages expectations – Clearly conveys what is technically achievable within budget and site constraints.
- Sells ideas – Enables designer to persuade client towards bolder/progressive design choices.
- Refines details – Opportunity to tweak finishes, furnishings based on client comments.
- Establishes scope – Solidifies what is included before construction documents commence.
- Saves rework – Avoids wasted time from major redesigned if issues are caught earlier.
- Tracks approvals – Provides documentation of client approvals at key project milestones.
- Manages budget – Ensures costs are aligned with client goals at various stages.
- Builds confidence – Reinforces the designer’s expertise and vision.
Starting an Interior Design Presentation
When presenting interior presentation the goal is to make the client feel comfortable, involved, and excited to see the design come to life. A thoughtful introduction and presentation style sets the stage for an engaging, productive meeting.
- Welcome the client – Greet them, offer water/coffee, make introductions.
- Give an overview – Explain the presentation purpose, flow, and estimated length.
- Show appreciation – Thank the client for the opportunity and input so far.
- Set expectations – Note that it’s a collaborative process open to feedback.
- Establish the vision – Summarize the design goals and client wishes.
- Start with inspirations – Use engaging visuals to introduce design concepts.
- Present confidently – Be knowledgeable yet conversational.
- Watch body language – Make eye contact, don’t turn your back.
- Invite participation – Ask for initial reactions, input as you go.
- Clarify as needed – Answer questions clearly without jargon.
- Read the room – Assess reactions; adjust pace/approach accordingly.
- Have a conversation – Make it an open dialogue, not a one-way lecture.
- Set a positive tone – Balance professionalism with warmth.
how to present an interior design concept
The presentation should provide an engaging, sensory introduction to the design narrative. Ensure the client connects with the concept on an emotional level.
Here are some tips for presenting an interior design concept:
- Create a mood board – Collage images, materials, colors that represent the design intent. Help tell the visual story.
- Develop inspirational sketches – Hand drawings to quickly convey spatial ideas and stylistic details.
- Use concept models – Simple massing models showing forms, spatial connections.
- Prepare initial floorplans – Hand drawn or digital plans to indicate layout and functionality.
- Show materials and finishes – Present physical or digital samples of proposed materials.
- Use inspirational descriptors – Compose a narrative to explain the concept’s origins and goals.
- Include spatial vignettes – Model or digitally render key spaces to visualize the concept.
- Develop title and style boards – Display the project name, client, date, and design aesthetics.
- Present in layers – Break down complex designs into digestible parts and pieces.
- Tell a story – Take the client on a journey through the eyes of the end user.
- Seek feedback – Have an open dialogue to understand responses and make refinements.
- Be passionate – Enthusiasm for the concept is contagious.
who is involved in creating the design presentation
For solo and small teams often the involved in presentation are lead or project designer and graphics team. While in larger firms more peopel are involved in putting up the design presentation.
There are usually several key team members involved in creating an interior design presentation:
- Lead Designer – The primary interior designer responsible for the project oversees the presentation creation. They ensure it aligns with the design concept and client needs.
- Project Designers – Any other designers working collaboratively on the project help develop presentation content.
- Graphics Team – Graphic designers, CAD technicians, render artists create the drawings, boards, models, etc.
- Support Staff – Administrative staff may assist with scheduling, printing, assembling materials.
- Construction Team – Contractors and tradespeople may provide estimates, feedback on constructability.
- Specialty Consultants – Lighting, acoustics, AV consultants help develop technical details.
- Photographers – For projects involving site photos, lifestyle images.
- Copywriters – Can assist with composing the narrative content.
- Principals/Partners – Senior leadership may review the presentation and provide guidance.
- Client – The client is the most important collaborator, providing feedback throughout the process.
The combination of the design, technical, and creative team allows for all aspects of the presentation to come together in a cohesive, impactful way. It’s a team effort!
Are FF&E part of the presentation?
Yes, furnishings, fixtures, and equipment (FF&E) are an important part of most interior design presentations.
Here are some of the key ways FF&E may be incorporated:
- Furniture Floor Plans – Scale drawings showing proposed furniture layouts and arrangements.
- Furniture Elevations – Scaled drawings with dimensions and details of specific furniture pieces.
- Furniture Spec Sheets – Manufacturers’ spec sheets for priced furniture items.
- Furniture Renderings – Digitally rendered perspective images showing furnishings in context.
- Furniture Samples – Photos, fabric swatches, paint colors for custom pieces.
- Furnishings Plan – A detailed list of all specified furniture, fabrics, and finishes.
- Furniture Inspiration – Mood boards with furniture images representative of the style.
- Furniture Models – Physical scale models or digital models of key furniture forms.
- Furniture Vignettes – Styled arrangements of furniture, accessories, and finishes.
- Pricing Summaries – Spreadsheets listing furniture costs, vendors, and lead times.
Showcasing the proposed FF&E allows clients to better visualize the complete design concept and understand how furnishings complement the architecture and finishes. Specifying detailed FF&E is an integral part of the design process and presentation.
What designers need to show presentation on site?
The goal is to bring anything needed to clearly explain the details and vision of the design in the context of the actual space.
It’s important for designers to have a capable laptop or tablet when presenting on site. This allows them to access and display digital presentation materials, 3D files, and other electronic design documents.
A powerful, portable device also enables designers to make edits or adjustments to the presentation on the fly in response to client feedback during the meeting.
The ability to pull up designs, add notes, make changes, and project plans in the space itself helps facilitate an interactive, productive on-site presentation.
With the right mobile technology, designers can make the most of the opportunity to share and discuss designs in person.
Allowing clients to review the presentation on site makes it as relevant and tangible as possible.
Here are some key things designers need to bring and show during an on-site presentation with a client:
- Presentation boards – Physical boards displaying materials, plans, concepts, etc.
- Digital presentation – Laptop, tablet, or slides to present digital materials.
- Fabric swatches – Cuttings of specified upholstery and drapery fabrics.
- Finish samples – Wood, tile, stone, wall covering samples, paint color chips.
- Furnishings plan – A detailed FF&E schedule and product specs.
- Floor plans – Scaled drawings of the space layout and furniture arrangements.
- Lighting plans – Technical lighting specifications and layouts.
- Finish plans – Drawings or schedules showing all finishes.
- Plumbing/Electrical plans – If applicable, show rough-in locations.
- Architectural details – Drawings of millwork, ceilings, built-ins, etc.
- Perspective sketches – Hand-drawn 3D perspectives of the space.
- Color renderings – Digitally rendered views of the proposed design.
- Models – Physical scale models, potentially with materials/finishes.
- Photography – Before photos, site photos, comparative photos.
- Specification book – Detailed specifications for all products.
Do designers do free presentations?
Most professional interior designers do not provide full design presentations for free.
However, there are a few scenarios where a designer may provide some initial ideas without charge :
- Initial Consultation – Many designers offer free initial consultations to discuss the project scope and determine if they are a good fit for the client.
- Concept Sketches – Some designers may provide a few rough concept sketches at no cost to give a sense of their design approach.
- Sample Boards – Small sample boards with a couple finish options are sometimes provided as part of an initial meeting.
- Portfolio – Designers will freely show their work portfolio during meetings.
- Proposal – When bidding on a project, a presentation or proposal may be offered.
- Existing Relationship – Designers working with past clients may start new projects with some pro bono work.
However, developing a full presentation with multiple detailed boards, drawings, specifications, etc takes a significant investment of the designer’s time and resources.
Most interior design firms will charge for the full presentation, typically billing hourly or as a percent of the overall project fee.
While free consultations are common, clients should expect that a comprehensive interior design presentation will have associated costs and fees in line with the scope of work involved.
You Might Also Like

How to Grow Your Interior Design Business: Tips for Success

Unlocking the Secrets of Interior Design Procurement

How to Create a Focal Point and Emphasis in a Room

The Basics of Interior Design Businesses

3D Production Workflow for Interiors

Get More Interior Design Leads: Seo Tips For Optimal Content
Architectural visualization
Virtual Staging
Virtual Staging Software
Virtual Staging Online Course
Modern Mansions For Sale
Refunds and Credit Card Security
Terms of Use
Architectural Visualizations and Interior Rendering | Tallbox. All rights reserved. © 2024
Privacy Overview
How did you hear about us?
Google Facebook Twitter Instagram Online Ads From a friend Other
Your Name (required)
Your Email (required)
How many photos?
Your Message
Upload archive
A presentation maker for every team
Give better presentations and visually communicate your ideas, projects, and everything you need. Miro’s online presentation maker helps you to gain the confidence to keep the momentum going.

Over 70M users love Miro.
Be presentation-ready in seconds
Make presentations in just a few clicks with Miro’s presentation creator. Choose one of the ready-made templates and edit it to suit your needs; no design experience is needed. We’ve got your back with a great selection of templates.
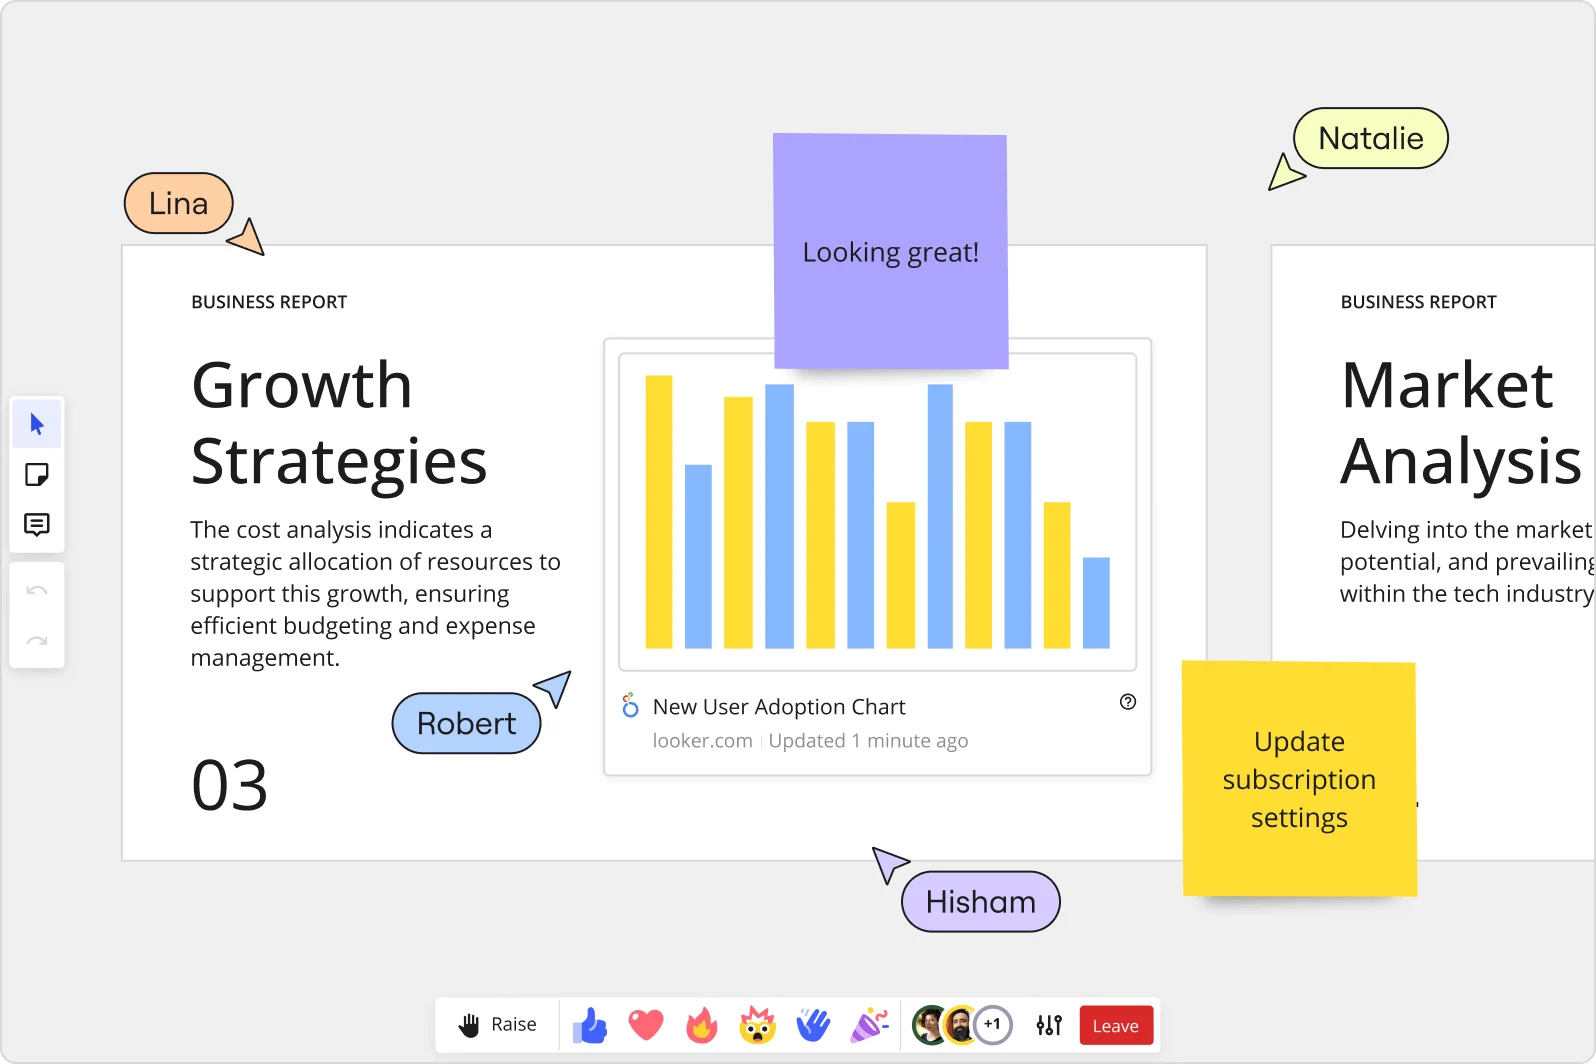
Layouts that fit your needs
We help you to get started, but you’re welcome to fully customize your presentation. Add your brand colors, fonts, and styles, create graphs, and move frames around to fit your storytelling. Don’t be afraid to explore the many editing tools on the left toolbar and get creative with the presentation maker.
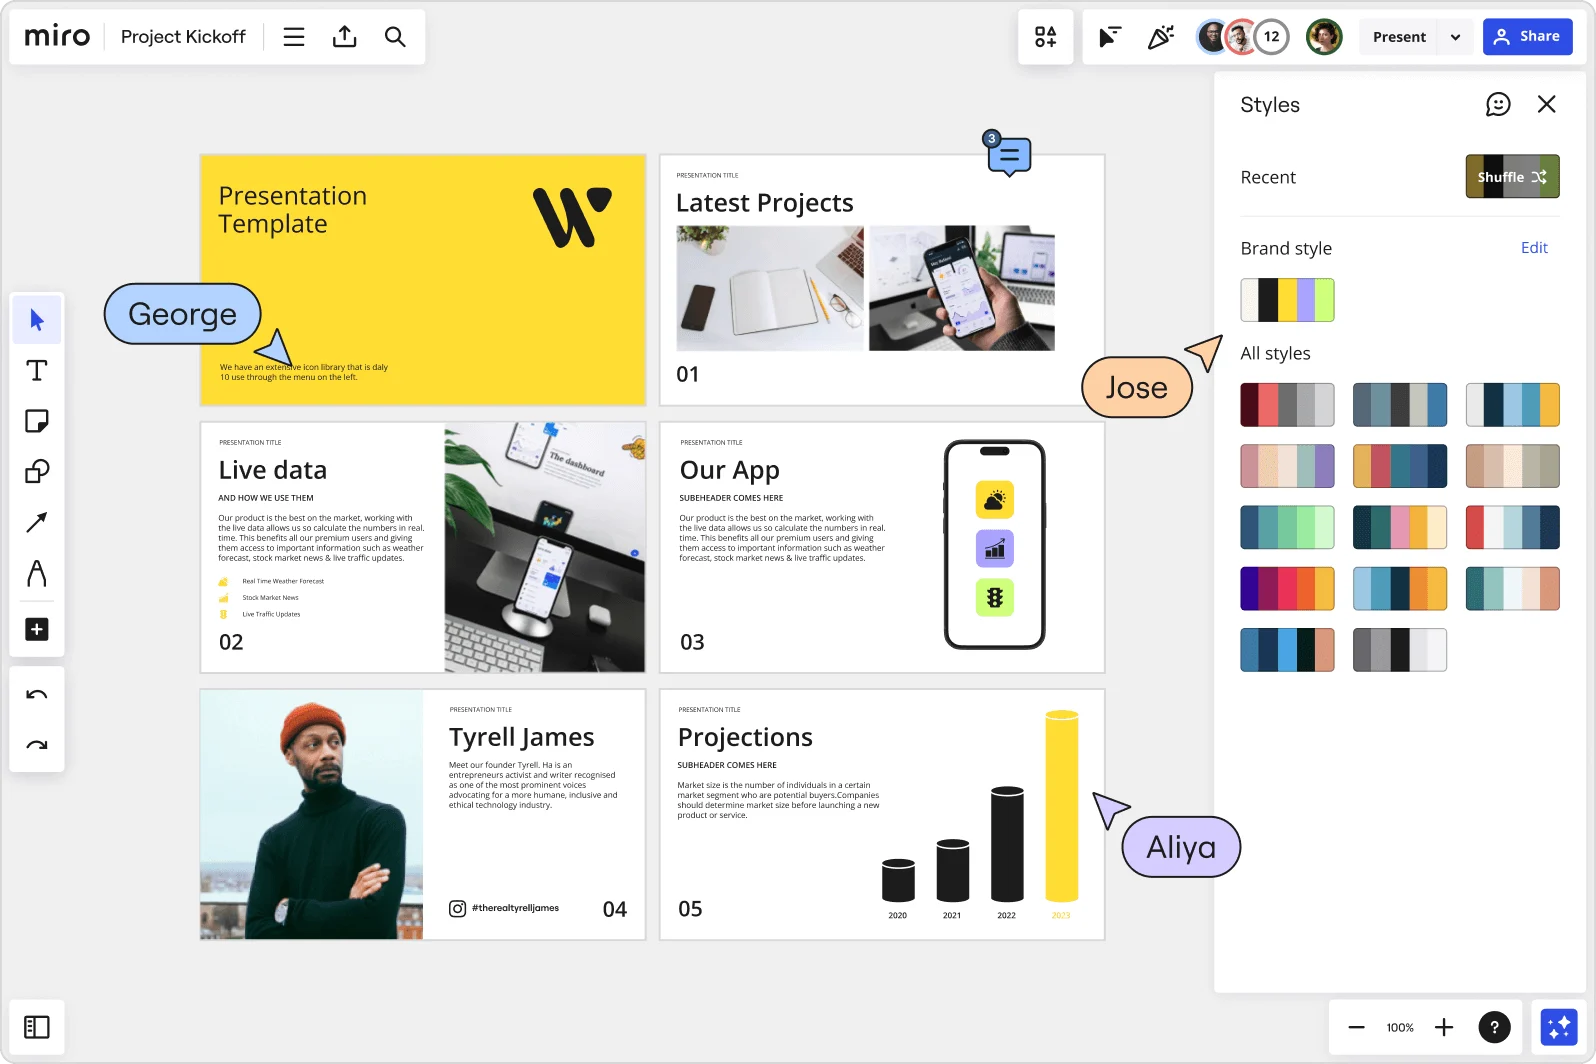
No more boring presentations
Present content and pre-planned activities to facilitate powerful meetings and workshops. Presentations are boring. On Miro, they’re not.
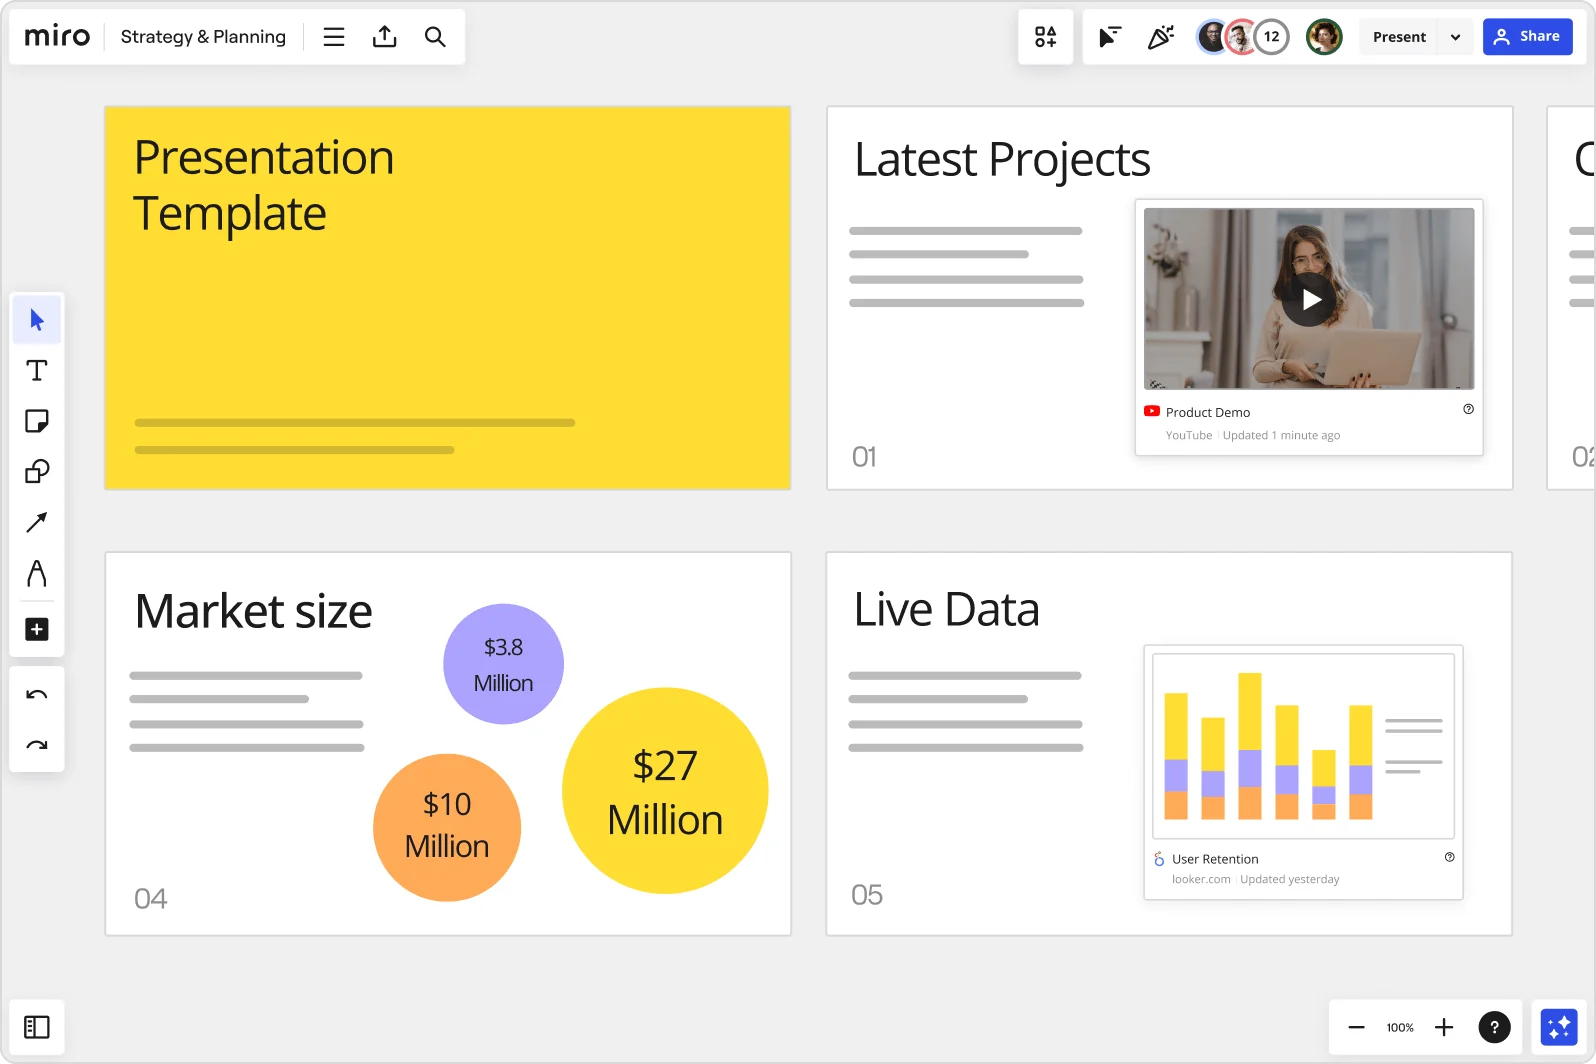
Why Miro is the best presentation maker
Master storytelling.
Miro’s presentation creator has an intuitive UI, making communicating your ideas easier without worrying about tech complications. Use the Presentation mode, and focus your energy on what matters: your content.
Co-creation made simple
Invite others to collaborate with you whenever, wherever. Miro’s robust capabilities allow you to have guests on your board or build a shared team space where everyone comes together to collaborate.
Create dynamic presentations
Use the drag-and-drop feature and effortlessly add images, text, and videos to your presentation frames. Miro’s visual workspace allows you to quickly create professional-looking presentations with just a few clicks.
Easily share your presentation
Engage your stakeholders and get buy-in by creating eye-catching and on-brand presentations. Use Brand Center and presentation templates to improve your bargaining power, influencing decision-making.
Related templates
Presentation Template
Deliver impressive presentations that resonate with your audience.
Logo Presentation Template
Present your design ideas with confidence and make your clients fall in love with their new logo.
Rebranding Presentation
Provide clarity around the reinvention of your brand and your rebranding strategies.
Company Vision Presentation Template
Summarize your company’s goals and describe your path to achieving them using professional-looking slides.
Sales Presentation Template
Shed pre-sales pitch nerves and deliver the speech of a lifetime with the Sales Presentation Template.
Pitch Deck Template
Make people care about your idea and gain supporters everywhere.
Present ideas from anywhere
Miro’s visual workspace helps teams to communicate and collaborate across formats, tools, and channels — without the constraints of physical location and meeting space.
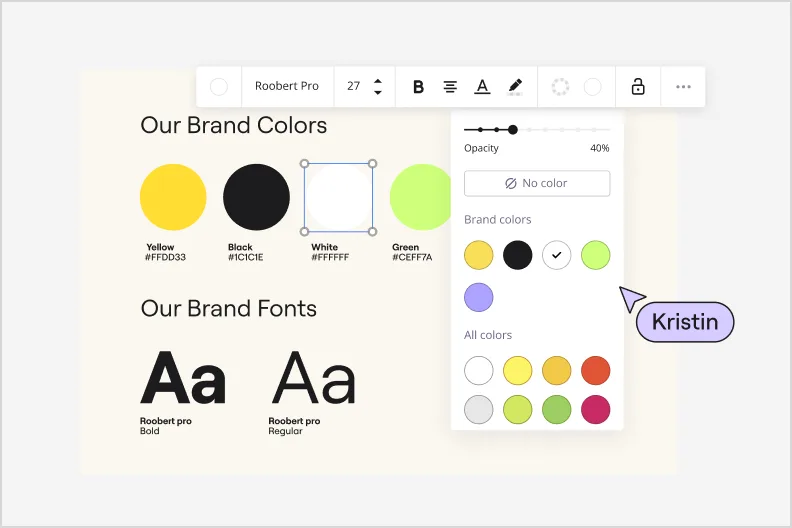
Brand management
Make sure your brand looks consistent across all work. With easy access to approved fonts, colors, styles, and templates, anyone can create polished and on-brand boards in just a few minutes.
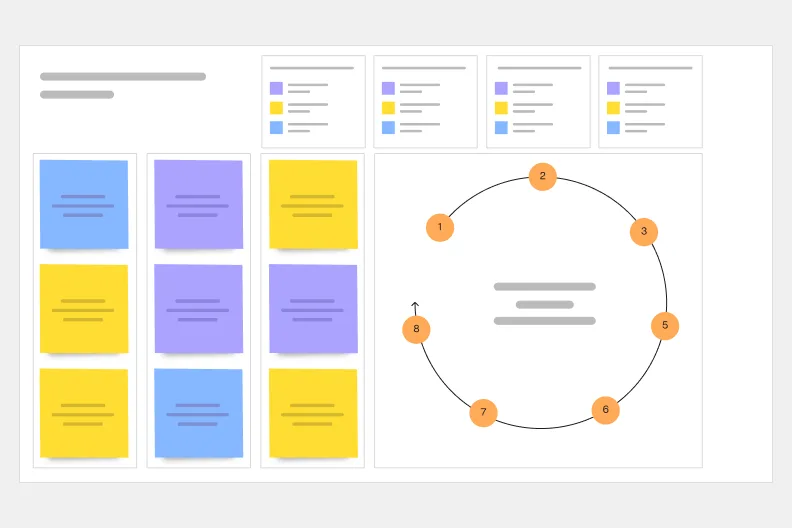
Meetings and workshops
Creative energy that you can feel, presentations that just flow, and teams that connect and collaborate like humans — bring the in-person experience online with Miro, whether you’re running a brainstorm or facilitating a workshop.
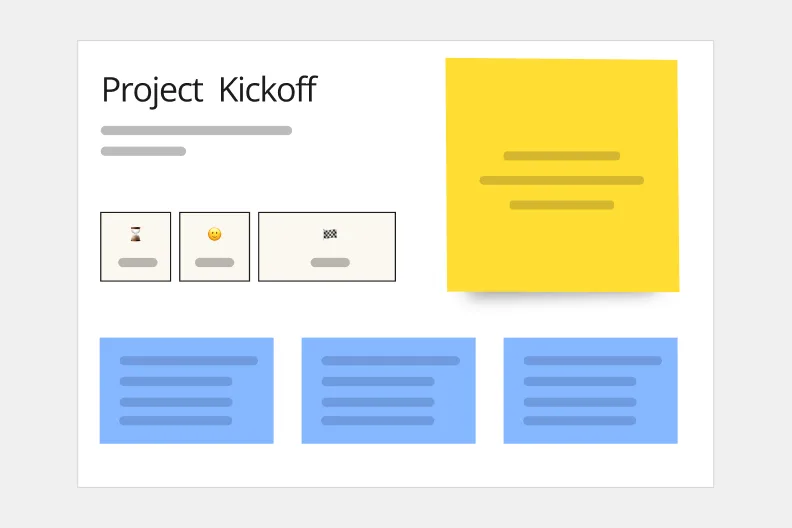
Client work solutions
Miro gives consultants, agencies, freelancers — and their clients — one living, dynamic space to go from project brief to big business breakthrough. Always collaborative, no matter how, where, or when you work.
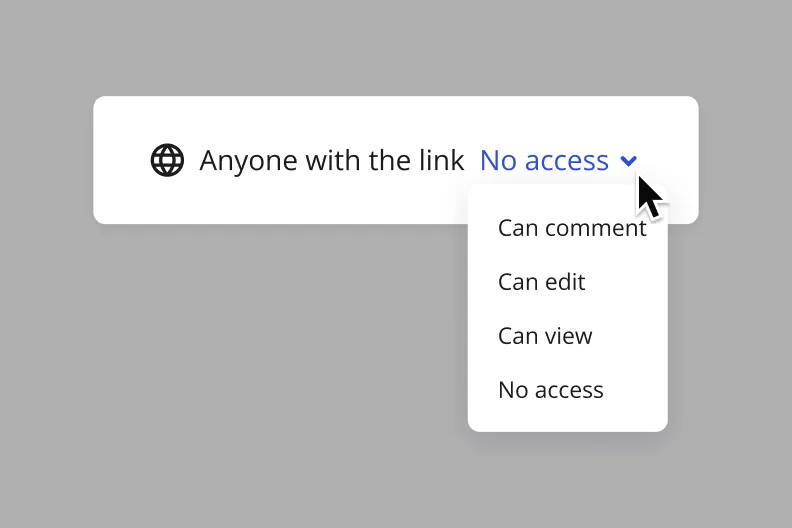
Hybrid work
How we work has changed. Your tools should too. Experience seamless collaboration, no matter when or where you work, in Miro. Give teams a dynamic and visual way to collaborate, connect, and create.
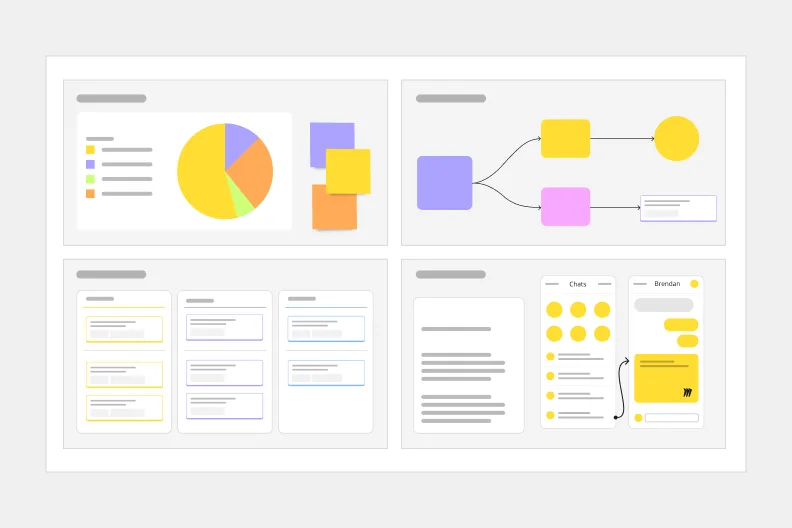
Project management
Manage complex projects — and their stakeholders — with confidence. Create process alignment and shared understanding between cross-functional teams with a collaborative visual workspace.
Dashboarding & Performance Tracking
Create a shared space for custom dashboards and performance monitoring, pattern identification, and decision-making.

Strategy development
Propel your plans from strategy through execution. Run engaging kickoff sessions, build visual presentations, manage and track progress collaboratively, all in one online planning tool.

Organizational design
Your employees are your greatest asset. Map out your organization to see the big picture and design for the future.
How to make a presentation
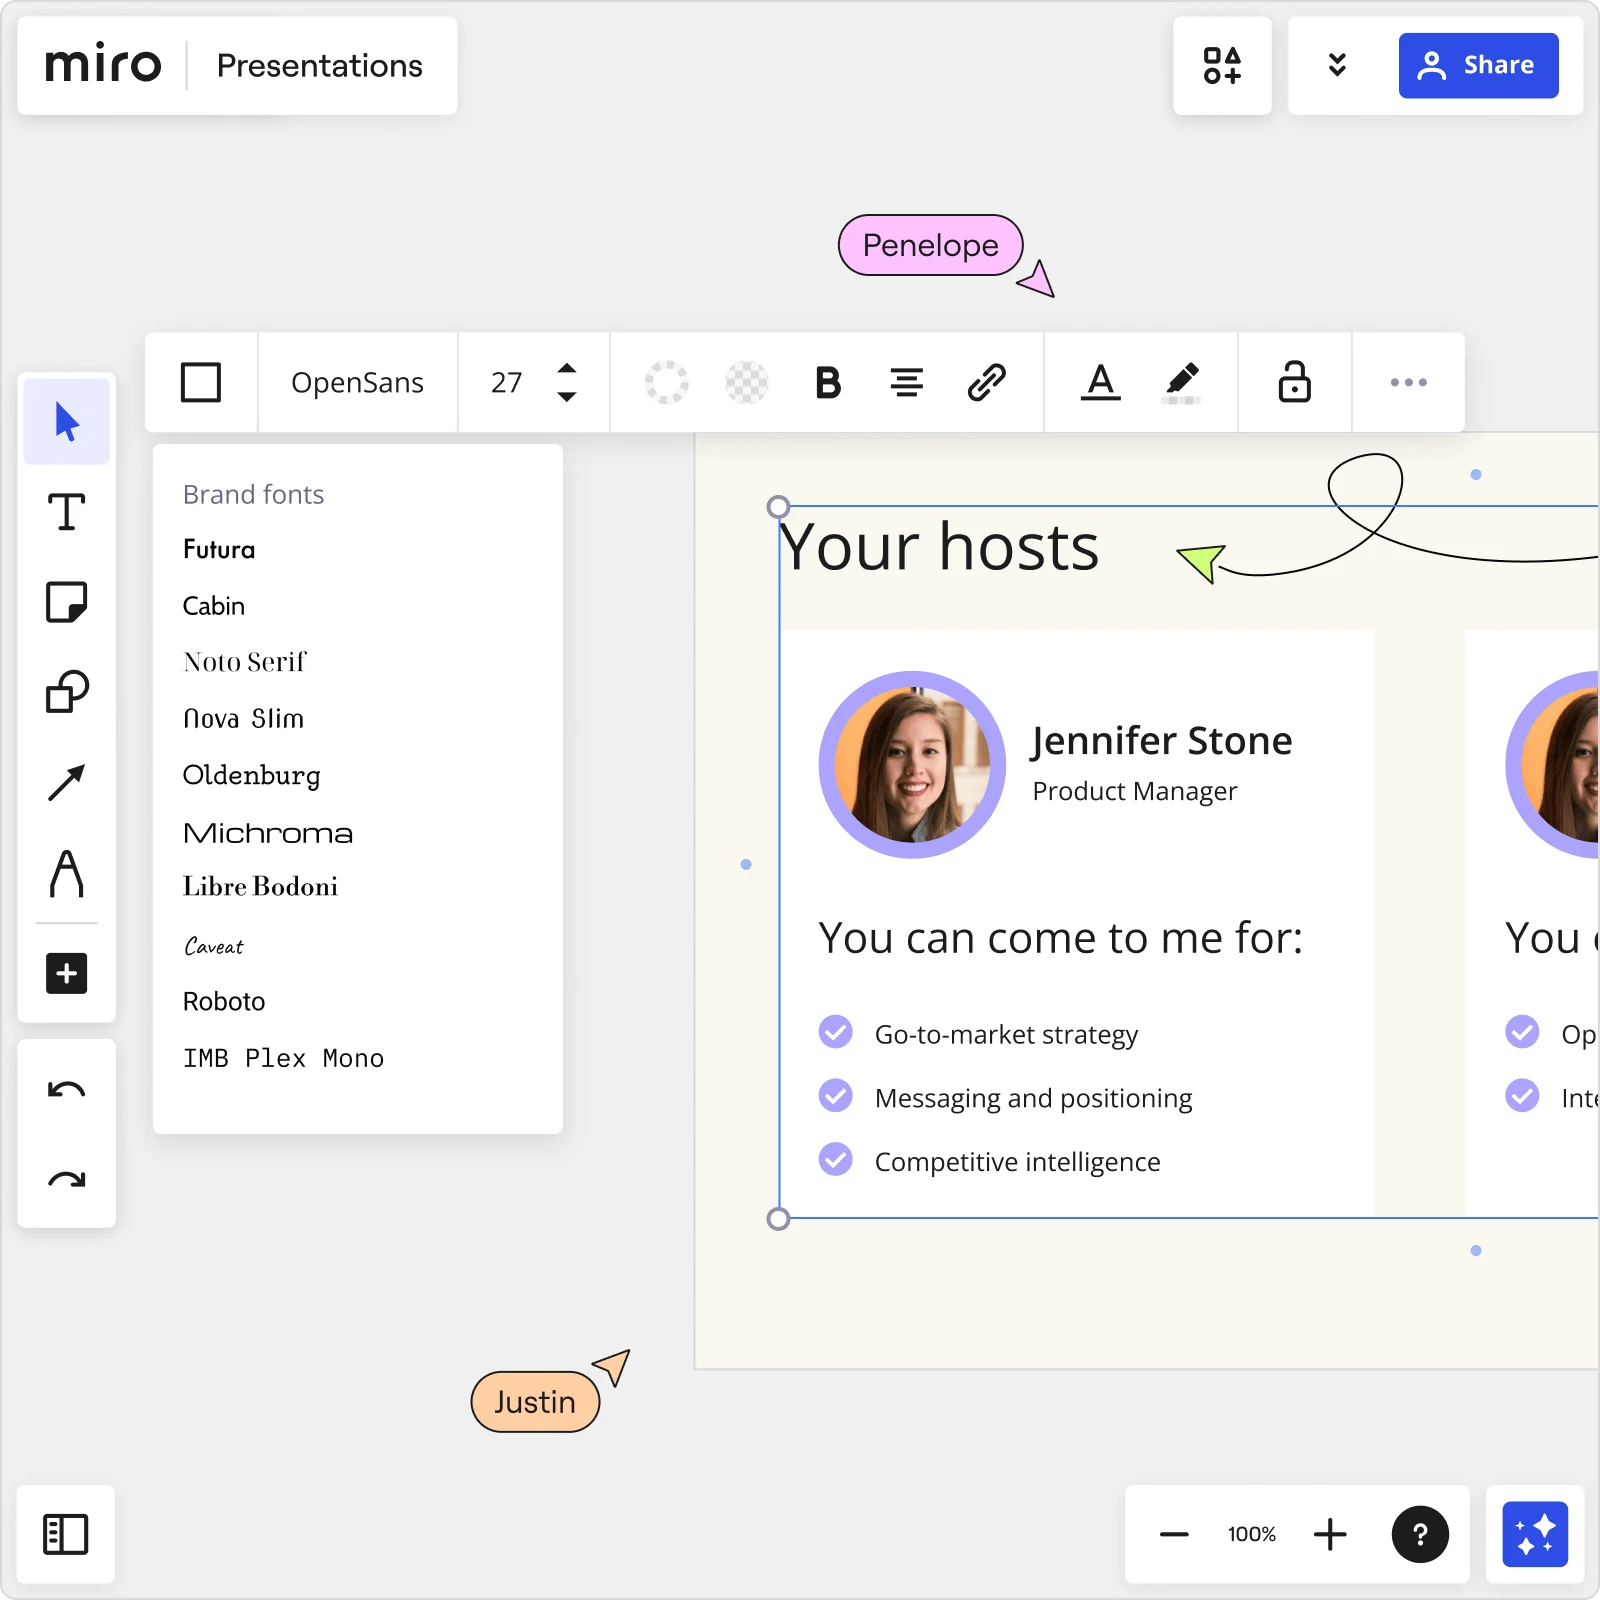
Select a ready-made template
Miro has a wide range of presentation templates you can choose from. Or start building from scratch, adding content to your board. Miro’s presentation maker has many features to help you get started.
Structure your presentation
Edit your content, apply your brand fonts and colors, and resize frames if needed.
Share ideas with one click
To present, select Presentation mode on the upper right toolbar. Invite others to join your presentation, and good luck!
Presentation maker FAQs
Where can i make free presentations.
Search for tools that give you free access. Sign up for free for Miro’s visual workspace, and see if it fits your needs.
Which is the best presentation maker?
There are many options out there; choose the one that gives you flexibility and suits your needs. Miro’s presentation maker allows you to create presentations quickly, saving time and effort when designing and crafting your storytelling. Try it for yourself, and see if it works for you.
How to make a good presentation slide?
Miro’s presentation maker allows you to use your board's frames as slides, working exactly as any regular presentation. When creating a presentation with Miro, you have the option to use the Presentation mode, which helps you manage your time and audience on the board, enabling you to facilitate and present at the same time.
10 Miro templates for powerful presentations
How do you design a good presentation?
What you need to know about human perception to be great at presentations
Get on board in seconds
Join thousands of teams using Miro to do their best work yet.
Online Architecture, Design & Archviz Courses
Browse all course s
Access all courses for just £15 per month or £79 per year! Join now.
- AutoCAD Essentials
- The Perfect Floor Plan
- SketchUp Layout Essentials
- Microstation Essentials [coming soon]
Design & Practice
- Architectural Design in Practice Vol.1
- The Project Guide
- How To Setup Your Own Studio
- Architectural Detailing Basics Vol.1
- Lumion Raytracing & Advanced Rendering
- Twinmotion for Beginners
- The Advanced Twinmotion Guide
- Chaos Corona Interiors
- Chaos Corona Exteriors
- Enscape to Vray Workflow
3D Modelling
- The Complete Guide to SketchUp
- SketchUp & Vray
- Rhino & Vray
- Cinema 4D & Chaos Corona
- Complex Geometry in SketchUp
- Parametric Architecture Masterclass
- Grasshopper Basics
- Autodesk Maya for Architects
- Rhino to Revit Workflow
- Autodesk Revit for Beginners
- The Essential Guide to Revit
- BIM Collaboration in Revit
- The Essential Guide to Archicad
- Area Plans & Schedules
Graphics & Presentation
- Photoshop Essentials
- InDesign Essentials
- The Guide to Architectural Short Films
- The Perfect Portfolio [coming soon]
Realtime Rendering
- Unreal Engine Interiors
- Unreal Engine Exteriors & Environments
- Complete Guide to D5 Render
- Complete Guide to Lumion
- Enscape for SketchUp
- Enscape for Revit
Hand Drawing & Illustration
- Sketch Like an Architect
- Illustrator Essentials [coming soon]
- The Guide to Architectural Diagrams [coming soon]
Professional Download Packs
In Practice
- Architects Tool Kit
- Architect in Practice
- CAD Drawings & Details
- Access For All Tool Kit
- CDM & Principal Designer Pack
- The Planning Tool Kit [coming soon]
Presentation, Design & Studies
- Ultimate Diagram Tool Kit
- Presentation Boards
- CAD Sheets & Title Blocks
- Technical Design Pack
- RIBA Part 3 Toolkit
- Architecture Student Bundle [coming soon]
Project & Software Examples
- SketchUp Model Set
- Project Pack Vol. 1
- Project Pack Vol. 2
Archviz & CGI
- Twinmotion Render Scenes
- Lumion Render Scenes
- D5 Render Scenes
- Vray for SketchUp Render Scenes
Learn more about the platform, its founders, tutors and how a membership works.
Gain valuable industry insights, practical knowledge and learn from our amazing guests!
Useful articles, tips, tricks & content updates. A great place to start to learn more about us.
Need support as a member or have a query about the platform, don’t hesitate to get in touch.
Architectural Presentation Templates | Example Boards
£ 10.00
Save HOURS of tediously designing your presentations and pick up our templates, instead! This pack contains 6 portrait presentation boards and 6 landscape boards, each with a unique design. The file formats available are Adobe InDesign & PDF. There are tons of bonuses within such as additional template boards, diagrams, visuals and more to inspire your future presentations, CVs and portfolios.
– The All-Rounder
– appearance & massing, – analysis & comparison, – design in detail, – key features, – introduction & analysis.
If you have any issues with your download, or you fail to receive the necessary email to access your purchase, get in touch with us right away. Please email us on: [email protected]
Generally, we work to the latest in file version (current year), but upon request we’re happy to ‘back-save’ the file for you to make it accessible.
By purchasing any files from ArchAdemia you are acquiring a Single Person Use license, whether for a personal or commercial project. You shall not directly replicate any of our drawings, details or imagery for your own use. All our downloads and templates are for training purposes only. We accept no liability for any replication that may cause any harm or damage to others. You may not rent, lease, sub-license, distribute, lend nor transfer photos ‘as is’ in their original unaltered form without prior written consent from ArchAdemia.

- This website uses cookies to ensure you get the best experience on our website.

Join our Mailing List.
Display Boards: A Key Tool for Visual Communication

Display boards are everywhere. We all used a school display board for our science fair; we are greeted by an office display board every morning when we get to work; and we’ve seen our kitchen cork display board overflowing with notes. They are such a simple and handy tool for visual communication.
It’s no wonder that they’ve been such an indispensable tool for communication in a host of different environments. Their structure and versatility has rendered them essential, but what if we could make some of them smarter and more efficient?
What is a Display Board?
A display board, or poster board, is any flat board-shaped rigid material which can stand on its own. It is used for exhibiting information in visual or text form and it applies to a variety of settings where displaying information is crucial for communication or engagement.
Display boards come in all shapes and sizes but their most common formats are mobile, tri-fold board structures. Often mounted on other surfaces, tabletop display boards or presentation boards are typically smaller and more portable. Several sizes, colors, and material combinations are available, and their cost varies accordingly.
What are Some Examples of Display Boards?
Below are some examples of how display boards can typically be used based on different settings and communication goals:
- Educational Tool : Often a large tri-fold board used to display research projects, educational material and visual aids for presentations.
- Advertising Medium : Any board that serves advertising or promotional material, most commonly in the form of a billboard or digital display.
- Information Signage : Often found in public spaces providing directions, maps , and tourist information.
- Artistic Exhibition : Commonly a simple flat surface onto which paintings, photographs and curatorial notes are displayed.
- Corporate Use : Typically in the form of a whiteboard, it is utilized in presentations as well as planning and brainstorming sessions.
- Conference and Fair Poster : Traditionally displaying research posters, event schedules and directional signs to attendees.

How Much Does a Display Board Cost?
The cost of a display board can vary widely. Its price range depends on several factors including material, size, quality, and any additional features like portability, interactivity (like whiteboard surfaces), or even electronic components in the case of digital display boards. Below is a general idea of their price ranges:
Basic Cardboard or Foam Boards
These are the most affordable options as their price can range from a few dollars to around $30 or $40, depending on the size and quality. They are often used for school projects, presentations, or temporary displays.
Professional Presentation Boards
These boards, which are commonly found in businesses or academic conferences, can range from just a few dollars up to a couple of hundreds, as they can also feature more functionality and extras like write-on whiteboards. They often have more durable materials and may have a tri-fold design. They can also come with carrying cases.
Digital Display Boards
These advanced solutions, such as LED display boards, could set you back at least a few hundred dollars for the screen, plus some other gear and software to run content management and playback. If you are planning to use a digital signage setup as a display board, your initial investment should include a TV, a media player and a content management system license or subscription.
Benefits of Digital Display Boards
When compared to traditional display boards, digital displays offer several advantages which more than justify their costlier initial investment. Some of the key advantages for upgrading to a digital signage solution like Yodeck include:
Dynamic Content
With digital boards you can display a wide range of image, video, and document formats. You can change, edit, layout, and schedule content easily and quickly, making your visual communication channel more attention-grabbing than a static inanimate display.
Easy Management
With a cloud-based solution, you get all your content and screens on a single dashboard no matter where your displays are located. This can be especially useful for large organizations managing many displays.
Real-time Updates
When it comes to getting accurate and time-sensitive information to your audience, digital displays will outperform their analog counterparts. With a digital signage platform you can quickly and remotely update your information, making digital displays ideal for presenting real-time information like news, weather, schedules, or promotional offers.
Interactivity and Other Integrations
As digital displays can run more than just static image or text formats, this allows you to integrate apps offering an extra layer of functionality. QR codes, interactivity features, and a host of other apps , when integrated into a reliable digital signage deployment, can greatly enhance user experience and engagement.
Higher Visibility
With bright displays and the ability to operate 24/7, digital boards are highly visible even from a distance and in various lighting conditions, including at night.
Cost-effectiveness Over Time
While the initial investment might be higher, digital boards can be more cost-effective and eco-friendly in the long run. This is due to the ease of updating content without the need to print new materials every time.

How to Make the Switch?
The transition from traditional boards can seem daunting. But if you want to try what digital boards have to offer, Yodeck can help you make that transition seamlessly and efficiently .
Start by assessing your needs, then research and budget for the transition. In this phase, it is important to note that with Yodeck you get your first screen for free, forever. This will come particularly handy if you decide to pilot test a digital board setup.
Sign up for free or request a demo today to see how the software can help you transition to your digital board era!
- SUGGESTED TOPICS
- The Magazine
- Newsletters
- Managing Yourself
- Managing Teams
- Work-life Balance
- The Big Idea
- Data & Visuals
- Reading Lists
- Case Selections
- HBR Learning
- Topic Feeds
- Account Settings
- Email Preferences
3 Ways to Nail Your Presentation to the Board
- Daniel Casse

No one wants a bored board.
The boardroom is a distinct forum that requires a different type of presentation and preparation. In this article, the author outlines three practices every business leader should embrace to enhance their board presentations: 1) Start with a governing thesis: a big idea or perspective that captures the main point of the discussion. Presentations that start this way leave the audience with a compelling message. 2) Understand that the CEO is not the target audience. A board presentation has to provide some quick refreshers on the operating environment and — more importantly — identify the biggest problems that need fixing. 3) Steer the presentation toward getting valuable feedback. Instead of concluding remarks that restate key business results, share two or three important ideas that will drive future success and concerns that could benefit from director input. The goal: Get the board’s validation or critiques of a proposed course of action. The result, invariably, is a mix of candid feedback and intelligent, probing questions that create thoughtful board engagement.
For most executives, even those at the most senior level, a presentation to the board of directors is the most demanding test of leadership communications. Very few succeed.
- DC Daniel Casse is the president of G100 Chief Executive, a group of public and private company CEOs that has been meeting for 20 years. He is also president and managing partner of High Lantern Group, a strategy and communications firm.
Partner Center
Got any suggestions?
We want to hear from you! Send us a message and help improve Slidesgo
Top searches
Trending searches

teacher appreciation
11 templates

17 templates

el salvador
32 templates

summer vacation
19 templates

27 templates
Coquette Aesthetic Vision Board
Coquette aesthetic vision board presentation, premium google slides theme and powerpoint template.
Download the Coquette Aesthetic Vision Board presentation for PowerPoint or Google Slides and start impressing your audience with a creative and original design. Slidesgo templates like this one here offer the possibility to convey a concept, idea or topic in a clear, concise and visual way, by using different graphic resources. You need to talk about a specific topic, but you don't know how to do it? Try using presentations like this one here, 100% customizable!
Features of this template
- 100% editable and easy to modify
- Different slides to impress your audience
- Contains easy-to-edit graphics such as graphs, maps, tables, timelines and mockups
- Includes 500+ icons and Flaticon’s extension for customizing your slides
- Designed to be used in Google Slides and Microsoft PowerPoint
- Includes information about fonts, colors, and credits of the resources used
What are the benefits of having a Premium account?
What Premium plans do you have?
What can I do to have unlimited downloads?
Don’t want to attribute Slidesgo?
Gain access to over 23000 templates & presentations with premium from 1.67€/month.
Are you already Premium? Log in
Related posts on our blog

How to Add, Duplicate, Move, Delete or Hide Slides in Google Slides

How to Change Layouts in PowerPoint

How to Change the Slide Size in Google Slides
Related presentations.

Premium template
Unlock this template and gain unlimited access

Register for free and start editing online
IMAGES
VIDEO
COMMENTS
How to Create an Interior Design Presentation Board. Check out these 5 steps to creating a board that conveys your vision and plan to your client. 1. Choose Digital Board vs Hard Board. In the digital age, the choice between a digital board and a hard board is pivotal. Each medium has its unique advantages and can significantly influence the ...
Architecture presentation boards are a tool to showcase your work. They are a way to draw your viewers into your design process and methods, providing an overall summary and vision for the project. You are communicating your design and showcasing your artistic skills, and your sense as a designer. Every successful project has a central concept ...
These notes outline and explain interior design Presentation Boards Layout tips and techniques and how to create eye catching Presentation Boards. Presentation Boards are used by interior designers but also by architects, graphic designers and concept artists in order to present their ideas, drawings and designs to clients, co-workers or their boss. Lets look at the key points to consider when ...
Key elements of an effective architecture presentation board layout include: A well-designed layout that organizes and presents information in a logical and visually appealing way. Clear and concise text that explains the project's concept, goals, and solutions. High-quality visuals, such as drawings, renderings, and photographs, that ...
Representing Architecture. Your architecture presentation board must use graphics and text to represent your design idea and clearly communicate the details and essential aspects of the scheme. It is important to be efficient with the production of drawings, and only use what is necessary to convey your idea. Quality is better than quantity as ...
Using a sample board to incorporate tangible textures into your interior design presentation can give you an advantage in winning them over. Digital Presentation Tools. Interior designers are fortunate to have a host of easy-to-use, effective digital interior design presentation tools available to create presentations that wow. Mood Boards
An architectural presentation board is like a sales pitch where you sell your ideas, concept, and design to win clients. An architecture presentation board serves several purposes, such as: Use for design presentations to clients, superiors, or colleagues. Can help land clients and earn commissions. Can help build your career and take your ...
In many ways, an architecture presentation board resembles a sales pitch, as you are essentially promoting your design, ideas, and concept to win clients over. 10 Architecture Presentation Board Ideas . While the architecture presentation board may not be the only aspect of the project itself, it certainly has an impact on the audience.
Today's video is the ultimate guide to architecture presentation boards which will cover presentation skills, story, structure, content, orientation & size, ...
October Design Daily Series : Day 1 ♥Hello Designers! Thank you so much for tuning in! We are finally welcoming October, Pumpkin Spice Lattes & everything fa...
This summary is a good starting point for the presentation. Keep the Boards Consistent. In most projects, you will be required to present several schematics detailing a variety of aspects of the project. For example, you may show off material boards, technical specifications, color boards, 3D drawings, etc. These boards should be visually ...
I think that if you can create a stunning presentation board, then you have 40% of the job done (which is captivating everyone's attention), and now your design can speak for itself! If you are interested, join me in this course so we can explore the world of presentation boards and everything there is to it! Enroll now for $99.
The importance of strong & clear architectural presentation boards in practice. Architectural presentation boards are powerful tools that convey design concepts, ideas, and visions visually. Whether you are a student presenting a project at university, a professional pitching to a client, or proposing a new project to a local planning authority ...
That's where a design presentation board comes in handy. It's a quick and organized way to show everything your design has to offer. Instead of emailing someone only a design source file, or just a link to a working prototype, you can include everything in one space.. A presentation filled with design source files and mockups, working prototypes, and even full-motion animated GIFs paints ...
This course is divided into two important parts: First it is understanding presentation boards and the second one is creating presentation boards. You can´t learn how to create a presentation board in InDesign without first understanding the though process behind communicating ideas through text and images combined. Method:
Design boards (often material presentations) are always put together for the client to understand the overall color-material palette of the project. Meetings often are conducted in-house. This part of the project presentation is important as it covers the colors overall and often may have specific references to ready-to-buy furniture or lighting.
1. Select a ready-made template. Miro has a wide range of presentation templates you can choose from. Or start building from scratch, adding content to your board. Miro's presentation maker has many features to help you get started. 2. Structure your presentation. 3. Share ideas with one click.
This pack contains 6 portrait presentation boards and 6 landscape boards, each with a unique design. The file formats available are Adobe InDesign & PDF. There are tons of bonuses within such as additional template boards, diagrams, visuals and more to inspire your future presentations, CVs and portfolios. Add to Cart.
Free Vision Board Maker. Create a vision board. 100% fully customizable. Beautifully designed templates. Millions of photos, icons and illustrations. Easily download or share. Craft a stunning vision board for every area of your life — from health and career to relationships. Drag and drop images, quotes, affirmations, and other vision board ...
Design for the board Game, presentation design. Marina Yudina. 75 261. Save. Site Analysis Architecture Presentation Board A0. M Kim. 33 2.3k. US $250. Save. Agency PowerPoint Template | Presentation Temp.
Display boards come in all shapes and sizes but their most common formats are mobile, tri-fold board structures. Often mounted on other surfaces, tabletop display boards or presentation boards are typically smaller and more portable. ... They often have more durable materials and may have a tri-fold design. They can also come with carrying ...
Design, present, inspire with Canva Presentations. Reimagine Presentations with cinematic visuals that captivate your audience - no matter how or where you're presenting. With features to collaborate smarter, create stunning data visualizations, and deliver confidently, Canva Presentations bring impact to your ideas. Create a presentation.
2) Understand that the CEO is not the target audience. A board presentation has to provide some quick refreshers on the operating environment and — more importantly — identify the biggest ...
Download the Coquette Aesthetic Vision Board presentation for PowerPoint or Google Slides and start impressing your audience with a creative and original design. Slidesgo templates like this one here offer the possibility to convey a concept, idea or topic in a clear, concise and visual way, by using different graphic resources.