31 of the best smartphone apps for presenters and professional speakers

Average: 4.2 ( 5 votes)

Can your smartphone make you a better speaker?
We use our smartphones for just about everything, and they certainly can help you improve your talks and audience engagement.
A few years ago, we posted an article on the 21 apps that you can use to improve your talks, and today we are updating this list with 10 new, tried and tested apps that can help you master your speaking techniques.
Let’s jump right in.

Create dynamic, visually powerful presentations

1. Voice Notes + Dictation
Some speakers find it easier to get into the flow and say what they are thinking, rather than write out what they would like to say. Voice Notes is one of the highest-rated free transcription apps and can help you by recording what you say and turning the recording into text. You can work out your content through various renditions of the recording, and then find the flow that will work best for your talk.
2. KeyNote , PowerPoint , Google Slides , and Prezi
All of your favorite slide creation platforms: KeyNote, PowerPoint, Google Slides and Prezi, are available as smartphone apps. Create and change your presentation on the go, keep them on hand so you can practice your talk anywhere, and have an immediate backup in case the tech fails at your next event.
KeyNote on Android | iOS
PowerPoint on Android | iOS
Google Slides on Android | iOS
Prezi on Android | iOS
While PowerPoint has been a keystone for many presentations for years, below are two newer apps which can help you create visually compelling slides that integrate video, images, and audio flawlessly, while you are on the go.
3. FlowVella
Flowvella has been created specifically for iPhones and iPads, and is one of the best new platforms for creating fully integrated and interactive presentations. It has been specifically designed and developed for tablet usage, and uses smart gesture technology. It allows you to flawlessly integrate media from all kinds of different sources so you never get caught awkwardly waiting for a video to connect or being forced to screenshot or open a PDF to include in the presentation.
4. Haiku Deck
Haiku Deck makes the most beautifully-designed presentations. It is near impossible to make an unattractive presentation with this tool. It is only available as an app: which is perfect if you are on the go or your smartphone is your go-to device. If you are looking for a simple, easy tool that makes gorgeous slides, this is the one for you.
Android | iOS
John Medina, a developmental molecular biologist and lecturer at the University of Washington, says that our brains will inevitably start to get bored after a mere 10 minutes , and by changing up the content style every 7-10 minutes, you can keep your audience engaged throughout your entire presentation. With Powtoon, you can create short informational animations that can help explain a specific point or an in-depth piece of information; keeping your audience engaged while still getting your idea across.
6. AIO Remote
Turn your Android smartphone into a presentation remote with the All In One Remote. All you need do is sync the presentation with the app and desktop app and you are ready to go. Integrates with Windows, Linux and Mac, and you can control any application on your computer through WiFi or Bluetooth. And it’s free!
Practice makes perfect

There is a fine line between over- and under-practicing your speech. Practice your talk until you know all your main points without hesitation, but still sound conversational and flexible.
Stop using filler words and improve your pronunciation
Most people use filler words like “um” and “ah” when they are speaking. However, when on stage this can be very distracting for your audience. Download the Ummo app to get a handle on your “ums” and “ahs”. The app records your speech, then generates a transcript highlighting where you used filler words. This way you can tackle making sure you omit them from your future talks.
This app was designed for non-native English speaker and speakers who struggle with speech impairments. Created by two international engineering students at Drexel University, Orai records your talk and gives you instant, action-oriented feedback which will help you to improve your pronunciation, pauses and energy levels, while offering speaking tips to help you improve the flow and make your talks more understandable.
This app will help you practice taking filler words out of your speaking. While Ummo will help you with your specific talk, what happens when you need to answer a question? The app will help you practice eliminating these words in unpracticed speech. There are two games: TalkAbout and FreeStyle, which record you speaking about various topics. The app monitors how many times you use filler words and gives you a detailed report to track your progress.
Timing is everything

Timing can make or break a performance — as anyone who has sat in on a session that has overrun by 20 minutes knows.
These next apps will help you manage your timing and pacing. From establishing good speaking rhythms to countdown clocks, these apps will help you go with the flow and stay on time.
A teleprompter “prompts” you with a visual text of your presentation. It allows you to read the text word-for-word ensuring consistent and accurate speech while maintaining the illusion of spontaneity.
10. iPrompt Pro
iPrompt Pro is one of the most intuitive teleprompting apps. It has a lot of options: from colour choices to scrolling speeds. It also has in-app text editing and timing changes, which is ideal for making changes as you are practicing. Although, there is some heavy advertising on the app (which can be quite tiresome) it is a low-cost, flexible app that has a lot to offer.
11. Teleprompt +3
Teleprompt +3 is a simple and well-designed app that has incredible options that will help you practice your talk. The timer tools are very helpful for ensuring your session runs on time. Tools like the audio and video recorder, rich text editor, and intuitive speed control help you make your talk look and sound natural. This is one of the more expensive apps, but if you are looking for a tool that will go above and beyond your expectations for a teleprompter, this is it.
12. Prompster
Prompster is smoothly-designed and provides readable text for all sorts of audible presentations, including talks, lectures, and sermons. You can create or import your documents, record your presentation (pro version), and share your talk with your audience via email. The onscreen controls allow you to set your text size and speed easily. If you are looking for a great tool to practice with, this is a tried-and-true app. It was voted iPhoneLife Magazine’s Best Public Speaking and Presentation App.
13. Teleprompter Pro Lite
Teleprompter Pro (both Lite and Premium) are very responsive and easy to use. You can type in or import your talk, then select your font, text size, and pace. The app continuously highlights where you are in the script so you won’t get lost. You can share your scripts on all of your devices: ideal for setting up your backup solutions. You can export prompt files using AirDrop or email. The Pro version also has a video recording function, which is perfect for watching your practices and making improvements.
Normal conversational speech ranges between approximately 120-200 words per minute, and listening to someone speak outside of this range can be difficult.
For example, an auctioneer can speak upwards of 400 words per minute, but listening to someone speak for 20 minutes in this range will befuddle and irritate any audience. On the other hand, speaking at less than 110 wpm will cause the audience to get bored and tune out.
Speech rate guidelines:
Slow: less than 110 wpm
Conversational: between 110 wpm and 160 wpm.
Fast: more than 160 wpm
Radio hosts and podcasters tend to speak at 150-160 wpm.
Auctioneers and commentators speak between 250 and 400 wpm.
Using a metronome can help you set your pace, but don’t forget to vary your pace — keeping it too even will sound monotonous, so play around with your pacing until it is in the right range while still sounding natural.
14. Metronome Beats
Metronome Beats has easy-to-use controls for increasing and decreasing the tempo in small increments. The visual beat indicators help you to keep track, and it is easy to mute the metronome while visually monitoring your tempo.
15. Pro Metronome
Pro Metronome was created for all kinds of stage performers, including musicians, to improve their rhythm. It is a fantastic app for public speakers who are working on their pacing. This app has a variety of ways to keep your tempo: from screen color changes to vibrations and sounds.
Timers and Clocks
It is so easy to lose track of how long you’ve been on stage. Being able to keep your talk on time is crucial. It keeps you from waffling on and ensures that the whole event runs in a timely manner.
Having a timer will help you keep your presentation flowing on time.
16. Amber Light Speech Timer
Modeled after a traffic light, this app helps you figure out where you are in your talk and how long you have left to get your point home. A green light displays for the introduction and body of your talk and it changes to amber when you are getting close to the end, and red when your time is up. The app is easy to use and allows you to custom-set your time frames. You can even change the alarm to a vibration if you are keeping it in your pocket onstage.
17. Toastmaster Timer
This app was originally designed for those who play the “Timer”, the individual in Toastmaster’s meetings who signals to the speaker when it is time to finish. It is a superb, free option for practicing. The timer is simple to use and has been designed specifically for speakers. It also uses the traffic light system but has slightly less customizable options than the Amber Light Speech Timer.
18. SpeakerClock
The SpeakerClock was inspired by the famous countdown clock that is used at TED conferences. The LED-style countdown clock is easy to see, even from a distance, so you are free to move around on stage. This app has a great design, and also includes a traffic-light-style feature that alerts you when it is time to get to your conclusion.
Keep your pre-performance jitters under control

While the above apps are practical and skills-focused, they don’t address one of the greatest challenges when speaking — stage fright.
Where a little bit of pre-stage anxiety is normal, if it tips into too much, it can have a detrimental effect and potentially ruin your talk.
These next few apps will help you manage your stress levels and bring your heart-rate back down. Helping you get your message out clearly and confidently.
19. Confident Public Speaking Now
This app is part guided meditation and part stress-relief training. It offers meditation-style hypnosis sessions, like “Relax Completely” and “Total Relaxation in 10 minutes”. It also offers video interviews on what causes, and how to deal with, stress. It aims to teach you how to enjoy small doses of stress and gives you some tools to help you deal effectively with anxiety.
20. Public Speaking by HiveBrain
Sometimes, all you need is some soothing, confidence-boosting words to get you in the right headspace. Dr Andrew Johnson's guided meditation / self-hypnosis program will help you relax and minimize the anxiety of speaking in front of crowds.
21. VirtualSpeech's Public Speaking
One of the most interesting new apps for public speakers helps you by putting you on a virtual stage. Upload your presentation, then practice in front of a fake audience. The app requires a virtual headset, but its 3D, realistic-looking scenarios can be very helpful in getting a handle on being in front of a group.
22. Insight Timer
With over 4.5K free guided meditations from over 1K meditation practitioners, and over 750 meditation music tracks, you will be able to find something that will help you stay calm. You can even customize your meditation using the background sounds and meditation tool intervals, so you have something that is specific to your needs and fits into your pre-performance routine.
23. Headspace
While not specific to public speaking, Headspace is a great way to learn more about meditation and start regular practice. The free trial helps you relax for 10 minutes a day for 10 days with guided exercises and lessons, and includes a personalized progress page, reward system for continued practice, and can even hook you up with a buddy to help ensure you stick to the practice. All the while being fun, light, and engaging. It is one of the top-rated apps on both iTunes and Android.
Calm offers a wide range of guided meditations to help you relax. Meditations of various lengths can help with building self-esteem and calming anxiety. There are also breathing exercises, unguided meditations, and more than 25 soothing sounds to help calm your nerves.
Interact with your audience

The next set of apps are all geared towards helping you engage with your audience while on stage.
Audience engagement
25. EngageNow
EngageNow lets you design attractive-looking polls and quizzes that empower the audience to interact with the big screen during an event. It can also be used to crowdsource questions or open up chat around the event in order to spark debate and connect audience members with each other.
26. Glisser
Glisser is a “complete package” when it comes to audience engagement. Within a few seconds they can visit your unique URL, see and download your slides, write personal notes, share content on social media; participate in polls and live Q+As, vote on content, or offer feedback. Even if you only incorporate a few of these features into your next presentation, yours will be miles ahead of the average presentation.
27. BuzzMaster
BuzzMaster takes the idea of polling to the next level and is perfect if you’d like to engage your audience in a more holistic debate about a topic. BuzzMaster encourages your audience to have an active role in sharing experiences during the event. These interactions are perfect for fueling inspiring debates and giving the audience members a distinct voice, providing you with valuable insight. Companies like Google, ASML, Microsoft, ABN-AMRO, and KPMG have been using BuzzMaster in their conferences to better engage their audiences.
28. Poll Everywhere Presenter App
Poll Everywhere has been around for some time and is still one of the best apps on the market for polling your audience. Audience members can participate through the app, text message, web browser, or Twitter, and the results are ready to display instantly. Use it as a standalone polling app alongside your presentation or integrate it directly into your PowerPoint with the software Poll Everywhere.
29. Mentimeter
Instantly and seamlessly interact with your audience by having them vote in real-time. Your audience does not have to sign-up or download anything. They only need to visit the website on their device, punch in the code unique to your presentation, then watch the stats tally instantly on a beautiful display. Mentimeter is a mobile voting app that lets you show the results live with real-time graphs and charts. Able to handle over 30,000 votes per minute, it can work for small events or big ones.
The app provides many different question/response formats such as multiple-choice, open-ended, rating scale and word clouds, and you can style it with your branding.
Q&A Apps
Slido has many of the same tools as the other apps mentioned in this section but has an interesting variation to the Q+A element for audience engagement. The audience can vote to discuss popular questions so that you can answer the ones that affect the most members. The questions can then be vetted by you on stage or by event organizers; saving a lot of time while giving your audience the feeling that they are connected to others who share the same thoughts.
31. Crowd Mics
Crowd Mics allows attendees to use their own phones as wireless microphones. Their questions can easily be amplified without the need to walk up to the microphone or have a runner try to access them. Your audience can also participate with text comments, questions, and live polling.
There has been a slew of new apps developed that can help you give better presentations, as presentation skills become more important for professionals across all industries.
From platform which will help you create visually stunning presentation slides , to tools which will train you on perfecting your pace and timing—there is an app for that.
While none of the tools can get up stage and do your talk for you, they can help smooth out the rougher bit, helping you tweak and perfect your talk.
Are there any tools that you use that you would love to see on this list? Contact us — we’d like to know what you are using!

Social networking: what to talk about on Facebook, Twitter, and LinkedIn
Creating effective presentation slides: which platform to use?

The Speaker’s Toolkit: Must-Have Tech and Apps for Modern Presenters

7 Best Apps for Mastering Public Speaking

7 IOS apps that can help you organize your speech
Search results for
Affiliate links on Android Authority may earn us a commission. Learn more.
9 best PowerPoint apps and tools for Android
Published on March 22, 2024

Presentation software is a powerful tool in the workplace. It’s especially true for PowerPoint, the most popular presentation software. It helps freshen up lectures, organize information in an easily deliverable way, and is generally accessible to most people. There are a lot of options as well. You can find presentation software on computers and smartphones.
Additionally, some tools make each platform easier. We have a bit of everything on this list. Here are the best PowerPoint apps and tools for Android.
The best PowerPoint apps and tools:
Andropen office, google home, google slides, microsoft powerpoint.
- Remote desktop apps
Unified Remote
Price: Free / $12.99
AndrOpen Office is likely the best bet for Linux users. It fully supports OpenOffice file formats and includes Writer, Calc, and Impress. Impress is the presentation software. It can also read PowerPoint files as well. In terms of PowerPoint apps, it does pretty well. You can create a slideshow, add graphics, add text, and the basic stuff like that. The free version is more usable than the first free version of most paid software. The app also works perfectly with niche functions like Samsung DeX. It’s not quite as powerful as Microsoft PowerPoint, but it’s close enough for most people.
Price: Free / $2.99 per item

Clicker works a lot like ASUS Remote Link. It lets you connect to your computer and use your phone as a presentation clicker. It also seems to work on Mac, Linux, Windows, iOS, and Android. That should cover just about everybody. In any case, the workflow for this one is pretty obvious. You create your PowerPoint on your computer, where you have full access to all of the tools. Then, you use this app to present the PowerPoint at your meeting. There is also remote trackpad functionality, Samsung S-Pen support, and space to keep notes for your speech. There aren’t many presentation clicker apps like this one, so it’s nice to see that at least one is really good.
Price: Free

Google Home is an out-of-the-box idea. You use it with a Chromecast to mirror your phone screen to a display. You can then use your phone to present your PowerPoint. This lets you work on your PowerPoint either on desktop or mobile. You must put the project on your mobile phone, use Google Home to mirror it, and begin your presentation. Chromecasts are small, easy to carry, and very easy to use. It lets you use the presentation space’s existing resources without carting in some extra equipment. Plus, the app is free.
Google Slides is the presentation app from the Google Drive office suite. It’s largely considered the top or at least second-best option in terms of PowerPoint apps. You can mess with your presentation on your phone or desktop via the web. Plus, Google Drive has live collaboration tools and many other features. Your presentation is stored in the cloud, so you can access and download it whenever you want. Plus, it can read, edit, and save PowerPoint files for excellent cross-product functionality. It’s also, far and away, the best free option available. That makes it great for students without access to a Microsoft Office account.
Price: Free / $9.99 per month

Microsoft PowerPoint is the top one or two PowerPoint apps in the world. It’s so good that people refer to presentation apps as PowerPoint apps. The mobile version is more functional than its desktop equivalent, even if the desktop variant is more powerful. On top of the usual presentation features, the app also includes a Presenter Coach function to help you prepare for your speech. Luckily, Microsoft has adapted nicely to the times. You can start fresh or edit existing PowerPoint presentations that you started on your computer. The full functionality is available with an Office 365 subscription. The good news is the subscription unlocks both the desktop and mobile versions of PowerPoint with just a single subscription. You also get Microsoft OneDrive space to store and transport your PowerPoints.
Remote Desktop apps
Price: Free / Varies

Remote desktop apps are a slightly archaic but very functional method of presenting stuff. These apps let you connect directly to your desktop computer, mirroring everything on your mobile phone. There are usually tools to let you navigate around. Thus, you can connect to your computer and give a presentation straight from your phone without moving any files. You can also use these to work on your PowerPoints straight from your computer, so you don’t lose any functionality by being on a smartphone or tablet. We have Microsoft Remote Desktop linked since it covers most use cases, but others are available, too.
Price: Free / $1.99 per item
Unified Remote is another app that lets you control your computer remotely. It works a lot like the ASUS Remote Link. You connect to your computer and can use the app to navigate the UI, as a mouse and keyboard, and there is a built-in presentation setup. This one is different because it has dedicated “remotes” for many specific apps, like Google Chrome, Spotify, Winamp, and, you guessed it, Microsoft PowerPoint. Downloads are available for Windows, Mac, Linux (Debian and RPM distros), Raspberry Pi (ARMv6 and MIPS), and others. That makes it suitable for just about everybody.
Price: Free / $3.99 per month / $29.99 per year

WPS Office is just one of many alternative office apps that double as PowerPoint apps. WPS Office has a writer, spreadsheet, and presentation function. The presentation function lets you read and edit PowerPoint files, so it’s a good start there. The app includes various layouts, animations, transitions, and other effects. Additionally, it lets you draw on slides or use a built-in digital laser pointer during your presentation, which is a nice little feature. WPS Office is free to use if you don’t mind the occasional annoying advertisement.
Zoho Show is one of the few reasonably good standalone PowerPoint apps. It’s not connected to an entire office suite, and it’s not a clicker or a remote desktop app. It’s an app dedicated to making presentations. It includes a bunch of stuff, including various types of charts, over 100 shapes, different formatting options, filters, animations, and other stuff. There are also templates to help you get started. It’s not quite as powerful as some competitors. At the time of this writing, the developers are still working on incorporating stuff like music into the app. However, this is an excellent alternative to Google Slides if you need a quick, free option.
If we missed any great presentation or PowerPoint apps and tools, tell us about them in the comments! You can also click here to check out our latest Android app and game lists.
You might like
7 Best Presentation Apps for Android and iOS Phones
There are so many reasons for giving presentations. Some examples could be when you want to showcase a new product, explain a new procedure, introduce a new concept or simply bring everyone up to date with what’s happening in the company. Either way, a robust presentation app for your smartphone could help you save a lot of time and resources. Presenting some of the best presentation apps for smartphones.
The job of a good presentation app is to help create beautiful slides that deliver information, is easy to use, connect with external devices, offer templates, and connect to the cloud. With these thoughts in mind, let’s take a look at some of the best presentation apps for Android and iOS platforms.
Also Read: CamScanner vs. Adobe Scan vs. Office Lens – Which One to Use and Why
If you are looking a minimal open-source powerpoint app for Android, this app is for you. Slide uses the traditional Takahashi method to present text in the visual method. For the unknown, Takashi method is a Japanese technique for showing extremely simple slides with as few texts as possible.

Download Slide Android
2. Microsoft PowerPoint
Probably the most popular presentation app in the world, PowerPoint by Microsoft works on any and every platform including Android and iOS. PowerPoint syncs with Office 365 and OneDrive to provide backup and solve multiple versions issue. It’s easy to use and comes with templates for different categories.

There is a presenter view option where you can see the presentation with speaker notes on your mobile, while the audience will only see the presentation, and not the notes.
- Cloud storage
- Cross-platform
- Create, edit, save
- Fonts, colors, images,
- Share and collaborate
- Presenter view
- Desktop version more reliable and powerful
Download Microsoft PowerPoint: Android | iOS
Also Read: Top 10 Speech to Text Apps for Transcribing Notes, Meetings and Lectures
Not to be left behind, Apple launched its own presentation app called Keynote. As is pretty common with most Apple apps, Keynote is only available for iOS and macOS platform. So much for cross-platform compatibility. Apple released Keynote for iCloud which works on browser so Windows users could use it but the experience is not the same. Keynote comes with a lot of animations and graphics that you can use in your presentation slides.

There are themes, templates, fonts, colors, and backgrounds to choose from. Works with Apple Pencil so you can highlight certain elements during live presentation, but it works only on iPad Pro for now. Though the app is well-designed comes with beautiful graphics to use, it is only suitable if you are deep inside the Apple ecosystem.
- Templates, animations, graphics
- Keynote Live
- iPad Pro, Apple Pencil, Apple Watch, Apple TV support
- No Windows or Android support
- Third-party cloud storage sites not supported
Download Keynote: iOS
4. Google Slides
Not to be left behind, Google launched its own office suite of productivity apps including Slides, a presentation app that works in the browser and mobile apps alike. Slides is completely free even if you are not a paid user and there are no ads. Since most people use Gmail and have a Drive account, using Slides makes a lot of sense. It got all the features you did expect from a presentation app like fonts, colors, sharing and collaborating features, comments which is present in all GSuite apps, and templates.

There is a presentation mode with speaker notes. You can present all the slides from your smartphone directly. The templates are pretty basic and nothing compared to what I saw in Keynotes. Slides biggest strength is real-time collaboration and how it makes it dead simple to make presentations.
- Fonts, colors, images
- Share, collaborate, comment
- Presentation view
- Simple and easy to use
- No native client for Windows, macOS
- Only syncs to Google Drive
- Lacks advanced animations and graphics
Download Google Slides: Android | iOS
Also Read: Best Bookkeeping Software for Small Business Owners
5. Haiku Deck
Haiku Deck will completely change the way you create, edit, share, and present slides. With an Instagram like interface, Haiku will give you instant access to over 40 million stock images. That’s a lot. It connects with a number of social media sites to import images from there as well.

Haiku Deck offers beautiful templates that are clutter-free and are designed with their own custom font. There is an option to insert pie or bar chart on the fly. Just insert the values and choose a location. Text will be aligned and spaced automatically so you don’t have to do it manually. AI at its best and a real time saver. On the flip side, Haiku Deck won’t allow you to make design choices, keeping things a little inflexible. Pricing begins at $9.99 per month. Too bad it works on Apple devices only.
- Stock photos
- Automatic text alignment, spacing
- Templates, charts,
- Share, collaborate
- Can’t work offline
- Not flexible
Download Haiku Dek: iOS
6. Remote for PowerPoint Keynote
Creating good presentations is not the only task that you will have to undertake. Once the presentation has been made, you will to literally ‘give it’. That’s where Remote for PowerPoint Keynote comes into the picture. As the name suggests, the app connects with Microsoft PowerPoint and Apple Keynote, allowing you to control your presentation using your smartphone.

Instead of using a presenter device, you can simply use your smartphone now. You can also view your presenter notes on the smartphone screen, and read it out loud. There is support for Bluetooth and WiFi as well as IPv6. It also comes with a mouse mode where the app will show a virtual mouse you can use to control the slides movement.
Download Remote for PowerPoint Keynote: Android | iOS
Prezi works differently then traditional presentation apps that we saw earlier above. Instead of showing slides one by one, Prezi will show the entire presentation as a video where different parts will be zoomed in. This creates an interesting effect. The animation effect is pretty cool.

Because Prezi is also on your smartphone, you don’t have to turn back and look at the screen every now and then. Just glance at your phone to view the slide, and slide notes, and carry on. Other features like sharing and collaborating are all there. Pricing begins at $5 per month.
Download Prezi: Android | iOS
Presentation Apps for Android and iOS
If you are looking for an app that’s simple to use and gets the job done, Google Slides is a great choice. It’s got everything you need and is completely free. If you need a little more control and some extra tools with cross-platform capabilities and desktop clients, Microsoft PowerPoint is the best. Hardcore Apple users should go for Keynote because it’s got killer animations. Haiku Deck got the largest collection of stock photos and connects with every social media site out there.
If you have a presentation coming up, you can use this website to get free design templates.

Gaurav Bidasaria
Gaurav is an editor here at TechWiser but also contributes as a writer. He has more than 10 years of experience as a writer and has written how-to guides, comparisons, listicles, and in-depth explainers on Windows, Android, web, and cloud apps, and the Apple ecosystem. He loves tinkering with new gadgets and learning about new happenings in the tech world. He has previously worked on Guiding Tech, Make Tech Easier, and other prominent tech blogs and has over 1000+ articles that have been read over 50 million times.
You may also like
Boost your android’s battery life with these 6..., 10 cool nothing os 2.5 features you should..., how to get google circle to search on..., how to check battery health on android, 2 ways to hide navigation gesture bar on..., what do icons and symbols mean on apple..., how to set a song as an alarm..., how to enable double/triple back tap on samsung..., how to check storage type and speed of..., what is stolen device protection on iphone, leave a comment cancel reply.
You must be logged in to post a comment.
- Presentation Design
The 5 Best Presentation Apps for Mobile
- By: Mimi Johnson
Building a presentation is easier than ever thanks to the best presentation apps available today. If you’ve got the right apps installed on your favorite device, you can craft your presentation from anywhere. We chose user-friendly, mobile-compatible options for some of the major concerns we see daily from presenters. Everything from taking notes, to designing slides, to sharing your final presentation can be done on mobile of you have the right tools. Let’s dive into the tools you’ll need in your presentation arsenal.
5 Apps you should download right now:
- My QRcode Generator
Evernote for Content
Evernote is a note-taking and task management application that can be used for presentation content. It’s great as an initial information dumping ground, where you can put all of the important items you want to highlight. When you’re not at your desk and have a spontaneous thought, it’s easy to open the app and jot it down from anywhere. It’s among the best presentation apps because it makes creating and organizing digital notes really simple. Consistently using the same app for all of your notes will transform the task of outlining your presentation from daunting to delightful.
Canva for Design
Presenters worldwide are turning to Canva for its user-friendly templates. It’s a great choice for someone designing on the go. When thinking about the best presentation apps, we wanted to share one that helped visualize content. Canva was created for this purpose, and their professionally-designed templates are great in a pinch.
iStock for Photography
Having a bank of stock photography to pull from can be a blessing or a curse. Some stock photography can look really sterile or stale. However, libraries like iStock are increasingly more useful with realistic and beautiful photography options. While they likely won’t have candid photos of your team, searching iStock for metaphorical tie-ins or emotional photographs will help support your narrative.
My QRcode Generator for Access
Many presentations are not sent ahead or left behind–they’re given live. Therefore, the problem with hyperlinks in a live presentation is that they can fail you. Your audience could jot them down incorrectly or forget about them altogether. Now, chances are good that your audience members have a device–whether a phone or a tablet–that can read a QR code. We’ve encouraged a lot of our clients to create free QR codes using something like My QRcode Generator instead of hyperlinks. Usually, you’ll leave these on the screen after the presentation is finished or during a pause. This will allow your audience to go right to the intended link easily, and worry-free.
Dropbox to Share
An important consideration for presentations is that they tend to result in large file sizes. That’s why the last item on our best presentation apps list had to be a way to share large file sizes. We use Dropbox every day both to receive and send presentations. We can create a folder ahead of time for a client to save to, then simply send them a link to the folder. Thankfully, Dropbox has a “preview” option where we can glance at a file from anywhere on mobile if we aren’t in the office. Having a plan in place for sending and receiving presentations takes the pressure off of last-minute edits and revisions.
All in all, we recommend having every tool available to you in your arsenal to make you the most well-rounded presenter imaginable. We enjoyed making this list of the best presentation apps for you, and hope you learned something new along the way. When it comes to presentations, we want you to tell your story effortlessly. These apps should help you engage your audience and turn boring presentations into boardroom home runs. Have questions? Reach out to us today!

Mimi Johnson
Join our newsletter today.
© 2006-2024 Ethos3 – An Award Winning Presentation Design and Training Company ALL RIGHTS RESERVED
- Terms & Conditions
- Privacy Policy
- Diversity and Inclusion
Presentations that stand out. Beautifully.
With its powerful tools and dazzling effects, Keynote makes it easy to create stunning and memorable presentations, and comes included with most Apple devices. Use Apple Pencil on your iPad to create diagrams or illustrations that bring your slides to life. And with real‑time collaboration, your team can work together, whether they’re on Mac, iPad, iPhone, or a PC.
See what’s new in Keynote
Present your story. Your way.
Keynote sets the stage for an impressive presentation. A simple, intuitive interface puts important tools front and center, so everyone on your team can easily add beautiful charts, edit photos, and incorporate cinematic effects. And Rehearse Mode lets you practice on the go, with the current or next slide, notes, and clock — all in one view.
Start with a gorgeous layout.
Choose from over 40 eye‑catching themes that instantly give your presentation a professional look. Or create your own slide designs, background images, and page‑by‑page customization.
Create next-level animations.
Add drama to your presentation with more than 100 cinematic transitions and effects. Make your words pop by adding textures, color gradients, and even photos — with just a tap. And animate objects along a path using Apple Pencil or your finger on your iPhone or iPad.
Make every slide spectacular.
Add subtle movement to your slides with dynamic backgrounds. Illustrate your point with over 700 Apple-designed shapes, or add photos, videos, music, image galleries, and charts. Easily remove backgrounds from supported images and live videos or manually refine adjustments as needed. You can even use your iPhone to take a photo or scan a document, and Continuity Camera can send it straight to Keynote on your Mac.
What’s new in Keynote.
Learn about everything you can do in Keynote
Get the updates. Then get in touch.
Stay up to date when people join, edit, or comment in collaborative presentations and easily get in touch with your team using Messages and FaceTime.
Get more done on iPad.
Quickly insert objects, find settings, and get to your favorite tools with the customizable toolbar. And Stage Manager makes it easy to multitask across multiple presentations and apps at the same time. 1
Make backgrounds disappear.
Now you can more easily remove backgrounds from supported images — and even live videos — or adjust them to your liking.
Add live video feeds to any slide.
Appear in a window, right on your slides, with a picture-in-picture display during remote presentations. Or include a live feed of your iPhone or iPad screen to show off apps.
Get started with dynamic themes.
Start with one of three beautiful new animated themes, then customize it to set the tone for each slide with 18 adjustable background presets — from understated to highly visual, monochrome to colorful, calm to energetic.
Captivate your audience with dynamic backgrounds.
Make your presentation stand out by adding stunning color and visual interest to your slides. Create motion on a title or closing slide for a bold statement, and keep viewers engaged with subtle movement throughout the presentation.
Present with your team. Seamlessly.
For slideshows with multiple presenters, you can take turns controlling a single deck — from anywhere — on Mac, iPad, and iPhone.
Play YouTube and Vimeo videos right in Keynote.
Embed a video from YouTube or Vimeo, then play it right in your presentations, without the need to download or open the video in a media player. 2
Present over video conference. Like a pro.
Play a slideshow in its own window so you can access other apps while you present. You can view your presenter notes, upcoming slides, and navigation in a separate window as well.
Outline your presentation. Easier.
With outline view for iPhone and iPad, quickly jot down your thoughts, restructure ideas, and move concepts from slide to slide. Then switch to slide view and start designing.
Present like never before. From anywhere.
With Keynote, presenting remotely can be just as seamless as presenting in person. Say goodbye to saying “Next slide, please” — now multiple people can present together, even remotely, with each person taking control of their section of the deck. Add a live video feed of yourself to any slide for a picture-in-picture experience. Or when presenting on your Mac, include a live feed of your iPhone or iPad screen to walk through your apps. You can even play a slideshow in its own window, so you can simultaneously access your notes and other apps.
Any presentation. Any device. Anytime.
You don’t work in one place on just one device. The same goes for Keynote. Work seamlessly across all your Apple devices. The slides you create using a Mac or iPad will look the same on an iPhone or web browser — and vice versa.
You can also work on presentations stored on iCloud or Box using a PC.
Start using Keynote at iCloud.com
Create and present together. Even when apart.
Work together in the same presentation, from across town or across the world. You can see your team’s edits as they make them — and they can watch as you make yours, too. You can even get notifications when people join, edit, or comment. When presenting as a team, you can also take turns controlling a single deck from anywhere.
Use Apple Pencil when inspiration strikes.
Add color, illustrations, and handwritten comments for more beautiful presentations with Apple Pencil on your iPad.
Plays well with Office.
Teaming up with someone who uses Microsoft PowerPoint? Keynote makes it a great working relationship. You can save Keynote presentations as PowerPoint files. Or import and edit PowerPoint presentations right in Keynote.
Learn more about Microsoft PowerPoint compatibility
See everything that’s new in Keynote
- What’s new in Keynote for iPhone and iPad
- What’s new in Keynote for Mac
- Keynote for iCloud release notes
Additional Resources
- Get Keynote support
- Learn about Microsoft Office compatibility
- Learn about collaboration for Pages, Numbers, and Keynote
- Use Keynote in a video conference app
Keynote User Guides
- Keynote User Guide for Mac
- Keynote User Guide for iPad
- Keynote User Guide for iPhone
- Keynote User Guide for Web
Build spreadsheets that are bottom-line brilliant.
Create documents that are, in a word, beautiful.
The best presentation software in 2024
These powerpoint alternatives go beyond the basics..

The latest presentation apps have made it easier than ever to format slides and create professional-looking slideshows without giving off a "this is a template" vibe. Even standard PowerPoint alternatives have updated key features to make it easier than ever to collaborate and create presentations quickly, so you can spend more time prepping for your actual presentation.
If, like me, you've used Google Slides unquestioningly for years, it's a whole new world out there. The newest crop of online presentation tools go way beyond the classic slideshow experience, with new features to keep your audience's attention, streamline the creation process with AI, and turn slide decks into videos and interactive conversations.
I've been testing these apps for the past few years, and this time, I spent several days tinkering with 25 of the top presentation software solutions out there to bring you the best of the best.
The best presentation software
Beautiful.ai for AI-powered design
Prezi for non-linear, conversational presentations
Powtoon for video presentations
Pitch for collaborating with your team on presentations
Gamma for conversational AI features
Mentimeter for audience engagement
Tome for generative AI features
What makes the best presentation app?
How we evaluate and test apps.
Our best apps roundups are written by humans who've spent much of their careers using, testing, and writing about software. Unless explicitly stated, we spend dozens of hours researching and testing apps, using each app as it's intended to be used and evaluating it against the criteria we set for the category. We're never paid for placement in our articles from any app or for links to any site—we value the trust readers put in us to offer authentic evaluations of the categories and apps we review. For more details on our process, read the full rundown of how we select apps to feature on the Zapier blog .
When looking for the best presentation apps, I wanted utility players. After all, slideshows are used for just about everything, from pitch decks and product launches to class lectures and church sermons. With that in mind, here's what I was looking for:
Pre-built templates. The best presentation tools should have attractive, professional-looking templates to build presentations in a hurry.
Sharing and collaboration options. Whether you plan to share your webinar slides later, or you just want to collaborate with a coworker on a presentation, it should be easy to share files and collaborate in real-time.
Flexibility and customization options. Templates are great, but top presentation apps should enable you to customize just about everything—giving you the flexibility to build exactly what you need.
Affordability. Creating compelling presentations is important, but you shouldn't have to bust your budget to make it happen. With capable free tools on the market, affordability is a top consideration.
Standalone functionality. There's no reason to use multiple tools when one can do it all, so I didn't test any apps that require and work on top of another presentation app like PowerPoint or Google Slides.
Familiar, deck-based interface. For our purposes here, I only tested software that uses slides, with the familiar deck-based editor you expect from a "presentation" tool (versus, for example, a video creation app).
While most apps now offer AI features in one way or another, it isn't a universal feature yet—and some apps' AI features leave a lot to be desired. For that reason, I opted not to make AI features a strict must-have for this year (though it probably will be a requirement next time I update the article). That means I've still included some apps that don't offer AI—if you opt for one of those, you can still easily get AI-generated images and text from a separate tool and copy them into your presentation app of choice.
Beyond that, I also looked for presentation apps that brought something unique to the table—features above and beyond what you can get for free from a legacy solution like PowerPoint or Google Slides.
Here's what my testing workflow looked like:
I went through any onboarding or guided tutorials.
I created a new deck, scanning through all available templates, noting how well-designed they were (and which were free versus paid).
I added new slides, deleted slides, edited text and images, and played around with other content types.
I changed presentation design settings, like color schemes and background images.
I reviewed and tested the sharing and collaboration options.
I tested out presenter view (when available).
After my first round of testing, I went back into the top performers to test any unique or niche features, like AI, brand settings, and interactive content. With that, these are the best presentation apps I found—each one really brings something different or radically easy to the table.
The best presentation software at a glance
The best free presentation software, canva (web, windows, mac, android, ios).

Canva pros:
Excellent free plan
Tons of amazing templates for all use cases
Feature-rich
Canva cons:
The AI tools aren't groundbreakingly useful
Canva offers one of the most robust free plans of all the presentation apps I tested. The app delays account creation until after you've created your first design, so you can get started building your presentation in seconds. Choose from an almost overwhelming number of beautiful templates (nearly all available for free), including those designed specifically for education or business use cases.
Anyone who's accidentally scrolled too far and been bumped to the next slide will appreciate Canva's editor interface, which eliminates that problem altogether with a smooth scroll that doesn't jump around. Choose from a handful of preset animations to add life to your presentations, or browse the library of audio and video files available to add. And Canva also has a number of options for sharing your presentation, including adding collaborators to your team, sharing directly to social media, and even via QR code.
Present directly from Canva, and let audience members submit their questions via Canva Live. Once you share a link to invite audience members to your presentation, they can send questions for you to answer. As the presenter, you'll see them pop up in your presenter view window, so you can keep the audience engaged and your presentation clear. Alternatively, record a presentation with a talking head bubble—you can even use an AI presenter here—to share remotely.
Canva has added a number of AI-powered tools , but I wasn't super impressed by them yet. The Magic Design tool, for example, isn't much more useful than the many pre-designed templates already available, while Magic Write is basically just white-labeled ChatGPT. These features will likely improve in time, but for now, you're better off starting from one of Canva's many great templates.
Canva pricing: Free plan available; paid plans start at $120/year for 1 user and include additional features like Brand Kit, premium templates and stock assets, and additional AI-powered design tools.
If you're looking for a capable free presentation tool with a more affordable upgrade, Zoho Show is worth a look. It's completely free for most features, offers a clean, intuitive editor, and includes a number of great templates. Plus, you can automate Zoho Show by connecting it with Zapier .
The best presentation app for AI-powered design
Beautiful.ai (web, mac, windows).
Beautiful.ai pros:
True AI design
No fussing around with alignment
Still allows for customization
Beautiful.ai cons:
No free plan
If you're like me, editing granular spacing issues is the absolute worst part of building a presentation. Beautiful.ai uses artificial intelligence to take a lot of the hassle and granular design requirements out of the presentation process, so you can focus on the content of a presentation without sacrificing professional design. If I needed to make presentations on a regular basis, this is the app I'd use.
Many apps have recently added AI design features, but Beautiful.ai has been doing it for years—and they've perfected the experience of AI design, ensuring the tool's reign as the most streamlined and user-friendly option for AI design.
The editor is a little different from most presentation apps, but it's still intuitive—and you'll start off with a quick two-minute tutorial. When creating a new slide, scroll through "inspiration slides" to find a layout you like; once you choose, the app will pull the layout and automatically adapt it to match the design of the rest of your presentation.
With 10 themes, several templated slides, over 40 fully-designed templates, and more than 20 different color palettes to choose from, Beautiful.ai strikes a perfect balance between automation and customization.
While Beautiful.ai doesn't offer a free plan, paid plans are reasonably priced and offer sharing and collaboration options that rival collab-focused apps like Google Slides. And speaking of Google, you can connect Beautiful.ai with Google Drive to save all your presentations there.
Note: I re-tested the generative AI feature (called DesignerBot) this year. It's great for adding individual slides to an existing presentation—automatically choosing the best layout and matching the design to the rest of the deck—but as with most other apps, it struggled to pull in relevant images.
Beautiful.ai pricing: Plans start at $12/month for unlimited slides, AI content generation, viewer analytics, and more. Upgrade to a Team plan for $40/user/month to get extra collaboration and workspace features and custom brand controls.
If you're a founder looking for an AI presentation tool for your pitch deck, Slidebean is a great Beautiful.ai alternative for startups. The app offers a number of templates; a unique, content-first outline editor; and a generative AI tool that builds a whole pitch deck based on your website. I didn't include it on the list mainly because of the price: the free plan is quite limited, and the paid all-access plan can only be billed annually.
The best presentation app for conversational presentations
Prezi (web, mac, windows, ios, android).
Prezi pros:
Doesn't restrict you to standard presentation structure
Lots of customization options
Prezi Video lets you display a presentation right over your webcam video
Prezi cons:
Steep learning curve
Struggling to squeeze information into a basic, linear presentation? Give Prezi a try. Unlike nearly all other presentation apps on the market, Prezi Present doesn't restrict the structure of your presentation to a straight line. The editor focuses on topics and subtopics and allows you to arrange them any way you want, so you can create a more conversational flow of information.
With the structural flexibility, you still get all the same customization features you expect from top presentation software, including fully-editable templates. There's a learning curve if you're unfamiliar with non-linear presentations, but templates offer a great jumping-off point, and Prezi's editor does a good job of making the process more approachable.
Plus, Prezi comes with two other apps: Prezi Design and Prezi Video. Prezi Video helps you take remote presentations to a new level. You can record a video where the presentation elements are displayed right over your webcam feed. Record and save the video to share later, or connect with your video conferencing tool of choice (including Zoom, Microsoft Teams, and Google Meet) to present live.
Prezi's generative AI feature works ok, but it's more useful as a wireframe. When I asked it to create a presentation about the Stanley Cup Playoffs, for example, the resulting content read a lot like a student writing a term paper in the broadest strokes possible to avoid doing any actual research.
Prezi pricing: Free 14-day trial and a free plan that includes up to 5 visual projects; paid plans start at $7/month and include additional features like private presentations and Prezi Present.
The best presentation app for video presentations
Powtoon (web, ios, android).
Powtoon pros:
Timing automatically changes based on the content on the slide
Can toggle between slideshow and video
Can orient presentation as horizontal, vertical, or square
Powtoon cons:
Limited free plan
Powtoon makes it easy to create engaging videos by orienting the editor around a slide deck. Editing a Powtoon feels just like editing a presentation, but by the time you finish, you have a professional video.
You can edit your slides at any time, and when you hit play, a video plays through your deck—the feel is almost like an animated explainer video. Each slide includes the animations you choose and takes up as much time as is needed based on the content on the slide. Powtoon figures the timing automatically, and you can see in the bottom-right of the editor how much time is used on your current slide versus the total presentation. If you ever want to present as a slide deck, just toggle between Slideshow and Movie.
You'll likely need to subscribe to a paid plan to get the most out of Powtoon—like creating videos longer than three minutes, downloading them as MP4 files, and white-labeling your presentations—but doing so won't break the bank. Plus, you'll unlock tons of templates complete with animations and soundtracks.
One of my favorite Powtoon features is the ability to orient your video: you can choose horizontal orientation (like a normal presentation) or opt for vertical (for mobile) or square (for social media). When your presentation is ready, you can publish straight to YouTube, Wistia, Facebook Ads, and any number of other locations.
Powtoon pricing: Limited free plan available; paid plans start at $15/month and include white-labeling, priority support, additional storage, and more.
The best presentation app for collaborating with your team
Pitch (web, mac, windows, ios, android).

Pitch pros:
Google levels of collaboration
Assign slides to specific team members
Excellent generative AI feature
Pitch cons:
User interface is a little different than you're used to
Need to collaborate on presentations with your team? Pitch is a Google Slides alternative that gets the job done. As far as decks go, Pitch includes all the beautifully-designed templates, customizability, and ease of use you expect from a top-notch presentation tool. But the app really shines when you add your team.
The right-hand sidebar is all about project management and collaboration: you can set and update the status of your deck, assign entire presentations or individual slides to team members, plus comment or add notes. Save custom templates to make future presentations even easier and faster.
You can also invite collaborators from outside your company to work with you on individual decks. And if you opt for a paid plan, Pitch introduces workspace roles, shared private folders, and version history.
Pitch also offers one of the most impressive generative AI features on this list. It still struggles to pull in relevant images, but I found the AI-generated written content and design to be top-notch.
Pitch pricing: Free plan offers unlimited presentations, custom templates, and live video collaboration; paid plans start at $22/month for 2 users with additional workspace features, presentation analytics, and more.
The best presentation app for conversational AI
Gamma (web).
Gamma pros:
Creates fully fleshed-out presentations from a prompt
Conversational chatbot-like experience
Can still manually edit the presentation
Gamma cons:
Not as much granular customization
I tested a lot of apps claiming to use AI to up your presentation game, and Gamma's conversational AI features were head and shoulders above the crowd.
Simply give the app a topic—or upload an outline, notes, or any other document or article—approve the outline, and pick a theme. The app will take it from there and create a fully fleshed-out presentation. It's far from perfect, but Gamma produces a very useful jumping-off point. (Last year, it was by far the best, but this year, other apps are catching up.)
Here's the key: Gamma is much more geared toward the iterative, chatbot experience familiar to ChatGPT users. Click on the Edit with AI button at the top of the right-hand menu to open the chat, and you'll see suggested prompts—or you can type in your own requests for how Gamma should alter the presentation.
Once you've done all you can with prompts, simply close the chat box to manually add the finishing touches. While you do sacrifice some granular customizability in exchange for the AI features, you can still choose your visual theme, change slide layouts, format text, and add any images, videos, or even app and web content.
Gamma pricing: Free plan includes unlimited users, 400 AI deck credits, and basic view analytics; upgrade to the Plus plan for $8/user/month to get unlimited AI credits, remove Gamma branding, and more.
The best presentation app for audience engagement
Mentimeter (web).

Mentimeter pros:
Tons of audience engagement features
Simple for participants to interact
Mentimeter cons:
Less granular customizability
Bit of a learning curve
If you need to engage with an audience during your presentation, Mentimeter makes that easy. The app is designed around interactive elements like quizzes, surveys, Q&As, sliders, and more (even a Miro whiteboard!).
Each of these is included in a number of different, professional-looking templates, so you can build a fully interactive presentation super quickly.
When it's time to present, your audience members can scan the QR code with their phone cameras or type in the URL and access code to participate. There's one code per presentation (so they won't have to do this on every slide), which gives access to each slide as you move through the presentation.
There are two main drawbacks to this one, though. First, there's a bit of a learning curve and less familiar editing interface (but I found it pretty easy to learn with some practice). The other drawback is that you can't get as granular with the visual customization as you can with many other presentation tools.
Mentimeter pricing: Free plan includes 50 participants per month and 34 different slide types; upgrade to the Basic plan for $11.99/presenter/month to get unlimited participants and slide types, private presentations, and more.
The best presentation app for generative AI

Top-tier generative AI features
Simple, customizable templates
Intuitive doc-style editor
There's definitely a learning curve
Tome is one of the new additions to this list that I'm most excited about. If you're looking for generative AI that just genuinely works , it's definitely worth a look. The editor is a bit more stripped down than most presentation apps but intuitive nonetheless—it's almost a cross between your standard deck editor and a Notion-style doc.
To generate an AI deck, click Generate with AI in the top right, and either write your own prompt or choose from the example prompts that cover a handful of common use cases, like sales enablement and company pitches. Edit or approve the suggested outline, then generate the full presentation.
From there, you can edit each slide as a doc via the right-hand menu—without limits on how much information you can include. During the presentation, you simply size down any slides that take up more than the standard amount of space. It's super simple but somehow feels revolutionary in a presentation app.
Tome pricing: Free plan available for manual editing without AI; upgrade to the Professional plan for $16/user/month to use the generative AI and design tools, plus engagement analytics, branding tools, and more.
What about the old standbys?
You might notice a few major presentation players aren't on this list, including OGs Microsoft PowerPoint, Apple Keynote, and Google Slides. These apps are perfectly adequate for creating basic presentations, and they're free if you have a Windows or Mac device or a Google account.
I didn't include them on the list because the presentation space has really developed in the last several years, and after testing them out, I found these behemoths haven't kept pace. If they weren't made by Microsoft/Apple/Google, I might not even be mentioning them. They're pretty basic tools, they're behind the curve when it comes to templates (both quantity and design), and they don't offer any uniquely valuable features like robust team collaboration, branding controls, video, and so on.
Some of these companies (think: Microsoft and Google) are openly working on some pretty impressive-sounding AI features, but they haven't really been focused on their respective presentation solutions just yet. Rest assured, I'm watching this space, and the next time we update this article, I'll re-test tools like Copilot for PowerPoint and Gemini for Google Slides to see what new features may be available.
In any case, if you're reading this, you're probably looking for an alternative that allows you to move away from one of the big 3, and as the presentation platforms featured above show, there's a ton to gain—in terms of features, usability, and more—when you do.
What about PowerPoint and Google Slides add-ons?
While I focused my testing on tools with full feature-sets—those that can serve as your sole presentation tool—there are a ton of add-on tools you can use atop big name tools like PowerPoint and Google Slides.
If you're looking to expand what you can do with PowerPoint or Google Slides, apps like Marq (formerly Lucidpress), Plus AI , Slidesgo , and Simplified can help you do things like access additional templates, save branded assets, and generate AI presentations from the app you're already using.
Related reading:
Canva AI tools to improve your design workflow
The best online whiteboards for collaboration
How to share a presentation on Zoom without sharing your browser tabs and address bar
This post was originally published in October 2014 and has since been updated with contributions from Danny Schreiber, Matthew Guay, Andrew Kunesh, and Krystina Martinez. The most recent update was in April 2024.
Get productivity tips delivered straight to your inbox
We’ll email you 1-3 times per week—and never share your information.

Kiera Abbamonte
Kiera’s a content writer who helps SaaS and eCommerce companies connect with customers and reach new audiences. Located in Boston, MA, she loves cinnamon coffee and a good baseball game. Catch up with her on Twitter @Kieraabbamonte.
- Presentations
Related articles

The 5 best team chat apps for business in 2024
The 5 best team chat apps for business in...
The best Asana alternatives in 2024

The best help desk software and customer support apps in 2024
The best help desk software and customer...

The top AI text generators in 2024
Improve your productivity automatically. Use Zapier to get your apps working together.

Filter by Keywords
The 15 Best Free Note Taking Apps to Use in 2024
Erica Chappell
Managing Editor
May 8, 2024
Are you a working professional who needs to take notes on the go? If so, you’re in luck! Technology has made it easier than ever for business professionals and students alike to find an app that perfectly fits their note taking needs. But with so many different options available, how do you know which ones are right for you?
Have no fear! In this post we’ll show off some of the best free note taking apps out there, while sharing information about each one’s features and capabilities.
Read on as we explain why ClickUp should be at the top of your list when looking for a reliable and effective note taking solution.
What is a Note Taking App?
Key features of the best note taking apps, 1. clickup docs, 2. google keep, 4. workflowy, 5. evernote, 8. squidnotes, 9. microsoft onenote, 10. simplenote, 11. dropbox paper, 12. goodnotes, 13. obsidian, 15. milanote.
Note taking apps are digital tools specifically designed to help you capture and organize ideas and information easily. They provide a digital canvas for you to jot down everything from meeting notes, task lists, and brainstorming sessions, to personal reflections, research findings, and even creative inspirations.
Ease of Use: The best note taking apps have an intuitive and user-friendly interface. You should be able to quickly jot down ideas, create lists, or record voice memos without navigating through complex menus or instructions.
Organization Capabilities: Look for an app that allows you to categorize, tag, or color-code your notes for easy retrieval. Some apps even offer the option to create notebooks or folders for more structured organization.
Search Functionality: A good note taking app should provide robust search capabilities, allowing you to find specific pieces of information within your notes quickly.
Sync Across Devices: If you’re using multiple devices (like a smartphone, tablet, and laptop), ensure the app can sync your notes across all of them. This way, you can access and update your notes from anywhere, at any time.
Integrations with Other Apps: Does the note taking app integrate well with other apps you frequently use? This could include your calendar, email, project management, or cloud storage apps. Seamless integration can significantly improve your productivity and efficiency.
Rich Text and Multimedia Support: Depending on your needs, you may want an app that supports rich text formatting, images, audio recordings, or even handwritten notes. These features can make your notes more comprehensive and versatile.
Collaboration Features: If you work as part of a team, look for apps that allow you to share your notes and collaborate with others. This could include real-time co-editing, comments, and task assignment.
Security and Privacy: Your notes may contain sensitive information. Ensure the app offers strong security features like end-to-end encryption and two-factor authentication.
Price: Last but not least, consider your budget. While many note taking apps offer free versions, they often come with limitations. Paid versions usually provide more features and storage space. However, make sure the cost is justified by the value it brings to your workflow.
15 Best Note Taking Apps in 2024

What makes a handy and reliable note-taking app?
Simple: functionality, user-friendly UI, accessibility, and searchability (and okay, maybe aesthetics, too). That’s what you get with ClickUp Docs, and so much more!
Because ClickUp is an all-in-one productivity tool, it offers all the features you need. From complex project management to your daily note-taking and documenting needs—and everything in between, ClickUp has you covered.
It helps you organize and bring all your notes and work into one centralized hub—and with the mobile app, you can keep them wherever you go. 😊
For effective note-taking or even fast-tracking blog writing with AI tools , ClickUp offers a doc feature to capture your most important notes, jot down your brilliant ideas, or store your self-reminder notes and checklists. All of which is easily shareable with anyone online via a public link (or kept private 🤫).
Beyond your everyday note-taking needs, ClickUp Docs can also be used for all kinds of use cases such as wikis, meeting minutes and agendas, knowledge bases, and company portals that can be linked directly to tasks, comments, chat conversations, and more, making it a great solution for small to enterprise teams .
The collaborative editing and detection feature within ClickUp Docs shows who’s working on what allowing teams to simultaneously work in the same Doc without overlap, creating a better collaborative note-taking experience for all. And should you need to embed files or add images to your notes, ClickUp Docs can support attachment files and embed links such as YouTube, spreadsheets, and so much more!
Best of all, ClickUp Docs offers basic to advanced typography and rich editing features to let you format your notes the way you prefer and make your notes stand out—change the font size and color, add highlight a text in color, add colored banners to break up the text; let your creativity run wild!
For quick notes and checklists, you can also take advantage of ClickUp’s Notepad feature to jot down ideas, reminders, and action items from anywhere and take them wherever you go via the ClickUp mobile app.
- ClickUp AI : Use AI to summarize your notes and create AI content faster
- Full-customizable platform and user-friendly interface
- View Notepad notes offline (Note: you’ll need an internet connection to save changes)
- Custom permission and sharing
- Rich-editing features
- Available on the mobile app
- Free Forever Plan
- Learning curve to the number of features
- Not all views are in the mobile app, yet
ClickUp pricing
- Free Forever Plan (best for personal use)
- Unlimited Plan (best for small teams ($7/member per month)
- Business Plan (best for mid-sized teams ($12/member per month)
- ClickUp AI is available on all paid plans for $5 per Workspace member per month
Availability: All devices Check out our page for a full breakdown of what makes ClickUp Docs one of the best note-taking apps on the market today!

Google Keep is a great note app because it meets all of the points I made above, plus it’s simple. And completely accessible.
Make note lists, save links, copy text and even record audio notes. Those are amazing features that come as part of your Gsuite applications.
With reminders, Google Keep can be used for very lightweight task management.
- As part of the Google Suite, you can take meeting minutes or lecture notes on your browser or your smartphone via an app and it stays with you.
- Opens next to Google Calendar
- Search for notes by color, lists with images, audio notes with reminders, or shared notes
Con: Formatting text or markdown is a bit harder to do.
Availability: All devices
Google Keep is free to download.
Compare this web app with #5: Evernote

Though only available on Apple products , Bear is a note taking app to be reckoned with. It has a simple left to right interface with a main menu, a note snippet display of your most recent notes, and then the actual note taking area.
One of its key features is its organizational system. Use hashtags to categorize, then use a slash command to create even more subfolders. You can do this from anywhere in the note. This is a simple way to organize and categorize your notes.
The new folders then automatically appear in your main menu. It also uses other markdown text editor shortcuts to link your notes together. Very intuitive!
- Hashtags and categorization from anywhere in the note
- Multiple themes to offer a style for everyone
- Markup editor supporting 150+ programming languages
Cons: Not enough separate workspaces or different levels of categories. This Reddit thread has more information on Bear.
Bear offers a 1 week free trial and is $1.49/month per user.
Availability: iOS
Check out these Bear App alternatives !

Workflowy is a notes/project management hybrid , but it works best for notes. Workflowy takes the idea of an outline to an extreme. Rather than create smaller cards for each of your notes (like a notepad), Workflowy drills further and further down into an outline, creating a hierarchical structure right from the start.
Workflowy offers extreme flexibility. Novelists use to plan books; managers can create quick tasks and checklists to pass onto their team.
From there, you can add tags and more organizational tools emerge.
With its new mobile apps, Workflowy is definitely worth a try.
Not sure about Workflowy? Check out our blog on Workflowy alternatives .
- Easy to see zoom in and out from the big picture to smaller details
- Backlinks easily to anything
- Mobile app for iOS and Android
CON: Sometimes users can be frustrated by its plain approach–it’s almost too simple. The blank page can be daunting after all. But you can set favorites and more to navigate.
Workflowy is free to use for up to 250 bullets per month. For additional items, you’ll have to purchase the pro version, which offers unlimited lists and items at $4.99/month.

Evernote, often considered the original authority in the realm of note-taking applications, has somewhat dimmed its once bright allure over time.
Recently, Evernote has imposed restrictions on their free plan , limiting users to a single notebook and a maximum of 50 notes. Despite these changes, the core functionality remains intact: the app still facilitates seamless note-taking, list creation, and even permits file attachments for comprehensive note organization. However, it’s important to remember that these limitations could impact the way you utilize Evernote on a day-to-day basis.
Proceed with caution on Evernote!
Check out our review on Evernote and its alternatives.
- Web clipper and card system are familiar
- Searchable text in file formats, including PDF files and documents
- Custom Evernote templates for note taking
CON: Limited free plan, rising prices and uncertain product leadership
Evernote also has a free plan with 60MB worth of uploads a month. The paid plans start at $8.99/user per month.
Availability: Everywhere

Paper is a different type of note taking app –it’s the one for you visual thinkers out there. Made more like a sketch pad, you can dive into paintbrushes, swirls, and shapes. Create mind maps or draw a quick cartoon as a reminder. Its notebook feature helps you set up the organization that you need to group your notes and drawings into different categories.
- Capture quick design ideas
- Easily add multiple photos to a page
- Sync your pages across all of your devices
CON: Not many keyboard functions for the text types out there…and only available on Mac/iOS
Paper’s free plan allows for up to 2GB. Paid plans start at $10/month per user.
Availability: Mac/iOS

Ulysses is a hybrid writing program and note taking app. If you find yourself needing to transform your notes from raw form into something presentable, then Ulysses lets you do that all across your Mac devices. You can take notes in a plain text mode and then throw in another theme for export.
It also offers writing goals and links to outside resources, like a PDF for instance. Its clean interface is inviting to many users.
- A minimalist interface for long-form writing
- Built-in proofreader and editing assistant
CON: One drawback? It requires an ongoing subscription, so take a test run before committing.
Ulysses is $5.99/month per user.
Availability: Mac and iOS

SquidNotes is one of those writing apps that captures your real handwriting. It mimics taking notes in an actual notebook or legal pad. You can use a compatible stylus or write with your finger. You can then resize your notes, add shapes and export to PDF and more. It’s also great for commenting on images and suggesting edits.
- Use your real handwriting (that’s a con for me)
- Great for marking up documents and suggesting edits
CON: Won’t be as concise or compact as other note taking apps such as Evernote or OneNote (if that matters to you)
SquidNotes offers a free plan for users. Paid plans start at $10/year.
Availability: Android
At first, I thought Microsoft OneNote was just the answer to Google Keep or Evernote…but it’s actually more than that.
It’s a great tool for annotating and commenting on PDFs, and it combines the functionality of traditional notes with the sketchbook approach. It’s the best one at doing both.
You can take audio dictation, photos, make a to-do list or draw. An amazing OneNote feature is using the keyboard and sketching in the same app. You don’t have to give up your handwritten notes entirely.
Microsoft users will want to take advantage especially since it connects to your 365 account, which can then sync across all your browsers, apps and mobile devices you use for Office365.
Check out our blog on OneNote alternatives & compare Notion vs. OneNote !
- Sketches and typed notes in one place! And Microsoft.
- Add voice notes
- Built in math assistant (paid feature)
- OneNote templates
Cons: Lacks a lot of major integrations.
Microsoft OneNote is free to download.
Compare Google Keep Vs OneNote !

Free notes?
Clean interface?
The team from Automattic (creators of WordPress) want to solve your note taking problems with Simplenote , a free and open-source note taking platform.
An advantageous feature is syncing Simplenote across all of your devices–whether it’s Windows, Mac or your mobile devices.
You also get markdown, which is a huge bonus for sharing code or to emphasize a point. On the flip side, Simplenote only supports basic note taking and there is no rich text editor.
One Simplenote feature that others don’t have is a drag-and-drop interface for revisions and note history. Just drag the toolbar to go back in time.
- Use across desktop and mobile devices, easy to review past history
- Simple interface
- Note version history
Cons: Not great for attachments, setting reminders, hard to format texts
Simplenote is $10/year per user.
Availability: Mac, iOS, Android, Windows

Dropbox Paper is a seamless collaboration tool for teams of all sizes and industries to edit documents and share all your notes within the program.
Users can add annotations to images, mention people from documents, and connect to their calendars to find meeting notes quickly.
Dropbox Paper has powerful syncing capabilities to help put everyone on the same page.
However, if you’re looking to share professional presentation slides, Dropbox lacks advanced formatting features compared to popular word processors.
- Dropbox files embedded into Dropbox Paper previews correctly
- Large selection of media support from other sources
Cons: Not as intuitive compared to top-rated word processors and poor note organization
Dropbox Paper is free to use.
Availability: iOs and Android apps

GoodNotes is a smart digital paper and social app for students.
Using GoodNote, students can connect with other students worldwide studying the same subjects and exchange notes.
This feature (at no extra cost) called Community allows users to create their own profile for others to view their documents.
While the Community feature is an incredible tool for people to connect, the note taking features compared to Notability are limited or non-existent.
- Built-in flashcards when you’re in study mode
- Shared Documents feature allows you to use a shareable link to collaborate
- No extra cost to download the Mac app
Cons: No task management features making GoodNotes unsuitable for high-level project planning
GoodNotes is a free note taking app for up to 3 notebooks. The unlimited version is a one time fee of $8.99.
Availability: iOS, iPadOS, and Mac

Obsidian is a note-taking and knowledge management app that runs as a Markdown-based system. The application was created based on how the human brain works—focusing on making and following connections between notes. It provides a rich-taking experience and a powerful method for linking documents together via backlinks, creating a web of knowledge, and helps users centralize notes in one place.
- Backlink and graph view help users easily navigate their notes
- Supports CommonMark and GitHub Flavored Markdown (GFM) for portability
- Customizable and can add plugins to create a personalized note-taking tool kit
- For Apple users, the iOS version works only with iCloud (does not work with other Cloud folders)
- Unable to export notes to MS Word (only as a PDF file)
- No table editing yet (available as a plugin)
Availability: Mac, Windows, Linux, Web, iOS, Android
Obsidian offers a free plan for personal use. Paid plans start at a flat rate of $25.
Bonus: Obsidian Vs. Notion

Coda is an all-in-one document management solution that brings all your words, data, and teamwork into one powerful doc. Teams can combine building blocks to create a doc, create, edit, and view documents and spreadsheets simultaneously, create surveys and polls , set up custom workflows, automate notifications, and so much more.
- Includes drag and drop capabilities
- Offers customizable Coda templates
- Real-time collaboration
- Mobile-friendly app for all your devices
- Onboarding can be intimidating; steep learning curve
- Issues with integration with other tools
- Slow speed and performance
Coda offers a limited free plan. Paid plans start at $10/month per user.
Availability : Cloud, SaaS, Web-based, Mobile (Android, iPhone, iPad)
Bonus: Coda Vs. Airtable

- User-friendly interface for note taking
- Collaboration geatures
- Creativity enhancements
- Limited text formatting
- Some users report not liking the board-based format
- Limited free version and expensive paid plans
Milanote offers free and paid plans starting at $9.99/month per user.
Note Taking Made Eas y Made with Note Taking Apps!
No doubt, having a great note taking app is a lifesaver. Your choice may depend on your use case. Do you want a lot of features available through an app like Ulysses, or something simple to jot down your grocery list? Or maybe an online notepad that’s available all across the web if you spend a lot of time in your tabs.
Your choice may depend on what you need, how often you need sketches (or not) and what you want to do with your notes once you’re done with them. Exporting isn’t for everyone.
Which best note taking app will you choose?
Other great posts to help with your notes:
- Best note taking strategies
- Best organizational tools
- Best productivity apps
- Release notes templates
- Bear vs Evernote
Questions? Comments? Visit our Help Center for support.
Receive the latest WriteClick Newsletter updates.
Thanks for subscribing to our blog!
Please enter a valid email
- Free training & 24-hour support
- Serious about security & privacy
- 99.99% uptime the last 12 months
5 Free Teleprompter Apps to Read Scripts While Shooting Videos or Hosting Webinars
Want to make your speeches seem impromptu? Record videos and read scripts with these free teleprompter apps next time.
From the President of the USA to Jeff Bezos, successful people use teleprompters to give speeches that seem impromptu. You can use the same trick to remember your lines with these free teleprompter apps.
We seem to be spending so much time talking to cameras these days, whether it's for a little shoot for our social media or a presentation in a Zoom meeting. Instead of remembering your speeches or writing little flashcards, use a teleprompter.
As the text scrolls next to your camera, it will seem like you're talking to the audience while you have the comfort of simply reading so that you don't forget any lines. Here are some of the best teleprompter tools you can use.
1. Teleprompter Mirror
Teleprompter Mirror is a fantastic web-based online teleprompter app that works entirely in your browser, on computers, or phones. It's one of those excellent no-signup web apps that you can start using immediately but is nonetheless packed with features.
Copy and paste your text into the main window to begin. You can adjust the font size, the scrolling speed, the margin, and the text and background colors. If you've got it set up exactly how you want it, save the script file to use it later. It couldn't be simpler.
Teleprompter Mirror also has a sister site, Voice Activated Teleprompter . This works with Chrome on desktop and mobile, as it listens to what you speak and moves the script forward accordingly. In our test, it worked well enough for amateurs, but there are better apps for this. That said, this one doesn't require any signups nor has any trial restrictions, so what have you got to lose in giving it a shot?
You can also use Teleprompter Mirror on a screen with any professional rig too, as it features vertical flip and horizontal flip. With professional rigs, you need to flip the text to mirror it on a screen over the camera.
2. SpeakFlow
For voice-activated teleprompters that scroll the text based on what you read, SpeakFlow is another excellent online teleprompter, and even has a few professional-level features. The free web app works in your browser, so you can use it on any device after registering.
SpeakFlow has two modes: Flow mode to scroll as you speak each word and Auto mode to scroll at a preset pace. It picked up our voice with unerring accuracy, in multiple accents. You can also add instructions and stage directions by wrapping words in brackets. The teleprompter won't wait for you to say such bracketed words in Flow Mode.
That said, there are some restrictions in the free version. Any serious video-maker might want to go for the premium version, which includes additional features like remote control (where someone else can scroll the text for you from another synced device), mirrored text, bookmarking, and version control.
3. Speechway
Teleprompter apps on phones are a little different. Sure, they can be used as standalone prompters next to a dedicated camera, but often, you'll be using the front camera of the phone itself for a video call or to shoot your selfie video for social media. Apps like Speechway overlay a teleprompter on the screen while you're doing that.
Speechway has three modes: classic, camera, and widget. The classic mode turns your phone into a dedicated teleprompter rig to be used with a camera. Camera mode uses the camera within the app, while widget mode overlays your script as a widget on any app for live-streaming or recording.
The widget mode is the most interesting one. You can adjust the widget's position and size anywhere on the screen (keeping it closer to the camera is better, as you look as if you're talking into the camera). Adjust the speed and size of the text freely, and go through all the various options to customize it. Adjusting opacity, font style, and font color are premium options.
The scripts themselves are easy to make, especially since you can import files from Google Docs or any TXT or DOC file on your Android. Speechway lets you turn your script into "pages" for easier breaks, add cue points (like bookmarks), and save the script to reuse for later. The app works fantastically well and can even be controlled with Bluetooth keyboards or other third-party accessories.
Download: Speechway for Android (Free, in-app purchases available)
4. Video Teleprompter
Unlike Android, you can't get widgets overlaid on any third-party app using a camera on an iPhone or iPad, so you'll need a video recorder app with a teleprompter. There are plenty of paid options, but the lite version of Video Teleprompter is good enough for most people.
The text box automatically orients itself next to the camera in both portrait and landscape mode. Unfortunately, you can't import scripts, but copy-paste works perfectly, and you can add cue points. Video Teleprompter also has a countdown timer before starting the video, which is a small but crucial feature to make more professional-looking videos.
One big turn-off with the free version is that it adds a watermark to all videos; you'll need to upgrade to Pro ($16.99 one-time purchase) for watermark-free videos, script importing, keyboard and Apple Watch control, and rich text export.
Importantly, Video Teleprompter does the basics well. Your videos look good, the audio sounds excellent, and it always seems like you're looking at the camera. That's what matters most.
Download: Video Teleprompter for iPhone or iPad (Free, premium version available)
5. PromptSmart
PromptSmart is the of the best teleprompter apps when it comes to voice recognition technology. The teleprompter works by scrolling down along with your voice. When you pause midway, the app replicates it by pausing the scroll-down and then resuming again when you start speaking.
The tool works on both Windows and Mac and offers Android and iOS apps. A few other features that caught our attention include:
- A free, in-built word process to type out and edit your scripts.
- VoiceTrack scrolling supports four languages: English, Spanish, German, Russian, and French.
- Control your presentation from the web browser (for the web app version).
- Cloud sync features let you sync your script from the web to your PromptSmart mobile apps.
It offers a 'lite' version, which gives you a free version for Android and iOS versions. And although PromptSmart doesn’t offer a free version for it's full features, it gives you a 7-day free trial that lets you use all of them from its different paid tiers. If you like the app, you can then buy the Starter or Team pack, which will cost you about $99.99/year and $199.99/year, respectively.
Download: PromptSmart for Android or iOS (Free trial, premium version available)
6. How to Make a DIY Teleprompter for Free or Less Than $5
If you use a dedicated camera to shoot your videos, then you can buy a teleprompter kit for $100 or make your own DIY kit for free by upscaling old items. It's surprisingly simple. Here's what you'll need:
- An old photo frame with a glass cover
- A file folder
- Electrical tape
- Protractor or ruler
- Wire hanger or Binder Clips or almost anything you have lying around
The process is to get the glass cover out of the frame, cut a hole in one side of the folder, and stick the glass there with electrical tape. Then, open up the folder so that the glass is at a 45-degree angle. Set it in place using the hanger, clips, or get creative with any material you have that ensures the folder stays in place at that angle.
That's it; you have a simple teleprompter ready to go. You can watch Roger Hansen's video above to see clear instructions for the whole process in action, or this improvised teleprompter by Joanna Gryzewska that can change angles. A quick search on the web will show you several other ways to make a DIY teleprompter, as it's one of the best tried-and-tested DIY camera hacks.
Learn to Write for a Teleprompter
These apps and tutorials will get you ready to use a teleprompter, but don't forget the most important part: the script. Writing a script for a teleprompter is different from writing a document.
There are several tips to keep in mind, such as writing words instead of numbers; for example, ten thousand instead of 10,000 so that you don't accidentally read it as one thousand in the heat of live recording. Practice and rehearse until you find a pace and diction that works for you. It'll help you tailor all future scripts to your style.
- Accessories
- Meet the team
- Advertise with us
- Privacy Policy
Presentations are a handy tool for students, teachers , and professionals. Moreover, you can also use them at parties and events because gone are the days of boring slides that fail to retain your audience’s attention. Today, you can quickly create captivating slideshows that communicate your message effectively and engagingly. So, check out these best presentation apps for iPad and iPhone, no matter what kind of project you’re working on in the classroom or the boardroom.

Although Canva is well-known as a graphic design app , it can also help you create spectacular slides for a presentation that will wow your audience. There are tons of professionally designed templates that you can customize according to your needs.
Moreover, you can add your own brand elements like logos and images to create a unified look. The best part is that it is incredibly easy to use, yet gives you impeccable results. You can add your original pictures, illustrations, and text, or choose from the extensive database of design elements that it offers.
Price : Free (In-app Purchases start from $0.99)
2. Google Slides

Creating top-notch presentations with Google Slides is a breeze. It has a highly intuitive user-interface that makes your work easy. Further, the real-time collaboration feature lets you work with your friends and colleagues. You can add and rearrange slides, format text, and shapes with ease.
Further, you can also open and edit PowerPoint slides right from this app. Another notable feature is that it lets you work even offline. So, if you ever find yourself without an internet connection, your work won’t hit a roadblock. Lastly, Google Slides supports several languages, such as English, German, Italian, Japanese, and more.
Price: Free
3. Microsoft PowerPoint

Across the world, PowerPoint has been synonymous with presentations for decades. In recent years, this tool has come a long way. So what better way to get creative than with this official app from Microsoft. It features a range of powerful and customizable slides and templates that will make you stand out.
Moreover, you can use a new AI tool called Presenter Coach that will help you practice your presentation and get real-time suggestions to adjust your pacing, avoid “umms” and speak confidently. Finally, there is seamless syncing with OneDrive that ensures your projects stay consistent across devices.
Price: Free (In-app Purchases start from $6.99)
4. Notability

This is a renowned note-taking app for your iPad , but it doubles up as an excellent way to share presentations with others and keep your audience engaged. It has a lot of useful tools like ink, highlighter, text, and audio. If you’re working on a compatible iPad, you can even handwrite and sketch with Apple Pencil to bring your projects to life.
Further, the laser pointer makes it easy to direct attention to specific parts of your work. There’s also a multi-note feature that lets you view another note on your device that stays hidden from the audience whom you are presenting to. Not surprisingly, this is a bestselling paid app on the iPad App Store
Price : $8.99
5. Slideshow Creator

If you want to make a more casual presentation for family gatherings or parties, check out this easy-to-use iPad and iPhone presentation app. It offers various slideshow styles for everything from birthdays and graduation to sports events, invitations, and more.
You simply have to select the style you want, select the photos, videos, and music you want to collate, add text and captions, and then export it into a video that you can share through social media or project on a big screen.
Price : Free (In-app Purchases start from $4.99)

Here’s the app that Apple itself uses to present brilliant creations to the world. It’s the most powerful app to present your ideas on an iPhone or iPad. In addition to all the basic features, there are advanced options like animated charts and cinematic transitions to add that extra flair with ease.
Further, Keynote Live allows you to present a slideshow that your audience can follow on their Apple devices or online on iCloud.com. Finally, with the built-in real-time collaboration feature, it lets you work with your team seamlessly. Thanks to the Keynote for iCloud, even Windows PC users can collaborate.
7. Adobe Spark Video

This one’s a video editor app that also lets you create professional presentations. Within minutes, you can put together compelling video stories replete with professional images that highlight your message. You can even select the soundtrack that you like best, and the app will compile everything with beautiful cinematic motion.
Whether you want to inform, persuade, or inspire, your presentations can make an impact with this app. You can even access, edit, and share your video from a browser using Adobe Spark. All this functionality for free is a pretty sweet deal.
Price: Free (Spark Subscription Monthly – $9.99)
8. Prezi Viewer

This iOS presentation app makes sure that you outshine everyone else. It’s intuitive and innovative, with stunning animations that draw your audience’s attention to precisely where you want it. You can even access and showcase your work offline if you need to.
When presenting, you don’t need to keep looking behind you because you can see your work on your phone screen too. Moreover, your iPhone or iPad acts as a clicker too! This neat app also supports multiple languages, including English, French, Spanish, German, Portuguese, Hungarian, Italian, Korean, and Japanese.
Summing Up!
So, when are you making your next presentation with one of these apps? Let us know your favorite in the comments below.
You may also like to read these:
- Best Document Scanner Apps
- How to convert Keynote Presentation to PowerPoint on iPhone, iPad, and Mac
- Document Creation Apps
- Best Project Management Apps

The founder of iGeeksBlog, Dhvanesh, is an Apple aficionado, who cannot stand even a slight innuendo about Apple products. He dons the cap of editor-in-chief to make sure that articles match the quality standard before they are published.
View all posts
🗣️ Our site is supported by our readers like you. When you purchase through our links, we earn a small commission. Read Disclaimer .
- iPhone Apps
LEAVE A REPLY Cancel reply
Save my name, email, and website in this browser for the next time I comment.
Related Articles
Artworkout: best app to learn how to draw on ipad, apps gone free today on the app store, ipad and iphone apps on sale today, best mac cleaner software and apps to keep your mac clean and optimized.
Bebop: Quick Notes 4+
Capture notes as text files, jack cheng llc.
- 4.6 • 5 Ratings
- Offers In-App Purchases
iPhone Screenshots
Description.
Bebop helps you get down your ideas, fast. It assumes that review and organization are better done on larger screens—that a mobile interface should be lightning-fast, clutter-free, and capture-first. • No ads, no logins, no tracking: Files are synced natively to your chosen iCloud or Dropbox folder* • BYOMA (Bring Your Own MacOS App): Open plain-text formats like .txt and .md/markdown plug neatly into Obsidian and NVAlt • Flashback notes: Cycle through recent notes with a single tap • Share extension: Quickly save links and text from other iOS apps • Unlimited notes (even for free users) For a one-time Pro upgrade (no subscriptions!) you’ll also get color themes, power-user settings, and help support future development. Bebop is made by Jack Cheng, an author and solo developer in Detroit, Michigan. ===== More info and privacy policy: https://www.jackcheng.com/bebop/ * Dropbox sync requires you to have the Dropbox iOS app installed.
Version 1.0.1
Ratings and Reviews
An app that does its job perfectly.
This is great for jotting down quick notes. I’m not looking to tag or organize anything, but rather get down a thought before I lose it. I have the .md files save to a Quick Notes folder in my Obsidian Vault where I can later manage them on my computer.
Pro version
I don’t see the value of the pro version having just paid for it. This is also an exact replica of the iOS native Notes application. I’d love to learn what is new or improved upon vs notes but I just don’t see it. Perhaps if you are an Obsidian user for Second Brain functionality, then is see the markdown export / syncing being of value but for a notion user I don’t see it
Developer Response ,
Hi Steve, thanks for trying out the app. You’re correct that it’s intended for users who already use Obsidian or a similar desktop app, and while the pro version has some marginal benefits right now, it’s more of a small “tip” for those who find the app useful to show appreciation. Apologies if this wasn’t properly conveyed in the app itself! You can get your purchase refunded by visiting https://reportaproblem.apple.com
App Privacy
The developer, Jack Cheng LLC , indicated that the app’s privacy practices may include handling of data as described below. For more information, see the developer’s privacy policy .
Data Not Collected
The developer does not collect any data from this app.
Privacy practices may vary, for example, based on the features you use or your age. Learn More
Information
- Pro Upgrade $4.99
- Developer Website
- App Support
- Privacy Policy

Family Sharing
Some in‑app purchases, including subscriptions, may be shareable with your family group when family sharing is enabled., you might also like.
Funnel: Quick Capture
Plinky: Easily Save Links
Stashpad Lists
Qept: Quick Notes Like Texting
Relog: Task Logger
How to See Notes on Canva Mobile App
Home » Blog » How to See Notes on Canva Mobile App

Founder of CanvaTemplates.com & Professional Graphic Designer
Jake Tucker
Canva Templates is reader supported. When you buy through links on our site, we may earn an affiliate commission. Learn more
Canva is a popular graphic design platform that allows users to create stunning designs for various purposes. One of its useful features is the ability to add notes to your designs, which can be helpful when collaborating with others or presenting your work. However, some users may not know how to access these notes on the Canva mobile app.
To see notes on the Canva mobile app, users can follow a few simple steps. First, they need to open the Canva app and select the design they want to view. Then, they can tap the “…” icon in the top right corner of the screen and select “Presentation Mode.” This will open the design in full screen mode, and users can swipe left to access the notes section.
By following these steps, users can easily view notes on the Canva mobile app and stay organized when working on their designs. Whether you’re collaborating with a team or presenting your work, notes can be a valuable tool to help you communicate your ideas effectively.
Understanding Canva Mobile App
Canva is a graphic design platform that allows users to create professional-looking designs with ease. The Canva Mobile App is a version of Canva that is designed specifically for mobile devices. It is available for both Android and iOS devices and can be downloaded for free from the App Store or Google Play.
The Canva Mobile App provides users with a wide range of design templates that can be customized to fit their specific needs. Users can choose from a variety of templates such as social media posts, presentations, flyers, and more. Each template is designed to be fully customizable, allowing users to change the text, images, and colors to fit their specific needs.
In addition to templates, the Canva Mobile App also provides users with a wide range of design elements that can be added to their designs. These design elements include images, icons, shapes, and more. Users can also upload their own images and use them in their designs.
The Canva Mobile App also provides users with a range of tools that can be used to edit their designs. These tools include the ability to crop images, adjust the brightness and contrast, and add filters to images. Users can also add text to their designs and choose from a wide range of fonts and colors.
Overall, the Canva Mobile App is a powerful tool that allows users to create professional-looking designs on the go. With its wide range of templates, design elements, and editing tools, the Canva Mobile App is a must-have for anyone who needs to create high-quality designs on their mobile device.
Accessing Notes on Canva Mobile App
To access notes on the Canva mobile app, the user needs to follow a few simple steps. Firstly, the user needs to open the Canva app on their mobile device and log in to their account. Once they are logged in, they need to select the design they want to work on and tap on it to open it.
Next, the user needs to tap on the “More” button located at the bottom right corner of the screen. This will open a menu with various options. The user needs to select the “Notes” option from the menu to open the notes section.
Once the notes section is open, the user can view all the notes that have been added to the design. The notes are displayed in chronological order, with the most recent note appearing at the top. The user can tap on a note to view its content and tap again to close it.
In addition to viewing notes, the user can also add new notes to the design from the notes section. To add a new note, the user needs to tap on the “Add Note” button located at the bottom of the screen. This will open a text box where the user can type their note. Once the note is typed, the user needs to tap on the “Save” button to add it to the design.
Overall, accessing notes on the Canva mobile app is a simple and straightforward process. With just a few taps, the user can view and add notes to their designs, making collaboration and communication easier than ever.
Creating Notes on Canva Mobile App
Step by step guide.
Creating notes on the Canva mobile app is a simple process. Here is a step-by-step guide to help you create notes on Canva mobile app:
- Open the Canva mobile app on your device and log in to your account.
- Select the design you want to add notes to.
- Tap the “Page Notes” icon located at the bottom of the screen.
- Type in the notes you want to add to the page.
- Tap “Save” to save the notes.
Tips and Tricks
Here are some tips and tricks to help you create effective notes on Canva mobile app:
- Use bullet points to organize your notes. This makes it easier to read and understand.
- Use bold text to highlight important information.
- Keep your notes brief and to the point. Paragraphs should contain no more than 3 sentences.
- Use tables to organize information in a clear and concise manner.
- Use different colors and fonts to make your notes stand out and more visually appealing.
By following these tips and tricks, you can create effective notes on the Canva mobile app that will help you stay organized and productive.
Editing Notes on Canva Mobile App
Editing process.
To edit notes on the Canva Mobile App, follow these simple steps:
- Open the Canva Mobile App on your phone.
- Select the design with the notes you want to edit.
- Tap on the “Presenter View” button located at the bottom of the screen.
- Swipe left or right to navigate between slides.
- Tap on the “Edit” button located at the top right corner of the screen.
- Edit the notes as desired.
- Tap on the “Done” button to save your changes.
Best Practices
When editing notes on Canva Mobile App, it’s important to keep in mind the following best practices:
- Keep your notes concise and to the point.
- Use bullet points or numbered lists to break up long paragraphs.
- Use bold or italicized text to highlight important points.
- Make sure your notes are easy to read by using a legible font and appropriate font size.
- Proofread your notes for spelling and grammar errors before saving your changes.
By following these best practices, you can ensure that your notes are clear, concise, and easy to read on the Canva Mobile App.
Sharing Notes from Canva Mobile App
Canva Mobile App is a powerful tool that allows users to create designs on-the-go. In addition to creating designs, users can also add notes to their designs. These notes can be used to provide additional information or context about the design.
To share notes from Canva Mobile App, users can follow these steps:
- Open the Canva Mobile App and navigate to the design with the notes that you want to share.
- Tap on the “Share” button located at the bottom of the screen.
- Select the platform where you want to share the notes. Users can choose from various social media platforms, messaging apps, or email.
- Add a message to the notes to provide additional context to the recipient.
- Tap on the “Send” button to share the notes.
Sharing notes from Canva Mobile App is a great way to collaborate with others and get feedback on designs. By following these steps, users can easily share notes with others and get the feedback they need to improve their designs.
Troubleshooting Common Issues
If you are experiencing issues with seeing notes on the Canva mobile app, there are a few common problems that you may encounter. Here are some troubleshooting tips to help you resolve these issues:
Note Visibility Issues
If you are having trouble seeing notes on your Canva mobile app, the first thing to check is whether or not the notes are visible on the desktop version of Canva. If the notes are visible on the desktop version, but not on the mobile app, then the issue may be with your mobile device.
One common issue is that the notes may be hidden behind other elements on the design. To check if this is the case, try zooming out on the design to see if the notes become visible. If the notes are still not visible, try closing and reopening the app to see if that resolves the issue.
Syncing Issues
If you are having trouble syncing notes between the desktop version of Canva and the mobile app, there are a few things to check. First, make sure that you are logged in to the same account on both the desktop and mobile versions of Canva. If you are logged in to different accounts, the notes may not sync correctly.
Another common issue is that the notes may not be syncing due to a poor internet connection. Check that you have a strong internet connection on both the desktop and mobile versions of Canva. If your internet connection is weak, try moving closer to your router or connecting to a different Wi-Fi network.
If you are still experiencing issues with syncing notes, try logging out of both the desktop and mobile versions of Canva, and then logging back in. This can sometimes help to resolve syncing issues.
Additional Resources and Help
Canva has a dedicated help center that provides step-by-step guides, articles, and resources to help users navigate through the app. Users can access the help center by clicking on the “Help” button located on the bottom right corner of the app.
In addition to the help center, Canva offers a Design School section where users can take courses to improve their design skills. The Canva on your mobile course is particularly helpful for users who want to learn more about using the app on their mobile devices.
Users can also reach out to Canva’s support team for additional help. The support team is available 24/7 and can be reached through the “Contact Us” form on the Canva website.
Overall, Canva provides a wealth of resources and support options for users who need help with the app. By taking advantage of these resources, users can learn how to use Canva to its fullest potential and create stunning designs on their mobile devices.

5 Of The Best Note-Taking Apps For Android In 2024
G one are the days when carrying around a pad and a pencil for notes is considered the norm. With the rectangular glass and metal slabs in our pockets getting increasingly more competent at undertaking everyday tasks, it is much simpler to pull your phone out and start typing. Most manufacturers equip devices with a preloaded notes app, and while those aren't unusable, you could be doing a lot better.
Certain smartphones like the Samsung Galaxy S24 Ultra have a dedicated stylus and well-engineered software. It is worth exploring first-party features since they work at a system level and are better integrated with the other apps on your phone. For the remaining majority of Android folks, the Play Store is home to countless notepad apps.
The best of these apps include a rich-text editor that can give your notes a glow up, and various other utilitiarian features like cloud backup and the ability to attach images. From jotting down quick reminders to journaling paragraphs, here are some of the best note-taking apps for Android that you should check out in 2024.
Read more: The 20 Best Mac Apps That Will Improve Your Apple Experience
It isn't every day that an app by a solo developer gets recommended at the top of a list, but this one has truly earned it. Noto is a minimalistic note-taking app that departs from the professional-looking design languages most other apps in this category opt for. You can archive old notes, import or export data from previous backups, and filter or sort notes for a better view.
Apart from the essentials that every notepad app offers like labeling your notes, creating folders, and adding reminders, Noto takes it a bit further with a few specifics. Heading into the app's settings menu reveals options to change the app icon and font, and the ability to change the default screen when you launch the app. You can lock your notes behind a passcode, which cannot be reset if you ever forget the combination of digits. If you have lengthy writeups saved, you can ask the app to remember the last scrolling position to make it simpler for you to jump back in.
There's a dedicated reading mode that does away with all distractions, sets a specified brightness level, and goes into full-screen mode. To add the cherry on top, Noto is completely free and devoid of any ads, with its source code being available on GitHub as well. Pairing the unique customizability options with the otherwise straightforward approach of the app, Noto is a great way to jot down notes and organize them in categories.
Notebook By Zoho
When it comes to productivity apps, Zoho makes some of the most collaborative tools — with its spreadsheet application, for example, being one of the best Microsoft Excel alternatives that you can use. The brand's deliverance in intuitive features extends to Android devices as well. Notebook is a simple and efficient way to create and organize your notes. You can access your data on other platforms as well, including iOS, macOS, or on any device through the online web app.
You can combine notes of similar meaning into notebooks, which is how this app handles categories. If you use Zoho's other products, you can enjoy seamless integration across platforms. The app also features a fun gestural navigation system, where you can swipe on your notes to view additional information, pinch a few notes to form a stack, and condense them while in landscape view to resemble a bookshelf.
Where this note-taking app shines though, are the widgets that you can pin to your launcher. Zoho's Notebook app was featured as one of Play Store's best apps in 2017 and has since received several improvements in design and functionality. The slew of editing and sorting features paired with the minimal yet powerful home screen widgets are reasons to want to use this app.
Obsidian handles note-taking very differently than most other apps — it strips away all distractions and puts the experience of jotting down your ideas front and center. The app also bypasses annoying text formatting issues by opting in for Markdown language instead. While you need to get used to extra keystrokes for, say, bolding a word, or slanting a phrase — it eventually increases your output and avoids distraction. The app does give you quick shortcuts to perform text formatting as well.
On Android, you are required to create a "vault", which is essentially a folder in fancy terms. Any notes that you create in a vault are Markdown files, which can be accessed using any text editor on any platform. Where Obsidian excels is in its support for extensions. You can choose from over a thousand add-ons from Obsidian's website to supercharge your note-taking experience. Some of these support very niche use cases, like being able to link to the current track you're listening to on Spotify.
The only downside of Obsidian is the fact that it isn't the easiest of interfaces for beginners. The inclusion of a cloud storage system is nifty, but keep in mind that it is locked behind a paywall. Even though Obsidian's subscription costs creep up in comparison to other note-taking apps, its free version offers a slightly greater number of essentials.
Looking for something a bit more casual but nonetheless rewarding? ColorNote brings a traditional and straightforward approach to how an app handles note-taking. The sticky notes-inspired layout and the largely clutter-free experience give it an edge over the dozens of similar apps that often bury the core fundamentals of writing down notes.
You can create a text-based note, or use a checklist format for every new piece you create. Every note comes with the ability to add a reminder, which is synced with the app's built-in calendar to display an agenda view and you can lock and sync notes once you've connected to either Google or Facebook. Checklist-based notes are easy and no-nonsense to create and their items can be shuffled in any order with a simple swipe.
Before saving your note, you can choose between nine vibrant colors, resembling the likes of a physical Post-it note. The app lets you sort notes based on color, so you can potentially have up to nine informal categories to dump your ideas into. We also found the widgets of ColorNote to be the most minimal looking, though it comes at the expense of looking a tad bit outdated. Regardless, the app's blunt yet functional nature is what makes it a strong contender for those looking to save their write-ups quickly.
BlackNote is an app best described with as few words as possible — because there's not much to it other than it being a dark-themed barebones note-taking service. This is also what makes it a joy to use, though. It's very similar in functionality to the ColorNote app, might we dare say that it could even be heavily inspired by its layout? You can create a regular note, or add checkboxes to make it a list.
The text editor is extremely minimal and only features two icons to change the font size and a save button at the very bottom. You can search for characters within a saved note, lock it, get rid of it, or star it into your favorites collection, which has a tab of its own. There is a dedicated section to add daily to-do items, as well as an omnipresent shopping list, saving you from the hassle of creating duplicate notes that fulfill the same purpose.
You can filter notes based on their title or the date they were created or last modified. That's quite literally everything the app can do — you'd be hard-pressed to find any other functionality within. This is great because your saved notes are the only thing in focus when using the app. BlackNote has over five million installs on the Play Store with an overwhelming amount of positive reviews, proving that sometimes, less is more.
Read the original article on SlashGear .

To revisit this article, visit My Profile, then View saved stories .
- Backchannel
- Newsletters
- WIRED Insider
- WIRED Consulting
Will Knight
OpenAI’s GPT-4o Model Gives ChatGPT a Snappy, Flirty Upgrade

Since it launched in late 2022, OpenAI’s ChatGPT has generally fended off suggestions that it has emotions or desires by responding that it’s just an artificial intelligence model. Upgrades announced by OpenAI Monday showed the company apparently trying to make the chatbot act more like a human.
In demos, the new version of ChatGPT was capable of rapid-fire, natural voice conversations, picked up on emotional cues, and displayed simulated emotional reactions of its own.
During a livestream from the company’s headquarters in San Francisco on Monday, Mira Murati, OpenAI’s chief technology officer, announced that ChatGPT will be powered by a new, more powerful AI model called GPT-4o. The model will be available to both free and paid users of ChatGPT via a new desktop app as well as the existing mobile app and web version.
Murati said the GPT-4o model allows ChatGPT to respond more rapidly to voice, image, and video input than OpenAI’s previous technology. In demos, she and other OpenAI employees had fast-flowing conversations with ChatGPT, which answered using a liveley and expressive female-sounding voice and nimbly kept up when interrupted.
ChatGPT adopted different emotional tones during the conversation and at times responded as if it were experiencing feelings of its own. When an OpenAI employee said he had been talking about how “useful and amazing” the chatbot is, it responded flirtatiously, gushing “Oh stop it, you’re making me blush.”
“This just feels so magical, and that’s wonderful,” Murati said, adding, “over the next few weeks we’ll be rolling out these capabilities to everyone.”
At another point in the demo, ChatGPT responded to OpenAI researcher Barret Zoph’s greeting by asking, “How can I brighten your day today?” When Zoph asked the chatbot to look at a selfie of him and say what emotions he was showing, ChatGPT responded, “I’ll put my emotional detective hat on” and warmly said, “It looks like you’re feeling pretty happy and cheerful … whatever’s going on, it looks like you’re in a great mood.”
In a blog post Monday, OpenAI’s CEO, Sam Altman, highlighted the significance of the new interface. “It feels like AI from the movies; and it’s still a bit surprising to me that it’s real,” Altman wrote. “Getting to human-level response times and expressiveness turns out to be a big change.”
OpenAI’s tweaks may make ChatGPT more engaging and popular, but they may also change the way users think about the program.
ChatGPT became a sensation last year thanks to its remarkable ability to answer questions and generate text with what often resembles humanlike understanding. But OpenAI and leading competitors such as Google have so far generally sought to limit the anthropomorphism of their chatbots, by refusing to answer certain types of questions and having models remind users that they are mere computer programs.

Louryn Strampe

Reece Rogers

Leah Feiger

Jennifer M. Wood
Despite that caution, the sometimes lifelike repartee of the latest chatbots can tap into users’ emotions. Some companies have adapted the technology to maximize this phenomenon, offering AI companions that role-play different human emotions or are offered as AI girlfriends and boyfriends . Some AI researchers have warned that the long-term implications of deploying programs that mimic and respond to emotions could be unwelcome.

A team at Google DeepMind last month released a research paper exploring the ethical risks that may arise as AI assistants become more capable. Among other things, the researchers warn that such assistants could become highly persuasive and addictive. Last year, a British man pleaded guilty to breaching security at Windsor Castle , saying that a chatbot he had exchanged more than 5,000 messages with had encouraged him to do so.
In addition to snappier conversational skills, OpenAI says its GPT-4o model makes ChatGPT better able to make sense of images, including photos and charts, and can store more information about a user in its “memory” to provide a more personalized experience.
OpenAI says it will make GPT-4o available to users of the free version of ChatGPT, essentially upgrading all users to its most capable AI model.
Google is expected to unveil new AI technologies of its own at the search company’s I/O developer conference starting Tuesday. Competition between companies working on AI seems unlikely to cool down. At the end of today’s OpenAI event, Murati promised that the company would soon be offering more announcements, “on our progress towards the next big thing.”
You Might Also Like …
In your inbox: Will Knight's Fast Forward explores advances in AI
He emptied a crypto exchange onto a thumb drive —then disappeared
The real-time deepfake romance scams have arrived
Boomergasms are booming
Heading outdoors? Here are the best sleeping bags for every adventure

Kate Knibbs

Benj Edwards, Ars Technica

Matt Burgess

Joel Khalili

Morgan Meaker
- Home Entertainment
- Home Appliances
- Semiconductor
- See All Product News
- Communities
- Sustainability
- Smart Living
- See All Corporate News
- Media Contacts
- Media Library
- Executive Bios
- Public Affairs
Suggestions
- 2024 TV Lineup
- Music Frame
- Galaxy Book4 Series
One UI 6.1 Update Brings Galaxy AI Features to Galaxy S22 Series and More

Transcript Assist creates accurate meeting summaries and translations
Starting today, Galaxy AI 1 , the premium mobile AI experiences introduced on the recent Galaxy S24 series will begin rolling out with the One UI 6.1 software update to Galaxy S22 series , Galaxy Z Flip4, and Galaxy Z Fold4 users in the U.S, as well as the Tab S8 series users in the U.S.
The One UI 6.1 update puts the following popular Galaxy AI features into the hands of more users: Circle to Search with Google 2 , Chat Assist, Interpreter, Live Translate 3 , Note Assist 4 , Transcript Assist, Browsing Assist 5 , Generative Edit, Edit Suggestion and AI-Generated Wallpaper.

Barrier-Free Communication and Productivity Taken to a New Level
Galaxy AI bridges communication by offering features that deliver messages across multiple languages. Traveling abroad no longer needs to be a daunting prospect with Interpreter converting speech into translated text on a split screen on your Galaxy foldable device . Live Translate offers instant voice and text translations over phone calls, while Chat Assist helps users’ message in different languages and adjust message tone.|
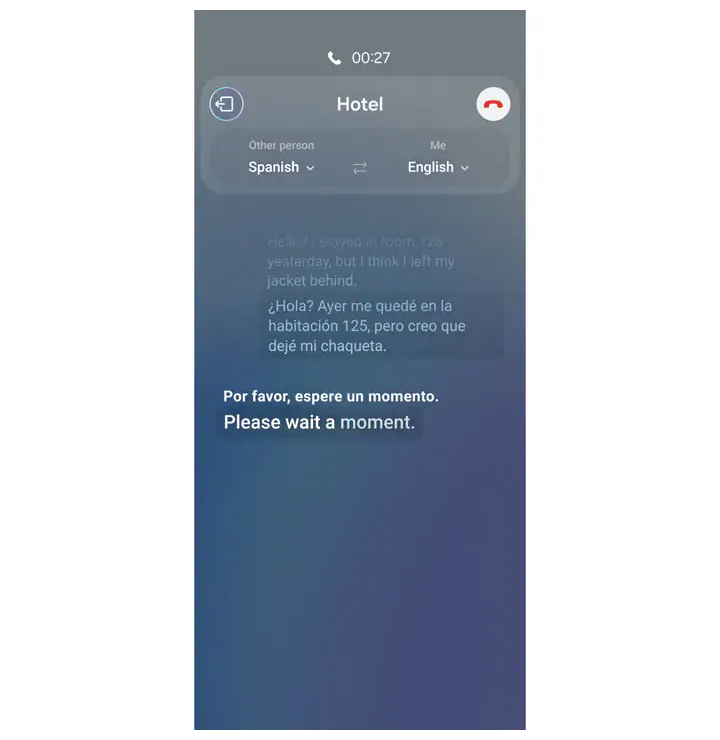
More users can also benefit from its game-changing productivity and information access. Circle to Search with Google streamlines social media and internet interactions with a simple and intuitive gesture, while Note Assist simplifies organization tasks with auto-formatting and summarization features. Browsing Assist adeptly summarizes and translates articles on a webpage and with Transcript Assist, users can effortlessly create accurate meeting summaries and translations.
Additionally, Galaxy S21 series, Galaxy Z Flip3, and Galaxy Z Fold3 users will have access to Circle to Search with Google and Chat Assist features with the latest software update.
For more information about Galaxy AI, please visit Samsung.com .
1 Galaxy AI features by Samsung will be provided for free until the end of 2025 on supported Samsung Galaxy devices.
2 requires internet connection; results may vary by uniqueness, clarity and framing of circled image and related factors., 3 samsung account log-in required. calls must be made using the native samsung phone app. samsung does not make any promises, assurances or guarantees as to the accuracy, completeness or reliability of the output provided by ai features., 4 for text in samsung notes only (200-4,000 characters); requires samsung account login and internet connection., 5 only available within samsung internet application., media contact.
Mobile Experience (MX) Smartphone, Wearable, Tablet, PC and Mobile Accessories [email protected]
More Stories

The Knox Journals: Tired of prying eyes on your personal information? Here’s how to stop it.

Mattel to Bring Three Channels to Samsung TV Plus

Press Release
Celebrate Earth Day with Certified Re-Newed Galaxy S23 Series
Sign up to receive the latest samsung news..
By clicking Subscribe you agree to Samsung U.S. Newsroom's Privacy Policy
Thank you! An email with a confirmation link was sent to you. Please click the link to start your subscription.
- Buy Supplies
- Get Support
- Change Country
PitneyShip mobile app Release Notes version 1.0.42 (iOS) 1.0.55 (Android) (April 4, 2024)
New features & enhancements, issues fixed, feedback option.
After successfully creating a label, both new and existing clients will be asked for feedback at regular intervals. Additionally, users can provide app feedback by tapping More > Feedback .
Print preview images
The print preview for USPS shipping labels has been updated. Users can preview these labels, including the 2D Barcode, for both USPS Domestic and International shipments.
There were no issues fixed in this release.
UPDATED : May 16, 2024
- Español – América Latina
- Português – Brasil
- Tiếng Việt
Build Your First Android App in Java
1. welcome.

In this codelab, you'll learn how to build and run your first Android app in the Java programming language. (If you're looking for the Kotlin version of this codelab , you can go here .)
What you must know already
This codelab is written for programmers and assumes that you know either the Java or Kotlin programming language. If you are an experienced programmer and adept at reading code, you will likely be able to follow this codelab, even if you don't have much experience with Java.
What you'll learn
- How to use Android Studio to build your app.
- How to run your app on a device or in the emulator.
- How to add interactive buttons.
- How to display a second screen when a button is pressed.
Use Android Studio and Java to write Android apps
You write Android apps in the Java programming language using an IDE called Android Studio. Based on JetBrains' IntelliJ IDEA software, Android Studio is an IDE designed specifically for Android development.
To work through this codelab, you will need a computer that can run Android Studio 3.6 or higher (or already has Android Studio 3.6 or higher installed).
2. Install Android Studio
You can download Android Studio 3.6 from the Android Studio page.
Android Studio provides a complete IDE, including an advanced code editor and app templates. It also contains tools for development, debugging, testing, and performance that make it faster and easier to develop apps. You can use Android Studio to test your apps with a large range of preconfigured emulators, or on your own mobile device. You can also build production apps and publish apps on the Google Play store.
Android Studio is available for computers running Windows or Linux, and for Macs running macOS. The OpenJDK (Java Development Kit) is bundled with Android Studio.
The installation is similar for all platforms. Any differences are noted below.
- Navigate to the Android Studio download page and follow the instructions to download and install Android Studio .
- Accept the default configurations for all steps, and ensure that all components are selected for installation.
- After the install is complete, the setup wizard downloads and installs additional components, including the Android SDK. Be patient, because this process might take some time, depending on your internet speed.
- When the installation completes, Android Studio starts, and you are ready to create your first project.
3. Task: Create your first project
In this step, you will create a new Android project for your first app. This simple app displays the string "Hello World" on the screen of an Android virtual or physical device.
Here's what the finished app will look like:

- How to create a project in Android Studio.
- How to create an emulated Android device.
- How to run your app on the emulator.
- How to run your app on your own physical device, if you have one.
Step 1: Create a new project
- Open Android Studio.

- Give your application a name such as My First App .

- Leave the defaults for the other fields.
- Click Finish .
After these steps, Android Studio:
- Creates a folder for your Android Studio project called MyFirstApp . This is usually in a folder called AndroidStudioProjects below your home directory.
- Builds your project (this may take a few moments). Android Studio uses Gradle as its build system. You can follow the build progress at the bottom of the Android Studio window.
- Opens the code editor showing your project.
Step 2: Get your screen set up
When your project first opens in Android Studio, there may be a lot of windows and panes open. To make it easier to get to know Android Studio, here are some suggestions on how to customize the layout.

- Depending on the size of your screen, consider resizing the pane on the left showing the project folders to take up less space.
At this point, your screen should look a bit less cluttered, similar to the screenshot shown below.

Step 3: Explore the project structure and layout

Based on you selecting the Basic Activity template for your project, Android Studio has set up a number of files for you. You can look at the hierarchy of the files for your app in multiple ways, one is in Project view. Project view shows your files and folders structured in a way that is convenient for working with an Android project. (This does not always match the file hierarchy! To see the file hierarchy, choose the Project files view by clicking (3) .)
- Double-click the app (1) folder to expand the hierarchy of app files. (See ( 1) in the screenshot.)
- If you click Project (2) , you can hide or show the Project view. You might need to select View > Tool Windows to see this option.
- The current Project view selection (3) is Project > Android .
In the Project > Android view you see three or four top-level folders below your app folder: manifests , java , java (generated) and res . You may not see java (generated) right away.
- Expand the manifests folder.
This folder contains AndroidManifest.xml . This file describes all the components of your Android app and is read by the Android runtime system when your app is executed. 2. Expand the java folder. All your Java language files are organized here. The java folder contains three subfolders:
com.example.myfirstapp: This folder contains the Java source code files for your app.
com.example.myfirstapp (androidTest): This folder is where you would put your instrumented tests, which are tests that run on an Android device. It starts out with a skeleton test file.
com.example.myfirstapp (test): This folder is where you would put your unit tests. Unit tests don't need an Android device to run. It starts out with a skeleton unit test file. 3. Expand the res folder. This folder contains all the resources for your app, including images, layout files, strings, icons, and styling. It includes these subfolders:
drawable : All your app's images will be stored in this folder.
layout : This folder contains the UI layout files for your activities. Currently, your app has one activity that has a layout file called activity_main.xml . It also contains content_main.xml , fragment_first.xml , and fragment_second.xml .
menu: This folder contains XML files describing any menus in your app.
mipmap : This folder contains the launcher icons for your app.
navigation: This folder contains the navigation graph, which tells Android Studio how to navigate between different parts of your application.
values : This folder contains resources, such as strings and colors, used in your app.
Step 4: Create a virtual device (emulator)
In this task, you will use the Android Virtual Device (AVD) manager to create a virtual device (or emulator) that simulates the configuration for a particular type of Android device.
The first step is to create a configuration that describes the virtual device.

- Click +Create Virtual Device . (If you have created a virtual device before, the window shows all of your existing devices and the +Create Virtual Device button is at the bottom.) The Select Hardware window shows a list of pre-configured hardware device definitions.
- Choose a device definition, such as Pixel 2 , and click Next . (For this codelab, it really doesn't matter which device definition you pick).
- In the System Image dialog, from the Recommended tab, choose the latest release. (This does matter.)
- If a Download link is visible next to a latest release, it is not installed yet, and you need to download it first. If necessary, click the link to start the download, and click Next when it's done. This may take a while depending on your connection speed.
- In the next dialog box, accept the defaults, and click Finish .
The AVD Manager now shows the virtual device you added.
- If the Your Virtual Devices AVD Manager window is still open, go ahead and close it.
Step 5: Run your app on your new emulator

- In Run > Select Device , under Available devices , select the virtual device that you just configured. This menu also appears in the toolbar.

The emulator starts and boots just like a physical device. Depending on the speed of your computer, this may take a while. You can look in the small horizontal status bar at the very bottom of Android Studio for messages to see the progress.
Once your app builds and the emulator is ready, Android Studio uploads the app to the emulator and runs it. You should see your app as shown in the following screenshot.

Step 6: Run your app on a device (if you have one)
What you need:
- An Android device such as a phone or tablet.
- A data cable to connect your Android device to your computer via the USB port.
- If you are using a Linux or Windows OS, you may need to perform additional steps to run your app on a hardware device. Check the Run Apps on a Hardware Device documentation. On Windows, you may need to install the appropriate USB driver for your device. See OEM USB Drivers .
Run your app on a device
To let Android Studio communicate with your device, you must turn on USB Debugging on your Android device.
On Android 4.2 and higher, the Developer options screen is hidden by default. To show Developer options and enable USB Debugging:
- On your device, open Settings > About phone and tap Build number seven times.
- Return to the previous screen ( Settings ). Developer options appears at the bottom of the list. Tap Developer options .
- Enable USB Debugging .
Now you can connect your device and run the app from Android Studio.
- Connect your device to your development machine with a USB cable. On the device, you might need to agree to allow USB debugging from your development device.
- Select your device, and click OK . Android Studio installs the app on your device and runs it.
Troubleshooting
If you're stuck, quit Android Studio and restart it.
If Android Studio does not recognize your device, try the following:
- Disconnect your device from your development machine and reconnect it.
- Restart Android Studio.
If your computer still does not find the device or declares it "unauthorized":
- Disconnect the device.
- On the device, open Settings->Developer Options .
- Tap Revoke USB Debugging authorizations .
- Reconnect the device to your computer.
- When prompted, grant authorizations.
If you are still having trouble, check that you installed the appropriate USB driver for your device. See the Using Hardware Devices documentation .
Check the troubleshooting section in the Android Studio documentation .
Step 7: Explore the app template
When you created the project and selected Basic Activity , Android Studio set up a number of files, folders, and also user interface elements for you, so you can start out with a working app and major components in place. This makes it easier to build your application.

Later in this codelab, you'll look at the Next button and modify the way it looks and what it does.
4. Task: Explore the layout editor
Generally, each screen in your Android app is associated with one or more fragments . The single screen displaying "Hello first fragment" is created by one fragment, called FirstFragment . This was generated for you when you created your new project. Each visible fragment in an Android app has a layout that defines the user interface for the fragment. Android Studio has a layout editor where you can create and define layouts.
Layouts are defined in XML . The layout editor lets you define and modify your layout either by coding XML or by using the interactive visual editor.
Every element in a layout is a view. In this task, you will explore some of the panels in the layout editor, and you will learn how to change property of views.
- How to use the layout editor.
- How to set property values.
- How to add string resources.
- How to add color resources.
Step 1: Open the layout editor

- Double-click fragment_first.xml .

On the left is a Palette (1) of views you can add to your app.
Below that is a Component Tree (2) showing the views currently in this file, and how they are arranged in relation to each other.
In the center is the Design editor (3) , which shows a visual representation of what the contents of the file will look like when compiled into an Android app. You can view the visual representation, the XML code, or both.

- Try selecting the different modes. Depending on your screen size and work style, you may prefer switching between Code and Design , or staying in Split view. If your Component Tree disappears, hide and show the Palette .

- At the lower right of the Design editor you see + and - buttons for zooming in and out. Use these buttons to adjust the size of what you see, or click the zoom-to-fit button so that both panels fit on your screen.

The Design layout on the left shows how your app appears on the device. The Blueprint layout , shown on the right, is a schematic view of the layout.

Depending on the size of your screen and your preference, you may wish to only show the Design view or the Blueprint view, instead of both.

- Use the device menu to view the layout on different devices. (This is extremely useful for testing!)

On the right is the Attributes panel. You'll learn about that later.
Step 2: Explore and resize the Component Tree
- In fragment_first.xml , look at the Component Tree . If it's not showing, switch the mode to Design instead of Split or Code .

The Component Tree closes. 4. Bring back the Component Tree by clicking the vertical label Component Tree on the left.

Step 3: Explore view hierarchies
- In the Component Tree , notice that the root of the view hierarchy is a ConstraintLayout view.
Every layout must have a root view that contains all the other views. The root view is always a view group , which is a view that contains other views. A ConstraintLayout is one example of a view group. 2. Notice that the ConstraintLayout contains a TextView , called textview_first and a Button , called button_first .

- If the code isn't showing, switch to Code or Split view using the icons in the upper right corner.
- In the XML code, notice that the root element is <androidx.constraintlayout.widget.ConstraintLayout> . The root element contains a <TextView> element and a <Button> element.
Step 4: Change property values
- In the code editor, examine the properties in the TextView element.
- Click on the string in the text property, and you'll notice it refers to a string resource, hello_first_fragment .
- Right-click on the property and click Go To > Declaration or Usages
values/strings.xml opens with the string highlighted.
- Change the value of the string property to Hello World! .
- Switch back to fragment_first.xml .

- Run the app to see the change you made in strings.xml . Your app now shows "Hello World!".

Step 5: Change text display properties
- With textview_first still selected in the Component Tree , in the layout editor, in the list of attributes, under Common Attributes , expand the textAppearance field. (You may need to scroll down to find it.)

- Change some of the text appearance properties. For example, change the font family, increase the text size, and select bold style. (You might need to scroll the panel to see all the fields.)
- Change the text color. Click in the textColor field, and enter g .
A menu pops up with possible completion values containing the letter g. This list includes predefined colors.

- Select @android:color/darker_gray and press Enter .
Below is an example of the textAppearance attributes after making some changes.

- Look at the XML for the TextView . You see that the new properties have been added.
- Run your app again and see the changes applied to your Hello World! string

Step 6: Display all attributes
- In the Attributes panel, scroll down until you find All Attributes .

- Scroll through the list to get an idea of the attributes you could set for a TextView .
5. Task: Add color resources
So far you have learned how to change property values. Next, you will learn how to create more resources like the string resources you worked with earlier. Using resources enables you to use the same values in multiple places, or to define values and have the UI update automatically whenever the value is changed.
- How resources are defined.
- Adding and using color resources.
- The results of changing layout height and width.
Step 1: Add color resources
First, you'll learn how to add new color resources.
- In the Project panel on the left, double-click on res > values > colors.xml to open the color resource file.

The colors.xml file opens in the editor. So far, three colors have been defined. These are the colors you can see in your app layout, for example, purple for the app bar.
- Go back to fragment_first.xml so you can see the XML code for the layout.
- Add a new property to the TextView called android:background , and start typing to set its value to @color . You can add this property anywhere inside the TextView code.
A menu pops up offering the predefined color resources:

- Choose @color/colorPrimaryDark.
- Change the property android:textColor and give it a value of @android:color/white .
The Android framework defines a range of colors, including white, so you don't have to define white yourself. 6. In the layout editor, you can see that the TextView now has a dark blue background, and the text is displayed in white.

Step 2: Add a new color to use as the screen background color
- Back in colors.xml , create a new color resource called screenBackground :
A Color can be defined as 3 hexadecimal numbers (#00-#FF, or 0-255) representing the red, blue, and green (RGB) components. The color you just added is yellow. Notice that the colors corresponding to the code are displayed in the left margin of the editor.

Note that a color can also be defined including an alpha value (#00-#FF) which represents the transparency (#00 = 0% = fully transparent, #FF = 100% = fully opaque). When included, the alpha value is the first of 4 hexadecimal numbers (ARGB).
The alpha value is a measure of transparency. For example, #88FFEE58 makes the color semi-transparent, and if you use #00FFEE58, it's fully transparent and disappears from the left-hand bar.
- Go back to fragment_first.xml .

- In the Attributes panel, select the background property and press Enter . Type "c" in the field that appears.
- In the menu of colors that appears, select @color/screenBackground . Press Enter to complete the selection.

- Click on the yellow patch to the left of the color value in the background field.

- Feel free to change the value of the screenBackground color, but make sure that the final color is noticeably different from the colorPrimary and colorPrimaryDark colors.
Step 3: Explore width and height properties
Now that you have a new screen background color, you will use it to explore the effects of changing the width and height properties of views.
- In fragment_first.xml , in the Component Tree , select the ConstraintLayout .

The layout_width and layout_height properties are both set to match_parent . The ConstraintLayout is the root view of this Fragment , so the "parent" layout size is effectively the size of your screen.
- Notice that the entire background of the screen uses the screenBackground color.

- Select textview_first . Currently the layout width and height are wrap_content , which tells the view to be just big enough to enclose its content (plus padding)
- Change both the layout width and layout height to match_constraint , which tells the view to be as big as whatever it's constrained to.
The width and height show 0dp , and the text moves to the upper left, while the TextView expands to match the ConstraintLayout except for the button. The button and the text view are at the same level in the view hierarchy inside the constraint layout, so they share space.

- Explore what happens if the width is match_constraint and the height is wrap_content and vice versa. You can also change the width and height of the button_first.
- Set both the width and height of the TextView and the Button back to wrap_content .
6. Task: Add views and constraints
In this task, you will add two more buttons to your user interface, and update the existing button, as shown below.

- How to add new views to your layout.
- How to constrain the position of a view to another view.
Step 1: View constraint properties
- In fragment_first.xml , look at the constraint properties for the TextView .
These properties define the position of the TextView . Read them carefully.
You can constrain the top, bottom, left, and right of a view to the top, bottom, left, and right of other views.
- Select textview_first in the Component Tree and look at the Constraint Widget in the Attributes panel.

Step 2: Add buttons and constrain their positions
To learn how to use constraints to connect the positions of views to each other, you will add buttons to the layout. Your first goal is to add a button and some constraints, and change the constraints on the Next button.
- Notice the Palette at the top left of the layout editor. Move the sides if you need to, so that you can see many of the items in the palette.

- Click on some of the categories, and scroll the listed items if needed to get an idea of what's available.
- Select Button , which is near the top, and drag and drop it onto the design view, placing it underneath the TextView near the other button.

Notice that a Button has been added to the Component Tree under ConstraintLayout .
Step 3: Add a constraint to the new button
You will now constrain the top of the button to the bottom of the TextView .
- Move the cursor over the circle at the top of the Button .

- Click and drag the circle at the top of the Button onto the circle at the bottom of the TextView .

The Button moves up to sit just below the TextView because the top of the button is now constrained to the bottom of the TextView .

- Take a look at the Constraint Widget in the Layout pane of the Attributes panel. It shows some constraints for the Button , including Top -> BottomOf textView .
- Take a look at the XML code for the button. It now includes the attribute that constrains the top of the button to the bottom of the TextView .
- You may see a warning, " Not Horizontally Constrained ". To fix this, add a constraint from the left side of the button to the left side of the screen.
- Also add a constraint to constrain the bottom of the button to the bottom of the screen.
Before adding another button, relabel this button so things are a little clearer about which button is which.
- Click on the button you just added in the design layout.
- Look at the Attributes panel on the right, and notice the id field.
- Change the id from button to toast_button .
Step 4: Adjust the Next button
You will adjust the button labeled Next , which Android Studio created for you when you created the project. The constraint between it and the TextView looks a little different, a wavy line instead of a jagged one, with no arrow. This indicates a chain , where the constraints link two or more objects to each other, instead of just one to another. For now, you'll delete the chained constraints and replace them with regular constraints.
To delete a constraint:

- Or click on one of the constrained views, then right-click on the constraint and select Delete from the menu.
- Or in the Attributes panel, move the cursor over the circle for the constraint until it shows an x, then click it.

If you delete a constraint and want it back, either undo the action, or create a new constraint.
Step 5: Delete the chain constraints
- Click on the Next button, and then delete the constraint from the top of the button to the TextView .
- Click on the TextView , and then delete the constraint from the bottom of the text to the Next button.
Step 6: Add new constraints
- Constrain the right side of the Next button to the right of the screen if it isn't already.
- Delete the constraint on the left side of the Next button.
- Now constrain the top and bottom of the Next button so that the top of the button is constrained to the bottom of the TextView and the bottom is constrained to the bottom of the screen. The right side of the button is constrained to the right side of the screen.
- Also constrain the TextView to the bottom of the screen.
It may seem like the views are jumping around a lot, but that's normal as you add and remove constraints.
Your layout should now look something like this.

Step 7: Extract string resources
- In the fragment_first.xml layout file, find the text property for the toast_button button.
- Notice that the text "Button" is directly in the layout field, instead of referencing a string resource as the TextView does. This will make it harder to translate your app to other languages.
- To fix this, click the highlighted code. A light bulb appears on the left.

- In the dialog box that appears, change the resource name to toast_button_text and the resource value to Toast and click OK .

- Notice that the value of the android:text property has changed to @string/toast_button_text .
- Go to the res > values > strings.xml file. Notice that a new string resource has been added, named toast_button_text .
- Run the app to make sure it displays as you expect it to.

You now know how to create new string resources by extracting them from existing field values. (You can also add new resources to the strings.xml file manually.) And you know how to change the id of a view.
Step 8: Update the Next button
The Next button already has its text in a string resource, but you'll make some changes to the button to match its new role, which will be to generate and display a random number.
- As you did for the Toast button, change the id of the Next button from button_first to random_button in the Attributes panel.

- In strings.xml , right-click on the next string resource.
- Select Refactor > Rename... and change the name to random_button_text .
- Click Refactor to rename your string and close the dialog.
- Change the value of the string from Next to Random .
- If you want, move random_button_text to below toast_button_text .
Step 9: Add a third button
Your final layout will have three buttons, vertically constrained the same, and evenly spaced from each other.

- In fragment_first.xml , add another button to the layout, and drop it somewhere between the Toast button and the Random button, below the TextView .
- Add vertical constraints the same as the other two buttons. Constrain the top of the third button to the bottom of TextView ; constrain the bottom of the third button to the bottom of the screen.
- Add horizontal constraints from the third button to the other buttons. Constrain the left side of the third button to the right side of the Toast button; constrain the right side of the third button to the left side of the Random button.
Your layout should look something like this:

- Examine the XML code for fragment_first.xml . Do any of the buttons have the attribute app:layout_constraintVertical_bias ? It's OK if you do not see that constraint.
The "bias" constraints allows you to tweak the position of a view to be more on one side than the other when both sides are constrained in opposite directions . For example, if both the top and bottom sides of a view are constrained to the top and bottom of the screen, you can use a vertical bias to place the view more towards the top than the bottom.
Here is the XML code for the finished layout. Your layout might have different margins and perhaps some different vertical or horizontal bias constraints.The exact values of the attributes for the appearance of the TextView might be different for your app.
Step 10: Get your UI ready for the next task
The next task is to make the buttons do something when they are pressed. First, you need to get the UI ready.
- Change the text of the TextView to show 0 (the number zero).
- Change the id of the last button you added, button2 , to count_button in the Attributes panel in the design editor.
- In the XML, extract the string resource to count_button_text and set the value to Count.

The buttons should now have the following text and ids:
- Run the app.
Step 11: Fix errors if necessary

The errors occur because the buttons have changed their id and now these constraints are referencing non-existent views.
If you have these errors, fix them by updating the id of the buttons in the constraints that are underlined in red.
7. Task: Update the appearance of the buttons and the TextView
Your app's layout is now basically complete, but its appearance can be improved with a few small changes.
Step 1: Add new color resources
- In colors.xml , change the value of screenBackground to #2196F3 , which is a blue shade in the Material Design palette .
- Add a new color named buttonBackground . Use the value #BBDEFB , which is a lighter shade in the blue palette.
Step 2: Add a background color for the buttons
- In the layout, add a background color to each of the buttons. (You can either edit the XML in fragment_first.xml or use the Attributes panel, whichever you prefer.)
Step 3: Change the margins of the left and right buttons
- Give the Toast button a left (start) margin of 24dp and give the Random button a right (end) margin of 24dp. (Using start and end instead of left and right makes these margins work for all language directions.)

Step 4: Update the appearance of the TextView
- Remove the background color of the TextView , either by clearing the value in the Attributes panel or by removing the android:background attribute from the XML code.
When you remove the background, the view background becomes transparent. 2. Increase the text size of the TextView to 72sp.
- Change the font-family of the TextView to sans-serif (if it's not already).
- Add an app:layout_constraintVertical_bias property to the TextView , to bias the position of the view upwards a little so that it is more evenly spaced vertically in the screen. Feel free to adjust the value of this constraint as you like. (Check in the design view to see how the layout looks.)

- Make sure the layout_width is wrap_content , and the horizontal bias is 50 ( app:layout_constraintHorizontal_bias="0.5" in XML).
Step 5: Run your app
If you implemented all the updates, your app will look like the following figure. If you used different colors and fonts, then your app will look a bit different.

8. Task: Make your app interactive
You have added buttons to your app's main screen, but currently the buttons do nothing. In this task, you will make your buttons respond when the user presses them.
First you will make the Toast button show a pop-up message called a toast . Next you will make the Count button update the number that is displayed in the TextView .
- How to find a view by its ID.
- How to add click listeners for a view.
- How to set and get property values of a view from your code.
Step 1: Enable auto imports
To make your life easier, you can enable auto-imports so that Android Studio automatically imports any classes that are needed by the Java code.
- In Android Studio, open the settings editor by going to File > Other Settings > Preferences for New Projects .
- Select Auto Imports . In the Java section, make sure Add Unambiguous Imports on the fly is checked.

Step 2: Show a toast
In this step, you will attach a Java method to the Toast button to show a toast when the user presses the button. A toast is a short message that appears briefly at the bottom of the screen.

- Open FirstFragment.java ( app > java > com.example.android.myfirstapp > FirstFragment ).
This class has only two methods, onCreateView() and onViewCreated() . These methods execute when the fragment starts.
As mentioned earlier, the id for a view helps you identify that view distinctly from other views. Using the findViewByID() method, your code can find the random_button using its id, R.id.random_button . 2. Take a look at onViewCreated() . It sets up a click listener for the random_button , which was originally created as the Next button.
Here is what this code does:
- Use the findViewById() method with the id of the desired view as an argument, then set a click listener on that view.
- In the body of the click listener, use an action, which in this case is for navigating to another fragment, and navigate there. (You will learn about that later.)
- Just below that click listener, add code to set up a click listener for the toast_button , which creates and displays a toast. Here is the code:
- If you want, extract the message string into a resource as you did for the button labels.
You have learned that to make a view interactive you need to set up a click listener for the view which says what to do when the view (button) is clicked on. The click listener can either:
- Implement a small amount of code directly.
- Call a method that defines the desired click behavior in the activity.
Step 3: Make the Count button update the number on the screen
The method that shows the toast is very simple; it does not interact with any other views in the layout. In the next step, you add behavior to your layout to find and update other views.
Update the Count button so that when it is pressed, the number on the screen increases by 1.
- In the fragment_first.xml layout file, notice the id for the TextView :
- In FirstFragment.java , add a click listener for the count_button below the other click listeners in onViewCreated() . Because it has a little more work to do, have it call a new method, countMe() .
- In the FirstFragment class, add the method countMe() that takes a single View argument. This method will be invoked when the Count button is clicked and the click listener called.
- Get the value of the showCountTextView . You will define that in the next step.
- Convert the value to a number, and increment it.
- Display the new value in the TextView by programmatically setting the text property of the TextView .
Here is the whole method:
Step 4: Cache the TextView for repeated use
You could call findViewById() in countMe() to find showCountTextView . However, countMe() is called every time the button is clicked, and findViewById() is a relatively time consuming method to call. So it is better to find the view once and cache it.
- In the FirstFragment class before any methods, add a member variable for showCountTextView of type TextView .
- In onCreateView() , you will call findViewById() to get the TextView that shows the count. The findViewById() method must be called on a View where the search for the requested ID should start, so assign the layout view that is currently returned to a new variable, fragmentFirstLayout , instead.
- Call findViewById() on fragmentFirstLayout , and specify the id of the view to find, textview_first . Cache that value in showCountTextView .
- Return fragmentFirstLayout from onCreateView() .
Here is the whole method and the declaration of showCountTextView :
- Run your app. Press the Count button and watch the count update.
9. Task: Implement the second fragment
So far, you've focused on the first screen of your app. Next, you will update the Random button to display a random number between 0 and the current count on a second screen.

- How to pass information to a second fragment.
Update the layout for the second fragment

Step 1: Add a TextView for the random number
- Open fragment_second.xml ( app > res > layout > fragment_second.xml ) and switch to Design View if needed. Notice that it has a ConstraintLayout that contains a TextView and a Button .

- Add another TextView from the palette and drop it near the middle of the screen. This TextView will be used to display a random number between 0 and the current count from the first Fragment .
- Set the id to @+id/textview_random ( textview_random in the Attributes panel.)
- Constrain the top edge of the new TextView to the bottom of the first TextView , the left edge to the left of the screen, and the right edge to the right of the screen, and the bottom to the top of the Previous button.
- Set both width and height to wrap_content .
- Set the textColor to @android:color/white , set the textSize to 72sp , and the textStyle to bold .

- Set the text to " R ". This text is just a placeholder until the random number is generated.
- Set the layout_constraintVertical_bias to 0.45 .
This TextView is constrained on all edges, so it's better to use a vertical bias than margins to adjust the vertical position, to help the layout look good on different screen sizes and orientations. 10. If you get a warning "Not Horizontally Constrained," add a constraint from the start of the button to the left side of the screen and the end of the button to the right side of the screen.
Here is the XML code for the TextView that displays the random number:
Step 2: Update the TextView to display the header
- In fragment_second.xml , select textview_second , which currently has the text "Hello second fragment. Arg: %1$s" in the hello_second_fragment string resource.
- If android:text isn't set, set it to the hello_second_fragment string resource.
- Change the id to textview_header in the Attributes panel.
- Set the width to match_constraint , but set the height to wrap_content , so the height will change as needed to match the height of the content.
- Set top, left and right margins to 24dp . Left and right margins may also be referred to as "start" and "end" to support localization for right to left languages.
- Remove any bottom constraint.
- Set the text color to @color/colorPrimaryDark and the text size to 24sp .
- In strings.xml , change hello_second_fragment to " Here is a random number between 0 and %d. "
- Use Refactor > Rename... to change the name of hello_second_fragment to random_heading .
Here is the XML code for the TextView that displays the heading:

Step 3: Change the background color of the layout
Give your new activity a different background color than the first activity:
- In colors.xml , add a new color resource:
- In the layout for the second activity, fragment_second.xml , set the background of the ConstraintLayout to the new color.
In the Attributes panel:

Your app now has a completed layout for the second fragment. But if you run your app and press the Random button, it may crash. The click handler that Android Studio set up for that button needs some changes. In the next task, you will explore and fix this error.
Step 4: Examine the navigation graph
When you created your project, you chose Basic Activity as the template for the new project. When Android Studio uses the Basic Activity template for a new project, it sets up two fragments, and a navigation graph to connect the two. It also set up a button to send a string argument from the first fragment to the second. This is the button you changed into the Random button. And now you want to send a number instead of a string.
- Open nav_graph.xml ( app > res > navigation > nav_graph.xml ).
A screen similar to the Layout Editor in Design view appears. It shows the two fragments with some arrows between them. You can zoom with + and - buttons in the lower right, as you did with the Layout Editor .
- You can freely move the elements in the navigation editor. For example, if the fragments appear with SecondFragment to the left, drag FirstFragment to the left of SecondFragment so they appear in the order you work with them.

Step 5: Enable SafeArgs
This will enable SafeArgs in Android Studio.
- Open Gradle Scripts > build.gradle (Project: My First App)
- Find the dependencies section In the buildscript section, and add the following lines after the other classpath entries:
- Open Gradle Scripts > build.gradle (Module: app)
- Just below the other lines that begin with apply plugin add a line to enable SafeArgs:

- Choose Build > Make Project . This should rebuild everything so that Android Studio can find FirstFragmentDirections .
Step 6: Create the argument for the navigation action
- In the navigation graph, click on FirstFragment , and look at the Attributes panel to the right. (If the panel isn't showing, click on the vertical Attributes label to the right.)
- In the Actions section, it shows what action will happen for navigation, namely going to SecondFragment .
- Click on SecondFragment , and look at the Attributes panel.
The Arguments section shows Nothing to show .
- Click on the + in the Arguments section.

Step 7: Send the count to the second fragment
The Next / Random button was set up by Android Studio to go from the first fragment to the second, but it doesn't send any information. In this step you'll change it to send a number for the current count. You will get the current count from the text view that displays it, and pass that to the second fragment.
- Open FirstFragment.java ( app > java > com.example.myfirstapp > FirstFragment )
- Find the method onViewCreated() and notice the code that sets up the click listener to go from the first fragment to the second.
- Replace the code in that click listener with a line to find the count text view, textview_first .
- Create an action with currentCount as the argument to actionFirstFragmentToSecondFragment() .
- Add a line to find the nav controller and navigate with the action you created.
Here is the whole method, including the code you added earlier:
- Run your app. Click the Count button a few times. Now when you press the Random button, the second screen shows the correct string in the header, but still no count or random number, because you need to write some code to do that.
Step 8: Update SecondFragment to compute and display a random number
You have written the code to send the current count to the second fragment. The next step is to add code to SecondFragment.java to retrieve and use the current count.
- In SecondFragment.java , add an import for navArgs to the list of imported libraries.
- In the onViewCreated() method below the line that starts with super , add code to get the current count, get the string and format it with the count, and then set it for textview_header.
- Get a random number between 0 and the count.
- Add code to convert that number into a string and set it as the text for textview_random .
Congratulations, you have built your first Android app!
10. Learn more
The intention of this codelab was to get you started building Android apps. We hope you want to know a lot more though, like how do I save data? How do I run background tasks? How do I display a list of photos? How do I ...
We encourage you to keep learning. We have more Android courses built by Google to help you on your learning journey.
Written tutorials
- Android Developer Fundamentals teaches programmers to build Android apps. This course is also available in some schools.
- Kotlin Bootcamp codelabs course is an introduction to Kotlin for programmers. You need experience with an object oriented programming language (Java, C++, Python) to take this course..
- Find more at developer.android.com , the official Android developer documentation from Google.
These interactive, video-based courses were created by Google experts in collaboration with Udacity. Take these courses at your own pace in your own time.
- Developing Android Apps in Kotlin : If you know how to program, learn how to build Android apps. This course uses Kotlin .
- Kotlin Bootcamp for Programmers : This is an introduction to Kotlin for programmers. You need some experience with an object oriented programming language (Java, C++, Python) to take this course.
Except as otherwise noted, the content of this page is licensed under the Creative Commons Attribution 4.0 License , and code samples are licensed under the Apache 2.0 License . For details, see the Google Developers Site Policies . Java is a registered trademark of Oracle and/or its affiliates.
OpenAI's big event: CTO Mira Murati announces GPT-4o, which gives ChatGPT a better voice and eyes
- OpenAI's "Spring Update" revealed new updates to ChatGPT.
- OpenAI CTO Mira Murati kicked off the event.
- She announced GPT-4o, its next flagship AI model, with improved voice and vision capabilities.
OpenAI just took the wraps off a big new update to ChatGPT.
Cofounder and CEO Sam Altman had teased "new stuff" coming to ChatGPT and GPT-4 , the AI model that powers its chatbot, and told his followers to tune in Monday at 1 p.m. ET for its "Spring Update" to learn more.
Also ahead of time, Altman ruled that the event would reveal GPT-5 or a new OpenAI search engine, which is reportedly in the works. OpenAI is reportedly planning to eventually take on internet search giant Google with its own AI-powered search product.
But the big news on Monday was OpenAI's new flagship AI model, GPT-4o, which will be free to all users and "can reason across audio, vision, and text in real time." It was CTO Mira Murati who delivered the updates with no appearance on the livestream from Altman.
There were a ton of demos intended to demonstrate the real-time smarts of GPT-4o.
OpenAI researchers showed how the new ChatGPT can quickly translate speech and help with basic linear algebra using its visual capabilities. The use of the tech on school assignments has been a polarizing topic in education since it first launched.
Say hello to GPT-4o, our new flagship model which can reason across audio, vision, and text in real time: https://t.co/MYHZB79UqN Text and image input rolling out today in API and ChatGPT with voice and video in the coming weeks. pic.twitter.com/uuthKZyzYx — OpenAI (@OpenAI) May 13, 2024
OpenAI posted another example to X of how one can interact with the new ChatGPT bot. It resembled a video call, and it got pretty meta.
In the video, ChatGPT takes in the room around it, discerns it's a recording setup, figures it might have something to do with OpenAI since the user is wearing a hoodie, and then gets told that the announcement has to do with the AI — it is the AI. It reacts with a voice that sounds more emotive.
OpenAI also announced the desktop version of ChatGPT, and a new and improved user interface.
In addition to GPT-4o and ChatGPT, OpenAI's other products include its AI-powered image generator DALL-E , its unreleased text-to-video generator Sora , and its GPT app store.
You can catch up on our liveblog of the event below.
That’s a wrap! OpenAI concludes the event without an appearance from Altman.
OpenAI says text and image input for GPT-4o-powered ChatGPT is launching today. Meanwhile, voice and video options will drop in the coming weeks, the company said.
Although Altman didn't step in front of the camera, the CEO posted videos from the audience on X.
He also teases "more stuff to share soon."
GPT-4o can also break down charts
The new AI model can interact with code bases, the OpenAI execs say. The next demo shows it analyzing a chart from some data.
It's a plot of global temperatures. GPT-4o gives some takeaways from what it sees, and CTO Mira Murati asks about the Y axis, which the AI explains.
ChatGPT reads human emotions — with a stumble
For the last live demo of the day, Zoph holds his phone up to his face and asks ChatGPT to tell him how he looks. Initially, it identifies him as a "wooden surface" — a reference to an earlier photo he had shared.
But after a second try, the model gives a better answer.
"It looks like you're feeling pretty happy and cheerful," ChatGPT says, noting the small smile on Zoph's face.
In one of the final tests, ChatGPT becomes a translator
In response to a request from an X user, Murati speaks to ChatGPT in Italian.
In turn, the bot translates her query into English for Zoph and Chen.
"Mike, she wonders if whales could talk, what would they tell us?" she said in English after hearing Murati's Italian.
It's pretty impressive.
The video demo shows how it could help with math homework, including basic linear algebra
OpenAI Research Lead Barret Zoph walks through an equation on a whiteboard (3x+1=4), and ChatGPT gives him hints as he finds the value of x — making it basically a real-time math tutor.
At the beginning, the bot jumped the gun.
"Whoops, I got too excited," it said after it tried to solve the math problem hadn't been uploaded yet.
But it then walked him through each step, recognizing his written work as he tried to solve the equation.
It was able to recognize math symbols, and even a heart.
OpenAI's first demo: Talking to GPT-4o
It's demo time!
The new bot has a voice that sounds like an American female, but no word yet if you can change it.
OpenAI Research Lead Mark Chen pulled out ChatGPT on his phone and asks for advice on giving a live presentation using Voice Mode.
"Mark, you're not a vacuum cleaner," it responds when he hyperventilates, appearing to perceive his nervousness. It then tells him to moderate his breathing.
Some big changes, you can interrupt the AI now, and there shouldn't be the usual 2 or 3-second delay with GPT-4o.
It can also detect emotion, according to OpenAI.
GPT-4o will have improved voice capabilities
Murati emphasizes the necessity of safety with the real-time voice and audio capabilities of the new GPT-4o model.
She says OpenAI is "continuing our iterative deployment to bring all the capabilities to you."
Murati says the big news is a "new flagship model" called GPT-4o.
The new model is called GPT-4o, and Murati says that OpenAI is making a "huge step forward" with ease of use with the new model.
It's free for users, and "allows us to bring GPT-4 class intelligence to our free users," Murati says.
And we're off!
The livestream began with CTO Mira Murati at OpenAI's offices.
OpenAI is going to be announcing 3 things today, she says. "That's it."
For those who want to watch live, you can view the whole event here.
OpenAI will be livestreaming its spring update, which kicks off in less than an hour.
Axel Springer, Business Insider's parent company, has a global deal to allow OpenAI to train its models on its media brands' reporting.
- Main content
IMAGES
VIDEO
COMMENTS
The next set of apps are all geared to helping you engage with you audience while on stage. Presentation Slide Apps. 14. Haiku Deck. iOS. Haiku Deck makes the most beautifully designed presentations, and it is near impossible to make an unattractive presentation with this tool. It is only available as an app perfect if your smartphone is your ...
It is near impossible to make an unattractive presentation with this tool. It is only available as an app: which is perfect if you are on the go or your smartphone is your go-to device. If you are looking for a simple, easy tool that makes gorgeous slides, this is the one for you. 5. Powtoon. Android | iOS.
Clicker. Price: Free / $2.99 per item. Joe Hindy / Android Authority. Clicker works a lot like ASUS Remote Link. It lets you connect to your computer and use your phone as a presentation clicker ...
Screenshots. Keynote is the most powerful presentation app ever designed for a mobile device. Start with an Apple-designed theme and add text, images, charts, tables, and shapes with just a few taps. Draw and write with Apple Pencil on iPad, or use your finger. Bring it all to life with cinematic animations and transitions that look as though ...
Download Slide Android. 2. Microsoft PowerPoint. Probably the most popular presentation app in the world, PowerPoint by Microsoft works on any and every platform including Android and iOS. PowerPoint syncs with Office 365 and OneDrive to provide backup and solve multiple versions issue.
1. Visme. Let's start with the best app for presentations you can use to design your presentation. Visme is a cloud-based graphic design software that allows designers and non-designers alike to create beautiful and professional presentations, infographics, social media graphics and more.
Voice Notes (Android) This is one of the highest-rated free transcription apps for Android. Dragon Anywhere (iOS) With this app, you can "easily dictate documents of any length, edit, format and share them directly from your iPhone or iPad — whether visiting clients, a job site, or your local coffee shop.".
It's among the best presentation apps because it makes creating and organizing digital notes really simple. Consistently using the same app for all of your notes will transform the task of outlining your presentation from daunting to delightful. Canva for Design. Presenters worldwide are turning to Canva for its user-friendly templates. It ...
Outline your presentation. Easier. With outline view for iPhone and iPad, quickly jot down your thoughts, restructure ideas, and move concepts from slide to slide. Then switch to slide view and start designing. You can also work on presentations stored on iCloud or Box using a PC. Start using Keynote at iCloud.com.
Screenshots. Keynote is the most powerful presentation app ever designed for a mobile device. Start with an Apple-designed theme and add text, images, charts, tables and shapes with just a few taps. Draw and write with Apple Pencil on iPad, or use your finger. Bring it all to life with cinematic animations and transitions that look as though ...
The good news is you'd now be able to upload up to 10GB/mo and your note size increases to 200MB. If you can spare the cash, I think Evernote Premium is a worthy upgrade. #8 - Milanote (Price: Starts from free | Available on: Web, Mac, iPhone) Last, but definitely not least, on this list is Milanote.
Learn about the best tools or apps for creating and managing speaker notes and slides for conference speaking. Compare PowerPoint, Keynote, Google Slides, Evernote, OneNote, Notion, Canva, Prezi ...
Get the familiar slideshow tool you know and love with the PowerPoint app. Create, edit, and view slideshows and present quickly and easily from anywhere. Present with confidence and refine your delivery, using Presenter Coach. Present slideshows and access recently used PowerPoint files quickly while on the go.
The best presentation software. Canva for a free presentation app. Beautiful.ai for AI-powered design. Prezi for non-linear, conversational presentations. Powtoon for video presentations. Pitch for collaborating with your team on presentations. Gamma for conversational AI features.
Paid versions usually provide more features and storage space. However, make sure the cost is justified by the value it brings to your workflow. 15 Best Note Taking Apps in 2024. 1. ClickUp Docs. Create beautiful Docs, wikis, and more—then connect them to workflows to execute ideas with your team.
Transparent Note is a simple note-taking app, save for one crucial difference: Your notes can be transparent, allowing you to see what's behind the note itself on your Mac or PC. The app is free ...
Control your presentation from the web browser (for the web app version). Cloud sync features let you sync your script from the web to your PromptSmart mobile apps. It offers a 'lite' version, which gives you a free version for Android and iOS versions. And although PromptSmart doesn't offer a free version for it's full features, it gives you ...
6. Keynote. Here's the app that Apple itself uses to present brilliant creations to the world. It's the most powerful app to present your ideas on an iPhone or iPad. In addition to all the basic features, there are advanced options like animated charts and cinematic transitions to add that extra flair with ease.
I use onenote. As other answers have mentioned convert it to PDF, then import it to onenote and select the option to printout. You'll have space to write next to the slides as well, instead of being limited to just the slide itself as with apps like samsung note or noteshelf. 1. Reply.
Bebop helps you get down your ideas, fast. It assumes that review and organization are better done on larger screens—that a mobile interface should be lightning-fast, clutter-free, and capture-first. • No ads, no logins, no tracking: Files are synced natively to your chosen iCloud or Dropbox folder*. • BYOMA (Bring Your Own MacOS App ...
Mobile App Pitch Deck. Pitch your mobile app to investors with this sample deck. Based on the advice from experts including Tom Tunguz and Guy Kawasaki, this template is built with pitch deck best ...
Open the Canva Mobile App on your phone. Select the design with the notes you want to edit. Tap on the "Presenter View" button located at the bottom of the screen. Swipe left or right to navigate between slides. Tap on the "Edit" button located at the top right corner of the screen. Edit the notes as desired.
The top app categories include gaming apps, social media apps, and lifestyle apps. Get your presentation custom designed by us, starting at just $10 per slide. STEP 1. UPLOAD PRESENTATION. Share your presentation and design preferences via our easy-to-use order form. STEP 2.
Download your presentation as a PowerPoint template or use it online as a Google Slides theme. 100% free, no registration or download limits. Create stunning mobile app presentations with these templates. Showcase your design and features effortlessly. No Download Limits Free for Any Use No Signups.
Noto. is a minimalistic note-taking app that departs from the professional-looking design languages most other apps in this category opt for. You can archive old notes, import or export data from ...
The model will be available to both free and paid users of ChatGPT via a new desktop app as well as the existing mobile app and web version. Murati said the GPT-4o model allows ChatGPT to respond ...
Starting today, Galaxy AI 1, the premium mobile AI experiences introduced on the recent Galaxy S24 series will begin rolling out with the One UI 6.1 software update to Galaxy S22 series, Galaxy Z Flip4, and Galaxy Z Fold4 users in the U.S, as well as the Tab S8 series users in the U.S. The One UI 6.1 update puts the following popular Galaxy AI ...
PitneyShip mobile app Release Notes for version 1.0.42 (iOS) 1.0.55 (Android) (April 4, 2024). Products affected: PitneyShip™ mobile app New Features & Enhancements; Issues Fixed; New Features & Enhancements Feedback option. After successfully creating a label, both new and existing clients will be asked for feedback at regular intervals. ...
How to run your app on your own physical device, if you have one. Step 1: Create a new project. After these steps, Android Studio: Step 2: Get your screen set up. When your project first opens in Android Studio, there may be a lot of windows and panes open.
OpenAI is reportedly planning to eventually with its own AI-powered search product. But the big news on Monday was OpenAI's new flagship AI model, GPT-4o, which will be free to all users and "can ...