

Turn your presentation into a video
When you make a recording of a presentation, all its elements (narration, animation, pointer movements, timings, and so on) are saved in the presentation itself. In essence, the presentation becomes a video that your audience can watch in PowerPoint.
So you have two options for turning your presentation into a video that's ready to view:
Save/export your presentation to a video file format (.mp4 or .wmv).
Save your presentation as a PowerPoint Show (.ppsx) file. (A PowerPoint Show appears full-screen in Slide Show, ready to view immediately.)
Save as a video file
After you've created your slides and recorded any timing and narrations and laser pointer gestures that you want to include, you're ready to create a video file.

On the File menu, select Save to ensure all your recent work has been saved in PowerPoint presentation format (.pptx).
Select File > Export > Create a Video . (Or, on the Recording tab of the ribbon, select Export to Video .)
In the first drop-down box under the Create a Video heading, select the video quality you want, which pertains to the resolution of the finished video. The higher the video quality, the larger the file size. (You may want to test them to determine which one meets your needs.)
* The Ultra HD (4K) option is only available if you're using Windows 10 or later.
The second drop-down box under the Create a Video heading tells whether your presentation includes narration and timings. (You may switch this setting if you like.)
If you haven't recorded timed narration, by default the value is Don't Use Recorded Timings and Narrations .
The default time spent on each slide is 5 seconds. You can change that timing in the Seconds to spend on each slide box. To the right of the box, select the up arrow to increase the duration, or select the down arrow to decrease the duration.
If you have recorded a timed narration, by default the value is Use Recorded Timings and Narrations .
Select Create Video .
In the File name box, enter a file name for the video, browse for the folder that will contain this file, and then select Save .
In the Save as type box, choose either MPEG-4 Video or Windows Media Video .
You can track the progress of the video creation by looking at the status bar at the bottom of your screen. The video creation process can take up to several hours depending on the length of the video and the complexity of the presentation.
Tip: For a long video, you can set it up to be created overnight. That way, it’ll be ready for you the following morning.
To play your newly-created video, go to the designated folder location, and then double-click the file.
Save as a PowerPoint Show
When someone opens a PowerPoint Show file, it appears full-screen in Slide Show, rather than in edit mode. The viewer begins watching the presentation immediately.
On the File menu, select Save As .
Choose the folder location where you want to store your PowerPoint Show file.
In the Save as type box, choose PowerPoint Show (*.ppsx) .

Select Save .
Why turn your presentation into a video?
When you want to give a high-fidelity version of your presentation to colleagues or customers (either as an e-mail attachment, published to the web, on a CD or DVD), save it and let it play as a video.
You can save your presentation as either an MPEG-4 video file (.mp4) or a .wmv file. Both formats are widely supported and can be streamed over the internet.
Some tips to remember when recording your presentation as a video:
You can record and time voice narration and laser pointer movements in your video.
You can control the size of the multimedia file and the quality of your video.
You can include animations and transitions in your movie.
Viewers do not need to have PowerPoint installed on their computers to watch it.
If your presentation contains an embedded video, the video will play correctly without your needing to control it.
Depending on the content of your presentation, creating a video may take some time. Lengthy presentations and presentations with animations, transitions, and media content will likely take longer to create. Fortunately, you can continue to use PowerPoint while the video is being created
What parts of a presentation won't be included in a video?
The following items won't be included in a video that you create using PowerPoint:
Media inserted in previous versions of PowerPoint. To include these, you can convert or upgrade the media object.
For example, if you inserted the media using PowerPoint 2007, it will be linked and it will play in the presentation. However, when you export the file as a video, the linked media will be dropped. You can convert the file to the new file format (select the File tab, and under Info , select Convert ), or you can right-click the media object and then select it to upgrade; it will embed the file and export it correctly.
QuickTime media (unless you have a third-party QuickTime codec named ffdShow installed and you have optimized for compatibility)
OLE/ActiveX controls
What to do with your video after creating it
After you create a video, you can share it with others by using the following methods:
Email your presentation to others
Save to a file share or other location
Upload it to your organization's Microsoft Stream video-sharing site , as described in the next section, "Save to a video-sharing site."
Save to the Microsoft video-sharing site
After you've created the video file, you can upload it to a video-sharing site. Microsoft Stream is an enterprise video service where people in an organization can upload, view, and share videos. Microsoft 365 business or education subscribers have access to this service from within PowerPoint for Microsoft 365.
Select File > Export , and then select Publish to Microsoft Stream .

Type a title and a description for the video.
Set other options, including whether you want others in your organization to have permission to see the video:

Select the Publish button.
The upload process can take several minutes, depending on the length of the video. A status bar at the bottom of the PowerPoint window tracks the progress, and PowerPoint shows a message when the upload is finished:

Select the message to go directly to the video playback page on Microsoft Stream.
For more information about this service, begin reading with What is Microsoft Stream? It includes information about Office 365 Video vs. Microsoft Stream.
1 The Ultra HD (4K) option is only available if you're using Windows 10 or later. 2 In PowerPoint 2016, the Ultra HD (4K) option isn't available in the Volume License edition.
When someone opens a PowerPoint Show file, it appears full-screen in Slide Show, rather than in edit mode. The viewer begins watching the presentation immediately.
Burn your presentation to a disc

Need more help?
Want more options.
Explore subscription benefits, browse training courses, learn how to secure your device, and more.

Microsoft 365 subscription benefits

Microsoft 365 training

Microsoft security

Accessibility center
Communities help you ask and answer questions, give feedback, and hear from experts with rich knowledge.

Ask the Microsoft Community

Microsoft Tech Community

Windows Insiders
Microsoft 365 Insiders
Find solutions to common problems or get help from a support agent.

Online support
Was this information helpful?
Thank you for your feedback.
PPT to MP4 converter
Convert your file from Microsoft PowerPoint Presentation File to MPEG-4 Video Stream with this PPT to MP4 converter .
Enter the timestamps of where you want to cut your video. The format is HH:MM:SS. HH = hour, MM = minutes, SS = seconds.
Example: 00:02:23 for 2 minutes and 23 seconds.
How to convert a PPT to a MP4 file?
- Choose the PPT file you want to convert
- Change quality or size (optional)
- Click on "Start conversion" to convert your file from PPT to MP4
- Download your MP4 file
Not convinced? Click on the following link to convert our demo file from PPT to MP4 :
Stay connected:
Rate this tool 4.3 / 5
You need to convert and download at least 1 file to provide feedback
Feedback sent
Thank you for your vote
Convert to PPT
Convert from ppt, file format, ppt (microsoft powerpoint presentation file).
PPT is the binary file format for Microsoft Office PowerPoint 97-2007. Presentations using PowerPoint can include images, text, audio, video, charts, graphs, hyperlinks, and animation to provide presentations created for students and businesses. Mos...
MP4 (MPEG-4 Video Stream)
MPEG-4 Part 14 files (MP4) are capable of storing multimedia such as audio, video, and subtitles. This file type is commonly used by Apple and other producers of mobile products which allow audio, still images, or video. This includes but is not limi...
Specify a downloader that fits your task
Home Blog PowerPoint Tutorials How To Convert a PowerPoint Presentation to a HD Video in 3 Steps
How To Convert a PowerPoint Presentation to a HD Video in 3 Steps
There are many reasons why you may consider converting a PowerPoint presentation to a High-Definition video ; for example if you want to share a presentation online through YouTube or Vimeo, create a self-running presentation or save the slide show video to a DVD.

In this article we will guide you on how to convert a PowerPoint presentations to a High Definition video (as an MP4 video file,Windows Media Video .wmv file or QuickTime Video File .mov) using Microsoft PowerPoint.
PowerPoint lets you save presentations as videos directly from the File > Save As dialog box; however if you need to choose the output video quality while saving the presentation then it is recommended to use the File > Export > Create a Video option.
High Definition (HD) or high-quality presentation uses a higher resolution (1280×720 or 1920×1080) to save the video information. It can improve the overall experience while watching a presentation online or playing a PowerPoint slideshow in a kiosk. It would be the preferred format if you plan to upload your video presentation to YouTube or Vimeo, and have higher quality. The main drawback is that the presentation video file size will be bigger and more bandwidth may be required.

Why You Should Convert a PowerPoint to a Video Format?
Converting a PowerPoint to a video format can have several advantages. From making intuitive videos to engaging your audience to address complex topics in just a few minutes.
Create a Video Slideshow
You can use the converted video file to create a video slideshow for display at an event or edit the content of the video to generate a video presentation.
Create Presentations and Tutorials
PowerPoint enables users to export their videos with voice-over narration and animations. This can help create extensive presentations for an audience
Use Professional Editing Software to Create Engaging Videos
Adding a voice-over, additional graphics, and some footage can help create a professional-looking presentation by using a video editing application. Similar to how you use Instagram tools to convert images into a stunning video, some famous video editing apps that can help you make the most out of your converted PowerPoint file to a video format include Adobe Premiere Pro, Camtasia Studio, iMovie, Final Cut Pro, etc. If you are a Windows user, you can look into alternatives to Final Cut Pro like Lightworks, Movavi Video Editor, and Shotcut.
Create a Video Instead of Using PowerPoint
You can convert PowerPoint to video by simply letting your slides play out, making the presentation easy to play for end users without the need to have PowerPoint installed. This approach can also be helpful if you intend to present your slides using a video player instead of PowerPoint, as the latter might not be available everywhere, whereas video players often come with all types of desktop and mobile operating systems.
Upload a Video Online
Many presenters also like to upload their presentations online for an audience. A teacher might be interested in making his/her presentation available for students, or an industry expert might wish to share a concept with others in the industry by uploading a video to a YouTube channel. Either way, converting your PowerPoint to a video can help make the content easily shareable via video streaming platforms like YouTube and Vimeo. Such a video can also be shared privately via file-sharing apps like Box, Dropbox, OneDrive, Google Drive, etc.
How To Convert PowerPoint to Video (Windows)
Step 1 – go to file > export.
The first step to save a PowerPoint presentation as a HD video go to File -> Export and then click Create a Video button.

Step 2 – Choose Video Resolution
Now, select a resolution to export your video. Other than the Standard (825×480) resolution, the high-definition resolution options include HD (Medium 1280×720), Full HD (Large 1920×1080), or Ultra HD 4K (Largest file size 1920×1080). If you are using an older version of PowerPoint, you might have limited options to select between HD resolutions, since versions older than PowerPoint 2013 only supported HD videos (1280×720).

Optional Step: Save Narrations, Laser Pointer Gestures & Recorded Timings in the Video Exported from PowerPoint
Aside from saving the PowerPoint presentation as an HD video, you can also save a video file that incorporates all the recorded timings during a rehearsal, narrations, and even laser pointer gestures.
In case you have recorded narrations for your slides, you can use them or select Record a Video option to instantly start narrating your slides. The Preview Timings and Narrations option in the same drop-down menu does what it says, it enables you to check and ensure that your narrations are correctly timed with your slides, so you can make necessary edits before finalizing your video.

Optional Step: Select Slide Duration
Choose the default time spent on each slide (in seconds) and whether to save the narrations, timings, and gestures. By default, 5.00 seconds are spent on each slide unless you have a different timing recorded for the presentation slideshow.

Step 3 – Select Video Format and Create a Video Presentation
Click Create Video button and choose the destination folder and output file name. For end users wondering how to convert ppt to MP4, this is the step where you can select MP4 as your output format. PowerPoint supports saving slide decks to MP4 or WMV video formats. Once you confirm, wait a few seconds in order for the file is being saved on your hard disk. Presentations with a lot of slides may require a longer wait time.

Something good about saving presentations as a video file is that all animations, transitions, and media are preserved.

How to Convert PowerPoint to Video (Mac)
How to Convert PPT to Video in Mac? If you’re wondering how to make a PowerPoint into a video on Mac, the steps are quite similar to how you would export PowerPoint to video on a PC, with a few minor differences.
To convert PowerPoint to video on Mac, go to File -> Export.
Step 2 – Choose Video Format
If you have been wondering how to save PowerPoint as MP4 on Mac, this is the step where you can pick a video file format to save your presentation as a video, including MP4 and MOV.
The difference between the PC and Mac during this step is the difference in the availability of video conversion options. The PC version, along with MP4, allows saving a video in the Windows Media Video (WMV) format, unlike Mac, which offers QuickTime video format (MOV) instead.
Step 3 – Select Video Resolution and Create Video
The new version of PowerPoint for Mac allows saving a presentation in HD (Medium 1280×720), Full HD (1920×1080), or Ultra HD 4K (1920×1080) format. The higher the resolution, the higher the file format, so make sure you have enough disk space to save a very heavy file, especially if you opt for Ultra HD 4K resolution.
Save Narrations, Laser Pointer Gestures & Recorded Timings (Optional)
To save narrations, recorded timings, and laser point gestures, select the Use Recorded Timings and Narrations option.
Select Slide Duration (Optional)
To precisely time how long each slide is presented in the video, select the time duration. The default duration is 5.00 seconds, unless you have specified time for each slide separately in the presentation.
Select Export to create your video. Depending on the resolution you have selected, it might take several minutes before the video is converted. Higher resolutions take more time to conversion.
Saving videos from PowerPoint can help you at the time you need to share a presentation slideshow online (for example, uploading it via YouTube or Vimeo, or any other online video platform ), but you can also use this technique to prepare a PowerPoint presentation for a kiosk, make interactive PowerPoint presentations or create a self-running presentation. PowerPoint presentations saved as videos can also be easily run from mobile devices without the need for PowerPoint to be installed on the device. If you wish to save your PowerPoint to video in a format easily accessible, you can opt for PowerPoint save as MP4 instead of using WMV or MOV file formats that are not supported by all types of video players.

Like this article? Please share
mp4, Presentation Ideas, Presentation Videos, Video, Windows Media Video, wmv Filed under PowerPoint Tutorials
Related Articles

Filed under Design , Presentation Ideas • May 1st, 2024
The Power of Mind Map Note Taking for Presenters
Add a new tool to your repertoire of presentation skills by mastering the art of mind map note taking. An ideal process to facilitate content retention.

Filed under Design • April 23rd, 2024
How to Create the Perfect Handouts for a Presentation
Learn how to create effective handouts for presentations and the recommended structure for handouts with this guide.

Filed under Presentation Ideas • February 15th, 2024
How to Create a 5 Minutes Presentation
Master the art of short-format speeches like the 5 minutes presentation with this article. Insights on content structure, audience engagement and more.
6 Responses to “How To Convert a PowerPoint Presentation to a HD Video in 3 Steps”
Can’t believe no one has commended you for this helpful tutorial! We want to mount several TVs in the lobby and exam rooms of our veterinary hospital to run informational presentations for our clients about pet care, our services, and helpful products. Recording a PowerPoint as a video and then putting it on a USB thumb drive to connect to the TV seems like it will be an effective, inexpensive way to get that accomplished. Thank you so much!
I second the above comment. Thank You
how to present a power point presentation on a smart tv..and having it loop over to continuous display..keep running.
This was very helpful. I had no clue that this could be done. I dedicated a PC to running the Power Point presentation for our lobby. Having it run on the TV via USB will free up that resource for us.
I haven’t dug into it yet, but is there a way to make it loop?
I keep getting this audio data not supported. Is there anyway to remove this?
Send us your issue to [email protected] we might be able to help you.
Leave a Reply
Convert Slides to Video
Convert PowerPoint and Google slides to video online; free
Convert PowerPoint to video online
VEED makes it super easy to convert your PowerPoint and Google slides to video. You can convert your slide shows to videos in just a few clicks, and you can do it straight from your browser. You can even record yourself while presenting your slides using our free screen and webcam recorder.
Upload your Microsoft PowerPoint or Google slides and record your webcam, audio, and screen. Easily customize your layout, background, and camera feed. Add annotations, scenes, and even soundwaves for audio recordings. You can also use our online video maker to create videos from slides for free!
How to Convert Slides to Video:
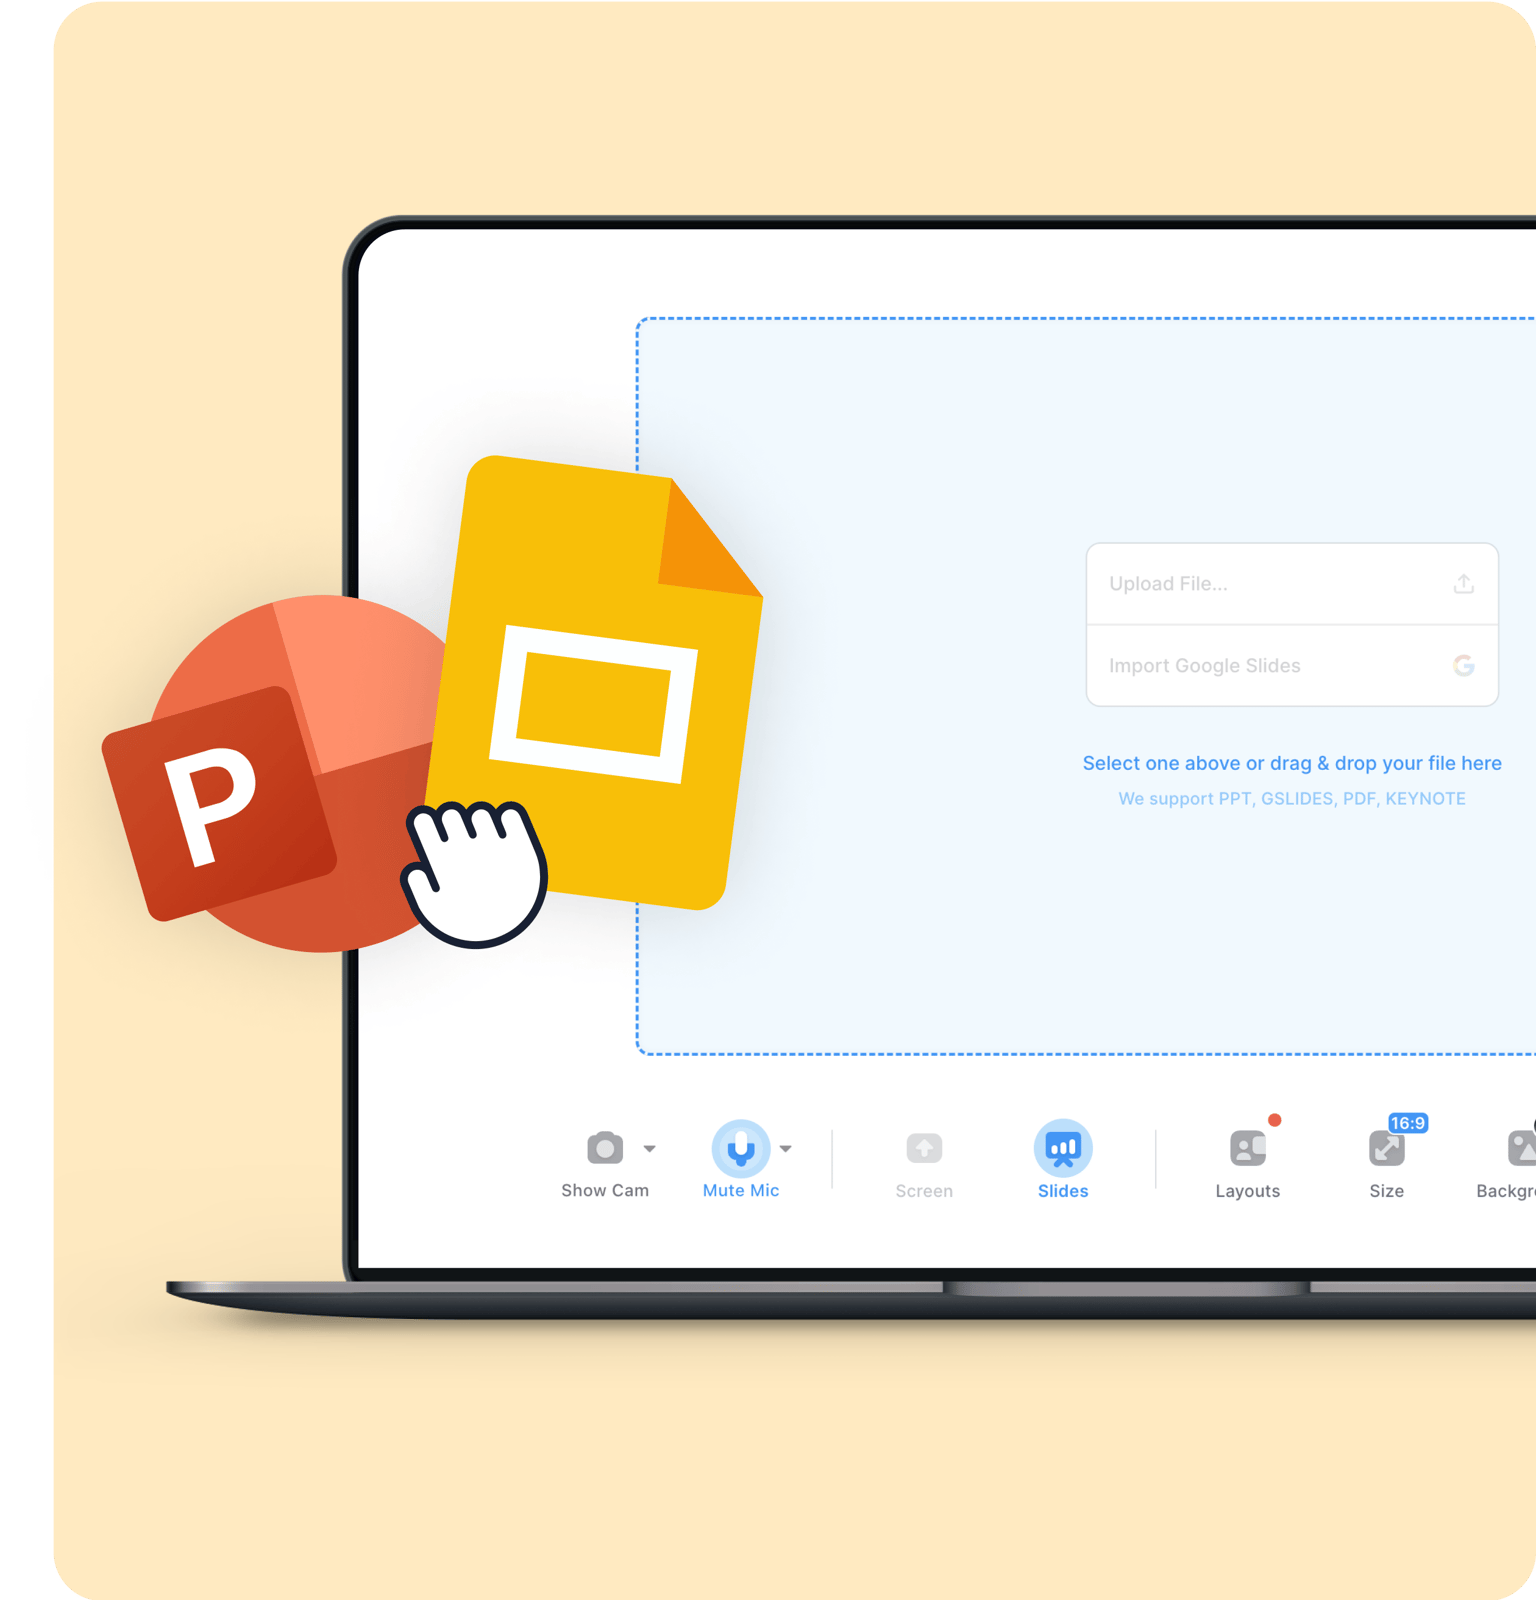
1 select layout.
Select from our list of layouts; in this case—Slides or Slides and Camera (you may need to click to ‘ Allow ’ permission to access your screen, camera, or microphone). You can record just your screen, your webcam, or both at the same time!
2 Start recording
Click the red button to start recording! You'll see a countdown before the recording starts. Don't worry if you mess up. You have unlimited time and unlimited retakes. You can navigate to other pages, and don't worry, you are still recording.
3 Review, edit, and export
You can playback your recording to review it, click ‘Share’ to share with friends and colleagues, or ‘Edit’ to edit your video (perfect for adding text, subtitles, and professional touches to your screen recording)
‘Convert Slides to Video’ Tutorial

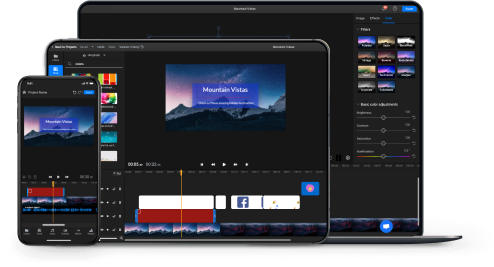
A powerful video editor for making videos from slides
VEED is a powerful and versatile screen and webcam recorder that lets you create videos from slides. It also features multiple layouts that you can choose from. You can record your screen and audio at the same time, record your slides and camera or slides only. After recording, give your PowerPoint presentations a new look! Add annotations, images, text, and more. Convert PowerPoint and Google slides to videos in just a few clicks!
Edit, add subtitles, and translate
After converting your PowerPoint and Google slides to video, you can edit it to make it look professional using our full suite of video editing tools. Personalize your presentation to suit your business needs. Add scenes, text, your logo, fonts, and so much more. You can also localize your video by adding subtitles and translating them to different languages—perfect for businesses with international teams. Our automatic translation tool is available to premium subscribers. Check our pricing page for more info. Transcribe and translate in minutes!
Create professional-looking business videos
VEED lets your team record important business messages, create explainer videos, presentations, and more. Share, comment, review, and collaborate on videos online—no software to download. You can even add subtitles automatically and translate them to different languages! Plus, you can add your logo and brand colors using our brand kit—available to pro users. It’s the best app for all your video marketing needs and there’s no software to download!
Absolutely, yes and it’s super easy! Upload your Google slides to VEED and start recording. You can also choose to record your webcam while presenting your slides. Edit your recording and export it as an mp4 video!
Just click ‘Edit’ when the recording is finished, and you will be taken into VEED’s video editor. Here you will be able to add subtitles, text, annotations, music, sound effects, and much more. Just hit the ‘Export’ button when you’re finished, to save your new edited recording.
VEED lets you download your presentation as an mp4 video. Just click Export when you’re done recording and download as mp4.
It really depends on your screen recording time. VEED lets you record your screen and webcam while presenting your slides. When you’re down recording, exporting your PPTX to mp4 only takes a few minutes.
Discover more
- PowerPoint to MP4
What they say about VEED
Veed is a great piece of browser software with the best team I've ever seen. Veed allows for subtitling, editing, effect/text encoding, and many more advanced features that other editors just can't compete with. The free version is wonderful, but the Pro version is beyond perfect. Keep in mind that this a browser editor we're talking about and the level of quality that Veed allows is stunning and a complete game changer at worst.
I love using VEED as the speech to subtitles transcription is the most accurate I've seen on the market. It has enabled me to edit my videos in just a few minutes and bring my video content to the next level
Laura Haleydt - Brand Marketing Manager, Carlsberg Importers
The Best & Most Easy to Use Simple Video Editing Software! I had tried tons of other online editors on the market and been disappointed. With VEED I haven't experienced any issues with the videos I create on there. It has everything I need in one place such as the progress bar for my 1-minute clips, auto transcriptions for all my video content, and custom fonts for consistency in my visual branding.
Diana B - Social Media Strategist, Self Employed
More than a slides to video converter
VEED is so much more than just a slides-to-video converter. It lets you do more than just record your screen and presentation slides online. You can resize your screen recordings to fit any video-sharing and social media platform. You can also edit your videos—add text and captions automatically, add music, sound effects, draw on your videos, and more! Use VEED and start creating professional-looking business videos today!

Critical PowerPoint Shortcuts – Claim Your FREE Training Module and Get Your Time Back!
How to Convert PowerPoint to Video (Step-by-Step)
- PowerPoint Tutorials
- Shortcuts & Hacks
- October 22, 2019
In this article you’ll learn how to convert PowerPoint to video, and the different options you have.

While most people know how to use PowerPoint to present their products and services live, few people know how to turn a PowerPoint into a video that runs on its own.
And while that might sound complicated, it’s in fact pretty easy, as you will see below.
There are two different ways to turn your PowerPoint presentations into video, the first of which gives you the most options, as discussed below.
But before you start the conversion process, here are some thoughts about why you should consider doing it in the first place.
Why Convert PowerPoint to Video?
It keeps your presentation the way it was intended.
Exporting your presentation as a video keeps all elements safely locked in place. That way you can email it to your colleagues or clients without worrying that something will shift, or that timings be messed up.
Video is more accessible and shareable
While most people have PowerPoint on their computer, we shouldn’t assume that they do. Convert your PowerPoint to video and the receiver can open it even if they don’t have a Microsoft subscription. They will have to have a media player though!
It’s also easier to view videos on a mobile device, so busy clients can check out your presentation while on the move.
Furthermore, it’s also easier to share videos on multiple platforms. They can be posted to YouTube, on your company blog, and on social media and video sharing networks.
People love videos!
With more than 75 million people watching online videos every day across the United States alone, you know you’re onto a good thing. According to marketing gurus, just mentioning the word ‘video’ in the subject line of an email increases the click-through rate by 19%.
We human beings naturally love a good story because it conveys a message on an emotional level; and videos are very effective for storytelling, especially in contrast to written text or even images.
Since people’s decision-making process is often based on emotions, turning your presentation into a video can be very convincing.
What is an MP4?
MP4 is short for MPEG-4 Video, and is a universal video format that plays on any device.
When converting PowerPoint to video, you can choose between the MPEG-4 Video file format (MP4) or the Windows Media Video file format (WMV), as discussed below.
The two main advantages of MP4 for your videos are:
- It’s a pre-compressed and compact file type format (so it’s small)
- It plays on just about any device
When converting PowerPoint to video, I highly recommend using the MP4 format unless you have a specific reason not to.
To learn more of the advantages of the MP4 format, see this Quora thread here .
Option #1. Convert PowerPoint to video

To convert your PowerPoint presentation into a video, simply:
- Click the File tab
- Select Export
- Select Create Video
- Choose your Video Quality and Recorded Timings and Narrations (see details below)
- Click Create Video
Choose where to save the video on your computer and click Save .

As a result, your PowerPoint presentation is converted into video, based on the Recorded Timings and Narrations you selected, or the preset seconds per slide you set (all discussed below).
You can even add music and loop it throughout your video if you want to. To learn how to add music to PowerPoint, read our guide here .
Video quality
Video quality determines not only the quality of your video output, but also how large the video file will be, as you can see in the image below.

For most situations, the Full HD (1080p) is a great choice.
That said, if you are showing your video on a large overhead projector and size isn’t an issue, you can improve the quality of your video by using the Ultra HD (4K) format.
Below you can see the different video quality options you have in the Create a Video dialog box.

If file size is an issue or you are just showing your video on a smaller laptop screen, you can save a lot of space with the HD (720p) or HD (480p) formats.
HD (720p) is supported on most websites and video platforms such as YouTube and Facebook. The HD (480p ) option is the best option for mobile devices.
Setting recorded timings and narrations

Recorded Timings and Narrations are important when converting PowerPoint to video as they not only dictate how long your video will be, but determine when things happen in your presentation.
There are a variety of ways you can set yourRecorded Timings or Narrations (all detailed below), but in short, your options are:
- Automatically set how many seconds you want per slide
- Set your own Rehearsal Timings (no audio or video) by clicking through your presentation
- Narrate your PowerPoint with voice and/or video, which automatically sets the slide timings for you
If you use the Record Slide Show dialog box to narrate your entire presentation, you can simply use the Save As dialog box (discussed next) to save your PowerPoint as a video, as your narrations will take care of everything in your video.
To learn everything you need to know about narrating a PowerPoint presentation, read our guide here .
Properly using PowerPoint animations
If you have animated sequences in your presentation and are going to use a pre-set number of seconds per slide, I recommend setting all your animations to After Previous.

To set an animation to trigger automatically as your slide changes, simply:
- Select your animated object
- Open the Animations tab
- Open the Start drop down
- Select After Previous
This ensures that your animations will trigger after the previous action, whether that is an animation or advancing to the next slide.
If you leave your animations set to On Click , they can add a delay of as much as 10 seconds to your video. This is especially if you are using the second conversion method (see the section below here on saving PowerPoint as a video).
Option #2. Save PowerPoint as Video
The fastest way to convert your PowerPoint presentations into a video format, is to use the Save As dialog box.
This works best when you have narrated your PowerPoint presentation using the Record Slide Show dialog box, and just want the Full HD (1080p) quality for your video.

That’s because all of your slide timings, actions and animated sequences are saved within your narration, so all PowerPoint then has to do is save itself as a video using the default settings.
If you are not narrating your presentation, then I recommend using the first method discussed above.

To save your presentation as a video from inside PowerPoint, simply:
- Hit F12 or Ctrl + Shift + S to open the Save As dialog box
- Choose a location to save your video
- Change the file type to either MPEG-4 Video (recommended) or Windows Media Video
- Click Save
Depending on the size of your presentation, it might take a minute or two to save your presentation as a video, so just hang tight.
When it is finished, your PowerPoint will be saved as a video in the Full HD (1080p) format. If you want a different video quality, you will need to use the Create a Video dialog box (see the first method discussed above).
After you save your presentation as a video, you can then embed it in other presentation if you want to. To learn how to embed a video in PowerPoint, read our guide here .
Note: I highly recommend saving your presentation in the MPEG-4 (MP4) file format as it is more universally accepted than the Windows Media Video (WMV) file format.
How to Record and Set Timings for Your Video
When converting PowerPoint to video, the timings not only determine the length of your video, they also determine the timing in which your animated sequences are triggered.
If you have a lot of animated sequences in your presentation, I don’t recommend using a set number of seconds per slide.
That’s because you can’t control the lag between the animated sequences and your content. Instead, I recommend using the Rehearse Timings command.
Here are the 4 different ways you can set and adjust slide timings for your presentation, from easiest to slowest.
1. Set a default number of seconds per slide

To use a standard number of seconds per slide for your slide timings, simply:
- Navigate to the File tab
- Click Export
- Select Create Video
- Set the number of seconds
The more seconds you set per slide, the longer your video will be in total.
2. Set transition timings to advance your slides
PowerPoint transitions are another great way to not only make flipping between your slides less abrupt, but also to automatically advance your slides.
Using the Transitions tab, you can both set a default number of seconds for all of your slides, as well as adjust the time spent on individual slides.

For example, to set a Fade transition and slide timings of 3 seconds per slide, simply:
- Navigate to the Transitions tab
- Click the Fade transition
- Under the Effect Options , choose Through Black
- Deselect On Mouse Click
- For After , input 3 seconds (and make sure there is a check mark next to After )
- Click Apply to All
As a result, all the slides in your presentation will now have a Fade transition and will automatically advance after 3 seconds.
You can also adjust the duration of the transitions between your slides if you want to get specific, but I think the default is usually fine.
3. Use the Rehearse Timings command
If you want to control the flow of your timings by manually clicking through your presentation, you can use the Rehearse Timings command.
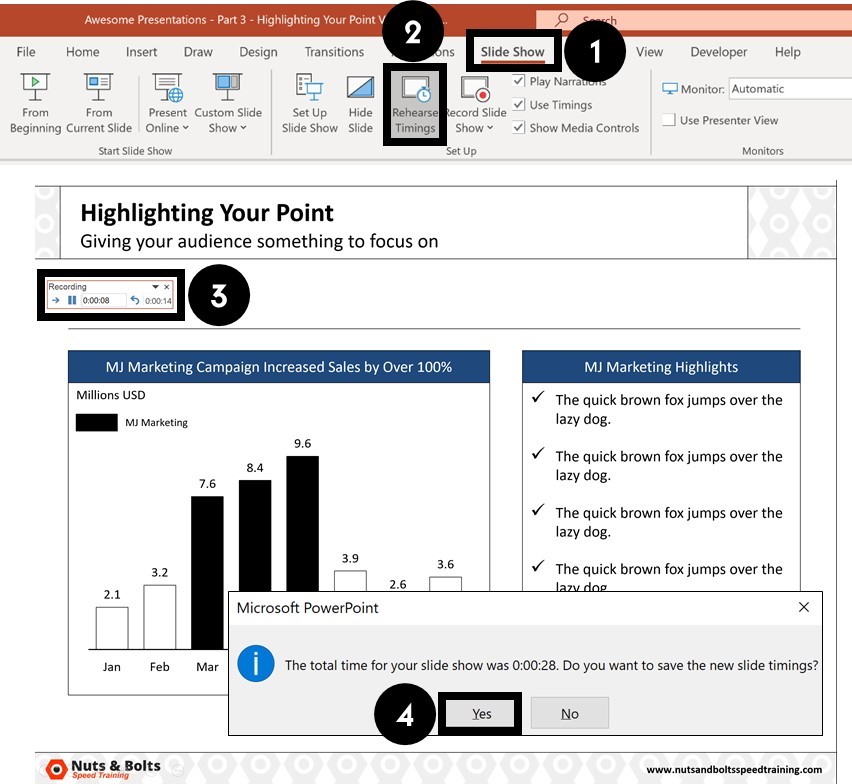
To set your slide timings with the Rehearse Timings command, simply:
- Navigate to the Slide Show tab
- Click the Rehearse Timings command
- Use the Rehearse Timings dialog box to click through your presentation
- When you are finished, click Yes to save the slide timings
Here is a quick run through of the commands on the Rehearse Timings dialog box.

Clicking Repeat starts the rehearsal timing over for the current slide you are on. That means you can restart the timing without having to start the presentation over from scratch.
4. Use the Record Slide Show command
The Record Slide Show command is the NEWEST and best way to add audio and video narrations to your presentations.
The advantage of using this tool to narrate your PowerPoint presentation, is that all of your slide timings, animations and actions are recorded for each slide.
That means you can simply use the Save As dialog box to quickly convert your narrated PowerPoint into a video.

To use the Record Slide Show command to narrate your presentation from the beginning, simply:
- Navigate to Slide Show tab
- Open the Record Slide Show drop down
- Select Record from Beginning
To learn how to use the Record Slide Show command to narrate your PowerPoint (and all the options you have), read our guide here.
Note: If you just click the Record Slide Show button (instead of opening the drop down), you will begin recording your narration from your current slide.
So that’s how to turn PowerPoint into a video, either by exporting your video using the Create a Video command, or by saving your PowerPoint presentation as a video using the Save As dialog box.
If you narrate you presentation using the Record Slide Show command, the Save As dialog box is the fastest way to turn your presentation into a video.
And while PowerPoint gives you two different video file types to choose from, I recommend using the universal MP4 video file format. That’s because it ensures that your video will play on any device (computer, tablet, or phone) that people may have.
If you enjoyed this article, you can learn more about our PowerPoint training courses and other presentation resources by visiting us here .
What’s Next?
Related articles, about the author.

This Post Has One Comment

Very useful tips. Many thanks!
Comments are closed.
Popular Tutorials
- How to Strikethrough Text (l̶i̶k̶e̶ ̶t̶h̶i̶s̶) in Word, Excel & PowerPoint
- How to Make Animated Fireworks in PowerPoint (Step-by-Step)
- Strikethrough Shortcut (l̶i̶k̶e̶ ̶t̶h̶i̶s̶) for Word, Excel & PowerPoint
- How to Create a Flash Card Memory Game in PowerPoint (Like Jeopardy)
- Keyboard Shortcuts Not Working: Solved
PowerPoint Tutorial Categories
- Strategies & Opinions
- Presentation Design
- Pictures, Icons, Videos, Etc.
- New Features
- Miscellaneous
- Charts & Data Viz
We help busy professionals save hours and gain peace of mind, with corporate workshops, self-paced courses and tutorials for PowerPoint and Word.
Work With Us
- Corporate Training
- Presentation & Template Design
- Courses & Downloads
- PowerPoint Articles
- Word Articles
- Productivity Resources
Find a Tutorial
- Free Training
- For Businesses
We help busy office workers save hours and gain peace of mind, with tips, training and tutorials for Microsoft PowerPoint and Word.
Master Critical PowerPoint Shortcuts – Secure Your FREE Training Module and Save Valuable Time!
⌛ Master time-saving expert techniques.
🔥 Create powerful presentations.
🚀 Propel your career to new heights.
We value your privacy – we keep your info safe.
Discover PowerPoint Hacks Loved by Industry Giants - KKR, AmEx, HSBC!
Over 114,880 professionals in finance, marketing and sales have revolutionized their PPT skills with our proven methods.
Gain FREE access to a full module of our premium PowerPoint training program – Get started today!
We hate spam too and promise to keep your information safe.
You are currently viewing a placeholder content from Facebook . To access the actual content, click the button below. Please note that doing so will share data with third-party providers.
Convert PowerPoint to MP4
Converting ppt to mp4 has never been easier.
Are you looking for a convenient solution to convert your PowerPoint to MP4? No hassle, no extra downloads and installs? Our lightning-fast tool empowers you to save PPT as MP4 files within just a couple of clicks. Before you convert PPT to MP4, you can enhance your video by trimming, adding effects and transitions, and layering other images or even other videos. Flixier is an advanced online video editor that anyone can use, anytime, and anywhere.

Save Time As You Convert PPT to MP4
Flixier is a browser-based video editor, which means that all you need is a steady internet connection and access to your favorite browser to convert PowerPoint to MP4. Say goodbye to having to download additional applications and software barriers. Save time and storage by working directly in our powerful cloud servers as you convert PPT to MP4. It’s that easy to convert PPT to MP4 with audio, all in one tab!
Convert PPT to MP4 With Audio
Flixier is not the usual PPT to MP4 converter that you can only use to change the file format. Not only can you take advantage of our tool to record presentations, but you can also convert PPT to MP4 with audio, so you don’t miss out on speaker key points. Before you save PPT as MP4 you can also record yourself or even use the innovative and natural-sounding voice-over generator in many languages of your choice. Pretty neat, right?
Convert PPT to MP4 And Share on Socials
Great, now that you’ve converted and edited PPT to MP4 with audio effects, your presentation is a bona fide multimedia project that’s ready to see the light! Flixier’s user-friendly interface can streamline your entire creative process whether by downloading and saving the MP4 locally or in a cloud storage solution. Even better, you can share your project to your preferred social media platform directly through Flixier’s seamlessly integrated interface. It’s as easy as click & share!
Enhance and Save PPT as MP4
There’s nothing more frustrating than faded colors on a presentation video. Use Flixier’s video enhancer tool to automatically adjust brightness, contrast, saturation, or gamma values as you convert PowerPoint to MP4, and you get a professional-looking video within minutes. The live enhancement previews allow you full control over the look and feel of your presentation before you save PPT as MP4 multimedia projects.
How to convert PowerPoint to MP4?
Upload your presentation.
Click on “Get Started”, then tap the "Record" button to turn your presentation into a video you can convert to save PPT as MP4. Flixier’s PowerPoint recorder works like a charm to record your decks.
Edit and Enhance
Experiment with video and audio customization features before you convert your PowerPoint to MP4. Go for snappy transitions, colorful effects, and visual aiding elements to highlight information in your presentation.
Convert and Save
Click on the “ Export” button and make sure you select “ Video” from the Format dropdown options. Flixier does its magic almost instantly and automatically produces your requested MP4 file.
Why use Flixier as a PowerPoint to MP4 converter
Convert powerpoint to mp4 for free.
The best thing about Flixier is that you can convert PPT to MP4 for free, without even creating an account! Click on ”Get Started” and jump right into editing your PowerPoint deck video. There’s also a free trial option that lets you save progress and safely store your files, so you can save PPT as MP4 and enjoy our tool’s numerous functionalities.
Add Images to Your PowerPoint
Before you convert PowerPoint to MP4 videos, you can tweak the content as you add image to video directly from Flixier. Either upload your own media or choose from the hundreds of royalty-free stock images the Flixier library boasts. Take your pick and remember that sometimes converting PPT to MP4 with audio is not enough, since you can enrich the presentation with illustrations, all in a couple of clicks.
A Top Presentation Editing Toolkit
Our online video editor boasts an impressive number of video editing functionalities to make your presentation truly stand out. Use Flixier to edit MP4 files and add motion graphics as key visual elements, subtitles, or dynamic transitions. Before you know it, the process of saving PPT as MP4 multimedia projects will have turned into a fun editing experience that will leave your peers speechless.
Save PPT as MP4 Securely
Our cloud-powered servers maintain the highest standards of security, so you can safely store your video projects. When you convert PPT to MP4 with audio files and other multimedia, the progress is automatically saved into your Flixier account, so you can relax and rely on the power of cloud storage and no longer fill up your device’s memory with “Version 5” of the same project.
What people say about Flixier

I’ve been looking for a solution like Flixier for years. Now that my virtual team and I can edit projects together on the cloud with Flixier, it tripled my company’s video output! Super easy to use and unbelievably quick exports.

My main criteria for an editor was that the interface is familiar and most importantly that the renders were in the cloud and super fast. Flixier more than delivered in both. I've now been using it daily to edit Facebook videos for my 1M follower page.

I'm so relieved I found Flixier. I have a YouTube channel with over 700k subscribers and Flixier allows me to collaborate seamlessly with my team, they can work from any device at any time plus, renders are cloud powered and super super fast on any computer.
Frequently Asked Questions
Can you save a ppt as an mp4.
Of course! You can easily save a PPT as an MP4 with Flixier, the online video editor that not only helps you record and convert PowerPoint presentations but also brings an advanced video editing suite to your fingertips.
How do I reduce the size of an MP4?
You can make an MP4 take up less space by using Flixier’s native MP4 compressor feature. It’s available for anyone, as long as you’ve got access to an internet connection and your preferred browser.
Is it free to convert ppt to mp4?
You can convert PPT to MP4 for free using Flixier! The online video editor comes with a free trial you can take advantage of to access numerous expert editing features, as well as the possibility to edit PPTs without even creating an account. It’s as simple as that!
Need more than a PPT to Video convertor?
Edit easily, publish in minutes, collaborate in real-time, other ppt converter tools.
Articles, tools and tips
Unlock the Potential of Your PC
Guide Center
Convert PPT to VIDEO
You have the option to convert your ppt file to video, as well as a variety of other formats, using our free online converter.
How to convert ppt to video?
Upload ppt-file, select «to video», download your video file, the security of your files is our priority.
Understanding the importance of the security of our users' data, we have implemented a number of measures to ensure reliable file conversion without the risk of information leakage or privacy violations.
Data encryption
Safe storage, harmless scripts, best tool to convert ppt to video, ppt to video fast and easy, secure ppt to video conversion, no software installation required, microsoft powerpoint, faqs on ppt to video conversion.
- Sign in Existing User
- Sign up New User
- Products Aspose.Total Product Solution Aspose.Words Product Solution Aspose.PDF Product Solution Aspose.Cells Product Solution Aspose.Email Product Solution Aspose.Slides Product Solution Aspose.Imaging Product Solution Aspose.BarCode Product Solution Aspose.Diagram Product Solution Aspose.Tasks Product Solution Aspose.OCR Product Solution Aspose.Note Product Solution Aspose.CAD Product Solution Aspose.3D Product Solution Aspose.HTML Product Solution Aspose.GIS Product Solution Aspose.ZIP Product Solution Aspose.Page Product Solution Aspose.PSD Product Solution Aspose.OMR Product Solution Aspose.SVG Product Solution Aspose.Finance Product Solution Aspose.Font Product Solution Aspose.TeX Product Solution Aspose.PUB Product Solution Aspose.Drawing Product Solution Aspose.Audio Product Solution Aspose.Video Product Solution Aspose.ebook Product Solution
- Pricing Information
- Paid Consulting
- Source Code
- Free Support
- Free Consulting
- New Releases
- Websites aspose.com aspose.cloud aspose.app aspose.org aspose.dev aspose.ai groupdocs.com groupdocs.cloud groupdocs.app conholdate.com conholdate.app conholdate.cloud
- Acquisition
Free Online PowerPoint to Video Converter
Convert powerpoint pptx or ppt presentations to video..
Press Ctrl + D to store it in your bookmarks in order not to search it again
Video SlidesToVideo
- Supported Documents: any PowerPoint files, PPT, PPTX and other formats
- Convert the files and save to AVI, FLV, MKV, MOV, MP4, WEBM, WMV, GIF, APNG file.
How to convert PowerPoint file to video
- Click inside the file drop area to upload PowerPoint file or drag and drop PowerPoint file
- Your PowerPoint file will be uploaded and will be converted.
- Download link of result file will be available instantly.
- You can also send a link to the Video file to your email address.
- Note that file will be deleted from our servers after 24 hours and download links will stop working after this time period.
❓ How can I convert PowerPoint to Video file
⏱️ why does the conversion take a little longer than i expected, 🛡 is it safe to upload my powerpoint file to aspose.video slidestovideo app, 💻 can i convert powerpoint to video file on linux, mac os or android.
Fast and Easy Conversion
Upload your files, then click on "Convert" button. You will get the download link as soon as the file is processed.
Convert from Anywhere
It works from all platforms including Windows, Mac, Android and iOS. All files are processed on our servers. No plugin or software installation required for you.
Convert Quality
Powered by Aspose , which are being used by many Fortune 100 companies across 114 countries.
The most popular PowerPoint file formats to convert
You can also convert other PowerPoint file formats to video. Please see the list below.
- PPT TO APNG
- PPTX TO MP4
- PPTX TO GIF
- PPTX TO APNG
- ODP TO APNG
- POWERPOINT TO MP4
- POWERPOINT TO GIF
- POWERPOINT TO APNG
Oops! An error has occurred.
Invalid file, please ensure that uploading correct file.
Would you like to report this error to the forum, so that we can look into it and resolve the issue? You will get the notification email when error is fixed.
Make this forum private, so that it will only be accessible to you and our developers
Error has been reported successfully.
You have successfully reported the error, You will get the notification email when error is fixed. Click this link to visit the forums.
Immediately delete the uploaded & processed files.
Are you sure to delete the files?
Bookmark this app
Send the download link to, send us your feedback, this is a feature for subscribers.
To use this feature,
please upgrade your Aspose app account
This is a feature for registered users
please login to your aspose app account
© Aspose Pty Ltd 2001-2022. All Rights Reserved.
How to video record yourself presenting a PowerPoint

What type of content do you primarily create?
Recording yourself presenting a PowerPoint can be challenging, especially getting the technical aspects right. You need to capture your screen, webcam, and audio seamlessly while delivering your content naturally and avoiding awkward transitions between slides.
Finding a tool that integrates all these components can seem daunting. However, recording yourself presenting a PowerPoint doesn't have to be reserved for the tech-savvy or professional speakers.
Whether you're a teacher creating online lessons, a marketer producing a product demo, or someone looking to improve their presentation skills, this guide will walk you through user-friendly tools and strategies that will teach you how to video record yourself presenting a PowerPoint.
- Recording yourself presenting a PowerPoint can be challenging, but it doesn't have to be reserved for experts.
- Video recording offers unlimited reach, repurposing opportunities, and a more engaging experience.
- Use PowerPoint's built-in recording feature or tools like Descript for a polished presentation.
- Other tools like Zoom, Loom, OBS Studio, Clipchamp, and Quick Time Player can also be used for recording.
- Tips include practicing your script, using slide notes, ensuring high-quality audio and lighting, and incorporating storytelling techniques.
Why video record yourself presenting a PowerPoint?
Video recording your PowerPoint presentations offers several advantages:
- Unlimited reach : Unlike in-person presentations confined to a specific time and location, recorded videos allow your message to reach audiences globally at their convenience.
- Repurposing opportunities: Recorded presentations can be repurposed as evergreen content across multiple platforms, such as social media, online courses, webinars, and internal training materials, maximizing their value.
- Personal and engaging : Recording yourself narrating a presentation adds a personal touch and dynamic element that static slides alone cannot replicate. Your viewers can see and hear you deliver the content, creating a more immersive and engaging experience.
How to record your presentation with the PowerPoint app
Built-in recording feature in powerpoint.
1. Open the PowerPoint slide you want to record.
2. Click on the Record tab of the top toolbar.
3. Click on the Record button and choose from any of the following options:
- From Current Slide
- From Beginning
4. You'll see the PowerPoint screen recording window.
5. Select the microphone and camera from the icon on the top-right.
6. Click the Stop and Replay buttons to end or replay your recording.
7. To export your presentation's recording, click Export to Video within the Recording tab.
Benefits : Easy to use, no external tools needed
Limitations : Limited editing capabilities.
How to make a more polished recording of your presentation with Descript
While PowerPoint's built-in recording features are helpful, they may not produce the refined result you want for your presentation. That's where Descript comes in handy.
It’s a whole production studio at your fingertips, with video recording, transcription, and editing capabilities, ready to transform dull PowerPoint slides into an engaging experience for your audience. Descript also has a built-in screen recorder.
You can use Descript on Windows, Mac, or even straight from your web browser.
Here's step-by-step guide to recording your PowerPoint presentation with Descript.
Set up your screen recording
1. Install and open Descript. At the top of the editor, click and open the Record panel.
2. Select Screen.
3. Set Recorder settings:
Adjust the default recording settings to your liking, including the transcription language, the maximum recording resolution, and more.
4. Set recording options. Choose which audio and video sources to record (e.g., microphone, computer audio, camera). Remember to turn the camera on to capture your talking head video alongside your PowerPoint presentation.
5. Click the Additional Settings icon for
- Studio Sound (Optional): Enhance audio quality with noise reduction and background removal
- Transcription (Optional): Enable automatic transcription for easier editing
- Recording separate audio tracks
6. Add (optional) Speaker labels for each audio track (e.g., "Narrator," "Expert") by typing them in the text box next to your audio inputs.
Capture your screen recording
1. Select the right recording option:
- Recording into script : Choose this if you haven’t recorded anything yet.
- Replace selection : Choose this if you already have a script and want to replace a specific section with a new recording.
- Record new layer : Pick this for recording your video as a new layer on top of an existing recording.
2. Click Record at the bottom of the Record panel.
3. Drag over the area of your screen you wish to record. Click Start Recording. Press Space to start recording the full screen.
4. Click Stop to finish recording
Bonus: Descript creates separate tracks for camera, microphone, and computer audio. You can edit each track individually for more precise control.
- Do a short test recording to ensure everything is set up correctly.
- Set your recording to transibe for easier editing.
Editing and polishing your PowerPoint recording in Descript
Descript's AI video editing tool makes it a breeze to trim, cut, and splice your video footage, ensuring a seamless flow from start to finish. You can add smooth transitions and other visual effects to make your presentation pop.
Here’s a glimpse of how to edit and polish your PowerPoint recording in Descript:
Edit your recording like a doc
Did you make a mistake during a slide transition? No problem. Just delete those sections in the text transcript (created automatically by Descript) and the video will adjust to match.
Remove filler words
Sound smoother and more confident by easily removing filler words like "um" and "uh" from the transcript.
Fix voiceover mistakes by typing
Didn't nail your delivery on a specific slide? No need to start from scratch! Descript's Overdub feature lets you simply type in the correct narration and replace the audio on that slide with AI voice cloning.
Boost video quality and engagement :
- Crisp up audio quality by reducing background noise and room reverb with the AI-powered Studio Sound feature.
- Replace your background completely with the Green Screen Video Editor —look like you're presenting in a sleek studio or broadcasting from a beach.
- Enable Eye Contact simulation with AI, so it appears you're making direct eye contact with viewers, even if you’re looking or reading something off-camera.
Other ways to video record yourself presenting a PowerPoint
Use Zoom’s meeting recording feature to record yourself giving a PowerPoint presentation. Start a Zoom meeting with yourself, share your PowerPoint window, and enable recording
Loom is a handy screen recording tool that also offers a webcam overlay. Launch the Loom app or Chrome extension and set it to record your screen and webcam. Expect high-quality recordings but no advanced editing features. The free plan offers only five minutes of recording at a stretch.
3. OBS Studio
OBS Studio is a free, open-source screen recorder/streaming software with a steeper learning curve. It’s popular among advanced or tech-savvy users who need granular customization and control.
To record your presentation, add a "Screen Capture" source to capture your PowerPoint window and a "Video Capture Device" source for your webcam.
4. Clipchamp: Recording natively in Windows
You can use Microsoft’s Clipchamp , the built-in screen recorder and video editor for Windows, to simultaneously capture your computer screen, webcam, and audio for recording your PowerPoint presentation. It’s also available as a browser-based app. You can record up to 30 minutes on screen and webcam recordings.
Users can also adjust the screen and webcam recordings in the editing timeline separately.
5. Quick Time Player Recording natively in Mac
Use Mac’s Quick Time Player to record your PowerPoint presentation. It’s not as straightforward as the other options on this list, so here’s a quick guide to help you out:
- Launch Quick Time Player.
- Select File and go to New Movie Recording.
- You'll be recording your entire screen in addition to recording your face, so adjust the size and location of the recording window so that it's in a nonintrusive corner of your PowerPoint.
- Go to View and select Float on Top .
- Next, go to File and select New Screen Recording.
- On the menu that appears, select Record Selected Portion and drag a border around your PowerPoint and the webcam recording window.
- Press Record and start presenting.
- You can adjust the video quality and the audio source in the webcam recording window.
How to turn your PowerPoint presentation slides into a video
Did you know PowerPoint lets you save your presentation as a video, too?
Here's a breakdown of the two ways you can do so—keeping all the presentation elements (narration, animation, pointer movements, timings, and so on) intact in the presentation itself.
Save your PowerPoint presentation as a video
This creates a separate video file (MP4 or WMV) that anyone can play, even without PowerPoint.
Follow these steps:
- Save your presentation
- Go to File > Export > Create a Video
- Ultra HD (4K): Best for large screens (if you have Windows 10+)
- Full HD (1080p): Great for computers and TVs
- HD (720p): Good for streaming online or on DVDs
- Standard (480p): Smallest size, good for phones
4. Decide on narration
- If you haven't recorded yourself talking, choose "Don't Use Recorded Timings and Narrations" from the dropdown menu
- If you have a recording, choose "Use Recorded Timings and Narrations." You can also set how long each slide shows for (default is 5 seconds)
5. Click Create Video
6. Name your video, pick a folder to save it in, and choose a file type (MPEG-4 or Windows Media Video)
Creating the video might take a while, especially for longer presentations. You can even leave it running overnight. Once done, find your video in the chosen folder and double-click to play it.
Save your PowerPoint presentation as a slideshow
This saves your presentation as a special file (PPSX) that starts playing automatically on full screen when opened. It only works with PowerPoint.
Here’s how it works:
- Make sure your presentation is saved (regular PowerPoint file)
- Go to File > Save As .
- Pick a folder to save the slideshow in.
- Under Save as type, choose PowerPoint Show (*.ppsx) .
- Click Save .
Now when someone opens the file, it will automatically play the slideshow.
Pro tips for making better video PowerPoint presentations
Practice your script.
Recording a flawless PowerPoint video rarely happens in one take. The key is practice.
Record practice run-throughs and watch them back. Make notes on areas that need improvement or parts lacking clarity. The more you drill your script, the more confident and natural you'll sound in the final recording.
Take advantage of PowerPoint's built-in Speaker Coach . The feature shows you whether your pace is too fast or slow, your use of filler words like "um," and suggestions to improve your voice modulation.
Use slide notes for coherent delivery
Wouldn’t a personal teleprompter make presentations so much easier? That’s what slide notes are for.
Having your thoughts and talking points organized within your PowerPoint file lets you have all crucial information and prompts readily available when recording.
Go ahead and add detailed notes or even a full script for each slide. This will help you stay on track and provide a handy transcript reference if you need to do any editing or voiceover work in post-production.
Use high-quality audio equipment or turn on Studio Sound
Poor audio recording quality is a surefire way to make even the most visually polished video feel amateurish. Do your presentation justice by investing in a decent external or Bluetooth microphone and audio interface to capture clear voiceover audio.
If you must use a built-in mic, record in a quiet environment to minimize background noise pickup. Or better yet, pair up with an AI-powered audio enhancement tool like Descript's Studio Sound , which reduces background noise , reverb, and other artifacts.
Ensure a clean background and even lighting
Ditch cluttered backgrounds. You want people to focus on the content of your PowerPoint and not be distracted by the funny shapes and colors in your video.
Your video lighting and framing matters, too. Position yourself facing a natural light source or bring supplemental video lighting to eliminate weird shadows and squinting-level glare.
Look directly into the camera or turn on Eye Contact
Looking directly into the camera is essential to create a sense of connection with the audience. Position your webcam or camera at eye level and imagine you're talking to a friend. If you're using Descript, enable the Eye Contact feature to auto-adjust your gaze towards the camera.
- Dress professionally and maintain a good posture to project confidence and authority.
- Use visuals, animations, and multimedia elements to enhance your presentation and keep your audience engaged.
- Consider adding closed captions or subtitles to your video for better accessibility and engagement, especially for those watching without sound.
- Speak clearly and at a moderate pace, using vocal variety to emphasize key points and maintain interest.
- Incorporate storytelling techniques, real-life examples, or personal anecdotes to make your video presentation more relatable and memorable .
Take your PowerPoint presentations from amateur to amazing
Recording yourself virtually presenting a PowerPoint allows you to distribute your message using the most engaging type of content: video. And there are many screen recording tools out there that can capture your screen and web camera footage with just a few clicks.
But how do you stand out?
By focusing on the presentation's depth, your delivery, and the video's quality. The first two are the bare minimum to communicate your message effectively.
But the right screen capture software and all-in-one video creation tool like Descript can help you with third. Use the tool to improve the quality of your recorded PPT presentations.
With Descript, it's easier than ever to record your screen, polish up the audio, and create stunning visuals all in one place. So why wait?
Sign up for Descript today and simplify your workflow while creating a PowerPoint presentation video that sticks with your audience in the long term.
How do you make a presentation video with your face?
To create a presentation video with your face, follow these steps:
- Open your presentation in PowerPoint.
- Go to the Slide Show tab.
- Click on Record and choose From Current Slide or From Beginning .
- Choose your microphone and camera by clicking on a sound icon on the top-right.
- Start recording by clicking on the record button.
- Speak into your microphone to narrate the presentation.
- Your webcam will capture your face during the recording.
- Click Stop when you finish recording.
- Export your recorded presentation by clicking on File> Export>Create a video.
How do you present yourself in PowerPoint?
To present yourself effectively in PowerPoint, follow these steps:
- Determine the key information to include in your presentation.
- Design and prepare your PowerPoint slides with a cohesive theme.
- Craft a compelling introduction to engage your audience.
- Tailor your presentation to different time constraints for flexibility.
- Capture the audience's attention before you begin speaking.
Related articles

Featured articles:
10 excellent Loom alternatives to record your screen
Looking for the best ways to record your screen without Loom? Find out 10 Loom alternatives, their features, and pricing.

How to record a YouTube video: A guide for all devices
If you want to record a YouTube video for personal use or fair-use repurposing, here are the steps to get started.

For Business
Social media video marketing: Everything you need to know
Learn how to win over potential customers (and the algorithms) with the right social media video marketing tools, strategy, and optimizations.

How to record a podcast on Zoom: A beginner’s guide
Follow this step-by-step guide on how to record a podcast on Zoom, then learn about why it may not be your best recording option.

How to record a Microsoft Teams meeting: 5 easy ways
Learn how to record a Microsoft Teams meeting on any device and get answers to common problems.

10 effective how-to videos to engage your audience
How-to videos are a great way to educate your audience. Whether you’re recording a software demo or training instructions, here’s how to create a how-to video.

Articles you might find interesting
Product Updates
How to Zoom in on a Video Using Descript
If you forgot to zoom while recording, video editing software makes it a snap to quickly and easily zoom in on video after the fact. Here are a few things to consider when applying zoom in on a video.

Marketing Strategy and Planning: Learn How to Promote and Grow Your Business
What is a marketing strategy plan, and how do you make one? We’ll go through all the basics right here and cover a few key terms.

How to buy ads for your podcast (if you have the money)
There are tons of ways to market your podcast for free, but money is a great way to kick things into gear. There are right and wrong ways to spend anywhere from $50 to $50,000. Here are some of those ways.

From stills to motion: A step-by-step guide on how to make a video with pictures
From GIFs to slideshows, image-based videos are compelling video formats used by many creators. Here’s how to make a video using photos.

Video advertising: A beginner’s guide
If you’re running video advertising for your business, this guide is for you. Learn how to run video ads with high ROI.

AI for Creators
The rules around using AI content on YouTube, Spotify & Audible
YouTube, Spotify, and Audible all have different rules about whether AI generated content is allowed on the platform. Learn their guidelines.

Join millions of creators who already have a head start.
Get free recording and editing tips, and resources delivered to your inbox.
Related articles:
Share this article
How-To Geek
How to add a video to a microsoft powerpoint presentation.
If a picture speaks a thousand words, a video speaks a million words!
Quick Links
Embedding videos versus linking to videos, supported video formats in powerpoint, how to insert a video into a powerpoint presentation, manage an embedded video's playback in powerpoint.
Videos can make presentations even more interesting or exciting. If you're looking to add a video to your Microsoft PowerPoint presentation, it's easy to do so. We'll show you how.
In PowerPoint, you can either embed a video or link to a video from your presentation. If you embed a video, your video becomes part of the presentation, which increases the overall size of the presentation file.
Related: How to Send PowerPoint Presentations With an Embedded Video
If you link to a video, PowerPoint only adds a reference to that video in your presentation. The downside of this method is that you need to send the video file separately if you share your presentation with someone. We have written a guide on how to send PowerPoint presentations with videos , so check that out.
In this guide, we'll focus on embedding a video in your presentation so you don't have to worry about sending separate files. And, if you're looking to add a YouTube video to your presentation , there's a way to do that, too.
Related: How to Embed a YouTube Video in PowerPoint
PowerPoint supports multiple video formats, including ASF, AVI, MP4, M4V, MOV, MPG, MPEG, and WMV. If your video is already in one of these formats, you can quickly add that to your presentation.
If your video is in another format, you can convert it to a supported format and then add it to your presentation.
Related: How to Use Handbrake to Convert Any Video File to Any Format
First, make sure the video you want to add to your presentation is saved on your Windows or Mac computer. Then, open your presentation with PowerPoint on your computer.
On the PowerPoint window, in the left sidebar, click the slide in which you want to add a video.
At the top of the PowerPoint window, click the "Insert" tab.
In the "Insert" tab, under the "Media" section (which is to the extreme right side of the interface), click "Video."
You'll now see an "Insert Video From" menu. Here, select "This Device."
Your computer's standard "open" window will open. In this window, access the folder that has your video file. Then double-click your video file to add it to your presentation.
You'll see your selected video in your presentation. To resize this video, click it and use the handles around the video to change its size. Then drag the video to place it at its desired location in your slide.
If you'd like to test the video, at the bottom-left corner of the video, click the play icon.
And you're all set.
Now that you have added a video to your presentation, you might want to change how it plays in your slides. In PowerPoint, you have multiple ways to change your video's playback.
To access these playback options, first, click your video in your presentation. Then, at the top of the PowerPoint window, click "Playback."
In the "Playback" tab, under the "Video Options" section, you will find various options to manage your video's playback.
For example, to change how your video starts to play in your presentation, click the "Start" drop-down menu and select one of these options:
- In Click Sequence : This plays your video in the click sequence. This means if you press the button for the next slide, your video will play.
- Automatically : This option automatically plays your video when the slide with your video opens.
- When Clicked On : Select this option to play your video only when you click it.
The other options are "Play Full Screen," which opens your video in full screen, and "Loop Until Stopped" that plays your video over and over again until you manually stop it.
Before you close PowerPoint, make sure you save your presentation so that your embedded video is saved with it. Do this by clicking File > Save in PowerPoint's menu bar.
And that's how you make your PowerPoint presentations even more engaging by including videos in them. Exciting!
If you don't want to add a video but you do want audio, you can add music to your presentations . This also helps enhance your presentation quality.
Related: How to Add Music to Your PowerPoint Presentation
WPS PDF - Convert and Edit Your PDF Files Freely
WPS PDF tools allow you to convert PDF files to and from Word, Excel PowerPoint, and image files online for free. You can also view, edit, read, and collaborate on PDF files on multiple platforms. You can also download WPS PDF for free to easily experience PDF file editing features such as adding comments, filling in forms, signing contracts, and printing files.

Great Alternative To Adobe PDF
Key features for wps office pdf, pdf convert, pdf organize, pdf compress, cloud collaboration, pdf protect, more free features, features under development.
Edit PDF Like Word
Edit PDF content and make beautiful annotations Insert links, page numbers, comments, and shapes
Powerful PDF Tools Across All Platforms
Desktop application all-in-one office suite for windows pc or mac, mobile app the complete office suite for android & iphone, online web free pdf productivity solution on the cloud..
Free to try WPS PDF toolkits with powerful editing and converting features.
1. For the Windows system on PC: Get the installation package in EXE format. WPS Office is available for Windows 7/8/9/10/11. 2. For the MacOS or Linux system: Click "Free Download" to get the installation package for the corresponding system.
1. For phones with the Android system: Go to Google Play and get the WPS Office installation package in apk format. 2. For iPhones with the iOS system: Go to Apple Store and search for WPS Office. 3. PDF Editor Pro: Download it from Google Play or Apple App Store.
Online PDF tools: Use free online PDF tools to merge, compress, create, edit and convert PDFs. Quick and easy. No installation or registration required. Turn images, ebooks, and documents to PDFs in a secure manner and vice versa.
Create PDF from the file
Create blank pdf, edit&manage pdf, compress pdf, organize pdf, convert pdf, pdf to word, word to pdf, pdf to excel, excel to pdf, pdf to picture, picture to pdf, other useful features, picture to text (ocr), extract text in pictures, pdf cloud collaboration, batch pdf printing, batch pdf printing for mutiple pdf files, pdf template, desktop application, all-in-one office suite for windows pc or mac, faq online for pdf, what is the best free pdf tool.
WPS PDF Blog offers quality articles with recommended top PDF tools (available online or offline) for users to choose:
7 Best Free PDF Tools for Beginners
4 Best Free PDF Converter Apps for Mobile and Laptop
3 Best Free PDF Tools for Editing
3 Best Free PDF Editors for Android Smartphones
Get the Best Free PDF Converters 2022 Online
How can I edit a PDF without Adobe?
There are 2 easy alternative methods for editing PDF files if you haven't downloaded Adobe:
Convert your PDF file into an editable format
1. Go to pdf.wps.com and choose an editable format (Word or Excel or PPT) that you like.
2. Select the PDF file that you want to edit.
3. Convert your PDF file to Word or Excel or PowerPoint online.
4. Click "OK" and go to edit the (Word or Excel or PowerPoint) file.
Download the all-in-one WPS Office app
1. WPS PDF is one of the service tools of WPS Office (including Writer, Spreadsheet, Presentation, and PDF), and the PDF edition is available across desktop, web and mobile platforms.
2. All file formats of WPS Office are compatible with Microsoft and Adobe.
Is the PDF to Word conversion free of charge?
Yes. It is a 100% free online tool, and each user can convert files 5 times free of charge.
1. Go to WPS PDF website pdf.wps.com , then users can find the PDF to Word tool page.
2. Go to the WPS PDF website pdf.wps.com , find Free PDF Converter, and choose PDF to Word.
Trust by users around the world
This is by far one of the best esign apps I have ever used. Simple, easy, and free. You can easily fill in check mark boxes and sign a signature and line it up. I finished filling out my document in 3 mins and was able to save and print it as a PDF which could be downloaded to my PC Windows system and phone with no ads. I would suggest this app to everyone.
I like WPS. It is a competitive free office suite, at no cost! WPS Office also has a PDF editor and viewer option, with a number of features including PDF to Word, PDF to Excel, and Merge PDF. I mostly use the viewer.
On PDF, WPS is capable of converting and editing a PDF file. You can convert to other formats (Word, Excel, PowerPoint, JPG), edit text, change font, change image, put a signature and do much more. You can also print files from other file formats like .doc or .xls to PDFs. You can do these even while offline.
Find the Free Fesources and Solutions
Meet our professional services, support 7*24, stay in advanced and quick to improve, get expert tutorials, tips, and tricks online to help you operate writer in, download wps pdf for free to discover more features..
Select multiple PDF files and merge them into one PDF file online.
Convert PDF files to editable Word documents in seconds (doc, docx formats)
Convert PDF files to editable Excel spreadsheets online without downloading any software
Convert PDF files to editable PowerPoint presentations online without size limit
Separate all pages from a single PDF file online and extract pages to multiple PDF files.
Convert Word (doc, docx) files to easy-to-share PDF files while preserving the layout for free
Convert Excel spreadsheets (xls, xlsx) to easy-to-read PDF files for free
Convert PowerPoint presentations (ppt, pptx) to easy-to-view and easy-to-share PDF files for free
Convert images (JPG, JPEG, PNG, BMP) to PDF files for free and easily adjust PDF orientation and margins
Manage multiple pages of a PDF file (add, delete, or rearrange pages)
Reduce the size of PDF files online using 3 compression methods
Create and fill e-signatures in PDF files online and secure your e-signature

Adobe Community
- Global community
- 日本語コミュニティ Dedicated community for Japanese speakers
- 한국 커뮤니티 Dedicated community for Korean speakers
- Acrobat Services API
- Discussions
- Unable to Convert PPT and DOC to PDF Using PDF Ser...
Unable to Convert PPT and DOC to PDF Using PDF Service API with Enterprise Version

Copy link to clipboard

never-displayed
IMAGES
VIDEO
COMMENTS
On the File menu, select Save to ensure all your recent work has been saved in PowerPoint presentation format (.pptx). Select File > Export > Create a Video. (Or, on the Recording tab of the ribbon, select Export to Video .) In the first drop-down box under the Create a Video heading, select the video quality you want, which pertains to the ...
Aspose.Slides PPT to Video converter is a free online service for converting PowerPoint presentations to videos. Slides: Convert all slides in your PowerPoint to video.Or you can select specific slides or a range of slides for conversion. Slide duration: Specify the time that is spent showing each slide in the video. Video resolution: Select the resolution that determines the amount of detail ...
PPT (Microsoft PowerPoint Presentation File) PPT is the binary file format for Microsoft Office PowerPoint 97-2007. Presentations using PowerPoint can include images, text, audio, video, charts, graphs, hyperlinks, and animation to provide presentations created for students and businesses.
In the top-left corner of PowerPoint, click the "File" option. From the sidebar that opens after clicking the "File" option, select "Export." In the "Export" menu, click "Create a Video." To the right of the "Export" menu, you will now see a "Create a Video" section. In this section, you will define the options for your video file.
Free online PowerPoint to video converter. VEED lets you convert your PowerPoint presentations to videos in just a few clicks, straight from your browser. You can even record yourself while presenting your slides using our free screen and webcam recorder. Upload your slides and record your webcam, audio, and screen.
Watch this video to learn how to convert your PowerPoint presentation into a video. When you make a recording of a presentation, all its elements (narration,...
Browse to the location where you want to save the file and give it a name then press "Save.". While the video is being created, you will see the small progress bar at the bottom of your PowerPoint window. Wait till this is done and then go to your video. Now you can double-click your video file and it will automatically play with your video ...
It's never been easier to convert your PPTX presentations to mp4. VEED is a powerful and versatile screen and webcam recorder that lets you create videos out of your slide shows. It also features multiple layouts that you can choose from. You can record your screen and audio at the same time, record your slides and camera or slides only.
Step 3 - Select Video Format and Create a Video Presentation. Click Create Video button and choose the destination folder and output file name. For end users wondering how to convert ppt to MP4, this is the step where you can select MP4 as your output format. PowerPoint supports saving slide decks to MP4 or WMV video formats.
Go to File > Export > Create a Video to choose the export settings for your PowerPoint presentation video. From this menu, there are several key settings to choose before you export your finished video. The dropdown boxes on the right side control the quality and timing of your presentation.
Under the Save & Send menu, find and click on Create a Video. Click on the Computer & HD Displays option to customise the video size and quality (small, medium and large size & quality). Click the Don't Use Recorded Timings and Narrations to select if you're using timings and narrations. Click Create Video and another dialogue box opens.
3. Download or Publish the Final Video. After you've finished editing, click the Export button in the upper right corner. Your transformed PowerPoint Presentation will be saved as an MP4 file, which is the most widely supported format. You can then easily share your video on social media, websites, or any other platform.
It also features multiple layouts that you can choose from. You can record your screen and audio at the same time, record your slides and camera or slides only. After recording, give your PowerPoint presentations a new look! Add annotations, images, text, and more. Convert PowerPoint and Google slides to videos in just a few clicks!
To convert your PowerPoint presentation into a video, simply: Click the File tab. Select Export. Select Create Video . Choose your Video Quality and Recorded Timings and Narrations (see details below) Click Create Video. Choose where to save the video on your computer and click Save.
Enhance and Save PPT as MP4. There's nothing more frustrating than faded colors on a presentation video. Use Flixier's video enhancer tool to automatically adjust brightness, contrast, saturation, or gamma values as you convert PowerPoint to MP4, and you get a professional-looking video within minutes. The live enhancement previews allow you full control over the look and feel of your ...
Convert any ppt files to video for free with usage of OnlineConvertFree. ⭐ ️Convert your ppt document to video and other formats online in a few seconds. ... 🔵 .ppt (PowerPoint Presentation) The .ppt format is the default file format for presentations created in Microsoft PowerPoint, a popular software for creating slideshows and ...
Free Online Convert your PowerPoint to video, convert PPT, PPTX and other PowerPoint formats to AVI, FLV, MKV, MOV, MP4, WEBM, WMV, GIF, APNG. Toggle navigation. ... Convert PowerPoint PPTX or PPT presentations to video. Powered by aspose.com and aspose.cloud. upload your PowerPoint file
Capture your screen recording. 1. Select the right recording option: Recording into script: Choose this if you haven't recorded anything yet.; Replace selection: Choose this if you already have a script and want to replace a specific section with a new recording.; Record new layer: Pick this for recording your video as a new layer on top of an existing recording.
On the PowerPoint window, in the left sidebar, click the slide in which you want to add a video. At the top of the PowerPoint window, click the "Insert" tab. In the "Insert" tab, under the "Media" section (which is to the extreme right side of the interface), click "Video." You'll now see an "Insert Video From" menu.
It includes a customizable icon family with 80 different icons and a world map (you can change sizes and colors). And more free icons & maps for your presentations available. Use as a Google Slides theme or download as PowerPoint template and edit on your computer. Also export to PDF, JPG, etc.
I am using the PDF service API, but I'm unable to convert PPT to PDF and DOC to PDF. I have an enterprise version, so why can't I use this service? I had to create a free tier account to use it. Views. 33 Translate. Translate. Report. Report. Follow; Report; More. Reply. Reply. Community guidelines.
Capture attention with our sleek Blue and White Minimal Video Business Presentation. Perfect for corporate meetings, it features a clean, modern design and professional agenda layout. ... and stylish photo frames directly from Canva's royalty-free asset library effortlessly. Share or export anywhere, be it PPT or Google Slides. Start editing ...
Convert PowerPoint presentations (ppt, pptx) to easy-to-view and easy-to-share PDF files for free. JPG to PDF Convert images (JPG, JPEG, PNG, BMP) to PDF files for free and easily adjust PDF orientation and margins. Organize PDF Manage multiple pages of a PDF file (add, delete, or rearrange pages) Compress PDF ...
I am using the PDF service API, but I'm unable to convert PPT to PDF and DOC to PDF. I have an enterprise version, so why can't I use this service? I had to create a free tier account to use it. Views. 21 Translate. Translate. Report. Report. Follow; Report; More. Reply. Reply. Community guidelines.
Add dynamic GIF's, captivating videos, and stylish photo frames directly from Canva's royalty-free asset library effortlessly. ... Share or export anywhere, be it PPT or Google Slides. Start editing for free . ... Download your presentation as a PowerPoint template or use it online as a Google Slides theme. 100% free, no registration or ...