How-To Geek
How to record voiceover narration in powerpoint.
If you're not able to physically present your slideshow, record a voiceover narration to make sure no points are missed.

Quick Links
Preparation, record a voiceover for your presentation.
If you’re sending out your presentation instead of giving it in front of an audience, but you feel adding a vocal explanation would better help to deliver the message, record a voiceover narration. Here’s how to do it.
Before you begin your PowerPoint narration, you’ll need to make sure you’ve made the proper preparations.
Set Up Your Mic
First, you’ll need a microphone. Most modern computers have a built-in microphone that gets the job done, but investing in a USB microphone will increase the audio quality of the narration by quite a bit.
The built-in microphone will be set as your input device by default, so if you plan on using it for the PowerPoint narration, you don’t need to take any additional steps in setting it up. However, if you plan to use a USB microphone for the narration, be sure to set it as the input device.
To do this on Windows, right-click the volume icon found on the right of the taskbar. In the menu that appears, select “Open Sound Settings.”
The “Sound Settings” window will appear. Here, scroll down to the “Input” section and click the box under “Choose your input device.”
If you’re using a USB microphone, it will appear here. Select it to set it as the input device.
The steps for Mac users are extremely similar. The only difference is you should go to "System Settings" and select "Sound" instead of right-clicking the volume icon like on Windows. From there, the steps are the same.
Take Notes and Rehearse
With your mic set up, you’re ready to start recording, right? Well, not quite. While you may not be physically standing in front of the audience delivering this presentation, you still need to treat it as though you are. This means going through the basics---taking notes and rehearsing your delivery.
One thing you can do to help you record a successful narration is to write out a script. As with a live presentation, though, you don’t want to sound like you’re reading straight from your notecards. Practice reading through the script a few times so that it sounds natural and fluid.
Once you’re confident in your delivery, it’s time to start recording.
Open the PowerPoint presentation in which you would like to record a voiceover narration. Head over to the “Slide Show” tab and, in the “Set Up” group, select “Record Slide Show.” Once selected, a drop-down menu will appear. Here, you can choose to start the narration from the beginning or from the current slide. If you choose to start recording from the current slide, make sure that you’re on the slide you’d like to start recording from.
Related: How to Record Your Screen with Microsoft PowerPoint
In this example, we’ll choose “Record from Beginning.”
Now, you’ll be in full-screen mode. You’ll notice a few extra tools appear, including a record button at the top-left corner of the screen. When you’re ready to start recording, click this button.
When you select the record button, a countdown timer will appear, giving you a three-second delay between clicking the button and starting your recording.
You can now start recording your voiceover narration! Continue through the presentation by clicking the right arrow to go to the next slide.
You can pause the recording at any time by pressing the pause button in the top-left corner of the window. The recording will automatically end when you make it to the last slide. Alternatively, you can press the stop button, also located at the top-left corner of the screen.
If you want to play your narration back, you can select the replay button.
A speaker icon will appear at the bottom-right corner of each slide that has a recorded narration. You can also play your narration back on each slide by hovering over the icon and pressing the play button.
If you’re not satisfied with the narration, simply repeat these steps to re-record.
Blog > Record voice narration for PowerPoint
Record voice narration for PowerPoint
01.11.21 • #presentation #powerpoint #voiceover #narration.
In this blog post, you'll learn how you can add a narration for your PowerPoint presentation. Adding audio or video narration can be very helpful, especially in a time where many seminars and meetings have to be conducted online. If you would rather give your presentation using a live stream (which has many benefits), scroll down to the bottom and learn how you can do that!
Here's what you need for recording:
- a microphone (your computer's microphone should do)
- a finished set of PowerPoint slides
- a video camera (only if you want to record video as well)
- Open your PowerPoint presentation or create a new one.
- In the taskbar, select Slide Show . Then click Record Slide Show .
- Choose the option Record from Beginning .

- You'll now get to a different view, which we'll call "Recorder View". Here's an overview:

- In the bottom right corner, you'll see three icons. The one on the left is for switching the microphone on/off. Make sure this function is turned on. The icon in the middle is for turning on/off your camera. You can choose if you want to switch the video recording on or not. The last icon is only available if you've chosen the video recording function. If the function is enabled, you'll be able to see a video preview.
- In the top right corner under "Settings", you can choose what microphone (and camera) you'd like to use. This is only relevant if you have an external recording device that you would like to use. If you're recording with your computer, you don't have to set anything here.
- Now it's time to record. Click the big red Record button on the top left and start speaking.
- Tip: You can either record all the slides at once without pressing pause, or you record each slide individually, then click pause, then go on to the next slide and record again. However, it's important to note that PowerPoint creates an individual audio file for each slide, even if you record all at once.
- Important : PowerPoint does not record during transitions, so only speak when you're on a slide.

- You can also draw on your slides with the painting tools on the bottom. These drawings will be saved to your presentations.
- On the bottom left corner, you'll see what slide you're on. You can also see two time counts. The first one is for the recording on the current slide, the second one is for the recording of the presentation overall.
- If you want to delete the whole voiceover, click Clear and Clear Recordings on all Slides . If you only want to delete the recording on the specific slide you are on, click Clear Recording on current Slide.
- If you want to re-record the audio from one slide after deleting it, just go to that slide and click Record again. Record what you want to say, then click Stop when you're done.
- Once you're done, leave the Recorder View. Click the small x in the top right corner or hit Esc .
- You can now either save the presentation as a regular PowerPoint file (just click Save and you're done) or as a video. If you'd like a video, follow the instructions below:
Save Presentation as Video
- Go to File in the PowerPoint taskbar

- Choose Export on the left, then Create a Video .

- Select the quality you'd like. We recommend Full HD (1080p).
- In the following drop-down menu, make sure Use Recorded Timings and Narrations is selected.

- The setting Seconds spent on each slide is only for the slides where there is no recording (if you have recordings on all of your slides, you can just ignore this setting.)
- Click Create Video and choose where the video should be saved. The video creation might take a while, so don't close PowerPoint right away!

Live interaction with polls & quizzes
If you prefer to give a talk where you can also interact with your audience, then the free software SlideLizard is the ideal solution! Using live polls , Q&A and feedback , your presentations will become even more exciting and interactive. SlideLizard integrates directly with PowerPoint, making it a breeze to use.

Can I record a presentation in PowerPoint?
Yes, PowerPoint also allows you to record your presentation with voice and video narration. You can read about how this works in our blog .
How can I record a presentation in PowerPoint with audio and video?
At first create your presentation. For the recording you will need a microphone (the one on your computer should do), your finished presentation and a video camera (if you also want to record a video). We have created a tutorial on our blog where you can read the further steps.
Related articles
About the author.

Pia Lehner-Mittermaier
Pia works in Marketing as a graphic designer and writer at SlideLizard. She uses her vivid imagination and creativity to produce good content.

Get 1 Month for free!
Do you want to make your presentations more interactive.
With SlideLizard you can engage your audience with live polls, questions and feedback . Directly within your PowerPoint Presentation. Learn more
Top blog articles More posts

Create an animated timeline in PowerPoint + Free Template

How to use the morph transition in PowerPoint

Get started with Live Polls, Q&A and slides
for your PowerPoint Presentations
The big SlideLizard presentation glossary
Internal preview.
An Internal Preview is a statement, which is made in the body of the speech, so that the audience knows what the speaker is going to discuss next.
Leading Questions
Leading questions subconsciously make the respondent think in a certain direction.
.pptm file extension
A .pptm file is a macro-enabled presentation created by MS PowerPoint which contains slides with layout, images, texts and embedded macros.
Internal Communication
Internal communication is particularly important for corporate communication. It communicates important information from leadership to staff so that they can do their jobs in the best possible way and work processes run well.
Be the first to know!
The latest SlideLizard news, articles, and resources, sent straight to your inbox.
- or follow us on -
We use cookies to personalize content and analyze traffic to our website. You can choose to accept only cookies that are necessary for the website to function or to also allow tracking cookies. For more information, please see our privacy policy .
Cookie Settings
Necessary cookies are required for the proper functioning of the website. These cookies ensure basic functionalities and security features of the website.
Analytical cookies are used to understand how visitors interact with the website. These cookies help provide information about the number of visitors, etc.
How to Record a PowerPoint Presentation with Narration
Can be helpful in creating a dramatic narrative
Microsoft PowerPoint has a built-in recording tool that allows you to narrate your presentations using recorded audio. You can export and share recorded presentations as video files.
This tutorial covers everything about recording PowerPoint presentations on Windows and Mac computers.

Record PowerPoint Presentation with Narration
Open the PowerPoint file/presentation you want to record and follow the steps below.
Record PowerPoint Presentation on Windows
- Select the slide you want to start recording from on the slide thumbnail pane.

- Head to the Record tab on the ribbon and select the Record button to start recording from the current/selected slide.

To record from the first slide, select the down-facing arrow icon below the Record button and select From Beginning .

You can also record a presentation from the Slide Show tab. Select Slide Show on the ribbon and select Record , From Current Slide , or From Beginning .

That’ll open PowerPoint’s presentation recorder in a fullscreen window.
- Select the Record icon and start speaking after the three seconds countdown.

PowerPoint records the presentation window and captures your voice and webcam feed as you navigate the slides. Select the left-facing and right-facing arrows to move to the previous and next slides in the presentation.
Record PowerPoint Presentation in macOS
- Open the Slide Show tab and select Record Slide Show .

- Select the Record button on the toolbar to start recording your narration.

Use your keyboard arrow keys to move back and forth between slides. Press N or Space Bar to move to the next slide or animation in the presentation. Press P or Backspace to return to the previous slide or animation.
Select Tips in the top-left corner for more keyboard shortcuts and other presentation tips.

Note: The narration tool doesn’t record slide transitions. When moving between slides, wait for the destination slide to appear on the screen before speaking.
PowerPoint Recorder Control/Settings
You’ll find a handful of controls and options on the recording tool. We’ll show you how to use these controls to include voiceovers or audio recordings in your presentation.

Using Presentation Pointer Tools
PowerPoint provides several tools to mark up your slides when narrating your presentation. There’s a pen tool, eraser, laser pointer, and highlighter.
With the Pen tool, you can draw on slides during narration/recording. Press Ctrl + P (Windows) or Command + P (Mac) to use the pen tool. You can also select the Pen icon to convert the pointer to a pen.

The Laser pointer tool converts your cursor to an onscreen laser. Use the laser pointer to draw attention to something on a slide/presentation.
Press Ctrl + L (Windows) or Command + L (Mac) to use the laser pointer. There’s also a Laser pointer icon on the toolbar.

Pressing Ctrl + I (or selecting the Highlighter tool ) converts your cursor to a highlighter.

Use the Eraser tool to remove inks and highlight from slides. Select the Eraser icon or press Ctrl + E and select the ink to erase.

On macOS, select the Erase Pen icon (or press E ) to erase all drawings and highlights on the slide.

You can change the pointer tools ink from the color selection boxes. However, one major limitation is that you can’t change the size of these pointer tools.
Pause and Resume Your Recording
In Windows, press I on your keyboard or select the Pause button in the top-left corner to pause your recording.

Press I again or select the Record icon to resume the recording.

If you use a Mac, select the Pause icon in the top toolbar to pause the recording.

Unmute or Mute Microphone
Check that your microphone is unmuted before recording. Select the microphone icon in the bottom-right corner to mute or unmute your mic.

PowerPoint for Windows allows you to mute and unmute your microphone in real time while recording video/audio narrations. The macOS version of PowerPoint only lets you configure your camera and microphone settings before recording.
Switch Microphone or Camera
Want to record your presentation with an external microphone or camera? Press Ctrl + M or select the audio/camera settings icon in the top-right corner and choose your preferred microphone/camera.

In macOS, select the microphone icon to mute or unmute your microphone. Select the arrow-down icon next to the microphone or camcorder icons to switch input devices.

Enable and Disable Camera
The recorder displays your camera or webcam feed in the bottom-right corner of the presentation slides.
Select the camcorder icon to remove your webcam feed from the recording. Select the icon again to display your webcam feed in the presentation.

You can also use the Ctrl + K keyboard shortcut on Windows computers to enable or disable your camera.
On Mac computers, you’ll find the video control icon on the top toolbar.

Note: The recording tool greys out the camcorder icon if your microphone is turned off.
Enable or Disable Camera Preview
PowerPoint allows you to disable the camera preview without turning off your camera or webcam.
Press Ctrl + J (Windows) or select the Camera Preview icon in the bottom-right corner to disable or enable the camera preview.

End a Recording
Press S on your Windows keyboard or select the Stop icon to end the recording.

Replay or Preview Your Recording
When you end a narration, press V on your keyboard or select Replay to preview or watch the recording.

The recorded narration will include all pen inks, highlights, and laser pointer gestures made during the presentation.
You can also preview/replay the narration outside the recording tool. Open the Slide Show tab and choose to watch the playback From Beginning or From Current Slide .

PowerPoint allows you to preview the playback on individual slides. A speaker/audio icon appears in the bottom-right of PowerPoint slides with narrations.
Choose the slide you want to preview, hover your cursor on the speaker icon in the bottom-right corner, and select Play .

Delete Current Narration/Recording
Did you spot an error when previewing your presentation? Want to delete the current narration and start from scratch?
Select the Clear existing recordings icon and choose whether to Clear Recordings on Current Slide or Clear Recordings on All Slides .

On Mac, select the Bin icon to delete the entire narration/recording.

Close the Narration Tool
Select the X icon on the title bar to close the presentation narration tool and return to Powerpoint.

Select End Show in the top-left corner to close the recording tool on a Mac computer.

Delete Narrations from Slides
Want to delete the narration or timing on an individual slide or the entire presentation? Select the slide with the narration you want to delete and follow the steps below.
- Open the Record tab and select the down-facing arrow below the Record icon.
- Select Clear and choose to clear timing or narration on current or all slides.

Export Recorded or Narrated Presentation
You can export a narrated PowerPoint presentation as a video file. The video output includes ink strokes, recorded audio/video, laser pointer gestures, and webcam/camera recording.
- Open the Record tab and select Export to Video .

Alternatively, open the File menu, select Export on the sidebar, and select Create a Video .

- Choose the quality of the video export in the first drop-down box—Ultra HD (4K), Full HD (1080p), HD (720p), Standard (480p).

- Choose Use Recorded Timings and Narrations in the next drop-down box and select Create Video .

- Give the recorded presentation a file name and select Save .

Narrate Your PowerPoint Presentations
The Microsoft PowerPoint web app doesn’t have a recording tool. As a result, you can only record presentations with narrations using PowerPoint for Windows or Mac.
You might meet issues recording a slide show if you use an outdated version of PowerPoint. Also, the recording tool on older versions of PowerPoint has a different interface and lacks some controls. Update PowerPoint and restart your computer if you cannot record a slide show.

Sodiq has written thousands of tutorials, guides, and explainers over the past 4 years to help people solve problems with Android, iOS, Mac, and Windows devices. He also enjoys reviewing consumer tech products (smartphones, smart home devices, accessories, etc.) and binge-watching comedy series in his spare time. Read Sodiq's Full Bio
Read More Posts:

Leave a Reply
Your email address will not be published. Required fields are marked *

How to Record Audio in PowerPoint for Narration or Voice-Over | Step-by-Step
I’ve scrolled through a lot of slideshows and, let’s face it, they’re not always the easiest to follow or understand what’s going on. I’m sure you have felt this too.
Have you ever thought, it would be great if the slides came with audio so that the presenter could explain and talk through each slide?
In this article, we’re going to show you how to record audio in PowerPoint as a narration or voice-over so your audience can feel as if you are presenting live and in person.
All you have to do is record yourself talking through each slide and PowerPoint will take care of the rest!
Related topic : If you are only looking to insert or add an audio that does not advance or move a slideshow in time and in synch your voice, this article: Adding Music to PowerPoint Slideshow explains how.
How to record audio as a voice-over or narration in PowerPoint – Quick Guide
- In PowerPoint, choose a slide.
- From Slide Show menu > click lower part Record Slide Show button
- Select a slide to Record from Current Slide, or Record from Beginning from the sub-menu
- NOTE: PowerPoint versions 2013-2016 only: A “Slide Show Settings” dialog box will appear for animation timings etc. You can leave both checked.
- PowerPoint will then open into full-screen Recording Mode
- NOTE: Microsoft Office PowerPoint versions 2013-2016 and Microsoft for Mac 365 will start recording immediately.
- In Recording Mode > click the Record button in the top left to start recording countdown.
- You are now ready to talk through your presentation and record your voice.
- To Stop or Pause recording > click Pause button or Stop / End Show (x) button.
- Jump to the full step-by-step tutorial below
Why use narrations or voice-overs in PowerPoint Presentation?
Adding a narration or voice-over into a presentation will enable your slideshow to be played and move forward in time or sync with your voice.
Recording audio for your slideshow is a widely used feature and has many benefits. For example:
- It’s useful in situations when a speaker is not available and when people want to view presentations on their own and at their leisure.
- It is also an effective way for speakers to rehearse and time specific slides or the entire presentations before they happen.
- And you may have watched many instructional videos or online courses with a recorded voice over, just because it makes the content easier to understand, is more engaging and lively than just written words alone.
After you finish the audio recording you can share or export your presentation by converting or exporting your PowerPoint (.ppt) file into a video (.mp4 or .mov file) which will have both your audio and visuals contained in one file.
Before recording your narration or voice-over – tips.
Make sure your microphone works..
An important step to take before recording your audio is to ensure your microphone is set up correctly and your voice can be played back clearly. The video below runs through how to set up an external mic for your Windows or Mac .
First, plug in your headset or microphone to your computer if you are not using the inbuilt mic. Or if you are using a Bluetooth headset, make sure it’s paired/connected properly.
To make sure everything is working OK, access the audio device settings on your computer as shown in the video above. While you are in the device settings menu, select your microphone and set it as default.
You can test the playback quality by using the free software tools on your machine:
- Windows 10 – Use Voice Recorder (previously called Sound Recorder)
- Mac – Use Voice Memos
- Chromebook – New in 2021 from OS 88. Use Screen Capture to test your audio recording by pressing the Ctrl, Shift, and Overview keys to bring up the capture bar. ( You may need to enable by entering chrome://flags in the URL address bar and search for “capture” in the search bar or by entering chrome://flags/#screen-capture in the URL address bar.)
Note – In PowerPoint 2016, you cannot change which microphone device you want to record in screen recording mode (so do it first!), however in 2019/Office 365 it is possible to do so, by using the settings link in the full-screen recording mode.
How to Record Audio in PowerPoint Step-by-Step Instructions.
Versions Covered: PowerPoint 2013, 2016, 2019, 2020, Office 365, PowerPoint for PC / Windows, PowerPoint for macOS and Chromebook.
- Start by opening the PowerPoint presentation in which you want to record your audio.

- Stop Recording. To end the slideshow recording, click the Stop (square button) at the top left. Or keyboard shortcut – Press Alt+S. You’re done recording your captivating and engaging PowerPoint slideshow with a voice-over / narration!
- Exit full screen recording window. Click the (x) button int the corner. To save your slide timings, click “yes” if prompted. When you return to your slide view, a small icon of a microphone appears on the bottom right corner of each slide. Click this icon to hear your voice over for any particular slide.
Advanced PowerPoint Audio Recording Options.
Add annotations to your recorded powerpoint slide show..
Adding annotations to your PowerPoint presentation is an optional step and can help your presentation stand out. But, what are annotations, and how should you use them when recording your voice-over?
If you want to draw a user’s attention to a specific area or to add some interactivity; using annotations is the way to do it. It is basically a virtual marker you can use to highlight elements in your presentation slides e.g by circling a word or picture, underlining a phrase, writing additional notes on-screen, or pointing to specific items.
To use the Annotation Tool in PowerPoint: Scroll to the bottom of the full screen recording view (as shown in the image below). Then, select any of the tools available (the laser pointer, highlighter or pen) and annotate your slide, by drawing with them using any mouse or other pointing device.
Note, this will not make a permanent change to your slides, it’s only visible in the recorded playback!

Using the Timings Function to Adjust Recording Speed.
As you record your narration, you will be able to see a clock in the bottom left corner showing how much time you spend on each slide, against the total amount of time recorded so far.
While this is very helpful for rehearsing your presentation, it’s quite common to have issues with timings with your recorded slideshow. For example when you have switched to the next slide too quickly.
To Change the Timings of Your Recording: Navigate to the Slide Show tab in the top ribbon > (Next to the Record Slide Show icon, we used before) > click the Rehearse Timings icon. The presentation will now once again go to full-screen mode, and you can use your arrow keys to change the slides and set new timings.
Clearing or Deleting your narration and / or timings
If you are not happy with your voice-over on a slide or wish to start the recording from the beginning, PowerPoint gives you some easy options to do so.
To Delete a Narration or Timings: Navigate to the Slide Show tab in the top ribbon OR the Recording Tab. Select the down arrow on the “ Record Slide Show ” button > from the menu choose “ Clear ” > Select the appropriate timings and/or narration option.
Save and Distribute the Presentation with Audio as a Movie / Video file.
Now that you are finished recording your PowerPoint presentation, your voice audio will be attached to the same file and it’s time to distribute it by exporting your PowerPoint (PPT file) into a video (.mp4 or .wmv) .
To Export your Presentation as a video: In PowerPoint navigate to File Menu > Export > Select your preferred options. (E.g.) File Format: MP4 . Quality Width 1,920 Height 1,080
Recording Audio Tips and Tricks
Macos 2019 – powerpoint audio recording tip.
To give PowerPoint access to record your screen in macOS you need to set up the right security and privacy permissions:
- Open System Preferences
- Select Security & Privacy
- Select Privacy tab.
- In the left panel scroll to Screen Recording > click “ +” icon .
- In the “Applications” window select PowerPoint

Microsoft 365, 2016, 2019 for Windows PC – Recording tab in PowerPoint
Microsoft 365 subscribers with the Click-to-Run version of Microsoft 365 for Windows PC can use the Recording tab .
The Recording tab shows the recorded video , screenshots, and screen recording options in a single menu for easy access. To turn on the Recording tab of the ribbon in PowerPoint 365 Windows PC
- Select the File menu > click Options .
- In the PowerPoint Options dialog box > click Customize Ribbon
- In the right-panel > select the Recording check box.
- Click OK .

If you click the button on the bottom of the “Record Slide Show” button, you can start from the beginning of the slideshow or from where you are.

Knowing the basics of recording audio in PowerPoint is a powerful tool for anyone who wants to make a downloadable slideshow, create an internet streamed webinar, upload a video for YouTube, Vimeo, or any other digital platform such as your website or other digital platforms.
You may also like: How to Turn a PowerPoint Into a Video

Related Posts
How to add music to powerpoint slideshow and find free music, [solved] how to upload powerpoint to google drive, 10s method: how to add bullet points in powerpoint.
- Irresistible Tech Gifts for That Special Dad
- Killer Smartphone Deals We Love
How to Do a Voiceover on PowerPoint
Narrate your presentations with ease
:max_bytes(150000):strip_icc():format(webp)/ColettaTeske-af57404a91b342578a97252b7dbd720f.jpg "record your voice powerpoint presentation")
- Central Washington University
What to Know
- Single slide: Select a slide. Go to Insert > Audio > Record Audio . Type a name, select Record , then read your script. Select Stop .
- Entire slideshow: Select View > Normal and choose the first slide. Select Slide Show > Record Slide Show > Record from Current Slide .
- To review the recording, click the sound indicator (it looks like a speaker) and then select Play to hear your recording.
This article explains how to record a voiceover on PowerPoint for a single slide or for the entire slideshow. The instructions apply to PowerPoint for Microsoft 365 , PowerPoint 2019, PowerPoint 2016, and PowerPoint 2013.
How to Record a Voiceover for a Single Slide
Before narrating your PowerPoint presentation, be prepared:
- You’ll need a microphone attached to, or built into, your computer. Test the microphone to make sure it is working. Set the sound level so your audio is easy to hear.
- Prepare yourself for the narration. Write a script you can follow while recording the voiceover. Practice the presentation a couple of times so your voiceover will sound smooth.
- Decide whether to record the voiceover one slide at a time or record a voiceover for the entire presentation in one go.
The simplest way to record audio for a voiceover is to record one slide at a time. To get started, select the slide where you want to add the narration, then go to Insert > Audio > Record Audio .
Here’s how to record a voiceover on the slide:
Type a Name for the voiceover narration.
Select Record (the button with a red dot).
Read your script or ad-lib the narration.
Select Stop when you’re finished recording.
The Record Sound dialog box disappears, and a speaker indicating sound appears in the center of the slide.
To review the recording, click that sound indicator and then select Play to hear your recording.
When you're finished, click anywhere outside the playback controls to accept the recording.
You’ll see an audio icon in the middle of the slide. Move this icon anywhere on the slide to get it out of the way of other elements on the slide.
How to Record a Voiceover for an Entire Presentation
The voiceover for the entire presentation can be recorded at one time. In addition to recording a voiceover, you can record a video of yourself giving your presentation.
To set up your presentation when you want to narrate an entire slideshow:
Select View > Normal
Select the first slide in the presentation where you want to record audio.
Select Slide Show > Record Slide Show > Record from Current Slide .
In PowerPoint 2019, the Recording window opens.
In PowerPoint 2016 and earlier versions, a Record Slide Show dialog box prompts you for further options. In the Record Slide Show box, select options to set up the slideshow:
- Slide and animation timings: When recording, PowerPoint automatically tracks the timing of slide changes and any animations that occur.
- Narrations, ink, and laser pointer: When recording, PowerPoint automatically tracks when narrations, any inking, or laser pointing occurs.
Leave both checked to make automating your slideshow easier.
Select Record .
In PowerPoint 2016, select Start Recording .
Select Pause to temporarily stop the recording if you need a break.
If you made a mistake and want to start over, select Clear > Clear Recordings.
In PowerPoint 2016 select Clear > Clear Recordings on Current Slide .
When you’ve finished recording a slide, select the Advance button to advance to the next slide or press the spacebar on your keyboard.
When you’re done recording your narration on the slide, select Stop and close the recording window to return to the presentation.
You may have noticed some controls at the bottom left side of the screen. These are a few controls to aid you in your presentation.
These handy handy tools include the Laser Pointer , Highlighter , and Eraser . As you advance through your presentation, mark or highlight parts of your slides as you narrate. PowerPoint records the timing of these marks (if you left the boxes checked) to go along with your narration. Likewise, using the laser pointer shows a simulated red laser dot so that you can point out different things on your slides as you narrate your presentation.
How to Listen to the Recorded Voiceover
Once you’ve recorded your narration, you can go back to the slides and listen to your voiceover.
Here’s how to play a narration:
Select the slide containing the voiceover you want to hear.
Look for the recording icon on the slide. It should appear as either a small video screenshot or a speaker icon on the slide.
Hover over select this icon and then click Play to preview the recording.
How to Turn a Voiceover Off
If you don’t want to hear your narrations when playing a slideshow, but want to keep the narrations with the slide, turn voiceover off.
To turn voiceover off, select Slide Show and click to deselect the Play Narrations checkbox.
How to Delete a Voiceover
There are a couple of ways to delete voiceover audio in your presentation. To delete the audio on a single slide, find and select the recording on that slide, then press the Delete key.
To delete the voiceover from all the slides in a presentation: Select Slide Show and then select the down arrow to open the Record Slide Show menu. Then, select Clear Narration on All Slides .
Embedding Versus Linking Audio Files in PowerPoint
When you use the PowerPoint tools to record a voiceover narration, the audio file is embedded in PowerPoint. This means the audio is part of the PowerPoint file and not stored in a separate file, making it easy to play your presentation on any device.
If you have audio you recorded using other software and it's stored on your computer, you can link to the audio file. Linked files keep your presentation size smaller, but links can be broken if the audio file isn't available to the PowerPoint presentation. To prevent broken links, store the presentation file and the audio files in the same folder on your computer.
Get the Latest Tech News Delivered Every Day
- How to Add Audio to PowerPoint
- How to Make a Slideshow on PowerPoint
- Adding Sounds, Music or Narration to PowerPoint Slide Shows
- How to Get PowerPoint on a Mac
- Edit Music, Sound, or Other Audio Settings in PowerPoint
- How to Make and Add Your Own Sound on TikTok
- Loop a PowerPoint Slide Show
- How to Convert PowerPoint to Video
- How to Use Speaker Notes in PowerPoint
- Change Order of Animations for PowerPoint Slides
- How to Add Music to PowerPoint
- How to Change a Black-and-White Picture to Color in PowerPoint
- How to Add Page Numbers in PowerPoint
- Add, Delete or Change the Order of PowerPoint Slides
- Using Design Themes in PowerPoint
- Create Family Trees Using PowerPoint Organization Chart
The Best Way to Add a Voice Over to PowerPoint

Marketing Content Strategist

Table of contents
Why record voice overs for powerpoint, recorded powerpoint presentations are more flexible, forget powerpoint’s built-in recorder — there’s a better way, how to record voice over for powerpoint.
- Pro tip: Edit your video in Camtasia
Tips for getting great audio
Frequently asked questions, subscribe to techsmith’s newsletter.
Microsoft PowerPoint is generally considered to be little more than a tool for creating and giving live presentations. It can, however, be used to create great content, such as educational and instructional videos — all you have to do is add a voice over.
Knowing how to do a voice over on PowerPoint is a brilliant way to transform a bunch of slides into a dynamic piece of professional content that can reach audiences far beyond the conference room. While PowerPoint comes with a built-in presentation recorder, it’s not without its limitations. But, there is a better way.
Tools like TechSmith’s Camtasia , ideal for screen recording and video editing, and TechSmith’s Audiate , designed for audio editing, make voiceover work a breeze. In this post, we’ll show you how to harness both of these tools for maximum impact.
Before we dive into the how-to, it’s important to understand why voice overs are so powerful in PowerPoint presentations and how exactly the help to ensure your presentation isn’t boring . So, in this post, we’ll also discuss:
- The importance of voice overs for PowerPoint presentations .
- Step-by-step instructions to record your voice over .
- A practical example to guide you through the process .
- Best practices for achieving high-quality audio .
The shift to digital and remote working, learning, and collaboration has firmly taken root. From Zoom meetings to virtual classrooms, and even messaging platforms like Slack, remote communication has become a normal part of everyday life. This digital transition means that meetings, workshops, employee training, classroom lectures, and presentations are increasingly moving online.
In today’s digital world, delivering your presentation doesn’t always require being there in person. Instead, you have the freedom to rehearse, record, and edit your presentation in advance, ensuring it’s polished before anyone sees it. It also means that your audience can watch your presentation at a time that suits them.
While this is excellent for perfecting your presentation without the pressure of a live audience, adding a voice over to a recorded presentation can significantly amplify its impact. Imagine a live presentation without the human touch of a voice – it’s like having a deck of slides without the story. There’s a reason why they’re called TED Talks, not just TED Decks.
With your voice breathing life into your PowerPoint, what was once a standard presentation becomes an immersive experience. Whether it’s for an online class, a webinar, or a remote business meeting, your message will resonate more when it’s heard.
As we navigate a world that increasingly blends face-to-face and virtual interactions, the power of a well-narrated presentation can’t be underestimated. It’s about breaking down barriers to communication, reaching people wherever they are, and making sure your message isn’t just delivered but remembered.
The Easiest and Fastest Way to Record and Edit Voice Over for PowerPoint!
Audiate makes recording and editing your voice as simple as editing text in a document.
While live meetings and educational sessions have their place, they require everyone to be in the same place at the same time (even if the place is virtual). That’s fine if all your employees, students, or other audience members are in the same time zone.
But what if your company has employees all over the world? That 2 p.m. ET meeting at your company’s HQ will take place at midnight for your employees in Sydney, Australia.

Moreover, what about employees, students, or others who have to share technology? Or don’t always have access to high-speed internet? Or the privacy necessary to meet at the appointed time?
By offering your presentation asynchronously (which is just a fancy word for “on-demand”), you give people the flexibility to consume your content when it’s convenient or easier for them. Plus they can consume it at their own pace, they have more opportunities to absorb and understand the information.
That doesn’t mean that synchronous (just a fancy word for “live” or “in-person) meetings, training sessions, classes, etc. aren’t important or useful. It just means that providing your audience with more options gives your content more value.
The first thing you’ll probably notice when you decide to record a voice over for your PowerPoint presentation is that PowerPoint has a built-in recorder. Just click the record presentation button and you’re good to go.
This will get the job done, but it’s not the best way to do it. And you know what they say, “If a job’s worth doing, it’s worth doing right”. If, for example, you want to make small edits to your recording at a later stage, you’re going to really regret using PowerPoint’s built-in recorder, as it doesn’t allow you to edit mistakes or verbal flubs.
With PowerPoint, you only get one take. That means you have to remember what you want to say, advance your slides, and do your best to avoid stumbling — just like if you were doing it in front of a live audience.

Quick-and-dirty recordings work in some cases, but for others — especially anything that will be consumed outside your company — you might want something a little more professional. Creating an on-demand recorded presentation will let you do exactly that.
Plus, by recording your voice over separately, you can ensure that your recordings are professional and more engaging.
Now, if you’re not going to use PowerPoint’s built-in recorder, what are you going to use? Well, this is where Audiate comes in…
Audiate is, without a doubt, one of the best tools you can use to record and edit a voice over. You’ll find out why in the following steps, but perhaps one of the coolest features of Audiate is that it allows you to edit audio recordings as if they were text files.
All you have to do is delete the words, sentences, and sounds you don’t want. We’ll tell you all about it shortly, but it’s really easy to use and integrates seamlessly with Camtasia. Best of all you can download a free trial for both Audiate and Camtasia , without giving up your credit card details — just click the links in this sentence!
Okay, so we told you that Audiate is easy to use. And when we say easy, we mean it’s almost ridiculously easy — and we’re going to prove it to you.
1. Start with a script
Whether you’ve created a new presentation or you’re recording one you’ve given a thousand times, writing a script will ensure you know what you want to say, exactly how and when you want to say it. It also helps you stay on topic and remember important points.
If you already have a slide deck, you can use that as the outline for your script. Then, just write up what you would say to your audience if you were presenting it live.
Of course, if you don’t want to write a full, word-for-word script, even a bulleted list of talking points is better than nothing at all. Trust us, a script will save you a ton of editing time later.
2. Record your audio
Gone are the days when audio recording and editing were reserved for professional audio producers, fraught with complex settings and overwhelming interfaces.
Audiate revolutionizes this process with its simplicity and user-friendliness. Its intuitive UI is designed for ease of use, allowing you to start recording your voice over in just a few seconds. To start, simply hit the Record button and start talking. Audiate will transcribe your audio in real-time, which means your words will appear on screen, as you speak.
Once you’re done recording, just click Stop, and Audiate will finish transcribing. This process not only makes recording a stress-free experience but also ensures that editing your voice over is super easy.
3. Edit and export your recording
Everyone makes mistakes or hesitates when recording — even the guy who does all the voice overs for movie trailers. The beauty of Audiate lies in its ability to correct these mishaps. Because Audiate displays your spoken words as text, it eliminates the need to comb through audio waveforms.
Made a mistake? Just find the word or sentence, highlight it, and delete it. Audiate even offers the option to automatically remove common hesitations like “umms” and “uhhs” in just a few clicks .
Need to rearrange your content? Audiate lets you cut and paste words or entire sections as needed. Adding more audio is just as easy — simply hit Record, and your new audio will be added to the end of the existing file, ready to be cut and pasted wherever you need it to be.
If you plan to add captions to your video (which we recommend you do), be sure to go through the transcription and correct anything that Audiate may have misheard to ensure the text matches what you said.
That’s it, you have now successfully recorded and edited your voice over! All that’s left to do is click the Export button and save it as a .WAV file. You can also click File and Export Script, which will save your transcript as an .SRT file that Camtasia can use to add captions.
In the next section, we’ll show you how to add your edited audio to your video in Camtasia.
Pro tip: Edit your video in Camtasia
Camtasia is a powerful, but easy-to-use video editor. Even if you’ve never made a video before, you can quickly learn to create professional-quality content — here’s how:
Import your slides

With Camtasia, you can import PowerPoint slides and insert the audio afterward. No more recording your screen while you run through your slides.
Just click File > Import > Media or, in the Media tab, click the Import Media button and navigate to select your PowerPoint files.
As it stands, Camtasia can’t import presentations made with Google Slides or Apple Keynote. However, if you created your deck in either of those applications, you can save your file as a PowerPoint presentation (.ppt file) and Camtasia can import that instead.
Once you’ve imported your slides, do the same thing for your audio recording.
Add your slides to the timeline

Once your slides and audio are in the Media Bin, drag the audio over to the Timeline. Then, simply add your slides to the Timeline as needed.
Now you can adjust the slide timing and the amount of time they’re visible to ensure they correlate with what’s being said in your voice over.
With everything in its right place, you can export and share your video with your audience, but there are a few more things you can do to ensure the audio is as good as it can possibly be…
Take your video a step further
Use Camtasia’s callouts and other features to add arrows, highlight important information, or otherwise enhance the video experience for your viewers. That’s something you definitely can’t do in PowerPoint.
When you’re ready to add your captions, click Modify and Add Captions to import your captions file. Drag it to the timeline and Camtasia will automatically put the captions in the right spot in your video.
When you’re satisfied that your video is done, you can save the file locally or upload it to any of Camtasia’s array of destinations, including YouTube, Google Drive, Vimeo, and TechSmith’s Screencast (to name a few).
Now your video really is ready to be shared with the world!
Just remember that if you ever need to edit or update your video, you can easily go back into Camtasia, replace whatever slides need changing, and import whatever new audio you’ve recorded. If you had recorded your presentation using PowerPoint, you’d have to start from scratch.
Improving Your Internal Communications
A guide to how visual content can help create a more collaborative and productive work environment.
Now we know you’re ready and raring to get started with your voice over, but we’d be remiss if if we didn’t give you a few pointers on how to record high-quality audio .
So, before you go, here are a few extra tips:
- Start with a script . You’ll speak more confidently and you’ll stay on point.
- Use a better mic . Your computer microphone will work in a pinch, but if you really want the best audio (or, if you plan to make more videos), invest in a decent USB microphone. Some of the best microphones for recording videos will probably cost a lot less than you think.
- Stay hydrated . Your voice sounds better when your vocal chords are nice and hydrated. So, be sure to keep water handy while you’re recording and take a sip when you need to. You can edit out that part later.
- Speak slowly and clearly . When people are nervous they tend to race through whatever they’re trying to say. So, remember to breathe, slow down, and enunciate.
Not at all. With the right tools, you can easily add voice overs to PowerPoint slides and turn your presentation into an engaging educational or informational video!
Not much! A decent microphone and a quiet place to record will go a long way in ensuring your recording sounds great.
While PowerPoint’s built-in recorder works in a pinch, you’ll save your self a lot of time and effort by using a standalone audio recorder like TechSmith’s Audiate.
We highly recommend TechSmith Camtasia. It’s super easy to use and can import PowerPoint slides directly!
Additional Resources
How to generate ai voice: enhancing your workflow with ai, the easiest way to shorten a video for social media, how to get good audio recordings from your home office.
How to Narrate a PowerPoint Presentation (And Record Your Voice)
For a presentation that you aren’t actually giving in person, you can narrate it within PowerPoint, recording your voice so that others can play it back when they watch the presentation.
It’s a nifty trick that popular with slide shows and presentations on networks such as SlideShare, YouTube, and even individual websites. And it can even help you when rehearsing your presentation as well.
Here’s how to narrate a PowerPoint presentation by recording your voice, in a few quick steps!
2 Million+ PowerPoint Templates, Themes, Graphics + More
Download thousands of PowerPoint templates, and many other design elements, with a monthly Envato Elements membership. It starts at $16 per month, and gives you unlimited access to a growing library of over 2,000,000 presentation templates, fonts, photos, graphics, and more.

Pitch PowerPoint

Business PPT Templates
Corporate & pro.

Animated PPT Templates
Fully animated.

Mystify Presentation

Maximus Template

Minimal PPT Templates
Clean & clear.
Explore PowerPoint Templates
Create and Design Your Presentation
The first step to preparing a narrated or recorded PowerPoint presentation is to design the presentation and refine the content. During this step you may even want to think about how you will script the presentation so that you are designing with a flow in mind.
Make sure to include any specific transitions you want to use from slide to slide, and don’t forget to read our guide on how to design a professional presentation for tips and pointers.
Prepare for Recording
Before recording a narration, it is advised to write out a script and check your computer microphone to ensure that the sound is correct and that recordings will be at an appropriate volume. You can do this with a short test recording.
Now it is time to record the narration. You can record narration for all slides or select slides.
Open your presentation and navigate to the Slide Show tab.

If you are recording narration for all of the slides, you are ready. If you plan to record a voiceover for only some of the slides, you want to hide the slides you won’t have a recording for.
You can do this by selecting the slides you don’t want to include, right- or ctrl-click and then Hide Slide.

The other option is to create a custom show. From the menu select Custom Show > Custom Slide Show > use the + to add slides. You will need to know which slide numbers you want for this option because you can’t see previews.
Record the Narration

Now you are ready to record. (Good luck!)
In the Slide Show tab, click the Record Slide Show Button from the first slide in your presentation.

Recording starts automatically. (You’ll notice the screen shifts into full presentation mode.) As you record the narration, you can use the navigation tools on the screen to advance slides. This will override any previous timing settings so that slides advance in tandem with your voice narration.
When you are finished, click End and you will be prompted to save the recording. Only one recording can be saved at a time. A new recording will override any previously saved recorded narrations.
You can preview the recording using the start button.
Helpful Keyboard Shortcuts
Using keyboard shortcuts during recording can make it a little easier.
Some shortcuts you might use include:
- Click, spacebar or right arrow: Advance to the next slide
- Delete or left arrow: Go back one slide
- B: Toggle to black screen
- Esc: End slide show recording
Choose a Playback Option

Finally, you’ll want to determine how the presentation will be played back for users.
Click on Set Up Slide Show from the menu and make your selections from the options on the screen. Then you can save or export to a desired file format.
A PowerPoint presentation with a narrated recording can be a useful tool to help get your information in front of more people. All you need to do it is a quiet room to record and a microphone attached to your computer.
Don’t forget to take a look at our full PowerPoint templates guide , or our collection of the best PowerPoint templates for your next project!
How to Add Voice Narration to a PowerPoint
Lee Stanton Lee Stanton is a versatile writer with a concentration on the software landscape, covering both mobile and desktop applications as well as online technologies. Read more December 11, 2020
When creating a PowerPoint presentation, voice narration can help to spice up your content and make it more engaging. This is especially true if you’re sending your presentation via email or when your audience is not in the same location as you.
In this article, we’re going to show you how to add voice narration to your PowerPoint presentation.
What’s PowerPoint Voice Narration?
PowerPoint’s voice narration is a feature that enables you to record and embed audio clips into your slide deck. You can then attach a narration icon on your slide, which plays when toggled. You can also set the audio to play automatically as the rest of the content is projected.
Preparation
Every successful and experienced PowerPoint enthusiast will tell you that the secret to making engaging and informative content lies in adequate preparation. To ensure that your presentation stands out, here are some tips:
Carefully Assemble Your Slide Deck
You should aim for a consistent presentation, where the content is presented in chronological order. You don’t want to end up with a presentation that is disorganized because that will make it difficult for your audience to follow. You’ll need to make sure that any audio clips you embed into your slide are not only in sync with the rest of the content but also form a clear and logical sequence of ideas in the minds of the audience.
Mental Preparation Is Key
After assembling all the necessary resources, ensure that you’re thoroughly familiar with the content. Only then can you project confidence into your voice narration. A good way to prepare is to scribble down the things you want to include in your narration well in advance. This helps you to come up with a mind map of the key points of your presentation.
Put the Mic to the test
Obviously, you need a microphone to record audio clips. Luckily, most modern computers come with an inbuilt microphone that needs minimal preparation. However, you’ll still want to make sure that you’re sufficiently audible. You can adjust things like volume by opening your computer’s settings and clicking on “Sound” in the menu on the left of your screen.
Quiet Environment
Non-ambient sounds can ruin even the best of presentations. Ensure that your room is nearly sound-proof before the recording starts. You should turn off things like fans and air conditioners.
How to Add Voice Narration to a PowerPoint Presentation
If you’re using any Microsoft package other than Office 365, here’s how you can add voice narration to your presentation:

PowerPoint automatically affixes a sound icon beneath every slide that has a voice narration. You’ll also notice that the time taken recording the slide is also included.
Once you’re done recording, it’s always a good idea to preview your slideshow. To do so, click on “Slide Show” on the Home tab in the menu bar. To listen to the audio you recorded for a particular slide, simply go to “Normal View” and click on the sound icon.
How to Add Voice Narration to PowerPoint Slides
Voice narration can be the difference between a presentation that impresses and one that truly stands out. Voice narration converts your presentation into a self-contained utility and provides your audience with a complete, self-teaching asset.
Here are the steps you should take to add voice narration to PowerPoint slides:

How to Insert Sound Effects in PowerPoint
Sound effects are a good way to make your slides more interesting to your audience. PowerPoint allows you to add a range of sounds to animations. What’s more, you have the option to play sounds every time you open a new slide during your presentation.
Before adding a sound, first, you have to create the animation effect. Here’s how you can add a sound effect to an animation:

How to Insert Music in PowerPoint
There can hardly be a better way to spice up your presentation than adding music. To play music across slides, here’s what you need to do:

And just like that, your music will start playing as soon as the slide is opened.
How to Add Voice Narration to PowerPoint on a Mac
If you own a Mac, adding voice narration to your PowerPoint presentation is straightforward.
- Click on “Slide Show” on the top menu.
- Select “Record Narration.” This will launch a new window.
- In the new window, specify the sound input device and input source.
- Click on “Record” to start recording. This launches the full-screen presentation mode.
- When done, press the escape key.
- Click on “Yes” when asked whether you’d like to save slide timings.
- PowerPoint automatically adds the speaker icon beneath each slide. To play the narration automatically every time the slide is opened, right-click on the speaker and select “Start Automatically.”
How to Add Voice Narration to PowerPoint on an iPad
You can add voice narration to a PowerPoint presentation on your iPad. Here’s how:
- Open the first slide of your presentation.
- Tap “Play.”
- Slide your finger down from the top right corner of your screen. This launches the Control Center. You’ll be able to see all recording options if you tap and hold the “Record” button.
- Tap the microphone button to turn it on.
- Select “Start Recording.” You’ll now have three seconds to prepare.
- Return to the Control center by tapping “Background.”
- Return to your presentation by tapping “Control Center Background.”
- Proceed to navigate through your slide deck as you add voice narration.
- When you’re done, slide your finger down from the top right corner of your screen to launch the Control Center. Then, tap the “Record” button.
Your recording will appear in the Photos app.
Additional FAQ
How do i add narration to powerpoint 365.
• Select “Slide Show.”
• You’ll be prompted to decide whether you want to start recording from the current slide or from the beginning. For best results, always start from the beginning. At this point, PowerPoint should automatically launch the slideshow mode.
• In the slideshow mode, you’ll notice a series of buttons on the top right corner. The first one, which appears in red, allows you to record. The second one stops the recording, while the third one allows you to play the audio recorded.

• The slide involving the recording is always on the main panel of the window. To begin recording a new slide, simply toggle the arrow on the right side of the window. To go back to the previous slide, toggle the arrow on the left. It’s important to note that PowerPoint automatically records the time spent on every slide.
• Use the buttons on the bottom right hand corner to toggle your mic and camera. If for some reason you want to repeat a part of the recording or all of it, PowerPoint will automatically delete the old recording and start you off on a clean slate. When you’re done recording, click on the middle, square-shaped button on the top left corner.
How Do I Voice Over a PowerPoint?
• Open the presentation and click on the “Slide Show” tab.
• Click on “Record Slide Show.”
• A dropdown menu will appear and prompt you to choose between starting recording from the beginning or from the current slide.
Create Engaging Content with Voice Narration
Voice narration may not be the most popular PowerPoint tool, but it presents a sure way to add an extra layer of quality to your presentations to make them more interesting and engaging. What’s your experience with the voice narration feature?
Let us know in the comments section.
Related Posts

Disclaimer: Some pages on this site may include an affiliate link. This does not effect our editorial in any way.

Paras Rastogi March 11, 2024

Lee Stanton December 21, 2023

Lee Stanton December 18, 2023
Send To Someone
Missing device.
Please enable JavaScript to submit this form.
PowerPoint Recorder
Record your PowerPoint presentations online
Powerful Online PowerPoint Recorder
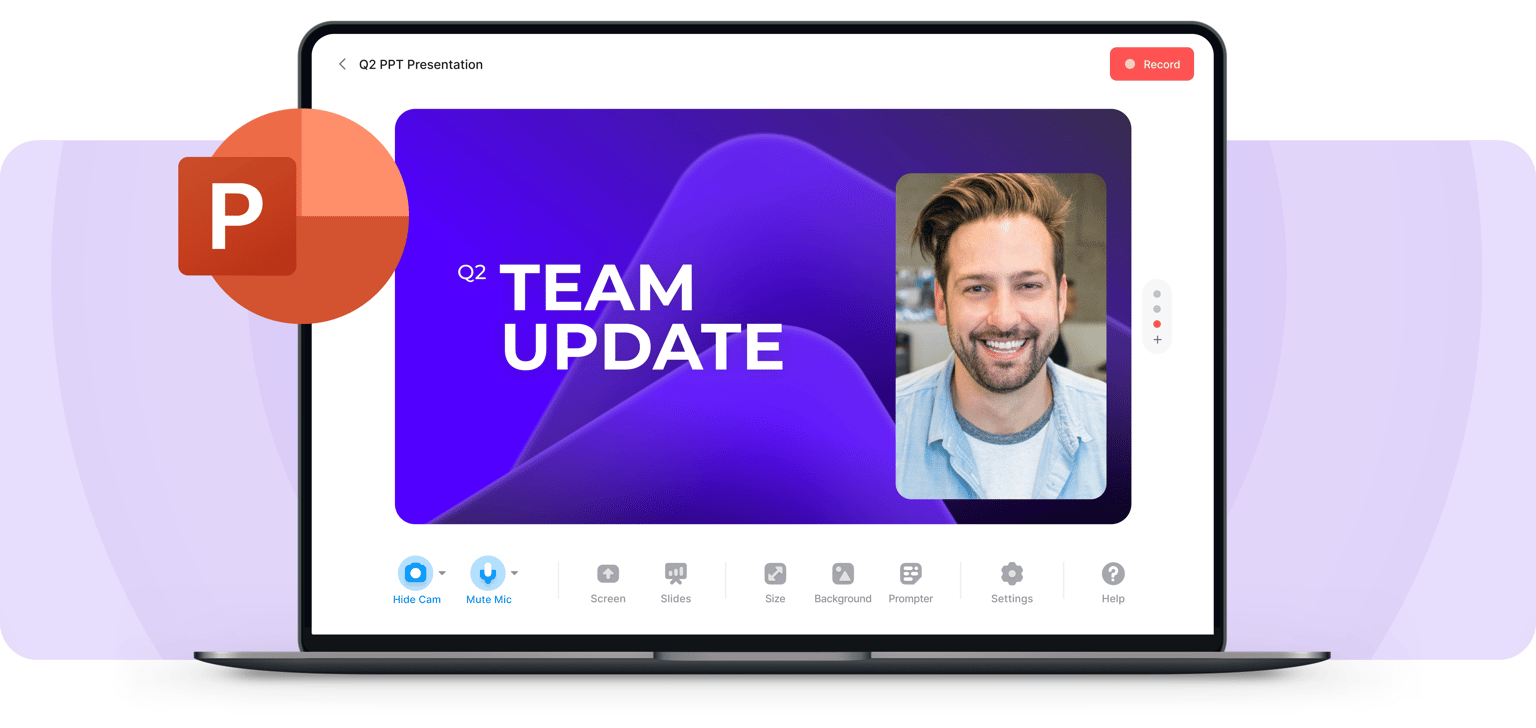
Make your presentations look professional using VEED’s online PowerPoint recorder. It’s fast, easy to use, and gives you access to video editing tools to make your presentation stand out. You can upload your slides or record your screen while you are presenting. Add yourself to the scene by recording your webcam and audio as well.
No need to install software. Open your browser and start recording! Choose from different layouts and customize your video after you record. You can also edit your recording using our professional video editor.
How to Record Your PowerPoint Presentation:
1 upload slides and select a layout.
Select from our list of layouts (you may need to click to ‘Allow’ permission to access your screen, camera, or microphone). You can record just your screen, your webcam, or both at the same time! You can either upload your slides or record while you’re presenting.
2 Start recording
Click the red button to start recording! You'll see a countdown before the recording starts. Don't worry if you mess up. You have unlimited time and unlimited retakes. You can navigate to other pages, and don't worry, you are still recording.
3 Review, edit, and export
You can playback your recording to review it, click ‘Share’ to share with friends and colleagues, or ‘Edit’ to edit your video (perfect for adding text, subtitles, and professional touches to your screen recording)

‘PowerPoint Recorder’ Tutorial

Highly customizable PPT recording software
VEED lets you easily customize your Microsoft PowerPoint presentation recordings. Select from different layouts and backgrounds. You can record your screen, webcam, audio, and upload your PowerPoint slides to present while recording. If you choose to record your entire desktop, you can easily switch the view between your presentation slides and other windows. When you’re finished, edit your video using our free video editor, where you can also add royalty-free music from our Stock Library.
All the things you need in a screen recorder
Our video capture software is packed with features that will help you create professional-looking recordings. When you press record, the countdown timer will appear to prompt you when your recording starts. To make sure that your audio is being picked up, check the little microphone icon on the bottom of your screen. It should be animated to indicate that your audio is being recorded. It only takes a few clicks. It’s the best app to record your Microsoft PowerPoint presentations.
Fast, free, and easy-to-use screen recorder software
Our screen recorder and video editor are free to use and beginner-friendly. However, if you need to record longer videos, you may need to subscribe to our premium plans. Check out our Pricing Page to see which plan suits your needs. It is super easy to use. It only takes a few clicks!
Microsoft does allow you to record your presentation as well as your voice or audio. But you might be limited because you can’t switch screens. Use VEED to record your entire desktop and switch between windows.
With VEED, you can record your audio, webcam, screen, and presentation slides all at the same time!
To add yourself or your camera to the recording, select the layout that includes “webcam.” Choose the size and positioning of your camera feed and start recording!
Although there are many screen recorders out there, VEED is your best choice when it comes to recording your PC screen! It’s free and online. No need to install software. Plus you can use our free video editor to enhance your recording even more.
What they say about VEED
Veed is a great piece of browser software with the best team I've ever seen. Veed allows for subtitling, editing, effect/text encoding, and many more advanced features that other editors just can't compete with. The free version is wonderful, but the Pro version is beyond perfect. Keep in mind that this a browser editor we're talking about and the level of quality that Veed allows is stunning and a complete game changer at worst.
I love using VEED as the speech to subtitles transcription is the most accurate I've seen on the market. It has enabled me to edit my videos in just a few minutes and bring my video content to the next level
Laura Haleydt - Brand Marketing Manager, Carlsberg Importers
The Best & Most Easy to Use Simple Video Editing Software! I had tried tons of other online editors on the market and been disappointed. With VEED I haven't experienced any issues with the videos I create on there. It has everything I need in one place such as the progress bar for my 1-minute clips, auto transcriptions for all my video content, and custom fonts for consistency in my visual branding.
Diana B - Social Media Strategist, Self Employed
More than a PowerPoint recorder
VEED is a complete browser-based tool that lets you do so much more than just record and share your Microsoft PowerPoint presentations. You can annotate your videos to make your presentation more informative. Edit your recording to add images, subtitles, and more. It is a professional all-in-one video-creation and editing software that’s great for beginners and pros alike. Create professional-looking videos in just a few clicks. You don’t need any video editing experience. Create stunning videos that you can share on social media in just minutes. Try VEED to create professional PowerPoint recordings today!


Introducing Copilot+ PCs
May 20, 2024 | Yusuf Mehdi - Executive Vice President, Consumer Chief Marketing Officer
- Share on Facebook (opens new window)
- Share on Twitter (opens new window)
- Share on LinkedIn (opens new window)

An on-demand recording of our May 20 event is available .
Today, at a special event on our new Microsoft campus, we introduced the world to a new category of Windows PCs designed for AI, Copilot+ PCs.
Copilot+ PCs are the fastest, most intelligent Windows PCs ever built. With powerful new silicon capable of an incredible 40+ TOPS (trillion operations per second), all – day battery life and access to the most advanced AI models, Copilot+ PCs will enable you to do things you can’t on any other PC. Easily find and remember what you have seen in your PC with Recall, generate and refine AI images in near real-time directly on the device using Cocreator, and bridge language barriers with Live Captions, translating audio from 40+ languages into English .
These experiences come to life on a set of thin, light and beautiful devices from Microsoft Surface and our OEM partners Acer, ASUS, Dell, HP, Lenovo and Samsung, with pre-orders beginning today and availability starting on June 18. Starting at $999, Copilot+ PCs offer incredible value.
This first wave of Copilot+ PCs is just the beginning. Over the past year, we have seen an incredible pace of innovation of AI in the cloud with Copilot allowing us to do things that we never dreamed possible. Now, we begin a new chapter with AI innovation on the device. We have completely reimagined the entirety of the PC – from silicon to the operating system, the application layer to the cloud – with AI at the center, marking the most significant change to the Windows platform in decades.
YouTube Video
The fastest, most secure Windows PCs ever built
We introduced an all-new system architecture to bring the power of the CPU, GPU, and now a new high performance Neural Processing Unit (NPU) together. Connected to and enhanced by the large language models (LLMs) running in our Azure Cloud in concert with small language models (SLMs), Copilot+ PCs can now achieve a level of performance never seen before. They are up to 20x more powerful [1] and up to 100x as efficient [2] for running AI workloads and deliver industry-leading AI acceleration. They outperform Apple’s MacBook Air 15” by up to 58% in sustained multithreaded performance [3] , all while delivering all-day battery life. With incredible efficiency, Copilot+ PCs can deliver up to 22 hours of local video playback or 15 hours of web browsing on a single charge. [4] That is up to 20% more battery in local video playback than the MacBook Air 15”. [5]
Windows now has the best implementation of apps on the fastest chip, starting with Qualcomm. We now offer more native Arm64 experiences than ever before, including our fastest implementation of Microsoft 365 apps like Teams, PowerPoint, Outlook, Word, Excel, OneDrive and OneNote. Chrome, Spotify, Zoom, WhatsApp, Adobe Photoshop, Adobe Lightroom, Blender, Affinity Suite, DaVinci Resolve and many more now run natively on Arm to give you great performance with additional apps, like Slack, releasing later this year. In fact, 87% of the total app minutes people spend in apps today have native Arm versions. [6] With a powerful new emulator, Prism, your apps run great, whether native or emulated.
Every Copilot+ PC comes secured out of the box. The Microsoft Pluton Security processor will be enabled by default on all Copilot+ PCs and we have introduced a number of new features, updates and defaults to Windows 11 that make it easy for users to stay secure. And, we’ve built in personalized privacy controls to help you protect what’s important to you. You can read more about how we are making Windows more secure here .
Entirely new, powerful AI experiences
Copilot+ PCs leverage powerful processors and multiple state-of-the-art AI models, including several of Microsoft’s world-class SLMs, to unlock a new set of experiences you can run locally, directly on the device. This removes previous limitations on things like latency, cost and even privacy to help you be more productive, creative and communicate more effectively.
Recall instantly
We set out to solve one of the most frustrating problems we encounter daily – finding something we know we have seen before on our PC. Today, we must remember what file folder it was stored in, what website it was on, or scroll through hundreds of emails trying to find it.
Now with Recall, you can access virtually what you have seen or done on your PC in a way that feels like having photographic memory. Copilot+ PCs organize information like we do – based on relationships and associations unique to each of our individual experiences. This helps you remember things you may have forgotten so you can find what you’re looking for quickly and intuitively by simply using the cues you remember. [7]
You can scroll across time to find the content you need in your timeline across any application, website, document, or more. Interact intuitively using snapshots with screenray to help you take the next step using suggested actions based on object recognition. And get back to where you were, whether to a specific email in Outlook or the right chat in Teams.
Recall leverages your personal semantic index, built and stored entirely on your device. Your snapshots are yours; they stay locally on your PC. You can delete individual snapshots, adjust and delete ranges of time in Settings, or pause at any point right from the icon in the System Tray on your Taskbar. You can also filter apps and websites from ever being saved. You are always in control with privacy you can trust.
Cocreate with AI-powered image creation and editing, built into Windows
Since the launch of Image Creator, almost 10 billion images have been generated, helping more people bring their ideas to life easily by using natural language to describe what they want to create. Yet, today’s cloud offerings may limit the number of images you can create, keep you waiting while the artwork processes or even present privacy concerns. By using the Neural Processing Units (NPUs) and powerful local small language models, we are bringing innovative new experiences to your favorite creative applications like Paint and Photos.
Combine your ink strokes with text prompts to generate new images in nearly real time with Cocreator. As you iterate, so does the artwork, helping you more easily refine, edit and evolve your ideas. Powerful diffusion-based algorithms optimize for the highest quality output over minimum steps to make it feel like you are creating alongside AI. Use the creativity slider to choose from a range of artwork from more literal to more expressive. Once you select your artwork, you can continue iterating on top of it, helping you express your ideas, regardless of your creative skills.

Take photo editing and image creation to the next level. With Restyle Image, you can reimagine your personal photos with a new style combining image generation and photo editing in Photos. Use a pre-set style like Cyberpunk or Claymation to change the background, foreground or full picture to create an entirely new image. Or jumpstart your next creative project and get visual inspiration with Image Creator in Photos. On Copilot+ PCs you can generate endless images for free, fast, with the ability to fine tune images to your liking and to save your favorites to collections.
Innovative AI experiences from the creative apps you love
We are also partnering with some of the biggest and most-loved applications on the planet to leverage the power of the NPU to deliver new innovative AI experiences.
Together with Adobe, we are thrilled to announce Adobe’s flagship apps are coming to Copilot+ PCs, including Photoshop, Lightroom and Express – available today. Illustrator, Premiere Pro and more are coming this summer. And we’re continuing to partner to optimize AI in these apps for the NPU. For Adobe Creative Cloud customers, they will benefit from the full performance advantages of Copilot+ PCs to express their creativity faster than ever before.

DaVinci Resolve Studio
Effortlessly apply visual effects to objects and people using NPU-accelerated Magic Mask in DaVinci Resolve Studio.

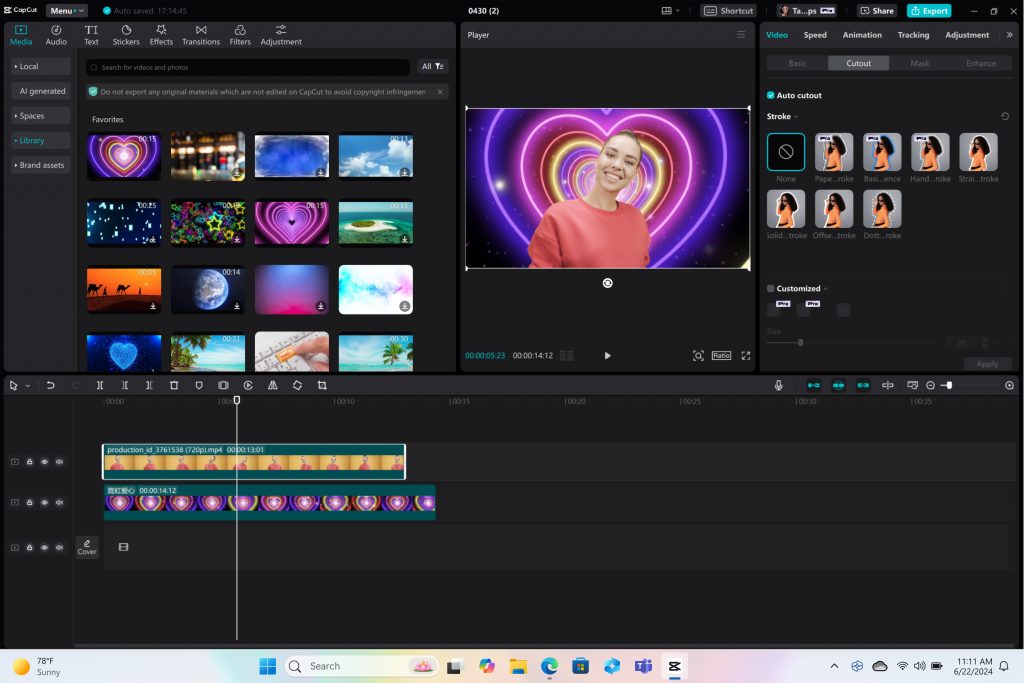
Remove the background from any video clip in a snap using Auto Cutout running on the NPU in CapCut.
Stay in your flow with faster, more responsive adaptive input controls, like head movement or facial expressions via the new NPU-powered camera pipeline in Cephable.

LiquidText
Make quicker and smarter annotations to documents, using AI features that run entirely on-device via NPU, so data stays private in LiquidText.

Have fun breaking down and remixing any music track, with a new, higher-quality version of NeuralMix™ that’s exclusive to NPU in Algoriddim’s djay Pro.

Connect and communicate effortlessly with live captions
In an increasingly connected and global world, Windows wants to bring people closer together. Whether catching up on your favorite podcast from a different country, or watching your favorite international sports team, or even collaborating with friends and colleagues across the world, we want to make more content accessible to more people.
Live Captions now has live translations and will turn any audio that passes through your PC into a single, English-language caption experience, in real time on your screen across all your apps consistently. You can translate any live or pre-recorded audio in any app or video platform from over 40 languages into English subtitles instantly, automatically and even while you’re offline. Powered by the NPU and available across all Copilot+ PCs, now you can have confidence your words are understood as intended.
New and enhanced Windows Studio Effects
Look and sound your best automatically with easily accessible controls at your fingertips in Quick Settings. Portrait light automatically adjusts the image to improve your perceived illumination in a dark environment or brighten the foreground pixels when in a low-light environment. Three new creative filters (illustrated, animated or watercolor) add an artistic flare. Eye contact teleprompter helps you maintain eye contact while reading your screen. New improvements to voice focus and portrait blur help ensure you’re always in focus.
Copilot, your everyday AI companion

Every Copilot+ PC comes with your personal powerful AI agent that is just a single tap away on keyboards with the new Copilot key. [8] Copilot will now have the full application experience customers have been asking for in a streamlined, simple yet powerful and personal design. Copilot puts the most advanced AI models at your fingertips. In the coming weeks, get access to the latest models including GPT-4o from our partners at OpenAI, so you can have voice conversations that feel more natural.
Advancing AI responsibly
At Microsoft, we have a company-wide commitment to develop ethical, safe and secure AI. Our responsible AI principles guided the development of these new experiences, and all AI features are aligned with our standards. Learn more here .
New Copilot+ PCs from Microsoft Surface and our partners
We have worked with each of the top OEMs — Acer, ASUS, Dell, HP, Lenovo, Samsung — and of course Surface, to bring exciting new Copilot+ PCs that will begin to launch on June 18. Starting at $999, these devices are up to $200 less than similar spec’d devices [9] .
Surface plays a key role in the Windows ecosystem, as we design software and hardware together to deliver innovative designs and meaningful experiences to our customers and fans. We are introducing the first-ever Copilot+ PCs from Surface: The all-new Surface Pro and Surface Laptop.

The new Surface Laptop is a powerhouse in an updated, modern laptop design with razor-thin bezels, a brilliant touchscreen display, AI-enhanced camera, premium audio, and now with a haptic touchpad.
Choose between a 13.8” and 15” display and four stunning colors. Enjoy up to 22 hours of local video playback on Surface Laptop 15” or up to 20 hours on Surface Laptop13.8” on top of incredible performance and all-new AI experiences.
The new Surface Pro is the most flexible 2-in-1 laptop, now reimagined with more speed and battery life to power all-new AI experiences. It introduces a new, optional OLED with HDR display, and ultrawide field of view camera perfect for Windows Studio Effects. The new Surface Pro Flex Keyboard is the first 2-in-1 keyboard designed to be used both attached or detached. It delivers enhanced stability, with Surface Slim Pen storage and charging integrated seamlessly, as well as a quiet, haptic touchpad. Learn more here.
New Copilot+ PCs from the biggest brands available starting June 18:
- Acer : Acer’s Swift 14 AI 2.5K touchscreen enables you to draw and edit your vision with greater accuracy and with color-accurate imagery. Launch and discover AI-enhanced features, like Acer PurifiedVoice 2.0 and Purified View, with a touch of the dedicated AcerSense button.
- ASUS : The ASUS Vivobook S 15 is a powerful device that brings AI experiences to life with its Snapdragon X Elite Platform and built-in Qualcomm® AI. It boasts 40+ NPU TOPS, a dual-fan cooling system, and up to 1 TB of storage. Next-gen AI enhancements include Windows Studio effects v2 and ASUS AiSense camera, with presence-detection capabilities for Adaptive Dimming and Lock. Built for portability, it has an ultra-slim and light all-metal design, a high-capacity battery, and premium styling with a single-zone RGB backlit keyboard.
- Dell : Dell is launching five new Copilot+ PCs, including the XPS 13, Inspiron 14 Plus, Inspiron 14, Latitude 7455, and Latitude 5455, offering a range of consumer and commercial options that deliver groundbreaking battery life and unique AI experiences. The XPS 13 is powered by Snapdragon X Elite processors and features a premium, futuristic design, while the Latitude 7455 boasts a stunning QHD+ display and quad speakers with AI noise reduction. The Inspiron14 and Inspiron 14 Plus feature a Snapdragon X Plus 1and are crafted with lightweight, low carbon aluminum and are energy efficient with EPEAT Gold rating.
- HP : HP’s OmniBook X AI PC and HP EliteBook Ultra G1q AI PC with Snapdragon X Elite are slim and sleek designs, delivering advanced performance and mobility for a more personalized computing experience. Features include long-lasting battery life and AI-powered productivity tools, such as real-time transcription and meeting summaries. A 5MP camera with automatic framing and eye focus is supported by Poly Studio’s crystal-clear audio for enhanced virtual interactions.
- Lenovo : Lenovo is launching two AI PCs: one built for consumers, Yoga Slim 7x, and one for commercial, ThinkPad T14s Gen 6. The Yoga Slim 7x brings efficiency for creatives, featuring a 14.5” touchscreen with 3K Dolby Vision and optimized power for 3D rendering and video editing. The T14s Gen 6 brings enterprise-level experiences and AI performance to your work tasks, with features including a webcam privacy shutter, Wi-Fi 7 connectivity and up to 64GB RAM.
- Samsung : Samsung’s new Galaxy Book4 Edge is ultra-thin and light, with a 3K resolution 2x AMOLED display and Wi-Fi 7 connectivity. It has a long-lasting battery that provides up to 22 hours of video playback, making it perfect for work or entertainment on the go.
Learn more about new Copilot+ PCs and pre-order today at Microsoft.com and from major PC manufacturers, as well as other leading global retailers.
Start testing for commercial deployment today
Copilot+ PCs offer businesses the most performant Windows 11 devices with unique AI capabilities to unlock productivity, improve collaboration and drive efficiency. As a Windows PC, businesses can deploy and manage a Copilot+ PC with the same tools and processes used today including IT controls for new features and AppAssure support. We recommend IT admins begin testing and readying for deployment to start empowering your workforce with access to powerful AI features on these high-performance devices. You can read more about our commercial experiences here .

AI innovation across the Windows ecosystem
Like we’ve always done with Windows, we have built a platform for our ecosystem partners to build on.
The first Copilot+ PCs will launch with both the Snapdragon® X Elite and Snapdragon® X Plus processors and feature leading performance per watt thanks to the custom Qualcomm Oryon™ CPU, which delivers unrivaled performance and battery efficiency. Snapdragon X Series delivers 45 NPU TOPS all-in-one system on a chip (SoC). The premium integrated Qualcomm® Adreno ™ GPU delivers stunning graphics for immersive entertainment. We look forward to expanding through deep partnerships with Intel and AMD, starting with Lunar Lake and Strix Point. We will bring new Copilot+ PC experiences at a later date. In the future we expect to see devices with this silicon paired with powerful graphics cards like NVIDIA GeForce RTX and AMD Radeon™, bringing Copilot+ PC experiences to reach even broader audiences like advanced gamers and creators.
We are at an inflection point where the PC will accelerate AI innovation. We believe the richest AI experiences will only be possible when the cloud and device work together in concert. Together with our partners, we’re setting the frame for the next decade of Windows innovation.
[1] Based on snapshot of aggregated, non-gaming app usage data as of April 2024 for iGPU-based laptops and 2-in-1 devices running Windows 10 and Windows 11 in US, UK, CA, FR, AU, DE, JP.
[2] Tested April 2024 using Phi SLM workload running 512-token prompt processing in a loop with default settings comparing pre-release Copilot+ PC builds with Snapdragon Elite X 12 Core and Snapdragon X Plus 10 core configurations (QNN build) to Windows 11 PC with NVIDIA 4080 GPU configuration (CUDA build).
[3] Tested May 2024 using Cinebench 2024 Multi-Core benchmark comparing Copilot+ PCs with Snapdragon X Elite 12 core and Snapdragon X Plus 10 core configurations to MacBook Air 15” with M3 8 core CPU / 10 Core GPU configuration. Performance will vary significantly between device configuration and usage.
[4] *Battery life varies significantly by device and with settings, usage and other factors. See aka.ms/cpclaims*
[5] *Battery life varies significantly based on device configuration, usage, network and feature configuration, signal strength, settings and other factors. Testing conducted May 2024 using the prelease Windows ADK full screen local video playback assessment under standard testing conditions, with the device connected to Wi-Fi and screen brightness set to 150 nits, comparing Copilot+ PCs with Snapdragon X Elite 12 core and Snapdragon X Plus 10 core configurations running Windows Version 26097.5003 (24H2) to MacBook Air 15” M3 8-Core CPU/ 10 Core GPU running macOS 14.4 with similar device configurations and testing scenario.
[6] Based on snapshot of aggregated, non-gaming app usage data as of April 2024 for iGPU-based laptops and 2-in-1 devices running Windows 10 and Windows 11 in US, UK, CA, FR, AU, DE, JP.
[7] Recall is optimized for select languages (English, Chinese (simplified), French, German, Japanese, and Spanish.) Content-based and storage limitations apply. Learn more here .
[8] Copilot key functionality may vary. See aka.ms/keysupport
[9] Based on MSRPs; actual savings may vary
Tags: AI , Copilot+ PC
- Check us out on RSS
- Add animation Video
- Add transitions between slides Video
- Add, format, and record video Video
- Add and record audio Video
Add and record audio

Add and record audio, such as music, narration, or sound bites, to your PowerPoint presentation and select the playback options.
Add audio from your PC
Select Insert > Media > Audio .
Select Audio on My PC .
In the Insert Audio dialog box, select the audio file you want to add.
Select Insert .
Record audio
Select Insert > Media > Audio .
Select Record Audio .
Type in a name for your audio file, select Record , and then speak.
Important: Your device must have a microphone enabled in order to record audio.
To review your recording, select Stop and then select Play .
Select Record to re-record your clip, or select OK if you’re satisfied.
To move your clip, select and drag the audio icon to where you want it on the slide.
Note: If you’re using more than one audio file per slide, it’s advisable to put the audio icon in the same spot on a slide to find it easily.
Select Play .
Change playback options
Select the audio icon and then select the Playback tab. Then select which options you'd like to use:
To trim the audio, select Trim and then use the red and green sliders to trim the audio file accordingly.
To fade in or fade out audio, change the number in the Fade Duration boxes.
To adjust volume, select Volume and select the setting you prefer.
To choose how the audio file starts, select the dropdown arrow and select an option:
In Click Sequence – Plays the audio file automatically with a click.
Automatically – Plays automatically once you advance to the slide that the audio file is on.
When Clicked On – Plays audio only when the icon is clicked on.
To choose how the audio plays in your presentation, select an option:
Play Across Slides – Plays one audio file across all slides.
Loop until Stopped – Plays an audio file on loop until it’s stopped manually by clicking the Play/Pause button.
To have the audio play continuously across all slides in the background, select Play in Background .
Delete audio
To delete audio, select the audio icon on the slide and press Delete.
Add audio to your PowerPoint presentation
Play music for the duration of your slide show

Need more help?
Want more options.
Explore subscription benefits, browse training courses, learn how to secure your device, and more.

Microsoft 365 subscription benefits

Microsoft 365 training

Microsoft security

Accessibility center
Communities help you ask and answer questions, give feedback, and hear from experts with rich knowledge.

Ask the Microsoft Community

Microsoft Tech Community

Windows Insiders
Microsoft 365 Insiders
Was this information helpful?
Thank you for your feedback.
IMAGES
VIDEO
COMMENTS
In the Options dialog box, click the Customize Ribbon tab on the left. Then, in the right-hand box that lists the available ribbon tabs, select the Recording check box. Click OK. To get ready to record, select Record on either the Recording tab or the Slide Show tab of the ribbon.
Record a Voiceover for Your Presentation. Open the PowerPoint presentation in which you would like to record a voiceover narration. Head over to the "Slide Show" tab and, in the "Set Up" group, select "Record Slide Show.". Once selected, a drop-down menu will appear. Here, you can choose to start the narration from the beginning or ...
Tutorial. Open your PowerPoint presentation or create a new one. In the taskbar, select Slide Show. Then click Record Slide Show. Choose the option Record from Beginning. You'll now get to a different view, which we'll call "Recorder View". Here's an overview: In the bottom right corner, you'll see three icons.
In this you will learn how to record a voice over a PowerPoint presentation, how to edit that audio snippet in PowerPoint and how to save the presentation ...
Record narration and timings for your presentation in Microsoft PowerPoint to give it a professional and polished feel. Record narration and timings:1. Selec...
Today's video will show you how to add and record audio narration to your slides in Microsoft PowerPoint. You'll need to make sure you have a recording devic...
Select the Record button on the toolbar to start recording your narration. Use your keyboard arrow keys to move back and forth between slides. Press N or Space Bar to move to the next slide or animation in the presentation. Press P or Backspace to return to the previous slide or animation.
From Slide Show menu > click lower part Record Slide Show button. Select a slide to Record from Current Slide, or Record from Beginning from the sub-menu. NOTE: PowerPoint versions 2013-2016 only: A "Slide Show Settings" dialog box will appear for animation timings etc. You can leave both checked.
Go to Insert > Audio > Record Audio. Type a name, select Record, then read your script. Select Stop. Entire slideshow: Select View > Normal and choose the first slide. Select Slide Show > Record Slide Show > Record from Current Slide. To review the recording, click the sound indicator (it looks like a speaker) and then select Play to hear your ...
Step 2. Press Record in PowerPoint. To record narrations in PowerPoint, start off by finding the Slide Show tab on PowerPoint's ribbon. Click on the Slide Show tab to change the available options.. On the Slide Show tab, click Record to start the recording process.. Make sure that you start on the first slide in PowerPoint to record audio and timings for the entire presentation.
The importance of voice overs for PowerPoint presentations. Step-by-step instructions to record your voice over. A practical example to guide you through the process. Best practices for achieving high-quality audio. Why record voice overs for PowerPoint? The shift to digital and remote working, learning, and collaboration has firmly taken root.
Open your presentation and navigate to the Slide Show tab. If you are recording narration for all of the slides, you are ready. If you plan to record a voiceover for only some of the slides, you want to hide the slides you won't have a recording for. You can do this by selecting the slides you don't want to include, right- or ctrl-click and ...
Learn how to record a PowerPoint Presentation with audio and video simply by using the build-in PowerPoint functionalities and tools. You will learn how to...
If you own a Mac, adding voice narration to your PowerPoint presentation is straightforward. Click on "Slide Show" on the top menu. Select "Record Narration.". This will launch a new ...
Look at the top of your screen to find the right option. Select "Record slide show." Now you've prepared your presentation to accept audio footage. Check the settings on your computer to ensure it enabled your microphone to capture your voice over. Press "Play" when you're ready to narrate.
Step 3: Open Your PowerPoint Slides and Capture the Screen. Open your PowerPoint presentation and put it in "Slide Show" mode. With Panopto Express, you'll have two options for recording your slides: You can either record your slides by recording your screen or by recording the slides within the PowerPoint application.
More than a PowerPoint recorder. VEED is a complete browser-based tool that lets you do so much more than just record and share your Microsoft PowerPoint presentations. You can annotate your videos to make your presentation more informative. Edit your recording to add images, subtitles, and more. It is a professional all-in-one video-creation ...
In this step-by-step tutorial, learn how to add a voice over / narration to a PowerPoint slide presentation. You'll learn three different methods to adding a...
10. Ardour. Ardour is a leading professional audio recording software designed for businesses to create high-quality audio recordings using its cut, trim, and split functionality. This free sound recording software enhances your audio and strives to refine your voice so you can deliver your message easily.
An on-demand recording of our May 20 event is available. Today, at a special event on our new Microsoft campus, we introduced the world to a new category of Windows PCs designed for AI, Copilot+ PCs. Copilot+ PCs are the fastest, most intelligent Windows PCs ever built. With powerful new silicon capable of an incredible...
To record and hear any audio, your computer must be equipped wi... You can add audio, such as music, narration, or sound bites, to your PowerPoint presentation.
Select Record to re-record your clip, or select OK if you're satisfied. To move your clip, select and drag the audio icon to where you want it on the slide. Note: If you're using more than one audio file per slide, it's advisable to put the audio icon in the same spot on a slide to find it easily.