We use essential cookies to make Venngage work. By clicking “Accept All Cookies”, you agree to the storing of cookies on your device to enhance site navigation, analyze site usage, and assist in our marketing efforts.
Manage Cookies
Cookies and similar technologies collect certain information about how you’re using our website. Some of them are essential, and without them you wouldn’t be able to use Venngage. But others are optional, and you get to choose whether we use them or not.
Strictly Necessary Cookies
These cookies are always on, as they’re essential for making Venngage work, and making it safe. Without these cookies, services you’ve asked for can’t be provided.
Show cookie providers
- Google Login
Functionality Cookies
These cookies help us provide enhanced functionality and personalisation, and remember your settings. They may be set by us or by third party providers.
Performance Cookies
These cookies help us analyze how many people are using Venngage, where they come from and how they're using it. If you opt out of these cookies, we can’t get feedback to make Venngage better for you and all our users.
- Google Analytics
Targeting Cookies
These cookies are set by our advertising partners to track your activity and show you relevant Venngage ads on other sites as you browse the internet.
- Google Tag Manager
- Infographics
- Daily Infographics
- Popular Templates
- Accessibility
- Graphic Design
- Graphs and Charts
- Data Visualization
- Human Resources
- Beginner Guides
Blog Beginner Guides How To Make a Good Presentation [A Complete Guide]

How To Make a Good Presentation [A Complete Guide]
Written by: Krystle Wong Jul 20, 2023

A top-notch presentation possesses the power to drive action. From winning stakeholders over and conveying a powerful message to securing funding — your secret weapon lies within the realm of creating an effective presentation .
Being an excellent presenter isn’t confined to the boardroom. Whether you’re delivering a presentation at work, pursuing an academic career, involved in a non-profit organization or even a student, nailing the presentation game is a game-changer.
In this article, I’ll cover the top qualities of compelling presentations and walk you through a step-by-step guide on how to give a good presentation. Here’s a little tip to kick things off: for a headstart, check out Venngage’s collection of free presentation templates . They are fully customizable, and the best part is you don’t need professional design skills to make them shine!
These valuable presentation tips cater to individuals from diverse professional backgrounds, encompassing business professionals, sales and marketing teams, educators, trainers, students, researchers, non-profit organizations, public speakers and presenters.
No matter your field or role, these tips for presenting will equip you with the skills to deliver effective presentations that leave a lasting impression on any audience.
Click to jump ahead:
What are the 10 qualities of a good presentation?
Step-by-step guide on how to prepare an effective presentation, 9 effective techniques to deliver a memorable presentation, faqs on making a good presentation, how to create a presentation with venngage in 5 steps.
When it comes to giving an engaging presentation that leaves a lasting impression, it’s not just about the content — it’s also about how you deliver it. Wondering what makes a good presentation? Well, the best presentations I’ve seen consistently exhibit these 10 qualities:
1. Clear structure
No one likes to get lost in a maze of information. Organize your thoughts into a logical flow, complete with an introduction, main points and a solid conclusion. A structured presentation helps your audience follow along effortlessly, leaving them with a sense of satisfaction at the end.
Regardless of your presentation style , a quality presentation starts with a clear roadmap. Browse through Venngage’s template library and select a presentation template that aligns with your content and presentation goals. Here’s a good presentation example template with a logical layout that includes sections for the introduction, main points, supporting information and a conclusion:

2. Engaging opening
Hook your audience right from the start with an attention-grabbing statement, a fascinating question or maybe even a captivating anecdote. Set the stage for a killer presentation!
The opening moments of your presentation hold immense power – check out these 15 ways to start a presentation to set the stage and captivate your audience.
3. Relevant content
Make sure your content aligns with their interests and needs. Your audience is there for a reason, and that’s to get valuable insights. Avoid fluff and get straight to the point, your audience will be genuinely excited.
4. Effective visual aids
Picture this: a slide with walls of text and tiny charts, yawn! Visual aids should be just that—aiding your presentation. Opt for clear and visually appealing slides, engaging images and informative charts that add value and help reinforce your message.
With Venngage, visualizing data takes no effort at all. You can import data from CSV or Google Sheets seamlessly and create stunning charts, graphs and icon stories effortlessly to showcase your data in a captivating and impactful way.

5. Clear and concise communication
Keep your language simple, and avoid jargon or complicated terms. Communicate your ideas clearly, so your audience can easily grasp and retain the information being conveyed. This can prevent confusion and enhance the overall effectiveness of the message.
6. Engaging delivery
Spice up your presentation with a sprinkle of enthusiasm! Maintain eye contact, use expressive gestures and vary your tone of voice to keep your audience glued to the edge of their seats. A touch of charisma goes a long way!
7. Interaction and audience engagement
Turn your presentation into an interactive experience — encourage questions, foster discussions and maybe even throw in a fun activity. Engaged audiences are more likely to remember and embrace your message.
Transform your slides into an interactive presentation with Venngage’s dynamic features like pop-ups, clickable icons and animated elements. Engage your audience with interactive content that lets them explore and interact with your presentation for a truly immersive experience.

8. Effective storytelling
Who doesn’t love a good story? Weaving relevant anecdotes, case studies or even a personal story into your presentation can captivate your audience and create a lasting impact. Stories build connections and make your message memorable.
A great presentation background is also essential as it sets the tone, creates visual interest and reinforces your message. Enhance the overall aesthetics of your presentation with these 15 presentation background examples and captivate your audience’s attention.
9. Well-timed pacing
Pace your presentation thoughtfully with well-designed presentation slides, neither rushing through nor dragging it out. Respect your audience’s time and ensure you cover all the essential points without losing their interest.
10. Strong conclusion
Last impressions linger! Summarize your main points and leave your audience with a clear takeaway. End your presentation with a bang , a call to action or an inspiring thought that resonates long after the conclusion.
In-person presentations aside, acing a virtual presentation is of paramount importance in today’s digital world. Check out this guide to learn how you can adapt your in-person presentations into virtual presentations .

Preparing an effective presentation starts with laying a strong foundation that goes beyond just creating slides and notes. One of the quickest and best ways to make a presentation would be with the help of a good presentation software .
Otherwise, let me walk you to how to prepare for a presentation step by step and unlock the secrets of crafting a professional presentation that sets you apart.
1. Understand the audience and their needs
Before you dive into preparing your masterpiece, take a moment to get to know your target audience. Tailor your presentation to meet their needs and expectations , and you’ll have them hooked from the start!
2. Conduct thorough research on the topic
Time to hit the books (or the internet)! Don’t skimp on the research with your presentation materials — dive deep into the subject matter and gather valuable insights . The more you know, the more confident you’ll feel in delivering your presentation.
3. Organize the content with a clear structure
No one wants to stumble through a chaotic mess of information. Outline your presentation with a clear and logical flow. Start with a captivating introduction, follow up with main points that build on each other and wrap it up with a powerful conclusion that leaves a lasting impression.
Delivering an effective business presentation hinges on captivating your audience, and Venngage’s professionally designed business presentation templates are tailor-made for this purpose. With thoughtfully structured layouts, these templates enhance your message’s clarity and coherence, ensuring a memorable and engaging experience for your audience members.
Don’t want to build your presentation layout from scratch? pick from these 5 foolproof presentation layout ideas that won’t go wrong.

4. Develop visually appealing and supportive visual aids
Spice up your presentation with eye-catching visuals! Create slides that complement your message, not overshadow it. Remember, a picture is worth a thousand words, but that doesn’t mean you need to overload your slides with text.
Well-chosen designs create a cohesive and professional look, capturing your audience’s attention and enhancing the overall effectiveness of your message. Here’s a list of carefully curated PowerPoint presentation templates and great background graphics that will significantly influence the visual appeal and engagement of your presentation.
5. Practice, practice and practice
Practice makes perfect — rehearse your presentation and arrive early to your presentation to help overcome stage fright. Familiarity with your material will boost your presentation skills and help you handle curveballs with ease.
6. Seek feedback and make necessary adjustments
Don’t be afraid to ask for help and seek feedback from friends and colleagues. Constructive criticism can help you identify blind spots and fine-tune your presentation to perfection.
With Venngage’s real-time collaboration feature , receiving feedback and editing your presentation is a seamless process. Group members can access and work on the presentation simultaneously and edit content side by side in real-time. Changes will be reflected immediately to the entire team, promoting seamless teamwork.

7. Prepare for potential technical or logistical issues
Prepare for the unexpected by checking your equipment, internet connection and any other potential hiccups. If you’re worried that you’ll miss out on any important points, you could always have note cards prepared. Remember to remain focused and rehearse potential answers to anticipated questions.
8. Fine-tune and polish your presentation
As the big day approaches, give your presentation one last shine. Review your talking points, practice how to present a presentation and make any final tweaks. Deep breaths — you’re on the brink of delivering a successful presentation!
In competitive environments, persuasive presentations set individuals and organizations apart. To brush up on your presentation skills, read these guides on how to make a persuasive presentation and tips to presenting effectively .

Whether you’re an experienced presenter or a novice, the right techniques will let your presentation skills soar to new heights!
From public speaking hacks to interactive elements and storytelling prowess, these 9 effective presentation techniques will empower you to leave a lasting impression on your audience and make your presentations unforgettable.
1. Confidence and positive body language
Positive body language instantly captivates your audience, making them believe in your message as much as you do. Strengthen your stage presence and own that stage like it’s your second home! Stand tall, shoulders back and exude confidence.
2. Eye contact with the audience
Break down that invisible barrier and connect with your audience through their eyes. Maintaining eye contact when giving a presentation builds trust and shows that you’re present and engaged with them.
3. Effective use of hand gestures and movement
A little movement goes a long way! Emphasize key points with purposeful gestures and don’t be afraid to walk around the stage. Your energy will be contagious!
4. Utilize storytelling techniques
Weave the magic of storytelling into your presentation. Share relatable anecdotes, inspiring success stories or even personal experiences that tug at the heartstrings of your audience. Adjust your pitch, pace and volume to match the emotions and intensity of the story. Varying your speaking voice adds depth and enhances your stage presence.

5. Incorporate multimedia elements
Spice up your presentation with a dash of visual pizzazz! Use slides, images and video clips to add depth and clarity to your message. Just remember, less is more—don’t overwhelm them with information overload.
Turn your presentations into an interactive party! Involve your audience with questions, polls or group activities. When they actively participate, they become invested in your presentation’s success. Bring your design to life with animated elements. Venngage allows you to apply animations to icons, images and text to create dynamic and engaging visual content.
6. Utilize humor strategically
Laughter is the best medicine—and a fantastic presentation enhancer! A well-placed joke or lighthearted moment can break the ice and create a warm atmosphere , making your audience more receptive to your message.
7. Practice active listening and respond to feedback
Be attentive to your audience’s reactions and feedback. If they have questions or concerns, address them with genuine interest and respect. Your responsiveness builds rapport and shows that you genuinely care about their experience.

8. Apply the 10-20-30 rule
Apply the 10-20-30 presentation rule and keep it short, sweet and impactful! Stick to ten slides, deliver your presentation within 20 minutes and use a 30-point font to ensure clarity and focus. Less is more, and your audience will thank you for it!
9. Implement the 5-5-5 rule
Simplicity is key. Limit each slide to five bullet points, with only five words per bullet point and allow each slide to remain visible for about five seconds. This rule keeps your presentation concise and prevents information overload.
Simple presentations are more engaging because they are easier to follow. Summarize your presentations and keep them simple with Venngage’s gallery of simple presentation templates and ensure that your message is delivered effectively across your audience.

1. How to start a presentation?
To kick off your presentation effectively, begin with an attention-grabbing statement or a powerful quote. Introduce yourself, establish credibility and clearly state the purpose and relevance of your presentation.
2. How to end a presentation?
For a strong conclusion, summarize your talking points and key takeaways. End with a compelling call to action or a thought-provoking question and remember to thank your audience and invite any final questions or interactions.
3. How to make a presentation interactive?
To make your presentation interactive, encourage questions and discussion throughout your talk. Utilize multimedia elements like videos or images and consider including polls, quizzes or group activities to actively involve your audience.
In need of inspiration for your next presentation? I’ve got your back! Pick from these 120+ presentation ideas, topics and examples to get started.
Creating a stunning presentation with Venngage is a breeze with our user-friendly drag-and-drop editor and professionally designed templates for all your communication needs.
Here’s how to make a presentation in just 5 simple steps with the help of Venngage:
Step 1: Sign up for Venngage for free using your email, Gmail or Facebook account or simply log in to access your account.
Step 2: Pick a design from our selection of free presentation templates (they’re all created by our expert in-house designers).
Step 3: Make the template your own by customizing it to fit your content and branding. With Venngage’s intuitive drag-and-drop editor, you can easily modify text, change colors and adjust the layout to create a unique and eye-catching design.
Step 4: Elevate your presentation by incorporating captivating visuals. You can upload your images or choose from Venngage’s vast library of high-quality photos, icons and illustrations.
Step 5: Upgrade to a premium or business account to export your presentation in PDF and print it for in-person presentations or share it digitally for free!
By following these five simple steps, you’ll have a professionally designed and visually engaging presentation ready in no time. With Venngage’s user-friendly platform, your presentation is sure to make a lasting impression. So, let your creativity flow and get ready to shine in your next presentation!
Discover popular designs

Infographic maker

Brochure maker

White paper online

Newsletter creator

Flyer maker

Timeline maker

Letterhead maker

Mind map maker

Ebook maker
- SimilarContent
- Netpeak Software
- Article Forge
- Jasper AI Copywriter
- Dreamstime.com
- Renderforest
- Office Timeline
- Smashinglogo
- GetResponse
- Klenty – Sales Engagement Tool
- Benchmark Email
- PromoRepublic
- Constant Contact
- FindThatLead
- EmailOctopus
- SmarterQueue
- Iconosquare
- Social Champ
- SocialOomph
- Social Searcher
- BrandMentions
- ProWorkflow
- Alerter System
- Bettermode Review
- AutoFxPro.com
- Blubrry Podcasting
- ContentStudio
- Influencer Marketing
- Growth Strategies
- Entrepreneurs
- Inspiration
- Media Mister
- Getty Images
- Hire Writers
- AMZ Watcher
- Sitechecker Pro
- Gravity Forms
- Supermetrics
What is Presentation Logic? Complete Guide
Logic is the foundation of all web applications . It is the backbone of all business applications, from websites to mobile apps . In addition to being a crucial component of a web application, presentation logic is also crucial for the development of interactive experiences. Essentially, presentation logic is a way to present information to users in the most efficient manner possible. Using the proper presentation logic, an application can improve its user experience and improve sales results.
A good example of presentation logic is found in game programming. Games use computer software that takes input from a game controller and forces characters on the screen to perform tasks. Modern computer applications are designed to react to human movement through special cameras or infrared devices. This allows them to build a virtual environment that makes the user feel as though they are actually inside the gaming system. In fact, a game program’s presentation logic may be the most complex part of its code.
While business logic consists of the rules of a company, presentation logic refers to how the details of an application are displayed. Both are important but must be considered separately. A business application can’t operate without either. It must adhere to both of these standards to keep users happy. In addition, it should also be easy to use. There are many types of presentation logic. Some are easier to use than others, but they are both important in any application.
Presentation logic is a concept in software development . It describes how the business objects are displayed to the user. This can include displaying information through pop-up screens or drop-down menus. A presentation layer can be built using prototyping tools, and then tested in a user acceptance testing environment. When it’s complete, it will be able to validate the data and business rules of the application. Then it can be used for user acceptance testing.
The two most common types of presentation logic are business logic and presentation logic. The latter is the most general type of presentation logic. It outlines the steps necessary to complete an action. Similarly, presentation logically explains how the business objects are presented to the user. When it is properly implemented, it will ensure that users retain the information. It will also ensure that the audience is able to understand the content of the application.
In simple terms , presentation logic is the processing required to create a print-out. It is also called business logic. It is an important part of an application, as it can define the business rules and actions that should be performed. It is also known as user interface. This layer is the foundation of the entire system. It’s where the business rules are implemented. Usually, presentation logic is implemented in the client side of a web-based application .
Presentation logic is the core of the application. The business logic layer provides a foundation for the user to interact with the application. It also contains all the business rules for the server. By contrast, presentation logic is the underlying code that determines how the data is presented. In contrast to business rules, presentation logic is the “rules” part. Instead of business rules, the logic layer implements the data stored on the server.
In Java, presentation logic is the logical presentation of ideas in a database. While business logic is the underlying code of an application, presentation logic is the logic for the data. And presentation logic is the core of an application. JSTL is a logical way to express business rules. This means that the data in an object is organized in the right way and a specific format must be used for it to be effective .
The presentation logic in an application is the logical layer for ideas. It is different from business logic. For instance, the presentation layer presents the objects that a user sees. The business logic is the logical way to apply the business rules. In this case, the presentation logic focuses on the data. It has a UI, and it must not be confusing. And application logic is the core of the system.
Presentation Layer
The presentation layer is a component of the software architecture that handles the user interface (UI) of an application. It is the layer that the end-users interact with, and its primary function is to present information to the user in a way that is understandable and easy to use.
The Presentation Layer is responsible for handling the presentation logic, which defines how the information will be presented to the user. It also handles user input validation and formatting of output data. The layer communicates with the application layer and the data layer to obtain the necessary information and to perform necessary actions.
The Presentation Layer consists of several components, including the user interface components, such as buttons, text boxes, and menus. It also includes the visual design components, such as themes and templates, that define the look and feel of the application. Additionally, it may include the animation and multimedia components, such as images, videos, and audio files.
The Presentation Layer has an essential role in software architecture. It is the layer that creates the first impression of the application for the users, and it affects the usability and user experience of the software. A well-designed presentation layer can make a significant difference in the success of the application.
The Presentation Layer is often implemented using web technologies, such as HTML, CSS , and JavaScript, for web-based applications, or platform-specific technologies, such as JavaFX or WPF, for desktop applications. The choice of technology depends on the requirements of the application and the target platform.
In conclusion, the Presentation Layer is a crucial component of software architecture that handles the user interface of an application. It is responsible for presenting information to the user, validating user input, and formatting output data. The presentation layer components include user interface components, visual design components, and animation and multimedia components. The Presentation Layer is implemented using web or platform-specific technologies, depending on the requirements of the application.
Presentation Logic
Presentation Logic is the part of software logic responsible for determining how the user interface components of an application should behave and interact with each other. It defines how the user interface will be presented to the user and how it will respond to user input.
Presentation Logic is closely related to the Presentation Layer, as it is responsible for implementing the behavior of the user interface components in that layer. It encapsulates the behavior of each component and determines how it should respond to user interactions, such as mouse clicks, keyboard input, or touch events.
The Presentation Logic is responsible for the following tasks:
- Validating user input: it ensures that the user input is in the correct format and within the expected range of values.
- Formatting output data: it formats the data to be displayed to the user in a way that is easy to read and understand.
- Managing user interface state: it maintains the state of the user interface components, such as their visibility, enabled/disabled status, and data values.
- Implementing user interface flow: it defines the navigation between different screens or pages of the application and manages the flow of the user interface.
Examples of Presentation Logic include:
- Enabling and disabling buttons based on user input: For example, disabling a “submit” button until all required fields in a form have been completed.
- Formatting data for display: For example, formatting a date to display as “DD/MM/YYYY” or “MM/DD/YYYY” based on user preferences.
- Implementing conditional logic: For example, showing or hiding specific user interface components based on user input or application state.
- Managing user authentication: For example, requiring users to log in before accessing certain features of the application.
The Presentation Logic should be designed to be reusable, maintainable, and testable. It should be separated from the business logic and data access logic to ensure that each layer can be developed independently.
Features of Presentation Logic
Presentation Logic has several features that are essential to ensure its effectiveness in software development. These features include separation of concerns, reusability, testability, and maintainability.
Separation of Concerns
Presentation Logic should be separated from other layers of the application to allow for clear division of responsibilities. Separation of concerns helps to reduce complexity, increase modularity, and promote code reuse. By separating Presentation Logic from business logic and data access logic, it becomes easier to maintain and test each layer independently.
Reusability
Presentation Logic should be designed to be reusable across different parts of the application. It allows for code reduction, faster development, and a consistent user experience. Reusable Presentation Logic components, such as form validation or navigation, can be shared across different screens or pages of the application, resulting in code optimization and reducing the time and effort required for development.
Testability
Presentation Logic should be designed to be easily testable to ensure its reliability and quality. Testability allows for quick and efficient debugging and helps to identify issues early in the development process. The Presentation Logic should be separated from the user interface components, allowing for the use of automated testing tools and frameworks to test its functionality.
Maintainability
Presentation Logic should be designed to be easy to maintain, update, and modify. It should be well-structured, with clear and concise code that is easy to understand. The Presentation Logic should follow coding best practices, such as code commenting, documentation, and consistent coding style. Good coding practices can help prevent errors, reduce bugs, and make it easier for other developers to work on the codebase.
In conclusion, Presentation Logic is a critical component of software development that determines how the user interface components of an application behave and interact with each other. The features of Presentation Logic include separation of concerns, reusability, testability, and maintainability. Separation of concerns allows for clear division of responsibilities, reusability enables code reduction and consistency, testability ensures reliability and quality, and maintainability promotes easy updates, modifications, and debugging. Developers should aim to implement these features in their Presentation Logic to create efficient and reliable software applications.
Benefits of Presentation Logic
Presentation Logic plays a crucial role in software development and provides several benefits to developers and end-users. These benefits include increased user experience, improved performance, reduced development time, and easier maintenance.
Increased User Experience
Presentation Logic determines how the user interface components are presented to the user, how they interact with each other, and how they respond to user input. By designing a clean and intuitive user interface with well-defined Presentation Logic, developers can improve the user experience of their application. Users are more likely to enjoy using an application that is easy to navigate, provides clear and concise feedback, and responds to their input quickly.
Improved Performance
Presentation Logic can significantly impact the performance of an application. By separating the user interface components from the business logic and data access logic, developers can optimize the performance of each layer independently. Well-designed Presentation Logic ensures that the user interface components are only updated when necessary, reducing the load on the application and improving overall performance.
Reduced Development Time
Presentation Logic can significantly reduce the development time required for an application. By using reusable components, developers can quickly develop and integrate new features into their applications. By separating Presentation Logic from business logic and data access logic, developers can work on each layer independently, allowing for parallel development and faster iteration.
Easier Maintenance
Presentation Logic can make it easier to maintain and update an application. By separating the user interface components from the business logic and data access logic, developers can easily modify or update the Presentation Logic without affecting other parts of the application. Well-structured Presentation Logic also promotes easy debugging, testing, and maintenance.
In conclusion, Presentation Logic provides several benefits to developers and end-users, including increased user experience, improved performance, reduced development time, and easier maintenance. Developers should aim to design well-structured Presentation Logic that is reusable, maintainable, and testable to create efficient and reliable software applications. By leveraging the benefits of Presentation Logic, developers can create user-friendly applications that are easy to maintain, update, and improve over time.
Best Practices for Implementing Presentation Logic
To implement Presentation Logic effectively, developers should follow certain best practices to ensure that the code is efficient, maintainable, and scalable. The following are some of the best practices for implementing Presentation Logic.
Follow the Separation of Concerns Principle
One of the most important best practices for implementing Presentation Logic is to follow the Separation of Concerns principle. This principle involves separating different concerns of an application into distinct modules or layers. By separating Presentation Logic from business logic and data access logic, developers can reduce the complexity of the codebase and make it easier to maintain and modify.
Use a Design Pattern
Using a design pattern such as Model-View-Controller (MVC) or Model-View-ViewModel (MVVM) can make it easier to implement Presentation Logic. These patterns help to separate the user interface, data, and business logic of an application into different modules, allowing for easier maintenance and testing.
Use Data Binding
Data binding is a technique that allows developers to bind data properties directly to user interface elements. This technique makes it easier to update the user interface elements when the underlying data changes. Using data binding can significantly reduce the amount of code required to implement Presentation Logic.
Use Reusable Components
Developers should aim to create reusable components for Presentation Logic wherever possible. This approach allows developers to use the same components across multiple screens or pages, reducing the amount of code required and promoting consistency in the user interface. Reusable components also make it easier to modify or update the Presentation Logic in the future.
Follow Coding Best Practices
Developers should follow coding best practices such as using consistent naming conventions, documenting the code, and avoiding duplicate code. These practices can help to improve the readability and maintainability of the codebase and reduce the likelihood of errors and bugs.
Use Automated Testing
Automated testing is an essential practice for implementing Presentation Logic effectively. Developers should write automated tests for their Presentation Logic to ensure that it is functioning as expected and to catch bugs and errors early in the development process. Automated testing can also help to reduce the amount of time and effort required for manual testing.
Frequently asked questions
What is presentation logic vs application logic.
Presentation logic and application logic are both important components of a software system, but they serve different purposes.
Presentation logic refers to the code that controls the user interface of an application. This includes the layout, formatting, and behavior of the various elements that the user interacts with, such as buttons, text boxes, and menus. The presentation logic is responsible for ensuring that the application’s user interface is visually appealing, intuitive, and easy to use.
Application logic, on the other hand, refers to the code that controls the underlying functionality of the application. This includes the algorithms and business logic that handle data processing, calculations, and other tasks that are essential to the application’s core functionality. The application logic is responsible for ensuring that the application functions correctly and efficiently.
To summarize, presentation logic is concerned with how the application looks and behaves, while application logic is concerned with what the application does. Both are important components of a software system, and they work together to create a seamless user experience.
What is the presentation logic components?
The presentation logic components typically include the following:
- User interface design: This component includes the layout and appearance of the user interface elements, such as buttons, menus, forms, and screens. The user interface design should be visually appealing and easy to use.
- Input validation: This component includes the code that checks the user input to ensure that it is valid and meets the required format and content. Input validation is important for data integrity and security.
- Event handling: This component includes the code that responds to user actions, such as clicking a button or entering data into a form. Event handling is essential for enabling user interactions and for triggering the application logic.
- Navigation: This component includes the code that controls how users navigate through the application. Navigation should be intuitive and consistent throughout the application.
- Error handling: This component includes the code that detects and handles errors that occur during user interactions. Error handling should provide helpful feedback to the user and prevent the application from crashing.
- User preferences and settings: This component includes the code that allows users to customize the application to their preferences, such as changing the language, font size, or color scheme.
These presentation logic components work together to create a user-friendly and visually appealing interface that enables users to interact with the application in a seamless and intuitive manner.
What is the importance of presentation logic?
The presentation logic of an application is important for several reasons:
- User experience: The presentation logic is responsible for creating a user-friendly and visually appealing interface that enables users to interact with the application in an intuitive and seamless manner. A well-designed user interface can enhance the user experience and increase user satisfaction.
- Usability: The presentation logic is responsible for ensuring that the user interface is easy to use and navigate. A well-designed user interface can improve the usability of an application, making it easier for users to achieve their goals.
- Branding and identity: The presentation logic can also contribute to the branding and identity of an application. A visually appealing and consistent user interface can help to establish the brand identity and differentiate the application from competitors.
- Accessibility: The presentation logic is responsible for ensuring that the user interface is accessible to all users, including those with disabilities. A well-designed user interface can enhance accessibility and ensure that all users can use the application effectively.
- Flexibility: The presentation logic can provide flexibility and customization options for users, such as allowing them to adjust the font size, color scheme, or language. This can improve user satisfaction and engagement.
- Overall, the presentation logic is important for creating a positive user experience, enhancing usability, establishing brand identity, improving accessibility, and providing flexibility and customization options for users.
Presentation Logic is an essential component of modern software development. It refers to the logic that determines how the user interface components of an application are presented to the user, how they interact with each other, and how they respond to user input. By designing a clean and intuitive user interface with well-defined Presentation Logic, developers can improve the user experience of their application.
In this article, we have explored the concept of Presentation Logic in detail, discussing its definition, components, and features. We have also outlined the benefits of implementing Presentation Logic, such as increased user experience, improved performance, reduced development time, and easier maintenance. Finally, we have provided some best practices for implementing Presentation Logic effectively, such as following the Separation of Concerns principle, using a design pattern, using data binding, creating reusable components, following coding best practices, and using automated testing.
In conclusion, Presentation Logic is a critical aspect of software development that can significantly impact the user experience, performance, and maintainability of an application. By implementing Presentation Logic effectively and following best practices, developers can create efficient, scalable, and user-friendly applications that meet the needs of their users.
Leave a Reply Cancel reply
You must be logged in to post a comment.
Related Posts

Technology in sports journalism

Exploring the design and applications of conductive inks in printed electronics

Expanding Horizons: The Strategic Advantage of a German Virtual Number

Navigating Cloud: A Comprehensive Guide to Successful Azure Migration

Tips and Tricks for Designing the Perfect Custom Powerpoint Theme

Tech Trends 2024: The Coolest Gifts for the Savvy Gadget Geek

How it works
For Business
Join Mind Tools
Article • 10 min read
How to Structure a Presentation
Choosing the best format for your audience.
By the Mind Tools Content Team

Have you ever sat through a rambling, disorganized presentation? If so, you probably found it hard to follow what the speaker was saying.
When presentations don't flow well, it's easy for audiences to get lost. This is why it's important to think carefully about the structure and organization of your presentation.
In this article, we'll explore some common structures that you can use next time you speak in front of other people.
The Importance of Structure
Without a defined structure, your audience may not be able to follow your presentation. When this happens, your opportunity is lost, the communication fails, and your reputation takes a hit. For example, if your aim is to persuade people, you'll want to use a different approach from the one you'd use if you wanted to demonstrate how a product works.
Many factors can influence your choice of structure, but the most important consideration is your presentation's purpose or goal. You need to identify what you want to achieve – do you want to inspire, motivate, inform, persuade, or entertain people?
Your audience's needs also affect the structure you choose. For example, those who are new to your topic need more background information than people with more expertise and experience. So, in this case, you'd want to choose an approach that gives you ample time to explain the context of your subject, as well as to reinforce your main points.
Structures to Consider
Below, we outline several structures that you can use to organize your presentation.
1. Open – Body – Conclusion
The Open – Body – Conclusion approach is one of the most practical structures you can use for presentations. (Click here to download a worksheet that helps you use it.)
People often call it the "tell 'em" approach, because you:
- Tell audience members what you're going to tell them (introduction).
- Tell them (body).
- Tell them what you told them (conclusion).
This structure is simple, effective and easy to remember. Its repetitive nature allows you to reinforce your points, which helps others remember them. It is also flexible: you can adjust the introduction and body to persuade, motivate, educate, or entertain them.
One downside, however, is that repetition can quickly bore people. The approach is also "old hat" to many, which can cause them to lose interest. If you choose to use it, balance repetition with plenty of interesting facts, images, anecdotes, or stories to hold your audience's interest.
Let's look at each stage of the Open – Body – Conclusion structure in detail and discuss the elements that you need to include in each. We'll start with the body, rather than the introduction, because the rest of your presentation will be based on that.
The body of your presentation needs to contain your key points. You should present these in a logical order, so that your audience can follow them easily.
Keep in mind that the body should comprise a limited number of ideas: the more you try to include, the fewer people will remember. A good guide is to cover three to five main points, but no more.
When organizing your ideas, use the chunking principle to put the information into specific units. This will make the concepts easier to grasp, and help people remember what you have told them.
Make sure that you back up your main points with facts. Use good information-gathering strategies in your research, and consider citing the sources that you use. To add credibility to your presentation, consider using the following information to support your ideas:
- Data, facts or statistics.
- Images or diagrams.
- Stories and examples.
- Quotes or testimonials from experts or industry leaders.
Reliable sources will strengthen your credibility , and build trust with your audience.
Your opening, or introduction, has two main purposes: to grab your audience's attention, and to cover the key points that you intend to talk about.
Instead of telling people what you plan to say, you can use a different approach and explain why they are there. What will they learn from your presentation, and how will the content benefit them?
It's also important to get their attention right from the beginning. You can do this in several ways:
- Tell a story.
- Ask a rhetorical question.
- Play a short video.
- Make a strong or unexpected statement.
- Challenge your audience.
- Use a quotation or example.
- Appeal to people's self-interest.
- Request a specific action.
- Use suspense.
If you plan to answer questions at the end of your presentation, it's a good idea to mention this in the introduction, so people don't interrupt you mid-flow.
Many presenters overlook the importance of a conclusion – but the statements you finish with are what many audience members will remember best.
With the "tell 'em" approach, your conclusion summarizes the main points in the body of your presentation. If you want people to take action, be specific about what you want them to do.
Think carefully about how you want them to feel once you've finished; your conclusion is a great opportunity to reinforce this. Why not inspire them with a great story, a quote or a compelling call to action?
2. The Sandwich Approach
The Sandwich Approach is a variation of the Open – Body – Conclusion structure. This three-part structure covers:
- Advantages and/or benefits of your message or idea.
- Risks and concerns.
- How the benefits manage or eliminate those risks.
This approach is effective when you want to persuade audience members, or change their minds.
Having evidence to support your position is critical. However, factual data and reams of spreadsheets and charts are not highly persuasive. What people respond to is "vivid" evidence that brings your concept or argument to life.
To brush up on your persuasion skills, look at The Rhetorical Triangle . This tool asks you to consider your communication from three perspectives: those of the writer, the audience and the context. It's a method that builds credibility, and helps you ensure that your arguments are logical.
3. Monroe's Motivated Sequence
Monroe's Motivated Sequence is another good structure to use when you need to motivate or persuade. This sequence consists of five key steps:
- Getting your audience's attention – Use an interesting "hook" or opening point, such as a shocking statistic. Be provocative and stimulating, not boring and unemotional.
- Creating a need – Convince the audience there's a problem, explain how it affects them. Persuade them that things need to change.
- Defining your solution – Explain what you think needs to be done.
- Describing a detailed picture of success (or failure) – Give people a vision; something they can see, hear, taste, and touch.
- Asking the audience to do something straight away – Get them involved right from the start. If you do this, it's then much easier to keep them engaged and active in your cause.
4. Demonstration Structure
Use a simple demonstration structure when you are unveiling a new product or service.
Start by explaining why the product or service is so good. What makes it special? What problem will it solve for people?
Next, demonstrate what it does. How you do this will depend on your product but, whatever you do, make sure it works! Bring any important points to the audience's attention and provide helpful tips, where appropriate. Show them the results, and finish by giving them useful information, a good understanding of your topic, and something to remember.
Don't get too wrapped up in the detail; remember to keep it simple. Your presentation will be more powerful and your audience will remember more if you highlight just a few of the most important features. This will whet their appetite, and leave them wanting to know more.
5. Opportunity, Benefits, Numbers Structure
The Opportunity, Benefits, Number (OBN) structure is useful when you face busy people who want to hear what you have to say in the shortest time possible.
To use this structure, give audience members a quick summary of the opportunity that they need to consider, and outline the benefits that they can expect. Then, show them the numbers that back up your claims. [1]
For example, imagine you are explaining why your company should implement a new performance management system. First, you might give some background on the proposal – for example, you want to drive a high-performance culture. Then, you could explain the benefits, such as improving organizational performance and profits. Finally, you could compare the cost of bringing the system in with the predicted return on investment, based on a similar system at another organization.
Presentations that lack a clear flow are confusing and ineffective. This is why it's important to pay careful attention when choosing the most appropriate structure.
Different structures fulfill different purposes. Before you begin, think about why you are giving your presentation. Do you want to inform, persuade, inspire, or entertain your audience?
The most common structure for presentations is Open – Body – Conclusion. This is often effective because it gives you the opportunity to repeat your key points a number of times. However, other structures can be more appropriate, depending on the circumstances, such as when you're trying to persuade an audience, demonstrate a product, or provide information in the most time-efficient way.
Download Worksheet
[1] Martinuzzi, B. (2013). '11 Ways to Structure a Knockout Presentation,' from American Express OPEN Forum [online]. Available here . [Accessed 7 August 2014.]
You've accessed 1 of your 2 free resources.
Get unlimited access
Discover more content
Linking Attitude and Behavior
Assessing the Need for Change
Drivers of Organizational Change and Techniques to Address Them
Add comment
Comments (0)
Be the first to comment!

Gain essential management and leadership skills
Busy schedule? No problem. Learn anytime, anywhere.
Subscribe to unlimited access to meticulously researched, evidence-based resources.
Join today and save on an annual membership!
Sign-up to our newsletter
Subscribing to the Mind Tools newsletter will keep you up-to-date with our latest updates and newest resources.
Subscribe now
Business Skills
Personal Development
Leadership and Management
Member Extras
Most Popular
Latest Updates

Better Public Speaking

How to Build Confidence in Others
Mind Tools Store
About Mind Tools Content
Discover something new today
How to create psychological safety at work.
Speaking up without fear
How to Guides
Pain Points Podcast - Presentations Pt 1
How do you get better at presenting?
How Emotionally Intelligent Are You?
Boosting Your People Skills
Self-Assessment
What's Your Leadership Style?
Learn About the Strengths and Weaknesses of the Way You Like to Lead
Recommended for you
Rise: 3 practical steps for advancing your career, standing out as a leader, and liking your life.
Patty Azzarello
Book Insights
Business Operations and Process Management
Strategy Tools
Customer Service
Business Ethics and Values
Handling Information and Data
Project Management
Knowledge Management
Self-Development and Goal Setting
Time Management
Presentation Skills
Learning Skills
Career Skills
Communication Skills
Negotiation, Persuasion and Influence
Working With Others
Difficult Conversations
Creativity Tools
Self-Management
Work-Life Balance
Stress Management and Wellbeing
Coaching and Mentoring
Change Management
Team Management
Managing Conflict
Delegation and Empowerment
Performance Management
Leadership Skills
Developing Your Team
Talent Management
Problem Solving
Decision Making
Member Podcast
Blog > How to structure a good PowerPoint Presentation
How to structure a good PowerPoint Presentation
08.09.21 • #powerpoint #tips.
When creating presentations, it is particularly important that they are well organized and have a consistent structure.
A logical structure helps the audience to follow you and to remember the core information as best as possible. It is also important for the presenter, as a good presentation structure helps to keep calm, to stay on the topic and to avoid awkward pauses.
But what does such a structure actually look like? Here we show you how to best organize your presentation and what a good structure looks like.
Plan your presentation
Before you start creating your presentation, you should always brainstorm. Think about the topic and write all your ideas down. Then think about the message you want to communicate, what your goal is and what you want your audience to remember at the end.
Think about who your audience is so that you can address them in the best possible way. One possibility is to start your presentation with a few polls to get to know your audience better. Based on the results, you can then adapt your presentation a little. Use the poll function of SlideLizard and have all the answers at a glance. SlideLizard makes it possible to integrate the polls directly into your PowerPoint presentation which helps you to avoid annoying switching between presentation and interaction tool. You can keep an eye on the results while the votes come in and then decide whether you want to share them or not.

- an informative
- an entertaining
- an inspiring
- or a persuasive presentation?
Typical Presentation Structure
The basic structure of a presentation is actually always the same and should consist of:
Introduction

Make sure that the structure of your presentation is not too complicated. The simpler it is, the better the audience can follow.
Personal Introduction
It is best to start your presentation by briefly introducing yourself which helps to build a connection with your audience right away.
Introduce the topic
Then introduce the topic, state the purpose of the presentation and provide a brief outline of the main points you will be addressing.
Mention the length
In the introduction, mention the approximate length of the talk and then also make sure you stick to it.
The introduction should be no longer than two slides and provide a good overview of the topic.
Icebreaker Polls
According to studies, people in the audience only have an average attention span of 10 minutes, which is why it is important to increase their attention right at the beginning and to arouse the audience's interest. You could make a good start with a few icebreaker polls for example. They lighten the mood right at the beginning and you can secure your audience's attention from the start.
For example, you could use SlideLizard to have all the answers at a glance and share them with your audience. In addition, the audience can try out how the polls work and already know how it works if you include more polls in the main part.

Get to know your audience
As mentioned earlier, it is always useful to think about who your audience actually is. Ask them questions at the beginning about how well they already know the topic of your presentation. Use SlideLizard for this so that you have a clear overview about the answers. You can use both single- and multiple-choice questions or also open questions and display their results as a WordCloud in your presentation, for example.
Include a quote
To make the beginning (or the end) of your presentation more exciting, it is always a good idea to include a quote. We have selected some powerful quotes for PowerPoint presentations for you.
Present your topic
The main part of a presentation should explain the topic well, state facts, justify them and give examples. Keep all the promises you made earlier in the introduction.
Length and Structure
The main part should make up about 70% of the presentation and also include a clear structure. Explain your ideas in detail and build them up logically. It should be organized chronologically, by priority or by topic. There should be a smooth transition between the individual issues. However, it is also important to use phrases that make it clear that a new topic is starting. We have listed some useful phrases for presentations here.
Visualize data and statistics and show pictures to underline facts. If you are still looking for good images, we have selected 5 sources of free images for you here.
Focus on the essentials
Focus on what is most important and summarize a bit. You don't have to say everything about a topic because your audience won’t remember everything either. Avoid complicated sentence structure, because if the audience does not understand something, they will not be able to read it again.
Make your presentation interactive
Make your presentation interactive to keep the attention of your audience. Use SlideLizard to include polls in your presentation, where your audience can vote directly from their smartphone and discuss the answers as soon as you received all votes. Here you can also find more tips for increasing audience engagement.

Repeat the main points
The conclusion should contain a summary of the most important key points. Repeat the main points you have made, summarize what the audience should have learned and explain how the new information can help in the future.
Include a Q&A part
Include a Q&A part at the end to make sure you don't leave any questions open. It's a good idea to use tools like SlideLizard for it. Your audience can ask anonymous questions and if there is not enough time, you can give them the answers afterwards. You can read more about the right way to do a question slide in PowerPoint here.
Get Feedback
It is also important to get feedback on your presentation at the end to keep improving. With SlideLizard you can ask your audience for anonymous feedback through star ratings, number ratings or open texts directly after your presentation. You can then export the responses and analyse them later in Excel.

Presentation style
Depending on the type of presentation you give, the structure will always be slightly different. We have selected a few different presentation styles and their structure for you.
Short Presentation

If you are one of many presenters on the day, you will only have a very limited time to present your idea and to convince your audience. It is very important to stand out with your presentation.
So you need to summarize your ideas as briefly as possible and probably should not need more than 3-5 slides.
Problem Solving Presentation

Start your presentation by explaining a problem and giving a short overview of it.
Then go into the problem a little more, providing both intellectual and emotional arguments for the seriousness of the problem. You should spend about the first 25% of your presentation on the problem.
After that, you should spend about 50% of your presentation proposing a solution and explaining it in detail.
In the last 25%, describe what benefits this solution will bring to your audience and ask them to take a simple but relevant action that relates to the problem being discussed.
Tell a Story

A great way to build an emotional connection with the audience is to structure a presentation like a story.
In the introduction, introduce a character who has to deal with a conflict. In the main part, tell how he tries to solve his problem but fails again and again. In the end, he manages to find a solution and wins.
Stories have the power to win customers, align colleagues and motivate employees. They’re the most compelling platform we have for managing imaginations. - Nancy Duarte / HBR Guide to Persuasive Presentations
Make a demonstration

Use the demonstration structure to show how a product works. First talk about a need or a problem that has to be solved.
Then explain how the product will help solve the problem and try to convince your audience of the need for your product.
Spend the end clarifying where and when the product can be purchased.
Chronological structure

When you have something historical to tell, it is always good to use a chronological structure. You always have to ask yourself what happens next.
To make it more interesting and exciting, it is a good idea to start by telling the end of something and after that you explain how you got there. This way you make the audience curious and you can gain their attention faster.
Nancy Duarte TED Talk
Nancy Duarte is a speaker and presentation design expert. She gives speeches all over the world, trying to improve the power of public presentations.
In her famous TED Talk "The Secret Structure of Great Talks" she dissects famous speeches such as Steve Jobs' iPhone launch speech and Martin Luther King's "I have a dream" speech. In doing so, she found out that each presentation is made up of 4 parts:
- What could be
- A moment to remember
- Promise of “New Bliss”
Related articles
About the author.

Helena Reitinger
Helena supports the SlideLizard team in marketing and design. She loves to express her creativity in texts and graphics.

Get 1 Month for free!
Do you want to make your presentations more interactive.
With SlideLizard you can engage your audience with live polls, questions and feedback . Directly within your PowerPoint Presentation. Learn more
Top blog articles More posts

How to mask images to crop to shape in PowerPoint

Record voice narration for PowerPoint

Get started with Live Polls, Q&A and slides
for your PowerPoint Presentations
The big SlideLizard presentation glossary
Slide transitions.
Slide transitions are visual effects which appear in PowerPoint when one slide moves to the next. There are many different transitions, like for example fade and dissolve.
Solution Presentation
A solution has already been found during a solution presentation. The only thing that remains is to find a solution on how to realize the decision.
Learning on Demand
Learning on Demand means that the content is available extactly when it's needed by the learner
Virtual Reality
With Virtual Reality people can practice situations and important processes in a virtual room by putting on special digital glasses. They can influence what happens themselves.
Be the first to know!
The latest SlideLizard news, articles, and resources, sent straight to your inbox.
- or follow us on -
We use cookies to personalize content and analyze traffic to our website. You can choose to accept only cookies that are necessary for the website to function or to also allow tracking cookies. For more information, please see our privacy policy .
Cookie Settings
Necessary cookies are required for the proper functioning of the website. These cookies ensure basic functionalities and security features of the website.
Analytical cookies are used to understand how visitors interact with the website. These cookies help provide information about the number of visitors, etc.
Presentation Structures: Everything You Need to Organize Your Talk
Hrideep barot.
- Presentation , Public Speaking , Speech Writing

A presentation structure includes an introduction, context, main body, conclusion, and scope for questions. Depending on the type of presentation you’re doing, this format can change. The article discusses various considerations for each section of a presentation structure.
For presentations to be understood and create a good impression, they can’t be haphazard. It has to have some sort of pre-planned presentation structure that is both logical and simple enough. Depending on the type of presentation you’re doing, there are likely some basic frameworks available that people tend to follow. Before we delve into the format, let’s consider key points to consider when planning a presentation.
How do you structure and plan a presentation?
We plan a presentation by considering the type of presentation, who our audience is, ideating the purpose, and formulating subtopics through research.
Consider the type of presentation
This leads to understanding the ideal flow to convey your content best. For instance, for persuasive presentations, you could use creative ways to convey what is best about a product, such as starting with a story about how it has helped many people achieve something.
On the other hand, for a progress presentation at your workplace, you might have conventions about what is expected, which must be followed precisely.
A few other types of presentations include:
- Informative presentations
- Instructive presentations
- Motivational presentations
- Analytical presentations
You might also want to consider if you want audience interaction and put that into the structure accordingly. While some allow questions mid-presentation for smaller audiences, it is typically left towards the end.
Consider your audience’s knowledge level and interests
This will determine if you can assume a particular knowledge base and not include it in your presentation structure or if you have to start off with basics and build up on that.
For instance, if you’re teaching 1st-year students about something, you might start with basics. But for graduates, a similar format would be unnecessary as they might have already learned about it.
Similarly, if your purpose is to deliver something entertaining, knowing about the interests and values of your audience helps a ton.
The most simple way is demographics. It’s typically quite easy to find out the expected age group, gender, etc of the audience. This information can help you have a basic idea of the sort of experiences they go through, which helps formulate an understanding.
Consider the purpose of your presentation
While this may seem obvious, many of us lose track of the main purpose and spend too much time on remotely related content. This diverts attention from the topic and might even cause boredom.
For example, if you’re advocating for some social action, it would be beneficial to stay on the topic itself, like the pros, cons, what can be done practically, etc. Instead, if the presenters spend more time criticizing others, the presentation will fall short of its purpose.
Few other examples of different purposes your presentation could have:
- Entertainment
- Providing information
- Telling your story
- Proposing ideas
- Discussing future plans for the company
Research your topic and start noting down the subtopics
Skip this if you already know exactly what needs to be a part of your presentation, and plan to include just that. While looking up your topic, you’ll discover the various sub-topics within that field. After you start noting them down, you can organize later what comes under which to build a structure.
Here is a guide on short presentations that you might be interested in.
So with these three considerations and subtopics in mind, we’re good to go over to decide our final structure.

What is the best presentation form?
The best presentation format is one that includes the introduction, context, main body, conclusion, and questions.
Here, we will discuss a template or structure for a typical presentation.
Introduction
- Greet the audience and introduce yourself, e.g., what you do and why you’re here
- The purpose of your presentation
- The flow or outline gives a sense of what they can expect
- Depending on the topic and audience, you might have to provide more or less context about your topic
- This could include a brief history, terminologies, the current market status, the current status of the field, etc.
- Includes the full depth of the primary purpose of the presentation
- All major chunks of data, including examples, evidence like research studies, etc, are included here
- Care needs to be taken at times to ensure that your introduction and context are not taking up so much time that the main body isn’t receiving enough attention. Ever wonder if a presentation can be too short? Check out this article .
- Bring emphasis to the main takeaways
- Thank your audience if they have been a good one
- Take questions and encourage healthy discussion
- End with sharing ways they can address their questions later
To make sure that the structure works out, it is important that you practice your presentation. This will also tell you if you’re falling within the time constraints. Here is a guide on how you can go about practicing your presentation.
5 Ways to Structure Your Presentation
The five ways include ordered, problem-solution, comparative, storytelling, and demonstrating structures.
1. Ordered Structure
The presentation follows a logical sequence starting with an introduction, main points, and then conclusions. This is what this article has focused on, as it’s the most straightforward method and tends to be very clear for the audience. However, for presentations that do not follow a clear progression, this may not be useful.
2. Problem-Solution Structure
This is useful when persuading the audience. You explain the problem (+ its importance and impact) and then provide a solution that motivates the audience to take it. This could be in the form of a product, a particular method of communication, some technical thing, etc. There should be a decent amount of time spent on the benefits of the solution as well as the exact “How?” to implement it to make the audience convinced. It helps to address any questions or barriers you expect them to have during the speech itself.
3. Comparative Method
This is useful when you want to highlight the benefits of something over alternatives . It is ideal to first fully address the alternatives by talking about their benefits and limitations. Then you lastly talk about the solution that you possess that effectively addresses the other limitations or is in some way a better choice than others, based on your arguments.
Alternatively, if you do not want to highlight the benefits of something particular and just form a comparison that demonstrates the pros and cons of different subjects in an unbiased manner, this technique is still used. For instance, how the main benefit of a product is practically useful for the consumer in comparison to the main benefit of another product can be discussed.
4. Storytelling Structure
This is useful when your goal is just to tell a story. This could be to explain the context or history of a company. It could also serve to talk about yourself and how you got there. A story will typically have an introduction, a complicating factor that introduces some challenges, and then an ending that highlights the importance of some action or belief.
You may also go in a timewise order when explaining a story. This might take away from the thrill but is useful nonetheless when it is required for the audience to properly understand what is being conveyed. Storytelling can be done in various ways, so feel free to find your own structure.
5. Demonstration Structure
This is useful when demonstrating products or services . The benefits of the product/service are highlighted and it is demonstrated showing those capabilities. The goal should be on persuading the audience that it is useful to them for their needs.
How to structure a scientific presentation?
Structuring a scientific presentation typically includes an introduction, methods, results, and discussion.
This typically follows the below format, but depending on the university/conference guidelines, you’ll have to adjust accordingly. The rest of the sub-topics revolves around these sections.
- Introduction/Background
- Literature review (if applicable)
- Acknowledgments (often optional)
After this, time is given to take questions.
How do you structure a presentation script?
The presentation never includes the full extent of the information. It’s just a concise version of what you’re speaking that adds as a visual aid at times while also highlighting major points.
The script is where the major content lies. The structure remains the same, but the content is greater in depth .
Sample Presentation Script
To make it easier for you to understand how you can structure your presentation script, here is a sample script for a presentation on the topic: Importance of Public Speaking.
This follows the same flow introduced earlier- introduction, context, main body, conclusion, and questions.
Title: Importance of Public Speaking
Slide 1: Why is Public Speaking Important?
Greetings, ladies, and gentlemen. Today, I will be exploring the importance of public speaking. My name is John, and I’m thrilled to discuss with you how improving our public speaking abilities may make a significant difference in our quality of life in the personal, social, and professional domains.
Slide 2: Introduction
Public speaking involves persuading an audience with a well-organized message. It is an essential part of our daily lives. We use it when we make conversation in social groups as well as when we address enormous crowds at social gatherings. It is a highly multifaceted and effective tool.
I will start off by giving some information about the context, moving on to its benefits, which is the main crux of our presentation, and then we will spend some time concluding.
Slide 3: Context
Effective communication is essential in our globally interconnected society. Speaking in front of an audience enables us to express our views and thoughts clearly and firmly. It facilitates the development of solid bonds and influences others, and acts as a catalyst for constructive change. Public speaking may open doors of opportunity and propel achievement for anyone, whether they are a student, professional, or member of the community.
Slide 4: Personal Development
Public speaking increases self-esteem and confidence, which are quite rudimentary to our self-efficacy. Effective communication skills help us to be more assertive and feel more in control of our lives. Research suggests that having an internal locus of control (i.e., feeling in control) leads to better outcomes in our personal lives as well as greater mental health. As we organize our ideas and arguments through public speaking, it improves critical thinking and organizational abilities. Furthermore, as we interact with others during talks and Q&A sessions, public speaking also enhances our listening abilities.
Slide 5: Professional Advancement
The ability to speak in front of an audience effectively is highly essential in most workplaces.
You ask Why? Well, it is because we are better able to communicate our qualifications and worth to potential employers, which enhances our performance in job interviews. Secondly, our influence within organizations grows when we can make a strong case for our points in meetings and conferences.
Next, for leadership positions, where success depends on inspiring and motivating others, public speaking is critical. And in general, you’ll need public speaking in any meeting or any talk you would typically deliver in front of a bunch of people.
Slide 6: Conclusion
Public speaking is a sought-after, multifaceted, and handy skill across many settings. It gives us the ability to inspire others, tell our stories, and make a lasting impression. Strong public speaking abilities help us communicate clearly and lead with influence in many facets of our lives.
Slide 7: Questions
I appreciate everyone here for being a great audience and cooperating wonderfully throughout the presentation. Now I will be taking any questions you all have. Feel free to discuss this now or reach out to me after the session is over.
Slide 8: Thank you
I want to thank you all for being here today.
I hope that the presentation did well to emphasize the importance of public speaking and perhaps motivated at least some of you to work on improving your abilities. We will end here.
[End of presentation]
Here are some tips for delivering an effective presentation.
We considered a few key points for presentation structure and the typical format that can be followed. We also covered five ways you can structure your presentation and the format for a scientific presentation. Lastly, we covered a sample script for presentations.
Public speaking coaching is a great way to increase your skills and get better at presentations as well.

Enroll in our transformative 1:1 Coaching Program
Schedule a call with our expert communication coach to know if this program would be the right fit for you

Lost Voice? Here’s How to Recover Sore Throat and Speak Again

7 Keys to Emcee Like a Pro: Unlock Your Hosting Potential

8 Ways to Rise Above the Noise to Communicate Better
- [email protected]
- +91 98203 57888
Get our latest tips and tricks in your inbox always
Copyright © 2023 Frantically Speaking All rights reserved
Kindly drop your contact details so that we can arrange call back
Select Country Afghanistan Albania Algeria AmericanSamoa Andorra Angola Anguilla Antigua and Barbuda Argentina Armenia Aruba Australia Austria Azerbaijan Bahamas Bahrain Bangladesh Barbados Belarus Belgium Belize Benin Bermuda Bhutan Bosnia and Herzegovina Botswana Brazil British Indian Ocean Territory Bulgaria Burkina Faso Burundi Cambodia Cameroon Canada Cape Verde Cayman Islands Central African Republic Chad Chile China Christmas Island Colombia Comoros Congo Cook Islands Costa Rica Croatia Cuba Cyprus Czech Republic Denmark Djibouti Dominica Dominican Republic Ecuador Egypt El Salvador Equatorial Guinea Eritrea Estonia Ethiopia Faroe Islands Fiji Finland France French Guiana French Polynesia Gabon Gambia Georgia Germany Ghana Gibraltar Greece Greenland Grenada Guadeloupe Guam Guatemala Guinea Guinea-Bissau Guyana Haiti Honduras Hungary Iceland India Indonesia Iraq Ireland Israel Italy Jamaica Japan Jordan Kazakhstan Kenya Kiribati Kuwait Kyrgyzstan Latvia Lebanon Lesotho Liberia Liechtenstein Lithuania Luxembourg Madagascar Malawi Malaysia Maldives Mali Malta Marshall Islands Martinique Mauritania Mauritius Mayotte Mexico Monaco Mongolia Montenegro Montserrat Morocco Myanmar Namibia Nauru Nepal Netherlands Netherlands Antilles New Caledonia New Zealand Nicaragua Niger Nigeria Niue Norfolk Island Northern Mariana Islands Norway Oman Pakistan Palau Panama Papua New Guinea Paraguay Peru Philippines Poland Portugal Puerto Rico Qatar Romania Rwanda Samoa San Marino Saudi Arabia Senegal Serbia Seychelles Sierra Leone Singapore Slovakia Slovenia Solomon Islands South Africa South Georgia and the South Sandwich Islands Spain Sri Lanka Sudan Suriname Swaziland Sweden Switzerland Tajikistan Thailand Togo Tokelau Tonga Trinidad and Tobago Tunisia Turkey Turkmenistan Turks and Caicos Islands Tuvalu Uganda Ukraine United Arab Emirates United Kingdom United States Uruguay Uzbekistan Vanuatu Wallis and Futuna Yemen Zambia Zimbabwe land Islands Antarctica Bolivia, Plurinational State of Brunei Darussalam Cocos (Keeling) Islands Congo, The Democratic Republic of the Cote d'Ivoire Falkland Islands (Malvinas) Guernsey Holy See (Vatican City State) Hong Kong Iran, Islamic Republic of Isle of Man Jersey Korea, Democratic People's Republic of Korea, Republic of Lao People's Democratic Republic Libyan Arab Jamahiriya Macao Macedonia, The Former Yugoslav Republic of Micronesia, Federated States of Moldova, Republic of Mozambique Palestinian Territory, Occupied Pitcairn Réunion Russia Saint Barthélemy Saint Helena, Ascension and Tristan Da Cunha Saint Kitts and Nevis Saint Lucia Saint Martin Saint Pierre and Miquelon Saint Vincent and the Grenadines Sao Tome and Principe Somalia Svalbard and Jan Mayen Syrian Arab Republic Taiwan, Province of China Tanzania, United Republic of Timor-Leste Venezuela, Bolivarian Republic of Viet Nam Virgin Islands, British Virgin Islands, U.S.

Oral Presentations
Presentation basics, key elements of good presentations.
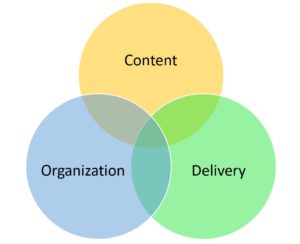
There are three key elements of good presentations: Content, Organization, Delivery. Your audience needs interesting and appropriate content in order to pay attention, especially at the start of a presentation. Logical organization helps retain your audience’s attention – they need to be able to follow your train of thought and predict where you are going with your ideas. Delivery also is important, as your own engagement with the information helps your audience engage.
Content deals with the substance of your presentation. Your ideas and information should be original and significant. Use accepted and relevant sources in your research, and reference those sources as needed. Offer a clear analysis that’s comprehensive and concise at the same time – strive for the right amount of information for your audience’s needs and the allotted presentation time. Make sure that your content is relevant to your audience, so that they understand immediately why they should pay attention to your presentation.
Garr Reynolds, in his book Presentation Zen: Simple Ideas on Presentation Design and Delivery , identifies characteristics of presentation content that create what he calls SUCCES(s): [1]
- Simplicity – reduce information to key points and essential meanings
- Unexpectedness – pose questions, offer interesting statistics, “make the audience aware that they have a gap in their knowledge and then fill that gap”
- Concreteness – use specific language, provide real-life examples
- Credibility – use sources, facts, statistics to back up your content; deliver information confidently; know your information well
- Emotions – engage your audience to feel something about your content
- Stories – use examples and illustrations to create a “story element” to the presentation
Finally, to make your content effective, repeat key information throughout your presentation. A memory research pioneer, German psychologist Hermann Ebbinghaus, found that we forget approximately 50 percent of new information within 18 minutes, with retention falling to 35 percent after a week. However, Ebbinghaus also discovered that repetition of the new information at key intervals can change this trajectory, a discovery known as the spacing effect. The lesson for presenters: work repetition into your presentation content.
Organization
Good organization requires a clear beginning, middle, and end. Link your ideas logically throughout the presentation to lead to an ending that resolves the problem or summarizes the situation you presented at the start. If you’re presenting based on a formal report or proposal, you may want to follow the order of the longer written document, but you don’t have to; as long as you include main ideas, it’s up to you to determine your presentation’s organization based on your audience and purpose. Strive for clear transitions between individual points, slides, and topics.

Delivery involves a range of factors from body language and word choice to vocal variety. A good presenter has a passion for the subject and an ability to convey and perhaps elicit that emotion in the audience. Audience engagement through eye contact, facial expression, gestures, and/or vocal tone contributes to an effective presentation. Delivery also deals with the confidence and professionalism with which you deliver the presentation. Hesitations, “ums,” and other types of vocal fumbling will distract your audience, while a clear, confident presentation helps to engage them.
Content, organization, and delivery work together and are equally important aspects of presentations.
The following two videos provide basic tips for creating effective presentations in terms of content, organization, and delivery. As you view them, consider their similarity of information and dissimilarity in presentation style. What can you infer about the presenter and intended audience of each presentation? Which video resonates more fully with you personally, and why? In terms of conveying information to a general audience, which video do you think is most effective, and why?
Planning Presentations
As you can see based on the video examples, presentations always require a situational analysis in the planning stage. Identify your audience, purpose, context, and all of the communication variables that you need to consider in order to make choices that will result in an effective presentation for your purpose and audience. For example, your purpose – the one, main idea that you want to convey through your presentation – can influence your content, organization, delivery, and overall approach. Identifying your audience can help you with what may be the most critical aspect of your presentation, making your information relevant to your audience. Analyzing communication variables for your presentation also will help you determine if you need supplemental materials or handouts, how to arrange a room for an in-person presentation, how best to structure a virtual presentation, and more.
Even if you are creating a presentation based on a formal report or proposal for which you have already done a situational analysis, do another situational analysis for your presentation, as your audience, organization, language, and overall approach may differ based on the different communication mode.
Planning Online Presentations
In addition to doing a situational analysis, online presentations may require some additional planning time in terms of how you present information. A real-time, in-person audience may pay attention to your presentation simply because you are present, and you may be able to adapt your presentation to audience reaction. However, it’s more difficult to capture the attention of a virtual audience, either real-time or asynchronous, so online presentations need to be thought through very deliberately in terms of their content, organization, look, and approach.
The following video, while written for online instructors, nonetheless offers important points to consider for any type of virtual, online presentation.
Understanding Presentation Audiences
Audiences are egocentric, meaning that they operate under the principle of WIIFM: what’s in it for them. Don’t expect your audience to meet you where you are; meet them where they are and then take them where you want to go together. According to Lucas, audiences “pay closest attention to messages that affect their own values, beliefs, and well being. Listeners approach speeches with one question uppermost in mind: ‘Why is this important to me?’ … What do these psychological principles mean to you as a speaker? First, they mean that your listeners will hear and judge what you say on the basis of what they already know and believe. Second, they mean you must relate your message to your listeners–show how it pertains to them, explain why they should care about it as much as you do.” [2]
Also, audiences have relatively short attention spans, and often decide whether or not to give you their attention within the first minute or so of a presentation. Various research studies indicate a five – twenty minute attention span for any type of presentation (note that results of studies vary). An article titled “ Neuroscience Proves You Should Follow TED’s 18-Minute Rule to Win Your Pitch ” discusses the concept of “cognitve backlog,” or the idea that the more information you provide, the more information your audience will tune out and not remember. [3]

These audience characteristics lay the groundwork for presentation strategies identified in the videos, strategies such as starting with and continuing a story, engaging attention with an interesting statistic, and more. The point to remember is that you need to make conscious, reasoned decisions about ways to engage your audience. Keeping audience attention span and egocentrism in mind, strive for the following presentation basics:
- Conciseness
- Connection with audience
Expectations for Presentations
The 10/20/30 rule, generally attributed to venture capitalist Guy Kawasaki, is a good guideline to help you achieve a “just right” balance in your presentations. Geared for entrepreneurs pitching their business, his advice is a discipline that would improve the quality—and, effectiveness—of most presentations. In brief, 10/20/30 translates to a maximum of 10 slides, a maximum of 20 minutes and a minimum of 30 point font. [4]

While this rule is a good starting point, it does not overrule your audience analysis or understanding of your purpose. Sometimes, you may need more slides or have a more involved purpose—like training people in new software or presenting the results of a research study—that takes more than 30 minutes to address. In that case, go with what your audience needs and what will make your presentation most effective. The concept behind the 10/20/30 rule—to make new learning easy for your audience to take in, process and remember—should still be your guide even if you don’t follow the rule exactly.
One last way to gauge presentations is to consider most audiences’ expectations for good presentations:
- main ideas are compelling and relevant
- information is organized with a clear beginning, middle, and end; audience can follow where the ideas are leading
- delivery shows the presenter’s enthusiasm and engagement
- visuals apply good design practices
- presentation length is appropriate for audience, purpose, and context
The following video summarizes characteristics that create effective presentations.
[1] Reynolds, Garr. (2012) Presentation Zen: Simple Ideas on Presentation Design and Delivery. 2nd ed. New Riders, Pearson Education. Information from pages 78- 81. http://ptgmedia.pearsoncmg.com/images/9780321811981/samplepages/0321811984.pdf
[2] Lucas, Stephen E. (2020) The Art of Public Speaking (13th edition).
[3] Gallo, Carmine. “Neuroscience Proves You Should Follow TED’s 18-Minute Rule to Win Your Pitch.” Inc. , https://www.inc.com/theupsstore/small-biz-ings.html
[4] Kawasaki, Guy. The 10/20/30 Rule of PowerPoint . December 2005. ↵
- Presentation Basics, original material and material adapted from Business Communication Skills for Managers, see attributions below. Authored by : Susan Oaks. Project : Communications for Professionals. License : CC BY-NC: Attribution-NonCommercial
- Making a Presentation for a Meeting. Authored by : Nina Burokas. Provided by : Lumen Learning. Located at : https://courses.lumenlearning.com/wmopen-businesscommunicationmgrs/chapter/making-a-presentation-for-a-meeting/ . Project : Business Communication Skills for Managers. License : CC BY: Attribution
- image of professional making a presentation. Authored by : rawpixel. Provided by : Pixabay. Located at : https://pixabay.com/photos/agreement-brainstorming-business-3408113/ . License : CC0: No Rights Reserved
- video Create an Effective Business Presentation. Authored by : Nick Morgan. Provided by : Harvard Business Review. Located at : https://www.youtube.com/watch?v=HTRt0zkD73M . License : Other . License Terms : YouTube video
- video How to Give a Great Presentation - 7 Presentation Skills and Tips to Leave an Impression. Provided by : Practical Psychology. Located at : https://www.youtube.com/watch?v=MnIPpUiTcRc . License : Other . License Terms : YouTube video
- video Teaching Tip: Designing Online Lectures and Recorded Presentations. Authored by : Greg Steinke and Jill Zimmerman. Provided by : CCAPS Teaching Tips, University of Minnesota. Located at : https://www.youtube.com/watch?v=GCAaRZJFJAU . License : Other . License Terms : YouTube video
- image of businesswoman presenting to an audience. Authored by : rawpixel. Provided by : Pixabay. Located at : https://pixabay.com/photos/analyzing-audience-board-3565815/ . License : CC0: No Rights Reserved
- Visual Aids. Authored by : Nina Burokas. Provided by : Lumen Learning. Located at : https://courses.lumenlearning.com/wmopen-businesscommunicationmgrs/chapter/visual-aids/ . Project : Business Communication Skills for Managers. License : CC BY: Attribution
- video Five Simple Rules for Creating World Changing Presentations. Authored by : Nancy Duarte. Provided by : Duarte Inc.. Located at : https://www.youtube.com/watch?v=hT9GGmundag . License : Other . License Terms : YouTube video

Privacy Policy

- High-impact business writing
- Effective email writing
- Bid, tender and sales-proposal writing
- Technical writing
- Writing for customer service

- Customer-service writing
- Effective report writing

Business writing essentials
How to write a presentation (and deliver it, even via Zoom)
Jack elliott.
31 minute read

You’ve been asked to give a presentation. Chances are, your response will be roughly one of the following:
1. It’s a subject you’re passionate about and you’re a confident speaker. You’re pleased to have the opportunity.
2. You secretly worry that your style is flat and unengaging. You’re not looking forward to it.
3. At best, the prospect makes you nervous; at worst, terrified. You’d rather have root canal surgery.
If you belong in one of the last two categories, you probably know you’re not alone. You may have heard the statistic that public speaking is more widely feared even than death .

However you feel about the prospect of presenting, this comprehensive guide will take you step by step through the process of planning, writing and delivering a presentation you can be proud of (even via Zoom).
Use the contents links below to jump to the section you need most, make your way through methodically from start to finish, or bookmark this page for next time you need it.
What is a presentation?
Essentially, it’s a story. And its origins go back thousands of years – to when our ancestors gathered around the campfire to listen to the wise elders of the tribe. Without PowerPoint!
These days, presentations encompass the glitz and scale of the Oscars or the new iPhone launch through to business briefings to smaller audiences, in person or – increasingly – online. We’re focusing on the business side.
Whatever the occasion, there’s always an element of drama involved. A presentation is not a report you can read at your leisure, it’s an event – speakers are putting themselves on the spot to explain, persuade or inspire you. Good presentations use this dynamic to support their story.
Always remember: everyone wants you to do well
If you are nervous, always remember: no one sets out to write a poor presentation and no one wants to go to one either. There may be private agendas in the room, but for the most part audiences approach presentations positively. They want to be engaged and to learn. They want you to do well.
First things first: the date’s in the diary and you need to prepare. Let’s break it down.

1. Preparing your presentation
Imagine you’re a designer in the automotive industry and your boss has asked you to give a presentation. The subject: the future of the car and how it will fit with all the other modes of transport.
Where to start? How to approach it? First you need an angle, a key idea.
We talk about ‘giving’ a presentation – and of course it’s the audience who will be receiving it. So, instead of beginning with cars (in this case), let’s think about people. That way we can root the talk in the everyday experience we all share.
Maybe you remember a time you were stuck in traffic on a motorway. Morning rush hour. No one moving. Up ahead children were crossing a footbridge on their way to school, laughing at the cars going nowhere. And you thought, ‘Enjoy it while you can! This will be you one day.’ But maybe not. Surely we can do better for future generations!
There’s your opening – the whole issue captured in a single image, and you’ve immediately engaged your audience with a simple story.
The who, the why and the what
Always begin with the people you’ll be addressing in mind. Before you start writing, answer three fundamental questions: who is your audience, why are you talking to them and what do you want to say?
The answers will provide the strong foundations you need and start the ideas flowing. Ignore them and you risk being vague and unfocused. Clear writing is the result of clear thinking and thinking takes time, but it’s time well spent.
Got a presentation to write? Before you do anything else, answer three fundamental questions: who is your audience, why are you talking to them and what do you want to say? @EmphasisWriting Share on X
Start with the audience
Are you a senior car designer talking to your team? If the answer’s yes, you can assume high-level, shared knowledge.
But if you’re talking to the sales or marketing departments, you can’t make the same assumptions – there are issues you might have to explain and justify. And if it’s a press briefing, it’s about getting the message out to the general public – a different story again.
Knowing your audience will also dictate your tone. Your presentation to the board is likely to be quite formal, whereas a talk for your team can be more relaxed.
And what’s the audience’s mood? On another occasion you might have bad news to deliver – perhaps the national economy and the company’s finances are threatening people’s jobs. Then you must empathise – put yourself in their position and adapt your tone accordingly.
I want to …
You also need a clear objective (the why ). For our car designer, the overriding objective should be to plant a key idea in the audience’s mind. Starting with that image of the schoolchildren, it’s to convince the audience that the company has a radical and distinctive design future.
That’s the takeaway. How should they do that? Should they explain, persuade or inspire – the three key strategies for any presentation? You may need to use several of them to achieve your goal.
Objectives should always complete the statement ‘I want to …’. What do you want to do ?
It’s about …
The what is the substance of your presentation – the building blocks, all the facts and figures that tell the audience ‘It’s about …’.
Back to our designer. The move away from petrol and diesel will allow a complete rethink of car design. The electric power unit and battery can lie under the car’s floor, freeing up all the space taken up by the conventional engine. And then there are all the issues around emission-free, autonomous vehicles in the ‘smart’ cities of the future.
When you’re planning, it can be helpful to get all the information out of your head and onto the page, using a mind map , like the example below (for a talk on UK transport policy).
This is an effective way of unlocking everything you know (or still need to do more research on). Start with your main topic, then keep asking yourself questions (like who, what, when, where, how and why) to dig into all the aspects.

Mind map with the topic of ‘UK transport policy at the centre. Arrows point out to six bubbles with the labels ‘Who’, ‘When’, ‘Why’, ‘How’, ‘What’ and ‘Where’. More arrows point out from each of these bubbles to explore related points in each area, and still more arrows from some of those points to expand further. The information reads:
- Special interests / NGOs
- Need for clear government direction
- What industry will do
- R&D spend
- What industry is doing
- Congestion [this leads to the sub-point ‘Wasted time and money’]
- More pollution
- More congestion
- More wasted time and money
- Climate change
- Road pricing
- Legislation
- Working together
- New technology
- Exports/revenue
- Social policy
- Rest of world
- Emerging economies
Once you’ve got it all out on the page, you can identify which parts actually belong in your presentation. Don’t try to include every last detail: audiences don’t want to process piles of information. They are more interested in your ideas and conclusions.
Now let’s put all this research and planning into a structure.
2. How to structure your presentation
On 28 August 1963, Dr Martin Luther King Jr stood on the steps of the Lincoln Memorial in Washington DC and delivered one of the most powerful speeches in history: ‘I have a dream’.
He was the leader of the civil rights movement in the US and his audience that day numbered in the hundreds of thousands. His goal was to inspire them to continue the struggle.
Presentations usually aim to either explain, persuade or inspire – sometimes with elements of all three. Your aim will determine your structure. This will be the backbone of your presentation, giving it strength and direction.
Explain in a logical sequence
When you explain, you add to people’s knowledge to build the key idea. But ask yourself, what does this audience already know?
If you’re an astrophysicist talking to an audience of your peers, you can use terms and concepts you know they’ll be familiar with. If you’re explaining black holes to Joe Public, you can’t do that. Typically, you’ll have to use simple analogies to keep the audience with you (‘Imagine you’re in a huge dark room …’).
Whether it’s black holes or new software, good explanations start with what we know and then build on that understanding, step by step, layer by layer. The audience will stay with you if they can follow your logic and you can help this with linking comments – ‘Building on that … ‘, ‘This means …’, ‘To illustrate that, I’ve always found …’.
Presentations usually aim to either explain, persuade or inspire – sometimes with elements of all three. Your aim will determine your presentation's structure. @EmphasisWriting Share on X
We need to change
If you’re writing a persuasive presentation, you also need to follow a particular sequence.
Whether you’re writing a pitch for a prospective customer or making research-based recommendations to a client, you follow the same structure. That structure is the Four Ps . It’s a powerful way of leading your audience’s thinking.
Start with the current situation – where you are now ( position ). Explain why you can’t stay there, so the audience agrees things have to change ( problem ). Suggest up to three credible ways you can address the issue ( possibilities ). Then decide which one is the optimum solution ( proposal ).
Three is a magic number for writers – not too many, not too few. But there may be one standout possibility, in which case you go straight to it ( position, problem, proposal ).
Think about how the pandemic has profoundly changed our working lives. Towns and cities are full of offices that people used to commute to. But to maintain social distancing, we’ve been encouraged to work from home where possible and to stay away from public transport.
At some point, decision-makers within organisations will have to make a call – or share a recommendation – about what to do long term. Should we go back to the office, stay at home or combine the two?
If we had to present on this choice using the Four Ps structure, we could outline the pros and cons of each possibility and then make a push for the one we recommend above the others. Or we could join the likes of Google and Twitter and simply propose purely remote working well into the future.
I have a dream
A presentation that inspires is about the future – about what could be. Scientists inspire children to follow careers in astronomy or physics with their passion and stunning visuals. Designers re-energise companies with their radical, exciting visions. Business leaders convince their staff that they really can turn things around.

An audience watching an inspirational presentation is not going to take away lots of facts and figures. What’s important is their emotional and intellectual engagement with the speaker, their shared sense of purpose. One way to build that engagement is with your structure.
From dark to light
The most inspiring presentations are so often born of shared struggle. On 13 May 1940, Winston Churchill addressed the British parliament – and the British people listening on their radios – in the darkest days of the Second World War.
He was brutally realistic in his assessment of the current position: ‘We have before us many, many long months of struggle and of suffering.’ He then set out his policy: ‘To wage war by sea, land and air, with all our might … against a monstrous tyranny’, and the prize: ‘Victory, however long and hard the road may be.’
In difficult situations, audiences immediately see through false hope and empty rhetoric. They want honest acknowledgement, and the determination and clear strategy to lead them to the future.
We can imagine how the same structure could show up in a more business-related context:
‘I’m not going to sugar-coat the figures. We have to change to save jobs and secure our future. There will be dark days and sacrifices along the way, but what’s the hardest part of any turnaround? It’s getting started. To do that, we all need to keep asking two fundamental questions: where can we improve, how can we improve? And if we push hard enough and if we’re utterly relentless, change will come and our momentum will build.’

Are you going to appeal to your audience’s
- habits of thought (current beliefs)?
If your recommendations run counter to their current beliefs, try appealing to their emotions.
3. Writing your presentation script
You don’t have to write a script. Some people put a few PowerPoint slides together and wing it; others make do with bullets on a smartphone, laptop or cue cards. It depends on the event and the presenter.
Writing a full script takes time, but if it’s a very important presentation and you might use it again – perhaps to appeal for investment – it will be worth it.
Some people will write a full script because the company or organisation that’s commissioned a presentation will want to see a copy well ahead of the event (often for legal reasons). Others will write the script, edit it down to the required time and then edit it down again to bullets or notes.
If the presentation is to a small audience, your notes or bullets will suit a more conversational approach. There are no rules here – see what works best for you. But what you must do is know your subject inside out.
To write clearly, you must think clearly and a full script will expose the areas that aren’t clear – where an explanation needs strengthening, for example, or where you should work on a transition.
Timing is everything
A full script also helps with working out timing, and timing is crucial. TED talks, for example, have a strict 18-minute limit, whether in front of an audience or online. That’s short enough to hold attention, but long enough to communicate a key idea. (The ‘I have a dream’ speech lasted 17 minutes 40 seconds and it changed the world.)
It takes a very skilled presenter to go much over 30 minutes. If you are taking questions during or after your presentation , however, it’s fine to build in extra time.
Imagine you’re writing your presentation in full and your slot is 20 minutes. On an A4 page with a 14-point Calibri font and 1.5 line spacing, that will equate to about 10 pages.
You can also divide the page in two, with slides on the left and text on the right (or vice versa). Then you can plan your words and visuals in parallel – and that will be roughly 20 pages.

Script page with a slide on the left-hand side and text on the right. The slide has the heading ‘What is your purpose?’ and has a photo of a smiling person at a whiteboard mid-presentation. The text on the slide reads:
Do you want to:
- do a combination of all three?
The notes next to the slide read:
How should they do that? Should they explain, persuade or inspire – the three key strategies for any presentation? You may need to use several of them to achieve your goal.
The most powerful key on your keyboard – Delete
Use these numbers as your goal, but your first draft will probably be longer. That’s when you start deleting.
Be ruthless. Anything not adding to the story must go, including those anecdotes you’ve been telling for years ( especially those anecdotes). It’s not about what you want to tell the audience, it’s about what they need to hear.
Don’t feel you have to include every single issue either. Dealing with two or three examples in some detail is far better than saying a little bit about many more.
And interpret visual material you’re displaying rather than describing it, just as you wouldn’t repeat the text that’s on the screen. The audience can see it already.
It’s a conversation
Be yourself – don’t write a script that’s not in your style. We want the real you, not a supercharged version.
Some people are naturals when it comes to presenting – which can mean they’ve learned how to draw on their authentic strengths.
Sir David Attenborough is a great example. He has a wide-ranging knowledge of the natural world. He has an infectious passion and enthusiasm for his subject. And most importantly, he doesn’t lecture the camera: he talks naturally to his audience (and he’s now using Instagram to inspire new generations).
You can take a cue from Sir David and make your presentation style your own. Knowing your own strengths and really understanding your why will help you speak with purpose and passion.
And aim to speak naturally. Use conversational, inclusive language. That means lots of personal pronouns ( I believe, we can) and contractions ( Don’t you wonder …, you’re probably thinking …).
Sir David Attenborough introduces his new series, Our Planet at its premiere. He builds up our awareness by layering information alongside arresting statistics. These are framed simply, in relatable terms (‘96% of mass on the planet is us …’), so we easily grasp their shocking significance. He also uses ‘we’ and ‘us’ a lot to underline how this environmental emergency affects us all on ‘the planet we all call home’.
Finding the right words
Imagine you’re talking to someone as you write. And try saying the words out loud – it’s a good way to catch those complex, overlong sentences or particular words that will be difficult to say.
Presentations are not reports that can be reread – the audience has to understand what you are saying in the moment . Don’t leave them wondering what on earth you’re talking about, as they will only fall behind.
So avoid using long or complex words, or words you wouldn’t hear in everyday conversation (if your everyday conversation includes ‘quarks’ and ‘vectors’, that’s fine). And beware of jargon – it can exclude the audience and it quickly becomes clichéd and outdated.
Here are some more hints and tips on how to write effectively for speaking:
Syntax (word order): Disentangle your thoughts and arrange the words in your sentences to be simple and logical. Often, complex syntax shows up when the main point is getting lost inside excess information (or that the speaker is unsure what their main point is).
Pace, rhythm and tone: Varying the pace, rhythm and tone of sentences makes both the speaking and listening experience far more enjoyable.
Make sure the stress falls on the most important words. For example, ‘To be or not to be ‘ (where the stress rises and falls on alternate words) or ‘I have a dream ‘ (where the stress falls on the final word).
Vary the length of sentences and experiment with using very short sentences to emphasise a point.
Play with rhythm by arranging words in pairs and trios. Saying things in threes gives a sense of movement, progression and resolution: Going, going … gone . Saying words in pairs gives a more balanced tone (‘courage and commitment’, ‘energy and effort’) or a sense of tension between the words (‘war and peace’, ‘imports and exports’).
Analogies: Good analogies can work well in presentations because they paint vivid pictures for the audience. The best way to do it is to use either a simile (‘It wasn’t so much a dinner party, more like feeding time at the zoo’) or a metaphor (‘He was the fox and the company was the henhouse’).
Alliteration: This means using two or more words that start with the same sound, like ‘big and bold’, ‘sleek and shiny’ or ‘key components’. On the page alliteration may look contrived, but it can effectively highlight important phrases in a presentation.
Words to avoid: Be careful about using clichés like ‘pushing the envelope’, ‘playing hardball’ and ‘thinking outside the box’. And think carefully about using any word that ends with -ism, -ise, -based, -gate, -focused and -driven.
Be careful with humour too: don’t write jokes unless you can naturally tell them well. Keep the tone light if it fits the occasion, but a badly told joke can be excruciating.
4. How to start your presentation
People tend to remember beginnings and endings the most, so make sure your opening and conclusion are both strong.
You have about a minute to engage an audience. You want them to be intrigued, to want to know more, to come slightly forward in their seats. If you only learn one part of your presentation by heart, make it that minute.
A quick ‘thank you’ is fine if someone has introduced you. A quick ‘good morning’ to the audience is fine too. But don’t start thanking them for coming and hoping they’ll enjoy what you have to say – you’re not accepting an Oscar, and they can tell you what they thought when it’s over. Get straight down to business.
There are four basic types of introduction which will draw your audience in:
- News – ‘Positive Covid-19 tests worldwide have now reached …’
- Anecdotal – ‘About ten years ago, I was walking to work and I saw …’
- Surprise – ‘Every five minutes, an American will die because of the food they eat.’
- Historical – ‘In 1800, the world’s population was one billion. It’s now 7.8 billion.’
You can interpret these beginnings in any number of ways. If you were to say, ‘I have an admission to make …’, we will expect a personal anecdote relating to your main theme. And because you’re alone in front of us, it’s playing on your vulnerability. We’re intrigued straight away, and you’ve established a good platform for the rest of the presentation.
You can also combine these techniques. The historical beginning creates a sense of movement – that was then and this is now – as well as a surprising fact. It may prompt a thought like, ‘Wow, where’s this going?’ And you can trade on this with your own rhetorical question: ‘What does this mean for everyone in this room? It’s not what you think …’.
As well as setting up your story, you need to quickly reassure the audience they’re in safe hands. One way to do that is to give them a map – to tell them where you’re going to take them and what they’re going to see along the way.
Then you’re starting the journey together.
5. How to end your presentation
Your ending is what you want the audience to take away: your call to action, your vision of the future and how they can contribute.
If your presentation is online or to a small group in a small room, your ending is not going to be a battle cry, a call to man the barricades – that would be totally inappropriate. But equally don’t waste it with something flat and uninspiring.
Here are four effective ways to end your talk (like the intros, you can combine them or come up with your own):
- Predict the future – ‘So what can we expect in the next ten years? …’
- Quotation – ‘As our chief exec said at the meeting yesterday, …’
- Repeat a major issue – ‘We can’t carry on with the same old same old.’
- Summarise – ‘Continuous improvement isn’t our goal. It’s our culture.’
Predicting the future fits well with a historical beginning – it completes the arc of your presentation.
If you end with a quotation, make sure it’s relevant and credible – it has to be an authoritative stamp.
Repeating a major issue means pulling out and highlighting a major strand of your presentation, while summarising is about encapsulating your argument in a couple of sentences.
Your ending can also be a change of tone, perhaps signalled by the single word ‘Finally …’. It’s the audience’s cue to come slightly forward again and pay close attention.
As with your opening, it will have more impact if you’ve learned your ending – put down your notes, take a couple of steps towards the audience and address them directly, before a simple ‘Thank you.’
6. Creating your PowerPoint slides
We’ve all been there – watching a seemingly endless, poorly designed slide deck that’s simply restating what the presenter is saying. So common is this tortuous experience that there’s a name for it: Death by PowerPoint. But it doesn’t have to be like this.
Do you need slides at all?
As with your script, the first thing you should ask is ‘Do I actually need this?’ In 2019, Sir Tim Berners-Lee gave the Richard Dimbleby lecture for the BBC. He spoke for about 40 minutes with no autocue (he’d memorised his script) – and no speaker support.
This is a uniquely powerful form of presentation because the audience’s attention is totally focused on that one person. The call to action at the end of a presentation and delivering bad news are also best done without visuals.
Visual support
But if they’re well-judged and relevant, slides or other visuals can add enormously to a presentation – whether it’s photography, video or the ubiquitous PowerPoint. There are, however, two things everyone should know about PowerPoint in particular:
- It’s incredibly versatile and convenient.
- In the wrong hands, it can be unbearably tedious.
Your PowerPoint slides should not essentially be your cue cards projected onto a screen. They shouldn’t be packed margin to margin with text or full of complex diagrams.
If the presentation is live, the audience has come to watch you, not your slide deck. Online, the deck may have to work harder to sustain visual interest.
As with the script, keep your finger poised over that Delete key when you’re putting the deck together.
How many slides?
There’s no hard-and-fast rule about how many slides you should use, but think in terms of no more than one or two a minute on average. And don’t use more than a couple of short video inserts in a 20-minute presentation.
You might have a section where you show a few slides in a sequence or hold a single slide for a couple of minutes, which is fine. Varying the pacing helps to keep a presentation moving.
Optimise for psychology
As self-professed presentation aficionado David JP Phillips notes in his TEDx talk , people – and that includes your audience – have terrible working memories. If you don’t account for this fact in your slides, your talk will not have a lasting impact. In fact, most of it will be forgotten within around 30 seconds.
To counter this effect, David identifies five key strategies to use when designing your PowerPoint:
- Only have one message per slide: more than that and you’re splitting your audience’s attention.
- Don’t use full sentences on slides, and certainly don’t imagine you can talk over them if you do. People trying to read and listen at the same time will fail at both and absorb nothing. Move your running text into the documentation section instead, and keep the slide content short and sweet.
- People’s focus will be drawn to the biggest thing on the slide. If your headline is less important than the content below it, make the headline text the smaller of the two.
- You can also direct people’s attention using contrast. This can be as simple as guiding their point of focus by using white text (on a dark background) for the words you want to highlight, while the surrounding text is greyed out.
- Including too many objects per slide will sap your audience’s cognitive resources. (Your headline, every bullet, any references, even a page number each count as an object.) Include a maximum of six objects per slide and viewers will give a mental sigh of relief. This will probably mean creating more slides overall – and that’s fine.
More Powerpoint and visual aid tips
Here are a few more guidelines for creating your visual aids:
- Never dive into PowerPoint as job one in creating your presentation. Work out your talk’s structure (at least) before designing your slide deck. Making a genuinely effective PowerPoint requires that you know your subject inside out.
- List any visuals you’ll need as you prepare your script. That terrific photo you saw recently could be difficult to track down, and you might need permission and to pay to use it.
- It bears repeating: keep each slide to one key idea.
- Use the build effect of adding one bullet at a time (or use the contrast trick above) and try not to use more than three bullets per frame (or six objects overall).
- Strip each bullet to the bare minimum – no articles (‘a’, ‘an’ and ‘the’), no prepositions (‘in’, ‘at’, ‘to’ etc) and cut right back on punctuation.
- Every word that’s not there for a reason has to go. Delete, delete, delete.
‘Extra’ slides
- Use a ‘walk-in’ slide. Rather than have the audience arrive to a blank screen, this tells them who you are and your presentation’s title.
- Use occasional holding slides in between those with more content – perhaps an image but no text. They give the audience a visual rest and put the focus back on you.
- A plain white background might look fine on a computer monitor, but it will be glaring on a big screen. Invert the norm with a dark background, or use shading or ‘ghosted’ images to break up backgrounds and add visual interest.
- Some colours work better than others on-screen. Blues and greys are soft and easy on the eye. Red is a no-no, whether for backgrounds or text. And if you stick with a light background, favour a more subtle dark grey over black for the text.
- Use sans serif fonts (like Arial, Helvetica or Calibri) and think about point size – make sure it’s easily legible.
- Only use upper case where absolutely necessary.
Images and data
- Photos work well full screen, but they also really stand out well on a black background.
- Make sure your charts and graphics aren’t too complex. The dense information that’s fine on the page will not work on-screen – it’s too much to take in. Graphs behind a TV newsreader are often reduced to a single line going dramatically up or down.
- Don’t present data or graphs and expect them to speak for themselves. You need to find the story and significance in the data and present that .
And finally
- Proofread, proofread, proofread – or risk standing in front of an embarrassing spelling mistake.
Technical check
- Check what laptop they’re using at your venue. If you’ve written your deck on a PC, run it on a PC (and, of course, the same rule applies if you’ve used a Mac).
- If you’ve emailed your presentation to the venue, take a USB copy along as back-up.
- If you’re presenting online, check which platform you’ll be using and get comfortable with it. If someone else will be hosting the event, make sure you arrange a time for a rehearsal, especially if there will be a producer.
7. Delivering your presentation
You’ve put a lot of time and effort into preparing your presentation and now you’ve come to the sharp end – it’s time to stand and deliver.
Run it through
You don’t have to rehearse, but most presenters do and for good reason – it catches weak points and awkward transitions. And, crucially, it bolsters confidence.
Read your script or go through your bullets aloud – it will help to settle your nerves. If you use colleagues as a dummy audience, you can do a sense check too: ‘Does that bit work?’ ‘Have I explained it clearly?’ ‘Do you get the big picture?’ And rehearsing out loud will catch those words and sentences you thought you could say but can’t.
The more you rehearse, the more familiar and natural the presentation will become. Rehearse the technical side too – where the video is going to come in, how you’re going to vary your pace and tone to maintain interest.
Try speaking slightly more slowly than you would normally so the audience catches every word, and don’t be afraid to pause now and again. It gives a breathing space for you and the audience.

Connect with your audience
When you deliver your presentation for real, establish eye contact with the audience, just as you would in a conversation. In a small room with a small audience, talk to individuals. In a larger space, don’t talk to the first couple of rows and ignore the rest – include everyone.
And if you stumble over your words here or there, carry on and don’t dwell on it – you’ll lose your concentration. Audiences are generally forgiving and they might not even notice.
Each audience is unique: they react differently in different places. And although tomorrow might be the tenth time you’ve done the same presentation, it will be the first time this audience sees it. Your duty is to keep it fresh for them.
A final point
This is your presentation – you’re in control and the audience needs to feel they’re in safe hands.
It’s perfectly natural to feel nervous , but it’s the thought of doing it that’s the worst bit. Once you get going – and especially when you sense the audience is with you – the nerves will start to disappear. Try to enjoy it. If you enjoy it, it’s far more likely the audience will too.
And remember: everyone wants you to do well.

8. How to present online
Taking to Zoom or another online platform to present was once the exception. These days, online presenting is as essential a skill as presenting in person.
The switch to online can be nerve-wracking and cause even usually skilled presenters to falter. But there’s no need for that to happen.
Indeed, all of the advice we’ve talked about on preparing, structuring and writing for in-person presenting is equally relevant for your online delivery. You just need to be ready for the unique challenges that remote presentations pose.
An obvious one is that while you still have an audience, it will probably be muted and possibly even unseen (if webcams are switched off). This makes it far more difficult to gauge audience reaction, and if the event is pre-recorded, there might not be any at all – at least not immediately. Clapping and laughing emojis are not quite like the real thing.
Keep eye contact
But although your audience may be many miles away, there are still ways you can – and should – create a sense of connection with them. Your presentation will have much more impact if you do.
Whether the event is live or recorded, at least start with your webcam on (unless you really can only use slides). If it’s an option and feels appropriate, consider keeping your camera on throughout – remember, you are the presentation as much as any visuals.
If you will be on display, make sure you know where your webcam’s lens is and at key moments of your talk look directly into it – and out at your audience – to punctuate those points.
And don’t look at a second screen to cue up your PowerPoint – viewers will think your attention is wandering.
Engage your online audience
Being an engaging speaker is always important, but remember that the online world is already a place we associate with distraction. It’s also easier for a viewer behind their laptop to disguise their wandering attention than it would be for one in an auditorium or boardroom.
This isn’t to say your audience don’t want to give you their attention. But it is more important than ever to keep your presentation sharp and concise. Revisit your structure, your script or cue cards and your slides. Take a really critical eye to it and (as always) delete, delete, delete anything that’s not directly relevant.
If it works for your format, you can look at making your presentation interactive. You can then break the content into short segments, interspersed with comment, polls, questions and discussion. The variety will be a welcome change for your viewers.
Your visuals are part of what will keep people with you – along with the interplay you create between you and them. This means following the best-practice guidance we covered earlier is even more important.
Using Zoom for your presentation? Master the art of online delivery through this simple mix of set-up, delivery and technical tricks @EmphasisWriting Share on X
Modulate your voice
Your tone of voice is extremely important here because presenting online is like radio with pictures. When people say ‘You have a great voice for radio’ what they mean is that it’s easy to listen to, often because you’re using quite a low-pitched, warm and relaxed register.
Listen to voices on the radio and voiceovers and identify the ones you particularly enjoy. What do you like about them? Why do you enjoy some voices and not others?
A flat, unmodulated voice, for instance, is difficult to listen to for long periods (and isn’t likely to inspire anyone).
Experiment with intentionally adding energy to your voice, as internet audio can have a dulling effect. As our trainer Gary Woodward puts it: ‘Turn up the enthusiasm dial even higher than you think, to make sure it comes through.’ And always vary your pace and tone as you would in a normal conversation.
And if it suits the tone of your talk, smile now and again. Smiling is contagious, and people will hear it in your voice even if they can’t see you.
Perfect your transitions
One of the other key challenges of remote presentations is that you have another layer of technology to wrestle with: sharing your PowerPoint online.
This means that many presentations begin with the popular catchphrase ‘Can you see my screen?’
This can also cause many presenters to stumble through their transitions, making the links between their slides clunky. And while remote audiences may be forgiving, for a slick presentation it’s best to prevent these sort of fumbles.
Naturally, practice plays a part here. But you can also give yourself the advantage with your set-up.
Dave Paradi from Think Outside the Slide explains one great way of setting up Zoom so you can smoothly cue up and run your slide deck – and be certain what’s being displayed.
You’ll even be able to see the rest of your screen (but the audience won’t). As you’ll be able to see what’s coming up, your transitions can also be seamless.
The trick is to use one of Zoom’s advanced settings after you hit ‘Share screen’, to share only a portion of your screen:

Advanced screensharing options pop-up box in Zoom, with the options ‘Portion of Screen’, ‘Music or Computer Sound Only’ and ‘Content from 2nd Camera’. The ‘Portion of Screen’ option is highlighted in blue.
This will give you a frame you can move to the part of the screen you want the audience to see.
Put your PowerPoint slides into ‘presenter view’ before launching the screenshare. Then you’ll be able to see the upcoming slides and your notes throughout, and your animations (like build slides) will work as normal.

Zoom’s ‘portion of screen’ setting in action
Presenter view in PowerPoint, with the current displayed slide on the left and the upcoming slide displaying smaller on the right, with notes below it. There is a notification saying ‘You are screen sharing’ at the top and a sharing frame positioned around the current slide.
The other part of the trick? Set it up in advance shortly before you’re due to speak. Once you’re happy with the set up, you can stop sharing until it’s time to kick off your talk. When you return to ‘Share screen’ again, it will reopen the frame in the same place.
Dave shows you the process in this video:
Five practical tips for a truly professional online presentation
You’re happy with the content of your talk, you’ve ruthlessly streamlined your slides and mastered your radio voice. Now just make sure you cover these crucial practicalities for a polished presentation:
1. Create a good space Make sure you have your environment well set up:
- Keep the background on display as tidy and minimalist as possible – a plain wall or backdrop is great, if you can.
- Manage and minimise background noise (shut the window, ensure your phone’s on silent, put the cat out, make sure someone’s watching the kids in another room – whatever it takes).
- Check your lighting: have your light source in front of you, not behind you (or you’ll be in shadow).
- Set up your computer or device at eye level so that you are well-framed and facing it straight on – avoid looming above it while providing a lovely view into your nostrils.
2. Think about your appearance Dress in the same way you would if the presentation were in person, and judge your choice of attire based on the formality of the event and your audience.
3. Practise! Run through the presentation and rehearse the technical side. Practise your transitions, including the initial cueing up of your slides (perhaps using the Zoom tip above), so that you can be confident in doing it all smoothly.
4. Be primed and ready Log in early on the day of your talk. Check all your tech is working, get your headset on and ensure everything is set up well ahead of time. This will save any last-minute issues (and stress) and means you can hit the ground running.
5. Stand and deliver Even online, consider giving your presentation standing up, if you can do so comfortably (adjusting your device or webcam accordingly). This may put you more into a presenting frame of mind and will differentiate you from most remote presenters.
Are you still there?
Live audiences have a group dynamic – as soon as a few people start laughing it becomes infectious and the others join in. It’s naturally different online. But that doesn’t have to throw you.
You might not get that immediate feedback, but don’t overcompensate and feel you have to win them back.
Yes, it’s often more difficult to gauge an audience’s reaction online – especially if their audio is muted and their webcams off. Yes, this can be daunting. But they are still out there listening. You may or may not hear (or see) laughter, but they could still be smiling and very interested in what you have to say. Have faith in your own content. Whatever form your delivery will take, keep coming back to your purpose and message for giving this talk – and keep considering the people you’ll be talking to. Whether the address will be online or in person, it is keeping this focus which is the key to every powerful presentation.
Ready to learn even more? Work one-to-one on your presentation-writing skills with one of our expert trainers or join our scheduled presentation-writing courses . If your team are looking to upskill, we also offer tailored in-house training . And if fear of presenting is holding your team back, check out our in-house course The reluctant presenter .
Image credit: lightpoet / Shutterstock

Your go-to guide to better writing
Get your own PDF copy of The Write Stuff , the definitive guide for everyone who writes at work.

These days he's one of Emphasis' top business-writing trainers, but in previous career lives Jack has written for many public and private sector organisations. He has an in-depth knowledge of the engineering and manufacturing sectors, particularly the UK automotive industry. As the lead scriptwriter for chairmen and CEOs, he has been responsible for proposals, pitches and reports as well as high-profile speeches and global product launches.
Was this article helpful?
This helps us make better content for you

You might also like

The readability techniques you need for clear business writing

Writing to the board
Writing a report for the board? Here’s what you need to know

Writing for marketing
How to write a winning marketing proposal [with presentation template]

Bids and proposals
Is your bid presentation pushing prospects into the cold?
Get expert advice, how-tos and resources for good writing (and great work).
How to Give a Persuasive Presentation [+ Examples]
Published: December 29, 2020
A presentation aimed at persuading an audience to take a specific action can be the most difficult type to deliver, even if you’re not shy of public speaking.

Creating a presentation that effectively achieves your objective requires time, lots of practice, and most importantly, a focused message.
With the right approach, you can create a presentation that leaves a skeptical audience enthusiastic to get on board with your project.
In this post, we'll cover the basics of building a persuasive presentation. Let's dive in.
![→ Free Download: 10 PowerPoint Presentation Templates [Access Now]](https://no-cache.hubspot.com/cta/default/53/2d0b5298-2daa-4812-b2d4-fa65cd354a8e.png "presentation logic explain")
What is a persuasive presentation?
In its most basic form, a persuasive presentation features a speaker who tries to influence an audience to accept certain positions and engage in actions in support of them. A good persuasive presentation uses a mixture of facts, logic, and empathy to help an audience see an issue from a perspective they previously discounted or hadn’t considered.
How to Plan a Persuasive Presentation
Want to make a persuasive presentation that connects with your audience? Follow these steps to win friends and influence people within your audience.
1. Decide on a single ask.
The key to convincing your audience is to first identify the singular point you want to make. A good persuasive presentation will focus on one specific and easy-to-understand proposition. Even if that point is part of a broader initiative, it ideally needs to be presented as something your audience can say "yes" or "no" to easily.
A message that isn’t well-defined or which covers too much can cause the audience to lose interest or reject it outright. A more focused topic can also help your delivery sound more confident, which (for better or worse) is an important factor in convincing people.
2. Focus on fewer (but more relevant ) facts.
Remember: You are (in the vast majority of cases) not the target audience for your presentation. To make your presentation a success, you’ll need to know who your audience is so you can shape your message to resonate with them.
When crafting your messaging, put yourself in your audience's headspace and attempt to deeply understand their position, needs, and concerns. Focus on arguments and facts that speak specifically to your audience's unique position.
As we wrote in our post on How to Present a Compelling Argument When You're Not Naturally Persuasive , "just because a fact technically lends support to your claim doesn't mean it will sway your audience. The best evidence needs to not only support your claim but also have a connection to your audience."
What are the target audience's pain points that you can use to make a connection between their needs and your goals? Focus on those aspects, and cut any excess information. Fewer relevant facts are always more impactful than an abundance of unfocused pieces of evidence.
3. Build a narrative around your evidence.
If you want to persuade someone of something, it’s not enough to win their brain -- you need their heart in it, too. Try to make an emotional connection with your audience throughout your presentation to better sell them on the facts you’re presenting. Your audience is human, after all, so some emotional tug will go a long way to shaking up how they view the issue you’re talking about. A little bit of emotion could be just what your audience needs to make your facts “click.”
The easiest way to incorporate an emotional pull into your presentation is through the use of narrative elements. As we wrote in our guide to crafting pitch decks , "When our brains are given a story instead of a list of information, things change -- big time. Stories engage more parts of our brains, including our sensory cortex, which is responsible for processing visual, auditory, and tactile stimuli. If you want to keep people engaged during a presentation, tell them a story."
4. Confidence matters.
Practice makes perfect (it's a cliche because it's true, sorry!), and this is especially true for presentation delivery. Rehearse your presentation several times before you give it to your audience so you can develop a natural flow and move from each section without stopping.
Remember, you're not giving a speech here, so you don't want your delivery to come across like you're reading fully off of cue cards. Use tools like notes and cue cards as ways to keep you on track, not as scripts.
Finally, if you can, try to practice your presentation in front of another human. Getting a trusted co-worker to give you feedback in advance can help strengthen your delivery and identify areas you might need to change or bulk up.
5. Prepare for common objections.
The last thing you want to say when someone in your audience expresses a concern or an outright objection during your presentation's question section is “umm, let me get back to you on that.”
Carefully research the subject of your presentation to make the best case possible for it -- but also prepare in advance for common objections or questions you know your stakeholders are going to ask. The stronger your command of the facts -- and the more prepared you are to proactively address concerns -- the more convincing your presentation will be. When you appear confident fielding any rebuttals during a question and answer session after your presentation, it can go a long way towards making your case seem more convincing.
Persuasive Presentation Outline
Like any writing project, you’ll want to create an outline for your presentation, which can act as both a prompt and a framework. With an outline, you’ll have an easier time organizing your thoughts and creating the actual content you will present. While you can adjust the outline to your needs, your presentation will most likely follow this basic framework.
I. Introduction
Every persuasive presentation needs an introduction that gets the listener’s attention, identifies a problem, and relates it to them.
- The Hook: Just like a catchy song, your presentation needs a good hook to draw the listener in. Think of an unusual fact, anecdote, or framing that can grab the listener’s attention. Choose something that also establishes your credibility on the issue.
- The Tie: Tie your hook back to your audience to garner buy-in from your audience, as this issue impacts them personally.
- The Thesis: This is where you state the position to which you are trying to persuade your audience and forms the focal point for your presentation.
II. The Body
The body forms the bulk of your presentation and can be roughly divided into two parts. In the first half, you will build your case, and in the second you will address potential rebuttals.
- Your Case: This is where you will present supporting points for your argument and the evidence you’ve gathered through research. This will likely have several different subsections in which you present the relevant evidence for each supporting point.
- Rebuttals: Consider potential rebuttals to your case and address them individually with supporting evidence for your counterarguments.
- Benefits: Outline the benefits of the audience adopting your position. Use smooth, conversational transitions to get to these.
- Drawbacks: Outline what drawbacks of the audience rejecting your position. Be sure to remain conversational and avoid alarmism.
III. Conclusion
In your conclusion, you will wrap up your argument, summarize your key points, and relate them back to the decisions your audience makes.
- Transition: Write a transition that emphasizes the key point you are trying to make.
- Summary: Summarize your arguments, their benefits, and the key pieces of evidence supporting your position.
- Tie-back: Tie back your summary to the actions of your audience and how their decisions will impact the subject of your presentation.
- Final word: Try to end on a last emotional thought that can inspire your audience to adopt your position and act in support of it.
IV. Citations
Include a section at the end of your presentation with citations for your sources. This will make independent fact-checking easier for your audience and will make your overall presentation more persuasive.
Persuasive Presentation Examples
Check out some of these examples of persuasive presentations to get inspiration for your own. Seeing how someone else made their presentation could help you create one that strikes home with your audience. While the structure of your presentation is entirely up to you, here are some outlines that are typically used for different subjects.
Introducing a Concept
One common type of persuasive presentation is one that introduces a new concept to an audience and tries to get them to accept it. This presentation introduces audience members to the dangers of secondhand smoke and encourages them to take steps to avoid it. Persuasive presentations can also be a good format to introduce marco issues, such as this presentation on the benefits of renewable energy .
Changing Personal Habits
Want to change the personal habits of your audience? Check out this presentation on how to adopt healthy eating habits . Or this presentation which encourages the audience to get more exercise in their daily lives.
Making a Commitment to an Action
Is your goal to get your audience to commit to a specific action? This presentation encouraging audience memes to become organ donors could provide inspiration. Trying to make a big sale? Check out this presentation outline that can encourage someone to buy a home .
Remember: You Can Do This
Anyone can craft a persuasive presentation once they know the basic framework for creating one. Once you get the process down, you’ll be in a better position to bring in sales, attract donors or funding, and even advance your career. The skills you learn can also benefit you in other areas of your personal and professional life as you know how to make a case and influence people toward it.
![Blog - Beautiful PowerPoint Presentation Template [List-Based]](https://no-cache.hubspot.com/cta/default/53/013286c0-2cc2-45f8-a6db-c71dad0835b8.png "presentation logic explain")
Don't forget to share this post!
Related articles.
![How to Create the Best PowerPoint Presentations [Examples & Templates]](https://blog.hubspot.com/hubfs/powerpoint.webp "presentation logic explain")
How to Create the Best PowerPoint Presentations [Examples & Templates]
![17 PowerPoint Presentation Tips From Pro Presenters [+ Templates]](https://blog.hubspot.com/hubfs/powerpoint-design-tricks_7.webp "presentation logic explain")
17 PowerPoint Presentation Tips From Pro Presenters [+ Templates]
![How to Write an Ecommerce Business Plan [Examples & Template]](https://blog.hubspot.com/hubfs/ecommerce%20business%20plan.png "presentation logic explain")
How to Write an Ecommerce Business Plan [Examples & Template]
![How to Create an Infographic in Under an Hour — the 2024 Guide [+ Free Templates]](https://blog.hubspot.com/hubfs/Make-infographic-hero%20%28598%20%C3%97%20398%20px%29.jpg "presentation logic explain")
How to Create an Infographic in Under an Hour — the 2024 Guide [+ Free Templates]
![20 Great Examples of PowerPoint Presentation Design [+ Templates]](https://blog.hubspot.com/hubfs/powerpoint-presentation-examples.webp "presentation logic explain")
20 Great Examples of PowerPoint Presentation Design [+ Templates]

Get Buyers to Do What You Want: The Power of Temptation Bundling in Sales

How to Create an Engaging 5-Minute Presentation
![How to Start a Presentation [+ Examples]](https://blog.hubspot.com/hubfs/how-to-start-presenting.webp "presentation logic explain")
How to Start a Presentation [+ Examples]

120 Presentation Topic Ideas Help You Hook Your Audience

The Presenter's Guide to Nailing Your Next PowerPoint
Download ten free PowerPoint templates for a better presentation.
Marketing software that helps you drive revenue, save time and resources, and measure and optimize your investments — all on one easy-to-use platform
Home Blog Guide to Presenting Using the Pyramid Principle
Guide to Presenting Using the Pyramid Principle
The conventional method for presenting a PowerPoint presentation entails reflecting upon the facts and fine details to draw the audience towards a conclusion. This can result in a lengthy Q&A session at the end of the presentation, where the audience might appear confused, unsatisfied, and at times, feel manipulated into being led towards a conclusion of the presenter’s choosing. A better alternative can be to use the Pyramid Principle .
Present using the Pyramid Principle: An Excellent Tool to Communicate Logical Information
The Pyramid Principle can be used for structuring communication to have a meaningful impact. Whether you’re making reports, delivering a presentation, or preparing an analysis, the Pyramid Principle can be an excellent tool to communicate logical information . The structured format in which the communication relays the answer prior to facts and data can help create an environment where critical thinking can be stimulated at the very start, instead of the end.
What is the Pyramid Principle?
Developed by an ex-McKinsey consultant, Barbara Minto, the Pyramid Principle is considered as one of the most important concepts of executive communication often taught in strategic communications and leadership programs . Unlike conventional modes of presenting information, the Pyramid Principle presents the answer at the beginning, followed by supporting arguments, data, and facts. The concept was documented in her book published in 1985 titled; The Pyramid Principle: Logic in Writing and Thinking .
The information is presented in the form of a pyramid, with the core idea at the top, which is then broken down by revealing fine details. The top of the pyramid contains the answer, which is the starting point. The middle of the pyramid represents supporting arguments. Whereas the bottom of the pyramid gives the supporting data and facts.
What are the 3 Rules When Creating Pyramid Structure?
When sitting through a lengthy PowerPoint presentation bloated with facts and data and a leading conclusion, one can feel unsatisfied with the presenter. However, when given the answer at the very beginning, you might feel a need to think through its merits from the very start. As you are presented with supporting arguments and facts, you can determine whether you agree or disagree with the statement or feel a need to raise important questions.
This approach makes it possible to aid structured thinking and stimulate critical thinking at the very start of a presentation or when reading through a report or research. Rather than feeling that you are being led towards a conclusion with convoluted information.
Supporting Arguments
Once the audience has been given the answer or hypothesis at the start, they can begin critically analyzing the supporting argument that follows. This is the second stage of the Pyramid Principle, where the answer is supported with relevant arguments to help test the validity of the hypothesis or to present it for critical analysis.
Supporting Data and Facts
Unlike conventional approaches to presenting data, the Pyramid Principle makes it possible to see supporting facts and data after a hypothesis. Rather than wondering what the long bits of information might be leading to. The one reading through the information or sitting in the audience does not need to wonder about the suggested conclusion, as it has already been presented at the start. Enabling critical analysis of the data and facts, as they are presented.
Why Does the Pyramid Principle Work?
Before the Pyramid Principle, Barbara Minto developed the MECE principle in the 1960s, which is a grouping principle that separates items into subsets. These subsets are mutually exclusive and collectively exhaustive, hence the name MECE. This concept underlies what was later known as the Pyramid Principle during the 1980s. Providing a mechanism to structure information for maximum impact. Making the principle practical and useful.
The Pyramid Principle suggests that ideas should be presented as a pyramid. Using the pyramid structure, the information is grouped together with similar, low-level facts, drawing insights from the similarity, and forming a group of related insights.
How is the Pyramid Principle used for Effective Writing?
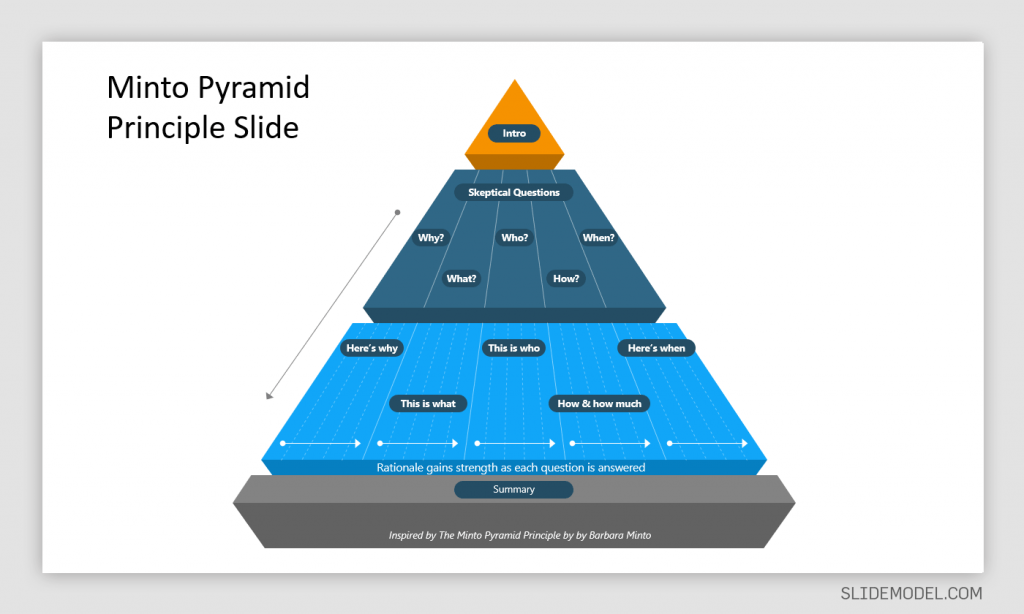
Effective writing produces content that is clear, accurate, and concise. The writing is focused, coherent, correct, supporting the central idea. When incorporating the Pyramid Principle for effective writing, the same rules apply. You need to start with the central idea. The ‘answer’ serves as a single thought, supported by arguments, data, and facts. You should present the ideas using the pyramid structure, summarizing the ideas grouped below each other, while remaining true to the ‘single thought’, i.e. the central idea (the answer).
An example of the structure for content produced using the Pyramid Principle would be as follows:
Answer -> Supporting Argument -> Evidence.
The answer shall remain at the top or at the heart of the content you are writing, whereas the supporting argument will be backed by evidence at each instance. If you have more than one supporting argument, you should take the time to structure each argument. For example, write the first supporting argument, followed by its evidence, before moving on to the second supporting argument and its related evidence.
How to Apply the Pyramid Principle in Preparing Presentations
When applying the Pyramid Principle, you must first start with the hypothesis and break it down with supporting arguments, backed by facts and data. It’s quite likely that during the course of the presentation, your audience would want to ask tough questions. Using this concept, you can enable those questions to be asked sooner and provide your breakdown of the information in a structured manner to ensure all your arguments are covered.
Begin with the Hypothesis
It is common to present the hypothesis at the very end after data, facts, and different ideas related to the potential hypothesis have been presented. The Pyramid Principle flips this conventional approach by presenting the hypothesis (answer) at the beginning.
Example: In our example, a mobile operator called ABC Telecom wants to enter a new market in Country X, located in Central Africa. The conventional approach would be to provide data and facts before mentioning why it’s a good idea to invest in a specific country. The presenter might even take the time to mention the country at the very end. The Pyramid Principle would require this information to be shared at the very beginning instead. In our example, the presenter would start the presentation by mentioning the hypothesis or answer.
In this case, the hypothesis might be something as follows: ‘investing in Country X would be profitable and lead to 30% increase in revenue for ABC Telecom over the next 5 years’.
Presenting the hypothesis at the start will stimulate critical thinking and aid structured communication, where there might be people for and against the argument scrambling to ask tough questions. That’s one of the benefits of the Pyramid Principle, as it helps bring out critical questions from the very start instead of at the end of a bloated presentation or report.
Present Arguments to Support Your Answer
It is essential to back the answer with supporting arguments to enable a meaningful discussion or to raise key questions regarding the accuracy of the hypothesis. For a business, this can have dire implications and major investment decisions might hinge on such information.
Example: The presenter proceeds to mention why investing in Country X by ABC Telecom is important for the long-term sustainability of the company. We assume that the argument for this investment is that ABC Telecom is already operating in a saturated market, where profit margins are projected to decline, and it is essential to move into a new market to increase revenue and profitability.
Present the Data to Support Your Argument
A supporting argument is only as good as the data and facts that are presented to back it up. The bottom of the pyramid, therefore, is the foundation of the Pyramid Principle. The foundation needs to contain accurate and reliable information that can back the hypothesis.
Example: In our example, ABC Telecom conducted research across 3 potential markets (Country X, Country Y, and Country Z) to look for countries to expand their operations in. During the research, it was revealed that only Country X appeared to be a lucrative market for investment.
The research revealed that Country Y and Country Z already have a saturated telecom industry with heavy taxes, rigid government policies, and very low ease of doing business ratings. Moreover, the population and telecom density of both these countries does not appear to indicate the potential for growth. On the contrary, Country X with a large population and low competition serves as a lucrative market. The market competition is slim, the government is looking to expand its telecom infrastructure, giving tax concessions to companies looking to set up their operations. The country also has a better ease of doing business ranking.
Another factor that goes in favor of ABC Telecom investing in Country X is that they are already operating in the neighboring country (Country W), making it easier to expand operations due to familiarity with the region. Furthermore, other global telecom operators are looking towards expanding into Asia Pacific, instead of Central Africa, leaving the market open for a new operator to rapidly expand. The recent rise in purchasing power, increased use of smartphones, and the demand for 4G and 5G services (currently not available in Country X) make another compelling argument for an efficient mobile operator to start operations in the country.
What are the Benefits of Applying the Pyramid Principle?
1. be better at structured thinking.
The idea behind structured thinking is to be efficient at problem-solving and critically analyzing things in an organized manner. The Pyramid Principle provides this formula in its pyramid-like structure, where important questions can be asked right from the start.
2. Focus on Core issues
Lengthy reports and presentations can lead to a lot of confusion and might even deviate the people in charge of making decisions from the core issue. By placing the core issue at the very heart and elaborating upon it at the start, the Pyramid Principle can help keep everyone involved in the discussion on point.
3. Placing the Solutions at the Start Initiates Critical Analysis
When exploring solutions, such as in our example above, (the expansion of a telecom operator into a new market), it is essential to initiate critical analysis. Key decisions related to investment, expansion into new markets, or changes to products or services can make or break a business. Placing the solution at the start of the discussion leaves ample room for critical analysis to see if the presented solution can be applied or if better alternatives can be explored.
4. Hypothesis Backed by Data can Aid Better Decision Making
How would you feel if you are presented with 1 hour of slides filled with data, with a solution at the end? It is likely that such a presentation would leave you weary and tired, unable to connect the data with the solution at the end. Now imagine, you are given the solution at the start of the presentation, and each bit of information related to the answer that you would see after that can be connected with the solution when analyzing its practical implications. The latter is an approach that will help you connect with the arguments, facts, and data, as they are presented. Since you are already aware of the answer or hypothesis that you need to focus on.
Is Barbara Minto’s Pyramid Principle Still Valid?
The short answer to the question would be, yes! Barbara Minto’s Pyramid Principle is considered as one of the most important methodologies for structured communication. Since its initial revelation during 1985 to the revised edition of Minto’s book in 1996; ‘The Minto Pyramid Principle: Logic in Writing, Thinking and Problem Solving’, the principle still remains effective. It is widely used for making business executives absorb information quickly, in a structured manner, and aiding executive communication.
Final Words
The Pyramid Principle can be used effectively for structured thinking, problem-solving, and presenting information in a palatable format for busy business executives. Moreover, presenting the information true to the core idea presented at the very start can help make it easier to keep the audience abreast with the arguments, data, and facts that follow.
At the very core of decision making, be it decisions made by businesses or individuals, everyone wants to find the solution that works best for them. But complex data analysis and information overload can hinder good decisions and obscure solutions. By starting with the potential solution, its merits and demerits can be critically analyzed with ease.
1. Minto Pyramid Principle PowerPoint Template
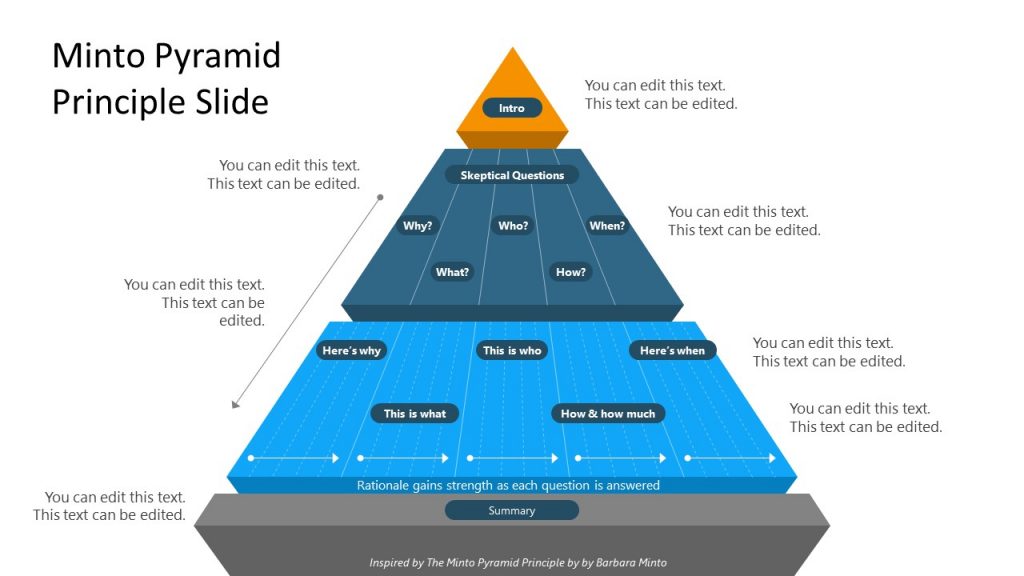
Use This Template
2. 3 Levels 3D Pyramid Template for PowerPoint
Like this article? Please share
Communication, Communication Skills, Presentation Approaches, Presentations
Related Articles

Filed under Design • May 22nd, 2024
Exploring the 12 Different Types of Slides in PowerPoint
Become a better presenter by harnessing the power of the 12 different types of slides in presentation design.

Filed under PowerPoint Tutorials • May 22nd, 2024
How to Insert a Word Document into PowerPoint
If you asked yourself how to link research data in .doc format into your presentations, then don’t miss our guide on how to insert a Word document into a PowerPoint file.

Filed under Design • March 27th, 2024
How to Make a Presentation Graph
Detailed step-by-step instructions to master the art of how to make a presentation graph in PowerPoint and Google Slides. Check it out!
Leave a Reply
- Effective Presentation Skills Tutorial
- Organizing the Presentation

Organize the content of your presentation in a logical sequence based on the outline you prepared. No matter how you decide to organize your presentation, keep the audience engaged to better help them remember the content. You can do this by asking them questions or having them share experiences related to the topic.
The Beginning of the Presentation
The beginning of your presentation sets the tone for the rest of the talk, so it is important to impress your audience with your approach, style and topic. Begin the presentation with something that attracts the audience’s attention, but keep it relevant to the topic and avoid jokes or irrelevant comments that could be misunderstood by the audience, especially if you are not familiar with the audience.
You can begin with an important statistic relevant to the topic, or a quote, or ask a question that interests the audience in the topic. For example, if the focus of your presentation is about environmental pollution by household activities, a simple question to interest the audience in your presentation could be "Does anyone know how many drops of drinking water are polluted by one drop of motor oil?" If anyone in the audience knows the correct answer, acknowledge that individual and ask how many of them knew that as well. Otherwise, give the answer, and begin your presentation.
Rule to Remember
Develop the beginning of your presentation after you develop the body of the presentation.
Engaging Opening
This video clip is an example of an opening statement that attracts the audience's attention to the topic .
Dry Opening
This video clip is an example of an opening statement that is dry and doesn't engage the audience's attention .
The Body of the Presentation
Begin planning the body of your presentation first. Once you have developed this part of the presentation, the beginning and end will fall into place.
You can order the main points of each section of your presentation as outlined in one of several ways depending on the nature of the presentation. Some possible orders of points include the following, though there can be others, depending on the topic and/or discipline:
- Spatial order – suitable for describing a layout or a process, from the beginning or entry point, to the end or exit.
- Chronological order – suitable for discussing literature review by years, or for describing the steps for doing something.
- Causal order – suitable for explaining causes and their effects. For example, how lack of sleep impacts worker productivity and safety.
- Topical order – suitable for presenting on different topics in a field such as different types of problem-solving techniques.
- Problem–Solution order – suitable for describing a particular problem and how it can be solved.
Choose the order suitable for covering the main points of your presentation for the particular section of the outline.
The End of the Presentation
End the presentation by reiterating the purpose of the presentation, summarizing the major points, and concluding with a quote, remark or fact that the audience will remember.
Missing Conclusion - Example 1
Missing conclusion - example 2.
These video clips are examples of a presenter transitioning from the body of the presentation to Q&A without a proper conclusion section.
- Preparing for the Presentation
- Designing Effective Presentation Materials
- Rehearsing the Presentation
- Delivering the Presentation
- Handling Questions and Answers
- Presentation Skills Quiz
- Presentation Preparation Checklist
- Common Reasons for Ineffective Presentations

Improve your practice.
Enhance your soft skills with a range of award-winning courses.
Ethos, Pathos, Logos: 3 Pillars of Public Speaking and Persuasion
April 11, 2018 - Gini Beqiri
Persuasive speaking is a skill that you can apply regularly throughout your life, whether you are selling a product or being interviewed. 2,300 years ago, Aristotle determined the components needed for persuasive speaking. They are referred to as the three pillars of persuasion – ethos, pathos and logos. In this article, we discuss how to use the three pillars for public speaking.
What are ethos, pathos and logos?
Ethos, pathos and logos are modes of persuasion used to convince and appeal to an audience. You need these qualities for your audience to accept your messages.
- Ethos : your credibility and character
- Pathos : emotional bond with your listeners
- Logos : logical and rational argument
Ethos – The Ethical Appeal
Ethos is Greek for “character” and “ethic” is derived from ethos.
Ethos consists of convincing your audience that you have good character and you are credible therefore your words can be trusted. Ethos must be established from the start of your talk or the audience will not accept what you say.
In fact, ethos is often established before your presentation, for example, you may be the CEO of the company you’re presenting to so you’re already perceived as a specialist.
Why is ethos important?
Characteristics of ethos.
There are four main characteristics of ethos:
- Trustworthiness and respect
- Similarity to the audience
- Expertise and reputation/history
1. Trustworthiness and respect
The audience are more likely to be respect you and think that what you’re saying is true if they perceive you as trustworthy . This judgement is formed using factors such as:
- Ethics and values
- Generosity and sharing
- If you’re part of a group that stands for the above values, such as an NSPCC worker
2. Similarity to the audience
Listeners are more likely to be convinced by someone they can relate to. For example, you may share:
- Age and gender
- Race and culture
- Personality etc
If you do not share traits with your audience you can choose to adjust your:
- Mannerisms and gestures
- Visual aids
But don’t do too much as your listeners will seen you as not being genuine.

Tony Robbins, a well known authority in the life coaching space, giving a TED Talk on ‘Why we do what we do’.
3. Authority
If the audience perceive that you are an expert they are more likely to be persuaded by what you say. Remember that every presenter has authority because they are the speaker.
For example:
- Political authority e.g. a prime minister
- Educational authority e.g. teacher
4. Expertise and reputation
Expertise is your knowledge of the subject.
Reputation is what your audience knows about your knowledge of the subject.
Reputation depends on:
- Achievements or acknowledgments from others in the area, such as, awards and testimonials.
- Your experience and the amount of years you have worked in this area.
- How involved you were with this topic – are you a key character?
- Your expertise should be verified, for example, you may be talking about different therapy treatments and your expertise is shown by you being a successful Clinical Psychologist.
- Your contribution to the area , perhaps through blogs, books, papers and products.
- Your authority
Merging the four characteristics of ethos
Not all of characteristics have to be present to develop high ethos, for example, a university lecturer speaking to her students is most likely perceived as trustworthy as the lecturer is known to provide correct information, she has authority over the 18-21 year olds due to her job title and her age.
But she’s not similar to her students because of this. She has been working in this area for 30 years and at the university for 5 years (expertise) and has contributed largely to the area through a number of studies and subsequent papers (reputation). This is enough ethos for the audience to be persuaded by what she says.
Another person, such as a manager addressing her employees may have a different combination of these traits but still have enough ethos. It’s hard to achieve complete ethos, especially considering that having authority often reduces similarity.
Improve ethos
Authority and reputation are usually predetermined before your presentation so it’s difficult to change the audience’s mind about this. But it’s easier to change people’s perception about how trustworthy and how alike you are during the presentation.
Improve ethos day to day:
- Become an expert in the topics you present on because people are more likely to want to listen to someone who has researched a topic for 10 years rather than 2 years.
- Ensure that people know about your expertise by promoting yourself, for example, ensure that people can easily access testimonials, reviews, papers etc.
- Treat the trustworthy characteristics as your values, so practice being honest, ethical, compassionate etc.
Improve ethos before a speech:
- Research your audience , especially concentrating on the traits you share, so you know how to appeal to them.
- Show up early to the presentation venue to show the audience that you want to be there.
- If, for example, you are speaking at a wider event, such as a conference, try to attend as much of it as possible. This means that you and the audience are sharing an experience so they are more likely to perceive you as similar to them.
- If the venue requires information to advertise your presentation, emphasise your ethos in this material so people will know why they should come and see your talk.

Telling personal stories during a presentation is a great way to increase ethos.
Increase ethos during a speech:
- In your introduction draw attention to your ethos because this is the best way to demonstrate your credentials to that particular audience on that particular day. Highlight vital facts that demonstrate the main four traits of ethos but which are relevant to the topic and the audience. Don’t make the introduction long and irrelevant.
- Tell personal stories that show the audience that you follow your own recommendations because they are more likely to believe you on other points that cannot easily be confirmed.
- Facts, stats and quotes should be up-to-date and from reputable sources, for example, between choosing from social media or Mind’s website to quote a statistic about anxiety, you would choose Mind’s website as this has high ethos which in turn increases your ethos.
- Reference people in the audience or previous speakers or events earlier that day. This forms connections with the audience.
- Be unbiased by admitting that you and your opposition’s side agree on at least one matter. This highlights that you are credible because you are treating the topic with consideration and fairness.
Improve ethos after the presentation
- Always stay for as long as you can after your speech in case audience members want to speak with you. This will also help with future presentations as it’s likely that this will become part of your reputation.
- Stick to your promises, for example, during the questions and answers session you may have agreed to find out an answer to a question and tell everyone – ensure that you do this to be seen as honest.
Pathos – The Emotional Appeal
Pathos is Greek for suffering and experience. Empathy, sympathy and pathetic are derived from pathos.
Pathos is to persuade by appealing to the audience’s emotions. As the speaker, you want the audience to feel the same emotions you feel about something, you want to emotionally connect with them and influence them. If you have low pathos the audience is likely to try to find flaws in your arguments.
Why is pathos important?
Emotions are motivators so the audience is more likely to be persuaded and act on your requests by using pathos. Pathos is more likely to increase the chances of your audience:
- Understanding your point of view.
- Accepting your arguments.
- Acting on your requests.
Example of pathos during a speech
Girls Who Code Founder Reshma Saujani explains how one of her students created an algorithm to detect false positives in breast cancer testing after her dad was diagnosed with cancer.
Watch the full video here: Why We Need Women in Tech
Improving pathos
- Choose emotional points and topics , for example “Beat your social anxiety” would trigger more powerful emotions than “Learn how to speak in a group.”
- Use analogies and metaphors – linking your ideas with something your listeners already know about and feel strongly about can trigger emotional responses. For example, “They are awful” compared to “They are poisonous.” This will use the audience’s knowledge that poison is bad and therefore this issue needs to be dealt with.
- Use emotionally charged words , for example, say “This kitchen roll is a life-saver” rather than “This kitchen roll is great”. Another way to make a statement more emotional is to use vivid and sensory words which allow the audience to experience the emotion. For instance, “The smell of your grandparents’ house” will increase the recollection of hopefully warm memories, and therefore will trigger certain emotions.
- Positive emotions, such as joy, should be linked with your claims.
- Negative emotions, such as anger, should be linked to your rival’s claims.
- Using humour increases the likelihood that the audience are enjoying themselves and so they are more likely to like you and listen to you.
- Visual aids can sometimes be more powerful than words, for example, showing an image of a scared small child will have more impact than saying that children are often victims of domestic violence.
- Research your audience and find out what their shared values are. Target these values and beliefs because they are strongly associated to emotions.
- Storytelling is a quick way to form an emotional connection. It’s often used to link a part of a key message with an emotional response – you’ll be familiar with seeing this in adverts asking for charity donations.
- Match what you’re saying with your body language , face and eyes. People often mirror emotions so by matching your body language with your words you increase the chances of triggering the desired emotions.
- Also match your voice to your words , for example, if you want to show sadness speak in a soft voice , if you want to show excitement then increase your pace etc.
- Stand as close as you can to the audience so the speech feels more personal – don’t hide behind the computer screen.
- Use words that carry suitable connotations , for example, if you asked a group of men whether they would like to be called “tall”, “lanky” or “big”. Even though the words have essentially the same meaning, the men are more likely to choose the word that has the most positive connotation, in this case the word “tall”.
- If you have accidentally caused a negative emotion find out why and apologise . For example, perhaps there have been severe interpersonal conflicts that you were unaware of and a joke you made upset audience members.
Logos – The Logical Appeal
The word “logic” is derived from logos.
Logos is to appeal to logic by relying on the audience’s intelligence and offering evidence in support of your argument. Logos also develops ethos because the information makes you look knowledgeable. Ask the following questions to decide if you have achieved logos:
- Are my messages coherent?
- Does the evidence support my claims?
- Will the audience’s actions lead to my desired outcome?
Why is logos important?
Essentially, logical arguments that make sense are not easily dismissed.
Improving logos
- Be comprehensive : Make sure your points and arguments can be understood
- Be logical : Ensure that your arguments make sense and that your claims and evidence are not implausible. Have a plan for dealing with opposing viewpoints that your listeners may already believe.
- Be specific : Base your claims on facts and examples as your arguments will be accepted quicker than something nonspecific and non-concrete. The more easily the evidence is accepted, the more easily the conclusions will be accepted.
Be comprehensive
- Use language that your audience will understand. Avoid jargon and technical terminology.
- Use simple figures and charts to make the presentations more understandable.
- Make the relationship between your evidence and conclusions clear.
- Analogies and metaphors are helpful especially when explaining new ideas and theories.

Engage the audience by asking them questions during your speech to increase logos.
- Ensure that the audience is involved by asking them engaging questions. This will make them active listeners so they may even come to your conclusion themselves.
- Talk about opposing views as this allows you to explain why your logical arguments are more reasonable.
- Deductive reasoning is looking at the evidence and coming to a conclusion . For example. “I don’t like loud places. That restaurant is really loud. So I won’t like that restaurant.”
- Inductive reasoning is when you add rational pieces, perhaps beliefs, to the evidence and come to a conclusion. The evidence is used to infer a conclusion but the conclusion is not guaranteed. For example: “All the vegan restaurants I have eaten in have been good. This is a vegan restaurant. So it must be good.”
The audience are using both types of reasoning as you speak, so their beliefs may interfere with them accepting your conclusions. Overcome these by building your argument on the audience’s widely held beliefs – commonplaces. For example, a company’s main value and therefore commonplace may be “Compassion makes us the best company”.
Use the audience’s commonplace like a fact and apply it to a new situation. So if you want to encourage your staff to join a committee, use their commonplace, for example, rather than your belief say: “This committee needs considerate and kind-hearted people.”
Be specific
- Facts and stats cannot be debated and they signify the truth.
- Visual evidence, such as, objects and videos are hard to challenge.
- Citing specialists and authorities on a topic increases the quality of your evidence and therefore your claims.
- Tell stories, such as, case studies or personal experiences. The audience would like to hear your own stories if you’re a specialist, for example, “When I was excavating in Nottingham…”
There is uncertainty over which pillar is the most important – Aristotle thought that logos was vital but when used by itself it lacks impact. So ensure that you treat all three pillars with equal importance to succeed in persuading your audience.
- Presentation Hacks
Secrets to Creating a Logical Presentation
- By: Scott Schwertly
When we say “logical,” what we are describing is “ a proper or reasonable way of understanding something .” Creating a presentation logically means organizing the content in order to maximize audience understanding. Because our brains work in similar ways, there are definitely techniques to build your next presentation to enhance memory and engagement.
Step One: Start Visually
Visual learning is one of the best ways to ignite the synapses in brain that connect and help us remember. We also know that people prefer images. For instance, “articles with images get 94% more total views .”
If you want to start creating a memorable presentation, be sure that the content is visually appealing, clear, and relevant to your main points. Not sure where to begin? We have a helpful guide on how to use images in your presentation.
Step Two: Utilize Narrative
We remember things that engage our minds with rich descriptions and storytelling. It’s what makes the difference between the sentence, “she has a dog” and “she has a pink poodle named Cupcake.” Empower your presentation content with descriptive details and structure it to have a beginning, middle, and end.
“ Neurologists say that our brains are programmed much more for stories than for abstract ideas. Tales with a little drama are remembered far longer than any slide crammed with analytics. ” – John Kotter ( Source )
Step Three: Rinse and Repeat Main Points
Your audience isn’t going to remember everything, so it’s important to control exactly what you want them to remember. This can be done by establishing the key points in your presentation, and then repeating them as many times as necessary. As the old saying goes, “ repetition is the Mother of all learning ,” (“ repetitio mater studiorum est” in Latin, if you are feeling especially smart).
If you aren’t convinced, Cambridge research suggests that you can learn a language at any age. In order to completely learn a new word, for instance, all you need to do is see it 160 times in 14 minutes . The memory traces of the new word versus the memory traces of a familiar word then become identical. Since you are already speaking the audience’s language there is no need to reach so high a number, but this teaching tool should still be used often.
Simplifying your message to a few main points, utilizing images to enhance memory, and repeating key concepts are all ways to structure a logical presentation. This will ensure that your audience remembers what you have to say for a long time afterwards, versus forgetting everything when they leave the room.
Question: How can you structure your presentation logically?

Scott Schwertly
Join our newsletter today.
© 2006-2024 Ethos3 – An Award Winning Presentation Design and Training Company ALL RIGHTS RESERVED
- Terms & Conditions
- Privacy Policy
- Diversity and Inclusion

Want to create or adapt books like this? Learn more about how Pressbooks supports open publishing practices.
7.4 Outlining Your Presentation
Linda Macdonald
For your presentation to be as effective as possible, it needs to be organized into logical patterns. Information will need to be presented in a way your audience can understand. This is especially true if you already know a great deal about your topic. You will need to take careful steps to include pertinent information your audience might not know and to explain relationships that might not be evident to them. Using a standard outline format, you can make decisions about your main points, the specific information you will use to support those points, and the language you will use. Without an outline, your message is liable to lose logical integrity . It might even deteriorate into a list of bullet points with no apparent connection to each other except the topic, leaving your audience relieved when your presentation is finally over.
A full-sentence outline lays a strong foundation for your message. It will call on you to have one clear and specific purpose for your message. Writing your specific purpose in clear language serves you well. It helps you frame a clear, concrete thesis statement. It helps you exclude irrelevant information. It helps you focus only on information that directly bears on your thesis. It reduces the amount of research you must do. It suggests what kind of supporting evidence is needed, so less effort is expended in trying to figure out what to do next. It helps both you and your audience remember the central message of your presentation.
Finally, a solid full-sentence outline helps your audience understand your message because they will be able to follow your reasoning. Remember that live audiences for oral communications lack the ability to “rewind” your message to figure out what you said, so it is critically important to help the audience follow your reasoning as it reaches their ears.
Speakers who carefully write a full-sentence outline show a stronger tendency to give powerful presentations of excellent messages.
Tests Scope of Content
When you begin with a clear, concrete thesis statement, it acts as kind of a compass for your outline. Each of the main points should directly explicate . The test of the scope will be a comparison of each main point to the thesis statement. If you find a poor match, you will know you have wandered outside the scope of the thesis.
Let us say that you have been asked to speak at the Hays chapter of Rotary International about the FHSU Wind Energy Project . The general purpose of your presentation is to inform, and your broad topic area is wind-generated energy for FHSU. Now you must narrow this to a specific purpose. You have many choices, but let us say your specific purpose is to inform a group of Rotarians about the economic reasons why FHSU utilizes two wind turbine generators.
Your first main point could be that modern windmills require a very small land base, making the cost of real estate low. This is directly related to economics. All you need is information to support your claim that only a small land base is needed.
In your second main point, you might be tempted to claim that windmills do not pollute in the ways other sources do. However, you will quickly note that this claim is unrelated to the thesis. You must resist the temptation to add it. Perhaps in another presentation, your thesis will address environmental impact, but in this presentation, you must stay within the economic scope. Perhaps you will say that once windmills are in place, they require virtually no maintenance. This claim is related to the thesis. Now all you need is supporting information to support this second claim.
Your third point, the point some audience members will want to hear, is the cost of generating electrical energy with windmills compared to other sources. This is clearly within the scope of energy economics. You should have no difficulty finding authoritative sources of information to support that claim.
When you write in outline form, it is much easier to test the scope of your content because you can visually locate specific information very easily and then check it against your thesis statement.
Tests Logical Relation of Parts
You have many choices for your topic, and therefore, there are many ways your content can be logically organized. In the example above, we simply listed three main points that were important economic considerations about wind farms. Often the main points of a presentation can be arranged into a logical pattern; let us take a look at some such patterns.
A chronological pattern arranges main ideas in the order events occur. In some instances, reverse order might make sense. For instance, for the FHSU Wind Energy Project , you might discuss when the idea was first proposed and the process of it being approved.
A cause-and-effect pattern calls on you to describe a specific situation and explain what the effect is. However, most effects have more than one cause. Even dental cavities have multiple causes: genetics, poor nutrition, teeth too tightly spaced, sugar, ineffective brushing, and so on. If you choose a cause-and-effect pattern, make sure you have enough reliable support to do the topic justice.
A biographical pattern is usually chronological. In describing the events of a business, you will want to choose the three most significant events. Otherwise, the presentation will end up as a very lengthy and often pointless timeline or bullet point list. For example, one could easily pick four major developments for Apple Computers that help explain its success. They include the releases of the Apple II, iTunes, iPod, and iPhone. A simple timeline would present great difficulty in highlighting the relationships between important events. An outline, however, would help you emphasize the key events that contributed to Apple’s success.
Although a comparison-contrast pattern appears to dictate just two main points, McCroskey, Wrench, and Richmond (2003) explain how a comparison-and-contrast can be structured as a presentation with three main points. They say that “you can easily create a third point by giving basic information about what is being compared and what is being contrasted. For example, if you are giving a presentation about two different medications, you could start by discussing what the medications’ basic purposes are. Then you could talk about the similarities, and then the differences, between the two medications.”
Whatever logical pattern you use, if you examine your thesis statement and then look at the three main points in your outline, you should easily be able to see the logical way in which they relate.
Tests Relevance of Supporting Ideas
When you create an outline, you can clearly see that you need supporting evidence for each of your main points. For instance, using the FHSU Wind Energy Project example above, your first main point claims that less land was needed for windmills than for other utilities. Your supporting evidence should be about the amount of acreage required for a windmill and the amount of acreage required for other energy generation sites, such as nuclear power plants or hydroelectric generators. Your sources should come from experts in economics, economic development, or engineering. The evidence might even be expert opinion but not the opinions of ordinary people. The expert opinion will provide stronger support for your point.
Similarly, your second point claims that once a wind turbine is in place, there is virtually no maintenance cost. Your supporting evidence should show how much annual maintenance for a windmill costs and what the costs are for other energy plants. If you used a comparison with nuclear plants to support your first main point, you should do so again for the sake of consistency. It becomes very clear, then, that the third main point about the amount of electricity and its profitability needs authoritative references to compare it to the profit from energy generated at a nuclear power plant. In this third main point, you should make use of just a few well-selected statistics from authoritative sources to show the effectiveness of wind farms compared to the other energy sources you have cited.
Where do you find the kind of information you would need to support these main points? A reference librarian can quickly guide you to authoritative statistics manuals and help you make use of them.
An important step you will notice is that the full-sentence outline includes its authoritative sources within the text . This is a major departure from the way you have learned to write a research paper. In the research paper, you can add that information to the end of a sentence, leaving the reader to turn to the last page for a fuller citation. In a presentation, however, your listeners can not do that. From the beginning of the supporting point, you need to fully cite your source so your audience can assess its importance.
Because this is such a profound change from the academic habits that you are probably used to, you will have to make a concerted effort to overcome the habits of the past and provide the information your listeners need when they need it.
Test the Balance and Proportion of the Presentation
Part of the value of writing a full-sentence outline is the visual space you use for each of your main points. Is each main point of approximately the same importance? Does each main point have the same number of supporting points? If you find that one of your main points has eight supporting points while the others only have three each, you have two choices: either choose the best three from the eight supporting points or strengthen the authoritative support for your other two main points.
Remember that you should use the best supporting evidence you can find even if it means investing more time in your search for knowledge.
Serves as Notes during the Presentation
Although we recommend writing a full-sentence outline during the presentation preparation phase, you should also create a shortened outline that you can use as notes allowing for a strong delivery. If you were to use the full-sentence outline when delivering your presentation, you would do a great deal of reading, which would limit your ability to give eye contact and use gestures, hurting your connection with your audience. For this reason, we recommend writing a short-phrase outline on 4 × 6 notecards to use when you deliver your presentation. The good news is that your three main points suggest how you should prepare your notecards.
Your first 4 × 6 notecard can contain your thesis statement and other keywords and phrases that will help you present your introduction. Your second card can contain your first main point, together with keywords and phrases to act as a map to follow as you present. If your first main point has an exact quotation you plan to present, you can include that on your card. Your third notecard should be related to your second main point, your fourth card should be about your third main point, and your fifth card should be related to your conclusion. In this way, your five notecards follow the very same organizational pattern as your full outline. In the next section, we will explore more fully how to create a speaking outline.
When we discuss outlining, we are actually focusing on a series of outlines instead of a single one. Outlines are designed to evolve throughout your presentation preparation process, so this section will discuss how you progress from a working outline to a full-sentence outline and, finally, a speaking outline. We will also discuss how using notecards for your speaking outline can be helpful to you as a speaker.
Working Outline
A working outline is an outline you use for developing your presentation. It undergoes many changes on its way to completion. This is the outline where you lay out the basic structure of your presentation. You must have a general and specific purpose; an introduction, including a grabber; and a concrete, specific thesis statement and preview. You also need three main points, a conclusion, and a list of references.
One strategy for beginning your working outline is to begin by typing in your labels for each of the elements. Later you can fill in the content.
When you look ahead to the full-sentence outline, you will notice that each of the three main points moves from the general to the particular. Specifically, each main point is a claim, followed by particular information that supports that claim so that the audience will perceive its validity. For example, for a presentation about coal mining safety, your first main point might focus on the idea that coal mining is a hazardous occupation. You might begin by making a very general claim, such as “Coal mining is one of the most hazardous occupations in the United States,” and then become more specific by providing statistics, authoritative quotations, or examples to support your primary claim.
A working outline allows you to work out the kinks in your message. For instance, let us say you have made the claim that coal mining is a hazardous occupation but you cannot find authoritative evidence as support. Now you must reexamine that main point to assess its validity. You might have to change that main point to be able to support it. If you do so, however, you must make sure the new main point is a logical part of the thesis statement–three main points–conclusion sequence.
The working outline should not be thought of a “rough copy,” but as a careful step in the development of your message. It will take time to develop. Here is an example of a working outline:
Name : Anomaly May McGillicuddy
Topic : Smart dust
General Purpose : To inform
Specific Purpose : To inform a group of science students about the potential of smart dust
Main Ideas :
- Smart dust is an assembly of microcomputers.
- Smart dust can be used by the military—no, no—smart dust could be an enormous asset in covert military operations. (That is better because it is more clear and precise.)
- Smart dust could also have applications in daily life.
Introduction : (Grabber) (fill in later)
(Thesis Statement) Thus far, researchers hypothesize that smart dust could be used for everything from tracking patients in hospitals to early warnings of natural disasters and defending against bioterrorism.
(Preview) Today, I am going to explain what smart dust is and the various applications smart dust has in the near future. To help us understand the small of it all, we will first examine what smart dust is and how it works. We will then examine some military applications of smart dust. And we will end by discussing some nonmilitary applications of smart dust.
(Transition) (fill in later)
Main Point I : Dr. Kris Pister, a professor in the robotics lab at the University of California at Berkeley, originally conceived the idea of smart dust in 1998 as part of a project funded by the Defense Advanced Research Projects Agency (DARPA).
- (supporting point)
Main Point II : Because smart dust was originally conceptualized under a grant from DARPA, military uses of smart dust have been widely theorized and examined.
Main Point III : According to the smart dust project website, smart dust could quickly become a common part of our daily lives.
Conclusion : (Bring your message “full circle” and create a psychologically satisfying closure.)
This stage of preparation turns out to be a good place to go back and examine whether all the main points are directly related to the thesis statement and to each other. If so, your message has a strong potential for unity of focus. But if the relationship of one of the main points is weak, this is the time to strengthen it. It will be more difficult later for two reasons: first, the sheer amount of text on your pages will make the visual task more difficult, and second, it becomes increasingly difficult to change things in which you have a large investment in time and thought.
You can see that this working outline can lay a strong foundation for the rest of your message. Its organization is visually apparent. Once you are confident in the internal unity of your basic message, you can begin filling in the supporting points in descending detail—that is, from the general (main points) to the particular (supporting points) and then to greater detail. The outline makes it visually apparent where information fits. You only need to assess your supporting points to be sure they are authoritative and directly relevant to the main points they should support.
Sometimes transitions seem troublesome, and that is not surprising. We often omit them when we have informal conversations. Our conversation partners understand what we mean because of our gestures and vocal strategies. However, others might not understand what we mean but think they do, and so we might never know whether they understood us. Even when we include transitions, we do not generally identify them as transitions. In a presentation, however, we need to use effective transitions as a gateway from one main point to the next. The listener needs to know when a speaker is moving from one main point to the next.
In the next type of outline, the full-sentence outline, take a look at the transitions and see how they make the listener aware of the shifting focus to the next main point.
Full-Sentence Outline
Your full-sentence outline should contain full sentences only. There are several reasons why this kind of outline is important. First, you have a full plan of everything you intend to say to your audience so that you will not have to struggle with wording or examples. Second, you have a clear idea of how much time it will take to present your presentation. Third, it contributes a fundamental ingredient of good preparation, part of your ethical responsibility to your audience. This is how a full-sentence outline looks:
Name: Anomaly May McGillicuddy
Specific Purpose : To inform a group of science students about the potential of smart dust.
- Smart dust could be an enormous asset in covert military operations.
Introduction : (Grabber) In 2002, famed science fiction writer, Michael Crichton, released his book Prey , which was about a swarm of nanomachines that were feeding off living tissue. The nanomachines were solar-powered, self-sufficient, and intelligent. Most disturbingly, the nanomachines could work together as a swarm as it took over and killed its prey in its need for new resources. The technology for this level of sophistication in nanotechnology is surprisingly more science fact than science fiction. In 2000, three professors of electrical engineering and computer Science at the University of California at Berkeley, Kahn, Katz, and Pister, hypothesized in the Journal of Communications and Networks that wireless networks of tiny microelectromechanical sensors, or MEMS; robots; or devices could detect phenomena including light, temperature, or vibration. By 2004, Fortune Magazine listed “smart dust” as the first in their “Top 10 Tech Trends to Bet On.”
(Thesis Statement) Thus far researchers hypothesized that smart dust could be used for everything from tracking patients in hospitals to early warnings of natural disasters and as a defense against bioterrorism.
(Preview) Today, I’m going to explain what smart dust is and the various applications smart dust has in the near future. To help us understand the small of it all, we will first examine what smart dust is and how it works. We will then examine some military applications of smart dust. And we will end by discussing some nonmilitary applications of smart dust.
(Transition) To help us understand smart dust, we will begin by first examining what smart dust is.
- According to a 2001 article written by Bret Warneke, Matt Last, Brian Liebowitz, and Kris Pister titled “Smart Dust: Communicating with a Cubic-Millimeter Computer” published in Computer , Pister’s goal was to build a device that contained a built-in sensor, communication device, and a small computer that could be integrated into a cubic millimeter package.
For comparison purposes, Doug Steel, in a 2005 white paper titled “Smart Dust” written for C. T. Bauer College of Business at the University of Houston, noted that a single grain of rice has a volume of five cubic millimeters.
- Each individual piece of dust, called a mote, would then have the ability to interact with other motes and supercomputers.
- As Steve Lohr wrote in the January 30, 2010, edition of the New York Times in an article titled “Smart Dust? Not Quite, But We’re Getting There,” smart dust could eventually consist of “Tiny digital sensors, strewn around the glove, gathering all sorts of information and communicating with powerful computer networks to monitor, measure, and understand the physical world in new ways.”
(Transition) Now that we’ve examined what smart dust is, let’s switch gears and talk about some of the military applications for smart dust.
- Major Scott Dickson, in a Blue Horizons paper written for the US Air Force Center for Strategy and Technology’s Air War College, sees smart dust as helping the military in battlespace awareness, homeland security, and weapons of mass destruction (WMD) identification.
- Furthermore, Major Dickson also believes it may be possible to create smart dust that has the ability to defeat communications jamming equipment created by foreign governments, which could help the US military not only communicate among itself, but could also increase communications with civilians in military combat zones.
- According to a 2010 article written by Jessica Griggs in new Scientist , one of the first benefits of smart dust could be an early defense warning for space storms and other debris that could be catastrophic.
(Transition) Now that we’ve explored some of the military benefits of smart dust, let’s switch gears and see how smart dust may be able to have an impact on our daily lives.
- Steve Lohr, in his 2010 New York Times article, wrote, “The applications for sensor-based computing, experts say, include buildings that manage their own energy use, bridges that sense motion and metal fatigue to tell engineers they need repairs, cars that track traffic patterns and report potholes, and fruit and vegetable shipments that tell grocers when they ripen and begin to spoil.”
- Theoretically, we could all be injected with smart dust, which relays information to our physicians and detects adverse changes to our body instantly.
- Smart dust could detect the microscopic formations of center cells or alert us when we’ve been infected by a bacterium or virus, which could speed up treatment and prolong all of our lives.
(Transition) Today, we’ve explored what smart dust is, how smart dust could be utilized by the US military, and how smart dust could impact all of our lives in the near future.
Conclusion : While smart dust is quickly transferring from science fiction to science fact, experts agree that the full potential of smart dust will probably not occur until 2025. Smart dust is definitely in our near future, but swarms of smart dust eating people as was depicted in Michael Crichton’s 2002 novel, Prey , isn’t reality. However, as with any technological advance, there are definite ethical considerations and worries related to smart dust. Even Dr. Kris Pister’s smart dust project website admits that as smart dust becomes more readily available, one of the trade-offs will be privacy. Pister responds to these critiques by saying, “As an engineer, or a scientist, or a hair stylist, everyone needs to evaluate what they do in terms of its positive and negative effect. If I thought that the negatives of working on this project were greater than or even comparable to the positives, I wouldn’t be working on it. As it turns out, I think that the potential benefits of this technology far outweigh the risks to personal privacy.”
Crichton, M. (2002). Prey . New York, NY: Harper Collins.
Dickson, S. (2007, April). Enabling battlespace persistent surveillance: the firm, function, and future of smart dust (Blue Horizons Paper, Center for Strategy and Technology, USAF Air War College). Retrieved from USAF Air War College website: http://www.au.af.mil/au/awc/awcgate/cst/bh_dickson.pdf
Griggs, J. (2010, February 6). Smart dust to provide solar early warning defense. New Scientist, 205 (2746), 22.
Kahn, J. M., Katz, R. H., & Pister, K. S. J. (2000). Emerging challenges: Mobile networking for “smart dust.” Journal of Communications and Networks, 2 , 188–196.
Lohr, S. (2010, January 30). Smart dust? Not quite, but we’re getting there. New York Times . Retrieved from http://www.nytimes.com
Pister, K., Kahn, J., & Boser, B. (n.d.). Smart dust: Autonomous sensing and communication at the cubic millimeter. Retrieved from http://robotics.eecs.berkeley.edu/~pister/SmartDust
Steel, D. (2005, March). Smart dust: UH ISRC technology briefing. Retrieved from http://www.uhisrc.com
Vogelstein, F., Boyle, M., Lewis, P., Kirkpatrick, D., Lashinsky, A.,…Chen, C. (2004, February 23). 10 tech trends to bet on. Fortune, 149 (4), 74–88.
Warneke, B., Last, M., Liebowitz, B., & Pister, K. S. J. (2001). Smart dust: Communicating with a cubic millimeter computer. Computer, 31 , 44–51.
When you prepare your full-sentence outline carefully, it may take as much as 1 ½ hours to complete the first part of the outline from your name at the top through the introduction. When you have completed that part, take a break and do something else. When you return to the outline, you should be able to complete your draft in another 1 ½ hours. After that, you only need to do a detailed check for completeness, accuracy, relevance, balance, omitted words, and consistency. If you find errors, instead of being frustrated, be glad you can catch these errors before you are standing up in front of your audience.
You will notice that the various parts of your presentation, for instance, the transition and main points, are labeled. There are compelling reasons for these labels. First, as you develop your message, you will sometimes find it necessary to go back and look at your wording in another part of the outline. Your labels help you find particular passages easily. Second, the labels work as a checklist so that you can make sure you have included everything you intended to. Third, it helps you prepare your speaking outline.
You will also notice the full references at the end of the outline. They match the citations within the outline. Sometimes while preparing a presentation, a speaker finds it important to go back to an original source to be sure the message will be accurate. If you type in your references as you develop your presentation rather than afterward, they will be a convenience to you if they are complete and accurate.
Do not think of the references as busywork or drudgery. Although they are more time-consuming than text, they are good practice for the more advanced academic work you will do in the immediate future.
Speaking Outline
Your full-sentence outline prepares you to present a clear and well-organized message, but your speaking outline will include far less detail. Whenever possible, you will use keywords and phrases, but in some instances, an extended quotation will need to be fully written on your speaking outline.
Resist the temptation to use your full-sentence outline as your speaking outline. The temptation is real for at least two reasons. First, once you feel that you have carefully crafted every sequence of words in your presentation, you might not want to sacrifice quality when you shift to vocal presentation. Second, if you feel anxious about how well you will do in front of an audience, you may want to use your full-sentence outline as a “safety net.” In our experience, however, if you have your full-sentence outline with you, you will end up reading, rather than speaking, to your audience.
Your presentation has five main components: introduction, main point one, main point two, main point three, and the conclusion. Therefore we strongly recommend the use of five notecards: one for each of those five components. There are extenuating circumstances that might call for additional cards, but begin with five cards only.
How will five notecards suffice in helping you produce a complete, rich delivery? Why can not you use the full-sentence outline you labored so hard to write? First, the presence of your full-sentence outline will make it appear that you do not know the content of your presentation. Second, the temptation to read the presentation directly from the full-sentence outline is nearly overwhelming; even if you resist this temptation, you will find yourself struggling to remember the words on the page rather than speaking extemporaneously. Third, sheets of paper are noisier and more awkward than cards. Fourth, it is easier to lose your place using the full outline. Finally, cards just look better. Carefully prepared cards, together with practice, will help you more than you might think.
Plan to use five cards. Use 4 × 6 cards. The smaller 3 × 5 cards are too small to provide space for a visually organized set of notes. With five cards, you will have one card for the introduction, one card for each of the three main points, and one card for the conclusion. You should number your cards and write on one side only. Numbering is helpful if you happen to drop your cards, and writing on only one side means that the audience is not distracted by your handwritten notes and reminders to yourself while you are speaking. Each card should contain keywords and key phrases but not full sentences.
Some presentations will include direct or extended quotations from expert sources. Some of these quotations might be highly technical or difficult to memorize for other reasons, but they must be presented correctly. This is a circumstance in which you could include an extra card in the sequence of notecards. This is the one time you may read fully from a card. If your quotation is important and the exact wording is crucial, your audience will understand that.
How will notecards be sufficient? When they are carefully written, your practice will reveal that they will work. If, during practice, you find that one of your cards does not work well enough, you can rewrite that card.
Using a set of carefully prepared, sparingly worded cards will help you resist the temptation to rely on overhead transparencies or PowerPoint slides to get you through the presentation. Although they will never provide the exact word sequence of your full-sentence outline, they should keep you organized during the presentation.
The “trick” to selecting the phrases and quotations for your cards is to identify the labels that will trigger a recall sequence. For instance, if the phrase “more science fact” brings to mind the connection to science fiction and the differences between the real developments and the fictive events of Crichton’s novel Prey , that phrase on your card will support you through a fairly extended part of your introduction.
You must discover what works for you and then select those words that tend to jog your recall. Having identified what works, make a preliminary set of no more than five cards written on one side only, and practice with them. Revise and refine them as you would an outline.
The following is a hypothetical set of cards for the smart dust presentation:
Introduction : 2002, Prey , swarm nanomachines feed on living tissue.
Kahn, Katz, and Pister, U C Berkeley engineering and computer sci. profs. hyp.
Microelectromechanical (MEMS) devices could detect light, temp, or vib.
Thesis Statement : Researchers hyp that s.d. could track patients, warn of natural disaster, act as defense against bioterrorism.
Prev .: What smart dust is and how it works, military aps, nonmilitary aps.
Transition : To help understand, first, what smart dust is.
I. Dr. Kris Pister, prof robotics lab UC Berkeley conceived the idea in 1998 in a proj. Defense Advanced Research Projects Agency (DARPA).
- 2001 article by Bret Warneke et al titled “Smart Dust: Communicating with a Cubic-Millimeter Computer” publ. in Computer , Pister wanted sensors, comm. devices, and computer in a cubic millimeter package.
Doug Steel of CT Bauer College of Bus at Houston noted grain of rice = 5 cm.
- Each mote could interact w/ others.
- (see extended quotation, next card)
Quotation : Steve Lohr, NYT Jan 30 2005, “Smart Dust? Not Quite, but We’re Getting There.” Smart dust could eventually consist of “Tiny digital sensors, strewn around the globe, gathering all sorts of information and communicating with powerful computer networks to monitor, measure, and understand the physical world in new ways.”
II. Orig conceptualized under DARPA, military uses theor. and examined.
Smart Dust website, battlefield surveill., treaty monitor., transp. monitor., + scud hunting.
benefit, surveill.
- Maj. Scott Dickson, Blue Horizons Paper for Ctr for Strat and Tech for USAF air war college, sees s.d. as help for battlespace awareness, homeland security, and WMD ID.
- could also defeat comm. jamming equipt by communicating among itself and w/ civilians in combat zones.
- 2010 article Jessica Griggs New Scientist , early defense, storms and debris.
Transition : Switch gears to daily lives.
III. s.d. project website: s.d. could become common in daily life.
Pasting particles for virtual computer keyboard to inventory control poss.
- Steve Lohr, 2010, NYT, “The applications for sensor-based computing, experts say, include buildings that manage their own energy use, bridges that sense motion and metal fatigue to tell engineers they need repairs, cars that track traffic patterns and report potholes, and fruit and vegetable shipments that tell grocers when they ripen and begin to spoil.”
Medically, accdng to SD project website, help disabled.
- interface w/ computers
injected, cd. relay info to docs and detect body changes instantly
- cancer cells, bacteria or virus, speed up treatment, and so on.
Transition : We expl. What SD is, how SD cd be used military, and how SD cd impact our lives.
Conclusion : Transf fiction to fact, experts agree potential 2025. Michael Crichton’s Prey isn’t reality, but in developing SD as fact, there are ethical considerations. Pister: privacy.
Dr. Kris Pister: “As an engineer, or a scientist, or a hair stylist, everyone needs to evaluate what they do in terms of its positive and negative effect. If I thought that the negatives of working on this project were larger or even comparable to the positives, I wouldn’t be working on it. As it turns out, I think that the potential benefits of this technology far far outweigh the risks to personal privacy.”
Using a set of cards similar to this could help you get through an impressive set of specialized information. But what if you lose your place during a presentation? With a set of cards, it will take less time to find it than with a full-sentence outline. You will not be rustling sheets of paper, and because your cards are written on one side only, you can keep them in order without flipping them back and forth to check both sides.
What if you go blank? Take a few seconds to recall what you have said and how it leads to your next points. There may be several seconds of silence in the middle of your presentation, and it may seem like minutes to you, but you can regain your footing most easily with a small set of well-prepared cards.
Under no circumstances should you ever attempt to put your entire presentation on cards in little tiny writing. You will end up reading a sequence of words to your audience instead of telling them your message.
As with any part of the presentation process, there are some pretty commonly agreed upon principles for creating an outline. Now that we have examined the basics of outline creation, there are some important factors to consider when creating a logical and coherent outline: singularity, consistency, adequacy, uniformity, and parallelism.
Singularity
For the sake of clarity, make sure your thesis statement expresses one idea only. Only in this way will it be optimally useful to you as you build your outline. If you have narrowed your topic skillfully, you can readily focus the thesis statement as one central point. For instance, if you have a thesis statement that says US employment law protects certain classes of people against discrimination but most people are unaware of how to file an EEOC complaint, you have a thesis statement focusing on two different issues. Which focus will you follow? It is crucial to choose just one, saving the other perhaps for a different presentation.
The same holds true for your three main points: they should each express one clear idea. For the sake of your audience, maintain clarity. If many different ideas are required in order to build a complete message, you can handle them in separate sentences with the use of such transitions as “at the same time,” “alternately,” “in response to that event,” or some other transition that clarifies the relationship between two separate ideas.
Consistency
The entire point of framing a thesis with one clear focus is to help you maintain consistency throughout your presentation. Beyond the grammatical requirements of subject-verb agreement, you will want to maintain a consistent approach. For instance, unless your presentation has a chronological structure that begins in the past and ends in the future, you should choose a tense, past or present, to use throughout the presentation. Similarly, you should choose language and use it consistently. For instance, use humanity instead of mankind or humans, and use that term throughout.
Similarly, define your terms and use those terms only to designate the meanings in your definition. To do otherwise could result in equivocation and confusion. For instance, if you use the word “right” in two or three different senses, you should change your language. The word “right” can be applicable to your right to a good education; the ethical difference between right and wrong; and the status of a statement as right , or accurate and correct. By the same token, in a healthcare setting, saying that a medical test had a positive outcome can be confusing. Does the patient test positive for the presence of disease, or does the test reveal some good news? If you find yourself using the same word to mean different things, you will need to spend extra time in your presentation explaining these meanings very clearly—or avoid the problem by making other word choices.
To make sure your audience will understand your presentation, you must set aside the assumption that what is obvious to you is also obvious to your audience. Therefore, pay attention to adequacy in two ways: definitions of terms and support for your main points.
You should use concrete language as much as you can. For instance, if you use the word “community,” you are using an abstract term that can mean many things. You might be referring to a suburban neighborhood; to a cultural group, such as the Jewish community; to an institutional setting that includes an academic community; or to a general sense of overarching mainstream community standards for what materials should or should not be broadcast on television, for instance. You may not find any definition of “community” that conveys your meaning. Therefore, you will need to define for your audience what you mean by “community.”
Adequacy is also a concern when you use evidence to support your main points. Evidence of the right kind and the right weight are needed. For instance, if you make a substantial claim, such as a claim that all printed news sources will be obsolete within ten years, you need expert sources. This means you need at least two well-known experts from the institutions that provide news (newspapers, television news, or news radio). They should be credible sources, not sources with extreme views whose contact with reality is questioned. This will give you the right kind of evidence, and a large enough amount of evidence.
A full-sentence outline readily shows whether you are giving “equal time” to each of your three main points. For example, are you providing three pieces of evidence to support each main point? It should also show whether each main point is directly related to the thesis statement.
Parallelism
Parallelism refers to the idea that the three main points follow the same structure or make use of the same kind of language. For instance, in the sample outline we used previously, you see that each of the main points emphasizes the topic, smart dust.
Parallelism also allows you to check for inconsistencies and self-contradictory statements. For instance, does anything within main point two contradict anything in main point one? Examining your text for this purpose can strengthen the clarity of your message. For instance, if in main point one you claim that computer crime leaves an electronic trail, but in main point two you claim that hackers often get away with their crimes, you have some explaining to do. If an electronic trail can readily lead to the discovery of the electronic felon, how or why do they get away with it? The answer might be that cybercrime does not fall within the jurisdiction of any law enforcement agency or that the law lags behind technology. Perhaps there are other reasons as well, and you must make sure you do not leave your audience confused. If you confuse them, you will sound confused, and you will lose credibility. There is no doubt that a full-sentence outline provides the most useful opportunity to examine your message for the details that either clarify or undermine your message.
Finally, your conclusion should do two things. First, it should come “full circle” to show the audience that you have covered all the territory you laid out in your preview. Second, it should provide satisfying, decisive, psychological closure. In other words, your audience should know when your presentation is over. You should not trail off. You should not have to say, “That’s it.” Your audience should not have to wait to see whether you are going to say anything else. At the right time, they should feel certain that the presentation is over and that they can clap.
7.4 Outlining Your Presentation Copyright © 2022 by Linda Macdonald is licensed under a Creative Commons Attribution-NonCommercial 4.0 International License , except where otherwise noted.
Share This Book

Three-tier architecture is a well-established software application architecture that organizes applications into three logical and physical computing tiers: the presentation tier, or user interface; the application tier, where data is processed; and the data tier, where application data is stored and managed.
The chief benefit of three-tier architecture is that because each tier runs on its own infrastructure, each tier can be developed simultaneously by a separate development team. And can be updated or scaled as needed without impacting the other tiers.
For decades three-tier architecture was the prevailing architecture for client-server applications. Today, most three-tier applications are targets for modernization that uses cloud-native technologies such as containers and microservices and for migration to the cloud.
Connect and integrate your systems to prepare your infrastructure for AI.
Register for the guide on app modernization
Presentation tier
The presentation tier is the user interface and communication layer of the application, where the end user interacts with the application. Its main purpose is to display information to and collect information from the user. This top-level tier can run on a web browser, as desktop application, or a graphical user interface (GUI), for example. Web presentation tiers are developed by using HTML, CSS, and JavaScript. Desktop applications can be written in various languages depending on the platform.
Application tier
The application tier, also known as the logic tier or middle tier, is the heart of the application. In this tier, information that is collected in the presentation tier is processed - sometimes against other information in the data tier - using business logic, a specific set of business rules. The application tier can also add, delete, or modify data in the data tier.
The application tier is typically developed by using Python, Java, Perl, PHP or Ruby, and communicates with the data tier by using API calls.
The data tier, sometimes called database tier, data access tier or back-end, is where the information that is processed by the application is stored and managed. This can be a relational database management system such as PostgreSQL , MySQL, MariaDB, Oracle, Db2, Informix or Microsoft SQL Server, or in a NoSQL Database server such as Cassandra, CouchDB , or MongoDB .
In a three-tier application, all communication goes through the application tier. The presentation tier and the data tier cannot communicate directly with one another.
Tier versus layer
In discussions of three-tier architecture, layer is often used interchangeably – and mistakenly – for tier , as in 'presentation layer' or 'business logic layer'.
They aren't the same. A 'layer' refers to a functional division of the software, but a 'tier' refers to a functional division of the software that runs on infrastructure separate from the other divisions. The Contacts app on your phone, for example, is a three - layer application, but a single-tier application, because all three layers run on your phone.
The difference is important because layers can't offer the same benefits as tiers.
Again, the chief benefit of three-tier architecture is its logical and physical separation of functionality. Each tier can run on a separate operating system and server platform - for example, web server, application server, database server - that best fits its functional requirements. And each tier runs on at least one dedicated server hardware or virtual server, so the services of each tier can be customized and optimized without impacting the other tiers.
Other benefits (compared to single- or two-tier architecture) include:
- Faster development : Because each tier can be developed simultaneously by different teams, an organization can bring the application to market faster. And programmers can use the latest and best languages and tools for each tier.
- Improved scalability : Any tier can be scaled independently of the others as needed.
- Improved reliability : An outage in one tier is less likely to impact the availability or performance of the other tiers.
- Improved security : Because the presentation tier and data tier can't communicate directly, a well-designed application tier can function as an internal firewall, preventing SQL injections and other malicious exploits.
In web development, the tiers have different names but perform similar functions:
- The web server is the presentation tier and provides the user interface. This is usually a web page or website, such as an ecommerce site where the user adds products to the shopping cart, adds payment details or creates an account. The content can be static or dynamic, and is developed using HTML, CSS, and JavaScript.
- The application server corresponds to the middle tier, housing the business logic that is used to process user inputs. To continue the ecommerce example, this is the tier that queries the inventory database to return product availability, or adds details to a customer's profile. This layer often developed using Python, Ruby, or PHP and runs a framework such as Django, Rails, Symphony, or ASP.NET.
- The database server is the data or backend tier of a web application. It runs on database management software, such as MySQL, Oracle, DB2, or PostgreSQL.
While three-tier architecture is easily the most widely adopted multitier application architecture, there are others that you might encounter in your work or your research.
Two-tier architecture
Two-tier architecture is the original client-server architecture, consisting of a presentation tier and a data tier; the business logic lives in the presentation tier, the data tier or both. In two-tier architecture the presentation tier - and therefore the end user - has direct access to the data tier, and the business logic is often limited. A simple contact management application, where users can enter and retrieve contact data, is an example of a two-tier application.
N-tier architecture
N-tier architecture - also called or multitier architecture - refers to any application architecture with more than one tier. But applications with more than three layers are rare because extra layers offer few benefits and can make the application slower, harder to manage and more expensive to run. As a result, n-tier architecture and multitier architecture are usually synonyms for three-tier architecture.
Move to cloud faster with IBM Cloud Pak solutions running on Red Hat OpenShift software—integrated, open, containerized solutions certified by IBM®.
Seamlessly modernize your VMware workloads and applications with IBM Cloud.
Modernize, build new apps, reduce costs, and maximize ROI.
IBM Consulting® application modernization services, which are powered by IBM Consulting Cloud Accelerator, offers skills, methods, tools, and initiatives that help determine the right strategy based on your portfolio. To modernize and containerize legacy system applications and accelerate the time-to-value of hybrid cloud environments.
Discover what application modernization is, the common benefits and challenges, and how to get started.
Learn about how relational databases work and how they compare to other data storage options.
Explore cloud native applications and how they drive innovation and speed within your enterprise.
Modernize your legacy three-tier applications on your journey to cloud. Whether you need assistance with strategy, processes, or capabilities—or want full-service attention—IBM can help. Start using containerized middleware that can run in any cloud—all bundled in IBM Cloud Paks.
Microsoft Power BI Blog
Power bi may 2024 feature summary.

Welcome to the May 2024 update! Here are a few, select highlights of the many we have for Power BI. There are new On-object Interaction updates, DAX query view is now generally available, find out how to view reports in OneDrive and SharePoint with live connected semantic models.
There is much more to explore, please continue to read on!
Microsoft Build Announcements
At Microsoft Build 2024, we are thrilled to announce a huge array of innovations coming to the Microsoft Fabric platform that will make Microsoft Fabric’s capabilities even more robust and even customizable to meet the unique needs of each organization. To learn more about these changes, read the “ Unlock real-time insights with AI-powered analytics in Microsoft Fabric ” announcement blog by Arun Ulag.
Earn a discount on your Microsoft Fabric certification exam!
We’d like to thank the thousands of you who completed the Fabric AI Skills Challenge and earned a free voucher for Exam DP-600 which leads to the Fabric Analytics Engineer Associate certification.
If you earned a free voucher, you can find redemption instructions in your email. We recommend that you schedule your exam now, before your discount voucher expires on June 24 th . All exams must be scheduled and completed by this date.
If you need a little more help with exam prep, visit the Fabric Career Hub which has expert-led training, exam crams, practice tests and more.
Missed the Fabric AI Skills Challenge? We have you covered. For a limited time , you could earn a 50% exam discount by taking the Fabric 30 Days to Learn It Challenge .

- Version number: v: 2.129.905.0
- Date published: 5/21/24
Modern Tooltip now on by Default
Matrix layouts, line updates, on-object interaction updates.
- Announcing general availability of DAX query view
New Manage relationships dialog
Refreshing calculated columns and calculated tables referencing directquery sources with single sign-on, announcing general availability of model explorer and authoring calculation groups in power bi desktop, microsoft entra id sso support for oracle database, certified connector updates, view reports in onedrive and sharepoint with live connected semantic models, storytelling in powerpoint – image mode in the power bi add-in for powerpoint, storytelling in powerpoint – data updated notification, git integration support for direct lake semantic models, editor’s pick of the quarter, new visuals in appsource, financial reporting matrix by profitbase, horizon chart by powerviz, sunburst chart by powerviz, stacked bar chart with line by jta.
- Drill Down Combo PRO – now with Legend field
Power BI tooltips are embarking on an evolution to enhance their functionality. To lay the groundwork, we are introducing the modern tooltip as the new default , a feature that many users may already recognize from its previous preview status. This change is more than just an upgrade; it’s the first step in a series of remarkable improvements. These future developments promise to revolutionize tooltip management and customization, offering possibilities that were previously only imaginable. As we prepare for the general availability of the modern tooltip, this is an excellent opportunity for users to become familiar with its features and capabilities.

Discover the full potential of the new tooltip feature by visiting our dedicated blog . Dive into the details and explore the comprehensive vision we’ve crafted for tooltips, designed to enhance your Power BI experience.
We’ve listened to our community’s feedback on improving our tabular visuals (Table and Matrix), and we’re excited to initiate their transformation. Drawing inspiration from the familiar PivotTable in Excel , we aim to build new features and capabilities upon a stronger foundation. In our May update, we’re introducing ‘ Layouts for Matrix .’ Now, you can select from compact , outline , or tabular layouts to alter the arrangement of components in a manner akin to Excel.

As an extension of the new layout options, report creators can now craft custom layout patterns by repeating row headers. This powerful control, inspired by Excel’s PivotTable layout, enables the creation of a matrix that closely resembles the look and feel of a table. This enhancement not only provides greater flexibility but also brings a touch of Excel’s intuitive design to Power BI’s matrix visuals. Only available for Outline and Tabular layouts.

To further align with Excel’s functionality, report creators now have the option to insert blank rows within the matrix. This feature allows for the separation of higher-level row header categories, significantly enhancing the readability of the report. It’s a thoughtful addition that brings a new level of clarity and organization to Power BI’s matrix visuals and opens a path for future enhancements for totals/subtotals and rows/column headers.

We understand your eagerness to delve deeper into the matrix layouts and grasp how these enhancements fulfill the highly requested features by our community. Find out more and join the conversation in our dedicated blog , where we unravel the details and share the community-driven vision behind these improvements.
Following last month’s introduction of the initial line enhancements, May brings a groundbreaking set of line capabilities that are set to transform your Power BI experience:
- Hide/Show lines : Gain control over the visibility of your lines for a cleaner, more focused report.
- Customized line pattern : Tailor the pattern of your lines to match the style and context of your data.
- Auto-scaled line pattern : Ensure your line patterns scale perfectly with your data, maintaining consistency and clarity.
- Line dash cap : Customize the end caps of your customized dashed lines for a polished, professional look.
- Line upgrades across other line types : Experience improvements in reference lines, forecast lines, leader lines, small multiple gridlines, and the new card’s divider line.
These enhancements are not to be missed. We recommend visiting our dedicated blog for an in-depth exploration of all the new capabilities added to lines, keeping you informed and up to date.
This May release, we’re excited to introduce on-object formatting support for Small multiples , Waterfall , and Matrix visuals. This new feature allows users to interact directly with these visuals for a more intuitive and efficient formatting experience. By double-clicking on any of these visuals, users can now right-click on the specific visual component they wish to format, bringing up a convenient mini-toolbar. This streamlined approach not only saves time but also enhances the user’s ability to customize and refine their reports with ease.

We’re also thrilled to announce a significant enhancement to the mobile reporting experience with the introduction of the pane manager for the mobile layout view. This innovative feature empowers users to effortlessly open and close panels via a dedicated menu, streamlining the design process of mobile reports.

Publish to folders
We recently announced a public preview for folders in workspaces, allowing you to create a hierarchical structure for organizing and managing your items. In the latest Desktop release, you can now publish your reports to specific folders in your workspace.
When you publish a report, you can choose the specific workspace and folder for your report. The interface is simplistic and easy to understand, making organizing your Power BI content from Desktop better than ever.

To publish reports to specific folders in the service, make sure the “Publish dialogs support folder selection” setting is enabled in the Preview features tab in the Options menu.

Learn more about folders in workspaces.
You can now ask Copilot questions about data in your model
We’re excited to preview a new capability for Power BI Copilot allowing you to ask questions about the data in your model! You could already ask questions about the data present in the visuals on your report pages – and now you can go deeper by getting answers directly from the underlying model. Just ask questions about your data, and if the answer isn’t already on your report, Copilot will then query your model for the data instead and return the answer to your question in the form of a visual!

We’re starting this capability off in both Edit and View modes in Power BI Service. Because this is a preview feature, you’ll need to enable it via the preview toggle in the Copilot pane. You can learn more about all the details of the feature in our announcement post here! (will link to announcement post)
Announcing general availability of DAX query view
We are excited to announce the general availability of DAX query view. DAX query view is the fourth view in Power BI Desktop to run DAX queries on your semantic model.
DAX query view comes with several ways to help you be as productive as possible with DAX queries.
- Quick queries. Have the DAX query written for you from the context menu of tables, columns, or measures in the Data pane of DAX query view. Get the top 100 rows of a table, statistics of a column, or DAX formula of a measure to edit and validate in just a couple clicks!
- DirectQuery model authors can also use DAX query view. View the data in your tables whenever you want!
- Create and edit measures. Edit one or multiple measures at once. Make changes and see the change in action in a DA query. Then update the model when you are ready. All in DAX query view!
- See the DAX query of visuals. Investigate the visuals DAX query in DAX query view. Go to the Performance Analyzer pane and choose “Run in DAX query view”.
- Write DAX queries. You can create DAX queries with Intellisense, formatting, commenting/uncommenting, and syntax highlighting. And additional professional code editing experiences such as “Change all occurrences” and block folding to expand and collapse sections. Even expanded find and replace options with regex.
Learn more about DAX query view with these resources:
- Deep dive blog: https://powerbi.microsoft.com/blog/deep-dive-into-dax-query-view-and-writing-dax-queries/
- Learn more: https://learn.microsoft.com/power-bi/transform-model/dax-query-view
- Video: https://youtu.be/oPGGYLKhTOA?si=YKUp1j8GoHHsqdZo
Copilot to write and explain DAX queries in DAX query view updates
DAX query view includes an inline Fabric Copilot to write and explain DAX queries, which remains in public preview. This month we have made the following updates.
- Run the DAX query before you keep it . Previously the Run button was disabled until the generated DAX query was accepted or Copilot was closed. Now you can Run the DAX query then decide to Keep or Discard the DAX query.

3. Syntax checks on the generated DAX query. Previously there was no syntax check before the generated DAX query was returned. Now the syntax is checked, and the prompt automatically retried once. If the retry is also invalid, the generated DAX query is returned with a note that there is an issue, giving you the option to rephrase your request or fix the generated DAX query.

Learn more about DAX queries with Copilot with these resources:
- Deep dive blog: https://powerbi.microsoft.com/en-us/blog/deep-dive-into-dax-query-view-with-copilot/
- Learn more: https://learn.microsoft.com/en-us/dax/dax-copilot
- Video: https://www.youtube.com/watch?v=0kE3TE34oLM
We are excited to introduce you to the redesigned ‘Manage relationships’ dialog in Power BI Desktop! To open this dialog simply select the ‘Manage relationships’ button in the modeling ribbon.

Once opened, you’ll find a comprehensive view of all your relationships, along with their key properties, all in one convenient location. From here you can create new relationships or edit an existing one.

Additionally, you have the option to filter and focus on specific relationships in your model based on cardinality and cross filter direction.

Learn more about creating and managing relationships in Power BI Desktop in our documentation .
Ever since we released composite models on Power BI semantic models and Analysis Services , you have been asking us to support the refresh of calculated columns and tables in the Service. This month, we have enabled the refresh of calculated columns and tables in Service for any DirectQuery source that uses single sign-on authentication. This includes the sources you use when working with composite models on Power BI semantic models and Analysis Services.
Previously, the refresh of a semantic model that uses a DirectQuery source with single-sign-on authentication failed with one of the following error messages: “Refresh is not supported for datasets with a calculated table or calculated column that depends on a table which references Analysis Services using DirectQuery.” or “Refresh over a dataset with a calculated table or a calculated column which references a Direct Query data source is not supported.”
Starting today, you can successfully refresh the calculated table and calculated columns in a semantic model in the Service using specific credentials as long as:
- You used a shareable cloud connection and assigned it and/or
- Enabled granular access control for all data connection types
Here’s how to do this:
- Create and publish your semantic model that uses a single sign-on DirectQuery source. This can be a composite model but doesn’t have to be.
- In the semantic model settings, under Gateway and cloud connections , map each single sign-on DirectQuery connection to a specific connection. If you don’t have a specific connection yet, select ‘Create a connection’ to create it:

- If you are creating a new connection, fill out the connection details and click Create , making sure to select ‘Use SSO via Azure AD for DirectQuery queries:

2. Finally, select the connection for each single sign-on DirectQuery source and select Apply :

We are excited to announce the general availability of Model Explorer in the Model view of Power BI, including the authoring of calculation groups. Semantic modeling is even easier with an at-a-glance tree view with item counts, search, and in context paths to edit the semantic model items with Model Explorer. Top level semantic model properties are also available as well as the option to quickly create relationships in the properties pane. Additionally, the styling for the Data pane is updated to Fluent UI also used in Office and Teams.
A popular community request from the Ideas forum, authoring calculation groups is also included in Model Explorer. Calculation groups significantly reduce the number of redundant measures by allowing you to define DAX formulas as calculation items that can be applied to existing measures. For example, define a year over year, prior month, conversion, or whatever your report needs in DAX formula once as a calculation item and reuse it with existing measures. This can reduce the number of measures you need to create and make the maintenance of the business logic simpler.
Available in both Power BI Desktop and when editing a semantic model in the workspace, take your semantic model authoring to the next level today!

Learn more about Model Explorer and authoring calculation groups with these resources:
- Use Model explorer in Power BI (preview) – Power BI | Microsoft Learn
- Create calculation groups in Power BI (preview) – Power BI | Microsoft Learn
Data connectivity
We’re happy to announce that the Oracle database connector has been enhanced this month with the addition of Single Sign-On support in the Power BI service with Microsoft Entra ID authentication.
Microsoft Entra ID SSO enables single sign-on to access data sources that rely on Microsoft Entra ID based authentication. When you configure Microsoft Entra SSO for an applicable data source, queries run under the Microsoft Entra identity of the user that interacts with the Power BI report.

We’re pleased to announce the new and updated connectors in this release:
- [New] OneStream : The OneStream Power BI Connector enables you to seamlessly connect Power BI to your OneStream applications by simply logging in with your OneStream credentials. The connector uses your OneStream security, allowing you to access only the data you have based on your permissions within the OneStream application. Use the connector to pull cube and relational data along with metadata members, including all their properties. Visit OneStream Power BI Connector to learn more. Find this connector in the other category.
- [New] Zendesk Data : A new connector developed by the Zendesk team that aims to go beyond the functionality of the existing Zendesk legacy connector created by Microsoft. Learn more about what this new connector brings.
- [New] CCH Tagetik
- [Update] Azure Databricks
Are you interested in creating your own connector and publishing it for your customers? Learn more about the Power Query SDK and the Connector Certification program .
Last May, we announced the integration between Power BI and OneDrive and SharePoint. Previously, this capability was limited to only reports with data in import mode. We’re excited to announce that you can now seamlessly view Power BI reports with live connected data directly in OneDrive and SharePoint!
When working on Power BI Desktop with a report live connected to a semantic model in the service, you can easily share a link to collaborate with others on your team and allow them to quickly view the report in their browser. We’ve made it easier than ever to access the latest data updates without ever leaving your familiar OneDrive and SharePoint environments. This integration streamlines your workflows and allows you to access reports within the platforms you already use. With collaboration at the heart of this improvement, teams can work together more effectively to make informed decisions by leveraging live connected semantic models without being limited to data only in import mode.
Utilizing OneDrive and SharePoint allows you to take advantage of built-in version control, always have your files available in the cloud, and utilize familiar and simplistic sharing.

While you told us that you appreciate the ability to limit the image view to only those who have permission to view the report, you asked for changes for the “Public snapshot” mode.
To address some of the feedback we got from you, we have made a few more changes in this area.
- Add-ins that were saved as “Public snapshot” can be printed and will not require that you go over all the slides and load the add-ins for permission check before the public image is made visible.
- You can use the “Show as saved image” on add-ins that were saved as “Public snapshot”. This will replace the entire add-in with an image representation of it, so the load time might be faster when you are presenting your presentation.
Many of us keep presentations open for a long time, which might cause the data in the presentation to become outdated.
To make sure you have in your slides the data you need, we added a new notification that tells you if more up to date data exists in Power BI and offers you the option to refresh and get the latest data from Power BI.
Direct Lake semantic models are now supported in Fabric Git Integration , enabling streamlined version control, enhanced collaboration among developers, and the establishment of CI/CD pipelines for your semantic models using Direct Lake.

Learn more about version control, testing, and deployment of Power BI content in our Power BI implementation planning documentation: https://learn.microsoft.com/power-bi/guidance/powerbi-implementation-planning-content-lifecycle-management-overview
Visualizations
– Animator for Power BI Innofalls Charts SuperTables Sankey Diagram for Power BI by ChartExpo Dynamic KPI Card by Sereviso Shielded HTML Viewer Text search slicer
Mapa Polski – Województwa, Powiaty, Gminy Workstream Income Statement Table
Gas Detection Chart
Seasonality Chart PlanIn BI – Data Refresh Service
Chart Flare
PictoBar ProgBar
Counter Calendar Donut Chart image
Making financial statements with a proper layout has just become easier with the latest version of the Financial Reporting Matrix.
Users are now able to specify which rows should be classified as cost-rows, which will make it easier to get the conditional formatting of variances correctly:

Selecting a row, and ticking “is cost” will tag the row as cost. This can be used in conditional formatting to make sure that positive variances on expenses are a bad for the result, while a positive variance on an income row is good for the result.
The new version also includes more flexibility in measuring placement and column subtotals.
Measures can be placed either:
- Default (below column headers)
- Above column headers

- Conditionally hide columns
- + much more
Highlighted new features:
- Measure placement – In rows
- Select Column Subtotals
- New Format Pane design
- Row Options
Get the visual from AppSource and find more videos here !
A Horizon Chart is an advanced visual, for time-series data, revealing trends and anomalies. It displays stacked data layers, allowing users to compare multiple categories while maintaining data clarity. Horizon Charts are particularly useful to monitor and analyze complex data over time, making this a valuable visual for data analysis and decision-making.
Key Features:
- Horizon Styles: Choose Natural, Linear, or Step with adjustable scaling.
- Layer: Layer data by range or custom criteria. Display positive and negative values together or separately on top.
- Reference Line : Highlight patterns with X-axis lines and labels.
- Colors: Apply 30+ color palettes and use FX rules for dynamic coloring.
- Ranking: Filter Top/Bottom N values, with “Others”.
- Gridline: Add gridlines to the X and Y axis.
- Custom Tooltip: Add highest, lowest, mean, and median points without additional DAX.
- Themes: Save designs and share seamlessly with JSON files.
Other features included are ranking, annotation, grid view, show condition, and accessibility support.
Business Use Cases: Time-Series Data Comparison, Environmental Monitoring, Anomaly Detection
🔗 Try Horizon Chart for FREE from AppSource
📊 Check out all features of the visual: Demo file
📃 Step-by-step instructions: Documentation
💡 YouTube Video: Video Link
📍 Learn more about visuals: https://powerviz.ai/
✅ Follow Powerviz : https://lnkd.in/gN_9Sa6U
Milestone Trend Analysis Chart by Nova Silva
Exciting news! Thanks to your valuable feedback, we’ve enhanced our Milestone Trend Analysis Chart even further. We’re thrilled to announce that you can now switch between horizontal and vertical orientations, catering to your preferred visualization style.
The Milestone Trend Analysis (MTA) Chart remains your go-to tool for swiftly identifying deadline trends, empowering you to take timely corrective actions. With this update, we aim to enhance deadline awareness among project participants and stakeholders alike.

In our latest version, we seamlessly navigate between horizontal and vertical views within the familiar Power BI interface. No need to adapt to a new user interface – enjoy the same ease of use with added flexibility. Plus, it benefits from supported features like themes, interactive selection, and tooltips.
What’s more, ours is the only Microsoft Certified Milestone Trend Analysis Chart for Power BI, ensuring reliability and compatibility with the platform.
Ready to experience the enhanced Milestone Trend Analysis Chart? Download it from AppSource today and explore its capabilities with your own data – try for free!
We welcome any questions or feedback at our website: https://visuals.novasilva.com/ . Try it out and elevate your project management insights now!
Powerviz’s Sunburst Chart is an interactive tool for hierarchical data visualization. With this chart, you can easily visualize multiple columns in a hierarchy and uncover valuable insights. The concentric circle design helps in displaying part-to-whole relationships.
- Arc Customization: Customize shapes and patterns.
- Color Scheme: Accessible palettes with 30+ options.
- Centre Circle: Design an inner circle with layers. Add text, measure, icons, and images.
- Conditional Formatting: Easily identify outliers based on measure or category rules.
- Labels: Smart data labels for readability.
- Image Labels: Add an image as an outer label.
- Interactivity: Zoom, drill down, cross-filtering, and tooltip features.
Other features included are annotation, grid view, show condition, and accessibility support.
Business Use Cases:
- Sales and Marketing: Market share analysis and customer segmentation.
- Finance : Department budgets and expenditures distribution.
- Operations : Supply chain management.
- Education : Course structure, curriculum creation.
- Human Resources : Organization structure, employee demographics.
🔗 Try Sunburst Chart for FREE from AppSource

Clustered bar chart with the possibility to stack one of the bars
Stacked Bar Chart with Line by JTA seamlessly merges the simplicity of a traditional bar chart with the versatility of a stacked bar, revolutionizing the way you showcase multiple datasets in a single, cohesive display.
Unlocking a new dimension of insight, our visual features a dynamic line that provides a snapshot of data trends at a glance. Navigate through your data effortlessly with multiple configurations, gaining a swift and comprehensive understanding of your information.
Tailor your visual experience with an array of functionalities and customization options, enabling you to effortlessly compare a primary metric with the performance of an entire set. The flexibility to customize the visual according to your unique preferences empowers you to harness the full potential of your data.
Features of Stacked Bar Chart with Line:
- Stack the second bar
- Format the Axis and Gridlines
- Add a legend
- Format the colors and text
- Add a line chart
- Format the line
- Add marks to the line
- Format the labels for bars and line
If you liked what you saw, you can try it for yourself and find more information here . Also, if you want to download it, you can find the visual package on the AppSource .

Drill Down Combo PRO – now with Legend field
We have added an exciting new feature to our Combo PRO, Combo Bar PRO, and Timeline PRO visuals – Legend field support . The Legend field makes it easy to visually split series values into smaller segments, without the need to use measures or create separate series. Simply add a column with category names that are adjacent to the series values, and the visual will do the following:
- Display separate segments as a stack or cluster, showing how each segment contributed to the total Series value.
- Create legend items for each segment to quickly show/hide them without filtering.
- Apply custom fill colors to each segment.
- Show each segment value in the tooltip
Read more about the Legend field on our blog article
Drill Down Combo PRO is made for creators who want to build visually stunning and user-friendly reports. Cross-chart filtering and intuitive drill down interactions make data exploration easy and fun for any user. Furthermore, you can choose between three chart types – columns, lines, or areas; and feature up to 25 different series in the same visual and configure each series independently.
📊 Get Drill Down Combo PRO on AppSource
🌐 Visit Drill Down Combo PRO product page
Documentation | ZoomCharts Website | Follow ZoomCharts on LinkedIn

That is all for this month! Please continue sending us your feedback and do not forget to vote for other features that you would like to see in Power BI! We hope that you enjoy the update! If you installed Power BI Desktop from the Microsoft Store, please leave us a review .
Also, don’t forget to vote on your favorite feature this month on our community website.
As always, keep voting on Ideas to help us determine what to build next. We are looking forward to hearing from you!
- Microsoft Fabric
Please enter your information to subscribe to the Microsoft Fabric Blog.
Microsoft fabric updates blog.
Microsoft Fabric May 2024 Update
- Monthly Update
Welcome to the May 2024 update.
Here are a few, select highlights of the many we have for Fabric. You can now ask Copilot questions about data in your model, Model Explorer and authoring calculation groups in Power BI desktop is now generally available, and Real-Time Intelligence provides a complete end-to-end solution for ingesting, processing, analyzing, visualizing, monitoring, and acting on events.
There is much more to explore, please continue to read on.
Microsoft Build Announcements
At Microsoft Build 2024, we are thrilled to announce a huge array of innovations coming to the Microsoft Fabric platform that will make Microsoft Fabric’s capabilities even more robust and even customizable to meet the unique needs of each organization. To learn more about these changes, read the “ Unlock real-time insights with AI-powered analytics in Microsoft Fabric ” announcement blog by Arun Ulag.
Fabric Roadmap Update
Last October at the Microsoft Power Platform Community Conference we announced the release of the Microsoft Fabric Roadmap . Today we have updated that roadmap to include the next semester of Fabric innovations. As promised, we have merged Power BI into this roadmap to give you a single, unified road map for all of Microsoft Fabric. You can find the Fabric Roadmap at https://aka.ms/FabricRoadmap .
We will be innovating our Roadmap over the coming year and would love to hear your recommendation ways that we can make this experience better for you. Please submit suggestions at https://aka.ms/FabricIdeas .
Earn a discount on your Microsoft Fabric certification exam!
We’d like to thank the thousands of you who completed the Fabric AI Skills Challenge and earned a free voucher for Exam DP-600 which leads to the Fabric Analytics Engineer Associate certification.
If you earned a free voucher, you can find redemption instructions in your email. We recommend that you schedule your exam now, before your discount voucher expires on June 24 th . All exams must be scheduled and completed by this date.
If you need a little more help with exam prep, visit the Fabric Career Hub which has expert-led training, exam crams, practice tests and more.
Missed the Fabric AI Skills Challenge? We have you covered. For a limited time , you could earn a 50% exam discount by taking the Fabric 30 Days to Learn It Challenge .
Modern Tooltip now on by Default
Matrix layouts, line updates, on-object interaction updates, publish to folders in public preview, you can now ask copilot questions about data in your model (preview), announcing general availability of dax query view, copilot to write and explain dax queries in dax query view public preview updates, new manage relationships dialog, refreshing calculated columns and calculated tables referencing directquery sources with single sign-on, announcing general availability of model explorer and authoring calculation groups in power bi desktop, microsoft entra id sso support for oracle database, certified connector updates, view reports in onedrive and sharepoint with live connected semantic models, storytelling in powerpoint – image mode in the power bi add-in for powerpoint, storytelling in powerpoint – data updated notification, git integration support for direct lake semantic models.
- Editor’s pick of the quarter
- New visuals in AppSource
- Financial Reporting Matrix by Profitbase
- Horizon Chart by Powerviz
Milestone Trend Analysis Chart by Nova Silva
- Sunburst Chart by Powerviz
- Stacked Bar Chart with Line by JTA
Fabric Automation
Streamlining fabric admin apis, microsoft fabric workload development kit, external data sharing, apis for onelake data access roles, shortcuts to on-premises and network-restricted data, copilot for data warehouse.
- Unlocking Insights through Time: Time travel in Data warehouse
Copy Into enhancements
Faster workspace resource assignment powered by just in time database attachment, runtime 1.3 (apache spark 3.5, delta lake 3.1, r 4.3.3, python 3.11) – public preview, native execution engine for fabric runtime 1.2 (apache spark 3.4) – public preview , spark run series analysis, comment @tagging in notebook, notebook ribbon upgrade, notebook metadata update notification, environment is ga now, rest api support for workspace data engineering/science settings, fabric user data functions (private preview), introducing api for graphql in microsoft fabric (preview), copilot will be enabled by default, the ai and copilot setting will be automatically delegated to capacity admins, abuse monitoring no longer stores your data, real-time hub, source from real-time hub in enhanced eventstream, use real-time hub to get data in kql database in eventhouse, get data from real-time hub within reflexes, eventstream edit and live modes, default and derived streams, route streams based on content in enhanced eventstream, eventhouse is now generally available, eventhouse onelake availability is now generally available, create a database shortcut to another kql database, support for ai anomaly detector, copilot for real-time intelligence, eventhouse tenant level private endpoint support, visualize data with real-time dashboards, new experience for data exploration, create triggers from real-time hub, set alert on real-time dashboards, taking action through fabric items, general availability of the power query sdk for vs code, refresh the refresh history dialog, introducing data workflows in data factory, introducing trusted workspace access in fabric data pipelines.
- Introducing Blob Storage Event Triggers for Data Pipelines
- Parent/child pipeline pattern monitoring improvements
Fabric Spark job definition activity now available
Hd insight activity now available, modern get data experience in data pipeline.
Power BI tooltips are embarking on an evolution to enhance their functionality. To lay the groundwork, we are introducing the modern tooltip as the new default , a feature that many users may already recognize from its previous preview status. This change is more than just an upgrade; it’s the first step in a series of remarkable improvements. These future developments promise to revolutionize tooltip management and customization, offering possibilities that were previously only imaginable. As we prepare for the general availability of the modern tooltip, this is an excellent opportunity for users to become familiar with its features and capabilities.

Discover the full potential of the new tooltip feature by visiting our dedicated blog . Dive into the details and explore the comprehensive vision we’ve crafted for tooltips, designed to enhance your Power BI experience.
We’ve listened to our community’s feedback on improving our tabular visuals (Table and Matrix), and we’re excited to initiate their transformation. Drawing inspiration from the familiar PivotTable in Excel , we aim to build new features and capabilities upon a stronger foundation. In our May update, we’re introducing ‘ Layouts for Matrix .’ Now, you can select from compact , outline , or tabular layouts to alter the arrangement of components in a manner akin to Excel.

As an extension of the new layout options, report creators can now craft custom layout patterns by repeating row headers. This powerful control, inspired by Excel’s PivotTable layout, enables the creation of a matrix that closely resembles the look and feel of a table. This enhancement not only provides greater flexibility but also brings a touch of Excel’s intuitive design to Power BI’s matrix visuals. Only available for Outline and Tabular layouts.

To further align with Excel’s functionality, report creators now have the option to insert blank rows within the matrix. This feature allows for the separation of higher-level row header categories, significantly enhancing the readability of the report. It’s a thoughtful addition that brings a new level of clarity and organization to Power BI’s matrix visuals and opens a path for future enhancements for totals/subtotals and rows/column headers.

We understand your eagerness to delve deeper into the matrix layouts and grasp how these enhancements fulfill the highly requested features by our community. Find out more and join the conversation in our dedicated blog , where we unravel the details and share the community-driven vision behind these improvements.
Following last month’s introduction of the initial line enhancements, May brings a groundbreaking set of line capabilities that are set to transform your Power BI experience:
- Hide/Show lines : Gain control over the visibility of your lines for a cleaner, more focused report.
- Customized line pattern : Tailor the pattern of your lines to match the style and context of your data.
- Auto-scaled line pattern : Ensure your line patterns scale perfectly with your data, maintaining consistency and clarity.
- Line dash cap : Customize the end caps of your customized dashed lines for a polished, professional look.
- Line upgrades across other line types : Experience improvements in reference lines, forecast lines, leader lines, small multiple gridlines, and the new card’s divider line.
These enhancements are not to be missed. We recommend visiting our dedicated blog for an in-depth exploration of all the new capabilities added to lines, keeping you informed and up to date.
This May release, we’re excited to introduce on-object formatting support for Small multiples , Waterfall , and Matrix visuals. This new feature allows users to interact directly with these visuals for a more intuitive and efficient formatting experience. By double-clicking on any of these visuals, users can now right-click on the specific visual component they wish to format, bringing up a convenient mini-toolbar. This streamlined approach not only saves time but also enhances the user’s ability to customize and refine their reports with ease.

We’re also thrilled to announce a significant enhancement to the mobile reporting experience with the introduction of the pane manager for the mobile layout view. This innovative feature empowers users to effortlessly open and close panels via a dedicated menu, streamlining the design process of mobile reports.

We recently announced a public preview for folders in workspaces, allowing you to create a hierarchical structure for organizing and managing your items. In the latest Desktop release, you can now publish your reports to specific folders in your workspace.
When you publish a report, you can choose the specific workspace and folder for your report. The interface is simplistic and easy to understand, making organizing your Power BI content from Desktop better than ever.

To publish reports to specific folders in the service, make sure the “Publish dialogs support folder selection” setting is enabled in the Preview features tab in the Options menu.

Learn more about folders in workspaces.
We’re excited to preview a new capability for Power BI Copilot allowing you to ask questions about the data in your model! You could already ask questions about the data present in the visuals on your report pages – and now you can go deeper by getting answers directly from the underlying model. Just ask questions about your data, and if the answer isn’t already on your report, Copilot will then query your model for the data instead and return the answer to your question in the form of a visual!

We’re starting this capability off in both Edit and View modes in Power BI Service. Because this is a preview feature, you’ll need to enable it via the preview toggle in the Copilot pane. You can learn more about all the details of the feature in our announcement post here! (will link to announcement post)
We are excited to announce the general availability of DAX query view. DAX query view is the fourth view in Power BI Desktop to run DAX queries on your semantic model.
DAX query view comes with several ways to help you be as productive as possible with DAX queries.
- Quick queries. Have the DAX query written for you from the context menu of tables, columns, or measures in the Data pane of DAX query view. Get the top 100 rows of a table, statistics of a column, or DAX formula of a measure to edit and validate in just a couple clicks!
- DirectQuery model authors can also use DAX query view. View the data in your tables whenever you want!
- Create and edit measures. Edit one or multiple measures at once. Make changes and see the change in action in a DA query. Then update the model when you are ready. All in DAX query view!
- See the DAX query of visuals. Investigate the visuals DAX query in DAX query view. Go to the Performance Analyzer pane and choose “Run in DAX query view”.
- Write DAX queries. You can create DAX queries with Intellisense, formatting, commenting/uncommenting, and syntax highlighting. And additional professional code editing experiences such as “Change all occurrences” and block folding to expand and collapse sections. Even expanded find and replace options with regex.
Learn more about DAX query view with these resources:
- Deep dive blog: https://powerbi.microsoft.com/blog/deep-dive-into-dax-query-view-and-writing-dax-queries/
- Learn more: https://learn.microsoft.com/power-bi/transform-model/dax-query-view
- Video: https://youtu.be/oPGGYLKhTOA?si=YKUp1j8GoHHsqdZo
DAX query view includes an inline Fabric Copilot to write and explain DAX queries, which remains in public preview. This month we have made the following updates.
- Run the DAX query before you keep it . Previously the Run button was disabled until the generated DAX query was accepted or Copilot was closed. Now you can Run the DAX query then decide to Keep or Discard the DAX query.

2. Conversationally build the DAX query. Previously the DAX query generated was not considered if you typed additional prompts and you had to keep the DAX query, select it again, then use Copilot again to adjust. Now you can simply adjust by typing in additional user prompts.

3. Syntax checks on the generated DAX query. Previously there was no syntax check before the generated DAX query was returned. Now the syntax is checked, and the prompt automatically retried once. If the retry is also invalid, the generated DAX query is returned with a note that there is an issue, giving you the option to rephrase your request or fix the generated DAX query.

4. Inspire buttons to get you started with Copilot. Previously nothing happened until a prompt was entered. Now click any of these buttons to quickly see what you can do with Copilot!

Learn more about DAX queries with Copilot with these resources:
- Deep dive blog: https://powerbi.microsoft.com/en-us/blog/deep-dive-into-dax-query-view-with-copilot/
- Learn more: https://learn.microsoft.com/en-us/dax/dax-copilot
- Video: https://www.youtube.com/watch?v=0kE3TE34oLM
We are excited to introduce you to the redesigned ‘Manage relationships’ dialog in Power BI Desktop! To open this dialog simply select the ‘Manage relationships’ button in the modeling ribbon.

Once opened, you’ll find a comprehensive view of all your relationships, along with their key properties, all in one convenient location. From here you can create new relationships or edit an existing one.

Additionally, you have the option to filter and focus on specific relationships in your model based on cardinality and cross filter direction.

Learn more about creating and managing relationships in Power BI Desktop in our documentation .
Ever since we released composite models on Power BI semantic models and Analysis Services , you have been asking us to support the refresh of calculated columns and tables in the Service. This month, we have enabled the refresh of calculated columns and tables in Service for any DirectQuery source that uses single sign-on authentication. This includes the sources you use when working with composite models on Power BI semantic models and Analysis Services.
Previously, the refresh of a semantic model that uses a DirectQuery source with single-sign-on authentication failed with one of the following error messages: “Refresh is not supported for datasets with a calculated table or calculated column that depends on a table which references Analysis Services using DirectQuery.” or “Refresh over a dataset with a calculated table or a calculated column which references a Direct Query data source is not supported.”
Starting today, you can successfully refresh the calculated table and calculated columns in a semantic model in the Service using specific credentials as long as:
- You used a shareable cloud connection and assigned it and/or.
- Enabled granular access control for all data connection types.
Here’s how to do this:
- Create and publish your semantic model that uses a single sign-on DirectQuery source. This can be a composite model but doesn’t have to be.
- In the semantic model settings, under Gateway and cloud connections , map each single sign-on DirectQuery connection to a specific connection. If you don’t have a specific connection yet, select ‘Create a connection’ to create it:

- If you are creating a new connection, fill out the connection details and click Create , making sure to select ‘Use SSO via Azure AD for DirectQuery queries:

- Finally, select the connection for each single sign-on DirectQuery source and select Apply :

2. Either refresh the semantic model manually or plan a scheduled refresh to confirm the refresh now works successfully. Congratulations, you have successfully set up refresh for semantic models with a single sign-on DirectQuery connection that uses calculated columns or calculated tables!
We are excited to announce the general availability of Model Explorer in the Model view of Power BI, including the authoring of calculation groups. Semantic modeling is even easier with an at-a-glance tree view with item counts, search, and in context paths to edit the semantic model items with Model Explorer. Top level semantic model properties are also available as well as the option to quickly create relationships in the properties pane. Additionally, the styling for the Data pane is updated to Fluent UI also used in Office and Teams.
A popular community request from the Ideas forum, authoring calculation groups is also included in Model Explorer. Calculation groups significantly reduce the number of redundant measures by allowing you to define DAX formulas as calculation items that can be applied to existing measures. For example, define a year over year, prior month, conversion, or whatever your report needs in DAX formula once as a calculation item and reuse it with existing measures. This can reduce the number of measures you need to create and make the maintenance of the business logic simpler.
Available in both Power BI Desktop and when editing a semantic model in the workspace, take your semantic model authoring to the next level today!

Learn more about Model Explorer and authoring calculation groups with these resources:
- Use Model explorer in Power BI (preview) – Power BI | Microsoft Learn
- Create calculation groups in Power BI (preview) – Power BI | Microsoft Learn
Data connectivity
We’re happy to announce that the Oracle database connector has been enhanced this month with the addition of Single Sign-On support in the Power BI service with Microsoft Entra ID authentication.
Microsoft Entra ID SSO enables single sign-on to access data sources that rely on Microsoft Entra ID based authentication. When you configure Microsoft Entra SSO for an applicable data source, queries run under the Microsoft Entra identity of the user that interacts with the Power BI report.

We’re pleased to announce the new and updated connectors in this release:
- [New] OneStream : The OneStream Power BI Connector enables you to seamlessly connect Power BI to your OneStream applications by simply logging in with your OneStream credentials. The connector uses your OneStream security, allowing you to access only the data you have based on your permissions within the OneStream application. Use the connector to pull cube and relational data along with metadata members, including all their properties. Visit OneStream Power BI Connector to learn more. Find this connector in the other category.
- [New] Zendesk Data : A new connector developed by the Zendesk team that aims to go beyond the functionality of the existing Zendesk legacy connector created by Microsoft. Learn more about what this new connector brings.
- [New] CCH Tagetik
- [Update] Azure Databricks
Are you interested in creating your own connector and publishing it for your customers? Learn more about the Power Query SDK and the Connector Certification program .
Last May, we announced the integration between Power BI and OneDrive and SharePoint. Previously, this capability was limited to only reports with data in import mode. We’re excited to announce that you can now seamlessly view Power BI reports with live connected data directly in OneDrive and SharePoint!
When working on Power BI Desktop with a report live connected to a semantic model in the service, you can easily share a link to collaborate with others on your team and allow them to quickly view the report in their browser. We’ve made it easier than ever to access the latest data updates without ever leaving your familiar OneDrive and SharePoint environments. This integration streamlines your workflows and allows you to access reports within the platforms you already use. With collaboration at the heart of this improvement, teams can work together more effectively to make informed decisions by leveraging live connected semantic models without being limited to data only in import mode.
Utilizing OneDrive and SharePoint allows you to take advantage of built-in version control, always have your files available in the cloud, and utilize familiar and simplistic sharing.

While you told us that you appreciate the ability to limit the image view to only those who have permission to view the report, you asked for changes for the “Public snapshot” mode.
To address some of the feedback we got from you, we have made a few more changes in this area.
- Add-ins that were saved as “Public snapshot” can be printed and will not require that you go over all the slides and load the add-ins for permission check before the public image is made visible.
- You can use the “Show as saved image” on add-ins that were saved as “Public snapshot”. This will replace the entire add-in with an image representation of it, so the load time might be faster when you are presenting your presentation.
Many of us keep presentations open for a long time, which might cause the data in the presentation to become outdated.
To make sure you have in your slides the data you need, we added a new notification that tells you if more up to date data exists in Power BI and offers you the option to refresh and get the latest data from Power BI.
Developers
Direct Lake semantic models are now supported in Fabric Git Integration , enabling streamlined version control, enhanced collaboration among developers, and the establishment of CI/CD pipelines for your semantic models using Direct Lake.

Learn more about version control, testing, and deployment of Power BI content in our Power BI implementation planning documentation: https://learn.microsoft.com/power-bi/guidance/powerbi-implementation-planning-content-lifecycle-management-overview
Visualizations
Editor’s pick of the quarter .
– Animator for Power BI Innofalls Charts SuperTables Sankey Diagram for Power BI by ChartExpo Dynamic KPI Card by Sereviso Shielded HTML Viewer Text search slicer
New visuals in AppSource
Mapa Polski – Województwa, Powiaty, Gminy Workstream Income Statement Table
Gas Detection Chart
Seasonality Chart PlanIn BI – Data Refresh Service
Chart Flare
PictoBar ProgBar
Counter Calendar Donut Chart image
Financial Reporting Matrix by Profitbase
Making financial statements with a proper layout has just become easier with the latest version of the Financial Reporting Matrix.
Users are now able to specify which rows should be classified as cost-rows, which will make it easier to get the conditional formatting of variances correctly:

Selecting a row, and ticking “is cost” will tag the row as cost. This can be used in conditional formatting to make sure that positive variances on expenses are a bad for the result, while a positive variance on an income row is good for the result.
The new version also includes more flexibility in measuring placement and column subtotals.
Measures can be placed either:
- Default (below column headers)
- Above column headers

- Conditionally hide columns
- + much more
Highlighted new features:
- Measure placement – In rows
- Select Column Subtotals
- New Format Pane design
- Row Options
Get the visual from AppSource and find more videos here !
Horizon Chart by Powerviz
A Horizon Chart is an advanced visual, for time-series data, revealing trends and anomalies. It displays stacked data layers, allowing users to compare multiple categories while maintaining data clarity. Horizon Charts are particularly useful to monitor and analyze complex data over time, making this a valuable visual for data analysis and decision-making.
Key Features:
- Horizon Styles: Choose Natural, Linear, or Step with adjustable scaling.
- Layer: Layer data by range or custom criteria. Display positive and negative values together or separately on top.
- Reference Line : Highlight patterns with X-axis lines and labels.
- Colors: Apply 30+ color palettes and use FX rules for dynamic coloring.
- Ranking: Filter Top/Bottom N values, with “Others”.
- Gridline: Add gridlines to the X and Y axis.
- Custom Tooltip: Add highest, lowest, mean, and median points without additional DAX.
- Themes: Save designs and share seamlessly with JSON files.
Other features included are ranking, annotation, grid view, show condition, and accessibility support.
Business Use Cases: Time-Series Data Comparison, Environmental Monitoring, Anomaly Detection
🔗 Try Horizon Chart for FREE from AppSource
📊 Check out all features of the visual: Demo file
📃 Step-by-step instructions: Documentation
💡 YouTube Video: Video Link
📍 Learn more about visuals: https://powerviz.ai/
✅ Follow Powerviz : https://lnkd.in/gN_9Sa6U

Exciting news! Thanks to your valuable feedback, we’ve enhanced our Milestone Trend Analysis Chart even further. We’re thrilled to announce that you can now switch between horizontal and vertical orientations, catering to your preferred visualization style.
The Milestone Trend Analysis (MTA) Chart remains your go-to tool for swiftly identifying deadline trends, empowering you to take timely corrective actions. With this update, we aim to enhance deadline awareness among project participants and stakeholders alike.

In our latest version, we seamlessly navigate between horizontal and vertical views within the familiar Power BI interface. No need to adapt to a new user interface – enjoy the same ease of use with added flexibility. Plus, it benefits from supported features like themes, interactive selection, and tooltips.
What’s more, ours is the only Microsoft Certified Milestone Trend Analysis Chart for Power BI, ensuring reliability and compatibility with the platform.
Ready to experience the enhanced Milestone Trend Analysis Chart? Download it from AppSource today and explore its capabilities with your own data – try for free!
We welcome any questions or feedback at our website: https://visuals.novasilva.com/ . Try it out and elevate your project management insights now!
Sunburst Chart by Powerviz
Powerviz’s Sunburst Chart is an interactive tool for hierarchical data visualization. With this chart, you can easily visualize multiple columns in a hierarchy and uncover valuable insights. The concentric circle design helps in displaying part-to-whole relationships.
- Arc Customization: Customize shapes and patterns.
- Color Scheme: Accessible palettes with 30+ options.
- Centre Circle: Design an inner circle with layers. Add text, measure, icons, and images.
- Conditional Formatting: Easily identify outliers based on measure or category rules.
- Labels: Smart data labels for readability.
- Image Labels: Add an image as an outer label.
- Interactivity: Zoom, drill down, cross-filtering, and tooltip features.
Other features included are annotation, grid view, show condition, and accessibility support.
Business Use Cases:
- Sales and Marketing: Market share analysis and customer segmentation.
- Finance : Department budgets and expenditures distribution.
- Operations : Supply chain management.
- Education : Course structure, curriculum creation.
- Human Resources : Organization structure, employee demographics.
🔗 Try Sunburst Chart for FREE from AppSource

Stacked Bar Chart with Line by JTA
Clustered bar chart with the possibility to stack one of the bars
Stacked Bar Chart with Line by JTA seamlessly merges the simplicity of a traditional bar chart with the versatility of a stacked bar, revolutionizing the way you showcase multiple datasets in a single, cohesive display.
Unlocking a new dimension of insight, our visual features a dynamic line that provides a snapshot of data trends at a glance. Navigate through your data effortlessly with multiple configurations, gaining a swift and comprehensive understanding of your information.
Tailor your visual experience with an array of functionalities and customization options, enabling you to effortlessly compare a primary metric with the performance of an entire set. The flexibility to customize the visual according to your unique preferences empowers you to harness the full potential of your data.
Features of Stacked Bar Chart with Line:
- Stack the second bar
- Format the Axis and Gridlines
- Add a legend
- Format the colors and text
- Add a line chart
- Format the line
- Add marks to the line
- Format the labels for bars and line
If you liked what you saw, you can try it for yourself and find more information here . Also, if you want to download it, you can find the visual package on the AppSource .

We have added an exciting new feature to our Combo PRO, Combo Bar PRO, and Timeline PRO visuals – Legend field support . The Legend field makes it easy to visually split series values into smaller segments, without the need to use measures or create separate series. Simply add a column with category names that are adjacent to the series values, and the visual will do the following:
- Display separate segments as a stack or cluster, showing how each segment contributed to the total Series value.
- Create legend items for each segment to quickly show/hide them without filtering.
- Apply custom fill colors to each segment.
- Show each segment value in the tooltip
Read more about the Legend field on our blog article
Drill Down Combo PRO is made for creators who want to build visually stunning and user-friendly reports. Cross-chart filtering and intuitive drill down interactions make data exploration easy and fun for any user. Furthermore, you can choose between three chart types – columns, lines, or areas; and feature up to 25 different series in the same visual and configure each series independently.
📊 Get Drill Down Combo PRO on AppSource
🌐 Visit Drill Down Combo PRO product page
Documentation | ZoomCharts Website | Follow ZoomCharts on LinkedIn
We are thrilled to announce that Fabric Core REST APIs are now generally available! This marks a significant milestone in the evolution of Microsoft Fabric, a platform that has been meticulously designed to empower developers and businesses alike with a comprehensive suite of tools and services.
The Core REST APIs are the backbone of Microsoft Fabric, providing the essential building blocks for a myriad of functionalities within the platform. They are designed to improve efficiency, reduce manual effort, increase accuracy, and lead to faster processing times. These APIs help with scale operations more easily and efficiently as the volume of work grows, automate repeatable processes with consistency, and enable integration with other systems and applications, providing a streamlined and efficient data pipeline.
The Microsoft Fabric Core APIs encompasses a range of functionalities, including:
- Workspace management: APIs to manage workspaces, including permissions.
- Item management: APIs for creating, reading, updating, and deleting items, with partial support for data source discovery and granular permissions management planned for the near future.
- Job and tenant management: APIs to manage jobs, tenants, and users within the platform.
These APIs adhere to industry standards and best practices, ensuring a unified developer experience that is both coherent and easy to use.
For developers looking to dive into the details of the Microsoft Fabric Core APIs, comprehensive documentation is available. This includes guidelines on API usage, examples, and articles managed in a centralized repository for ease of access and discoverability. The documentation is continuously updated to reflect the latest features and improvements, ensuring that developers have the most current information at their fingertips. See Microsoft Fabric REST API documentation
We’re excited to share an important update we made to the Fabric Admin APIs. This enhancement is designed to simplify your automation experience. Now, you can manage both Power BI and the new Fabric items (previously referred to as artifacts) using the same set of APIs. Before this enhancement, you had to navigate using two different APIs—one for Power BI items and another for new Fabric items. That’s no longer the case.
The APIs we’ve updated include GetItem , ListItems , GetItemAccessDetails , and GetAccessEntities . These enhancements mean you can now query and manage all your items through a single API call, regardless of whether they’re Fabric types or Power BI types. We hope this update makes your work more straightforward and helps you accomplish your tasks more efficiently.
We’re thrilled to announce the public preview of the Microsoft Fabric workload development kit. This feature now extends to additional workloads and offers a robust developer toolkit for designing, developing, and interoperating with Microsoft Fabric using frontend SDKs and backend REST APIs. Introducing the Microsoft Fabric Workload Development Kit .
The Microsoft Fabric platform now provides a mechanism for ISVs and developers to integrate their new and existing applications natively into Fabric’s workload hub. This integration provides the ability to add net new capabilities to Fabric in a consistent experience without leaving their Fabric workspace, thereby accelerating data driven outcomes from Microsoft Fabric.

By downloading and leveraging the development kit , ISVs and software developers can build and scale existing and new applications on Microsoft Fabric and offer them via the Azure Marketplace without the need to ever leave the Fabric environment.
The development kit provides a comprehensive guide and sample code for creating custom item types that can be added to the Fabric workspace. These item types can leverage the Fabric frontend SDKs and backend REST APIs to interact with other Fabric capabilities, such as data ingestion, transformation, orchestration, visualization, and collaboration. You can also embed your own data application into the Fabric item editor using the Fabric native experience components, such as the header, toolbar, navigation pane, and status bar. This way, you can offer consistent and seamless user experience across different Fabric workloads.
This is a call to action for ISVs, software developers, and system integrators. Let’s leverage this opportunity to create more integrated and seamless experiences for our users.

We’re excited about this journey and look forward to seeing the innovative workloads from our developer community.
We are proud to announce the public preview of external data sharing. Sharing data across organizations has become a standard part of day-to-day business for many of our customers. External data sharing, built on top of OneLake shortcuts, enables seamless, in-place sharing of data, allowing you to maintain a single copy of data even when sharing data across tenant boundaries. Whether you’re sharing data with customers, manufacturers, suppliers, consultants, or partners; the applications are endless.
How external data sharing works
Sharing data across tenants is as simple as any other share operation in Fabric. To share data, navigate to the item to be shared, click on the context menu, and then click on External data share . Select the folder or table you want to share and click Save and continue . Enter the email address and an optional message and then click Send .

The data consumer will receive an email containing a share link. They can click on the link to accept the share and access the data within their own tenant.

Click here for more details about external data sharing .
Following the release of OneLake data access roles in public preview, the OneLake team is excited to announce the availability of APIs for managing data access roles. These APIs can be used to programmatically manage granular data access for your lakehouses. Manage all aspects of role management such as creating new roles, editing existing ones, or changing memberships in a programmatic way.
Do you have data stored on-premises or behind a firewall that you want to access and analyze with Microsoft Fabric? With OneLake shortcuts, you can bring on-premises or network-restricted data into OneLake, without any data movement or duplication. Simply install the Fabric on-premises data gateway and create a shortcut to your S3 compatible, Amazon S3, or Google Cloud Storage data source. Then use any of Fabric’s powerful analytics engines and OneLake open APIs to explore, transform, and visualize your data in the cloud.
Try it out today and unlock the full potential of your data with OneLake shortcuts!

Data Warehouse
We are excited to announce Copilot for Data Warehouse in public preview! Copilot for Data Warehouse is an AI assistant that helps developers generate insights through T-SQL exploratory analysis. Copilot is contextualized your warehouse’s schema. With this feature, data engineers and data analysts can use Copilot to:
- Generate T-SQL queries for data analysis.
- Explain and add in-line code comments for existing T-SQL queries.
- Fix broken T-SQL code.
- Receive answers regarding general data warehousing tasks and operations.
There are 3 areas where Copilot is surfaced in the Data Warehouse SQL Query Editor:
- Code completions when writing a T-SQL query.
- Chat panel to interact with the Copilot in natural language.
- Quick action buttons to fix and explain T-SQL queries.
Learn more about Copilot for Data Warehouse: aka.ms/data-warehouse-copilot-docs. Copilot for Data Warehouse is currently only available in the Warehouse. Copilot in the SQL analytics endpoint is coming soon.
Unlocking Insights through Time: Time travel in Data warehouse (public preview)
As data volumes continue to grow in today’s rapidly evolving world of Artificial Intelligence, it is crucial to reflect on historical data. It empowers businesses to derive valuable insights that aid in making well-informed decisions for the future. Preserving multiple historical data versions not only incurred significant costs but also presented challenges in upholding data integrity, resulting in a notable impact on query performance. So, we are thrilled to announce the ability to query the historical data through time travel at the T-SQL statement level which helps unlock the evolution of data over time.
The Fabric warehouse retains historical versions of tables for seven calendar days. This retention allows for querying the tables as if they existed at any point within the retention timeframe. Time travel clause can be included in any top level SELECT statement. For complex queries that involve multiple tables, joins, stored procedures, or views, the timestamp is applied just once for the entire query instead of specifying the same timestamp for each table within the same query. This ensures the entire query is executed with reference to the specified timestamp, maintaining the data’s uniformity and integrity throughout the query execution.
From historical trend analysis and forecasting to compliance management, stable reporting and real-time decision support, the benefits of time travel extend across multiple business operations. Embrace the capability of time travel to navigate the data-driven landscape and gain a competitive edge in today’s fast-paced world of Artificial Intelligence.
We are excited to announce not one but two new enhancements to the Copy Into feature for Fabric Warehouse: Copy Into with Entra ID Authentication and Copy Into for Firewall-Enabled Storage!
Entra ID Authentication
When authenticating storage accounts in your environment, the executing user’s Entra ID will now be used by default. This ensures that you can leverage A ccess C ontrol L ists and R ole – B ased a ccess c ontrol to authenticate to your storage accounts when using Copy Into. Currently, only organizational accounts are supported.
How to Use Entra ID Authentication
- Ensure your Entra ID organizational account has access to the underlying storage and can execute the Copy Into statement on your Fabric Warehouse.
- Run your Copy Into statement without specifying any credentials; the Entra ID organizational account will be used as the default authentication mechanism.
Copy into firewall-enabled storage
The Copy Into for firewall-enabled storage leverages the trusted workspace access functionality ( Trusted workspace access in Microsoft Fabric (preview) – Microsoft Fabric | Microsoft Learn ) to establish a secure and seamless connection between Fabric and your storage accounts. Secure access can be enabled for both blob and ADLS Gen2 storage accounts. Secure access with Copy Into is available for warehouses in workspaces with Fabric Capacities (F64 or higher).
To learn more about Copy into , please refer to COPY INTO (Transact-SQL) – Azure Synapse Analytics and Microsoft Fabric | Microsoft Learn
We are excited to announce the launch of our new feature, Just in Time Database Attachment, which will significantly enhance your first experience, such as when connecting to the Datawarehouse or SQL endpoint or simply opening an item. These actions trigger the workspace resource assignment process, where, among other actions, we attach all necessary metadata of your items, Data warehouses and SQL endpoints, which can be a long process, particularly for workspaces that have a high number of items.
This feature is designed to attach your desired database during the activation process of your workspace, allowing you to execute queries immediately and avoid unnecessary delays. However, all other databases will be attached asynchronously in the background while you are able to execute queries, ensuring a smooth and efficient experience.
Data Engineering
We are advancing Fabric Runtime 1.3 from an Experimental Public Preview to a full Public Preview. Our Apache Spark-based big data execution engine, optimized for both data engineering and science workflows, has been updated and fully integrated into the Fabric platform.
The enhancements in Fabric Runtime 1.3 include the incorporation of Delta Lake 3.1, compatibility with Python 3.11, support for Starter Pools, integration with Environment and library management capabilities. Additionally, Fabric Runtime now enriches the data science experience by supporting the R language and integrating Copilot.

We are pleased to share that the Native Execution Engine for Fabric Runtime 1.2 is currently available in public preview. The Native Execution Engine can greatly enhance the performance for your Spark jobs and queries. The engine has been rewritten in C++ and operates in columnar mode and uses vectorized processing. The Native Execution Engine offers superior query performance – encompassing data processing, ETL, data science, and interactive queries – all directly on your data lake. Overall, Fabric Spark delivers a 4x speed-up on the sum of execution time of all 99 queries in the TPC-DS 1TB benchmark when compared against Apache Spark. This engine is fully compatible with Apache Spark™ APIs (including Spark SQL API).
It is seamless to use with no code changes – activate it and go. Enable it in your environment for your notebooks and your SJDs.

This feature is in the public preview, at this stage of the preview, there is no additional cost associated with using it.
We are excited to announce the Spark Monitoring Run Series Analysis features, which allow you to analyze the run duration trend and performance comparison for Pipeline Spark activity recurring run instances and repetitive Spark run activities from the same Notebook or Spark Job Definition.
- Run Series Comparison: Users can compare the duration of a Notebook run with that of previous runs and evaluate the input and output data to understand the reasons behind prolonged run durations.
- Outlier Detection and Analysis: The system can detect outliers in the run series and analyze them to pinpoint potential contributing factors.
- Detailed Run Instance Analysis: Clicking on a specific run instance provides detailed information on time distribution, which can be used to identify performance enhancement opportunities.
- Configuration Insights : Users can view the Spark configuration used for each run, including auto-tuned configurations for Spark SQL queries in auto-tune enabled Notebook runs.
You can access the new feature from the item’s recent runs panel and Spark application monitoring page.

We are excited to announce that Notebook now supports the ability to tag others in comments, just like the familiar functionality of using Office products!
When you select a section of code in a cell, you can add a comment with your insights and tag one or more teammates to collaborate or brainstorm on the specifics. This intuitive enhancement is designed to amplify collaboration in your daily development work.
Moreover, you can easily configure the permissions when tagging someone who doesn’t have the permission, to make sure your code asset is well managed.

We are thrilled to unveil a significant enhancement to the Fabric notebook ribbon, designed to elevate your data science and engineering workflows.

In the new version, you will find the new Session connect control on the Home tab, and now you can start a standard session without needing to run a code cell.

You can also easily spin up a High concurrency session and share the session across multiple notebooks to improve the compute resource utilization. And you can easily attach/leave a high concurrency session with a single click.

The “ View session information ” can navigate you to the session information dialog, where you can find a lot of useful detailed information, as well as configure the session timeout. The diagnostics info is essentially helpful when you need support for notebook issues.

Now you can easily access the powerful “ Data Wrangler ” on Home tab with the new ribbon! You can explore your data with the fancy low-code experience of data wrangler, and the pandas DataFrames and Spark DataFrames are all supported.

We recently made some changes to the Fabric notebook metadata to ensure compliance and consistency:
Notebook file content:
- The keyword “trident” has been replaced with “dependencies” in the notebook content. This adjustment ensures consistency and compliance.
- Notebook Git format:
- The preface of the notebook has been modified from “# Synapse Analytics notebook source” to “# Fabric notebook source”.
- Additionally, the keyword “synapse” has been updated to “dependencies” in the Git repo.
The above changes will be marked as ‘uncommitted’ for one time if your workspace is connected to Git. No action is needed in terms of these changes , and there won’t be any breaking scenario within the Fabric platform . If you have any further updates or questions, feel free to share with us.
We are thrilled to announce that the environment is now a generally available item in Microsoft Fabric. During this GA timeframe, we have shipped a few new features of Environment.
- Git support

The environment is now Git supported. You can check-in the environment into your Git repo and manipulate the environment locally with its YAML representations and custom library files. After updating the changes from local to Fabric portal, you can publish them by manual action or through REST API.
- Deployment pipeline

Deploying environments from one workspace to another is supported. Now, you can deploy the code items and their dependent environments together from development to test and even production.
With the REST APIs, you can have the code-first experience with the same abilities through Fabric portal. We provide a set of powerful APIs to ensure you the efficiency in managing your environment. You can create new environments, update libraries and Spark compute, publish the changes, delete an environment, attach the environment to a notebook, etc., all actions can be done locally in the tools of your choice. The article – Best practice of managing environments with REST API could help you get started with several real-world scenarios.
- Resources folder

Resources folder enables managing small resources in the development cycle. The files uploaded in the environment can be accessed from notebooks once they’re attached to the same environment. The manipulation of the files and folders of resources happens in real-time. It could be super powerful, especially when you are collaborating with others.

Sharing your environment with others is also available. We provide several sharing options. By default, the view permission is shared. If you want the recipient to have access to view and use the contents of the environment, sharing without permission customization is the best option. Furthermore, you can grant editing permission to allow recipients to update this environment or grant share permission to allow recipients to reshare this environment with their existing permissions.
We are excited to announce the REST api support for Fabric Data Engineering/Science workspace settings. Data Engineering/Science settings allows users to create/manage their Spark compute, select the default runtime/default environment, enable or disable high concurrency mode or ML autologging.

Now with the REST api support for the Data Engineering/Science settings, you would be able to
- Choose the default pool for a Fabric Workspace
- Configure the max nodes for Starter pools
- Create/Update/Delete the existing Custom Pools, Autoscale and Dynamic allocation properties
- Choose Workspace Default Runtime and Environment
- Select a default runtime
- Select the default environment for the Fabric workspace
- Enable or Disable High Concurrency Mode
- Enable or Disable ML Auto logging.
Learn more about the Workspace Spark Settings API in our API documentation Workspace Settings – REST API (Spark) | Microsoft Learn
We are excited to give you a sneak peek at the preview of User Data Functions in Microsoft Fabric. User Data Functions gives developers and data engineers the ability to easily write and run applications that integrate with resources in the Fabric Platform. Data engineering often presents challenges with data quality or complex data analytics processing in data pipelines, and using ETL tools may present limited flexibility and ability to customize to your needs. This is where User data functions can be used to run data transformation tasks and perform complex business logic by connecting to your data sources and other workloads in Fabric.
During preview, you will be able to use the following features:
- Use the Fabric portal to create new User Data Functions, view and test them.
- Write your functions using C#.
- Use the Visual Studio Code extension to create and edit your functions.
- Connect to the following Fabric-native data sources: Data Warehouse, Lakehouse and Mirrored Databases.
You can now create a fully managed GraphQL API in Fabric to interact with your data in a simple, flexible, and powerful way. We’re excited to announce the public preview of API for GraphQL, a data access layer that allows us to query multiple data sources quickly and efficiently in Fabric by leveraging a widely adopted and familiar API technology that returns more data with less client requests. With the new API for GraphQL in Fabric, data engineers and scientists can create data APIs to connect to different data sources, use the APIs in their workflows, or share the API endpoints with app development teams to speed up and streamline data analytics application development in your business.
You can get started with the API for GraphQL in Fabric by creating an API, attaching a supported data source, then selecting specific data sets you want to expose through the API. Fabric builds the GraphQL schema automatically based on your data, you can test and prototype queries directly in our graphical in-browser GraphQL development environment (API editor), and applications are ready to connect in minutes.
Currently, the following supported data sources can be exposed through the Fabric API for GraphQL:
- Microsoft Fabric Data Warehouse
- Microsoft Fabric Lakehouse via SQL Analytics Endpoint
- Microsoft Fabric Mirrored Databases via SQL Analytics Endpoint
Click here to learn more about how to get started.

Data Science
As you may know, Copilot in Microsoft Fabric requires your tenant administrator to enable the feature from the admin portal. Starting May 20th, 2024, Copilot in Microsoft Fabric will be enabled by default for all tenants. This update is part of our continuous efforts to enhance user experience and productivity within Microsoft Fabric. This new default activation means that AI features like Copilot will be automatically enabled for tenants who have not yet enabled the setting.
We are introducing a new capability to enable Copilot on Capacity level in Fabric. A new option is being introduced in the tenant admin portal, to delegate the enablement of AI and Copilot features to Capacity administrators. This AI and Copilot setting will be automatically delegated to capacity administrators and tenant administrators won’t be able to turn off the delegation.
We also have a cross-geo setting for customers who want to use Copilot and AI features while their capacity is in a different geographic region than the EU data boundary or the US. By default, the cross-geo setting will stay off and will not be delegated to capacity administrators automatically. Tenant administrators can choose whether to delegate this to capacity administrators or not.

Figure 1. Copilot in Microsoft Fabric will be auto enabled and auto delegated to capacity administrators.

Capacity administrators will see the “Copilot and Azure OpenAI Service (preview)” settings under Capacity settings/ Fabric Capacity / <Capacity name> / Delegated tenant settings. By default, the capacity setting will inherit tenant level settings. Capacity administrators can decide whether to override the tenant administrator’s selection. This means that even if Copilot is not enabled on a tenant level, a capacity administrator can choose to enable Copilot for their capacity. With this level of control, we make it easier to control which Fabric workspaces can utilize AI features like Copilot in Microsoft Fabric.

To enhance privacy and trust, we’ve updated our approach to abuse monitoring: previously, we retained data from Copilot in Fabric, including prompt inputs and outputs, for up to 30 days to check for misuse. Following customer feedback, we’ve eliminated this 30-day retention. Now, we no longer store prompt related data, demonstrating our unwavering commitment to your privacy and security. We value your input and take your concerns seriously.
Real-Time Intelligence
This month includes the announcement of Real-Time Intelligence, the next evolution of Real-Time Analytics and Data Activator. With Real-Time Intelligence, Fabric extends to the world of streaming and high granularity data, enabling all users in your organization to collect, analyze and act on this data in a timeline manner making faster and more informed business decisions. Read the full announcement from Build 2024.
Real-Time Intelligence includes a wide range of capabilities across ingestion, processing, analysis, transformation, visualization and taking action. All of this is supported by the Real-Time hub, the central place to discover and manage streaming data and start all related tasks.
Read on for more information on each capability and stay tuned for a series of blogs describing the features in more detail. All features are in Public Preview unless otherwise specified. Feedback on any of the features can be submitted at https://aka.ms/rtiidea
Ingest & Process
- Introducing the Real-Time hub
- Get Events with new sources of streaming and event data
- Source from Real-Time Hub in Enhanced Eventstream
- Use Real-Time hub to Get Data in KQL Database in Eventhouse
- Get data from Real-Time Hub within Reflexes
- Eventstream Edit and Live modes
- Default and derived streams
- Route data streams based on content
Analyze & Transform
- Eventhouse GA
- Eventhouse OneLake availability GA
- Create a database shortcut to another KQL Database
- Support for AI Anomaly Detector
- Copilot for Real-Time Intelligence
- Tenant-level private endpoints for Eventhouse
Visualize & Act
- Visualize data with Real-Time Dashboards
- New experience for data exploration
- Create triggers from Real-Time Hub
- Set alert on Real-time Dashboards
- Taking action through Fabric Items
Ingest & Process
Real-Time hub is the single place for all data-in-motion across your entire organization. Several key features are offered in Real-Time hub:
1. Single place for data-in-motion for the entire organization
Real-Time hub enables users to easily discover, ingest, manage, and consume data-in-motion from a wide variety of sources. It lists all the streams and KQL tables that customers can directly act on.
2. Real-Time hub is never empty
All data streams in Fabric automatically show up in the hub. Also, users can subscribe to events in Fabric gaining insights into the health and performance of their data ecosystem.
3. Numerous connectors to simplify data ingestion from anywhere to Real-Time hub
Real-Time hub makes it easy for you to ingest data into Fabric from a wide variety of sources like AWS Kinesis, Kafka clusters, Microsoft streaming sources, sample data and Fabric events using the Get Events experience.
There are 3 tabs in the hub:
- Data streams : This tab contains all streams that are actively running in Fabric that user has access to. This includes all streams from Eventstreams and all tables from KQL Databases.
- Microsoft sources : This tab contains Microsoft sources (that user has access to) and can be connected to Fabric.
- Fabric events : Fabric now has event-driven capabilities to support real-time notifications and data processing. Users can monitor and react to events including Fabric Workspace Item events and Azure Blob Storage events. These events can be used to trigger other actions or workflows, such as invoking a data pipeline or sending a notification via email. Users can also send these events to other destinations via Event Streams.
Learn More
You can now connect to data from both inside and outside of Fabric in a mere few steps. Whether data is coming from new or existing sources, streams, or available events, the Get Events experience allows users to connect to a wide range of sources directly from Real-Time hub, Eventstreams, Eventhouse and Data Activator.
This enhanced capability allows you to easily connect external data streams into Fabric with out-of-box experience, giving you more options and helping you to get real-time insights from various sources. This includes Camel Kafka connectors powered by Kafka connect to access popular data platforms, as well as the Debezium connectors for fetching the Change Data Capture (CDC) streams.
Using Get Events, bring streaming data from Microsoft sources directly into Fabric with a first-class experience. Connectivity to notification sources and discrete events is also included, this enables access to notification events from Azure and other clouds solutions including AWS and GCP. The full set of sources which are currently supported are:
- Microsoft sources : Azure Event Hubs, Azure IoT hub
- External sources : Google Cloud Pub/Sub, Amazon Kinesis Data Streams, Confluent Cloud Kafka
- Change data capture databases : Azure SQL DB (CDC), PostgreSQL DB (CDC), Azure Cosmos DB (CDC), MySQL DB (CDC)
- Fabric events : Fabric Workspace Item events, Azure Blob Storage events

Learn More
With enhanced Eventstream, you can now stream data not only from Microsoft sources but also from other platforms like Google Cloud, Amazon Kinesis, Database change data capture streams, etc. using our new messaging connectors. The new Eventstream also lets you acquire and route real-time data not only from stream sources but also from discrete event sources, such as: Azure Blob Storage events, Fabric Workspace Item events.
To use these new sources in Eventstream, simply create an eventstream with choosing “Enhanced Capabilities (preview)”.

You will see the new Eventstream homepage that gives you some choices to begin with. By clicking on the “Add external source”, you will find these sources in the Get events wizard that helps you to set up the source in a few steps. After you add the source to your eventstream, you can publish it to stream the data into your eventstream.
Using Eventstream with discrete sources to turn events into streams for more analysis. You can send the streams to different Fabric data destinations, like Lakehouse and KQL Database. After the events are converted, a default stream will appear in Real-Time Hub. To turn them, click Edit on ribbon, select “Stream events” on the source node, and publish your eventstream.
To transform the stream data or route it to different Fabric destinations based on its content, you can click Edit in ribbon and enter the Edit mode. There you can add event processing operators and destinations.
With Real-Time hub embedded in KQL Database experience, each user in the tenant can view and add streams which they have access to and directly ingest it to a KQL Database table in Eventhouse.
This integration provides each user in the tenant with the ability to access and view data streams they are permitted to. They can now directly ingest these streams into a KQL Database table in Eventhouse. This simplifies the data discovery and ingestion process by allowing users to directly interact with the streams. Users can filter data based on the Owner, Parent and Location and provides additional information such as Endorsement and Sensitivity.
You can access this by clicking on the Get Data button from the Database ribbon in Eventhouse.

This will open the Get Data wizard with Real-Time hub embedded.

You can use events from Real-Time hub directly in reflex items as well. From within the main reflex UI, click ‘Get data’ in the toolbar:

This will open a wizard that allows you to connect to new event sources or browse Real-Time Hub to use existing streams or system events.
Search new stream sources to connect to or select existing streams and tables to be ingested directly by Reflex.

You then have access to the full reflex modeling experience to build properties and triggers over any events from Real-Time hub.
Eventstream offers two distinct modes, Edit and Live, to provide flexibility and control over the development process of your eventstream. If you create a new Eventstream with Enhanced Capabilities enabled, you can modify it in an Edit mode. Here, you can design stream processing operations for your data streams using a no-code editor. Once you complete the editing, you can publish your Eventstream and visualize how it starts streaming and processing data in Live mode .

In Edit mode, you can:
- Make changes to an Eventstream without implementing them until you publish the Eventstream. This gives you full control over the development process.
- Avoid test data being streamed to your Eventstream. This mode is designed to provide a secure environment for testing without affecting your actual data streams.
For Live mode, you can :
- Visualize how your Eventstream streams, transforms, and routes your data streams to various destinations after publishing the changes.
- Pause the flow of data on selected sources and destinations, providing you with more control over your data streams being streamed into your Eventstream.
When you create a new Eventstream with Enhanced Capabilities enabled, you can now create and manage multiple data streams within Eventstream, which can then be displayed in the Real-Time hub for others to consume and perform further analysis.
There are two types of streams:
- Default stream : Automatically generated when a streaming source is added to Eventstream. Default stream captures raw event data directly from the source, ready for transformation or analysis.
- Derived stream : A specialized stream that users can create as a destination within Eventstream. Derived stream can be created after a series of operations such as filtering and aggregating, and then it’s ready for further consumption or analysis by other users in the organization through the Real-Time Hub.
The following example shows that when creating a new Eventstream a default stream alex-es1-stream is automatically generated. Subsequently, a derived stream dstream1 is added after an Aggregate operation within the Eventstream. Both default and derived streams can be found in the Real-Time hub.

Customers can now perform stream operations directly within Eventstream’s Edit mode, instead of embedding in a destination. This enhancement allows you to design stream processing logics and route data streams in the top-level canvas. Custom processing and routing can be applied to individual destinations using built-in operations, allowing for routing to distinct destinations within the Eventstream based on different stream content.
These operations include:
- Aggregate : Perform calculations such as SUM, AVG, MIN, and MAX on a column of values and return a single result.
- Expand : Expand array values and create new rows for each element within the array.
- Filter : Select or filter specific rows from the data stream based on a condition.
- Group by : Aggregate event data within a certain time window, with the option to group one or more columns.
- Manage Fields : Customize your data streams by adding, removing, or changing data type of a column.
- Union : Merge two or more data streams with shared fields (same name and data type) into a unified data stream.
Analyze & Transform
Eventhouse, a cutting-edge database workspace meticulously crafted to manage and store event-based data, is now officially available for general use. Optimized for high granularity, velocity, and low latency streaming data, it incorporates indexing and partitioning for structured, semi-structured, and free text data. With Eventhouse, users can perform high-performance analysis of big data and real-time data querying, processing billions of events within seconds. The platform allows users to organize data into compartments (databases) within one logical item, facilitating efficient data management.
Additionally, Eventhouse enables the sharing of compute and cache resources across databases, maximizing resource utilization. It also supports high-performance queries across databases and allows users to apply common policies seamlessly. Eventhouse offers content-based routing to multiple databases, full view lineage, and high granularity permission control, ensuring data security and compliance. Moreover, it provides a simple migration path from Azure Synapse Data Explorer and Azure Data Explorer, making adoption seamless for existing users.

Engineered to handle data in motion, Eventhouse seamlessly integrates indexing and partitioning into its storing process, accommodating various data formats. This sophisticated design empowers high-performance analysis with minimal latency, facilitating lightning-fast ingestion and querying within seconds. Eventhouse is purpose-built to deliver exceptional performance and efficiency for managing event-based data across diverse applications and industries. Its intuitive features and seamless integration with existing Azure services make it an ideal choice for organizations looking to leverage real-time analytics for actionable insights. Whether it’s analyzing telemetry and log data, time series and IoT data, or financial records, Eventhouse provides the tools and capabilities needed to unlock the full potential of event-based data.
We’re excited to announce that OneLake availability of Eventhouse in Delta Lake format is Generally Available.
Delta Lake is the unified data lake table format chosen to achieve seamless data access across all compute engines in Microsoft Fabric.
The data streamed into Eventhouse is stored in an optimized columnar storage format with full text indexing and supports complex analytical queries at low latency on structured, semi-structured, and free text data.
Enabling data availability of Eventhouse in OneLake means that customers can enjoy the best of both worlds: they can query the data with high performance and low latency in their Eventhouse and query the same data in Delta Lake format via any other Fabric engines such as Power BI Direct Lake mode, Warehouse, Lakehouse, Notebooks, and more.
To learn more, please visit https://learn.microsoft.com/en-gb/fabric/real-time-analytics/one-logical-copy
A database shortcut in Eventhouse is an embedded reference to a source database. The source database can be one of the following:
- (Now Available) A KQL Database in Real-Time Intelligence
- An Azure Data Explorer database
The behavior exhibited by the database shortcut is similar to that of a follower database
The owner of the source database, the data provider, shares the database with the creator of the shortcut in Real-Time Intelligence, the data consumer. The owner and the creator can be the same person. The database shortcut is attached in read-only mode, making it possible to view and run queries on the data that was ingested into the source KQL Database without ingesting it.
This helps with data sharing scenarios where you can share data in-place either within teams, or even with external customers.
AI Anomaly Detector is an Azure service for high quality detection of multivariate and univariate anomalies in time series. While the standalone version is being retired October 2026, Microsoft open sourced the anomaly detection core algorithms and they are now supported in Microsoft Fabric. Users can leverage these capabilities in Data Science and Real-Time Intelligence workload. AI Anomaly Detector models can be trained in Spark Python notebooks in Data Science workload, while real time scoring can be done by KQL with inline Python in Real-Time Intelligence.
We are excited to announce the Public Preview of Copilot for Real-Time Intelligence. This initial version includes a new capability that translates your natural language questions about your data to KQL queries that you can run and get insights.
Your starting point is a KQL Queryset, that is connected to a KQL Database, or to a standalone Kusto database:

Simply type the natural language question about what you want to accomplish, and Copilot will automatically translate it to a KQL query you can execute. This is extremely powerful for users who may be less familiar with writing KQL queries but still want to get the most from their time-series data stored in Eventhouse.

Stay tuned for more capabilities from Copilot for Real-Time Intelligence!
Customers can increase their network security by limiting access to Eventhouse at a tenant-level, from one or more virtual networks (VNets) via private links. This will prevent unauthorized access from public networks and only permit data plane operations from specific VNets.
Visualize & Act
Real-Time Dashboards have a user-friendly interface, allowing users to quickly explore and analyze their data without the need for extensive technical knowledge. They offer a high refresh frequency, support a range of customization options, and are designed to handle big data.
The following visual types are supported, and can be customized with the dashboard’s user-friendly interface:

You can also define conditional formatting rules to format the visual data points by their values using colors, tags, and icons. Conditional formatting can be applied to a specific set of cells in a predetermined column or to entire rows, and lets you easily identify interesting data points.
Beyond the support visual, Real-Time Dashboards provide several capabilities to allow you to interact with your data by performing slice and dice operations for deeper analysis and gaining different viewpoints.
- Parameters are used as building blocks for dashboard filters and can be added to queries to filter the data presented by visuals. Parameters can be used to slice and dice dashboard visuals either directly by selecting parameter values in the filter bar or by using cross-filters.
- Cross filters allow you to select a value in one visual and filter all other visuals on that dashboard based on the selected data point.
- Drillthrough capability allows you to select a value in a visual and use it to filter the visuals in a target page in the same dashboard. When the target page opens, the value is pushed to the relevant filters.
Real-Time Dashboards can be shared broadly and allow multiple stakeholders to view dynamic, real time, fresh data while easily interacting with it to gain desired insights.
Directly from a real-time dashboard, users can refine their exploration using a user-friendly, form-like interface. This intuitive and dynamic experience is tailored for insights explorers craving insights based on real-time data. Add filters, create aggregations, and switch visualization types without writing queries to easily uncover insights.
With this new feature, insights explorers are no longer bound by the limitations of pre-defined dashboards. As independent explorers, they have the freedom for ad-hoc exploration, leveraging existing tiles to kickstart their journey. Moreover, they can selectively remove query segments, and expand their view of the data landscape.

Dive deep, extract meaningful insights, and chart actionable paths forward, all with ease and efficiency, and without having to write complex KQL queries.
Data Activator allows you to monitor streams of data for various conditions and set up actions to be taken in response. These triggers are available directly within the Real-Time hub and in other workloads in Fabric. When the condition is detected, an action will automatically be kicked off such as sending alerts via email or Teams or starting jobs in Fabric items.
When you browse the Real-Time Hub, you’ll see options to set triggers in the detail pages for streams.

Selecting this will open a side panel where you can configure the events you want to monitor, the conditions you want to look for in the events, and the action you want to take while in the Real-Time hub experience.

Completing this pane creates a new reflex item with a trigger that monitors the selected events and condition for you. Reflexes need to be created in a workspace supported by a Fabric or Power BI Premium capacity – this can be a trial capacity so you can get started with it today!

Data Activator has been able to monitor Power BI report data since it was launched, and we now support monitoring of Real-Time Dashboard visuals in the same way.
From real-time dashboard tiles you can click the ellipsis (…) button and select “Set alert”

This opens the embedded trigger pane, where you can specify what conditions, you are looking for. You can choose whether to send email or Teams messages as the alert when these conditions are met.
When creating a new reflex trigger, from Real-time Hub or within the reflex item itself, you’ll notice a new ‘Run a Fabric item’ option in the Action section. This will create a trigger that starts a new Fabric job whenever its condition is met, kicking off a pipeline or notebook computation in response to Fabric events. A common scenario would be monitoring Azure Blob storage events via Real-Time Hub, and running data pipeline jobs when Blog Created events are detected.
This capability is extremely powerful and moves Fabric from a scheduled driven platform to an event driven platform.

Pipelines, spark jobs, and notebooks are just the first Fabric items we’ll support here, and we’re keen to hear your feedback to help prioritize what else we support. Please leave ideas and votes on https://aka.ms/rtiidea and let us know!
Real-Time Intelligence, along with the Real-Time hub, revolutionizes what’s possible with real-time streaming and event data within Microsoft Fabric.
Learn more and try it today https://aka.ms/realtimeintelligence
Data Factory
Dataflow gen2 .
We are thrilled to announce that the Power Query SDK is now generally available in Visual Studio Code! This marks a significant milestone in our commitment to providing developers with powerful tools to enhance data connectivity and transformation.
The Power Query SDK is a set of tools that allow you as the developer to create new connectors for Power Query experiences available in products such as Power BI Desktop, Semantic Models, Power BI Datamarts, Power BI Dataflows, Fabric Dataflow Gen2 and more.
This new SDK has been in public preview since November of 2022, and we’ve been hard at work improving this experience which goes beyond what the previous Power Query SDK in Visual Studio had to offer.
The latest of these biggest improvements was the introduction of the Test Framework in March of 2024 that solidifies the developer experience that you can have within Visual Studio Code and the Power Query SDK for creating a Power Query connector.
The Power Query SDK extension for Visual Studio will be deprecated by June 30, 2024, so we encourage you to give this new Power Query SDK in Visual Studio Code today if you haven’t.

To get started with the Power Query SDK in Visual Studio Code, simply install it from the Visual Studio Code Marketplace . Our comprehensive documentation and tutorials are available to help you harness the full potential of your data.
Join our vibrant community of developers to share insights, ask questions, and collaborate on exciting projects. Our dedicated support team is always ready to assist you with any queries.
We look forward to seeing the innovative solutions you’ll create with the Power Query SDK in Visual Studio Code. Happy coding!
Introducing a convenient enhancement to the Dataflows Gen2 Refresh History experience! Now, alongside the familiar “X” button in the Refresh History screen, you’ll find a shiny new Refresh Button . This small but mighty addition empowers users to refresh the status of their dataflow refresh history status without the hassle of exiting the refresh history and reopening it. Simply click the Refresh Button , and voilà! Your dataflow’s refresh history status screen is updated, keeping you in the loop with minimal effort. Say goodbye to unnecessary clicks and hello to streamlined monitoring!

- [New] OneStream : The OneStream Power Query Connector enables you to seamlessly connect Data Factory to your OneStream applications by simply logging in with your OneStream credentials. The connector uses your OneStream security, allowing you to access only the data you have based on your permissions within the OneStream application. Use the connector to pull cube and relational data along with metadata members, including all their properties. Visit OneStream Power BI Connector to learn more. Find this connector in the other category.
Data workflows
We are excited to announce the preview of ‘Data workflows’, a new feature within the Data Factory that revolutionizes the way you build and manage your code-based data pipelines. Powered by Apache Airflow, Data workflows offer seamless authoring, scheduling, and monitoring experience for Python-based data processes defined as Directed Acyclic Graphs (DAGs). This feature brings a SaaS-like experience to running DAGs in a fully managed Apache Airflow environment, with support for autoscaling , auto-pause , and rapid cluster resumption to enhance cost-efficiency and performance.
It also includes native cloud-based authoring capabilities and comprehensive support for Apache Airflow plugins and libraries.
To begin using this feature:
- Access the Microsoft Fabric Admin Portal.
- Navigate to Tenant Settings.
Under Microsoft Fabric options, locate and expand the ‘Users can create and use Data workflows (preview)’ section. Note: This action is necessary only during the preview phase of Data workflows.

2. Create a new Data workflow within an existing or new workspace.

3. Add a new Directed Acyclic Graph (DAG) file via the user interface.

4. Save your DAG(s).

5. Use Apache Airflow monitoring tools to observe your DAG executions. In the ribbon, click on Monitor in Apache Airflow.

For additional information, please consult the product documentation . If you’re not already using Fabric capacity, consider signing up for the Microsoft Fabric free trial to evaluate this feature.
Data Pipelines
We are excited to announce a new feature in Fabric that enables you to create data pipelines to access your firewall-enabled Azure Data Lake Storage Gen2 (ADLS Gen2) accounts. This feature leverages the workspace identity to establish a secure and seamless connection between Fabric and your storage accounts.
With trusted workspace access, you can create data pipelines to your storage accounts with just a few clicks. Then you can copy data into Fabric Lakehouse and start analyzing your data with Spark, SQL, and Power BI. Trusted workspace access is available for workspaces in Fabric capacities (F64 or higher). It supports organizational accounts or service principal authentication for storage accounts.
How to use trusted workspace access in data pipelines
Create a workspace identity for your Fabric workspace. You can follow the guidelines provided in Workspace identity in Fabric .
Configure resource instance rules for the Storage account that you want to access from your Fabric workspace. Resource instance rules for Fabric workspaces can only be created through ARM templates. Follow the guidelines for configuring resource instance rules for Fabric workspaces here .
Create a data pipeline to copy data from the firewall enabled ADLS gen2 account to a Fabric Lakehouse.
To learn more about how to use trusted workspace access in data pipelines, please refer to Trusted workspace access in Fabric .
We hope you enjoy this new feature for your data integration and analytics scenarios. Please share your feedback and suggestions with us by leaving a comment here.
Introducing Blob Storage Event Triggers for Data Pipelines
A very common use case among data pipeline users in a cloud analytics solution is to trigger your pipeline when a file arrives or is deleted. We have introduced Azure Blob storage event triggers as a public preview feature in Fabric Data Factory Data Pipelines. This utilizes the Fabric Reflex alerts capability that also leverages Event Streams in Fabric to create event subscriptions to your Azure storage accounts.

Parent/Child pipeline pattern monitoring improvements
Today, in Fabric Data Factory Data Pipelines, when you call another pipeline using the Invoke Pipeline activity, the child pipeline is not visible in the monitoring view. We have made updates to the Invoke Pipeline activity so that you can view your child pipeline runs. This requires an upgrade to any pipelines that you have in Fabric that already use the current Invoke Pipeline activity. You will be prompted to upgrade when you edit your pipeline and then provide a connection to your workspace to authenticate. Another additional new feature that will light up with this invoke pipeline activity update is the ability to invoke pipeline across workspaces in Fabric.

We are excited to announce the availability of the Fabric Spark job definition activity for data pipelines. With this new activity, you will be able to run a Fabric Spark Job definition directly in your pipeline. Detailed monitoring capabilities of your Spark Job definition will be coming soon!

To learn more about this activity, read https://aka.ms/SparkJobDefinitionActivity
We are excited to announce the availability of the Azure HDInsight activity for data pipelines. The Azure HDInsight activity allows you to execute Hive queries, invoke a MapReduce program, execute Pig queries, execute a Spark program, or a Hadoop Stream program. Invoking either of the 5 activities can be done in a singular Azure HDInsight activity, and you can invoke this activity using your own or on-demand HDInsight cluster.
To learn more about this activity, read https://aka.ms/HDInsightsActivity

We are thrilled to share the new Modern Get Data experience in Data Pipeline to empower users intuitively and efficiently discover the right data, right connection info and credentials.

In the data destination, users can easily set destination by creating a new Fabric item or creating another destination or selecting existing Fabric item from OneLake data hub.

In the source tab of Copy activity, users can conveniently choose recent used connections from drop down or create a new connection using “More” option to interact with Modern Get Data experience.

Related blog posts
Microsoft fabric april 2024 update.
Welcome to the April 2024 update! This month, you’ll find many great new updates, previews, and improvements. From Shortcuts to Google Cloud Storage and S3 compatible data sources in preview, Optimistic Job Admission for Fabric Spark, and New KQL Queryset Command Bar, that’s just a glimpse into this month’s update. There’s much more to explore! … Continue reading “Microsoft Fabric April 2024 Update”
Microsoft Fabric March 2024 Update
Welcome to the March 2024 update. We have a lot of great features this month including OneLake File Explorer, Autotune Query Tuning, Test Framework for Power Query SDK in VS Code, and many more! Earn a free Microsoft Fabric certification exam! We are thrilled to announce the general availability of Exam DP-600, which leads to … Continue reading “Microsoft Fabric March 2024 Update”
Advertisement
Supported by
At Trump Trial’s Closings, Lawyers Weave Facts Into Clashing Accounts
A defense lawyer painted Donald J. Trump as the victim of unscrupulous people, but a prosecutor said Mr. Trump had directed a scheme to conceal a hush-money payment.
- Share full article

By Ben Protess , Jonah E. Bromwich and Maggie Haberman
For nearly three hours on Tuesday, Donald J. Trump’s lawyer did his level best to persuade the jury to acquit his client, wielding a scalpel to attack nearly every strand of the criminal case against the former president.
Then it was a prosecutor’s turn. Rather than using a fine blade, he swung a sledgehammer.
Throughout a marathon closing argument that nearly outlasted daylight, the prosecutor delivered a sweeping rebuke of the former president, seeking to persuade the jury of 12 New Yorkers that Mr. Trump had falsified records to cover up a sex scandal involving a porn star. The prosecutor, Joshua Steinglass, wove together witness testimony and documents to drive home the key points of the weekslong case, the first criminal trial of an American president.
Facing the judge’s 8 p.m. deadline, Mr. Steinglass raced to the wire, stopping only to take a gulp of water as the sky darkened outside the towering courtroom windows.
“Everything Mr. Trump and his cohorts did in this case was cloaked in lies,” Mr. Steinglass said as the jurors, who had been glued to most of his presentation, began to fidget in their seats.
By the time the prosecutor finished, the courthouse had closed to other business and the traffic on Lower Manhattan streets had slowed. More than 10 hours after Mr. Trump’s lawyer began the day by calling the case “absurd” and “preposterous,” Mr. Steinglass finally had the final word.
The disparate strategies — Mr. Steinglass’s closing was more than twice as long as the defense’s — reflected their separate tasks. The defense needed only to establish reasonable doubt, while the prosecution needed to persuade the jury to accept a narrative that, Mr. Steinglass argued, could lead to only one ending: guilty on all counts.

The Donald Trump Indictment, Annotated
The indictment unveiled in April 2023 centers on a hush-money deal with a porn star, but a related document alleges a broader scheme to protect Donald J. Trump’s 2016 campaign.
The closing arguments were each side’s last chance to pitch their case to the jury — and frame the facts to their advantage — as they drew from a deep well of evidence: testimony from 22 witnesses, reams of emails and a surreptitious recording of Mr. Trump coordinating a secret payoff.
Starting Wednesday, the power will shift from the lawyers at the lectern to the jurors in the deliberation room. The jury could take anywhere from a few hours to weeks to reach a verdict while Mr. Trump, the presumptive Republican nominee for president, campaigns to reclaim the White House.
Tuesday began with Mr. Trump’s lawyer, Todd Blanche, commanding the spotlight.
He aimed attacks at the prosecution’s bedrock contention that the records were false, and that Mr. Trump was responsible for creating them. But Mr. Blanche saved his harshest criticism for the prosecution’s star witness, Michael D. Cohen, Mr. Trump’s former fixer. It was he who paid off the porn star, Stormy Daniels, in a hush-money deal in the final days of the 2016 presidential campaign.
Portraying Mr. Cohen as a greedy liar bent on revenge, Mr. Blanche assailed his credibility and claimed that the defense had caught him testifying falsely about Mr. Trump’s knowledge of the deal.
“It was a lie,” yelled Mr. Blanche, adding that it was “per-jur-y,” emphasizing each syllable. He accused the prosecution of being “perfectly happy” to have their star witness lie to jurors.
After the prosecution successfully objected, Mr. Blanche pivoted to a medley of sports-themed insults, calling Mr. Cohen “literally like the M.V.P. of liars” and “the G.L.O.A.T.,” or the “greatest liar of all time.”
In a blistering rebuttal, Mr. Steinglass accused Mr. Trump of “chutzpah,” noting that Mr. Cohen had told many of his lies to protect the former president. He also said that many other witnesses for the prosecution — the defense called only two — remained loyal to Mr. Trump, including his longtime friend, David Pecker, the former publisher of The National Enquirer. Mr. Pecker, Mr. Steinglass argued, had “absolutely no reason to lie here,” and yet, “his testimony is utterly devastating.”
The prosecutor also defended Mr. Cohen, who years ago pleaded guilty to federal charges for his role in the hush-money arrangement, observing that he “is understandably angry that, to date, he’s the only one who’s paid the price for his role in this conspiracy.” But, he told jurors, “I’m not asking you to feel bad for Michael Cohen — he made his bed.”
Before Mr. Steinglass stepped to the lectern, Mr. Blanche’s argument had emphasized Mr. Cohen’s importance to Mr. Trump even as he impugned Mr. Cohen’s character. And when Mr. Blanche pleaded with the jury not to send Mr. Trump to prison based on Mr. Cohen’s word — even though a prison sentence would not be mandatory — the judge admonished him stingingly.
“Making a comment like that is highly inappropriate,” the judge, Juan M. Merchan, scolded. “It is simply not allowed,” he added, noting that Mr. Blanche was a former prosecutor, and should know better. “It’s hard for me to imagine how that was accidental.”

The Links Between Trump and 3 Hush-Money Deals
Here’s how key figures involved in making hush-money payoffs on behalf of Donald J. Trump are connected.
To persuade jurors, the prosecution and defense outlined dueling versions of the same underlying story: Mr. Trump’s fixer, Mr. Cohen, struck a hush-money deal with a porn star in the waning days of the 2016 presidential campaign. He did so to silence her story of a sexual encounter with Mr. Trump.
Nearly everything else is in dispute.
Mr. Steinglass argued that Mr. Trump had directed the hush-money deal, reimbursed Mr. Cohen and then falsified records to cover up the whole thing. Mr. Blanche countered that Mr. Cohen was a rogue actor who struck the deal on his own and was repaid for unrelated legitimate legal expenses. He argued that the records in question were accurate, and that Mr. Trump did not have sex with Ms. Daniels, whom he cast as an extortionist.
Mr. Steinglass scoffed at that, while noting, “extortion is not a defense for falsifying business records.”
Mr. Trump, who faces probation or as long as four years in prison, is charged with 34 felony counts of falsifying business records, one for each purportedly bogus document: 11 invoices from Mr. Cohen, 11 checks to him and 12 entries in Mr. Trump’s ledger.

Who Are Key Players in the Trump Manhattan Criminal Trial?
The first criminal trial of former President Donald J. Trump is underway. Take a closer look at central figures related to the case.
The records portrayed the payments to Mr. Cohen — $420,000 spread throughout 2017 — as ordinary legal expenses that arose from a retainer agreement.
But Mr. Steinglass argued that there was no such retainer or legal expense. And the $420,000, he said, included repayment for the hush money, an overdue bonus and another debt Mr. Trump owed Mr. Cohen. To top it off, Mr. Trump covered Mr. Cohen’s tax bill on the influx of cash.
It was a lot of money, Mr. Steinglass acknowledged, but to the president-elect, “It was worth it to hide the truth about what this money was really for.”
Mr. Blanche tried to undercut that argument, articulating a novel interpretation of the evidence: that the documents weren’t false. Telling the jury that Mr. Cohen was Mr. Trump’s personal lawyer and in fact performed legal work for Mr. Trump in 2017 while being paid, he said that “there were still outstanding matters they were dealing with.”
Mr. Blanche also claimed that Mr. Trump and Mr. Cohen actually had a retainer — just not a written one.
“The records were not false, and there was no intent to defraud,” Mr. Blanche contended.
Mr. Steinglass cast that argument as absurd. Not only was there no written retainer agreement, he noted, but the payouts to Mr. Cohen clearly included reimbursement for the hush money. Citing one of the most damning pieces of evidence, Mr. Steinglass said that Mr. Trump’s chief financial officer had jotted notes about the arrangement on a copy of Mr. Cohen’s bank statement — the very one showing that Mr. Cohen had paid off Ms. Daniels.
Mr. Steinglass referred to these handwritten notes as “the smoking guns” of the prosecution’s case, saying they “completely blow out of the water the claim the money paid to Cohen” was for legal services.
Even Mr. Trump has admitted he repaid Mr. Cohen for the hush money, Mr. Steinglass noted, citing previous disclosures that appeared to contradict the former president’s own legal defense.
Perhaps anticipating this argument, Mr. Blanche offered the jury an alternative: Blame Mr. Trump’s employees.
“The invoices were all submitted by Michael Cohen,” he noted, while other Trump Organization employees handled the ledger entries.
The entries, he said, were logical and rote, explaining that the company’s software provided a drop-down menu where one of the few options is “legal expense.” And because Mr. Cohen was a lawyer, he said, this was the obvious choice.
But Mr. Blanche strained to explain the checks, which are particularly problematic for Mr. Trump. While president, he personally signed nine of them, each referring to the retainer.
Mr. Blanche argued that Mr. Trump had signed the checks without paying them much mind — “he was running the country,” Mr. Blanche reminded the jury — and claimed that there was “not a shred of evidence” proving that Mr. Trump was involved in the minutiae of paying Mr. Cohen and drafting the records.
Yet throughout the trial, the prosecution has portrayed Mr. Trump as a penny-pinching micromanager, an image he has burnished in his own books. In fact, Mr. Trump titled one chapter “How to Pinch Pennies.” In another, he wrote, “always question invoices.”
Mr. Steinglass called it “crazy” to think that Mr. Trump would afford his employees broad authority over his money and his records.
He also referred to a crucial meeting in which, Mr. Cohen said, Mr. Trump had blessed the plan to falsify the records.
Mr. Cohen testified that it had occurred in Trump Tower in January 2017, just days before Mr. Trump was sworn in as president. Mr. Trump, Mr. Cohen told the jury, approved of the arrangement and knew that the records were false.
Ultimately, Mr. Steinglass argued, the case comes down to “a conspiracy and a coverup,” a plot that began in summer 2015, when Mr. Trump had summoned Mr. Cohen and Mr. Pecker, the tabloid publisher, to Trump Tower. They met, Mr. Steinglass said, to hatch a scheme to suppress negative stories about Mr. Trump.
The stories focused on Mr. Trump’s sex life, not with his wife, but with a former Playboy model and with the porn star, Ms. Daniels.
Calling The National Enquirer “a covert arm” of the 2016 Trump campaign, Mr. Steinglass noted that the supermarket tabloid had bought and buried the model’s story of an affair with Mr. Trump. When it was time to settle up with Mr. Pecker, Mr. Cohen spoke to Mr. Trump about the repayment and made a secret recording of their discussion. Mr. Steinglass played the tape for the jury, in which Mr. Trump instructed his fixer to “pay in cash.”
Attacking the defense’s claims that the recording was somehow doctored, Mr. Steinglass argued that Mr. Trump’s lawyers were “desperate” to undercut the recording, because it was “nothing short of jaw-dropping.”
And although Mr. Pecker later refused to pay Ms. Daniels to keep quiet, he notified Mr. Cohen that she was shopping her story in the final stretch of the campaign.
“This scheme, cooked up by these men, at this time, could very well be what got President Trump elected,” Mr. Steinglass said.
Reporting was contributed by Kate Christobek , Jesse McKinley , Michael Gold , Wesley Parnell and Susanne Craig .
Ben Protess is an investigative reporter at The Times, writing about public corruption. He has been covering the various criminal investigations into former President Trump and his allies. More about Ben Protess
Jonah E. Bromwich covers criminal justice in New York, with a focus on the Manhattan district attorney’s office and state criminal courts in Manhattan. More about Jonah E. Bromwich
Maggie Haberman is a senior political correspondent reporting on the 2024 presidential campaign, down ballot races across the country and the investigations into former President Donald J. Trump. More about Maggie Haberman
Our Coverage of the Trump Hush-Money Trial
News and Analysis
With Donald Trump’s personal freedom at risk and his political fortunes in the balance, lawyers on both sides of his criminal trial made their closing arguments to the 12 jurors who will decide Trump’s fate.
The actor Robert De Niro, speaking on behalf of the Biden campaign outside the Manhattan courthouse where Trump’s trial is being held, declared in an off-script moment that Trump should go to jail .
As Trump awaits the conclusion of his trial, the former president is leaning into an outlaw image , aligning himself with fellow defendants and people convicted of crimes.
More on the Trump Investigations
Case Tracker: Trump is facing multiple criminal cases related to his business and political activities. Follow the latest developments .
What if Trump Is Convicted?: Will any of the proceedings hinder Trump’s presidential campaign? Here is what we know, and what we don’t know .
Election Interference Cases: In Arizona , Georgia , Michigan and Nevada , several allies of Trump are facing charges related to efforts to keep him in power after he lost in 2020.
Trump on Trial Newsletter: Sign up here to get the latest news and analysis on the cases in New York, Florida, Georgia and Washington, D.C.
IMAGES
VIDEO
COMMENTS
Apply the 10-20-30 rule. Apply the 10-20-30 presentation rule and keep it short, sweet and impactful! Stick to ten slides, deliver your presentation within 20 minutes and use a 30-point font to ensure clarity and focus. Less is more, and your audience will thank you for it! 9. Implement the 5-5-5 rule. Simplicity is key.
Presentation logic is the core of the application. The business logic layer provides a foundation for the user to interact with the application. It also contains all the business rules for the server. By contrast, presentation logic is the underlying code that determines how the data is presented. In contrast to business rules, presentation ...
This sequence consists of five key steps: Getting your audience's attention - Use an interesting "hook" or opening point, such as a shocking statistic. Be provocative and stimulating, not boring and unemotional. Creating a need - Convince the audience there's a problem, explain how it affects them.
Length and Structure. The main part should make up about 70% of the presentation and also include a clear structure. Explain your ideas in detail and build them up logically. It should be organized chronologically, by priority or by topic. There should be a smooth transition between the individual issues.
This clarifies the overall purpose of your talk and reinforces your reason for being there. Follow these steps: Signal that it's nearly the end of your presentation, for example, "As we wrap up/as we wind down the talk…". Restate the topic and purpose of your presentation - "In this speech I wanted to compare…". 5.
Ergo . . . . When it comes to creating your presentation, you can use verbal and visual cues to denote logical structure. To help your audience hear your logic, use words and phrases like "first," "second" and "third," "because of A, B and C" or "therefore," "so then," and "it follows.". It may not make for beautiful ...
Presentation skills are the abilities and qualities necessary for creating and delivering a compelling presentation that effectively communicates information and ideas. They encompass what you say, how you structure it, and the materials you include to support what you say, such as slides, videos, or images. You'll make presentations at various ...
The presentation follows a logical sequence starting with an introduction, main points, and then conclusions. This is what this article has focused on, as it's the most straightforward method and tends to be very clear for the audience. ... You explain the problem (+ its importance and impact) and then provide a solution that motivates the ...
Presentation logic. In software development, presentation logic is concerned with how business objects are displayed to users of the software, e.g. the choice between a pop-up screen and a drop-down menu. [1] The separation of business logic from presentation logic is an important concern for software development and an instance of the ...
There are three key elements of good presentations: Content, Organization, Delivery. Your audience needs interesting and appropriate content in order to pay attention, especially at the start of a presentation. Logical organization helps retain your audience's attention - they need to be able to follow your train of thought and predict ...
Presentations usually aim to either explain, persuade or inspire - sometimes with elements of all three. Your aim will determine your structure. This will be the backbone of your presentation, giving it strength and direction. Explain in a logical sequence. When you explain, you add to people's knowledge to build the key idea.
Follow these steps to win friends and influence people within your audience. 1. Decide on a single ask. The key to convincing your audience is to first identify the singular point you want to make. A good persuasive presentation will focus on one specific and easy-to-understand proposition. Even if that point is part of a broader initiative, it ...
The conventional method for presenting a PowerPoint presentation entails reflecting upon the facts and fine details to draw the audience towards a conclusion. This can result in a lengthy Q&A session at the end of the presentation, where the audience might appear confused, unsatisfied, and at times, feel manipulated into being led towards a conclusion of the presenter's choosing.
Organizing the Presentation. Organize the content of your presentation in a logical sequence based on the outline you prepared. No matter how you decide to organize your presentation, keep the audience engaged to better help them remember the content. You can do this by asking them questions or having them share experiences related to the topic.
Logos - The Logical Appeal. The word "logic" is derived from logos. Logos is to appeal to logic by relying on the audience's intelligence and offering evidence in support of your argument. Logos also develops ethos because the information makes you look knowledgeable. Ask the following questions to decide if you have achieved logos:
Creating a presentation logically means organizing the content in order to maximize audience understanding. Because our brains work in similar ways, there are definitely techniques to build your next presentation to enhance memory and engagement. Step One: Start Visually. Visual learning is one of the best ways to ignite the synapses in brain ...
7.4 Outlining Your Presentation. Linda Macdonald. For your presentation to be as effective as possible, it needs to be organized into logical patterns. Information will need to be presented in a way your audience can understand. This is especially true if you already know a great deal about your topic.
Sales teams often use persuasive presentations to win clients. 5. Problem-solution presentation. A problem-solution presentation aims to aid in decision-making efforts by describing a problem or a challenge and presenting an audience with a solution or a set of solutions.
"Market logic" centered on the intended users of software, and, in the case of presentation software, focused to the communication practices of white-collar workers in the United States (and ...
The presentation tier and the data tier cannot communicate directly with one another. Tier versus layer. In discussions of three-tier architecture, layer is often used interchangeably - and mistakenly - for tier, as in 'presentation layer' or 'business logic layer'. They aren't the same.
A logical presentation explains its necessary topics with reasons. In research presenta‐ ... To explain a presentation's topics, each one must be connected with reasons. To support logically organized presentations for computer science researches, both fundamental and additional topics must be determined as well as their relations.
The presentation tier. The presentation tier is the user interface. This is what the software user sees and interacts with. This is where they enter the needed information. This tier also acts as a go-between for the data tier and the user, passing on the user's different actions to the logic tier. Just imagine surfing on your favorite website.
Logic is the study of correct reasoning.It includes both formal and informal logic.Formal logic is the study of deductively valid inferences or logical truths.It examines how conclusions follow from premises due to the structure of arguments alone, independent of their topic and content. Informal logic is associated with informal fallacies, critical thinking, and argumentation theory.
Copilot to write and explain DAX queries in DAX query view updates DAX query view includes an inline Fabric Copilot to write and explain DAX queries, which remains in public preview. This month we have made the following updates. Run the DAX query before you keep it. Previously the Run button was disabled until the generated DAX query was ...
Welcome to the May 2024 update. Here are a few, select highlights of the many we have for Fabric. You can now ask Copilot questions about data in your model, Model Explorer and authoring calculation groups in Power BI desktop is now generally available, and Real-Time Intelligence provides a complete end-to-end solution for ingesting, processing, analyzing, visualizing, monitoring, and acting ...
The first criminal trial of former President Donald J. Trump is underway. Take a closer look at central figures related to the case. The records portrayed the payments to Mr. Cohen — $420,000 ...