How to Record Audio on PowerPoint – Windows & Mac Instructions
Table of Contents
Recording your PowerPoint presentation as a video can make a difference when pitching a client , internally, or transforming your slides into an online course.
Now that Microsoft added a recording function directly into PowerPoint, it has become easier to create a video out of any presentation.
All you need is to start recording yourself narrating.
In this tutorial, we will be taking you through the step-by-step process of recording audio on PowerPoint for both Windows & Mac .

Why Record PowerPoint Presentations?
PowerPoint is a great tool to give live presentations, but there are cases where you won’t be able to present live.
While you could send a PPT file or PDF export, a presentation recording allows you to capture the sentiment of the topic, and helps connect with your audience.
Videos are more engaging than presentations, and especially when giving a lecture or training online, video is a better solution.
Let’s hit that record button and go directly to the instructions:
Recording a PowerPoint Presentation on Windows
Windows is the default option for PowerPoint, follow the instructions below to turn your slides into video. All you need to do is find the Record tab and follow the step-by-step instructions to create a video presentation in no time.
Go to the Record Tab
Located in your toolbar, the record tab includes all the options for recording a video inside the software. Click on it to bring up all the options for recording a video.

Record slide show
Now, you need to start the audio recording and follow the steps to record your PowerPoint slides to turn them into video.
Start the Recording
Choose whether to start the recording from the beginning or a specific slide. This will bring you to the full-screen recording mode.

Be sure to check all the recording options including the camera, microphone, narration, and letter size of the transcription before you start recording.
Start recording
Click on the red circle to start recording. Wait for the countdown and start presenting (or narrating).

Tip: Replay the video playback and ensure the recording is good enough before saving. You may need to delete and reshoot it.
Use the Cameo feature
A recent addition to Microsoft PowerPoint is the Cameo feature where you can also record video from your webcam directly into the presentation. Read more on Microsoft’s website about it.
On the presentation, all you need to do is click on the camera icon 📹 while in presenting mode.
Control the presentation, timing, and transitions
While in presenting mode, you can control the transition between the slides by clicking the next slide button. You will also see the time you are recording to control your timing between slides.
Keep an eye on the timer.
Export the Video
On Windows, there is the Export option in your toolbar to save the recording as a video. Alternatively, you can go through the main menu, but it’s easier after you hit stop to just export directly.

Choose a destination for your video or audio file before hitting the button for “Export Video”.

Customize Export
Choose “customize export” and select your preferred setting for the video file. Here is where you can select your preferred quality, dimensions, and more.
Then, click “Create Video” to get your video file.

Edit the Recording
For longer video recordings, it’s a good idea to do some video editing, trim pauses, and make your presentation look more professional. You may want to add transitions or sounds as well.
Especially if you are creating an online course or training, your presentation will look more professional after editing. Consider a professional video editor to help you out.
Check out our choices for video training tools to edit your videos.
Upload to your LMS
For video training or courses, you will need somewhere to host and deliver your videos to your learners.
LearnWorlds is the top online course platform , you can easily upload your video as a video learning unit .
You can try LearnWorlds a 30-day free trial:
Your professional looking Academy in a few clicks
Recording a powerpoint presentation on mac.
While PowerPoint is a Microsoft software, many Mac users download and use it on their computers as well. With more than 40k reviews on the app store , PowerPoint is a very popular Keynote alternative.
Go to the Record tab
PowerPoint on Mac has a dedicated tab for recording. Find it at the right side of your toolbar.

Record the Presentation
The next step for recording your slide show is to click on the record icon on the left. Click on the icon with the red circle to bring up the full-screen presenting mode.

Control the presentation, slide transition & timing
You can choose whether to show your camera, mute the microphone, use the highlighter, or change slides while narrating.
You can monitor the time you spend recording, and you can record, pause, or stop the recording at any time. The transcript helps to record the narration by reading while recording.
When you press record, wait for the countdown timer and then start speaking.

Cameo on Mac
You can use the Cameo feature to add a video recording of yourself to the presentation.
Use the audio button icon if you just want to insert audio. You can play the audio while presenting a slide live, instead of recording a voice-over.

Replay the video to ensure it was recorded correctly
Before you end the slideshow (End Show option), watch the playback to ensure you have a high-quality recording.
Export Video File
Mac’s “File” toolbar is hidden, so you need to move your cursor out of bounds on the top of your screen to find the “Export…” option.
Choose “File” above the toolbar, and then “Export…”

Choose Destination
Next, choose a destination for your video file.

Customize Export: Compression, Format, Quality, TImings & Narration
Choose the format (MP4 or MOV) instead of a PowerPoint file, the compression, and presentation quality. Be sure to customize the settings to your liking.
Be sure to trim pauses, and do some editing of the video. This is especially important for longer videos for a more professional output. Consider hiring a video editor for better editing.
LearnWorlds is our recommended best learning management system , you can easily upload your video as a course or any other training material. It comes with everything you need to create and sell online education out-of-the-box.
Additional Tips for Recording Audio on Powerpoint
After many meetings, recordings, and live webinars I have hosted over the years, I came to understand the huge importance of high-quality audio in any live interaction,
Before you start recording, be sure you are ready with the right video lighting setup and microphone setup.
You will need to be ready:
- A good microphone (depends on your budget) – and test the sound quality
- Reduce external noise (close windows, have sound absorbents like audio sponges in the room, etc.)
- Prepare your speaking notes or transcript
- Prepare for multiple takes (recordings)
- Practice before-hand
Additionally, be sure your face is well-lit, and for more professional setups, you may need to buy lights for your video recordings.
Recording your presentation comes with many advantages, like making it more engaging and getting to be “present” even asynchronously to your audience.
It makes a huge difference, especially when taking your training material from offline presentations into online courses!
Frequently Asked Questions (FAQs)
How do i record a powerpoint presentation as a video.
PowerPoint includes the built-in ability to record video in slideshow mode and record both audio and your webcam for a more personalized experience.
Can you record a PowerPoint in presentation mode?
Yes, there is a tab dedicated to recording videos in PowerPoint without any additional plugins.
Can you video record yourself on PowerPoint?
Yes, PowerPoint allows you to use the Cameo feature to either add video to your slides or record the presentation while you narrate it.
How do I convert a PPT slideshow into a video?
You will need to record a narration on top of your presentation. You can skip the narration and just record the slides with a transition to create a video.
Can PowerPoint record computer audio?
Yes, you can record audio from your microphone.
How do you add audio and video to a PowerPoint presentation?
You can either record and insert it at that moment or import video and audio from your computer to PowerPoint by clicking on the “Insert” tab.

Nick Malekos
Nick Malekos is a Senior Digital Marketer in LearnWorlds. He is a results based and well-rounded Digital Marketer with years of experience in the education industry, writer and digital literacy trainer.


Apr 20, 2023
Record customized camera feeds with cameo in PowerPoint for Mac
Ridhima Gupta
- Add our blog to your RSS feed reader" href="/rss/blog.xml" data-bi-name="RSS Subscription" data-bi-id="rss_feed" data-bi-bhvr="120" data-bi-socchn="RSSSubscription" title="Microsoft 365 Insider Blog RSS" target="blank" class="d-inline-block">
Hey, Office Insiders! My name is Ridhima Gupta, and I’m a Product Manager on the Office Video team. Previously, we let you know about adding a live camera feed with cameo in PowerPoint for Mac . Today, we’re excited to announce that cameo is now available when recording slide shows, allowing you to personalize your camera feed for recorded video stories in PowerPoint for Mac.
Record customized camera feed with cameo
You can now make the video recording of your presentation even more personal and create immersive stories. With cameo supported when recording slide shows in PowerPoint for Mac, you can customize your camera feed’s appearance before you record. You can apply your favorite camera styles, shapes, and sizes to cameo, and choose the perfect place on the slide for your camera feed.
How it works
- Open a presentation that you want to record and share.
- On the Recording tab, select Cameo to add your custom camera feed to the slides.

- To review your video, click the Play preview button.
- If you’re not satisfied, select the Delete button, and then select the Record button to re-record your video. Don’t worry, your camera will appear just as you styled 😊
- When you’re happy with your recording, select Export to export your presentation as a video.

Tips and tricks
- Impress your audience with creative storytelling with different text and camera layouts, such as adding text in front or behind your camera feed.
- Create an engaging story using the power of transitions when moving from slide to slide by clicking the Transitions tab, and then selecting the one you want to use —such as Morph, Fade, and Wipe.

- Find the best place on your slide for your camera feed and get helpful recommendations by selecting Design > Designer .
Requirements
In order to use this feature, you must
- Use a computer equipped with a webcam and microphone.
- Have granted camera permissions to PowerPoint in your computer’s privacy settings.
Availability
This feature is rolling out to Insiders running Beta Channel Version 16.72 (Build 23032701) or later.
Don’t have it yet? It’s probably us, not you.
Features are released over some time to ensure things are working smoothly. We highlight features that you may not have because they’re slowly releasing to larger numbers of Insiders. Sometimes we remove elements to further improve them based on your feedback. Although this is rare, we also reserve the option to pull a feature entirely out of the product, even if you, as an Insider, have had the opportunity to try it.
We want to hear from you! Please click Help > Feedback to send us your thoughts about this feature.
Sorry, JavaScript must be enabled to use this app.
- Irresistible Tech Gifts for That Special Dad
- Killer Smartphone Deals We Love
How to Get PowerPoint on a Mac
Get the widely used presentation tool
:max_bytes(150000):strip_icc():format(webp)/SamCostello-d7fcf106ec2048ccb06d1e2190b3396d.jpg "how to record a powerpoint presentation on mac")
- Ithaca College
:max_bytes(150000):strip_icc():format(webp)/ryanperiansquare-de5f69cde760457facb17deac949263e-180a645bf10845498a859fbbcda36d46.jpg "how to record a powerpoint presentation on mac")
- Western Governors University
What to Know
- From the Mac App Store: Apple Menu > App Store > search for PowerPoint > Get > Install > enter Apple ID if prompted > Open .
- PowerPoint requires a subscription from Microsoft. You can sign up via In-App Purchase or at the Microsoft website.
- Keynote, Apple's alternative to PowerPoint, comes pre-installed on new Macs (and can be downloaded from the Mac App Store).
This article explains how to get PowerPoint on Mac, its requirements—including a subscription—and some free alternatives available on the Mac.
How Do I Get PowerPoint on Mac?
Getting PowerPoint on your Mac is very easy. Just a few clicks, and you'll be ready to start making slides and building presentations. Here's what to do:
Open the Mac App Store by going to the Apple menu > App Store or the Applications folder > App Store .
You can also download PowerPoint directly from Microsoft , but these instructions focus on the Mac App Store.
Search for PowerPoint .
On the search results screen, click Get .
Click Install .
Enter your Apple ID password when prompted.
When the download is finished, click Open to launch PowerPoint.
Once you've opened PowerPoint, you'll need to sign into your Microsoft account or use a free trial.
Is PowerPoint Free for the Mac?
PowerPoint is not free on the Mac (or on Windows, for that matter). Microsoft offers a free, 30-day trial after you download PowerPoint. Once the free trial expires, you need to pay to keep using the app. Options include a one-time purchase price or a monthly or annual subscription , which provides cloud storage features and ongoing technical support. You can subscribe through Microsoft's website or use in-app purchases via your Apple ID.
Do Macs Come With PowerPoint?
No. To get PowerPoint on your Mac, you need to download and install it using the steps from the first section of this article (or, as noted before, directly from Microsoft).
What Is the Mac Version of PowerPoint?
While PowerPoint may be the most well-known program for making slides and creating presentations, it's far from the only one. Your Mac probably came with one of the alternatives pre-installed.
Apple makes a program called Keynote which is a direct competitor to PowerPoint. It offers all of the core features of PowerPoint—creating slides and presentations, animations, templates, presenter mode, etc. It integrates tightly with Apple's other software and services like iCloud.
Keynote comes pre-installed for free on all modern Macs. It's likely in your Applications folder as you read this. If it's not, and if your Mac and version of the macOS are compatible with it, you can download it for free from the Mac App Store by searching for "Keynote."
Need to make slides and want to avoid both PowerPoint and Keynote? There are many other PowerPoint alternatives , but one place to start is Google Slides , which is free, web-based, and integrates with your Google account and other Google productivity tools.
To print PowerPoint slides with Notes on a Mac, open your presentation and select Print . In the Print dialog box, select Show Details . In the Layout box, select Notes . Configure the rest of your printing options and select Print .
The easiest way to record a voiceover in PowerPoint on a Mac is to record by slide. Select the slide where you want to add the narration, then select Insert from the menu bar and click Audio > Record Audio . Enter a name for the narration, select Record , read your script, and select Stop when you're finished recording.
To convert PowerPoint to video on a Mac, open the presentation you want to save and select File > Export . In the export window, next to File Format , select a file format option, such as MP4 or MOV . Choose your video quality, choose whether you want to include narrations, adjust timing, and select Export .
Get the Latest Tech News Delivered Every Day
- How to Update a Mac
- How to Use WhatsApp on a Mac
- How to Use Copilot in Powerpoint
- How to Use Microsoft's Free PowerPoint Viewers
- The Best Free Productivity Apps for the iPad
- 4 Ways of Transferring Files From Android to Mac
- How to Install Mac OS on PC
- What Is Microsoft PowerPoint and How Do I Use It?
- The 10 Best Word Processing Apps for iPad in 2024
- What Is Microsoft Word for Mac?
- The 20 Best Mac Apps of 2024
- How to Fix 'Cannot Be Opened Because the Developer Cannot be Verified' Error on Mac
- How to Transfer Files Between an iPhone and a Mac
- How to Convert PowerPoint to Video
- How to Update PowerPoint on Windows and Mac
- What Is an Animation in Presentation Software?
Microsoft 365 - PowerPoint for Mac - Creating a Screen Recording with Audio
- Campus Technology Support
Record your screen in PowerPoint
You can record your computer screen and related audio, and then embed it in your PowerPoint slide—or you can save it as a separate file.

Open the slide that you want to put the screen recording on.
On the Insert tab of the ribbon, select Screen Recording .

Tip: PowerPoint automatically records the audio and the mouse pointer, so by default those options are selected on the control dock. To turn them off, deselect Audio and Record Pointer.
Select Record . Use Pause as needed and Stop when you're done.
Note: Unless you pin the Control Dock to the screen, it will slide up into the margin while you record. To make the unpinned Control Dock reappear, point the mouse cursor at the top of the screen.
Your video is added to the slide. Right-click the video frame, select the Start icon and pick how you want your video to start: In Click Sequence , Automatically , or When Clicked On .
You can change the look of the video by right-clicking the video frame, select the Style icon, and pick another shape.
Save your screen recording as a separate file
Right-click the video frame and select Save Media as .
In the Save Media as box, choose a folder, and in the File name box, type a name.
Select Save.
Trim your video
Right-click the video frame and select Trim .
To determine where you want to trim your video footage, in the Trim Video box, select Play .
When you reach the point where you want to make the cut, select Pause . Use the Next Frame and Previous Frame buttons to specify precise timing.
Do one or more of the following:
To trim the beginning of the clip, select the start point (shown in the image below as a green marker). When you see the two-headed arrow, drag the arrow to the desired starting position for the video.

To trim the end of the clip, click the end point (shown in the image above as a red marker). When you see the two-headed arrow, drag the arrow to the desired ending position for the video.
Select OK .

Need more help?
Want more options.
Explore subscription benefits, browse training courses, learn how to secure your device, and more.

Microsoft 365 subscription benefits

Microsoft 365 training

Microsoft security

Accessibility center
Communities help you ask and answer questions, give feedback, and hear from experts with rich knowledge.

Ask the Microsoft Community

Microsoft Tech Community

Windows Insiders
Microsoft 365 Insiders
Was this information helpful?
Thank you for your feedback.
- DemoCreator > Easy video recorder and editor for PC & Mac
- DemoAir > Online screen recording tool for everyone
- Visual Assets > NEW Creative video/audio effects for DemoCreator
- Virbo > Easily convert text into spokesperson videos
- Screen Recorder >
- Webcam Recorder >
- Game Recorder > HOT
- Virtual Avatar Recorder > NEW
- Video Presentation >
- Video Editor >
- Cut/Merge Video >
- Resize Video >
- Change Video Speed
- Audio Editing
- Online Screen Recorder >
- Online Voice Recorder >
- Online Webpage Screenshot >
- Screen Recorder for Chrome >
- Online Video Presentation Maker >
- HOT Video Editor > Take your videos to the next level
- NEW DemoCreator > Easily make a visual video presentation
- AI Subtitle Generator > HOT
- AI Voice Generator > HOT
- AI Denoise >
- AI Voice Changer >
- AI Beauty Filter > NEW
- AI Video Object Remover > NEW
- AI Background Remover >
- AI Teleprompter >
- AI Video >
- AI Voice >
- AI News >
- Hot Spot >
- Best AI Avatar Generators >
- AI Audio to Video >
- AI Virtual Friends Apps >
- Best AI Face Generators >
- Online Course >
- PPT Recording >
- Demo Video >
- Game Recording >
- Record on Windows >
- Record on Mac >
- Record on Mobile >
- Game Recording >
- YouTube Videos >
- Creative Effects >
- Audio Editing >
- Video Conference >
- Zoom Recording >
- Remote Work >
- Demo Video Tips >
- Online Class > NEW
- Teacher Skills >
- Elearning Tips >
- Lectures Recording >
- HOT DemoCreator Camp Take your videos to the next level

- User Guide >
- Video Tutorial >
- Tech Specs >
- What's New >
- Download Buy Now Download Buy Now Download Buy Now
- How To Record a Powerpoint Presentation With Audio and Video on Mac

- How to Record Webcam on Windows and Mac
- 6 Best Ways to Take a Scrolling Screenshot in Windows 11 or 10
- Top Tips on How to Record Video on Windows 11
- How to Use a Screen Video Recorder in Windows 7
- Steps on How to Record Videos on Windows 8
- 7 Most Efficient Screen Video Recorders for Windows 10
- 10 Best Free Screen Recorders for PC To Capture Every Moment
- 10 Best Voice Recorder Apps for PC To Enhance Your Recording
- Top Offline Screen Recorder for Mac OS (Free & Paid)
- 10 Best GIF Recorders for Mac
- 10 Best Screen Recorders for Mac [2024]
- How To Record a YouTube Video on a Mac – All Methods
- The Ultimate Race: Top 10 Skype Call Recorders for Mac
- Screen Recorder App for PC, Android, iPhone, and Chrome
- Top 9 Best Android Apps for Screen Recording
- 6 Best Free Webcam Recorders
- Top 8 Secret Screen Recorder Apps in 2023
- How To Record Console Gameplay
- How to Take screenshots in Windows 11
- How to Record YouTube Videos on Your PC [Only 5 Steps]
- How to Record a Zoom Meeting
- Record Facecam on Windows 11 – Top 8 Tools to Try on Windows 11
- Best Webcam Recorder with Facial Beauty Function
- Top 10 Audio Recording Software for Mac
- How to Record Screen on Mac with Audio
- Top Online Sound Recorders
- Audio Extractor: 8 Best Software to Extract Audio from Video
- 6 Best Ways to Record YouTube Audio [Easy]
- 2 Best Ways to Record Audio in Windows 11
- Top 2 Methods for Screen Recording With Audio on Windows 10
- Windows 11 Screen Recorder
- Best OBS Settings for Low-End PC
- Best Windows Game Capture Programs
- 12 Best Android Screen Recorders with Internal Audio
- 10 Best 60 FPS Screen Recorders for Windows/Mac
- Top14 HD 1080P Screen Recorders for PC
- Best Facial Recognition Software
- How To Record Audio in PowerPoint on Mac - Full Guide
Are you a teacher wanting to make remote learning fun for your students? Or a business person needing to give powerful virtual presentations? Recording PowerPoint presentations with audio and video on a Mac can help.
In this tutorial, we will show you how to record PowerPoint presentations with audio and video on a Mac . This will help you create interesting lessons, meetings, or ads that grab your audience's attention. Whether you're running an online workshop or showing off a product, learning this skill will boost your content.
How To Record a PowerPoint Presentation on Mac With Audio and Video Using DemoCreator
The best way to record a video presentation on Mac is by using powerful third-party software solutions. We advise you to try Wondershare DemoCreator to take your recording experience to the next level.
It's a powerful, all-in-one solution that allows you to record and edit your videos and supports up to 4K/8K recordings and 120 FPS, making it suitable for your presentations. Moreover, you can discover the most amazing AI-powered features, such as AI teleprompter, virtual avatar , AI background remover, to elevate your experience and bring your content to life.
Another useful feature that can elevate your video presentation is annotations, where you can draw and interact with the creation during the recording process.
To use the tool, head to the official Wondershare DemoCreator website, download the tool, and follow the steps below:

How To Record a Presentation on Mac Directly in PowerPoint
PowerPoint is also a universal tool that allows you to record your presentations with audio and video on a Mac device. However, you must have a licensed Office account to access this feature. If you do, follow the steps below to learn how to record your creations:
- Open the presentation you want to record.

- Next, select the recording area.

The program will start recording, and you can begin your presentation journey. Beware that the program won't catch any audio elements during transitions, so ensure you don't talk during that period to avoid mistakes.
We don't recommend using this feature to record your PowerPoint presentations because the outcome may be buggy. Moreover, the videos you play within the presentation may be lower in quality, and the audio sequels may also encounter issues.
If you need to record a presentation for professional purposes, you may need more powerful solutions, such as the one above.
Another reason why you should avoid this solution is because it doesn't offer customization features. You cannot create unique recordings, and the journey may be more overwhelming than with third-party software solutions.
- Record screen, audio, and webcam simultaneously
- Various annotation tools to emphasize important points
- AI teleprompter to ensure a smooth presentation
- Compatible with video conference applications like Zoom and Google Meet for live-streamed presentations

Tips for Recording PowerPoint Presentations With Audio and Video on Mac
Recording a professional presentation on a Mac device can be stressful, especially if you have yet to gain experience in the recording field. Thus, we've prepared some tips and guidelines you can follow for the best, most efficient journey.
- Record in a quiet environment - By choosing a quiet place to record your presentations, you'll avoid unnecessary background noises and distractions, leading to more professional results.
- Test your recordings - Before creating the final draft, you should test the recording process and create the most efficient setup. Reviewing your creations lets you see which issues you can work on.
- Ask for opinions - once you record the presentation, you can ask your friends and family members to review the creation and provide honest opinions. It will also help you review your work from an objective perspective.
- I mplement annotations - annotations can help you emphasize the most critical parts of your presentations and convey the appropriate message through your recordings.
- Use captions and subtitles - these textual elements will make your content more accessible and reach a larger audience accordingly.
By using these tips, you'll undoubtedly take your experience to the next level and master the art of presentation recording.

PowerPoint provides some of the best tools and features for creating professional presentations. Once you create your masterpiece, you may want to record it with audio and video elements to enhance its importance. We've covered the best methods you can try to meet your goals and master the art of presentation recording on Mac.
However, to get the most professional results and amaze your audience, you should use powerful third-party software solutions such as Wondershare DemoCreator. This feature-packed tool will allow you to edit and customize your videos, leading to the best presentation experience.
How can I record a PowerPoint presentation on a Mac with audio and video?
What is the best way to record presentations on a mac.
- Open the app and click on the All-in-One Recorder feature.
- Select recording preferences.
- Click the REC button or press the F9 key to start recording.
Can I use DemoCreator to create PowerPoint video presentations on Mac?
You may also like.


Contribute to the Microsoft 365 and Office forum! Click here to learn more 💡
April 9, 2024
Contribute to the Microsoft 365 and Office forum!
Click here to learn more 💡
PowerPoint Forum Top Contributors: Steve Rindsberg - John Korchok - Bob Jones AKA: CyberTaz ✅
May 10, 2024
PowerPoint Forum Top Contributors:
Steve Rindsberg - John Korchok - Bob Jones AKA: CyberTaz ✅
- Search the community and support articles
- Microsoft 365 and Office
- Search Community member
Ask a new question
Powerpoint for Mac - Screen Recording
Powerpoint for Mac - Updated 2022: "Insert > Screen Recording doesn't show up next to the video and audio boxes, Goal is to record a scrolling Finale Music. Any suggestions? ~ thank you.
Report abuse
Reported content has been submitted
Replies (2)
- Volunteer Moderator
I think the reason you don't find the option to insert a screen recording is because PowerPoint doesn't make screen recordings of other application windows.
You can use QuickTime, which is built-into your Mac for this purpose, then insert the resulting video file. If you are seeking programs with advanced screen recording capabilities, they are out there. Camtasia is one that is well known and respected.
Was this reply helpful? Yes No
Sorry this didn't help.
Great! Thanks for your feedback.
How satisfied are you with this reply?
Thanks for your feedback, it helps us improve the site.
Thanks for your feedback.
Since thanks, Jim, your information was very helpful. Mike
Question Info
- Norsk Bokmål
- Ελληνικά
- Русский
- עברית
- العربية
- ไทย
- 한국어
- 中文(简体)
- 中文(繁體)
- 日本語
Keynote User Guide for Mac
- What’s new in Keynote 14.0
- Intro to Keynote
- Intro to images, graphs and other objects
- Create a presentation
- Choose how to navigate your presentation
- Open or close a presentation
- Save and name a presentation
- Find a presentation
- Print a presentation
- Undo or redo changes
- Show or hide sidebars
- Quick navigation
- Change the working view
- Expand and zoom your workspace
- Customise the Keynote toolbar
- Change Keynote settings on Mac
- Touch Bar for Keynote
- Create a presentation using VoiceOver
- Add or delete slides
- Reorder slides
- Group or ungroup slides
- Skip or unskip a slide
- Change the slide size
- Change a slide background
- Add a border around a slide
- Show or hide text place holders
- Show or hide slide numbers
- Apply a slide layout
- Add and edit slide layouts
- Change a theme
- Add an image
- Add an image gallery
- Edit an image
- Add and edit a shape
- Combine or break apart shapes
- Draw a shape
- Save a shape to the shapes library
- Add and align text inside a shape
- Add 3D objects
- Add lines and arrows
- Animate, share or save drawings
- Add video and audio
- Record audio
- Edit video and audio
- Add live video
- Set movie and image formats
- Position and align objects
- Use alignment guides
- Place objects inside a text box or shape
- Layer, group and lock objects
- Change object transparency
- Fill shapes and text boxes with colour or an image
- Add a border to an object
- Add a caption or title
- Add a reflection or shadow
- Use object styles
- Resize, rotate and flip objects
- Move and edit objects using the object list
- Add linked objects to make your presentation interactive
- Select text
- Copy and paste text
- Use dictation to enter text
- Use accents and special characters
- Format a presentation for another language
- Use phonetic guides
- Use bidirectional text
- Use vertical text
- Change the font or font size
- Add bold, italic, underline or strike-through to text
- Change the colour of text
- Change text capitalisation
- Add a shadow or outline to text
- Intro to paragraph styles
- Apply a paragraph style
- Create, rename or delete paragraph styles
- Update or revert a paragraph style
- Use a keyboard shortcut to apply a style
- Adjust character spacing
- Add drop caps
- Raise and lower characters and text
- Format fractions automatically
- Create and use character styles
- Format dashes and quotation marks
- Format Chinese, Japanese, or Korean text
- Set tab stops
- Format text into columns
- Adjust line spacing
- Format lists
- Add a highlighting effect to text
- Add mathematical equations
- Add borders and rules (lines) to separate text
- Add or delete a table
- Select tables, cells, rows and columns
- Add or remove rows and columns
- Move rows and columns
- Resize rows and columns
- Merge or un-merge cells
- Change the look of table text
- Show, hide or edit a table title
- Change table grid lines and colours
- Use table styles
- Resize, move or lock a table
- Add and edit cell content
- Format dates, currency and more
- Create a custom cell format
- Highlight cells conditionally
- Format tables for bidirectional text
- Alphabetise or sort table data
- Calculate values using data in table cells
- Use the Formulas and Functions Help
- Add or delete a graph
- Change a graph from one type to another
- Modify graph data
- Move, resize and rotate a graph
- Change the look of data series
- Add a legend, grid lines and other markings
- Change the look of graph text and labels
- Add a graph border and background
- Use graph styles
- Animate objects on and off a slide
- Animate objects on a slide
- Change build order and timing
- Add transitions
- Present on your Mac
- Present on a separate display
- Present on a Mac over the internet
- Use a remote
- Make a presentation advance automatically
- Play a slideshow with multiple presenters
- Add and view presenter notes
- Rehearse on your Mac
- Record presentations
- Check spelling
- Look up words
- Find and replace text
- Replace text automatically
- Set author name and comment colour
- Highlight text
- Add and print comments
- Send a presentation
- Intro to collaboration
- Invite others to collaborate
- Collaborate on a shared presentation
- See the latest activity in a shared presentation
- Change a shared presentation’s settings
- Stop sharing a presentation
- Shared folders and collaboration
- Use Box to collaborate
- Create an animated GIF
- Post your presentation in a blog
- Use iCloud Drive with Keynote
- Export to PowerPoint or another file format
- Reduce the presentation file size
- Save a large presentation as a package file
- Restore an earlier version of a presentation
- Move a presentation
- Delete a presentation
- Password-protect a presentation
- Lock a presentation
- Create and manage custom themes
- Transfer files with AirDrop
- Transfer presentations with Handoff
- Transfer presentations with the Finder
- Keyboard shortcuts
- Keyboard shortcut symbols
Record Keynote presentations on Mac
You can record a presentation with voiceover narration on your Mac to play later in Keynote or export as a video file. This is especially useful when you want to distribute or present a pre-recorded presentation virtually or if you want to record a slideshow for someone to play in your absence.
Record a presentation
Open the presentation, then click to select the first slide in the slide navigator .
Choose Play > Record Slideshow (from the Play menu at the top of your screen). The presenter display appears with recording controls visible at the bottom of your screen.
The timer counts down from 3 before recording begins.
Do any of the following while recording the presentation:
Go to the next slide or build: Press the Right Arrow key.
Go back a slide or reset the builds on the slide: Press the Left Arrow key.
Jump to a different slide: Press any number to make the slide navigator appear, enter the slide number, then press Return.
Open or close a list of keyboard shortcuts: Press the Question Mark (?) key on your keyboard. You can use the shortcuts to control your presentation.
To edit the recording, do one of the following:
Press Esc to exit the presenter display.
The recording is saved with your presentation and can be played in Keynote. To export a recorded presentation as a video or another file format, see Export to PowerPoint or another file format .
To remove a recording from your Keynote presentation, choose Play > Clear Recording, then select Clear in the pop-up menu.
Play a recorded presentation in Keynote on Mac
With the presentation open, do one of the following:
Play recorded presentation in full screen: Choose Play > Play Recorded Slideshow.
Play recorded presentation in a window: Choose Play > Play Recorded Slideshow in Window.
To stop playing the presentation, press Esc.
Byte Bite Bit
How to Record a PowerPoint Presentation: Step-by-Step Guide for Professionals
Recording a PowerPoint presentation can be a game-changer for anyone looking to deliver polished and professional content. Whether we are educators, business professionals, or students, knowing how to record and narrate our slides efficiently can bring our presentations to a whole new level. Forget about the days of live presentations where a slip of the tongue or technical glitch could throw us off. Now, we can rehearse, record, and perfect our slides before ever presenting them.

The process is surprisingly straightforward with PowerPoint’s built-in features. Start by navigating to the “Record” tab where we can select options to record our screen, audio, and even video through a webcam. This allows us to create an engaging presentation that looks and sounds like we are right there in the room with our audience. Just imagine the flexibility and professionalism it brings, especially when we can embed annotations and gestures using the ink feature!
What makes it even better is the ability to edit and save the recording in various formats, including MP4 video files, ensuring compatibility across different platforms. Think about how convenient it is to send your polished presentation to remote teams or even upload it to your favorite online platform. This means our hard work reaches the audience exactly as intended, with all our points perfectly emphasized and no missed cues.
- 1.1 Incorporating Visuals and Transitions
- 1.2 Enhancing Narration and Audio
- 2.1 Streamlining Presentations with Recording Tools
- 2.2 Exploring Advanced Editing and Playback
- 3.1 Mastering Presentation Techniques
- 4.1 Useful Tabs and Tools
- 4.2 Recording Narration
- 4.3 Editing and Saving
- 4.4 Subscriptions and Compatibility
Crafting a Powerful PowerPoint Presentation
Creating a compelling PowerPoint presentation involves carefully balancing appealing visuals and dynamic audio. We focus on incorporating visuals with transitions and enhancing narration with seamless audio integration.
Incorporating Visuals and Transitions
Effective visuals can transform a good presentation into a memorable one. High-resolution images, crisp icons, and thoughtfully designed layouts play a significant role in capturing and maintaining the audience’s attention. For PowerPoint, resolution options like Full HD or Ultra HD can make a big difference, especially on large screens.
Slide transitions should be chosen carefully. While flashy animations might be tempting, they can sometimes distract rather than enhance. Focus on subtle transitions like Fade or Push from the Slide Show tab to keep the flow smooth. Adding custom animations to specific elements can also help highlight key points without overwhelming the viewer.
Incorporating charts, graphs, and infographics can break up text-heavy slides, making information easier to digest. Using the Record Slide Show option allows us to time these transitions perfectly with our narration, ensuring a synchronized and professional outcome.
Enhancing Narration and Audio
Good narration adds personality and clarity to a presentation. Before recording, we need to check our microphone settings to ensure clear audio. PowerPoint’s Record tab lets us add voiceovers to individual slides, making it easy to pause and adjust as needed.
Adding background music or sound effects can enhance the auditory experience. However, it’s crucial to balance this audio so it doesn’t overpower the narration. Background music should be set at a lower volume, while sound effects should be used sparingly for emphasis.
Ensuring that the narration and audio timings align with the visual transitions creates a seamless experience. After recording, we can preview the presentation, make adjustments, and ensure the final version is polished. This involves exporting the PowerPoint file to formats like MP4 or Full HD video, ready to be shared.
Effectively Utilizing PowerPoint Features
Leveraging PowerPoint’s robust tools for recording and editing ensures your presentation is polished and engaging. Let’s dive into efficient methods for streamlining your presentations with the built-in recording tools and explore advanced editing techniques for playback.
Streamlining Presentations with Recording Tools
Recording your PowerPoint presentations transforms them into dynamic videos that can be easily shared. First, ensure that you enable the Recording tab in the Ribbon to access essential features. Using a webcam can personalize your narrative and create a direct connection with your audience.
For a seamless recording experience, we recommend utilizing the Teleprompter View . It displays your notes without cluttering the screen. Press Record Slide Show and wait for the countdown before starting.
During the session, make full use of ink gestures for real-time annotations on slides. Pause and resume recordings to maintain a natural flow. Once done, click Stop Recording . Replaying and editing recordings is straightforward. Utilize the edit view to trim parts, adjust timings, and even re-record sections if necessary. Save your recording in MP4 format for universal compatibility.
Exploring Advanced Editing and Playback
After creating your recording, fine-tune it with advanced editing options. PowerPoint allows precise control over the playback. We can adjust slide timings, overlay additional audio narrations, and incorporate screen recordings .
Reset to Cameo inserts your video into a specific position on the slide, making the setup professional. Clean up any unwanted areas with the eraser tool and clear specific parts without affecting the entire recording.
Exporting your presentation as a video is simple. Under the File menu, choose Create a Video . Select the desired quality and save it. Ensure the file size suits your needs, balancing quality and accessibility. With these tools, you maximize the impact of your presentations, delivering content that is both informative and engaging.
Maximizing Engagement during PowerPoint Delivery
Making our PowerPoint presentations engaging is vital. By refining our presentation techniques, we capture attention and make the material more memorable.
Mastering Presentation Techniques
Using a laser pointer can effectively highlight key points. It helps direct the audience’s focus precisely where we need it.
Incorporating a webcam can add a personal touch, making our delivery feel more human and relatable. This is especially useful when presenting to remote audiences.
Engage with visual aids, such as highlighters and cameos , to emphasize important content. Highlighting can be done digitally on slides, adding layers of interaction.
We shouldn’t overlook the power of audio icons for narrations. Narrating slides, coupled with recorded timings, ensures the message is delivered as intended.
When it comes to resetting parts of the presentation, tools like the retake and delete options give us flexibility. Also, we can use the pause and stop buttons to manage our pacing.
Utilize presenter view for a comprehensive view of notes and upcoming slides, maintaining seamless delivery. This helps us know what’s next without losing track.
Subscriptions benefits and training courses from providers offer in-depth tutorials and expert tips to sharpen our skills. These benefits help us stay updated with the latest features and best practices.
Finally, tapping into communities and forums can provide additional insights from fellow presenters. We learn from shared experiences, thus improving our techniques.
Optimizing PowerPoint for Different Formats and Audiences
When preparing a PowerPoint presentation , it’s crucial to tailor it to the intended audience and output format. Let’s explore some key tips.
First, let’s talk about resolution . If projecting onto large screens, we should choose Full HD 1080p or even Ultra HD for crystal-clear visuals. This ensures our images and text remain sharp.
We can control video quality by exporting the presentation as a video file. PowerPoint supports MP4 format , which balances quality and file size effectively. If our audience is using different devices, this format will be widely compatible.
Useful Tabs and Tools
PowerPoint offers several tabs for a seamless recording experience:
- Record tab : Allows us to record our slideshow, including narration and laser pointer gestures.
- Slide Show tab : Useful for setting up Presenter View and Teleprompter View, ensuring we stay on track during the presentation.
Recording Narration
Including narration can enhance our presentation. We can utilize a webcam and web camera for recording narration to add a personal touch.
To get started:
- Click on the Record Slide Show option.
- Ensure our microphone and camera are enabled.
Editing and Saving
We’re bound to make mistakes. Luckily, PowerPoint lets us delete and edit specific sections of our recordings. After perfecting it, we can export the presentation in different formats or save it directly to OneDrive for easy sharing.
Subscriptions and Compatibility
For those of us using Microsoft 365 , some features offer added benefits, such as better integration with other Office apps and cloud storage. However, PowerPoint 2016 users can still access essential recording tools, though with fewer bells and whistles.
By customizing our presentation and recording settings, we can ensure it resonates with any audience and looks professional across all formats. Let’s always aim for precision and clarity to leave a lasting impression!
Related posts:
- How to Do Hanging Indent on PowerPoint: Step-by-Step Formatting Guide
- How to Embed a YouTube Video in PowerPoint: Step-by-Step Guide
- How to Add a Video to PowerPoint: Step-by-Step Tutorial
- How to Make a Picture a Circle in PowerPoint: Step-by-Step Guide
- How to Print Notes in PowerPoint: A Step-by-Step Guide
- How to Add Narration to PowerPoint: Step-by-Step Guide for Effective Presentations
- How to Add Slide Numbers in PowerPoint: A Step-by-Step Guide
- How to Insert GIF into PowerPoint: A Step-by-Step Guide
- How to Add Hyperlink in PowerPoint: A Step-by-Step Guide
- How to Do a Voice Over on PowerPoint: Easy Steps for Professionals
- How to Add Notes to PowerPoint: Enhance Your Presentations with Ease
- How to Add Music to PowerPoint: Step-by-Step Guide for Seamless Presentations
Leave a Comment Cancel reply
Save my name, email, and website in this browser for the next time I comment.
3 Best Ways to Record Audio on Mac

Paurush dabbles around iOS and Mac while his close encounters are with Android and Windows. Before becoming a writer, he produced videos for brands like Mr. Phone and Digit. On weekends, he is a full-time cinephile trying to reduce his never-ending watchlist, often making it longer.
Your Mac is a full-blown multimedia machine that lets you record audio as required. The best part is that you don’t have to pay for any expensive audio recording software either. In fact, you can use a handful of built-in tools on your Mac to record high-quality audio.

Be it recording audio for PowerPoint presentations or uploading videos on social media, you can do it all with your MacBook. In this post, we will share the best ways to record audio on your Mac. We will also share how you can record your Mac screen with audio. So, let’s get to it.
1. Record Audio Using Voice Memos
The Voice Memos app comes pre-installed on your Mac, and it can record good-quality audio files and even share them. You can also record audio in Lossless format to get the best quality. Since it is a core app, ensure that you are using the latest version of macOS to avoid any hiccups.
Step 1: Press Command + Spacebar to open Spotlight Search, type Voice Memos, and press Return.

Step 2: Allow Microphone permissions to the app if the popup appears on your screen.
Step 3: Click the Record icon at the bottom-left corner to start recording. To ensure the best quality, try to sit in a quiet place (not exactly like in the film) and record your audio.

You can even create a folder for your recordings by selecting the New Folder option in the sidebar.

Once created, you can select the folder name from the Sidebar and start recording audio on your MacBook.
Follow these steps to record Lossless audio using the Voice Memos app on your Mac.
Step 1: Open the Voice Memos app and click on Voice Memos in the top-right corner.
Step 2: Click on Settings.

Step 3: In Audio Quality, select Lossless.

You can also enable Location-based Naming for your audio recordings.

Once you have finished recording your audio, right-click on its file name to get more options. You can choose to share your file, edit, or trim the recording.

Double-click on the recording to manually change the file name.
In case you face any issues while using Voice Memos on your Mac, refer to our post to learn some troubleshooting methods .
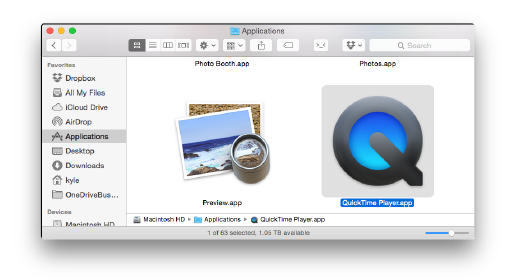
2. Using QuickTime Player
The next built-in app to use for recording audio on your Mac is the good old QuickTime Player. In case you have been ignoring it in favor of VLC, now is your time to start commissioning it again. The QuickTime Player helps you record both audio and your Mac’s screen. What’s interesting is that in our usage, we were able to get slightly better quality audio from QuickTime Player compared to Voice Memos while using a USB Microphone with our Mac .
Here’s how you can fire up the QuickTime Player to record audio on your Mac.
Step 1: Press Command + Spacebar to open Spotlight Search, type QuickTime Player, and press Return.

Step 2: Right-click the app icon on the Dock and select New Audio Recording.

Step 3: Click the Record icon to start recording. You can also click the dropdown icon and choose your mic for recording the audio. Your Mac’s built-in mic is selected by default.

Step 4: Once done, stop the recording and close the recorder window.
Step 5: Enter the name of your recorded file, choose the file location, and click on Save.

You can also choose to delete the file and repeat the process to record the audio again.

3. Record Audio Using GarageBand
The next pre-installed app is GarageBand. This utility is an old wine, albeit in a new bottle, thanks to software updates. Here’s how you can use GarageBand to record and save your audio.
Step 1: Press Command + Spacebar to open Spotlight Search, type GarageBand, and press Return.

Step 2: Select Empty Project and click on Choose.

Step 3: Select Mic or Link and click on Create.

Step 4: Click on Input at the bottom and select your input mic.

You can click the Circle icon next to Input to switch between mono and stereo recording. Single circle is mono and two circles is stereo.

If you are using headphones, you can enable the Monitoring option. This will allow you to listen to your own voice while recording.

Step 5: Disable the Metronome options to remove beats from the background.

You can also switch to Time as the recording display by selecting the same from the dropdown menu at the top.

Step 6: Once you see the mic audio levels, click the Record icon to start.

Step 7: After finishing the recording, click the Pause icon to stop.

Step 8: Click the Share button at the top Menu Bar and select ‘Export Song to Disk.’

Step 9: Enter the name of your file, choose the audio format, and click Export to save the file.

Record Screen With Audio on Mac
As mentioned earlier, QuickTime Player also helps you record your Mac’s screen. But by default, the audio doesn’t get recorded. So, let’s see how you can record your screen audio using a third-party program called BlackHole. You can download the installer for your Mac by clicking the link provided below.
Download BlackHole For Mac
You can fill in basic details to download the program. Once done, open the installer and finish the installation process. Then follow the steps.
Step 1: Press Command + Spacebar to open Spotlight Search, type AudioMidi Setup, and press Return.

Step 2: Click the Plus icon at the bottom-left corner and select Create Aggregate Device.

Step 3: Rename it to QuickTime Player Input and select BlackHole 16ch from the right menu. We are calling it Test Input Device for this post.

Step 4: Click the Plus icon again and select ‘Create Multi-Output Device’.

Step 5: Rename it to Screen Record With Audio and select MacBook Speakers or Built-in Output. Then select BlackHole 16ch.

Ensure that the Built-in Output is above BlackHole 16ch.
Step 6: Close the window and open System Settings.

Step 7: Click on Sound and select BlackHole 16ch as the Input Device.

Step 8: Close the Settings window and open QuickTime Player.
Step 9: Right-click the app icon and select New Screen Recording.

Step 10: Select the area of your screen that you wish to record. Then click on Options at the bottom.

Step 11: Click on BlackHole 16ch under Microphone.

Step 12: Hit Record to record your screen with audio.

Mic Check 1..2..3
These steps will help you record audio from your Mac. But you have to agree that the default Microphone on your Mac can only do so much in terms of audio quality. That’s why it is better to record using an external microphone. You can also refer to our post if you need help fixing your Mac’s external microphone, which is not recording .
Was this helpful?
Last updated on 15 March, 2024
The above article may contain affiliate links which help support Guiding Tech. However, it does not affect our editorial integrity. The content remains unbiased and authentic.

The article above may contain affiliate links which help support Guiding Tech. The content remains unbiased and authentic and will never affect our editorial integrity.
DID YOU KNOW

Paurush Chaudhary
More in mac.

How to Customize Gestures for Apple’s Trackpad or Magic Mouse on a Mac

4 Best MacBook Air M1 Docking Stations (Thunderbolt and USB-C)
Join the newsletter.
Get Guiding Tech articles delivered to your inbox.
Screen record on Mac: Tips and tricks from basics to advanced
Capturing a screen recording on your Mac is valuable for a variety of scenarios. There are handy third-party apps to help with this, but Apple offers a free built-in option with macOS . Follow along for several ways to screen record on Mac.
Table of contents
Built-in macos tool, screen record on mac with third-party apps.
With modern macOS releases (Mojave and later), Macs have a hidden screen record app with more advanced controls like a timer, save to destination choices, show/hide the mouse pointer, remember last selection, microphone control, and more.
If you mostly do straightforward screen recording on Mac, the native functionality is free with no app to download.
However, if you need advanced features, we’ll cover third-party options below too.
Screen record on Mac: Basics to advanced
- On your Mac keyboard, press the combination command + shift + 5 (can be used while running any app)
- In the bottom middle of the screen, choose the rectangle with a circle icon to record the whole screen or the dotted-line rectangle with a circle icon to record a selection of your screen
- Click the Options button if you’d like to enable the microphone, show mouse clicks, select a save location, and more
- Choose Record to start
- When you’re done, click the Stop button (circle with square icon) in the menu bar found in the top middle/right of your screen
- Your recording will show up on your Mac’s desktop by default unless you picked a different save location
You can also pull up this menu in QuickTime by clicking File > New Screen Recording but the keyboard shortcut is usually faster.
Here’s how all that looks on Mac:

From there you can either hit Record to start or click Options to customize your screen record settings.

If you have multiple displays in your setup you’ll get to choose which screen to record if you selected the full-screen option.
When you’re done, click the Stop button (circle with square icon) in the menu bar found in the top middle/right of your screen.

Look for your saved screen recording on your desktop or where you chose to save it when customizing
If you need advanced screen record features, a favorite of the team here at 9to5Mac is CleanShot X .
Capabilities include:
- Annotations
- Quick access overlay
- Scrolling capture in addition to entire screen, selection, windows, more
- Freeze screen
- Record as GIF
- Auto-enable Do Not Disturb
- Show/Hide cursor
- Hide clutter from your desktop when recording
- Capture Clicks
- Capture Keystrokes
- Upload screenshots and recordings and get a link to share with CleanShot Cloud
- Team management features
- Custom domain and branding
CleanShot X is priced at $29 for 1 Mac as a one-time purchase that includes updates for a year (optional $19 annual subscription for future updates). Meanwhile, CleanShot Cloud Pro offers all the features including custom domain names and branding, self-destruct control, and more from $8/month per user when paid annually .
Two more popular third-party screen record apps for Mac worth checking out include:
- Snagit – free trial then $39/year or $63 lifetime
- Monosnap – free basic plan or $2.50 or $5/month for advanced and commercial plans
Read more 9to5Mac tutorials:
- Best USB-C and Thunderbolt displays for Mac
- Use iMac as monitor: How to create a Mac to Mac, PC to Mac, or iPad to Mac setup
- Tips and tricks to fix Bluetooth connection issues on Mac
- 30+ Mac tips for new setups that everyone should know [Video]
FTC: We use income earning auto affiliate links. More.
Check out 9to5Mac on YouTube for more Apple news:

Apple’s Mac lineup consists of MacBook, MacBoo…
A collection of tutorials, tips, and tricks from…

Michael is an editor for 9to5Mac. Since joining in 2016 he has written more than 3,000 articles including breaking news, reviews, and detailed comparisons and tutorials.
Michael Potuck's favorite gear

Satechi USB-C Charger (4 ports)
Really useful USB-C + USB-A charger for home/work and travel.

Apple Leather MagSafe Wallet
My slim wallet of choice for iPhone 12

Manage push notifications
- 繁體中文 English Español Deutsch Português Italiano Français 日本語 한국어 Türkçe Dutch Polish Thai Indonesian Malay
- 免費下載 Windows 版本 macOS 版本
- 螢幕錄影 RecExperts Windows 版本 win電腦螢幕錄製 RecExperts Mac 版本 macOS螢幕錄製 Online Screen Recorder 免費線上螢幕錄影工具 ScreenShot 電腦螢幕截圖
- 相關文章 Windows 10螢幕錄影 Zoom錄影教學 Mac 上錄製內部音訊 電腦上錄遊戲 螢幕側錄軟體
- 用戶支援 支援中心 教學指南、授權碼、聯絡方式 Chat 支援 聯絡技術人員 售前咨詢 咨詢銷售服務人員
EaseUS RecExperts是一款簡易、好用的螢幕錄影軟體,用於螢幕錄影、網路攝影機錄影、錄聲音、錄影Zoom會議畫面、錄直播或甚至遊戲錄製。立即下載螢幕錄影程式,捕捉任何畫面。
EaseUS RecExperts
如何將 PPT 簡報錄製成影片?5 種方法
有時面對面的演講很不方便,尤其是在新冠病毒大流行期間。但您可以透過 Zoom 會議來完成該任務,或錄製自己演示帶有視訊和音訊的 PowerPoint 的視訊。為觀眾提供更大的靈活性非常有用,因為他們可以在空閒時間觀看影片和收聽內容。

如何 在 Mac 和 Windows 上錄製帶有音訊和視訊的 PowerPoint 簡報 ?如果您擔心這些問題,請繼續閱讀這篇文章,您可以在以下部分中獲得所有答案。
在 Mac 上錄製 PowerPoint 簡報影片的建議方法
錄製自己示範 powerpoint 的其他選項.
若要錄製自己在 Mac 上示範 PowerPoint 的過程,請選擇有效的螢幕錄影工具。這裡有兩個建議的工具。
工具 1. 使用外部聲音錄製 PowerPoint 的 QuickTime 播放器
它是一款可靠的 Mac 螢幕錄製工具。它的多功能性可以在許多方面幫助用戶。例如,您可以錄製螢幕和音訊。具有基本功能,您可以使用它來捕獲帶有螢幕和外部聲音的 PowerPoint 簡報。只要麥克風可用,它就可以錄製您的聲音。

使用 QuickTime Player 錄製帶有螢幕和音訊的 PowerPoint 簡報的簡單指南。
步驟 1. 在 Mac 上開啟 QuickTime Player,點選「檔案」。然後,選擇“新螢幕錄製”。
步驟 2. 當出現新視窗時,按一下「錄製」按鈕右側的向下箭頭,然後選擇麥克風。然後,點擊紅色圓圈開始錄製。此外,您也可以在示範 PowerPoint 時擷取網路攝影機。

步驟 3. 若要使用音訊和視訊 Mac 錄製 PowerPoint 簡報,您可以在必要時翻轉幻燈片。使用麥克風呈現內容。您的聲音和螢幕上發生的事情都會被記錄下來。
步驟 4. 完成示範後,切換回QuickTime Player,然後前往工具列右上角點選「停止」。然後您可以將影片儲存到合適的資料夾中。
工具 2. EaseUS RecExperts 使用系統和外部聲音擷取 PowerPoint
該工具允許獨立捕獲內部和外部聲音。與無法在 Mac 上錄製系統聲音的 QuickTime Player 不同, EaseUS RecExperts 提供了此選項。此外,它還涉及 Mac 上的螢幕、遊戲和網路攝影機。透過這些有用的功能,您可以輕鬆地 錄製帶有音訊的 PowerPoint 。
要探索更多有用的功能,請親自嘗試!
macOS 上此畫面和錄音軟體的主要功能:
- 在 Mac 上錄製帶有音訊的螢幕
- 選擇系統或外部的音訊資源
- 允許 Mac 上的網路攝影機選項
在 Mac 上擷取 PowerPoint 投影片畫面的步驟:
步驟1. Mac中下載並啓動EaseUS RecExperts。要擷取整個螢幕,請在主介面中點擊「全螢幕」。如果您想自定義錄製區域,請選擇「區域」按鈕。

步驟2. 要錄製聲音,請點擊工具欄左下角的聲音圖示。音訊源可以是您的外接聲音或系統聲音。根據您的需求啟用所需裝置。

步驟3. 在錄製前,可在主介面點擊「設定」變更錄製影片的輸出格式。然後,向下滑動選單到輸出格式。選擇您喜歡的輸出類型。

步驟4. 完成後,點擊REC按鈕開始錄製。軟體可以擷取Mac螢幕上顯示的任何內容。完成後,點擊停止按鈕。然後您可以在「錄製檔案」中觀看錄製的影片。

除了上面部分顯示的兩個錄音軟體之外,如果您想在捕獲帶有音訊和螢幕的 PowerPoint 簡報時嘗試不同的功能,還有更多選項。
選項 1. OBS Studio 錄製 PowerPoint 簡報
相容性:Windows/Mac/Linux
OBS Studio 以其在不同作業系統上的螢幕和音訊錄製功能而聞名。作為一款功能強大的開源錄音軟體,它支援直播,您也可以擴展其功能。
同時,該工具可以捕獲和混合高品質的音訊。為了讓您錄製具有螢幕和音訊的 PowerPoint 幻燈片,可以輕鬆套用 OBS Studio 中的相關功能。

- 能夠充當直覺的音訊混音器
- 在 Mac 上輕鬆錄製螢幕和音訊
選項 2. VLC 擷取帶有音訊的 PowerPoint 簡報
相容性:Windows/Mac
VLC 提供了比播放影片更強大的功能。您可以將此應用程式視為專業應用程式,因為它支援幾乎所有下一代編解碼器,如 HEVC、MPEG-4、MPEG-2 等。作為開源軟體,它支援添加插件來豐富其功能。
要使用音訊和視訊 Mac 錄製 PowerPoint 簡報,您需要聲音裝置來錄製您的聲音。當軟體和硬體準備好後,你就可以開始錄製你喜歡的內容了。

選項 3. Bandicam 錄製 PowerPoint 幻燈片簡報
相容性:Windows
它是一個易於使用的螢幕錄影工具。您可以選擇螢幕的任何部分作為錄製區域。它支援您錄製網路研討會、遊戲玩法、線上講座和 Skype 通話。此外,Bandicam 允許在螢幕上添加網路攝影機覆蓋,以便您可以輕鬆錄製自己演示 PowerPoint,例如製作反應影片、教學影片等。

- 支援即時繪圖解釋投影片內容
- 錄製 PowerPoint 簡報時加入特效
選項 4. Camtasia 錄製投影片 PowerPoint
該軟體提供了幫助錄製影片以教學、培訓和解釋概念的功能。經過幾次更新後,它能夠調整您的音軌,以便您可以在每個影片項目中獲得一致的聲級。
您可以使用 Camtasia 中的主題為您的錄音添加徽標或代表性圖像,這使您的影片令人印象深刻,同時也保護您的智慧財產權。試著將這些效果套用到您的 PowerPoint 簡報中!

- 不同版本的交叉相容性有限
- 缺乏一些影片拍攝的編輯功能
這篇文章提到了幾個有用的錄音軟體,可以在 Windows 和 Mac 上錄製 PowerPoint 簡報。在這些工具中,EaseUS RecExperts 以其豐富的功能被認為是最通用的工具。馬上免費下載!
希望以簡單易懂的文筆,帶給讀者輕鬆好讀的科技文章~
2023 適用於 Win/Mac Top6 最佳免費 60 FPS 螢幕錄影軟體
Agnes 於 2023年12月05日 更新
如何暫停 Instagram Reels [2024 更新]
Harrison 於 2024年04月01日 更新
【4 款錄音工具】 在 Mac 上輕鬆錄製螢幕
Harrison 於 2023年12月05日 更新
[2023] 如何輕鬆開啟Zoom模糊背景會議
Copyright © 2004 - 2023 EaseUS. All rights reserved.
Make Creative Slides, in WPS Presentation
Wps presentation is a free powerpoint editor for effortless slide creation, editing, saving, and sharing. seamlessly handle powerpoint presentations across multiple platforms with full compatibility with microsoft office. available for pc windows, mac, linux, android, and ios devices..

See How Easy to Do with WPS Presentation
Tell best stories with pro templates, discover an extensive collection of over 100,000 professional & beautiful templates in wps office., empower yourself to deliver compelling presentations that impress and inspire your audience. step onto the stage with confidence and make your message heard.

Friendly UI, Free Alternative to Microsoft PowerPoint
Embark a seamless and intuitive presentation experience with wps presentation's user-friendly interface, carefully designed to resemble powerpoint., discover the comfort and simplicity of navigation, allowing you to effortlessly create, edit, and format your slides with absolute confidence..

Compatible with .PPT, .PPTX Files
Wps presentation is compatible with 20 file formats, including .ppt, .pptx, .pps, .pot, .pptm, .potx, .potm, and more., with wps presentation, effortlessly maintain the integrity of your slides, animations, formatting, charts, and other elements, ensuring seamless preservation throughout your work..

File Management and Sharing, Anywhere
Wps presentation smoothly synchronizes powerpoint files across a range of devices: pc windows, mac, linux, android, iphone, ipad, and multiple cloud platforms., you can share a powerpoint with others and collaborate in real-time, track edits, versions, and contributors for seamless teamwork during your presentations..

Popular Features of WPS Presentation

WPS Office's Presentation Tools offer batch font settings, custom text formats, and easy insertion of pictures to multiple slides. Create stunning and engaging presentations effortlessly with these powerful features
See What Our Users Have to Say

Rated as Leader

Editor's Rating: Excellent

Google Play
Editor's Choice&Top Developer

WPS Presentation works seamlessly! It just as fine as Microsoft Powerpoint, with changes in the document getting reflected quickly.

WPS Office is a solid office productivity suite that provides a good alternative to Microsoft Office at zero cost!

I prepare my presentations the way I want, easily convert them into pdf. I also suggest my students to use WPS and every user seems very happy using WPS.
Free All-in-One Office Suite
Wps office offers more than just the presentation feature for free powerpoint slides editing. it also provides powerful tools for word documents, excel spreadsheets, and pdf documents, allowing you to handle a wide range of file formats seamlessly on pc windows, mac, linux, android and ios devices..

What Else You May Want to Know
- Yes, you can use WPS Presentation for free. The free version of WPS Presentation covers most features and provides free templates suitable for daily presentation needs.
- However, for access to premium templates and advanced features like OCR (Optical Character Recognition) and premium templates, a premium subscription is required. The premium subscription offers additional functionality and tools to elevate your presentation creation experience.
- Yes, WPS Presentation is designed to be user-friendly and easy to adapt to. Its interface closely resembles Microsoft PowerPoint, allowing you to effortlessly edit existing presentations or create new ones. With its intuitive tools and familiar layout, WPS Presentation ensures a smooth and straightforward user experience.
- Yes, you can save your presentations and other files from WPS Presentation directly to Google Drive. WPS Presentation offers seamless integration with Google Drive, enabling you to effortlessly save and sync your files to the cloud storage service. This feature allows you to access your presentations from any device and collaborate with others efficiently.
- The primary distinctions between WPS Presentation and Microsoft PowerPoint are the cost and accessibility. WPS Presentation is available for free, while Microsoft PowerPoint often requires a costly subscription or purchase.
- WPS Presentation offers seamless cloud integration with services like Google Drive, facilitating convenient presentation storage, synchronization and collaboration.
- Additionally, WPS Presentation not only supports PC Windows, Mac, Android, and iOS devices like Microsoft PowerPoint, but also extends its compatibility to Linux, an option not covered by Microsoft PowerPoint.
- Hot Topics:
Get start with WPS Presentation to edit PowerPoint slides for free!

How to record audio on your Mac
Recording audio on the best Macs should be a simple process, but that unfortunately isn’t the case. Sure, recording only your microphone audio is easy through the Voice Memos app, but recording your system audio and screen is more difficult. For a long time, Macs did not support system audio recording at all.
Surprisingly, this is a feature that just works on our great iPhones . While Apple did add system audio recording to macOS through the ScreenCaptureKit API at one point, a lot of apps still don’t support the feature. In this guide, we’ll help you try and solve this entire mess in the easiest way possible.
10 must-have apps you should install on your new Mac
How to record audio on mac using the voice memos app.
If your goal is to simply record your voice using your mic, the Voice Memos app is your best bet. This is a native app that’s already installed on your Mac, and it’s great for capturing quick voice notes or ideas without video. You could also use it for recording voiceovers.
- Press the Command + Spacebar keys on your keyboard to bring up Spotlight Search. Search for the Voice Memos app.
- After launching the app, click the red record button to record your voice. You could also use the Touch Bar controls if you have a MacBook with the Touch Bar.
- While recording, click the pause button to stop or resume the recording temporarily.
- Click Done to stop the recording.
- Your recording will be automatically saved with the date and time. You can edit recordings by trimming or renaming them within the app.
How to record your screen and microphone using QuickTime
If you want to record your screen and microphone simultaneously, the QuickTime Player app is a good choice. Like the Voice Memos app, this is also a native macOS app that should be preinstalled on your system. Unfortunately, there is no system audio recording feature. Nevertheless, you can still record your screen and microphone with ease.
- Press the Command + Spacebar keys on your keyboard to bring up Spotlight Search. Search for the QuickTime Player app.
- Go to the File menu at the top and select New Screen Recording .
- Choose either the Record Entire Screen or Record Selected Portion option.
- Click Options to bring up the recording options menu. Choose your microphone to record your voice. From this menu, you can also choose if you want to set a timer and where you want the recording to be saved.
- Click the Record button to start capturing your screen and microphone.
- Hit the Stop button in the menu bar at any time to finish the recording.
It's important to note that at the time of writing this article, the QuickTime Player doesn't allow you to record system audio. However, there is a clever workaround for this in the next section.
Use a third-party plugin to record system audio with QuickTime
While QuickTime doesn't natively support system audio recording, you can install a third-party plugin called BlackHole to enable this feature. The process is a bit involved, but it's a one-time setup that you'll thank yourself every time you have to record your screen and system audio in the future.
- Go to the BlackHole website to download the plugin. You'll have to enter your email to get a download link in your inbox. Once you get the download link in your inbox, click it, and you'll be taken to the download page.
- On the download page, click BlackHole 2ch to begin the download. Double-click the downloaded file to run the installer.
- Follow the prompts on-screen from the installer to start the setup processor. Mainly, it will ask you to accept the license agreement. That's it for installing Blackhole.
- To get Blackhole working, press Command + Space , and search for Audio MIDI Setup . Click the first result.
- In the Audio Devices window, click the + (plus) icon, and choose Create Aggregate Device .
- Select the new Aggregate Device you just created, and make sure that Blackhole 2ch and Built-in Microphone are enabled. If you have an external mic, make sure you enable that instead of the built-in one.
- Click the plus icon again in the Audio Devices window, and choose Create Multi-Output Device . Make sure that built-in output and Blackhole 2ch are enabled for this device as well.
- Next, to keep things simple, double-click the names of the new devices you just created to rename them. Rename the Aggregate device to Quick Time Input and Multi-Output Device to System audio . Close the Audio Devices window now.
- Next, search for Sound in Spotlight search, and click the first result that pops up. Under the Output tab, select the newly created System audio device.
- Press Shift + Command + 5 on your keyboard to bring launch QuickTime. Click the options button, and select Quick Time Input .
Exploring the built-in macOS tools
The best thing about macOS is its built-in tools and features. While recording system audio isn't the simplest process, installing the BlackHole plugin for QuickTime is a one-time setup that works well. This goes to show that third-party apps and the built-in features are both equally great. If you want to improve your macOS experience even further, here are some essential Mac apps you should be using .

IMAGES
VIDEO
COMMENTS
In the Options dialog box, click the Customize Ribbon tab on the left. Then, in the right-hand box that lists the available ribbon tabs, select the Recording check box. Click OK. To get ready to record, select Record on either the Recording tab or the Slide Show tab of the ribbon.
Step 2 | Start Recording. To record narrations in PowerPoint, start of by finding the Slide Show tab on PowerPoint's ribbon. Click on the Slide Show tab to change the available options. Make sure that you start on the first slide in PowerPoint to record audio and timings for the entire presentation. Now, find the Record Slide Show buton and ...
If you need to record your PowerPoint presentation on your Mac so that it can be used online either on a video sharing platform like YouTube or perhaps in a...
Open the slide you want to start recording from. Near the upper right corner of the PowerPoint window, select Record. When you're ready, select the round, red Record button, wait for the countdown, then start speaking. To record from a specific slide, go to it, and then select Record. Note: Narration isn't recorded while the transition between ...
You can record your PowerPoint presentation—or just a single slide—and capture voice, ink gestures, and your video presence. The completed recording is like any other presentation. You can play it for your audience in Slide Show or you can export it as a video file. So instead of just handing the deck to someone, people can see your ...
This video shows how to record presentation and export it as a video file on PowerPoint for Mac version 16.37.
Do you want to be able to record your PowerPoint presentations with audio on Mac? 👉In this tutorial, we'll show you two easy methods for recording audio on ...
How it works. Open the PowerPoint presentation for which you want to record a video to share. In the top-right corner, select the Record button, or select Record >From Beginning or Record > From Current Slide . NOTE: To record engaging and dynamic camera layouts, design your slides with cameo object by select Record>Cameo . To refer to your ...
How it works. Just like before, you can enter the Record Slide Show experience by clicking Slide Show > Record Slide Show. 1. Toggle video and audio options in the options dropdowns in the recording toolbar. 2. Use the Record, Pause, and Resume buttons to control narration and navigation recording. 3. After clicking the Stop button to stop ...
Recording a PowerPoint Presentation on Mac. While PowerPoint is a Microsoft software, many Mac users download and use it on their computers as well. With more than 40k reviews on the app store, PowerPoint is a very popular Keynote alternative. Go to the Record tab. PowerPoint on Mac has a dedicated tab for recording.
Presenter drawing recording . You can also now record notes taken with the pen or highlighter tool. Any drawing done in the recording state will be captured. When you or your audience member plays the presentation back, it will seem like you are drawing on the slides in real time. Laser pointer recording . Similar to recording for the pen tool ...
Recording WITHOUT Webcam. In PowerPoint, open the finished presentation you would like to narrate. Go to the "Slide Show" tab. Select "Record Slideshow" and choose the "Recording from Beginning" option. Once you select "Record from Beginning", the PowerPoint will automatically display presentation mode. Only sound needs to be ...
With cameo supported when recording slide shows in PowerPoint for Mac, you can customize your camera feed's appearance before you record. You can apply your favorite camera styles, shapes, and sizes to cameo, and choose the perfect place on the slide for your camera feed. How it works. Open a presentation that you want to record and share.
To customize the presenter display before you start recording, move the pointer, then click . For more details about modifying the display, see Customize the presenter display. Click to record your presentation. The timer counts down from 3 before recording begins. Do any of the following while recording the presentation:
I have seen several videos and tutorials about using PowerPoint for recording videos. It records the slideshow, your audio, and allows you to write or draw on the screen. I cannot figure out how to get it to work on my Mac. I am using the desktop version for Mac. I have a teacher O365 account. Note: I know about Zoom, Screencastify ...
The easiest way to record a voiceover in PowerPoint on a Mac is to record by slide. Select the slide where you want to add the narration, then select Insert from the menu bar and click Audio > Record Audio. Enter a name for the narration, select Record, read your script, and select Stop when you're finished recording.
Open QuickTime: Go to the file menu and select New Screen Recording. The Screen Recording window will open: Click the down arrow next to the record button and select the Microphone as the Internal Microphone: Click the record button: Once the recording starts, start the PowerPoint presentation and speak as needed during the recording.
Open the slide that you want to put the screen recording on. On the Insert tab of the ribbon, select Screen Recording. On the Control Dock, choose Select Area (or if you want to select the entire screen for recording, press Windows logo key+Shift+F). You'll see the cross-haired cursor . Select and drag to select the area of the screen you want ...
About Press Copyright Contact us Creators Advertise Developers Terms Privacy Policy & Safety How YouTube works Test new features NFL Sunday Ticket Press Copyright ...
Open your PowerPoint presentation and the app and click on the All-in-One Recorder option. Next, customize your recording preferences in the next window, as presented in the image below. Set the capture area and decide whether you want to record system audio, microphone, or webcam simultaneously. After completing the customizations, click the ...
Hi. I think the reason you don't find the option to insert a screen recording is because PowerPoint doesn't make screen recordings of other application windows. You can use QuickTime, which is built-into your Mac for this purpose, then insert the resulting video file. If you are seeking programs with advanced screen recording capabilities, they ...
Open the presentation, then click to select the first slide in the slide navigator. Choose Play > Record Slideshow (from the Play menu at the top of your screen). The presenter display appears with recording controls visible at the bottom of your screen. To customise the presenter display before you start recording, move the pointer, then click .
Reset to Cameo inserts your video into a specific position on the slide, making the setup professional. Clean up any unwanted areas with the eraser tool and clear specific parts without affecting the entire recording. Exporting your presentation as a video is simple. Under the File menu, choose Create a Video.
Follow these steps to record Lossless audio using the Voice Memos app on your Mac. Step 1: Open the Voice Memos app and click on Voice Memos in the top-right corner. Step 2: Click on Settings ...
In the bottom middle of the screen, choose the rectangle with a circle icon to record the whole screen or the dotted-line rectangle with a circle icon to record a selection of your screen. Click ...
About Press Copyright Contact us Creators Advertise Developers Terms Privacy Policy & Safety How YouTube works Test new features NFL Sunday Ticket Press Copyright ...
錄製自己示範 PowerPoint 的其他選項; 在 Mac 上錄製 PowerPoint 簡報影片的建議方法. 若要錄製自己在 Mac 上示範 PowerPoint 的過程,請選擇有效的螢幕錄影工具。這裡有兩個建議的工具。 工具 1. 使用外部聲音錄製 PowerPoint 的 QuickTime 播放器. 它是一款可靠的 Mac 螢幕錄製 ...
WPS Presentation is a free Powerpoint Editor for Effortless Slide Creation, Editing, Saving, and Sharing. Seamlessly handle PowerPoint presentations across multiple platforms with full compatibility with Microsoft Office. Available for PC Windows, Mac, Linux, Android, and iOS devices. Free Download.
Press the Command + Spacebar keys on your keyboard to bring up Spotlight Search. Search for the QuickTime Player app. Go to the File menu at the top and select New Screen Recording. Choose either ...