- Video Marketing
- Case Studies
- Create a video


How to create animated presentations [Easiest Way for 2023]

Guru - November 22, 2022 - Leave your thoughts. 11 min read
animaker deck , animated presentations , online presentation maker , presentation maker
It's no secret that traditional presentations can get boring for the audience as they often include many sentences, subheadings, and images—and that's just the beginning.
You also don’t want it to look like a high school science project: all over-the-top formatting and an overwhelming amount of text.
So how can you make your presentation more engaging? Well, don’t worry anymore, we have got an alternative for you!
This is where animated presentations come in.
In this article, we have compiled the quickest and easiest steps to create an animated presentation using Animaker Deck .
Introduction to Animaker Deck
With Animaker Deck, you can create your own animated characters and use tons of pre-built templates, millions of stock assets, real-time collaboration, and more!
It can do everything that Powerpoint can do and much more!
If you want to ensure your presentation keeps people engaged and interested, it’s time to change things up a bit from the usual way of creating a presentation.
So why wait? Let’s jump right into the steps!
Signing up with Animaker Deck
Understanding the user interface.
- Ways to create an animated presentation in Animaker Deck
Creating an animated presentation from scratch
Creating an animated presentation from templates, previewing & presenting the slides, sharing your work-of-art.
Click here to log into Animaker if you're already a registered user. If you are new to Animaker, you can sign-up and create an account with Animaker Deck for free.
Before we start to create a presentation, let’s spend some time understanding the user interface of the Animaker Deck app.

On the left side, we have the Library section . Under the library section, you can access the Templates, Characters, Properties, Text, Background, Images, and Upload features with a single click.
Moving on, to the right, we have the Slides section , where you can re-arrange the slides, duplicate the slides, delete the slides, and even make edits to the slides, such as transition effects.
In the center, we have a Workspace displaying the selected slide. Here you will add fonts, and images, change the background and other properties and make all the slides customizations.
And at the top, you will find options to Share, Import, and Present the slide deck.
We shall look into each option in depth in the upcoming steps.
Ways to create an animated presentation in Animaker Deck:
There are two ways to create an animated presentation in Animaker Deck
Customizing the Background
Introducing characters, using properties, adding text .
2. Creating an animated presentation from templates
Selecting a template
- Editing the text
Customizing the Character
Editing the background images.
Let's get started right away!
One way of creating an animated presentation in Animaker Deck is from scratch on a blank canvas. Here’s what we will cover:
Using the Backgrounds feature, you can easily search and apply backgrounds according to your preferences.
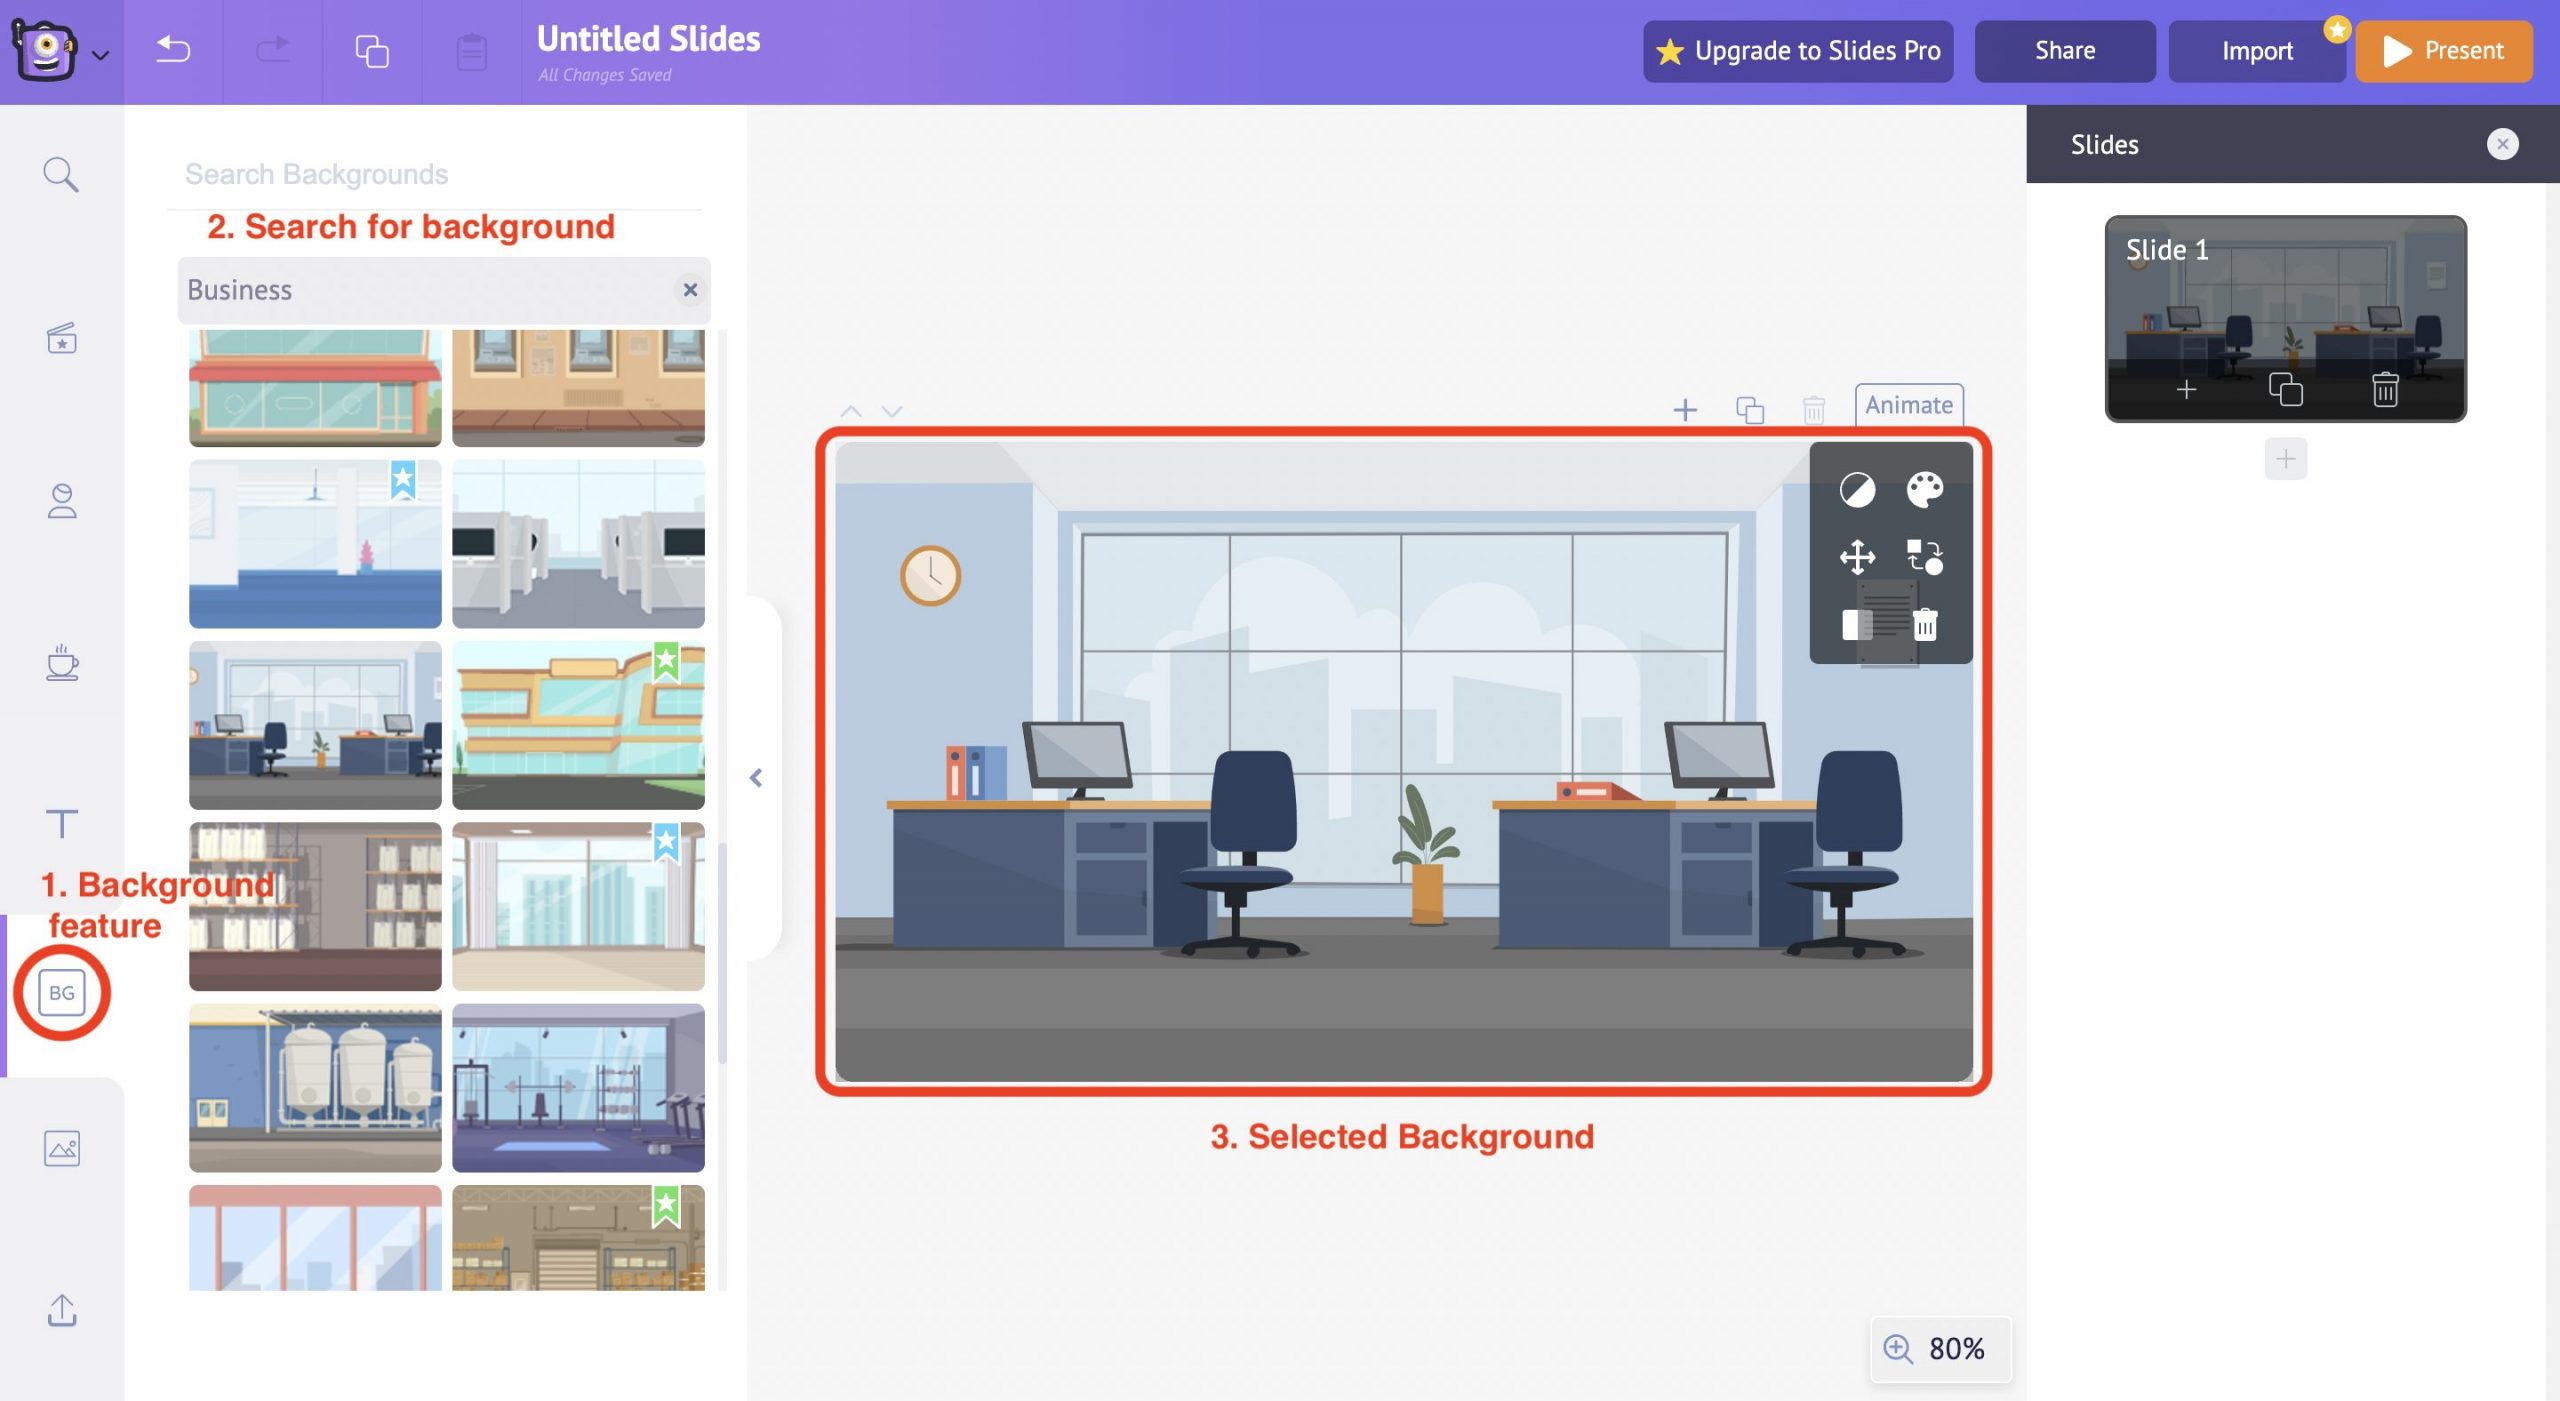
The best part is that you can customize the background colors to match your slide style.
For instance, let’s say you want to create an intro slide for your business. First, choose a suitable background for your slide from the Library.
Once you find and select a suitable background, it will appear in the central workspace. Also, you will notice a few options pop up in the workspace. It is called an “item menu.”
You can customize the colors, add filters, swap elements, and resize and delete the elements in the slide from these options.
Do all the presentations you have made so far lack personality?
You can now infuse life into the slides with the help of Animated Characters.
With Animaker Deck, you can create your personalized characters or use the built-in characters from the Library section, whichever fits your scenario.
In this instance, let’s choose one from the built-in character library.

The selected character will appear in the slide, along with the item menu. Use the options in the item menu to customize the character per your preferences.
Also, you can find the Actions and Expressions section on the right side of the workspace. Apply a suitable action and expression to your character from the available options.
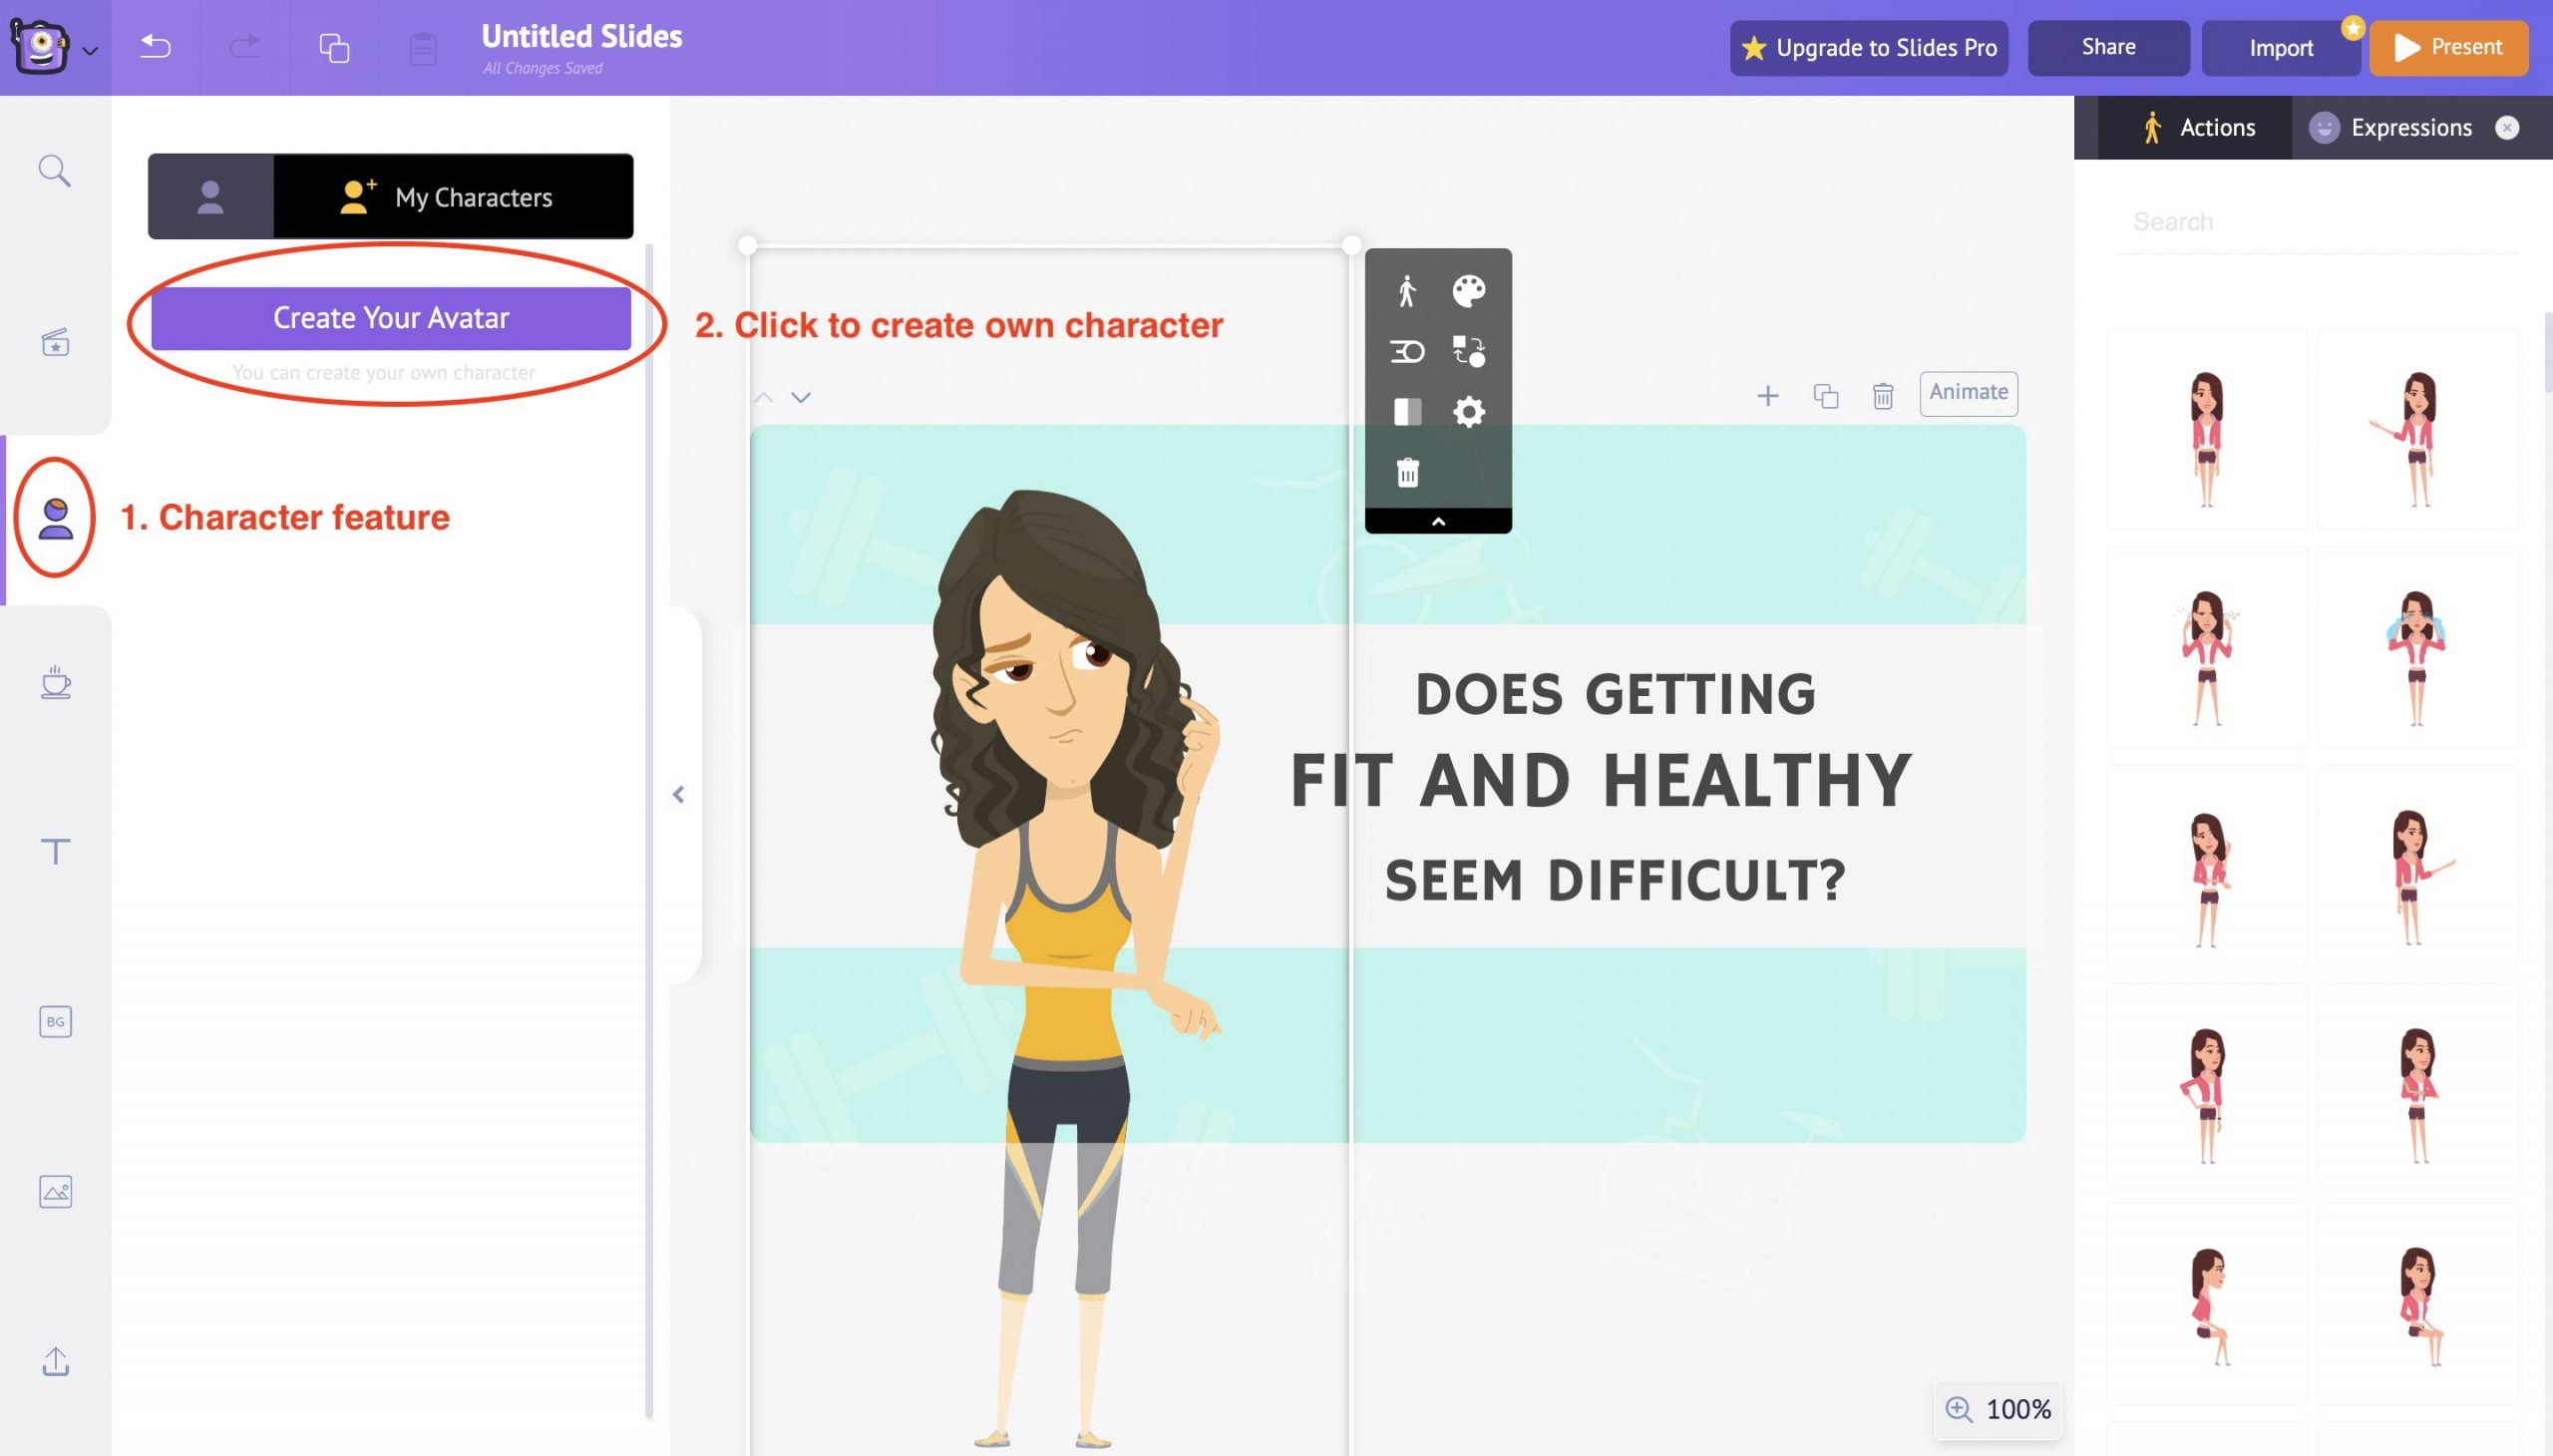
If you are not happy with the pre-built characters, you can even create and introduce your own custom characters into the slide deck.

Use the Create Your Avatar button under the Characters feature to create your own custom character.
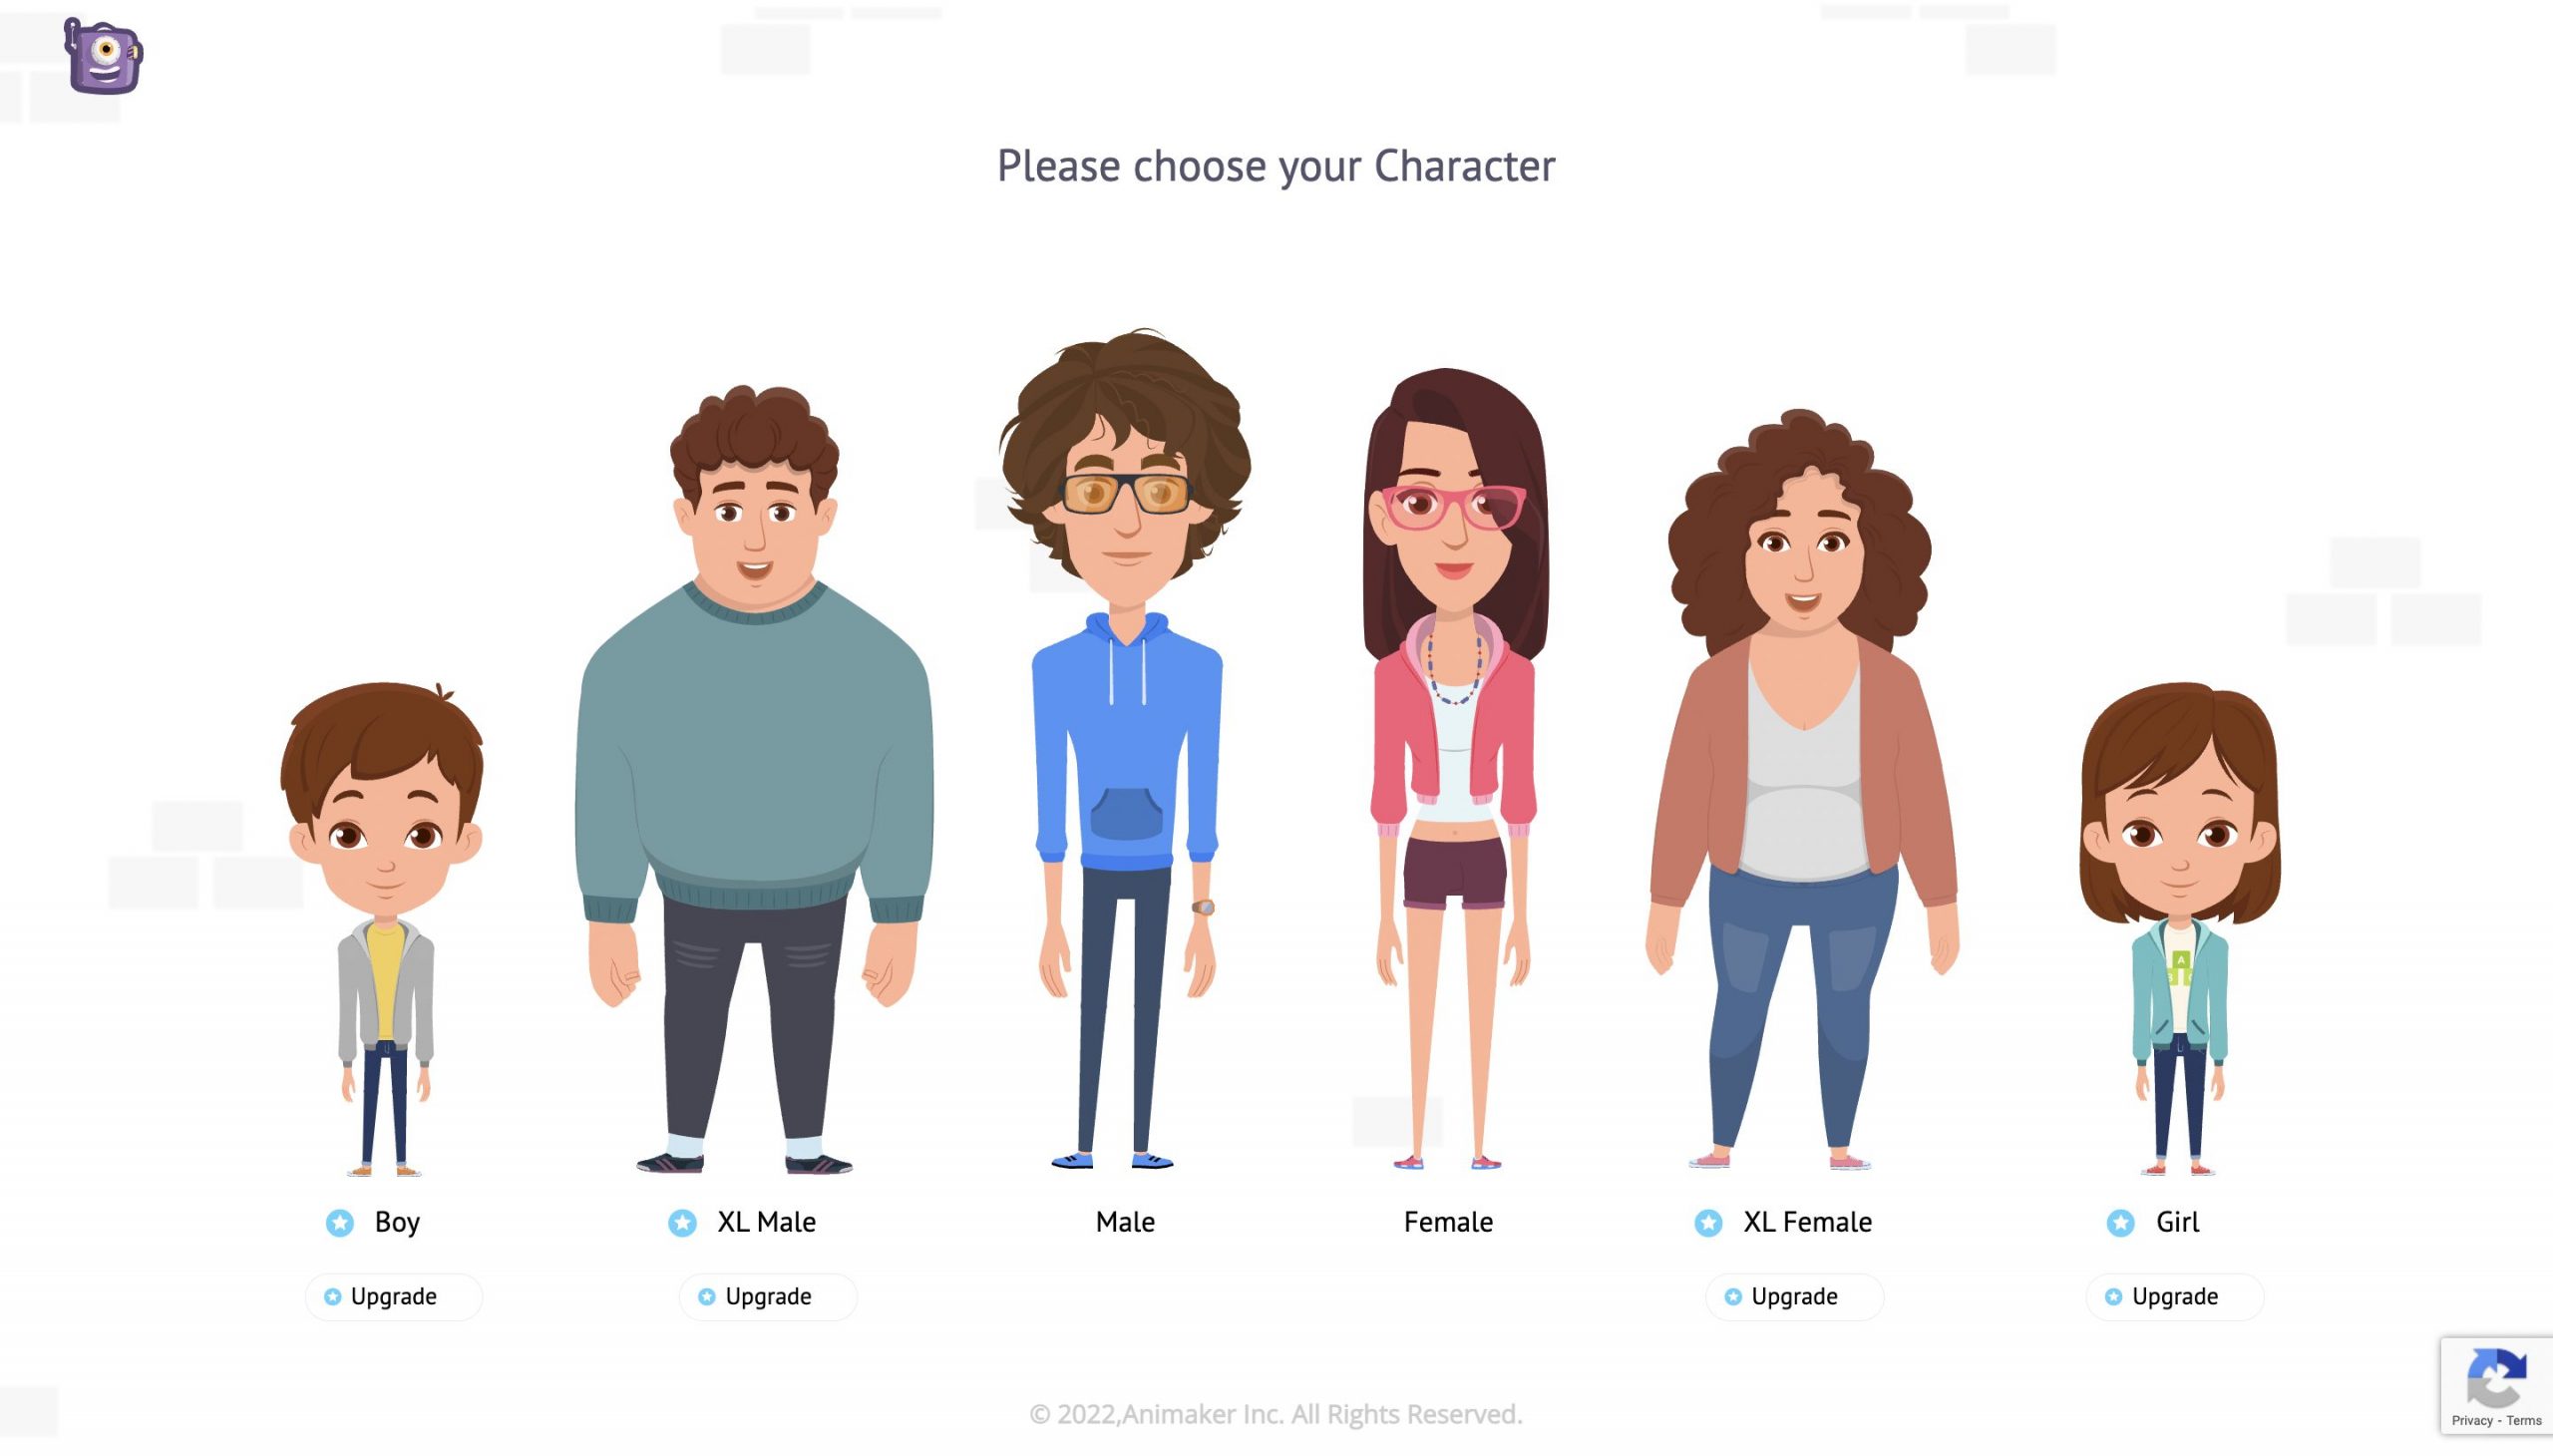
Animaker Deck offers you options to create a character between Young Adults and Children.
Pick the one as per your preference. Once you select the type, you will be taken to the character customization screen.
Here you can customize each and every aspect of your character, starting from head to toe.
This is the cherry on top of the Animaker Deck app. This way, you can introduce yourself as a character in your presentation as well.
Once you have finished the customizations, save your character and refresh the project. You can find the newly created character in the My Characters tab under the Character feature.
Animaker Deck is loaded with tons of Properties. Icons, Graphs, Charts, Numbers, Illustrations, or anything you name, are covered under the properties section.
Now, let’s add a speech bubble to the character. You can do this by searching for a speech bubble under the properties section in the library.
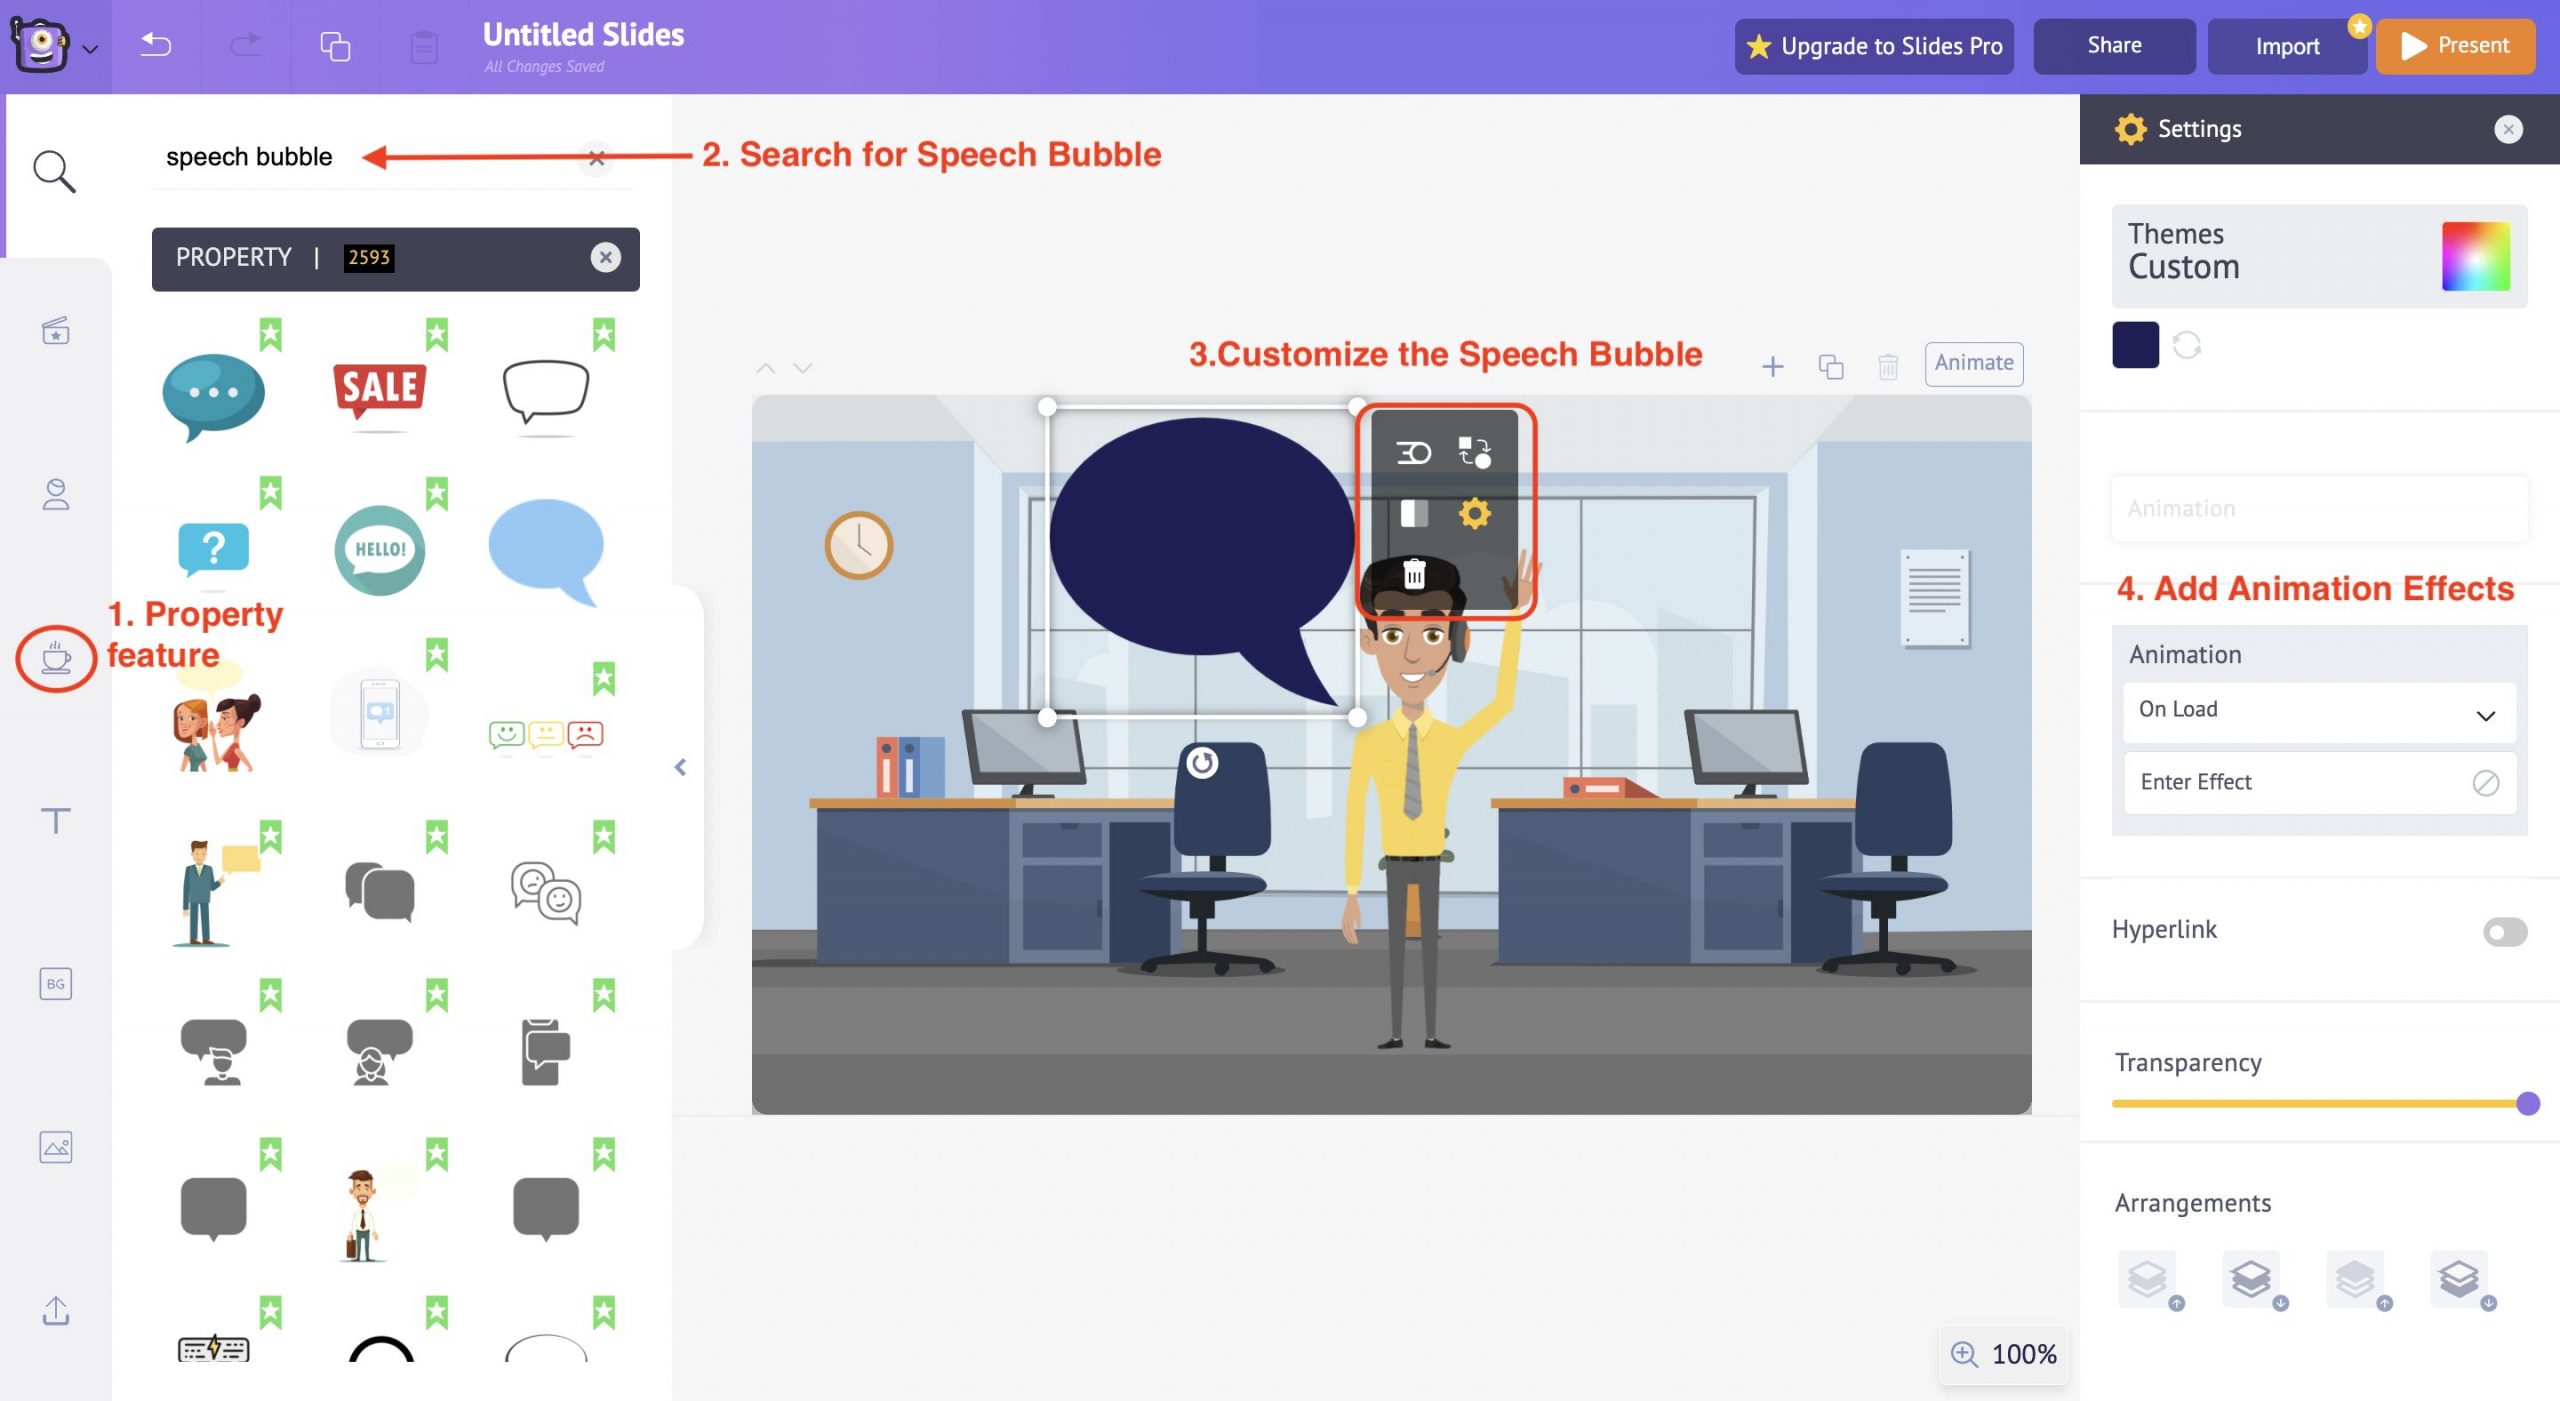
Once you select the speech bubble, it will appear in the workspace. Use the item menu options to customize the size and color.
You can also add animation effects to the speech bubble from the options available on the right side of the workspace.
Introducing entry and exit animations to the properties in the slide adds extra appeal to the presentation overall.
Using the Text feature, you can add text to your slides in two ways.
One is to choose and edit from the built-in text templates designed along with animation effects, and the second is to enter the text manually with text boxes.
Select a suitable text design from the Text feature under the library section.
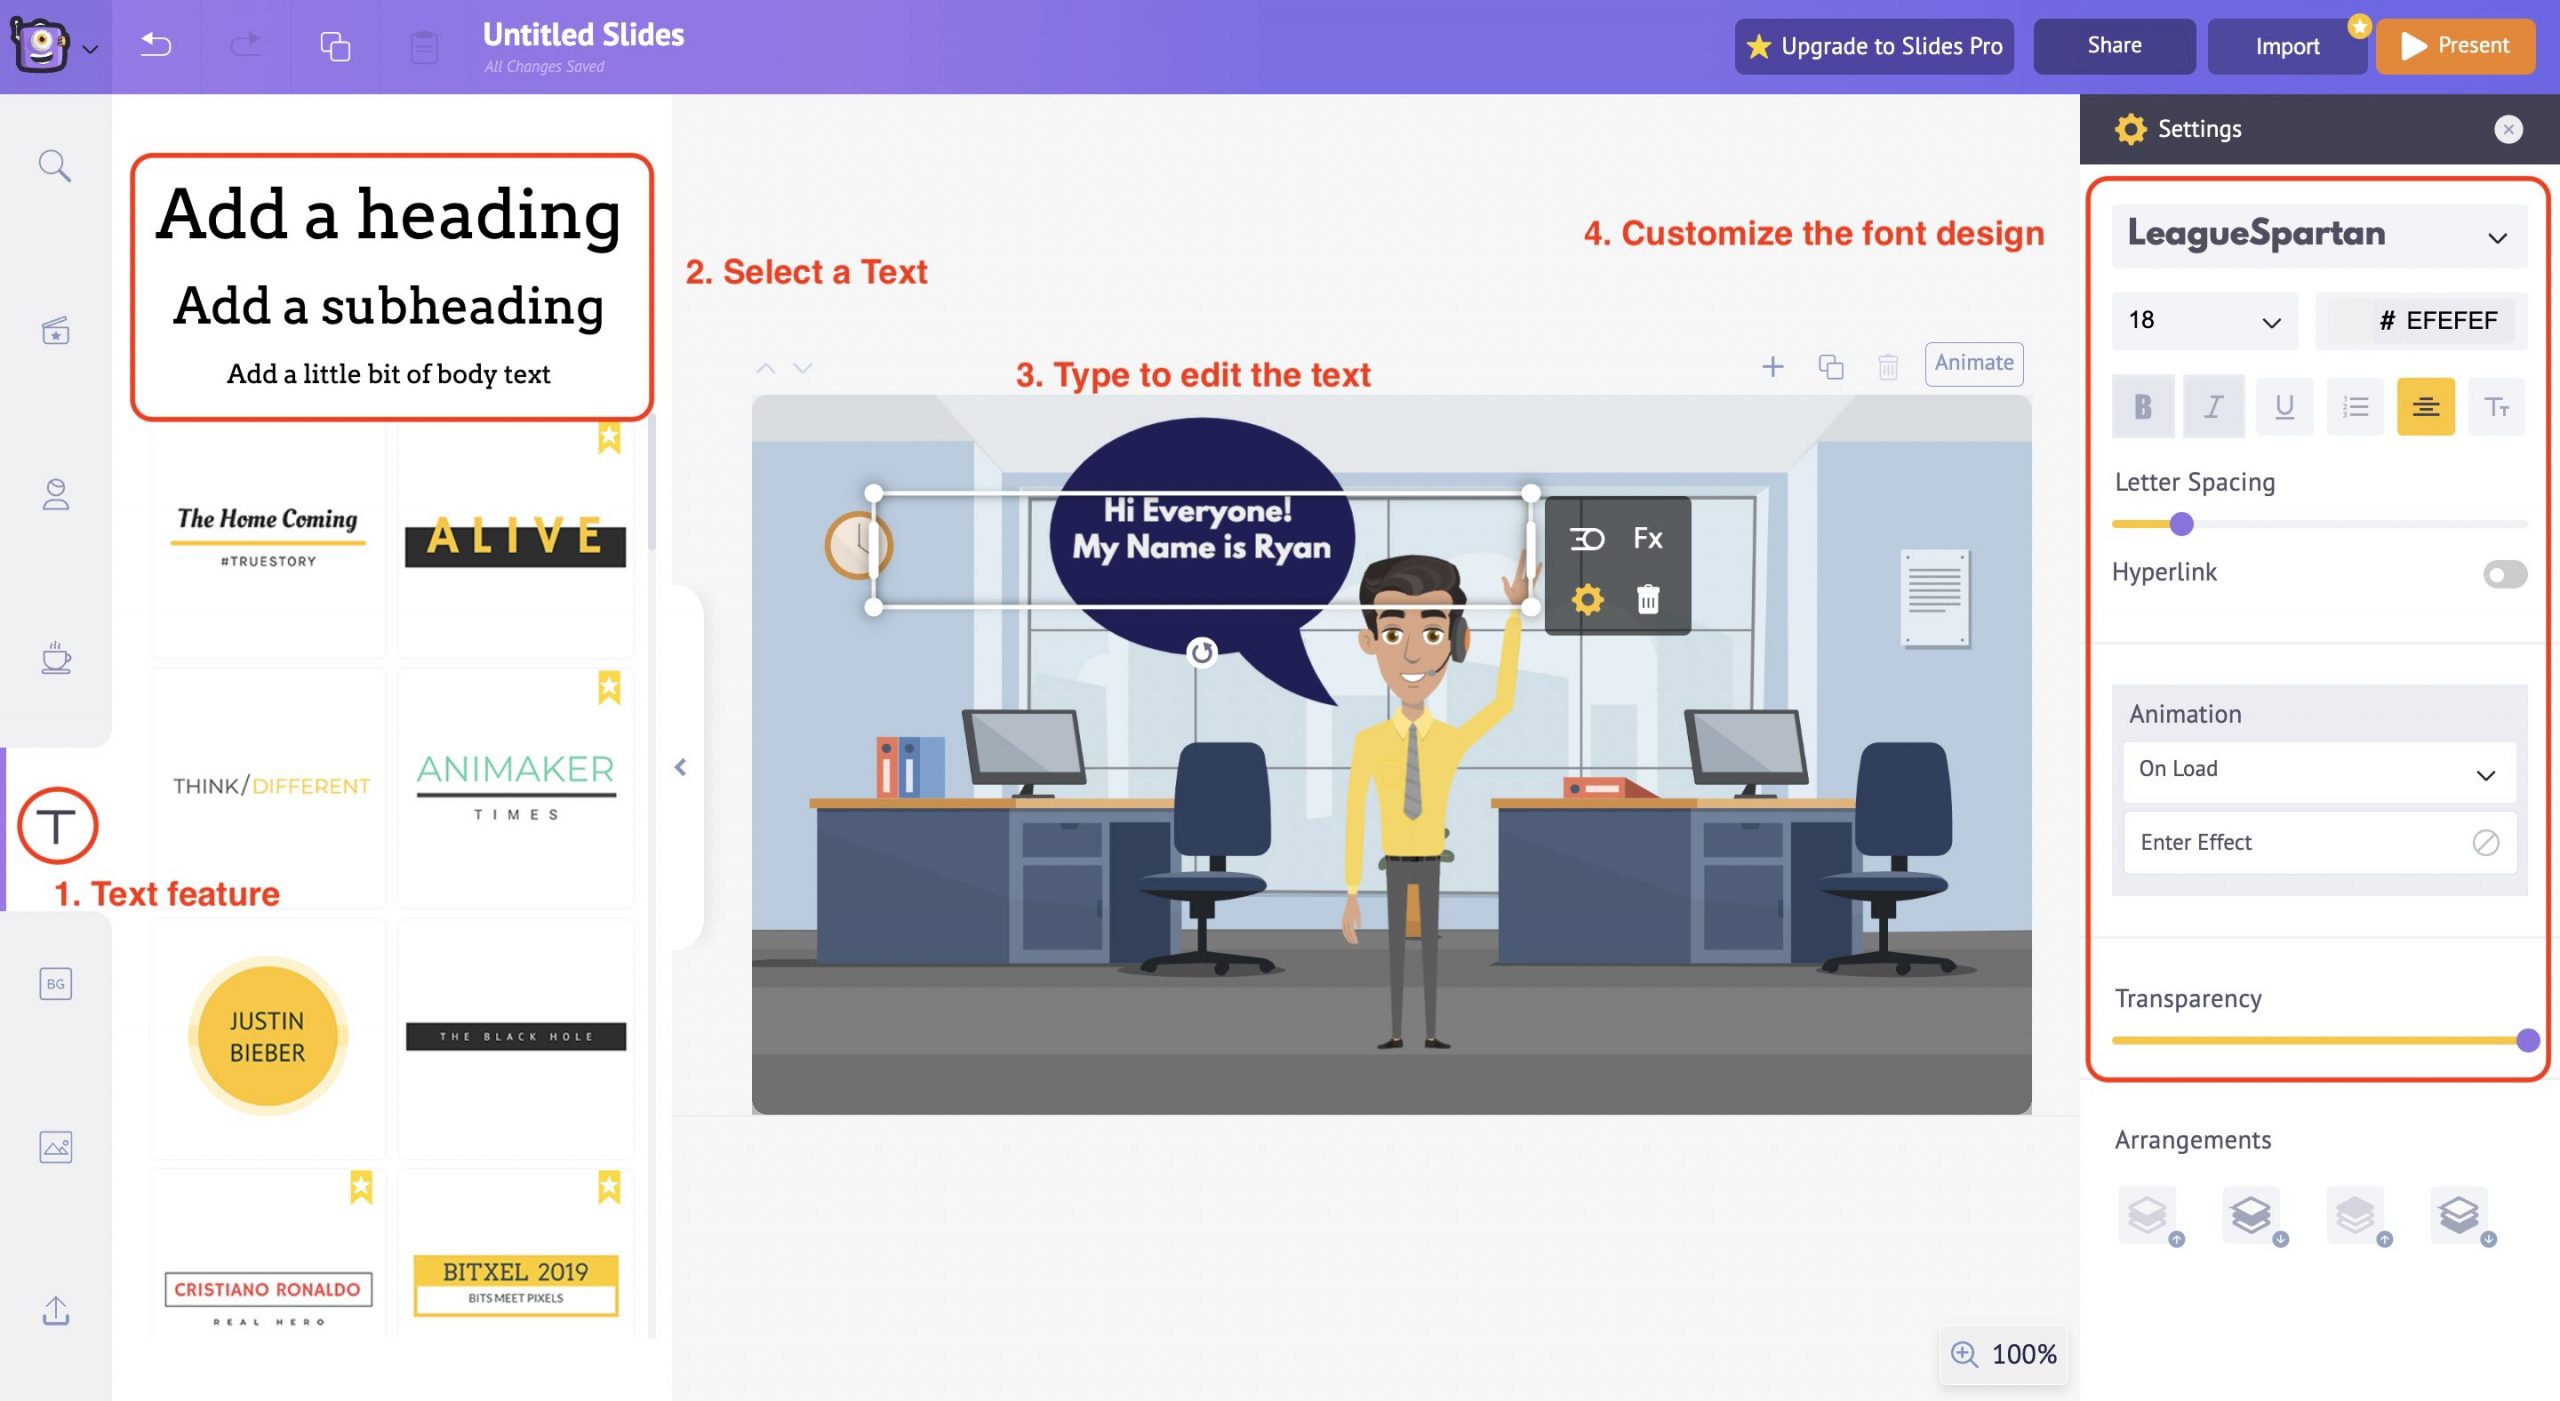
Once you select the text design, it will appear in the workspace; now, you can type in the required text and use the item menu options to customize the color, font style, size, and alignment and adjust the case sensitivity of the text.
In this instance, we have used the empty text box design and entered the text manually. You can also use the built-in text design templates and edit them accordingly.
Also, it is possible to add animation effects to the text just like we did to the properties earlier.
You can even adjust the transparency of the text by using the transparency slider beneath the animation effects on the right side of the workspace.
This way, Animaker Deck gives a complete customization option for the users to edit and change the slides according to everyone’s preferences.
Another way of creating an animated presentation is from pre-built templates.
Here’s what we will cover:
Animaker Deck offers more than 50 professionally designed templates to choose from.
Use these templates to inject fresh ideas into your static slides!
The templates feature is on the left side under the library section.
Go carefully through the different templates and select a suitable one for your use case. Then click Add all.
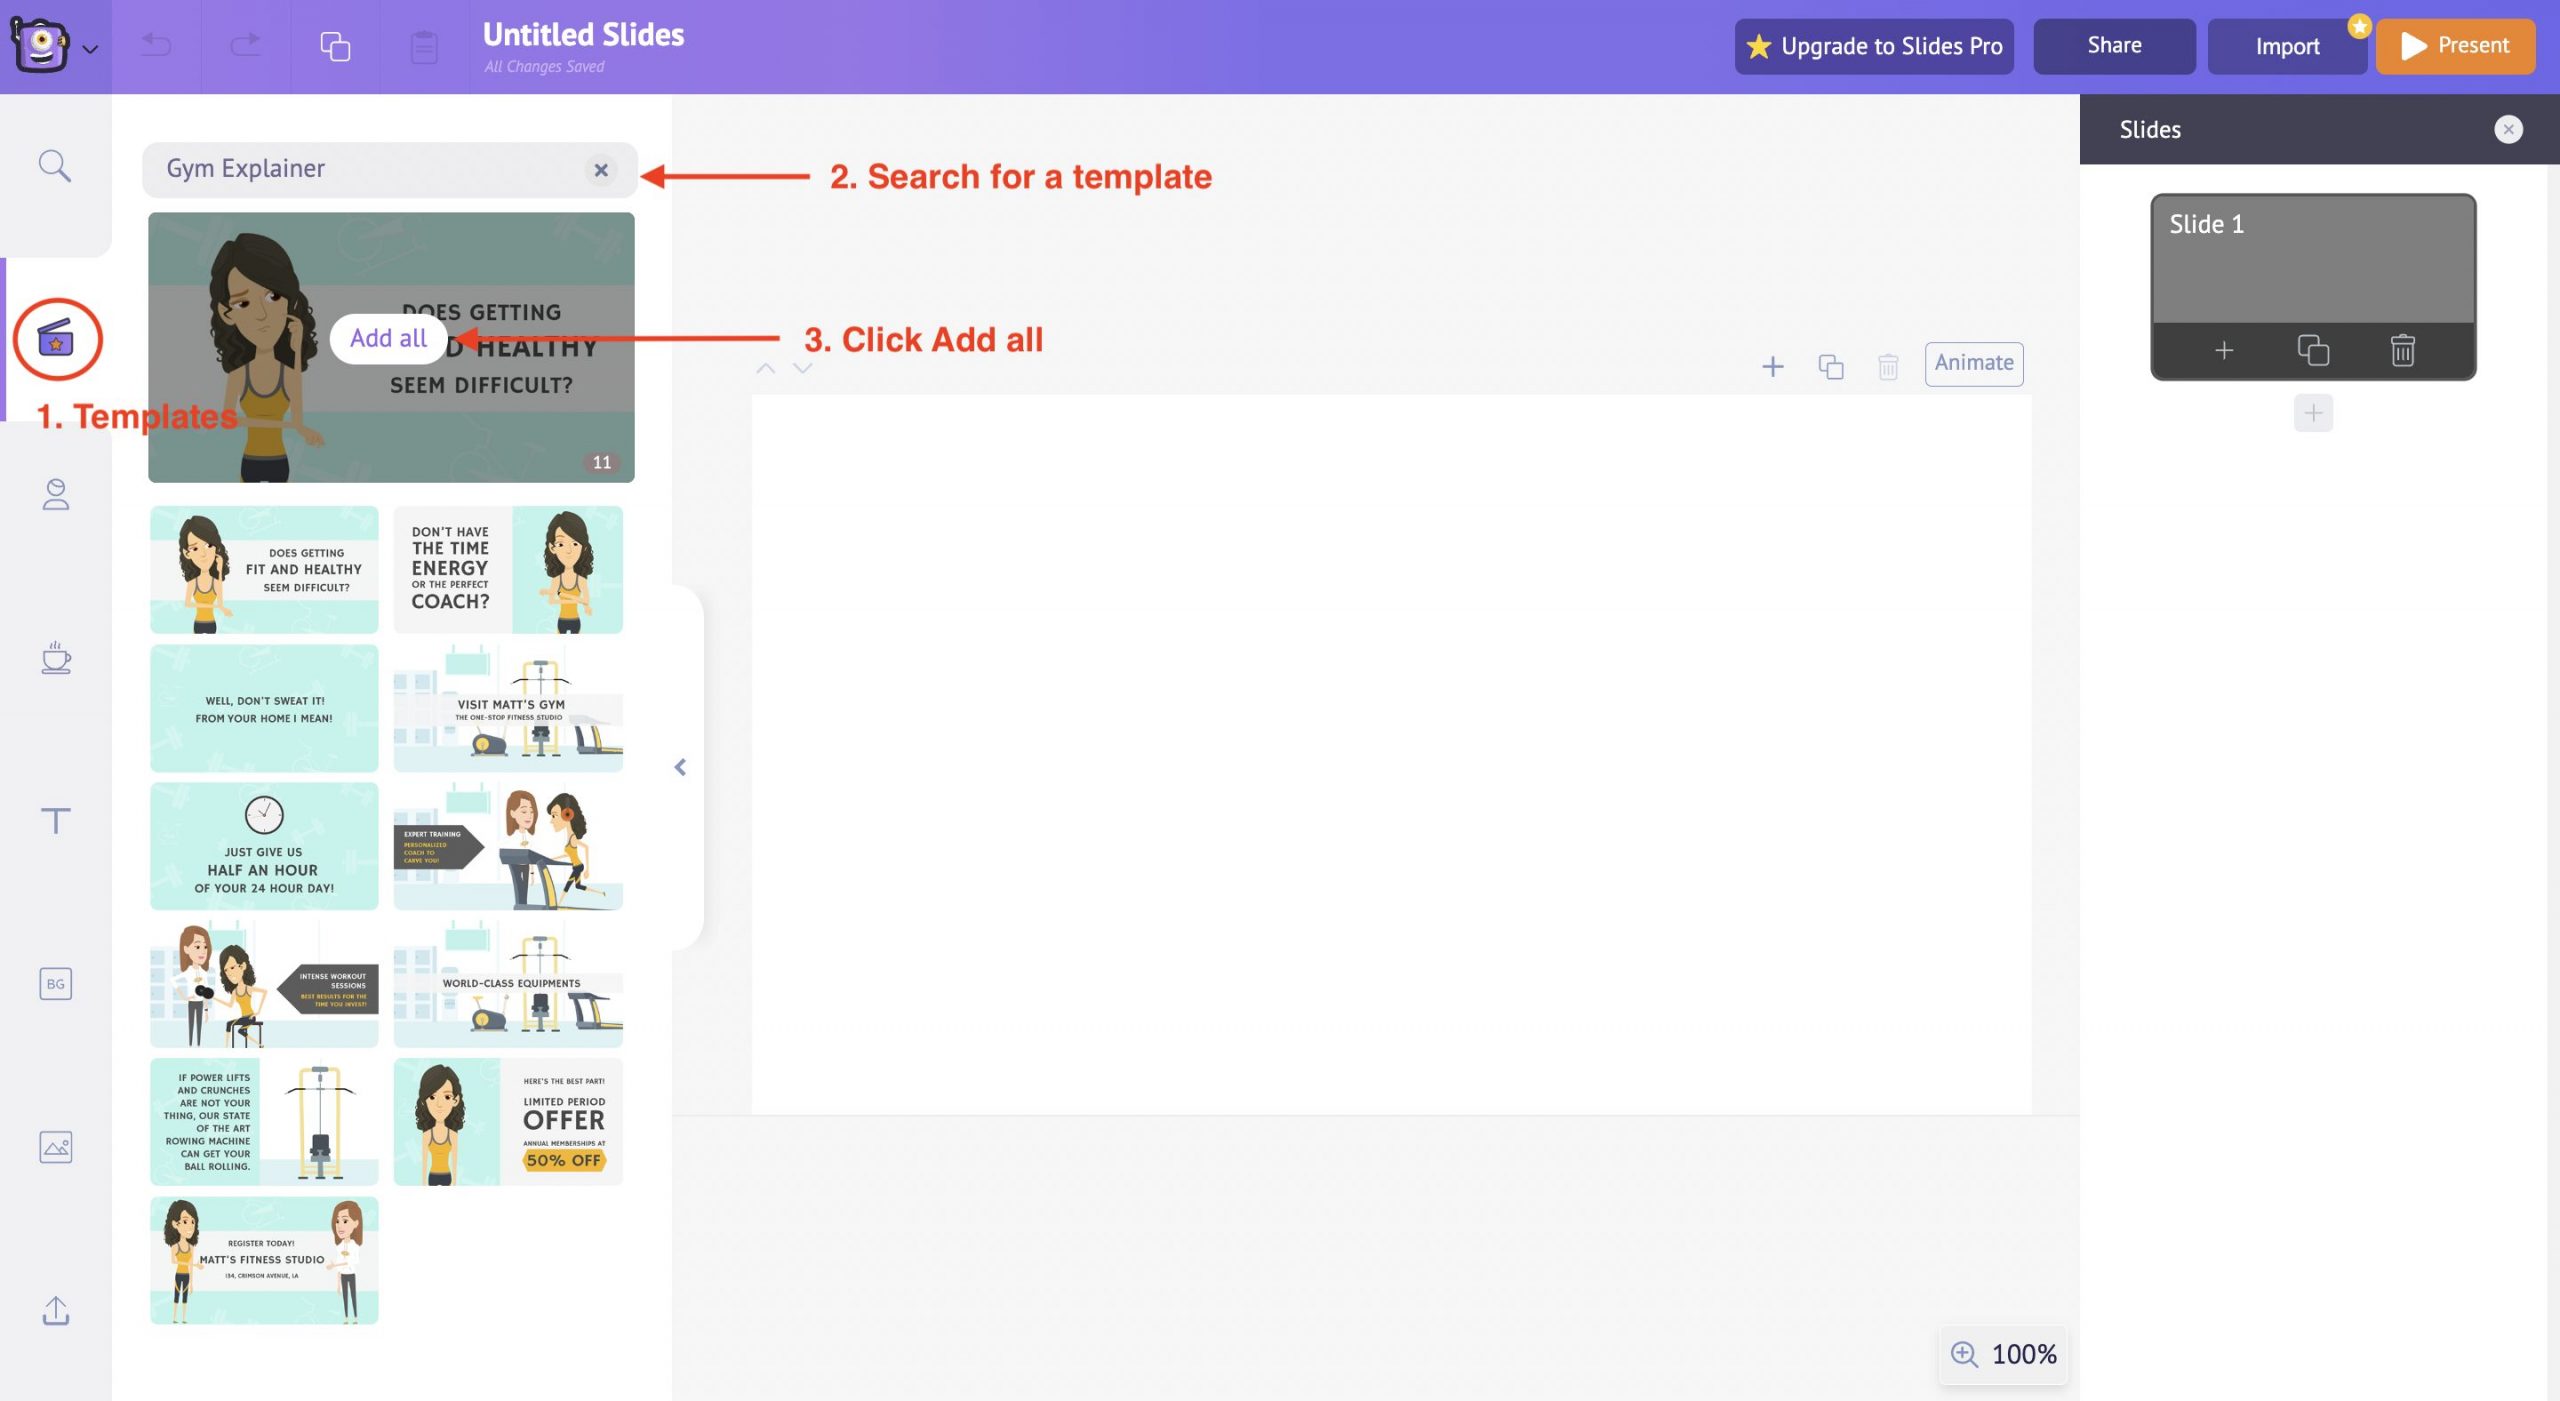
A pop-up window will appear, asking you to overwrite; click confirm to insert the template.
Once you have clicked the confirm button, all the slides will be inserted into the project.
Now the best part about creating an animated presentation from templates in Animaker Deck is that every aspect of the template is completely customizable. The three main aspects of the template that you can customize as per your preferences are
- Background Images
Editing the Text
Select the Text that you want to edit. Then click on the Settings option from the item menu. You can find different options to customize the text on the right side.
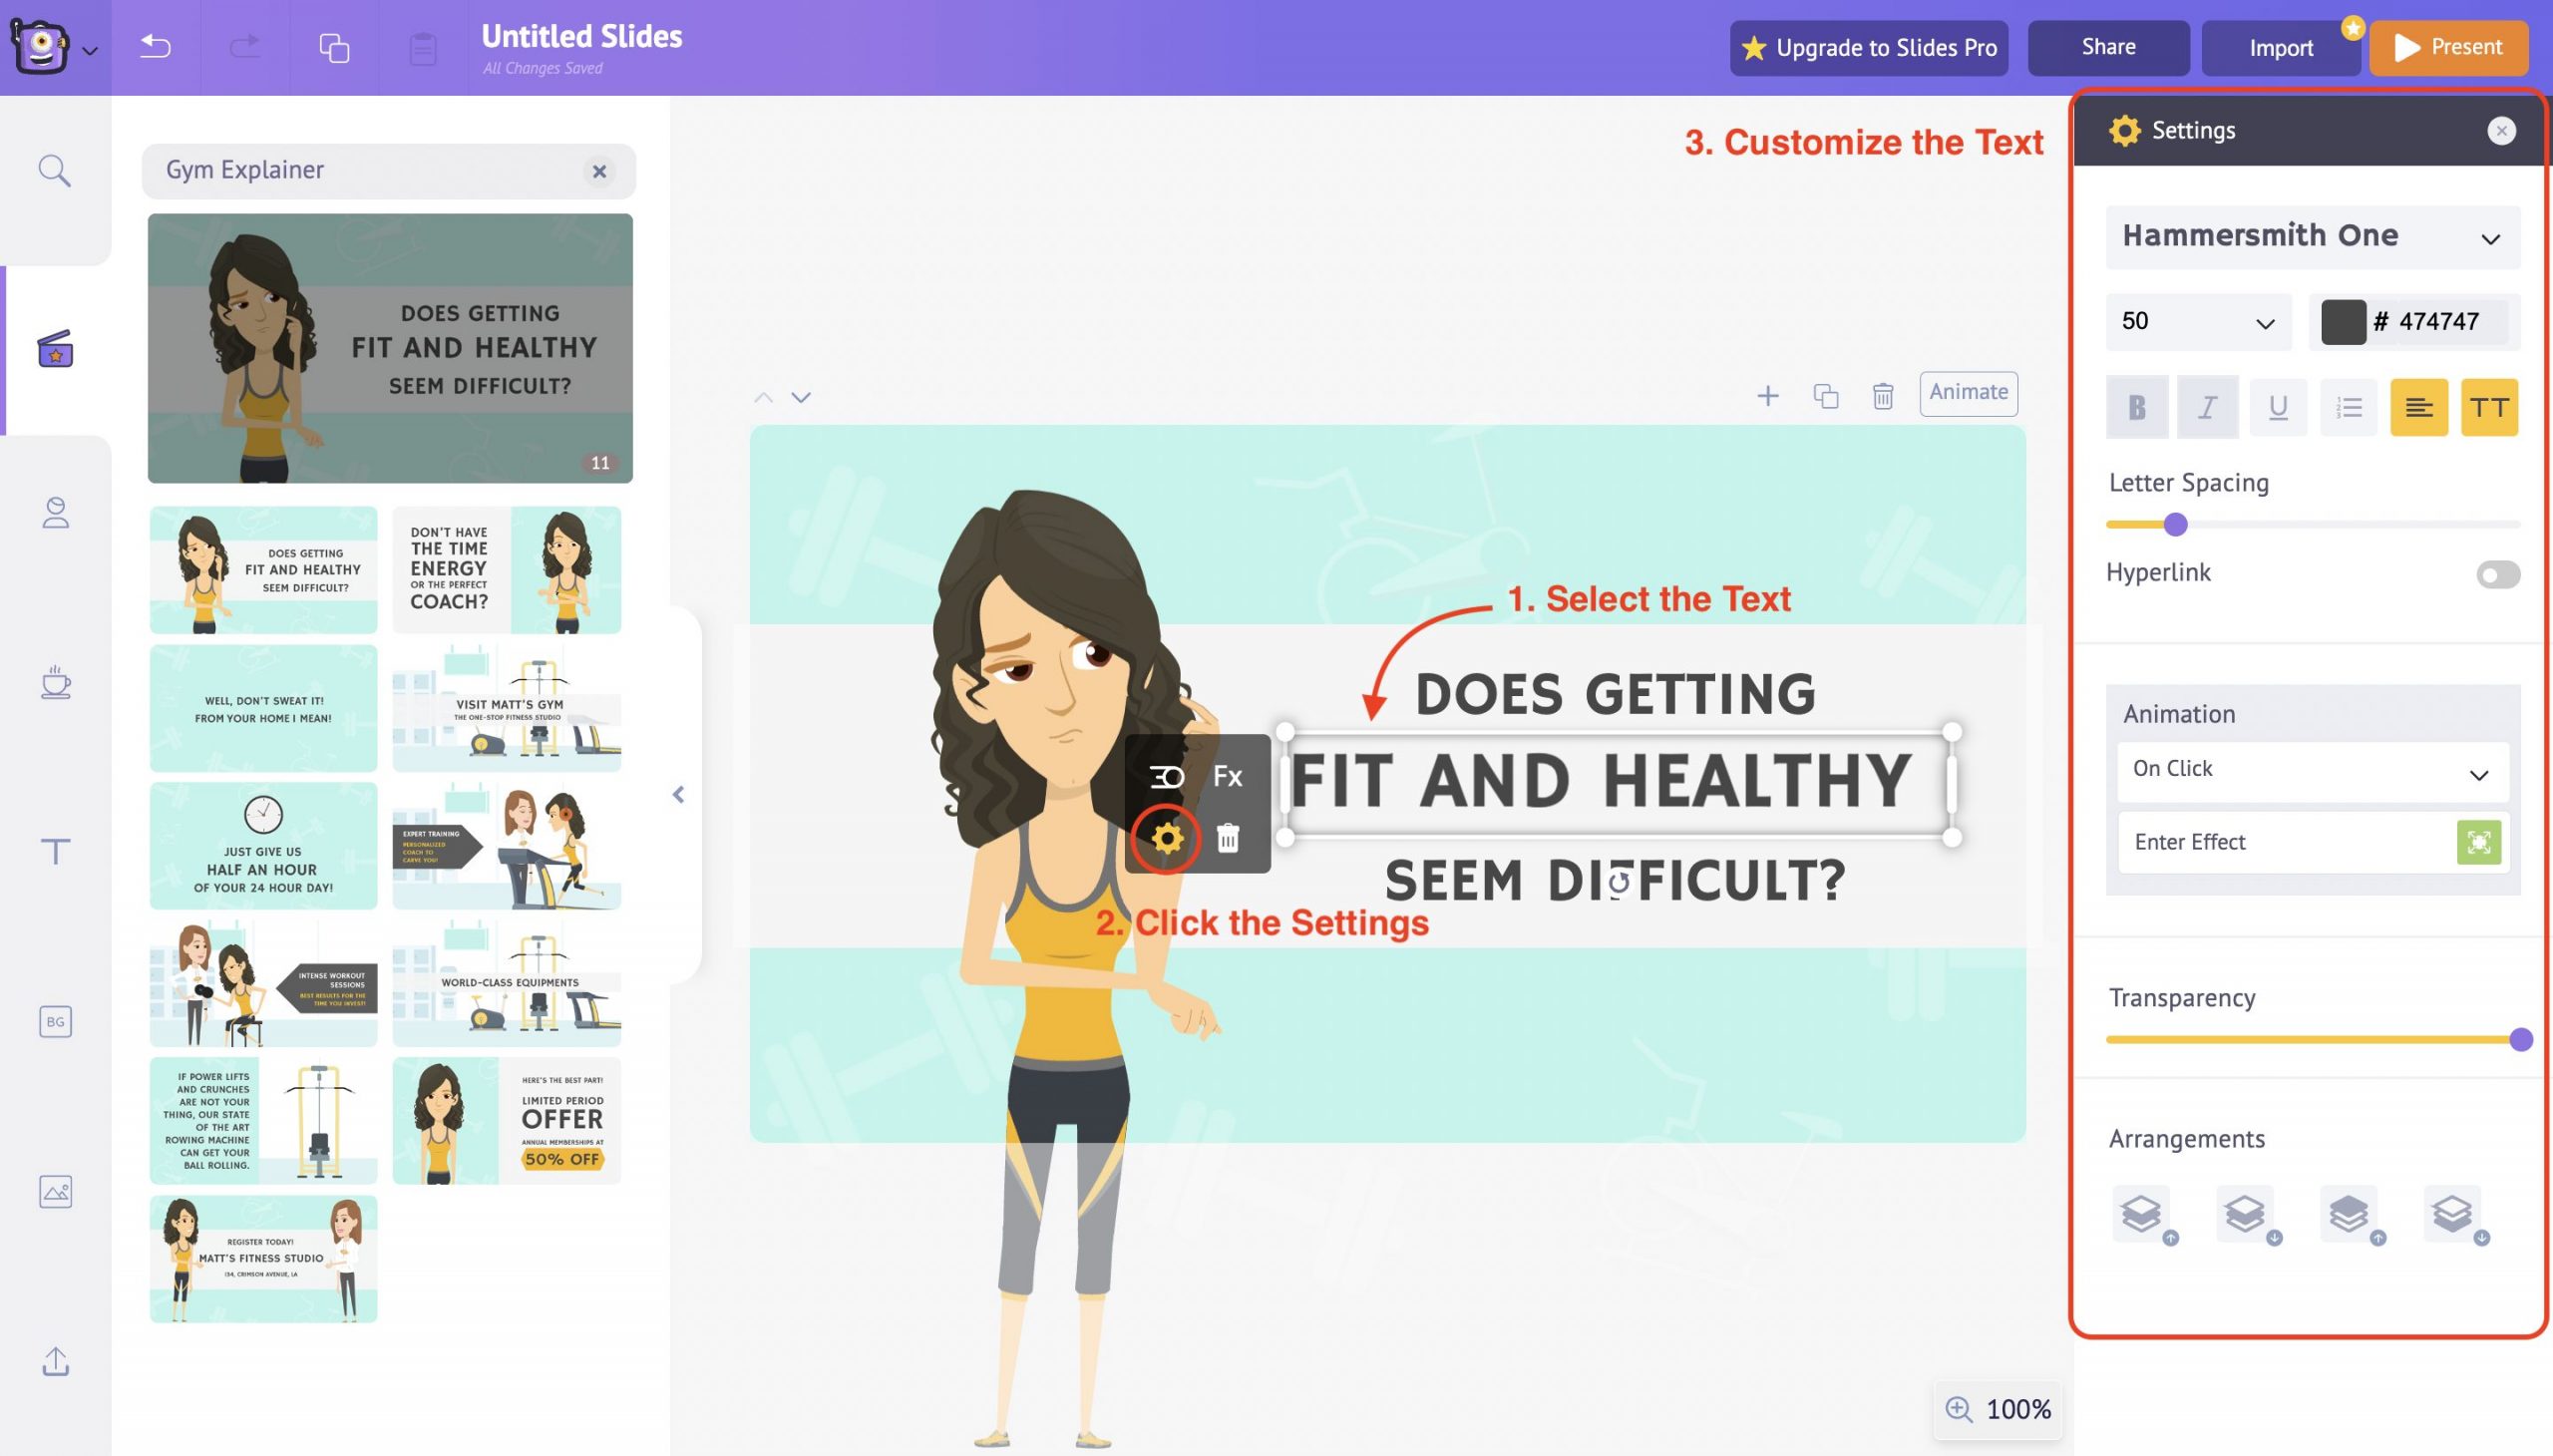
For instance, you can choose a different font, change the font’s color, and adjust the line spacing. You can also make the text a Hyperlink by toggling the Hyperlink button.
Use all these options to edit the text according to your preference.
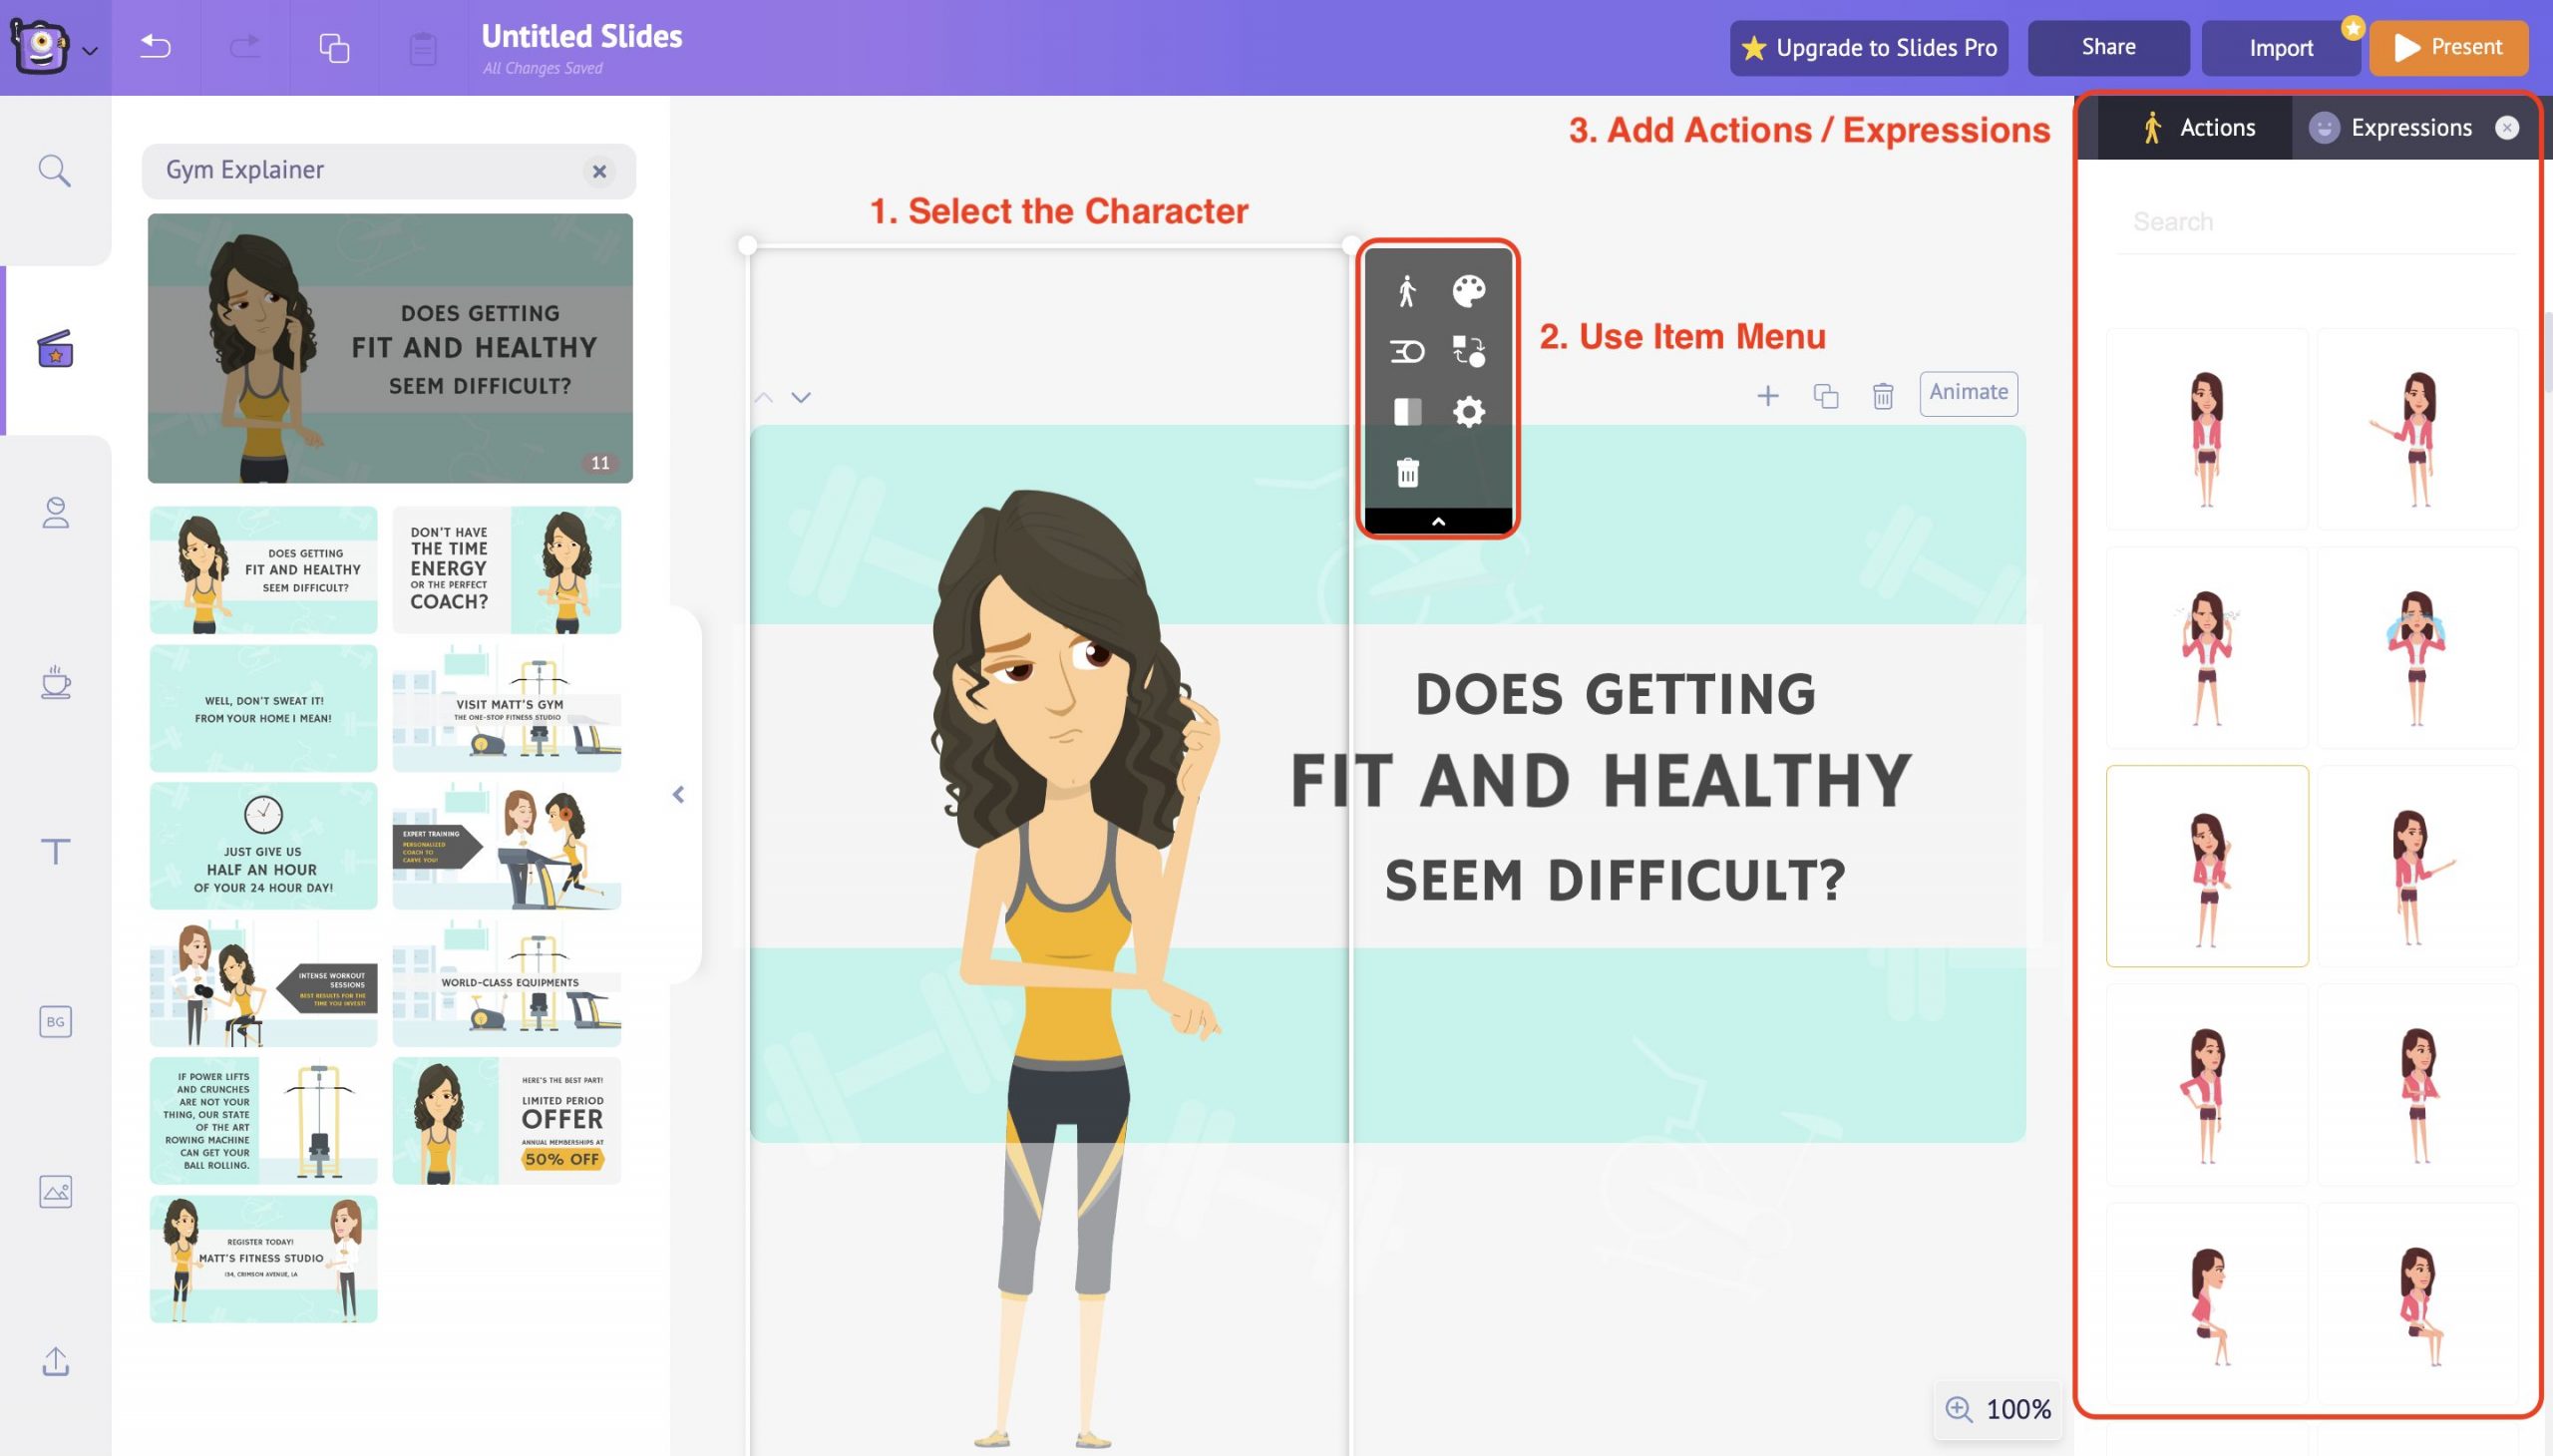
Select the Character and use the item menu to customize it. You can alter the color of the character and its attire as per your preference.
You can also introduce actions and expressions to the character and bring life to your presentation. Simply select an action under the action tab, and it will reflect in character immediately. It’s that easy to animate your characters.
Also you can even introduce your own custom characters into the slide deck.
Animaker Deck, in partnership with GIPHY, PEXELS & PIXABAY, provides access to thousands of quirky gifs and iconic images which can be used in your slides with a single click.
You have the flexibility to even customize the existing background image in the template as per your preference.
Select the Background image and use the Item Menu options to edit the elements present in the background image.
For instance, you can alter the color of the elements, resize them, group them together or delete them.
Also, you can introduce animation effects to the background image to lit up the presentation.
However, if you are still unhappy with the customizations, Animaker Deck has covered you with the Upload option.
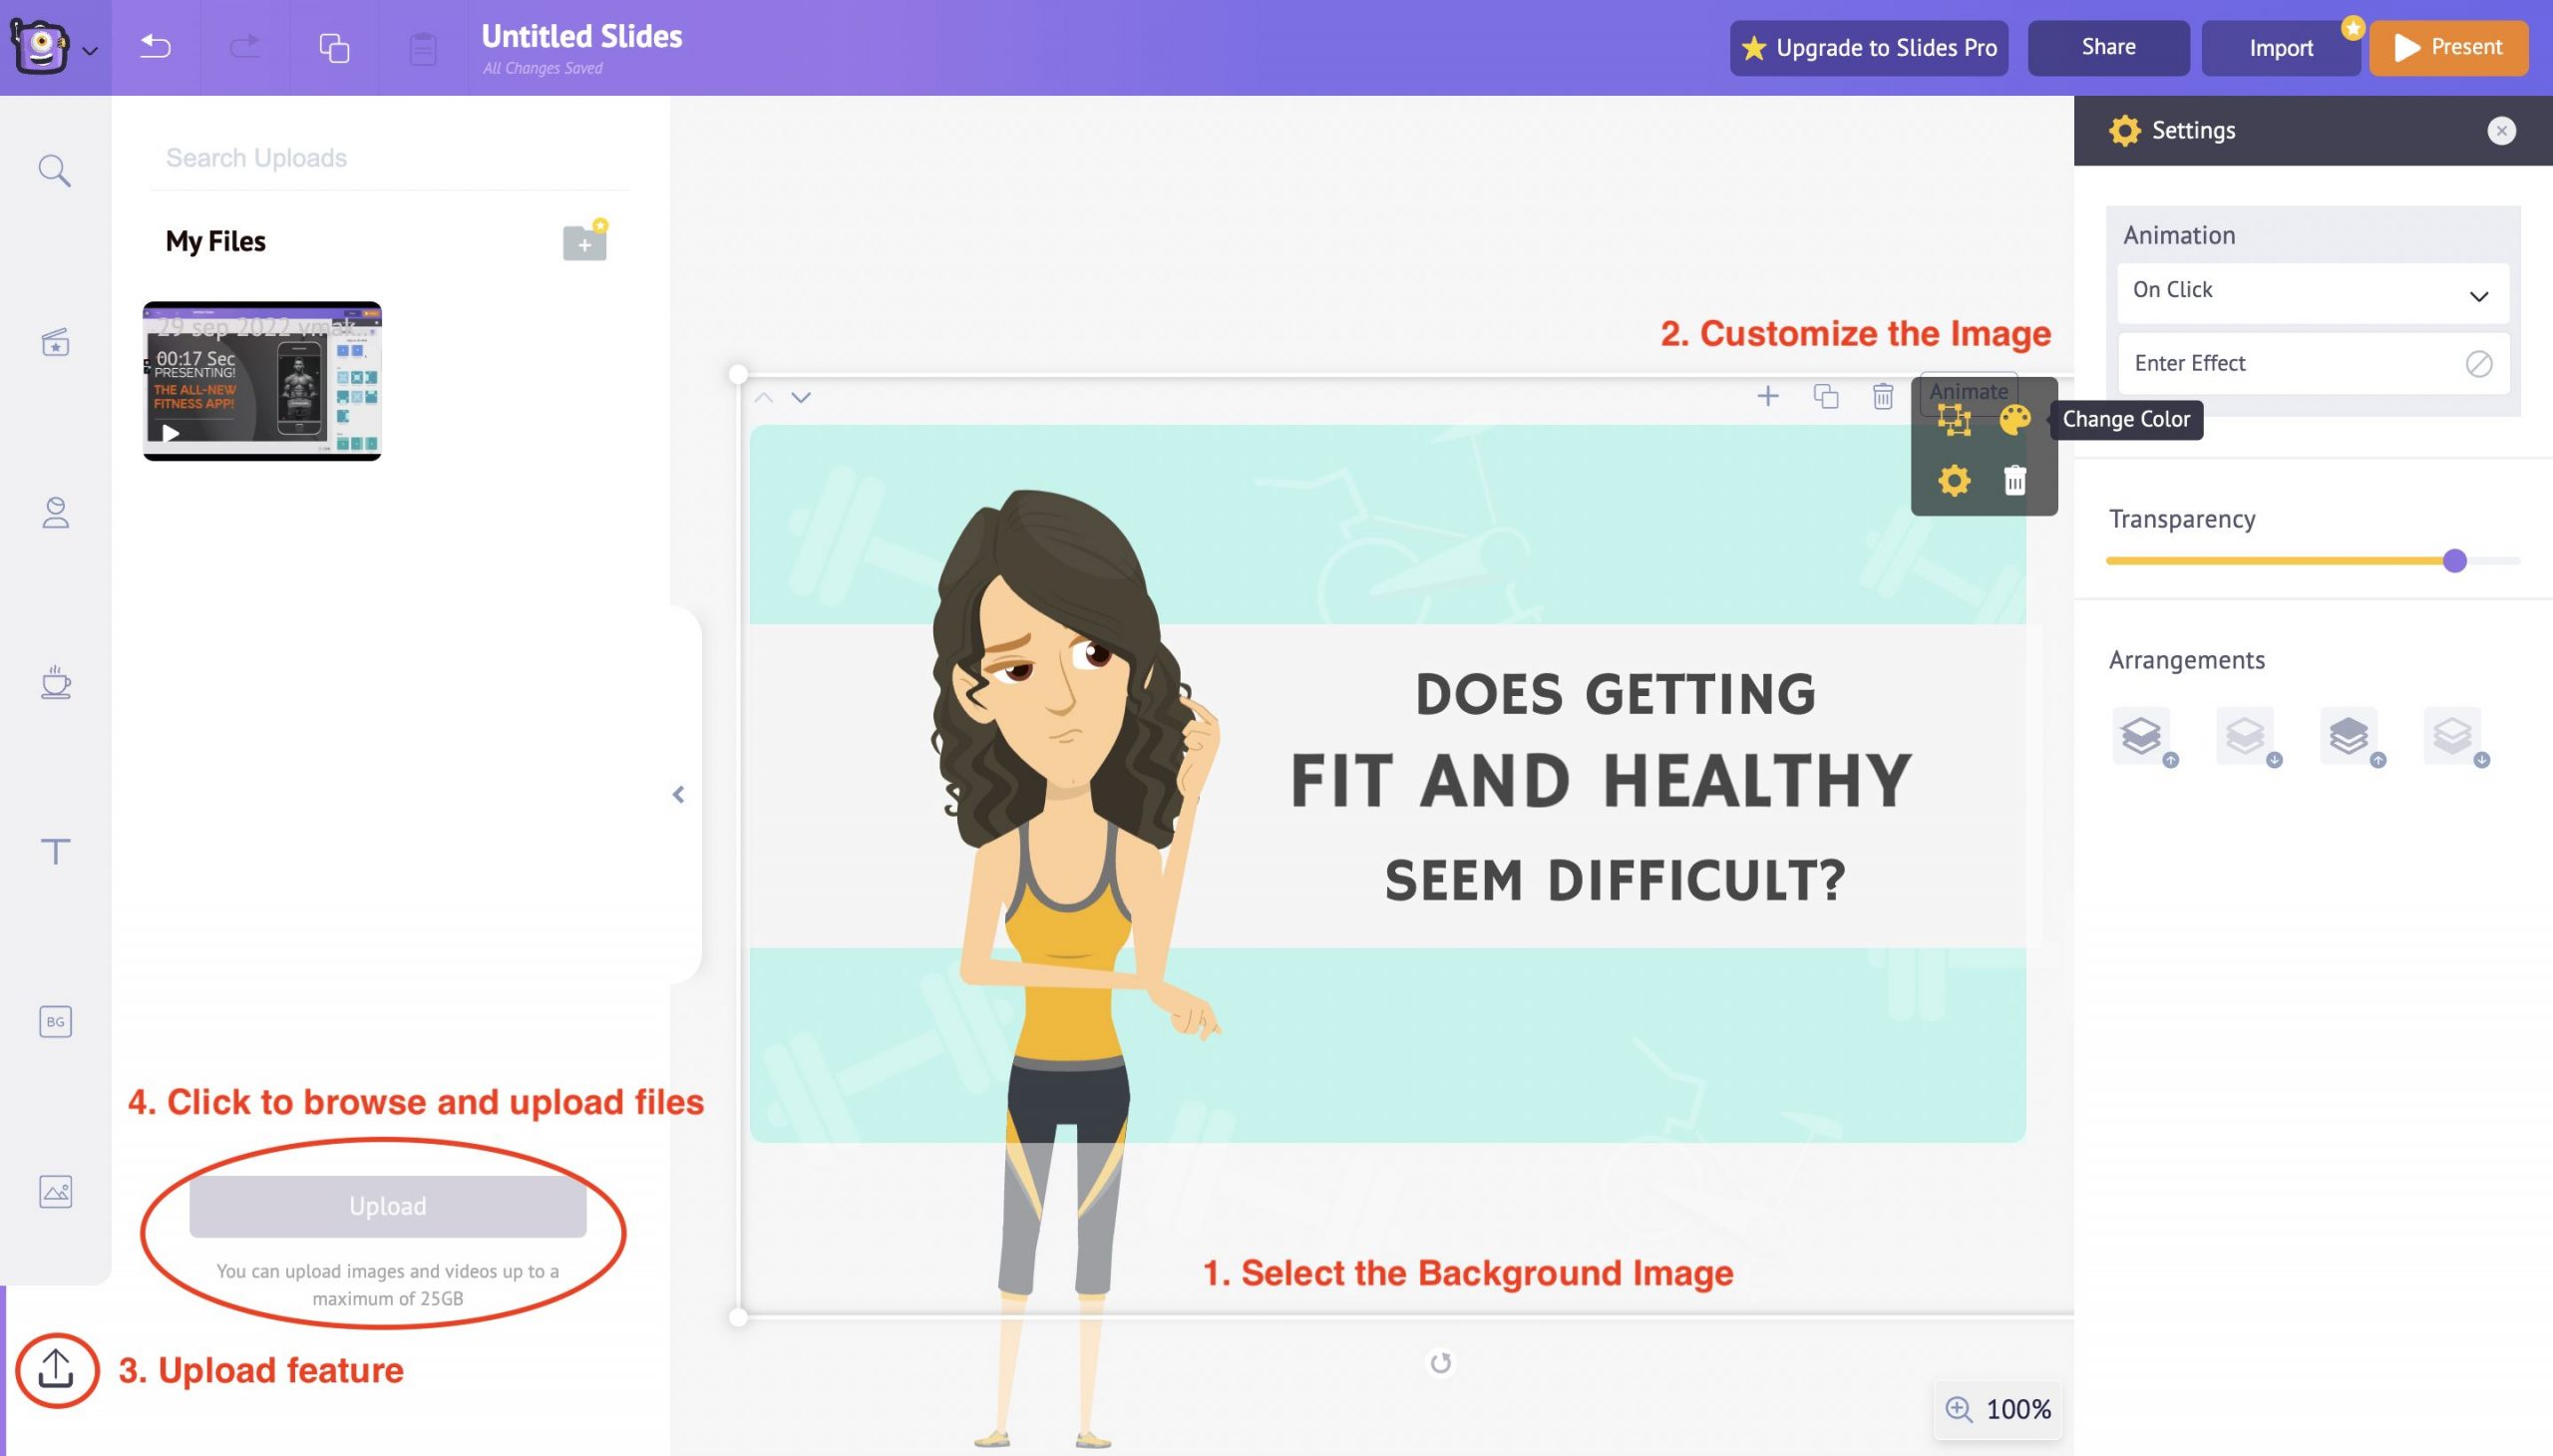
Animaker Deck offers up to 25 GB of storage space for you to upload your custom files onto the slide decks.
That’s some steal, right?
You can upload your own custom images and images into the slide decks by using the Upload feature in the library section.
Click on the Upload button to browse files from your local disc and upload them directly to your project.
Another simpler way of customizing your background is by playing around with the colors.
You can use solid colors as a background, or even better, you can use gradient colors matching your presentation style.
You can add up to five colors and create a gradient-style background on your own!
This way, you get complete control over the selected template and customize it as per your needs.
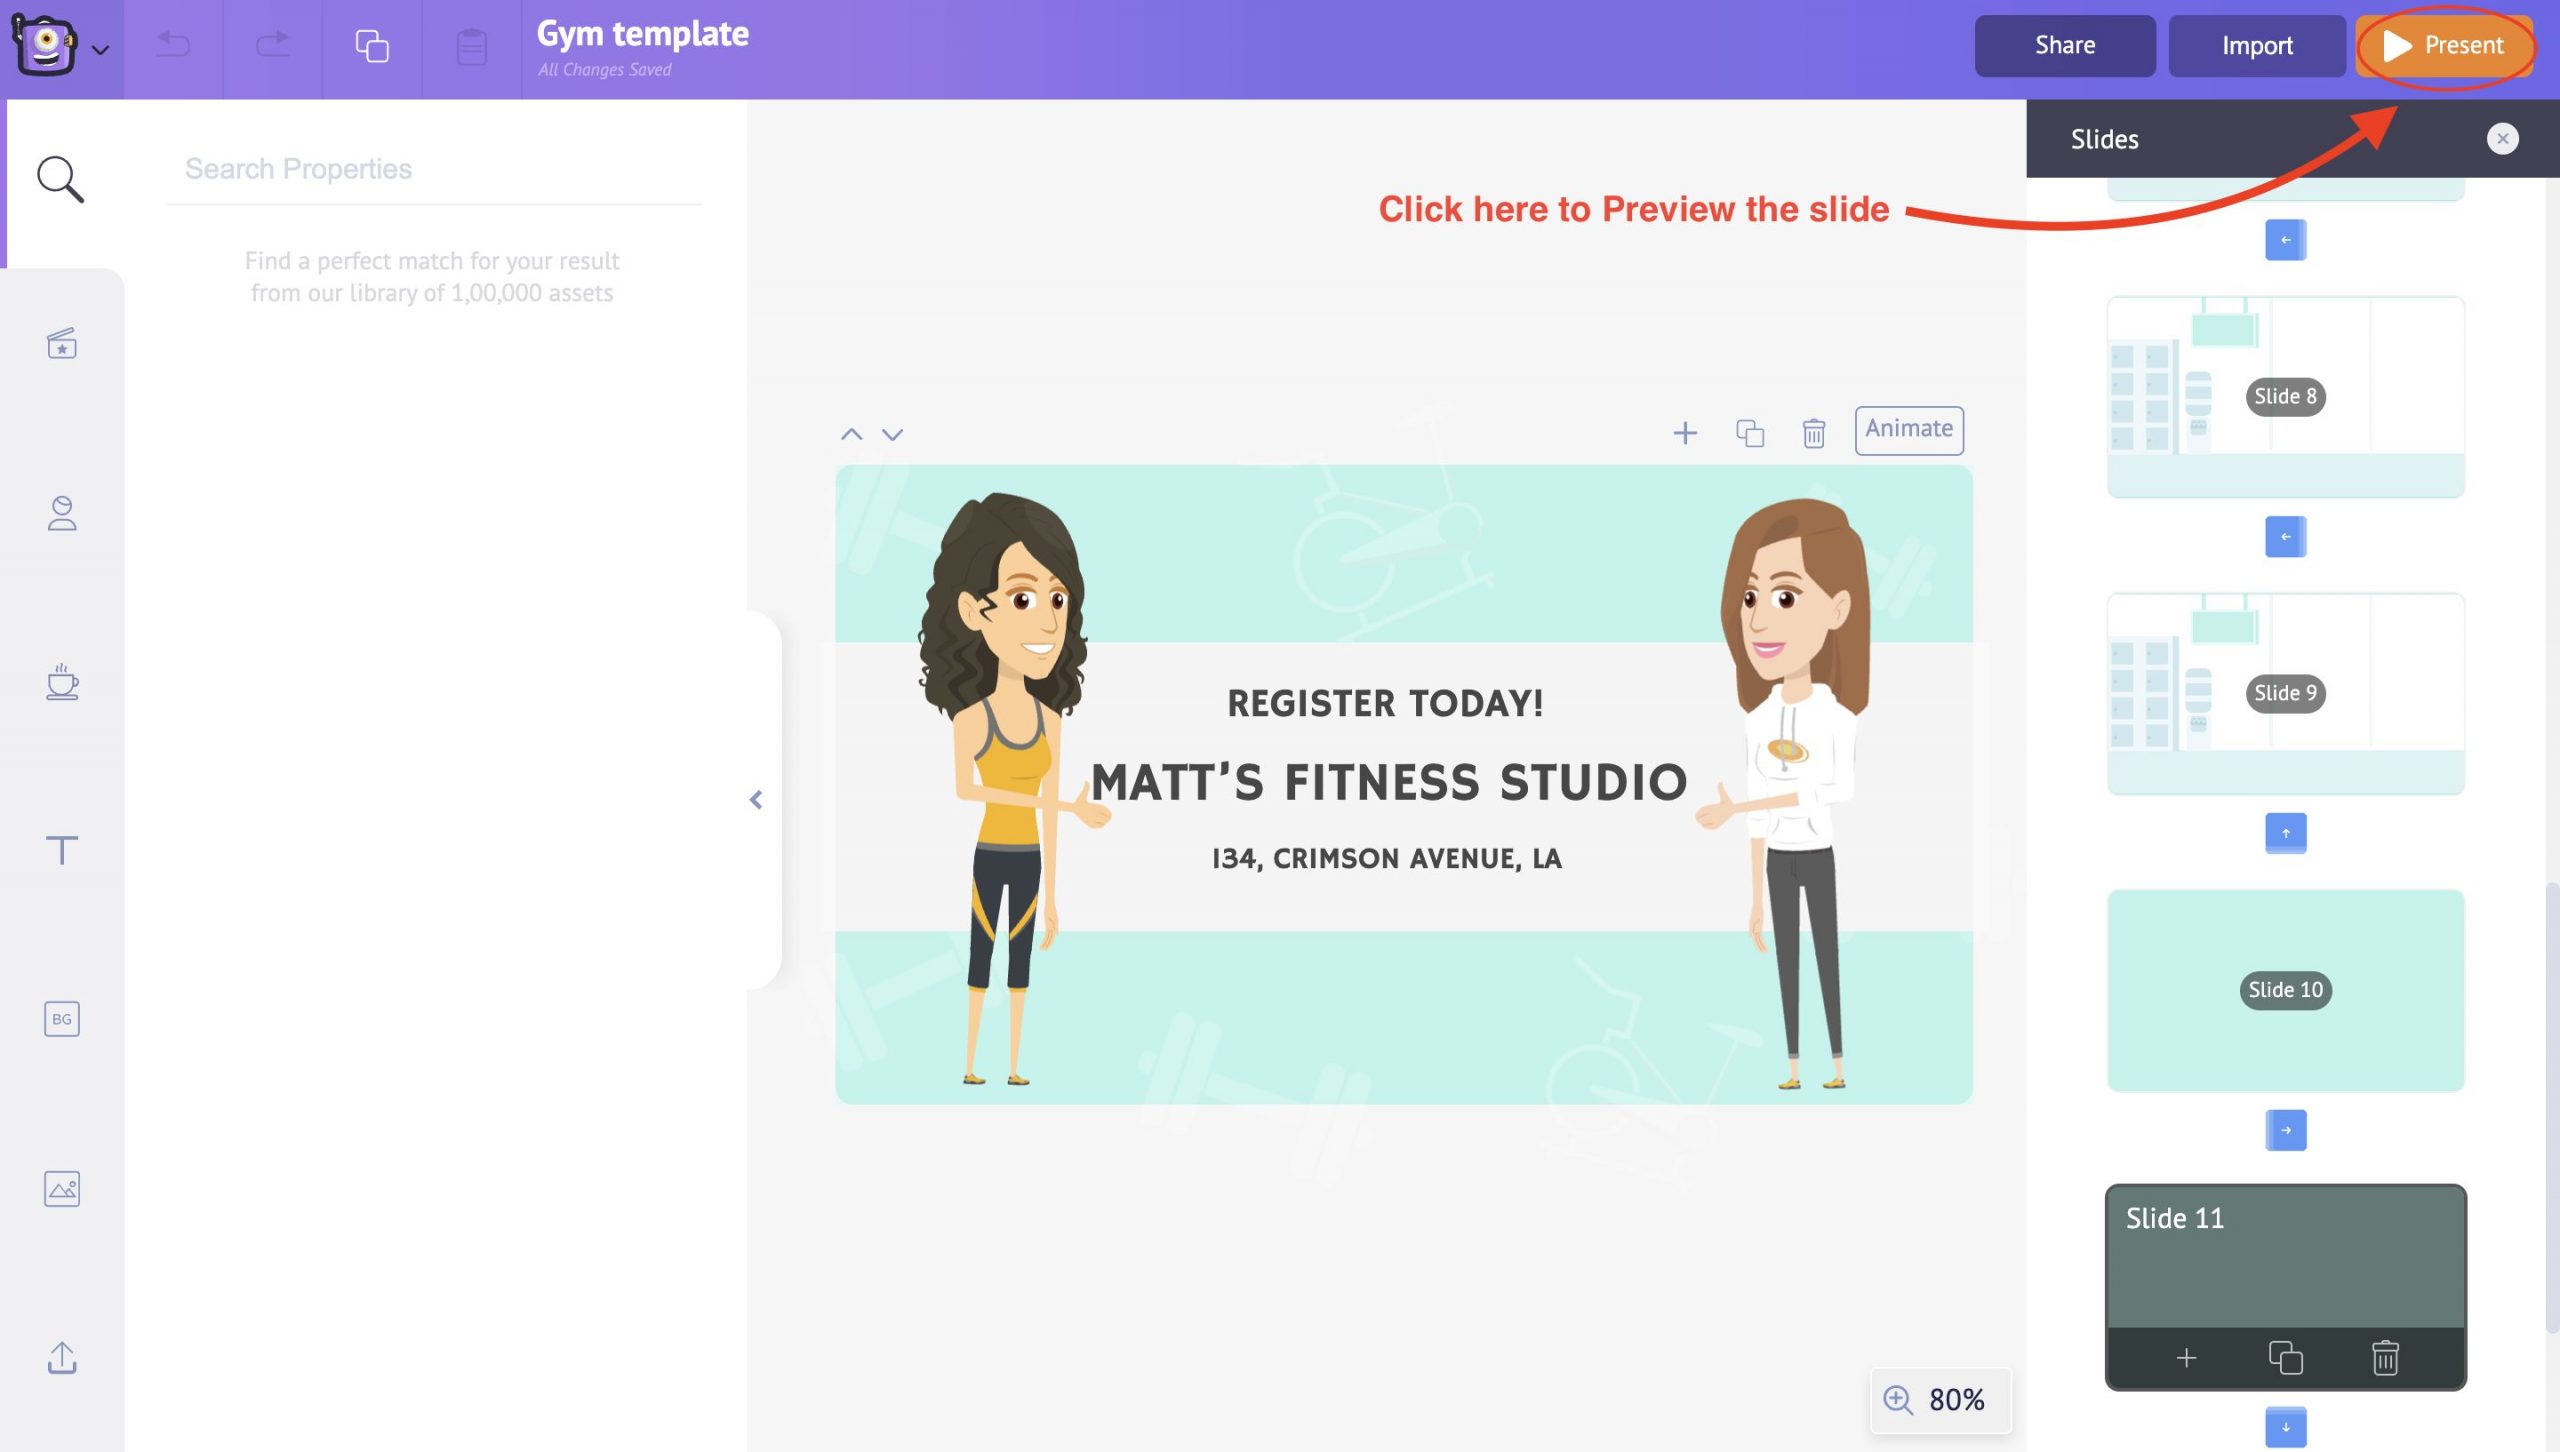
Once you’ve finished customizing the template, click on the present button to preview the entire presentation.
Once you have added the character, text, and properties and selected the suitable background, it’s time to preview how everything looks together when presented.
To do this, head to the Present option in the top menu. Clicking on the Present button will allow you to preview the slide in fullscreen.
This way, you can check and alter the slide's contents accordingly. It’s that simple to create an animated presentation from scratch in Animaker Deck.
Similarly, you can add more slides and customize them according to your use cases.
If you are working in a team, the next step is to get your presentation reviewed by your tea members. A collaborative review process can help elevate your presentation’s quality.
Use the Share button in the top right to share the presentation with your team. All you need to do is enter your colleagues' email addresses and choose between copy and edit links.
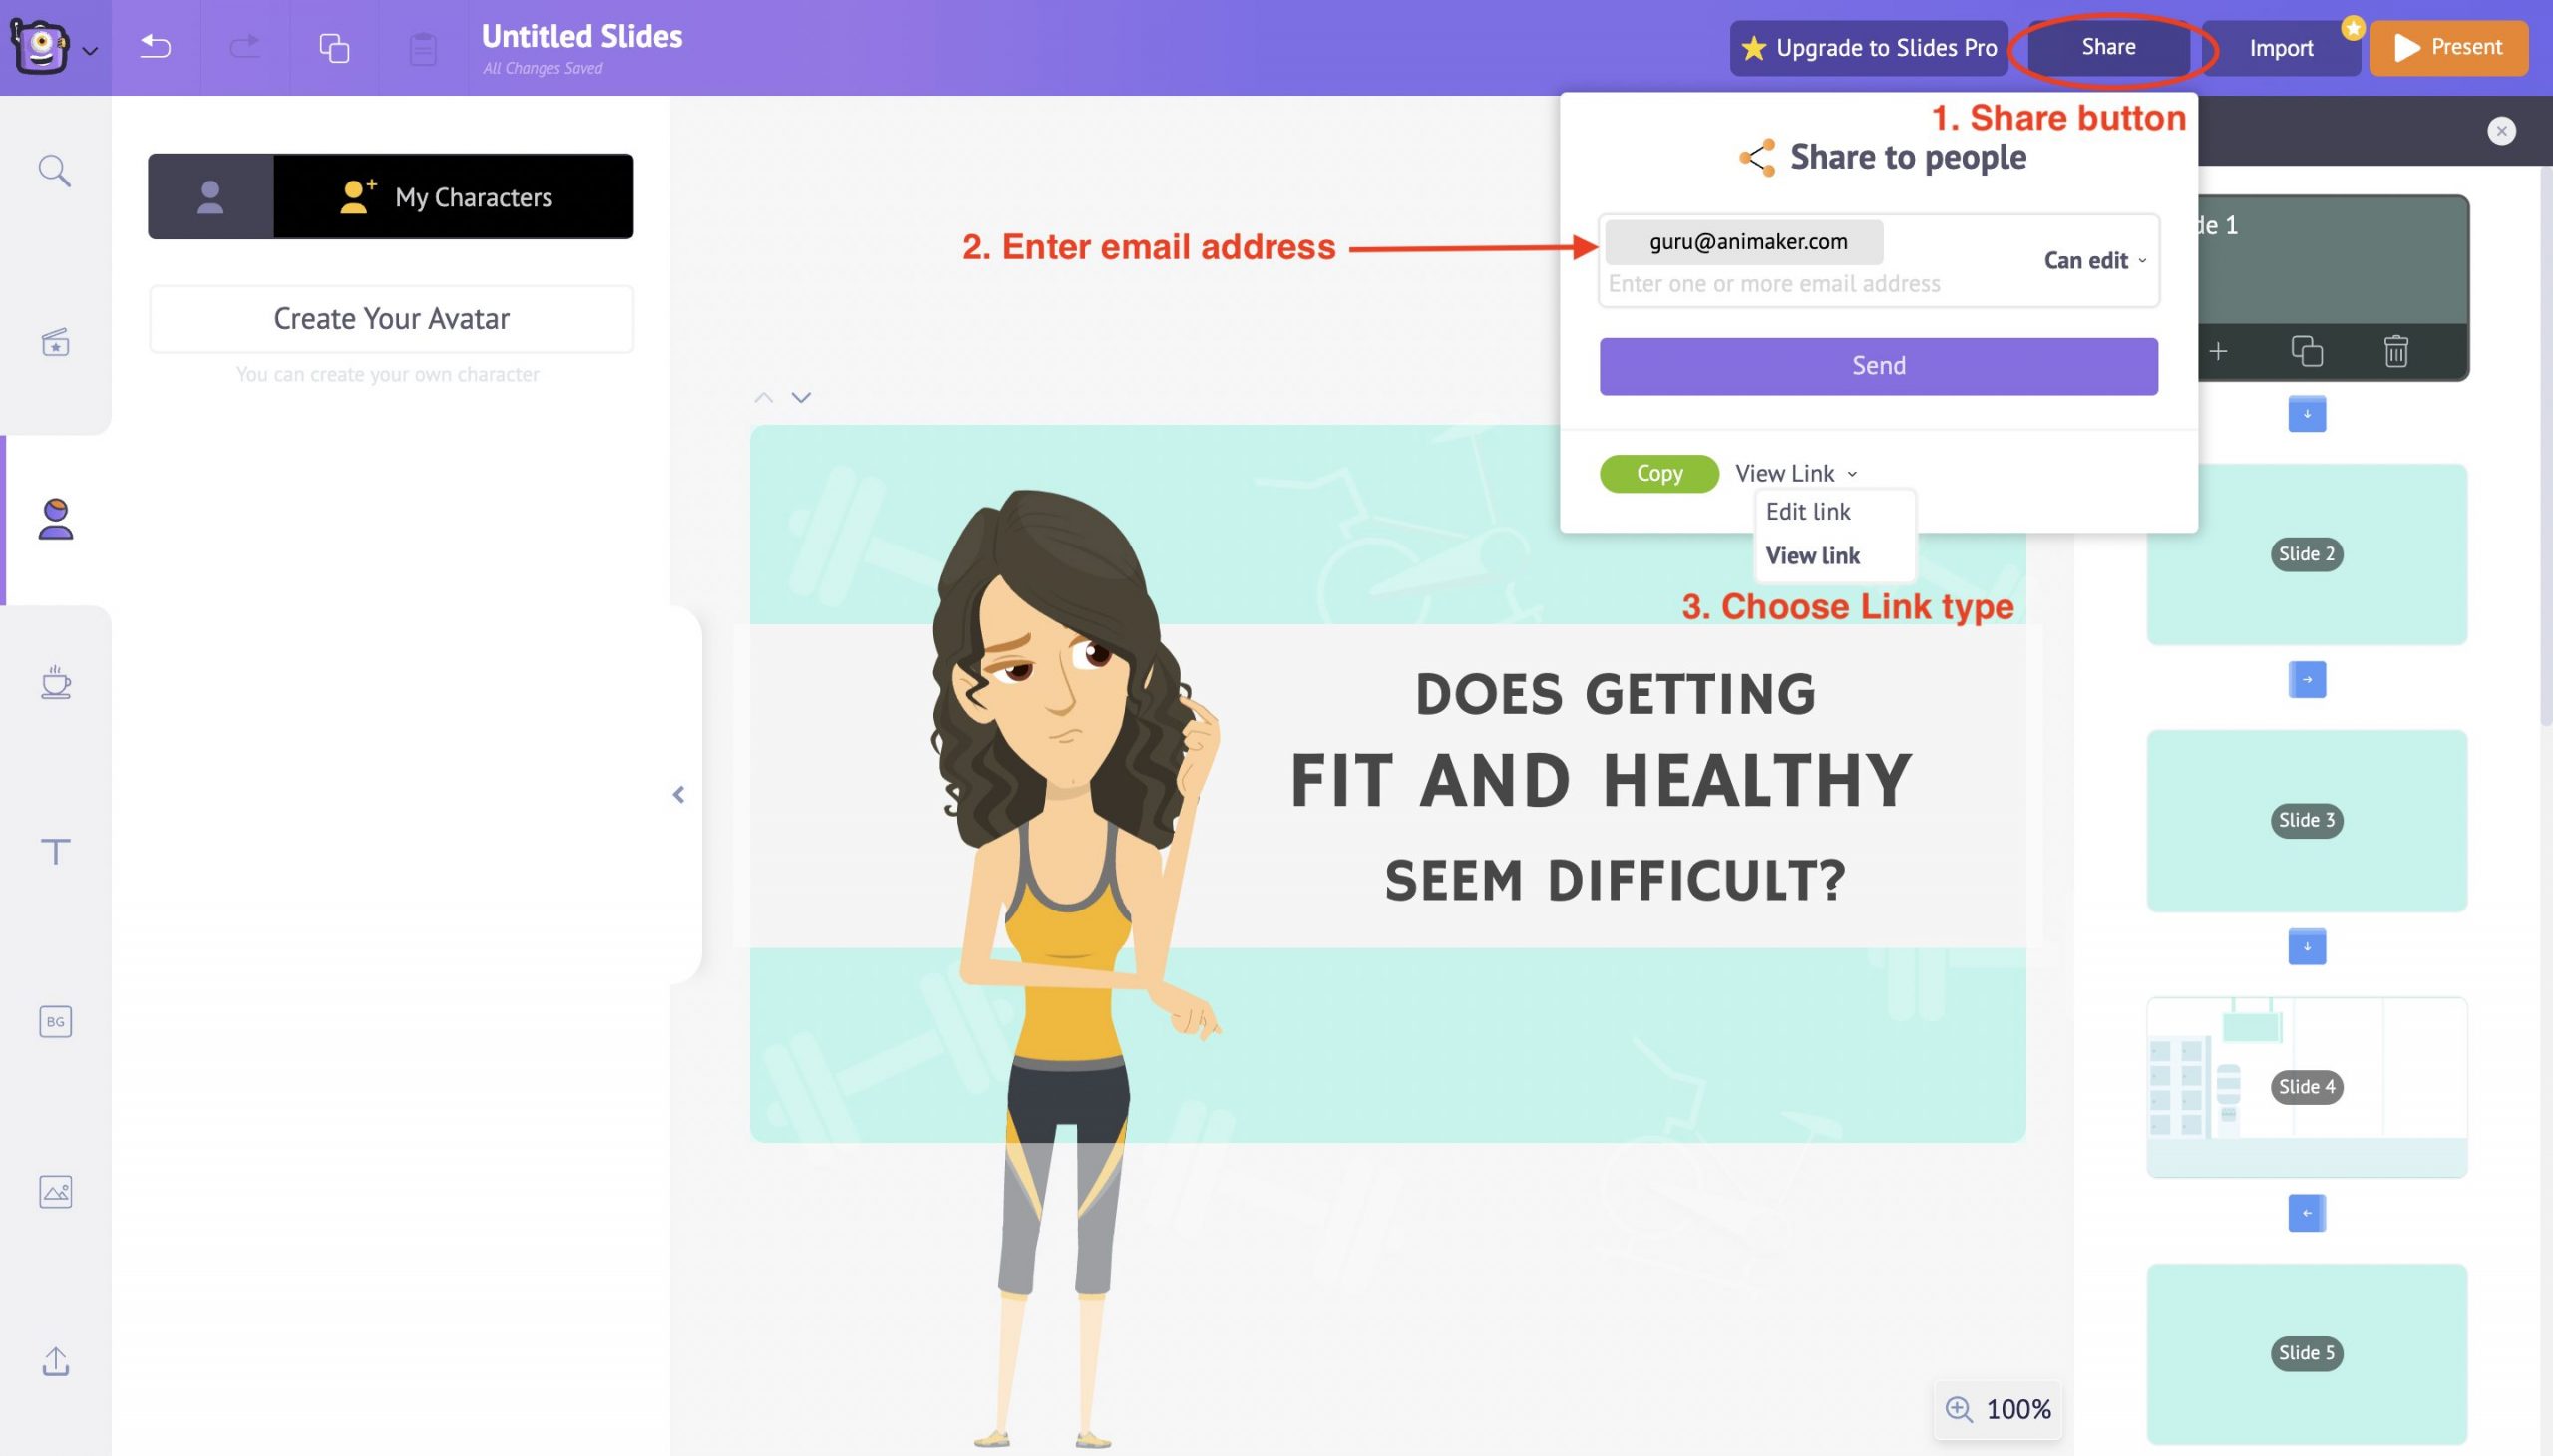
Animaker Deck makes it easy for you to collaborate with your entire team and edit your slide decks together in real-time.
Also, there’s an option to preview the created slide decks with the help of the Present button in the top right corner.
Use this present button to review all the changes, animations, and other transition effects made (if any) throughout the slide.
And that’s a wrap!👏
You have now successfully learned how to create kick-ass animated presentations in a jiffy.
With the advent of influential online presentation makers like Animaker Deck, creating professional-looking animated presentations has become easier and more affordable than ever before.
It is only the beginning! The world of presentations awaits you!
Get started and sweep your audiences right away!
[thrive_link color='purple' link='https://accounts.animaker.com/register/animaker/?trackId=zgvjaw7u9hsi8la&path=/moments/createTemplateDeckProject?templateId=blank' target='_blank' size='medium' align='aligncenter'] Take me to Animaker Deck! [/thrive_link]
Related Posts
Pro-Hacks & Tips to improve your Animaker videos!

Nostalgia marketing: How can startups use cartoon videos to target today’s millennials

How to Animate your text in under 5 minutes!
Subscribe to get awesome DIY tips that could break the boundaries of other DIY tools.
Create Engaging Animated Videos On Your Own
Our drag-and-drop builder makes it easy for anyone to create pro-level animated videos using pre-made templates and ready-to-go assets with zero technical skills.

How To Create Cool Animated Presentations In 5 Easy Steps
You’ve probably seen one of those really cool animated video presentations on YouTube and thought to yourself: “Wow I want one of those explainer videos !” But you soon find out that it’s too expensive, and doing one yourself is just impossible because there is no tool out there that lets you do it…right?
Well, you’re wrong! Now you can Do-It-Yourself!
Once you have learned the five steps to “creating an awesome Powtoon”, you will be able to create your very own cool animated “presentation-cartoon” ( Powtoon ) using Powtoon‘s awesome online animation software.

Functionally it’s as easy as creating a PowerPoint or Keynote presentation, but there are a few new things that you need to consider — (after you finished reading this article please refer to our video tutorial: How To Write an Addictive Script )
How to Create an Animated Presentation
So here are the steps to create an awesome 90 seconds product demo clip using our online video maker :
Step 1: Script
You need to create a script that describes what will happen in every “scene”.
We recommend working with the following simple guidelines to create exciting presentations with an engaging and captivating story:
- Identify the problem are you or your product addressing .
- How does the frustration manifest itself? (Expensive, labor-intensive, annoying, etc…)
- Aggravate problem (for example show what usefulness other solutions are there)
- What is your solution, what are its benefits and why is it better?
- CALL TO ACTION: Test us – Try us – Buy Us.
Remember that when reading your newly created script without pauses, 90 seconds corresponds to around 225 words! So before finalizing your script, please make sure to do a word count (and if I can give you another piece of advice: SHORTEN THE SCRIPT ONCE and then SHORTEN IT AGAIN).
Try this animated presentation video template!
Step 2: Voiceover Guide / Background Music
You need to either choose a background track for your music or record a voiceover. This means that you need an MP3 file of the TEXT PARTS of the script read out as they will appear in the Powtoon . Don’t worry, this does not have to be a professional voiceover, it can just be something basic for now, you are doing this mainly as a TIMING guide.
So you can do this yourself (record yourself in http://audioboo.fm/ ) or use an online text to voice software . You can always hire a professional voiceover artist later to give your Powtoon a really polished sound, this can make a really big difference for a relatively small investment.
Once you have your voice-over guide, all you need to do is upload it into Powtoon and you will now be able to add the visuals to the sound.

Step 3: Dividing the Slides
Now you can start creating visual content according to the script. Each slide represents a scene and an idea as outlined in the script. Try to keep your slides short, this way you can put a lot of interesting visuals in your Powtoon project.
If you have a voiceover, you can make some of the words come to life using Powtoon’s animated options by making them appear in time on the screen. You don’t need to have each word that appears in the script on the stage but rather chose important words to emphasize certain points.
Step 4: Populate the Slides
Now it’s time to include additional features and make things fun such as colors, graphics, background, animation styles, props, images, and characters to your slides. It’s important to convey the message together with the graphic objects and as little text as possible, so the audience doesn’t have to sit there reading all the time (unless this is the effect you’re after) and doesn’t get overwhelmed with information.
For example: If the problem makes the main character sad, it is enough to display the main character in a sad pose without adding any text.

Step 5: Timing
Now you have to time it all. This is the last step and is actually one that can have a significant effect on the “professional” look and feel of your final result.
The Powtoon timeline is designed to allow you to easily adjust the appearance and timing of all the elements on the screen. You can now listen to the voiceover running in the background and make sure that all the visual elements reflect what you hear. The more accurate you get this; the more awesome the final result!
- Latest Posts

Jordana Pepper
Latest posts by jordana pepper ( see all ).
- The Most Creative Teacher Is… - October 22, 2015
- How To Make Marketing Videos People Will Really Love & Share! - April 28, 2015
- Digital Marketing in 2015 - March 15, 2015
- 5 Steps to Overcoming Stage Fright - March 2, 2015
Powtoon Celebrates 500,000 Presentations with a Nationwide Gift to Educators
Why Companies Are Gearing Towards Video Marketing
Reachli Saves Thousands Making Landing Page Videos
Presentation design – the powerpoint alternative, brian boyko has some thoughts about windows 8 he wants to share with you…in an animated presentation that’s gone viral, working with powtoon in the classroom (for students).

Thank you for your interest in Powtoon Enterprise!
A solution expert will be in touch with you soon via phone or email.
Request a demo
By submitting, you agree to our Terms of Use and Privacy Policy.
Presentation animation made easy

Summary/Overview
Incorporating animation into your presentation can add necessary energy that will pull your coworkers into your ideas and plans for your workplace. Follow along with our easy guide to presentation animation and you’ll be engaging your colleagues in no time.
What is presentation animation?
Presentation animation is any visual effect applied to individual slides or specific objects on slides. You can animate text boxes, images, tables or indices, shapes, or any additional graphics. These effects can include changes in color or size, entrance and exit effects, slide transitions, or any other movement.
Adding animation to your presentation is easy with the free Adobe Express presentation maker . Get started today with fun and customizable animated presentation templates .
Types of presentation animation
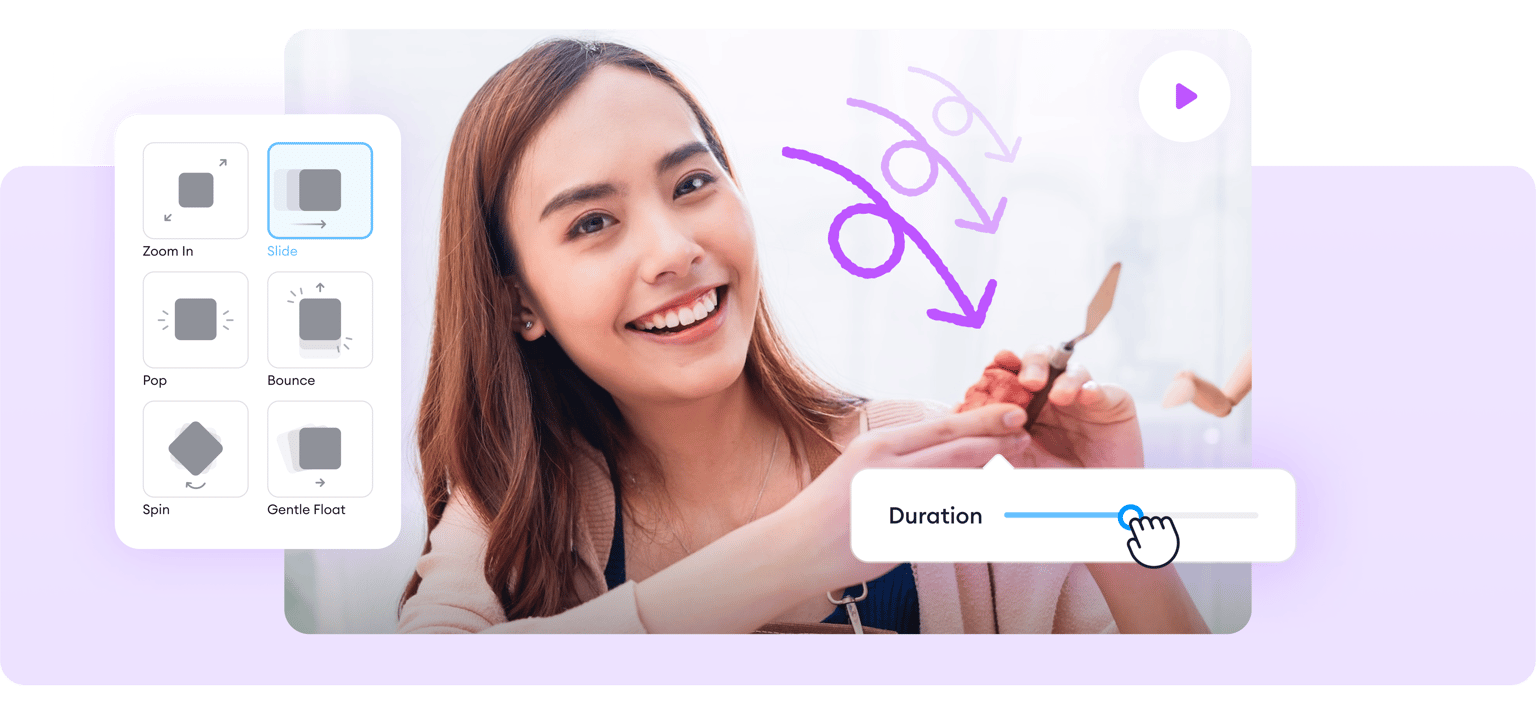
Text animation.
Text animations are animated effects applied to text already on a slide. These effects can include flickering, fading, sliding across the slide, growing in size, shuffling the colors of the text boxes, or a typewriter-style action.
Photo animation
Photo animations are animated effects applied to the static visual elements of a slide. These visual elements could be a shape, an icon, or a photograph. Effects applied to these elements could be blurring them, changing their color filter, zooming in or out of the image, using greyscale, panning from side to side, or fading the image.
More than one animated effect can be added to the same element, which can be customized based on your intended feel for the slide.
Why use animation in presentations?
Animation should be a contributing factor to your overall message. They keep the focus of your audience so you can get your point across.
Movement is a universal concept. Whether you’re using Adobe Express, Google, Prezi, or attempting to use PowerPoint animation tools, animation can be added to develop your ideas, maintain consistency in your branding, and be applied equally to multiple formats — like social media thumbnails or infographics.
Benefits of adding animation to your presentation:
- Well-placed animation can make any presentation more dynamic, and therefore more memorable. Your audience will better retain any information you provide because they feel more engaged with your presentation.
- Because visuals engage audience more than any other medium, they can help you say more. Adding animation can extend your point past what would’ve otherwise been a text-heavy deck.
- Most people — 65%, to be exact — are visual learners. Using animation can deepen one’s understanding of the concepts presented more than traditional diagrams or text breakdowns, thus allowing for a quicker communication of ideas.
- Animation can cut down on time, and as we know, time is money. The more time you save in your work, the more resources you’ll have to apply elsewhere as needed.
How do I animate my presentation?
- Start with a free presentation template from Adobe Express . Add in whatever text and images you’d like, or simply use what’s provided.
- Tap the “Animation” tab on the righthand side to see the available elements for your slide.
- Select which text and images you’d like to animate and play around with the effects to find out what works best with your content.
- Once you’ve picked your animation elements, you can add additional slides, view all the slides at once to get a cohesive vision of your presentation, or start a new project.
Try Adobe Express today
Explore more free Adobe Express presentation templates

Ready to create standout content?
Start for free
Explore more related posts
https://www.adobe.com/express/learn/blog/how-to-make-qr-code-menu
https://www.adobe.com/express/learn/blog/why-you-need-scheduling-tools
https://www.adobe.com/express/learn/blog/tiktok-as-search-engine
Make Animated Presentation
Captivate your audience with dynamic animated presentations!
319 reviews

Bring your presentations to life with animated presentations!
Take your PowerPoint presentations to the next level with our powerful animated presentation maker. VEED’s professional video editing software lets you create captivating presentations that engage your audience from start to finish. Our vast selection of animation options allows you to bring your ideas to life, making your message stand out and leave a lasting impression. Make video presentations for your clients, make pitches to investors, and give clear, powerful lectures. You can also use our screen recorder to upload your Microsoft PowerPoint slides and Google slides. Use our editor to add background music, text, subtitles , and more!
How to create animated presentations:
Upload slides, videos, or start recording
Upload your video to VEED or record yourself using VEED’s webcam recorder. You can also upload your slides and present them while recording.
Add music, animations, images, text, and more!
If you don’t have your own animations, you can select from our stock media library and add animated clips to your video presentation. Choose from our wide selection of royalty-free background music, video clips, and more!
Present, pitch, and share your presentation
Export your animated video presentation or send the VEED link to your clients to direct them to the video view page—letting them watch your video without having to download it.
More ideas for your animated video presentation:

Create stunning visuals, add your slides, and more!
Our animated presentation maker lets you create stunning visuals quickly and without complicated configurations. With a vast selection of video templates and animated clips from our stock library, you can choose the perfect style to match your message and brand. Customize your presentation and impress your audience with stunning visuals that bring your ideas to life. One way to liven up your presentation is by adding transitions. Just click on the Transitions tool from the left menu, select a style, and drag and drop it in between video clips.
Add text, background music, and subtitles to your moving presentation
After uploading your slides and recording yourself, you can edit your video and use our wide array of tools to make it look exciting and fun for your audience. VEED’s drag-and-drop interface lets you quickly add text, images, and animations to your slides, making it simple to create engaging and dynamic presentations. Choose from our wide selection of animated clips from our stock media library. Automatically add subtitles to your videos! You can also animate elements like text, logos, and subtitles.
Use our Brand Kit to stay on brand across all platforms
Our Brand Kit lets you upload your logo, brand colors, fonts, and more so you can stay on brand when sharing your video presentation—especially on social media. You can even animate your logo for added impact! Plus, you can save your video as a template so you can streamline your entire content creation process. Our brand kit and full stock library are available to premium subscribers. Check our pricing page for more info.
How do I make an animated video presentation?
Upload your video to VEED or use our webcam recorder. You can also upload your slides and present them while recording yourself. Edit your video, add all the animated elements you want, and download!
Which app is best for making animated presentations?
There are many video presentation software out there, but VEED stands out because of its smooth user interface and design. Plus, it works straight from your browser!
How do I animate my presentation?
You don’t need to manually animate your presentation! VEED lets you add animated elements and animated video clips from our full stock video library. Animate text, characters, logos, and more!
How do I make an animation in PowerPoint?
Microsoft PowerPoint offers basic animation features. But if you want to animate more elements, the best app to use is VEED’s online video editor!
Discover more
- Demo Creator
- Tutorial Video Maker
- Webinar Video
Loved by creators.
Loved by the Fortune 500
VEED has been game-changing. It's allowed us to create gorgeous content for social promotion and ad units with ease.

Max Alter Director of Audience Development, NBCUniversal

I love using VEED. The subtitles are the most accurate I've seen on the market. It's helped take my content to the next level.

Laura Haleydt Brand Marketing Manager, Carlsberg Importers

I used Loom to record, Rev for captions, Google for storing and Youtube to get a share link. I can now do this all in one spot with VEED.

Cedric Gustavo Ravache Enterprise Account Executive, Cloud Software Group

VEED is my one-stop video editing shop! It's cut my editing time by around 60% , freeing me to focus on my online career coaching business.

Nadeem L Entrepreneur and Owner, TheCareerCEO.com

When it comes to amazing videos, all you need is VEED
Create animated presentation
No credit card required
More than making animated presentations!
You can do so much more than just create animated presentations with VEED! VEED is a professional, all-in-one video editing software that features all the tools you need to create stunning videos that engage your audience from start to finish. Need to make quick videos and personalize them in a snap? Start from our video templates! All these—straight from your browser.

Home Blog PowerPoint Tutorials PowerPoint Animations: Animate Text, Objects, and Slides in Your Presentations
PowerPoint Animations: Animate Text, Objects, and Slides in Your Presentations

Working with graphic assets can bring a degree of expectancy when delivering a presentation, such as in the case of PowerPoint animations. They can help add emphasis to slide content and reveal parts of the slide gradually to help presenters discuss topics sequentially.
As a presenting software, PowerPoint provides all kinds of animations for emphasis, entrance, exit, and to create a set motion. Join us today to learn all about animations in PowerPoint and unleash your creative potential.
Table of Contents
How PowerPoint Animations Can Benefit Presentation Design
Understanding powerpoint animation basics, types of animations in powerpoint, how to animate text on powerpoint, animating objects for visual impact, crafting seamless slide transitions in powerpoint, mastering advanced animation techniques in powerpoint, dos and don’ts of powerpoint animations, real-world use cases of animated presentation slides, recommended animated powerpoint templates, enhanced engagement and understanding through animations.
Dynamic presentations can have many benefits. The importance of such animations is often only realized by people familiar with PowerPoint. As we’ve seen in our guide on visual communication , graphical elements can make concepts more understandable. In the case of animations, we can use the transitions between slides or elements to split concepts and make them clearer.
Audience engagement is another factor, as eye-catching slides often include surprise elements hidden behind animations. These elements attract the audience’s interest and increase retention rate. In this case, animations serve as powerful presentation aids for the speaker.
Capturing Audience Attention
PowerPoint animations are more likely to capture the audience’s attention than static slides. The moving objects on-screen are the type of visuals people are likely to find attention-grabbing instead of trying to read through static slides or looking at static images. On this behalf, storytelling techniques boost their efficacy in connecting with the audience by implementing animations and transitions rather than sticking to static slides.
Emphasizing Relationships Between Elements
Whenever we work with contrasting values, like pros and cons slides , animations help the presenter highlight areas of interest or disclose the opposite values section by section. This, in turn, structures the speech for real-time interaction with the graphical assets rather than having the audience read the slide and lose focus on the speech.
Interactive Presentations
As mentioned before, presenters can craft compelling stories through the careful use of animations in PPT. What is often overlooked is the link between interactive presentations and animations. For instance, a speaker can deliver different outcomes of the presentation by selecting one path whose outcome is revealed through an animation. This “wow” factor induces surprise and creatively presents case scenarios.
Another option is when introducing your team in presentations. Rather than using static slides, incorporating animations gives more rhythm to the presentation and invites the public to interact with the speaker.
Getting Started with Animation in PowerPoint
To start with animations in PowerPoint, select an object you wish to animate and go to the Animations tab to choose an animation to add to the slide element. When adding animations to multiple objects in a slide, you should consider the sequence you wish to use to animate objects.

Accessing Animation Features
When accessing animation features, you will come across various animation types. By expanding the Animations menu, you can select animations for entrance, exit, emphasis, and motion paths to create a path for your animated sequence. You can also click to instantly preview an animation for the selected object or switch to slideshow mode to see how the animation will appear.

Adding Animations to Text and Objects
Once an animation is added to a text or object, a number is assigned. This number shows the sequence in which the object will be presented. For example, the object will be the first to be animated on screen, followed by two, three, and so on.

You can adjust the sequence of animations, triggers, and other settings from the Animation Pane in PowerPoint.

Timing and Sequence in Animations
The Timing menu in the Animations pane provides options to set the duration of the animation, the time to delay the animation on the screen (if necessary), and to assess if the animation starts on click, with the previous or after the last animation. How you select these animations will help you adjust the time and sequence of the animations. For example, you can use ‘ with previous’ option to show two animated objects simultaneously.

Entrance, Exit, and Emphasis Animations
Some of the most commonly used animation types fall under three categories: entrance, exit, and emphasis animations.
Entrance Animations
The Entrance Animations are meant to start or introduce objects. You can explore all entrance-related animations by going to Animations -> Animation (menu) -> More Entrance Effects . This will reveal all entrance animations you can click to preview for a selected object. These often consist of basic animations with effects like appear, fly-in, float-in, strips, wheel, circle, box, dissolve-in, split, wedge, wipe, plus, diamond, checkerboard, blinds, etc. The animations can be divided into three categories: basic, subtle, and moderate. These categories help identify the type of effects in each category according to how prominent they might be on screen.

Exit Animations
The Exit Animations are meant to help exit a slide or animated sequence to close a topic or subtopic, or to conclude the on-screen animations for a slide. These animations are similar to the Entrance Animations with the same effects. You can use these animation types for an exit sequence using effects like blinds, circles, checkerboard, box, plus, split, wedge, wipe, diamond, dissolve out, contract, swivel, fade, zoom, basic zoom, collapse, float up, etc.
Like the Entrance Animations, you can go to Animations -> Animation (menu) -> More Exit Effects to preview the animations and to see the three categories for basic, subtle, or moderate animations.

Emphasis Animations
Other than basic, subtle, and moderate, the Emphasis Animations come with an additional category, ‘exciting.’ Emphasis animations in PowerPoint provide visual aids for emphasizing content within slides. The effects for these animation types in PowerPoint are also quite different from the entrance and exit-themed effects. Effects like fill color, grow/shrink, transparency, line color, teeter, color pulse, object color, desaturate, darken, lighten, blink, wave, and others can help emphasize an object within a slide to make it pop out before the audience.

Exploring Motion Path Animations
If primary effects aren’t what you want, it’s time to switch to Motion Paths . These are animated effects in PowerPoint that showcase objects across a specific path. In other words, these are elaborate animations that drag objects on the screen based on a particular shape or path, such as a 4,5, 6, or 8-point star, crescent moon, circle, diamond, football, heart, octagon, pentagon, square, trapezoid, teardrop, right triangle, arc (down, right, left, up), curvy right, bounce right, etc.
Motion Paths are divided into four categories. The basic effects consist of shapes, whereas, Line Curves provide lines and curves to animated objects. Similarly, the special category contains more elaborate effects such as inverted square, loop de loop, peanut, bean, curved square, etc.

Choosing Appropriate Animation Styles
When choosing animation styles, picking a style that best resonates with your presentation slides is important. The animations’ names and categories can help you identify what might work for you. Furthermore, after adding an animation, you can go to Effect Options to view the various directions and options used to refine the animation to build your sequence further. Depending on the animation type, you can pick variations of the animation, directions, colors, transparency, points to edit or lock, or other options for selected effects. The image below shows the variations for the Wheel animation in PowerPoint via Effect Options .

Similarly, if you select Transparency from Emphasis Effects, you can choose how transparent the object will appear on the screen. Likewise, many color-themed effects enable picking a custom color to animate an object.

Since Motion Paths are unique, you will get options to edit points, lock paths, reverse the direction of the default animated sequence, etc.

Now that you know how to animate in PowerPoint, it’s time to explore making written content more interesting using animations.
Start by opening a blank PPT file and adding a placeholder text. The idea is to learn how text interacts with animation effects without working with complex graphic layouts.

Select the text and switch to the Animations tab. In there, pick an animation effect of your preference. You will get a preview of the effect applied – which will show the number of the animation order once completed.

Animations for text, like any other animation, can be controlled in terms of behavior by accessing the panel at the right-most section of the Ribbon.

Additionally, we can expand the animations panel to select from the different effects offered by PowerPoint.

Animating Text Elements on PPT Templates
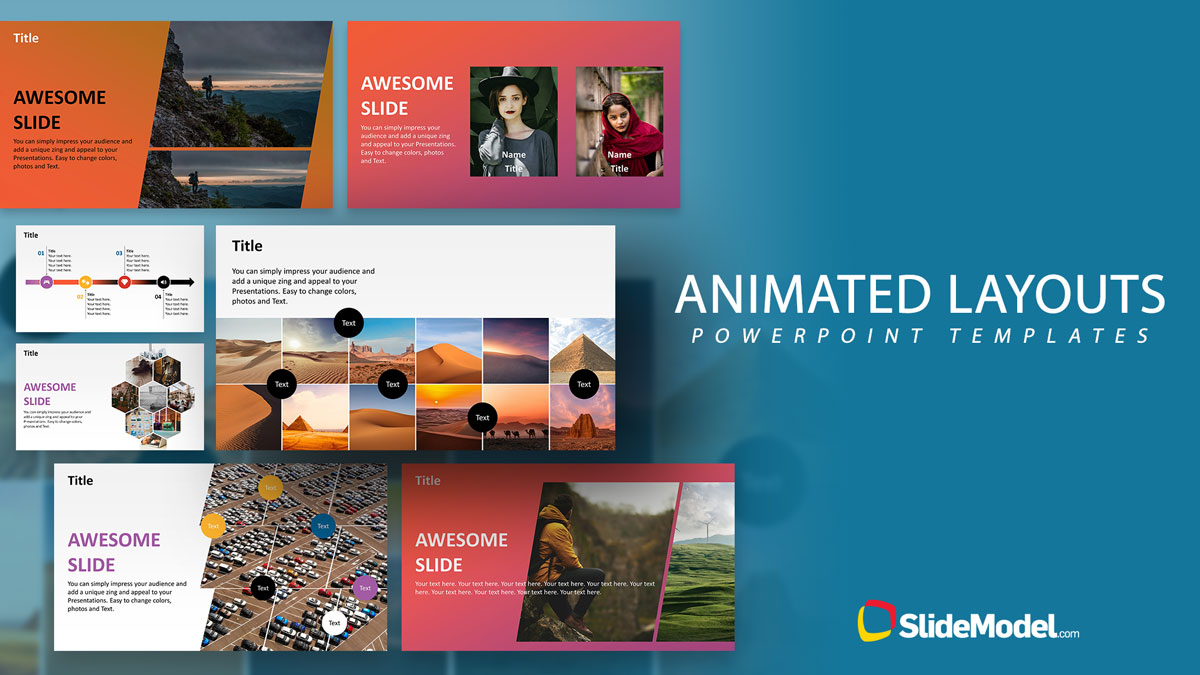
Animating text elements to highlight key aspects of your slides can be a great way to create engaging presentations. The Animated 3D 4 Steps & Core PowerPoint Template shown below are among the Animated PowerPoint templates at SlideModel that animate objects and text elements for emphasis while retaining a clear layout.
As visible from the animated sequence from the Animation Pane in the image below, the slide deck uses animated text boxes with a mix of other slide elements to create a sequence where a four-step diagram is highlighted with supported text to help elaborate each part of the diagram in an animated sequence. We can add, remove, or modify the included effects via the Animation Pane.

Balancing Text Animations for Impact
By balancing text animations, you can have maximum impact when highlighting content for your slides. The animations can be triggered to start simultaneously to reveal all the text after a sequence of objects, before objects appear, or one by one to reveal the diagram contents gradually.

Animating Images, Shapes, and Charts
When animating shapes and images, you can use a variety of animation types for entrance, exit, and emphasis, and to make the content pop out. However, charts require subtle animations, and it’s best to use basic effects to reveal charts, such as Appear and Disappear .
The Animated Network Diagram PowerPoint Template is an example of how to animate shapes.

The template’s title slide reveals shapes and icons in the form of a diagram in an animated sequence.
You can also include images in such a template to customize the given diagram and animate it to reveal the image simultaneously or after a set of objects has already been revealed.

If you are including a chart in your slide that is to be animated, make sure the animation corresponds to other elements that might also be animated. For example, you can trigger the chart to be revealed after the slide title with a simple Appear effect. In such a case, the chart can be displayed altogether or gradually, in animated form.

Applying Object Animations Strategically
When placing slide objects, you must apply the animations strategically to avoid revealing information out of sequence. Furthermore, it is also worth considering how your effects appear. For example, in the image of the diagram below, would you prefer the diagram to appear floating upward or downward? Such considerations and other vital elements, such as your branding needs, are important to ponder when setting your animated sequence.

Enhancing Presentation Flow with Transitions
While Animations for PowerPoint are one way of making your slides engaging, PowerPoint Transitions is another. You can access them via the Transitions tab in PowerPoint and apply transitions between slides.

While many legacy transitions provide basic effects when switching between slides, some of the more recent additions to this menu, such as Morph Transition , enable the creation of elaborate animations by using Transitions to animate your slides. The below example shows a slide with the Morph transition, giving an animated effect to the diagram.

Maintaining Coherence Between Slides
When applying Transitions, it is essential to maintain coherence between slides by ensuring they don’t overlap with any added Animations. To do this, you should preview your slide deck to see how it might appear once all the animated effects have been included in your slides. Like PowerPoint Animations, you can also use Effect Options for Transitions to set a sequence or direction that best suits your needs.

Layering for Complex Animation Effects
Using layers of multiple objects and slides can easily create advanced animation effects. This can be done using not only PowerPoint animations but also transitions. The Animated Pendulum Swing PowerPoint Templates from the SlideModel archive of animated templates use Transitions like Morph to create animated sequences. The below example shows a swinging pendulum created using Morph.

Combining and Triggering Animations
Depending on the number of elements within a slide and the animations used, you can use triggers to customize and set sequences for slide elements to animate. The example below shows the selected pendulum’s various linking options for the on-click trigger. By placing your slide objects to be connected and triggered with different parts of your slide, you can create and customize animated sequences that can be pretty attention-grabbing.

PowerPoint Animation Painter
If you thought you had to start from scratch to animate each slide of your presentation, you are sorely mistaken. Much like the Format Painter option in PowerPoint, we can find Animation Painter , which is accessible via the Ribbon under the Advanced Animation control options.

This tool helps us duplicate animations between elements of the same slide or copy animation effects from one slide to another. As a format copying tool, it requires at least one animation effect to be placed otherwise the option is grayed out.
Creative Experimentation
Experimenting with Animations in PowerPoint can be pretty helpful to avoid making monotonous presentations. Experimentation does not necessarily require making slides from scratch, but you can also use ready-made templates such as the 3D animation PowerPoint Templates at SlideModel. Alternatively, some slide deck templates offer a considerable range of animation effects intended for maximum audience engagement, which users can quickly customize by editing placeholder areas for text, images, and logos.
Below is a list of do’s and don’ts of PowerPoint Animations for making presentations that best use animated effects.
Maintain Animation Moderation
It is essential to maintain moderation when using animations, as the use of too many animations on a single slide or presentation can make the content confusing.
Use of Appropriate Animations
Try to use appropriate animations for slide objects. The animation should suitably show if the object is to enter, exit, be emphasized, or be highlighted using a motion path.
Avoid Animation Overload
Avoid flashy animated sequences unless your presentation is meant for an audience that might find engaging, such as children in a classroom session.
Subtle can be Just as Engaging
Sometimes, subtle animations can be just as engaging as an animation with an elaborate effect. This can, in fact, be a better option than using animations that might be visually overpowering or difficult to follow due to elaborate effects.
Ensure Visual Consistency
As discussed earlier, it is vital to maintain consistency in using animated effects. Be it Animations or Transitions, using flashy effects or too many diverse effects can hurt how the audience perceives your content, as it might become confusing, visually overpowering, or unprofessional. In such a case, the audience might quickly lose interest in the presentation, leading to Death by PowerPoint.
Less is More
The design language of visual designs over the past decade or more has been intended to use fewer effects and graphical elements with ample space to make the interface look clean. Be it Modern UI or Material design apps, this design language has been evident across desktop and mobile UIs. Using the same concept, you can design your slides with fewer animations and graphical elements to make your content more visually appealing.
Turning PowerPoints into Millions
Courtney Allen, a professional PowerPoint designer who came out of a BFA in graphic design from Boise State University, had all but PowerPoint as a part of her portfolio. She started her freelancing career via Upwork, making over a thousand PowerPoints for clients, bringing in as many as $2 million. She suggests using simple designs and animations to make the most out of PowerPoint presentations.
Guy Kawasaki Pitch Deck
Guy Kawasaki, a former Apple employee, whose famous 10-slide pitch deck has inspired a variety of PowerPoint templates. This rule was designed for startups and business presentations, focusing on pitching a concept to investors. While this isn’t directly related to using animations in presentations, it is an example of making the best use of minimalist content in a few slides. You can learn more about the Guy Kawasaki pitch deck from our article about the 10/20/30 rule for PowerPoint presentations .
How not to use an Animated PowerPoint Presentation in Court!
Presentations with animations aren’t always a great idea. In 2014, a court in the United States criticized a PowerPoint presentation by the prosecutor, which led to the court throwing the case out. The presentation was made with sound effects and animations, with flashy elements like the bullseye. Some of the significant mistakes made by the prosecutor included ‘visual advocacy,’ where the defendant was marked with the word ‘guilt’ in the slide deck. Not to mention, the animated presentation seemed to be aimed at influencing the court using visual aids. Something that did not sit well with the court.
Use of PowerPoint by the US Military
The US Military has often been accused of Death by PowerPoint for preparing what some call the worst PowerPoint slides ever created. The issue became so profound that in 2011, it was revealed that an executive communications manager at Microsoft, Dave Karle, was tasked with ensuring that the US military could finally start using the software properly. After discussions with top military officials, an updated military presentation method was created, consisting of a number of presentation templates, tips, and graphics and more than 6000 map symbols.
In this section, you can check some ready-made templates that can be easily customized for your presentation’s purposes. All these templates feature professionally made animation effects with native PowerPoint tools.
1. Multi-Purpose Animated PowerPoint Slide Deck
Those looking for how to animate in PowerPoint now have a ready-made solution to create mind-blowing presentations in a couple of minutes. This slide deck contains 26 slides in a broad selection of topics. We can present facts, introduce our team, our company, display charts with animated effects, and so much more. Check it out now!
Use This Template
2. Animated 8-Step Social Media Carousel PowerPoint Template
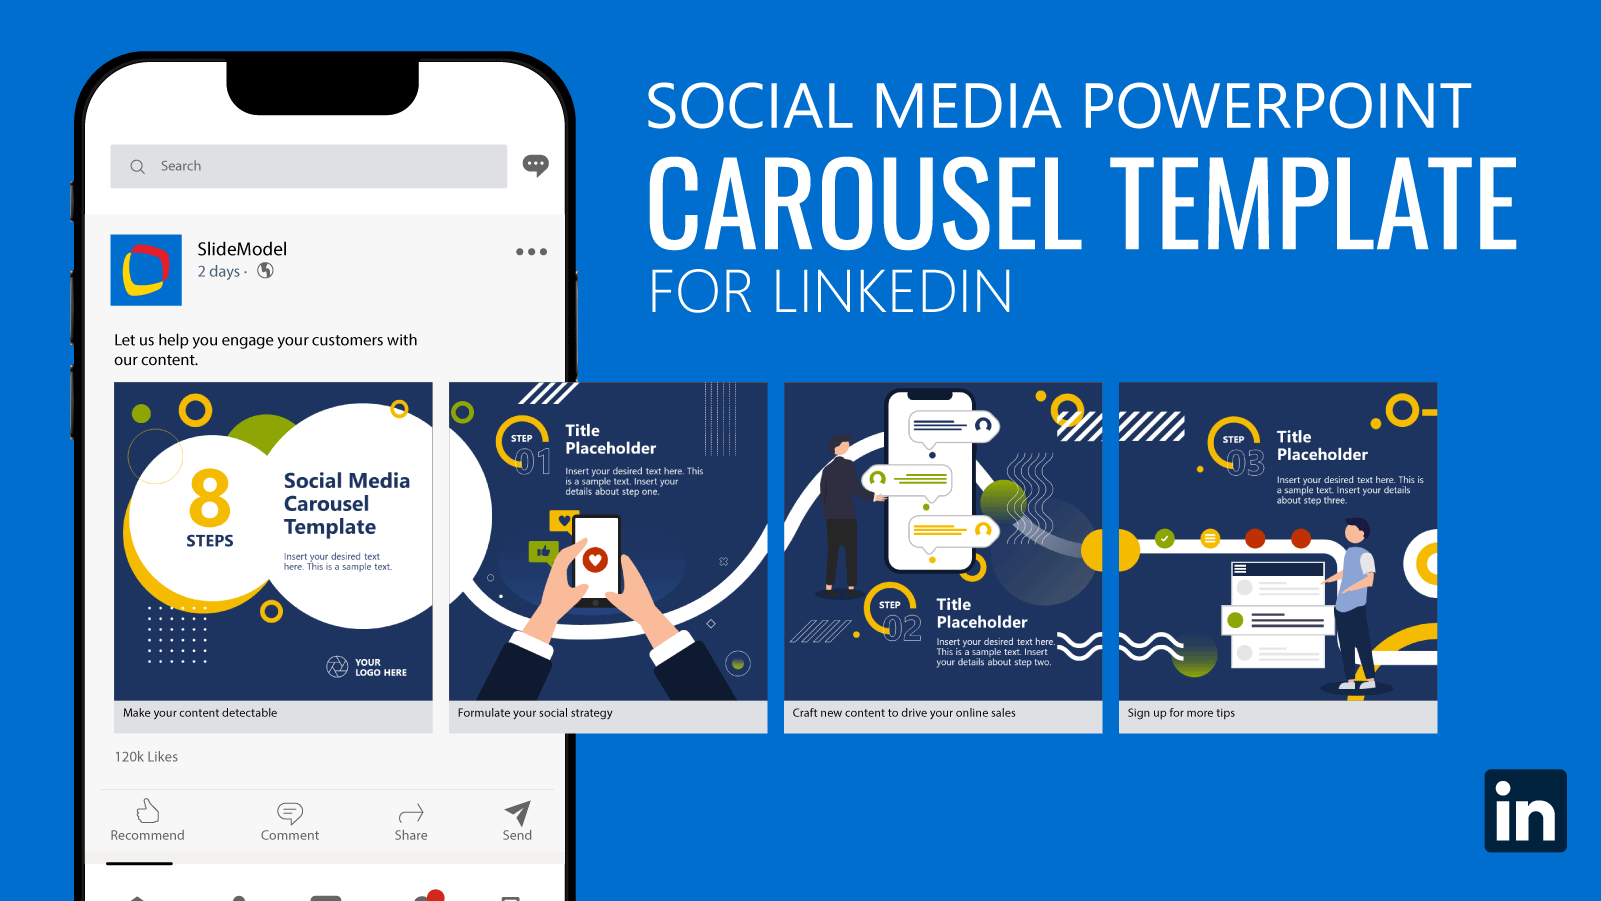
Bring dynamism to your social media posts by implementing this vivid social media carousel template. With eye-catching animated effects, this template emulates the typical carousel posts we can find on platforms like LinkedIn or Instagram.
3. Problem Solving Animated PowerPoint Template
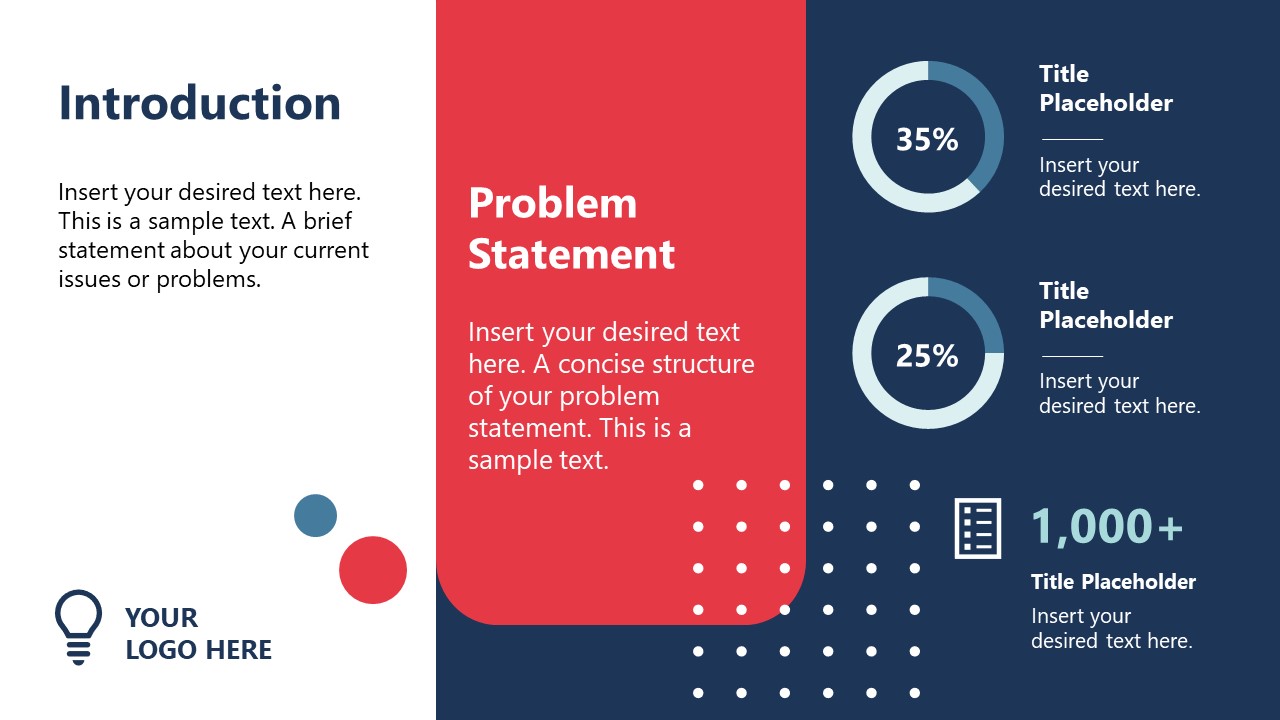
Bring professional graphics to troubleshooting sessions with your team. This template, filled with PowerPoint animations, offers a user-friendly approach to conventional problem-solving situations in which the team has to observe the Issue Matrix, suggest possible solutions, and prepare an implementation plan and its corresponding process flow diagram. Thanks to its high-quality animation effects, the speaker can introduce the facts individually, without diverting attention from the speech.
4. Animated Company Profile Presentation Template for PowerPoint
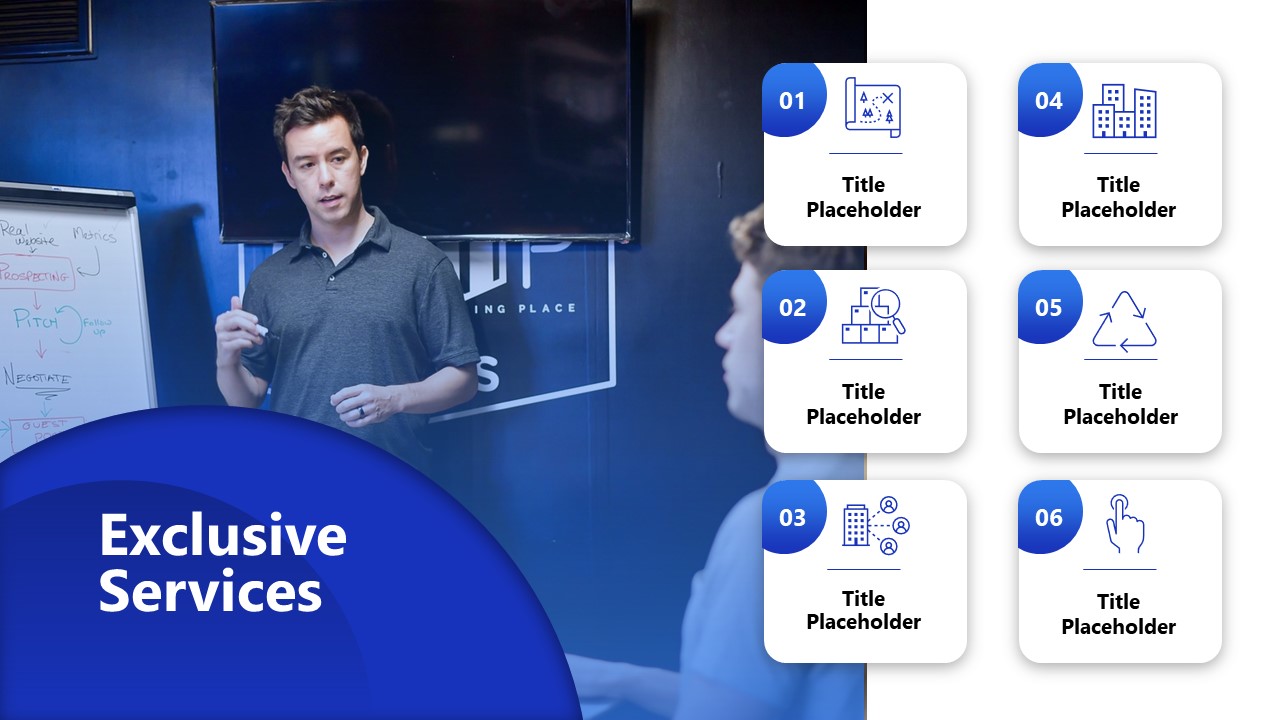
We’ve seen this template as one of the examples of animations for PowerPoint. It is a 21-slide solution offering all the tools required for a corporate-styled company profile presentation, specifically tailored for service businesses.
5. Corporate Company Profile Animated PowerPoint Template
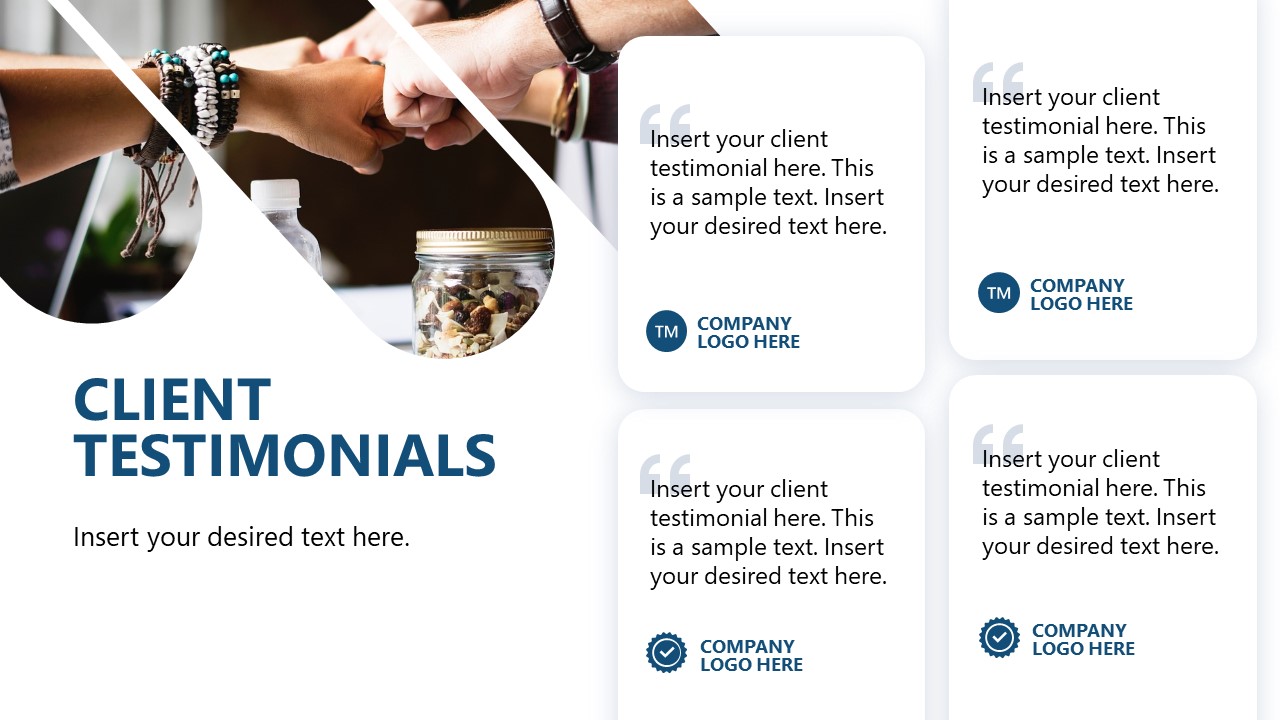
An alternative option for company profile presentations, featuring a minimalistic graphic layout with a broad variety of animation effects. Check these 12 slides and customize them with information relevant to your organization – we bring complex animation effects in a ready-made format. Colors and placeholder images can also be replaced.
6. Animated Roadmap PowerPoint Template
Bring more action to any planning meeting using this animated PowerPoint roadmap template. After a clear path overview, each milestone slide contains animation effects to introduce relevant information to the topic. It is a new take on traditional roadmap presentations that allows the speaker to pace themselves regarding how to disclose the information about the strategy to embark on.
7. Animated Pros & Cons Comparison Slide Template for PowerPoint

We mentioned the advantages of using PowerPoint animations to discuss contrasting values of a situation. Well, this animated Pros & Cons slide is the ideal tool for that purpose, offering a generalist view, then two accompanying slides for Pros & Cons, respectively, with animated effects to introduce additional information per point.
Using animations to make visually appealing and engaging presentations requires ensuring that your content corresponds with your added animated effects. It is always best to use animations in moderation and to keep your slides minimalist while unleashing your creativity as a presenter. Using ready-made PowerPoint templates can also help give you a good starting point to begin experimenting with animations and effects. This can also be useful for people new to PowerPoint Animations to explore what is doable with an animated slide deck, using animated sequences tailored for customization.
Whether you’re using an animated template or making one from scratch, a preview in slideshow mode can save you a lot of trouble with potential issues tied to animated effects. Last but not least, using animations in PowerPoint isn’t always necessary, and you can even go for a simple slide deck with a handful of slides. What matters is that you should be aware of the information being presented, and the visual aids should be just to aid your slides and not meant to be the whole package on their own.

Like this article? Please share
Animations, Microsoft PowerPoint, PowerPoint Tools Filed under PowerPoint Tutorials
Related Articles

Filed under PowerPoint Tutorials • May 31st, 2024
How to See Notes in PowerPoint
Optimize your presentation slides by knowing how to see notes in PowerPoint. Instructions for slide design and Presenter View modes.

Filed under PowerPoint Tutorials • May 28th, 2024
How to Circle Something in PowerPoint
Mark important areas in your presentation slides by learning how to circle something in PowerPoint. Instructions with shapes, handmade, and slideshow.

Filed under PowerPoint Tutorials • May 22nd, 2024
How to Remove Animations from PowerPoint and Google Slides
This tutorial explains how to remove animations/transitions in PowerPoint and Google Slides
Leave a Reply
Presentation Guru
The best ways online to create an animated presentation.

A lot of people rely on static slide decks created using conventional presentation apps like PowerPoint or Keynote. It seems that the use of animations is still perhaps overrated. Many presenters don’t like experimenting with animations, even for their PowerPoint slides, as they like playing it safe.
This can perhaps be attributed to the plethora of technical issues that presenters can face due to device and software compatibility problems, many of which we touched upon in our post about common tech problems faced by presenters.
While you might not be an expert in using professional animation software like 3D Studio Max, Maya or Adobe After Effects, however, you can easily create animated presentations using some easy to use web services.
Video presentations made using web apps can be shared online or downloaded as offline video files which you can play using a computer or mobile device, without worrying about device compatibility problems. In what is to follow, we will provide you with a list of the 5 best web services for making animated presentations.
1) GoAnimate
It doesn’t matter whether you are a techie or someone who still has problem navigating through the Windows Start menu. If you know how to use a mouse and keyboard that’s all you need to start making professional looking animations using GoAnimate . This web service allows creating animations using a readymade template, background music and animated characters that you can pick and choose from the given options.
Using GoAnimate is pretty much like using PowerPoint. The only difference is that instead of a slide deck, you can create animated videos with your custom branding. GoAnimate is perfect for making anything from short video clips to marketing demos, videos for your YouTube channel and of course, animated presentations with interesting characters.

GoAnimate videos can be downloaded offline, uploaded to YouTube or used for your projects made using other software like Lectora. GoAnimate has a monthly subscription system, however, you can sign-up for a 14-day free trial to test the service.
Wideo is another awesome website for making animated presentations using readymade templates, animated characters and a plethora of useful tools that can help you create animated video clips in no time.
You can start making animated presentations and video clips by either starting from scratch, or opt for a readymade template. Wideo provides a simple slide based layout to help presenters create animated videos with custom branding, animated characters, audio tracks and some awesome backgrounds. Wideo not only provides animated characters but you can also create videos using realistic imagery, such as marketing and sales video presentations with details about your product or service.

Videos made using Wideo can be downloaded offline, uploaded to YouTube and shared across social media websites.
Wideo can be used on a 7-day trial basis, with a limitation of making 30 second videos. This should be enough to test drive the service and see if you want to use Wideo as your animation maker.
3) Animation Maker
Animation Maker is another easy to use web app for making animated videos. You can make use of 120 different animation styles for making awesome video animations. The available video templates cater for all kinds of categories, such as for making animations about education, travel, business, health, food, sports, etc. Animation Maker even has templates for making animated infographics.
You can also add audio tracks and voice-over to further enhance your animated video clips. Animation Maker gives the option to export videos directly to YouTube and Facebook, as well as to download them offline.

Animation Maker has a free edition with limited functionality. The free version is limited to 2 minute SD quality videos.
4) PowToon
PowToon works pretty much like GoAnimate and Wideo. You can use readymade templates for making animated presentations and video clips by designing various slides that play out in animated form. PowToon offers a lot of resources like royalty free music, animated charts and graphs, as well as online collaboration features to help you design some awesome animated presentations.
Presentations made using PowToon can be downloaded as MP4 files or uploaded to YouTube. You can also export your content in PDF or PPT format. PowToon has a Presentation Mode for making animated video presentations, and a Movie Mode, which is suitable for making video clips of a different nature, such as perhaps marketing videos, animations for a class lecture, informative video clips, etc.

PowToon offers a free version with 100MB storage, with the option to make 5 minute video clips. The premium packages offer a lot of additional features, with the option to create HD and Full HD video animations.
5) MakeWebVideos
MakeWebVideos is so easy to use that you can create an animated video clip in just 30 minutes. There are several useful templates offered by this online video software that you can pick for making awesome video animations. You can get started by picking a video template, and follow a simple 3 step process to change the graphics, text and background music to quickly create an animated video presentation, marketing video, public service message, etc.
With easy editing features, you can create HD videos which can be downloaded offline or embedded online. MakeWebVideo gives you an estimate for your video once it’s complete. It’s more of a pay as you go system, where costs can vary according to the type of video you create and the resources you use.

Here is an explainer video which shows how you can create animated videos with MakeWebVideos in just a few minutes.
The web services mentioned in this post include presentation services which are as easy to use as PowerPoint. These web apps offer an easy to use mechanism for presenters to create professional looking animated video presentations and clips, without the need for any graphic designing or coding related knowledge. By using your creative sense, these services can enable you to turn boring charts and confusing data into easy to understand, animated video clips, with a voice over, background music, informative text and animated characters.
If you liked this, you might also like
Create the Best Video Presentations with these Innovative Tools
How to Turn Your PowerPoint into a Video
- Latest Posts
Farshad Iqbal
+farshad iqbal, latest posts by farshad iqbal ( see all ).
- Let’s look at Interactive Digital Whiteboards - 6th March 2018
- Six of the Best Laptops for Presenters - 16th January 2018
- Where Can I Find Great Clip Art and More for Powerpoint? - 12th December 2017
- The Best Digital Whiteboards for Presenters - 21st November 2017
- The Best Screen Mirroring Apps and Technology for Every Occasion - 24th October 2017
23 Comments
28th February 2017 at 3:29 pm
Great post Farshad. Thanks for the information and the links.It’s really useful.
1st March 2017 at 2:00 pm
Thanks Jim.
Best animated explainer videos
3rd May 2017 at 6:38 am
Thanks for such useful tools list and their details go animate and powtoon are really useful to make some best explainer videos
Animation Maker
23rd November 2017 at 1:48 pm
What do you think about premium features of powtoon? worth or not?
Cartoon Maker Apps
10th May 2018 at 5:16 am
Hi Farsahad,
Thanks for sharing these animation tools. I was always wondering how can I make animated presentation. I’m going to try them and see if they works for me.
Rosie Hoyland
10th May 2018 at 9:18 am
We’d love to know how you get on and what worked for you. Keep us posted.
20th June 2018 at 12:58 pm
Congratulations on your post, it is very complete. We don’t know if you have used http://www.genial.ly before but it is a very useful tool to create animated and interactive content very easily. We think it will be very interesting for you to take in consideration Genially in your next articles. Kind regards
21st June 2018 at 10:09 am
Hi Cecilia – thanks for introducing this to us – it looks interesting – we’ll explore further…
23rd October 2018 at 11:21 am
Thanks For sharing this information. It’s Nice..!!! https://games.lol/
Village Talkies
17th January 2019 at 11:39 am
Corporate Video Production Company in Bangalore and Explainer, Animation Video Maker in Chennai Wow! your article is really great with detailed information. It is really very helpful for us.
MiniBigTech
23rd July 2019 at 8:09 am
This blog totally depends on animation as there is numerous firm in Pakistan they are providing good. So every entrepreneur should see this content before using the services. Check it out click on video animation service . Please contact us at any time.
19th December 2019 at 10:53 am
Thanks for the information
Explainby Video
31st January 2020 at 12:01 pm
Great listing of the tools this would really help to create an explainer video animation with online tools this is really amazing Thanks!
27th July 2020 at 4:28 am
Thanks for sharing excellent informations. Your web-site is very cool
30th July 2020 at 11:04 am
Very informative article. It’s worth visiting and recommending. Thank you for sharing this helpful information with us. Keep going and update the latest information at this knowledge hub.
Digital Marketing Agency Pakistan
12th January 2021 at 11:14 am
Very nice & informative. Thanks for sharing with us, Did you know that Dexterous is the best digital marketing agency pakistan.
13th August 2021 at 2:10 pm
Thanks, Farshad for your blog loaded with so much information. Stopping by your blog helped me to get what I was looking for.
sajithkumar
27th August 2021 at 7:24 am
While surfing through the net for Animated Presentation. I found your post, it’s interesting and the narration is good.once again thanks for sharing this wonderful post.
Digious Solutions
14th September 2021 at 11:05 pm
Very Informative, Keep sharing the blogs. Digious Solutions is the website of a development company in the US, UK and local Markets, providing Web Development , Graphic Design , Digital Marketing , Mobile Application Development , E-commerce Solutions and many more services. We aspire to become the premier IT Company focusing on new realms.
suvarnabhoomi infra
16th November 2021 at 9:01 am
Keep sharing more stuff. Your blog looks good.
23rd November 2021 at 10:41 am
thanks for great post
25th November 2021 at 7:08 am
Thanks for sharing such excellent information.
6th January 2022 at 2:17 pm
Very good article. Thanks for your work
Your email address will not be published. Required fields are marked *
Follow The Guru

Join our Mailing List
Join our mailing list to get monthly updates and your FREE copy of A Guide for Everyday Business Presentations
The Only PowerPoint Templates You’ll Ever Need
Anyone who has a story to tell follows the same three-act story structure to...

How to get over ‘Impostor Syndrome’ when you’re presenting
Everybody with a soul feels like an impostor sometimes. Even really confident and experienced...
What’s it for?
Make interactive presentations
Create show-stopping presentations and clickable slide decks with Genially’s free online presentation builder. Leave boring behind and tell a story that’s interactive, animated, and beautifully engaging.
INTERACTIVE CONTENT
A presentation that works like a website
Engage your audience with interactive slides that they can click on and explore. Add music, video, hotspots, popup windows, quiz games and interactive data visualizations in a couple of clicks. No coding required!

NO-CODE ANIMATION
Make your slides pop with animation
Bring a touch of movie magic to the screen with incredible visual effects and animated page transitions. Add click-trigger and timed animations to make any topic easy to understand and captivating to watch.

INTEGRATIONS
Live from the world wide web
Embed online content directly in your slides for a media-rich interactive experience. From YouTube and Spotify to Google Maps and Sheets, Genially works seamlessly with over 100 popular apps and websites.

TEMPLATES & TOOLKIT
Genius design tools
With Genially, anyone can create a polished and professional presentation. Choose from over 2000 pre-built templates, or create your own design using the drag-and-drop resources, color palettes, icons, maps and vector graphics.

ONLINE PLATFORM
Safe and sound in the cloud
Because Genially is online, you can relax knowing that your slides are always up-to-date. There’s no risk of forgetting to save changes or accessing the wrong file. Log in from anywhere, collaborate with your team, and make edits in real time.
All-in-one interactive presentation maker
Real-time collaboration
Co-edit slide decks with others in real time and organize all of your team projects in shared spaces.
Multi format
Present live, share the link, or download as an interactive PDF, MP4 video, JPG, HTML, or SCORM package.
Engagement Analytics
See how many people have viewed and clicked on your slides and keep tabs on learner progress with User Tracking.
Import from PPTX
Give your old decks a new lease of life by importing PowerPoint slides and transforming them with a little Genially magic.
Keep content on-brand with your logo, fonts, colors, brand assets, and team templates at your fingertips.
Quiz & Survey Builder
Use the Interactive Questions feature to add a fun quiz to your slides or gather feedback from your audience.
Beautiful templates
Make your next deck in a flash with Genially’s ready-to-use slides.

Okr shapes presentation

School notebook presentation

Animated sketch presentation

Minimal presentation

Land of magic presentation

Onboarding presentation

Visual presentation

Animated chalkboard presentation

Online Education Guide

Terrazzo presentation

Startup pitch

Historical presentation
THEMES FOR EVERYONE
Interactive presentation ideas
From classroom materials to business pitches, make an impact every day with Genially.

Education presentations

Pitch decks

Business presentations

Thesis defense
Why the world loves Genially presentations

Share anywhere
Present live
From the front of the room or behind a screen, you’ll wow your audience with Genially. Heading off grid? Download in HTML to present dynamic slides without WiFi.
Share the link
Every Genially slide deck has its own unique url, just like a website! Share the link so that others can explore at their own pace, or download an MP4 video slideshow or PDF.
Post online
Embed the slides on your website or post them on social media. Upload to Microsoft Teams, Google Classroom, Moodle or any other platform.

The benefits of interactive slides
🗣️ Active participation An interactive slide deck gives your audience cool things to click on and discover, boosting learning and engagement.
👂 Multi-sensory experience Audio, video, animations, and mouse interactions make your content immersive, entertaining and accessible.
🧑🤝🧑 People-friendly format Pop-ups and embeds condense more material into fewer slides so you can break information down into digestible chunks.
🎮 Gamification Games, quizzes and puzzles make information more memorable and enable you to gather feedback and check understanding.
How to make an interactive presentation
With Genially’s easy-to-use presentation platform, anyone can make incredible visual content in moments.
Choose a template or a blank canvas

Get stunning results in less time with a ready-made template. Feeling creative? Design your own slides from scratch.
Customize the design
Add animations and interactions
Resources to become a pro presentation creator

VIDEO TUTORIAL
How to create an interactive presentation: Get started in Genially.

EXPERT TIPS
How to present data without sending your audience to sleep.

MICRO COURSE
No-code animation: Bring your slides to life with cinematic visual effects.

PRESENTATION IDEAS
The art of digital storytelling: Engage and thrill on screen.
Genially in a nutshell
How do I make a presentation interactive and how does Genially work? Find the answers to all of your slide-related questions here!
What’s an interactive presentation?
Interactive slides contain clickable hotspots, links, buttons, and animations that are activated at the touch of a button. Instead of reading or watching passively, your audience can actively interact with the content.
Genially’s interaction presentation software allows you to combine text, photos, video clips, audio and other content in one deck. It’s a great way to condense more information into fewer slides.
If you’re a teacher, you can share multiple materials in one single learning resource. Students can create their own projects using digital media and online maps. For business or training, try embedding spreadsheet data, PDFs, and online content directly in your slides.
An interactive slide deck is more user-friendly than a Microsoft PowerPoint presentation or Google Slides document. That’s because you can break information down into chunks with pop-ups, labels, voiceovers and annotated infographics.
The other benefit of interactive content is increased engagement. It’s easier to keep your audience’s attention when they’re actively participating. Try Genially’s presentation software and free slideshow maker to see how it’s better than other presentation websites. You won’t go back to standard presentation apps!
How do you make a clickable slide?
The best way to make slides clickable is to use Genially’s free interactive presentation program. Design your slide then apply an interaction. In a couple of clicks, you can add popup windows, hyperlinks, close-up images, games, animations, multimedia and other content.
Choose from the library of hotspot buttons and icons to show people what to click on. Go to Presenter View to get a preview and see how your content will appear to your audience.
How do I create presentations that look professional?
You’ve got a deadline looming and you’re staring at the screen with a blank presentation. We’ve all been there! Starting a presentation design from scratch is tricky, especially if you’re short on time.
Genially’s free online presentation maker has over 2000 ready-to-use templates for professional slide presentations, photos slideshows, and more. Each slide design has been created by our team of top graphic designers. No need to worry about fonts, centering images, or designing a matching color scheme. It’s all done for you.
Start by browsing our layouts and themes for education, business and then customize with your own text and images.
How do I share or download my slides?
Because Genially is a cloud based presentation software, you can simply share the link to your slides. Like other online presentation tools, there are no files to download or store on your computer. Everything is saved online.
When you publish your slide deck, it gets its own unique url, just like a website. Share the link with others to let them explore the content in their own time. If you’re presenting live, just click the Present button.
You can also embed your presentation on your website, company wiki, or social media. Genially is compatible with WordPress, Moodle, Google Classroom, and other platforms. If you use an LMS, you can also download your interactive design slides in SCORM format.
For slideshow videos and slideshows with music, share online or download as an MP4 video. Check out our free slideshow templates for ideas.
Can I make a free presentation in Genially?
You bet! Genially is an easy-to-use slide maker, with a free version and paid plans. The free plan allows you to create unlimited slides with interactions and animations. Subscribe to one of our paid plans for more advanced features.
Discover a world of interactive content
Join the 25 million people designing incredible interactive experiences with Genially.
👀 Turn any prompt into captivating visuals in seconds with our AI-powered design generator ✨ Try Piktochart AI!
- Piktochart Visual
- Video Editor
- AI Design Generator
- Infographic Maker
- Banner Maker
- Brochure Maker
- Diagram Maker
- Flowchart Maker
- Flyer Maker
- Graph Maker
- Invitation Maker
- Pitch Deck Creator
- Poster Maker
- Presentation Maker
- Report Maker
- Resume Maker
- Social Media Graphic Maker
- Timeline Maker
- Venn Diagram Maker
- Screen Recorder
- Social Media Video Maker
- Video Cropper
- Video to Text Converter
- Video Views Calculator
- AI Brochure Maker
- AI Document Generator
- AI Flyer Generator
- AI Image Generator
- AI Infographic
- AI Instagram Post Generator
- AI Newsletter Generator
- AI Quote Generator
- AI Report Generator
- AI Timeline Generator
- For Communications
- For Education
- For eLearning
- For Financial Services
- For Healthcare
- For Human Resources
- For Marketing
- For Nonprofits
- Brochure Templates
- Flyer Templates
- Infographic Templates
- Newsletter Templates
- Presentation Templates
- Resume Templates
- Business Infographics
- Business Proposals
- Education Templates
- Health Posters
- HR Templates
- Sales Presentations
- Community Template
- Explore all free templates on Piktochart
- Course: What is Visual Storytelling?
- The Business Storyteller Podcast
- User Stories
- Video Tutorials
- Need help? Check out our Help Center
- Earn money as a Piktochart Affiliate Partner
- Compare prices and features across Free, Pro, and Enterprise plans.
- For professionals and small teams looking for better brand management.
- For organizations seeking enterprise-grade onboarding, support, and SSO.
- Discounted plan for students, teachers, and education staff.
- Great causes deserve great pricing. Registered nonprofits pay less.
AI-Powered Poster Generator
With the Piktochart AI poster generator, you can turn any prompt into a gorgeous poster in seconds. No design skills? No problem. Just tweak it as you wish, then share your poster.
The new way of creating posters
Create in a Flash
Prompt to poster in 10 seconds
Say goodbye to complicated design steps. Simply type in your theme and watch as our AI poster maker transforms it into reality.
AI Image Generation
Bring your vision to life
Go stock photos and generate images that are contextualized to your needs with our advanced AI image generator. Put your creativity to the test and generate highly realistic images that make you stand out.

Create Without Limits
Where every idea finds its canvas
For events, marketing, learning, or personal creations, Piktochart AI delivers captivating poster designs for every need. Dive into a universe of impressive imagery tailored to suit any subject.

Create Your Vision
Piktochart starts, you put the finishing touches
Our AI sets the stage with a professionally crafted poster, then passes control to you, allowing you to modify and refine each detail to amplify your visual impact while keeping true to your brand.
Posters created using Piktochart’s AI-powered poster maker

Professionals like you use Piktochart’s free online poster maker to:

- Create eye-catching promotional materials that align with brand identity, ideal for advertising campaigns, product launches, and trade shows.
- Design captivating posters for corporate events, webinars, and conferences.
- Communicate new offers, services, or store openings.

HR & Internal Comms
- Internal announcements, motivational quotes, or event notifications.
- Job advertisements and onboarding materials to attract and welcome new employees.
- Convey important company policies and reminders through clear, engaging posters, ensuring better compliance and awareness.

NGOs and Government Organizations
- Develop impactful posters for awareness drives, fundraising events, and community outreach programs.
- Attract volunteers, highlighting the roles, benefits, and the difference they can make.
- Announce charity events, workshops, and seminars.

- Create informative posters on health topics, wellness tips, and medical advisories.
- Showcase healthcare services, specialist departments, and new medical technologies available at healthcare facilities.
- Display important health and safety protocols within healthcare settings.
How to Make a Digital Poster
1. Define Your Story
Briefly describe (within 120 characters) the purpose behind your poster. Whether it’s for promotion, making an announcement, driving awareness, or sharing health information.
2. Select from Our Varied Poster Designs
Jumpstart your project with our array of ready-to-use poster templates, perfect for shining a spotlight on any subject. After picking your preferred design, you’ll find yourself in our editing suite.
3. Tweak the Design with Piktochart Editor
With your template chosen, hitting the “Edit” button grants you entry into the Piktochart editor. This is your playground to adjust, alter, and align the design to reflect your personal touch and message.
4. Enhance with Visual Elements
Piktochart’s user-friendly drag-and-drop editor makes personalization a breeze. Tap into our rich collection of complimentary photos, icons, illustrations, and text options to craft a poster that stands out. Enhancing and tailoring colors is just a click away with our versatile design tool.
5. Publish and Promote
Once your poster is exactly as you envisioned, it’s time to save and share your work. Export in various formats like JPG, PNG, or PDF, catering to both digital platforms and print materials.
AI-Powered Visualization for Any Topic
What kinds of posters can be generated using this AI tool?
Navigating design elements and finding the right visual style can be daunting. With Piktochart AI, it’s easy to transform data into high-quality posters . Excellence made simple, just for you.
Event posters
Drum up buzz and awareness for an upcoming event. Piktochart AI transform dense data and information into engaging invitational posters for your events.
Advertising posters
Spark emotions that incite action – whether it is to make a purchase, improve brand opinion, donate to a cause, or make a lifestyle change. With Piktochart AI, it’s achievable at the click of a button.
Conference posters
Inform your audience with a glance about an upcoming conference. Whether it’s for a medical conference, marketing conference, or any conferences, Piktochart AI’s user-friendly poster maker helps you catch the attention of your audience effortlessly.
Ready to use AI to design posters like a pro?
Join more than 11 million people who already use Piktochart to create stunning posters.
Is it possible to personalize my poster with my own photos and diagrams?
What’s the limit on poster creation, how do i enhance the quality of my posters, is signing up mandatory to use piktochart, poster resources.

How to Make a Poster in 6 Easy Steps [2023 Guide With Templates]

25 Poster Ideas, Templates, and Tips for Creative Inspiration

Communications
7 Types of Posters and What Makes Them Stand Out
What else can you create with piktochart ai.

5 Ways To Make Your Own Animated GIFs
Y ou're messaging your friend, and they just told you the juiciest gossip you've ever heard. It's so utterly surprising that words simply won't cut it. So what do you do instead? You send a GIF of Chris Pratt's iconic surprised expression (from that one scene in "Parks and Recreation"), and it perfectly conveys your shock without typing a single word or needing to film a reaction video. That's the beauty of GIFs — they can easily get the message across without much of a hassle. Besides messaging, GIFs are also great for other use cases like giving flair to your otherwise static and boring presentation or serving as a fun social media post announcing your small business's new opening hours.
While the web is loaded with GIFs for nearly every mood or moment, sometimes you just won't find the exact expression for your situation. That's where making your own GIF can come in handy. We'll walk you through five ways to create a custom animated GIF using Photoshop and Photoshop alternatives like GIMP and Canva.
Read more: The 20 Best Mac Apps That Will Improve Your Apple Experience
Using Photoshop
When it comes to editing photos, Photoshop is one of the top software of choice. However, you can also use it to turn your videos or photos into GIFs. To make an animated GIF in Photoshop , here's what you need to do:
- Create a new file in Photoshop.
- Drag and drop your video file into Photoshop.
- (Optional) Change the size via Image > Image Size. Adjust the width and height to your preferred dimensions. Then, press OK. When prompted to transform the video layer to a smart object layer, select Convert.
- (Optional) Trim the video down by adjusting the start and endpoints of the video in the Timeline window.
- Press the play button on the Timeline window to preview the video.
- Import your photos as separate layers via File > Scripts > Load Files into Stack. In the Load Layers dialog box, press Browse and choose the photos you need for your GIF. Hit OK to confirm.
- Navigate to Window > Timeline.
- Press the Create Frame Animation button in the Timeline window that opens.
- Still in the Timeline window, select the hamburger menu at the top-right.
- Enable Make Frames From Layers.
- Change the time each frame is displayed by clicking on "0 sec." under each frame in the Timeline window and setting it to your desired duration.
- (Optional) Drag and drop the frames to rearrange them.
- To save your GIF, navigate to File > Export > Save for Web (Legacy). In the Save for Web dialog box, ensure that GIF is selected (found at the top) and Looping Options is set to Forever (located at the bottom) before hitting Save.
GIMP is a standout choice for those in need of advanced photo-editing capabilities but without the hefty Photoshop price tag. And just like Photoshop, GIMP allows you to make a custom GIF. Follow these steps to do so:
- Open your photos in GIMP by going to File > Open as Layers and selecting all the images you'll be using.
- Drag the layers to rearrange your photos in the desired order, with the top layer appearing first in your GIF.
- If necessary, adjust subsequent layers to ensure a smooth transition from the first layer.
- Rename each layer in the Layers panel to include the frame duration you want in parentheses. That means the first layer can be "frame 1(500ms)" and the second layer "frame 2(300ms)."
- To check your animation, navigate to Filters > Animation > Playback, then click the play button.
- Reduce your image's file size by selecting Filters > Animation > Optimize (for GIF).
- Go to File > Export As.
- Press Select File Type.
- Choose GIF image from the options.
- Hit Export.
- In the Export Image as GIF dialog box, enable As animation and Loop forever.
- If you didn't set frame durations earlier, specify your desired delay in "Delay between frames where unspecified." Check "Use delay entered above for all frames" for uniform timing.
- For "Frame disposal where unspecified," select "One frame per layer (replace)" and ensure "Use disposal entered above for all frames" is enabled.
- Click Export to save your custom GIF.
Using Canva
One thing you probably didn't realize you can do in Canva is make animated GIFs. Here's how:
- Log into Canva if you haven't already.
- Click on Create a design at the top.
- Search for "animated social media" if you want a square GIF or "video" if you want a landscape rectangle GIF.
- Upload your video to Canva. Alternatively, select one from Elements > Videos or Design > Templates.
- Drag and drop the video onto your empty page.
- Adjust the position as necessary.
- (Optional) Increase the playback speed by selecting Playback at the top and changing the Video speed.
- Shorten your video to the desired length by dragging the edges of the video. Free accounts can download up to one-minute GIFs and paid accounts up to two-minute GIFs, but generally, short five-second GIFs work best.
- (Optional) Add a text and animate it.
- Upload the photos you want to use.
- Place each photo on a separate page.
- Adjust the position and size as needed.
- Click on the time indicator at the top.
- Set it to one second per page.
- Turn on Apply to all pages.
- Add any elements you like. Animated stickers are best, but you can also use static graphics.
- Adjust the GIF duration by clicking on the time at the top and entering your preferred time.
- To animate the entire page, select the Animate button and choose your style.
- Download your creation by selecting Share > Download, changing the File type to GIF, and pressing the Download button.
Using PowerPoint
Aside from helping you make presentations for your boss or school, PowerPoint is also a surprisingly great tool for creating GIFs. Here's a step-by-step guide to turning your PowerPoint slides into animated GIFs:
- Start with a blank presentation.
- Change the slide size by going to Design > Slide Size > Custom Slide Size. Adjust the width and height to your liking.
- Go to the Insert tab.
- Select Media on the far right of the ribbon.
- Choose Video > This Device.
- Position the video on your slide.
- (Optional) Use the Video Format tab to adjust the video's size, border, shape, color, and brightness.
- (Optional) Trim the video or add a fade duration by selecting the video and clicking the Playback tab that appears at the top.
- To save your presentation as a GIF, navigate to File > Save as. Choose the destination and make sure to change the file type from PPTX to Animated GIF Format.
- Upload your photos to PowerPoint from Insert > Pictures > This Device.
- Place a different photo on each slide for a sequence or use just one and animate it. To animate your photo, head to the Animations tab and pick your effect. Adjust the Duration and Delay based on your preferences. Hit the Preview button to check out how your animation looks.
- (Optional) Add an animated text via Insert > Text Box. Type in your text and change the font, size, color, highlight, background, and alignment in the Home tab. Then, go to Animations and apply your effect of choice.
- To save as a GIF, go to File > Export > Create an Animated GIF. Choose the quality, set the time per slide, decide which slides to include, and if needed, make the background transparent. Hit Create GIF.
Using GIPHY
GIPHY is most people's go-to database for ready-to-use GIFs, but it also comes complete with a nifty GIF maker should you want to create your own. Follow these steps to use it:
- Head over to the GIPHY Create page .
- Sign up for a free account if you don't have one already.
- In the GIF section, click on Choose File. You can use JPG, PNG, GIF, MP4, MOV, or WebM formats.
- Trim your video by dragging the edges or entering the start and end timestamps. Do note that you can make GIFs for up to 30 seconds only.
- Hit the "Continue to Create" button.
- (Optional) Decorate your GIF with a text, sticker, or filter.
- (Optional) Switch the Loop Type to Reverse to reverse the video.
- Adjust the GIF's size as necessary.
- Transform your static photo into a GIF by adding an animated sticker. Select Sticker (folded circle icon), search for the sticker you want to use, and click on it to place it on your photo.
- (Optional) Add a text by clicking on the Aa icon. Type in your caption and change the font style, color, outline, and alignment.
- (Optional) Apply a filter for extra visual appeal.
- Change the aspect ratio of the photo as needed.
- Once you're happy with the custom GIF, press Download at the bottom to save it to your device.
Read the original article on SlashGear .

Make Creative Slides, in WPS Presentation
Wps presentation is a free powerpoint editor for effortless slide creation, editing, saving, and sharing. seamlessly handle powerpoint presentations across multiple platforms with full compatibility with microsoft office. available for pc windows, mac, linux, android, and ios devices..

See How Easy to Do with WPS Presentation
Tell best stories with pro templates, discover an extensive collection of over 100,000 professional & beautiful templates in wps office., empower yourself to deliver compelling presentations that impress and inspire your audience. step onto the stage with confidence and make your message heard.

Friendly UI, Free Alternative to Microsoft PowerPoint
Embark a seamless and intuitive presentation experience with wps presentation's user-friendly interface, carefully designed to resemble powerpoint., discover the comfort and simplicity of navigation, allowing you to effortlessly create, edit, and format your slides with absolute confidence..

Compatible with .PPT, .PPTX Files
Wps presentation is compatible with 20 file formats, including .ppt, .pptx, .pps, .pot, .pptm, .potx, .potm, and more., with wps presentation, effortlessly maintain the integrity of your slides, animations, formatting, charts, and other elements, ensuring seamless preservation throughout your work..

File Management and Sharing, Anywhere
Wps presentation smoothly synchronizes powerpoint files across a range of devices: pc windows, mac, linux, android, iphone, ipad, and multiple cloud platforms., you can share a powerpoint with others and collaborate in real-time, track edits, versions, and contributors for seamless teamwork during your presentations..

Popular Features of WPS Presentation

WPS Office's Presentation Tools offer batch font settings, custom text formats, and easy insertion of pictures to multiple slides. Create stunning and engaging presentations effortlessly with these powerful features
See What Our Users Have to Say

Rated as Leader

Editor's Rating: Excellent

Google Play
Editor's Choice&Top Developer

WPS Presentation works seamlessly! It just as fine as Microsoft Powerpoint, with changes in the document getting reflected quickly.

WPS Office is a solid office productivity suite that provides a good alternative to Microsoft Office at zero cost!

I prepare my presentations the way I want, easily convert them into pdf. I also suggest my students to use WPS and every user seems very happy using WPS.
Free All-in-One Office Suite
Wps office offers more than just the presentation feature for free powerpoint slides editing. it also provides powerful tools for word documents, excel spreadsheets, and pdf documents, allowing you to handle a wide range of file formats seamlessly on pc windows, mac, linux, android and ios devices..

What Else You May Want to Know
- Yes, you can use WPS Presentation for free. The free version of WPS Presentation covers most features and provides free templates suitable for daily presentation needs.
- However, for access to premium templates and advanced features like OCR (Optical Character Recognition) and premium templates, a premium subscription is required. The premium subscription offers additional functionality and tools to elevate your presentation creation experience.
- Yes, WPS Presentation is designed to be user-friendly and easy to adapt to. Its interface closely resembles Microsoft PowerPoint, allowing you to effortlessly edit existing presentations or create new ones. With its intuitive tools and familiar layout, WPS Presentation ensures a smooth and straightforward user experience.
- Yes, you can save your presentations and other files from WPS Presentation directly to Google Drive. WPS Presentation offers seamless integration with Google Drive, enabling you to effortlessly save and sync your files to the cloud storage service. This feature allows you to access your presentations from any device and collaborate with others efficiently.
- The primary distinctions between WPS Presentation and Microsoft PowerPoint are the cost and accessibility. WPS Presentation is available for free, while Microsoft PowerPoint often requires a costly subscription or purchase.
- WPS Presentation offers seamless cloud integration with services like Google Drive, facilitating convenient presentation storage, synchronization and collaboration.
- Additionally, WPS Presentation not only supports PC Windows, Mac, Android, and iOS devices like Microsoft PowerPoint, but also extends its compatibility to Linux, an option not covered by Microsoft PowerPoint.
- Hot Topics:
Get start with WPS Presentation to edit PowerPoint slides for free!
IMAGES
VIDEO
COMMENTS
Go carefully through the different templates and select a suitable one for your use case. Then click Add all. A pop-up window will appear, asking you to overwrite; click confirm to insert the template. Once you have clicked the confirm button, all the slides will be inserted into the project.
Bold Flash is an excellent way of highlighting a line of text in a busy slide, for example. Try these text style effects as a great example of animation PowerPoint. With PowerPoint slide animation, it's easy to call attention to a piece of text. Audiences always appreciate clarity and focus on your message.
Once you have your voice-over guide, all you need to do is upload it into Powtoon and you will now be able to add the visuals to the sound. . Step 3: Dividing the Slides. Now you can start creating visual content according to the script. Each slide represents a scene and an idea as outlined in the script. Try to keep your slides short, this way ...
This menu makes it easy to choose an animation to add to an object. On the Animations tab, you can simply click on one of the animation thumbnails to apply it to a selected object. Download this PowerPoint Design template on Envato Elements. Click on the part of the slide that you want to animate.
Start with a free presentation template from Adobe Express. Add in whatever text and images you'd like, or simply use what's provided. Tap the "Animation" tab on the righthand side to see the available elements for your slide. Select which text and images you'd like to animate and play around with the effects to find out what works ...
In this step-by-step tutorial, learn how to use animations in Microsoft PowerPoint. Learn animation fundamentals, layer on multiple animations, adjust the du...
1 Visme. An animated presentation software allows users to apply special effects to the transition between slides. Using a tool like Visme will turn your presentations into works of digital art. The animation options are classy, easy to use and never over the top.
Our animated presentation maker lets you create stunning visuals quickly and without complicated configurations. With a vast selection of video templates and animated clips from our stock library, you can choose the perfect style to match your message and brand. Customize your presentation and impress your audience with stunning visuals that ...
Looking to elevate your presentations to the next level? Learn how to craft stunning animated presentations effortlessly using Canva! In this comprehensive t...
Below is a list of do's and don'ts of PowerPoint Animations for making presentations that best use animated effects. Maintain Animation Moderation. It is essential to maintain moderation when using animations, as the use of too many animations on a single slide or presentation can make the content confusing. Use of Appropriate Animations
In this PowerPoint slide animation tutorial, you will learn how to organize and animate your presentation contents so that it grabs the attention of your aud...
2) Wideo. Wideo is another awesome website for making animated presentations using readymade templates, animated characters and a plethora of useful tools that can help you create animated video clips in no time.. You can start making animated presentations and video clips by either starting from scratch, or opt for a readymade template. Wideo provides a simple slide based layout to help ...
55,333 templates. Create a blank Animated Presentation. Vintage Minimalist Animated Artist Portfolio Presentation. Presentation by AV Creatives. Blue and White Geometric Double-Sided Poster A3 Portrait. Poster by cavani team. Beige Watercolor Project Presentation.
There are different ways to start animations in your presentation: On Click - Start an animation when you click a slide. With Previous - Play an animation at the same time as the previous animation in your sequence. After Previous - Start an animation immediately after the previous one happens.
You can make your presentation animated with moving stickers (opens in a new tab or window), illustrations, and free GIFs (opens in a new tab or window), as well as, transitions (opens in a new tab or window) to make your slides, texts (opens in a new tab or window), and charts dynamic. Upload images and videos to incorporate with your messages ...
Make sure to maintain a balance between exposition, rising action, climax, and resolution to keep viewers engaged from start to finish. Use visual cues, music, and narration to guide the audience through the narrative arc and evoke emotional responses at key moments. 3. Choosing the Right Animation Style.
With Visme's Presenter Studio, you can record your presentation and share it with your audience. Record your screen, audio, and video, or switch off your camera for an audio-only presentation. Present asynchronously on your own time, at your own pace. Let your colleagues watch it at their convenience. Create Your Presentation.
Open Canva and type "Video" to start making an animated video. Choose a video template. Browse our gallery of animated video templates and choose a layout for your project. You can also create an animated video from a blank canvas. Edit the video template. Start editing your animation video by changing the text, colors, and fonts.
No-code animation: Bring your slides to life with cinematic visual effects. The art of digital storytelling: Engage and thrill on screen. Create clickable presentations and slide decks with animation, infographics, multimedia and beautiful design. Easy to use. 1000+ templates.
To create multimedia presentations, you need the right tools. Below are four tools to help you create engaging multimedia presentations. Software #1: Visme. The first software on the list is Visme. The varied collection of integrations in our editor is just the right combination to create a multimedia presentation that will make an impact.
Need to make an animated presentation? No problem! In 5 easy steps, you can structure and animate a presentation that's totally unique, and makes a deeper im...
Make your presentations come to life with a morph PowerPoint template. Whether you're a teacher, student, or business professional, these templates will help you captivate your audience with engaging transitions and animations. With a range of customizable slides, you can easily manage your content and create seamless visual storytelling.
Automating interactive presentations. Interactivity tools for easier participation, real-time feedback-gathering, flexible, professional templates. . $11.99/mo. SlidesAI. Google Slides integration. Google Slides integration, support for 100+ languages, includes access to 1 million+ stock images. 3 free presentations/month. $10/mo.
4. Enhance with Visual Elements. Piktochart's user-friendly drag-and-drop editor makes personalization a breeze. Tap into our rich collection of complimentary photos, icons, illustrations, and text options to craft a poster that stands out. Enhancing and tailoring colors is just a click away with our versatile design tool. 5.
Trim your video by dragging the edges or entering the start and end timestamps. Do note that you can make GIFs for up to 30 seconds only. Hit the "Continue to Create" button. (Optional) Decorate ...
In this video Hadas will show us how to animate your presentations with Canva. She will cover 4 different ways to add motion to presentations and also give s...
With WPS Presentation, effortlessly maintain the integrity of your slides, animations, formatting, charts, and other elements, ensuring seamless preservation throughout your work. ... allowing you to effortlessly edit existing presentations or create new ones. With its intuitive tools and familiar layout, WPS Presentation ensures a smooth and ...
On many real world cases, efficiency of the layout has also been increased. Pack Islands in Blender 3.5 (default values) Pack Islands in Blender 3.6 LTS (default values) Shapeshift. Choose the final shape of the UV packing between Exact Shape (Concave), Convex Hull, or Bounding Box, giving layouts that use available space depending the geometry.
To create your animated presentation visit: https://bit.ly/3mkarCGAre you tired of using regular PowerPoint presentations and their lifeless slides? Are you ...