Critical PowerPoint Shortcuts – Claim Your FREE Training Module and Get Your Time Back!

How to Make a PowerPoint Presentation (Step-by-Step)
- PowerPoint Tutorials
- Presentation Design
- January 22, 2024
In this beginner’s guide, you will learn step-by-step how to make a PowerPoint presentation from scratch.
While PowerPoint is designed to be intuitive and accessible, it can be overwhelming if you’ve never gotten any training on it before. As you progress through this guide, you’ll will learn how to move from blank slides to PowerPoint slides that look like these.

Table of Contents
Additionally, as you create your presentation, you’ll also learn tricks for working more efficiently in PowerPoint, including how to:
- Change the slide order
- Reset your layout
- Change the slide dimensions
- Use PowerPoint Designer
- Format text
- Format objects
- Play a presentation (slide show)
With this knowledge under your belt, you’ll be ready to start creating PowerPoint presentations. Moreover, you’ll have taken your skills from beginner to proficient in no time at all. I will also include links to more advanced PowerPoint topics.
Ready to start learning how to make a PowerPoint presentation?
Take your PPT skills to the next level
Start with a blank presentation.
Note: Before you open PowerPoint and start creating your presentation, make sure you’ve collected your thoughts. If you’re going to make your slides compelling, you need to spend some time brainstorming.
For help with this, see our article with tips for nailing your business presentation here .
The first thing you’ll need to do is to open PowerPoint. When you do, you are shown the Start Menu , with the Home tab open.
This is where you can choose either a blank theme (1) or a pre-built theme (2). You can also choose to open an existing presentation (3).
For now, go ahead and click on the Blank Presentation (1) thumbnail.

Doing so launches a brand new and blank presentation for you to work with. Before you start adding content to your presentation, let’s first familiarize ourselves with the PowerPoint interface.
The PowerPoint interface

Here is how the program is laid out:
- The Application Header
- The Ribbon (including the Ribbon tabs)
- The Quick Access Toolbar (either above or below the Ribbon)
- The Slides Pane (slide thumbnails)
The Slide Area
The notes pane.
- The Status Bar (including the View Buttons)
Each one of these areas has options for viewing certain parts of the PowerPoint environment and formatting your presentation.
Below are the important things to know about certain elements of the PowerPoint interface.
The PowerPoint Ribbon

The Ribbon is contextual. That means that it will adapt to what you’re doing in the program.
For example, the Font, Paragraph and Drawing options are greyed out until you select something that has text in it, as in the example below (A).

Furthermore, if you start manipulating certain objects, the Ribbon will display additional tabs, as seen above (B), with more commands and features to help you work with those objects. The following objects have their own additional tabs in the Ribbon which are hidden until you select them:
- Online Pictures
- Screenshots
- Screen Recording
The Slides Pane

This is where you can preview and rearrange all the slides in your presentation.
Right-clicking on a slide in the pane gives you additional options on the slide level that you won’t find on the Ribbon, such as Duplicate Slide , Delete Slide , and Hide Slide .

In addition, you can add sections to your presentation by right-clicking anywhere in this Pane and selecting Add Section . Sections are extremely helpful in large presentations, as they allow you to organize your slides into chunks that you can then rearrange, print or display differently from other slides.

The Slide Area (A) is where you will build out your slides. Anything within the bounds of this area will be visible when you present or print your presentation.
Anything outside of this area (B) will be hidden from view. This means that you can place things here, such as instructions for each slide, without worrying about them being shown to your audience.

The Notes Pane is the space beneath the Slide Area where you can type in the speaker notes for each slide. It’s designed as a fast way to add and edit your slides’ talking points.
To expand your knowledge and learn more about adding, printing, and exporting your PowerPoint speaker notes, read our guide here .
Your speaker notes are visible when you print your slides using the Notes Pages option and when you use the Presenter View . To expand your knowledge and learn the ins and outs of using the Presenter View , read our guide here .

You can resize the Notes Pane by clicking on its edge and dragging it up or down (A). You can also minimize or reopen it by clicking on the Notes button in the Status Bar (B).
Note: Not all text formatting displays in the Notes Pane, even though it will show up when printing your speaker notes. To learn more about printing PowerPoint with notes, read our guide here .
Now that you have a basic grasp of the PowerPoint interface at your disposal, it’s time to make your presentation.
Adding Content to Your PowerPoint Presentation
Notice that in the Slide Area , there are two rectangles with dotted outlines. These are called Placeholders and they’re set on the template in the Slide Master View .
To expand your knowledge and learn how to create a PowerPoint template of your own (which is no small task), read our guide here .

As the prompt text suggests, you can click into each placeholder and start typing text. These types of placeholder prompts are customizable too. That means that if you are using a company template, it might say something different, but the functionality is the same.

Note: For the purposes of this example, I will create a presentation based on the content in the Starbucks 2018 Global Social Impact Report, which is available to the public on their website.
If you type in more text than there is room for, PowerPoint will automatically reduce its font size. You can stop this behavior by clicking on the Autofit Options icon to the left of the placeholder and selecting Stop Fitting Text to this Placeholder .
Next, you can make formatting adjustments to your text by selecting the commands in the Font area and the Paragraph area of the Home tab of the Ribbon.

The Reset Command: If you make any changes to your title and decide you want to go back to how it was originally, you can use the Reset button up in the Home tab .

Insert More Slides into Your Presentation
Now that you have your title slide filled in, it’s time to add more slides. To do that, simply go up to the Home tab and click on New Slide . This inserts a new slide in your presentation right after the one you were on.

You can alternatively hit Ctrl+M on your keyboard to insert a new blank slide in PowerPoint. To learn more about this shortcut, see my guide on using Ctrl+M in PowerPoint .
Instead of clicking the New Slide command, you can also open the New Slide dropdown to see all the slide layouts in your PowerPoint template. Depending on who created your template, your layouts in this dropdown can be radically different.

If you insert a layout and later want to change it to a different layout, you can use the Layout dropdown instead of the New Slide dropdown.
After inserting a few different slide layouts, your presentation might look like the following picture. Don’t worry that it looks blank, next we will start adding content to your presentation.

If you want to follow along exactly with me, your five slides should be as follows:
- Title Slide
- Title and Content
- Section Header
- Two Content
- Picture with Caption
Adding Content to Your Slides
Now let’s go into each slide and start adding our content. You’ll notice some new types of placeholders.

On slide 2 we have a Content Placeholder , which allows you to add any kind of content. That includes:
- A SmartArt graphic,
- A 3D object,
- A picture from the web,
- Or an icon.
To insert text, simply type it in or hit Ctrl+C to Copy and Ctrl+V to Paste from elsewhere. To insert any of the other objects, click on the appropriate icon and follow the steps to insert it.
For my example, I’ll simply type in some text as you can see in the picture below.

Slides 3 and 4 only have text placeholders, so I’ll go ahead and add in my text into each one.

On slide 5 we have a Picture Placeholder . That means that the only elements that can go into it are:
- A picture from the web

To insert a picture into the picture placeholder, simply:
- Click on the Picture icon
- Find a picture on your computer and select it
- Click on Insert
Alternatively, if you already have a picture open somewhere else, you can select the placeholder and paste in (shortcut: Ctrl+V ) the picture. You can also drag the picture in from a file explorer window.

If you do not like the background of the picture you inserted onto your slide, you can remove the background here in PowerPoint. To see how to do this, read my guide here .
Placeholders aren’t the only way to add content to your slides. At any point, you can use the Insert tab to add elements to your slides.
You can use either the Title Only or the Blank slide layout to create slides for content that’s different. For example, a three-layout content slide, or a single picture divider slide, as shown below.

In the first example above, I’ve inserted 6 text boxes, 3 icons, and 3 circles to create this layout. In the second example, I’ve inserted a full-sized picture and then 2 shapes and 2 text boxes.
The Reset Command: Because these slides are built with shapes and text boxes (and not placeholders), hitting the Reset button up in the Home tab won’t do anything.
That is a good thing if you don’t want your layouts to adjust. However, it does mean that it falls on you to make sure everything is aligned and positioned correctly.
For more on how to add and manipulate the different objects in PowerPoint, check out our step-by-step articles here:
- Using graphics in PowerPoint
- Inserting icons onto slides
- Adding pictures to your PowerPoint
- How to embed a video in PowerPoint
- How to add music to your presentation
Using Designer to generate more layouts ideas
If you have Office 365, your version of PowerPoint comes with a new feature called Designer (or Design Ideas). This is a feature that generates slide layout ideas for you. The coolest thing about this feature is that it uses the content you already have.
To use Designer , simply navigate to the Design tab in your Ribbon, and click on Design Ideas .

NOTE: If the PowerPoint Designer is not working for you (it is grey out), see my troubleshooting guide for Designer .
Change the Overall Design (optional)
When you make a PowerPoint presentation, you’ll want to think about the overall design. Now that you have some content in your presentation, you can use the Design tab to change the look and feel of your slides.
For additional help thinking through the design of your presentation, read my guide here .
A. Picking your PowerPoint slide size
If you have PowerPoint 2013 or later, when you create a blank document in PowerPoint, you automatically start with a widescreen layout with a 16:9 ratio. These dimensions are suitable for most presentations as they match the screens of most computers and projectors.
However, you do have the option to change the dimensions.
For example, your presentation might not be presented, but instead converted into a PDF or printed and distributed. In that case, you can easily switch to the standard dimensions with a 4:3 ratio by selecting from the dropdown (A).
You can also choose a custom slide size or change the slide orientation from landscape to portrait in the Custom Slide Size dialog box (B).

To learn all about the different PowerPoint slide sizes, and some of the issues you will face when changing the slide size of a non-blank presentation, read my guide here .
B. Selecting a PowerPoint theme
The next thing you can do is change the theme of your presentation to a pre-built one. For a detailed explanation of what a PowerPoint theme is, and how to best use it, read my article here .
In the beginning of this tutorial, we started with a blank presentation, which uses the default Office theme as you can see in the picture below.

That gives you the most flexibility because it has a blank background and quite simple layouts that work for most presentations. However, it also means that it’s your responsibility to enhance the design.
If you’re comfortable with this, you can stay with the default theme or create your own custom theme ( read my guide here ). But if you would rather not have to think about design, then you can choose a pre-designed theme.
Microsoft provides 46 other pre-built themes, which include slide layouts, color variants and palettes, and fonts. Each one varies quite significantly, so make sure you look through them carefully.
To select a different theme, go to the Design tab in the Ribbon, and click on the dropdown arrow in the Themes section .

For this tutorial, let’s select the Frame theme and then choose the third Variant in the theme. Doing so changes the layout, colors, and fonts of your presentation.

Note: The theme dropdown area is also where you can import or save custom themes. To see my favorite places to find professional PowerPoint templates and themes (and recommendations for why I like them), read my guide here .
C. How to change a slide background in PowerPoint
The next thing to decide is how you want your background to look for the entire presentation. In the Variants area, you can see four background options.

For this example, we want our presentation to have a dark background, so let’s select Style 3. When you do so, you’ll notice that:
- The background color automatically changes across all slides
- The color of the text on most of the slides automatically changes to white so that it’s visible on the dark background
- The colors of the objects on slides #6 and #7 also adjust, in a way we may not want (we’ll likely have to make some manual adjustments to these slides)

Note: If you want to change the slide background for just that one slide, don’t left-click the style. Instead, right-click it and select Apply to Selected Slides .
After you change the background for your entire presentation, you can easily adjust the background for an individual slide.

Inside the Format Background pane, you can see you have the following options:
- Gradient fill
- Picture or texture fill
- Pattern fill
- Hide background
You can explore these options to find the PowerPoint background that best fits your presentation.
D. How to change your color palette in PowerPoint
Another thing you may want to adjust in your presentation, is the color scheme. In the picture below you can see the Theme Colors we are currently using for this presentation.

Each PowerPoint theme comes with its own color palette. By default, the Office theme includes the Office color palette. This affects the colors you are presented with when you format any element within your presentation (text, shapes, SmartArt, etc.).

The good news is that the colors here are easy to change. To switch color palettes, simply:
- Go to the Design tab in the Ribbon
- In the Variants area, click on the dropdown arrow and select Colors
- Select the color palette (or theme colors) you want
You can choose among the pre-built color palettes from Office, or you can customize them to create your own.
As you build your presentation, make sure you use the colors from your theme to format objects. That way, changing the color palette adjusts all the colors in your presentation automatically.
E. How to change your fonts in PowerPoint
Just as we changed the color palette, you can do the same for the fonts.

Each PowerPoint theme comes with its own font combination. By default, the Office theme includes the Office font pairing. This affects the fonts that are automatically assigned to all text in your presentation.

The good news is that the font pairings are easy to change. To switch your Theme Fonts, simply:
- Go to the Design tab in the Ribbon
- Click on the dropdown arrow in the Variants area
- Select Fonts
- Select the font pairing you want
You can choose among the pre-built fonts from Office, or you can customize them to create your own.
If you are working with PowerPoint presentations on both Mac and PC computers, make sure you choose a safe PowerPoint font. To see a list of the safest PowerPoint fonts, read our guide here .
If you receive a PowerPoint presentation and the wrong fonts were used, you can use the Replace Fonts dialog box to change the fonts across your entire presentation. For details, read our guide here .
Adding Animations & Transitions (optional)
The final step to make a PowerPoint presentation compelling, is to consider using animations and transitions. These are by no means necessary to a good presentation, but they may be helpful in your situation.
A. Adding PowerPoint animations
PowerPoint has an incredibly robust animations engine designed to power your creativity. That being said, it’s also easy to get started with basic animations.
Animations are movements that you can apply to individual objects on your slide.

To add a PowerPoint animation to an element of your slide, simply:
- Select the element
- Go to the Animations tab in the Ribbon
- Click on the dropdown arrow to view your options
- Select the animation you want
You can add animations to multiple objects at one time by selecting them all first and then applying the animation.
B. How to preview a PowerPoint animation

There are three ways to preview a PowerPoint animation:
- Click on the Preview button in the Animations tab
- Click on the little star next to the slide
- Play the slide in Slide Show Mode
To learn other ways to run your slide show, see our guide on presenting a PowerPoint slide show with shortcuts .
To adjust the settings of your animations, explore the options in the Effect Options , Advanced Animation and the Timing areas of the Animation tab .

Note: To see how to make objects appear and disappear in your slides by clicking a button, read our guide here .
C. How to manage your animations in PowerPoint

The best way to manage lots of animations on your slide is with the Animation Pane . To open it, simply:
- Navigate to the Animations tab
- Select the Animation Pane
Inside the Animation Pane, you’ll see all of the different animations that have been applied to objects on your slide, with their numbers marked as pictured above.
Note: To see examples of PowerPoint animations that can use in PowerPoint, see our list of PowerPoint animation tutorials here .
D. How to add transitions to your PowerPoint presentation
PowerPoint has an incredibly robust transition engine so that you can dictate how your slides change from one to the other. It is also extremely easy to add transitions to your slides.
In PowerPoint, transitions are the movements (or effects) you see as you move between two slides.

To add a transition to a PowerPoint slide, simply:
- Select the slide
- Go to the Transitions tab in the Ribbon
- In the Transitions to This Slide area, click on the dropdown arrow to view your options
- Select the transition you want
To adjust the settings of the transition, explore the options in the Timing area of the Transitions tab.
You can also add the same transition to multiple slides. To do that, select them in the Slides Pane and apply the transition.
E. How to preview a transition in PowerPoint

There are three ways to preview your PowerPoint transitions (just like your animations):
- Click on the Preview button in the Transitions tab
- Click on the little star beneath the slide number in the thumbnail view
Note: In 2016, PowerPoint added a cool new transition, called Morph. It operates a bit differently from other transitions. For a detailed tutorial on how to use the cool Morph transition, see our step-by-step article here .
Save Your PowerPoint Presentation
After you’ve built your presentation and made all the adjustments to your slides, you’ll want to save your presentation. YOu can do this several different ways.

To save a PowerPoint presentation using your Ribbon, simply:
- Navigate to the File tab
- Select Save As on the left
- Choose where you want to save your presentation
- Name your presentation and/or adjust your file type settings
- Click Save
You can alternatively use the Ctrl+S keyboard shortcut to save your presentation. I recommend using this shortcut frequently as you build your presentation to make sure you don’t lose any of your work.

This is the standard way to save a presentation. However, there may be a situation where you want to save your presentation as a different file type.
To learn how to save your presentation as a PDF, see our guide on converting PowerPoint to a PDF .
How to save your PowerPoint presentation as a template
Once you’ve created a presentation that you like, you may want to turn it into a template. The easiest – but not technically correct – way, is to simply create a copy of your current presentation and then change the content.
But be careful! A PowerPoint template is a special type of document and it has its own parameters and behaviors.
If you’re interested in learning about how to create your own PowerPoint template from scratch, see our guide on how to create a PowerPoint template .
Printing Your PowerPoint Presentation
After finishing your PowerPoint presentation, you may want to print it out on paper. Printing your slides is relatively easy.

To open the Print dialog box, you can either:
- Hit Ctrl+P on your keyboard
- Or go to the Ribbon and click on File and then Print

Inside the Print dialog box, you can choose from the various printing settings:
- Printer: Select a printer to use (or print to PDF or OneNote)
- Slides: Choose which slides you want to print
- Layout: Determine how many slides you want per page (this is where you can print the notes, outline, and handouts)
- Collated or uncollated (learn what collated printing means here )
- Color: Choose to print in color, grayscale or black & white
There are many more options for printing your PowerPoint presentations. Here are links to more in-depth articles:
- How to print multiple slides per page
- How to print your speaker notes in PowerPoint
- How to save PowerPoint as a picture presentation
So that’s how to create a PowerPoint presentation if you are brand new to it. We’ve also included a ton of links to helpful resources to boost your PowerPoint skills further.
When you are creating your presentation, it is critical to first focus on the content (what you are trying to say) before getting lost inserting and playing with elements. The clearer you are on what you want to present, the easier it will be to build it out in PowerPoint.
If you enjoyed this article, you can learn more about our PowerPoint training courses and other presentation resources by visiting us here .
🔒 Unlock the PowerPoint Shortcuts Trusted by Industry Leaders KKR, American Express, HSBC, and More!
Join over 114,880 professionals from diverse fields including consulting, investment banking, advertising, marketing, sales, and business development who have supercharged their PowerPoint game with our proven methods.
✅ Customize compelling presentations effortlessly.
✅ Master time-saving techniques for faster deck creation.
✅ Boost your career prospects with top-notch PowerPoint skills.
Get FREE access to the Critical PowerPoint Shortcuts module of our premium training course by entering your name and email below.
DISCLAIMER: PC Users Only!
We respect your privacy and will keep your info safe and confidential.
About The Author

Popular Tutorials
- How to Strikethrough Text (l̶i̶k̶e̶ ̶t̶h̶i̶s̶) in Word, Excel & PowerPoint
- How to Make Animated Fireworks in PowerPoint (Step-by-Step)
- Strikethrough Shortcut (l̶i̶k̶e̶ ̶t̶h̶i̶s̶) for Word, Excel & PowerPoint
- How to Create a Flash Card Memory Game in PowerPoint (Like Jeopardy)
- Keyboard Shortcuts Not Working: Solved
PowerPoint Tutorial Categories
- Strategies & Opinions
- Shortcuts & Hacks
- Pictures, Icons, Videos, Etc.
- New Features
- Miscellaneous
- Charts & Data Viz
We help busy professionals save hours and gain peace of mind, with corporate workshops, self-paced courses and tutorials for PowerPoint and Word.
Work With Us
- Corporate Training
- Presentation & Template Design
- Courses & Downloads
- PowerPoint Articles
- Word Articles
- Productivity Resources
Find a Tutorial
- Free Training
- For Businesses
We help busy office workers save hours and gain peace of mind, with tips, training and tutorials for Microsoft PowerPoint and Word.
Master Critical PowerPoint Shortcuts – Secure Your FREE Training Module and Save Valuable Time!
⌛ Master time-saving expert techniques.
🔥 Create powerful presentations.
🚀 Propel your career to new heights.
We value your privacy – we keep your info safe.
Discover PowerPoint Hacks Loved by Industry Giants - KKR, AmEx, HSBC!
Over 114,880 professionals in finance, marketing and sales have revolutionized their PPT skills with our proven methods.
Gain FREE access to a full module of our premium PowerPoint training program – Get started today!
We hate spam too and promise to keep your information safe.
You are currently viewing a placeholder content from Facebook . To access the actual content, click the button below. Please note that doing so will share data with third-party providers.

Cloud Storage

Custom Business Email

Video and voice conferencing

Shared Calendars

Word Processing

Spreadsheets
Presentation Builder

Survey builder

Google Workspace
An integrated suit of secure, cloud-native collaboration and productivity apps powered by Google AI.
Tell impactful stories, with Google Slides
Create, present, and collaborate on online presentations in real-time and from any device.
- For my personal use
- For work or my business

Jeffery Clark
T h i s c h a r t h e l p s b r i d g i n g t h e s t o r y !

E s t i m a t e d b u d g e t

Make beautiful presentations, together
Stay in sync in your slides, with easy sharing and real-time editing. Use comments and assign action items to build your ideas together.

Present slideshows with confidence
With easy-to-use presenter view, speaker notes, and live captions, Slides makes presenting your ideas a breeze. You can even present to Google Meet video calls directly from Slides.

Seamlessly connect to your other Google apps
Slides is thoughtfully connected to other Google apps you love, saving you time. Embed charts from Google Sheets or reply to comments directly from Gmail. You can even search the web and Google Drive for relevant content and images directly from Slides.

Extend collaboration and intelligence to PowerPoint files
Easily edit Microsoft PowerPoint presentations online without converting them, and layer on Slides’ enhanced collaborative and assistive features like comments, action items, and Smart Compose.

Work on fresh content
With Slides, everyone’s working on the latest version of a presentation. And with edits automatically saved in version history, it’s easy to track or undo changes.

Make slides faster, with built-in intelligence
Assistive features like Smart Compose and autocorrect help you build slides faster with fewer errors.

Stay productive, even offline
You can access, create, and edit Slides even without an internet connection, helping you stay productive from anywhere.
Security, compliance, and privacy

Secure by default
We use industry-leading security measures to keep your data safe, including advanced malware protections. Slides is also cloud-native, eliminating the need for local files and minimizing risk to your devices.
Encryption in transit and at rest
All files uploaded to Google Drive or created in Slides are encrypted in transit and at rest.
Compliance to support regulatory requirements
Our products, including Slides, regularly undergo independent verification of their security, privacy, and compliance controls .
Private by design
Slides adheres to the same robust privacy commitments and data protections as the rest of Google Cloud’s enterprise services .

You control your data.
We never use your slides content for ad purposes., we never sell your personal information to third parties., find the plan that’s right for you, google slides is a part of google workspace.
Every plan includes

Collaborate from anywhere, on any device
Access, create, and edit your presentations wherever you are — from any mobile device, tablet, or computer — even when offline.

Get a head start with templates
Choose from a variety of presentations, reports, and other professionally-designed templates to kick things off quickly..

Photo Album

Book Report

Visit the Slides Template Gallery for more.
Ready to get started?
- PRO Courses Guides New Tech Help Pro Expert Videos About wikiHow Pro Upgrade Sign In
- EDIT Edit this Article
- EXPLORE Tech Help Pro About Us Random Article Quizzes Request a New Article Community Dashboard This Or That Game Popular Categories Arts and Entertainment Artwork Books Movies Computers and Electronics Computers Phone Skills Technology Hacks Health Men's Health Mental Health Women's Health Relationships Dating Love Relationship Issues Hobbies and Crafts Crafts Drawing Games Education & Communication Communication Skills Personal Development Studying Personal Care and Style Fashion Hair Care Personal Hygiene Youth Personal Care School Stuff Dating All Categories Arts and Entertainment Finance and Business Home and Garden Relationship Quizzes Cars & Other Vehicles Food and Entertaining Personal Care and Style Sports and Fitness Computers and Electronics Health Pets and Animals Travel Education & Communication Hobbies and Crafts Philosophy and Religion Work World Family Life Holidays and Traditions Relationships Youth
- Browse Articles
- Learn Something New
- Quizzes Hot
- This Or That Game
- Train Your Brain
- Explore More
- Support wikiHow
- About wikiHow
- Log in / Sign up
- Computers and Electronics
- Presentation Software
- PowerPoint Insertions
How to Edit a PowerPoint Template
Last Updated: May 7, 2024
This article was co-authored by wikiHow staff writer, Darlene Antonelli, MA . Darlene Antonelli is a Technology Writer and Editor for wikiHow. Darlene has experience teaching college courses, writing technology-related articles, and working hands-on in the technology field. She earned an MA in Writing from Rowan University in 2012 and wrote her thesis on online communities and the personalities curated in such communities. This article has been viewed 111,512 times. Learn more...
Templates can speed up the creation of projects, but they can also slow productivity down when they are slightly incorrect, out-of-date, or disorganized. This wikiHow article will show you how to control the look and feel of all of your slides by editing a template in PowerPoint on a computer.

- If you don’t have a PowerPoint template, you can search the web for one or create your own .

- For example, if you change the font on a text-based slide, the entire group’s font will change. In Slide Master view, you will see a menu of formatting options, like adding or removing the slide title and footers, changing the background styles , hiding or showing the background graphics , and changing the theme.
- You can add elements such as an image placeholder throughout your slideshow, like a logo. Use Insert Placeholder from the Slide Master menu to add an image or a text box that will appear in the same spot, with the same dimensions, throughout the slideshow.
- Using the Themes drop-down, you can apply a pre-made consistent color scheme and font. Since not all themes will work with your customized template, you can use the colors and font styles as inspiration. Use the Colors and Fonts drop-downs to further customize your template.

- From the File tab, select Save As .
- In the "Save as File Type" menu, choose PowerPoint template . It will save in your Custom Office Templates folder with a .potx extension. [2] X Research source
- Click Save after you’ve given the template a name.
Expert Q&A
- If you don’t already have a Microsoft Office account, you can get a free trial version for a limited time. Thanks Helpful 0 Not Helpful 0

You Might Also Like

- ↑ https://support.office.com/en-us/article/customize-a-slide-master-036d317b-3251-4237-8ddc-22f4668e2b56#OfficeVersion=2010plus
- ↑ https://designshack.net/articles/business-articles/how-to-edit-powerpoint-template/
About This Article

1. Open a PowerPoint Template. 2. Click Slide Master from the View tab. 3. Edit the slide masters themes, colors, fonts, and placeholders. 4. Click Save as from the File tab. 5. Click PowerPoint Template from Save File Type... . 6. Click Save . Did this summary help you? Yes No
- Send fan mail to authors
Is this article up to date?
Featured Articles

Trending Articles

Online PowerPoint Editor
Edit powerpoint presentation. edit pptx, ppt, or odp., powered by aspose.com and aspose.cloud ., * by uploading your files or using our service you agree with our terms of service and privacy policy ..
Send the download link to
Press Ctrl + D to save this page as a bookmark.
We've already processed ??? files with a total size of ??? Mbytes.

How to edit presentation online
- Click Drop or upload your file .
- Select the PowerPoint file you want to open and edit on your computer. Your PowerPoint will be uploaded and then presented in an online Editor menu.
- Edit your PowerPoint: Edit text; Change the size of fonts; Use formatting options; Move shapes and objects; And perform other tasks.
- Once you finish editing your presentation, click the Download icon.
Aspose.Slides Editor App is used to create and edit PowerPoint presentations (PPT or PPTX), templates and layouts. Load your presentation and observe the slides. Choose the element on a slide and modify its properties, color, size, layout, etc. Move, resize and delete elements. Zoom the slides, change z-order, etc. Download the resulting presentation in different formats as PDF, TIFF, etc. Other Aspose Apps you may want to try: Merger web app for merging presentations; Watermark web app for adding watermarks to presentations. Read an article on creating invitations in PowerPoint: 3 Easy Steps for Creating Invitations in PowerPoint

Aspose.Slides Editor
- Online PPTX or PPT Editor.
- Open PPTX or PPT online.
- Edit PowerPoint online. Save edited presentation.
- Edit or create PowerPoint presentation online.
- Edit any PowerPoint file: PPT , PPTX or ODP.
- Edit presentation slideshow: PPS , PPSX .
- How do I edit a PowerPoint presentation online? To edit your PowerPoint online, upload the PowerPoint file. Then you get to access editing options.
- Can I edit PowerPoint without Office? Yes. You do not have to install Office or Microsoft PowerPoint. To use Aspose Editor, all you have to do is upload your file. No payment, software installation, or plugin is required.
- How do I edit a text box in PowerPoint? Upload your PowerPoint file. Click the text box. You can now edit or make changes to the text.
- How do I edit PowerPoint on my mobile phone? Aspose PowerPoint Editor works everywhere: mobile phones (iPhones and Android devices) or computers (Windows, macOS). Use it.
- Can I format a text in PowerPoint online? Yes, you can format a text. Click the text and then apply your preferred formatting options to it.
- Are there limits on uploaded files? For a single presentation, the maximum file size is 35 MB and the maximum number of slides is 50. If you must edit a presentation that exceeds 35 MB or contains more than 50 slides, we recommend you use Aspose PowerPoint Splitter to divide the slides into multiple presentations. You can then modify the presentations you obtained individually.
Simple Editing
Edit from Anywhere
Trusted operations
Other supported editors.
We provide editors used to work with other PowerPoint documents. Please, see the list below.
- Edit PDF (Edit PDF document)
- Edit PDF text (Edit text in PDF)
- Change PowerPoint Background (PowerPoint Presentation)
- Create Presentation (PowerPoint Presentation)
- Create Slides (PowerPoint Presentation)
- Edit PowerPoint Template (PowerPoint Presentation)
- Edit PPS (PowerPoint Presentation)
- Edit Slideshow (PowerPoint Presentation)
- PowerPoint Creator (PowerPoint Presentation)
- Web PowerPoint (PowerPoint Presentation)
Oops! An error has occurred.
Error has been reported successfully..
You have successfully reported the error, You will get the notification email when error is fixed. Click this link to visit the forums.
� Aspose Pty Ltd 2001-2022. All Rights Reserved.
How-To Geek
How to edit a header and footer in powerpoint.
Need to add headers and footers to a PowerPoint presentation? We'll walk you through it!
Quick Links
How to insert headers and footers in powerpoint, how to edit headers and footers in powerpoint, how to add a header in powerpoint.
Headers and footers in PowerPoint are ideal for displaying descriptive content, such as slide numbers , author info, the date and time, and more. We'll show you how to easily insert or edit info in a header or footer in PowerPoint.
To insert headers and footers in PowerPoint, open your presentation, and then click "Insert."
In the "Text" group, click "Header and Footer."
When the window opens, you'll be in the "Slide" tab. You can select any of the following options to add them to your slides:
- Date and time
- Slide number
You might notice that there isn't an option for a header. This is because headers aren't actually available on slides, but there's a simple work-around for this we'll cover below.
Related: How to Add a Header or Footer to a Word Document
After you make your selections, you can see in the "Preview" on the right where they'll appear on the slide.
Type the text you want to appear in the footer in the text box under "Footer." You can select the "Don't Show on Title Slide" option if you don't want PowerPoint to add the text to the title slide of your presentation.
After you have everything the way you want it, click "Apply" to add your content to the currently selected slide. We clicked "Apply to All" to add our content to all slides in our presentation.
The content now appears at the bottom of the PowerPoint presentation slides you selected.
This is difficult to see, though---let’s edit it!
There are a couple of ways you can edit headers and footers in PowerPoint. Since each slide in your PowerPoint presentation is likely different, you might only need to edit something on a single slide. If that's the case, just click the content and edit it as you would any other text in that slide.
You can edit the format of the text, too. Just click and drag your cursor over the text you want to edit to highlight it, and then use the formatting tools in the pop-up menu.
If you want to edit the footer on all of your slides, you can do so by going back to Insert > Header and Footer, but the formatting options aren't available there.
If you want to change the font size and color of the footer text on all slides, select "Slide Master" in the "Master Views" section under the "View" tab.
Click the top slide in the left pane.
Then, highlight and edit the footer text in this slide. We changed our font size to 14 pt., and the color to red.
When you switch back to View > Normal, your changes will appear on all slides.
Adding a header isn’t so much of a hack, as it is just adding a new text box to the top of your slide. You can do this in the Slide Master, so it will then appear on every slide in your presentation.
To do this, navigate to View > Slide Master to open the Slide Master. Select the top slide, go to the "Text" group under the "Insert" tab, and then click "Text Box."
Click and dragging your cursor to draw a header text box in the appropriate location, and then type your text.
When you return to View > Normal, your new header box will appear at the top of each slide.
How To Edit Or Modify a PowerPoint Template
Easier than starting from scratch
PowerPoint is a useful program to help you create slides for a presentation and even turn them into a video. It has aged well and is still one of the most popular choices for educators, in-house business presentations and home theatre applications.
You can add graphics, text, and multimedia to enhance the appearance and make your presentations more engaging. The list of rich media, including music and video continues to grow.
Along with those features is the ever-expanding variety of templates. Even so, not every template has all that you want or need. Some editing is still required from time to time. The good news is that those templates, purchased or free, can usually be modified and edited by you.
Edit Or Modify a PowerPoint Template
When it comes to Powerpoint templates you can:
- Start from scratch with a blank presentation and use it as a one-off or create a custom template
- Use one of the themes provided from the program or downloaded for free
- Purchase templates from various sources
Learning how to edit a presentation is a valuable tool to have in your kit. Many tutorials suggest using the Slide Master view. However, Slide Master provides blank layouts. It is not a way to edit an existing template.
Let’s say you just purchased a bundle of templates because they look impressive and you want to use them for your business. However, the templates are niche-based, and your business provides online services such as website design.
For example, maybe you like the layout and built-in animations of a real estate Powerpoint template. Does that mean you can’t use it? No, you can customize it for your business by swapping out the images with ones that are more relevant to your industry.
There are many ways to edit a Powerpoint presentation. For the purposes of this tutorial, we are going to outline the steps to turn a real estate template into one for a website design company.
Start With The Cover Slide
Below is the first slide in a purchased real estate Powerpoint presentation.

The first thing you will want to do is to replace the house image with an image of a website. There are two different ways to do this.
Right-Click On An Image To Change It
Some templates will allow you to swap out the picture simply by right-clicking on it and choosing Change picture . Then select the source of your new image ( File, Online Sources, Icons, Clipboard ).

I prefer to use image sites that I know are free and not subject to any copyright laws. As you can see in the image below, when you select From Online Source , you are taken to a screen where you can choose pictures under Creative Commons .
However, there is also a disclaimer on the bottom of the pop-up that says: You are responsible for respecting others’ rights, including copyright.

To be safer legally, use the From a file option and choose an image from a free stock photo website .
Use The Selection Panel To Change Images
Templates that have more complicated animations and transitions will require a different method to change the images.
Start by making sure you are on the Home tab in the top navigation bar.

Now you want to look for and click the Select drop-down menu on the right slide of the top navigation. Choose Selection pane .

This will open a new tab that shows you all the elements on the slide and gives you the ability to “show” or “hide” them.

Your goal in this step is to isolate the image from any other elements on the slide so that you can change it.
Click on Hide All so that you see a blank white screen. The number of elements you will see in the selection panel will depend upon the complexity of the slide.
In this example, it is easy to identify which element is the image as there is only one picture. If your slide has many photos, you will want to click on the dash (-) next to the name of each picture element to find the one you want to change.
Click them on and off until you find the right one.

Make sure that once you find the right picture, it is the only element that is showing. By hiding the other items, you can isolate the image to change it.
At this point, you can follow the same instructions above by right-clicking on the image and selecting Change Picture .
Change Font & Shape Colors
You can also change the font colors and type, as well as the transparency and color of the shapes.
If you choose an image that uses the same color scheme as the template, you will probably only need to do minimal changes, if any. But if you find a picture you want to use that doesn’t match the color scheme, don’t worry. It’s easy to change.
The image below shows the cover slide with a website image that replaced the picture of the home.

It looks out of place from a color perspective. So, let’s change the colors to match our new image for a more congruent look.
Change The Color Of The Shapes
Right-click with your cursor on the background shape that contains the title and select Format Shape .

This process will open a side panel where you can see that the bottom bar is filled with a solid color with 30% transparency. You can also see the color that is used.

Let’s select a color that blends better with our new image. Click the dropdown arrow next to Color and choose the Eyedropper option. You can also select any theme, standard, or custom colors. But if you want to match the colors in the image, using the Eyedropper works best.

Move your cursor to any part of the image that is the color you want to use and click return . You will now see that the bottom bar is the color you chose using the Eyedropper.

Now, remember that the original slide had a 30% transparency effect. This is removed when you change the color. If you want to use that with your new color, right-click the bottom bar, select Format and put the Transparency level back to 30%.

Follow the same procedures as above to change the right color column to the same color. You will notice that now there is an additional section called Recent Color to make it even easier for you to use the same color you used before.

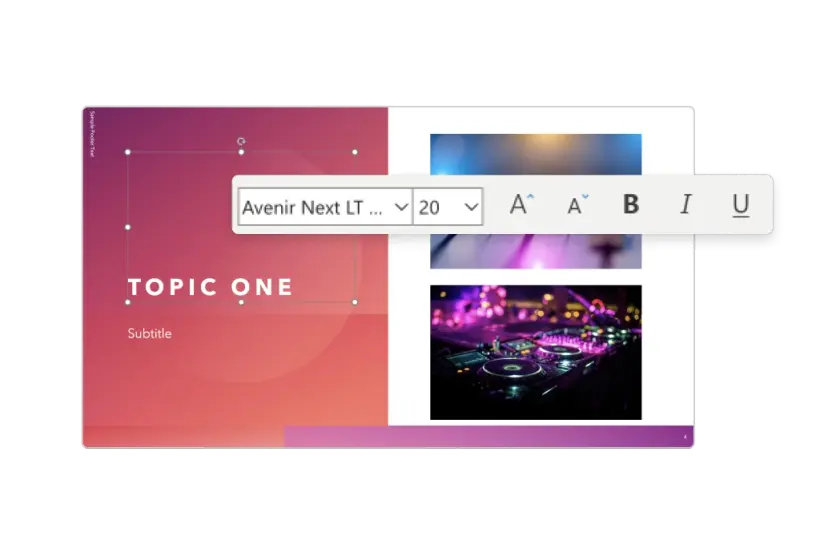
You can change the color, font, size, and location of any text in your template. Start by highlighting the text and looking at the top navigation section that refers to what you can do with text.

With the text highlighted, you can make several edits, including:
- Style (bold, italic, underlined, shadowed)
If you are not sure what any of the options mean, hover your mouse over it to see a description. Of course, you will want to replace what the text says to match your business.
To move the location of the text, put your mouse over one of the dots you see in the highlighted section until your cursor turns into a vertical arrow.
Then use the arrows on your keyboard to move the text up, down, right, or left.
In this sample, the white text looks good with the image and color scheme. However, it could use a few tweaks to the location and style.
See the new slide below and how we transformed it from the original slide by customizing it while keeping the same basic design, animations, and transitions as the template.

The benefit of editing and customizing pre-made templates is that you can benefit from the design skills, animations, and transitions of professional Powerpoint creators.
There is no need to avoid a template that is geared towards an industry or niche that isn’t yours. By following the instructions above, you can have the best of both worlds.

David has a background in small business and lives in Australia. He is a WordPress and Ubuntu Developer who enjoys design, CSS and tech tool integration. Read David's Full Bio
Read More Posts:

Find the perfect PowerPoint presentation template
Bring your next presentation to life with customizable powerpoint design templates. whether you're wowing with stats via charts and graphs or putting your latest and greatest ideas on display, you'll find a powerpoint presentation template to make your ideas pop., presentations.
Help your data, insights, and recommendations make a statement with beautiful and easily customizable presentation templates.

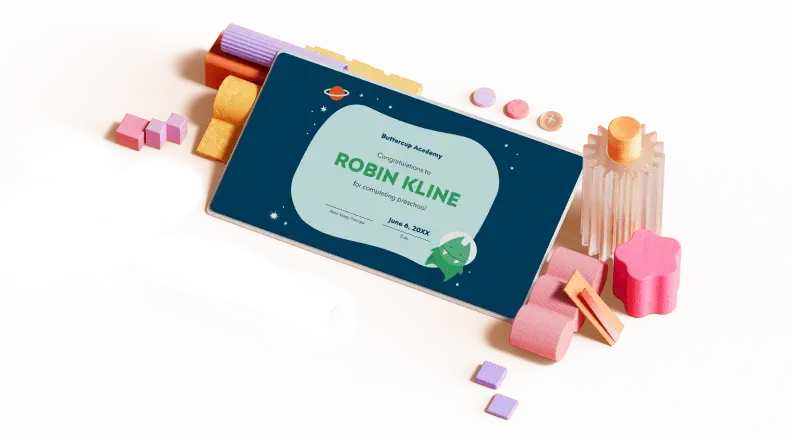
Certificates
Celebrate accomplishments big and small with customizable certificate templates. From gift certificates to awards for finishing a course or training, find a template that highlights their accolades.
Boost visibility for your show, project, or business with easily customizable poster templates. Find templates for all your promotion needs and make them uniquely yours in a flash.

Keep track of whatever you need to in style. From personal planning to promotional calendars, find templates for every kind of project and aesthetic.

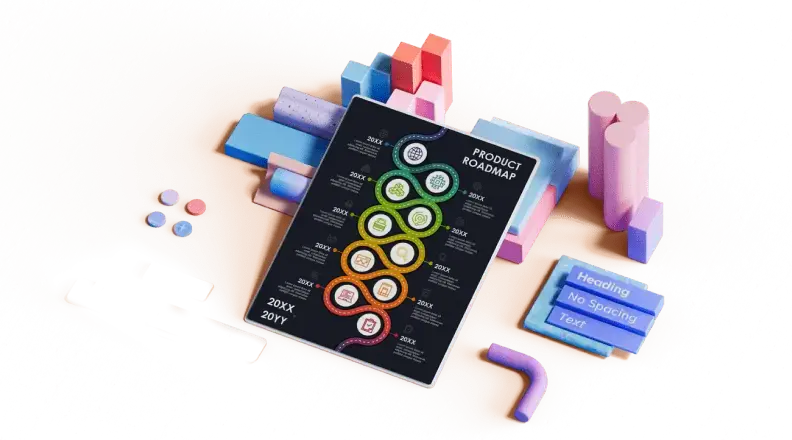
Infographics
Say more with less using helpful and easily customizable infographic templates. Add clarity to business presentations, school projects, and more with these helpful templates.
Start with the best PowerPoint templates

Elevate your storytelling
Tips, tricks, and insider advice from our business and design experts
A quick way to create beautiful, powerful PowerPoint presentations
Create captivating, informative content for PowerPoint in just a few minutes—no graphic design experience needed. Here's how:

1. Find the perfect PowerPoint template
2. Customize your creation

3. Show it off
Let's create a powerpoint design, frequently asked questions, where can i find slide templates and themes that i can customize.
To find customizable slide templates and themes, you can explore the business presentations templates or search by PowerPoint templates . Once you find a template that resonates with you, customize it by changing its color scheme, add in your own photos, and swap out the font.
How do I use pre-made PowerPoint templates?
After you've chosen a PowerPoint template to use, customize it. Explore [design tips] on how to customize a deck that resonates with your brand while putting emphasis on the topic at hand. Play with other design elements, like photo shapes, to make each slide unique.
How can I make or edit my own custom PowerPoint templates?
Start from scratch by creating your own PowerPoint template . Follow tips for designs and business presentations so that your unique template is cohesive and relevant to your brand. Incorporate your brand's color scheme and graphics so that all your slides aren't text only.
What kinds templates can I get online for PowerPoint?
You can get PowerPoint templates that have modern designs, animated ones, or even hand-drawn art in each slide. The color schemes range from bold to subtle. Each template's slides are also organized based on what you may want to include in your presentation . You can use the template as a starting point and customize its specific details from theme.
Popular categories

ONLYOFFICE DocSpace 2.5 released: Public rooms improvements, user groups, storage management, embedding presets, and more
ONLYOFFICE DocSpace 2.5 released
Online presentation editor
Open, create and edit stunning powerpoint presentations online.
Impress your audience with stunning work and projects
Build content of any complexity, let yourself be creative, present easily and freely, bring team efforts together, use ai helper, take your slides beyond basic, get started and choose where to work, in onlyoffice docspace, in the platform you use, in the platform you build, from your pc, from your mobile devices, learn more about onlyoffice presentation editor.
Yes, you can install and use free ONLYOFFICE Desktop Editors to edit local presentations offline.
Yes, you can install free Documents app for iOS or Android devices to work on presentations on-the-go.
Yes, you can integrate the presentation editor into your app. Please use ONLYOFFICE Docs Developer .
- GroupDocs.Total Product Family
- GroupDocs.Viewer Product Solution
- GroupDocs.Annotation Product Solution
- GroupDocs.Conversion Product Solution
- GroupDocs.Comparison Product Solution
- GroupDocs.Signature Product Solution
- GroupDocs.Assembly Product Solution
- GroupDocs.Metadata Product Solution
- GroupDocs.Search Product Solution
- GroupDocs.Parser Product Solution
- GroupDocs.Watermark Product Solution
- GroupDocs.Editor Product Solution
- GroupDocs.Merger Product Solution
- GroupDocs.Redaction Product Solution
- GroupDocs.Classification Product Solution
- GroupDocs.Splitter Product Solution
- GroupDocs.Translation Product Solution
- GroupDocs.Rewriter Product Solution
- GroupDocs.Unlock Product Solution
- Source Code
- Free Support
- Free Download
- Free Consulting
- aspose.cloud
- groupdocs.com
- groupdocs.cloud
- groupdocs.app
- conholdate.com
- conholdate.cloud
- conholdate.app
- containerize.com
- codeporting.com
- fileformat.com
- fileformat.app
- Acquisition
- GroupDocs Products
- Editor Apps
- Edit PowerPoint
PowerPoint Editor
Edit powerpoint file online from any device with a modern browser like chrome and firefox..
Powered by groupdocs.com and groupdocs.cloud .
- File upload
By uploading your files or using our service you agree with our Terms of Service and Privacy Policy .
Open file via link
About editor app.
If you need to edit documents in different formats using only the usual browser like Chrome, Firefox or Safari, without installing any editing software like Microsoft Office or OpenOffice, then Powerpoint Editor App is exactly what you need!
With our Powerpoint Editor App, which is absolutely free and doesn’t require registration, you can easily drag and drop the required file on upload form, edit its content right here in the browser, and then download the edited version in order to save it locally. Even more, you’re not forced to download the resultant file in the same format as you’ve uploaded it, — you’re able to choose any appropriate one! For example, you can upload a document in RTF format, edit it, and save as DOCX.
WYSIWYG-editor with its toolbar adapts to the specific format of an uploaded document, enabling those features and possibilities, which are actual for only this format and disabling those, which are not related. In particular, Presentation documents like PPT, PPTM, and ODP, there will be navigation between slides. The toolbar contains all features that are applicable for the given format.
This online editor, because of its web-based nature, is absolutely portable and multi-platform — you only need a usual web-browser without any plugins, and no matter on which platform you’re using it: desktop PC or smartphone, Windows, Linux, or macOS, Android or iOS.
Presentation File Formats
Presentation file formats that store collection of records to accommodate presentation data such as slides, shapes, text, animations, video, audio and embedded objects.
How to view, edit, download a document using Editor App
Questions & answers.
- How can I edit a POWERPOINT file using PowerPoint Editor? First of all, you need to select and add this file for editing by two ways: drag and drop your file to the white area with the label ”Click or drop your file here” or click on this area and then select the desired file using file explorer. Once a file is added, the green progress bar will begin to grow, and when completed, the PowerPoint Editor will be opened with file content inside it.
- The Editor was opened after file uploading, but there is a “Please wait, while document is loading” message and no any document content. Will it appear and how long does it take? The document loading time depends on three factors: document size, the complexity of document content and aspects of the document format. For example, plain text files (TXT) are much easier to open and display than XLS spreadsheets, and it may be faster to open an eBook with a huge 1000 page novel inside rather than a complex 10-slide PPTX presentation with tons of animations, comments and images.
- How can I edit the content of a document when it is opened in the Editor? In short: like in any other WYSIWYG-editor. There is a toolbar with three groups of tools: File, Format, and Insert. First group contains buttons for saving and downloading the document, second is responsible for formatting existing content, while third — for inserting the new entities inside content like images, tables, lists and so on. There also are two emerging groups of buttons on the toolbar — Table and List. They appear when you point at a table or a list respectively and contain tools for working with them like adding or removing table rows and columns, list indentation and so on.
- Does PowerPoint Editor require an internet connection when a document is loaded and opened? Yes, the PowerPoint Editor is a client-server tool where WYSIWYG-editor is only a facade for a server-based software. If an internet connection is lost during document editing, you will not be able to save and download the edited document.
- What about privacy, is it safe to use the PowerPoint Editor? Yes, it is. Editor usage scenario implies that you select and open a document, edit it and then save and download the edited version, and that’s all. The unique URL is generated after you’ve opened the file, but this URL is known only for you and no one else. Finally, the uploaded file will be automatically deleted from our servers after 24 hours after uploading and this URL will become inactive.
- Can I edit a document on Linux, Mac OS or Android? It can be anything that has a modern browser and an internet, no matter what device it is, which operating system is there, and what the browser is. PC or smartphone, Windows or Mac OS, Android or iOS, Chrome or Firefox, — all of them are supported.
Other file and document editors
Editor supports most popular file and document formats including Word, Excel, PowerPoint.
- EBOOK FILE FORMATS EDITOR EBook File Formats
- EMAIL FILE FORMATS EDITOR Email File Formats
- SPREADSHEET FILE FORMATS EDITOR Spreadsheet File Formats
- FIXED-LAYOUT FILE FORMATS EDITOR Fixed-layout File Formats
- PROGRAMMING FILE FORMATS EDITOR Programming File Formats
- WEB FILE FORMATS EDITOR Web File Formats
- WORD PROCESSING FILE FORMATS EDITOR Word Processing File Formats

- Privacy Policy
- Terms of Service
GroupDocs online applications
- Classification
- Translation
Select a language
- Slovenščina

Edit a presentation in PowerPoint for the web
PowerPoint for the web can open files stored on OneDrive, SharePoint, or Dropbox.
Upload a file to OneDrive
If your file is saved on a computer hard disk, a flash drive, or a USB stick, the first thing to do is upload it to OneDrive.
Sign in to OneDrive with your Microsoft account (hotmail.com, outlook.com, live.com, or msn.com)
or Sign in to your Microsoft 365 work or school account (.com, .org, .edu) and go to OneDrive.
Navigate to the destination folder.
Select Upload to save the files to OneDrive.
Upload a file to SharePoint
Sign in to your Microsoft 365 work or school account (.com, .org, .edu) and go to SharePoint.
Navigate to the destination folder.
Select Upload to save the files to SharePoint.
Edit a file with a Microsoft account
In some cases, when you open a presentation from OneDrive directly or through a shared link with a Microsoft account, PowerPoint for the web displays the file in Reading view.
To edit such a file:
In your web browser, navigate to the file in OneDrive.
Click the file name once to open the file in PowerPoint for the web.
select Edit Presentation , and then select Edit in PowerPoint for the web .

The file switches from Reading view to Editing view, where you can:
Add or change content
Share the file and collaborate with others
View the presentation in Slide Show
Edit a file with a Microsoft 365 work or school account
When you open a presentation from OneDrive for work or school or SharePoint directly or through a shared link with a Microsoft work or school account, PowerPoint for the web displays the file in Editing view by default.
Editing an .odp or .pptx file in PowerPoint for the web
Using Office Online in OneDrive
Create more with PowerPoint templates

Need more help?
Want more options.
Explore subscription benefits, browse training courses, learn how to secure your device, and more.

Microsoft 365 subscription benefits

Microsoft 365 training

Microsoft security

Accessibility center
Communities help you ask and answer questions, give feedback, and hear from experts with rich knowledge.

Ask the Microsoft Community

Microsoft Tech Community

Windows Insiders
Microsoft 365 Insiders
Was this information helpful?
Thank you for your feedback.
- Slidesgo School
New feature available: edit our templates with Canva

Whenever you need to create, Slidesgo is there. We’re continually enhancing your presentation design process with templates that are primed to impress for any occasion. And in order to let your ideas flow best, comfort is key. How could Slidesgo help you with this? By making you feel right at home with our resources, no matter your preferred platform .
You spoke, and we listened. Now, your favorite slides can be accessed on a new platform: Canva! This new format adds to our existing options (PowerPoint and Google Slides), expanding your ways to utilize our first-rate presentation content . We’ve started with a selection of Canva-ready templates, but we’re just warming up—very soon, all Slidesgo content will follow this path. Get ready for a smoother, faster workflow!
More platforms, more great presentations
Which slidesgo presentations can i edit with canva, where can i find the option to edit with canva, will there be more presentations available for editing in canva.
All educators, students, and presenters agree on one thing: time is money. And efficiency drops when you’re not comfortable. That’s why we’ve introduced this new download format, giving you another stunning platform to craft your presentations. What does this mean for you? More flexibility and simplicity for your design process because all the resources you adore will now be closer to your fingertips .
Whether you’re a teacher gearing up for your next lesson, a student tackling a group project, or a marketer devising a pitch, you can create presentations seamlessly without any new learning curve. At the end of the day, it’s the same Slidesgo content you know and love—just improved .
To familiarize yourself with this new playground, we’ve picked a variety of Slidesgo templates across various themes and subjects that are fully compatible with Canva. Our collection is filled with both free and premium resources , so there’s something suitable for every occasion.
As a Slidesgo user (or if you’re new here, welcome! You’ve arrived at just the right moment), you might know that content availability varies by account type. This gives you the flexibility to access what you need, exactly when you need it, now with even better accessibility .

Discovering our Canva-ready templates is a breeze. Simply spot the “Editable in Canva” label accompanying our templates in this exciting new format. No need to spend hours sifting through all our templates—just follow these straightforward steps, and you’ll be enjoying this new functionality in no time:
- Head to the Slidesgo search bar and type “editable in Canva”.
- Explore the collection and pick the template that resonates with you the most.
- Hit the “Download” button. You’ll now see this brand-new format alongside the usual options for PowerPoint and Google Slides.
Click on “Canva” , and you’ll be directly addressed to your personal area on their website. Easy-peasy!
This is just the beginning: our collection will grow, and many more templates will soon feature the “Editable in Canva” tag. And (spoiler alert) we aim to make all our content available in this format , just as with our other download options. So, keep an eye out for our updates!
At Slidesgo , we believe in unlimited creativity, anytime and anywhere inspiration hits . Give it a go and discover how easy and fun making presentations can be with our new Canva download option!
Do you find this article useful?
Related tutorials.

Smartick, now available on Slidesgo
In the few years since its launch, Slidesgo has become one of the most popular sources of Google Slides and PowerPoint templates for creative presentations. Educators from all levels have experienced the ease of creating visually striking presentations using Slidesgo’s templates.However, great-looking templates are not the only things on our platform. In partnership with the learning platform Smartick, Slidesgo is now able to offer full presentations on topics as complex as math.The next era of hassle-free presentation making is here, and we're ready to tell you all about it.

Start with a mic drop, end with a high five: Make lessons easily cool with AI icebreaker generator and exit ticket
So, here’s the tea: everyone’s been there, right? You’re about to start a class or a workshop, the room’s kinda charged, everyone’s looking at you, and bam—the pressure’s on to make the first words out of your mouth. Fast-forward, and it’s wrap-up time, but instead of ending on a meh note, you’re dreaming of dropping the mic—metaphorically, of course.That’s where our latest AI-powered tools come into play. Introducing the coolest duo since PB&J: the AI icebreaker generator and the AI exit ticket. Picture them as the BFFs your classroom or conference never knew they needed, turning “uhh, what now?” moments into “aha!”...

The easy way to wow with Slidesgo for Google Slides
Get ready to create great presentations at the speed of light. Whether you're a teacher igniting the passion in your classroom, a professional seeking to sell an idea, or a student aiming to blow your classmates away, Slidesgo for Google Slides is your presentation BFF.Picture this: Slidesgo effortlessly integrates into your Google Slides workspace, unveiling a treasure trove of over 20,000 templates to make your presentations sparkle like a brilliant diamond. With this helpful plugin by your side, you'll breeze through the process of searching, adding, and customizing slides. The result? Presentations that not only look visually stunning, but also overflow with information, ensuring your presentations...

How to print PowerPoint notes
Crafting an impactful PowerPoint slideshow and delivering a captivating presentation are distinct skills. The first focuses on designing appealing visuals to convey a clear message, while the second involves employing effective presentation techniques to ensure the audience grasps the idea. The content of this article will help you with the latter part of this process, guiding future presenters on how to print PowerPoint with speaker notes to enhance your presentations success and effectiveness.
Purdue Online Writing Lab Purdue OWL® College of Liberal Arts
Welcome to the Purdue Online Writing Lab

Welcome to the Purdue OWL
This page is brought to you by the OWL at Purdue University. When printing this page, you must include the entire legal notice.
Copyright ©1995-2018 by The Writing Lab & The OWL at Purdue and Purdue University. All rights reserved. This material may not be published, reproduced, broadcast, rewritten, or redistributed without permission. Use of this site constitutes acceptance of our terms and conditions of fair use.
The Online Writing Lab at Purdue University houses writing resources and instructional material, and we provide these as a free service of the Writing Lab at Purdue. Students, members of the community, and users worldwide will find information to assist with many writing projects. Teachers and trainers may use this material for in-class and out-of-class instruction.
The Purdue On-Campus Writing Lab and Purdue Online Writing Lab assist clients in their development as writers—no matter what their skill level—with on-campus consultations, online participation, and community engagement. The Purdue Writing Lab serves the Purdue, West Lafayette, campus and coordinates with local literacy initiatives. The Purdue OWL offers global support through online reference materials and services.
A Message From the Assistant Director of Content Development
The Purdue OWL® is committed to supporting students, instructors, and writers by offering a wide range of resources that are developed and revised with them in mind. To do this, the OWL team is always exploring possibilties for a better design, allowing accessibility and user experience to guide our process. As the OWL undergoes some changes, we welcome your feedback and suggestions by email at any time.
Please don't hesitate to contact us via our contact page if you have any questions or comments.
All the best,
Social Media
Facebook twitter.
Featured Products
Video Converter
All in one media converter tool.
Screen Recorder
Your all-featured screen recorder.
A comprehensive DVD ripper.
Blu-ray Player
Your incredible multimedia player.
MP4 Converter
A solid file converter to MP4.
MKV Converter
Best tool to convert MKV files.
PowerPoint Watermark Remover: Master 2 Ways for Pro Presentations
PowerPoint, a versatile and widely used presentation software, empowers users to create engaging slideshows. While it offers many features to enhance your presentations, you may encounter watermarks when working with specific files. Fortunately, PowerPoint watermark removal features can help you remove those.
This write-up will provide a step-by-step process you can follow to achieve that. Moreover, it will present various methods of removing watermarks from pictures and videos before uploading them into your PowerPoint. Let us explore these methods!
Part 1. How to Remove a Watermark in PPT
Part 2. how to remove watermark before uploading to ppt, part 3. faqs about removing watermark in powerpoint.
This section will explore a hassle-free method to remove watermarks from slides using PowerPoint’s features. These features offer a comprehensive solution for a polished and professional presentation. Let us dive into how to remove the watermark in PowerPoint:
1. Design Tab
Step 1 Start by opening your PowerPoint file containing the watermark.
Step 2 Choose the slide with the watermark or any slide if the watermark appears on many slides.
Head to the Design tab. It is where you control the look of your slides. In the Design tab, find Format Background in the Customize section and click on it.
Step 3 Go to the Fill tab once the Format Background sidebar appears. Then, select Solid Fill in the Fill tab. It ensures you are working with a simple, single-color background.
Use the color palette to choose a background color, replacing the area where the watermark is. Optionally, you can change the transparency if you desire to.
Step 4 Hit Apply to All if you want the new background without the watermark on all slides.
Step 5 Return to your slides to confirm the watermark has been removed from the selected slide or all slides.

2. Slide Master
Step 1 Open the PowerPoint file where the watermark is located.
Step 2 Head to the View tab. Look for the Slide Master in the Master Views group.
Step 3 In Slide Master view, you will notice a panel with thumbnail images. Locate the specific slide layout containing the watermark you wish to remove and click on it.
Note: If there are many layouts, hold down the Ctrl key and click on each.
Step 4 Find the watermark image or text on the chosen slide layout. Once found, click on it and press the Delete key on your keyboard.
Step 5 To make these changes effective throughout your presentation, return to the View tab and select Normal in the Presentation Views group. Confirm that the watermark has disappeared from your slides.

1. Remove Photo Watermark
Have you ever had an excellent picture for your PowerPoint but got bothered by a watermark? AVAide Watermark Remover is a helpful friend in such situations. It is a platform that erases watermarks, keeping your picture background clean. It offers various options to remove the watermark: brush, lasso, and polygonal. Impressive, right?
This online platform uses AI to understand and fill colors around the watermark. It does not remove the mark; it fixes details and makes your picture look perfect. Are you worried about safety? This platform ensures it is safe with a strong 256-bit SSL certificate, so there are no viruses, ads, or risks. Enjoy a hassle-free way to remove watermarks and make your PowerPoint look great!
Step 1 Head to the official AVAide Watermark Remover website.
Step 2 Press the Choose a Photo button. Then, import the image containing the watermark you want to remove.

Step 3 A new window will appear on your screen, where you can see your imported image. You have three options to remove the watermark on your image: Brush , Lasso , and Polygonal .
Use the Brush for marking and removing the watermark. Use the Lasso to draw around the watermark for removal. Use Polygonal for precise selections with straight lines. If there are unwanted highlights, you can use the Eraser to remove them.

Step 4 Once the watermark is covered, click the Remove button. AVAide Watermark Remover will kickstart the process, leaving you with a watermark-free picture.

Step 5 Press the Download button to save the watermark-free image to your local folder.

2. Remove Video Watermark
If you have videos with watermarks, making you hesitate to upload them on PowerPoint, AVAide Video Converter can be your solution.
It has a built-in Video Watermark Remover. It can help you achieve a professional and clean presentation. It simplifies the process of removing watermarks manually using a selection box. Therefore, you can remove the watermark without unwanted elements or residues. Moreover, it enables you to remove many watermarks in a single video. It makes your task efficient and hassle-free. Upgrade your presentation game with AVAide Video Converter!
Here is a guide on how to remove watermarks from your video using AVAide Video Converter:
Step 1 Visit the AVAide Video Converter official website to download and install the program.
TRY IT FREE For Windows 7 or later
TRY IT FREE For Mac OS X 10.12 or later
Step 2 Open the program and navigate to the Toolbox tab. Select the Video Watermark Remover from the provided tools.

Step 3 Import the video with the watermark by clicking the (+) button.

Step 4 A new window will appear for watermark removal. Click the + Add watermark removing area button to activate the selection box on the preview screen.
Move the selection box to the watermark in the video frame. Then, resize it using the circles on each side to cover the watermark.

Step 5 Once satisfied, click the Export button to start the watermark removal process. After completion, find your watermark-free video in your local folder.

- Full Guide to Resize Pictures with PowerPoint Easily
- Remove Watermark from PDF: Reasons & Effective Approaches
Can I remove watermarks from PowerPoint slides on my mobile device?
It might be more challenging on mobile devices due to limited editing features. A computer with a dedicated editing program, like AVAide Video Converter, is often more effective.
What are the benefits of removing a watermark from my PowerPoint slides?
Removing watermarks can give your presentation a more polished and professional appearance. It ensures that your audience focuses on your content without distractions. It makes the information more accessible and appealing.
Will removing a watermark change the file size of my presentation?
It does not change the file size of your presentation. Using high-resolution images to replace the watermarked ones could increase the file size.
Is there a way to recover the original file without a watermark if it's accidentally deleted?
If you delete or replace a file, returning the original without the watermark is hard. To avoid this, save a copy of your files in another place.
Does removing a watermark impact the formatting of my slides?
Removing a watermark itself should not affect the formatting of your slides. You might need to change the formatting to ensure a seamless fit if you replace watermarked images with new ones.
You have learned two straightforward methods to remove watermarks in PowerPoint . In addition, you have gained insights into eliminating watermarks from images and videos using AVAide's user-friendly tools. Simplify your workflow, enhance your presentations, and make your content truly yours with AVAide. Do you have something to say? Feel free to share it in the comment section!
By Jane Pineda on May 10, 2024
AVAide Watermark Remover
Easily get rid of annoying watermarks and unwanted objects from your photos without quality loss.
Related Articles

How to Make A Picture Background Transparent in PowerPoint

A Quick Guide to Editing Background Graphics in PowerPoint

How to Remove Object from Background (Online & Photoshop)
Select Your Language
Copyright © 2024 AVAide. All rights reserved.
- Cover Letters
- Jobs I've Applied To
- Saved Searches
- Subscriptions
Marine Corps
Coast guard.
- Space Force
- Military Podcasts
- Benefits Home
- Military Pay and Money
- Veteran Health Care
- VA eBenefits
- Veteran Job Search
- Military Skills Translator
- Upload Your Resume
- Veteran Employment Project
- Vet Friendly Employers
- Career Advice
- Military Life Home
- Military Trivia Game
- Veterans Day
- Spouse & Family
- Military History
- Discounts Home
- Featured Discounts
- Veterans Day Restaurant Discounts
- Electronics
- Join the Military Home
- Contact a Recruiter
- Military Fitness
Marine Corps Aims for a New Way of Teaching, Ditching Old Models of PowerPoint Lectures
")
The Corps is changing the way Marines learn, and how their instructors -- charged with preparing them for the fleet -- teach.
Yes, that includes getting rid of "death by PowerPoint" and "sage on the stage," popular military colloquialisms describing an old way of instruction. The Marine Corps is ditching them in favor of what it calls "outcomes-based" learning, according to officials at the Modern Day Marine Expo in Washington, D.C., on Tuesday.
The initiative, headed by the service's Training and Education Command, is called Project Triumph. It's been in the works for years, and means the service will focus on the individual Marine's ability to learn rather than cramming instruction into their heads, whether they understand it or not.
Read Next: Air Force Starts to Fly Some Ospreys Again Following Crash that Killed 8 Airmen in Japan
"Instead of teaching them what to think, we're teaching them how to think," Col. Karl Arbogast, the director of policy and standards for Training and Education Command, told a crowd at the exposition. "And in the process, we're making them better decision-makers, or adaptable -- and we're able to deal with changing and challenging environments depending upon the job that they've been asked to do."
Outcomes-based learning has been part of American education for decades . According to the Department of Education, the learning method focuses on the end state for the student, where they can actually demonstrate results of the education they've received.
That differs from traditional methods in a few ways, according to the department. In outcomes-based learning, time is meant to be a resource that can be flexible, depending on the needs of the teacher or student. The curriculum is also based around the end state, rather than the sometimes rigid steps meant to meet that end state.
The Marine Corps, for its part, wants to use this method to create more mentally agile Marines, specifically ones who can solve problems and make decisions on their own, "faster and sooner" than what previous instruction has offered, according to the initiative.
An example Arbogast gave centered on the Infantry Marine Course, or IMC. Instead of having most of the students sitting through classroom instruction and then going to the field, the school changed the ratio of students to instructors so that they can learn in squad-sized groups, a more personal setting. Specifically, one sergeant or staff sergeant was in charge of teaching a group of about 14 Marines.
Arbogast said those Marines would be required to study material before instruction in what he called "self-guided" learning. They would then bring that knowledge to their groups, helping inform the instructor on what they were able to retain on their own before hitting the field for practical applications.
It would be there, in the field, testing those "outcomes" that Marines would develop close-knit relationships, learn about leadership and work together -- skills they would carry into their line units, Arbogast said.
The initiative also takes instructors to task, too -- changing the way they teach to adapt to a "learner-centric" method of education.
"Not every instructor is of the same quality -- not as good in areas but there's some areas that they're better at," Arbogast said. "Just like any student who shows up, sometimes simple things ... maybe they'll take to right away, and other things become a bit more challenging for them, depending on the individual."
Because of that, Marine instructors have to be mentally agile, too, specifically "being able to, as an instructor, [to] recognize that every student is going to learn things a little bit differently, and being able to adapt that for the individual," he said.
Officials said that the old way of teaching, the PowerPoint instructor model, results in a "passive" learning style that does not lead to real, true retention of information.
An example they pointed to was teaching land navigation, a fundamental skill in the military, in which Marines can consume material focused on that skill prior to coming into the classroom, be guided by an instructor based on that pre-loaded knowledge, then take it to the field for practical applications.
"What we know from research is when a learner learns in that passive environment, they're going to go away, and within a few short months, all of that data is gone," Timothy Heck, the deputy officer in charge of the Marine Corps Center for Learning and Faculty Development, told Military.com on Wednesday.
"Whereas in a new methodology, where the learner is directly involved in their own learning, and developing the actual lesson ... during the facilitation, they're going to retain that information far longer down the road," Heck said.
Training and Education Command also created new military occupational specialties, 095X or formal school instructors, which are designated as "exceptional" MOSs -- outside of the Marine's primary job -- so the service can keep better tabs on who is qualified to teach.
Arbogast told reporters Tuesday that the initiative was bolstered by his own experience as a student throughout his career in the Marine Corps.
"It wasn't that long ago when people were instructing me, every teacher that was up there, they didn't care whether I understood the material, what my baseline was, where I had started from," he said. "They didn't care; they just gave the class and walked.
"We're improving so much more than that," he said.
Project Triumph is being developed in conjunction with two other Training and Education Command initiatives, Project Trident and Project Tripoli. Project Trident focuses on supporting Marines in building "close kill webs" in contested environments; Tripoli looks to embed live, virtual and "constructive" assets into exercises across the force.
Together, officials said they make up how Marines train, why Marines train, and where Marines train, respectively.
Related: Marines Field New Technology that Can Measure Bullet Trajectory, Simulated Wounds in California Exercise
Drew F. Lawrence

You May Also Like
")
Only as Fortson is lying on the floor of his apartment fatally wounded does the deputy tell him to drop his weapon, a firearm...
")
The Defense Department will publish a rule Friday that will affect the amount service members will receive if they are...
")
The AV-8B Harrier II has been a tactical stalwart for the service since the 1980s -- and even before that, in different...
")
Sen. Jerry Moran demanded McDonough explain the department's lack of compliance with the law and provide a plan to "guarantee...
Military News
- Investigations and Features
- Military Opinion
Select Service
- National Guard
Most Popular Military News
")
Senior Airman Roger Fortson lived in an off-base residence, and his special operations squadron at Hurlburt Field in the...
")
Staff Sgt. Gordon Black flew to China and eventually to the city in southeastern Russia to meet with the woman, Aleksandra...
")
A 7th Infantry Division soldier at Joint Base Lewis-McChord in Washington state was accidentally shot April 25 by a 1st...
")
The 4th Psychological Operations Group posted “Ghosts in the Machine 2” May 2 on YouTube, exactly two years to the day after...
")
Master Chief Petty Officer of the Coast Guard Reserve Timothy Beard was relieved Friday as a result of "loss of confidence,"...
Latest Benefits Info
- Burial at Sea: A Time-Honored Tradition
- 4 Tips for Flying Space-A
- The Mental Burden of Using Military Benefits
- Fertility Benefits for Active-Duty Service Members
- Military Child Care Fees
More Military Headlines
")
Netanyahu spoke after President Joe Biden said the United States would not provide offensive weapons for Israel’s long...
- Apache Crash Injures 2 Fort Riley Soldiers as Army Grapples with Nonstop Aviation Incidents
- 9 Military Hospitals Receive Top Marks for Patient Safety
- Army Pumping Millions into Food Kiosks, But They May Soon Be Obsolete
- Florida Airman Was Shot by Deputy Within Seconds of Opening Apartment Door, Body Cam Footage Shows
- 'They Took My Gift Away': In Interview, Mother of Florida Airman Killed by Police Describes Shock
- Police Who Shot Florida Airman 6 Times in His Home May Have Entered Wrong Apartment, Family Says
- China Criticizes US for Ship's Passage Through Taiwan Strait Weeks Before New Leader Takes Office
- How Shannon Kent Became a Trailblazer Among US Special Operations Forces
- Navy Hopes to Have Beleaguered USS Boxer Deploy This Summer After Fixes
Military Benefits Updates
- Storied Marine Corps Jet to Make Final Appearance at Cherry Point Air Show as Service Transitions to F-35
- Trucker Acquitted in Deadly Crash with Marine Veterans Asks for License Back
- Marines' New Amphibious Combat Vehicle Makes Operational Debut in Annual Philippines Exercise
- Massachusetts Woman Accused of Driving into Fenway Park, Crashing into Coast Guard Base: 'We Are All Going to Be in a Movie'
- Coast Guard Relieves Its Top Reserve Enlisted Leader After Investigation into Misconduct
- What We Know About Various Investigations Stemming from Key Bridge Collapse
Entertainment
- The Best Games to Buy Right Now, No Matter Your Current Pay Level
- Pierce Brosnan Returns to the World of Espionage in 'A Spy's Guide to Survival'
- 9 Games You Can Fit in Your Ruck and Play in the Field
IMAGES
VIDEO
COMMENTS
To edit such a file: In your web browser, navigate to the file in OneDrive. Click the file name once to open the file in PowerPoint for the web. select Edit Presentation, and then select Edit in PowerPoint for the web. The file switches from Reading view to Editing view, where you can: Add or change content. Share the file and collaborate with ...
Free online presentation maker. Try our new tool to edit this selection of templates for people that want to let their creativity run free. Create interactive resources easily, quickly and without the need for any software. A really useful tool for teachers and students. Move the content, add images, change colors and fonts or, if you prefer ...
Open the slide master view mode. To access slide master view mode, click View and then the Slide Master icon. 2. Click Insert Slide Master. It's in the "Edit Master" section in the panel in the upper-left corner. This adds a new Slide Master to the PowerPoint layout. 3.
Click the upload button next to Create to import your PPTX file. Select your Powerpoint file (PPTX) from your computer and import it into Visme. Your presentation will now appear in your dashboard for you to jump in and make changes right inside Visme. Add photos, vector icons, new text blocks, animations and more until your PowerPoint is complete.
The first thing you'll need to do is to open PowerPoint. When you do, you are shown the Start Menu, with the Home tab open. This is where you can choose either a blank theme (1) or a pre-built theme (2). You can also choose to open an existing presentation (3).
Easily edit Microsoft PowerPoint presentations online without converting them, and layer on Slides' enhanced collaborative and assistive features like comments, action items, and Smart Compose ...
Download Article. 1. Open your PowerPoint template. Since the features are similar between the computer program, the web app, and the mobile app, this method works for them all. If you don't have a PowerPoint template, you can search the web for one or create your own. 2. Click the View tab.
How to edit presentation online. Click Drop or upload your file. Select the PowerPoint file you want to open and edit on your computer. Your PowerPoint will be uploaded and then presented in an online Editor menu. Edit your PowerPoint: Edit text; Change the size of fonts; Use formatting options; Move shapes and objects; And perform other tasks.
If you're wanting to reuse a PowerPoint presentation but would like to clear the slideshow's formatting, there's no need to do it slide by slide---you can do it all at once. Here's how. First, open the PowerPoint presentation with the formatting you want to edit. To illustrate the before and after, here's what we'll be working with in this example.
To do this, navigate to View > Slide Master to open the Slide Master. Select the top slide, go to the "Text" group under the "Insert" tab, and then click "Text Box." Click and dragging your cursor to draw a header text box in the appropriate location, and then type your text. When you return to View > Normal, your new header box will appear at ...
Some editing is still required from time to time. The good news is that those templates, purchased or free, can usually be modified and edited by you. Edit Or Modify a PowerPoint Template. When it comes to Powerpoint templates you can: Start from scratch with a blank presentation and use it as a one-off or create a custom template
It automates the process you use to edit PowerPoint theme designs. And it keeps your slides more consistent in their look and feel. We'll use the Hero v1 template to completely customize your PowerPoint presentation.. To set a slide's layout, make sure that you're on the Home tab on PowerPoint's ribbon. Click on the Layout drop-down.You'll see a variety of thumbnails for the PowerPoint layouts ...
Find the perfect PowerPoint presentation template Bring your next presentation to life with customizable PowerPoint design templates. Whether you're wowing with stats via charts and graphs or putting your latest and greatest ideas on display, you'll find a PowerPoint presentation template to make your ideas pop.
Step 1: Click on the View tab on the right top. Step 2: Then click on the slide master icon. Step 3: Slide view will be shown. Then select and click on the text box icon on the top to insert the watermark. Step 4: Drag cursor over the slide, text box will appear. Type the text (to set as a watermark) in that text box.
Open your PowerPoint presentation and select the slide where you want to add audio. On the Insert tab, in the Media group, click the Audio drop-down arrow. You'll see two options: the first one allows you to add audio from your PC, whereas the second one allows you to record audio (you'll need to have a microphone set up in your computer).
Impress your audience with stunning work and projects. Express any idea using a wide selection of formatting tools, objects, and style options. ONLYOFFICE Presentation Editor works with PowerPoint presentations and can save them in PDF, PNG, JPG. PPTX, PPT, ODP, and PPSX files are also supported.
How to view, edit, download a document using Editor App. Step 1. Click inside the file drop area to upload a file or drag & drop a file. Step 2. File will be automatically rendered for you to view/edit/download instantly. Step 3. View & edit document.
To edit such a file: In your web browser, navigate to the file in OneDrive. Click the file name once to open the file in PowerPoint for the web. select Edit Presentation, and then select Edit in PowerPoint for the web. The file switches from Reading view to Editing view, where you can: Add or change content. Share the file and collaborate with ...
You spoke, and we listened. Now, your favorite slides can be accessed on a new platform: Canva! This new format adds to our existing options (PowerPoint and Google Slides), expanding your ways to utilize our first-rate presentation content. We've started with a selection of Canva-ready templates, but we're just warming up—very soon, all ...
Free Google Slides theme, PowerPoint template, and Canva presentation template. Get your social media popping with our slick PowerPoint and Google Slides template, perfect for marketing pros! Wrapped in fresh white, yellow, and green, this simple illustrative slideshow template is your go-to for crafting eye-catching content that stands out.
To change it for a whole presentation at once however, you'll need an add-in like BrightSlide. Default editing language. If you have the Language displayed in your status bar as described above, then you will see the Default Editing Language whenever you have nothing selected on the slide.
The Online Writing Lab at Purdue University houses writing resources and instructional material, and we provide these as a free service of the Writing Lab at Purdue.
Step 2 Open the program and navigate to the Toolbox tab. Select the Video Watermark Remover from the provided tools.. Step 3 Import the video with the watermark by clicking the (+) button.. Step 4 A new window will appear for watermark removal. Click the + Add watermark removing area button to activate the selection box on the preview screen. Move the selection box to the watermark in the ...
The Corps is changing the way Marines learn, and how their instructors -- charged with preparing them for the fleet -- teach. Yes, that includes getting rid of "death by PowerPoint" and "sage on ...