Home Blog Design How to Design a Winning Poster Presentation: Quick Guide with Examples & Templates

How to Design a Winning Poster Presentation: Quick Guide with Examples & Templates

How are research posters like High School science fair projects? Quite similar, in fact.
Both are visual representations of a research project shared with peers, colleagues and academic faculty. But there’s a big difference: it’s all in professionalism and attention to detail. You can be sure that the students that thrived in science fairs are now creating fantastic research posters, but what is that extra element most people miss when designing a poster presentation?
This guide will teach tips and tricks for creating poster presentations for conferences, symposia, and more. Learn in-depth poster structure and design techniques to help create academic posters that have a lasting impact.
Let’s get started.
Table of Contents
- What is a Research Poster?
Why are Poster Presentations important?
Overall dimensions and orientation, separation into columns and sections, scientific, academic, or something else, a handout with supplemental and contact information, cohesiveness, design and readability, storytelling.
- Font Characteristics
- Color Pairing
- Data Visualization Dimensions
- Alignment, Margins, and White Space
Scientific/Academic Conference Poster Presentation
Digital research poster presentations, slidemodel poster presentation templates, how to make a research poster presentation step-by-step, considerations for printing poster presentations, how to present a research poster presentation, final words, what is a research poster .
Research posters are visual overviews of the most relevant information extracted from a research paper or analysis. They are essential communication formats for sharing findings with peers and interested people in the field. Research posters can also effectively present material for other areas besides the sciences and STEM—for example, business and law.
You’ll be creating research posters regularly as an academic researcher, scientist, or grad student. You’ll have to present them at numerous functions and events. For example:
- Conference presentations
- Informational events
- Community centers
The research poster presentation is a comprehensive way to share data, information, and research results. Before the pandemic, the majority of research events were in person. During lockdown and beyond, virtual conferences and summits became the norm. Many researchers now create poster presentations that work in printed and digital formats.

Let’s look at why it’s crucial to spend time creating poster presentations for your research projects, research, analysis, and study papers.

Research posters represent you and your sponsor’s research
Research papers and accompanying poster presentations are potent tools for representation and communication in your field of study. Well-performing poster presentations help scientists, researchers, and analysts grow their careers through grants and sponsorships.
When presenting a poster presentation for a sponsored research project, you’re representing the company that sponsored you. Your professionalism, demeanor, and capacity for creating impactful poster presentations call attention to other interested sponsors, spreading your impact in the field.
Research posters demonstrate expertise and growth
Presenting research posters at conferences, summits, and graduate grading events shows your expertise and knowledge in your field of study. The way your poster presentation looks and delivers, plus your performance while presenting the work, is judged by your viewers regardless of whether it’s an officially judged panel.
Recurring visitors to research conferences and symposia will see you and your poster presentations evolve. Improve your impact by creating a great poster presentation every time by paying attention to detail in the poster design and in your oral presentation. Practice your public speaking skills alongside the design techniques for even more impact.
Poster presentations create and maintain collaborations
Every time you participate in a research poster conference, you create meaningful connections with people in your field, industry or community. Not only do research posters showcase information about current data in different areas, but they also bring people together with similar interests. Countless collaboration projects between different research teams started after discussing poster details during coffee breaks.
An effective research poster template deepens your peer’s understanding of a topic by highlighting research, data, and conclusions. This information can help other researchers and analysts with their work. As a research poster presenter, you’re given the opportunity for both teaching and learning while sharing ideas with peers and colleagues.
Anatomy of a Winning Poster Presentation
Do you want your research poster to perform well? Following the standard layout and adding a few personal touches will help attendees know how to read your poster and get the most out of your information.

The overall size of your research poster ultimately depends on the dimensions of the provided space at the conference or research poster gallery. The poster orientation can be horizontal or vertical, with horizontal being the most common. In general, research posters measure 48 x 36 inches or are an A0 paper size.
A virtual poster can be the same proportions as the printed research poster, but you have more leeway regarding the dimensions. Virtual research posters should fit on a screen with no need to scroll, with 1080p resolution as a standard these days. A horizontal presentation size is ideal for that.
A research poster presentation has a standard layout of 2–5 columns with 2–3 sections each. Typical structures say to separate the content into four sections; 1. A horizontal header 2. Introduction column, 3. Research/Work/Data column, and 4. Conclusion column. Each unit includes topics that relate to your poster’s objective. Here’s a generalized outline for a poster presentation:
- Condensed Abstract
- Objectives/Purpose
- Methodology
- Recommendations
- Implications
- Acknowledgments
- Contact Information
The overview content you include in the units depends on your poster presentations’ theme, topic, industry, or field of research. A scientific or academic poster will include sections like hypothesis, methodology, and materials. A marketing analysis poster will include performance metrics and competitor analysis results.
There’s no way a poster can hold all the information included in your research paper or analysis report. The poster is an overview that invites the audience to want to find out more. That’s where supplement material comes in. Create a printed PDF handout or card with a QR code (created using a QR code generator ). Send the audience to the best online location for reading or downloading the complete paper.
What Makes a Poster Presentation Good and Effective?
For your poster presentation to be effective and well-received, it needs to cover all the bases and be inviting to find out more. Stick to the standard layout suggestions and give it a unique look and feel. We’ve put together some of the most critical research poster-creation tips in the list below. Your poster presentation will perform as long as you check all the boxes.
The information you choose to include in the sections of your poster presentation needs to be cohesive. Train your editing eye and do a few revisions before presenting. The best way to look at it is to think of The Big Picture. Don’t get stuck on the details; your attendees won’t always know the background behind your research topic or why it’s important.
Be cohesive in how you word the titles, the length of the sections, the highlighting of the most important data, and how your oral presentation complements the printed—or virtual—poster.
The most important characteristic of your poster presentation is its readability and clarity. You need a poster presentation with a balanced design that’s easy to read at a distance of 1.5 meters or 4 feet. The font size and spacing must be clear and neat. All the content must suggest a visual flow for the viewer to follow.
That said, you don’t need to be a designer to add something special to your poster presentation. Once you have the standard—and recognized—columns and sections, add your special touch. These can be anything from colorful boxes for the section titles to an interesting but subtle background, images that catch the eye, and charts that inspire a more extended look.
Storytelling is a presenting technique involving writing techniques to make information flow. Firstly, storytelling helps give your poster presentation a great introduction and an impactful conclusion.
Think of storytelling as the invitation to listen or read more, as the glue that connects sections, making them flow from one to another. Storytelling is using stories in the oral presentation, for example, what your lab partner said when you discovered something interesting. If it makes your audience smile and nod, you’ve hit the mark. Storytelling is like giving a research presentation a dose of your personality, and it can help turning your data into opening stories .
Design Tips For Creating an Effective Research Poster Presentation
The section above briefly mentioned how important design is to your poster presentation’s effectiveness. We’ll look deeper into what you need to know when designing a poster presentation.
1. Font Characteristics
The typeface and size you choose are of great importance. Not only does the text need to be readable from two meters away, but it also needs to look and sit well on the poster. Stay away from calligraphic script typefaces, novelty typefaces, or typefaces with uniquely shaped letters.
Stick to the classics like a sans serif Helvetica, Lato, Open Sans, or Verdana. Avoid serif typefaces as they can be difficult to read from far away. Here are some standard text sizes to have on hand.
- Title: 85 pt
- Authors: 65 pt
- Headings: 36 pt
- Body Text: 24 pt
- Captions: 18 pt

If you feel too prone to use serif typefaces, work with a font pairing tool that helps you find a suitable solution – and intend those serif fonts for heading sections only. As a rule, never use more than 3 different typefaces in your design. To make it more dynamic, you can work with the same font using light, bold, and italic weights to put emphasis on the required areas.
2. Color Pairing
Using colors in your poster presentation design is a great way to grab the viewer’s attention. A color’s purpose is to help the viewer follow the data flow in your presentation, not distract. Don’t let the color take more importance than the information on your poster.

Choose one main color for the title and headlines and a similar color for the data visualizations. If you want to use more than one color, don’t create too much contrast between them. Try different tonalities of the same color and keep things balanced visually. Your color palette should have at most one main color and two accent colors.
Black text over a white background is standard practice for printed poster presentations, but for virtual presentations, try a very light gray instead of white and a very dark gray instead of black. Additionally, use variations of light color backgrounds and dark color text. Make sure it’s easy to read from two meters away or on a screen, depending on the context. We recommend ditching full white or full black tone usage as it hurts eyesight in the long term due to its intense contrast difference with the light ambiance.
3. Data Visualization Dimensions
Just like the text, your charts, graphs, and data visualizations must be easy to read and understand. Generally, if a person is interested in your research and has already read some of the text from two meters away, they’ll come closer to look at the charts and graphs.

Fit data visualizations inside columns or let them span over two columns. Remove any unnecessary borders, lines, or labels to make them easier to read at a glance. Use a flat design without shadows or 3D characteristics. The text in legends and captions should stay within the chart size and not overflow into the margins. Use a unified text size of 18px for all your data visualizations.
4. Alignment, Margins, and White Space
Finally, the last design tip for creating an impressive and memorable poster presentation is to be mindful of the layout’s alignment, margins, and white space. Create text boxes to help keep everything aligned. They allow you to resize, adapt, and align the content along a margin or grid.
Take advantage of the white space created by borders and margins between sections. Don’t crowd them with a busy background or unattractive color.

Calculate margins considering a print format. It is a good practice in case the poster presentation ends up becoming in physical format, as you won’t need to downscale your entire design (affecting text readability in the process) to preserve information.
There are different tools that you can use to make a poster presentation. Presenters who are familiar with Microsoft Office prefer to use PowerPoint. You can learn how to make a poster in PowerPoint here.
Poster Presentation Examples
Before you start creating a poster presentation, look at some examples of real research posters. Get inspired and get creative.
Research poster presentations printed and mounted on a board look like the one in the image below. The presenter stands to the side, ready to share the information with visitors as they walk up to the panels.

With more and more conferences staying virtual or hybrid, the digital poster presentation is here to stay. Take a look at examples from a poster session at the OHSU School of Medicine .
Use SlideModel templates to help you create a winning poster presentation with PowerPoint and Google Slides. These poster PPT templates will get you off on the right foot. Mix and match tables and data visualizations from other poster slide templates to create your ideal layout according to the standard guidelines.
If you need a quick method to create a presentation deck to talk about your research poster at conferences, check out our Slides AI presentation maker. A tool in which you add the topic, curate the outline, select a design, and let AI do the work for you.
1. One-pager Scientific Poster Template for PowerPoint
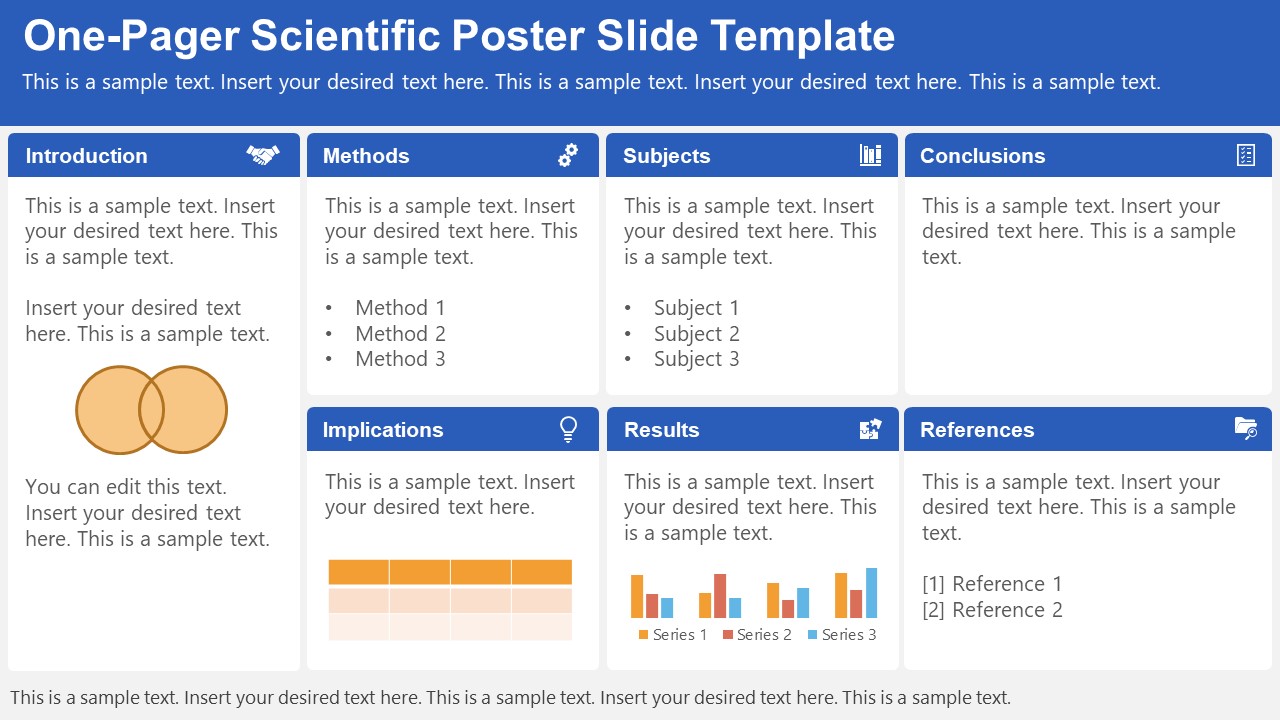
A PowerPoint template tailored to make your poster presentations an easy-to-craft process. Meet our One-Pager Scientific Poster Slide Template, entirely editable to your preferences and with ample room to accommodate graphs, data charts, and much more.
Use This Template
2. Eisenhower Matrix Slides Template for PowerPoint
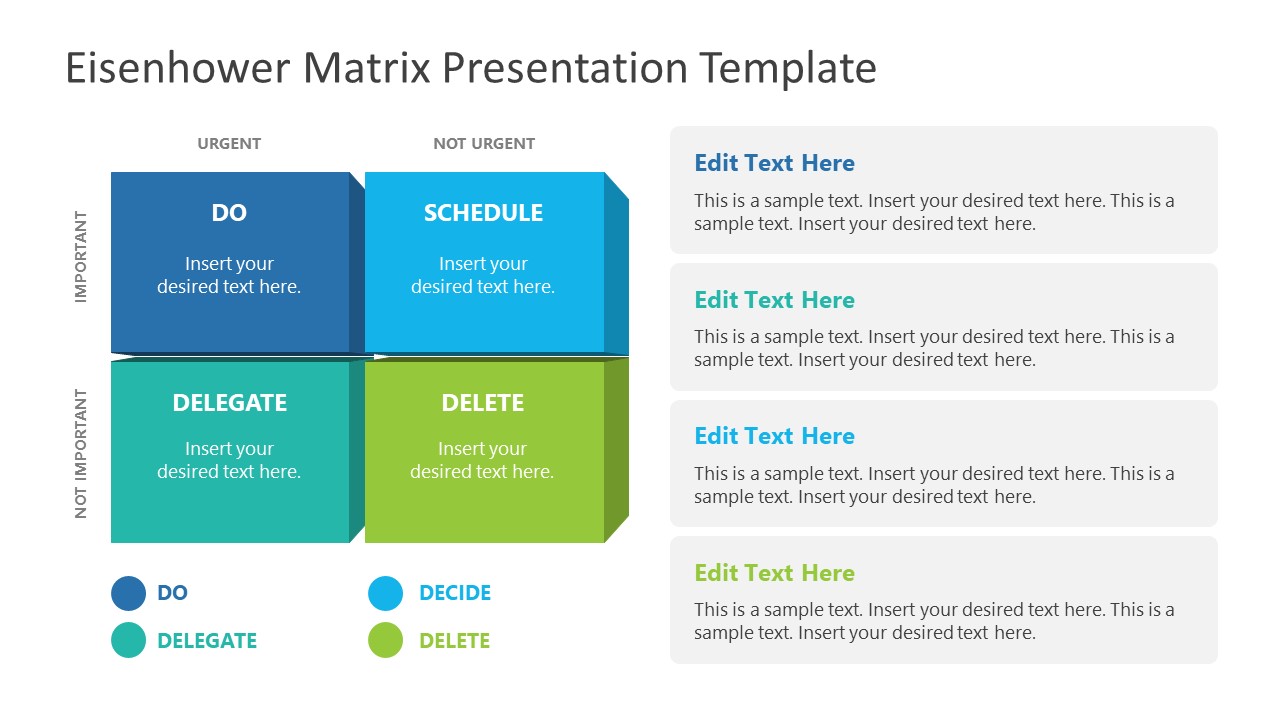
An Eisenhower Matrix is a powerful tool to represent priorities, classifying work according to urgency and importance. Presenters can use this 2×2 matrix in poster presentations to expose the effort required for the research process, as it also helps to communicate strategy planning.
3. OSMG Framework PowerPoint Template

Finally, we recommend presenters check our OSMG Framework PowerPoint template, as it is an ideal tool for representing a business plan: its goals, strategies, and measures for success. Expose complex processes in a simplified manner by adding this template to your poster presentation.
Remember these three words when making your research poster presentation: develop, design, and present. These are the three main actions toward a successful poster presentation.

The section below will take you on a step-by-step journey to create your next poster presentation.
Step 1: Define the purpose and audience of your poster presentation
Before making a poster presentation design, you’ll need to plan first. Here are some questions to answer at this point:
- Are they in your field?
- Do they know about your research topic?
- What can they get from your research?
- Will you print it?
- Is it for a virtual conference?
Step 2: Make an outline
With a clear purpose and strategy, it’s time to collect the most important information from your research paper, analysis, or documentation. Make a content dump and then select the most interesting information. Use the content to draft an outline.
Outlines help formulate the overall structure better than going straight into designing the poster. Mimic the standard poster structure in your outline using section headlines as separators. Go further and separate the content into the columns they’ll be placed in.
Step 3: Write the content
Write or rewrite the content for the sections in your poster presentation. Use the text in your research paper as a base, but summarize it to be more succinct in what you share.
Don’t forget to write a catchy title that presents the problem and your findings in a clear way. Likewise, craft the headlines for the sections in a similar tone as the title, creating consistency in the message. Include subtle transitions between sections to help follow the flow of information in order.
Avoid copying/pasting entire sections of the research paper on which the poster is based. Opt for the storytelling approach, so the delivered message results are interesting for your audience.
Step 4: Put it all together visually
This entire guide on how to design a research poster presentation is the perfect resource to help you with this step. Follow all the tips and guidelines and have an unforgettable poster presentation.
Moving on, here’s how to design a research poster presentation with PowerPoint Templates . Open a new project and size it to the standard 48 x 36 inches. Using the outline, map out the sections on the empty canvas. Add a text box for each title, headline, and body text. Piece by piece, add the content into their corresponding text box.

Transform the text information visually, make bullet points, and place the content in tables and timelines. Make your text visual to avoid chunky text blocks that no one will have time to read. Make sure all text sizes are coherent for all headings, body texts, image captions, etc. Double-check for spacing and text box formatting.
Next, add or create data visualizations, images, or diagrams. Align everything into columns and sections, making sure there’s no overflow. Add captions and legends to the visualizations, and check the color contrast with colleagues and friends. Ask for feedback and progress to the last step.
Step 5: Last touches
Time to check the final touches on your poster presentation design. Here’s a checklist to help finalize your research poster before sending it to printers or the virtual summit rep.
- Check the resolution of all visual elements in your poster design. Zoom to 100 or 200% to see if the images pixelate. Avoid this problem by using vector design elements and high-resolution images.
- Ensure that charts and graphs are easy to read and don’t look crowded.
- Analyze the visual hierarchy. Is there a visual flow through the title, introduction, data, and conclusion?
- Take a step back and check if it’s legible from a distance. Is there enough white space for the content to breathe?
- Does the design look inviting and interesting?
An often neglected topic arises when we need to print our designs for any exhibition purpose. Since A0 is a hard-to-manage format for most printers, these poster presentations result in heftier charges for the user. Instead, you can opt to work your design in two A1 sheets, which also becomes more manageable for transportation. Create seamless borders for the section on which the poster sheets should meet, or work with a white background.
Paper weight options should be over 200 gsm to avoid unwanted damage during the printing process due to heavy ink usage. If possible, laminate your print or stick it to photographic paper – this shall protect your work from spills.
Finally, always run a test print. Gray tints may not be printed as clearly as you see them on screen (this is due to the RGB to CMYK conversion process). Other differences can be appreciated when working with ink jet plotters vs. laser printers. Give yourself enough room to maneuver last-minute design changes.
Presenting a research poster is a big step in the poster presentation cycle. Your poster presentation might or might not be judged by faculty or peers. But knowing what judges look for will help you prepare for the design and oral presentation, regardless of whether you receive a grade for your work or if it’s business related. Likewise, the same principles apply when presenting at an in-person or virtual summit.
The opening statement
Part of presenting a research poster is welcoming the viewer to your small personal area in the sea of poster presentations. You’ll need an opening statement to pitch your research poster and get the viewers’ attention.
Draft a 2 to 3-sentence pitch that covers the most important points:
- What the research is
- Why was it conducted
- What the results say
From that opening statement, you’re ready to continue with the oral presentation for the benefit of your attendees.
The oral presentation
During the oral presentation, share the information on the poster while conversing with the interested public. Practice many times before the event. Structure the oral presentation as conversation points, and use the poster’s visual flow as support. Make eye contact with your audience as you speak, but don’t make them uncomfortable.
Pro Tip: In a conference or summit, if people show up to your poster area after you’ve started presenting it to another group, finish and then address the new visitors.
QA Sessions
When you’ve finished the oral presentation, offer the audience a chance to ask questions. You can tell them before starting the presentation that you’ll be holding a QA session at the end. Doing so will prevent interruptions as you’re speaking.
If presenting to one or two people, be flexible and answer questions as you review all the sections on your poster.
Supplemental Material
If your audience is interested in learning more, you can offer another content type, further imprinting the information in their minds. Some ideas include; printed copies of your research paper, links to a website, a digital experience of your poster, a thesis PDF, or data spreadsheets.
Your audience will want to contact you for further conversations; include contact details in your supplemental material. If you don’t offer anything else, at least have business cards.
Even though conferences have changed, the research poster’s importance hasn’t diminished. Now, instead of simply creating a printed poster presentation, you can also make it for digital platforms. The final output will depend on the conference and its requirements.
This guide covered all the essential information you need to know for creating impactful poster presentations, from design, structure and layout tips to oral presentation techniques to engage your audience better .
Before your next poster session, bookmark and review this guide to help you design a winning poster presentation every time.

Like this article? Please share
Cool Presentation Ideas, Design, Design Inspiration Filed under Design
Related Articles

Filed under Google Slides Tutorials • April 23rd, 2024
How to Align Objects in Google Slides
Optimize your layouts by learning how to align objects in Google Slides presentations. Step-by-step guide with screenshots.

Filed under Design • January 11th, 2024
How to Use Figma for Presentations
The powerful UI/UX prototyping software can also help us to craft high-end presentation slides. Learn how to use Figma as a presentation software here!

Filed under Design • December 28th, 2023
Multimedia Presentation: Insights & Techniques to Maximize Engagement
Harnessing the power of multimedia presentation is vital for speakers nowadays. Join us to discover how you can utilize these strategies in your work.
Leave a Reply
- Join for Free
Introduction to Poster Design
A course by 12caracteres , design and communication studio.

Learn the basic techniques to create conceptual designs that communicate and seduce
- Spanish with subtitles in English
- 95% positive reviews ( 215 )
- 3456 students
- Information

Posters are a unique form of artistic expression, illustrating cultural, social, and political opinions on the streets instead of museums. Design studio 12caracteres—founded by Samuel Aznar and Miguel Frago—specializes in creating highly impactful graphic solutions, rooted in a strong concept. The poster format is what has set them apart from the rest, combining design with emotional impact for clients such as TED, Oxfam Intermón, Ambar, Do Carñena, and Warner Music.
In this course, Miguel Frago, 12caracteres’ Creative Director, shows you his creative step-by-step process to creating a poster that is informatively direct and clear, capable of seducing an audience, and generating an emotion that stays engraved into the viewer’s mind.
What will you learn in this online course?
21 lessons & 23 downloads

- 21 lessons (2h 32m)
- 23 additional resources (8 files)
- Online and at your own pace
- Available on the app
- Audio: Spanish
- Spanish , English , Portuguese , German , French , Italian , Polish , Dutch
- Level: Beginner
- Unlimited access forever
What is this course's project?
Design a poster with the theme of your choice, following 12caracteres’ creative process.

Projects by course students

By andres270416
By oscargutierre
By sanchez_sanz_cristina
Who is this online course for?
For students, illustrators, designers, graphic artists, or anyone with an interest in learning how to create posters with a strong formal and conceptual process.
Requirements and materials
You don’t need design experience to take this course, however, it's recommended to have basic drawing skills, and know how to use software such as Adobe Photoshop, InDesign, Illustrator, or another, where you can work with images and typography.
As for materials, you’ll need a pencil, paper, a computer with Photoshop, InDesign, or Illustrator installed.

Muy bueno el curso, con lo necesario para iniciar, recomendaría se incluyeran más ejemplos del proceso creativo, gracias...
View translation
Hide translation
cesarvilledaa
Simple pero al punto, la creatividad de estos señores es soberbia.
petersenannecharlotte
Spoken too fast, and only Spanish in all PDFs? NOT GOOD
gustavoborges
Muito interessante. Recomendo!
Esperava mais do curso.
- More reviews

12caracteres A course by 12caracteres
12caracteres is a design and communication studio that was founded by Samuel Aznar y Miguel Frago with a reputation for their creative work in many areas, with a common vision: the conceptual base defines how each project unfolds. Emotion and manual techniques are also a common characteristic that defines their work, always combining both analogical and digital techniques.
They’re passionate about designing posters related to cultural events, where they are able to let their fully express creativity and reap its full potential. They have developed posters for concerts and social events for organizations such as TED, Oxfam Intermón, Ambar, Do Cariñena and Warner Music.
Introduction
- Presentation
- What will we do in the course?
The poster: resources and context
- Poster history
- The poster: functionality and aesthetics
- The visual metaphor
- Techniques for generating images
- Special production techniques
- The irruption of the digital world
The conceptual part of the project
- The assignment: development and analysis of the briefing
- Create key concepts
- How to communicate the concept visually. Define the graphic style
The practical part of the project
- Sketch and define the central motif
- Production resources
- The creation of the central motif of the poster
- The typographic selection and layout of the main piece 1
- The typographic selection and layout of the main piece 2
End applications
- Presentation of the proposal to the client
- Adaptation of the poster to different printed and digital formats
Final project
What to expect from a domestika course, learn at your own pace.
Enjoy learning from home without a set schedule and with an easy-to-follow method. You set your own pace.
Learn from the best professionals
Learn valuable methods and techniques explained by top experts in the creative sector.
Meet expert teachers
Each expert teaches what they do best, with clear guidelines, true passion, and professional insight in every lesson.
Certificates Plus
If you're a Plus member, get a custom certificate signed by your teacher for every course. Share it on your portfolio, social media, or wherever you like.
Get front-row seats
Videos of the highest quality, so you don't miss a single detail. With unlimited access, you can watch them as many times as you need to perfect your technique.
Share knowledge and ideas
Ask questions, request feedback, or offer solutions. Share your learning experience with other students in the community who are as passionate about creativity as you are.
Connect with a global creative community
The community is home to millions of people from around the world who are curious and passionate about exploring and expressing their creativity.
Watch professionally produced courses
Domestika curates its teacher roster and produces every course in-house to ensure a high-quality online learning experience.
Domestika's courses are online classes that provide you with the tools and skills you need to complete a specific project. Every step of the project combines video lessons with complementary instructional material, so you can learn by doing. Domestika's courses also allow you to share your own projects with the teacher and with other students, creating a dynamic course community.
All courses are 100% online, so once they're published, courses start and finish whenever you want. You set the pace of the class. You can go back to review what interests you most and skip what you already know, ask questions, answer questions, share your projects, and more.
The courses are divided into different units. Each one includes lessons, informational text, tasks, and practice exercises to help you carry out your project step by step, with additional complementary resources and downloads. You'll also have access to an exclusive forum where you can interact with the teacher and with other students, as well as share your work and your course project, creating a community around the course.
You can redeem the course you received by accessing the redeeming page and entering your gift code.
- Graphic Design
- Poster Design

Courses you might be interested in
How-To Geek
How to make a poster using microsoft powerpoint.
Microsoft PowerPoint isn't just for presentations--you can make posters with it, as well. Here's how.
Quick Links
Define the poster dimensions, design your poster.
Microsoft PowerPoint isn't just for presentations---it also provides all of the creative tools you need to design a beautiful poster. Just set the dimensions, design the poster, and print it out. Here's how to make a poster using PowerPoint.
Posters come in all sizes, but the first thing you need to know is PowerPoint's slide limit is 56-inches x 56-inches, so you'll need to plan accordingly. It's also important to note that you want to set your poster dimensions before you start designing your poster. Otherwise, you might end up having to rework parts of your design due to the size change.
Related: How to Reduce the File Size of a PowerPoint Presentation
Here are some of the standard poster sizes to get you started:
- Small poster: 11" x 17"
- Medium poster: 18" x 24"
- Large posters: 24" x 36" or 27" x 39"
Once you've decided on your poster size, set the dimensions in PowerPoint. To do this, open PowerPoint and navigate to the "Design" tab.
In the "Customize" group, select "Slide Size."
Select "Custom Slide Size" from the dropdown menu.
The "Slide Size" window will appear. Input the width and height specifications to match your required size. Keep in mind that if your height is larger in size than your width, the orientation of the slide will automatically change to "Portrait."
When you're finished, select "OK."
Once selected, a new window will appear giving you two scaling options: Maximize or Ensure Fit. If your slide already has content on it, you'll want to select "Ensure Fit."
Your slide will now be resized.
Your poster design is going to depend completely on you. You'll want to pay attention to the background of the poster, text and image arrangement, font size and style, etc. Essentially, you should treat this part exactly as if you were just creating another slide for a presentation.
Because the design and process of this step is going to differ for everyone, we'd like to offer some of our previous guides to get you started in the design process:
- Insert a picture or other object.
- Use an image as a background.
- Insert an image inside text.
- Get a picture behind text.
- Make a border or frame.
Once your design is ready, all that's left to do is print it out and hang it up!
Related: How to Troubleshoot Printing Issues in Microsoft Word
We use essential cookies to make Venngage work. By clicking “Accept All Cookies”, you agree to the storing of cookies on your device to enhance site navigation, analyze site usage, and assist in our marketing efforts.
Manage Cookies
Cookies and similar technologies collect certain information about how you’re using our website. Some of them are essential, and without them you wouldn’t be able to use Venngage. But others are optional, and you get to choose whether we use them or not.
Strictly Necessary Cookies
These cookies are always on, as they’re essential for making Venngage work, and making it safe. Without these cookies, services you’ve asked for can’t be provided.
Show cookie providers
- Google Login
Functionality Cookies
These cookies help us provide enhanced functionality and personalisation, and remember your settings. They may be set by us or by third party providers.
Performance Cookies
These cookies help us analyze how many people are using Venngage, where they come from and how they're using it. If you opt out of these cookies, we can’t get feedback to make Venngage better for you and all our users.
- Google Analytics
Targeting Cookies
These cookies are set by our advertising partners to track your activity and show you relevant Venngage ads on other sites as you browse the internet.
- Google Tag Manager
- Infographics
- Daily Infographics
- Popular Templates
- Accessibility
- Graphic Design
- Graphs and Charts
- Data Visualization
- Human Resources
- Beginner Guides
Blog Marketing 55+ Creative Poster Ideas, Templates & Design Tips
55+ Creative Poster Ideas, Templates & Design Tips
Written by: Ryan McCready May 03, 2023

Think about some of the most creative posters that you have seen throughout your life. I know that there are a handful that stick out in your brain.
Now, what makes all of those posters so memorable? Honestly, it takes a lot of things working in perfect harmony to create a poster.
In this article, I’m going to show you how to bring all of those elements together to come up with a creative poster idea.
But if you want to get a head start and not start from scratch, why not use a poster template to speed up the process?
Here are 55+ creative posters ideas to inspire you, so you can create your own.
57 Poster design ideas to keep in mind
Before we start, here are some poster design tips you need to be aware of:
- Use a color overlay for a more understated poster
- Keep consistent margin widths
- Incorporate your product directly into your creative poster ideas
- Use directional cues like icons and illustrations to direct the eye to important information
- Design two complementary creative posters
- Group important information together to help it stand out
- Use accent colors in your minimalist designs
- Use hand-drawn illustrations in your poster design
- Go ahead and pick an EXTRA bold color palette
Now onto the complete list:
1. Mix bold complementary colors with a simple poster layout

Let’s be honest, this creative poster looks like it belongs on the wall of your favorite local boutique or coffee house. Maybe the one that knows you by name because you’re in there a little too often.

The designer pulled off this trendy look by combining a complementary color palette with a relatively simple layout. As you can see, the orange background really helps the off-white sections jump off the page. And the succulent, which is always trendy, adds a bit of interesting green to the poster background too.
Related : How to Apply the Right Layout To Your Poster
2. Start with an eye-catching poster background image

Most of the time your poster background image or graphic is going to dominate the design. It’s also going to be the first thing that a reader will see, so you need to make it count.
These days many people just slap a vague stock image on their poster and call it a day. Now I have a well-documented hatred of most stock photos , but with this event poster template , they absolutely nail it.

From the bold color palette to the way the image naturally divides the poster, to the modern font choice, it all comes together perfectly.
Honestly, it may be one of my favorite creative poster ideas in this article! And it hurts me a little to say this, but the stock photo is what makes it perfect.
Just so you know, some of our poster templates are free to use and some require a small monthly fee. Sign up is always free, as is access to Venngage’s online drag-and-drop editor.
3. Create the best motivational posters by using color overlays

The best motivational posters are simple and clear. They typically use an inspiring or breathtaking image, and pair it with a really bold message. However, sometimes the perfect image is very busy and colorful. When you add text it seems to just disappear into the image.
To solve this problem, you can apply a color overlay that’ll subdue your background photo. You can check out this motivational poster example to see how a color overlay works.

With a simple transparent layer, you can turn a vivid or colorful image into a reserved background in seconds.
Plus, the color overlay helps the text on your motivational poster jump out at the reader.
4. Use leading lines to direct the reader’s eyes to your creative poster

Leading lines direct the eye towards the focal point of an image. Using leading lines is a great way to compose a memorable picture.
This photography composition concept can also be used to create a memorable poster as well, like in the example above .
In this case, the lines of the buildings naturally direct the eye down the poster to the job listings.

Without those leading lines, readers might not even notice the job listings. And this company would miss out on some great employees.
5. Create your own custom icon story

If you’re struggling to think of a creative poster idea, don’t worry icons are here to help! Because they are so versatile and plentiful I try to use them in all of my projects, especially posters.

As you can see in this conservation poster template, pollution-centric icons come together to form a dolphin from scratch.
All it takes is a few clicks .
Using icons to create a whole new story is powerful and will make people stop to learn more, especially if they are passionate about conservation or just love dolphins.
6. Make your poster pop with a two-toned title

One of the quickest ways for a designer to upgrade their garage sale poster is to use a two-toned title.
Pick two contrasting colors that pop from the background.

This approach can instantly make any header eye-catching, as you can see in the poster example above. I
I’m guessing you know that our eyes are drawn to objects that are different from those around them. You can use this inherent trait to grab a reader’s attention rather quickly.
7. Use a consistent page margin width to avoid clutter

Inspirational posters are all about a compelling message that resonates with the reader.
It’s important for the message to be clear.
But in this inspirational poster example, there’s A LOT going on.
Multiple colors, fonts, words, and shapes come together to form a very interesting poster design. And there are hundreds of creative poster ideas out there just like this.
With so much going on, why does it still work so well?

The poster feels professional and organized because the designers used a consistent margin width around the text.
As you go from one line to another, your eye knows exactly where to look.
This is a great way to make the actual text just as compelling as the message.
So, if you’re thinking about taking a similar approach when making an inspirational poster on your laptop for graphic design or just want a creative look, I recommend using a consistent margin width .
8. Feature a bold color scheme to attract attention

If you haven’t been paying attention, you may have missed that bold colors are a graphic design trend again.
After seeing ultra-minimalist designs dominate the last decade I’ve welcomed colors back with open arms, especially on posters.

In this romantic movie poster , the designers used 8 bold colors to help the design stand out.
I could see this poster on the wall of any dorm or school.
It’s as if t he designers knew they were going to need a ton of bold color to get the attention of those darn millennials and Gen Zs.
9. Pick a creative poster idea that reflects the theme

Making design choices that don’t fit the idea, theme, or topic of your creative poster is a common mistake new designers make.
Heck, it’s a mistake that I made in my early design days.

For example, since Europa is a moon off of Jupiter, it would need a sci-fi or futuristic theme.
A fun font and colorful palette would not have the desired effect. And frankly, it would look out of place on a poster about space.
10. Divide your poster layout in half to contrast “before” and “after”

A common marketing tactic is to show how your customers’ lives are before and after they buy your product.
Think about all the ads that you see on TV that show how your life will be better because of their product (even if they don’t always tell you what their product actually does.)

The same idea can be used while coming up with a creative poster idea.
In this poster example, the page is split in half to show the “before” and “after” effect of being an organ donor.
11. Look for creative ways to incorporate product shots into your poster design

Whoever created this product poster for Nest did an incredible job!
They flawlessly blended a three-dimensional product right into the flat poster design.
And best of all, it doesn’t look overly promotional, or even out of place.

Now, maybe you don’t have a product that can be inserted into a poster so effortlessly like this.
But you can use it as the background image, or even as the main focal point on your poster. All it takes is a little extra creativity, and you will be golden.
12. Upgrade a simple poster with bold shapes and patterns

Never use a raw stock photo. There are too many vague stock photos out there that do nothing to help your marketing collateral stand out.
This is a great rule of thumb when it comes to creating posters that succeed.
Yo u can start with a stock photo as your base, but you should make it your own before anyone sees it.

In this poster from Hami Miharu Matsunaga, they do just that.
All it takes is an eye-catching pattern and some bold colors to instantly turns a nondescript photo into an interesting event poster .
13. Organize your poster into blocks to give it structure

When designing a poster with lots of components, like an event poster with lots of names, sometimes you have more information than you know what to do with.
To help keep your poster design organized, divide the page into “block” sections, like in the concert poster example above.
The clean lines make it easier to scan the poster for important information!

Without these sections, you would be left with a mess of band names, and some annoyed fans.
So follow their lead and make sure you keep things well organized.
14. Use icons to direct the eye to important information

We have already talked about using leading lines to direct the eye in the right direction in a previous example.
Well, this tip is similar: use icons to point to important information.

If the icons you select already look like arrows, like above, then you are made in the shade.
These pointing shapes are called “directional cues”. It doesn’t really matter where you look on this poster, the icons are pointing you towards the center.
15. Create event posters for the day of the event as well

Most event poste rs advertise a certain event for many weeks or months in advance. I mean, almost all of the examples that we have featured in this roundup are like that.
However, you’re going to need posters on the day of the event as well.
For example, this poster would probably be used the day of the event to point out where the actual festivities are.

Others could lists rules, a schedule or something that helps the event attendees out during the day.
So don’t forget to create those kinds of posters before its too late!
16. Include a visual gag or pun, it never hurt anyone

If your creative poster idea can cause an emotional reaction, people are likely going to remember it.

You can achieve a positive reaction by not taking your poster design too seriously.
And secondly, by using a visual pun or gag, like in the informative poster above.
I know I’m going to remember this poster for weeks to come, mainly because it was so punny. I bet you will too.
17. Include a transparent shape to give the poster template depth

If you want to add some depth to your flat poster template , then this example is perfect for you.
The designer gave this poster extra depth by using a simple transparent shape.
With a strong background image and a bold color scheme, this creative poster idea will stand out from the pack.

I think that a solid shape would not have had the same appeal, and instead made the poster flat and nondescript.
But instead, the background image is able to filter through and give the poster some unique texture too.
18. Blend your topic into your font choices, or create your own

There are no rules out there that say you must use a premade font to bring your creative poster ideas to fruition.
Sometimes you need to create a font from scratch, and with our collection of icons, you can create do just that!
We have already seen how a designer used related icons to create a dolphin from scratch. You can use the same general idea to build your own custom font as well.

For example, in the event poster above , the designer actually uses musical graphics and icons to build an interesting font.
19. Use a solid background shape or border to make text pop

If you want to make text jump off your creative poster, follow the example above.
The designers use solid black blocks to make the title text stand out. It also shows the reader where they should look first, which is always a plus.

Additionally, this tactic can highlight a date, a website, or something important on your poster.
Just be sure to use this trick sparingly, or it loses its effectiveness.
20. Include clever design choices to stand out in this busy world

This creative poster looks like a mess of random shoes, right? Well, it is, from this angle.
But if you take a step back, you can clearly see that the shoes are actually spelling something out.
It’s almost like one of those magic picture books that dominated the 90s.

And this creative poster idea will definitely catch someone’s eye as they are walking by. It may actually cause them to do a double take and come back to it. If that’s not an effective poster, I don’t know what is!
21. Highlight an object that everyone will recognize

Creative posters that reveal their complexity over time will have a lasting impact on your audience.
For example, if you took a quick glance at this poster you would probably see a grail.
This object happens to be what they are searching for in this installment of Indiana Jones. Even the most casual fan, like myself, would recognize that imagery from afar.

But when you take a close look at the rest of the poster, you see the profiles of Indy and his father form the grail.
This a great way to feature various iconic objects that causal, and hardcore, fans will be drawn to.
And it happens to be a famous optical illusion!
22. Include a simple and memorable tagline

In this fast-paced world, you have to get your message out there quickly and efficiently.
That means sometimes the most straightforward posters are best.
For example, this designer created a very interesting poster by saying two things with a single phrase.

They were able to create a very unique and modern poster by keeping things simple.
They could have said both of those things separately on this poster, but the impact wouldn’t be the same. And it wouldn’t have been an interesting poster in the slightest!
23. Create variations of the same poster design

In this section, you’re going to get two creative poster examples, for the price of one!
Well, actually, they are basically the same event posters.
Both posters are a variation of the same design This is a fantastic way to design posters that fit different spaces and environments
The blue one might work best in a bar or coffee shop, but the red one fits a gym perfectly.
Plus, in this case, the posters illustrate the competitive nature of the event perfectly! With one team using a red paddle, and others playing with the blue one.
24. Don’t be afraid of negative space

You don’t need to cover every single pixel of your graphic to create an interesting or creative poster.
It’s good design practice to leave some when creating graphics to allow your poster to breathe.

Especially if you’re trying to create a flat or minimalist poster, like above. As you can see in this example, the blank space actually helps the text pop off the page.
25. Make handwritten fonts the design focus of your poster

As brands try to become more genuine and lifelike, handwritten fonts are still a trend.
They give each poster and design a bit of whimsy that other fonts don’t really have.

Take a minute to imagine how the example would feel if they used an ultra-modern font. I’m pretty confident that it would look out of place, and not have the same impact.
Especially if it was paired with a quote that can cause an emotional reaction, like in the poster template above.
26. Make sure all the important details are in one spot

Searching for a creative poster for important details, like an event location or time, can be a pain.
If the key information isn’t easy to find, your poster won’t be doing its job effectively.
That’s why I recommend placing pertinent information in the same general area.
Things like the date, a website, or the event location should all be in a single spot. Usually, the header or footer is a safe spot for this info.

In this poster example from AAF Omaha, all of their key info is grouped together.
They use negative space to make the information stand out from the background.
27. Visualize your event schedule or timetable with a timeline

The designer for this poster decided to visualize the event’s schedule directly on the poster by using a timeline template.

They could have included a start and end time, like many other types of posters on this list.
But this makes it easy for readers to know if any events are happening simultaneously.
28. Let the poster background image influence your design choices

Most of the time the poster background is, well, kinda fades into the background.
But it doesn’t have to, and can instead be the focal point of your poster.

In the hiring poster above, the background image actually set the tone for the whole poster.
From the font color to the poster structure, and even the way the text is oriented. And it all comes together to create a pretty unique poster.
29. Elevate your minimalist poster design with accent colors

I think, one of the bigger misconceptions in the design world is that minimalist posters should have no color.
However, minimalist design ideals focus on using the bare essentials to create something beautiful and functional. There’s no more, or no less used, just a perfect balance.

In this minimalist poster example, they do just that, with some accent colors to make it more eye-catching.
This minimalist poster design could’ve been a boring line drawing if they stuck to just one color. But the pops of bold color help make it far more striking.
30. Use an infographic to tell a data-driven story

If you want to include some data or charts on your poster, I would recommend using an infographic as inspiration.
With an infographic, you can use graphs, figures, maps and charts to effectively tell a story. As you can see in the example above, they use all of these graphics in an interesting way.

All of these graphics come together to efficiently explain how Credilogic grew over the past decade.
From the timeline infographic that explains their origin story to the graph that shows their growth over the year, and even the logo history.
If they were wanting to introduce their company to the community with this infographic-like poster, I would say they succeeded.
31. Use a landscape page orientation for a different poster design

As you may have noticed, almost every poster we have featured (and most posters in general) share one thing in common: they are actually all vertically oriented.

If you want to stand out from all of the other posters in the world, try using a horizontal or landscape page orientation.
In the event poster example above, they do just that and it works very well.
32. Feature a single call-to-action on your poster

I’m guessing that if you’re creating a poster, you want a person to take an action after they read it.
In the marketing world, we call that a call-to-action, and you should have one on almost every poster that you create.
This call-to-action could tell people to come to your event at a certain time or ask for a follow on social media.
In the creative poster example above, their call to action tells readers to visit a website for more information about the event. This is a great way to engage with readers on a more interactive platform.
Just remember to only have one call to action, or you risk confusing your audience.
33. Highlight an important piece of information with a contrasting font color

Sometimes all you need to do to grab someone’s attention is highlight a particular word or phrase. This phrase could be something like “Free”, “Act Now” or “50% Off.”
Or, in the case of this creative poster example, the word “Drink.” As you can see, this word is highlighted in a particular font color to make sure it jumps off the poster.

The designers know that people aren’t going to pass up the opportunity for free food and drinks, so they made sure readers can’t miss it.
34. Tell a story with images or icons, not words

It’s a well-known fact that your brain processes images a lot faster than text . And you can use this hack to make your creative poster a guaranteed knockout.
All you need is a few icons or graphics that can tell a quick story, like in the poster example above.
However, try to only use recognizable or simple icons to tell your story. Nothing too technical or out of right field, or your readers will end up confused.

I’m guessing that you were able to decipher that this minimalist poster was for a winter jazz concert pretty quickly. But if not, they added some explanatory text below the icons too.
35. Improve almost any photograph with a duotone

Duotones hit the graphic design world recently, and it seems to be sticking around for a while.
This style became very popular because it allows a designer to add bold and bright colors to any image.

If you’re looking for a bold poster background, a duotone is perfect, especially when you want to improve a stock photo or keep a consistent color palette throughout the poster.
36. Incorporate unconventional borders for a modern poster design

I would recommend featuring a border on all your minimalist posters, like above. It will help give the most basic poster some much-needed structure.

This border actually helps direct your eye to the important information on the poster. It’s functional and gives the poster a sleek modern look.
37. Change the reader’s perspective, literally

You may need to change perspective if you’re having trouble thinking of a creative poster idea. Start by taking a new look at a very common topic and you will have a ton of great ideas in no time.

In this example from IQ Agency, they take that idea very literally and design a memorable poster.
Almost everyone knows the NYC skyline, that’s not unique. But when they flip the perspective and add some bold, partially obscured text, this poster becomes an instant classic.
38. Use hand-drawn illustrations to give your poster a playful feel

I’m a big fan of using hand-drawn illustrations for a lot of the same reasons I like hand-drawn fonts.
They both can add a bit of fun and whimsy to any poster. Plus, the icons can make the poster feel a lot more genuine, even if it’s created by a massive corporation.

If hand-drawn illustrations fit your brand , like in the example above, I would definitely use them as well. I can’t think of a better place than Maker Faire, which is filled with quirky creators, to use hand-drawn illustrations!
39. Combine multiple design influences for a truly creative poster idea

Now, I’ll admit that it took me a few viewings to see how amazing this poster is. But after I saw exactly what the designer was trying to say, I was sold.
The inspiration for this poster actually came from both the event, a night market, and the date it was being held on, the 4th Of July.

They then smashed those ideas together to create a killer poster. It has a vintage poster design feel, with the flag providing structure for the poster and then folding into an old school stall that you could find at the market. It’s perfect!
40. Use related color and shapes to break down a complex schedule

If you’re going to include a lot of info on your creative poster, I would recommend breaking it down into consumable chunks.
The presentation is really up to you and depends on the amount of info you want to share. You can use color, shapes, or borders to keep things organized.
Or you could combine all of those design ideas like they did in the event poster example above.
Instead of just listing their event schedule on a blank piece of paper, the designers used color and shapes to beautifully connect it all.
41. Go ahead and pick an EXTRA bold color palette

We’re going to end this collection with an example that I love. I actually saw this collection of posters a few months ago, and have been waiting to use it in an article.
The extra bold color was what initially caught my eye, and I’m guessing your eye as well.
But my favorite thing about this collection of posters is that you have to view all of them to get the whole story. The bold color and slightly obscured text create a sense of continuity between them.
Overall it’s one of the best creative poster ideas I have seen in a long while.
42. Present text or titles in a unique way

Sometimes to get your message out there, you need to think outside of the box, especially when you’re designing a creative poster.
In this unique poster example, the designer decided to present the event title in an innovative way.
Instead of going the traditional route, they presented the text across multiple lines. Then they used random breaks in the words to form an interesting focal point.

It may take someone a few seconds to read this poser, but it will definitely stick with them long after the fact.
43. Don’t use the whole canvas for your poster design

Just because you have a large canvas to work with, it doesn’t mean you have to fill it up completely with content.
When you look at any professional poster, you’ll notice the effective use of white space. It’s a simple way to avoid a disorganized look.
This designer decided to take that idea to heart and included a ton of white space on their poster. As you can see, almost half of the poster is blank! However, this white space helps the main content stand out even more.

Without the open space, I don’t think the ticket theme would have been as interesting as well.
But in this poster example, it almost jumps off the paper to grab your attention.
44. Create multiple versions of your creative poster

I don’t think anyone will argue the fact that most people have different tastes and preferences.
This is particularly true when it comes to design, and art as a whole.
One group of people may love your creative poster idea, but the other may hate it. Now without even meaning to, you have turned off a large portion of your potential audience.
Because of this vast pool of potential readers and their varied tastes, I would recommend creating a few different creative posters.
As you can see in the futuristic poster examples above, they designed 4 different posters for a single event.
This approach will hopefully ensure they appeal to a larger audience than they could with just one distinct poster example.
45. Upgrade a stock photo with flat icons, filters, and borders

One of my biggest design pet peeves is when people insert a stock image onto their graphic s . They don’t even take the time to add icons, borders or a simple color filter!
All of these things could have instantly upgraded the photo and made the graphics unique to their brand!

In this creative poster example, they used a simple border to give the image more structure and draw the eye in.
And then they added a flat pink shape to make the text really pop.
Overall, they created a very engaging poster without using any gimmicks that distract from the message.
46. Add a splash of vivid color to your minimalism

Vivid color palettes are one of the biggest graphic design trends this year.
Massive brands like Apple, Spotify and Google are adding them to their marketing and design arsenal.
You can use these bright colors to add a little something extra to your minimalist poster. In the poster above, the creators used a vivid gradient to catch the eye.

Plus it fits exceptionally well with the simple design used throughout the rest of the poster.
And this approach doesn’t abandon the minimalist ideals of using only what you need to get a point across.
47. Use a simple poster background that can easily be changed

In an attempt to stand out this year, some people will use very complicated poster backgrounds .
Or they might slap a somewhat related stock photo on their poster and call it a day.
Complicated poster backgrounds work for some types of events, but sometimes it’s better to keep it simple.
In this poster example, you can see that they used a simple flat background throughout the poster. As you can see, the information becomes the main focal point of the poster with this approach.

Best of all, with a flat background, you can easily change the color scheme of your poster to fit different situations.
You can also easily reuse the poster template for future events this way.
Using Venngage’s My Brand Kit , all you have to do is click once to add your brand colors to the poster.
With a second click, you can see a swap where the colors appear, like so:
48. Make your text pop with layers and depths

Bold text is one of this year’s biggest graphic design trends because this type of text will jump out and grab your attention.
It also looks amazing o n high-definition screens, so expect to see bold fonts all over your social media feeds this year.
If you want to take bold text to the next level, I recommend following Nike’s lead.
In this poster example, they separated their bold text into different layers and it looks incredible.

A poster example like this will definitely stand above the noise in real life and on social media.
49. Swap a letter with an icon or illustration

I have been a fan of this innovative poster example since the moment I saw it.
From the minimalist design to the patterns, I liked every part of it. Plus it promotes an important and potentially heavy topic in a fun way.

But in my opinion, the replacement of the letter “O” with an icon is the best part of this example.
With this swap, the designer wanted to make sure people knew that voting was a great way to make sure their voice is heard.
This simple design choice will ensure that their message is seen by a ton of people. I think it was a success because almost two years after its publication, people are still sharing this poster on social media.
50. Create a light and dark version of your creative poster

Twitter was one of the first tech giants to add a light and dark mode to their platform.
Now almost all of the big tech companies include it with their app.
They saw that they could improve their user experience by making things a little more flexible.
This is because depending on the situation, a light background is going to make things look better and vice versa.
When designing your poster, I think it’s important to keep that idea in mind. Sometimes your poster will be seen on a dark wall, and other times it will be seen on a bright white social media feed.

As you can see with this example, they created both a light and dark version of the same poster to make sure it looks great anywhere.
51. Use gradient fills in your poster designs

Gradients are a simple way to add a bit of color or excitement to your poster background.
They are now super easy to use with Venngage. All it takes is a single click to add them to your poster.
But in this example, they decided to use gradients in a different way.
Instead of placing a gradient in the background, the designer added it to all of their shapes.

In combination with a simple white background, the gradients add a lot of depth to the simple shapes.
52. Make sure your poster has a call-to-action

If you’re not familiar with marketing lingo, you may not know what a call-to-action is. Simply put, it’s a word or phrase that should inspire a reader to take action.
Most poster examples are going to have at least a simple call to action. Something like:
- Call 124-1424 For More Information
- Buy Tickets @ Tickets.com
- Visit The Community Center Now
- Sign Up Today!
These easy-to-digest phrases are usually the most important part of any poster. Without them, your poster probably won’t be effective because no one will know what you want them to do.
In this hiring poster example, they include a call to action at the bottom of the poster:

If the designer wouldn’t have added that section, the whole poster would have been a waste of time. And the company might be asking themselves why no one had applied to their job.
Well, without a way to get in contact with the company, it’s pretty hard to apply for a job!
53. For event posters, make sure your design matches the event

One of my biggest pet peeves is when event posters don’t match the event they are promoting.
I find it more puzzling than intriguing when a book event poster looks like it’s promoting a dubstep concert.
Confusing your users from the start isn’t a great way to design a winning poster. So be sure to keep in mind what event you’re promoting throughout the whole design process.

In this retro party poster example, you can see that the design elements match the event perfectly.
From the colors to the patterns and even the main font, this poster looks like it came straight from the 1990s!
I also like that they added a CD icon to really increase the nostalgia.
54. Don’t use a boring background under your color filter

At this moment in time, there are millions of free images, stock photos and patterns in the world. With even more being added each day!
So why would you use a boring background image or pattern under your color filter? I know I wouldn’t.
Not sure exactly what I’m talking about? Check out this poster example, and you can see how powerful an interesting background image can be:

These flowers add so much color to the minimalist poster, all without distracting from the written content.
This poster is also a great example of a trend called colorful minimalism that I think will dominate 2019!
55. Break your poster into different sections with boxes & borders

There really isn’t a rule for how much information you can include on a poster.
However, you need to make sure that this info is easy to consume, and that the info is actually relevant to the poster and useful to the reader.
One of the easiest ways to keep your poster organized is to use boxes and borders.
Now if you plan to include a ton of different information on your poster, try to emulate this poster example.

The designer actually broke this poster into 7 different sections using just a few lines and borders.
These borders make the poster a lot easier to read and navigate from one point to the next.
Without them, the information would all run together, which is never good!
56. Always use high-quality images on your creative poster

If you’re planning on sharing your poster on social media or printing it out, be sure to use high-quality images .
In fact, always try to use high-quality images on all your posters. You really never know where they might be shared, or who will see them. It’s better to be safe than sorry!
Plus, readers are going to associate the images with your business from the beginning. If you use an odd or low-quality image on your poster, these same people will probably not want to work with your brand.
In this beautiful poster example, they definitely made the right choice with their featured image:

Not only does it fit the theme of the poster, but it will also look clear and professional on any screen.
There’s nothing more frustrating than putting a ton of effort into a poster, and finding out it looks bad on a large screen.
57. Make a creative poster design using icons

If you don’t want to include a photo or image on your poster, an icon collage is a great visual alternative.
I really like icon collages because you can get very specific with what icons you use . Especially because at Venngage, we have thousands of icons at your disposal!
In this sales poster example, the designer used a collection of clothing icons in the collage:

Each icon is different from the next, and it allows the brand to show that they have a ton of clothing on sale. With an image or photo, you might only get to include a few products if you’re lucky.
Plus because you can change the icon color, the collage can be used on other posters or design projects!

You made it to the end of our roundup of creative poster ideas! Great job!
And if you’re looking for a little more info about creating posters I would start here:
- How to Make a Poster in 10 Steps (2024 Poster Design Guide + Templates)
- 22 Event Poster Ideas, Backgrounds & Design Tips
- 21 Essential Human Resources Poster Examples
Discover popular designs

Infographic maker

Brochure maker

White paper online

Newsletter creator

Flyer maker

Timeline maker

Letterhead maker

Mind map maker

Ebook maker
How to design a great science poster in PowerPoint
On this page I'll explain how to use PowerPoint to get a great science poster design. Good to mention beforehand: this is a tutorial about using PowerPoint for your design. If you want to learn how to create a concept/idea for a science poster or visual, you can find this knowhow in the Science Poster Design Guide . After that, you can for example use a tool such as PowerPoint to create the final design.
1. Create a poster file

- Open PowerPoint. In the top bar go to File > New Presentation.
- A new file opens. Delete all the content boxes on the blank page.
- Save your file as a regular PowerPoint file.
2. Resize to A0: 841 x 1189 mm

- Go to top bar 2 (the one with ‘Home, Insert, Draw’) > Design.
- Select Slide Size (image 1).
- Click Page Setup > Fill in: Width - 841 mm, Height: 1189 mm (image 2). Click OK.
3. Add your colour palette

- Go to top bar 2 > Design.
- Go to Format Background (image 1).
- At Fill, select Solid fill (image 2).
- Click the icon next to Colour (in the Format Background menu).
- From the popup menu select 'More Colours'.
- From the new popup menu, select 'CMYK' Sliders in the dropdown box (image 3).
- Fill in the CMYK values of colour 1 of your colour palette. If you have a colour palette from for example coolors.co , they provide you with the CMYK values of each colour. If you don’t have the CMYK colours, you can get them through various tools, such as color-hex.com .
- Drag the colour in the left bottom corner to the empty colour rectangles (image 4). Repeat step 8 and 9 for all your colour palette colours.
4. Background colour (optional)

- If you want to give your background a colour, go to top bar 2 > Design > Format Background.
- At 'Fill' select 'Solid fill' (image 1).
- Click on the icon next to 'Colour'.
- In the popup window, select 'More Colours...'.
- In the new popup window, you see your colour palette, or you can select another (suitable) colour in the CMYK sliders (image 2).
- Select your colour and click 'OK'.
5. Add background shapes (optional)

- If you also use shapes as a background (such as a top bar or a rectangle with text in it), go to top bar 2 > Insert.
- Click the Shapes icon.
- Select your shape from the popup menu.
- In the poster draw the shape (by clicking on the poster and dragging).
- Give the shape the right size (by scaling with your mouse).
- Select the shape
- Go to top bar 2 > Shape Format
- Go to the Shape Fill icon and click on the dropdown button next to it.
- Select the colour.
- If you want to change the border colour (or don’t want to show a border), go to the icon next to Shape Fill, called Shape Outline.
- Click on the dropdown button next to it.
- Select No Outline or a colour.
- Select the shape.
- Go to top bar 2 > Shape Format.
- Go to the Edit Shape icon and click on it. Select Edit Points.
6. Add your texts

- Go to the top bar, select Insert > Text Box (image 1).
- Place the text box on the right place in the poster (image 2).
- Write or copy and paste your own text in it.
- Go to the lightgrey top bar (with font and font size, etc. in it).
- From the font dropdown box, select the font of your liking (image 3).
- From the font size dropdown box, select (or write) the font size of your liking (image 4).
- In the Font Colour dropdown box, select the colour you want for your text (image 5).
- For other texts on your poster: Select the text box of the previous steps, and copy and paste it, to create a new text box.
- Repeat step 2-7 for this text box.
- Selecting your text box, go to the Line Space icon in top bar 2 (Home tab) (image 6).
- Click on Line Spacing Options In the popup menu.
- At Line Spacing, select Exactly (image 7).
- Next to ‘At:’, fill in the spacing. Experiment with different values. It always has to be a value that is larger then the font size used in the text box.
- Select text box.
- Go to top bar 2 > Home.
- Click on one of the text alignment icons: you can choose ‘Align to left’, ‘Centre text’, Align to right’ and ‘Justify text' (image 8).
7. Add and make your images

- Go to top bar 2 > Insert.
- Select the Insert Picture icon (image 1).
- Select your choice, mostly it will be ‘Picture from File'.
- Select your picture in the popup menu and click 'Insert'.
- If your images are vector images, you can adjust the color of it.
- Choose one of the following icons: Shapes, Icons, SmartArt (image 2).
- Choose your shape, icon or illustration and insert it in your poster. The colours are adjustable.
8. Draw your images (optional)

- If you want to draw your own images in PowerPoint, go to top bar 2 > Draw.
- Select one of the drawing pencils and start drawing (image 1).
- When you have drawn a shape or a line, you can go to top bar 2 > Shape Format, and adjust the colour (image 2).
9. Insert your charts

- If you use charts on your poster, go to top bar 2 > Insert.
- Select the Chart icon and choose a suitable chart design from the drop down menu (image 1).
- When selecting a chart, Excel automatically opens.
- Fill in the right values in Excel (image 2).
- Now it’s time to adjust the design of the chart. Go back to PowerPoint. By clicking on elements in the chart, you can adjust the design of it (image 3).
- Repeat the previous steps for all your charts.
10. Export to PDF (including bleed )

- PowerPoint does not have the bleed ability, so you have to integrate the bleed (most of the time 3 mm at each side) into the custom size. In top bar 2, go to Design.
- Select the icon Slide Size.
- Add 6 mm to both width and height (image 1).
- The popup window asks you if you want to scale the content, choose 'Don’t Scale'.
- Check if there are elements on the poster that you need to make larger (because they don’t cover the bleed area). If applicable: make them larger
- Go in the top bar to File > Export.
- Choose PDF.
- Click 'Save'.
You are done, congratulations with your science poster!
Infographics Illustration Data Visualization General Design
About Buy here
Follow Science Poster Design Guide
LinkedIn Twitter Instagram
Creating a Poster
What exactly is a poster presentation.
A poster presentation combines text and graphics to present your project in a way that is visually interesting and accessible. It allows you to display your work to a large group of other scholars and to talk to and receive feedback from interested viewers.
Poster sessions have been very common in the sciences for some time, and they have recently become more popular as forums for the presentation of research in other disciplines like the social sciences, service learning, the humanities, and the arts.
Poster presentation formats differ from discipline to discipline, but in every case, a poster should clearly articulate what you did, how you did it, why you did it, and what it contributes to your field and the larger field of human knowledge.
What goals should I keep in mind as I construct my poster?
- Clarity of content. You will need to decide on a small number of key points that you want your viewers to take away from your presentation, and you will need to articulate those ideas clearly and concisely.
- Visual interest and accessibility. You want viewers to notice and take interest in your poster so that they will pause to learn more about your project, and you will need the poster’s design to present your research in a way that is easy for those viewers to make sense of it.
Who will be viewing my poster?
The answer to this question depends upon the context in which you will be presenting your poster. If you are presenting at a conference in your field, your audience will likely contain mostly people who will be familiar with the basic concepts you’re working with, field-specific terminology, and the main debates facing your field and informing your research. This type of audience will probably most interested in clear, specific accounts of the what and the how of your project.
If you are presenting in a setting where some audience members may not be as familiar with your area of study, you will need to explain more about the specific debates that are current in your field and to define any technical terms you use. This audience will be less interested in the specific details and more interested in the what and why of your project—that is, your broader motivations for the project and its impact on their own lives.
How do I narrow my project and choose what to put on my poster?
Probably less than you would like! One of the biggest pitfalls of poster presentations is filling your poster with so much text that it overwhelms your viewers and makes it difficult for them to tell which points are the most important. Viewers should be able to skim the poster from several feet away and easily make out the most significant points.
The point of a poster is not to list every detail of your project. Rather, it should explain the value of your research project. To do this effectively, you will need to determine your take-home message. What is the single most important thing you want your audience to understand, believe, accept, or do after they see your poster?
Once you have an idea about what that take-home message is, support it by adding some details about what you did as part of your research, how you did it, why you did it, and what it contributes to your field and the larger field of human knowledge.
What kind of information should I include about what I did?
This is the raw material of your research: your research questions, a succinct statement of your project’s main argument (what you are trying to prove), and the evidence that supports that argument. In the sciences, the what of a project is often divided into its hypothesis and its data or results. In other disciplines, the what is made up of a claim or thesis statement and the evidence used to back it up.
Remember that your viewers won’t be able to process too much detailed evidence; it’s your job to narrow down this evidence so that you’re providing the big picture. Choose a few key pieces of evidence that most clearly illustrate your take-home message. Often a chart, graph, table, photo, or other figure can help you distill this information and communicate it quickly and easily.
What kind of information should I include about how I did it?
Include information about the process you followed as you conducted your project. Viewers will not have time to wade through too many technical details, so only your general approach is needed. Interested viewers can ask you for details.
What kind of information should I include about why I did it?
Give your audience an idea about your motivation for this project. What real-world problems or questions prompted you to undertake this project? What field-specific issues or debates influenced your thinking? What information is essential for your audience to be able to understand your project and its significance? In some disciplines, this information appears in the background or rationale section of a paper.
What kind of information should I include about its contribution ?
Help your audience to see what your project means for you and for them. How do your findings impact scholars in your field and members of the broader intellectual community? In the sciences, this information appears in the discussion section of a paper.
How will the wording of my ideas on my poster be different from my research paper?
In general, you will need to simplify your wording. Long, complex sentences are difficult for viewers to absorb and may cause them to move on to the next poster. Poster verbiage must be concise, precise, and straightforward. And it must avoid jargon. Here is an example:
Wording in a paper: This project sought to establish the ideal specifications for clinically useful wheelchair pressure mapping systems, and to use these specifications to influence the design of an innovative wheelchair pressure mapping system.
Wording on a poster:
Aims of study
- Define the ideal wheelchair pressure mapping system
- Design a new system to meet these specifications
Once I have decided what to include, how do I actually design my poster?
The effectiveness of your poster depends on how quickly and easily your audience can read and interpret it, so it’s best to make your poster visually striking. You only have a few seconds to grab attention as people wander past your poster; make the most of those seconds!
How are posters usually laid out?
In general, people expect information to flow left-to-right and top-to-bottom. Viewers are best able to absorb information from a poster with several columns that progress from left to right.
Even within these columns, however, there are certain places where viewers’ eyes naturally fall first and where they expect to find information.
Imagine your poster with an upside-down triangle centered from the top to the bottom. It is in this general area that people tend to look first and is often used for the title, results, and conclusions. Secondary and supporting information tend to fall to the sides, with the lower right having the more minor information such as acknowledgements (including funding), and personal contact information.

- Main Focus Area Location of research fundamentals: Title, Authors, Institution, Abstract, Results, Conclusion
- Secondary Emphasis Location of important info: Intro, Results or Findings, Summary
- Supporting Area Location of supporting info: Methods, Discussion
- Final Info Area Location of supplemental info: References, Acknowledgments
How much space should I devote to each section?
This will depend on the specifics of your project. In general, remember that how much space you devote to each idea suggests how important that section is. Make sure that you allot the most space to your most important points.
How much white space should I leave on my poster?
White space is helpful to your viewers; it delineates different sections, leads the eye from one point to the next, and keeps the poster from being visually overwhelming. In general, leave 10—30% of your poster as white space.
Should I use graphics?
Absolutely! Visual aids are one of the most effective ways to make your poster visually striking, and they are often a great way to communicate complex information straightforwardly and succinctly. If your project deals with lots of empirical data, your best bet will be a chart, graph, or table summarizing that data and illustrating how that data confirms your hypothesis.
If you don’t have empirical data, you may be able to incorporate photographs, illustrations, annotations, or other items that will pique your viewers’ interest, communicate your motivation, demonstrate why your project is particularly interesting or unique.
Don’t incorporate visual aids just for the sake of having a pretty picture on your poster. The visual aids should contribute to your overall message and convey some piece of information that your viewers wouldn’t otherwise get just from reading your poster’s text.
How can I make my poster easy to read?
There are a number of tricks you can use to aid readability and emphasize crucial ideas. In general:
- Use a large font. Don’t make the text smaller in order to fit more onto the poster. Make sure that 95% of the text on your poster can be read from 4 feet away. If viewers can’t make out the text from a distance, they’re likely to walk away.
- Choose a sans-serif font like Helvetica or Verdana, not a serif font, like Times New Roman. Sans-serif fonts are easier to read because they don’t have extraneous hooks on every letter. Here is an example of a sans-serif and a serif font:
- Once you have chosen a font, be consistent in its usage. Use just one font.
- Don’t single-space your text. Use 1.5- or double-spacing to make the text easier to read.
For main points:
- Use bold, italicized, or colored fonts, or enclose text in boxes. Save this kind of emphasis for only a few key words, phrases, or sentences. Too much emphasized text makes it harder, not easier, to locate important points.
- AVOID USING ALL CAPITAL LETTERS, WHICH CAN BE HARD TO READ.
- Make your main points easy to find by setting them off with bullets or numbers.
What is my role as the presenter of my poster?
When you are standing in front of your poster, you—and what you choose to say—are as important as the actual poster. Be ready to talk about your project, answer viewers’ questions, provide additional details about your project, and so on.
How should I prepare for my presentation?
Once your poster is finished, you should re-familiarize yourself with the larger project you’re presenting. Remind yourself about those details you ended up having to leave out of the poster, so that you will be able to bring them up in discussions with viewers. Then, practice, practice, practice!
Show your poster to advisors, professors, friends, and classmates before the day of the symposium to get a feel for how viewers might respond. Prepare a four- to five-minute overview of the project, where you walk these pre-viewers through the poster, drawing their attention to the most critical points and filling in interesting details as needed. Make note of the kinds of questions these pre-viewers have, and be ready to answer those questions. You might even consider making a supplemental handout that provides additional information or answers predictable questions.
How long should I let audience members look at the poster before engaging them in discussion?
Don’t feel as if you have to start talking to viewers the minute they stop in front of your poster. Give them a few moments to read and process the information. Once viewers have had time to acquaint themselves with your project, offer to guide them through the poster. Say something like “Hello. Thanks for stopping to view my poster. Would you like a guided tour of my project?” This kind of greeting often works better than simply asking “Do you have any questions?” because after only a few moments, viewers might not have had time to come up with questions, even though they are interested in hearing more about your project.
Should I read from my poster?
No! Make sure you are familiar enough with your poster that you can talk about it without looking at it. Use the poster as a visual aid, pointing to it when you need to draw viewers’ attention to a chart, photograph, or particularly interesting point.
Sample Posters
Click on the links below to open a PDF of each sample poster.
“Quantitative Analysis of Artifacts in Volumetric DSA: The Relative Contributions of Beam Hardening and Scatter to Vessel Dropout Behind Highly Attenuating Structures” James R. Hermus, Timothy P. Szczykutowicz, Charles M. Strother, and Charles Mistretta
Departments of Medical Physics, Biomedical Engineering, and Radiology: University of Wisconsin-Madison
“Self-Care Interventions for the Management of Mouth Sores in Hematology Patients Receiving Chemotherapy” Stephanie L. Dinse and Catherine Cherwin
School of Nursing: University of Wisconsin-Madison
“Enhancing the Fluorescence of Wisconsin Infrared Phytofluor: Wi-Phy for Potential Use in Infrared Imaging” Jerad J. Simmons and Katrina T. Forest
Department of Bacteriology: University of Wisconsin-Madison

Academic and Professional Writing
This is an accordion element with a series of buttons that open and close related content panels.
Analysis Papers
Reading Poetry
A Short Guide to Close Reading for Literary Analysis
Using Literary Quotations
Play Reviews
Writing a Rhetorical Précis to Analyze Nonfiction Texts
Incorporating Interview Data
Grant Proposals
Planning and Writing a Grant Proposal: The Basics
Additional Resources for Grants and Proposal Writing
Job Materials and Application Essays
Writing Personal Statements for Ph.D. Programs
- Before you begin: useful tips for writing your essay
- Guided brainstorming exercises
- Get more help with your essay
- Frequently Asked Questions
Resume Writing Tips
CV Writing Tips
Cover Letters
Business Letters
Proposals and Dissertations
Resources for Proposal Writers
Resources for Dissertators
Research Papers
Planning and Writing Research Papers
Quoting and Paraphrasing
Writing Annotated Bibliographies
Creating Poster Presentations
Writing an Abstract for Your Research Paper
Thank-You Notes
Advice for Students Writing Thank-You Notes to Donors
Reading for a Review
Critical Reviews
Writing a Review of Literature
Scientific Reports
Scientific Report Format
Sample Lab Assignment
Writing for the Web
Writing an Effective Blog Post
Writing for Social Media: A Guide for Academics
How to Create a Research Poster
- Poster Basics
- Design Tips
- Logos & Images
What is a Research Poster?
Posters are widely used in the academic community, and most conferences include poster presentations in their program. Research posters summarize information or research concisely and attractively to help publicize it and generate discussion.
The poster is usually a mixture of a brief text mixed with tables, graphs, pictures, and other presentation formats. At a conference, the researcher stands by the poster display while other participants can come and view the presentation and interact with the author.
What Makes a Good Poster?
- Important information should be readable from about 10 feet away
- Title is short and draws interest
- Word count of about 300 to 800 words
- Text is clear and to the point
- Use of bullets, numbering, and headlines make it easy to read
- Effective use of graphics, color and fonts
- Consistent and clean layout
- Includes acknowledgments, your name and institutional affiliation
A Sample of a Well Designed Poster
View this poster example in a web browser .

Image credit: Poster Session Tips by [email protected], via Penn State
Where do I begin?
Answer these three questions:.
- What is the most important/interesting/astounding finding from my research project?
- How can I visually share my research with conference attendees? Should I use charts, graphs, photos, images?
- What kind of information can I convey during my talk that will complement my poster?
What software can I use to make a poster?
A popular, easy-to-use option. It is part of Microsoft Office package and is available on the library computers in rooms LC337 and LC336. ( Advice for creating a poster with PowerPoint ).
Adobe Illustrator, Photoshop, and InDesign
Feature-rich professional software that is good for posters including lots of high-resolution images, but they are more complex and expensive. NYU Faculty, Staff, and Students can access and download the Adobe Creative Suite .
Open Source Alternatives
- OpenOffice is the free alternative to MS Office (Impress is its PowerPoint alternative).
- Inkscape and Gimp are alternatives to Adobe products.
- For charts and diagrams try Gliffy or Lovely Charts .
- A complete list of free graphics software .
A Sample of a Poorly Designed Poster
View this bad poster example in a browser.

Image Credit: Critique by Better Posters
- Next: Design Tips >>
- Last Updated: Jul 11, 2023 5:09 PM
- URL: https://guides.nyu.edu/posters
Poster templates
Picture-perfect posters are possible with customizable template designs. create an eye-catching, informative poster that puts your unique message front and center..

Free poster templates that make a statement
Create a powerful poster with these poster templates that are ready to be customized and will fit all your needs, whether you’re issuing a public service announcement, promoting a fundraiser, or sharing an infographic. Or maybe you're launching a sale, promoting an event, or hosting an open house for your real estate business. Easily edit any of these templates with Microsoft PowerPoint , Microsoft Word , or another Microsoft 365 app, depending on the template you choose. Change up the text, font, colors, images, and other design elements, then download and print it yourself or send it to a print service. Even use these poster templates to create social media posts for Facebook , Instagram , and other social channels. For more, check out these free flyer templates .
Got any suggestions?
We want to hear from you! Send us a message and help improve Slidesgo
Top searches
Trending searches

11 templates

teacher appreciation

mother teresa
18 templates

memorial day
12 templates

summer vacation
25 templates

Research Poster Presentation templates
Posters are great for showing a certain amount of information at a glance in a short time. they're meant to be seen by many people that just walk by. what about showing a summary of a research or a paper with this selection of google slides & powerpoint templates, you'll have a printable design ready to pique everyone's interest..

Anatomy Poster for College Students
Download the Anatomy Poster for College Students presentation for PowerPoint or Google Slides. As university curricula increasingly incorporate digital tools and platforms, this template has been designed to integrate with presentation software, online learning management systems, or referencing software, enhancing the overall efficiency and effectiveness of student work. Edit this...

Pastel Brutalist Research Poster
This kind of templates for research posters are becoming quite popular here, so, in order to increase the variety, let's try combining two different elements: pastel colors and the brutalist style. The former is a good option whenever you want a more "calming "approach. The latter... sometimes does the opposite!...

Medical Anatomy Poster
Download the "Medical Anatomy Poster" presentation for PowerPoint or Google Slides. Healthcare goes beyond curing patients and combating illnesses. Raising awareness about diseases, informing people about prevention methods, discussing some good practices, or even talking about a balanced diet—there are many topics related to medicine that you could be sharing...

Premium template
Unlock this template and gain unlimited access
Elegant Academic Research Poster
A well-designed research poster should seamlessly blend academic content with elegant aesthetics. Research posters should feature an organized layout, legible typography, and relevant visuals. The goal is to present the research material in a clear and concise manner. How about this printable design? With a balanced content and this arrangement,...

Documentary Journalist Portfolio
Download the Documentary Journalist Portfolio presentation for PowerPoint or Google Slides. When a potential client or employer flips through the pages of your portfolio, they're not just looking at your work; they're trying to get a sense of who you are as a person. That's why it's crucial to curate...

Anatomy Poster for Education
Download the Anatomy Poster for Education presentation for PowerPoint or Google Slides. The education sector constantly demands dynamic and effective ways to present information. This template is created with that very purpose in mind. Offering the best resources, it allows educators or students to efficiently manage their presentations and engage...

3D Style Research Poster
Wow, this poster is going to amaze everyone! We've created a poster design for you to include everything about your latest research and present it to those who want to know what you've discovered. We have organized the poster with sections so that you can include an introduction, the basis...

Elegant Research Poster
Elegance is your main characteristic! And if this is what you want to convey in your creations... Your wishes will come true! So, you are looking for a research poster to transmit the class and elegance that you give to your project. Well, this is the design you need. The...

Breastfeeding Research Poster
Breastfeeding is not only a natural, beautiful thing to do for your baby, but it also has numerous health benefits for both mother and child. Breastmilk contains all the necessary nutrients and antibodies your baby needs to thrive, while also protecting against illnesses and allergies. Condensing all this information is...

Academic Conference Poster
Are you ready to present your research at an academic conference? Make sure you do it in style with this amazing academic conference poster template! Showcase your data, results, and conclusions in a clear and eye-catching design. This template features a cream color scheme with a modern style, giving your...

Simple Brutalist Style Research Poster
Impactful, creative, innovative. Want these adjectives to describe your research poster? Then this template is the perfect one you’re looking for. In addition to a ground-breaking design, it includes editable resources so that your research data can be displayed in a visual, synthetized way that everyone can understand —both scientists...

Cystic Fibrosis in Children Case Report
Download the Cystic Fibrosis in Children Case Report presentation for PowerPoint or Google Slides. A clinical case is more than just a set of symptoms and a diagnosis. It is a unique story of a patient, their experiences, and their journey towards healing. Each case is an opportunity for healthcare...

Minimalist Geometric Style Research Poster
A good research post helps you show all the information concisely and clearly. We know that you have been working on a research project for a while now and finally it’s time to make a presentation. Take this minimalist geometric style post! It has already all the structure built up...

Earthquake & Inner Earth Movements Research Poster
We have designed for you the perfect printable template to present your research on earthquakes and inner Earth movements. In it you will find the structure, images, graphs and icons to explain in detail your hypothesis, objectives, methodology, analysis and conclusions. It is designed in earth tones and contains different...

Formal Style Research Poster for University
Science has so many branches and fields of study. Did you find the one you feel the most comfortable in? Did you finish a research that took you quite some time? Do you love research posters? It seems that you've found what you were looking for! Let the design of...

Anatomy Poster for High School
Download the Anatomy Poster for High School presentation for PowerPoint or Google Slides. High school students are approaching adulthood, and therefore, this template’s design reflects the mature nature of their education. Customize the well-defined sections, integrate multimedia and interactive elements and allow space for research or group projects—the possibilities of...

Collage Style Research Poster
Some degrees require you to design a research poster after your final research. It’s only natural, since these kinds of structures are visual, simple and help convey lots of information in little space. And they also are a reflection of the person’s creativity! With this design you can express your...
- Page 1 of 4
Great presentations, faster
Slidesgo for Google Slides :
The easy way to wow
Free Site Analysis Checklist
Every design project begins with site analysis … start it with confidence for free!
How to Create a Successful Architecture Presentation Board
- Updated: December 31, 2023

Architecture is as much about effective communication as it is about innovative design. At the heart of this communicative process lies the architecture presentation board, a tool quintessential for architects to convey their vision, ideas, and concepts.
These boards are more than mere visual aids; they are the narrative bridge between an architect’s imaginative conception and the practical world where these ideas may take shape. They are not just a requirement for academic submissions or professional proposals but are a fundamental aspect of the architectural design process.
They serve as a canvas where ideas are visualized, concepts are explained, and designs are brought to life for various audiences, be it clients, peers, competition judges, or the general public.
Understanding how to effectively create and present these boards is crucial, as a well-crafted presentation not only showcases a finished scheme but also reflects the thought process, attention to detail, and the authors ability to communicate complex ideas succinctly and visually.
What are architecture presentation boards used for?
Architecture presentation boards serve several different purposes:
- Students use them to present work to their professors and peers.
- Professionals use them to present designs to clients, committees, shareholders, and exhibitions.
- They may be a means to win a commission, or they may help to take a project into the next stage.
What is the purpose of an architecture presentation board?
Architecture presentation boards are a tool to showcase your work. They are a way to draw your viewers into your design process and methods, providing an overall summary and vision for the project. You are communicating your design and showcasing your artistic skills, and your sense as a designer.
Every successful project has a central concept, a “big picture” theme that gives it purpose. When you look at your project, what is that big idea?
As it is central to your whole project, this will guide you as you prioritize your work and determine the flow of your ideas. The primary purpose of your project is to communicate this central concept in the best way possible.

AutoCAD Template Kit
Format your drawings with the correct set of tools. This CAD template enables you as a designer to spend your time on what matters – the design!

Stop searching for CAD blocks!
How do you layout an architecture presentation board, 01 – structure/order.
Before you begin laying out your presentation board, think about the main points you want to convey. From there, determine what images and graphics will best represent those ideas. Gather all of the information you will need, making a note of what graphics and text you will need to communicate your ideas.
Remember, you are essentially telling a story, so pay close attention to the flow of the narrative as you arrange your elements. Consider the beginning, middle, and end of the story you want to tell.
Depending on the guidelines you are given, you may present your boards side-by-side, as separate boards presented in a sequence, or as one big poster. If no strict parameters are in place, figure out what structure and layout will tell your story the best. While a series of boards will logically convey your story, one big board is often the easiest option.

02 – Orientation
Will your presentation board be oriented in portrait or landscape? Sometimes you will get to make that call, but many times it will be determined for you by your director, client, or professor. Make sure you know beforehand what the parameters are.
If you get to choose, give it some careful thought. Which orientation will give your graphics the room they need to be the most impactful? Which orientation gives your whole project a natural flow for your narrative?
03 – Size
Much like orientation, you may or may not get to decide what size your presentation boards will be. You will often have restrictions that limit you to a specific board size and a certain number of boards.
Make sure you know your limitations before you start working on your layout. Your boards should all be the same size to achieve continuity.
You can use a combination of different sizes to produce a board of equivalent size. For example, a combination of two A1 boards will add up to an A0 board.

04 – Layout
The most common way to organize your layout is by using a grid. Using a grid will help keep the boards in your project consistent.
If you are using InDesign , you can achieve this uniformity by creating a master page that acts as a template for your whole project.
Templates are useful because they can save you a great deal of time, and they ensure uniformity throughout your project. Your grid should include spaces for titles, numbering, your name, and any other information that will repeat on each board.
Before you start laying out your actual boards, sketch out various configurations so you can determine what will work best. You can do a small-scale sketch to get the basic idea of the flow of each board. This allows you to change the arrangement of the elements before you commit to anything on your boards.
You can do this initial phase using software or sketching it out on paper.
After you have determined what type of layout you want to use, estimate how much space you will need for each element on the page. Each graphic needs to be large enough to have an impact. Determine how much space you would like to leave in between each graphic.
Use equal spacing throughout your project to create continuity. Here is an excellent tutorial on planning your layout using Indesign:
The layout of each board should show the relationship between all of the elements. It should be clear to read and follow a logical left-to-right and top-to-bottom progression.
Imagine a viewer looking at your presentation. What do you want them to see first? What is the best way to make them understand your project? Does your layout achieve this?
You should also pay attention to the relationship between each board. Is there a logical progression from one board to the next? Does the sequence make sense? If you will not display the boards in a configuration that makes them all visible at once, make sure you number them, so your viewers follow the correct sequence.
Don’t feel the need to fill every square inch of your presentation board. Leave enough space so that it doesn’t look too busy or cluttered. On the other hand, don’t leave too much space either, or it will look like you didn’t finish the board, didn’t have enough material for the board, or that you didn’t work very hard.
05 – Visual Hierarchy
Some of your images need to garner more attention than others. Consider all of the graphics and text you will be using. Which images are central to your main idea?
The images that are essential for communicating your vision should take up more space in the grid. You should have an image that people can see from a distance and other images that they can see from up close. This creates a visual hierarchy.
What is the most important aspect of your project? Make that the element people can see from a distance. There are ways to accomplish this in addition to making it the largest element on the board. For example, you can use color to draw the viewer’s eye to a particular graphic, especially if the rest of the board is monochromatic.

06 – Background
The background of your presentation board should be simple. This allows the viewer to see all of the elements without the distraction of a busy background. You don’t want anything to detract from the critical details of the board. Your graphics and text should be the primary focus; don’t use bold colors or textures that will detract from that.
A white, or even light gray, background will make your graphics and text stand out. It will give your presentation a professional look that isn’t too busy. You can use other colors if they help convey your central concept; just make sure the background is plain enough that the viewer focuses on the design, not the background.
Be very selective when using a black background, as it may make the text harder to read, and your graphics may not stand out as much as you would like them to.
Whatever color you choose for your background, use it to your advantage. Effective use of negative space can make your design look clean and professional.

07 – Color Scheme
Many professionals and students stick with black, white, and gray for presentation boards. While this can give your boards a professional look, don’t be afraid to add a pop of color. While sticking with greyscale may seem like a safe choice, there is a risk of blacks and greys making your design seem cold and lifeless.
Think about ways you can use color to bring life to your design. You may opt to add just one color, such as green for landscaping, to provide contrast to an otherwise monochromatic presentation. You could also bring in an additional color to represent a particular building material (brick, glass, wood, etc.).
You can also choose a brighter, more eye-catching color, such as yellow or orange, as a feature in your diagrams . Whatever you choose, use the same color across all of your boards to maintain a consistent flow.
If color is one of the main focuses of your project, or if there are details that you cannot adequately represent in greyscale, then you should feel free to delve deeper into the world of color. Don’t limit yourself to merely an accent color in this case, but don’t take it too far and make the mistake of overusing color to the point where it is a distraction.
08 – Font
All of the text throughout your project should be in one font. Don’t use font style as an avenue for creativity; it is more important to make sure the font style and size produce a readable, consistent product.
Sans serif fonts, such as Helvetica or Futura, will give your presentation a clean, minimalist look.
Avoid script or handwriting fonts, as they will not give your boards a clean, professional look. Keep the color of your font dark (black or dark grey work well) to provide contrast to a light background.
Whichever font you select, make sure the style and size are readable for your viewers before you finalize your boards. The best way to do this is to print out your text on an A3 paper, pin it up somewhere, and stand back to see how it will look when it is displayed.

A full breakdown, list, and description of the most popular fonts for architecture can be found here .
09 – Title
The most common placement for a title bar is the top left since your board will most likely follow a left-to-right and top-to-bottom progression. Many successful and professional-looking boards have titles at the top right, at the bottom, or somewhere in the middle.
Choose the position that makes the most sense for your project. As with other design decisions, make sure it does not distract the viewer from seeing the big picture.
Make sure the title placement is consistent from board to board. This consistency will be both visually appealing and professional.
10 – Text
Keep your explanations concise. People are not going to spend much time reading lengthy descriptions, so only include relevant information and keep it short. Remember that your text boxes are part of your visual hierarchy, so utilize the size and alignment to complement your graphics. Consider the various ways you can align the text within the text box. What flows best? What is pleasing to the eye?
Aside from your title, do not use all capitals in your text. Your work will look more professional and be easier to read if you stick with the standard rules of capitalization.
Whenever possible, use a graphic or a sketch, rather than an explanation, to portray an idea. Since this is a graphic presentation, you want your graphics to tell the story, not your text. Include a concise statement that highlights the features of your design. This is basically your sales pitch; lengthy explanations will make you lose your audience.
11 – Image Selection
The selection of images is a critical part of putting your presentation board together. The graphics you choose can make or break your entire design presentation.
You want to select the images that best convey the important details of your project. If you use too many images, your presentation may appear cluttered and confusing. If you use too few images, it may look like you did not put much effort into your presentation.
Over the course of your project, you have generated countless sketches, renderings, models, and drawings. Resist the temptation to include everything just to show how hard you worked. Keep your big picture in mind and determine which images will directly show or best support that idea.

12 – Models
On occasion, a physical model, or even several models showing different aspects of your design, may be required for your presentation board. This is an additional means of communicating your vision to your viewers.
There are several materials you can choose for your model. Card and cardboard are inexpensive and come in various weights, finishes, and colors.
Foam board is also available in various widths and thicknesses. It is generally white, but it also comes in other colors. It is very lightweight and sturdy, making it an ideal material for your presentation board.
Balsawood is another good option. It is easy to work with and comes in varying weights. The material you choose will depend on the look you are trying to achieve as well as how much weight you can adhere to your presentation board.
Your model pieces can be cut by hand with tools such as an X-Acto knife or a scalpel. If you have access to a laser cutter, it will save you some time and give you more precision.

13 – Time Constraints
Give yourself enough time to produce a well-thought-out, effective, visually appealing presentation. You spent a considerable amount of time on your design; it would be a shame to rush through your presentation boards. Give each part of the process enough attention so that your final product really showcases and highlights your talent and hard work.
Time management is critical when working on a big project like this. It can seem overwhelming at first, so split the project into smaller sub-tasks to make it more manageable. Give yourself a deadline for each of those smaller tasks. Make a schedule that shows which tasks you will accomplish each day. Make sure you leave yourself a little wiggle room in case anything unexpected comes up.
What should be included in an architecture presentation board?
Unless you receive explicit instructions regarding what to include in your presentation boards, it is up to you which elements make the cut. When you are deciding what elements to incorporate into your project, reflect on what will best explain your design.
When someone completely unfamiliar with your project is looking at your boards, what do you want them to see?
When deciding what text to include in your project, make sure you include an introduction, your design brief, and any applicable precedents. In addition, you will want to include concise textual explanations as needed throughout your presentation.
For your graphic representations, you want to include the basics: elevations, floor plans, and sections. You can represent these with 3d drawings, perspectives, or renders. You may also include some key features of your design that make it unique, and in addition to highlighting the finished product, select elements that show your concept and design development.
Some additional tips:
- When choosing a perspective view, select one that highlights the best aspects of your design. This graphic is usually the most prominent picture on the presentation board. The hero image!
- You will want to include at least two different elevation views so your viewers can get a sense of the bigger picture.
- Don’t be afraid to include sketches. If you include some sketches that show the progression from a simple idea to the final product, you can communicate your vision as well as your process.
When you are adding all of these elements to your presentation board, make sure each graphic representation of the plan has the same orientation. If one picture has north pointed in one direction and another picture has north pointed in a different direction, it can be disorienting for the viewer.
Likewise, each graphic should use the same scale unless there is one picture that is bigger than the others for the purpose of visual hierarchy.
There is one obvious detail that you may inadvertently overlook. Make sure your name is on your presentation board. If you have more than one board, put your name on each one. The name is in the bottom right-hand corner, but it can also appear in the title bar.

Types of Architectural Presentation Boards
Organizing your architectural presentation sheets into specific categories can be a very effective way to present your projects. There are several types of architectural presentation boards, and the following tips can help you present your project at different stages:
C onceptual board
Concept sheets are a type of presentation board that showcase your initial ideas and approach to a project. They typically include information about the concept behind the project and how design decisions were made. It is important to submit concept sheets before presenting your architectural drawings and renderings.
When creating concept sheets, you may want to include conceptual collages and diagrams to help explain your ideas to the audience. These can be created using 3D modeling software or programs like Adobe Photoshop or Illustrator. The goal of concept sheets is to clearly and simply present the various stages of your project to the review panel.
Site a nalysis board
Before beginning a project, architects perform thorough analyses to determine the needs, conditions, and limitations of the site. This analysis serves as the foundation for the concept development. Site analysis boards may include site analysis, urban scale analysis, sociocultural analysis, analysis of physical conditions, and environmental analysis.
It is important to conduct extensive research and present your findings in a clear and organized way, as analysis boards can help reinforce the concepts presented in your architectural drawings.
It is also important to keep in mind that the jury members may have difficulty understanding analysis presented alongside the architectural drawings.
Technical / Detail Board
Technical drawings are a crucial aspect of architectural projects, as they help to depict the structural elements of a design and guide the construction process. It is important to present technical drawings in a clear and organized manner, particularly in application projects and student projects.
Technical drawing boards should typically include a master plan at a scale of 1/5000 or 1/1000, as well as site plans and floor plans at a scale of 1/500, and sections and elevations at a scale of 1/200. Detail drawings, including system sections and details at scales of 1/20, 1/10, and 1/5, should also be included on the technical drawing boards.
These drawings will help to provide a more complete understanding of the project to the review panel.

Professional Boards
While student projects and competition entries are evaluated by a panel of judges, in professional practice, the client serves as the “jury” for your work. Instead of preparing presentation boards in the same way you would for school or competition projects, it is important to create presentations that will appeal to clients.
The most important factor for most clients is the design of the living space, so it can be helpful to focus on renderings and plain plans rather than technical drawings. The visual appeal of your presentation boards, including the color scheme and atmosphere in the renderings, as well as your ability to effectively present and explain your ideas to the client, will also be important factors in their evaluation of your work.
Programs, Software, and Tools
There are several software applications you can use to build your presentation board. Choose one that you are already familiar with, so you aren’t trying to learn new software while you are doing your layout. That is an added stressor that you just don’t need!
InDesign, Illustrator, and Photoshop are excellent programs, but if you need something a bit more simple, Microsoft Word, Pages, Powerpoint, or Keynote will also work.
InDesign was designed for making presentations. AutoCAD was designed for constructing plans. Photoshop was designed for editing raster images. Illustrator was designed for creating vector art. While some people are able to make their whole presentation using Illustrator, Photoshop, or even PowerPoint, it makes more sense to use each piece of software in a way that takes advantage of its strengths.
You can import files from AutoCAD, Photoshop, and Illustrator into InDesign and take advantage of the strengths of each application.
Before you delve into your own presentation board, do some research. Look online for examples and make a note of the elements you like. Combine that inspiration with your creativity to produce a stunning presentation.
Here are some websites you can use for inspiration:
The President’s Medals Winners
Pinterest – Architectural Presentation Boards
World Architecture Students Community – Presentation Boards
FAQ’s about architecture presentation boards
How do you present an architecture presentation.
Here are some general guidelines for presenting an architecture presentation:
- Define your objective : Clearly define the purpose of your presentation and the main ideas or arguments you want to convey.
- Organize your material : Gather and organize your material in a logical and coherent manner that supports your objectives. This may include drawings, images, models, diagrams, and text.
- Create a clear and visually appealing layout : Use a layout that is easy to follow and that effectively presents your material. Consider using contrast, hierarchy, and balance to guide the viewer’s eye.
- Practice your presentation : Practice your presentation to ensure that you are comfortable with your material and can deliver it in a clear and confident manner.
- Use visual aids effectively : Use visual aids such as slides, drawings, and models to supplement your presentation and help illustrate your points. Avoid overloading the viewer with too much information and focus on presenting the most important ideas.
- Engage your audience : Engage your audience by using a variety of presentation techniques, such as asking questions, using storytelling, and using interactive elements.
- Conclude with a summary : Recap the main points of your presentation and conclude with a clear and concise summary.
Why do architects use presentation boards?
As explained above, architecture presentation boards are commonly used by architects and designers to visually communicate their ideas and designs.
Presentation boards typically consist of a series of large format panels that can be mounted on a wall or a stand. These panels can be used to display a variety of materials, such as drawings, images, models, diagrams, and text.
Presentation boards are an effective way to present a comprehensive overview of a project or design concept, and they can be used to showcase the key features and characteristics of a project.
They are often used in design reviews, presentations, exhibitions, and competitions , and can be a useful tool for architects and designers to communicate their ideas to a variety of audiences, including clients, stakeholders, and reviewers.
Presentation boards can be customized to suit the specific needs of the project and can be designed to effectively convey the key ideas and concepts of the design, enabling architects and designers to effectively present and showcase their work in a clear and visually appealing manner.
To Sum Up…
Even the most exceptional design concept can appear uninspired if you do not present it well.
You have spent weeks, maybe even months, on your design. Don’t sell yourself short by not communicating your vision well. The professional, creative, and aesthetic quality of your presentation will affect how your work is received.

Every design project begins with site analysis … start it with confidence for free!.
Leave a Reply Cancel reply
You must be logged in to post a comment.
As seen on:

Unlock access to all our new and current products for life .
Providing a general introduction and overview into the subject, and life as a student and professional.
Study aid for both students and young architects, offering tutorials, tips, guides and resources.
Information and resources addressing the professional architectural environment and industry.
- Concept Design Skills
- Portfolio Creation
- Meet The Team
Where can we send the Checklist?
By entering your email address, you agree to receive emails from archisoup. We’ll respect your privacy, and you can unsubscribe anytime.
We use cookies to ensure you have the best experience, improve functionality and performance, personalize ads, and analyze traffic. By clicking ‘Allow,’ you agree to our use of cookies. To change your preferences, please click ‘Cookie Settings.’ For more information, visit our Cookie Policy.
Customer Reviews
Free research poster powerpoint templates.

About our free research poster templates
Easy to use and customize.
▪ Change colors with one click ▪ Most standard US and international poster sizes. ▪ Support for all PowerPoint versions ▪ Only basic PowerPoint skills required ▪ Fully customizable ▪ Instructions included with the poster templates. ▪ Online video tutorials ▪ Configured to print professionally ▪ Additional layouts included in each template
40 color schemes built-in to every research poster template
Five reasons to print your poster with us >, professionally designed research poster templates.
QUICK FIND POSTER TEMPLATES American standard poster sizes (inches) 30x40 | 36x48 | 36x56 | 36x60 | 36x72 | 36x96 | 42x60 | 42x72 | 42x90 | 44x44 | 48x48 | 48x72 | 48x96 | Trifold | Virtual International common poster sizes (centimeters) 91x122 | 70x100 | 100x140 | 100x100 | 100x200 | A0 | A1 | Virtual IMPORTANT Check the requirements of your conference before you download and work on a poster template. If you need further assistance, our phone support is available and free. We are here to provide the best service you can ask for.
Step-by-Step Tutorials
This series of short videos and animated tutorials will walk you through the research poster-making process, answering the most common questions along the way.
Need further poster template assistance? 510.649.3001
Free powerpoint poster templates for research poster presentations.

Poster template design: Aragon Standard poster sizes in inches (Height x Width) - Click on a size to download 36x48 | 36x56 | 36x60 | 36x72 | 36x96 | 42x60 | 42x72 | 42x90 | 44x44 | 30x40 | 48x48 | 48x72 | 48x96 | Trifold | Virtual - Standard Screen (4:3 Ratio) | Virtual - Wide Screen (16:9 Ratio) Standard poster sizes in centimeters (Height x Width) - Click on a size to download 122x91 | 100x70 | 140x100 | 100x100 | 200x100 | A0 | A1 ► View Samples ► Learn how to customize the template colors

Poster template design: Beaumont Standard poster sizes in inches (Height x Width) - Click on a size to download 36x48 | 36x56 | 36x60 | 36x72 | 36x96 | 42x60 | 42x72 | 42x90 | 44x44 | 30x40 | 48x48 | 48x72 | 48x96 | Trifold | Virtual - Standard Screen (4:3 Ratio) | Virtual - Wide Screen (16:9 Ratio) Standard poster sizes in centimeters (Height x Width) - Click on a size to download 122x91 | 100x70 | 140x100 | 100x100 | 200x100 | A0 | A1 ► View Samples ► Learn how to customize the template colors

Poster template design: Newfield Standard poster sizes in inches (Height x Width) - Click on a size to download 36x48 | 36x56 | 36x60 | 36x72 | 36x96 | 42x60 | 42x72 | 42x90 | 44x44 | 30x40 | 48x48 | 48x72 | 48x96 | Trifold | Virtual - Standard Screen (4:3 Ratio) | Virtual - Wide Screen (16:9 Ratio) Standard poster sizes in centimeters (Height x Width) - Click on a size to download 122x91 | 100x70 | 140x100 | 100x100 | 200x100 | A0 | A1 ► View Samples ► Learn how to customize the template colors
Poster template design: Winchester Standard poster sizes in inches (Height x Width) - Click on a size to download 36x48 | 36x56 | 36x60 | 36x72 | 36x96 | 42x60 | 42x72 | 42x90 | 44x44 | 30x40 | 48x48 | 48x72 | 48x96 | Trifold | Virtual - Standard Screen (4:3 Ratio) | Virtual - Wide Screen (16:9 Ratio) Standard poster sizes in centimeters (Height x Width) - Click on a size to download 122x91 | 100x70 | 140x100 | 100x100 | 200x100 | A0 | A1 ► View Samples ► Learn how to customize the template colors

Poster template design: Lockwood Standard poster sizes in inches (Height x Width) - Click on a size to download 36x48 | 36x56 | 36x60 | 36x72 | 36x96 | 42x60 | 42x72 | 42x90 | 44x44 | 30x40 | 48x48 | 48x72 | 48x96 | Trifold | Virtual - Standard Screen (4:3 Ratio) | Virtual - Wide Screen (16:9 Ratio) Standard poster sizes in centimeters (Height x Width) - Click on a size to download 122x91 | 100x70 | 140x100 | 100x100 | 200x100 | A0 | A1 ► View Samples ► Learn how to customize the template colors
Poster template design: Kensington Standard poster sizes in inches (Height x Width) - Click on a size to download 36x48 | 36x56 | 36x60 | 36x72 | 36x96 | 42x60 | 42x72 | 42x90 | 44x44 | 30x40 | 48x48 | 48x72 | 48x96 | Trifold | Virtual - Standard Screen (4:3 Ratio) | Virtual - Wide Screen (16:9 Ratio) Standard poster sizes in centimeters (Height x Width) - Click on a size to download 122x91 | 100x70 | 140x100 | 100x100 | 200x100 | A0 | A1 ► View Samples ► Learn how to customize the template colors

Poster template design: Stone A new, simplified concept for better poster design Standard poster sizes in inches (Height x Width) - Click on a size to download 36x48 | 36x56 | Trifold | Virtual - Standard Screen (4:3 Ratio) | Virtual - Wide Screen (16:9 Ratio) Standard poster sizes in centimeters (Height x Width) - Click on a size to download A0 ► View Samples ► Learn how to customize the template colors

Poster template design: Marquee Standard poster sizes in inches (Height x Width) - Click on a size to download 36x48 | 36x56 | 36x60 | 36x72 | 36x96 | 42x60 | 42x72 | 42x90 | 44x44 | 30x40 | 48x48 | 48x72 | 48x96 | Trifold | Virtual - Standard Screen (4:3 Ratio) | Virtual - Wide Screen (16:9 Ratio) Standard poster sizes in centimeters (Height x Width) - Click on a size to download 122x91 | 100x70 | 140x100 | 100x100 | 200x100 | A0 | A1 ► View Samples ► Learn how to customize the template colors
Poster template design: Winston Standard poster sizes in inches (Height x Width) - Click on a size to download 36x48 | 36x56 | Trifold | Virtual - Standard Screen (4:3 Ratio) | Virtual - Wide Screen (16:9 Ratio) Standard poster sizes in centimeters (Height x Width) - Click on a size to download A0 ► View Samples ► Learn how to customize the template colors

Poster template design: Chamberlain Standard poster sizes in inches (Height x Width) - Click on a size to download 36x48 | 36x56 | 36x60 | 36x72 | 36x96 | 42x60 | 42x72 | 42x90 | 44x44 | 30x40 | 48x48 | 48x72 | 48x96 | Trifold | Virtual - Standard Screen (4:3 Ratio) | Virtual - Wide Screen (16:9 Ratio) Standard poster sizes in centimeters (Height x Width) - Click on a size to download 122x91 | 100x70 | 140x100 | 100x100 | 200x100 | A0 | A1 ► View Samples ► Learn how to customize the template colors

Poster template design: Forrest Standard poster sizes in inches (Height x Width) - Click on a size to download 36x48 | 36x56 | 36x60 | 36x72 | 36x96 | 42x60 | 42x72 | 42x90 | 44x44 | 30x40 | 48x48 | 48x72 | 48x96 | Trifold | Virtual - Standard Screen (4:3 Ratio) | Virtual - Wide Screen (16:9 Ratio) Standard poster sizes in centimeters (Height x Width) - Click on a size to download 122x91 | 100x70 | 140x100 | 100x100 | 200x100 | A0 | A1 ► View Samples ► Learn how to customize the template colors

PAPERLESS POSTER PRESENTATION HANDOUTS
Free with a printed poster order.
A feature-packed alternative to traditional paper poster handouts

Instant QR Code Generator
Add functionality to your poster! Share a link to a page, your email or additional info on the web. It's easy, free and further connects your audience!

Professional Trifold Poster Boards
Ready to use out of the box. Great solution for tabletop 36x48 Trifold poster presentations. Price includes printing, mounting and free Ground FedEx shipping.

Poster Font Size Checker
A convenient way to visualize what size the text will be on your printed poster. Wondering how big the fonts will be on your poster? Download and print this PDF on your desktop printer.

Quick access to ALT code symbols
Click here to choose from over 350 easy to copy and use ALT code symbols.

Fabric Research Posters
Say goodbye to poster tubes with a professional fabric poster you can pack in your luggage! With our crease-resistant EasyTravel™ fabric your presentation will look professional, sharp, and will pack nicely in your carry-on.

Simplify Your Group’s Poster-Ordering Process
Join our free service designed to help you coordinate your group’s poster orders, get discounted rates and customized special features not normally available for standard orders.
Links to university corporate identity (Logo) pages
List of corporate identity pages where you can download university logos to use with your poster presentation. Help your fellow researchers. Good quality logos for use in printed research posters are difficult to find online. If you have a link to the identity page of your university, email it to us and we will add it to our list for others to use.
UC Berkeley Texas A&M UCLA Columbia Medical Center Stanford University
Adelphi University Duke University UPENN Bradley University ENMU
UNC Chapel Hill Northwestern University Magnet recognition Seal Howard University University of Houston
Drexel University Carlow University UNLV UNR UFL
TUFTS George Mason U. St. Scholastica College Mount Royal University Penn State
Yale University University of Wisconsin SD School of Mines USC GATECH
STARTER POWERPOINT POSTER TEMPLATES
Standard size research poster templates in inches use these starter poster templates as a starting point for your own poster designs, thumbnails of posters are shown in proportion to each others’ sizes based on a 48 inch (height) x 96 inch (width) display area, 36” tall x 48” wide .
STARTER 36x48 POWERPOINT POSTER TEMPLATE The 36x48 scientific poster template size is one of the smaller sizes and also one of the most common. It is very suitable for scientific posters with low to moderate amount of text and graphics. The 36x48 research poster template can also be printed at the following sizes without distortion or any necessary adjustments: 36x48 (Standard), 42x56, 48x64, 30x40
Trifold (tabletop)
STARTER TRIFOLD POWERPOINT POSTER TEMPLATE These free PowerPoint poster templates are designed for a standard 3x4 foot poster presentation to be mounted on a standard Trifold poster board. This research poster template should be printed only at the following size: 36x48 (Standard Trifold) This poster template is for a standard Trifold board presentation. You can use it with poster boards available at office-supply stores or our professional ready-to-use Trifold poster presentation product. Are you looking for a larger MonsterBoard template? Use this PowerPoint MonsterBoard template.
36” Tall x 56” Wide
STARTER 36x56 POWERPOINT POSTER TEMPLATE This free PowerPoint poster template is designed for a standard 3x4.5 foot poster presentation. This PowerPoint research poster template is for a medium size poster. It is suitable for most poster presentations. It can accommodate moderate to large amounts of content. This scientific poster template can be printed at the following sizes: 36x56 (Standard), 42x65.3, 48x74.6
36” Tall x 60” Wide
STARTER 36x60 POWERPOINT POSTER TEMPLATE This free PowerPoint poster template is designed for a standard 3x5 foot poster presentation. This is also one of the standard sizes. It is used mostly when the height of the presentation board is only three feet and there is more content to present that can fit in a 48x36 poster. This scientific poster template can be printed at the following sizes: 36x60 (Standard), 42x70, 48x80
36” Tall x 72” Wide
STARTER 36x72 POWERPOINT POSTER TEMPLATE This free PowerPoint poster template is designed for a standard 3x6 foot poster presentation. The same as the above scientific poster template, only wider by a foot. Again, it depends on how much content you need to present. This scientific poster template can be printed at the following sizes: 36x72 (Standard), 42x84, 48x96
36” Tall x 96” Wide
STARTER 36x96 POWERPOINT POSTER TEMPLATE This free PowerPoint poster template is designed for a standard 3x8 foot poster presentation. It’s the widest one you can use on a three foot tall presentation board. It has five columns. This scientific poster template can be printed at the following sizes: 96x36 (Standard), 24x64
42” Tall x 60” Wide
STARTER 42x60 POWERPOINT POSTER TEMPLATE This free PowerPoint poster template is designed for a standard 3.5x5 foot poster presentation. This PowerPoint research poster template is suitable for most poster presentations. It can accommodate moderate to large amounts of content. This scientific poster template can be printed at the following sizes: 42x60 (Standard), 36x51.42, 48x68.57
42” Tall x 72” Wide
STARTER 42x72 POWERPOINT POSTER TEMPLATE This free PowerPoint poster template is designed for a standard 3.5x6 foot poster presentation. This PowerPoint research poster template is for a medium size poster. It is suitable for most poster presentations. It can accommodate moderate to large amounts of content. This scientific poster template can be printed at the following sizes: 42x72 (Standard), 36x61.70, 48x82.28
42” Tall x 90” Wide
STARTER 42x90 POWERPOINT POSTER TEMPLATE This free PowerPoint poster template is designed for a standard 3.5x7.5 foot poster presentation. This PowerPoint research poster template is for a large size poster. It is suitable for most poster presentations. It can accommodate moderate to large amounts of content. This scientific poster template can be printed at the following sizes: 42x90 (Standard), 36x77.14, 44x94.28
44” Tall x 44” Wide
STARTER 44x44 POWERPOINT POSTER TEMPLATE This free PowerPoint poster template is designed for a standard 3.7 x 3.7 foot poster presentation. This PowerPoint research poster template is for a medium size poster. It is suitable for many poster presentations. It can accommodate moderate amounts of content. This scientific poster template can be printed at the following sizes: 44x44 (Standard), 36x36, 42x42, 48x48
48” Tall x 72” Wide
STARTER 48x72 POWERPOINT POSTER TEMPLATE This free PowerPoint poster template is designed for a standard 4x6 foot poster presentation. This PowerPoint research poster template is for a medium/large size poster. It is suitable for most poster presentations. It can accommodate moderate to large amounts of content. This scientific poster template can be printed at the following sizes: 48x72 (Standard), 24x36, 42x63
48” Tall x 48” Wide
STARTER 48x72 POWERPOINT POSTER TEMPLATE This free PowerPoint poster template is designed for a standard 4x4 foot poster presentation. This scientific poster template is a good size for limited available spaces without compromising room for content. This research poster template can be printed at the following sizes: 48x48 (Standard), 36x36, 24x24, 42x42
48” Tall x 96” Wide
STARTER 48x96 POWERPOINT POSTER TEMPLATE This free PowerPoint poster template is designed for a standard 4x8 foot poster presentation. This poster template is for the largest size poster usually allowed in conferences. It can accommodate a lot of content. You can use this template if you also have a large number of photos, tables, charts, and text. This scientific poster template can be printed at the following sizes: 48x96 (Standard), 24x48, 42x84, 36x72
40” Tall x 30” Wide
STARTER 40x30 POWERPOINT POSTER TEMPLATE This free PowerPoint poster template is designed for a standard 40x30 inch poster presentation. This vertical poster template can accommodate a moderate amount of content. It can accommodate several photos, tables, charts, and a decent amount of text. This scientific poster template can be printed at the following sizes: 40x30 (Standard), 48x36, 56x42
Free PowerPoint poster templates in metric sizes (cm) for international poster conferences
Thumbnails of posters are shown in proportion to each others’ sizes based on a 200 cm (height) x 100 cm (width) display area, 91 wide x 122 tall.
STARTER 91cmX122cm POWERPOINT POSTER TEMPLATE This free PowerPoint poster template is designed for a standard metric 91 cm by 122 cm scientific poster presentation for international poster sessions. This PowerPoint poster template is essentially a vertical version of a standard 48x36 inch poster presentation. This scientific poster template can be printed at the following sizes: 91 cm x122 cm (Standard 36x48 inches), 76x102 cm
70 Wide x 100 Tall
STARTER 70cmX100cm POWERPOINT POSTER TEMPLATE This free PowerPoint poster template is designed for a standard metric 70 cm by 100 cm scientific poster presentation for international poster sessions. This PowerPoint poster template is for a small size poster poster presentation commonly used at international conferences. This scientific poster template can be printed at the following sizes: 70 cm x100 cm (Standard 27.5x39.37 inches), 100x143 cm
100 Wide x 140 Tall
STARTER 100cmX140cm POWERPOINT POSTER TEMPLATE This free PowerPoint poster template is designed for a standard metric 100 cm by 140 cm scientific poster presentation for international poster sessions. This PowerPoint poster template is for a small size poster poster presentation commonly used at international conferences. This scientific poster template can be printed at the following sizes: 100 cm x140 cm (Standard 39.37x55.12 inches)
1 Meter x 1 Meter
STARTER 100cmX100cm POWERPOINT POSTER TEMPLATE This free PowerPoint poster template is designed for a standard metric 1 meter by 1 meter scientific poster presentation for international or domestic poster sessions. This template is commonly required at the Keystone Symposia research poster conferences. This scientific poster template can be printed at the following size: 100 cm x 100 cm (Standard 39 x 39 inches). Any square size up to 121 x 121 cm
100 Wide x 200 Tall
STARTER 100cmX200cm POWERPOINT POSTER TEMPLATE This free PowerPoint poster template is designed for a standard metric 1 meter by 2 meter scientific poster presentation for international or domestic poster sessions. This scientific poster template can be printed at the following size: 100 cm x 200 cm (Standard 39 x 78 inches)
STARTER A0 POWERPOINT POSTER TEMPLATE This free PowerPoint poster template is designed for a standard metric A0 scientific poster presentation at a 841mm x 1189mm size for international or domestic poster sessions. This scientific poster template can be printed at the following size: 46.81 inches x 33.11 inches
STARTER A1 POWERPOINT POSTER TEMPLATE This free PowerPoint poster template is designed for a standard metric A1 scientific poster presentation at a 594mm x 841mm poster size for international or domestic poster sessions. This scientific poster template can be printed at the following size: 23.39 inches x 33.11 inches
VIRTUAL POSTER PRESENTATION
STARTER POSTER TEMPLATES These free PowerPoint poster templates are designed for screen presentations at virtual meetings Virtual - Standard Screen (4:3 Ratio) Virtual - Wide Screen (16:9 Ratio)

Virtual poster sessions for conferences and meetings of all sizes
If you are a meeting organizer we can help you set up a virtual poster session, free yourself from managing poster submissions and provide your meeting's attendees with a versatile presentation platform that will meet all your requirements.
Five good reasons to print your poster with PosterPresentations.com
Amazingly fast printing: Experience amazingly fast printing with us! If you place your poster order between Monday and Friday before 3pm Eastern time (noon Pacific time), we'll ship it out the same day. You can expect your delivery within one, two, or three business days. Plus, if you give us an additional two business days, we'll provide free shipping! Top-Quality Materials: We take pride in using the finest materials available in the industry. Our prints are produced on high-quality photographic papers, vinyls, and exquisite fabrics. In fact, we were the pioneers of fabric printing for research posters in the USA back in 2008. Reliable Customer Support: Rest assured that we don't simply print whatever you send us. We ensure that your files are optimized for the best possible printing results. If we notice any issues, we'll promptly inform you. Your presentation matters as much to us as it does to you. Competitive Pricing with No Surprises: As a professional, you'll find our prices to be competitive, and we never add unexpected last-minute fees. Furthermore, expedited printing is always included at no extra cost. For students, our prices are among the lowest nationwide. Group Discounts Available: Place a group order with us and not only will you enjoy free shipping, but also discounts that can beat most of our competitors. Feel free to reach out to us at 510.649.3001 for more information.
PosterPresentations.com 2117 Fourth Street STE C Berkeley California 94710 USA
Copyright © 2024
Poster Printing
Research paper posters
Fabric posters
Trifold poster boards
Rollup banners
Dry-erase whiteboards
PowerPoint poster templates
Poster-making tutorials
Google Slides support
Terms and Privacy
Poster design services
New Services
Virtual poster meetings
- Paperless poster handouts
- Photo Editor
- Poster Maker
Easily create posters with the free poster maker online
Tap into Picsart’s online poster maker to easily create a poster for all types of events. Thanks to a straightforward user interface and a library of ready-to-go templates, everyone can create eye-catching poster designs without needing design skills or experience.

Poster design templates
Speed up your design process with a library of expert-crafted poster templates .

Unique fonts and images
Picsart’s poster maker offers a large selection of trendy fonts and images to customize your posters.

Printer-friendly
Create posters that look just as good in print as on your screen.
How to make a poster
Open poster maker.
Use the button below to open the Picsart editor and get started.
Browse poster templates
Design fast with an intuitive poster creator.
Quickly get your poster design process up and running with Picsart’s intuitive online design tools. Find everything you need to design posters in one convenient interface. If you’re in a rush, tap into the poster creator’s templates library to jumpstart your creative process and get inspiration or design one from scratch.

Promote events, products, ideas, and more
Regardless of whether you are designing a poster for a concert, an ad, or an exhibit, you can easily rely on Picsart for all your poster needs. Thanks to a diverse range of templates, stickers, and fonts, you can find usable options for even the most niche use cases.

Design posters for any occasion

Create poster designs from scratch
Take matters into your own hands and create poster designs from scratch with Picsart’s intuitive online editor. Find all you need in one convenient place with the built-in library for backgrounds , stickers, photos , text styles, and so much more. Upload your own custom fonts to use in your posters and align with your brand guidelines.

Discover free poster templates
It’s easy to create art with graphic design templates. Choose from stunning templates made by professional designers and edit them with just a few clicks.

Access a diverse array of poster editing tools
Customize templates to create truly unique poster designs quickly. Adjust anything from the layout of the template to the font, graphic elements, and more. Use the built-in photo editor to add text to posters in a variety of fonts, enhance the photo quality of your poster visuals, and even generate images and stickers from scratch with AI.

Design high-resolution and printer-friendly posters
Create posters that will look just as good in print as on any display with Picsart, regardless of the canvas size. Use built-in tools like image upscale to make your low-res photos look good, even on the largest poster sizes. Design, download, and print posters with ease for all occasions with Picsart

More tools to love from Picsart

AI logo generator
Create a memorable brand identity with AI and minimal effort.

AI sticker generator
Generate custom stickers with AI to use across digital and print materials.

AI GIF generator
Effortlessly generate custom GIF visuals from scratch.

Photo to cartoon
Get your own cartoon character adaptation in a second with this effect.

Effortlessly DIY cards for any occasion with Picsart.

Add text to image
Complement your images with a vast library of free fonts.

Effortlessly create logos without needing a design degree.

Sticker maker
Turn your photos into custom stickers with ease.
Poster Maker FAQ
What is the size of a poster.
Posters can be all shapes and sizes, depending on the need. Wall posters are commonly 24x36 inches, while 11x18 is a popular size for announcement posters and flyers. The size is ultimately up to you and your end goals.
How can I make a poster stand out?
Consider using a Picsart template to find inspiring themes that you can customize with graphics and design elements. Add or remove stickers or custom colors. Refresh the fonts or images. Go beyond the traditional to create something that truly grabs attention.
What is the best font for posters?
That’s also up to you. Posters announcing formal events or organization meetings often work best with more traditional fonts like Arial or Calibri, while a club meeting or decorative poster might be enhanced with something eye-catching or playful, like ComicSans.
What to include on a poster?
For decorative purposes, that’s entirely down to the aesthetic you’re aiming for. If it’s for an announcement or informative purposes, you’ll want to include text with relevant details, meeting times, and contact information as needed.
Are there free poster templates on Picsart?
Yes. You can browse tons of different free poster creation templates to find a great starting point for whatever you have in mind.


The Canva Windows app lets you enjoy all the features you love in a dedicated program. Launch Canva instantly from your desktop. Dive into deep work without the tab overload. WORK SMARTER WITH THE VISUAL SUITE A complete suite of tools for our visual world - Craft professional content with 250,000+ free templates. - Design visual Docs with videos, charts, or linked Canva designs. - Capture your team’s best ideas with Whiteboards. - Present with confidence. Wow your audience with visual slides. - Design, schedule, and track your social posts in one place. - Print anything from t-shirts to mugs, posters, and packaging. - Turn your designs into a website. Save on domain costs. - Collaborate in real time with your team, from anywhere. - Connect your favorite work apps for a seamless workflow. PHOTO & VIDEO EDITING MADE SIMPLE Fresh content at your fingertips - Edit photos instantly. Auto enhance, focus, or blur to add depth. - Personalize with ease. Filter photos, add text, and adjust image lighting. - Need to remove photo clutter? Add, replace, or modify details with AI tools. - Restore photos or customize emojis. Discover new possibilities with Canva apps. - Play with video editing. Crop, split, or speed up videos. - Finish with the perfect audio track. Sync to the beat in a snap. MEET MAGIC STUDIO All the power of AI. All in one place. - Find the right words, fast, with Magic Write. - Create custom presentations and posts in seconds with Magic Design. - Turn ideas into images and videos with Magic Media. - Swap design formats, languages, or dimensions with Magic Switch. - Extend an image in any direction with Magic Expand. - Instantly add transitions to your design with Magic Animate. CANVA PRO GIVES YOU MORE MAGIC Unlock premium templates, powerful tools, and AI-powered magic. - Unlimited access to 100+ million premium templates and content. - Full access to 20+ AI-powered tools with Magic Studio. - Set up, manage, and grow your brand with Brand Kit. - Resize designs without limits with Magic Switch. - Remove image and video backgrounds in a click. - Turn slides and brainstorms into a doc with Magic Switch. - Schedule social media posts to 8 platforms with Content Planner. - Working with a team? Collaborate faster with Canva for Teams. Canva Pro - $14.99/month or $119.99/year Canva for Teams - $29.99/month or $300/year for the first 5 team members Prices in USD. Localized pricing applies. Subscription auto-renews unless turned off at least 24 hours before the renewal date. Any unused portion of a trial period, if offered, will be forfeited when you purchase a paid subscription. https://about.canva.com/terms-of-use https://about.canva.com/privacy-policy
Https://about.canva.com/terms-of-use https://about.canva.com/privacy-policy https://www.canva.com/policies/license-agreements.
IMAGES
VIDEO
COMMENTS
Step 3: Write the content. Write or rewrite the content for the sections in your poster presentation. Use the text in your research paper as a base, but summarize it to be more succinct in what you share. Don't forget to write a catchy title that presents the problem and your findings in a clear way.
The very best academic poster presentations summarize information concisely and attractively. They successfully publicize research findings and generate discussion using a mixture of text, tables, graphs and images. ... 94% of delegates agreed that poster imagery (rather than content) is most likely to draw a viewer's attention.
Design studio 12caracteres—founded by Samuel Aznar and Miguel Frago—specializes in creating highly impactful graphic solutions, rooted in a strong concept. The poster format is what has set them apart from the rest, combining design with emotional impact for clients such as TED, Oxfam Intermón, Ambar, Do Carñena, and Warner Music.
13. Glacier Bay Alaska. Russ Gray. This is a travel poster that Russ Gray made after his great trip to Alaska. Glacier Bay is the national park in Alaska, and Zaandam was the name of the ship he cruised on. The colors definitely scream Alaska, and "Braggadocio" typeface just falls in perfectly with the design.
Follow this poster making tutorial in order or jump ahead to a section of your interest. Step #1: Identify the Purpose of Your Poster. Step #2: Choose a Poster Template. Step #3: Add in Your Text Content. Step #4: Add Photos and Graphics. Step #5: Customize Colors and Fonts.
Arrange the 4 P's of your strategy: your product, price, promotion and place. Choose a design that will mark your audience and look good in your selected place. Make your campaign details the focus of the poster. Add high-quality images of your product or service. Include a relevant call to action.
1. Use at least 16 pt font in your poster to make it easy to read. If the font on your presentation poster is too small, it will discourage prospective viewers from reading it. Highlight all of your body text and select the 16 pt font option. [8] If you have enough room, increase the font size to 20 pt or 24 pt.
This dreamy template can be customized to work as an event poster for virtually any type of gathering, with its ethereal colors and shapes and simple but effective font combinations. 4. Store-wide Sale Poster. This trendy poster cleverly uses shapes of all kinds, plus visually pleasing color overlay in calming colors.
Canva's free poster maker has thousands of templates designed by our team of professional designers. Templates are your shortcut to great design: You'll have a custom poster in minutes. We've got poster templates for every need—from concerts to retail, conferences and quotes. Or design from scratch to create something entirely unique.
Medium poster: 18" x 24". Large posters: 24" x 36" or 27" x 39". Once you've decided on your poster size, set the dimensions in PowerPoint. To do this, open PowerPoint and navigate to the "Design" tab. In the "Customize" group, select "Slide Size." Select "Custom Slide Size" from the dropdown menu.
Before we start, here are some poster design tips you need to be aware of: Use a color overlay for a more understated poster. Keep consistent margin widths. Incorporate your product directly into your creative poster ideas. Use directional cues like icons and illustrations to direct the eye to important information.
Go to the top bar, select Insert > Text Box (image 1). Place the text box on the right place in the poster (image 2). Write or copy and paste your own text in it. Go to the lightgrey top bar (with font and font size, etc. in it). From the font dropdown box, select the font of your liking (image 3).
Practice a 1- to 2-minute pitch until you feel comfortable. The poster and your pitch must be aimed at the audience that will be present. The clearer and more rational your poster layout, the easier it will then be for you to make a strong pitch. —Srinivas.
Prepare a four- to five-minute overview of the project, where you walk these pre-viewers through the poster, drawing their attention to the most critical points and filling in interesting details as needed. Make note of the kinds of questions these pre-viewers have, and be ready to answer those questions.
Research posters summarize information or research concisely and attractively to help publicize it and generate discussion. The poster is usually a mixture of a brief text mixed with tables, graphs, pictures, and other presentation formats. At a conference, the researcher stands by the poster display while other participants can come and view ...
poster. If you have a color vision deficiency, have someone check your poster. In general, avoid heavy use of reds and greens. Use symbols and line patterns (e.g., dashed or dotted) instead of colors for graph elements. Logistics . 12. Methods for poster creation a. Single sheet: Single sheet printing produces one large print.
Choose from whiteboards, posters, presentations, and more. Open a pre-made template that fits your needs, or start with a blank slate. Begin drawing and customizing your template with Draw on the side panel. With our free drawing tool, you can adjust your pen's color, thickness, and style to make your design your own.
Easily edit any of these templates with Microsoft PowerPoint, Microsoft Word, or another Microsoft 365 app, depending on the template you choose. Change up the text, font, colors, images, and other design elements, then download and print it yourself or send it to a print service. Even use these poster templates to create social media posts for ...
Download the Anatomy Poster for High School presentation for PowerPoint or Google Slides. High school students are approaching adulthood, and therefore, this template's design reflects the mature nature of their education. Customize the well-defined sections, integrate multimedia and interactive elements and allow space for research or group ...
Architecture presentation boards are a tool to showcase your work. They are a way to draw your viewers into your design process and methods, providing an overall summary and vision for the project. You are communicating your design and showcasing your artistic skills, and your sense as a designer. Every successful project has a central concept ...
This free PowerPoint poster template is designed for a standard 4x4 foot poster presentation. This scientific poster template is a good size for limited available spaces without compromising room for content. This research poster template can be printed at the following sizes: 48x48 (Standard), 36x36, 24x24, 42x42.
Take matters into your own hands and create poster designs from scratch with Picsart's intuitive online editor. Find all you need in one convenient place with the built-in library for backgrounds, stickers, photos, text styles, and so much more. Upload your own custom fonts to use in your posters and align with your brand guidelines.
Poster by Leonora. Blue Green Illustrative Presentation Skills Infographic Poster. Poster by venicedesigns. Brown Aesthetic Congratulations Poster (Portrait) Poster by Magic Power. Blue Watercolor Dream Big Inspirational Poster. Poster by Tanya LeClair - So Swell Studio. Black Closed Sign Landscape Poster.
The Canva Windows app lets you enjoy all the features you love in a dedicated program. Launch Canva instantly from your desktop. Dive into deep work without the tab overload. WORK SMARTER WITH THE VISUAL SUITE A complete suite of tools for our visual world - Craft professional content with 250,000+ free templates. - Design visual Docs with videos, charts, or linked Canva designs. - Capture ...