Top 9 JavaScript frameworks to create beautiful presentation slides
Presentation frameworks are tools or libraries that can help you create presentations using web technologies that you are familiar with, such as HTML, CSS, JavaScript, Markdown, Vue, React, and more. You’ll have full control over the appearance and layout of your slides.
They allow you to export your slides as HTML files that can be viewed in any modern browser. You don’t need to install any software or plugin to view your slides. You can also share your slides online using platforms such as Slides.com, GitHub Pages, Netlify.
Reveal ( 64.2k ⭐) — An open source HTML presentation framework that allows you to create beautiful and interactive presentations using web technologies. You can use HTML, CSS, JavaScript, Markdown, LaTeX, and more to create stunning slides with animations, transitions, code highlighting, and other features.
Impress ( 37.3k ⭐) — Another open source HTML presentation framework that is similar to reveal.js, but with a different approach, inspired by the idea behind prezi.com. It uses CSS3 3D transforms to create dynamic and spatial presentations that can zoom, rotate, and pan across the slides.
Sli dev ( 27.3k ⭐) — A web-based slides maker and presenter that is designed for developers. It allows you to create beautiful and interactive presentations using Markdown, HTML, Vue components, and other web technologies. You can also use features such as live coding, recording, drawing, LaTeX, diagrams, icons, and more to enhance your slides.
MDX Deck ( 11.1k ⭐) — A library based on MDX that allows you to create presentations using Markdown and React components. You can write your slides in a single MDX file and separate them with --- . You can also import and use any React component in your slides, as well as customize the theme and layout of your presentation.
Spectacle ( 9.5k ⭐) — A React-based library for creating sleek presentations using JSX syntax that gives you the ability to live demo your code, created and maintained by Formidable Labs. You can use it to create beautiful and interactive slides with animations, transitions, code highlighting, and other features.
Code Surfer ( 6.2k ⭐) — A library that allows you to create presentations using Markdown and React components. You can write your slides in a single MDX file and separate them with --- , add code highlighting, code zooming, code scrolling, code focusing, code morphing, and fun to MDX Deck slides.
WebSlides ( 6.1k ⭐) — A library that allows you to create beautiful HTML presentations and websites. Just choose a demo and customize it in minutes. 120+ slides ready to use. You can use HTML, CSS, JavaScript, Markdown, LaTeX, and more to create stunning slides with animations, transitions, code highlighting, and other features.
Fusuma ( 5.3k ⭐) — A tool that allows you to create slides with Markdown easily. You can use HTML, CSS, JavaScript, Markdown, Vue components, and other web technologies to create stunning slides with animations, transitions, code highlighting, and other features.
PptxGenJS ( 2.1k ⭐) — A JavaScript library that allows you to create presentations, compatible with PowerPoint, Keynote, and other applications that support the Open Office XML (OOXML) format. You can use it to generate PPTX files with just a few simple JavaScript commands in any modern desktop and mobile browser. You can also integrate PptxGenJS with Node, Angular, React, and Electron.

Common features
Presentation frameworks typically share several common features that aim to enhance the creation and delivery of visually engaging and interactive presentations. Here are some of the common features you can find:
Ease of use : They allow you to use web technologies that you are familiar with, such as HTML, CSS, JavaScript, Markdown, Vue, React, and more. You don’t need to learn a new software or tool to create your slides. You can also use your favorite code editor or IDE to write and edit your slides.
Nested slides : They allow you to create sub-sections or sub-topics within your presentation. You can use nested slides to organize your content, add more details, or create interactive menus.
Markdown support : Markdown is a lightweight markup language that allows you to format text using simple syntax. You can use Markdown to write your slides in a plain text editor and then convert them to HTML. Markdown makes it easy to create headings, lists, links, images, code blocks, and more.
Auto-Animate : A feature that automatically animates the transitions between slides or elements to create smooth and dynamic effects for your presentation, detect the changes between slides and animate them accordingly.
PDF export : You can use PDF export to print your presentation, share it online, or view it offline. PDF export can also preserve the layout, fonts, and images of your presentation.
Speaker notes : You can use speaker notes to prepare your speech, add additional information, or provide references. Speaker notes are usually hidden from the audience but visible to you in a separate window or screen.
LaTeX support : LaTeX is a document preparation system that allows you to create high-quality typesetting for mathematical and scientific expressions. You can use LaTeX to write complex formulas, equations, symbols, and diagrams in your presentation. LaTeX can also handle cross-references, citations, and bibliographies.
Syntax highlighted code : You can use syntax highlighted code to display your source code in your presentation. Syntax highlighted code can make your code more readable, understandable, and attractive.
jQuery Script - Free jQuery Plugins and Tutorials
10 best html presentation frameworks in javascript (2024 update), what is html presentation framework.
An HTML Presentation Framework helps you create a fullscreen web presentation to showcase your web content just like Apple Keynote and Microsoft PowerPoint.
It separates your HTML content into several fullscreen pages (slides) so that the visitors are able to navigate between these slides with certain operations (mouse wheel, arrow keys, touch events, etc).
The Best HTML Presentation Framework
You have been tasked with building an HTML5 presentation application, but where should you start? As there are many frameworks to choose from, it can be challenging to know where to begin.
In this post, we're going to introduce you the 10 best JavaScript HTML presentation frameworks to help developers generate professional, nice-looking presentations using JavaScript, HTML, and CSS. Have fun.
Originally Published Feb 2020, up date d Feb 27 2024
Table of contents:
- jQuery HTML Presentation Frameworks
- Vanilla JS HTML Presentation Frameworks
Best jQuery HTML Presentation Frameworks
Full page presentations with jquery and css animations.
A vertical full-page presentation app (also called fullscreen page slider) implemented in JavaScript (jQuery) and CSS animations.

[ Demo ] [ Download ]
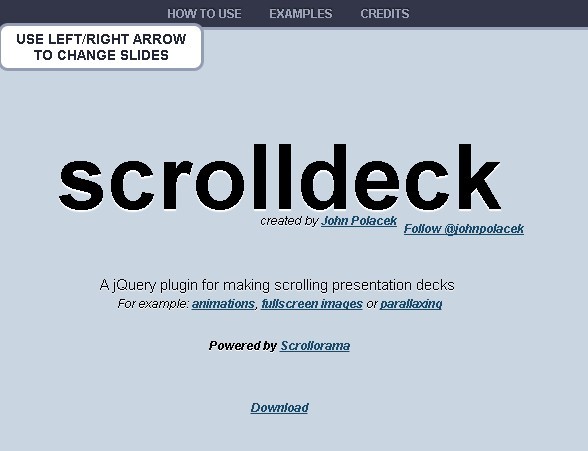
jQuery Amazing Scrolling Presentation Plugin - scrolldeck
scrolldeck is a cool jQuery plugin that make it easier to create amazing scrolling presentation like Slide Animation s, Image Slides and parallax effects for your project.
Easy Dynamic Presentation Plugin In jQuery - Presentation.js
A jQuery-powered presentation plugin that allows users to create better professional-looking presentations, with awesome jQuery and/or CSS 3 animations.

jQuery Plugin To Create Amazing Presentations - mb.disclose
An awesome jQuery plugin that provides an amazing way to present Html contents in carousel like presentations. You can customize the CSS3 powered animations for each Html element using Html5 data-* attributes.
Responsive Web Presentation Plugin For jQuery - sectionizr
A really simple jQuery web presentation plugin which presents any html contents in a responsive, fullscreen, carousel-style page UI. Supports both horizontal and vertical scrolling.

Best Vanilla JS HTML Presentation Frameworks
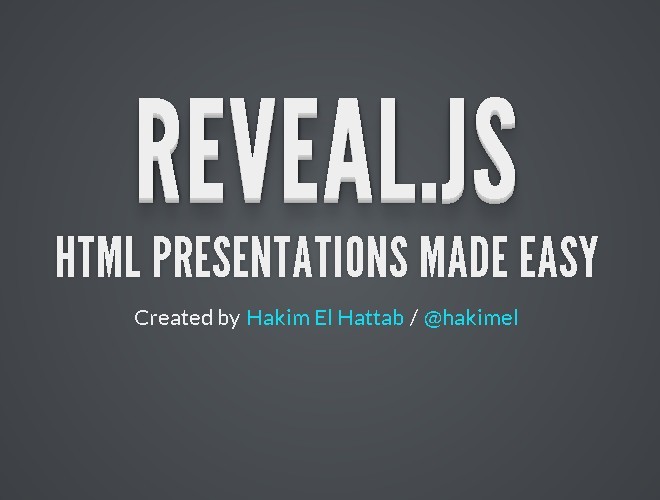
Beautiful html presentation library - reveal.js.
reveal.js is an open source HTML presentation framework. It's a tool that enables anyone with a web browser to create fully-featured and beautiful presentations for free.
Presentations made with reveal.js are built on open web technologies. That means anything you can do on the web, you can do in your presentation. Change styles with CSS, include an external web page using an iframe or add your own custom behavior using our JavaScript API.
Fullscreen Scrolling Presentation In JavaScript – Pageable
A lightweight JavaScript library to generate a fullscreen scrolling presentation where the users are allowed to scroll through sectioned pages with drag, swipe, and mouse wheel events.

Amazing Presentation Framework With CSS3 - impress.js
An amazing Presentation framework for modern bowsers. Based on CSS3 transforms and transitions. It doesn't depend on any external stylesheets. It adds all of the styles it needs for the presentation to work.
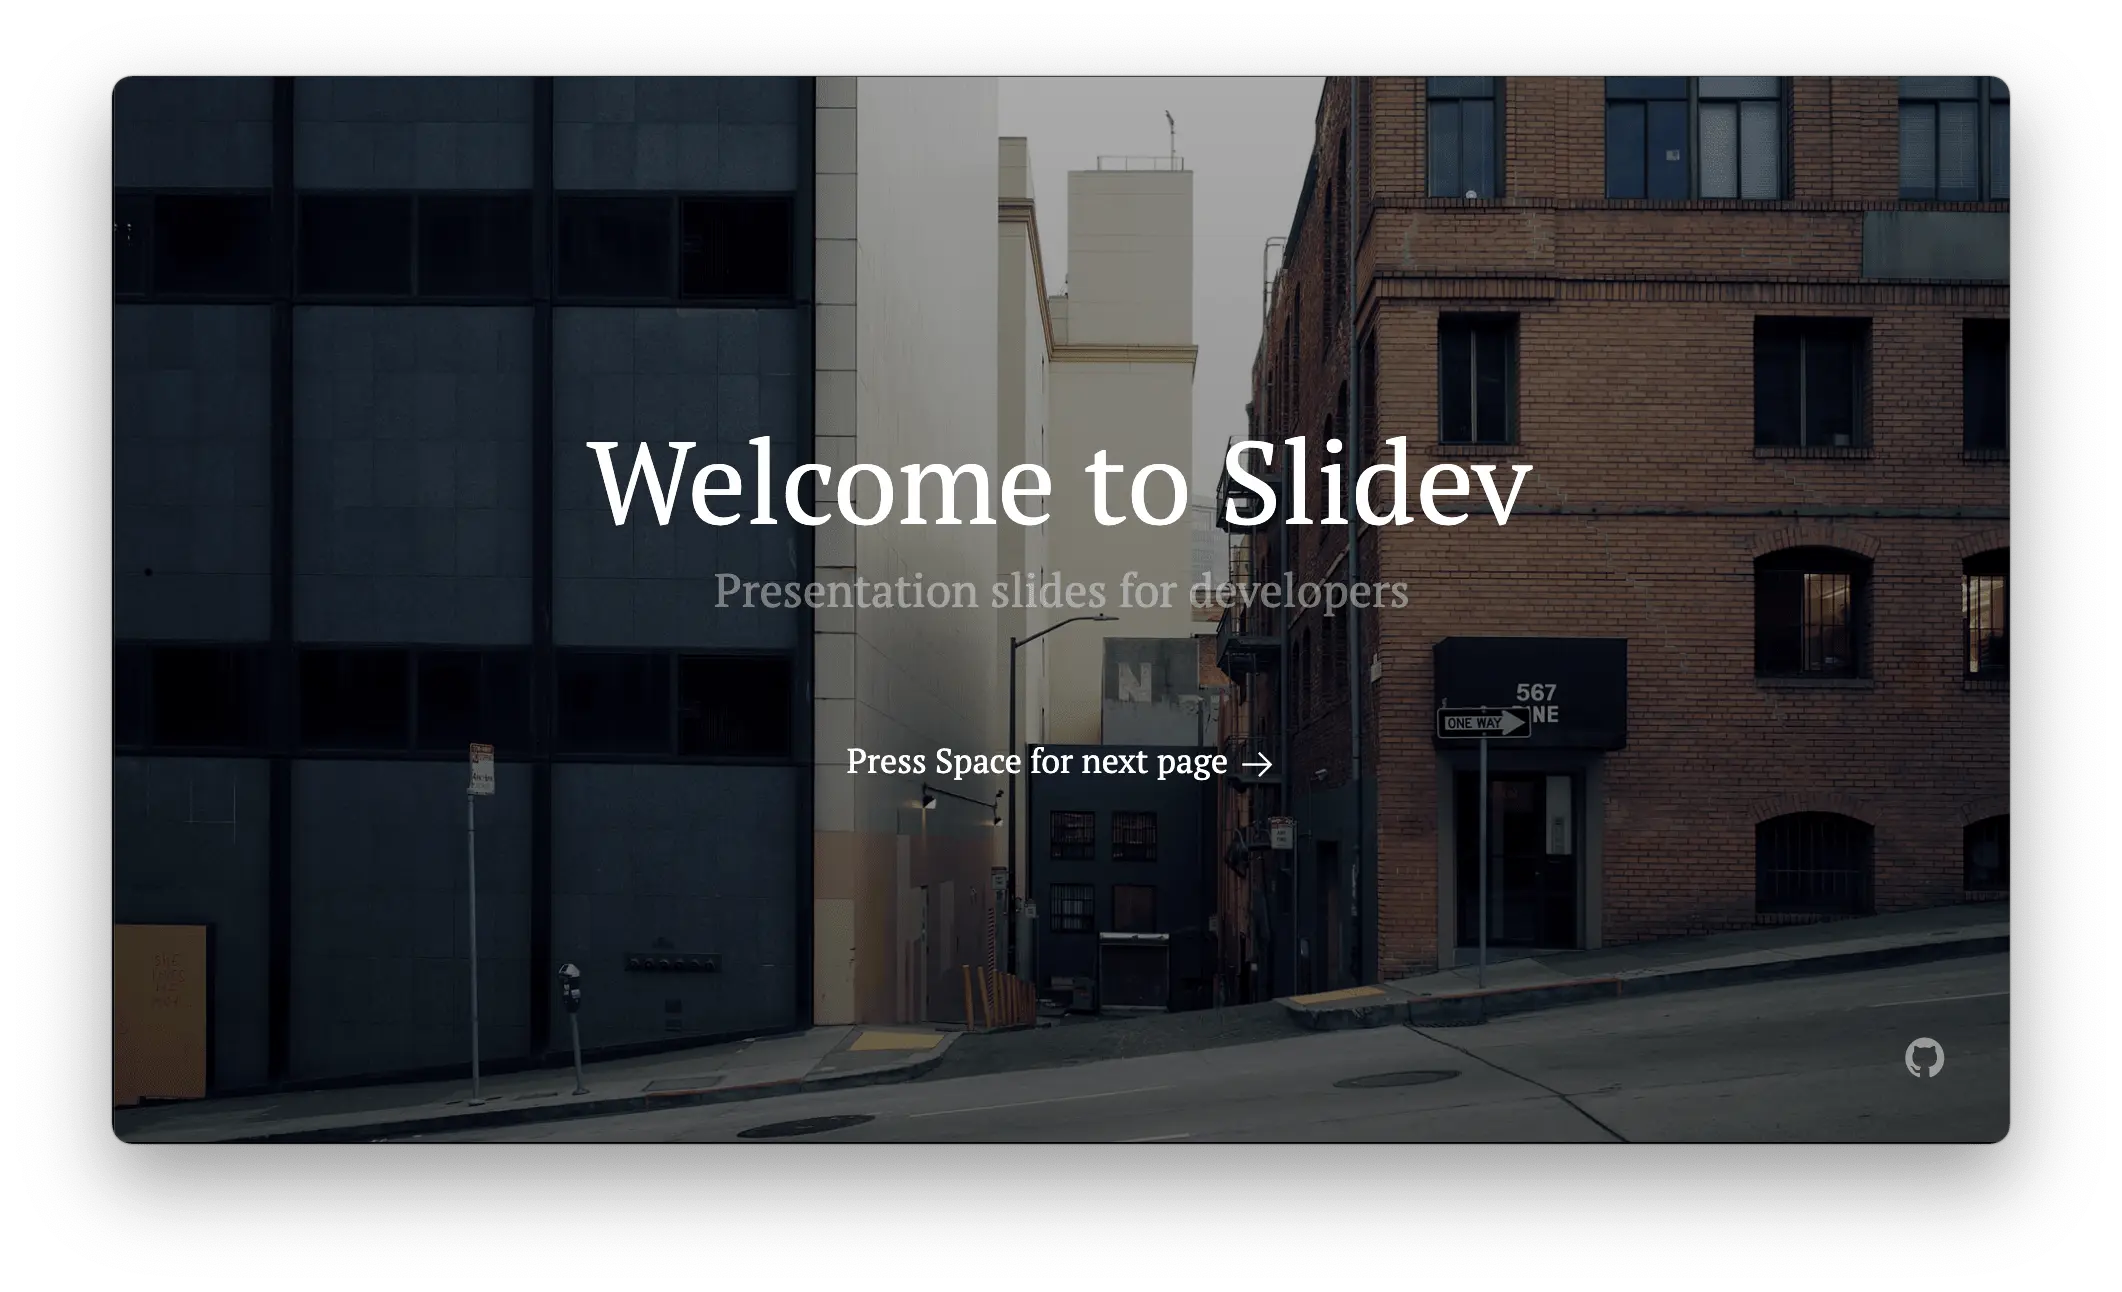
Slidev aims to provide the flexibility and interactivity for developers to make their presentations even more interesting, expressive, and attractive by using the tools and technologies they are already familiar with.
When working with WYSIWYG editors, it is easy to get distracted by the styling options. Slidev remedies that by separating the content and visuals. This allows you to focus on one thing at a time, while also being able to reuse the themes from the community. Slidev does not seek to replace other slide deck builders entirely. Rather, it focuses on catering to the developer community.
Shower HTML presentation engine
Shower HTML presentation engine built on HTML, CSS and vanilla JavaScript. Works in all modern browsers. Themes are separated from engine. Fully keyboard accessible. Printable to PDF.

Conclusion:
There is no one right answer. The right presentation framework for you depends on your own project requirements, as well as your personal preferences. However, with the ten HTML presentation frameworks listed above to choose from, you are bound to find one that suits your specific needs.
Looking for more jQuery plugins or JavaScript libraries to create awesome HTML Presentations on the web & mobile? Check out the jQuery Presentation and JavaScript Presentation sections.
- 10 Best Mobile-friendly One Page Scroll Plugins
- Prev: Weekly Web Design & Development News: Collective #330
- Next: Weekly Web Design & Development News: Collective #331
You Might Also Like
10 Best JavaScript Plugins To Paginate Large HTML Table (2024 Update)

10 Best Mega Menu Systems In JavaScript And Pure CSS (2024 Update)

10 Best Rating Systems In JavaScript & Pure CSS (2024 Update)

10 Best Marquee-like Content Scrolling Plugins In JavaScript (2024 Update)

10 Best Tag Cloud Generators In JavaScript (2023 Update)
7 Best Github Style Calendar Heatmap Plugins In JavaScript
Add Your Review
Your browser doesn't support the features required by impress.js, so you are presented with a simplified version of this presentation.
For the best experience please use the latest Chrome , Safari or Firefox browser.
impress.js *
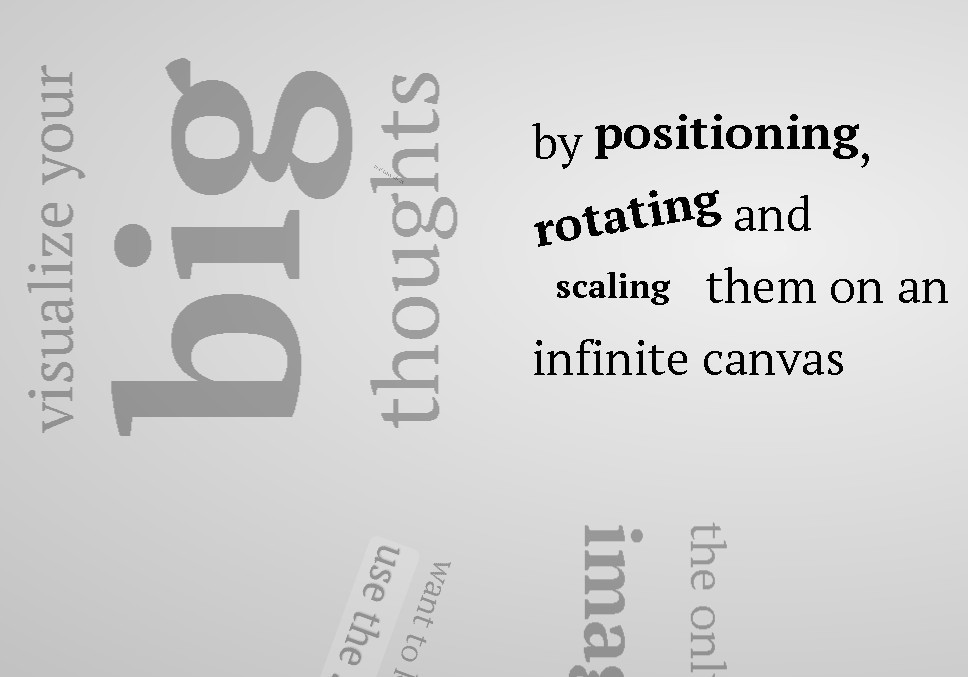
It’s a presentation tool inspired by the idea behind prezi.com and based on the power of CSS3 transforms and transitions in modern browsers.
visualize your big thoughts
and tiny ideas
by positioning , rotating and scaling them on an infinite canvas
the only limit is your imagination
want to know more?
one more thing...
have you noticed it’s in 3D * ?
Use a spacebar or arrow keys to navigate. Press 'P' to launch speaker console.

A Presentation Framework by @marcolago
Press Down Key to continue Or Swipe Up if you prefer.
What is it?
Flowtime.js is a framework for easily building HTML presentations or websites.
It’s built with web standards in mind and on top of a solid full page grid layout.
The animations are managed with native and accelerated CSS3 transitions. Javascript takes care of the navigation behaviour and adds advanced functionalities and configuration options.
Press Down Key or Swipe Up to continue.
Compatibility and Support
Flowtime.js is fully compatible with real moderns browsers:
- Internet Explorer 10
Internet Explorer 9 and some old versions of other browsers lack the transitions and some modern Javascript features but the main navigation and functionalities will work.
In older browsers degrades to a bi-directional scrolling navigation with anchor links.
Touch Devices Support
On touch devices you can navigate through slides swiping in all directions.
By now Flowtime.js was tested and works on Safari Mobile and Chrome Mobile on iOS devices but the support will be wider in the near future.
Mastering the Navigation
You can navigate in many ways. The most common way is using the keyboard.
Navigation Keys and default behaviours:
- Down Key goes to the next page or shows up the next fragment (we’ll see this later).
- Up Key goes to the previous page or hides the fragment.
- Right Key goes to the adjacent page in the next section (if available, it’s like a grid, otherwise it goes to the last page in the next section).
- Left Key goes to the adjacent page in the previous section.
Alternate Navigation Control
Pressing the Shift Key you can alternate the the default navigation keys behaviour; let’s see how:
- Down Key goes to the next page skipping all the fragments.
- Up Key goes to the previous page skipping all the fragments.
- Right Key goes to the first page in the next section.
- Left Key goes to the first page in the previous section.
Some Other Keys
Because: the more, the better.
- Page Up Key goes to the first page of the current section.
- Page Down Key goes to the last page of the current section.
- Home Key goes to the first page of the first section.
- End Key goes to the last page of the last section.
Overview Mode.
You can look at the entire presentation by pressing ESC Key . When in Overview Mode you can go back to the Page Mode by pressing again the ESC Key.
Try it out!
WARNING! Experimental Feature. If you experience problems in webkit browser you can use the alternate Overview Mode; see the documentation for more info.
Navigating the Overview
In Overview Mode the arrow keys works in the same way as in Page Mode, highlighting the future destination. To navigate to the highlighted page just press Return or Enter Key or click on the desired page.
Navigate via Links or Javascript API
You can link every page by simply building the href value using this schema:
Where data-id attribute is an optional attribute you can add to every section or page. I.e.: if you want to go to back to the first page click here (press backspace to come back to this page) .
You can also trigger every navigation behaviour using the Flowtime.js Javascript API . Take a look at the documentation if you want to learn more.
Navigate With History
Flowtime.js offers a full support for the HTML5 History API where available or gracefully degrades on the hashchange event.
This means that you can navigate using the browser’s back and forward buttons and deeplink a page for sharing purposes.
Progress Indicator
You can enable a default progress indicator useful not only to know what’s the current page you are looking, but also as a navigation tool.
Look at the bottom right corner and you can see a miniature of the presentation structure.
Clicking on a page thumb will navigate to that page.
Fragments Support
The built in fragments navigation allows to advance step by step inside a page. Press down to try.
You can discover single elements or even a single part of an element, one at a time.
Fragments navigation is deeply customizable with some configuration options You can learn how in the documentation .
Fragments Unleashed
Thanks to some special classes you can add a couple of useful custom behaviours.
- The .step fragment will partially fades out;
- The .shy fragment will completely hides itself;
- You can use this two special fragment types to easily create special effects.
This is a .shy example!
And this is a .step one!
Default HTML Structures
Flowtime.js comes with a default theme that styles the most common HTML structures, like:
1 st Level Heading
2 nd level heading, 3 rd level heading, 4 th , 5 th and 6 th level heading, unordered lists.
- Another item.
- Just another item.
- Ok, we get it!
Ordered Lists
Definition lists, quotes and citations.
My favourite quotation: The bad craftsman blames his tools .
Sotto un cespo di rose scarlatte dai al rospo the caldo col latte. Sotto un cespo di rose paonazze tocca al rospo lavare le tazze.
Quoting and citing with <blockquote>, <q>, <cite>, and the cite attribute on HTML5 Doctor.
Theme and Styling
If you don’t like the default theme or you want to build your own (or both things), or if you want to build a website on top of Flowtime.js, you can write your own theme and replace the default one.
Theme and core css are in separate files so you can’t break the layout (unless you override some classes).
Fluid Layout
Everything can be fluid, just use em , rem and % units if you want to make an element resizable.
Image Management
Images are fluid like all the other content.
You can insert images in the flow or stack images ones on top the others with a minimal markup overhead to create some fancy fragments tricks.
Go to the next pages to see fluid images in action and how stacked images can be managed, both in the flow or centered in the slide. Look at the source code to learn how to write the markup.

Stacked Images

Centered Stacked Images

About the Centered Stack
You can center anything, not only images!
Just like this content. Useful for splash pages and titles.
And you are not limited to stacks, you can center what you want.
Native Parallax Support
By popular demand Flowtime.js includes native parallax support*.
Simply add a parallax class to anything you want to have parallax enabled and configure the amount of distance for all elements or for a single element using data-parallax attribute.
For an example go to the next page ; for more info read the documentation .
* By the way: I’m not a parallax fan; but ehi… this is the "web 3.0".
The Invaders from Audiogalaxy

This Page Is Just for Testing the Parallax
In the previous page, from left to right:
Code Snippets Highlight
Code highlight is a courtesy of Lea Verou’s Prism . Because I really didn’t want to re-invent the wheel. You can use what you want, it’s not a dependency (but it’s very smart and cool).
Events and Custom Implementations
When navigated to a page Flowtime.js fires a custom flowtimenavigation event full of useful properties to customize or build your components or behaviours.
Read the documentation to learn more about this event and its properties.
Some Examples
You can take a look at some examples to explore some of the possibilities that Flowtime.js offers to customize your experience.
- Cross Direction
- Custom Fragment Animations
- Duplicated IDs
- Modal Overlay
- Page Titles in Navigation
- Scroll the Current Section Only
- Sub Pages Demo
- Video Embedding and Controls
Continues …
More Examples
- Default Behavior;
- gridNavigation(false);
- nearestPageToTop(true);
- rememberSectionsLastPage(true);
- rememberSectionsStatus(true);
If you need a specific example or if you have a question about a feature feel free to ask or open an issue .
Use It! It’s Free
This project is open source, feel free to contribute to the development on Github .
Feedbacks, suggestions and bug reports are welcomes.
Use it as you wish and build great things. And when you have done so let me know the URL, I will appreciate it.
Designed and coded by Marco Lago Interaction/Experience/Game/Designer/Developer
You can find me on Twitter as @marcolago
If you like this work spread the word, you know how ;)

- About Harlepengren
- Gravity’s Symphony: a Marble Run Journey
- Open Shading Language Resources

A Beginner’s Guide to Using Reveal.js for Presentations
Introduction.
In our last post , we talked about FullPageOS. FullPageOS is designed to immediately boot into Chromium. With this approach, you can set up a Raspberry Pi to show one or more slides. If you’re looking to create dynamic and interactive presentations, Reveal.js is an excellent tool to consider. Reveal.js is a powerful JavaScript framework that allows you to build stunning presentations using HTML, CSS, and JavaScript. In this tutorial, we will guide you through the process of using Reveal.js to create engaging presentations that will captivate your audience. If you are interested in a more advanced use of Reveal.js, check out how we used Reveal to create a dynamic presentation .
Setting Up Reveal.js
Start by downloading the latest version of Reveal.js from the official GitHub repository . This repository has everything you need to get started.
I created a new folder called “test” and copied index.html as well as the folders dist, css, and plugin. The file, index.html, contains a template structure for the presentation. You can modify the <div class=”slides”> section to create your slides. Each <section> element represents a slide. You add headings, paragraphs, images, and other HTML elements within the <section> tags. For example, we created two slides:
Customizing Your Presentation in Reveal.js
Reveal.js offers many options for customizing your slides. We are going to cover three areas here:
Slide Themes
- Configuration Options
Slide Transitions
Reveal.js offers several built in themes https://revealjs.com/themes/ . In the dist folder, there is a subfolder that includes the themes. We can simply set the stylesheet to the desired theme through the following code.
For me, the size of the font (40px) was a little large, so I added the following style code to the header to override the stylesheet font size.
Slide Configuration
The second area of customization is the configuration of how the slides and the controls are presented. These options can be adjusted in the the reveal.Initialize() section of the code. For example, the code below removes the slide tutorial (basically the arrow bouncing so the user knows that it is there), moves the arrows to the edge instead of the bottom, and adds a slide progress indicator.
Below is a chart with the different options:
Here is example code.
Here are example slides that show the autoAnimate transition:
You can also implicitly animate the position of text. For example:
In the previous section, we showed how to enable slide transitions in the configuration. However, you can also adjust in each slide by adding a data-transition element to each slide with the animation type. In addition, you can add data-transition-speed to control the speed of the change. For example, the following slide would zoom:
Code and Math in Reveal.js
Reveal.js offers built in features for including both code and math in your presentation.
For code, reveal.js includes highlight.js as a plugin. This allows you to use a code header followed by your code. I won’t go into detail on this plugin here (maybe a future post). For now, you can check out the highlight.js website .
Reveal.js also includes a math plugin that allows you to display mathematical equations. You can choose among multiple different math typesetters, including: KaTeX or MathJax.
Advanced Features in Reveal.js
Reveal.js offers many advanced features, such as vertical slides, speaker notes, fragments, and more.
- Vertical slides allow you to create nested slides within a horizontal slide, providing a hierarchical structure to your presentation. Personally, I like the idea of being able to organize the presentation in this way.
- Speaker notes allow you to add additional information or reminders that are visible only to the presenter.
- Fragments enable you to animate elements on a slide, revealing them incrementally.
- Through the markdown plugin , you can format the content of the slide using markdown.
You have learned the basics of using Reveal.js to create interactive and captivating presentations. By leveraging HTML, CSS, and JavaScript, you can customize your presentations, add advanced features, and engage your audience like never before. As you delve deeper into Reveal.js, explore its rich documentation and experiment with the available options to create visually stunning and interactive presentations. Happy presenting!
Related Posts

Analyzing the Game Show Deal or No Deal: Strategies to Win Big

From Static to Spectacular: Adding Real-Time Data to RevealJS

Unit Testing in Python Using unittest: A Quick Overview
Create Incredible Web Presentations with Reveal.js
Feb 24, 2023 · 12 min read

Reveal.js is an open-source HTML presentation framework. Anyone with a web browser can use it to make attractive presentations for free. The program allows anyone with a web browser to create fully-featured and interactive presentations that support CSS 3D transforms , nested slides, and a variety of other capabilities. It is recommended for those interested in programmable techniques and web technology.
It has lots of benefits. Some of these consist of the following:
- Responsive design: Reveal.js presentations scale to fit the user’s screen, making them compatible with a wide range of devices.
- Interactive elements: Reveal.js supports these elements, which can improve user experience and make presentations more interesting. Interactive elements include links, images, and videos.
- Themes can be readily modified to reflect the user’s brand or tastes to make a presentation look more attractive when the theme matches the content in a slide.
- Simple and intuitive user interface: Reveal.js enables users to build and edit presentations with minimal technical expertise.
- Open-source: Reveal.js is free to use, and its source code is available for users to examine and edit.
React Reveal vs. Reveal.js: what’s the difference?
The distinction between React Reveal and Reveal.js will be demonstrated in this section:
- HTML, CSS, and JavaScript are the foundations on which Reveal.js is constructed, but React Reveal requires React.
- Reveal.js is the way to go if you want to make static presentations and need to deal with a vanilla JavaScript-based project. React Reveal is the greatest option for creating interactive presentations if you are working with React.
- You can make interactive slides with Reveal.js, which has a number of features like slides and transitions. You can also make interactive slides with React Reveal, but you can also do so while using React components .
- Additional capabilities offered by React Reveal include a higher degree of customization and support for animations.
Alternatives to Reveal.js
Many Reveal.js alternatives may be utilized to make engaging presentations with eye-catching visuals. Several well-liked choices include:
- Impress.js , a JavaScript library that enables the creation of 3D presentations with a range of transitional effects.
- Prezi : An online presentation tool that lets users zoom in and out of slides to make dynamic, interactive presentations.
- PhotoSwipe : An open-source JavaScript picture gallery and lightbox, PhotoSwipe. It is modular, independent of frameworks, and made for desktop and mobile devices.
- Owl Carousel 2 : Owl Carousel 2 is a jQuery carousel plugin with full customization and touch and drag functionality.
- FlexSlider is a fantastic, totally responsive jQuery slider plugin. It offers designers and developers a quick way to launch a slideshow, carousel, or image slider.
- Keynote : Apple’s PowerPoint-like presentation software for Mac and iOS devices.
- Haiku Deck : A web-based application that enables users to design minimalistic presentations with spectacular visual effects.
Getting Started
In this session, we’ll use Reveal.js to create spectacular presentations by utilizing JavaScript. In this section, we’ll learn everything we need to know to get Reveal.js running on our project. To write code to create stunning presentations, let’s first understand the basic setup and installations before using Reveal.
Installations
The best way to install Reveal.js is to clone the source code on GitHub. Utilizing this is extremely simple for you. Just use the code below in your terminal to clone the GitHub repository.
Run the following command to install all the necessary packages and start Reveal.js after you’ve cloned the repository for it in your working directory.
Furthermore, once Reveal.js has been successfully installed in your project, you must start the Reveal.js server on port 8000 (the default port) by executing the following code:
Please use the code below if you decide to run the Reveal.js server on a different port:
You can easily install Reveal.js manually using npm or yarn if you don’t want to clone the GitHub repository:
You may easily include the Reveal.js file as an ES6 module once it has been installed in your front-end framework, such as React:
Folder Structure
This section will go over Reveal.js’ folder structure. When changes are made, the folder structure might change, but this won’t affect how Reveal.js is utilized in our project.
Since we are not the original developers, we won’t be explaining every file in Reveal.js. I’ll go over the most significant directories and files first:
- CSS files that describe how a presentation should appear and be organized are stored in the CSS folder.
- The JS folder houses the JS files that provide interaction and other functionality.
- The presentation begins with a file called index.html that also contains the HTML markup for the slides.
- A reveal.js file contains reveal.js’ setup parameters.
Reveal.js’s folder structure is shown in the image below:
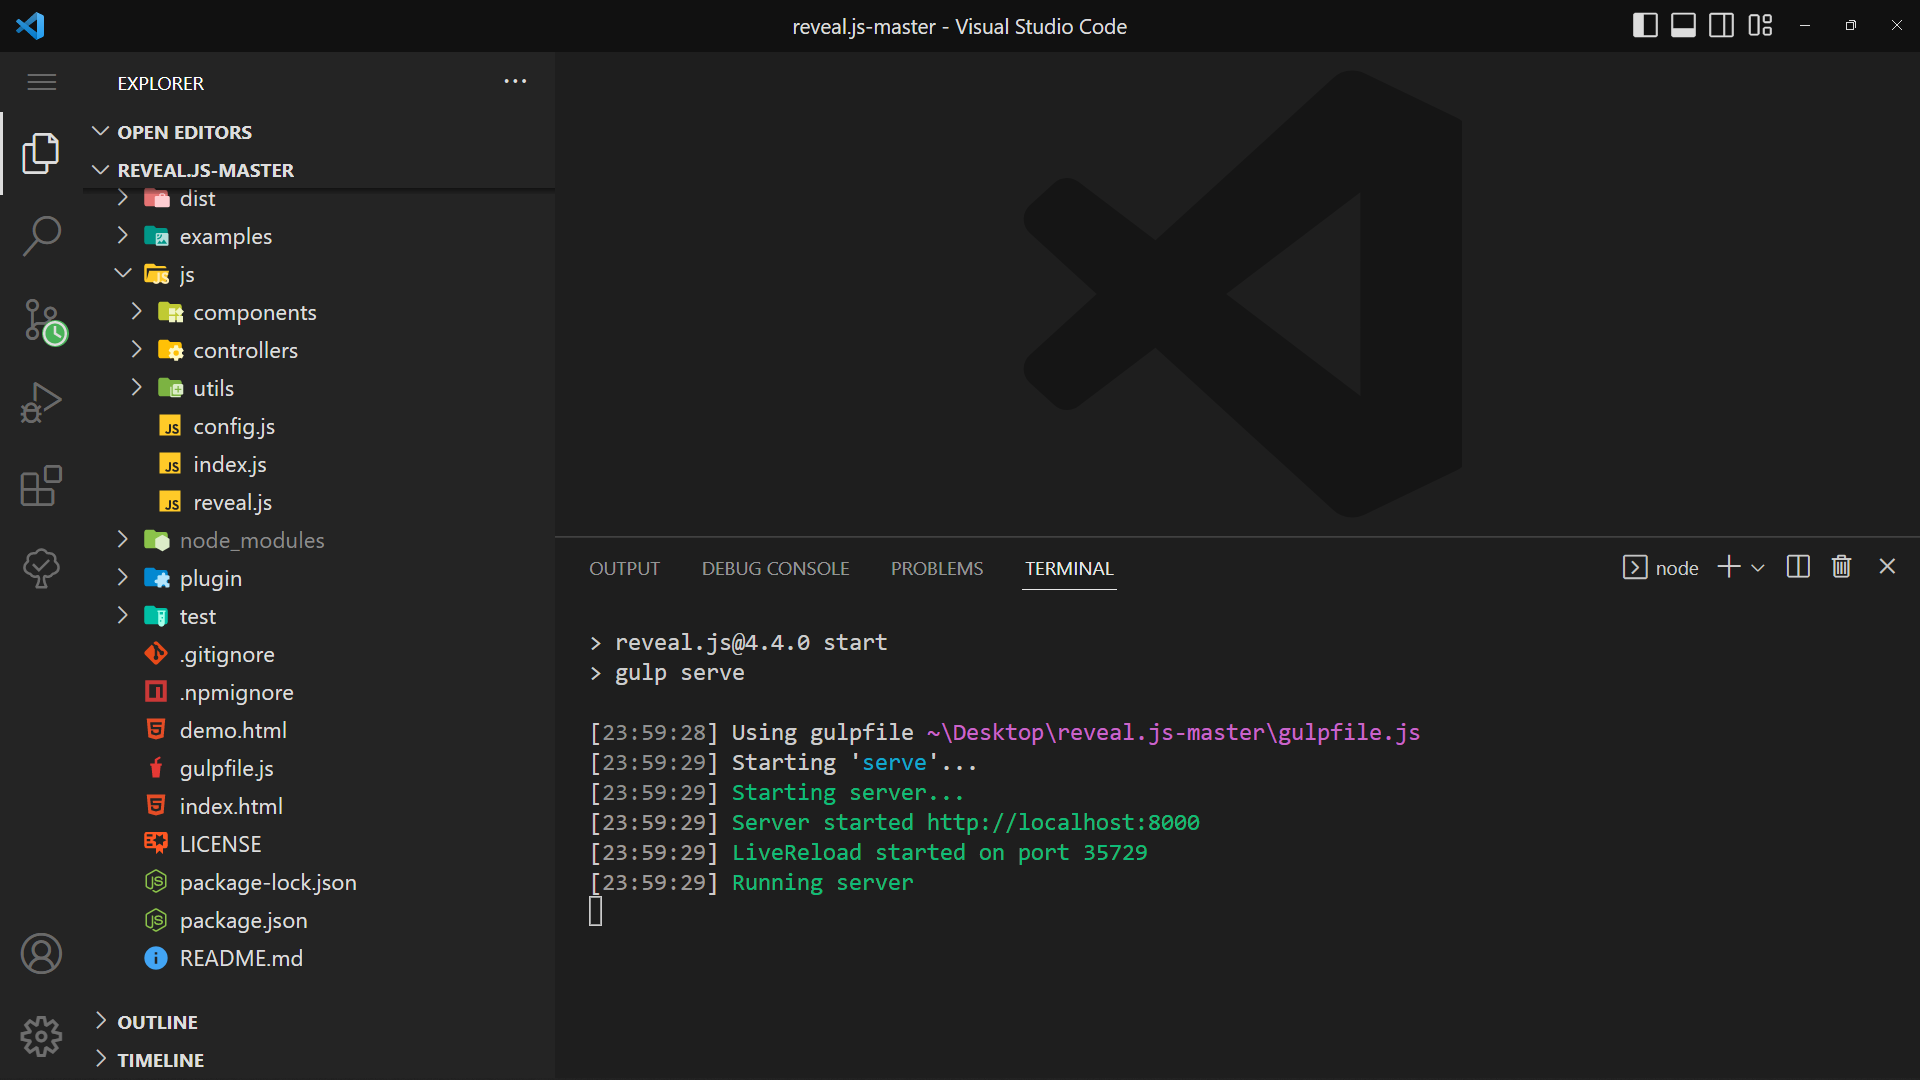
As you can see in the screenshot above, I installed Reveal.js in the opened terminal and launched it by typing npm start .
Starter Template
The starter template is just what is loaded in the index.html page of the Reveal.js folder structure, which we mentioned in the section labeled “Folder Structure” above.
Launch your browser and navigate to the following URLs: http://localhost:8000 The link takes you to the active running page where our presentations will appear in the browser:
This section will concentrate on the contents of Reveal.js. On Reveal Web Presentation, the contents are the components of a responsive presentation. We can use Reveal.js on any project once we have worked with all the components that go into making responsive, stunning presentations, covering Markup, Markdown, Backgrounds, Media, Code Math, Fragments, Links, and Layout.
Markup is the first step in getting started with Reveal.js, and you must use the section element to build markups in Reveal.js. Please remember that the parent class will have the class name . reveal , and the reveal class div will have a child element with the class name .slide . If you place the section element line by line, as in the code below, you will have a slider that moves horizontally.
To make a vertically moving slide, add sections within a section; this is a simple technique; see the code below:
Just use the up and down arrows to view the previous and next slides.
Please use the code below to add a horizontal and vertical sliding format. It’s really simple; the horizontal section of our code will stand alone and not be inside of any section; however, the vertical section will have sections inside of a section.
Backgrounds
It’s simple to add a background color to a slider in Reveal.js; all you have to do is include an attribute that initializes the color for a specific area. You can use the data-background-color attribute to add a background color to a section and specify the value to any color name you choose. View a responsible slider with background colors by referring to the code and outputs below.
Click here to read more about background colors in Reveal.js.
In Reveal.js, media can be used as a presentation. We’ll be showing a video as a presentation in this section. The data-autoplay autoplay attribute must be included in the video tag as an attribute to make the video play when its slide section is open. Code:
You can present codes on the slide and have the code highlighted using Reveal.js. Highlight.js is the only thing that powers the code highlight. You will always use the <code> element when presenting code in Reveal.js, and all you need to do to make HTML escape the default behavior and treat the content as genuine code. Add the data-line-numbers attribute to the <code> element and specify values that will represent the line of code that will be highlighted, as shown below.
In Reveal.js, mathematical expressions can be displayed. To use math in your presentation, you must include the RevealMath.KaTeX plugin, which will reflect the math in your presentation.
Let’s run The Lorenz Equations as a presentation:
The Lorenz equations are a set of partial differential equations that describe two-dimensional fluid flow. Please click here to learn more.
On a slide, fragments are utilized to draw attention to or gradually reveal specific parts. Before moving on to the next slide, each element with the class fragment will be stepped through.
Please include the data-fragment-index attribute and set its value to a number if you wish to use fragments. The number value indexed 1 will appear first, followed by the number 2, in that order.
Session Replay for Developers
Uncover frustrations, understand bugs and fix slowdowns like never before with OpenReplay — an open-source session replay suite for developers. It can be self-hosted in minutes, giving you complete control over your customer data
Happy debugging! Try using OpenReplay today.
While watching slides, Reveal.js also simplified things for us. The following slide in a presentation can be easily reached by clicking a link , and the previous slide can likewise be reached by doing the same.
If you want to navigate to a slider, be sure that the portion of the slider you are visiting has an Id that matches the value of the “href” attribute on the HTML anchor element that is now being clicked.
To instantly navigate to the first page of the slide without passing through any intermediary sections, add ”#/0” (0 == first-slide) to the clickable link that will take you to the first page of the slide.
This section will go over the layout in Reveal.js. You can change the text size, and you can also construct a slide by showing an item on top of the previous item; this is known as staking.
Let’s practice stacking by simply laying images on top of one another.

Now that we understand how stacking works, let’s spend some time working with FIT TEXT. We’ll display some text in a responsive large format in this part under layout by simply utilizing the class name r-fit-text. Below is a code sample of big text applied to Session Replay:
Please note that you can move forward and backward with the arrow keys.
Customization
In this section, we’ll customize some of Reveal.js’s presentations, focusing on Themes and Transitions, the two most significant things to consider while working with Reveal.js.
Theming is essential for creating anything on the internet. In Reveal.js, you can integrate some theme collections supplied by Reveal.js developers.
To use a theme of your choice, import the theme’s CSS styles into your project. The default theme is black when you install reveal.js or clone the Reveal.js repository. A line of code for incorporating a theme into your project is provided below:
Look closely at the code above; you can see where I wrote theme-name ; please replace it with any of the theme names listed below:
- Black (default)
Below, I used a theme name titled sky on a slide:
Utilizing the dracula theme produces the theme below:
Now that we’ve learned more about theming , I’d like you to experiment with different theme names to see how they look on your web presentation slide.
Transitions
Reveal.js provides us with some amazing transition effects to use while making a presentation on the web. It is quite simple to use these transition effects , and some of these transition effects include:

To use these effects, insert a data-transition attribute into your HTML element and set the attribute’s value to the name of the transition effect listed above.
That’s all for transitions in this section; if you want to learn more about Reveal.js transitions, please click here .
We’ll go through presentation features in Reveal.js, such as vertical slides and auto-slide in this section, and since we’ve already covered the implementation largely on vertical slides, we’ll go over more in depth. Let’s get started.
Vertical Slides
Moving between slides by default employs a horizontal sliding transition. These horizontal slides are the main or top-level slides in your presentation. We can’t rely on just one direction in a presentation, and the usage of presenting on slide vertically is critical. We learned how to design a slide that uses vertical direction earlier in this article.
Below is a code sample on utilizing vertical slides:
Auto-Animate
Reveal.js supports auto animation . The auto animate plays a vital role in web presentation. Auto animation applies smooth transition to a slide content, which is noticeable when viewing a presentation. For example, when you set margin-top: 40px to a section, you will see the smooth animation on how the second section comes down slowly. We’ll be implementing some examples here in this section.
To initiate the auto-animate to a section, add the data-auto-animate attribute to the two or multiple sections you want to integrate the auto-animate effect.
The code output above shows that we added margin-top: 100px to the section child (h1) using data-auto-animate , and you can see the effect applied smoothly and removing the default slide horizontal direction to a slightly vertical direction. Please remember that the element in this example is internally hidden but moved using the margin-top attribute. JavaScript will use a CSS transform to achieve fluid movement. Most CSS attributes may be animated and transitioned using the same technique, allowing you to modify positions, font-size, line-height, color, padding, and margin.
We’ll be working on auto-slide in a slide in this section. This is relatively straightforward to accomplish; simply look at our JavaScript code at the bottom of our HTML page and add the autoSlide duration as an integer and set the Boolean value of a loop to true :
JavaScript:
A play/pause icon can be found in the bottom left corner of the slide, as shown in the output above. A round loader describes the progress of the timing function in the icon. The following code is for the output presentation:
Slide Numbers
Numbering is important in slides, and you may add a slider number in two ways: obtain the current slide number and get the slide number and the overall slide count (X/X).
Set slideNumber to true in the config section at the bottom of the HTML page to obtain the real slide number.
Slide Code:
If you look closely at the output above, you will notice a page number counter in the bottom right corner of the screen. When I reached the vertical part while sliding horizontally, the counter format changed to 3.1, which indicates 3 represents the last horizontal slide page and 1 represents the first vertical slide.
To set a slide number in (X/X) format, set your config to the code below:
Please look closely at the bottom right corner of the screen; you will see the page numbering in X/X format. See the code for the output below:
Please, click here to learn more about slide numbers.
Useful hints and guidelines for Reveal.js
In this section, we’ll discover valuable hints and guidelines for working with Reveal.js, which will greatly improve our experience working with Reveal.js for presentation:
- Use keyboard shortcuts to navigate through slides: Use arrow keys or the space bar to move ahead and back through slides.
- Personalize the appearance and feel of your presentation: You can alter the theme, font, and background color of your slides with Reveal.js.
- To add background images to presentations, use the data-background attribute: You can change a slide’s background image by adding the data-background attribute to the slide’ element.
- To set the transition effect between slides, use the data-transition attribute: Transition effects such as ‘slide,’ ‘fade,’ ‘convex,’ and ‘concave’ are available.
I hope you enjoyed this article; we covered everything we needed to know to get started with Reveal.js. We also learned about how to use Reveal.js in our project. There are many more features in Reveal.js, and you can learn more by visiting Reveal’s official website . You may also begin integrating presentations into client’s projects or your project by using Reveal.js; this will help you grow your experience utilizing Reveal.js.
Gain Debugging Superpowers
Unleash the power of session replay to reproduce bugs and track user frustrations. Get complete visibility into your frontend with OpenReplay, the most advanced open-source session replay tool for developers.
Check our GitHub Repo
More articles from OpenReplay Blog
Apr 4, 2024, 11 min read

Multipart Forms with Vue and Pinia
{post.frontmatter.excerpt}

Sep 13, 2022, 5 min read
Multiple Electronic Wallets in React with Web3Modal
HTML Presentations Made Easy
Created by Hakim El Hattab / @hakimel
reveal.js is a framework for easily creating beautiful presentations using HTML. You'll need a browser with support for CSS 3D transforms to see it in its full glory.
Vertical Slides
Slides can be nested inside of other slides, try pressing down .

Basement Level 1
Press down or up to navigate.
Basement Level 2
Basement level 3.
That's it, time to go back up.

Not a coder? No problem. There's a fully-featured visual editor for authoring these, try it out at http://slid.es .
Point of View
Press ESC to enter the slide overview.
Hold down alt and click on any element to zoom in on it using zoom.js . Alt + click anywhere to zoom back out.
Works in Mobile Safari
Try it out! You can swipe through the slides and pinch your way to the overview.
Marvelous Unordered List
- No order here
Fantastic Ordered List
- One is smaller than...
- Two is smaller than...
Transition Styles
You can select from different transitions, like: Cube - Page - Concave - Zoom - Linear - Fade - None - Default
Reveal.js comes with a few themes built in: Default - Sky - Beige - Simple - Serif - Night Moon - Solarized
* Theme demos are loaded after the presentation which leads to flicker. In production you should load your theme in the <head> using a <link> .
Global State
Set data-state="something" on a slide and "something" will be added as a class to the document element when the slide is open. This lets you apply broader style changes, like switching the background.
Custom Events
Additionally custom events can be triggered on a per slide basis by binding to the data-state name.
Slide Backgrounds
Set data-background="#007777" on a slide to change the full page background to the given color. All CSS color formats are supported.
Image Backgrounds
Repeated image backgrounds, background transitions.
Pass reveal.js the backgroundTransition: 'slide' config argument to make backgrounds slide rather than fade.
Background Transition Override
You can override background transitions per slide by using data-background-transition="slide" .
Clever Quotes
These guys come in two forms, inline: “The nice thing about standards is that there are so many to choose from” and block:
“For years there has been a theory that millions of monkeys typing at random on millions of typewriters would reproduce the entire works of Shakespeare. The Internet has proven this theory to be untrue.”
Pretty Code
Courtesy of highlight.js .
Intergalactic Interconnections
You can link between slides internally, like this .
Fragmented Views
Hit the next arrow...
... to step through ...
Fragment Styles
There's a few styles of fragments, like:
highlight-red
highlight-green
highlight-blue
current-visible
highlight-current-blue
Spectacular image!
Export to pdf.
Presentations can be exported to PDF , below is an example that's been uploaded to SlideShare.
Take a Moment
Press b or period on your keyboard to enter the 'paused' mode. This mode is helpful when you want to take distracting slides off the screen during a presentation.
Stellar Links
- Try the online editor
- Source code on GitHub
- Follow me on Twitter
BY Hakim El Hattab / hakim.se

DEV Community
Posted on Jan 11, 2019
How To Build A Captivating Presentation Using HTML, CSS, & JavaScript
Building beautiful presentations is hard. Often you're stuck with Keynote or PowerPoint, and the templates are extremely limited and generic. Well not anymore.
Today, we're going to learn how to create a stunning and animated presentation using HTML, CSS, and JavaScript.
If you're a beginner to web development, don't fret! This tutorial will be easy enough to keep up with. So let's slide right into it!

We're going to be using an awesome framework called Reveal.js . It provides robust functionality for creating interesting and customizable presentations.
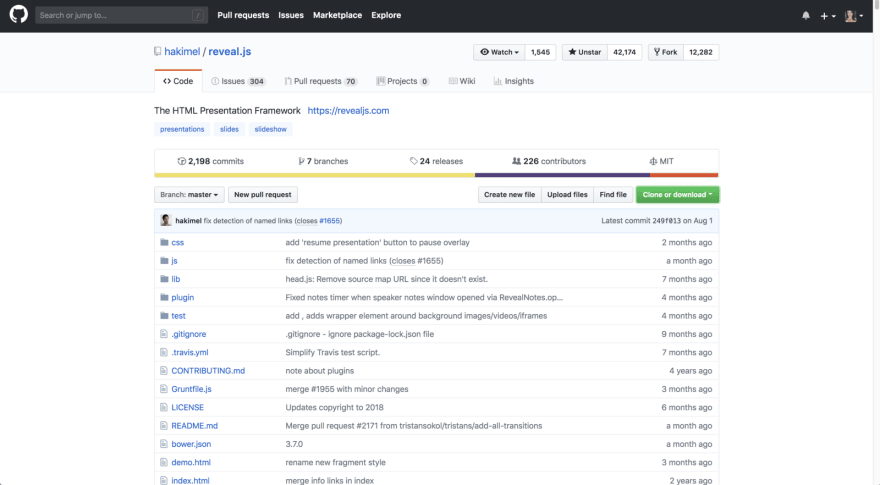
- Head over to the Reveal.js repository and clone the project (you can also fork this to your GitHub namespace).
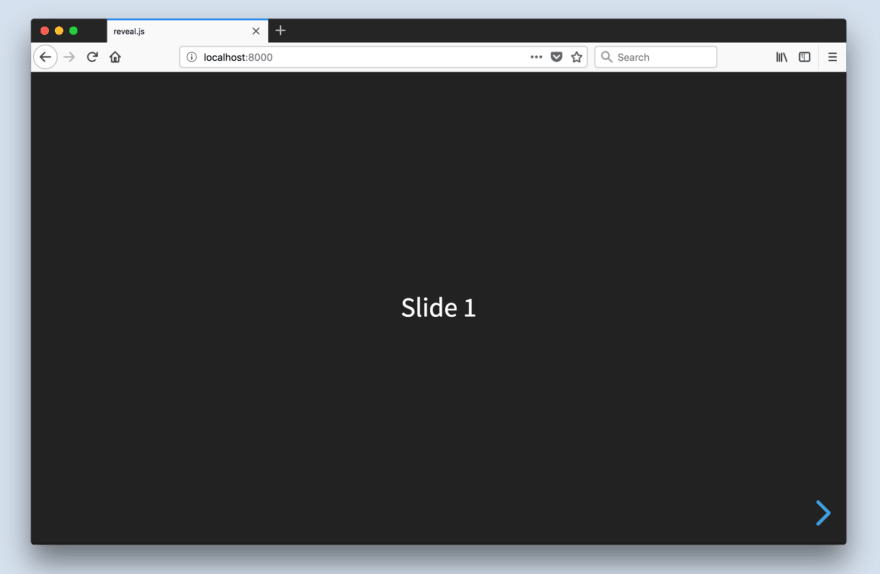
- Change directories into your newly cloned folder and run npm install to download the package dependencies. Then run npm start to run the project.
The index.html file holds all of the markup for the slides. This is one of the downsides of using Reveal.js; all of the content will be placed inside this HTML file.

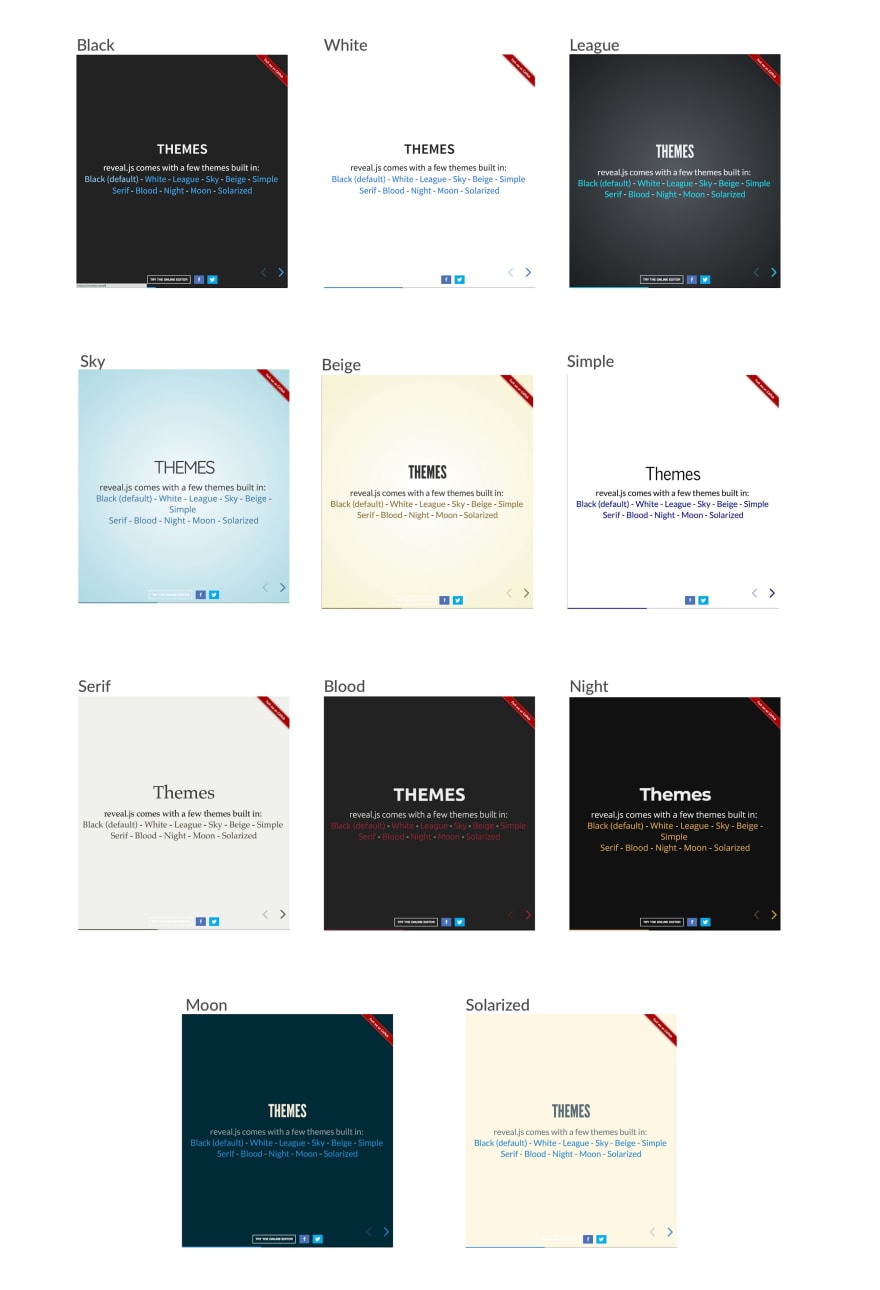
Built-In Themes
Reveal includes 11 built-in themes for you to choose from:
Changing The Theme
- Open index.html
- Change the CSS import to reflect the theme you want to use
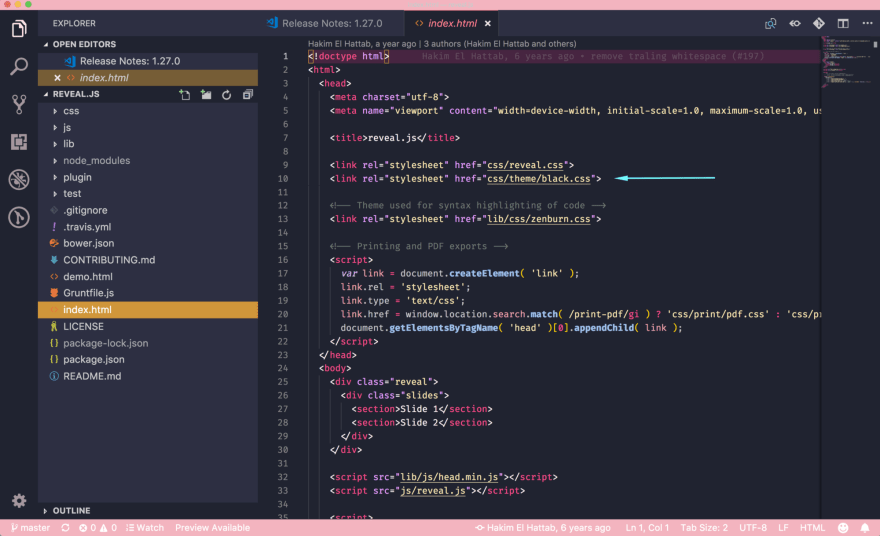
The theme files are:
- solarized.css
Custom Themes
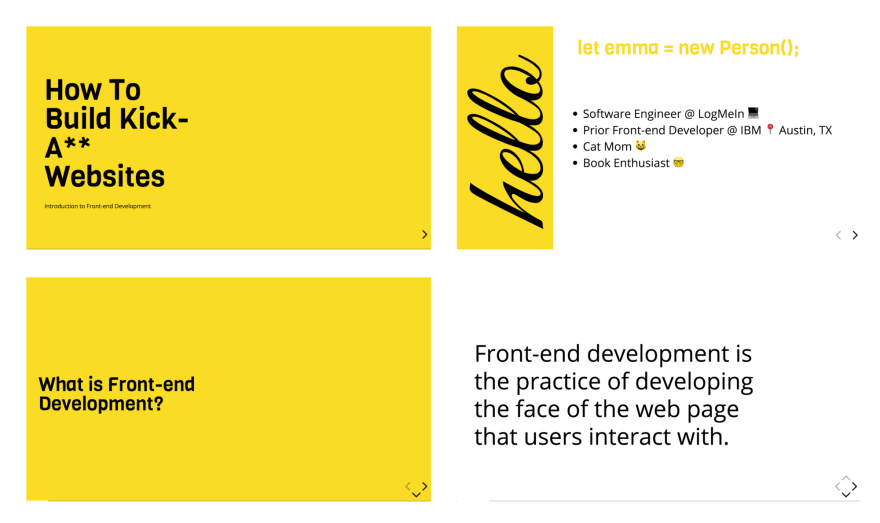
It's quite easy to create a custom theme. Today, I'll be using my custom theme from a presentation I gave called "How To Build Kick-Ass Website: An Introduction To Front-end Development."
Here is what my custom slides look like:
Creating A Custom Theme
- Open css/theme/src inside your IDE. This holds all of the Sass files ( .scss ) for each theme. These files will be transpiled to CSS using Grunt (a JavaScript task runner). If you prefer to write CSS, go ahead and just create the CSS file inside css/theme.
- Create a new .scss file. I will call mine custom.scss . You may have to stop your localhost and run npm run build to transpile your Sass code to CSS.
- Inside the index.html file, change the CSS theme import in the <head> tag to use the name of the newly created stylesheet. The extension will be .css , not .scss .
- Next, I created variables for all of the different styles I wanted to use. You can find custom fonts on Google Fonts. Once the font is downloaded, be sure to add the font URL's into the index.html file.
Here are the variables I chose to use:
- Title Font: Viga
- Content Font: Open Sans
- Code Font: Courier New
- Cursive Font: Great Vibes
- Yellow Color: #F9DC24
- Add a .reveal class to the custom Sass file. This will wrap all of the styles to ensure our custom theme overrides any defaults. Then, add your custom styling!
Unfortunately, due to time constraints, I'll admit that I used quite a bit of !important overrides in my CSS. This is horrible practice and I don't recommend it. The reveal.css file has extremely specific CSS styles, so I should have, if I had more time, gone back and ensured my class names were more specific so I could remove the !importants .
Mixins & Settings
Reveal.js also comes with mixins and settings you can leverage in your custom theme.
To use the mixins and settings, just import the files into your custom theme:
Mixins You can use the vertical-gradient, horizontal-gradient, or radial-gradient mixins to create a neat visual effect.
All you have to do is pass in the required parameters (color value) and voila, you've got a gradient!
Settings In the settings file, you'll find useful variables like heading sizes, default fonts and colors, and more!

The structure for adding new content is:
.reveal > .slides > section
The <section> element represents one slide. Add as many sections as you need for your content.
Vertical Slides
To create vertical slides, simply nest sections.
Transitions
There are several different slide transitions for you to choose from:
To use them, add a data-transition="{name}" to the <section> which contains your slide data.
Fragments are great for highlighting specific pieces of information on your slide. Here is an example.
To use fragments, add a class="fragment {type-of-fragment}" to your element.
The types of fragments can be:
- fade-in-then-out
- fade-in-then-semi-out
- highlight-current-blue
- highlight-red
- highlight-green
- highlight-blue
You can additionally add indices to your elements to indicate in which order they should be highlighted or displayed. You can denote this using the data-fragment-index={index} attribute.
There are way more features to reveal.js which you can leverage to build a beautiful presentation, but these are the main things which got me started.
To learn more about how to format your slides, check out the reveal.js tutorial . All of the code for my presentation can be viewed on GitHub. Feel free to steal my theme!
Top comments (18)
Templates let you quickly answer FAQs or store snippets for re-use.
- Joined Oct 2, 2018
I really love reveal.js. I haven't spoken in a while so I haven't used it. I've always used their themes and never thought about making my own. This is probably super useful for company presentations, too. I'm SO over google slides. Trying to format code in those is a nightmare LOL
- Location Stockholm
- Education Siena College
- Work Software Engineer at Spotify
- Joined Dec 21, 2018
Yeah it is time consuming, but the result is much better
- Location Antibes, France
- Work Senior Software Engineer at Spotify
- Joined Oct 16, 2017
The best thing in this - and now I'm not being ironic - is that while you work on a not so much technical task - creating a presentation - you still have to code. And the result is nice.
On the other hand, I know what my presentation skills teachers would say. Well, because they said it... :) If you really want to deliver a captivating presentation, don't use slides at all. Use the time to prepare what you want to say.
I'm not that good - yet, but taking their advice, if must I use few slides, with little information on them and with minimal graphical distractions. My goal is to impress them by what I say, not is what behind my head.
I'm going to a new training soon, where the first day we have to deliver a presentation supported by slides at a big auditorium and the next day we have to go back and forget about the slides and just get on stage and speak. I can't wait for it.
- Location Lake Villa, IL
- Education Bachelor in Electronics Engineering
- Work Computer & Technology Enthusiast
- Joined Oct 8, 2017
How about github.com/team-fluxion/slide-gazer ?
It's my fourth attempt at creating a simple presentation tool to help one present ideas quickly without having to spend time within a presentation editor like Microsoft PowerPoint. It directly converts markdown documents into elegant presentations with a few features and is still under development.
- Location Singapore
- Work Web Developer at FirstCom Solutions
- Joined Jan 15, 2019
Yup, RevealJS is awesome !
Previously I either used PPT or Google Slides. One is a paid license and the other requires an internet connection.
The cool thing about it is that since it's just HTML files behind the scenes, the only software you need to view it with is a web browser. Has amazing syntax-highlighting support via PrismJS. And as a web developer, it makes it simple to integrate other npm packages if need be...
I actually just used it to present a talk this week!
- Email [email protected]
- Location Indianapolis, IN
- Education Purdue University
- Pronouns he/him
- Work Senior Frontend Engineer at Whatnot
- Joined Aug 3, 2017
Great article, Emma! I love Reveal and this is a great write up for using it!
- Email [email protected]
- Location New Delhi, India 🇮🇳
- Joined Dec 5, 2018
I think its a coincidence 😅 I was just starting to think to use reveal.js and suddenly you see this post 🤩
- Location Saratoga Springs,NY
- Education BA, University of Michigan
- Work Documentarian
- Joined Sep 7, 2018
Check out slides.com If you want to skip the heavy lifting and/or use a presentation platform based on reveal.js.
Everything is still easy to customize. The platform provides a UI to work from and an easy way to share your stuff.
BTW - I have no affiliation with slides.com, or even a current account. I used the service a few years back when I regularly presented and wanted to get over PowerPoint, Google Slides, Prezi, etc.
- Location Toronto, ON
- Education MFA in Art Video Syracuse University 2013 😂
- Work Cannot confirm or deny atm
- Joined May 31, 2017
Well I guess you get to look ultra pro by skipping the moment where you have to adjust for display detection and make sure your notes don’t show because you plugged your display connector in 😩 But If the conference has no wifi then we’re screwed I guess
- Location Palm Bay, FL
- Education FullSail University
- Work Developer Relations Manager at MetaMask
- Joined Sep 16, 2018
I like Reveal, but I still have not moved past using Google docs slides because every presentation I do has to be done yesterday. Hoping that I can use Reveal more often this year as I get more time to work on each presentation.
- Email [email protected]
- Location Abuja Nigeria
- Work Project Manager Techibytes Media
- Joined Feb 19, 2019
Well this is nice and I haven't tried it maybe because I haven't spoken much in meet ups but I think PowerPoint is still much better than going all these steps and what if I have network connection issues that day then I'm scrolled right?
- Email [email protected]
- Joined Apr 16, 2018
Using Node and Soket.io remote control (meant to be used on phones) for my school's computer science club, it also features some more goodies which are helpful when having multiple presentations. It can be modded to use these styling techniques effortlessly. Feel free to fork!
SBCompSciClub / prez-software
A synchronized role based presentation software using node, prez-software.
TODO: Make system to easily manage multiple presentations Add Hash endocing and decoding for "sudo" key values TODO: Document Code
Run on Dev Server
npm i nodemon app.js Nodemon? - A life saving NPM module that is ran on a system level which automatically runs "node (file.js)" when files are modified. Download nodemon by running npm i -g nodemon
Making a Presentation
- Copy an existing presentation folder
- Change the folder name (which should be located at public/slides) with the name day[num of day] ex(day2)
Making a Slide
Making a slide is pretty simple. Just add a HTML section. <section> <!--slide content--> </section> inside the span with the class of "prez-root". Also keep in mind that you will need to copy and pate the markup inside the prez root to the other pages (viewer & controller).
Adding Text
You may add text however you desire, but for titles use the…
Awesome post! I’m glad I’m not the only one who likes libraries. 😎
- Location Los Angeles
- Education Engineering, Physics, and Math
- Joined Sep 6, 2018
Fantastic post. I just loved it.
- Location France
- Work Co-Founder of Depot
- Joined Sep 2, 2017
Awesome introduction! I feel like I need to give this a try the next time I create a presentation.
Some comments may only be visible to logged-in visitors. Sign in to view all comments.
Are you sure you want to hide this comment? It will become hidden in your post, but will still be visible via the comment's permalink .
Hide child comments as well
For further actions, you may consider blocking this person and/or reporting abuse

Exploring the Versatility of Web Scraping APIs for Data Extraction
sameer - Apr 1

Earth rescue - A CSS only game
Boris - Apr 25

How to have AI onboard your users (Next.js, OpenAI, CopilotKit)
David Asaolu - Apr 25

Bun Runtime - Introduction (Part 1)
Anish Ghimire - Apr 14

We're a place where coders share, stay up-to-date and grow their careers.
reveal.js your Presentation
reveal.js is an open source HTML presentation framework. It's recommended to those with a heart for programmatic approaches and web technologies. I started using it to replace PowerPoint. This article sums up my experiences, shows how the most important tasks can be achieved and then explains my custom method of using reveal.js. If you're interested in bash, it also explains the automation scripts used.
Table of Contents
Slides and vertical slides, headings and lists, horizontal partitioning, code blocks, auto-animate, backgrounds, development environment, clean script, integrity checks, directory overview, what is reveal.js.
Use the blue arrows in the bottom right corner to jump between slides. If you're using a vertical mobile device, consider turning it and reading this article in landscape mode—presentations aren't held on TikTok after all. To enter fullscreen you have to use a PC, click on the presentation and press F ( Esc to exit). This presenter behaves how a PowerPoint user would expect it.
The creation of such a presentation however isn't anything like PowerPoint. Everything that is shown is defined in an index.html file, the complete structure of which will be described later on . What follows are the individual elements forming the presentation.
You create slides inside the <div class="slides"> environment with one <section> tag each. If you insert another <section> tag within this, you've created a vertical slide. The default transition between horizontal slides is a horizontal swipe, while vertical slides swap places with a vertical movement.
Here is an example, where ellipsis ( ... ) indicate omitted parts:
I never use plain horizontal slides. Instead I use the outer <section> tags to group multiple vertical slides into logical units. When there's a horizontal swipe, the viewer knows that I start talking about a new subtopic.
Press Esc while you're not in fullscreen and on PC. Now you see the slide overview and you should be able to make out the individual horizontal slides as columns. This overview serves as a quick access menu if you want to jump to a different slide without mashing your poor keyboard.
From this point on, I for simplicity won't always show the outer <section> tag in the code examples.
Since reaveal.js is an HTML framework, you may let all your WebDev skills shine. If you've never worked with any web technologies, reveal.js is a great way of getting started. That also means that if e.g. you need lists with numbers, you can google HTML numbered list ; these features aren't limited to reveal.js.
You can use the <h1> tag for headings; <h2> , <h3> and so on are subheadings and subsubheadings. Lists can be created with the <ul> and <li> tags as shown below.
I use the custom class half-part to horizontally split the slide in two parts.
half-part class is defined in theme/template/custom_styles.scss . The build system compiling SCSS to CSS I used is described below . But feel free to simply add the code to a style.css file and import it like this in HTML:
There are many different ways of rendering LaTeX equations with reveal.js. I chose to use KaTeX, which is loaded via a plugin (check out the template section ). It allows me to write equations wherever I want within a $LaTeX math environment$ . If you need multiple lines, use the aligned environment.
More complex LaTeX structures, e.g. utilizing TikZ, have to be precompiled into an image with transparent background. This article is already nerdy enough so check out 2022_03_14_neue_formeln_messunsicherheiten/stromwaage.tex if you're interested.
The <p> tag creates a paragraph and the <br / > a newline.
I'm using highlight.js for code highlighting. It can again be loaded through a plugin (see the template section for more). The actual code get's loaded from a separate file ( code.cpp ) using the external_code plugin.
There are two main ways of animating elements:
- Auto-Animate and
- Fragments .
Auto-Animate works by transitioning between two similar slides, which are denoted by the data-auto-animate attribute. data-auto-animate-restart separates different consecutive animations. Every element that exists in both slides should have the same data-id attribute; then reveal.js smoothly transitions between them. With this you can cleanly add new or change already existent content. When you not only change the content of a tag but also the type of tag you use, you have to contain the changing tag in a wrapper-div as shown in the example below.
You can find more information in the official documentation .
The main problem with auto-animate is code duplication: When you add a new tag you still need to redefine your old tags over and over again. Therefore I prefer fragments wherever possible.
When parts of your slide should be revealed bit by bit, assign them the fragment class. If you need a different order in which to reveal the fragments, use the data-fragment-index attribute as shown in the second example.
At this point you might be wondering how I'm defining the left and right headers on each slide. They are custom and heavily inspired by Benjamin Hackl 's reveal.js presentations. And when you're already at it, check out Benjamin's presentations ; they inspired me to try out reveal.js in the first place.
Take another look at the very beginning of the example presentation:
Contrary to Benjamin Hackl's version, these headers are defined within the div class="slides"> environment, right before the first slide. This makes the headers scale correctly with different screen resolutions. The title section(s) should contain the data-state="titleslide" attribute; these slides won't show the left header. Now you can prettily place the title on the first slide and then move it to the top left, so that any laggards joining your audience late know which presentations they are interrupting.
The source code defining the header-left and header-right classes can again be found in theme/template/custom_styles.scss .
All the different options you have for backgrounds can be found in the official documentation . This is only a little sneak peek of what can be done.
To quickly get started you can use my template . I'll keep it updated with any necessary future fixes. Feel free to delete the copyright notice in the top; your presentation belongs under your copyright, not mine. I'd be glad if you could give this article credit but I don't require you to.
There are a few more features that didn't make it in this article. Take a look at my presentations and their source code for some inspiration. This also includes the example presentation used in this very article.
You should notice that there is a light mode as well. Actually there are many different themes you can use—there never is just black and white.
The next few paragraphs explain what else you need to make a reveal.js presentation work.
Installing and Compiling Like Me
When I went to the installation page on revealjs.com I found the recommended method to not suit my taste in the slightest. You are expected to clone the reveal.js repository, replace the provided example presentation with you own, compile and call it a day. When you have multiple presentations you have to store the reveal.js source code multiple times and when you intend to use Git for version control, you have to create a fork of the reveal.js repo over and over again. While searching for a workaround, I realized that the index.html file isn't actually part of the compilation step. This means that you can compile the reveal.js resources once and use them in multiple presentations; the compiled reveal.js resources are independent of the individual presentations.
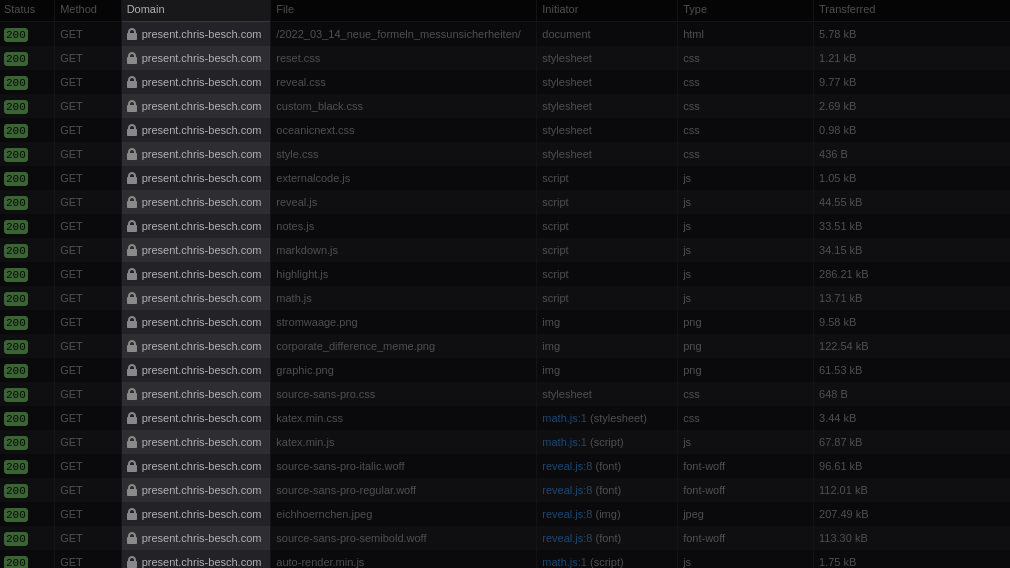
Additionally I need high reliability— when you're standing in front of an audience, your presentation has to work. A necessity for this is the ability to present without an active internet connection. If you're hosting your presentation locally, this might sound simple enough. But it get's more complicated when you realize just how many typical web solutions load resources from content delivery networks (CDNs). These CDNs might not be reachable at all time and are a big privacy concern. Therefore I don't accept anything that doesn't get loaded from my own site. This mostly concerns the plugins I need.
So I created a slightly different way of using reveal.js: I'm using a single Git repository for all my presentations, each in their own directory. They have access to reveal.js, my custom themes, whatever plugins I consider useful and other static resources. A custom build script build.sh puts everything needed for hosting the presentations in the public directory.
Build Script
This section explains in detail what the build.sh script needs to do in order for my way of using reveal.js to work. It is written for those who are already somewhat familiar with bash scripting and reveal.js's build process .
First of all it clones reveal.js into the build directory reveal , which isn't being tracked by Git (excluded via .gitignore ). After which it checks out a specific version of reveal.js.
Since I use custom themes, I copy them from the theme into the reveal/css/theme/source and reveal/css/theme/template directories.
Now the reveal directory contains everything required to compile reveal.js just like normal .
The reveal/dist and reveal/plugin directories contain all output files and get copied into the public folder.
This is also a good time to copy any static files; for example code highlighting themes.
The vendor directory contains a few submodules, other git repositories (checked out at a specific commit) contained in a subdirectory. These are plugins for reveal.js.
Some plugins are precompiled and can't be loaded using submodules. These plugins need to be downloaded and extracted by the build script.
The penultimate step is to copy the actual presentations into the public directory and create a table of contents index.html . Such a table of contents won't be very pretty but it is enough for debugging purposes. Anyways, everyone knows that software developers don't deserve pretty interfaces ;)
Because no one wants to build everything over and over when they change a small detail, a few symlinks form a convenient dev environment. This allows you to directly open your presentation index.html files as if they had already been copied into the public directory. You can even use live-server , which can be installed with yarn global add live-server , to automatically reload the page when you change your presentation. If you use VSCode, you can check out the Live Server plugin .
Just don't forget to compile right before publishing the public directory. Otherwise your changes wouldn't get deployed.
If you intend to undo a build or start a clean one—for example when you've changed the version of a dependency—you can use the clean.sh script.
Automated tests can really give you the confidence you need when standing in front of a crowd. So far I have only included the most basic check there is, testing if all referred resources are actually accessible. The check.sh script does just that.
This script launches a local web server and silences all output by dumping it into /dev/null . The single & executes this command in the background. Everything else is being executed in a separate process, which firstly sets the to_kill variable to the PID of the just-launched web server in the background. Then we wait a moment for the server to boot up and use the broken-link-checker program, which can be installed using yarn global add broken-link-checker . In the end the web server gets shot down to avoid any zombie processes. This is where the to_kill variable gets used.
What follows is an entire overview of my presentations repository . Comments are in parenthesis.
And with that we reach the end. I hope you learned something; if there're any questions, feel free to reach out via a channel of your liking: Contact .
Have an above-average day!
Create PowerPoint presentations with JavaScript
The most popular powerpoint+js library on npm with 1,800 stars on github, works everywhere.
- Every modern desktop and mobile browser is supported
- Integrates with Node, Angular, React, and Electron
- Compatible with Microsoft PowerPoint, Apple Keynote, and many others
Full Featured
- All major objects are available (charts, shapes, tables, etc.)
- Master Slide support for academic/corporate branding
- Animated gifs, SVG images, YouTube videos, RTL text, and Asian fonts
Simple And Powerful
- The absolute easiest PowerPoint library to use
- Learn as you code using the built-in typescript definitions
- Tons of sample code comes included (75+ slides of demos)
Export Your Way
- Exports files direct to client browsers with proper MIME-type
- Other export formats available: base64, blob, stream, etc.
- Presentation compression options and more
Navigation Menu
Search code, repositories, users, issues, pull requests..., provide feedback.
We read every piece of feedback, and take your input very seriously.
Saved searches
Use saved searches to filter your results more quickly.
To see all available qualifiers, see our documentation .
- Notifications
Presentation Slides for Developers
slidevjs/slidev
Folders and files, repository files navigation.
Presentation slide s for dev elopers 🧑💻👩💻👨💻
Video Preview | Documentation
- 📝 Markdown-based - use your favorite editors and workflow
- 🧑💻 Developer Friendly - built-in syntax highlighting, live coding, etc.
- 🎨 Themable - theme can be shared and used with npm packages.
- 🌈 Stylish - on-demand utilities via UnoCSS .
- 🤹 Interactive - embedding Vue components seamlessly.
- 🎙 Presenter Mode - use another window, or even your phone to control your slides.
- 🧮 LaTeX - built-in LaTeX math equations support.
- 📰 Diagrams - creates diagrams with textual descriptions
- 🌟 Icons - access to icons from any iconset directly.
- 💻 Editors - integrated editor, or extension for VS Code
- 🎥 Recording - built-in recording and camera view.
- 📤 Portable - export into PDF, PNGs, or even a hostable SPA.
- ⚡️ Fast - instant reloading powered by Vite .
- 🛠 Hackable - using Vite plugins, Vue components, or any npm packages.
Getting Started
Try it online ⚡️.
sli.dev/new
Code of conduct
Releases 323, sponsor this project.
Contributors 227
- TypeScript 64.9%
- JavaScript 2.9%
- Skip to main content
- Skip to search
- Skip to select language
- Sign up for free
Presentation API
Secure context: This feature is available only in secure contexts (HTTPS), in some or all supporting browsers .
Experimental: This is an experimental technology Check the Browser compatibility table carefully before using this in production.
The Presentation API lets a user agent (such as a Web browser) effectively display web content through large presentation devices such as projectors and network-connected televisions. Supported types of multimedia devices include both displays which are wired using HDMI, DVI, or the like, or wireless, using DLNA , Chromecast , AirPlay , or Miracast .
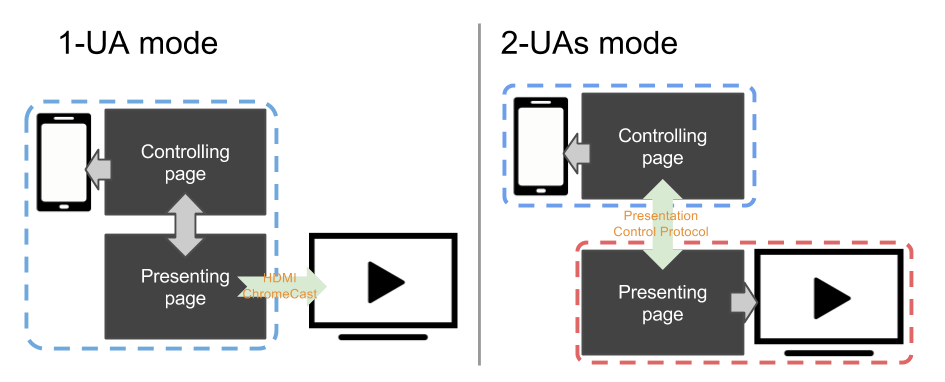
In general, a web page uses the Presentation Controller API to specify the web content to be rendered on presentation device and initiate the presentation session. With Presentation Receiver API, the presenting web content obtains the session status. With providing both the controller page and the receiver one with a messaged-based channel, a Web developer can implement the interaction between these two pages.
Depending on the connection mechanism provided by the presentation device, any controller- and receiver page can be rendered by the same user agent, or by separated user agents.
- For 1-UA mode devices, both pages are loaded by the same user agent. However, rendering result of the receiver page will be sent to the presentation device via supported remote rendering protocol.
- For 2-UAs mode device, the receiver page is loaded directly on the presentation device. Controlling user agent communicates with presentation device via supported presentation control protocol, to control the presentation session and to transmit the message between two pages.
In controlling browsing context, the Presentation interface provides a mechanism to override the browser default behavior of launching presentation to external screen. In receiving browsing context, Presentation interface provides the access to the available presentation connections.
Initiates or reconnects to a presentation made by a controlling browsing context.
A PresentationAvailability object is associated with available presentation displays and represents the presentation display availability for a presentation request.
The PresentationConnectionAvailableEvent is fired on a PresentationRequest when a connection associated with the object is created.
Each presentation connection is represented by a PresentationConnection object.
A PresentationConnectionCloseEvent is fired when a presentation connection enters a closed state.
The PresentationReceiver allows a receiving browsing context to access the controlling browsing contexts and communicate with them.
PresentationConnectionList represents the collection of non-terminated presentation connections. It is also a monitor for the event of new available presentation connection.
Example codes below highlight the usage of main features of the Presentation API: controller.html implements the controller and presentation.html implements the presentation. Both pages are served from the domain https://example.org ( https://example.org/controller.html and https://example.org/presentation.html ). These examples assume that the controlling page is managing one presentation at a time. Please refer to the comments in the code examples for further details.
Monitor availability of presentation displays
In controller.html :
Starting a new presentation
Reconnect to a presentation.
In the controller.html file:
Presentation initiation by the controlling UA
Setting presentation.defaultRequest allows the page to specify the PresentationRequest to use when the controlling UA initiates a presentation.
Monitor connection's state and exchange data
Monitor available connection(s) and say hello.
In presentation.html :
Passing locale information with a message
In the presentation.html file:
Specifications
Browser compatibility.
BCD tables only load in the browser with JavaScript enabled. Enable JavaScript to view data.
Presentation API polyfill contains a JavaScript polyfill of the Presentation API specification under standardization within the Second Screen Working Group at W3C. The polyfill is mostly intended for exploring how the Presentation API may be implemented on top of different presentation mechanisms.
This browser is no longer supported.
Upgrade to Microsoft Edge to take advantage of the latest features, security updates, and technical support.
JavaScript API for PowerPoint
- 4 contributors
A PowerPoint add-in interacts with objects in PowerPoint by using the Office JavaScript API, which includes two JavaScript object models:
PowerPoint JavaScript API : The PowerPoint JavaScript API provides strongly-typed objects that you can use to access objects in PowerPoint.
Common APIs : Introduced with Office 2013, the Common API can be used to access features such as UI, dialogs, and client settings that are common across multiple types of Office applications.
Learn programming concepts
See PowerPoint add-ins overview for information about important programming concepts.
Learn about API capabilities
For hands-on experience using the Common API to interact with content in PowerPoint, complete the PowerPoint add-in tutorial .
For detailed information about the PowerPoint JavaScript API object model, see the PowerPoint JavaScript API reference documentation .
Try out code samples in Script Lab
Use Script Lab to get started quickly with a collection of built-in samples that show how to complete tasks with the API. You can run the samples in Script Lab to instantly see the result in the task pane or document, examine the samples to learn how the API works, and even use samples to prototype your own add-in.
- PowerPoint add-ins documentation
- PowerPoint add-ins overview
- PowerPoint JavaScript API reference
- Office client application and platform availability for Office Add-ins
- API Reference documentation
Office Add-ins
Coming soon: Throughout 2024 we will be phasing out GitHub Issues as the feedback mechanism for content and replacing it with a new feedback system. For more information see: https://aka.ms/ContentUserFeedback .
Submit and view feedback for
Additional resources
Presenting Code
reveal.js includes a powerful set of features aimed at presenting syntax highlighted code — powered by highlight.js . This functionality lives in the highlight plugin and is included in our default presentation boilerplate.
Below is an example with clojure code that will be syntax highlighted. When the data-trim attribute is present, surrounding whitespace within the <code> is automatically removed.
HTML will be escaped by default. To avoid this, add data-noescape to the <code> element.
Make sure that a syntax highlight theme is included in your document. We include Monokai by default, which is distributed with the reveal.js repo at plugin/highlight/monokai.css . A full list of available themes can be found at https://highlightjs.org/static/demo/ .
Line Numbers & Highlights
You can enable line numbers by adding data-line-numbers to your <code> tags. If you want to highlight specific lines you can provide a comma separated list of line numbers using the same attribute. For example, in the following example lines 3 and 8-10 are highlighted:
Line Number Offset 4.2.0
You can offset the line number if you want to showcase a excerpt of a longer set of code. In the example below, we set data-ln-start-from="7" to make the line numbers start from 7.
Step-by-step Highlights
You can step through multiple code highlights on the same code block. Delimit each of your highlight steps with the | character. For example data-line-numbers="1|2-3|4,6-10" will produce three steps. It will start by highlighting line 1, next step is lines 2-3, and finally line 4 and 6 through 10.
HTML Entities 4.1.0
Content added inside of a <code> block is parsed as HTML by the web browser. If you have HTML characters (<>) in your code you will need to escape them ($lt; $gt;).
To avoid having to escape these characters manually, you can wrap your code in <script type="text/template"> and we'll handle it for you.
The highlight.js API & beforeHighlight 4.2.0
If you want to interact with highlight.js before your code is highlighted you can use the beforeHighlight callback. For example, this can be useful if you want to register a new language via the highlight.js API .
Manual Highlighting
All of your code blocks are automatically syntax highlighted when reveal.js starts. If you want to disable this behavior and trigger highlighting on your own you can set the highlightOnLoad flag to false.

Slides.com — the reveal.js presentation editor.
Become a reveal.js pro in the official video course.

IMAGES
VIDEO
COMMENTS
reveal.js is an open source HTML presentation framework. It's a tool that enables anyone with a web browser to create fully-featured and beautiful presentations for free. Presentations made with reveal.js are built on open web technologies. That means anything you can do on the web, you can do in your presentation. Change styles with CSS ...
Impress (37.3k ⭐) — Another open source HTML presentation framework that is similar to reveal.js, but with a different approach, inspired by the idea behind prezi.com. It uses CSS3 3D transforms to create dynamic and spatial presentations that can zoom, rotate, and pan across the slides.
js/: Contains js/impress.js, which contains a concatenation of the core src/impress.js and all the plugins. Traditionally this is the file that you'll link to in a browser. In fact both the demo and test files do exactly that. css/: Contains a CSS file used by the demo. This file is not required for using impress.js in your own presentations ...
Best Vanilla JS HTML Presentation Frameworks Beautiful HTML Presentation Library - reveal.js. reveal.js is an open source HTML presentation framework. It's a tool that enables anyone with a web browser to create fully-featured and beautiful presentations for free. Presentations made with reveal.js are built on open web technologies.
impress.js is a presentation tool based on the power of CSS3 transforms and transitions in modern browsers and inspired by the idea behind prezi.com.
Flowtime.js is a framework for easily building HTML presentations or websites. It's built with web standards in mind and on top of a solid full page grid layout. The animations are managed with native and accelerated CSS3 transitions. Javascript takes care of the navigation behaviour and adds advanced functionalities and configuration options.
reveal.js is an open source HTML presentation framework. It enables anyone with a web browser to create beautiful presentations for free. Check out the live demo at revealjs.com. The framework comes with a powerful feature set including nested slides, Markdown support, Auto-Animate, PDF export, speaker notes, LaTeX typesetting, syntax ...
Setting Up Reveal.js. Start by downloading the latest version of Reveal.js from the official GitHub repository. This repository has everything you need to get started. I created a new folder called "test" and copied index.html as well as the folders dist, css, and plugin. The file, index.html, contains a template structure for the presentation.
reveal.js enables you to create beautiful interactive slide decks using HTML. This presentation will show you examples of what it can do. Vertical Slides. Slides can be nested inside of each other. Use the Space key to navigate through all slides. Basement Level 1
Reveal.js is an open-source HTML presentation framework. Anyone with a web browser can use it to make attractive presentations for free. The program allows anyone with a web browser to create fully-featured and interactive presentations that support CSS 3D transforms, nested slides, and a variety of other capabilities.It is recommended for those interested in programmable techniques and web ...
A framework for easily creating beautiful presentations using HTML. Reveal.js HTML Presentations Made Easy. Created by Hakim El Hattab / @hakimel. Heads Up. ... Pass reveal.js the backgroundTransition: 'slide' config argument to make backgrounds slide rather than fade.
Creating A Custom Theme. Open css/theme/src inside your IDE. This holds all of the Sass files ( .scss) for each theme. These files will be transpiled to CSS using Grunt (a JavaScript task runner). If you prefer to write CSS, go ahead and just create the CSS file inside css/theme. Create a new .scss file.
reveal.js is an open source HTML presentation framework. It's recommended to those with a heart for programmatic approaches and web technologies. I started using it to replace PowerPoint. This article sums up my experiences, shows how the most important tasks can be achieved and then explains my custom method of using reveal.js.
Today I'm starting a series of short videos on Reveal.js, an HTML Presentation Framework for making beautiful web presentations. In this first video, we'll l...
In the fifth episode, learn about the reveal.js library which can be used to create beautiful html format presentations which can have slides and can run in ...
Create PowerPoint presentations with JavaScript The most popular powerpoint+js library on npm with 1,800 stars on GitHub. Get Started. Demos. HTML to PPTX. Works Everywhere. Every modern desktop and mobile browser is supported; Integrates with Node, Angular, React, and Electron;
Features. 🎨 Themable - theme can be shared and used with npm packages. 🌈 Stylish - on-demand utilities via UnoCSS. 🤹 Interactive - embedding Vue components seamlessly. 🎙 Presenter Mode - use another window, or even your phone to control your slides. 🧮 LaTeX - built-in LaTeX math equations support.
The Presentation API lets a user agent (such as a Web browser) effectively display web content through large presentation devices such as projectors and network-connected televisions. Supported types of multimedia devices include both displays which are wired using HDMI, DVI, or the like, or wireless, using DLNA, Chromecast, AirPlay, or Miracast.. In general, a web page uses the Presentation ...
In this article. A PowerPoint add-in interacts with objects in PowerPoint by using the Office JavaScript API, which includes two JavaScript object models: PowerPoint JavaScript API: The PowerPoint JavaScript API provides strongly-typed objects that you can use to access objects in PowerPoint. Common APIs: Introduced with Office 2013, the Common ...
Azure Open AI refers to the collaboration between OpenAI and Microsoft Azure. Under this partnership, OpenAI's AI models and technologies are hosted by Microsoft in Azure, making them accessible to developers and organizations through the Azure platform. The Azure OpenAI service automatically encrypts any data that persists in the cloud ...
Presenting Code. reveal.js includes a powerful set of features aimed at presenting syntax highlighted code — powered by highlight.js. This functionality lives in the highlight plugin and is included in our default presentation boilerplate. Below is an example with clojure code that will be syntax highlighted.
More than 50 abstracts, including 11 oral presentations, span Pfizer's robust portfolio of approved and pipeline therapies across its key tumor areas and core scientific modalities New five-year progression-free survival data for LORBRENA® (lorlatinib) in first-line ALK-positive advanced lung cancer Results from ECHELON-3, third Phase 3 study to demonstrate overall survival benefit for ...